
Final Fantasy 2 Pixel Remaster 100% Walkthrough - Castle Deist & Deist Cavern

With the Dreadnought now destroyed, the airship will automatically drop you off at Altair.
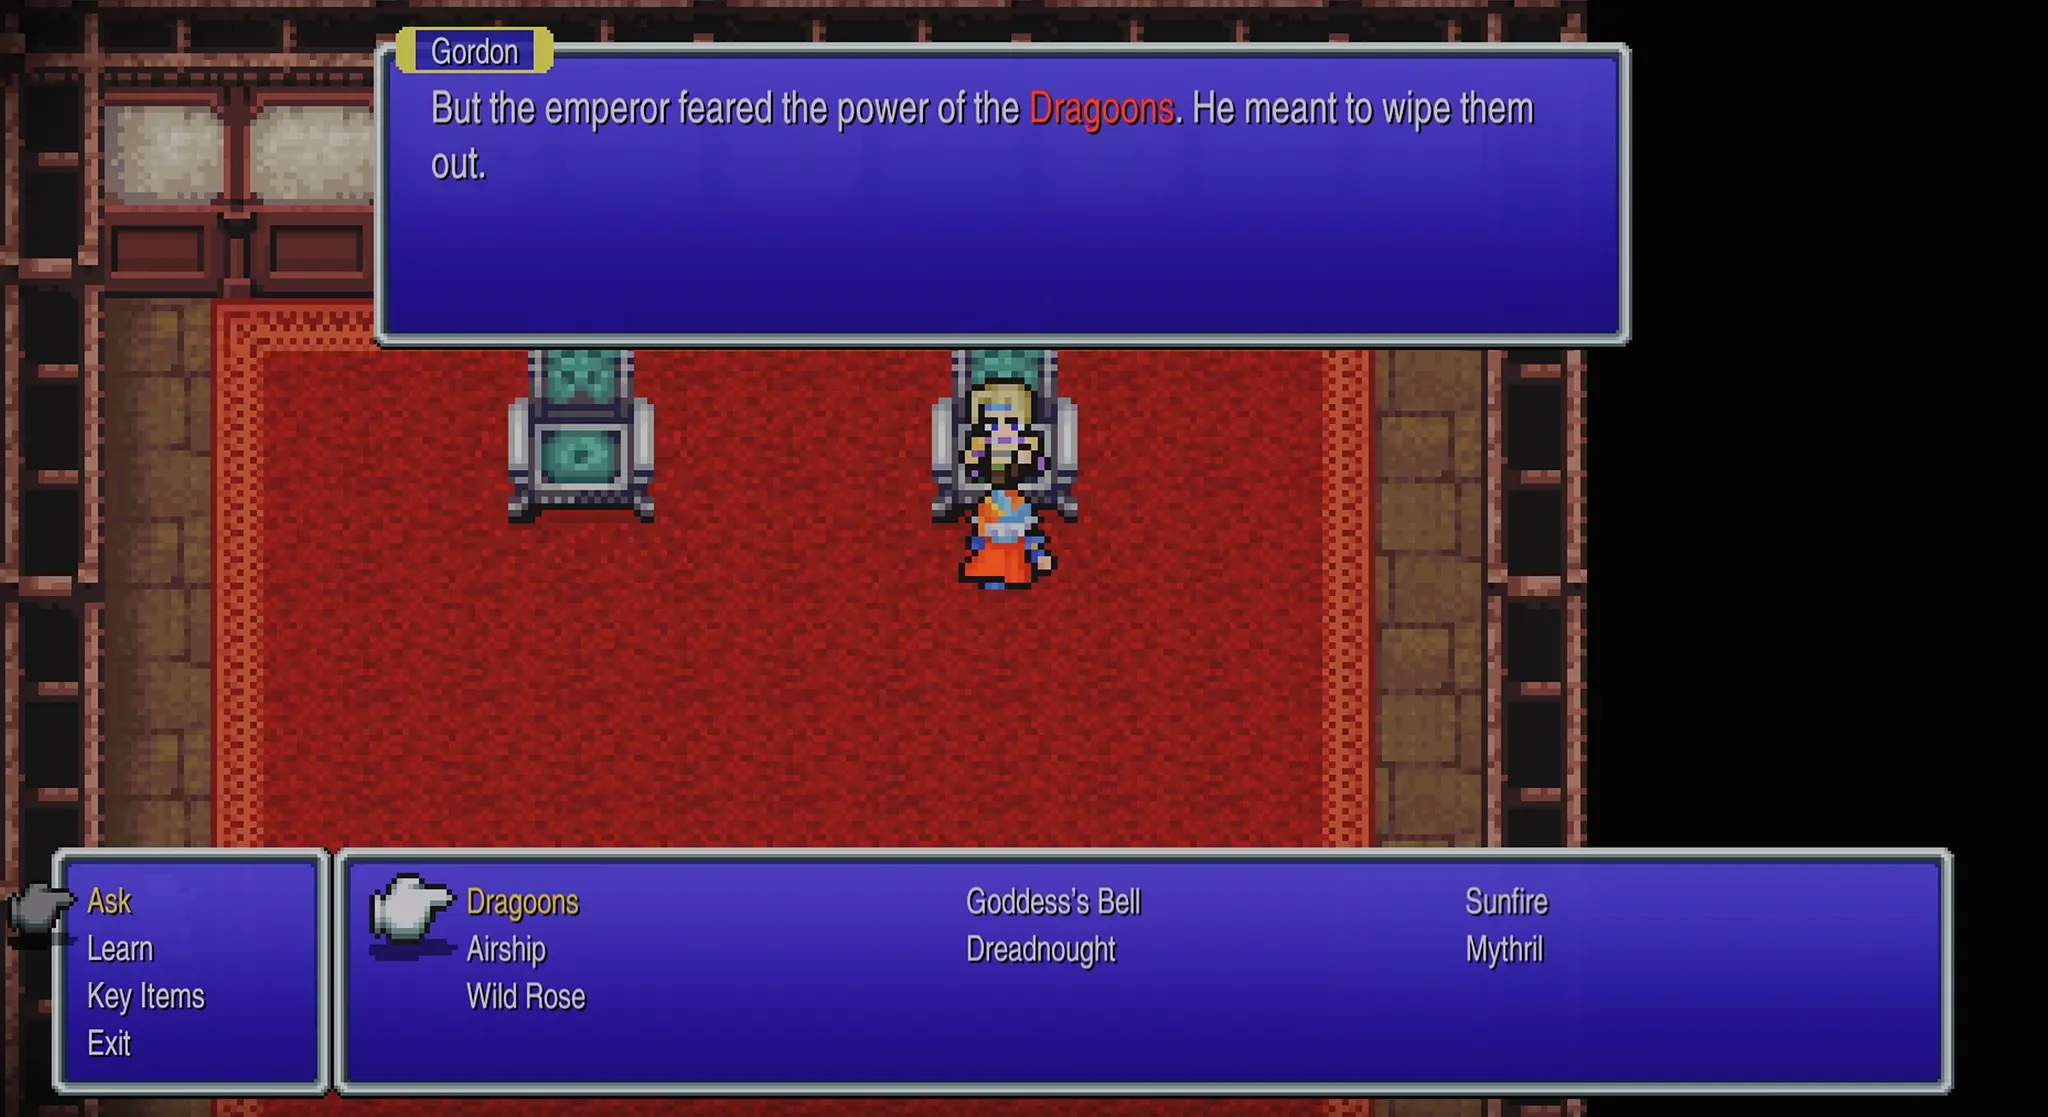
Go into the hideout to speak with the King, he will ask us to go to Deist to search for Wyverns and Dragoons, he will then pass away and Gordon will leave the party.
After Minwu and Gordon leave the room, go into the throne room and speak with Gordon, when he mentions the Dragoons, press the Learn option to learn this new password.
(This password is missable so make sure you Learn it here)
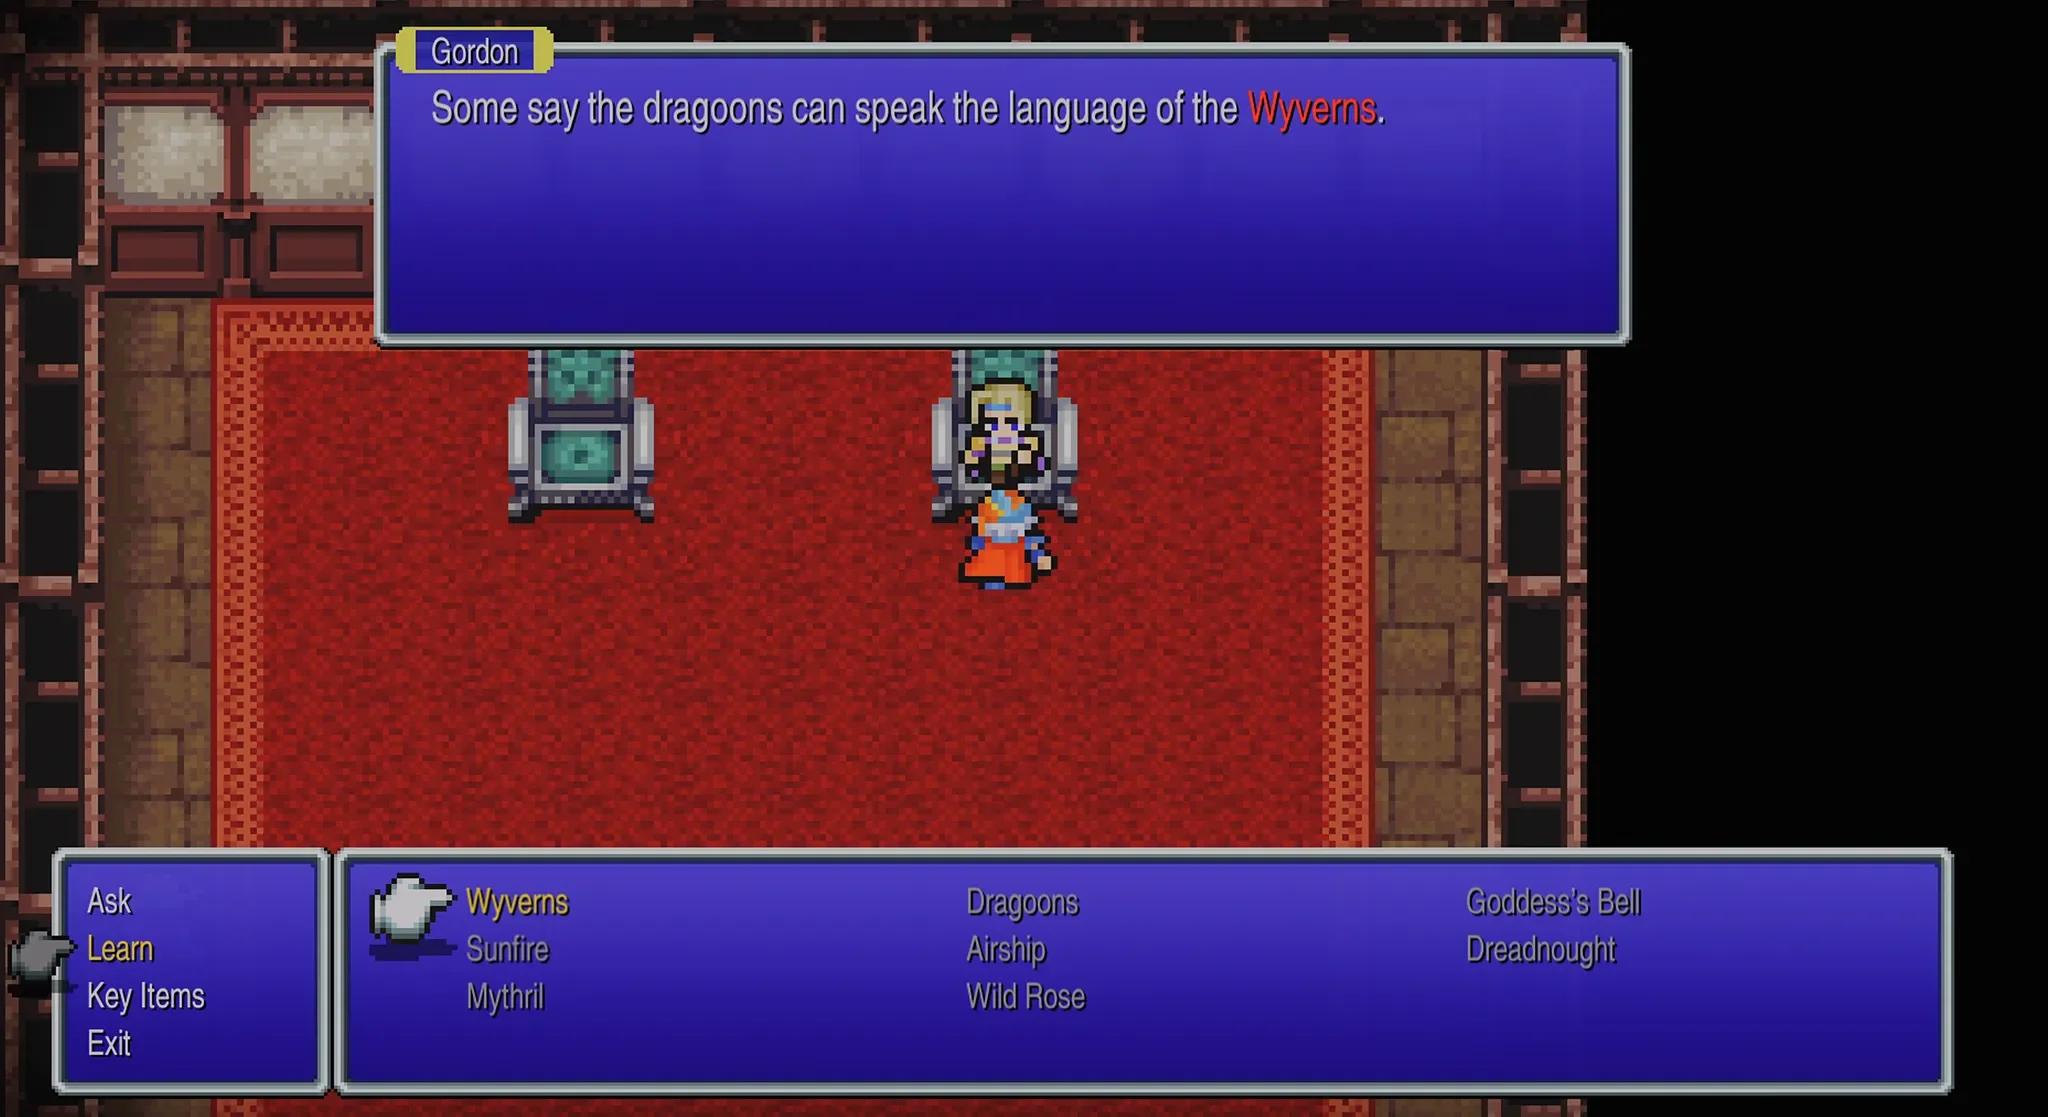
Then Ask Gordon about the Dragoons, he will then mention Wyverns, Learn this password too. If you the Ask Gordon about Wyverns he will tell you to go to Paloom to get a ship.

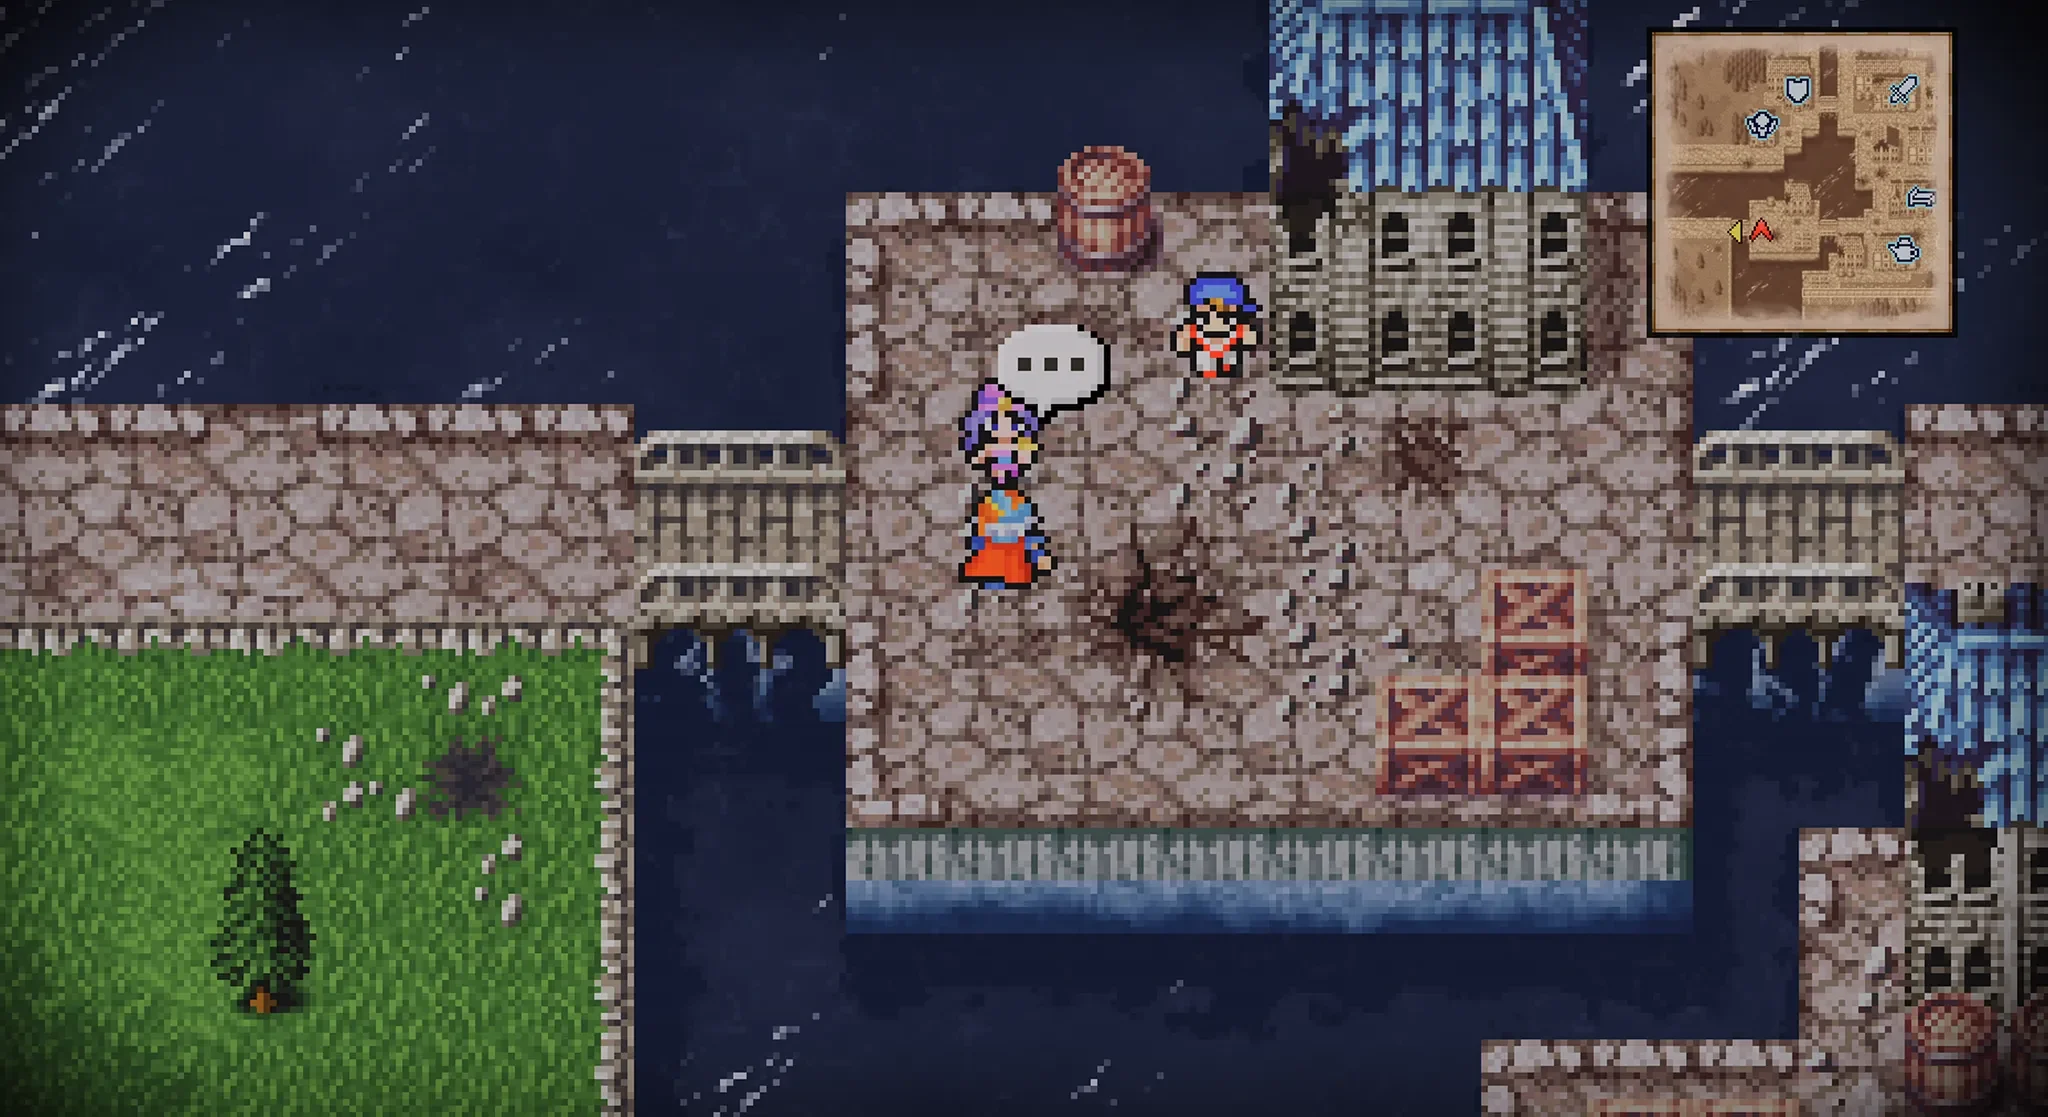
When you get to Paloom you will see a new NPC by the entrance, this is Leila.
After the conversation with Leila, leave Paloom and interact with the ship you will see just to the right of the town, this will initiate a fight against some pirates.
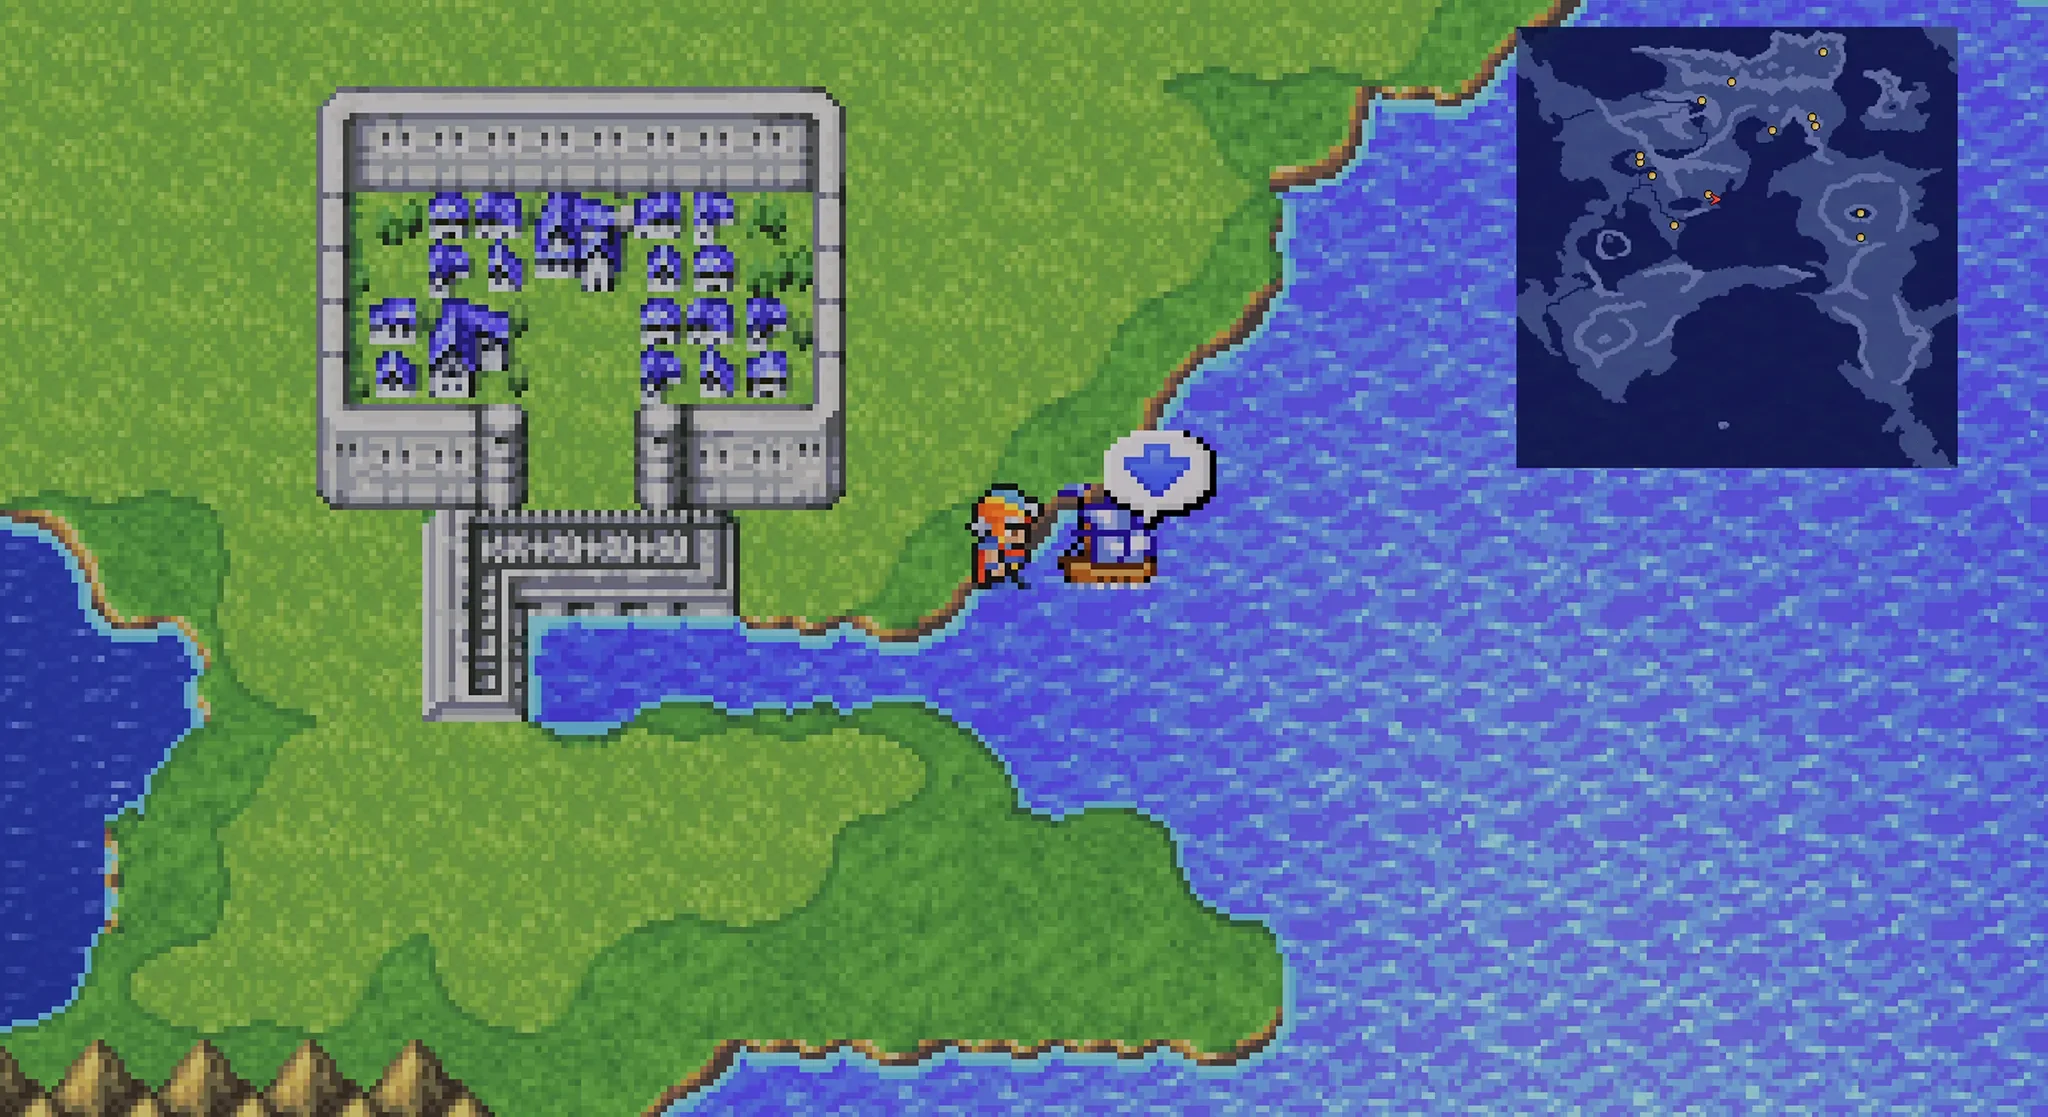
Once you defeat them, Leila will join your party and you will be able to freely control the ship to travel across the sea.
 "A Pirate's Mate" Trophy for reaching this far in the main story.
Missable Bestiary Entries
Now that you have the ship there are a few enemies that you can encounter in the water that will become missable later on so I recommend fighting one of each now just to make sure you don’t miss them later.
The missable sea monsters are: Killer Fish, Sea Snake, Buccaneer, and Hell Diver.
They are all very common and you will most likely fight many of them on your way to Castle Deist anyway, but just double check to be sure.
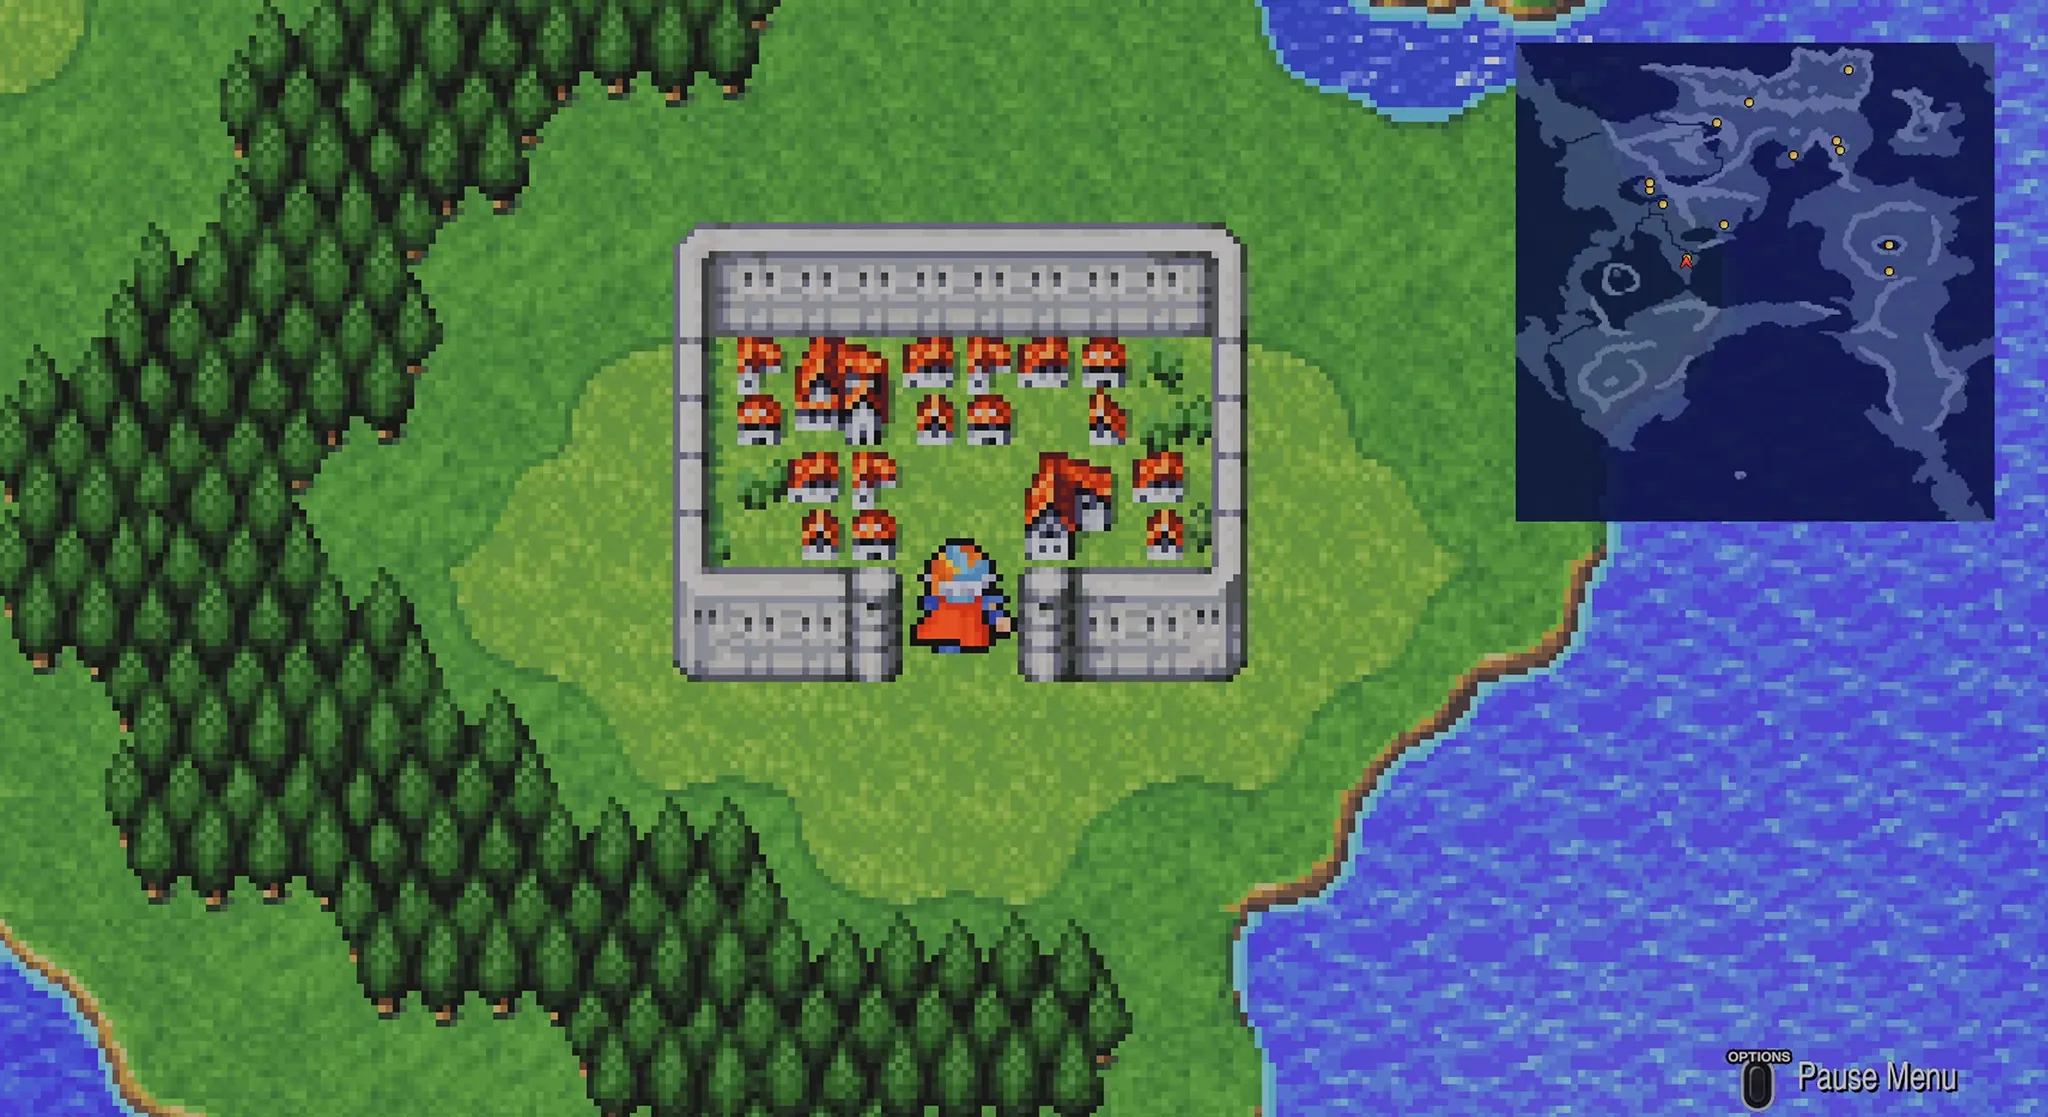
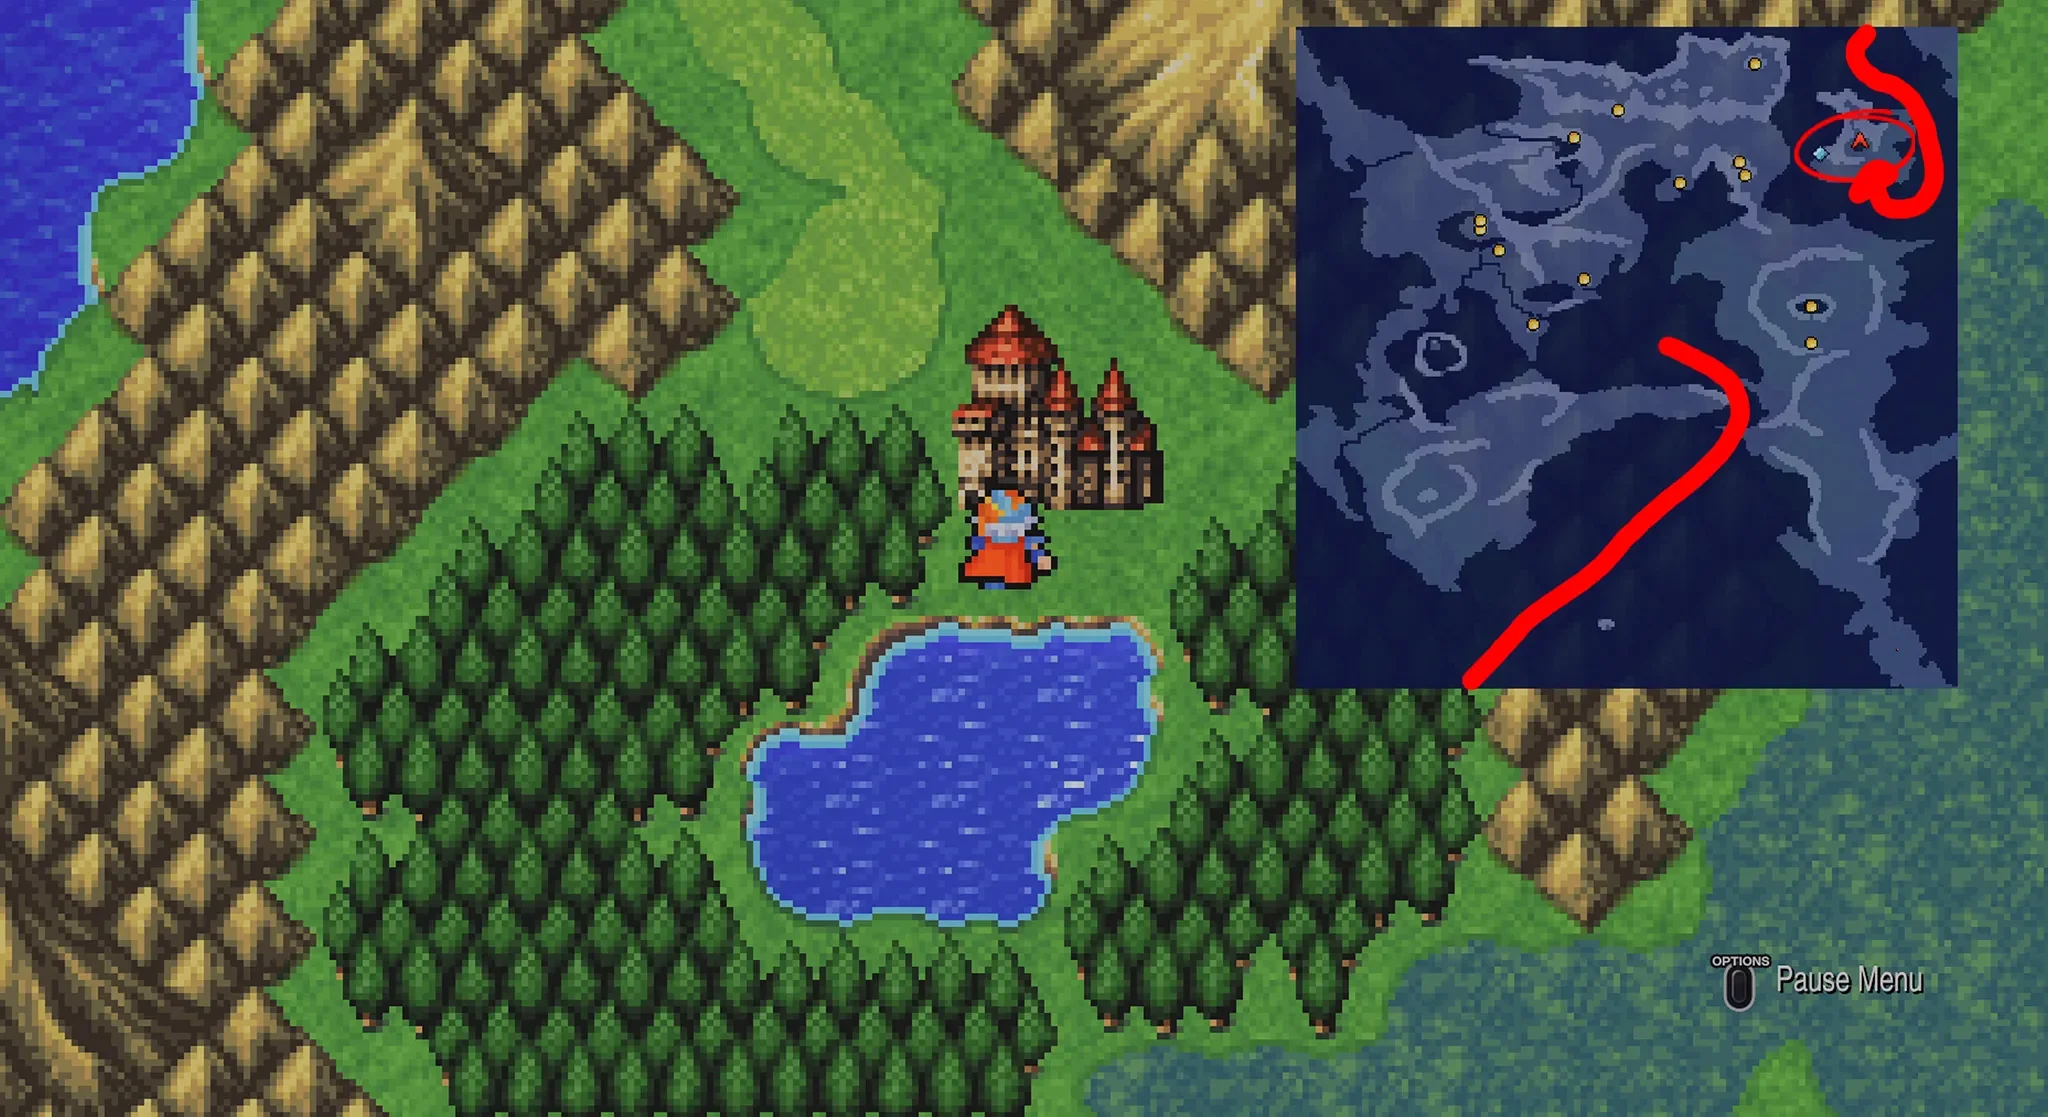
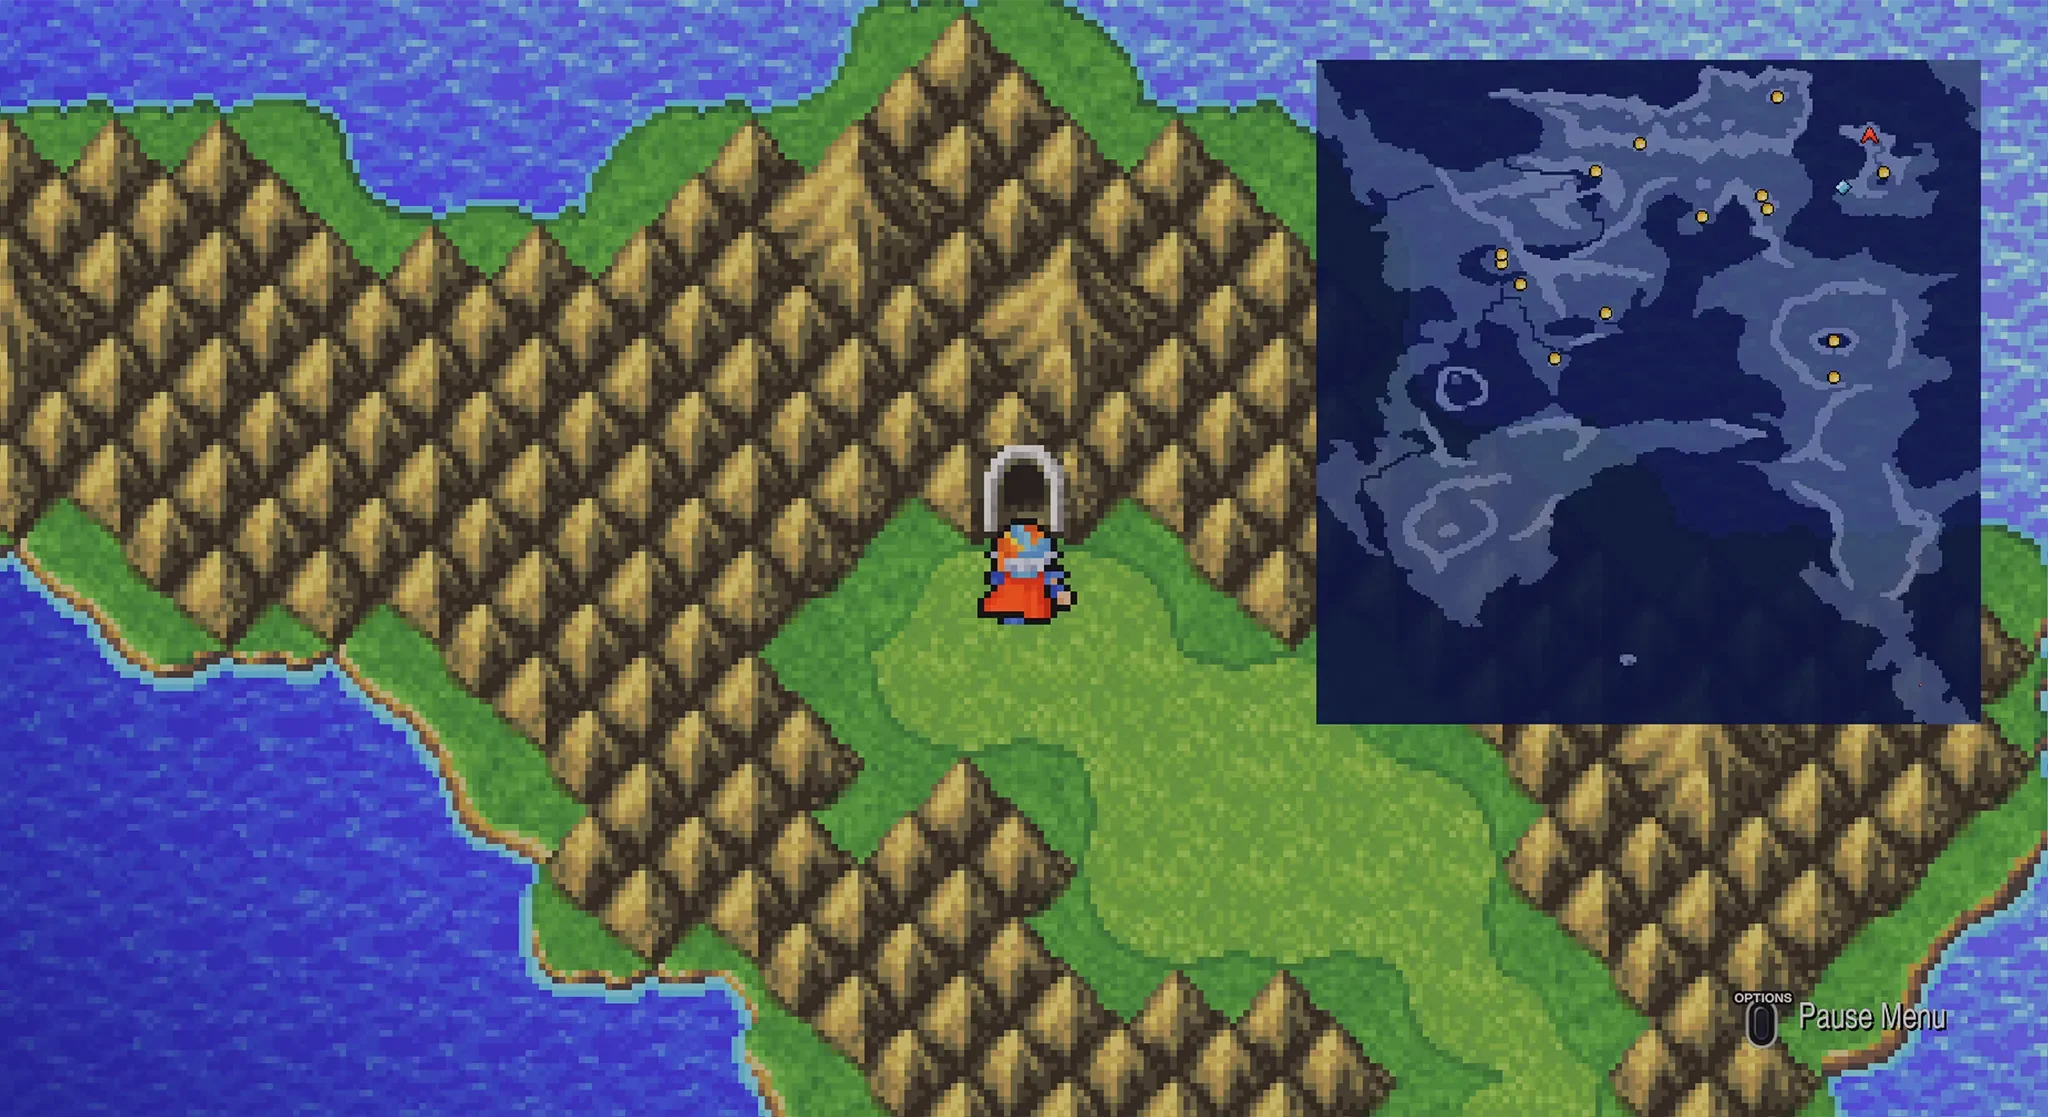
Castle Deist
Castle Deist is on the island at the north-east part of the map, to get there just sail down to the south-west side of the sea and you will loop around to the top side of the map.
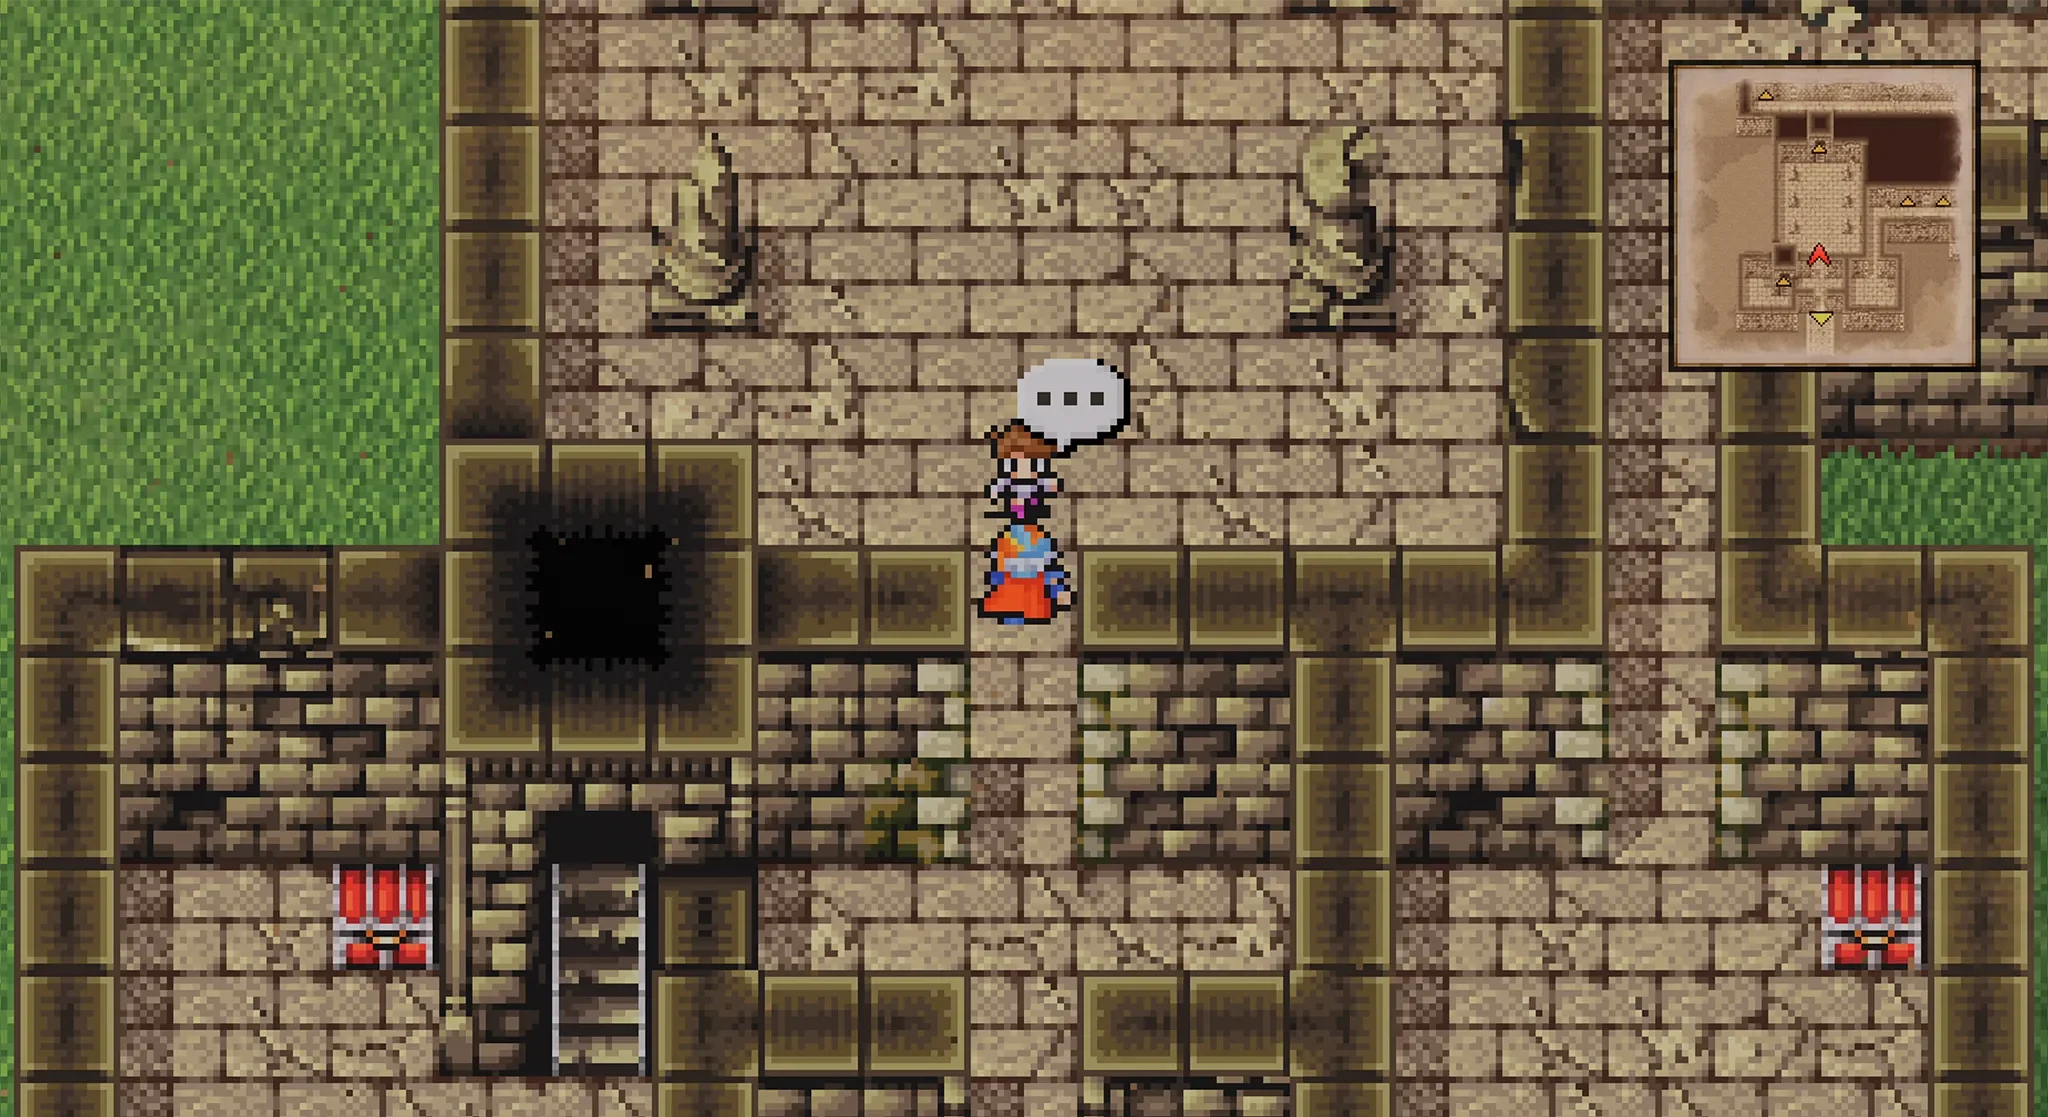
As soon as you enter Castle Deist you will see a kid that will run away when you try and speak to him. Follow him to 2F, then go down and right to find him by his mother.
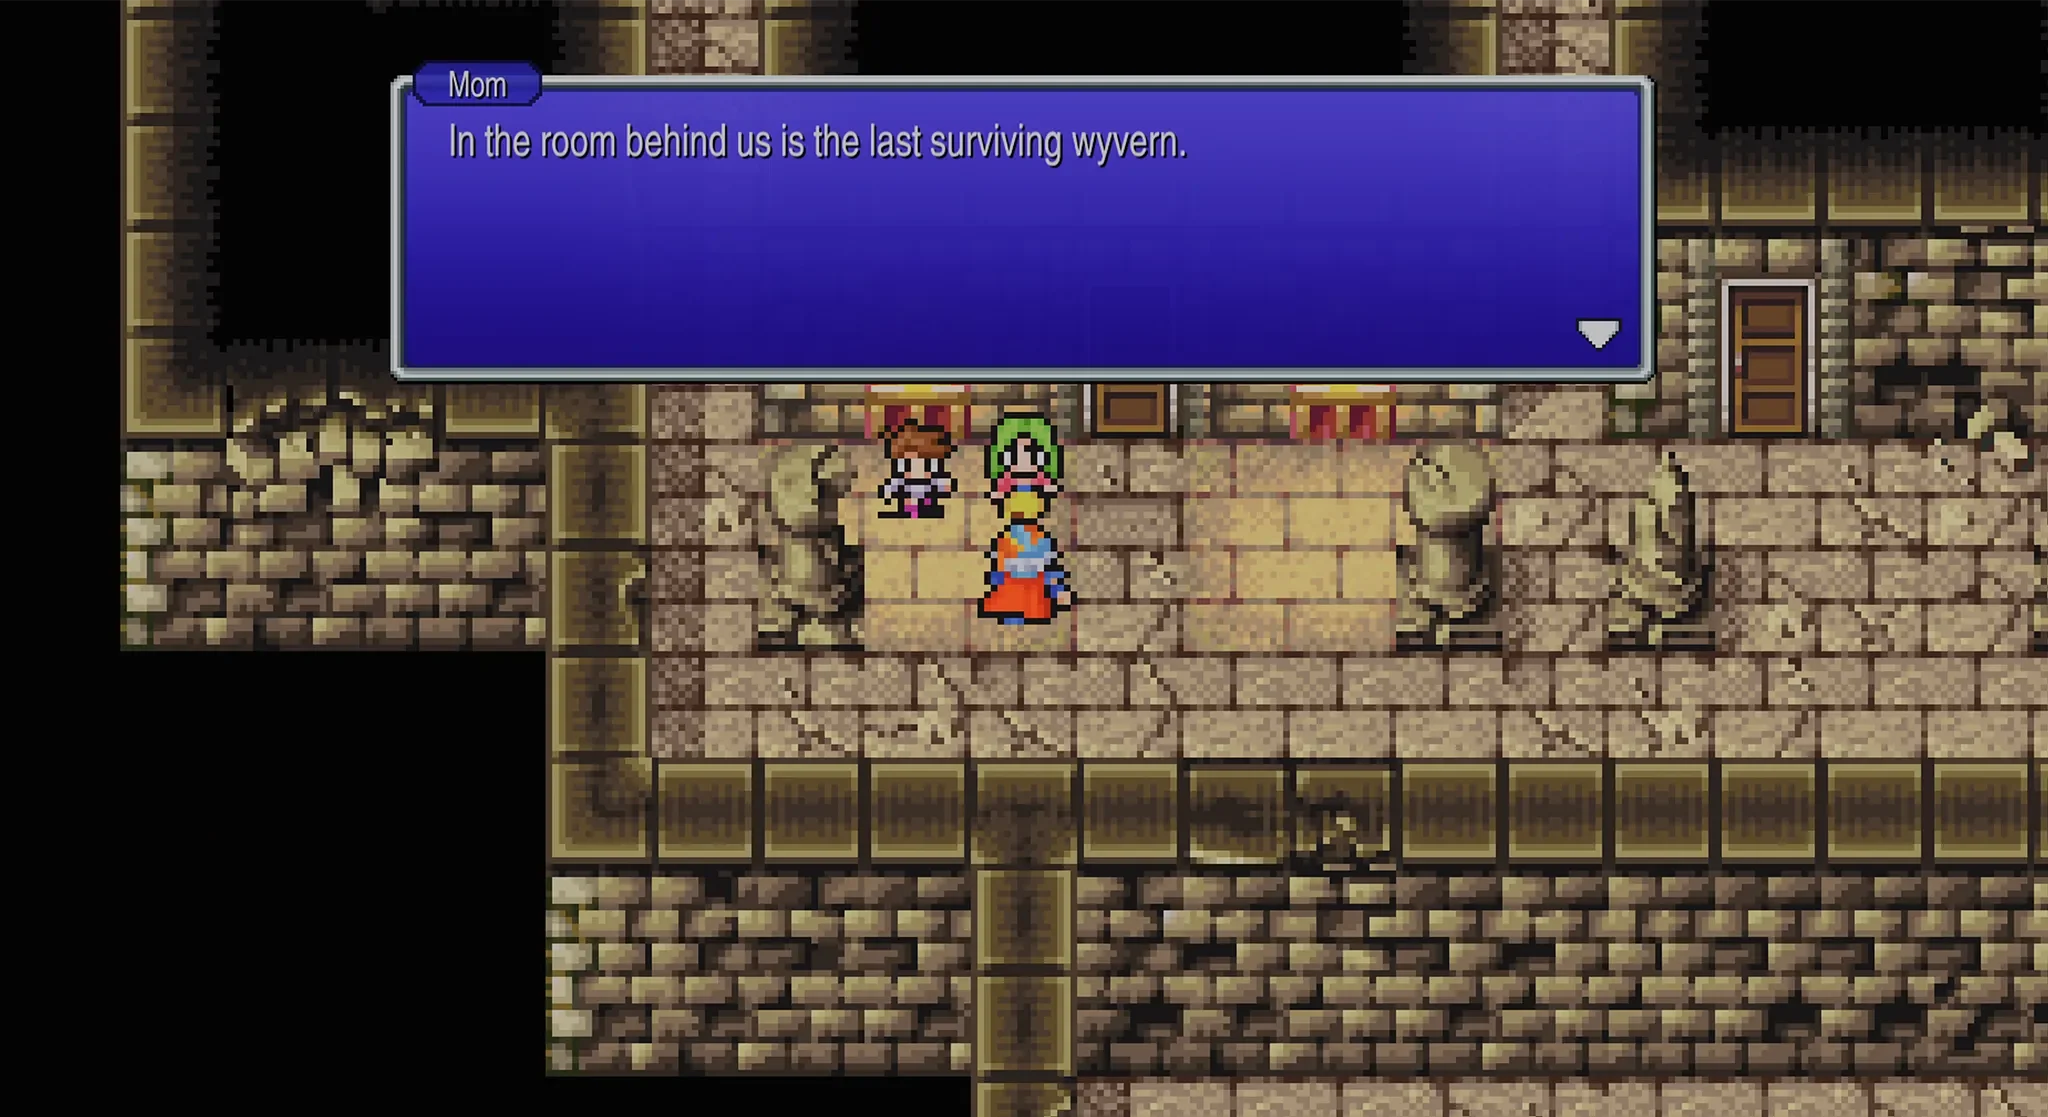
The mother will reveal that her husband was a Dragoon and that the last surviving Wyvern is in the room behind her. She also tells you that there is a Pendant in the Deist Cavern that will allow you to understand the Wyvern, so that will be out next main objective.
But before we leave the castle let’s get all 14 treasure chests first!
2F
We will be starting with 2F as the entrance part of 1F doesn’t have any chests and the only rooms in 1F that do have chests are accessed through 2F anyway.
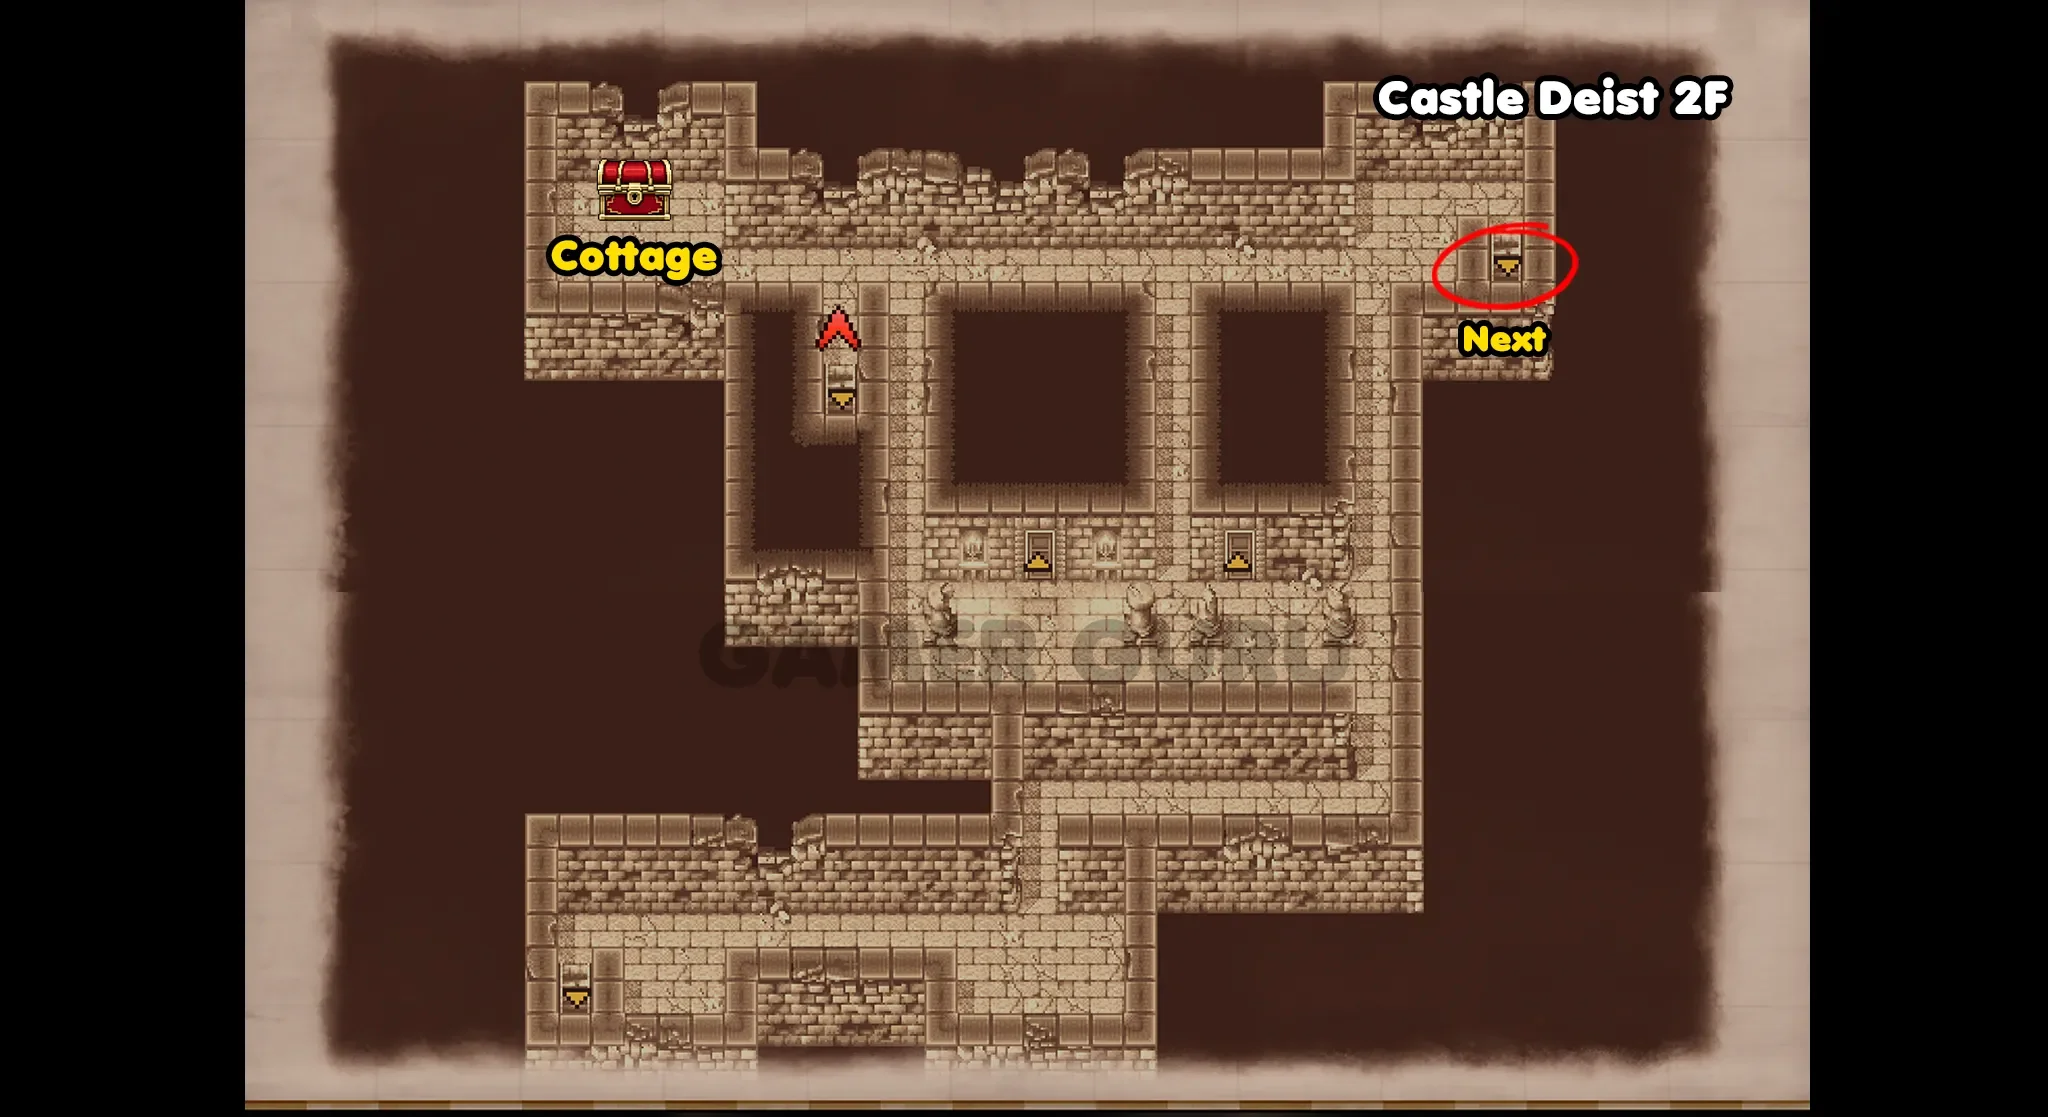
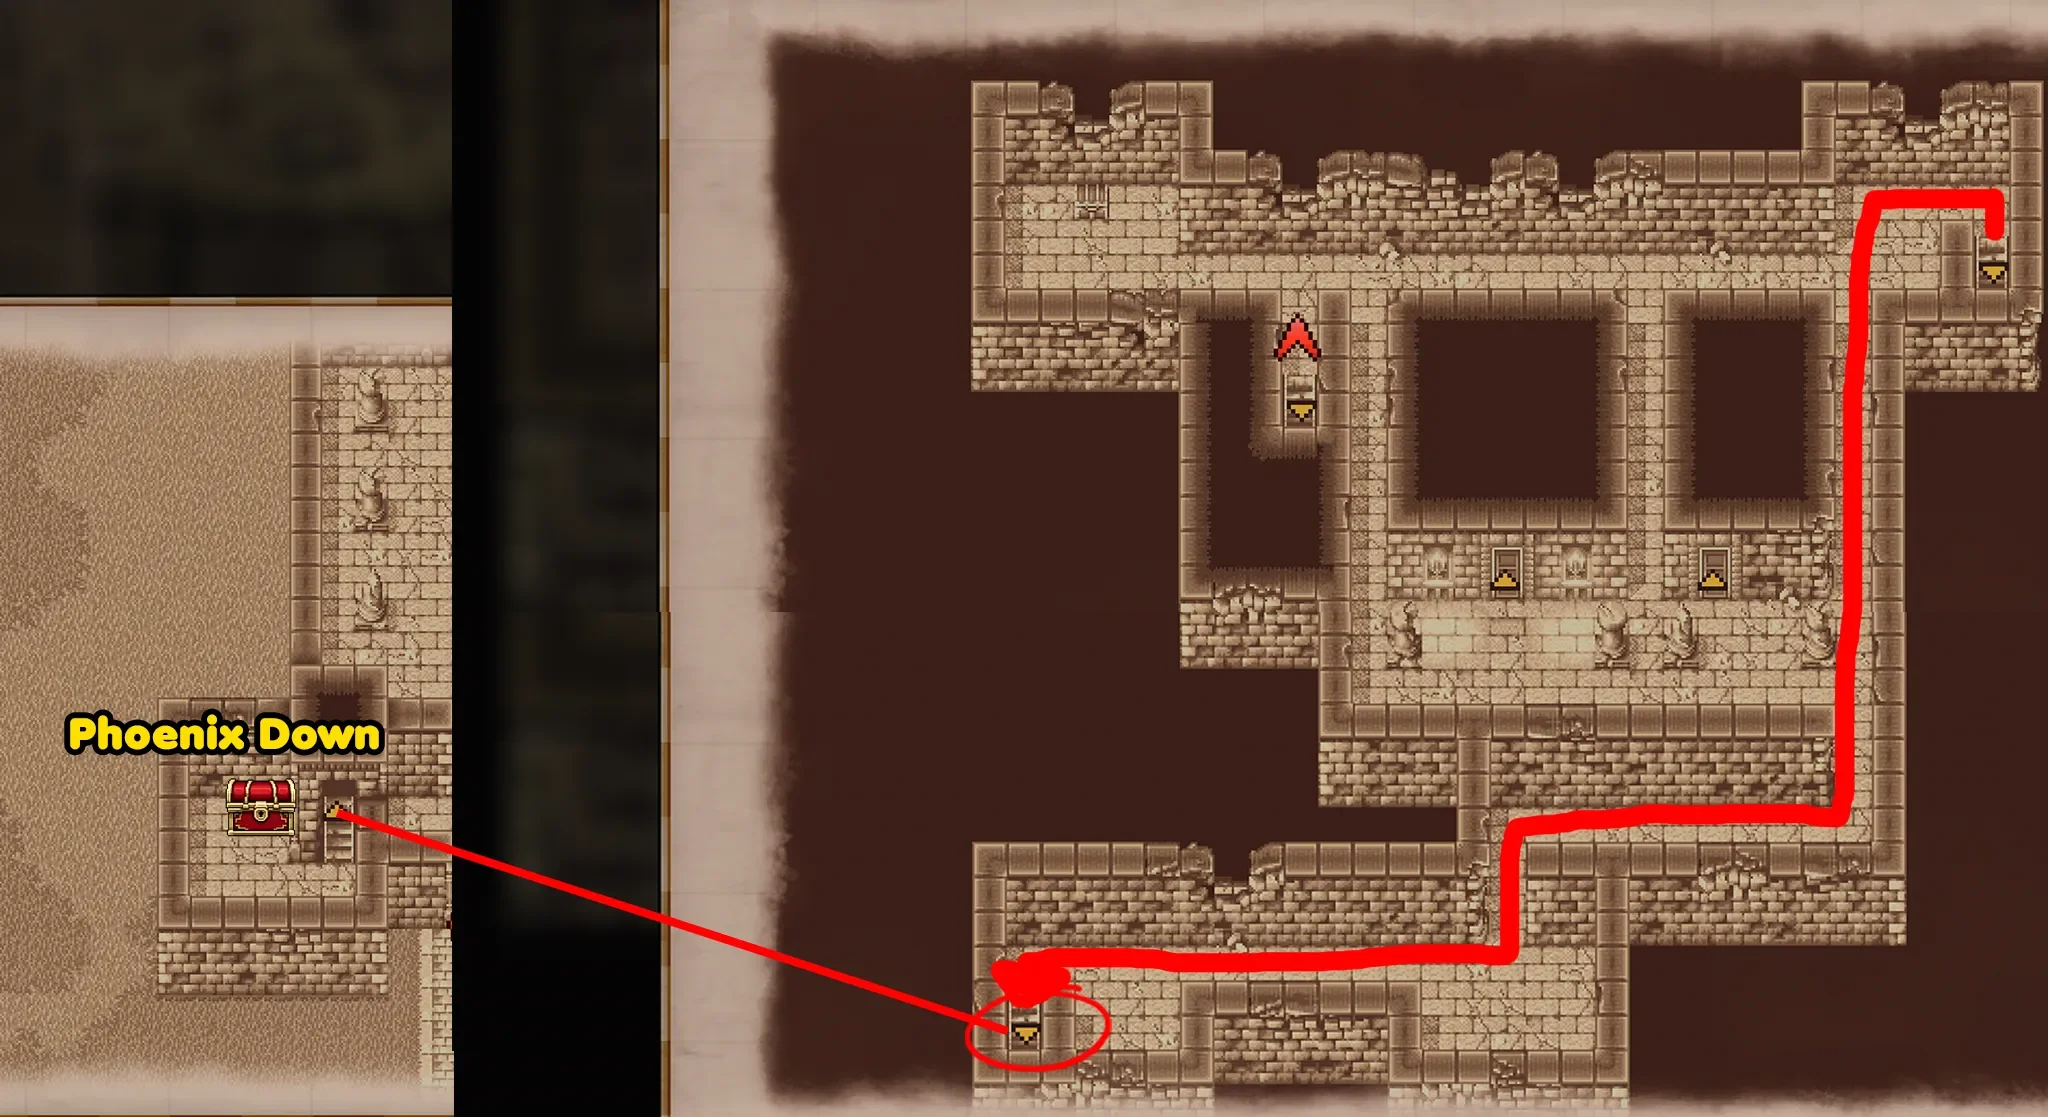
2F only has the one chest at the top left and it contains a Cottage, after opening it, head down the stairs at the top right part of the room to reach 1F.
1F
We will now be in the top hallway of 1F, first go through the door that is all the way to the left at the top, this will lead to a room with 8 chests, these chests contain: Gold Needle, Sage’s Wisdom, Saint’s Spirit, Wing Sword, Mallet, Cross, Antidote and Eye Drops.
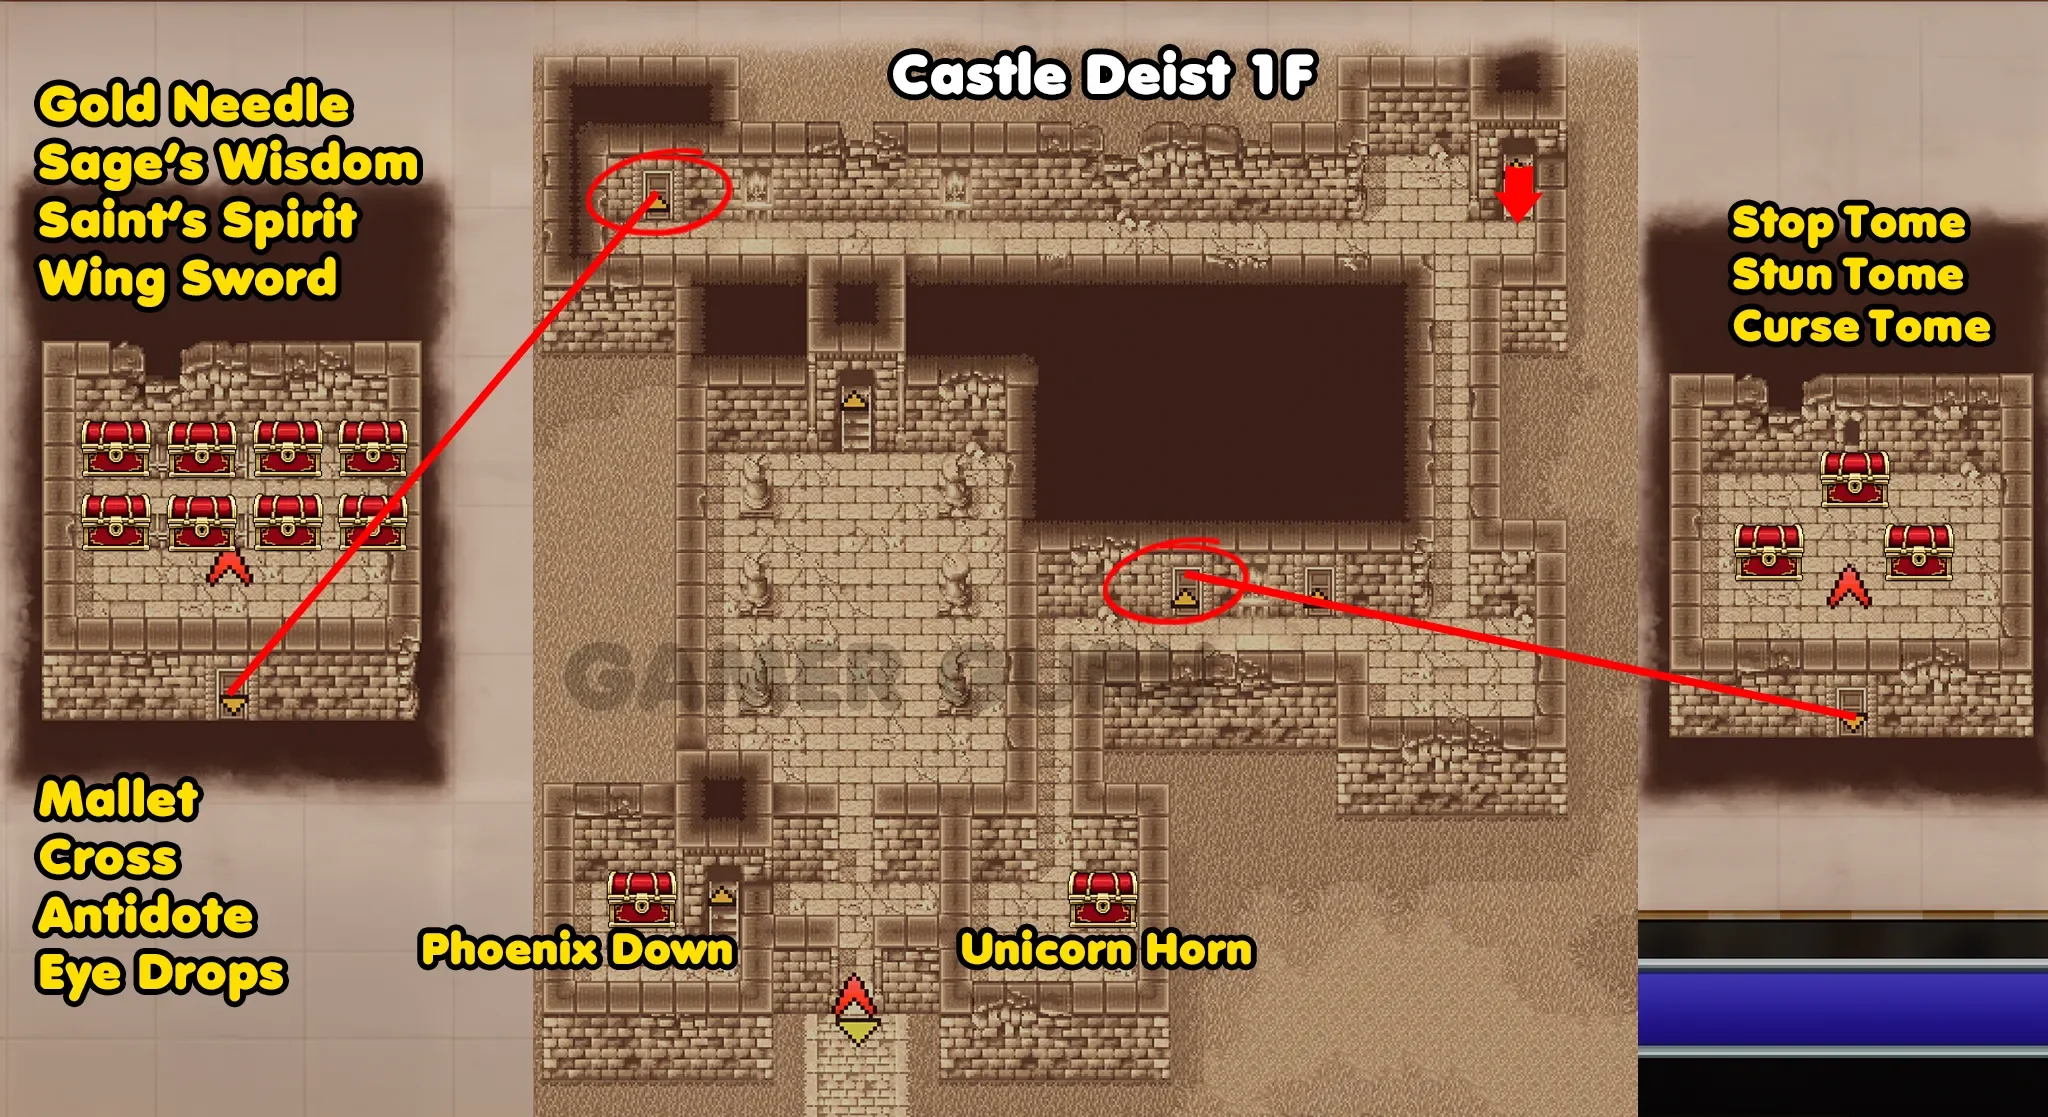
Exit back out into the hallway and go to the bottom right of the floor to open the chest that contains the Unicorn Horn.
After that go through the door almost directly above the last chest to reach another room that has 3 more chests, open them to get: Stop Tome, Stun Tome & Curse Tome.
To reach the final chest in the bottom left, the one that has the Phoenix Down, you need to return back to 2F, then take the stairs at the bottom left to reach the small room back in 1F with the chest.
Now that you have all the chests you can leave the castle and head for Deist Cavern.
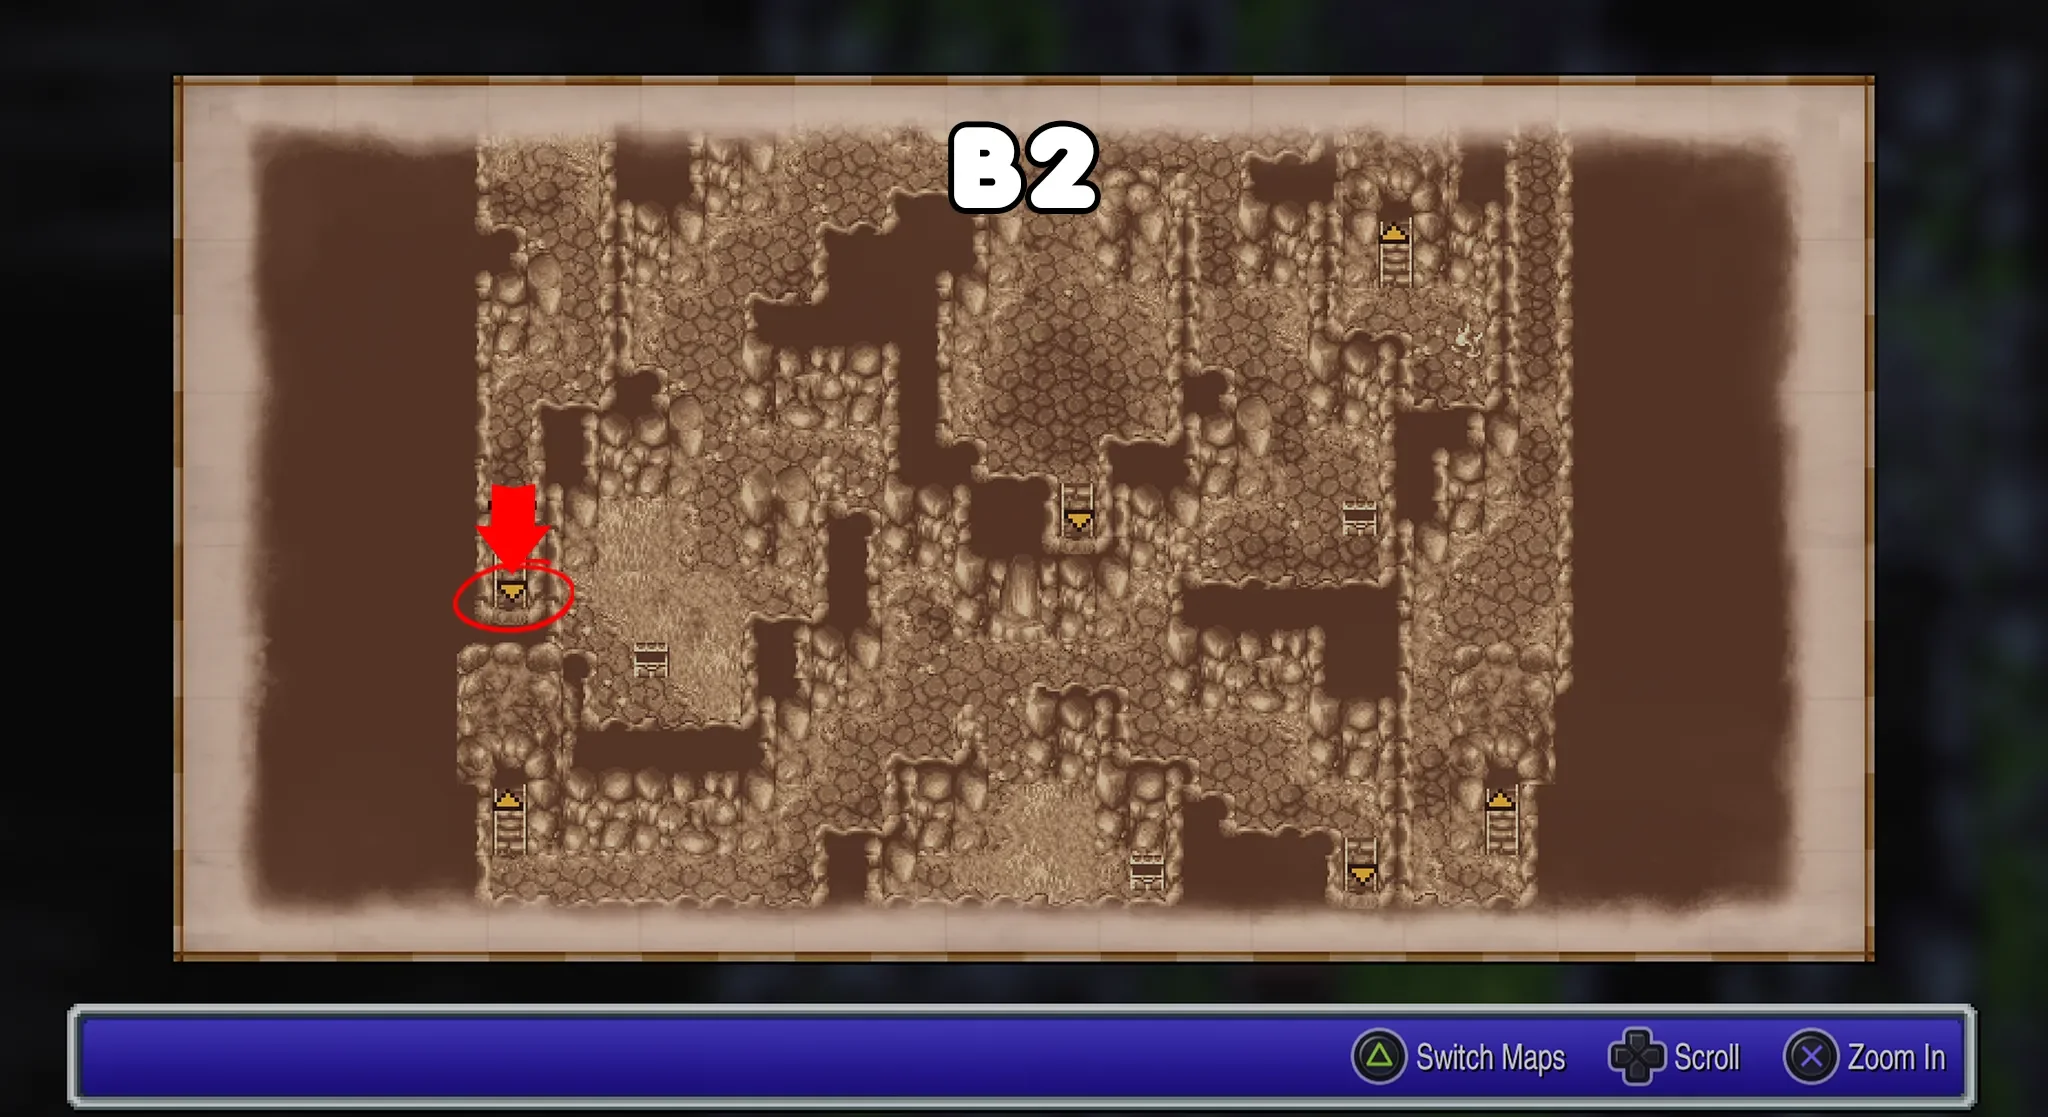
Deist Cavern
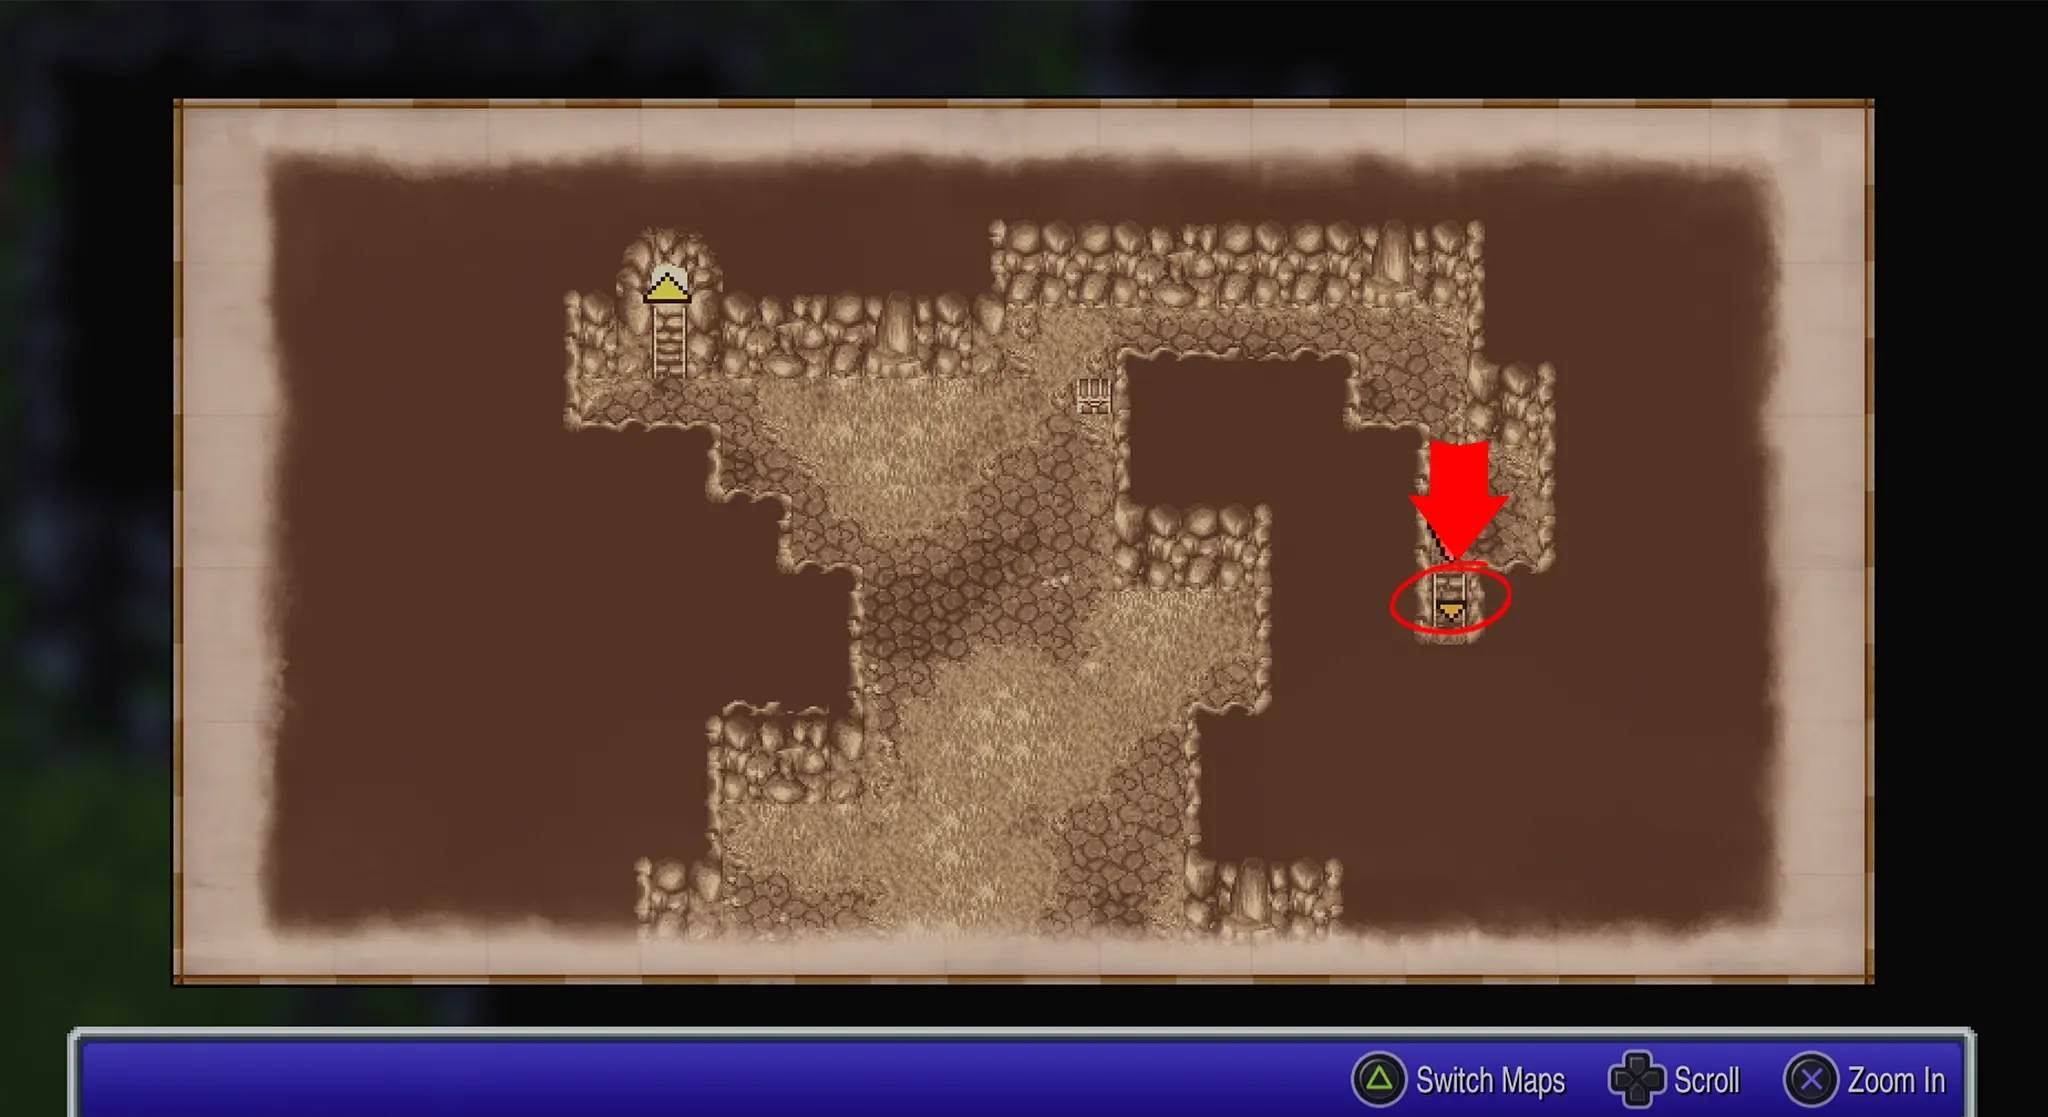
You will find Deist Cavern slightly to the north of Castle Deist. During this visit ignore all the treasure chests, we will be coming back for those in just a second, for now we are just here for the Pendant.
To find the Pendant just go through the door at the top right of B1 and you will find it in the next small room.
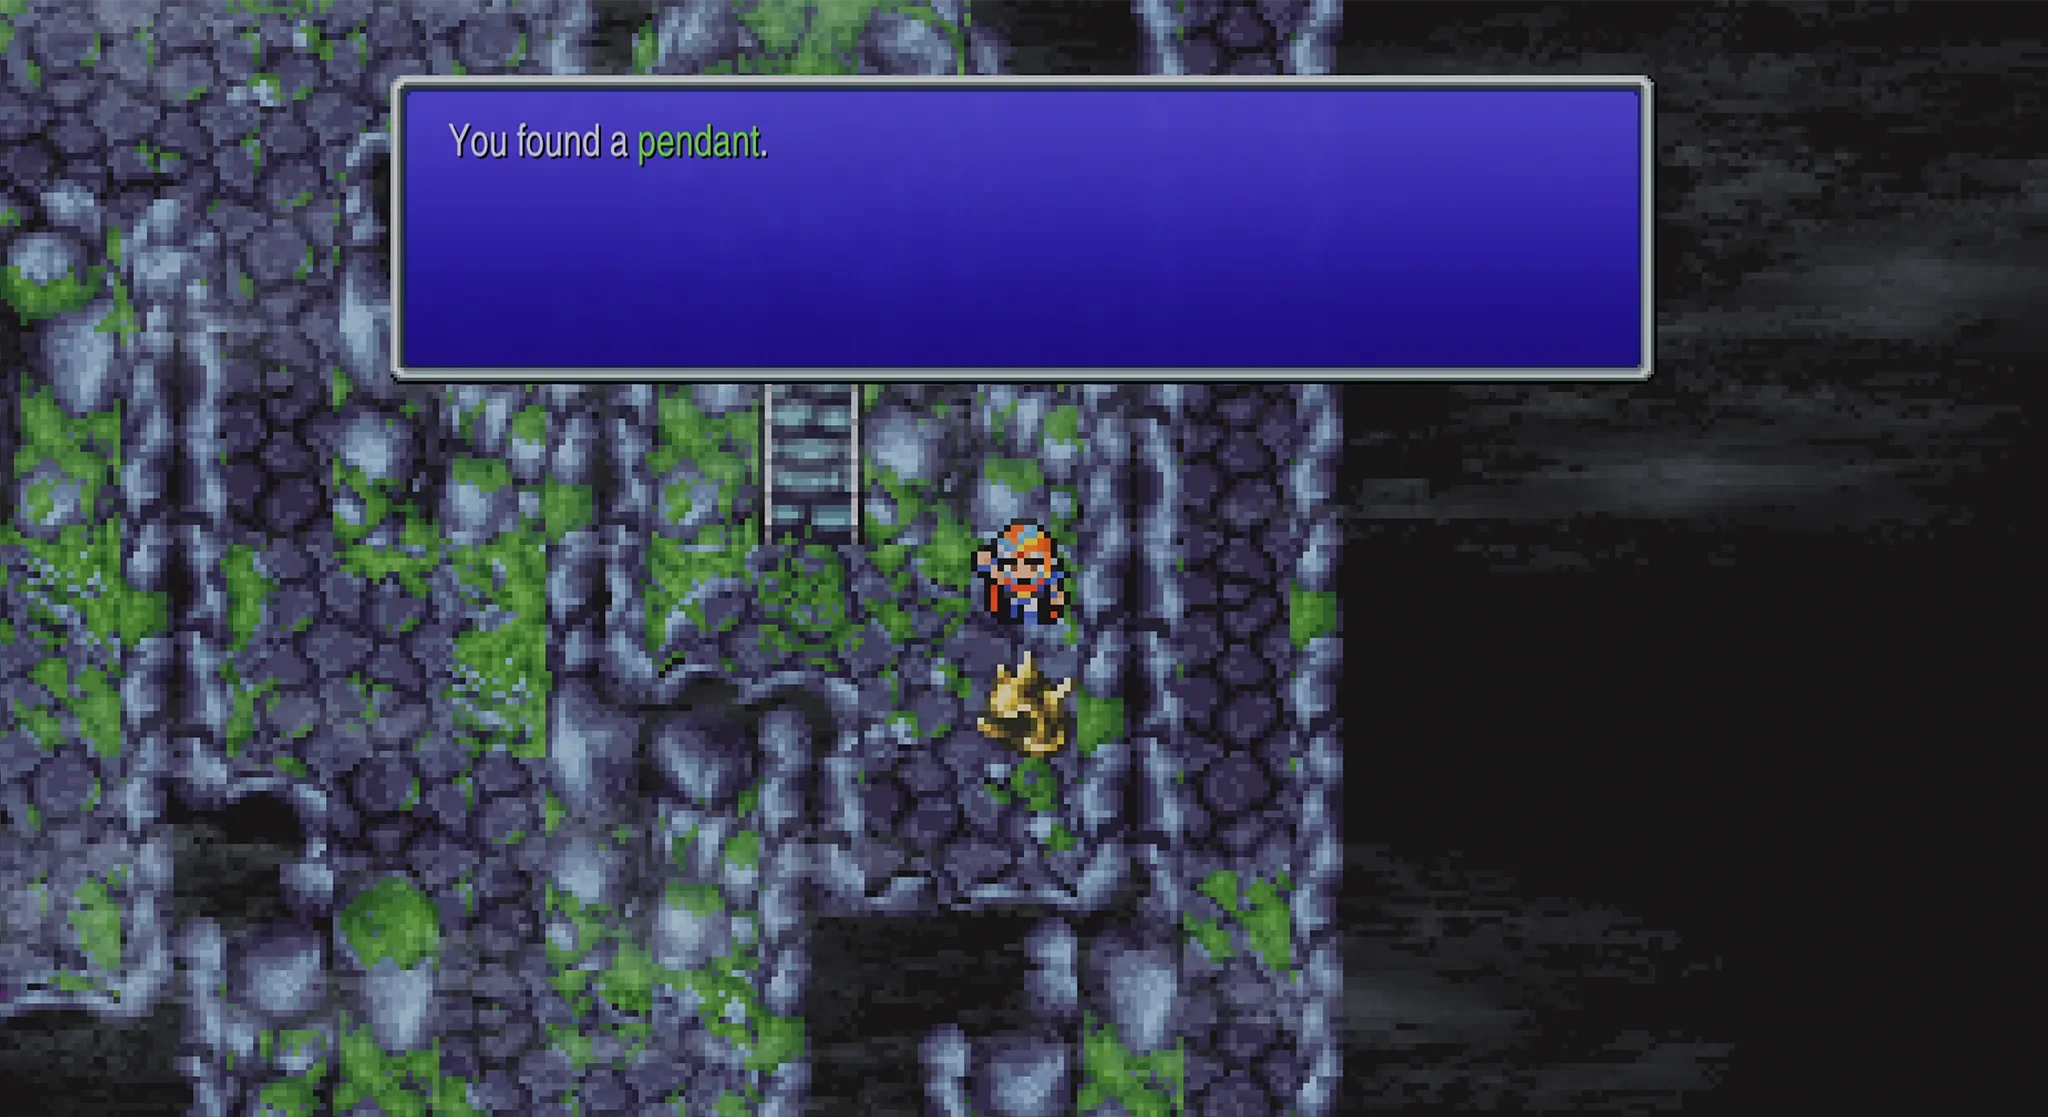
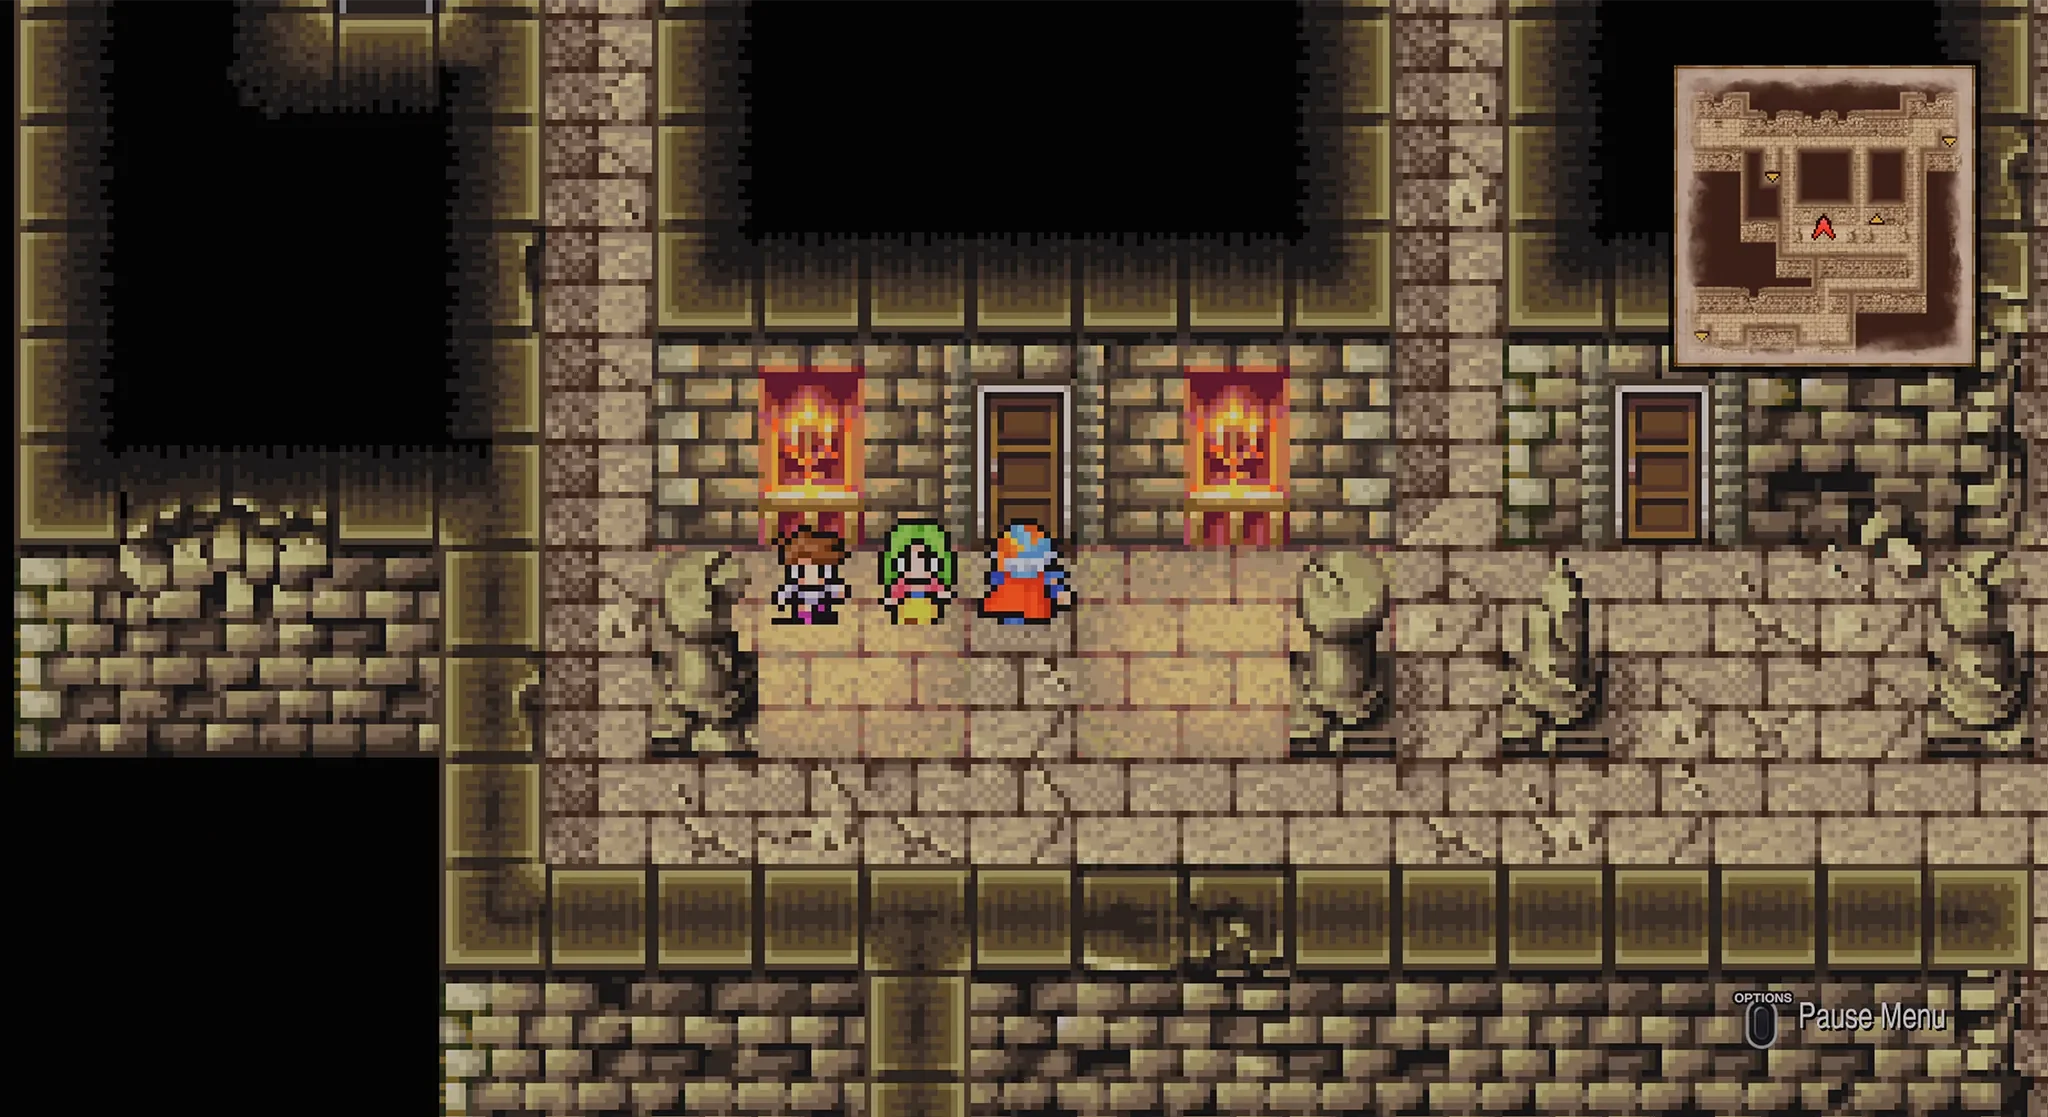
Once you have the Pendant, return to Castle Deist and you will now be able to speak with the Wyvern in the room behind where the kid and his mother stand.
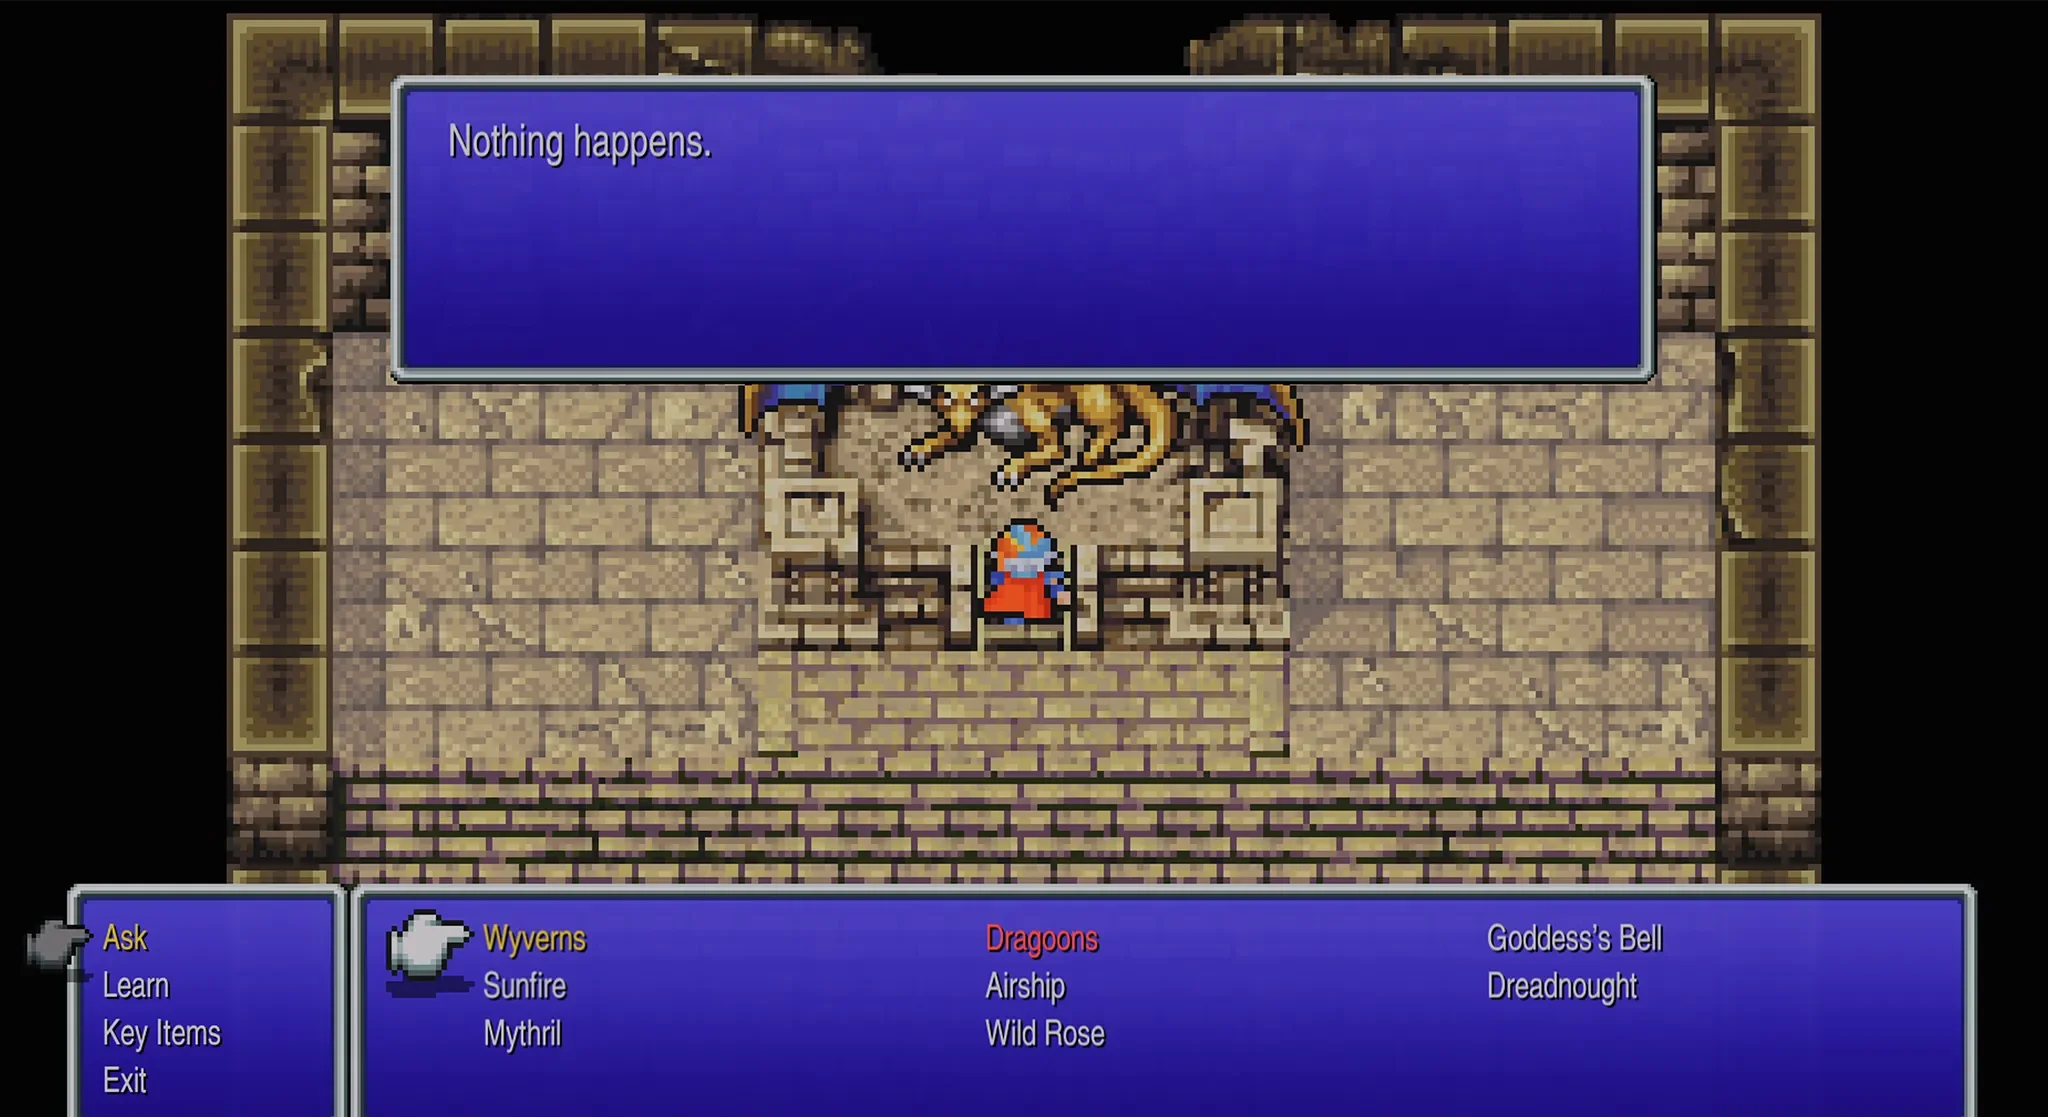
While interacting with the Wyvern, Ask it about the Wyverns and it will give you the Last Wyvern Egg, and ask you to take it to the Life Spring at the end of Deist Cavern.
It is now that we have to return to Deist Cavern and actually make it to the end, we will also now be getting all 13 of the chests in the dungeon.
Now unfortunately we can’t really divide this dungeon by floors as we have all of the previous ones as there is a lot of going up and down different floors through different doors, but we will still be including images of each floor to make everything easy to follow.
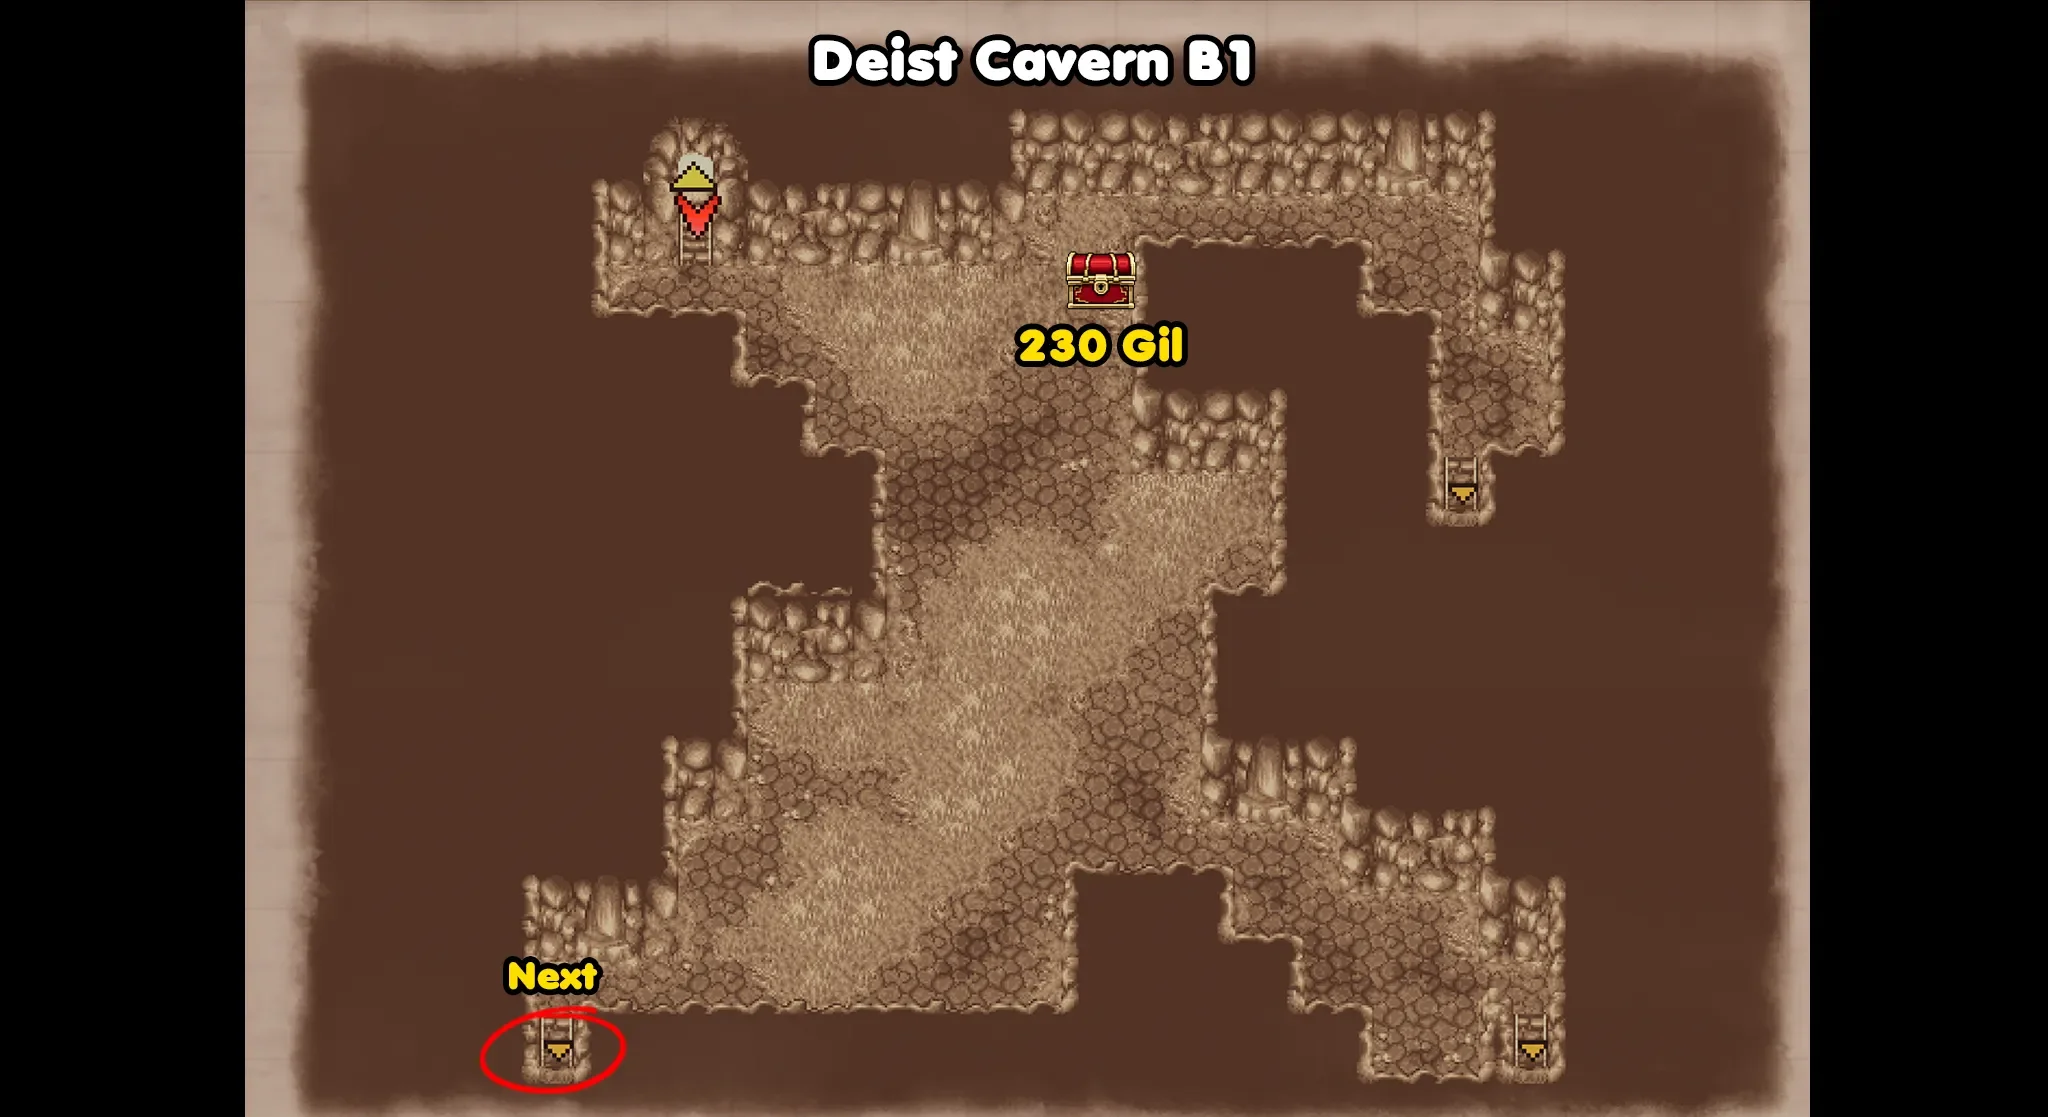
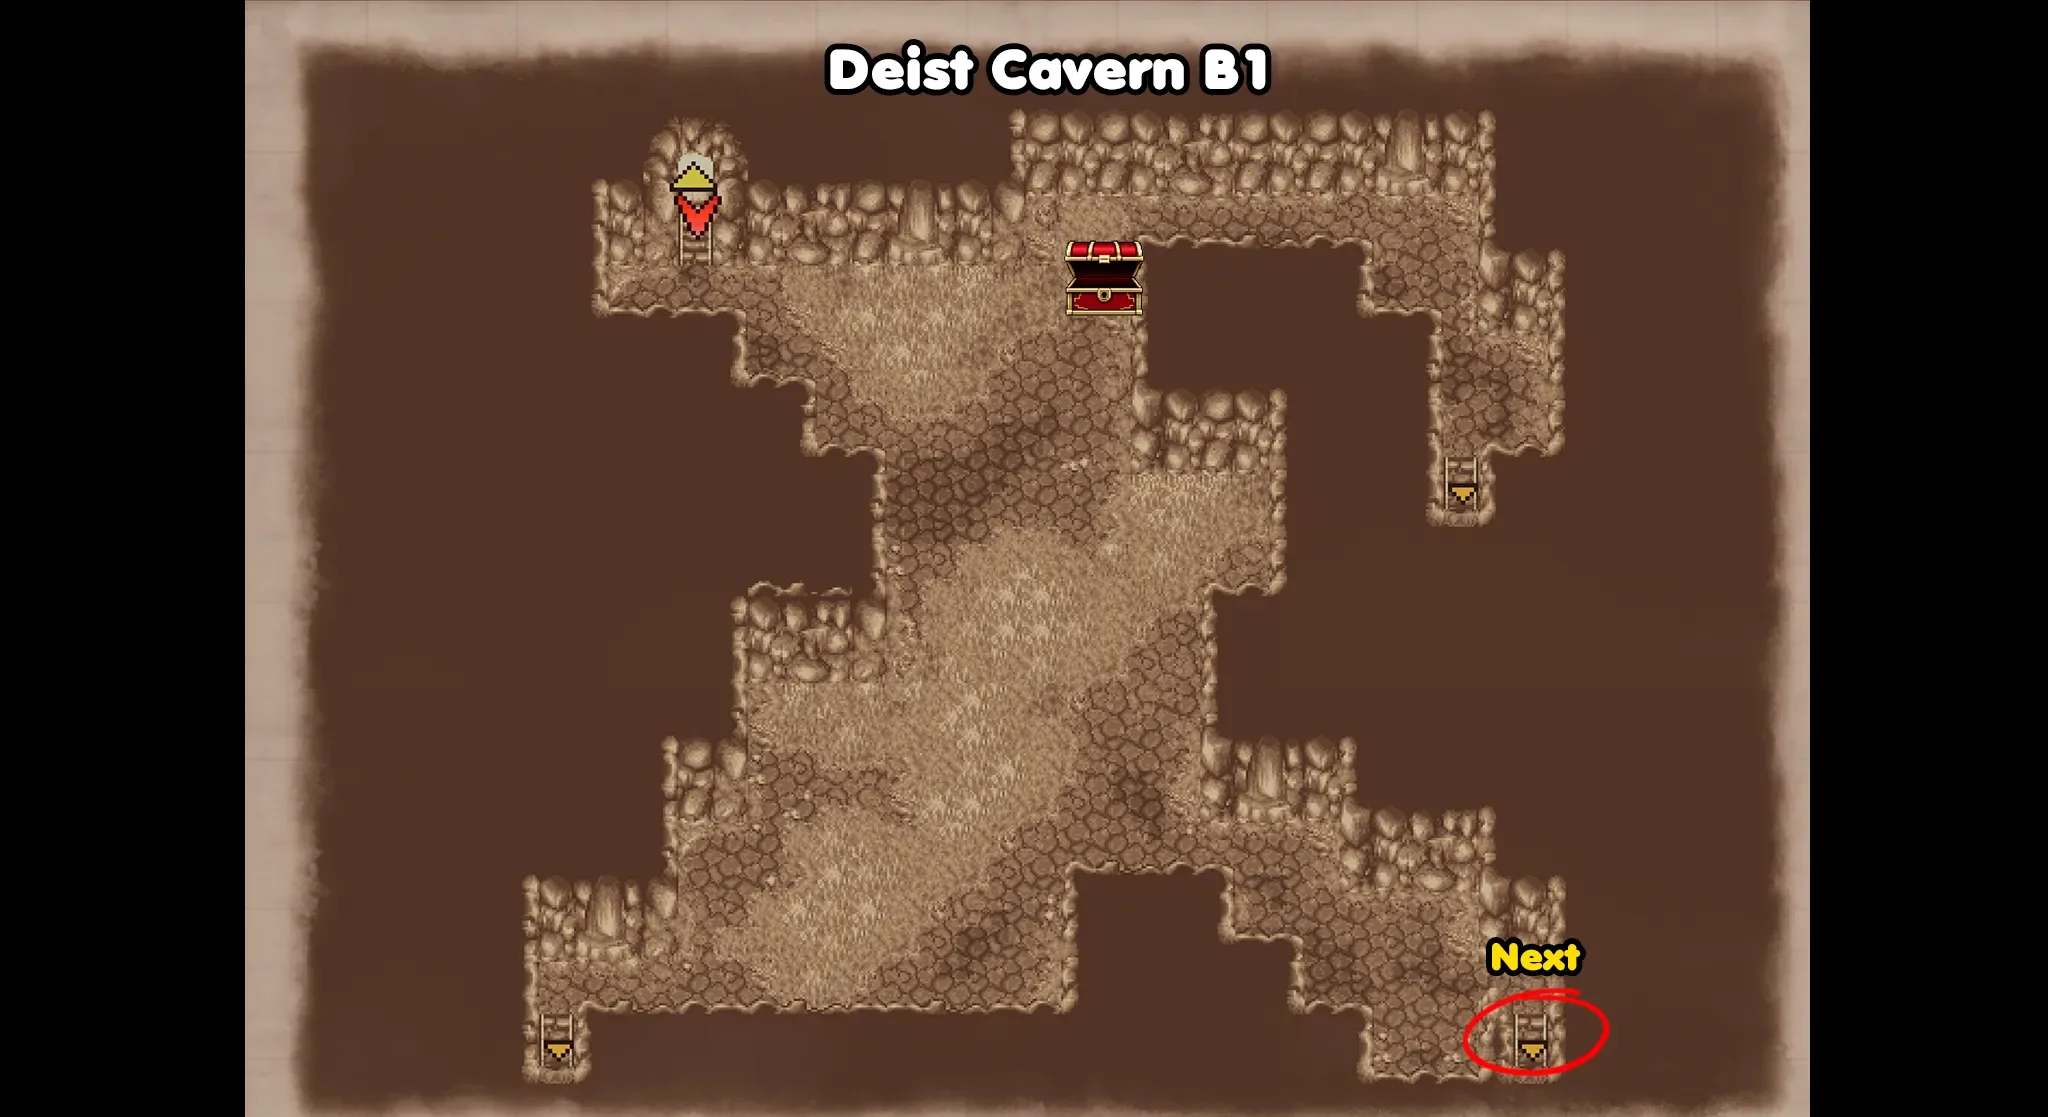
In B1 there is only 1 chest that contains 230 Gil and it is almost impossible to miss.
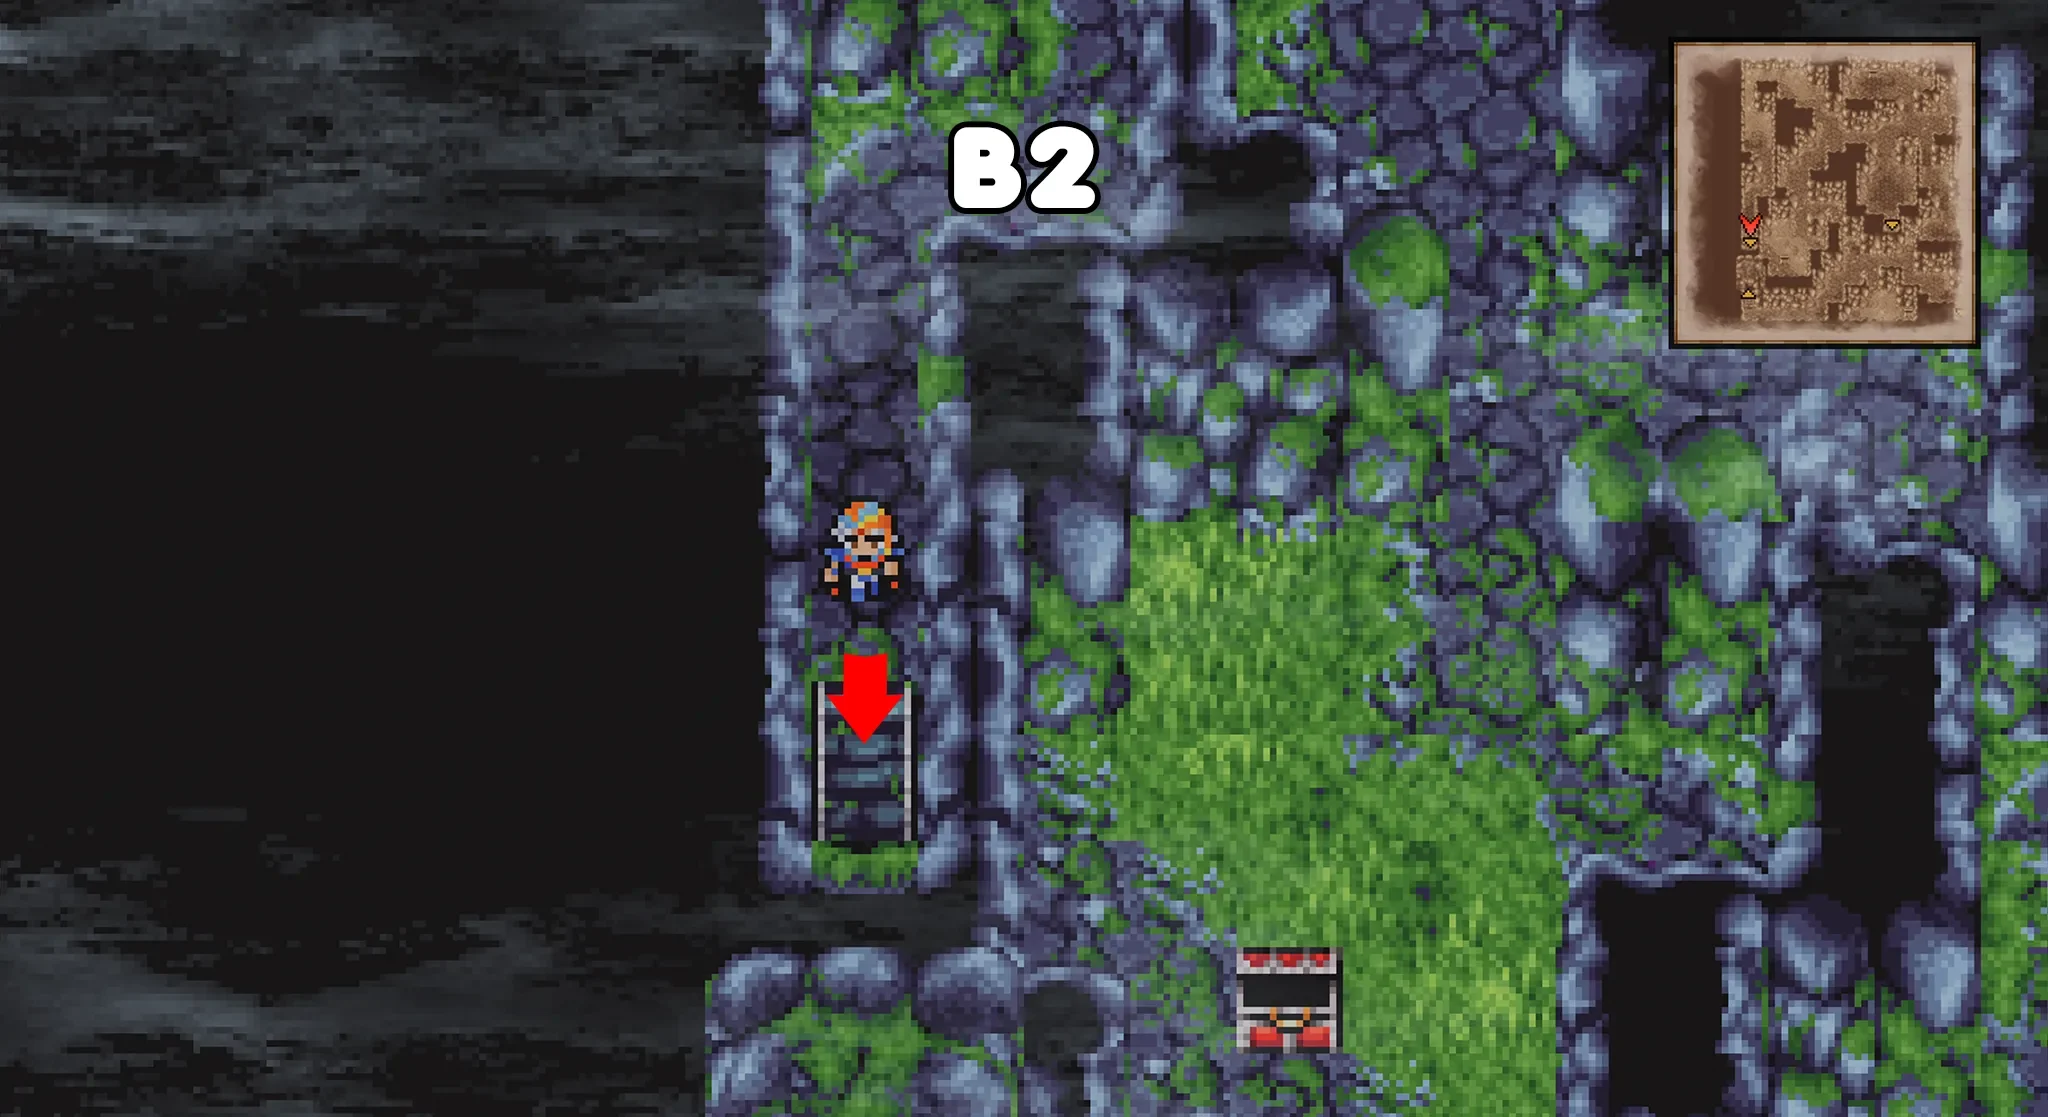
After opening the chest go down the stairs at the bottom left to reach the south part of B2.
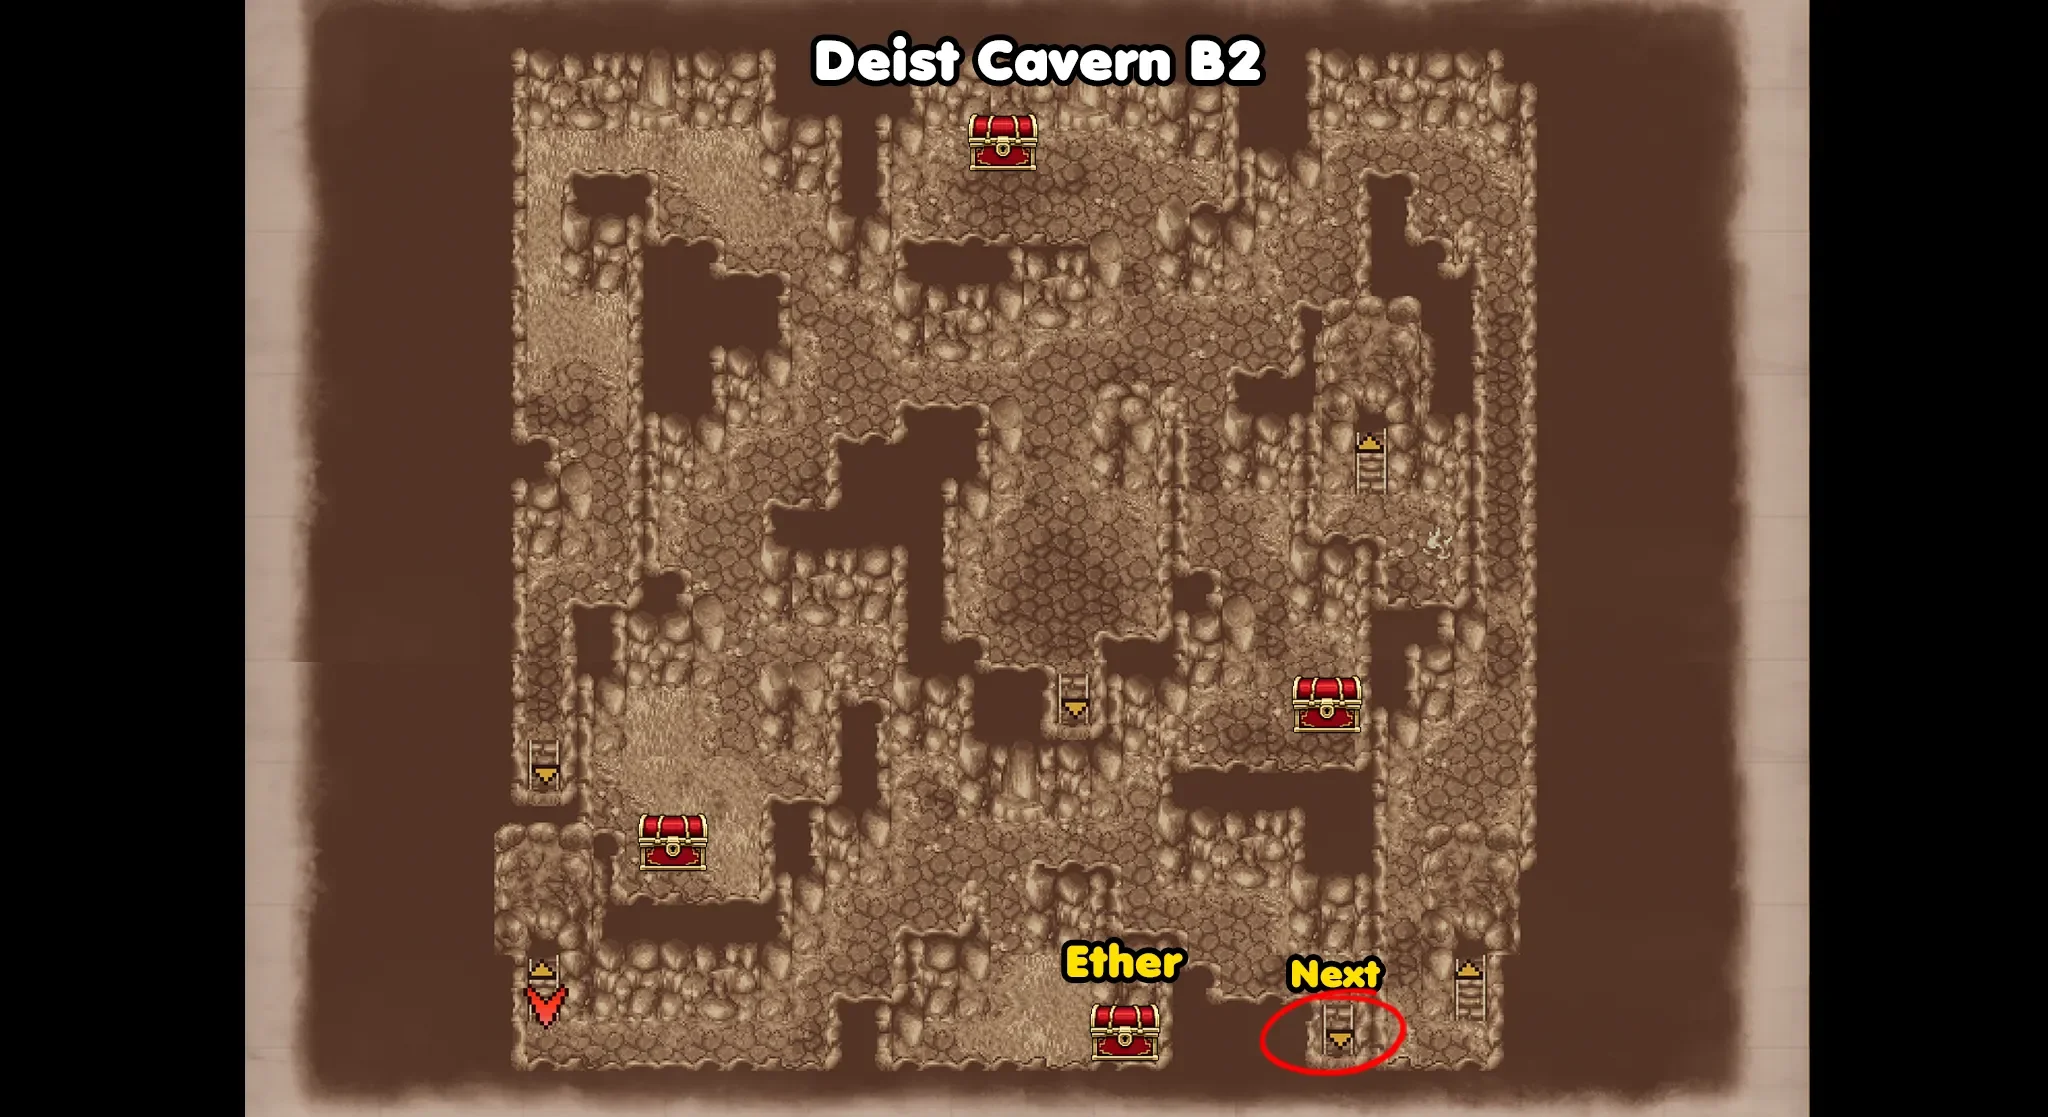
In this section of B2 we will only be able to get the bottom chest that has the Ether for now. Once you have opened it go down the stairs to the right to reach the bottom right section of B3.
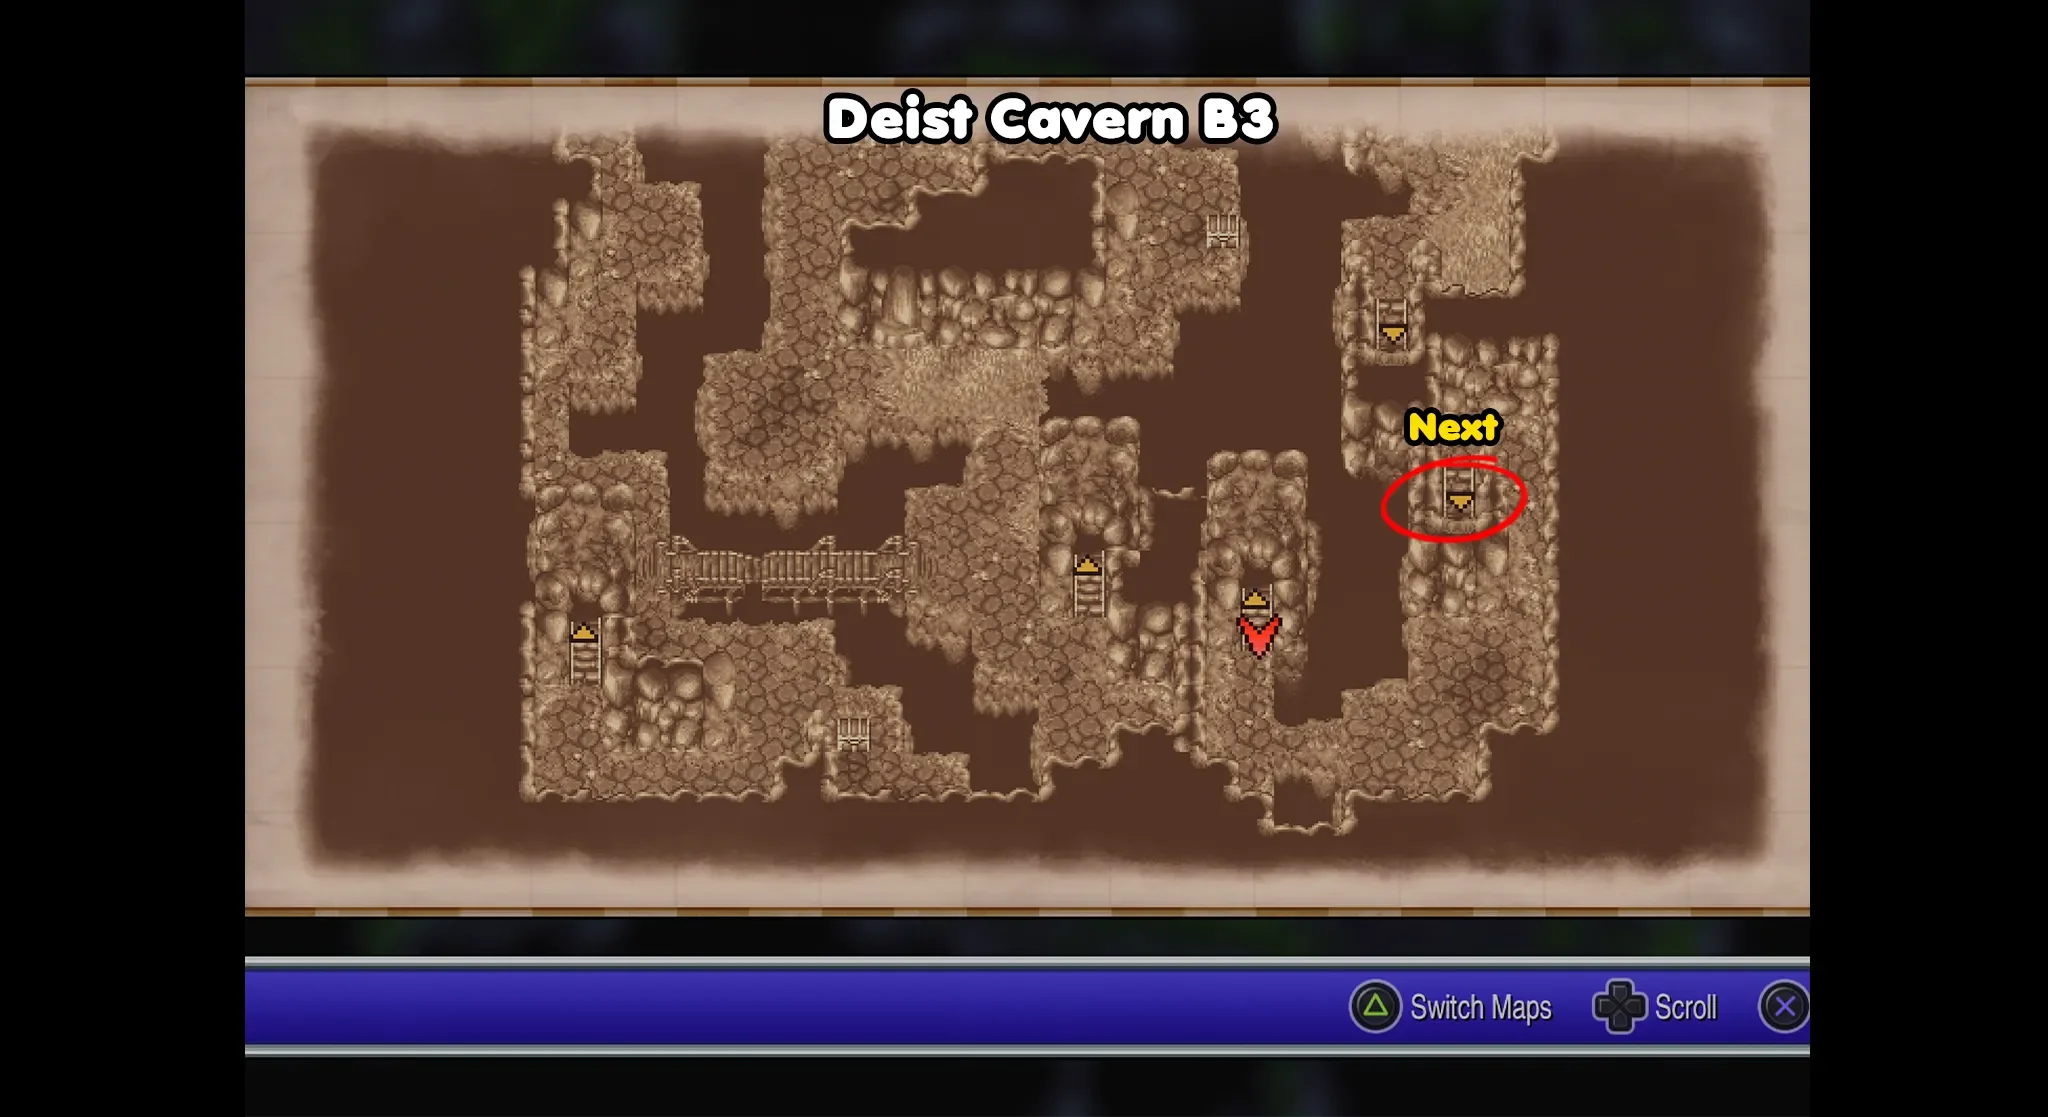
In this part of B3 there aren’t any chest for us to get, so just go through the door slightly above the one we came through to reach B4.
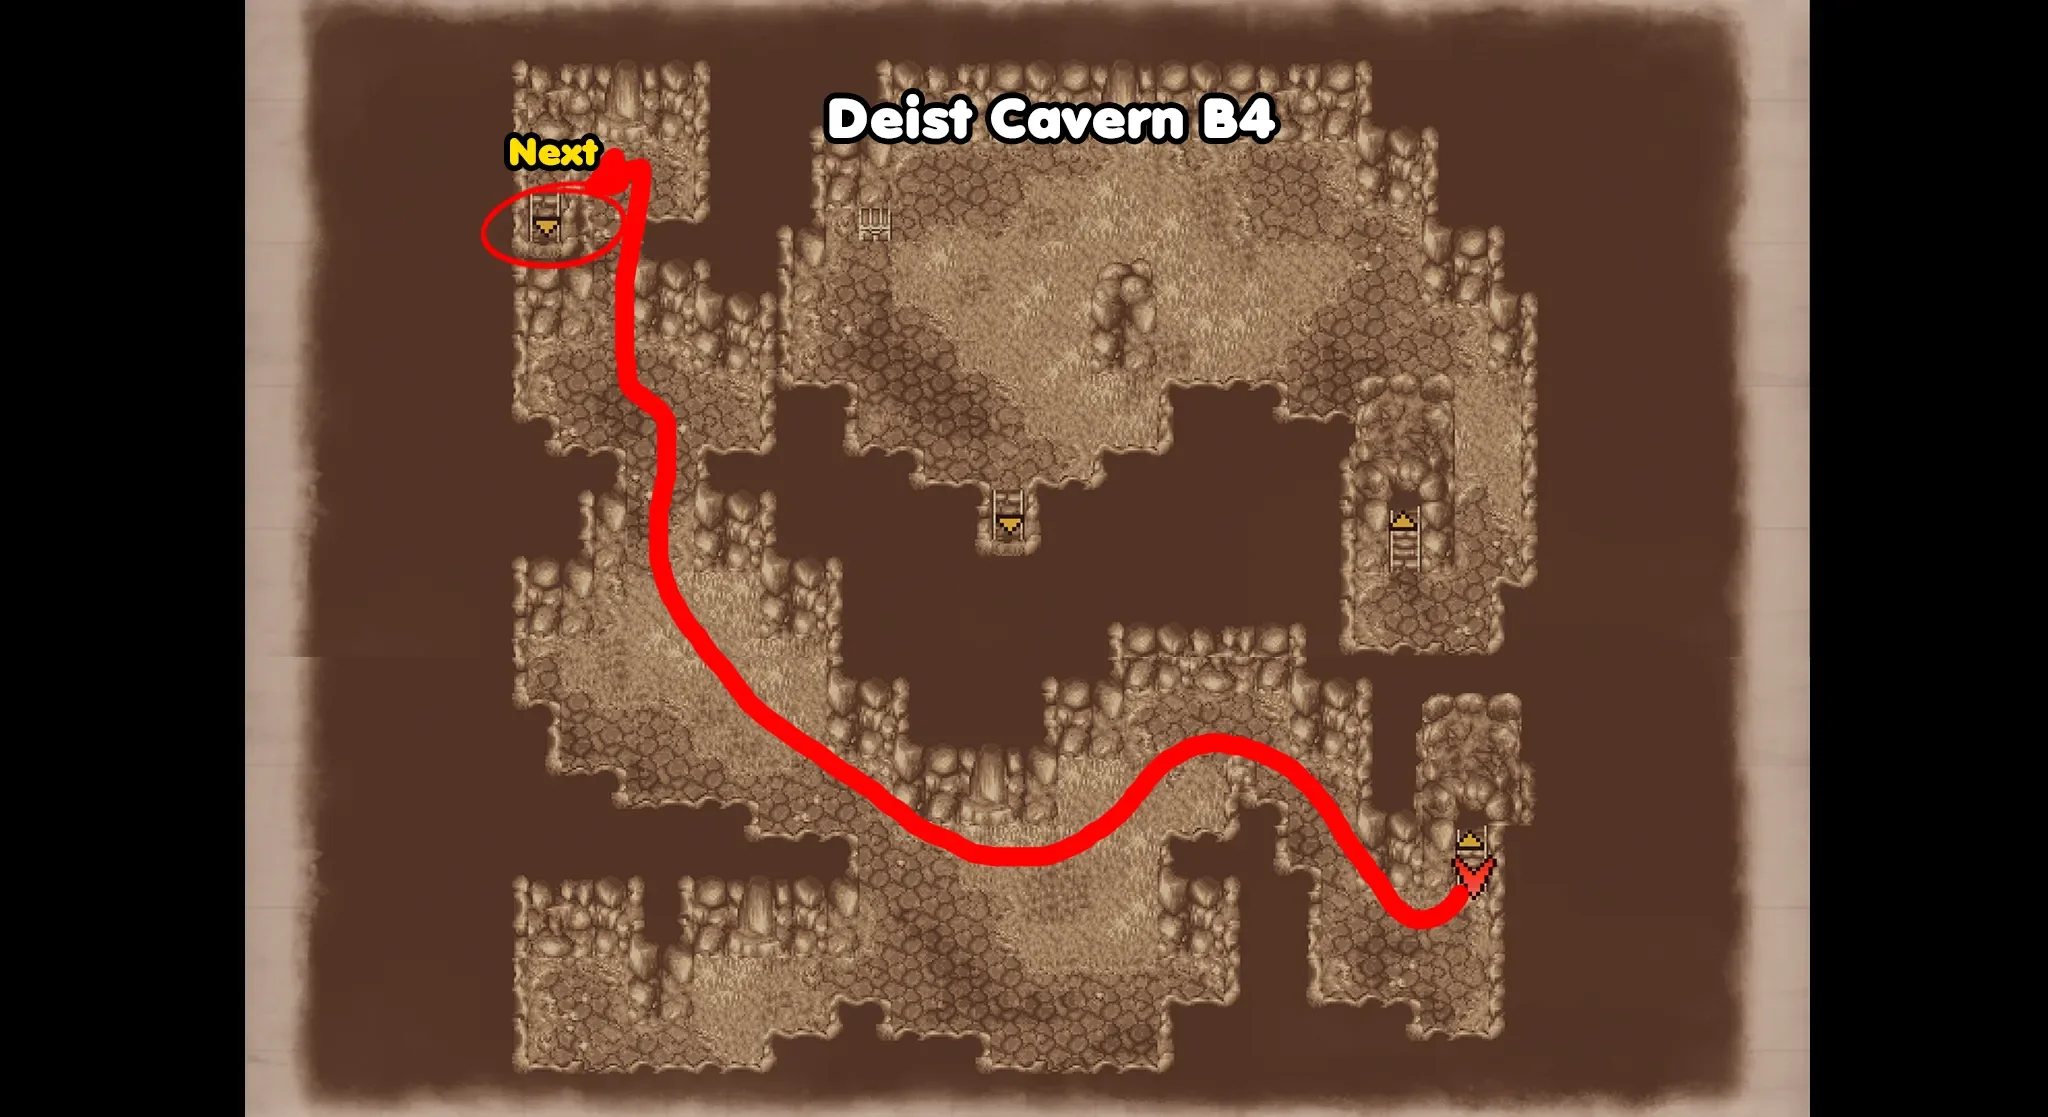
In the section of B4 that we arrive it there again won’t be any chests for us to open, so go to the top left of the floor to reach the stairs to B5.
This will place us in the section of B5 that has 4 chests at the bottom right end of the room.
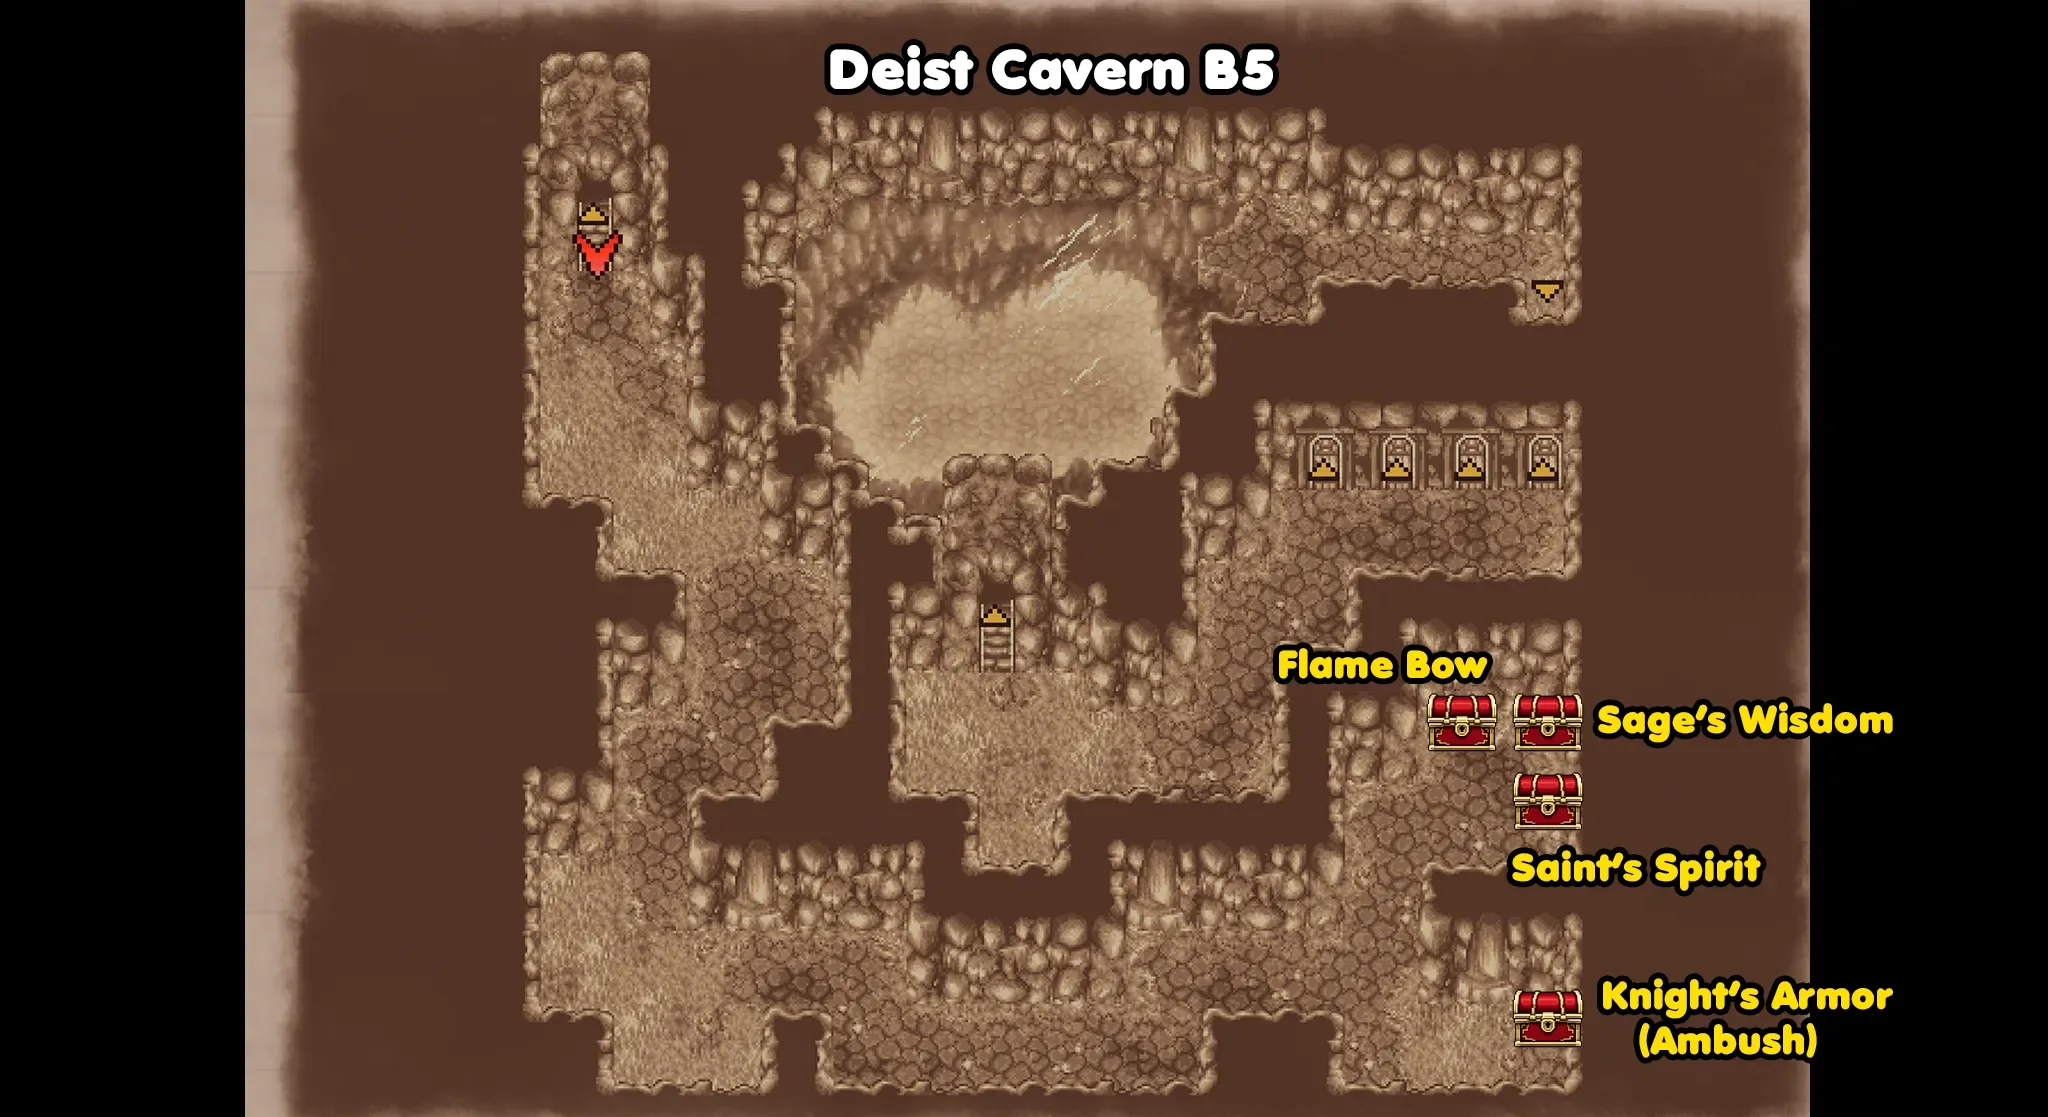
The top chest on the left contains the Flame Bow, the one to its right has a Sage’s Wisdom, the one just below it has a Saint’s Spirit and then finally the one at the bottom has the Knight’s Armor, but be careful, this last one is an ambush with 4 Adamantoise so come prepared!
After opening all 4 of these chests you need to return all the way back to B1, so either use Teleport or walk all the way back.
If you do use Teleport, now would be the perfect time to use a Cottage to heal your party in the overworld before heading back into the cave.
Now that we are back at the entrance of B1, this time go down the stairs at the bottom right of the floor. This will take you to the main section of B2.
Now that you are in the main area of B2 there are 3 more chests that you can find here.
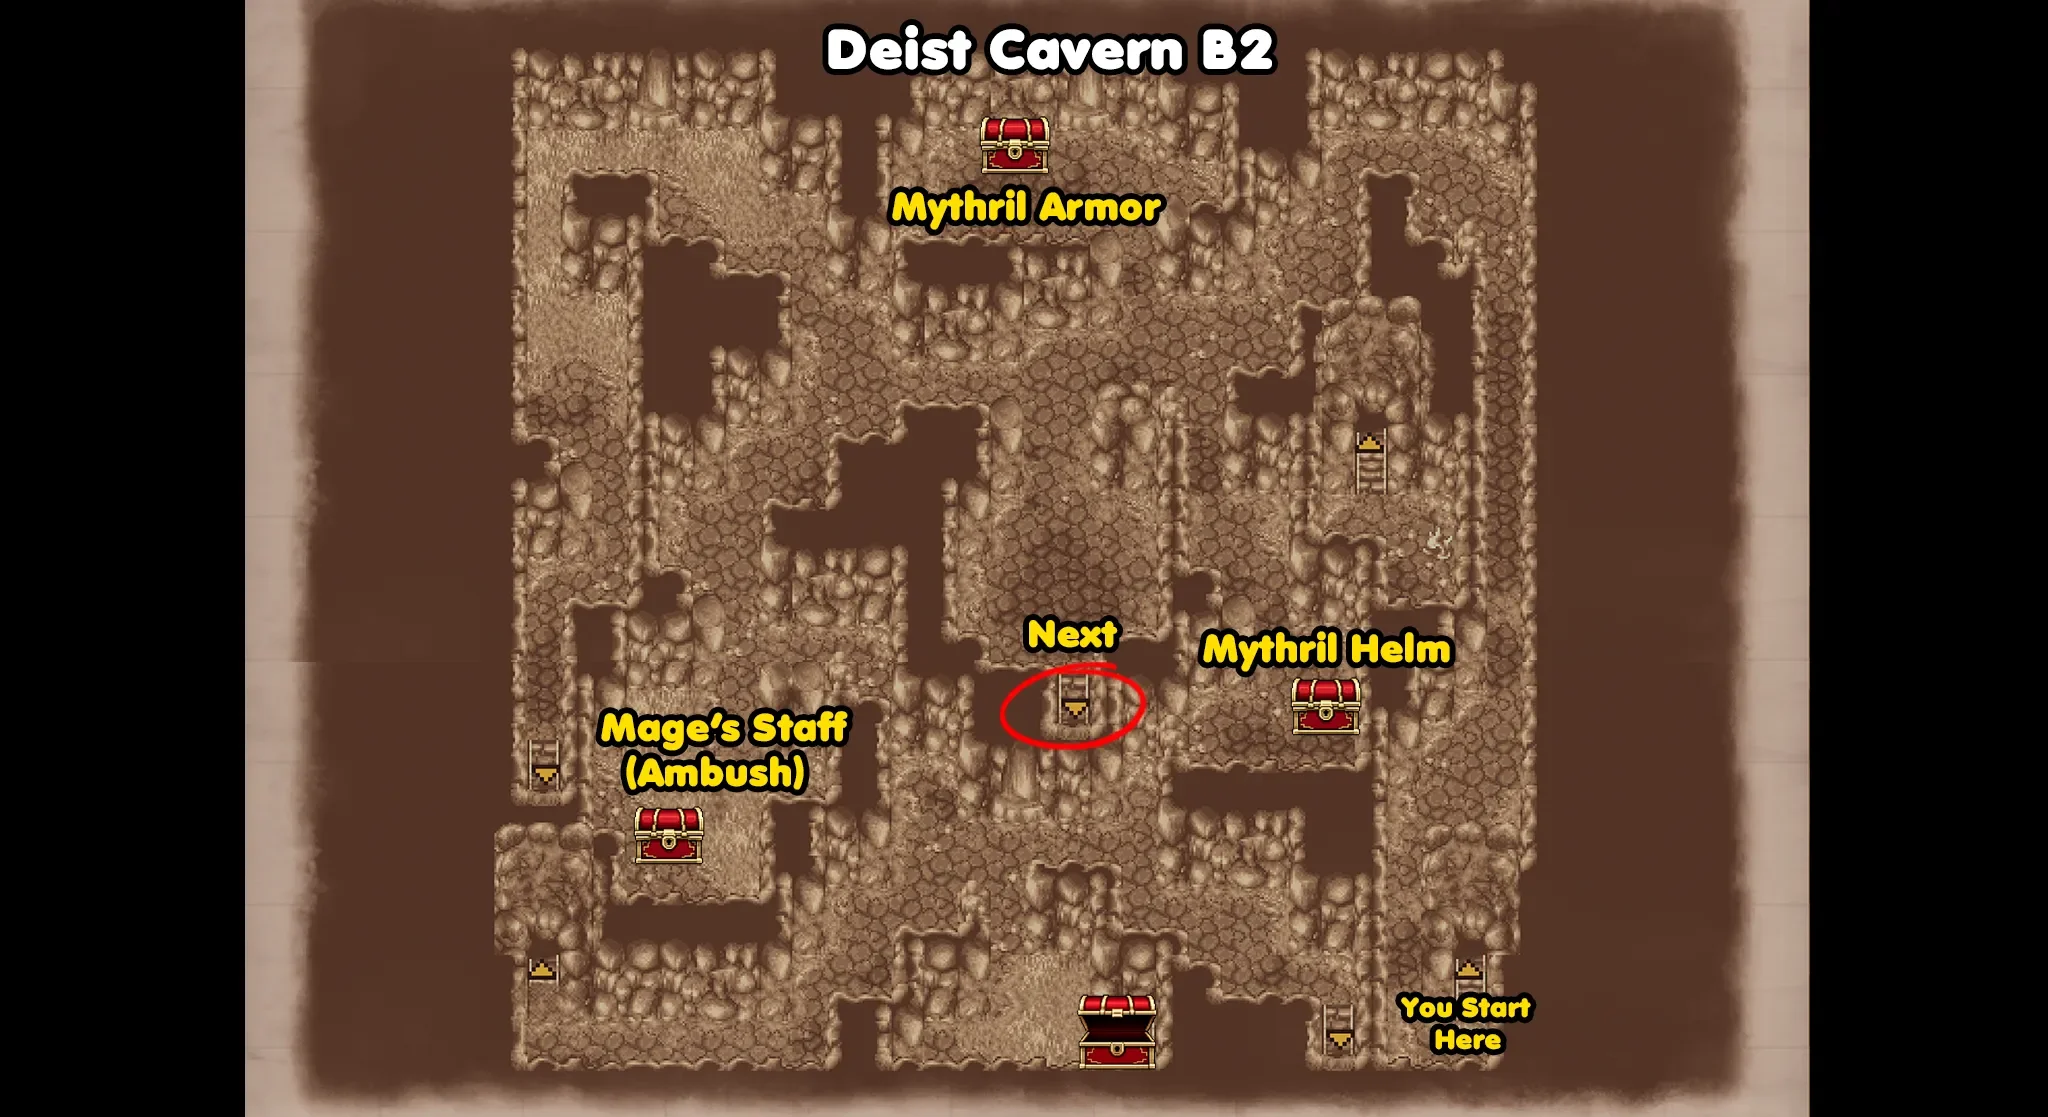
You will start at the bottom right side of the floor, go all the way to the top and then go to the left, first head down the get the chest that contains the Mythril Helm, then go up to the very top to get the chest that has the Mythril Armor.
Finally go to the bottom right chest that contains the Mage’s Staff, but be careful this one also has an enemy ambush when you open it!
Once you have opened all 3 chests you can go down the stairs in the middle of the room to reach the middle area of B3.
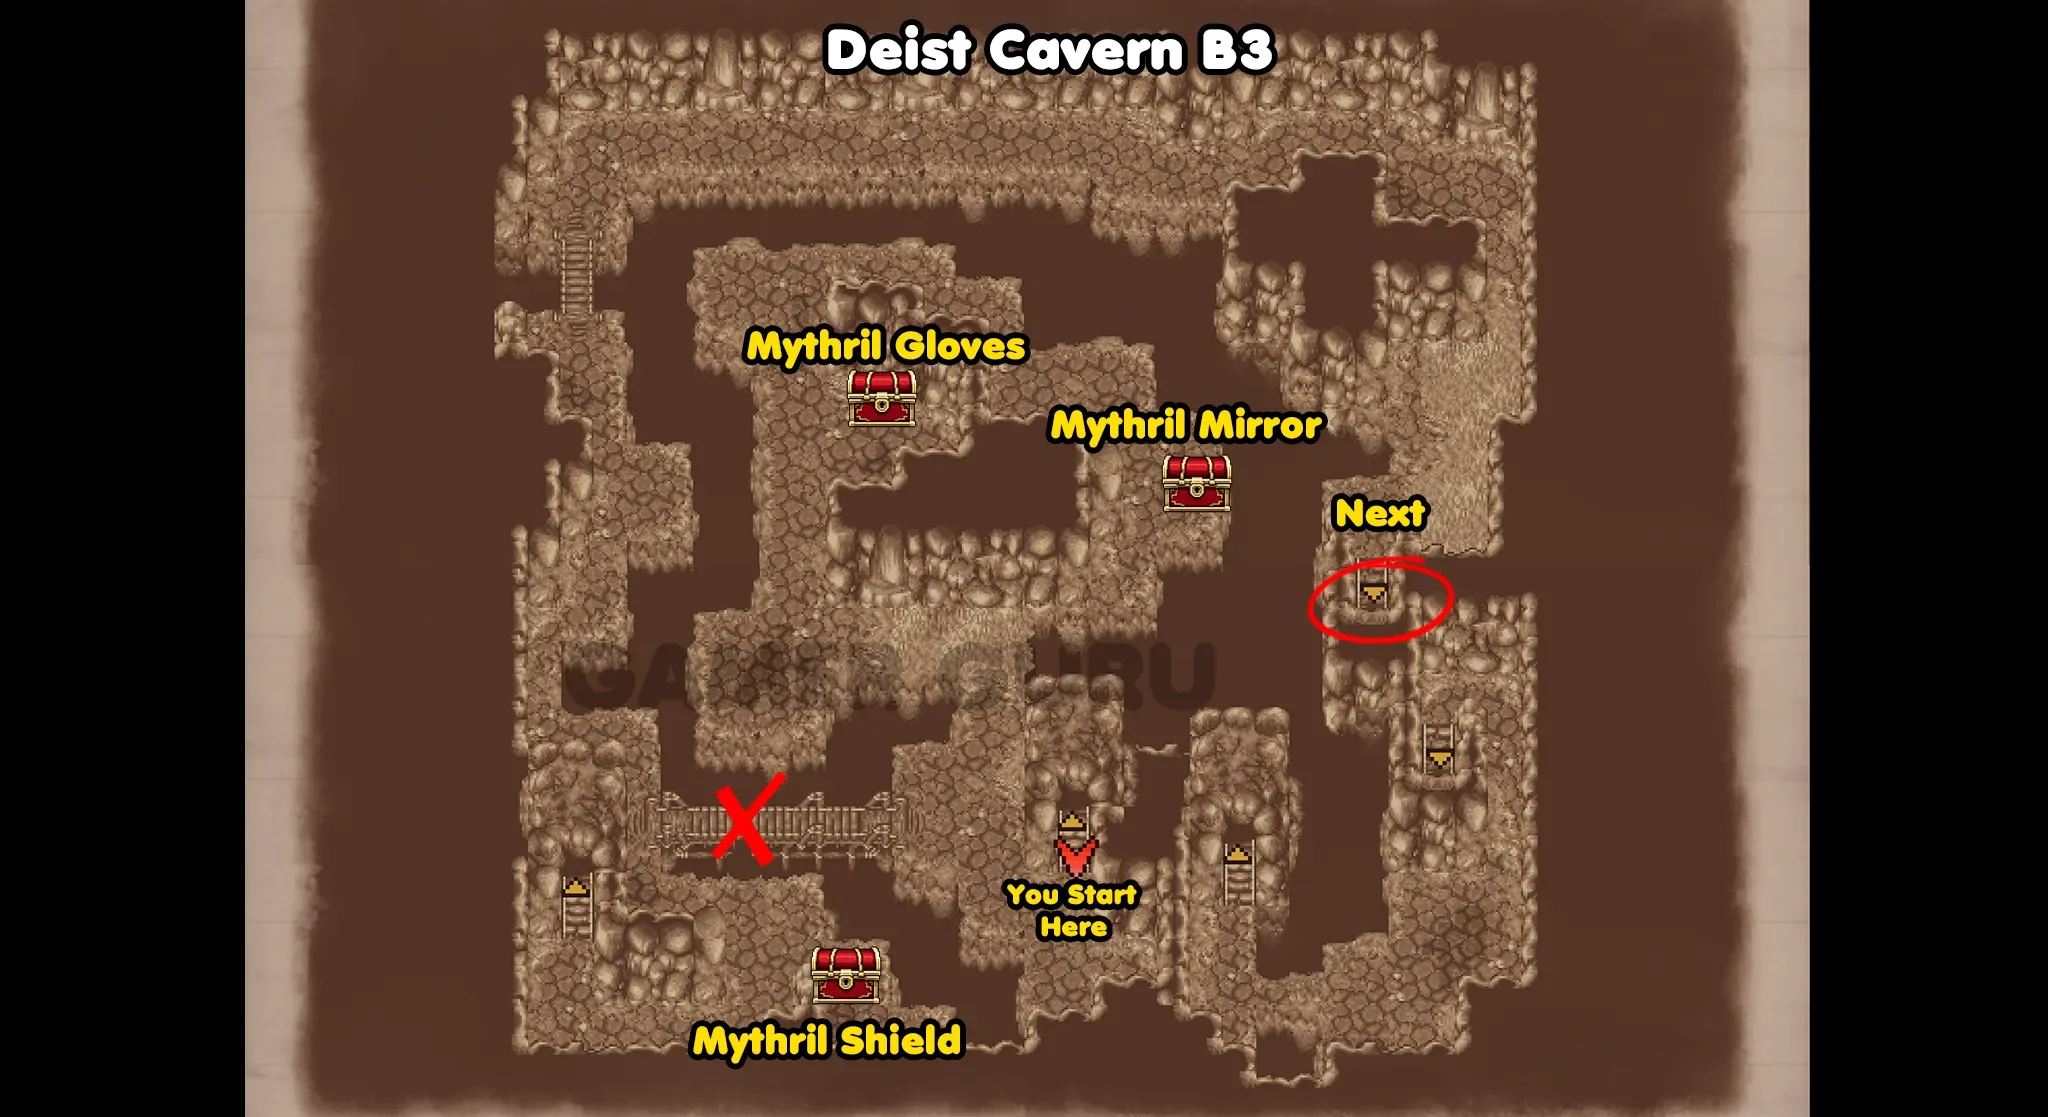
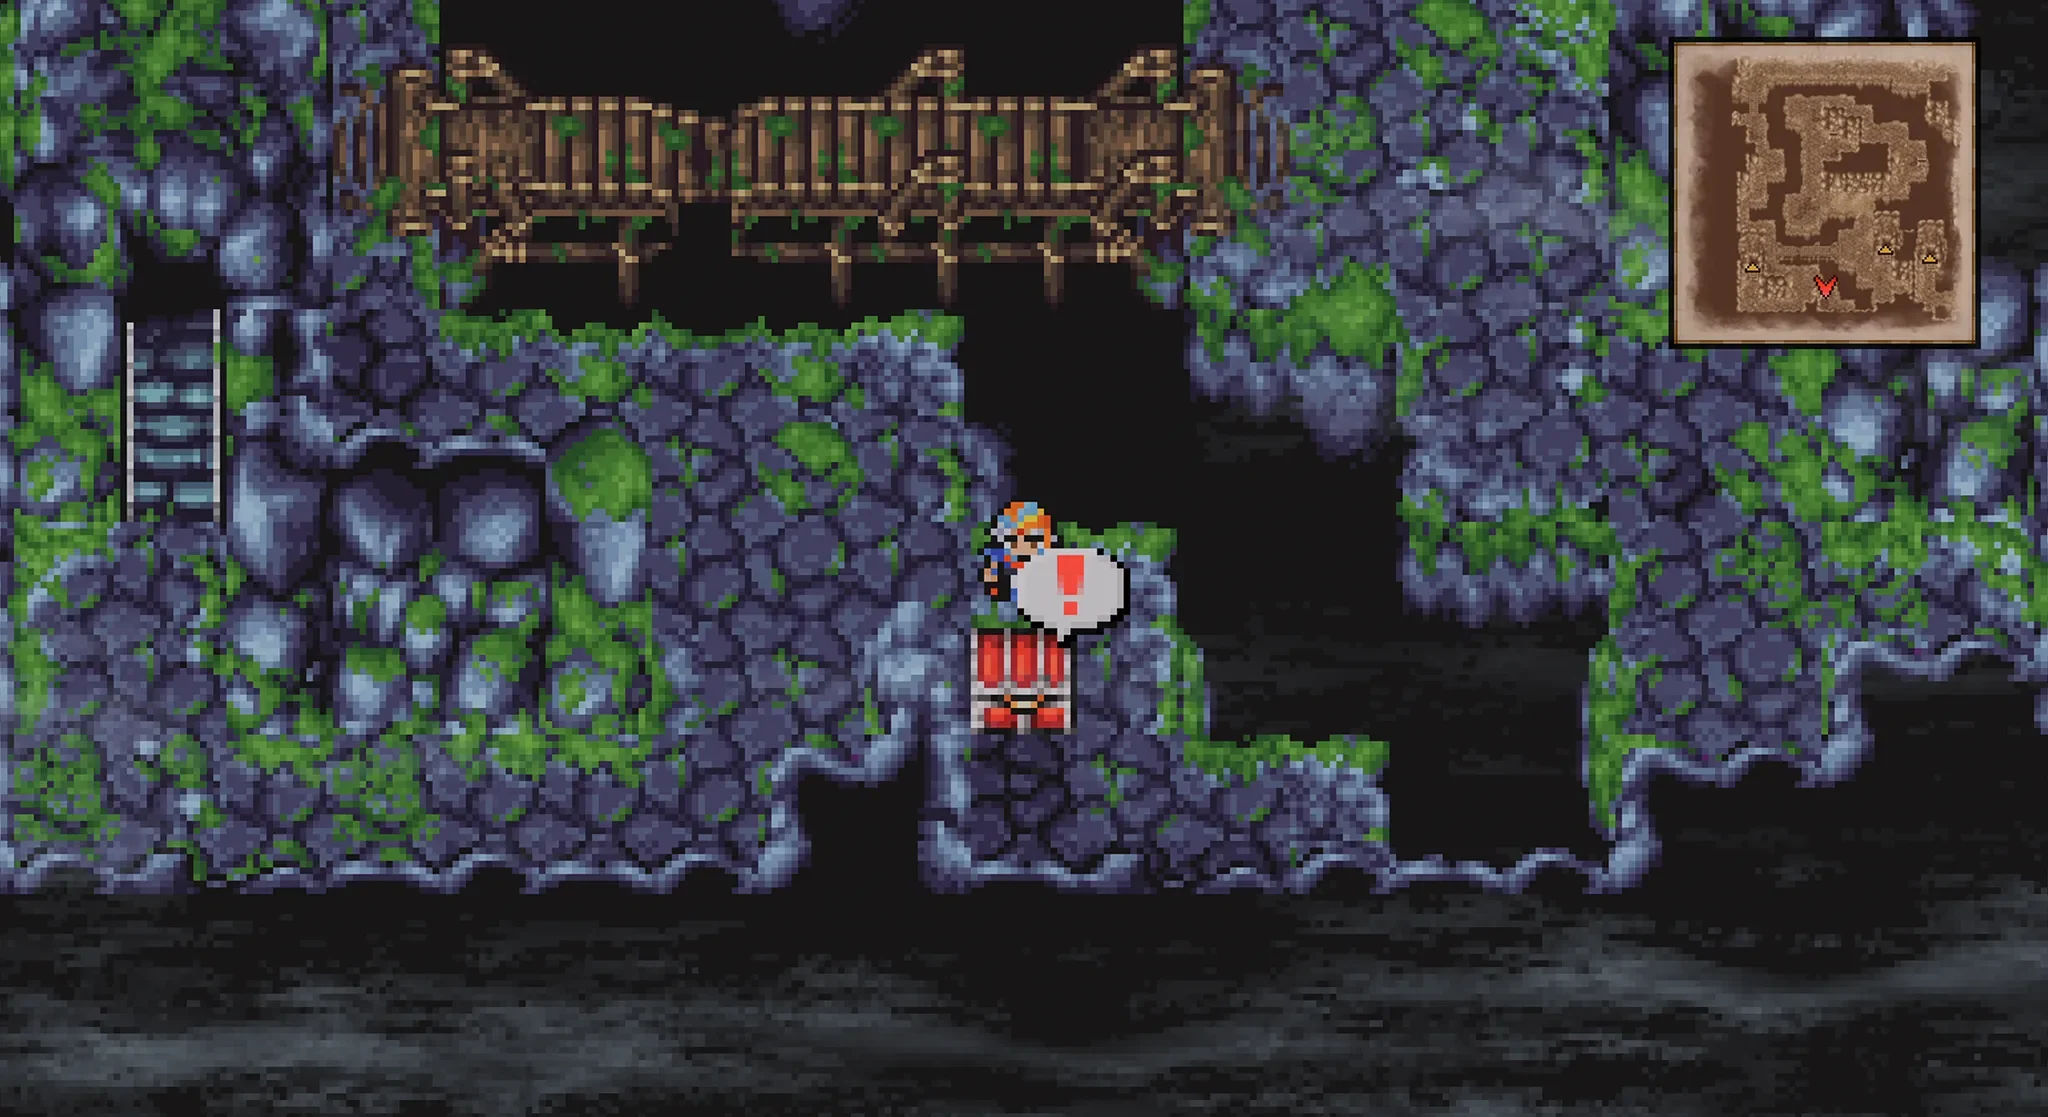
When you arrive in B3, DON’T cross the bridge, if you try to it will break and you will drop down to the previous part of B4 again.
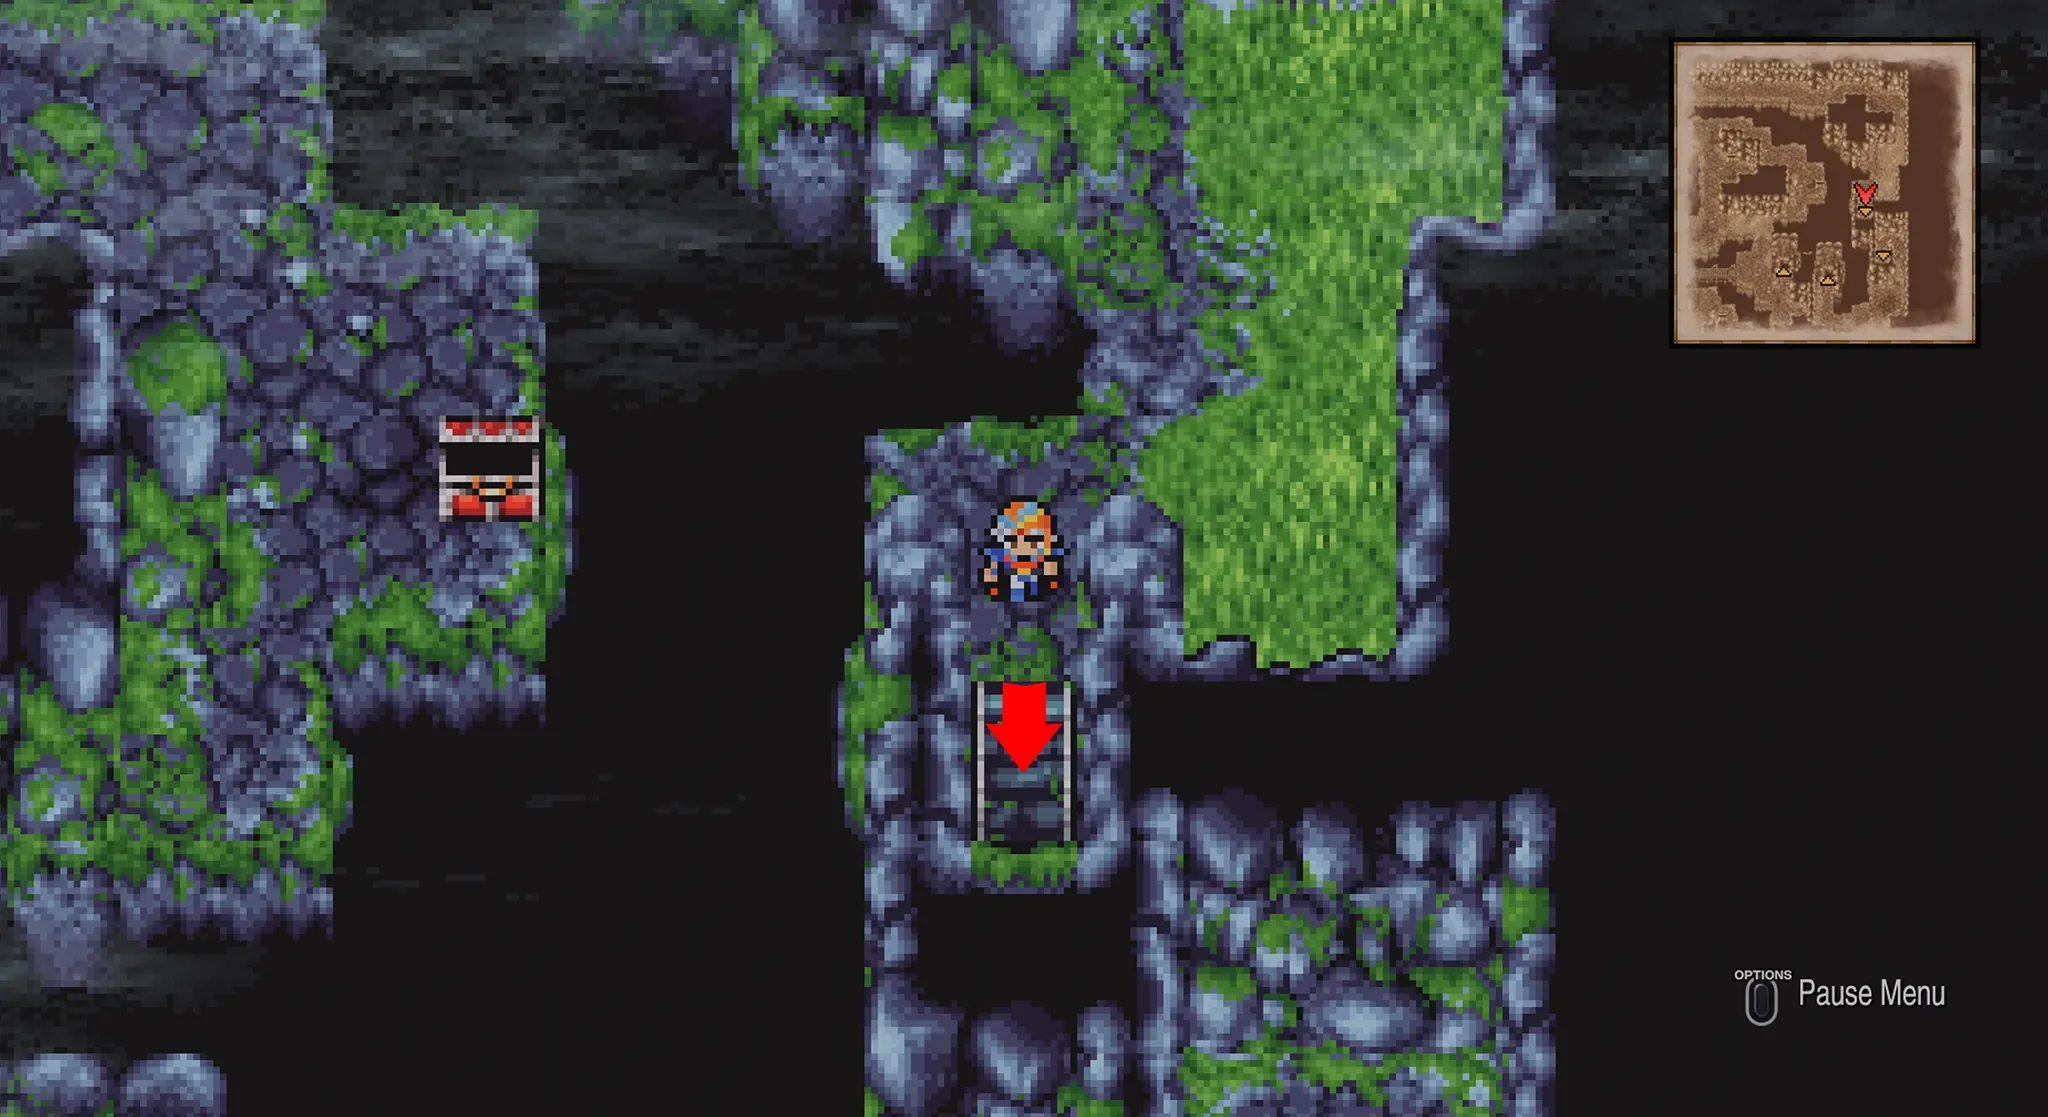
From the entrance go up and slightly to the left to find the chest that has the Mythril Gloves, then continue walking around to the right to open the next chest that has the Mythril Mirror.
Once you have opened these 2 chests, return back up the stairs you just came down to return to B2.
In B2 this time take the stairs all the way on the left hand side, this will take you to the other side of the bridge in B3.
Now that you are on the left side of the bridge in B3, you can get the chest to the right of the entrance that has the Mythril Shield.
Then walk all the way to the top of the room, go right and then down to find the stairs to B4.
In B4 you will find the final 13th chest of this dungeon, it contains an Acid Phial. After opening the chest, go down the stairs in the middle of the floor to reach B5.
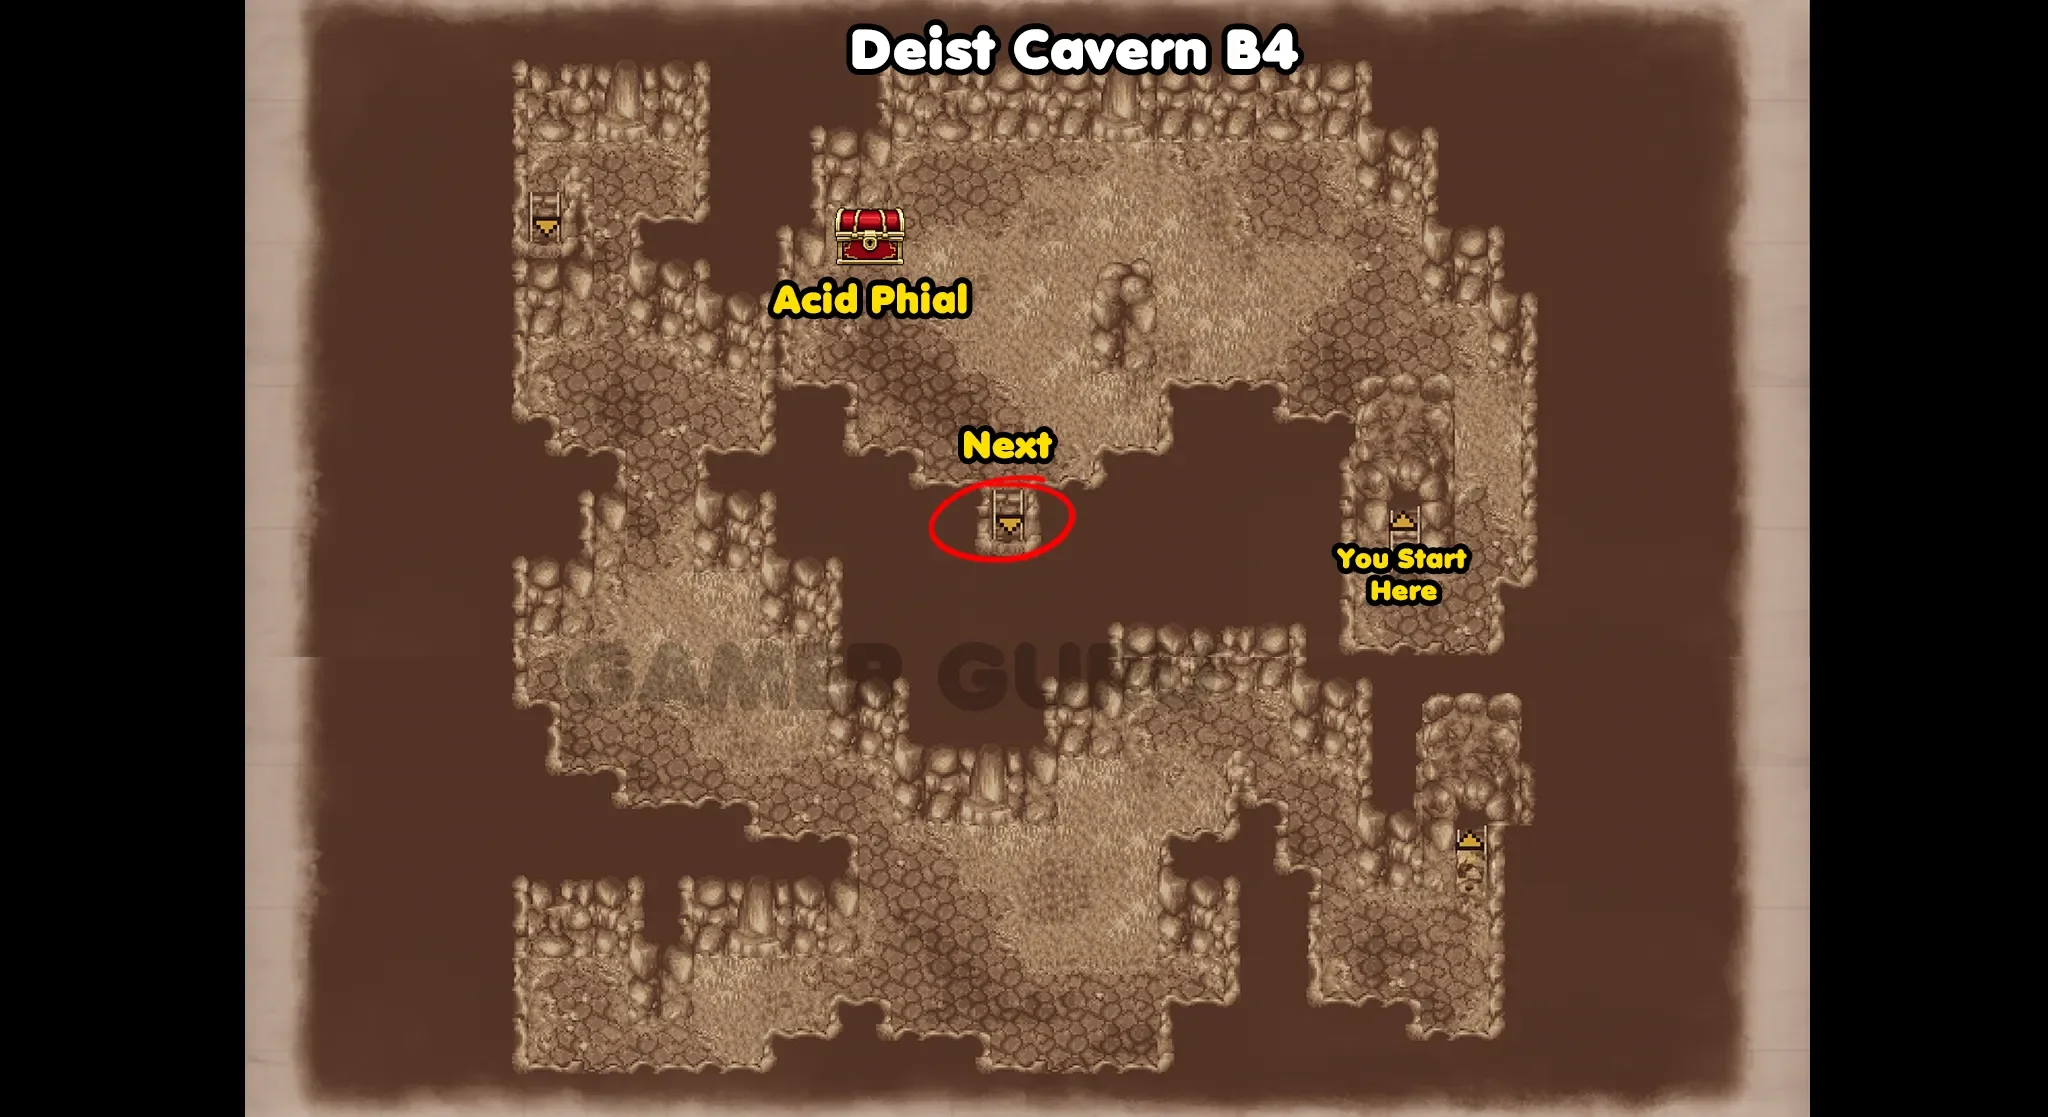
When you reach B5 you will see 4 doors on your right, 3 of them lead to empty rooms, the correct door is the 3rd one from the left, go through this door to reach the x4 Chimera Boss.

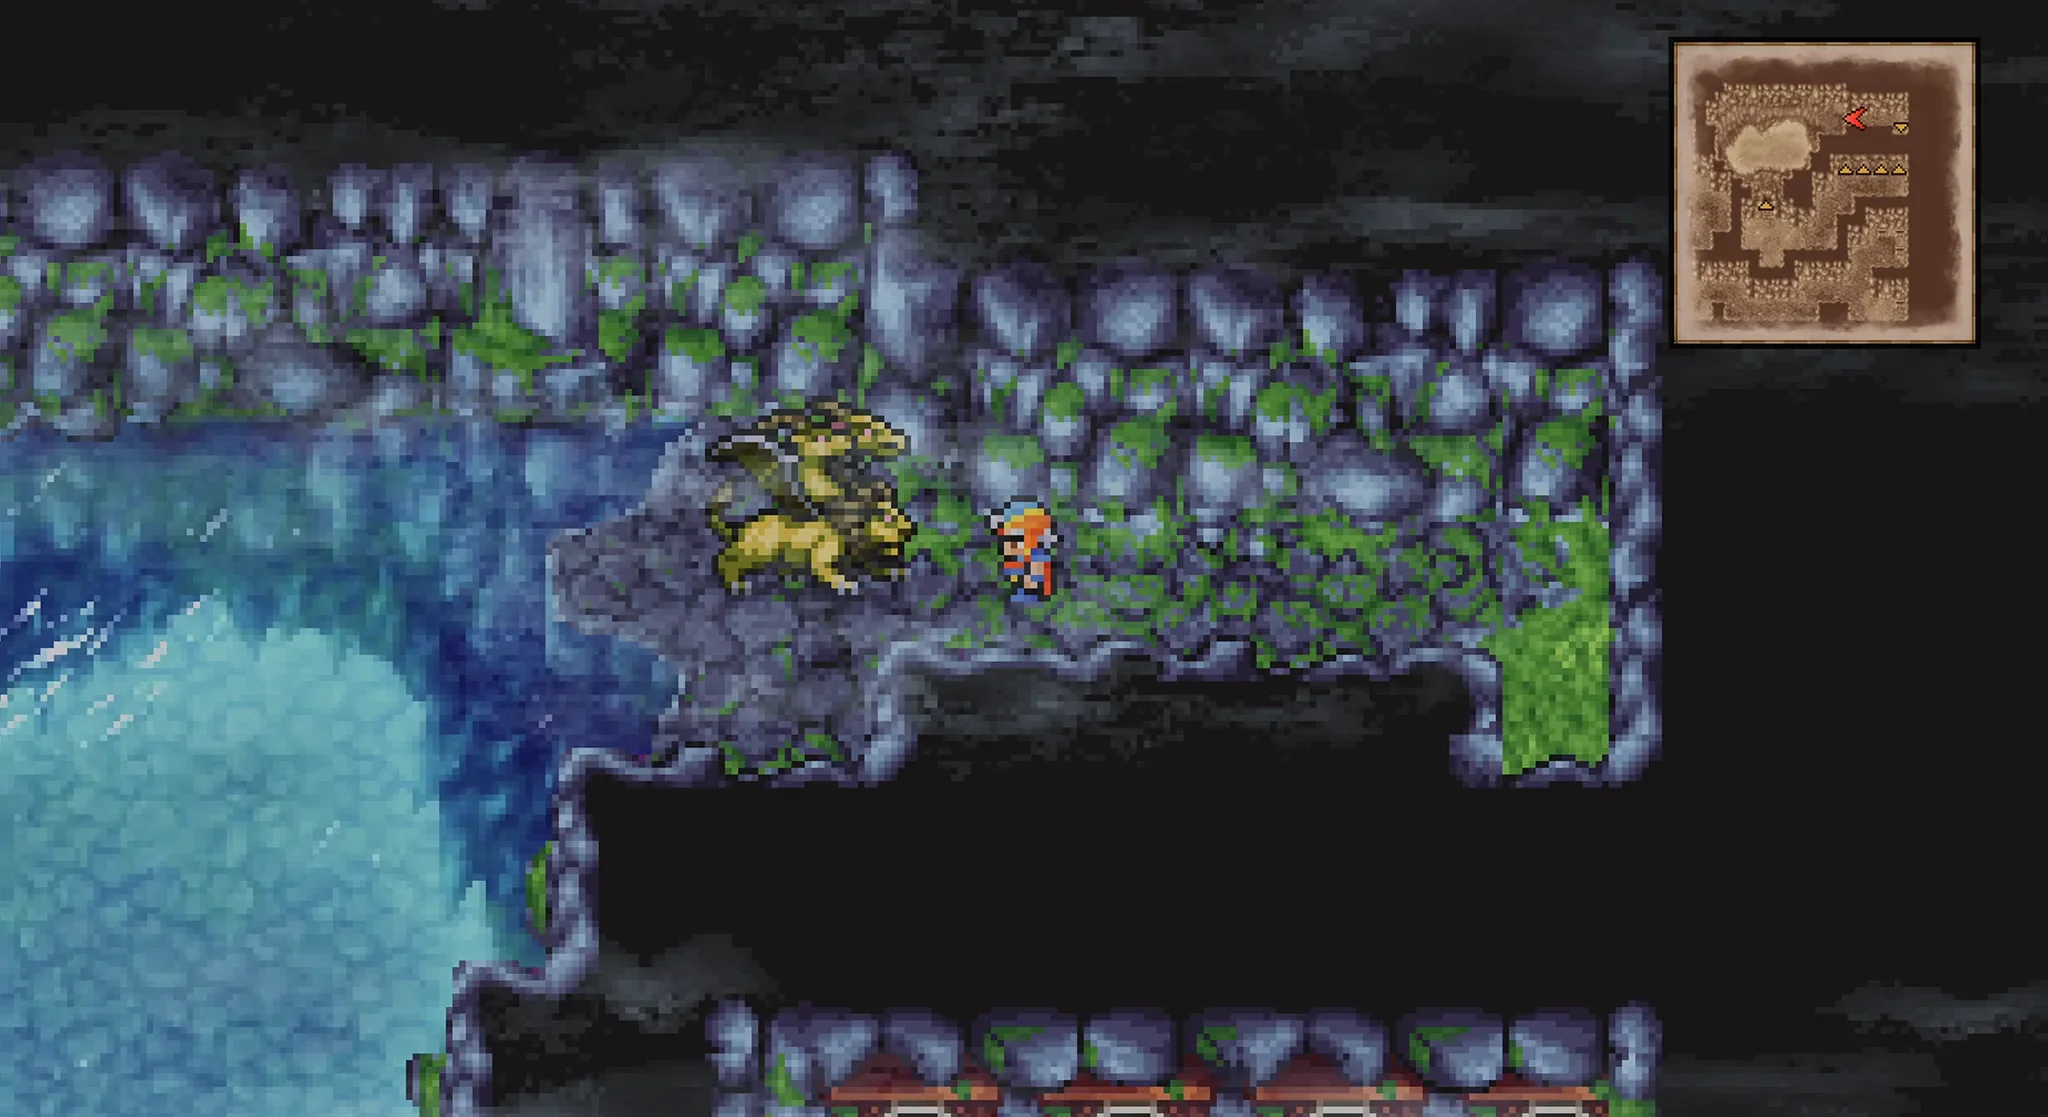
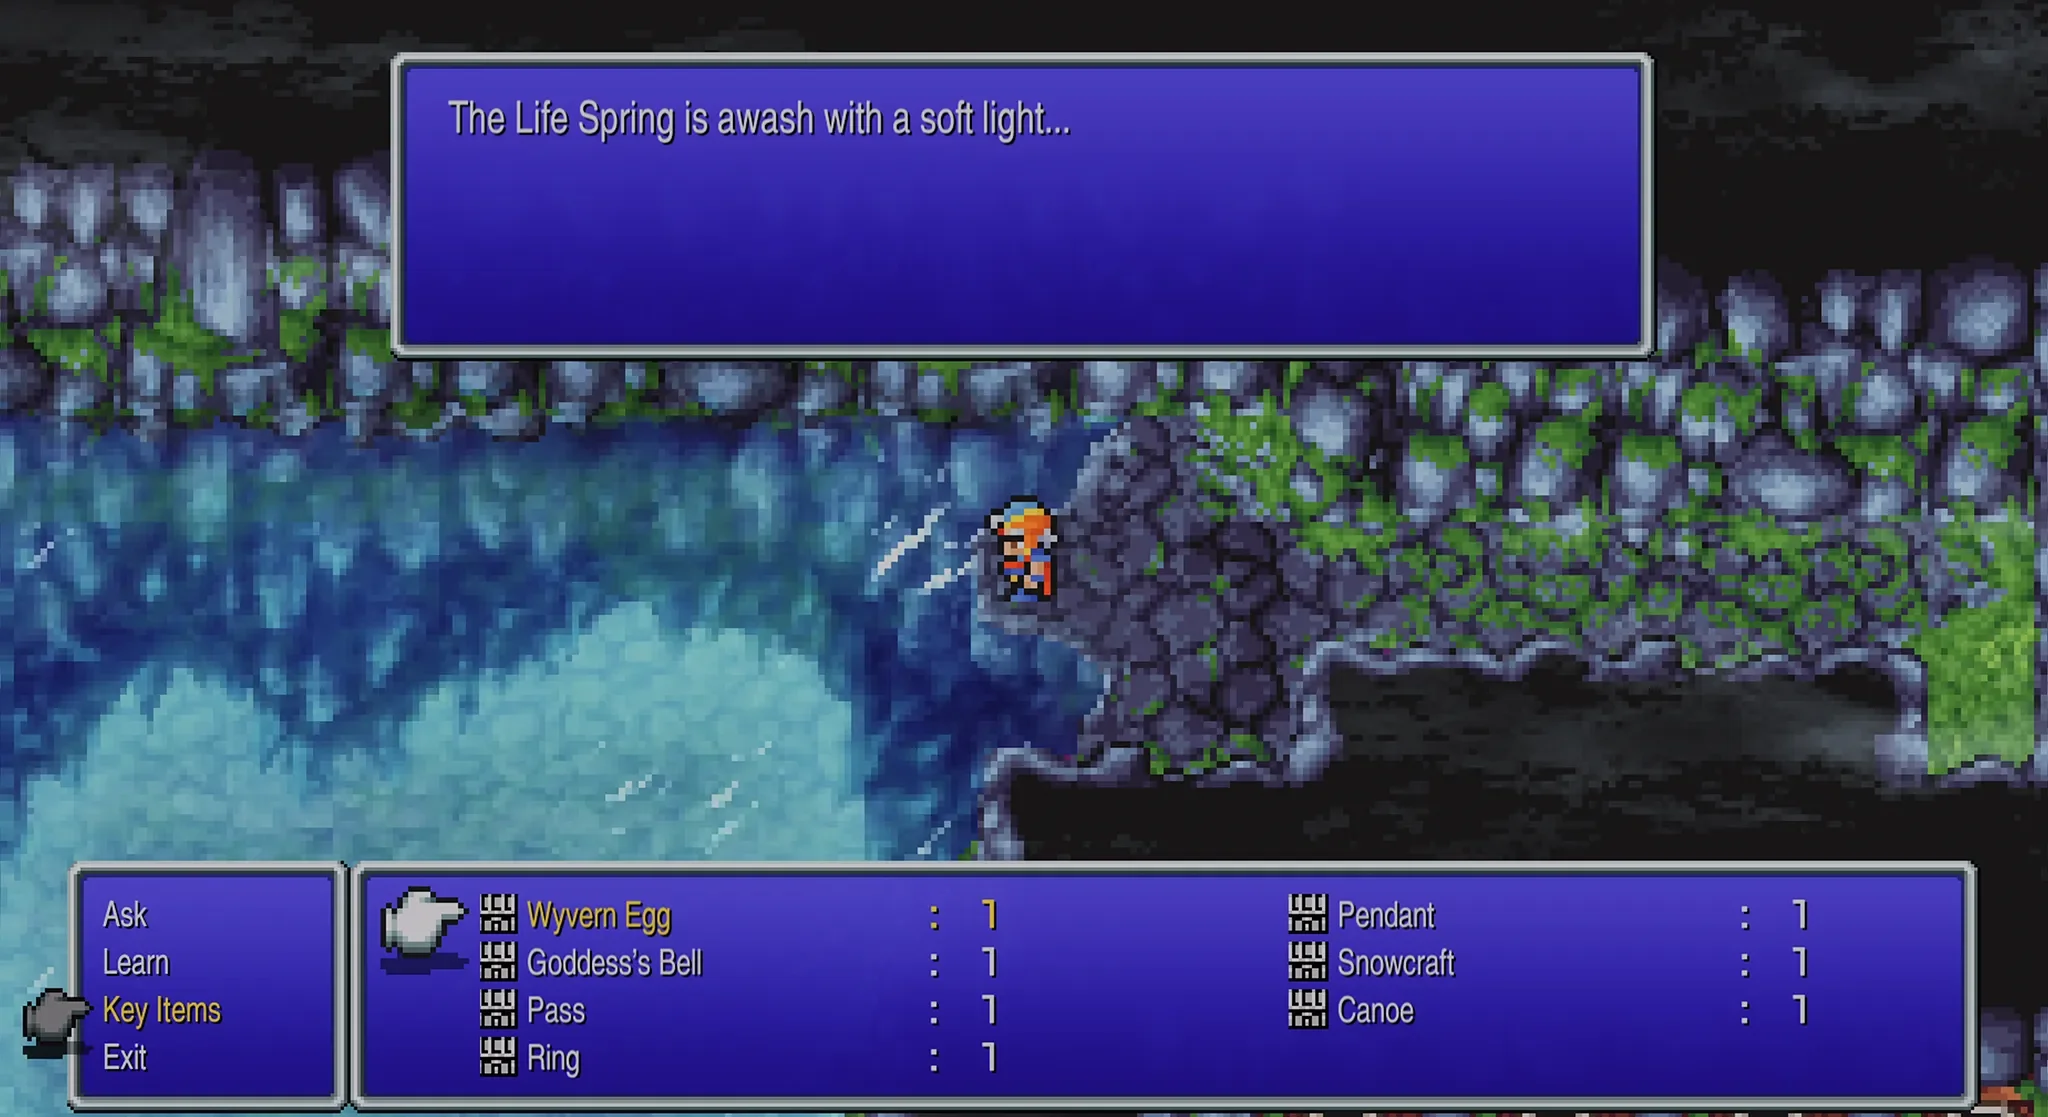
After you defeat the Chimeras, interact with the Life Spring and select Key Items > Wyvern Egg to place the Egg in the water.
You can now use Teleport to leave Deist Cavern.