
Final Fantasy 2 Pixel Remaster 100% Walkthrough - Dreadnought

Now that we have completed the Kashuan Keep and obtained the Sunfire, our next objective is to head back to Altair.
However, as we seen in the previous cutscene, Cid’s airship got captured by the Dreadnought so we won’t be able to use the airship’s fast travel for now.
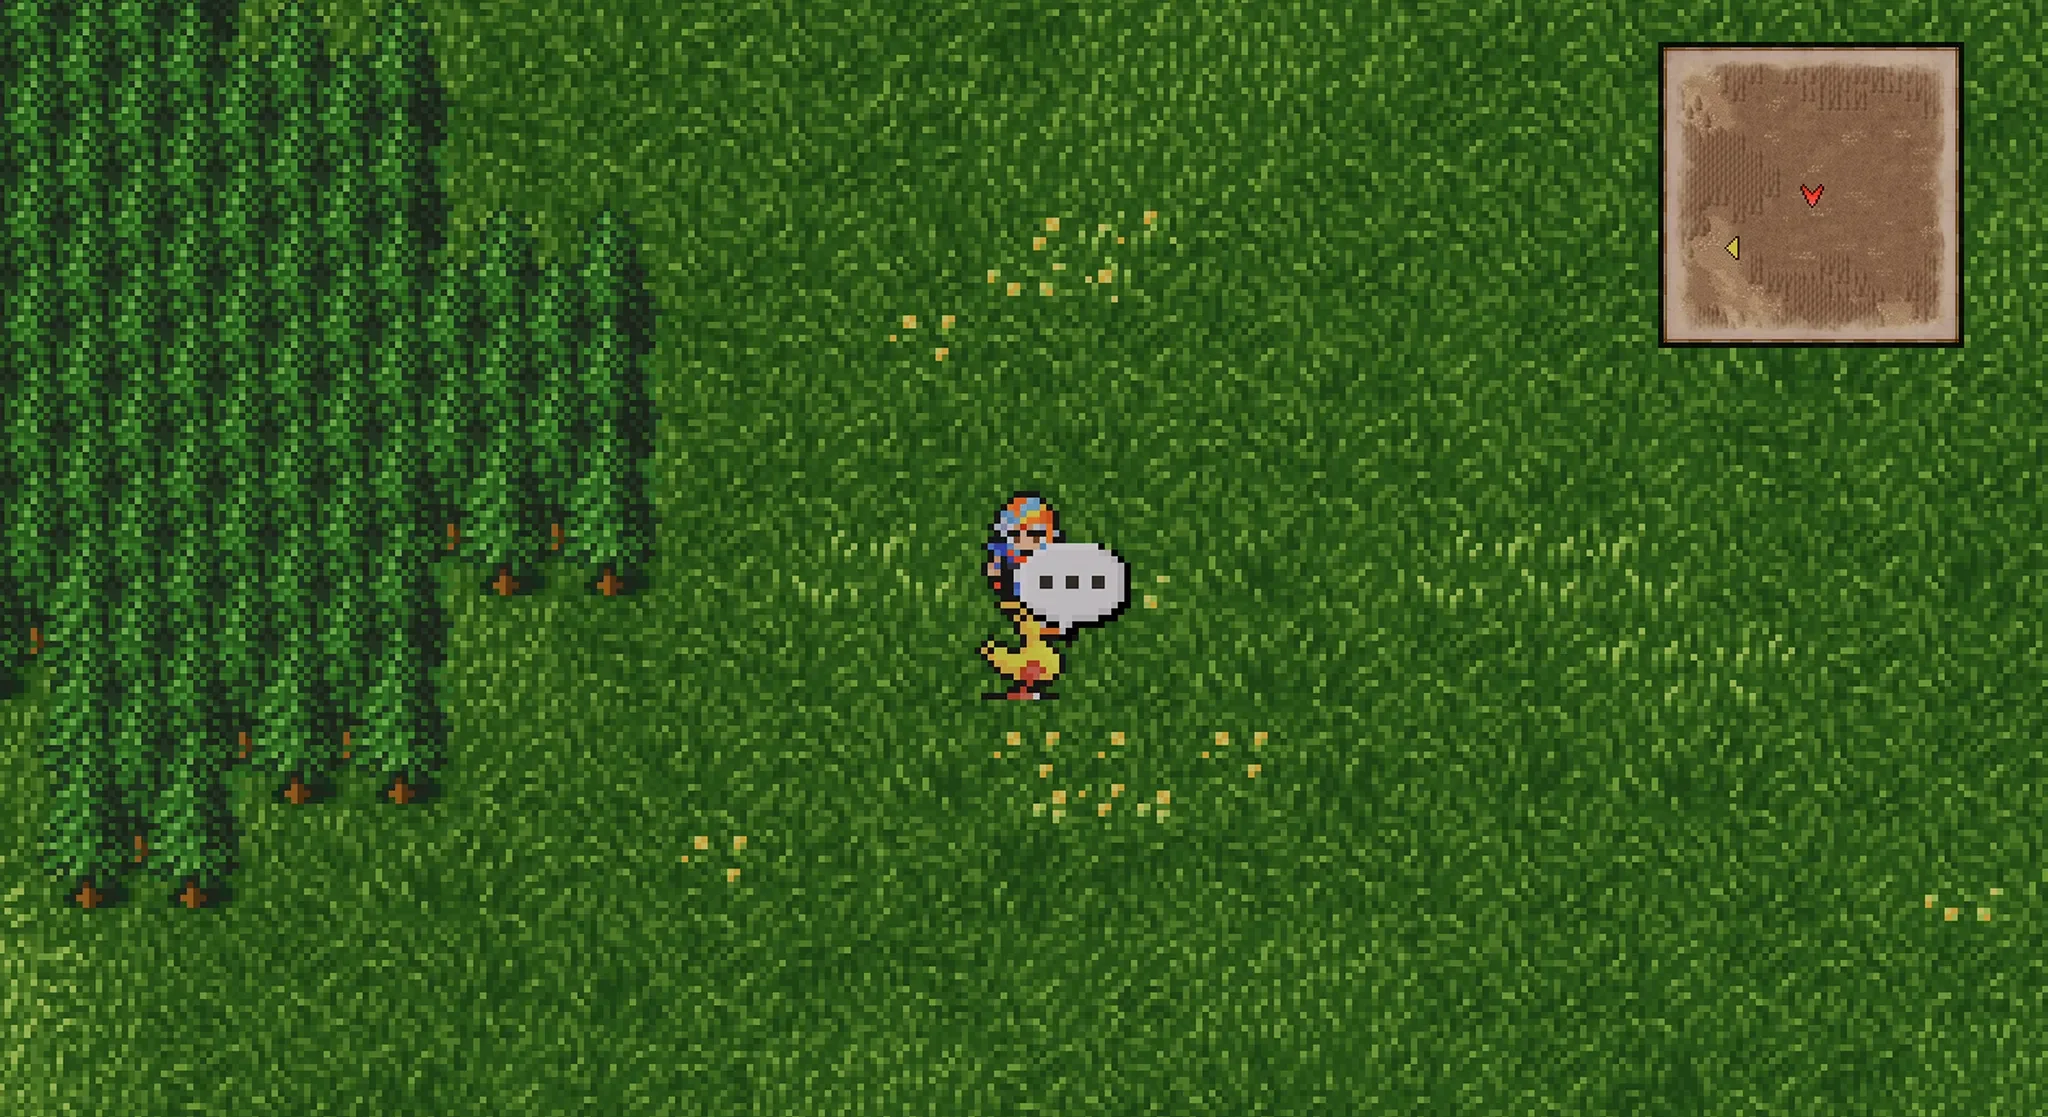
Getting a Chocobo
But don’t worry you won’t have to walk all the way back to Altair, we are going to get a Chocobo from the Chocobo Forest to make moving around the world map a lot faster.
Inside Chocobo Forest simply interact with a Chocobo to ride it, then just ride it all the way back around to Paloom where you can take the canoe down to Altair.

When you arrive back at Altair go to the King’s Room and speak with Minwu, he will tell you that the Dreadnought has taken Hilda because she was also on Cid’s airship, so we need to go and rescue her.
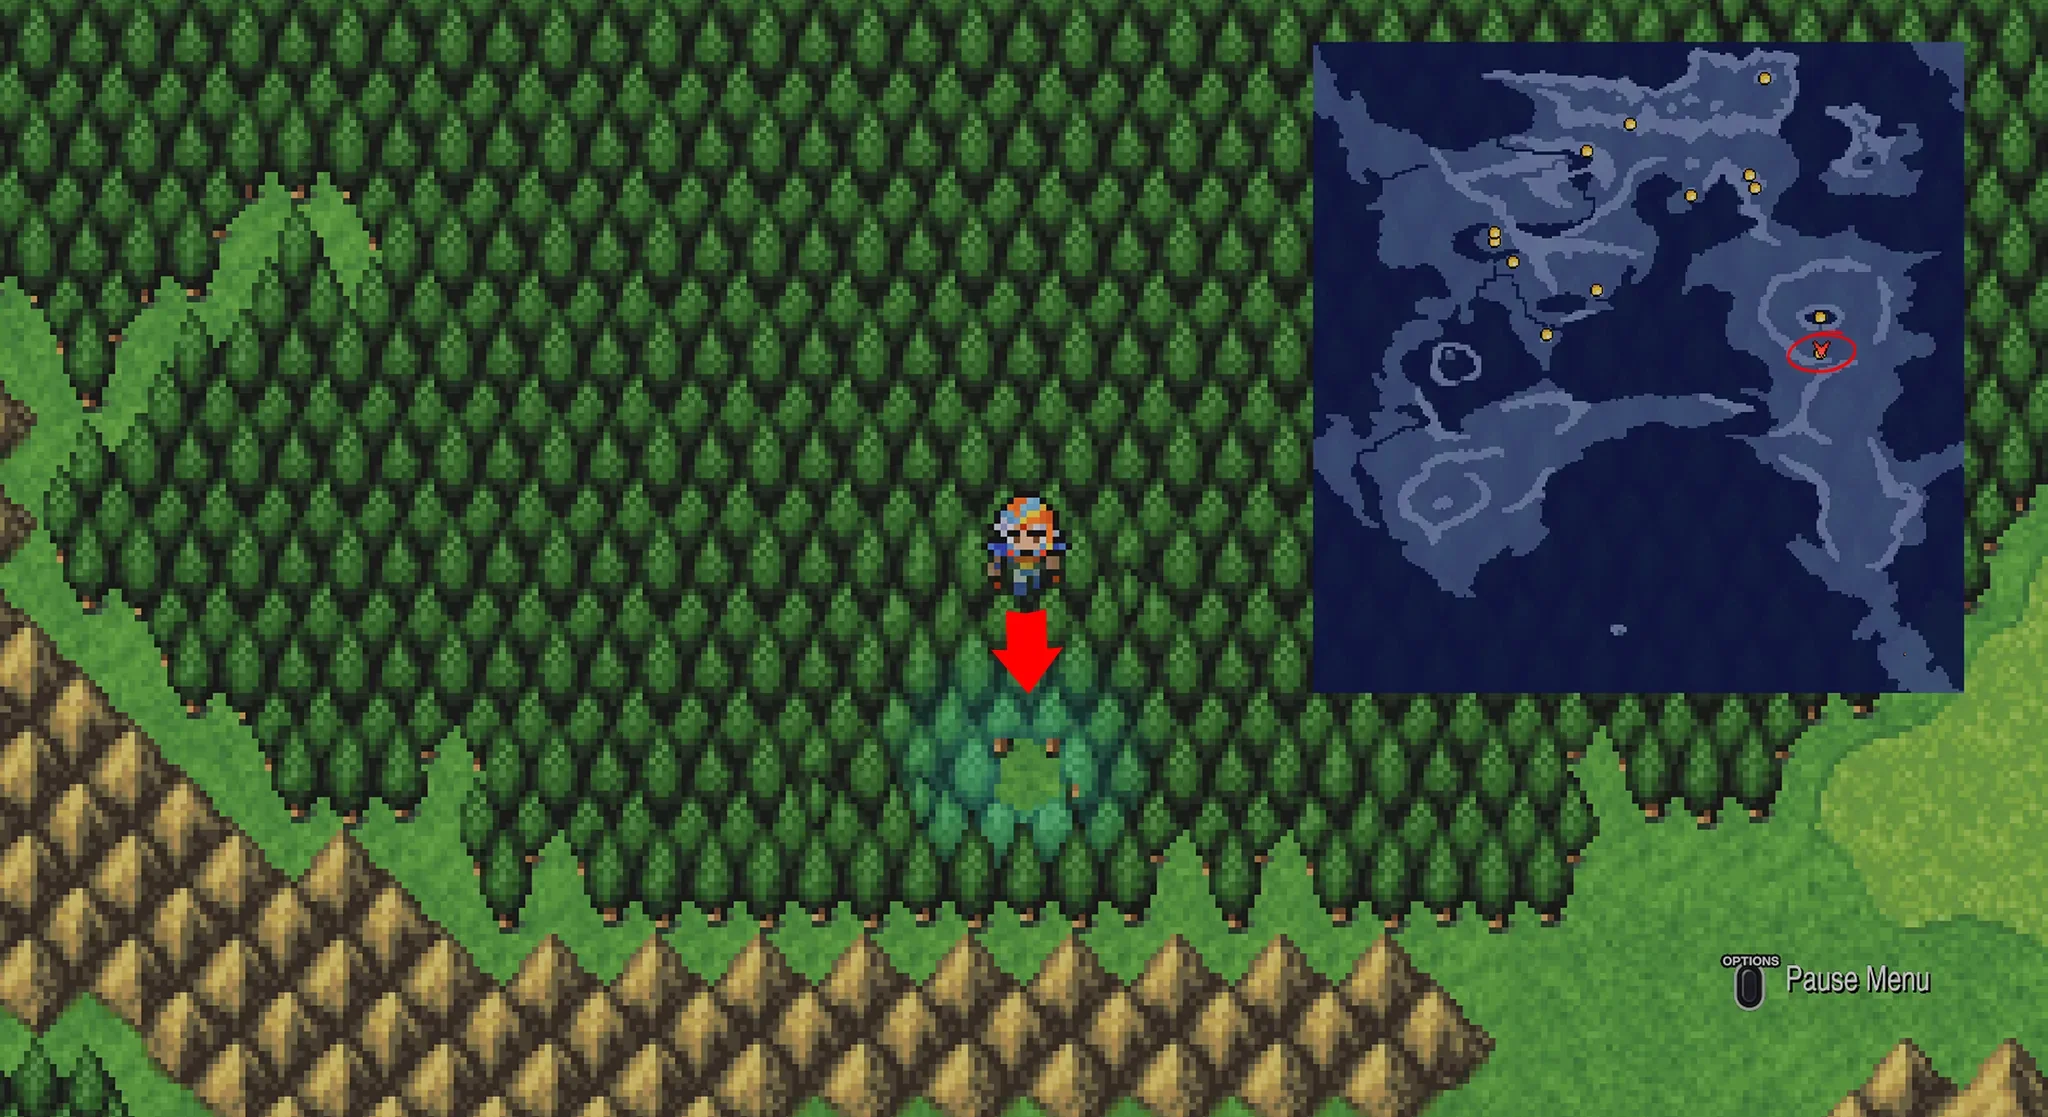
Finding The Dreadnought
The Dreadnought is located at the very south-east part of the map. The quickest way to get there is to go north-west from Altair, continue past Fynn all the way to the top left corner of the world map, as if you continue past the edge of the map it will loop around to the other side, so if you exit through the top left corner you will come out at the bottom right, which is where we will find the Dreadnought.
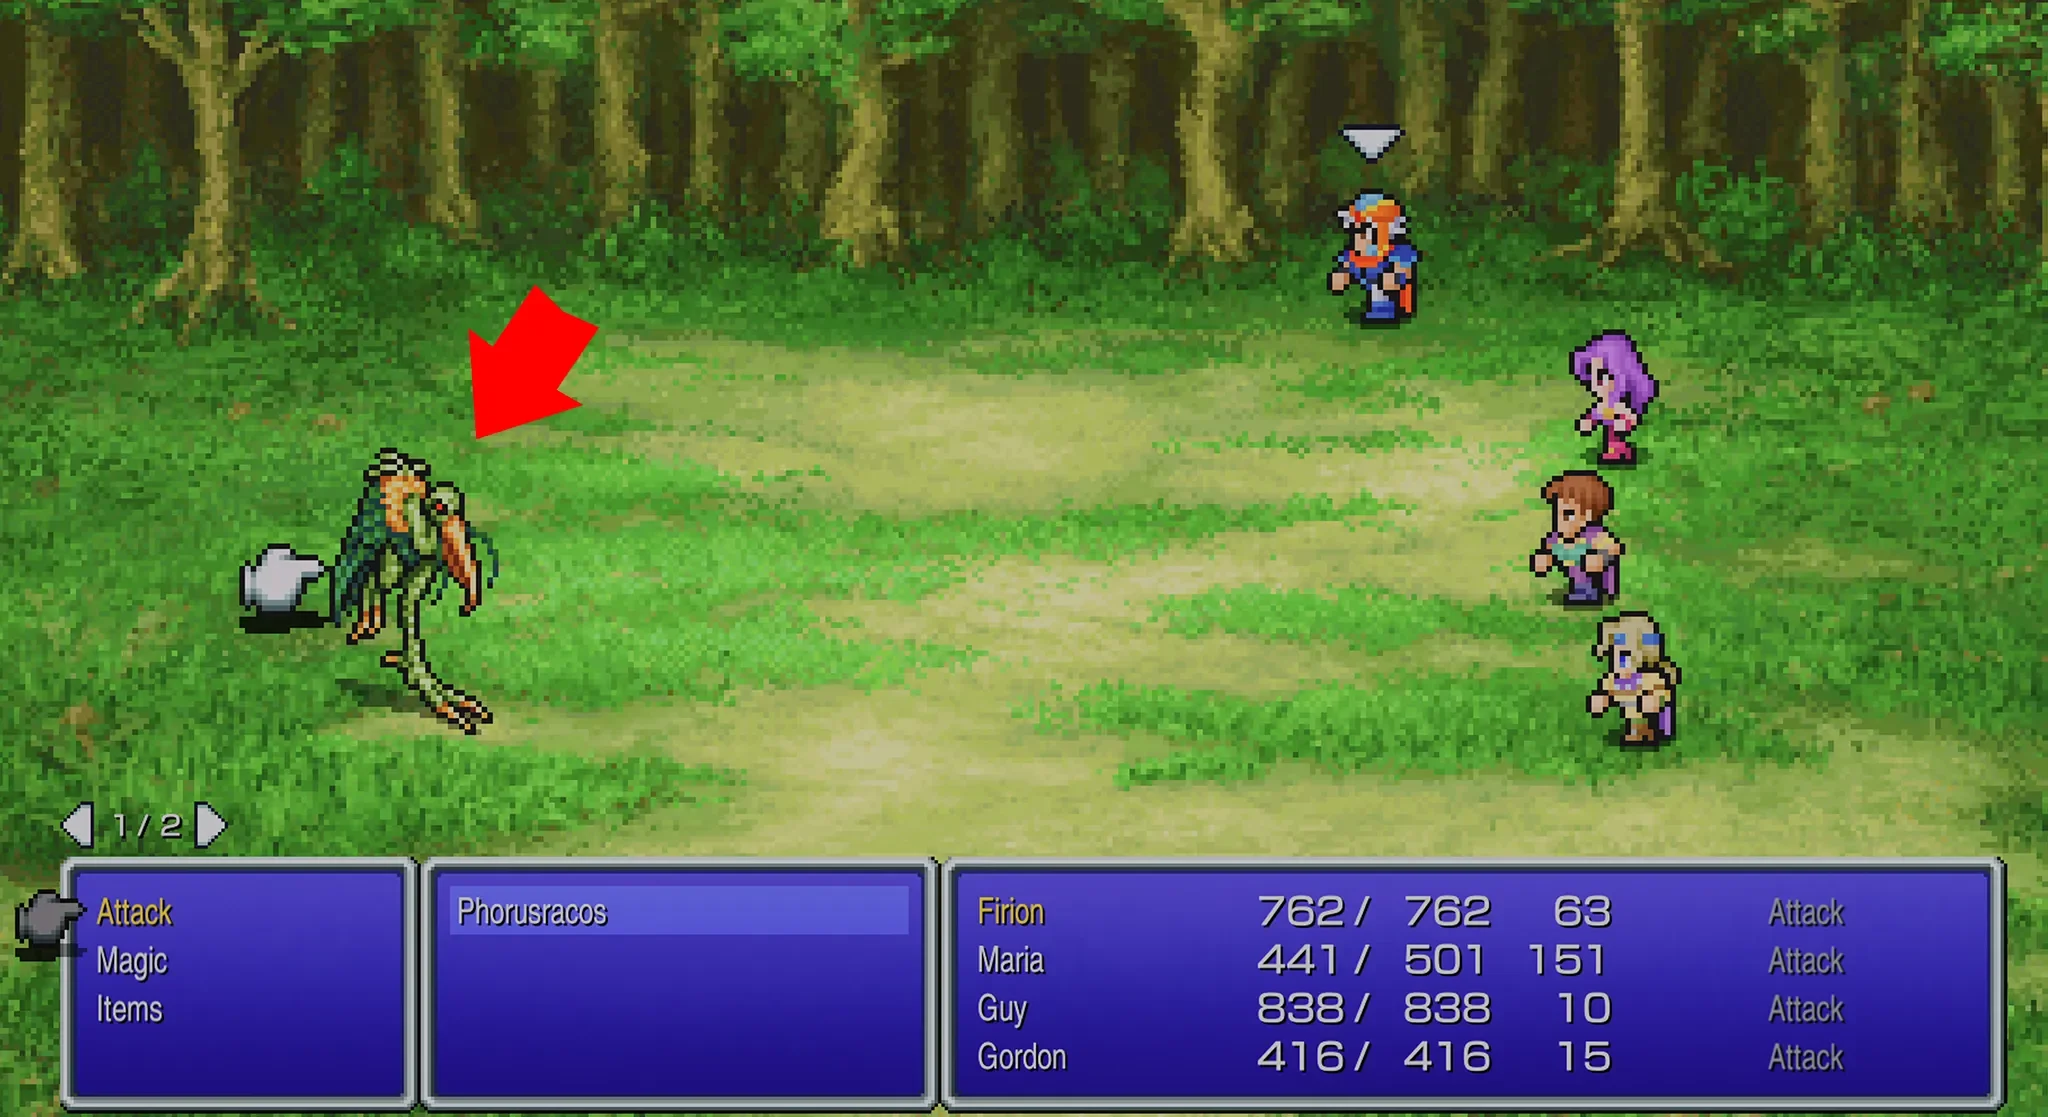
Missable Bestiary Entry
Before heading inside the Dreadnought, there is an enemy type that you can randomly encounter just outside the dungeon called the “Phorusracus”, this enemy type will eventually become missable later on in the story so I highly recommend you try to defeat one now before heading into the dungeon to make sure you don’t miss it later on.
Dreadnought Dungeon
Missable Chests Warning!
All of the treasure chests inside the Dreadnought Dungeon are missable as this dungeon will disappear forever after you complete it, so make sure you double check at the end to make sure you have all 10 of the chests in here before finishing it.
You don’t have to worry about any of the bestiary entries inside the Dreadnought as all of the enemy types you can find in the dungeon can also be found in other regions.
It is also important to note that once you rescue Cid and Hilda inside the Dreadnought you won’t be able to leave until you have completed the rest of the dungeon so make sure you come prepared!
On a final note, there are many enemies in this dungeon that can cause status ailments so if you want to be extra prepared you can buy Esuna Tomes from the Magic Shop in Bafsk.
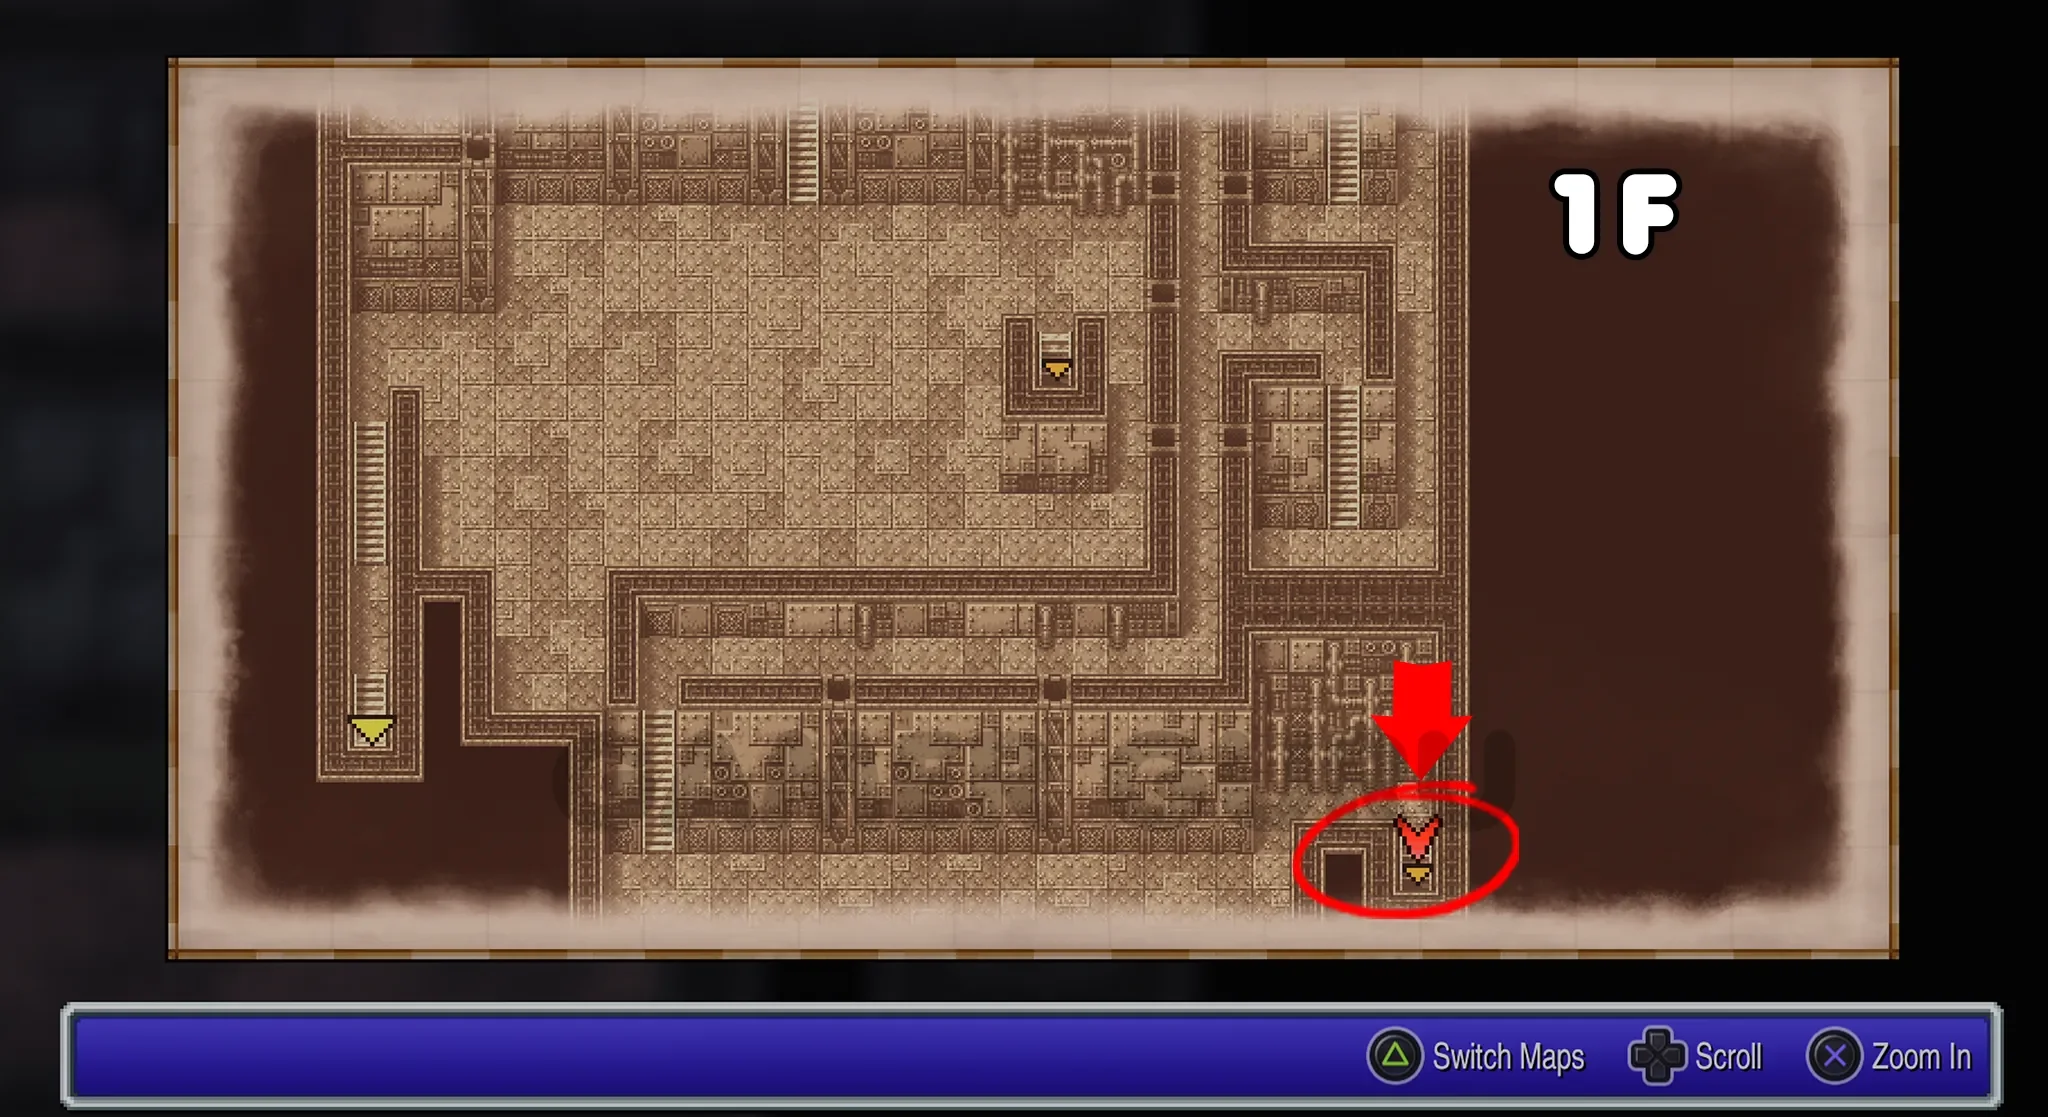
1F
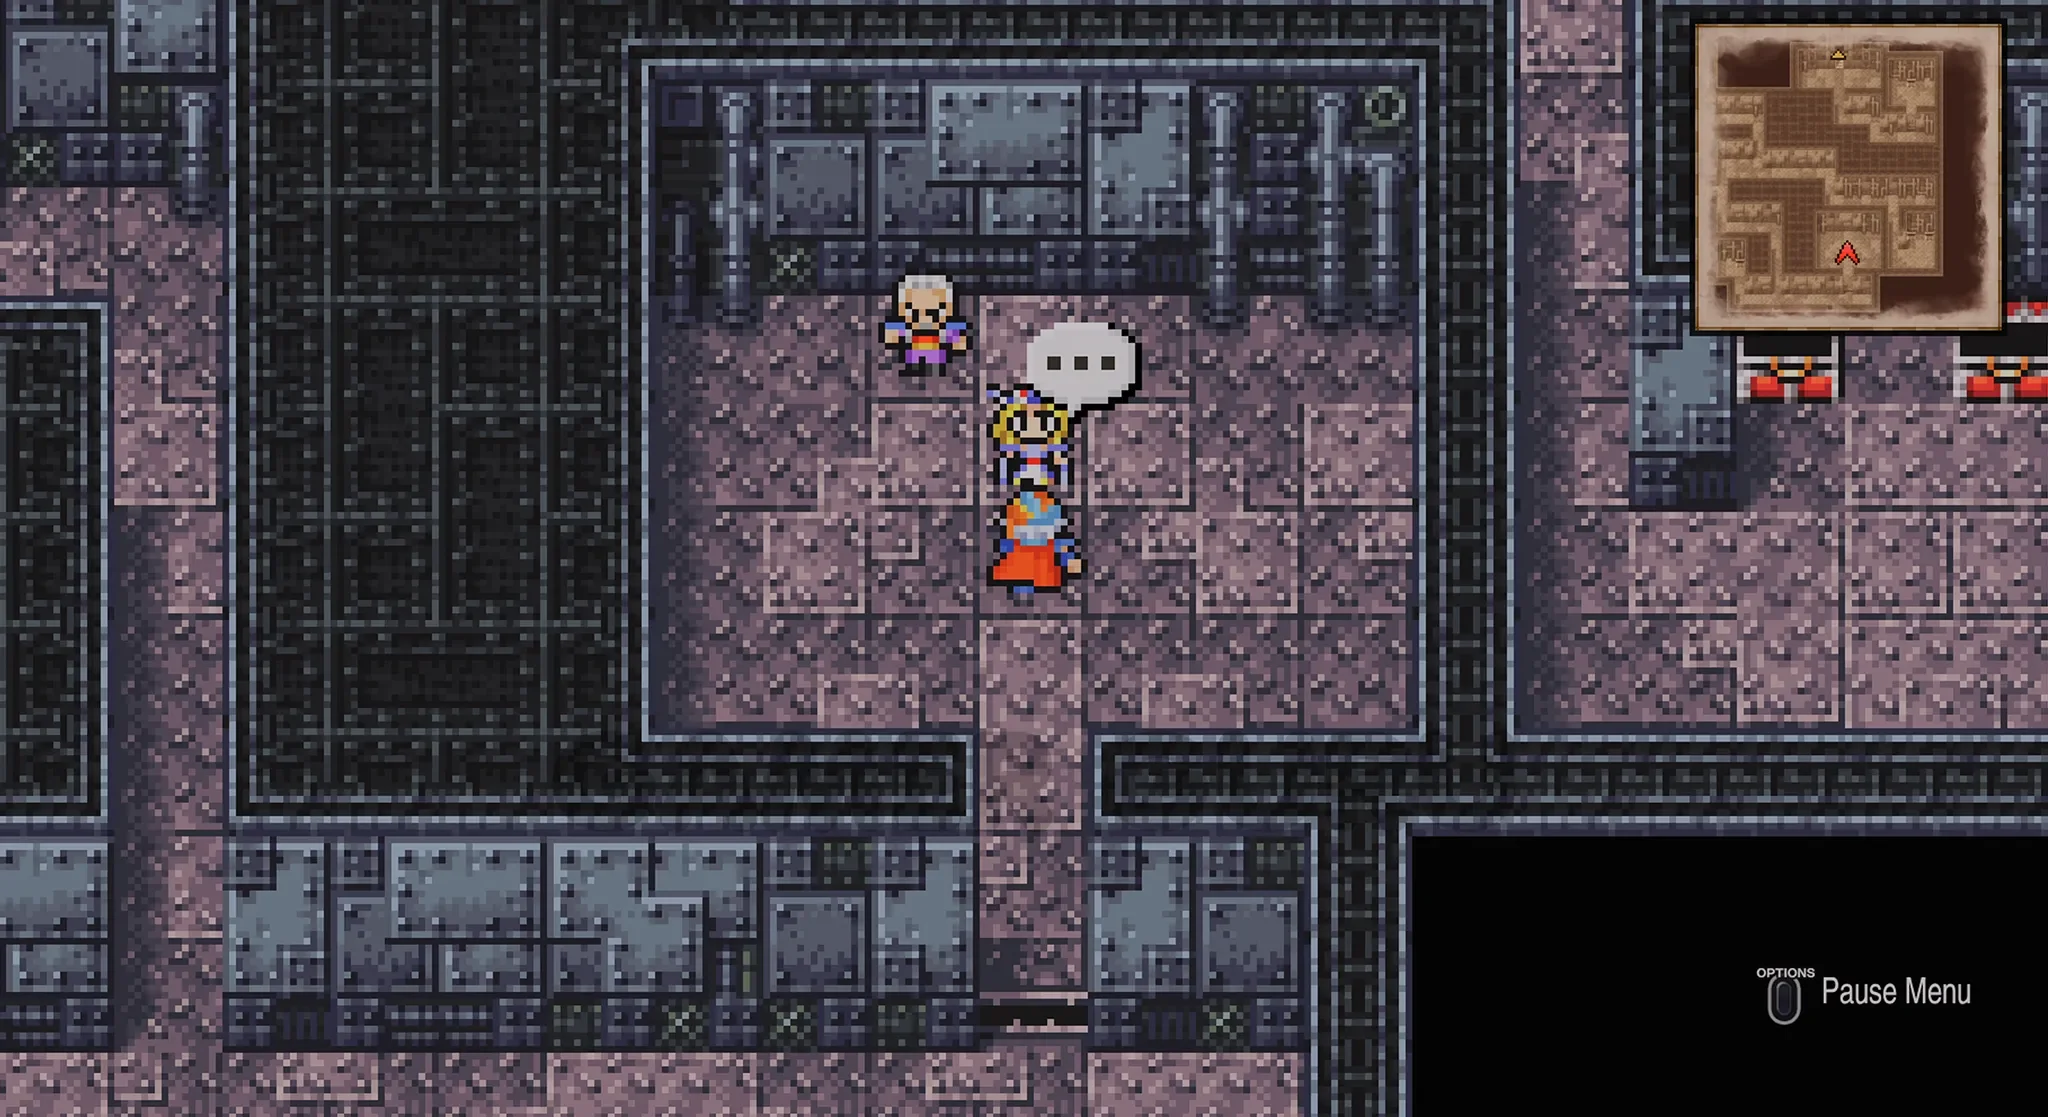
As soon as you walk in you will encounter a guard, during the conversation choose Key Items > Pass and he will let you through, if you didn’t get the Pass you can mention the password Wild Rose to start a fight with the guard to make him move.
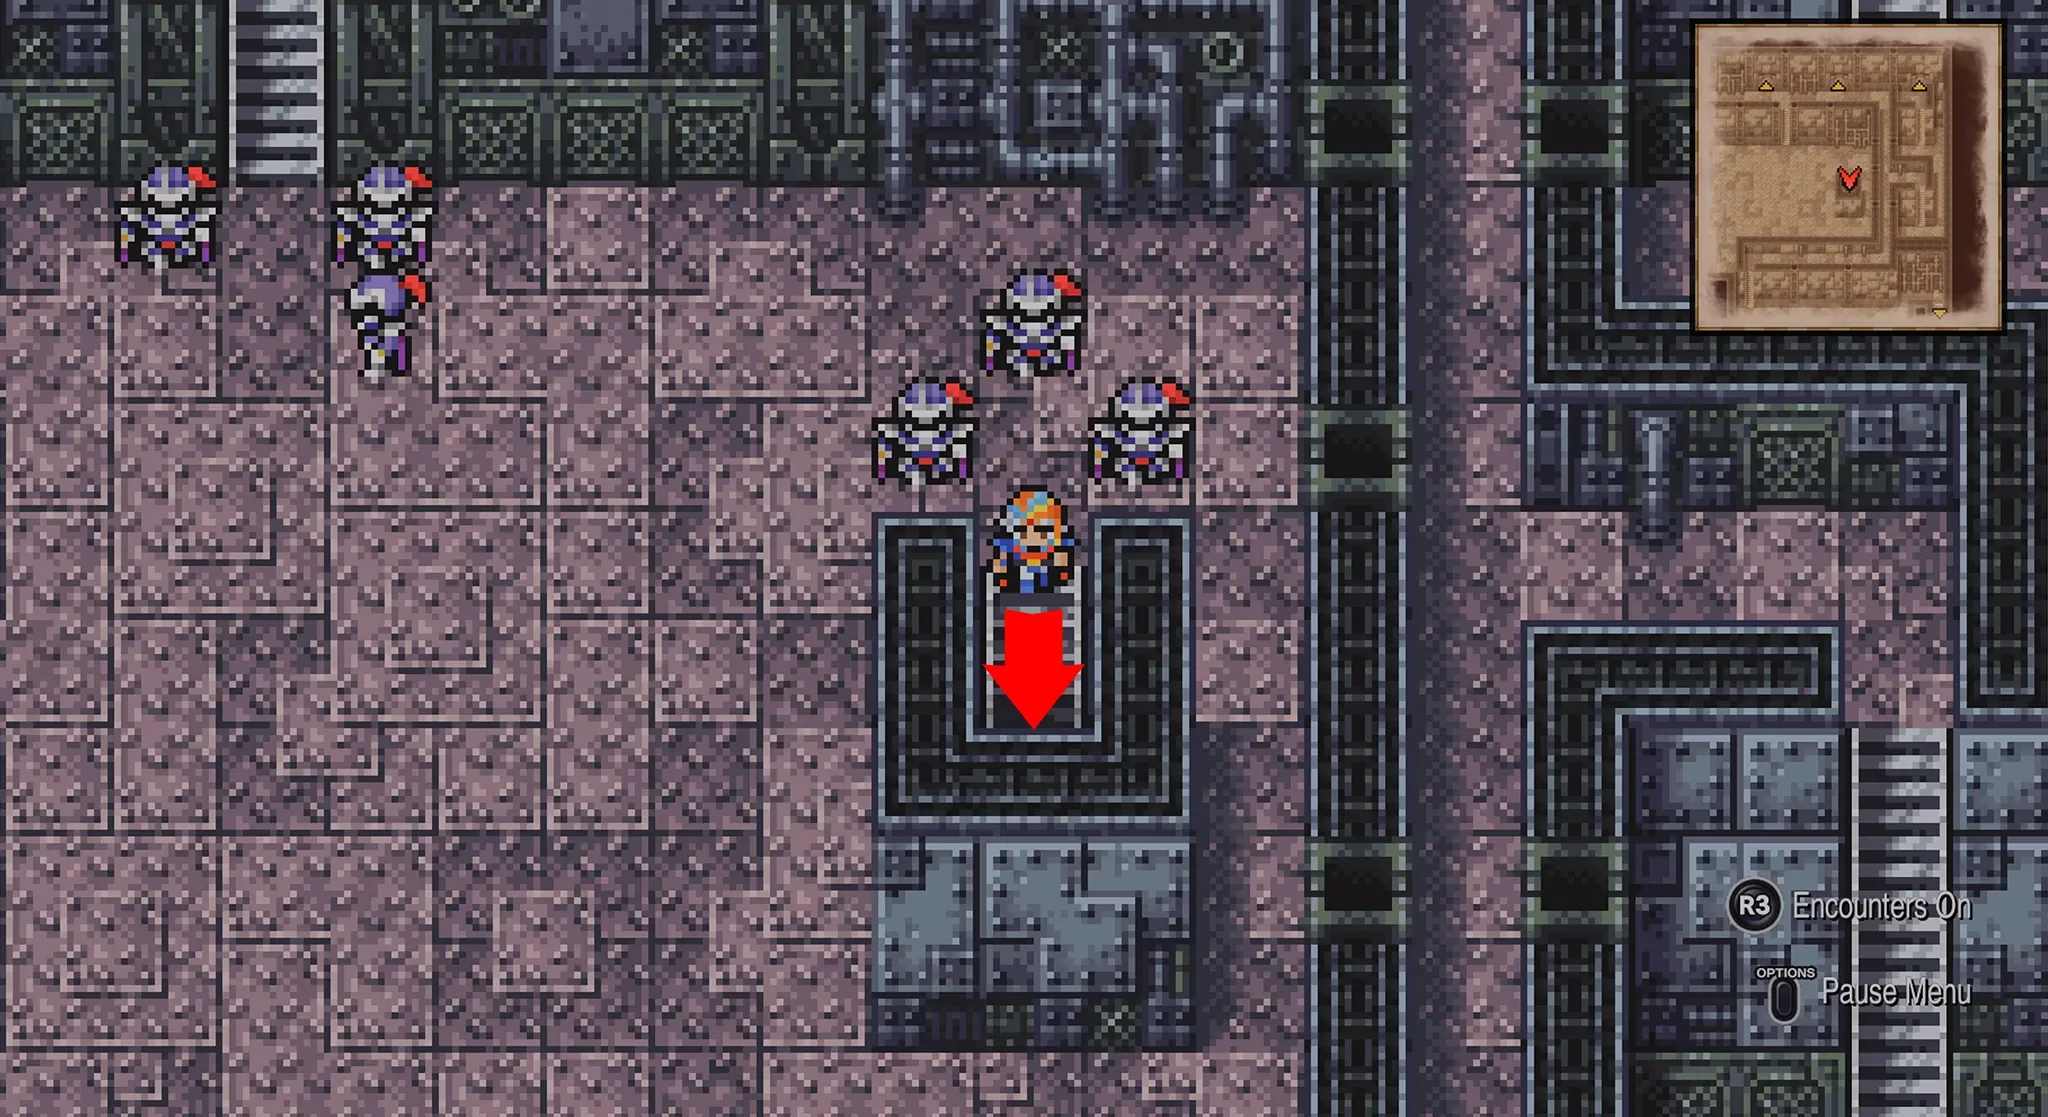
Once you are inside don’t talk with any more of the guards as they will all start fights with you.
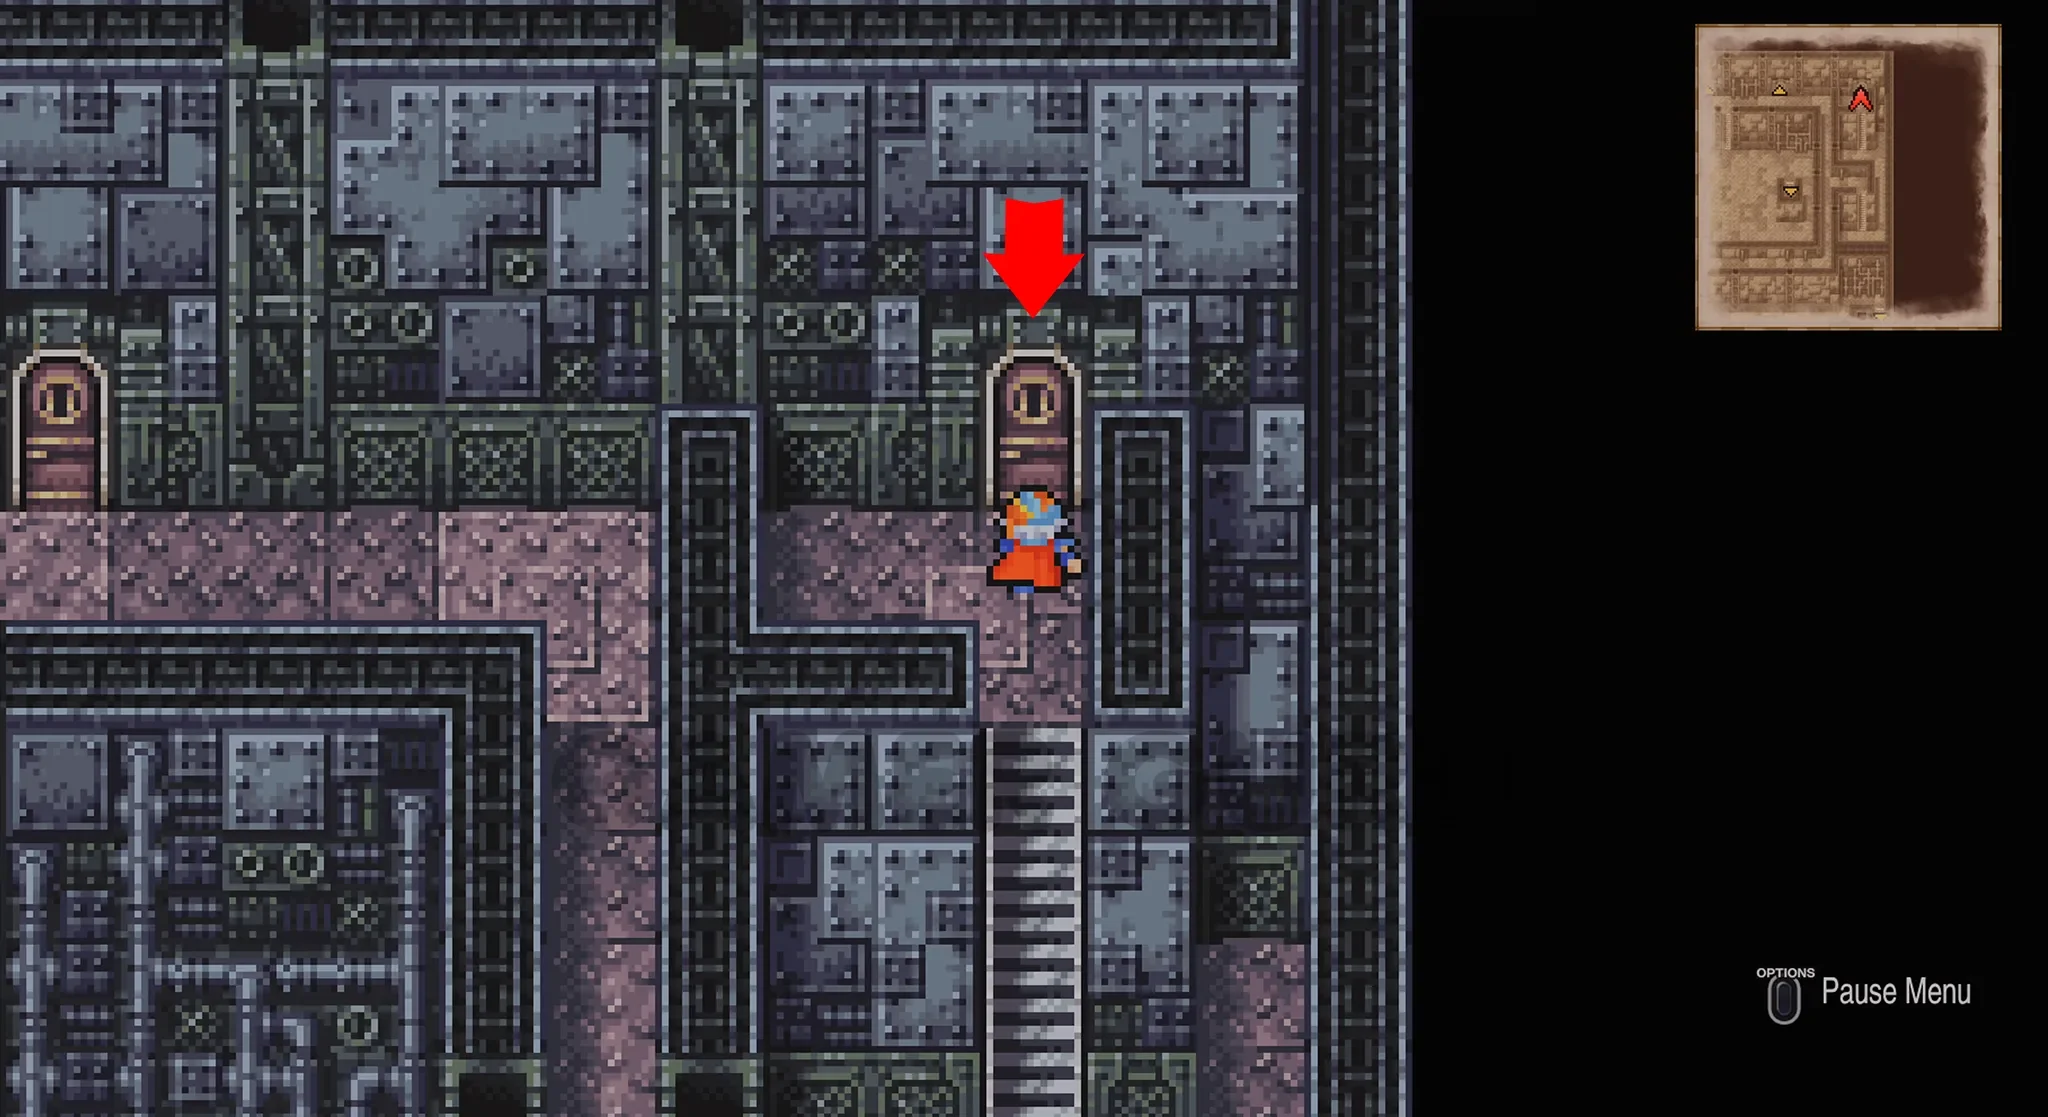
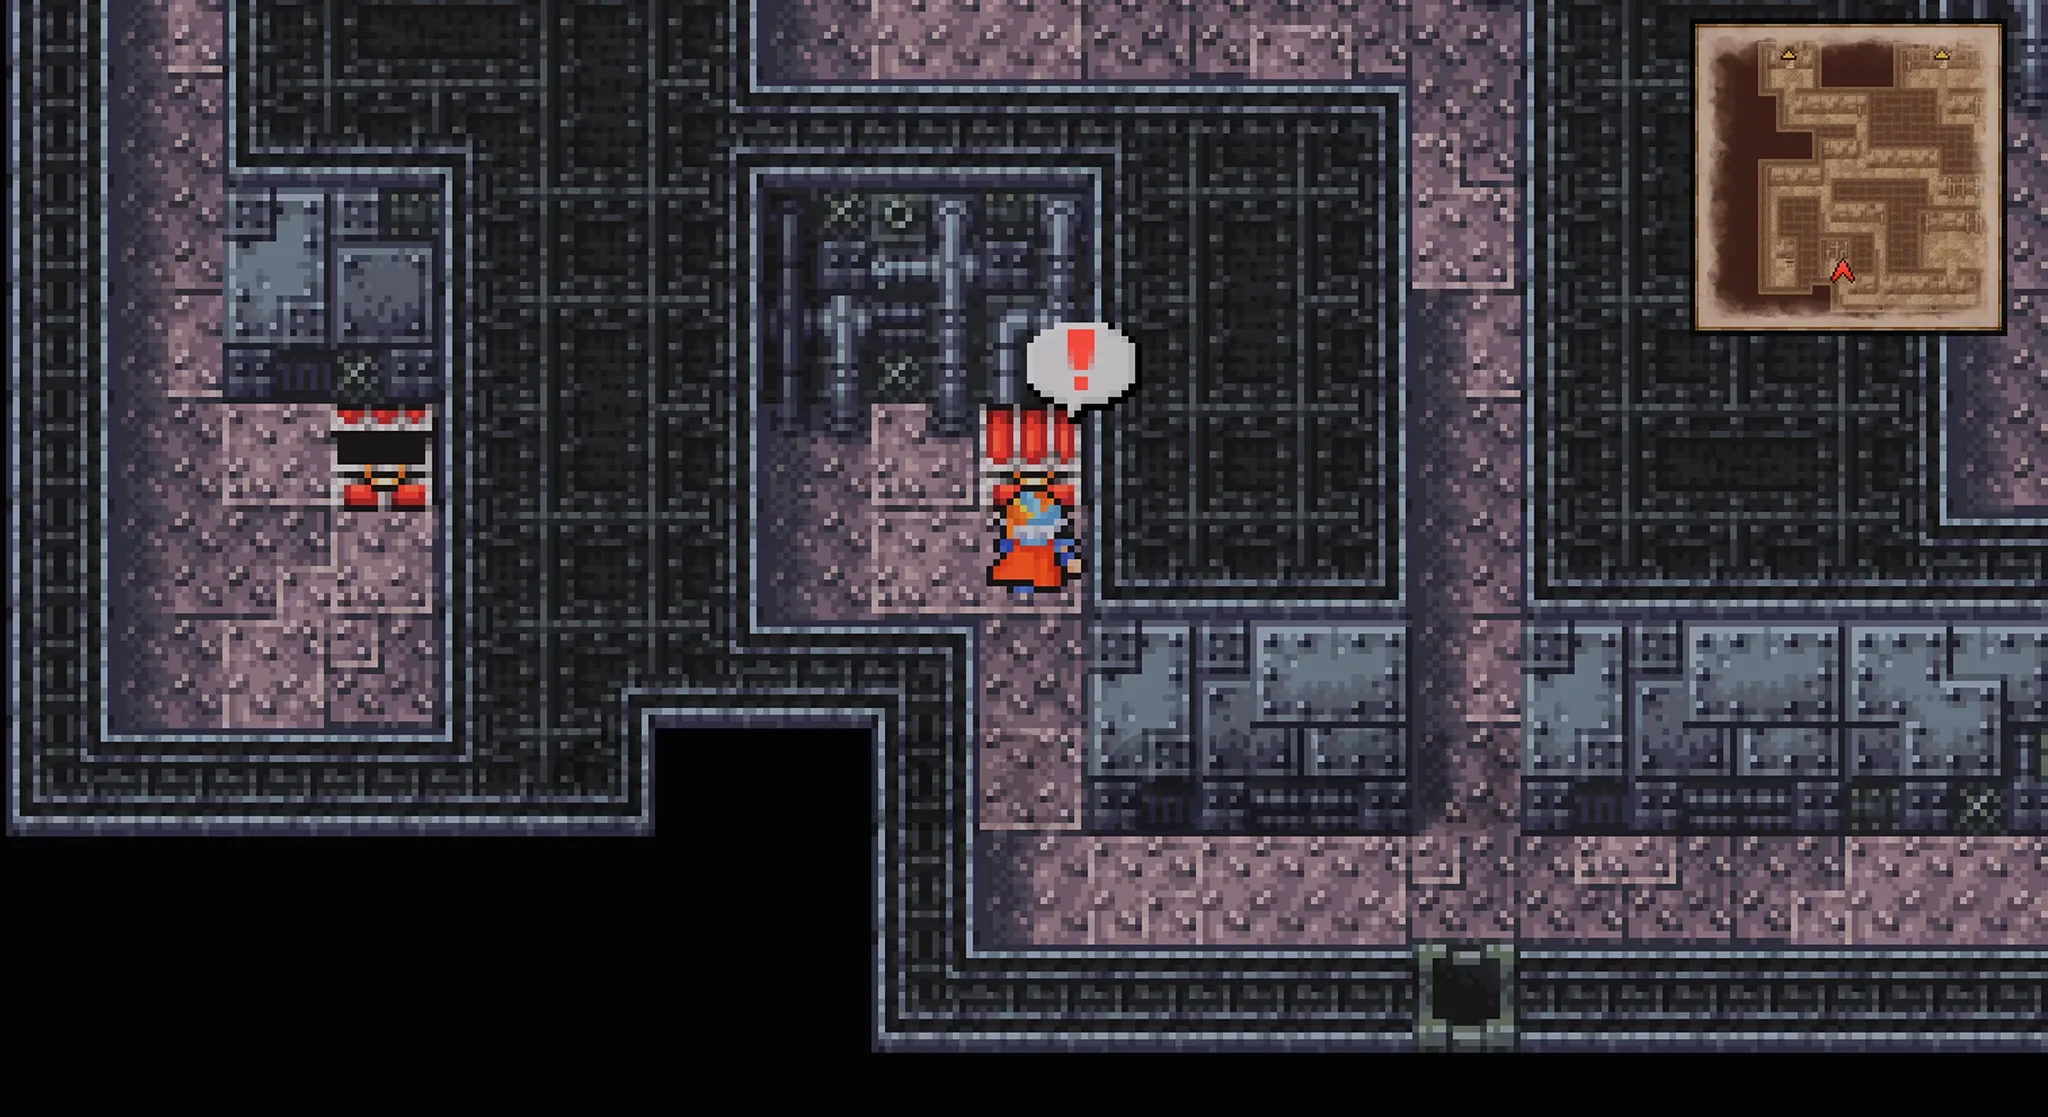
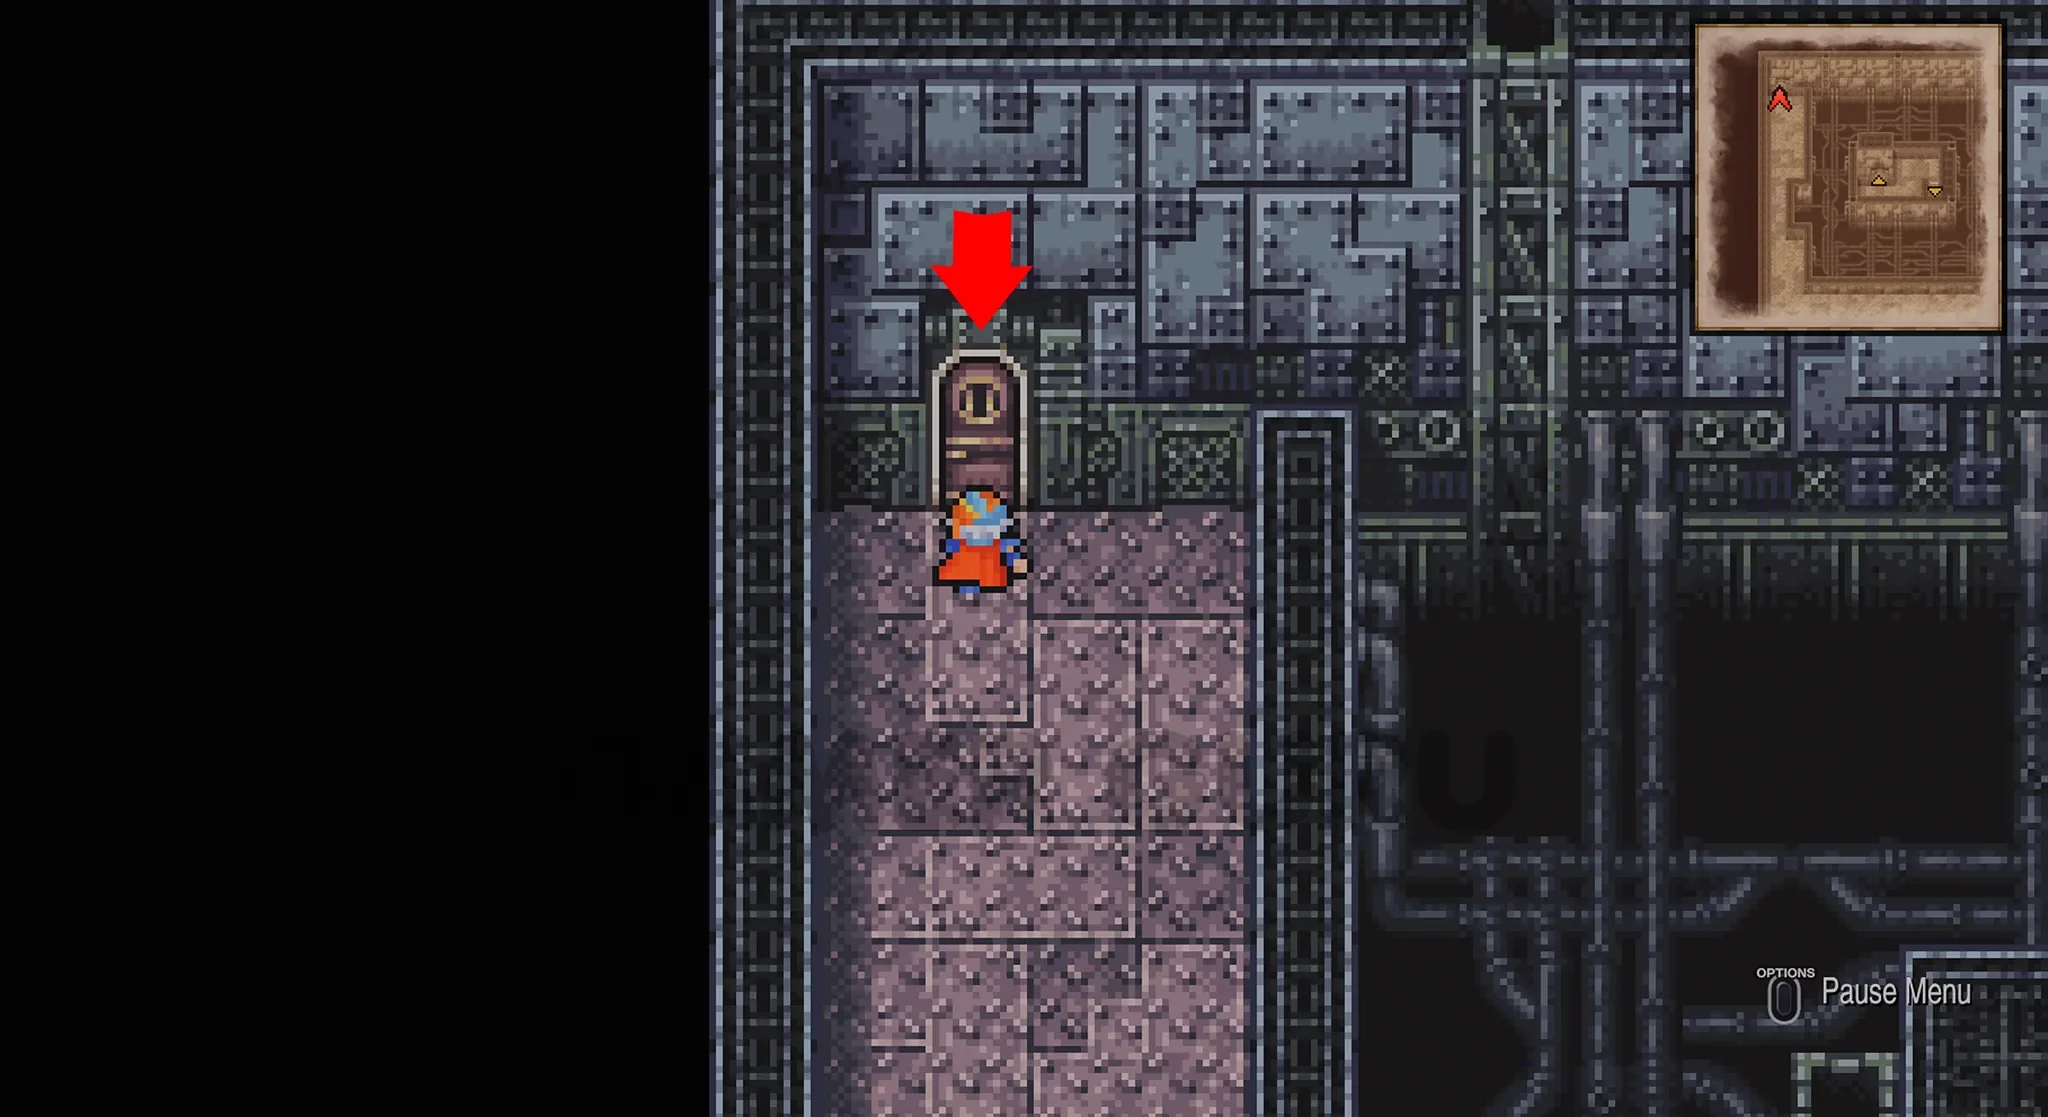
On this first floor there is only 1 chest at the top left, but before we get that we are going to head down the stairs to the right of the entrance area to reach the closed off cell area in 2F.
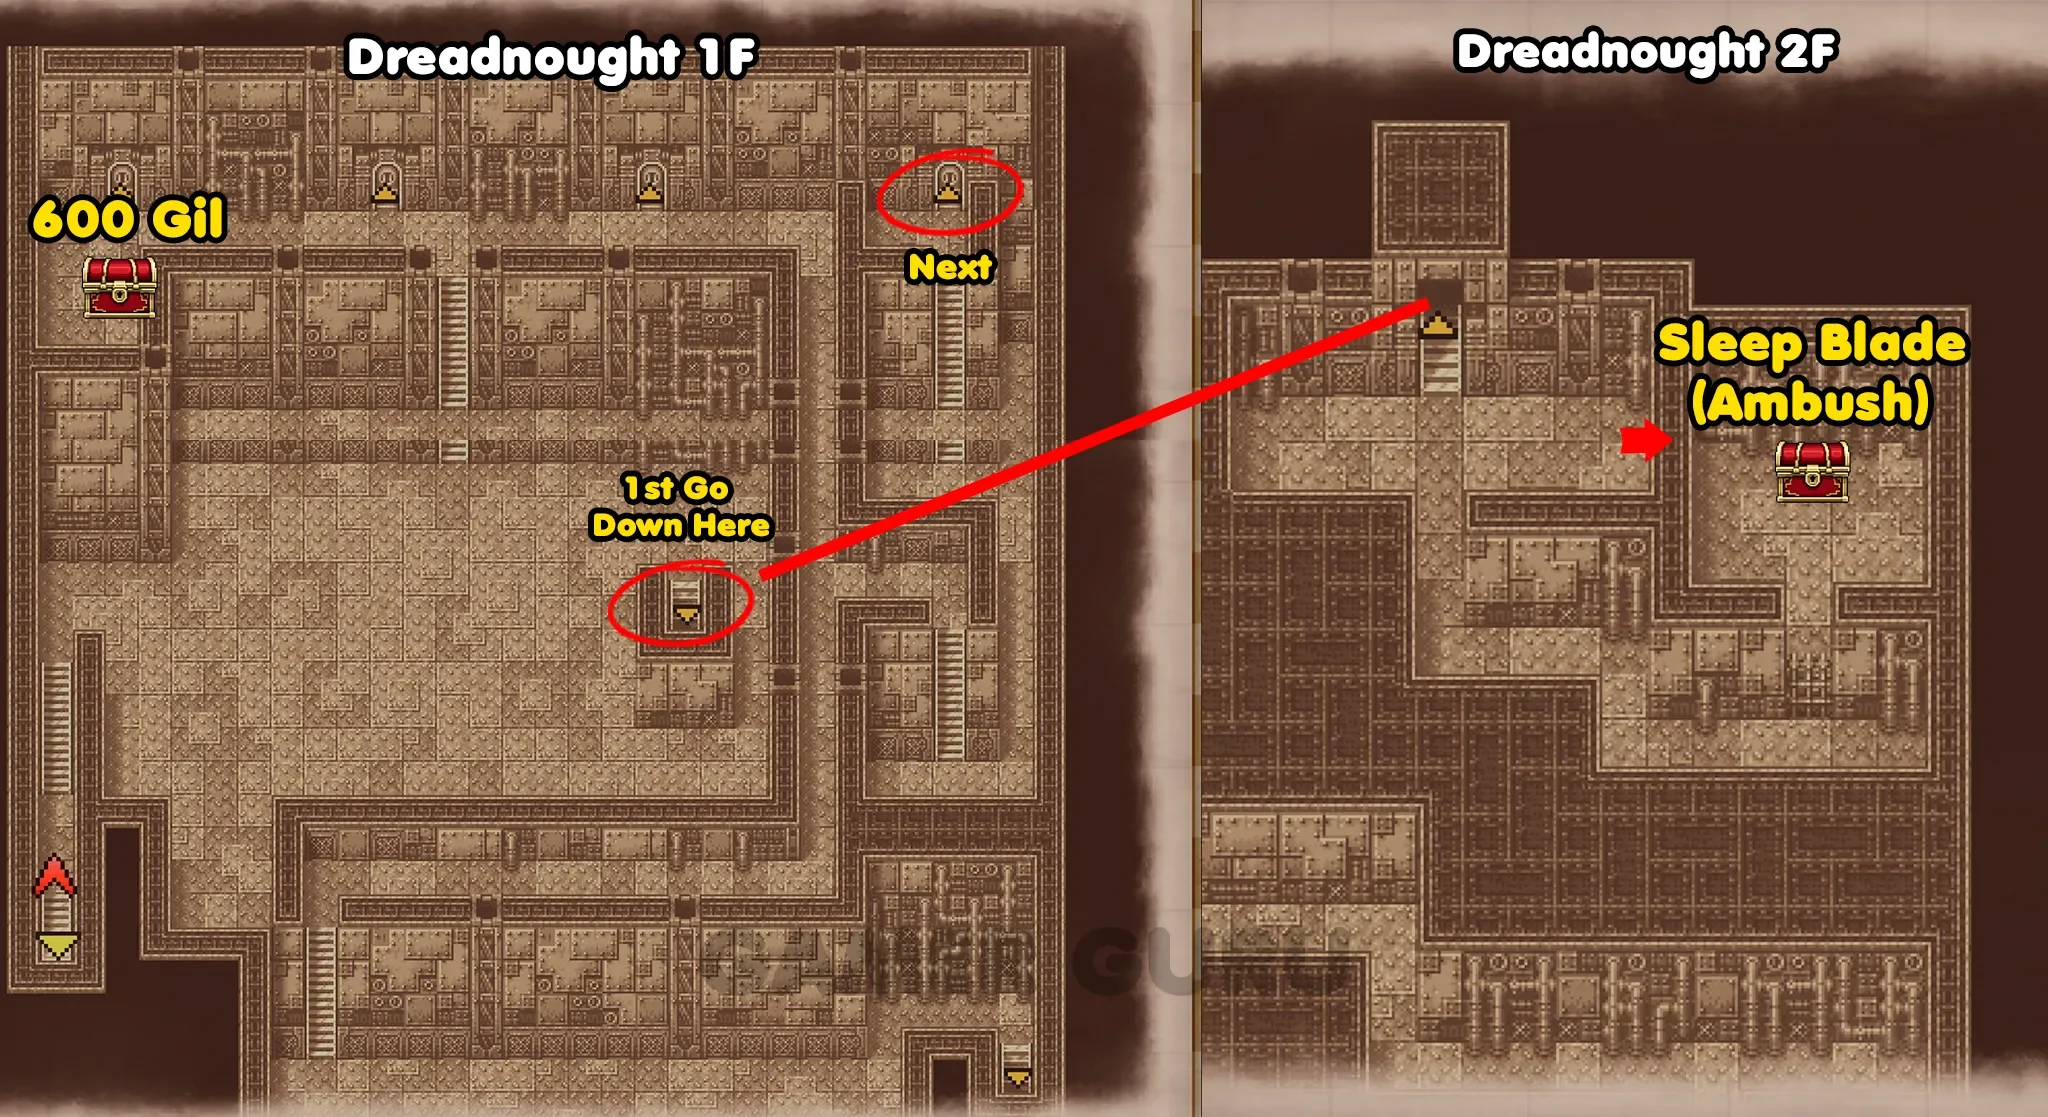
Here there will be a chest behind a closed cell gate, to reach it you just need to walk through the wall where the red arrow is showing in the image above, to the left of the chest.
Be careful as this chest is an enemy ambush and quite a difficult one, so be sure to heal up before you start, and if you have a Esuna Tome make sure you teach it to someone before starting this fight.
Once you defeat the enemies you will get the Sleep Blade which is a really good weapon for this dungeon.
Now return back to 1F and go to the top left part of the room to get the chest that contains 600 Gil.
After you have opened the chest go through the door at the top right side of the room (ignore all other doors for now) this will take you to the main area of 2F.
2F
There are 5 Chests on 2F, but we already got the one in the cell (Sleep Blade) in the previous step so there are only 4 we need to get here.
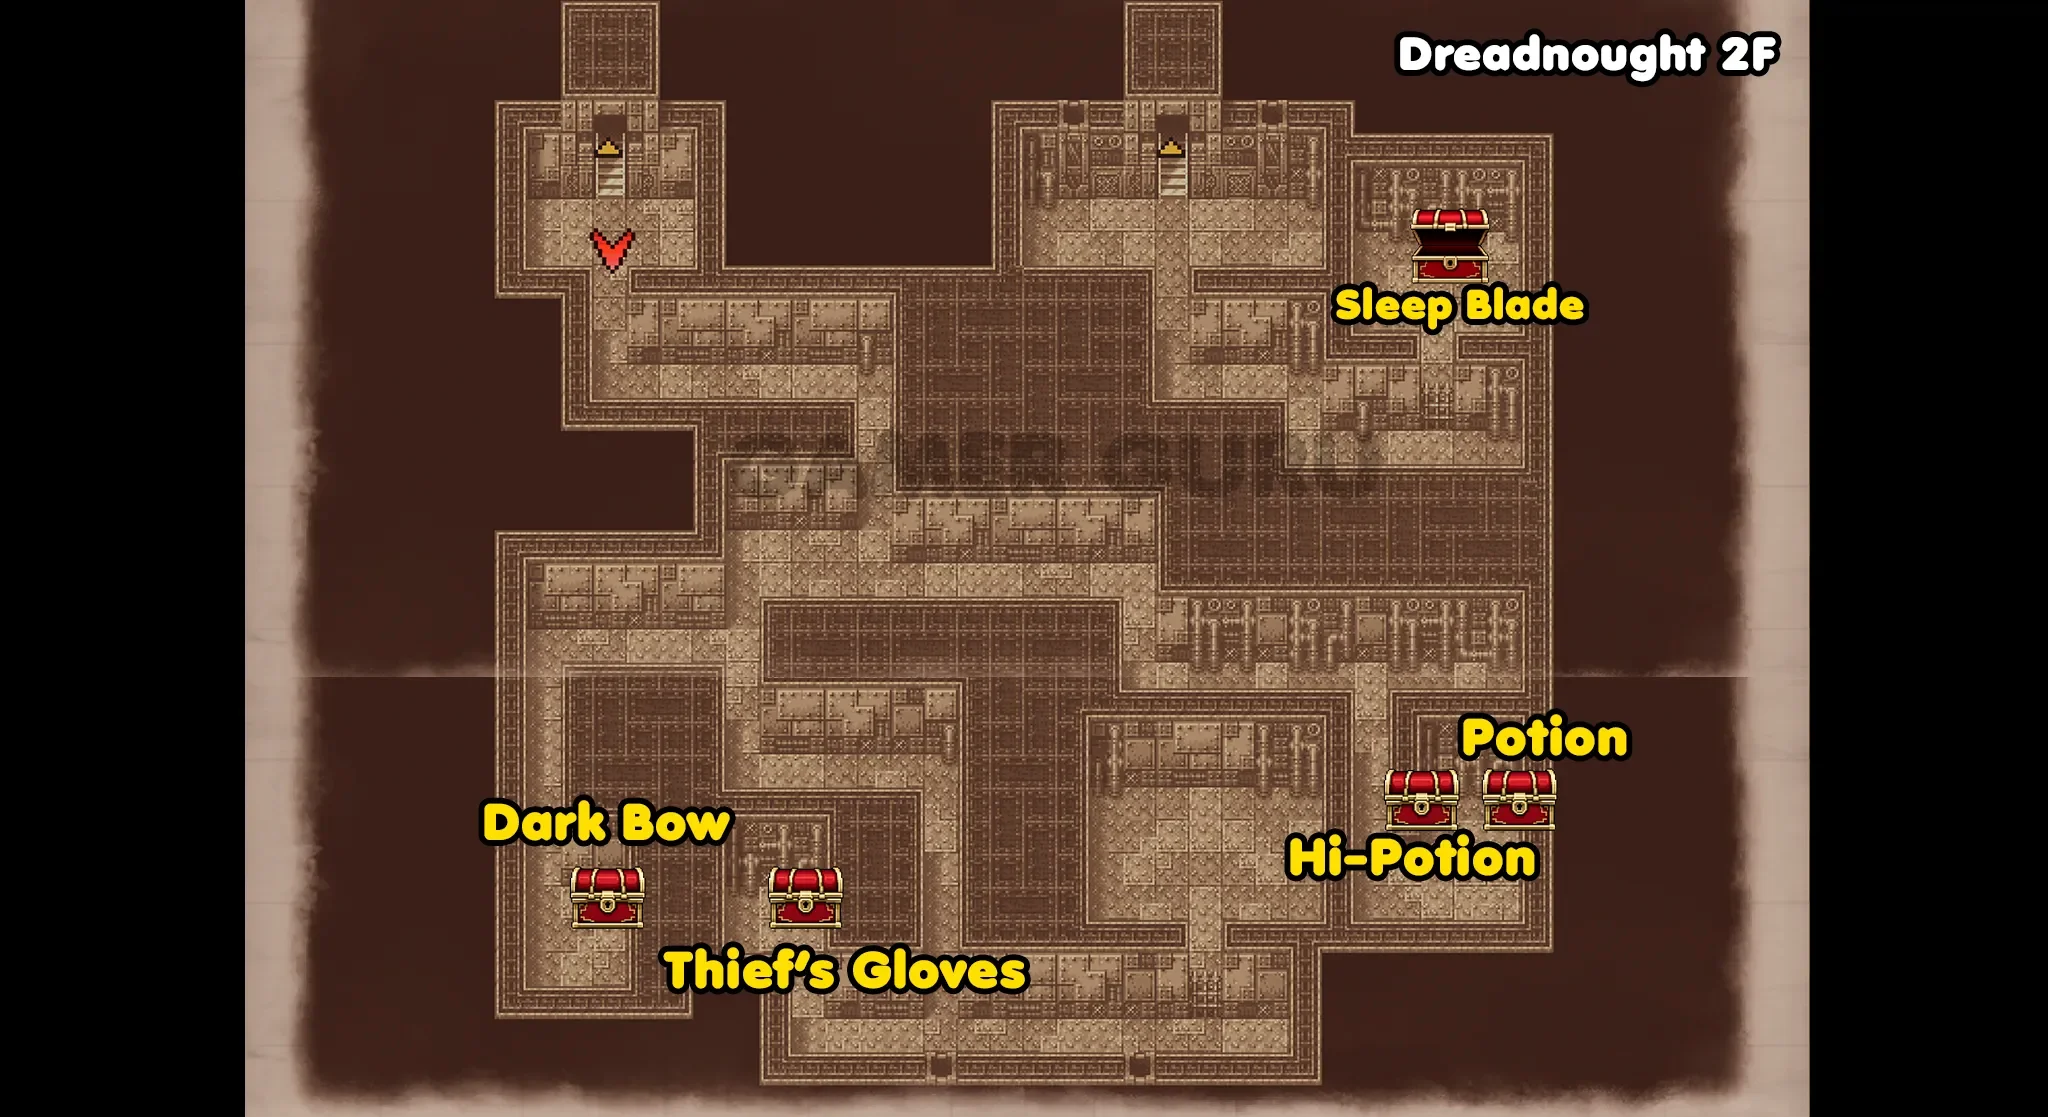
Starting from the one in the bottom left, this one contains a Dark Bow which is a huge upgrade if you were still using the Mythril Bow so be sure to equip it.
Then grab the 2 chests on the right hand side of the floor, these contain a Hi-Potion and a regular Potion.
Then finally open the chest in the middle, on the way down to the cell where the princess is. This one has the Thief’s Gloves which are great for increasing Agility on slower party members.
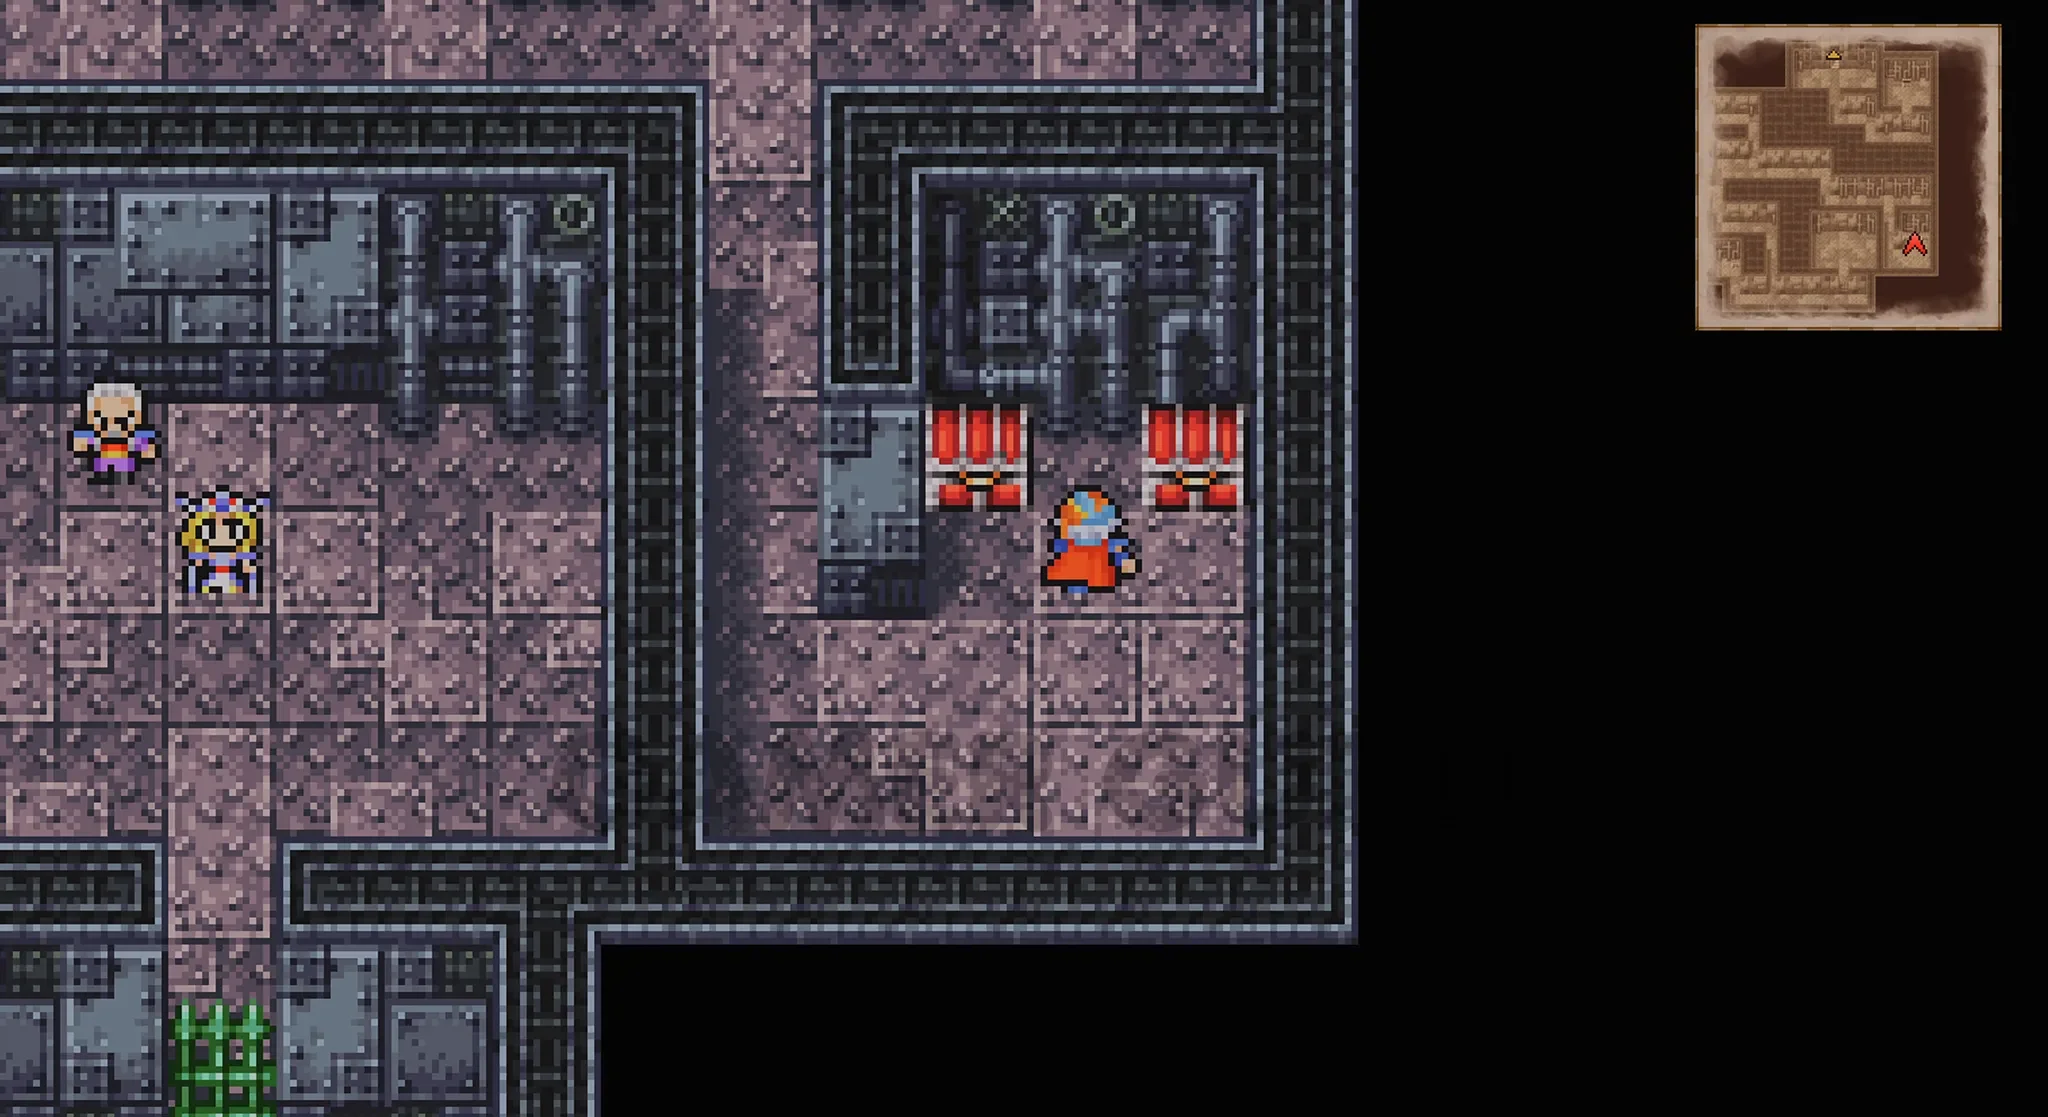
After opening all the chests on this floor go to the cell at the bottom where they are holding Hilda and Cid.
Important: After speaking with both of them, Hilda and Cid, they will leave the Dreadnought and you won’t be able to leave until you have completed the rest of the dungeon, so make sure that you are prepared!
After Hilda and Cid have left, return back to 1F, and this time go up the stairs at the bottom right to reach 3F.
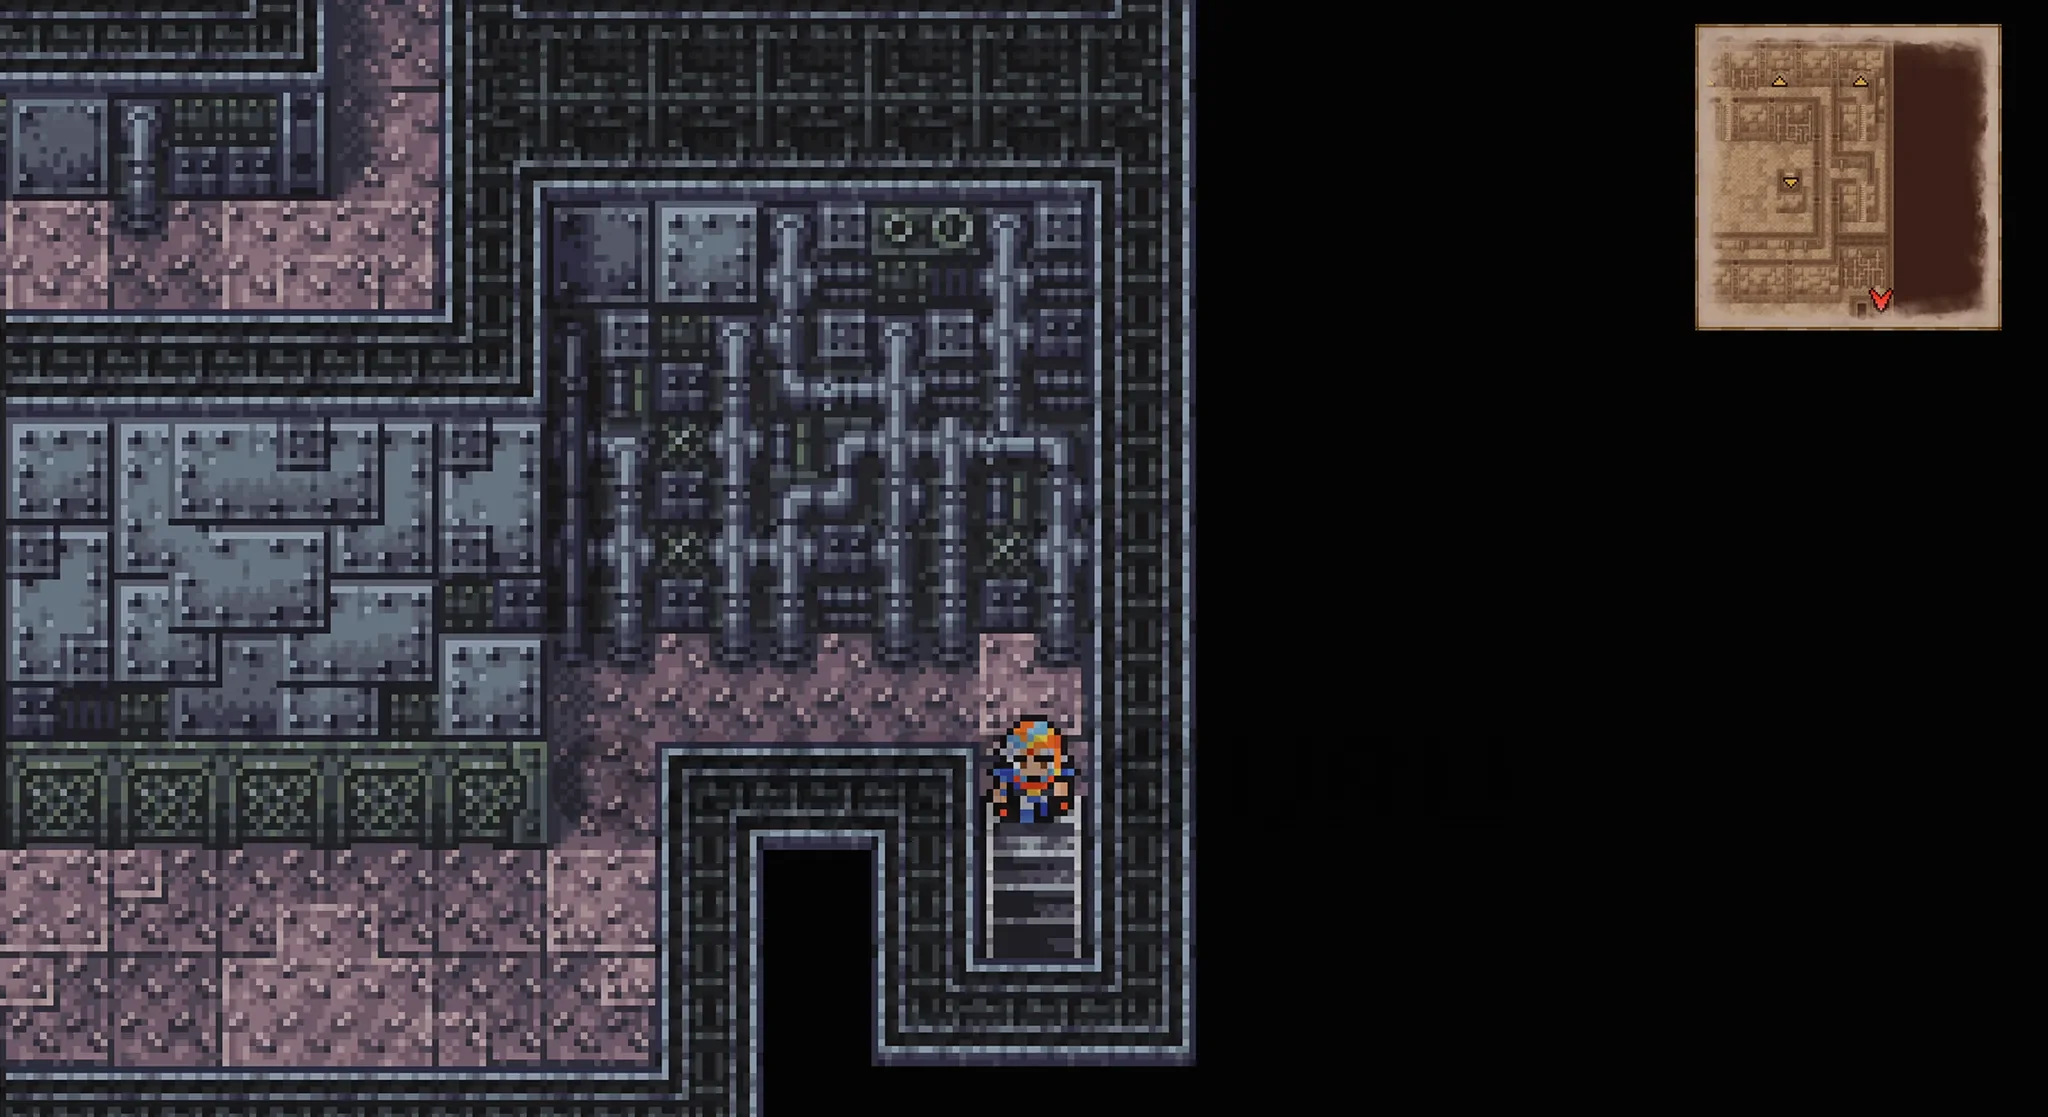
3F
This floor doesn’t have any chests so you can just go straight across to the other door that leads to 4F.
4F
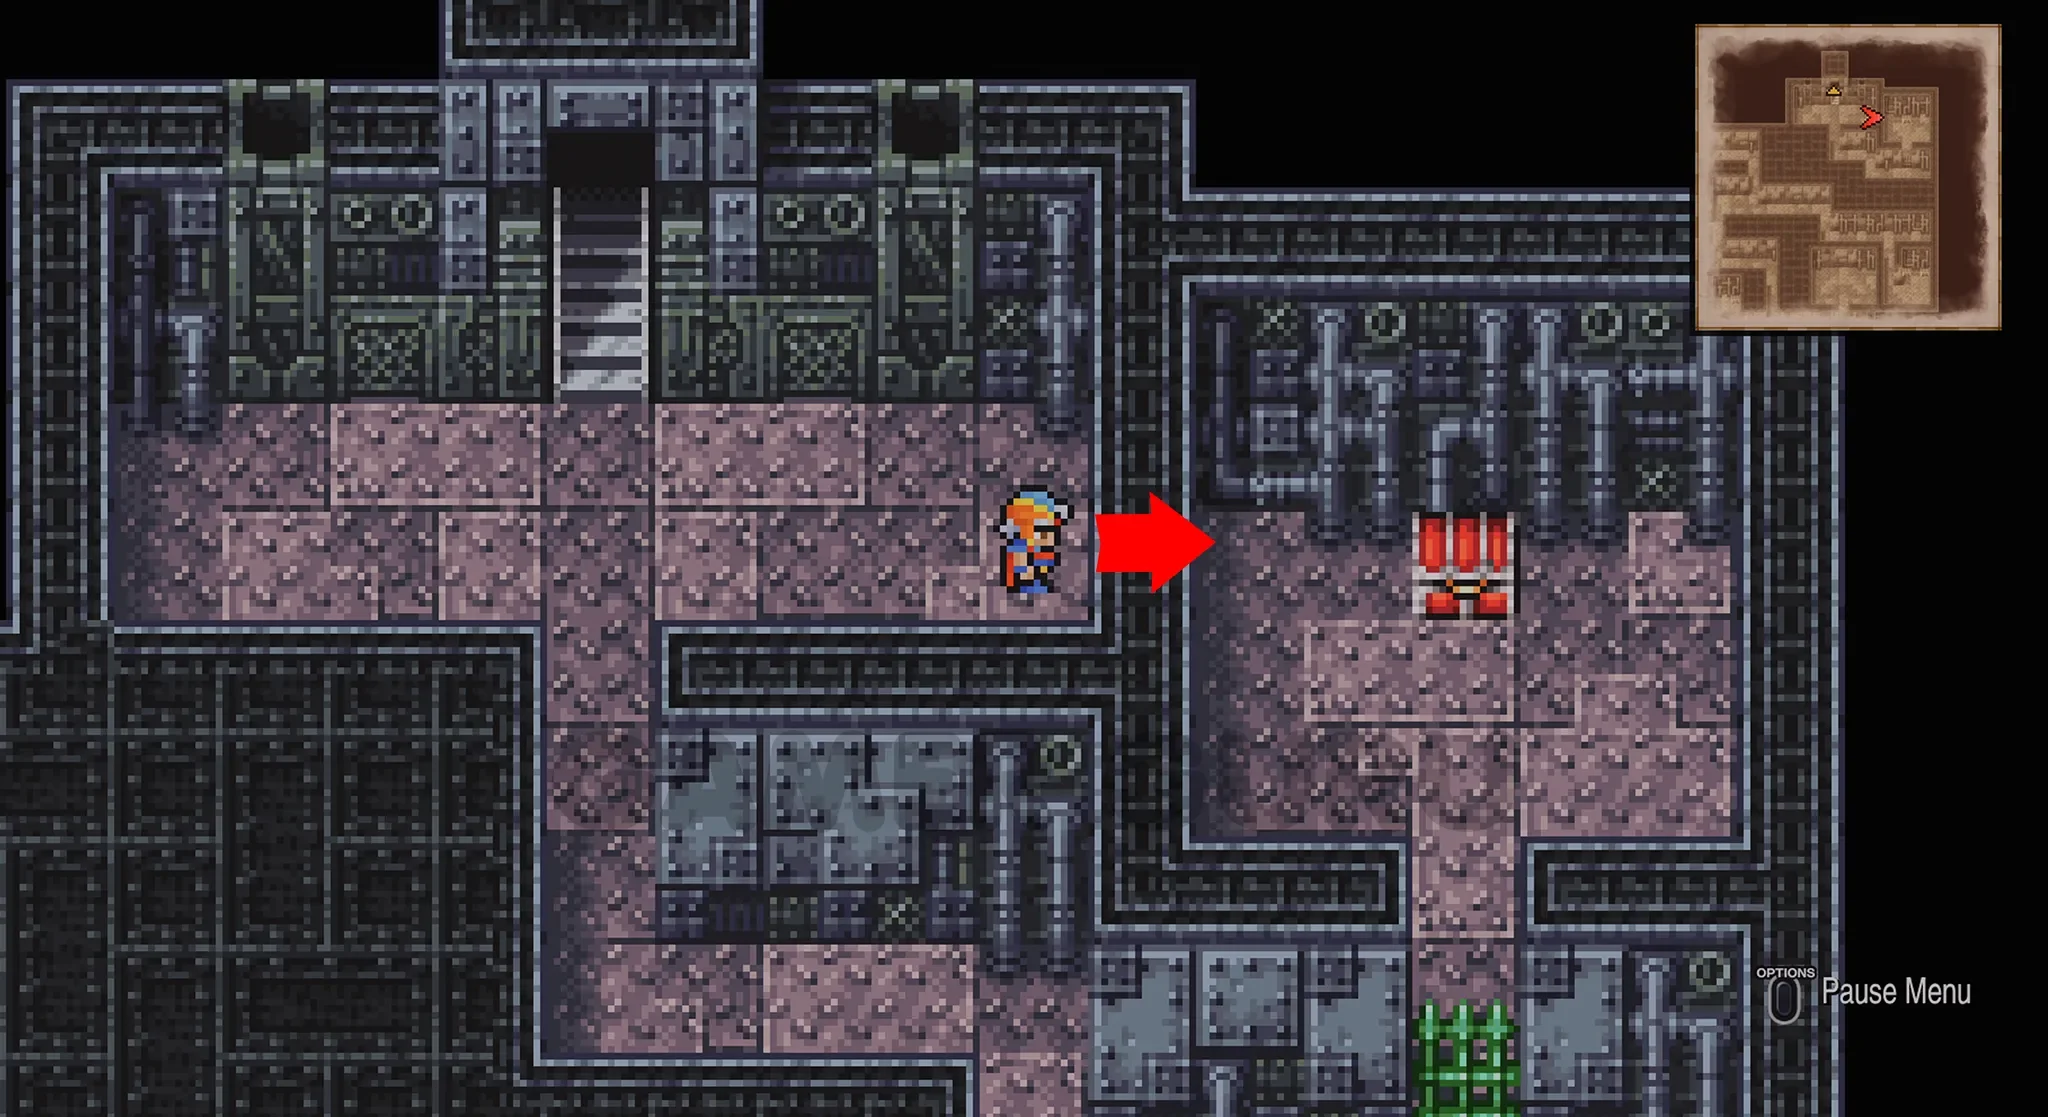
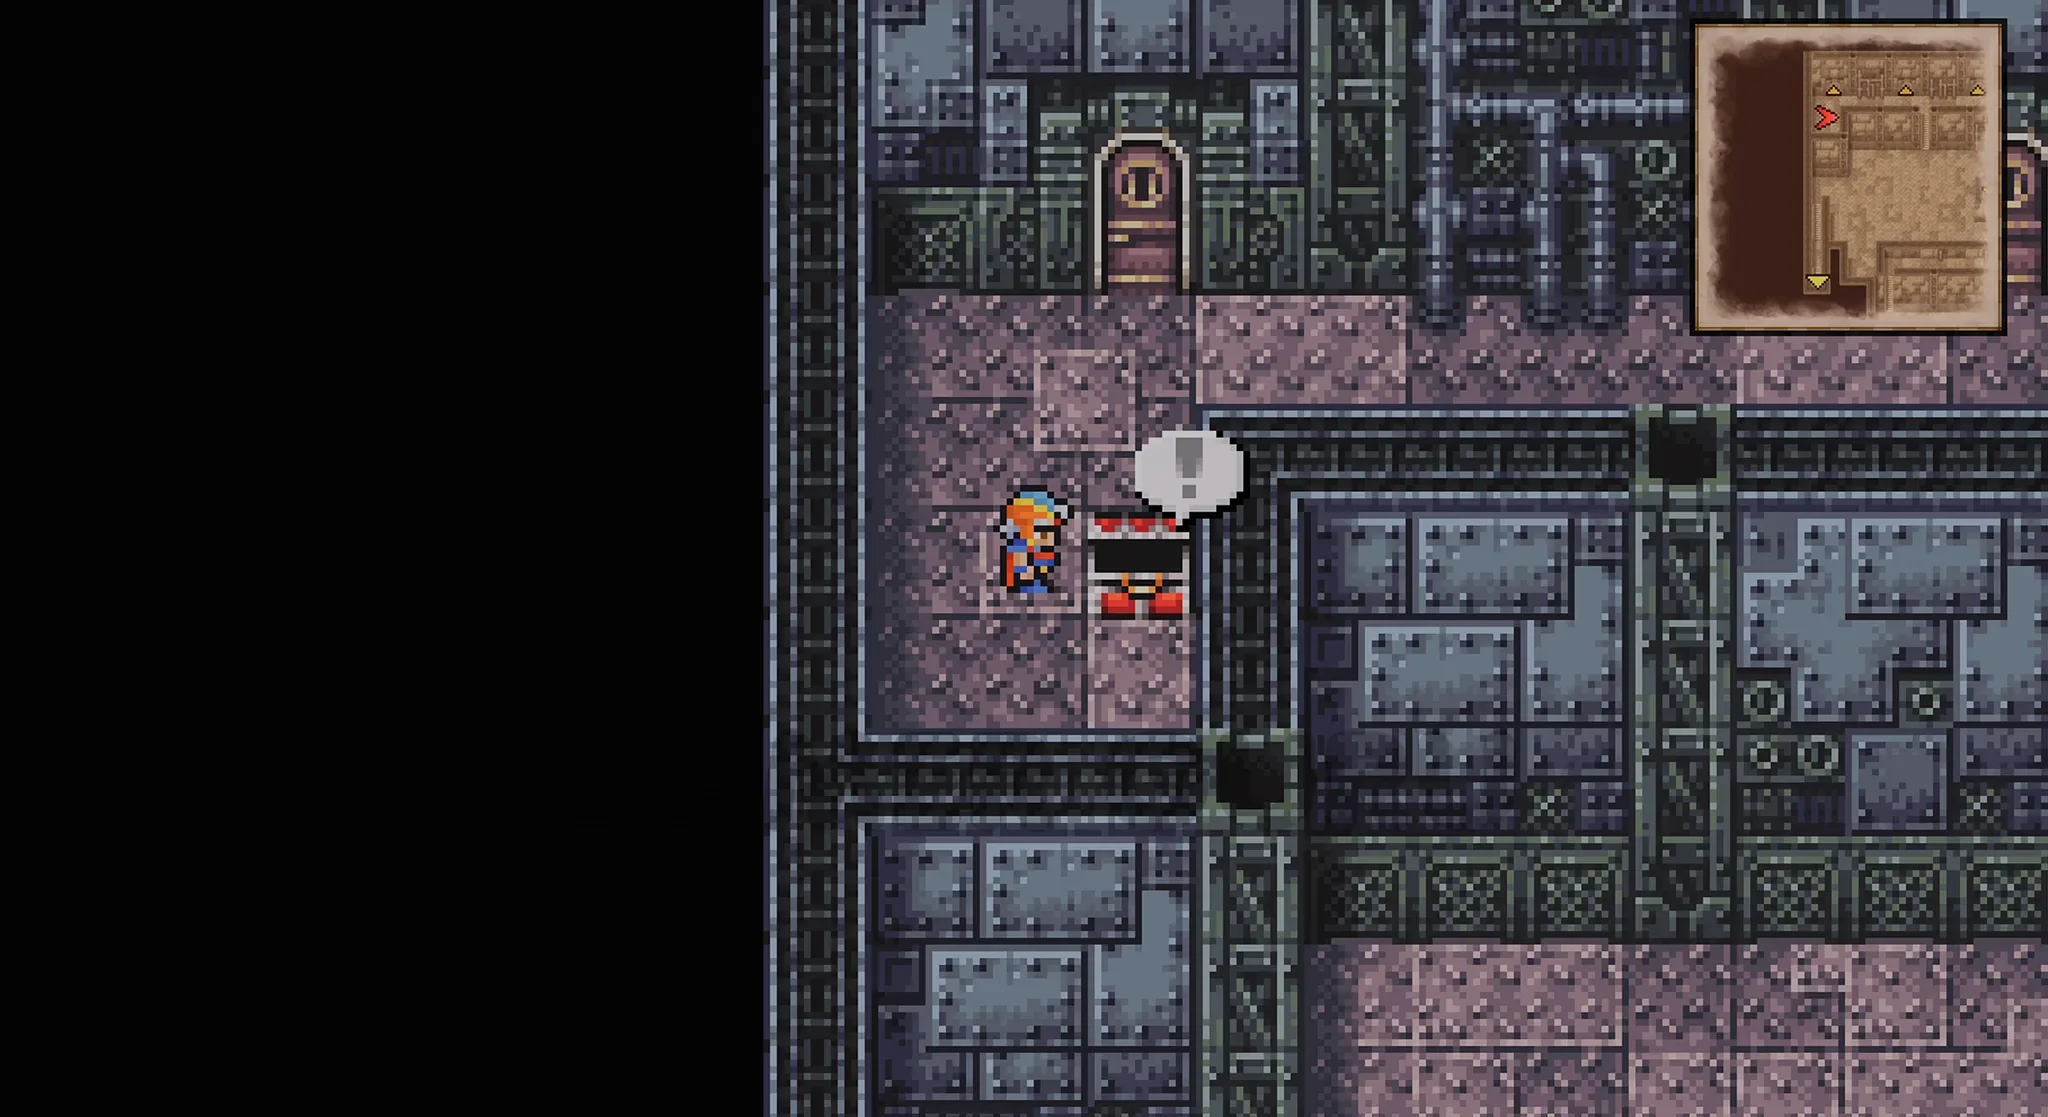
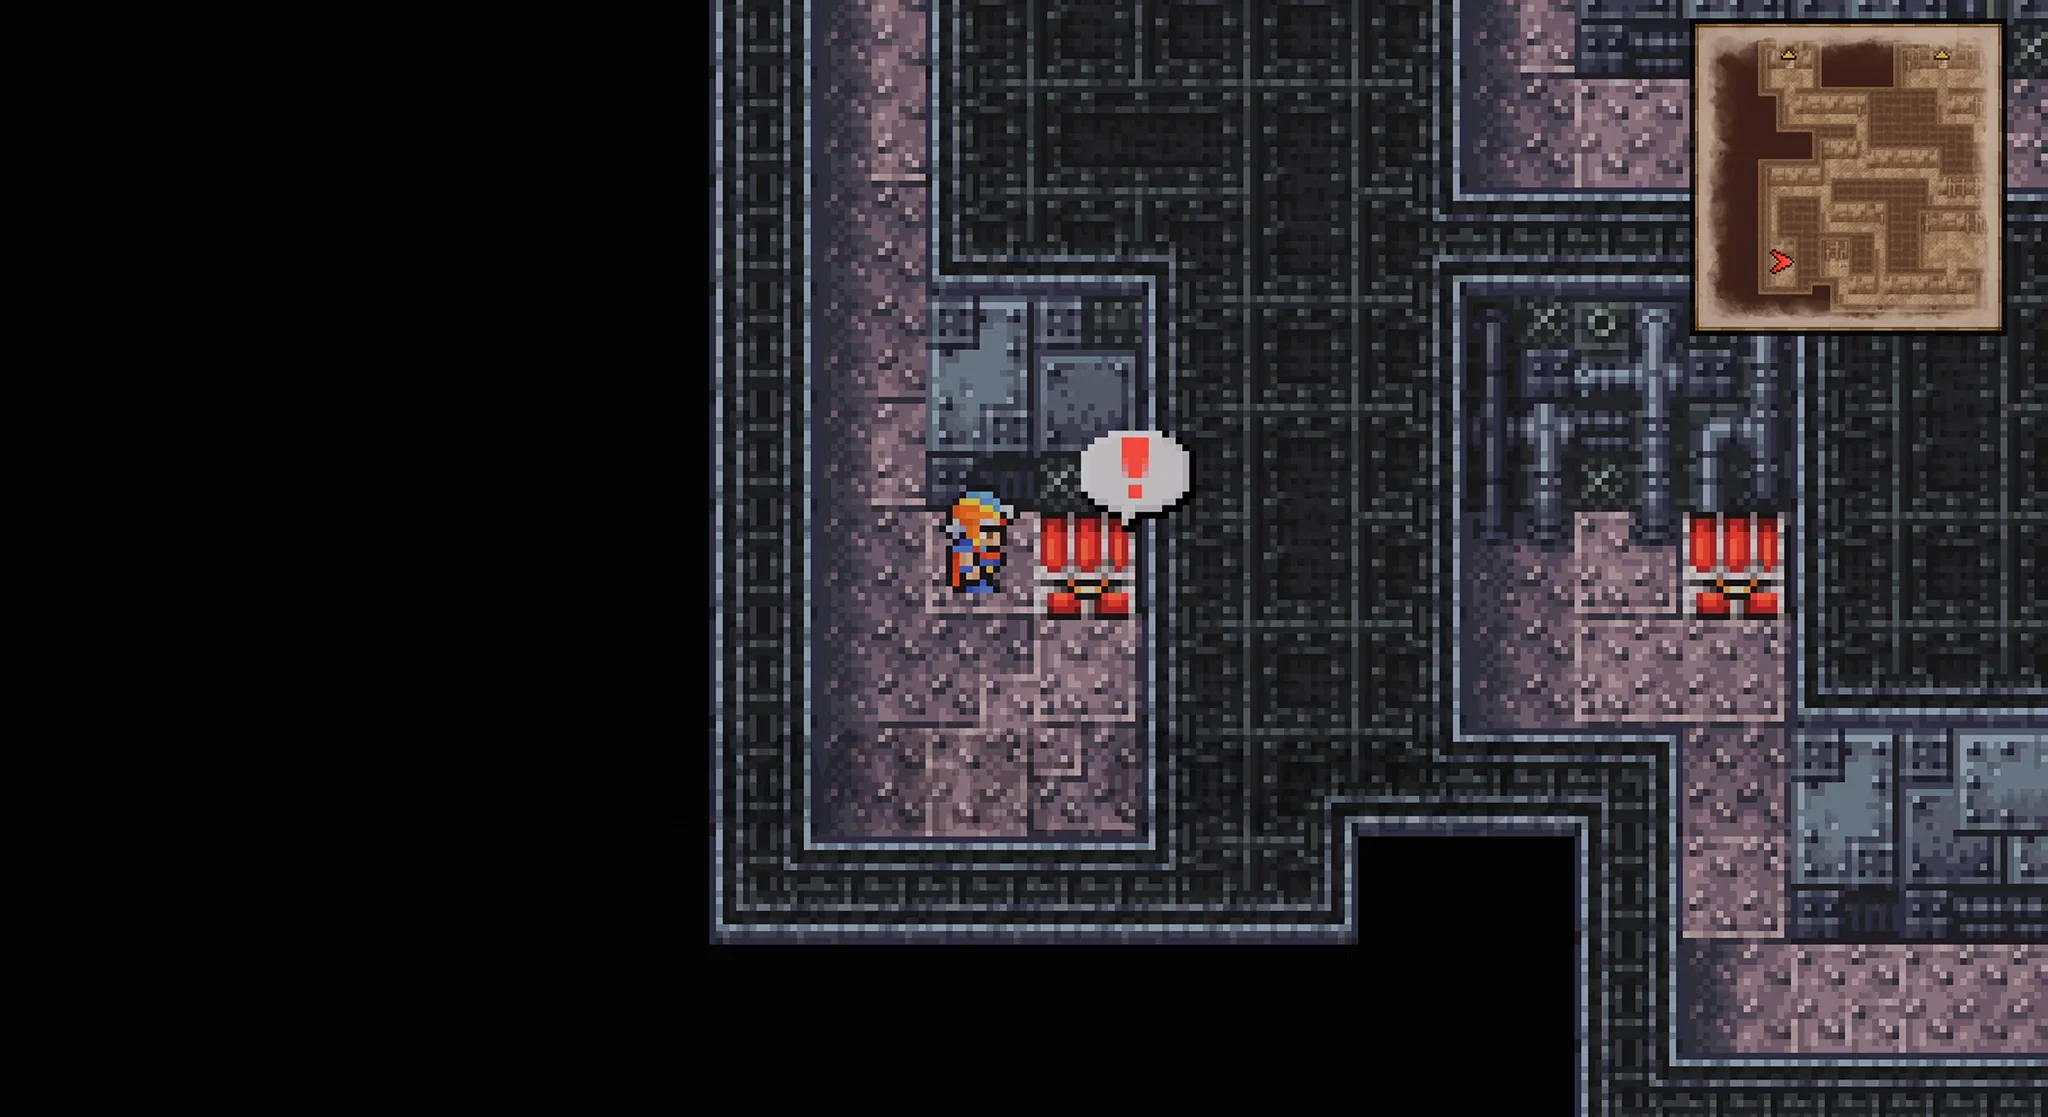
The last 4 chests in this dungeon are all found on this floor, all right next to each other on the right side of the room.
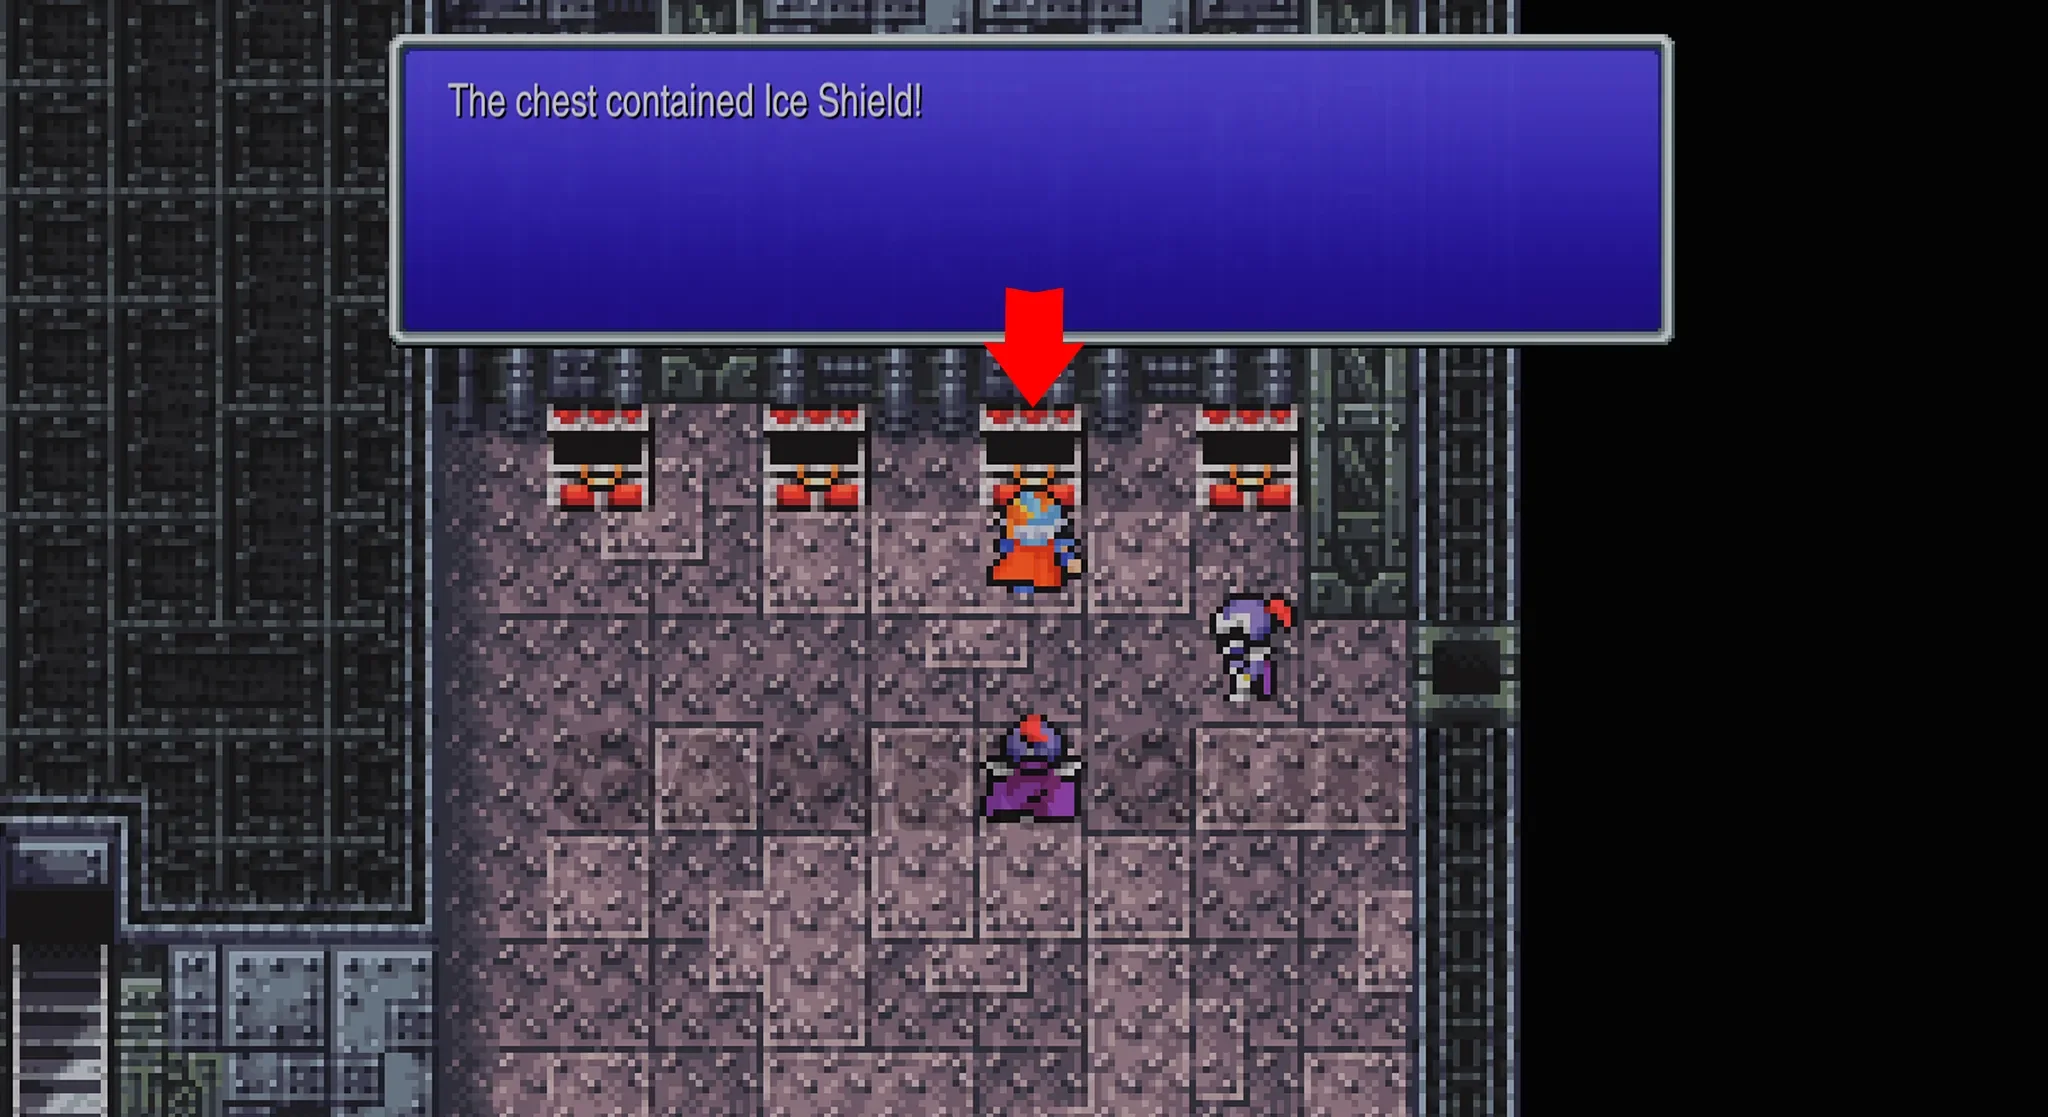
These 4 chests (from left to right) contain a Trident, Main Gauche, Ice Shield (Ambush) and Giant’s Helm.
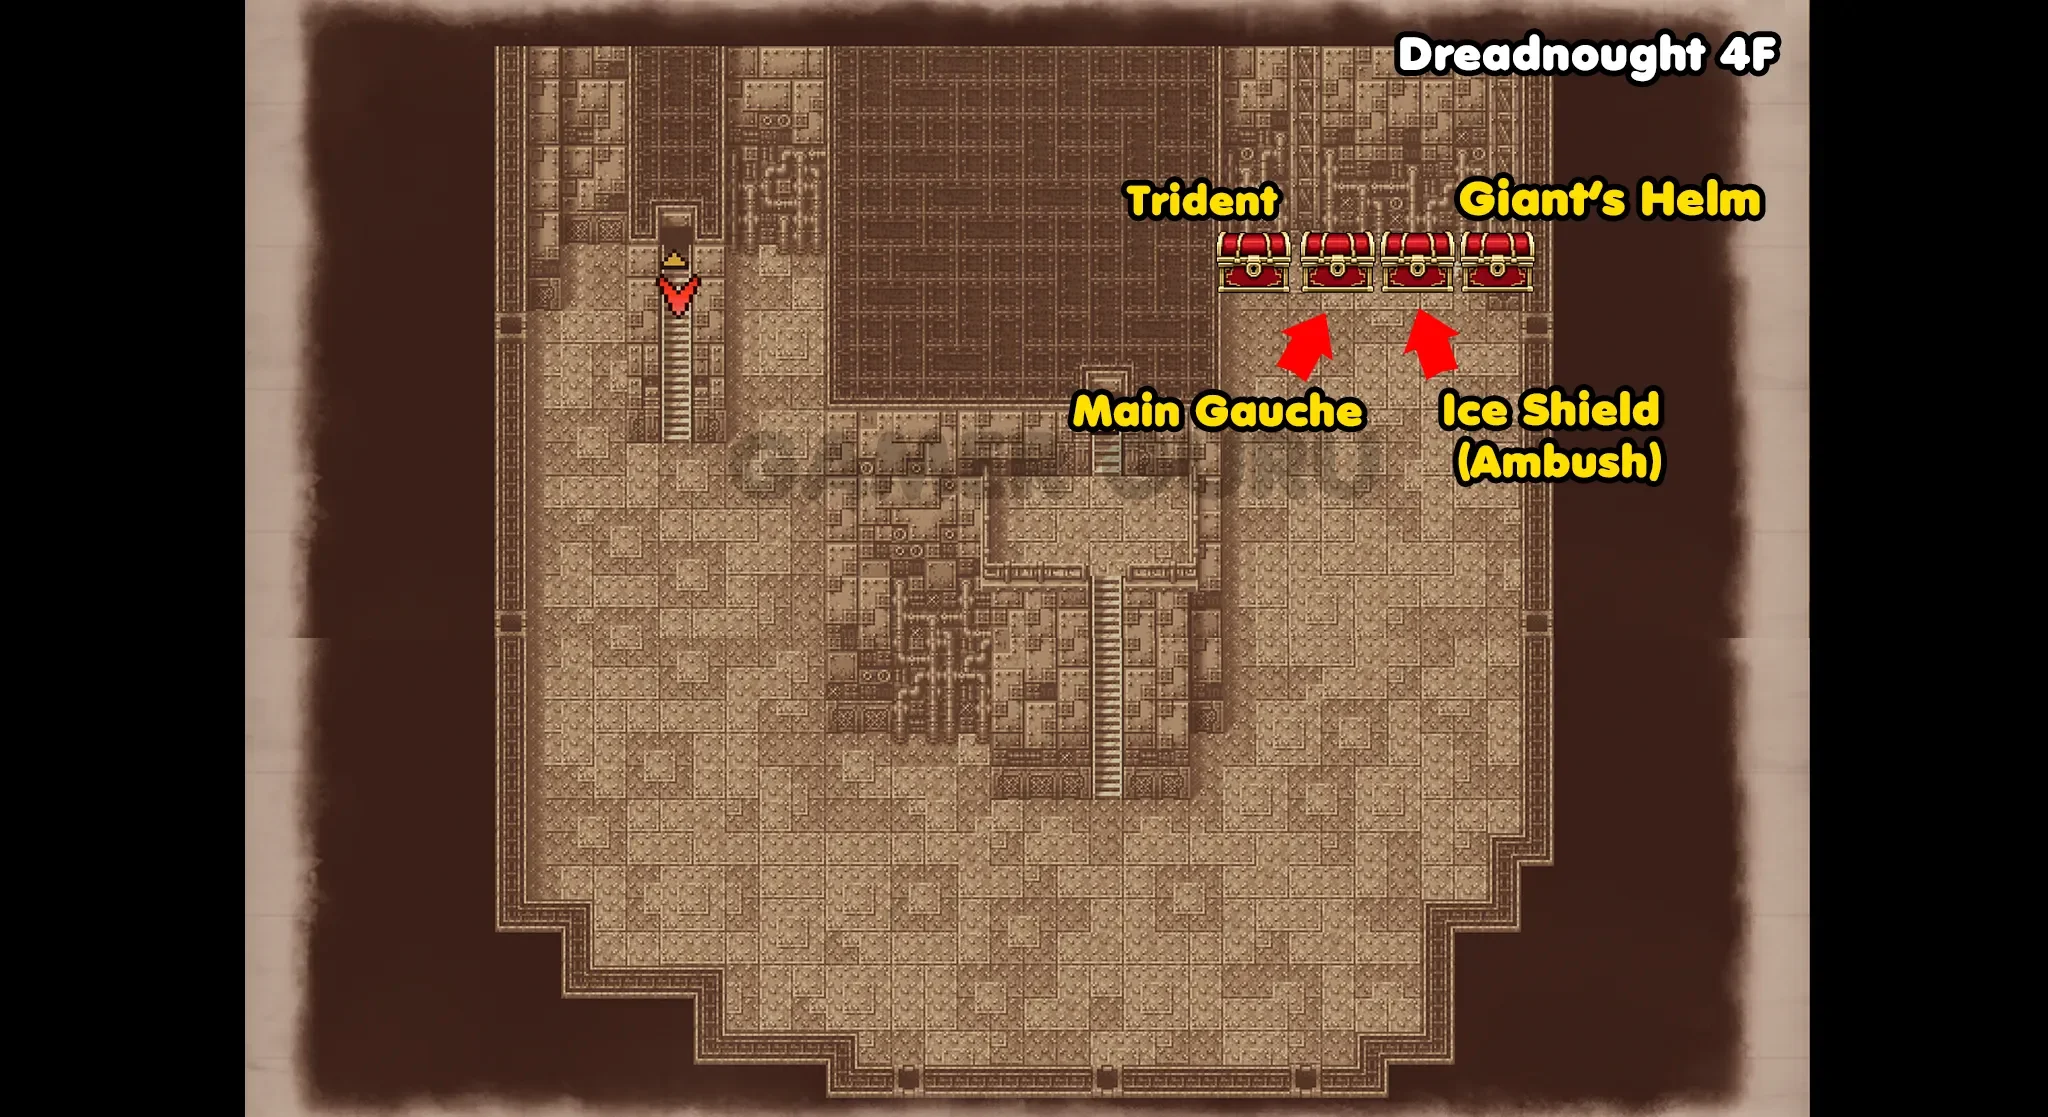
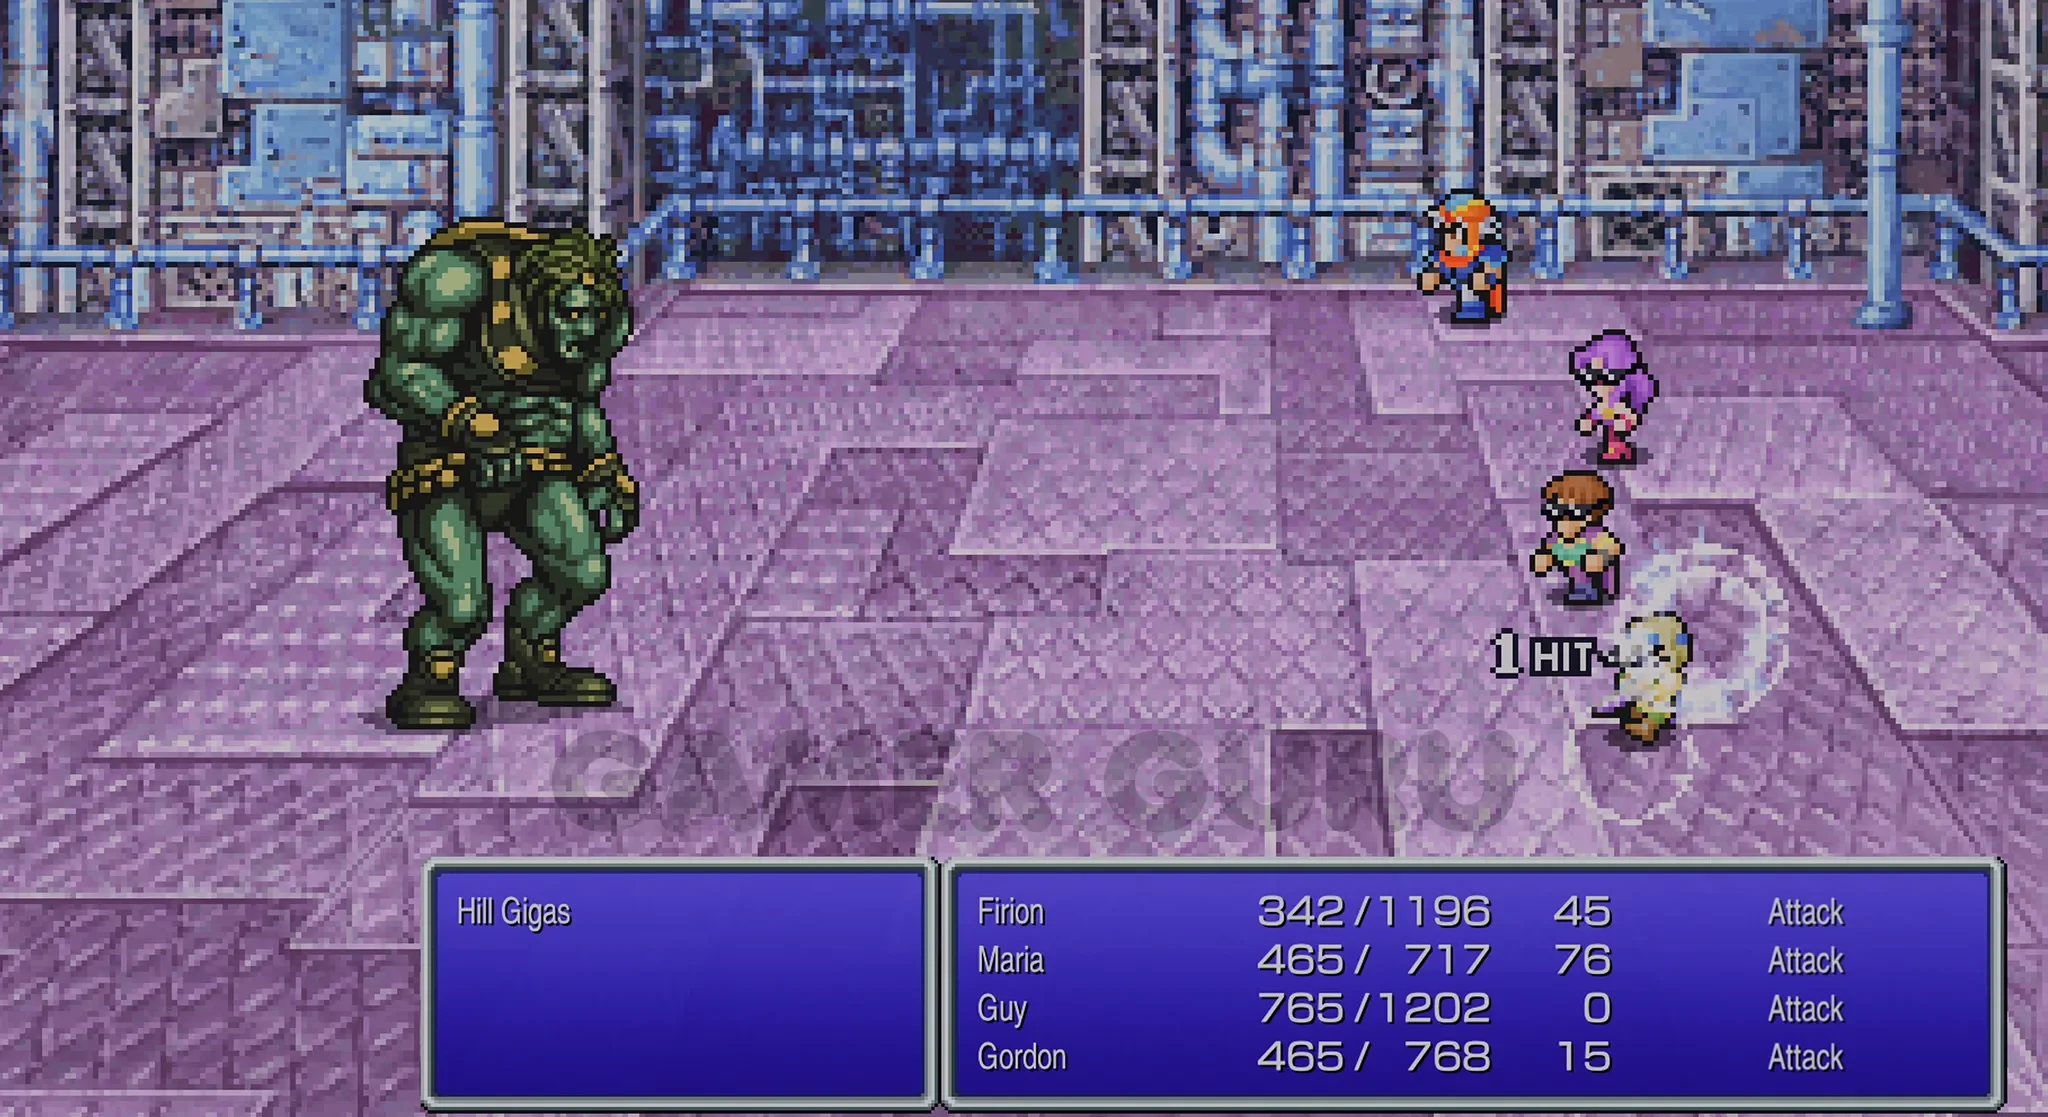
Be very careful as the 3rd chest (Ice Shield) will initiate a pretty difficult ambush against a Hill Gigas, so heal up before the fight.
You should now have all 10 of the chests in the Dreadnought, check the counter on the world map menu to make sure you have them all before advancing, as we mentioned before, you will not be able to return here later.
After making sure you have all 10 chests you can go up the stairs in the middle of the room to reach 5F.
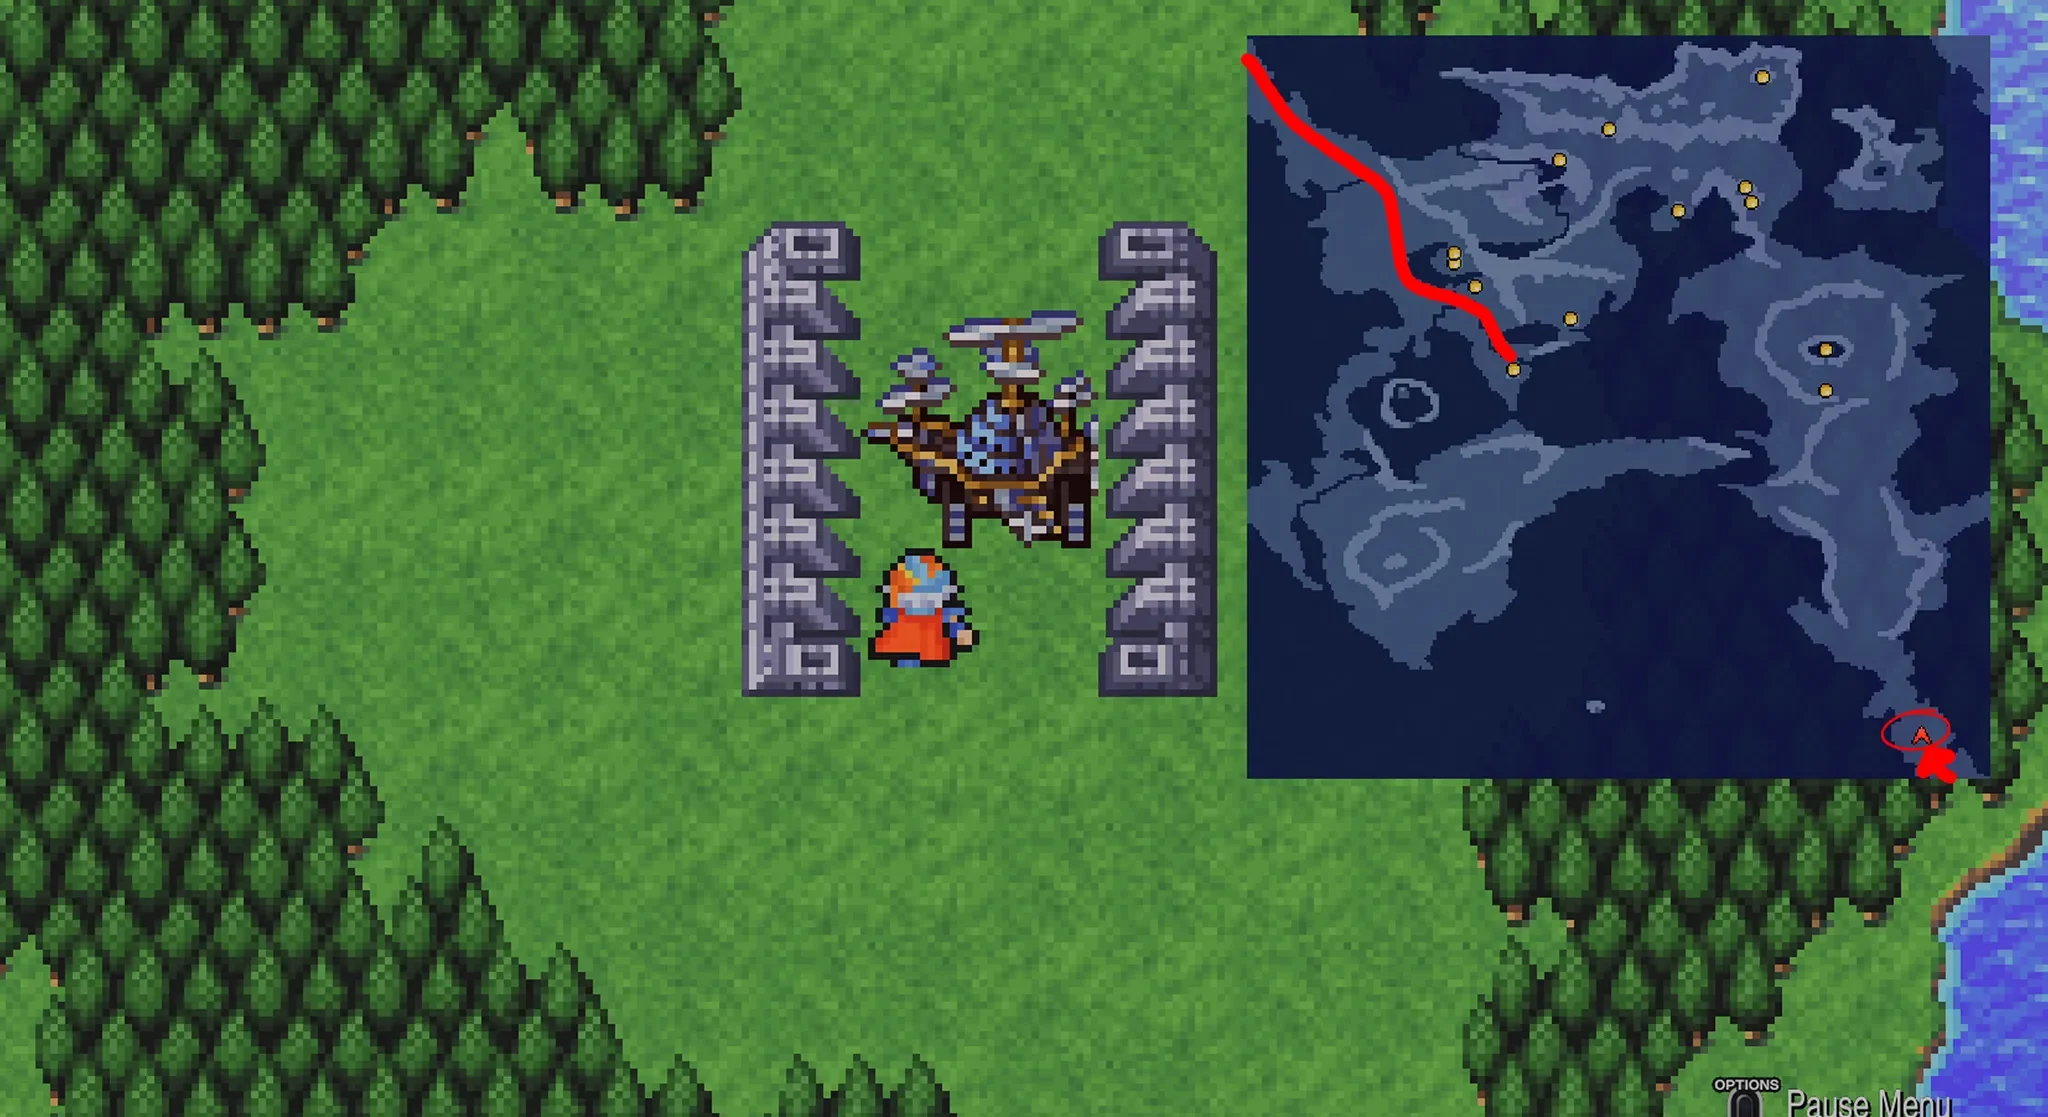
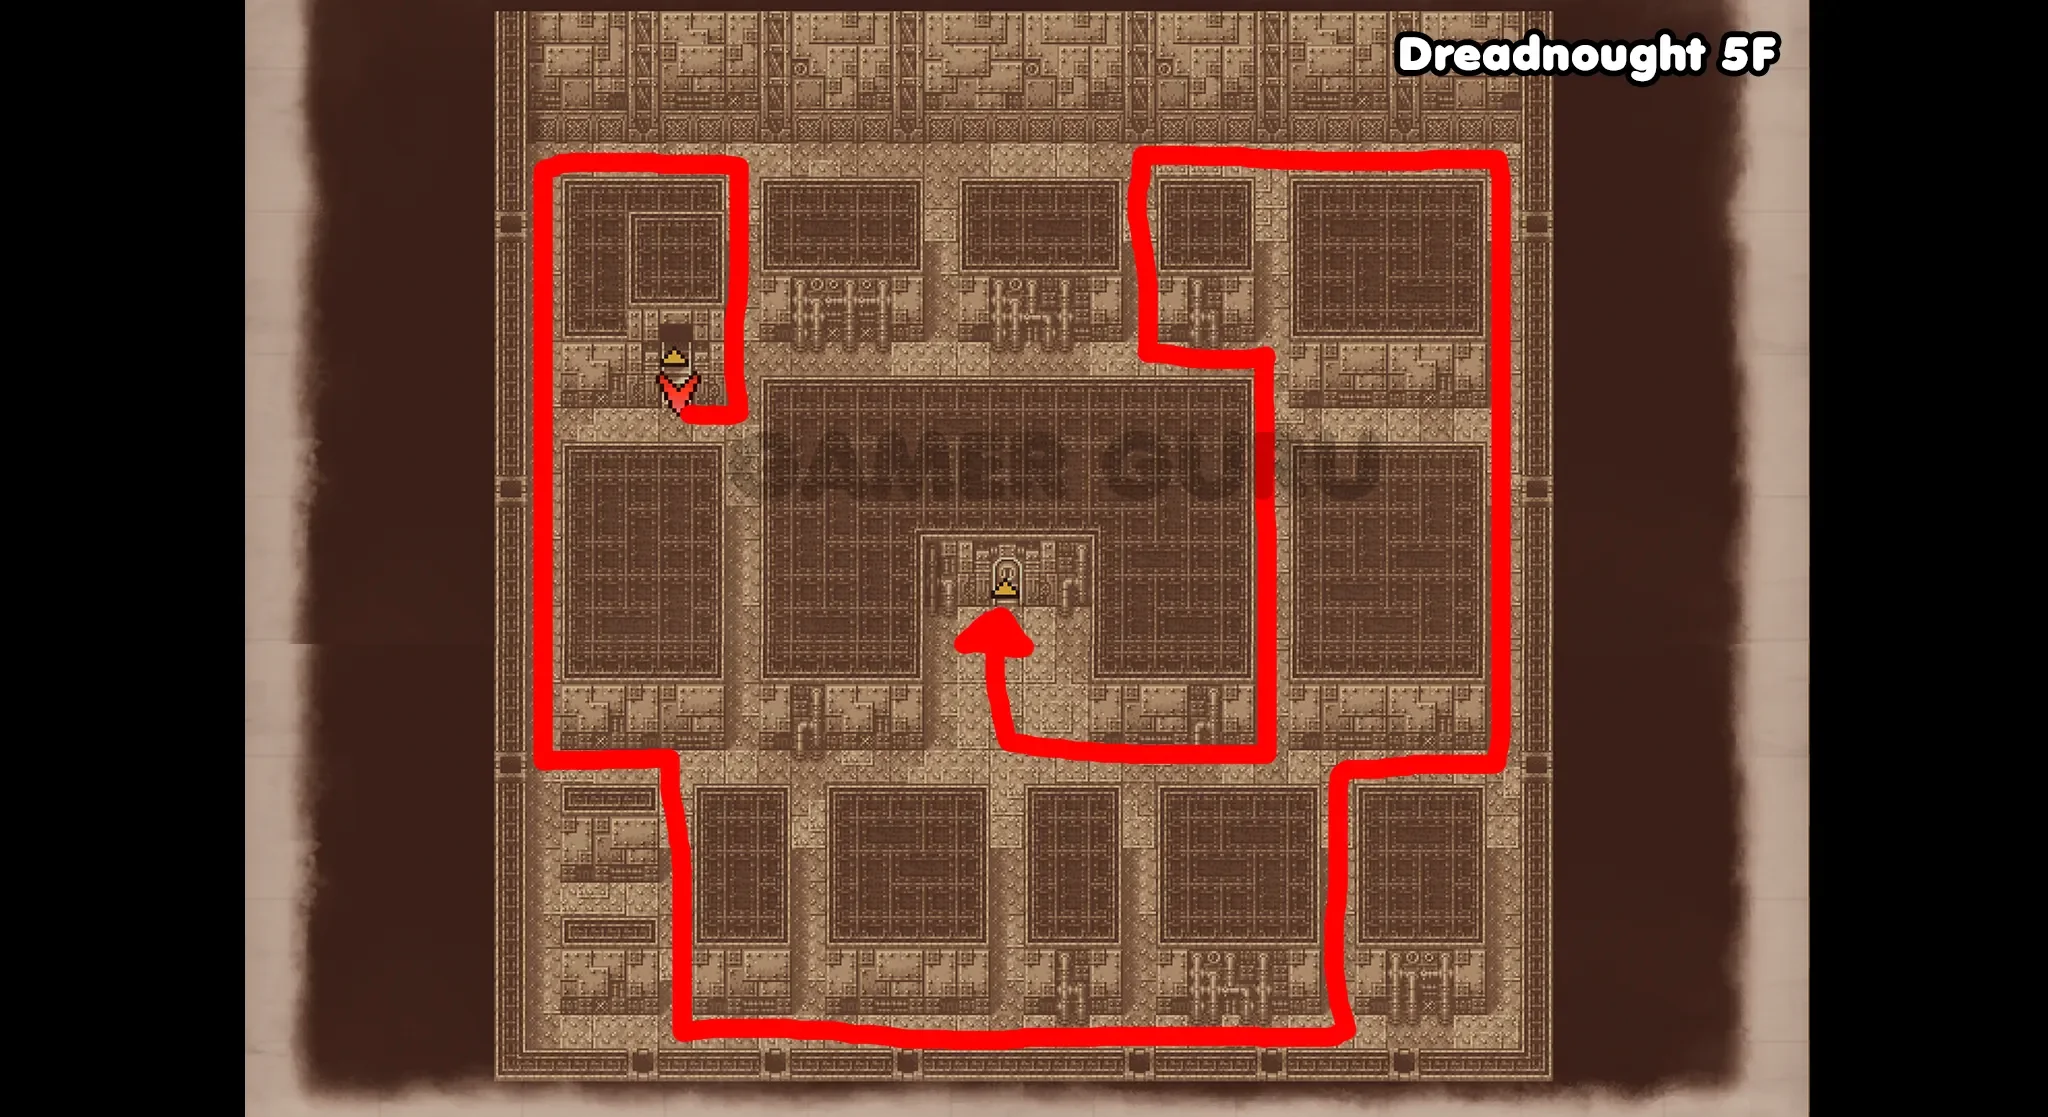
5F
This floor is basically a maze where you have to find your way past the guards to reach the door in the middle that leads to the Engine Room.
Follow the red path in the image below to reach the door quickly.
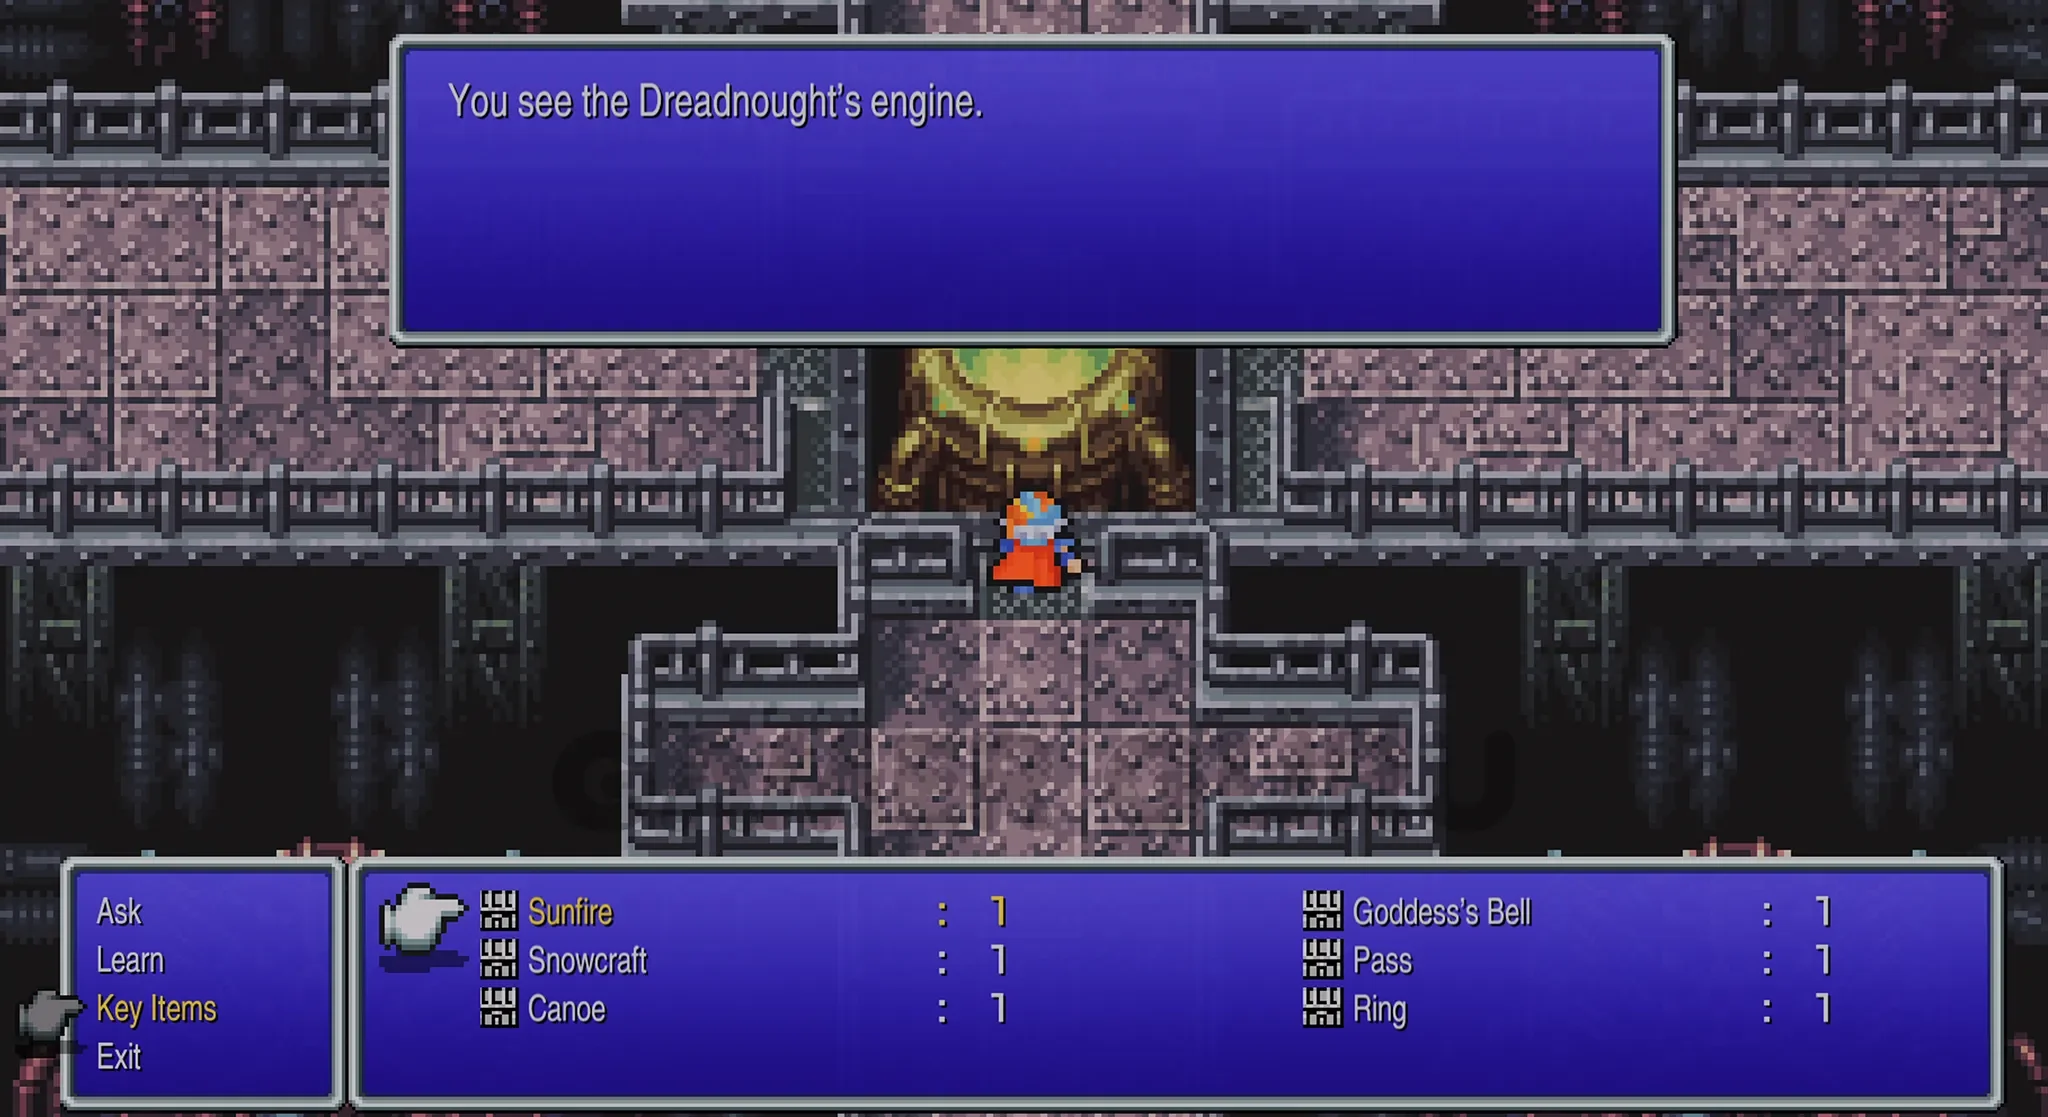
When you’re in the Engine Room, interact with the furnace and use Key Item > Sunfire to destroy the Dreadnought and complete the dungeon.
 "Counterattack" Trophy for reaching this far in the main story.