
Final Fantasy 2 Pixel Remaster 100% Walkthrough - Castle Fynn

In the previous chapter of the walkthrough we just finished the Coliseum and now it is time to head back to Altair again!
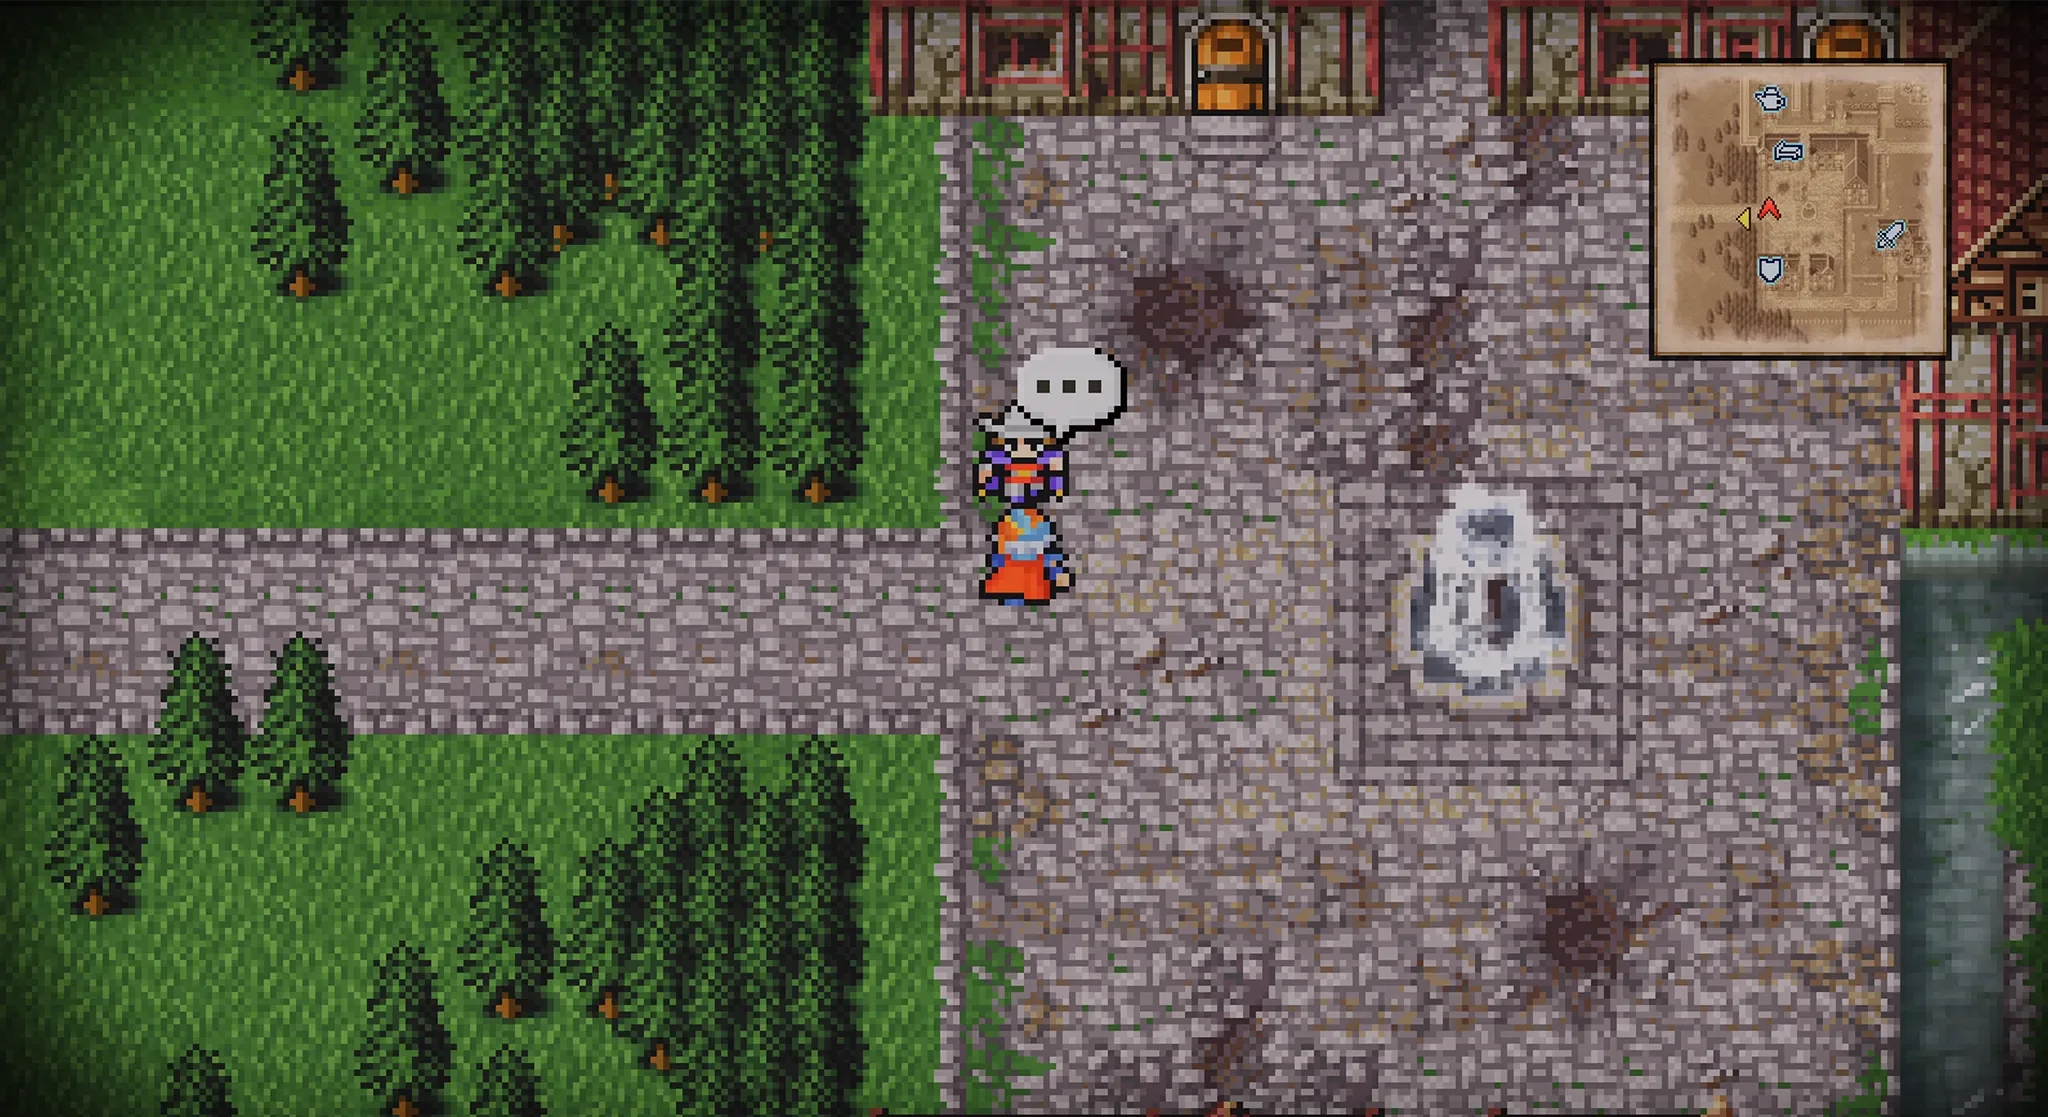
When you arrive in Altair, speak with the new guard near the entrance, he will mention that Hilda is at the Rebel Camp near Fynn.
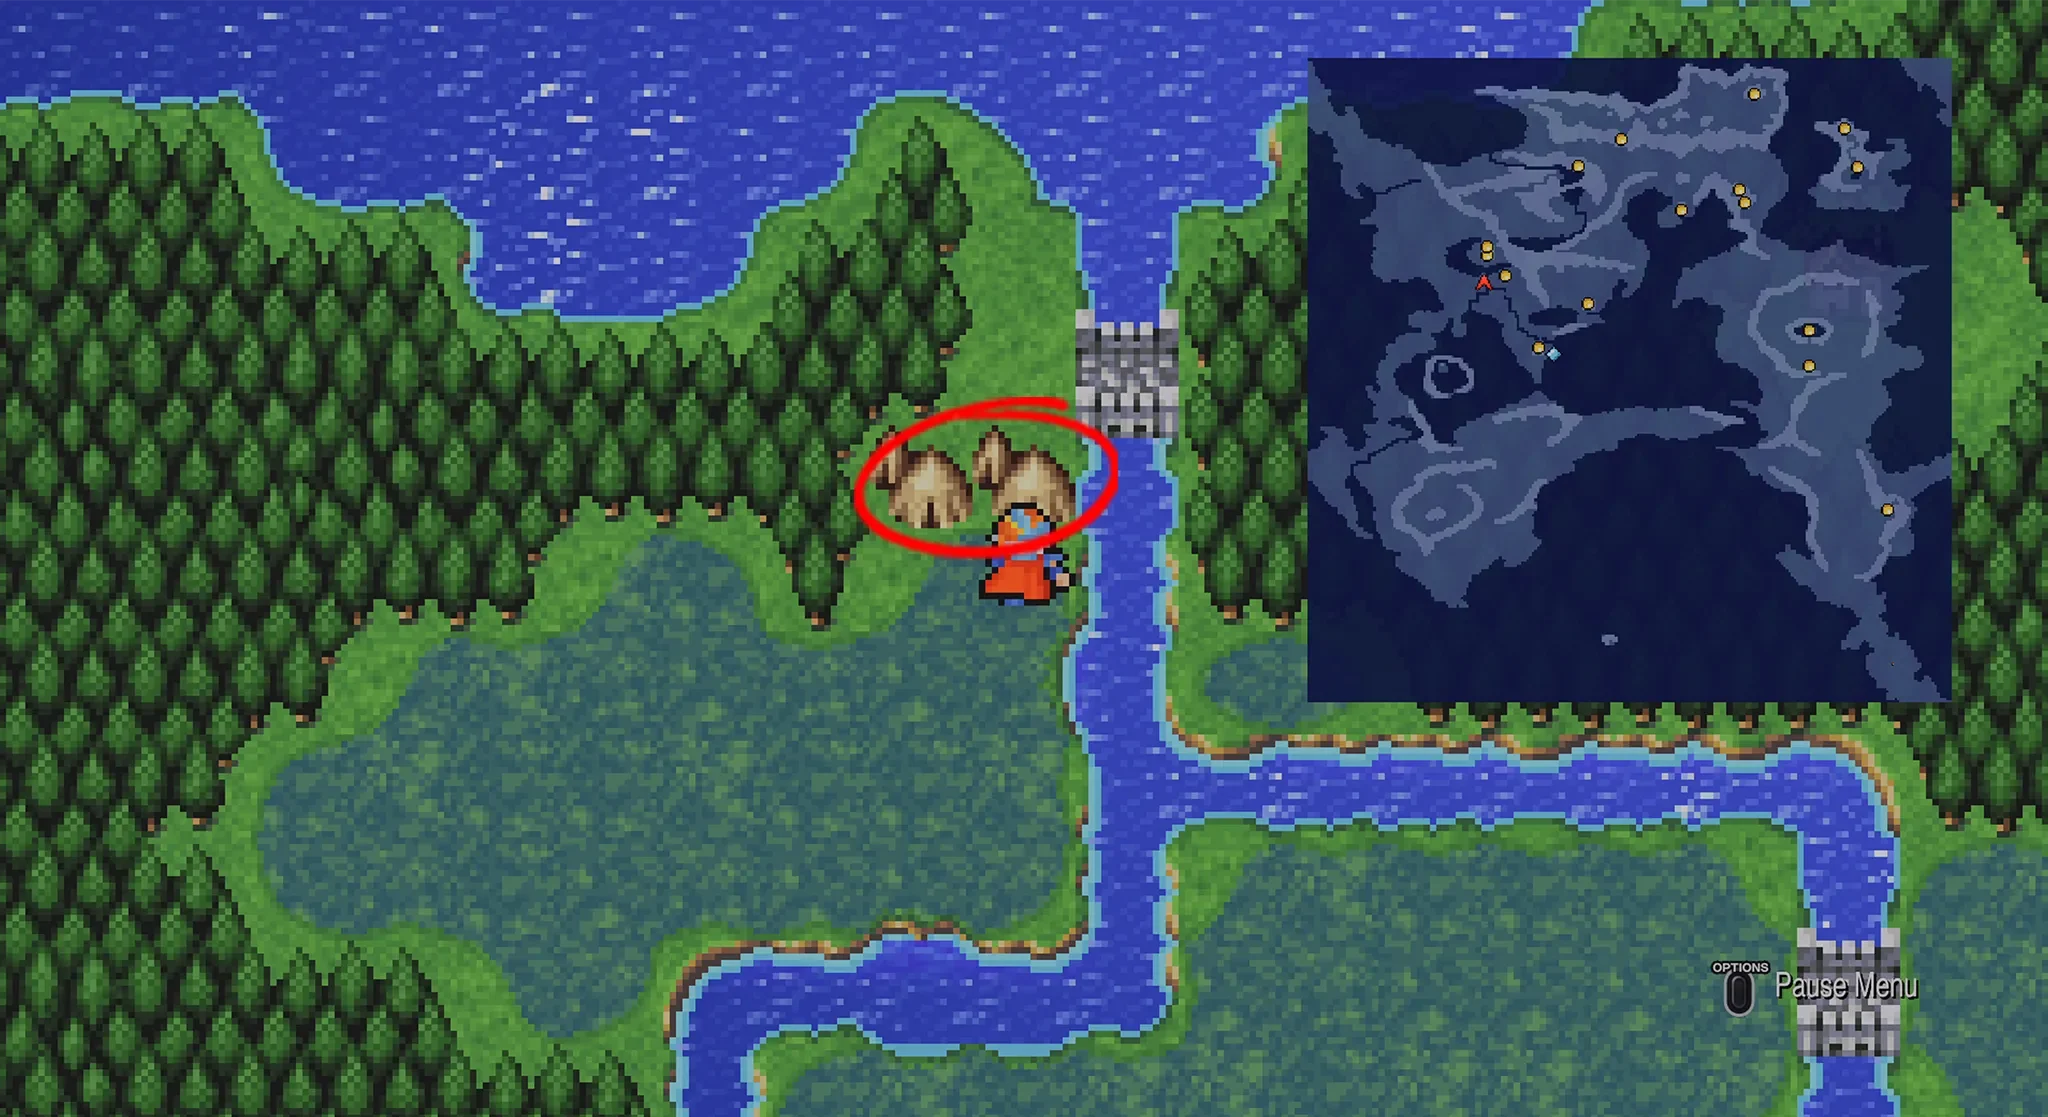
Missable Location: Rebel Camp
There will now be a Rebel Camp set up just across the bridge to the west of Gatrea which you will most likely visit anyway for the story but you can technically skip it as it is optional, so make sure to go there at least once as it will disappear after retaking Castle Fynn and you need to visit all locations for the “Adventurous Wayfarer” Trophy.
Castle Fynn
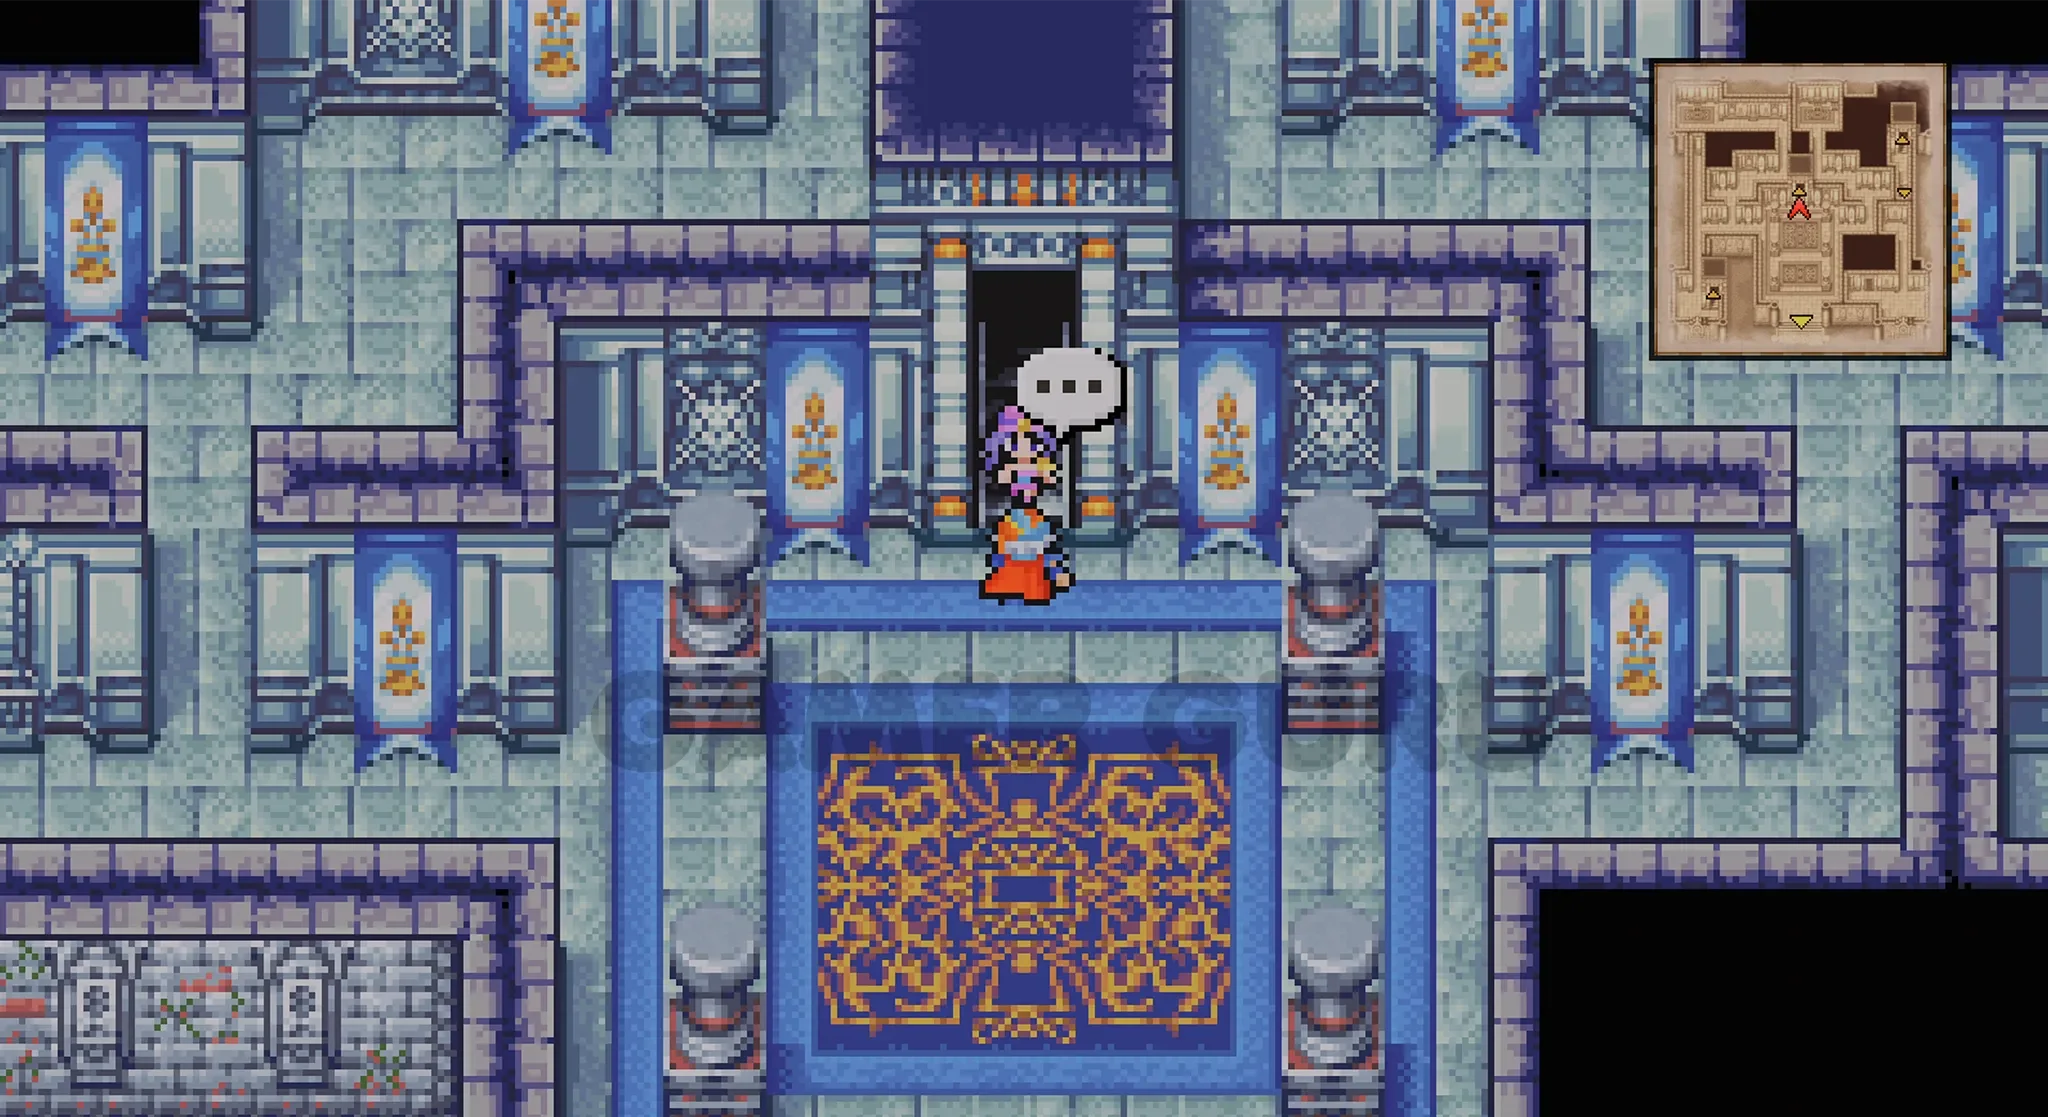
Once you have made sure to have visited the Rebel Camp, it is time to head for Castle Fynn.
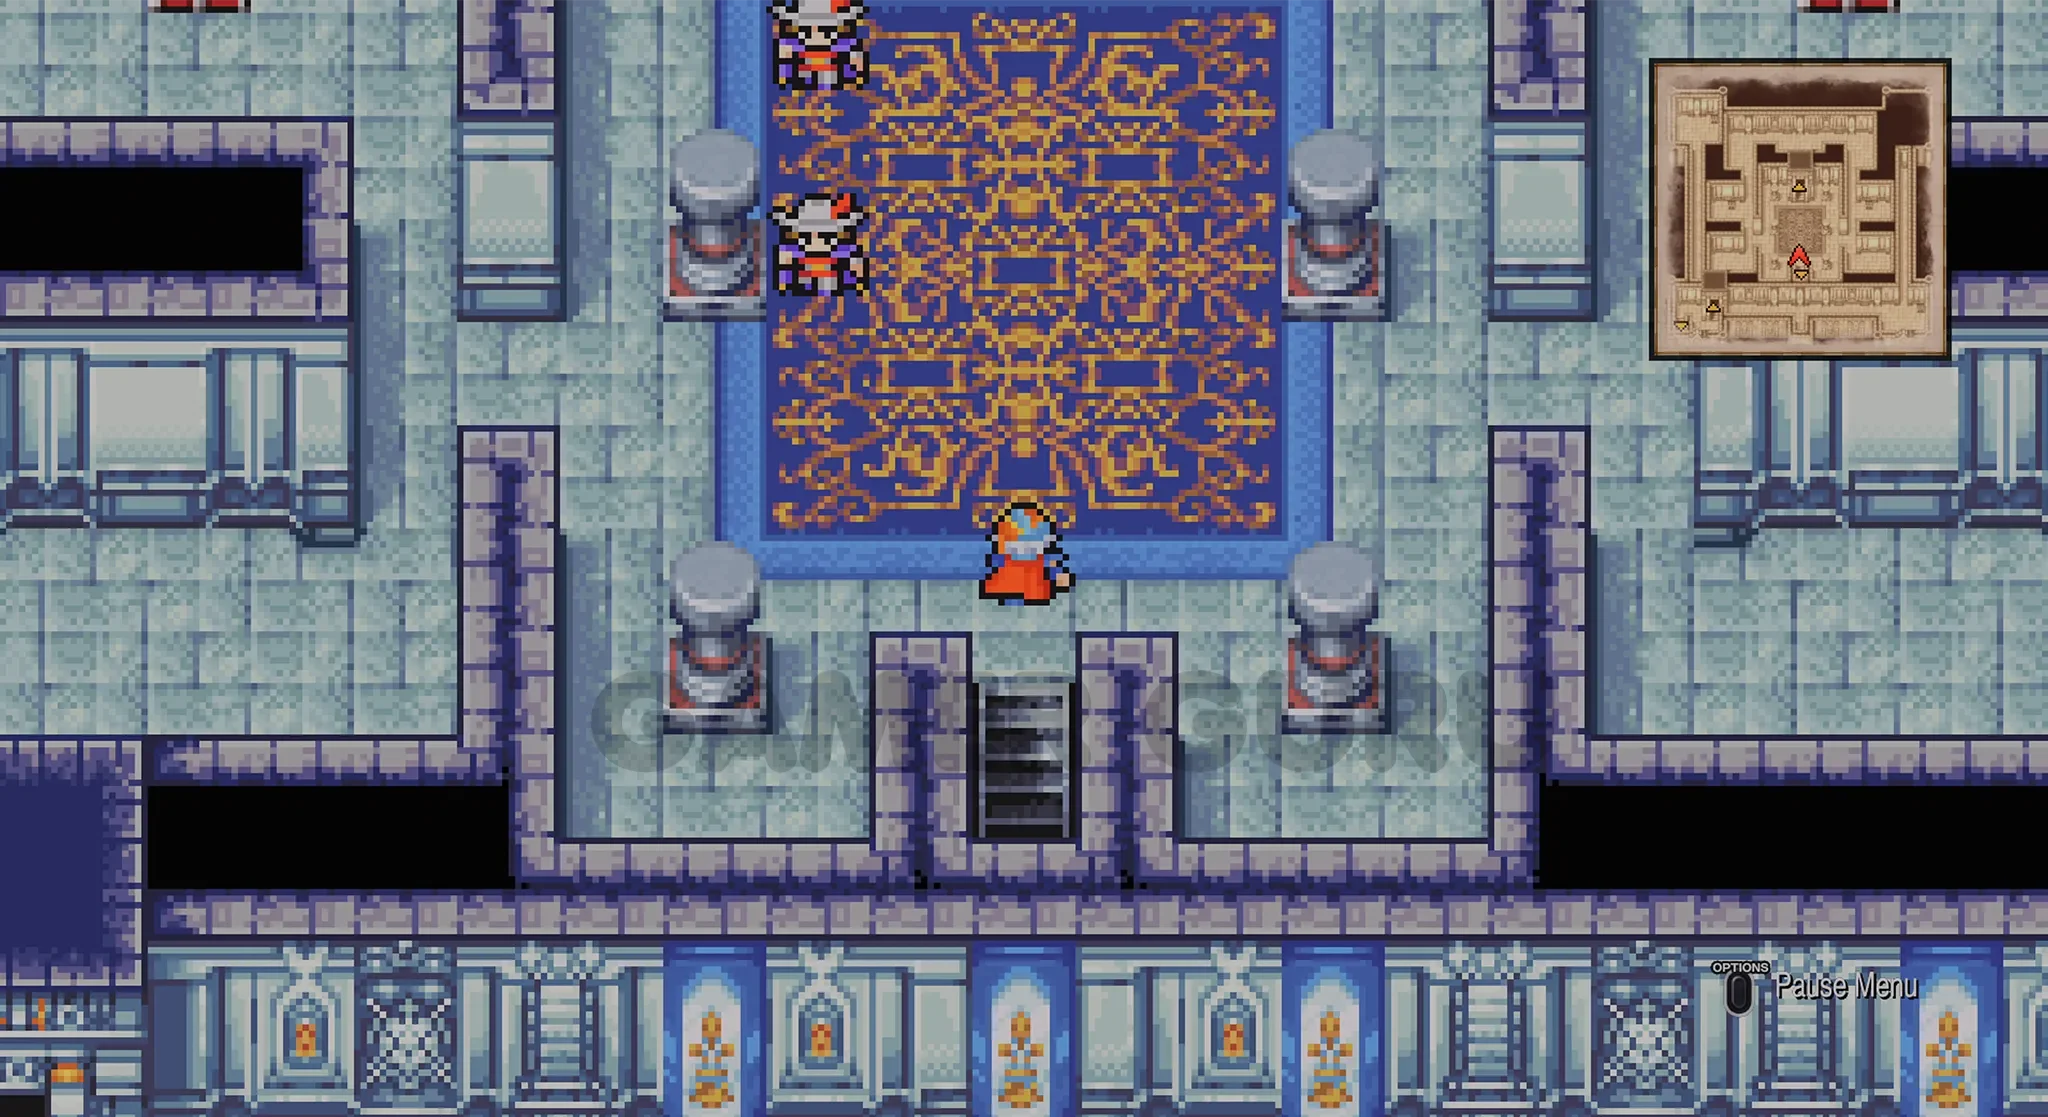
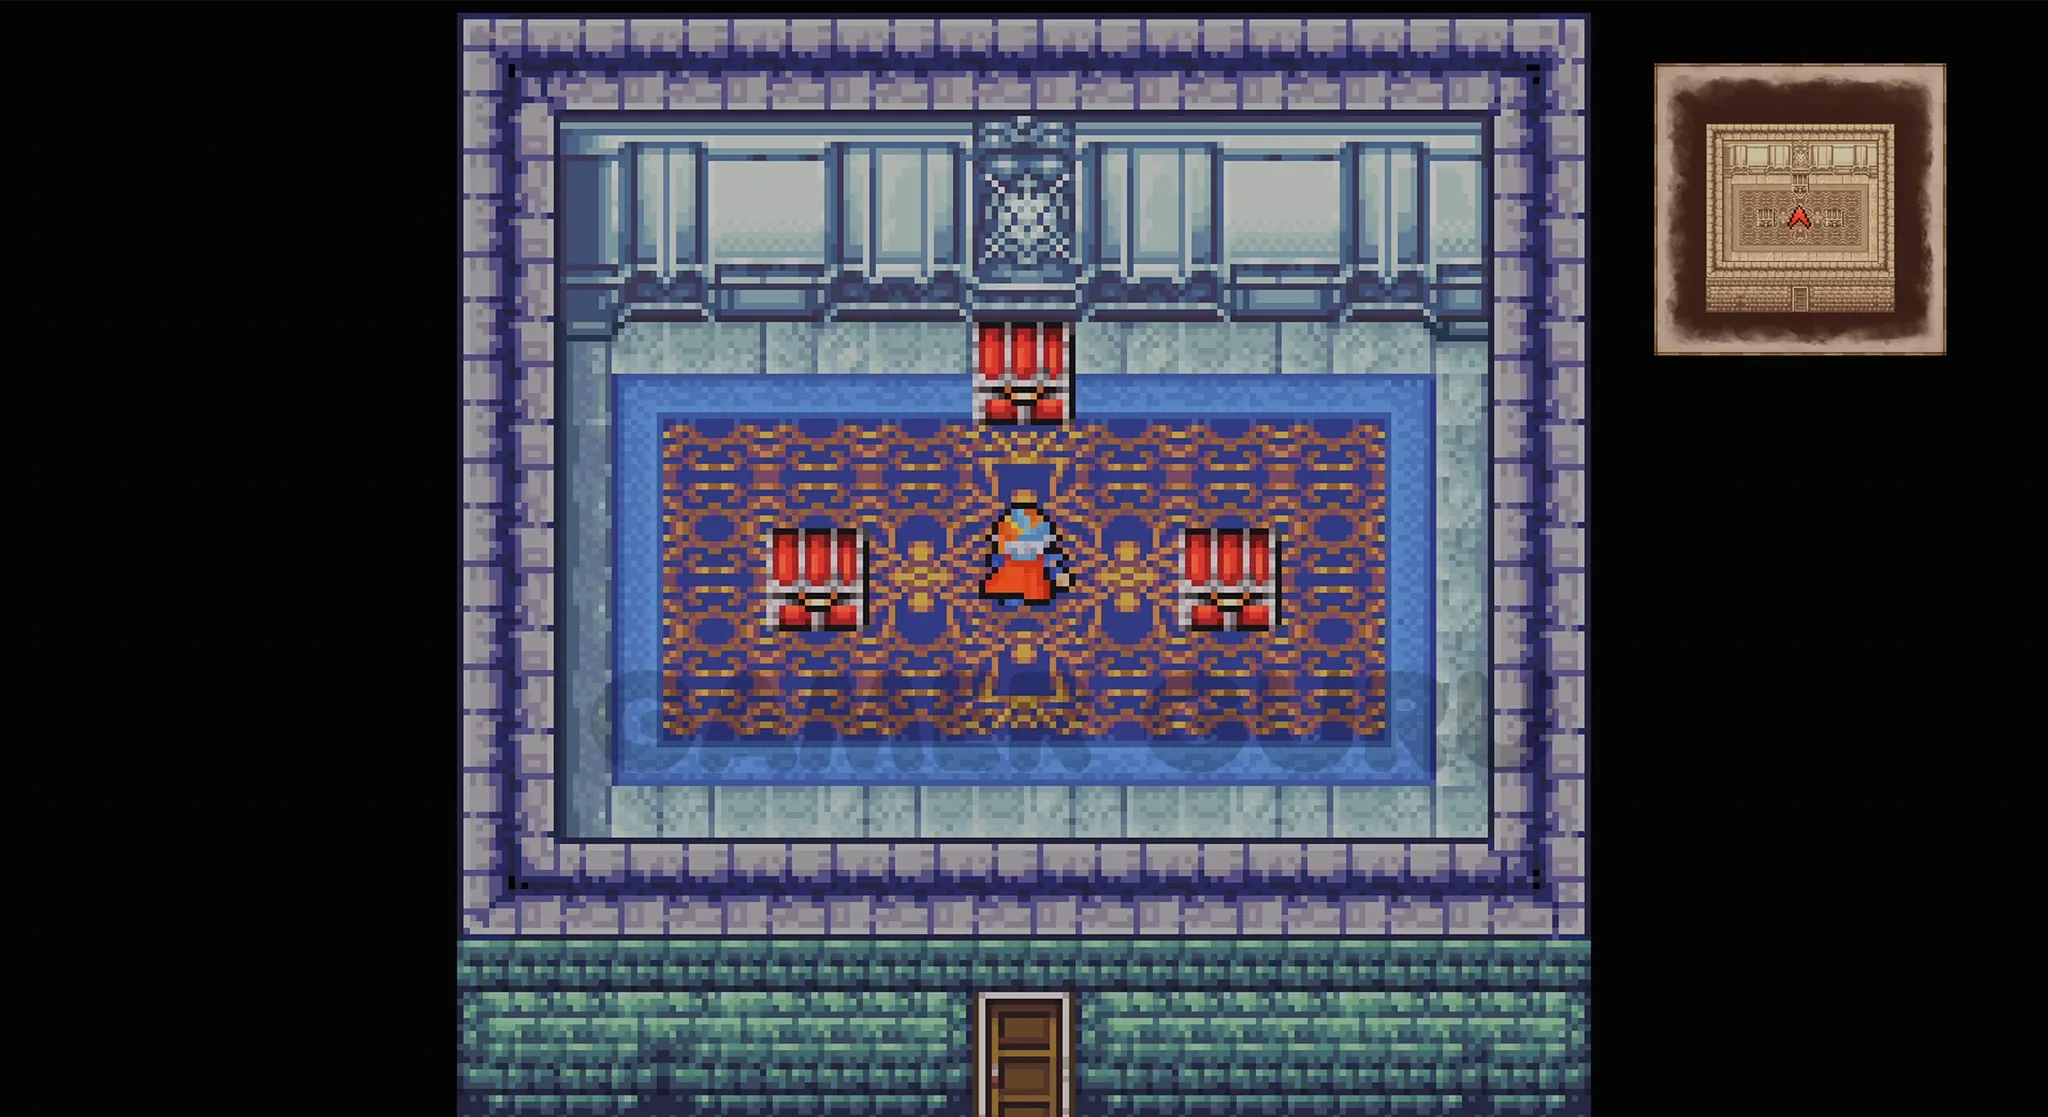
As soon as you enter you will see Leila waiting for you, she will re-join your party again here. For now don’t worry about any chests, we will be getting them all in a little while, for now just go straight up the stairs in the middle of each room until you reach the Throne Room.
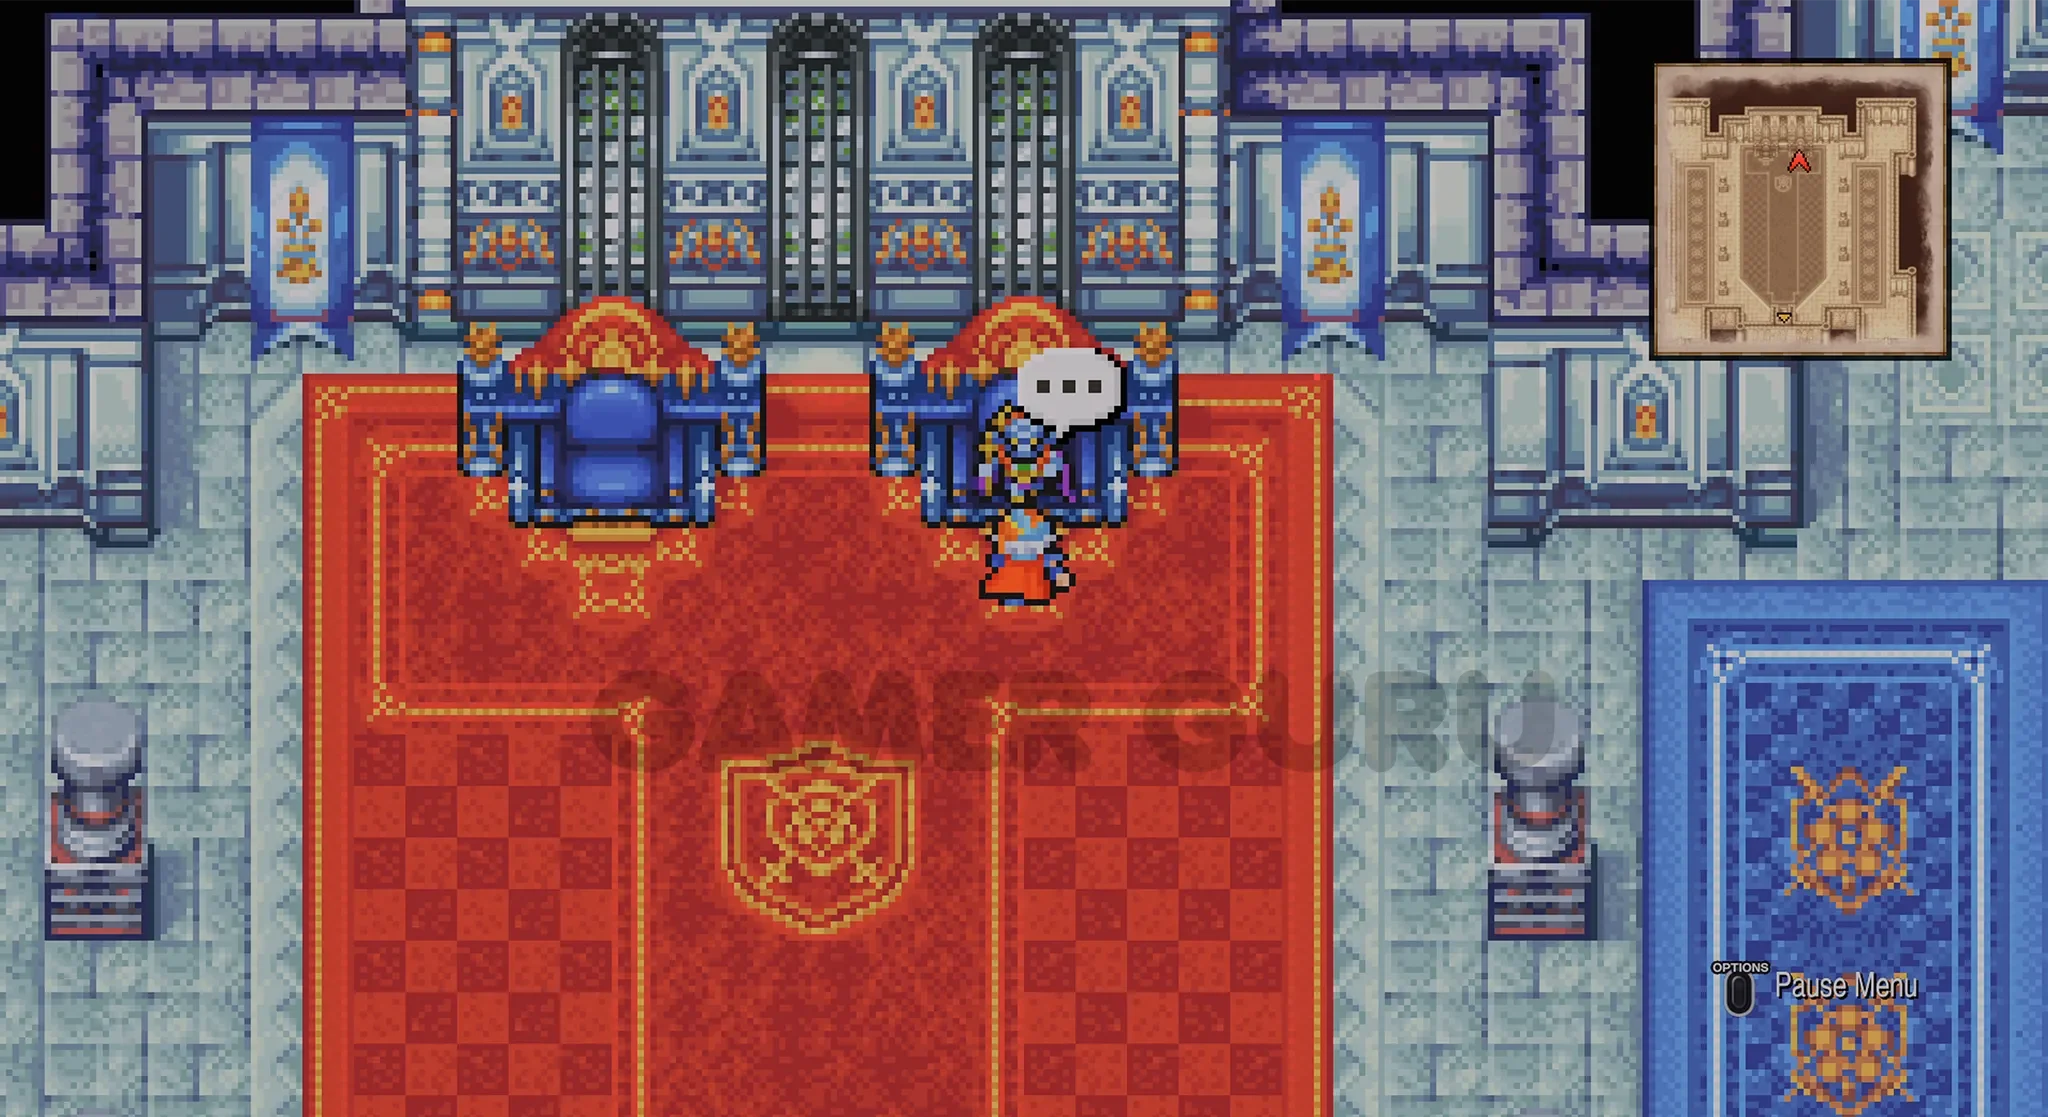
In the Throne Room interact with Gottos to start another Boss Fight.
 “Rebel Victory” Trophy.
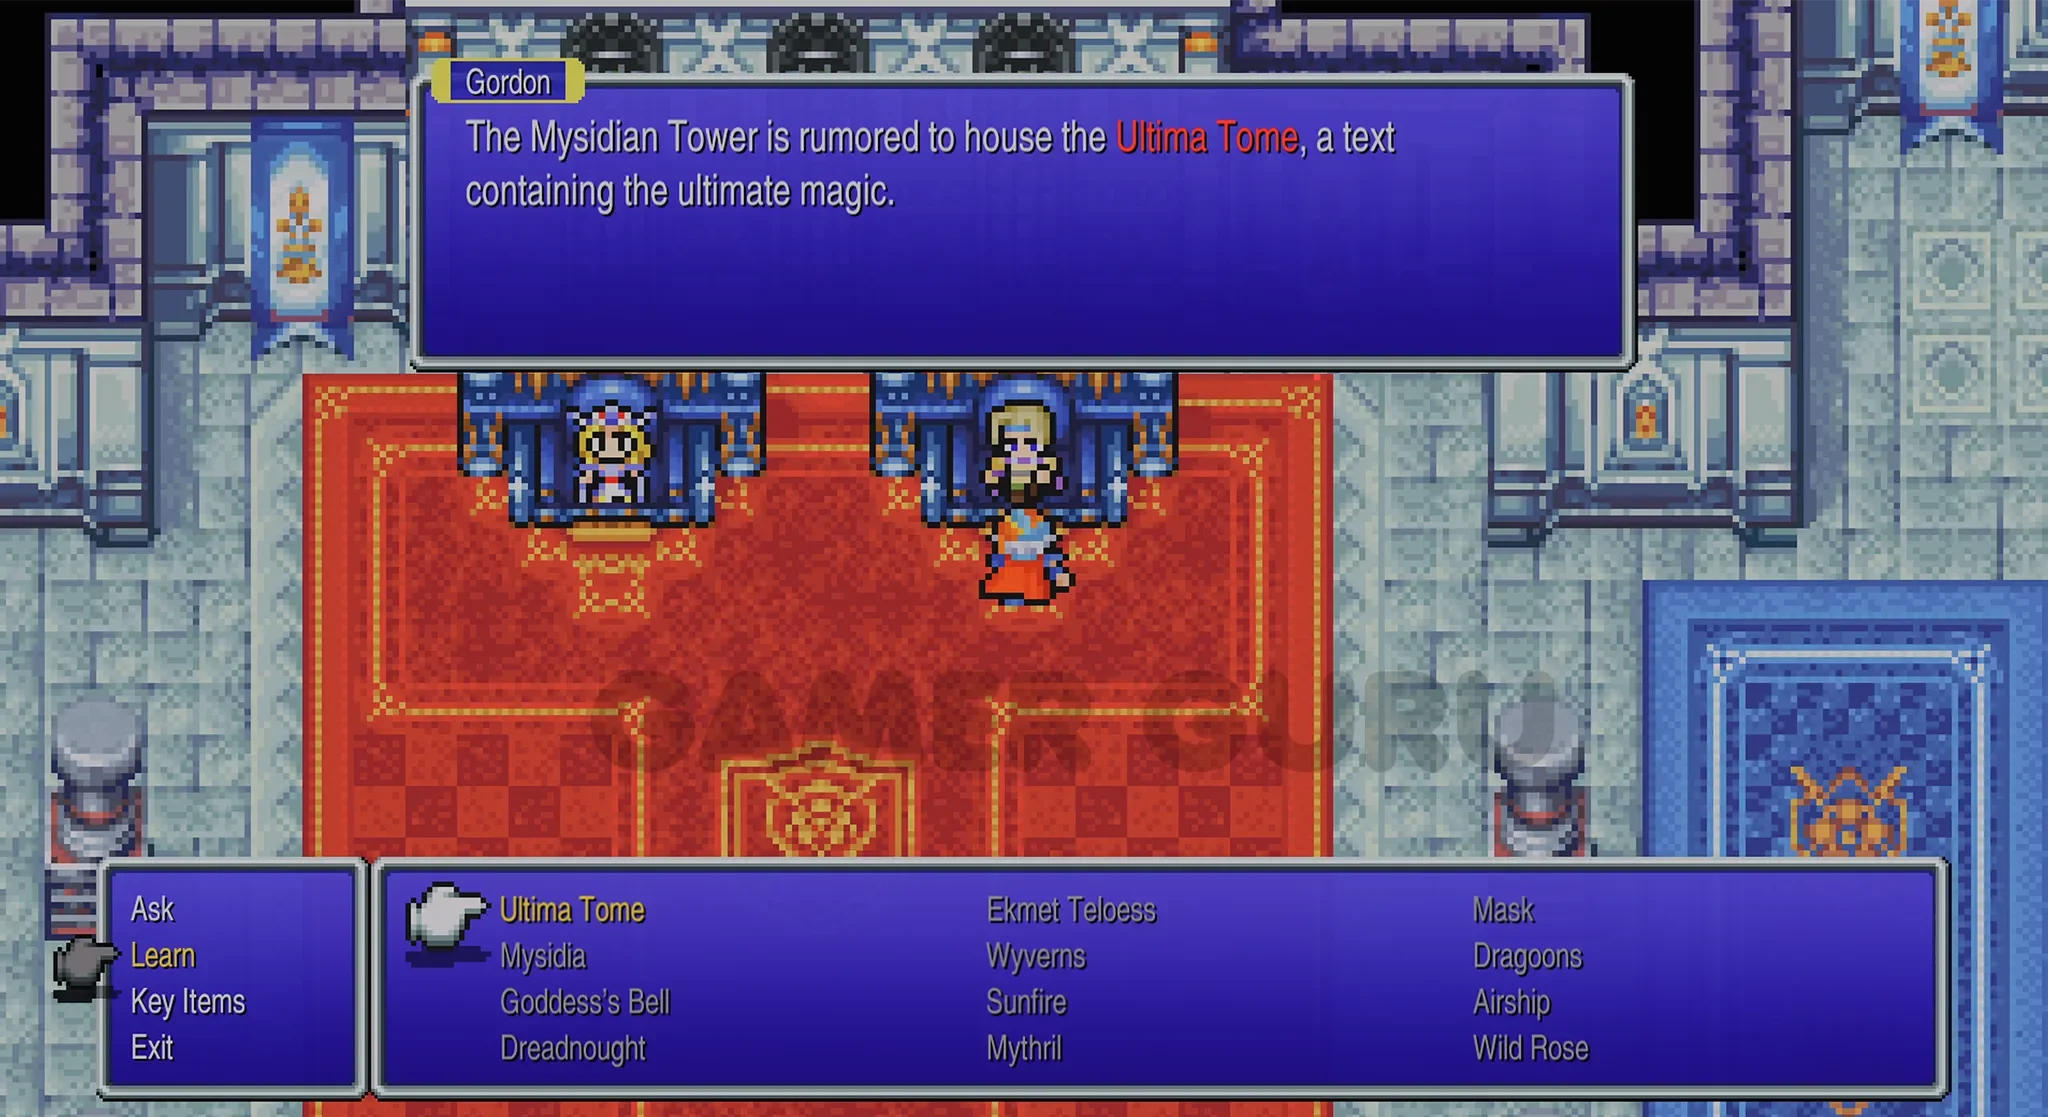
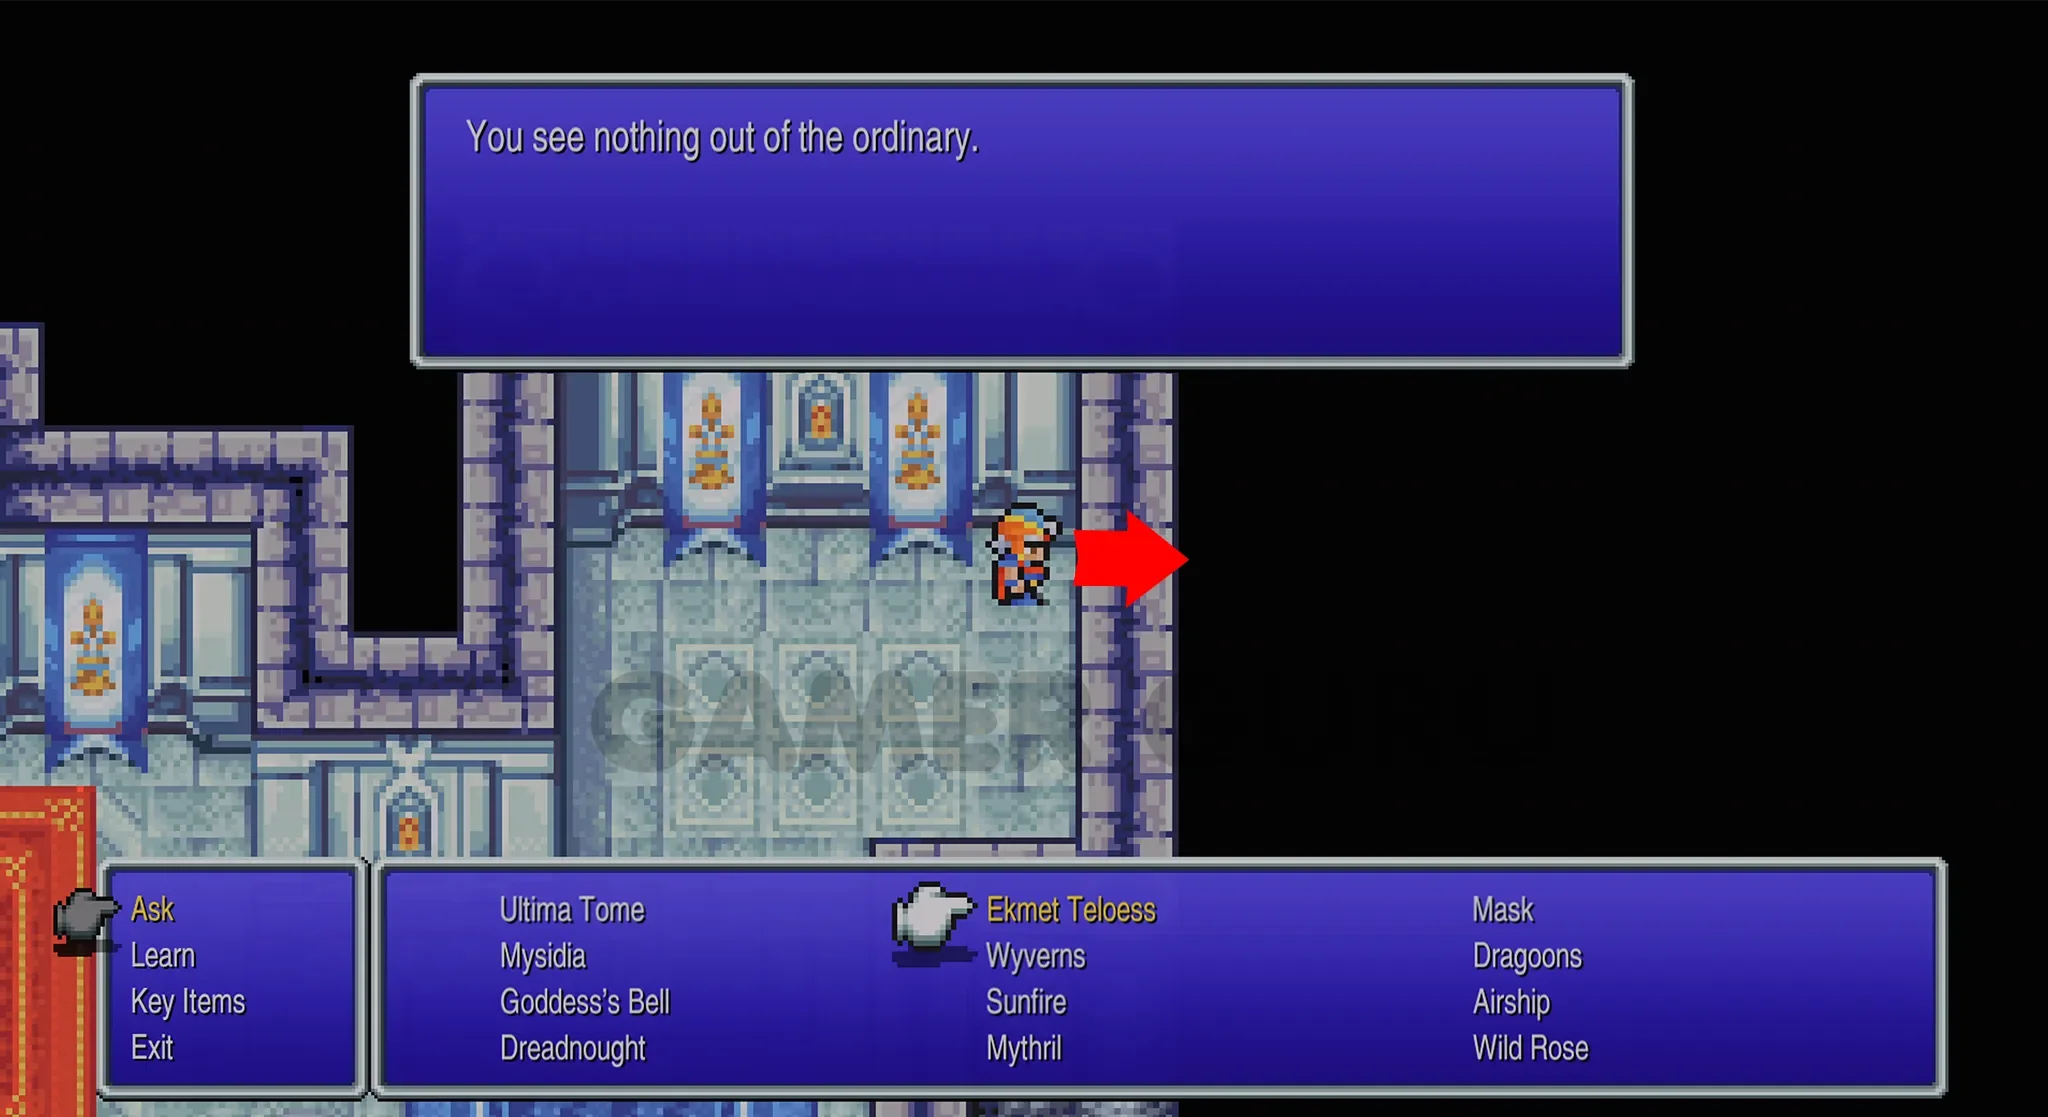
When you speak to princess Hilda she will mention Mysidia, this is a new password, so Learn it. Then Ask Hilda about Mysidia and she will mention another password, Mask, Learn this one too, and again Ask about the Mask and she will mention yet another password for us to Learn, Ekmet Teloess.


Now speak to Gordon on her right, Ask him about Mysidia and he will mention the Ultima Tome password which we can also Learn.
(The Ultima Tome Password is missable so make sure you Learn it here!)
Now that we have learnt all 4 new passwords it’s time to start exploring the castle and getting all of the treasure chests for this location!
1F
To keep things in order let’s start back at the entrance of the castle in 1F.
This room has 3 chests we can reach from here, all 3 of them contain Gil. The two in the middle have 2000 Gil and 1000 Gil, the one on the left has another 1000 Gil.
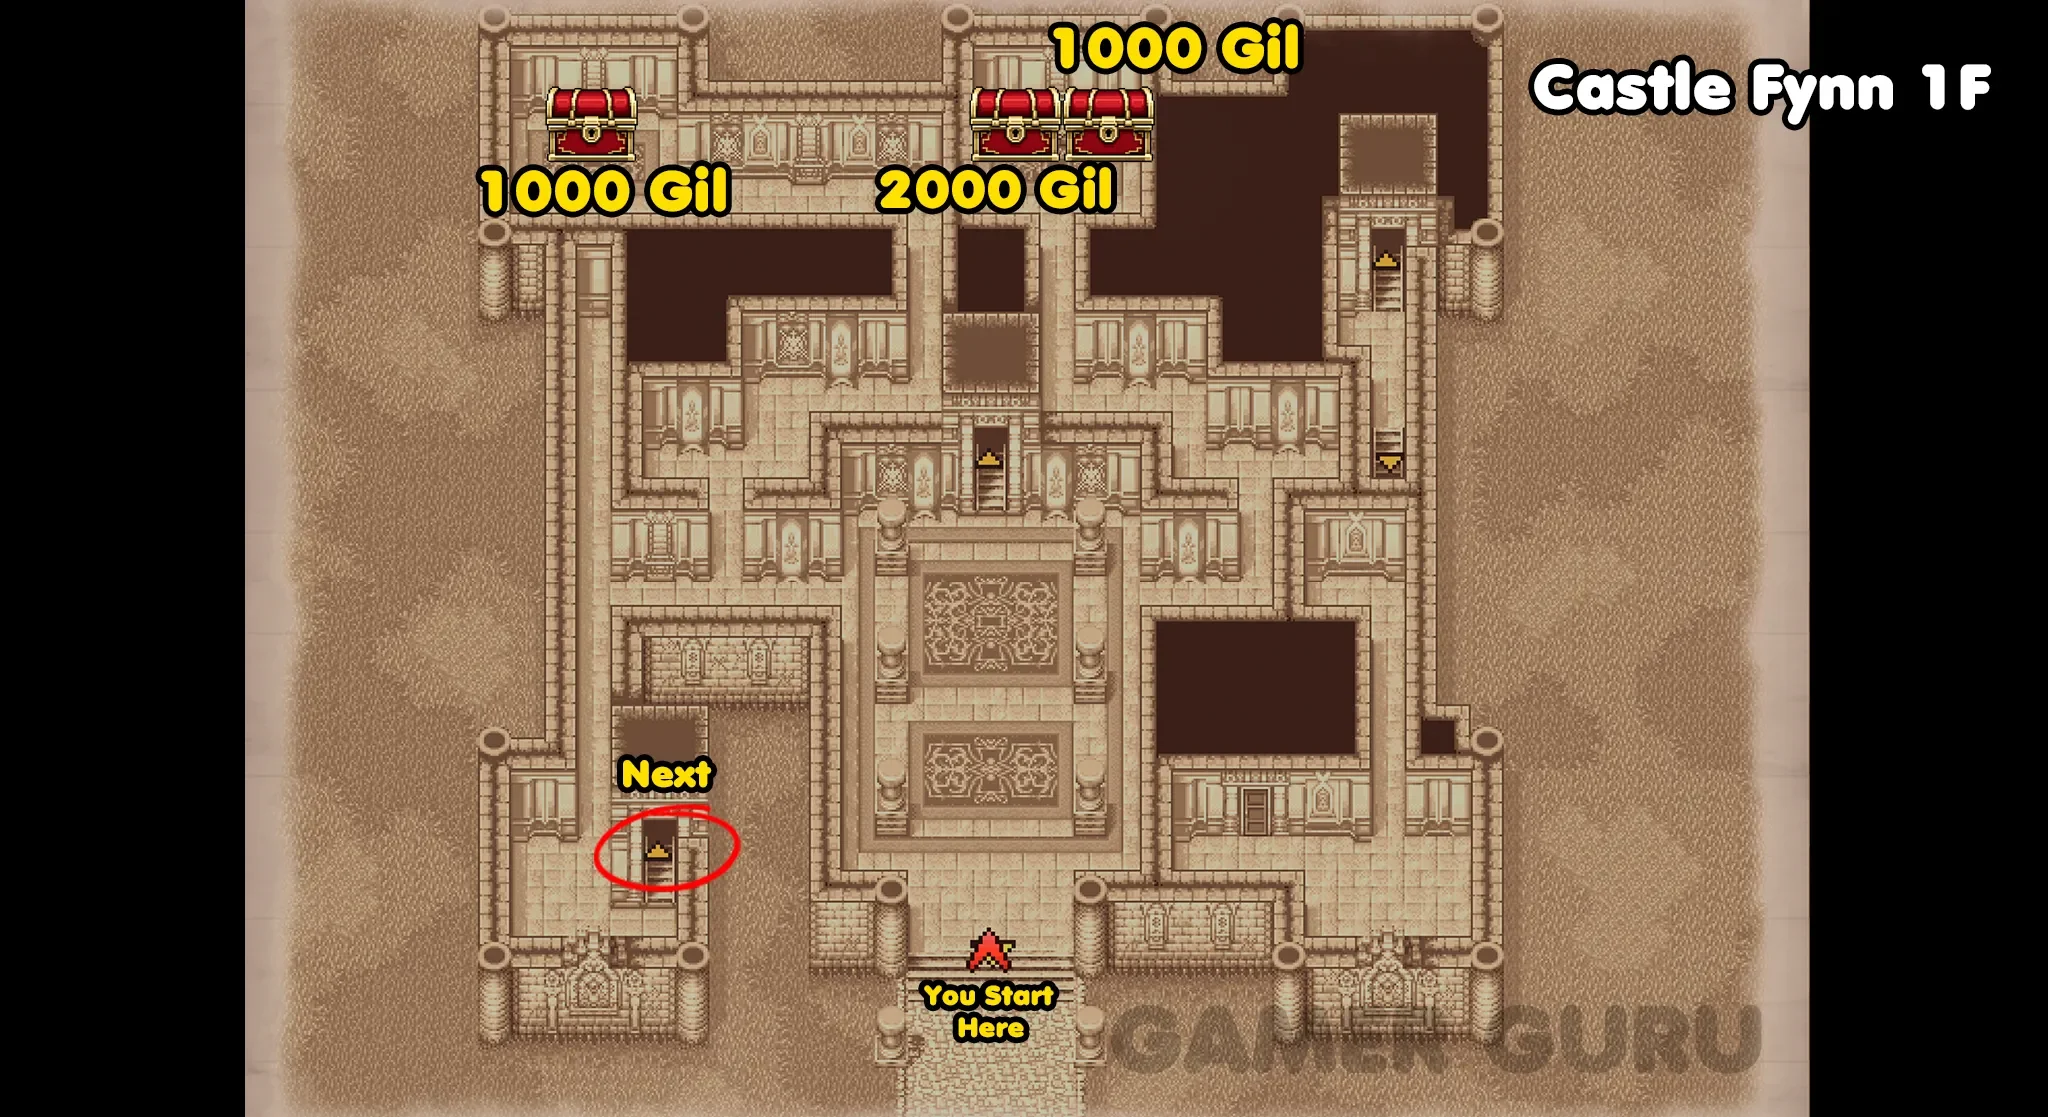
Once you have opened all 3 chests, go up the stairs in the bottom left corner marked in the image, these stairs will take you to 3F.
3F
When you arrive on 3F, go all the way to the right, then up, here you will see a door that will take you to a side room that has 3 more chests.
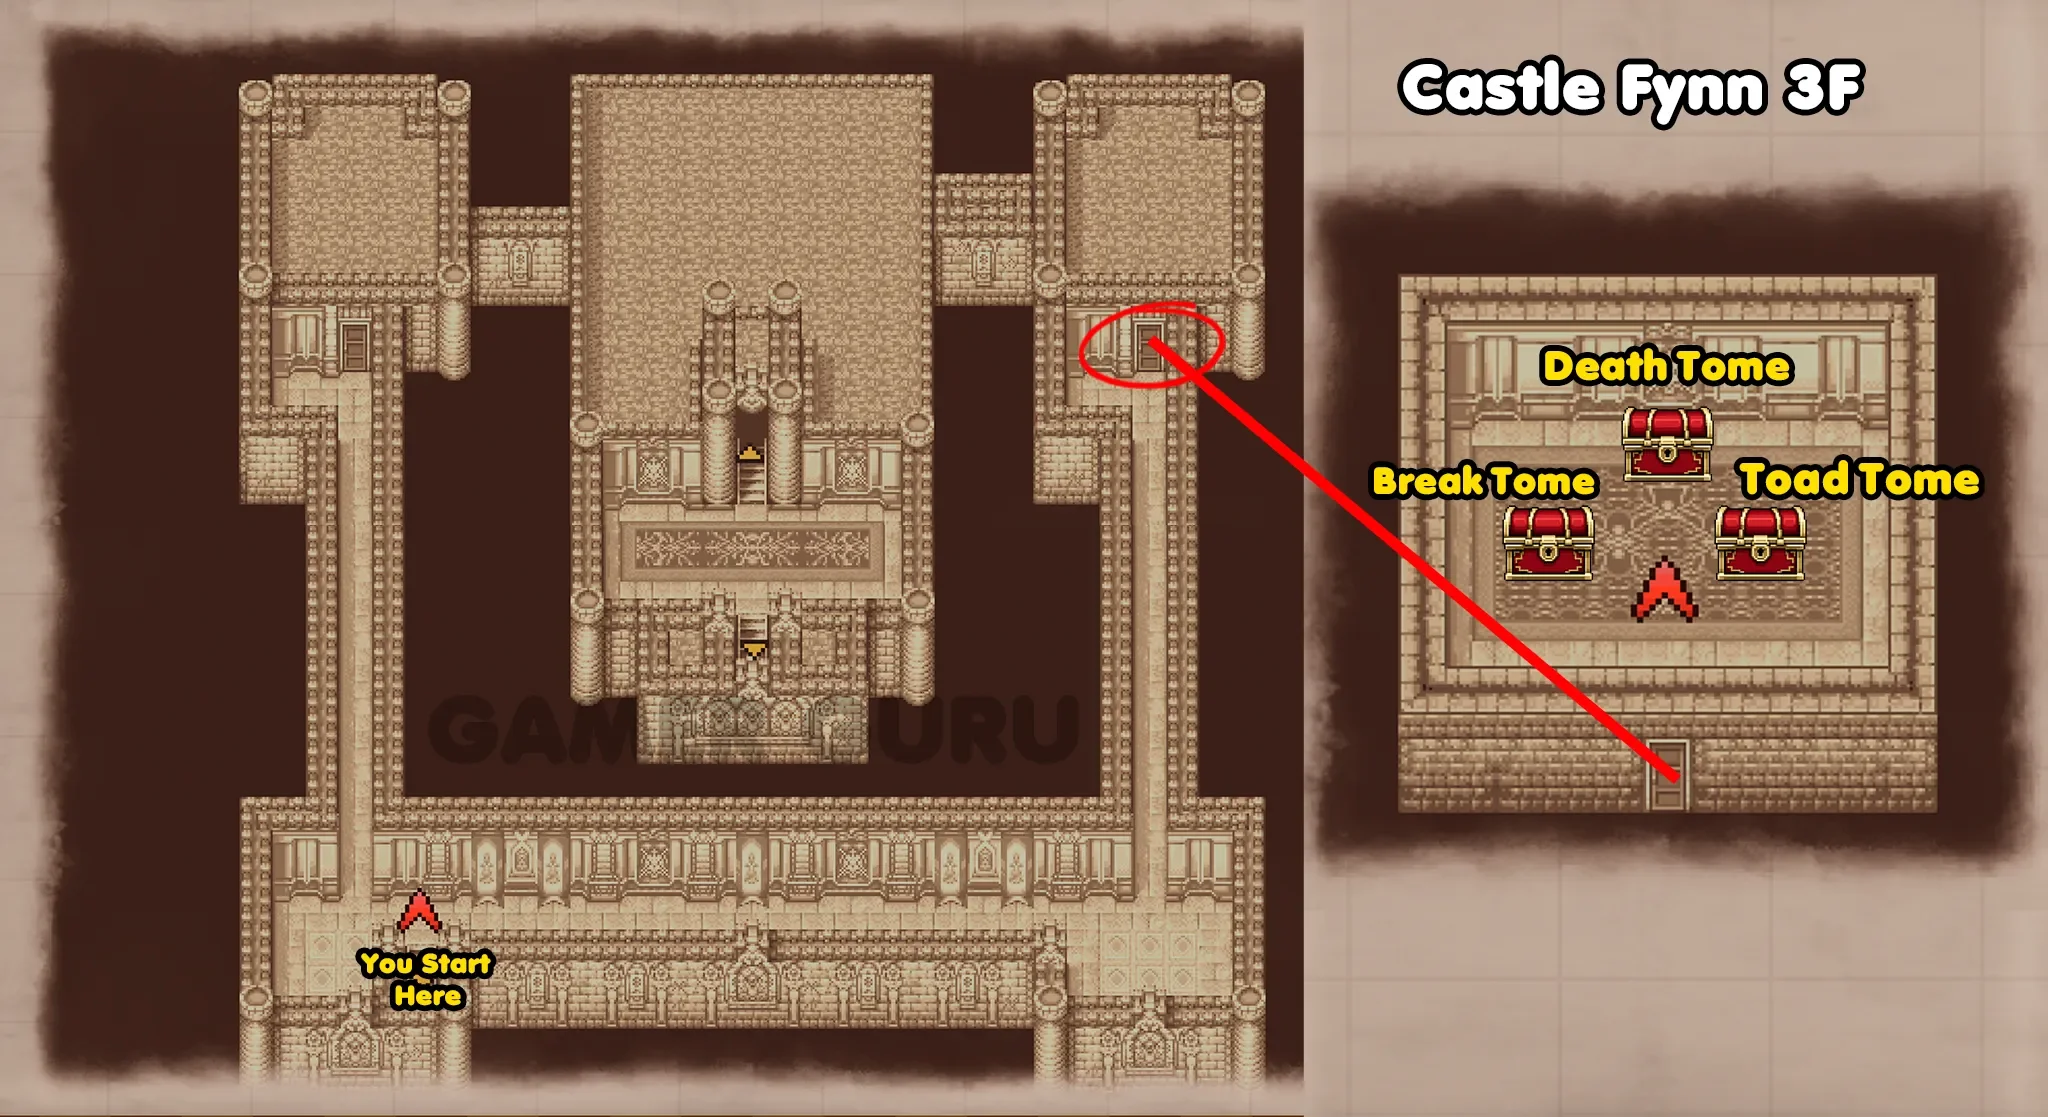
These chests contain a Break Tome, a Death Tome and a Toad Tome.
Once you have opened all 3 head back down to the 1F entrance area, and this time go up the middle stairs to reach 2F.
2F
On floor 2F you can find 4 chests, 2 of them will be in the main room, one on each side, the one on the left contains an Aura Tome and the one on the right has a Potion, be careful as both are enemy ambushes!
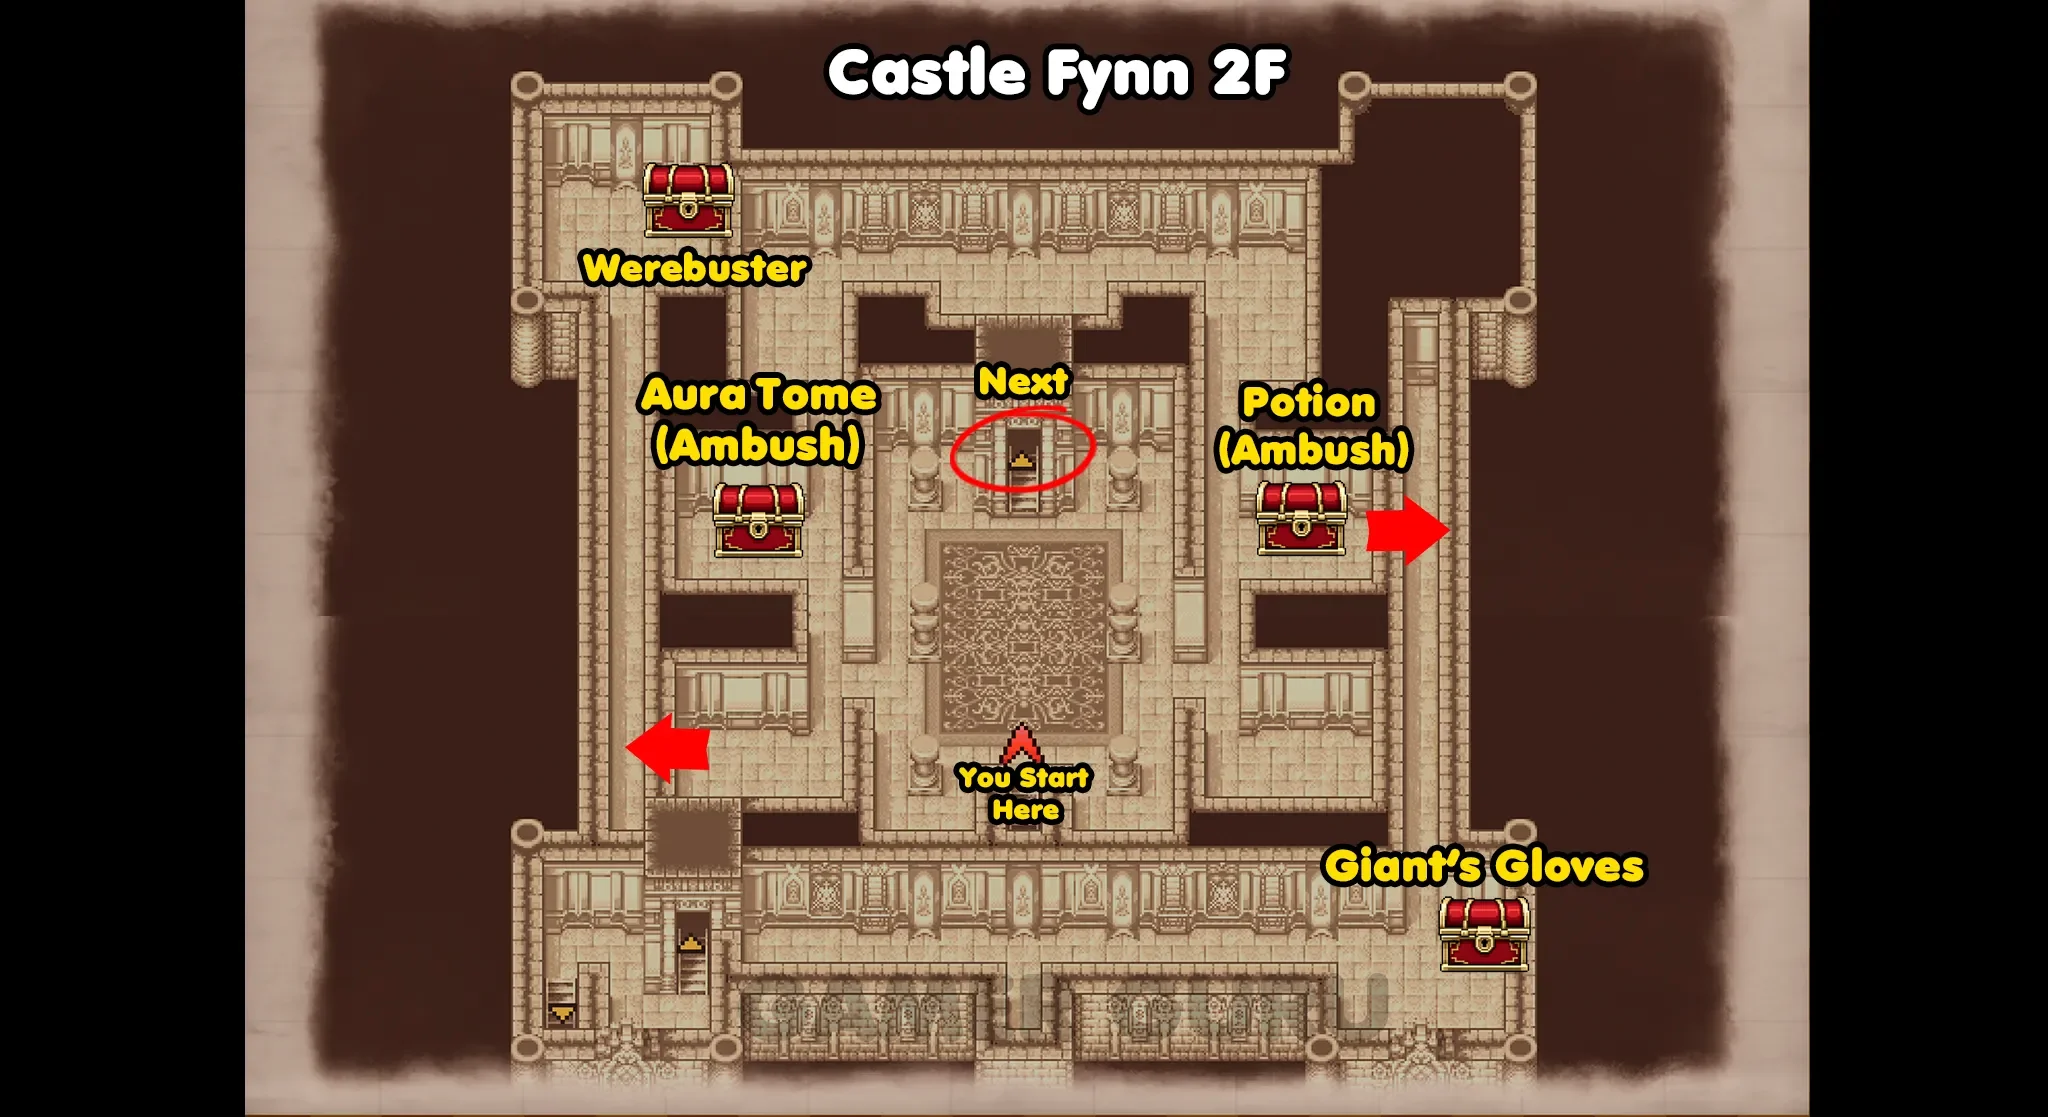
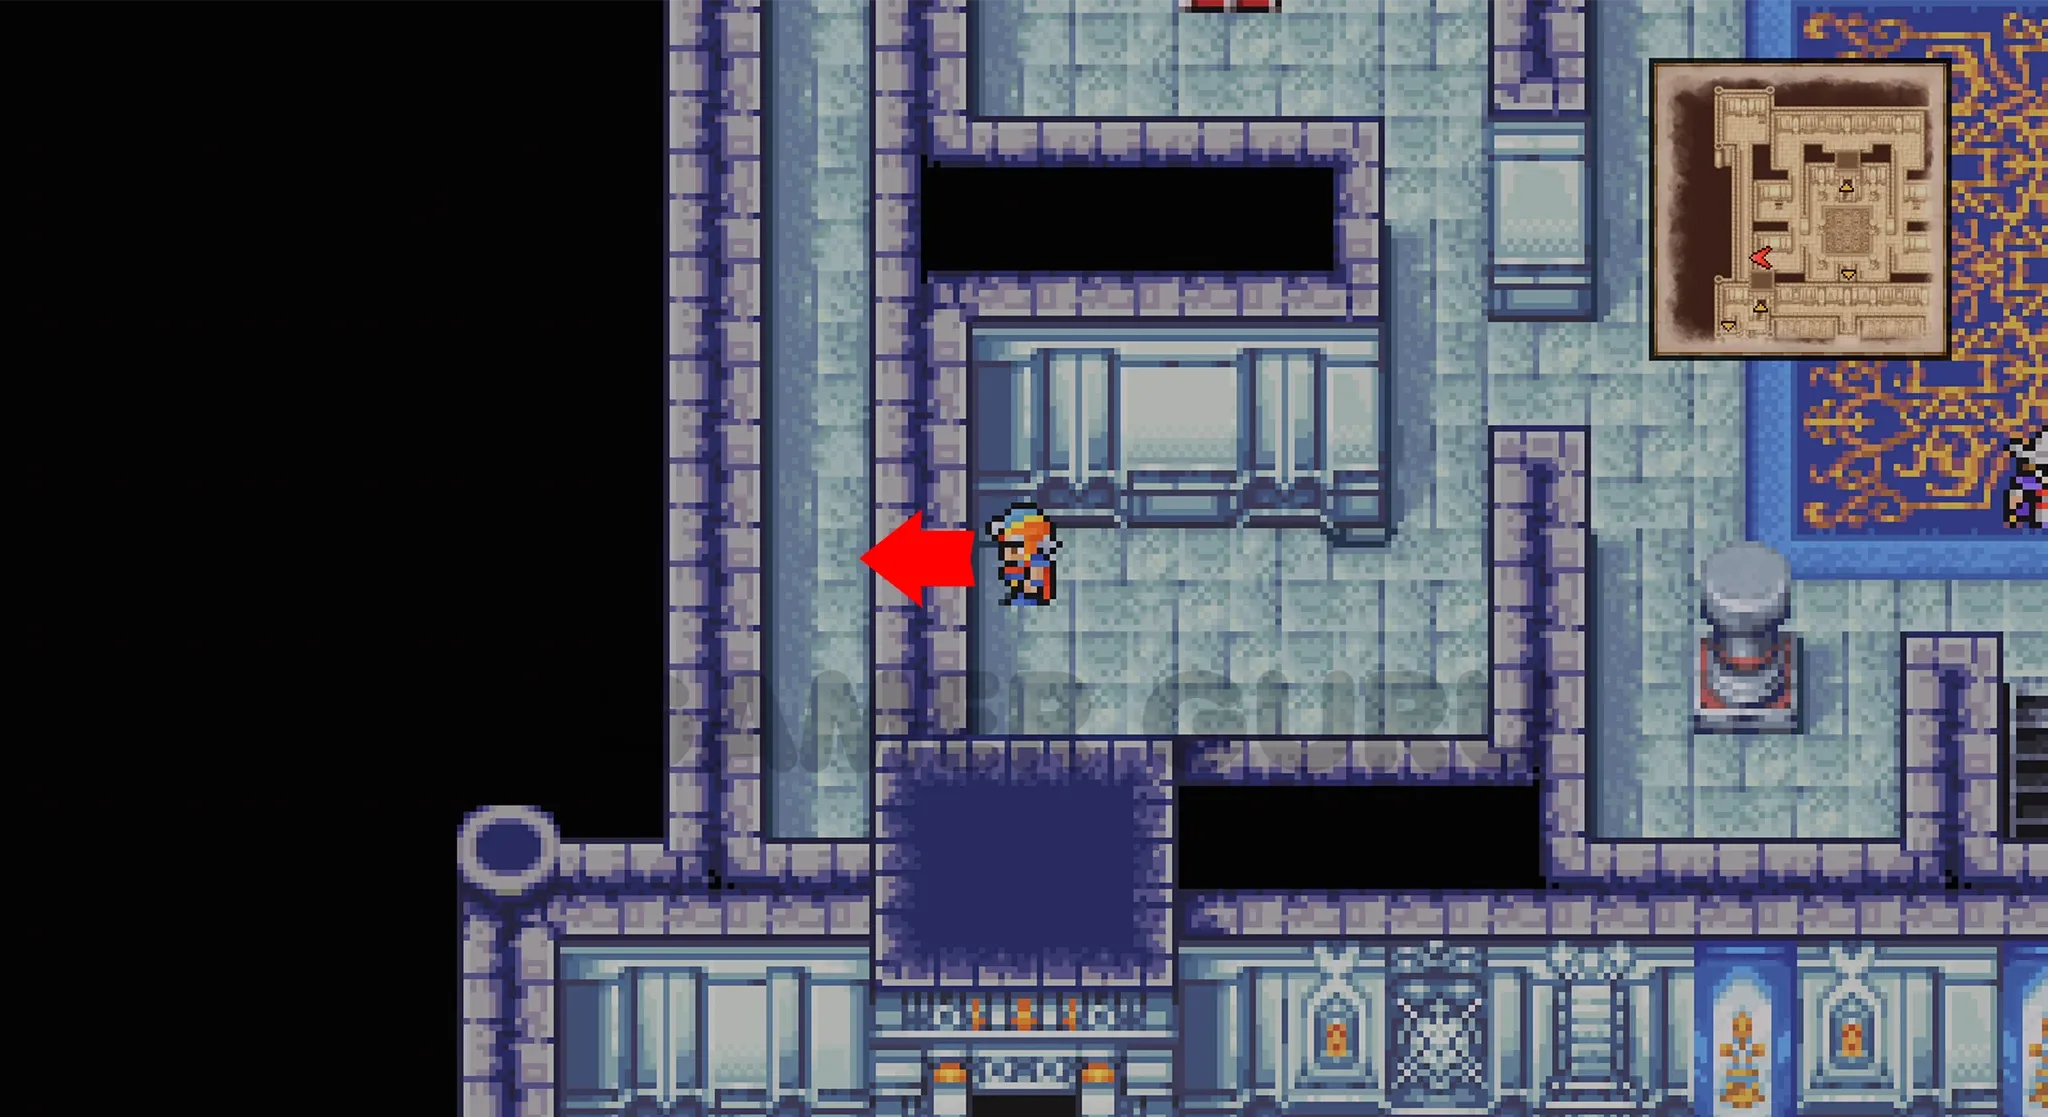
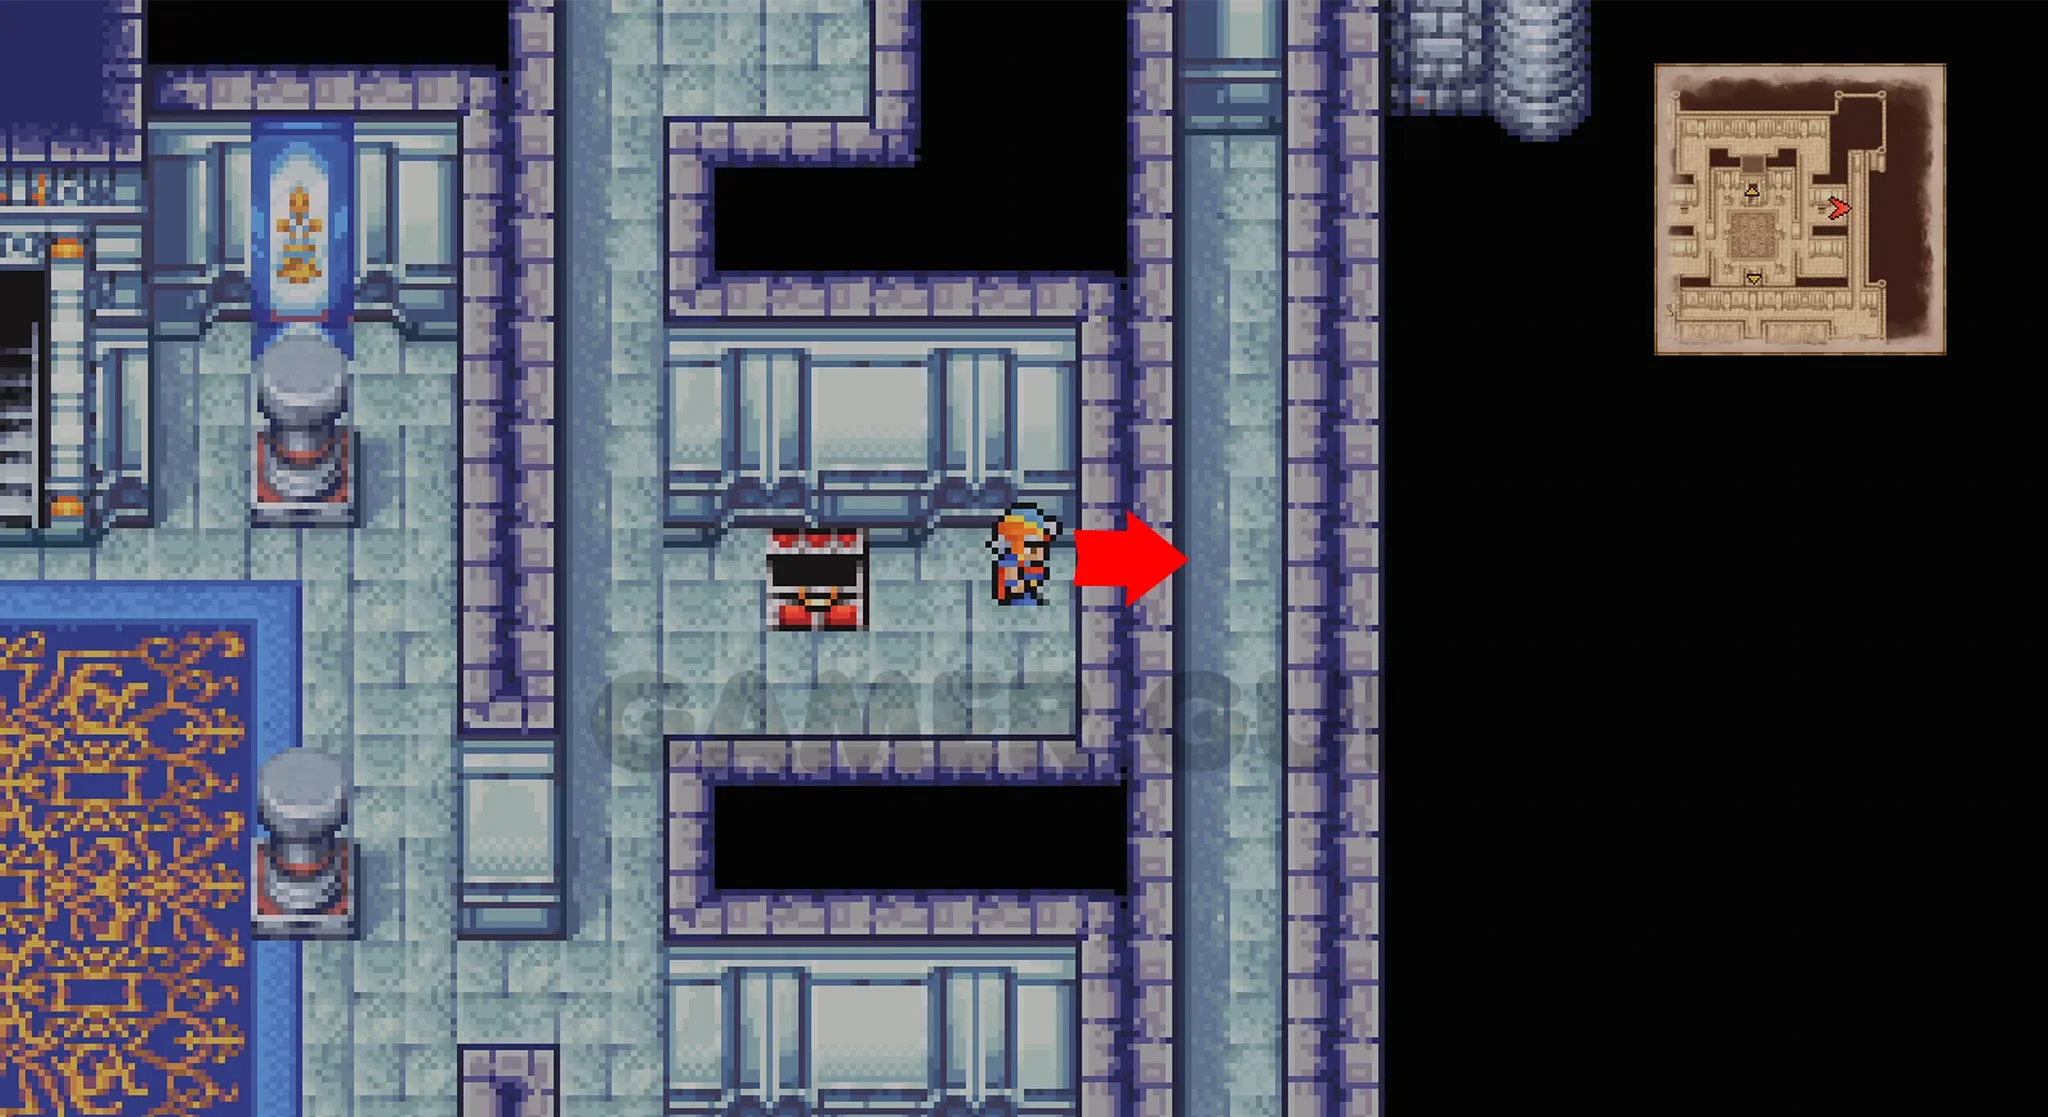
To get the other 2 chests on the outskirts of 2F you need to simply go through the fake walls (marked in the image by the red arrows). The chest on the left contains a Werebuster and the one on the right side contains Giant’s Gloves.
Those are all of the chests in the regular part of Castle Fynn, at this point you should have 10/27 chests for this area.
The rest are going to be on the way down to, and inside the Castle Basement where we need to head next anyway to find the White Mask.
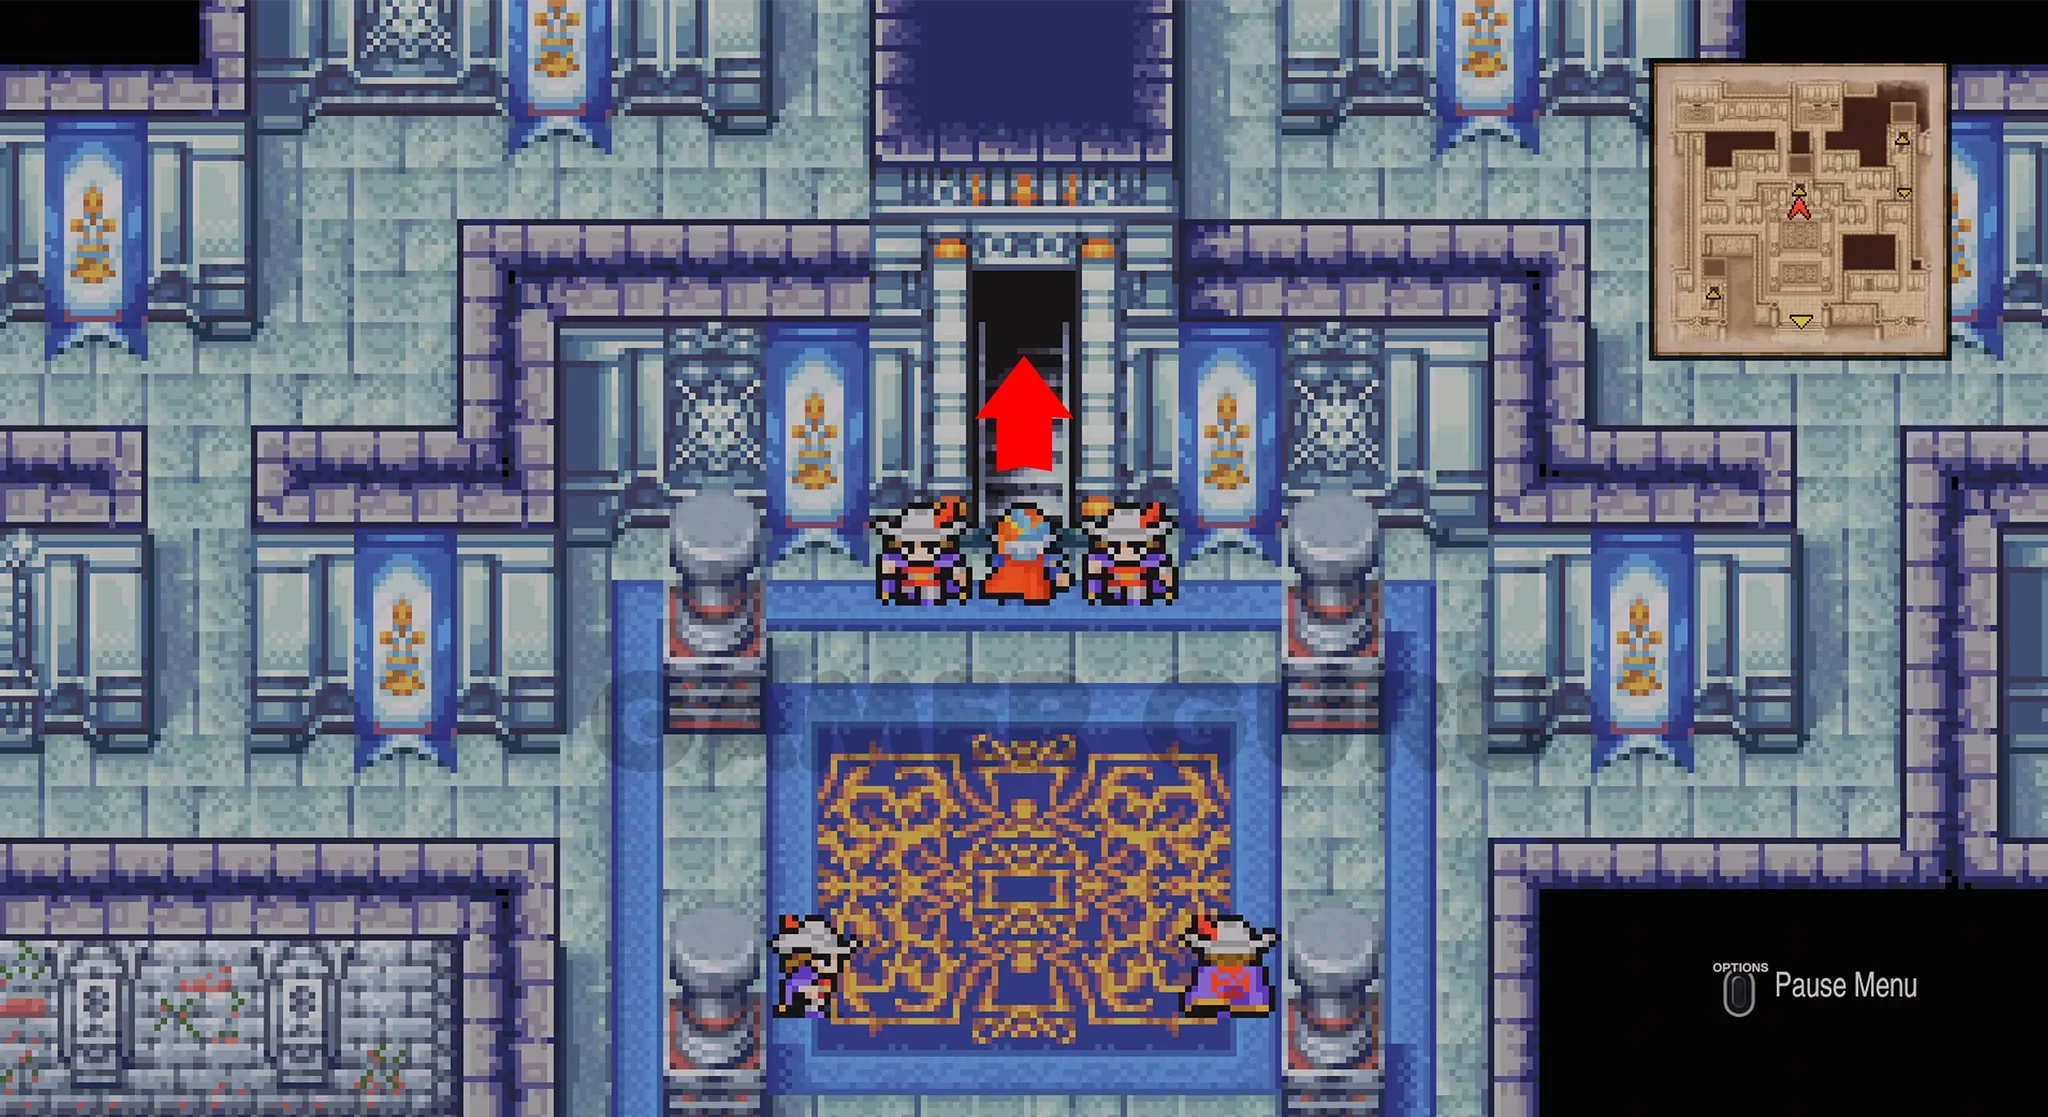
So head back to the Throne Room and interact with the wall at the top right shown in the image below.
Ask the wall “Ekmet Teloess” and it will reveal a hidden passage we can now go through.
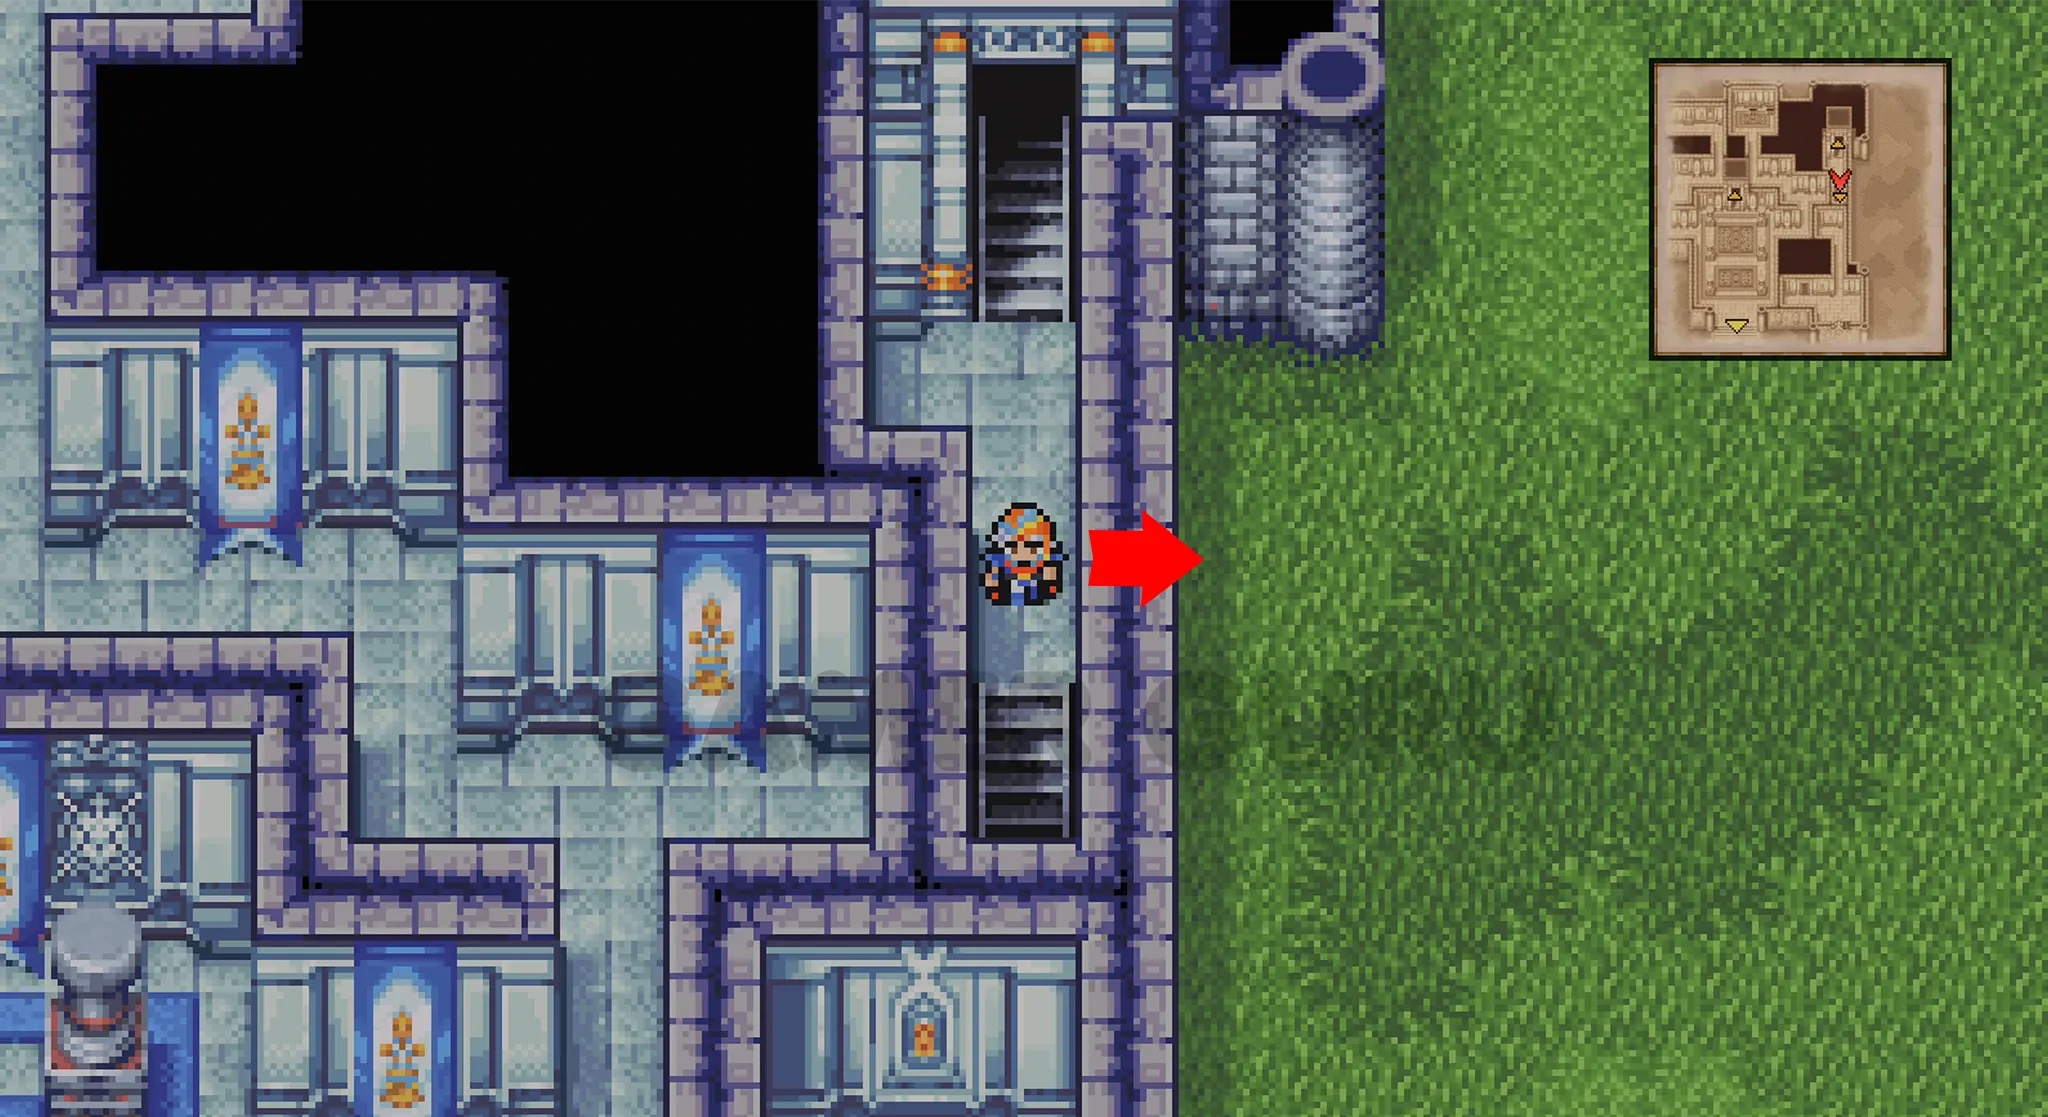
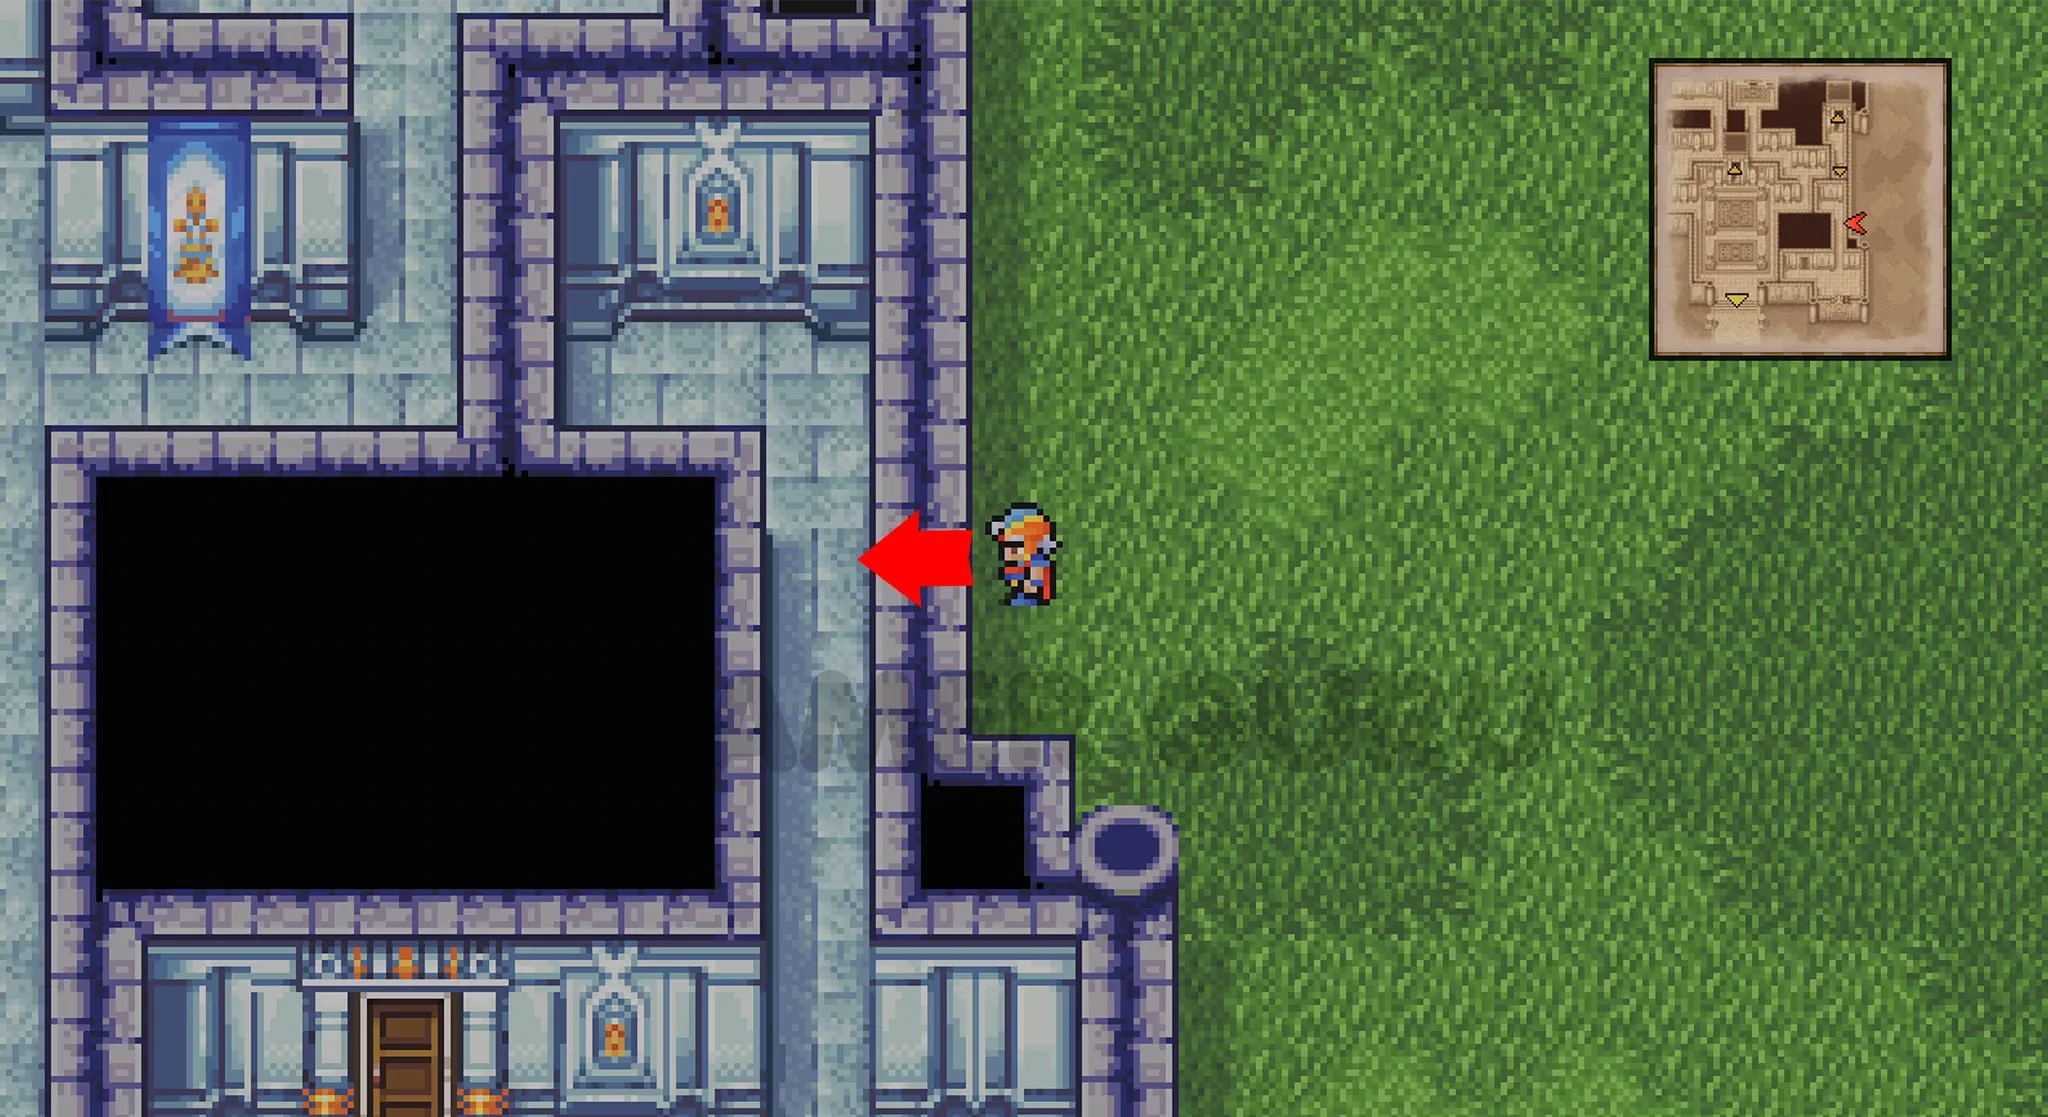
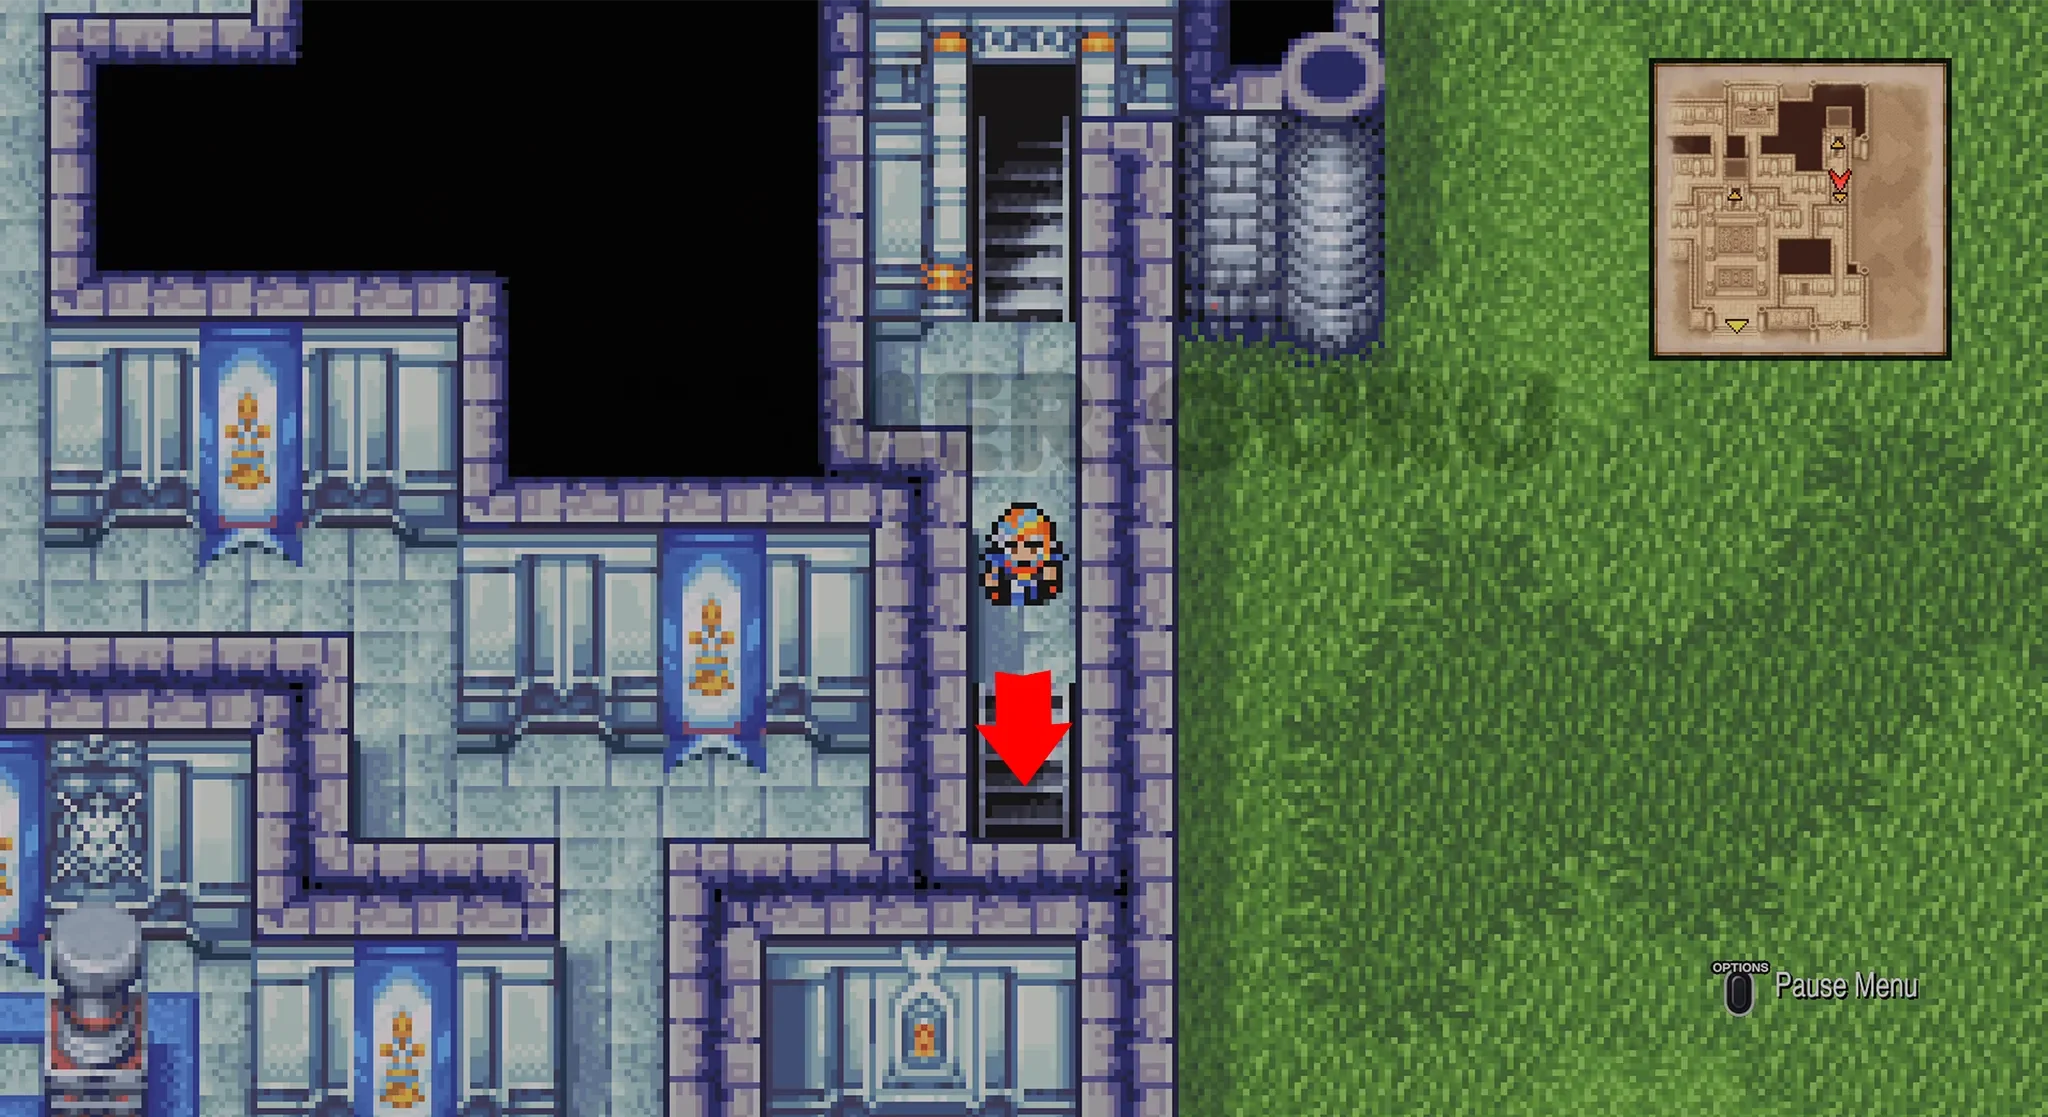
Keep going down these stairs behind the secret passage until you reach 1F, don’t go down the final stairs, instead go through the fake wall on the right to get outside, then use another fake wall to get back inside a bit further down, here you will find the door that leads to a side room with 3 more chests.
Exit the side room, go back through the fake walls and this time go down those final stairs to reach the Castle Basement.
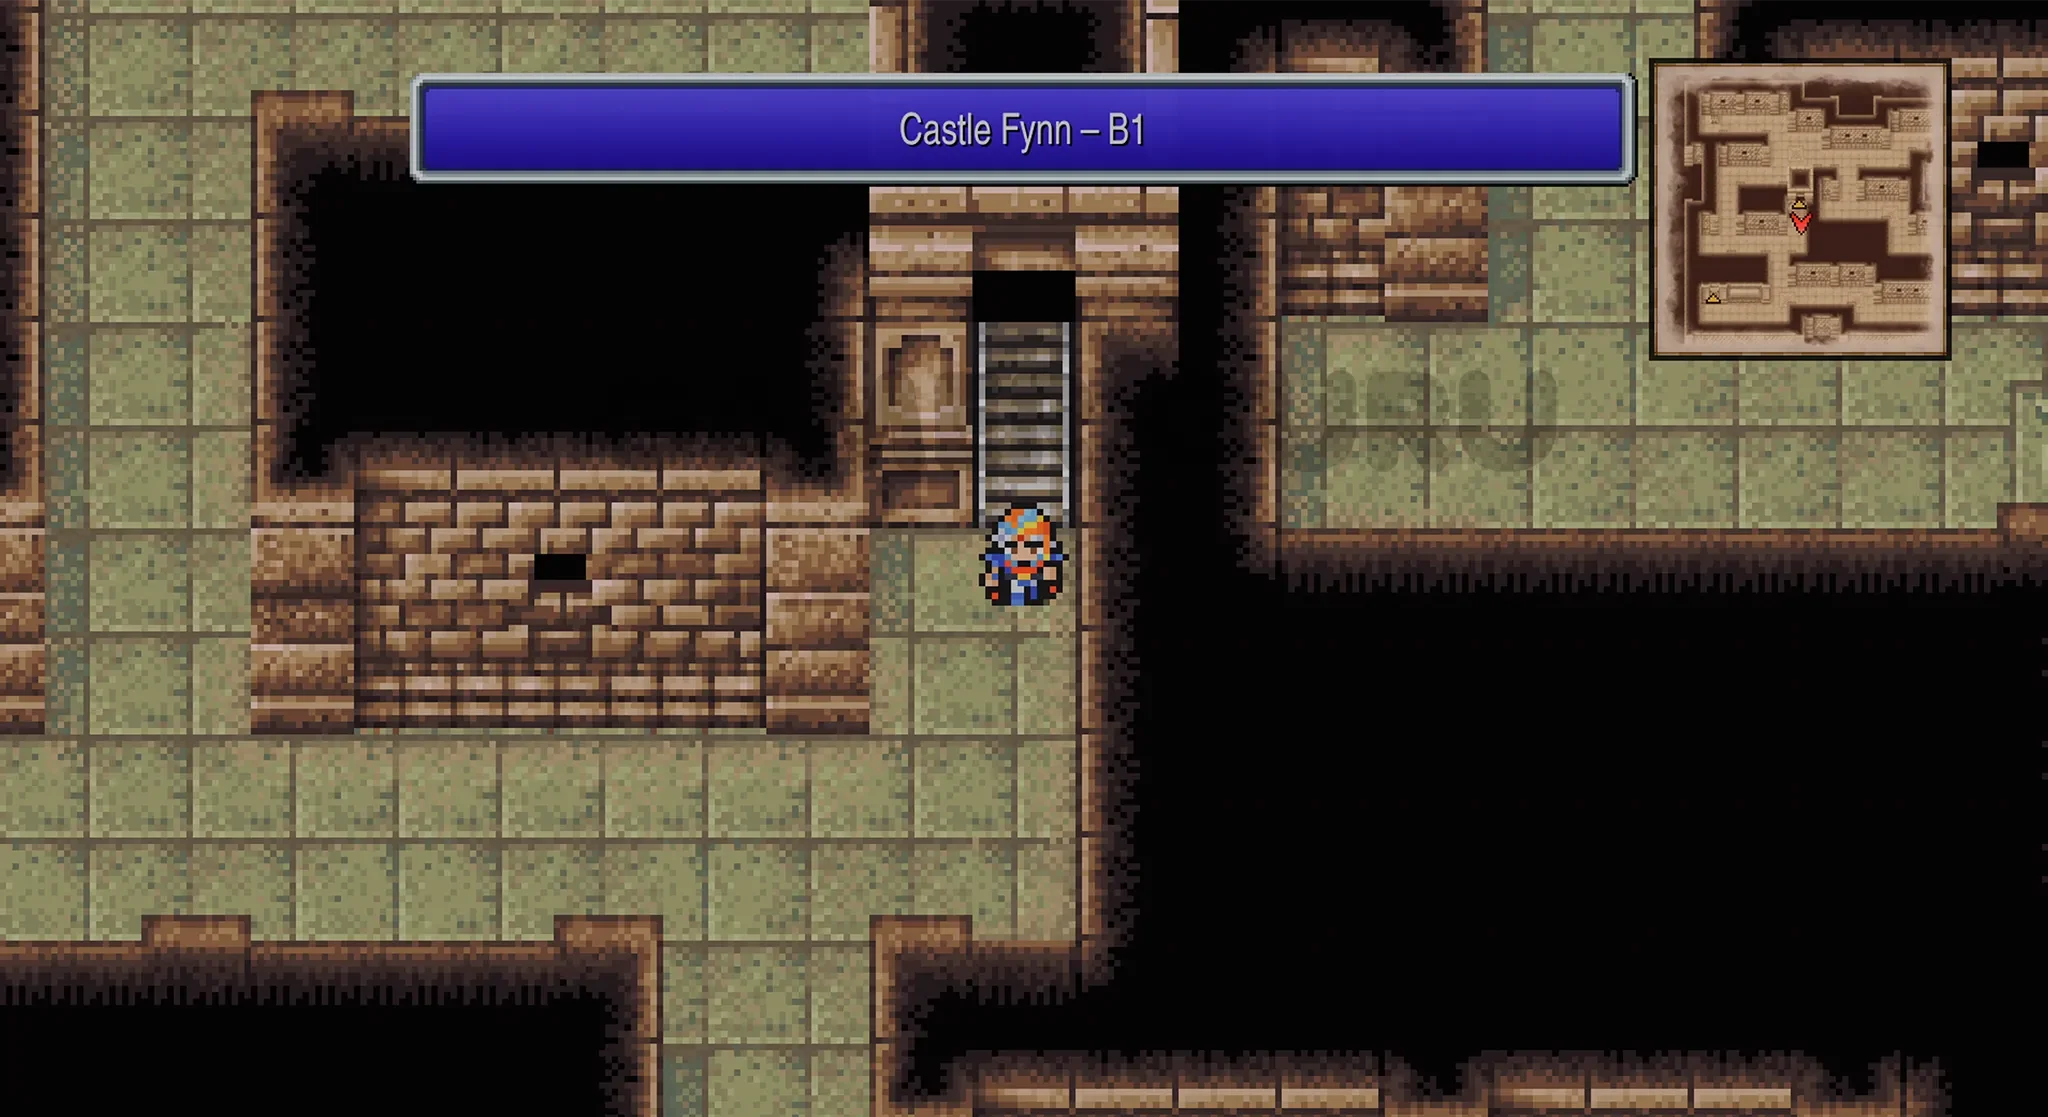
Castle Fynn Basement B1
Pretty much every floor of the basement is going to have 3 chests to open and a bunch of useless doors that lead to empty rooms, so pay close attention to the images of what door you need to take after each floor to reach the next floor without wasting time.
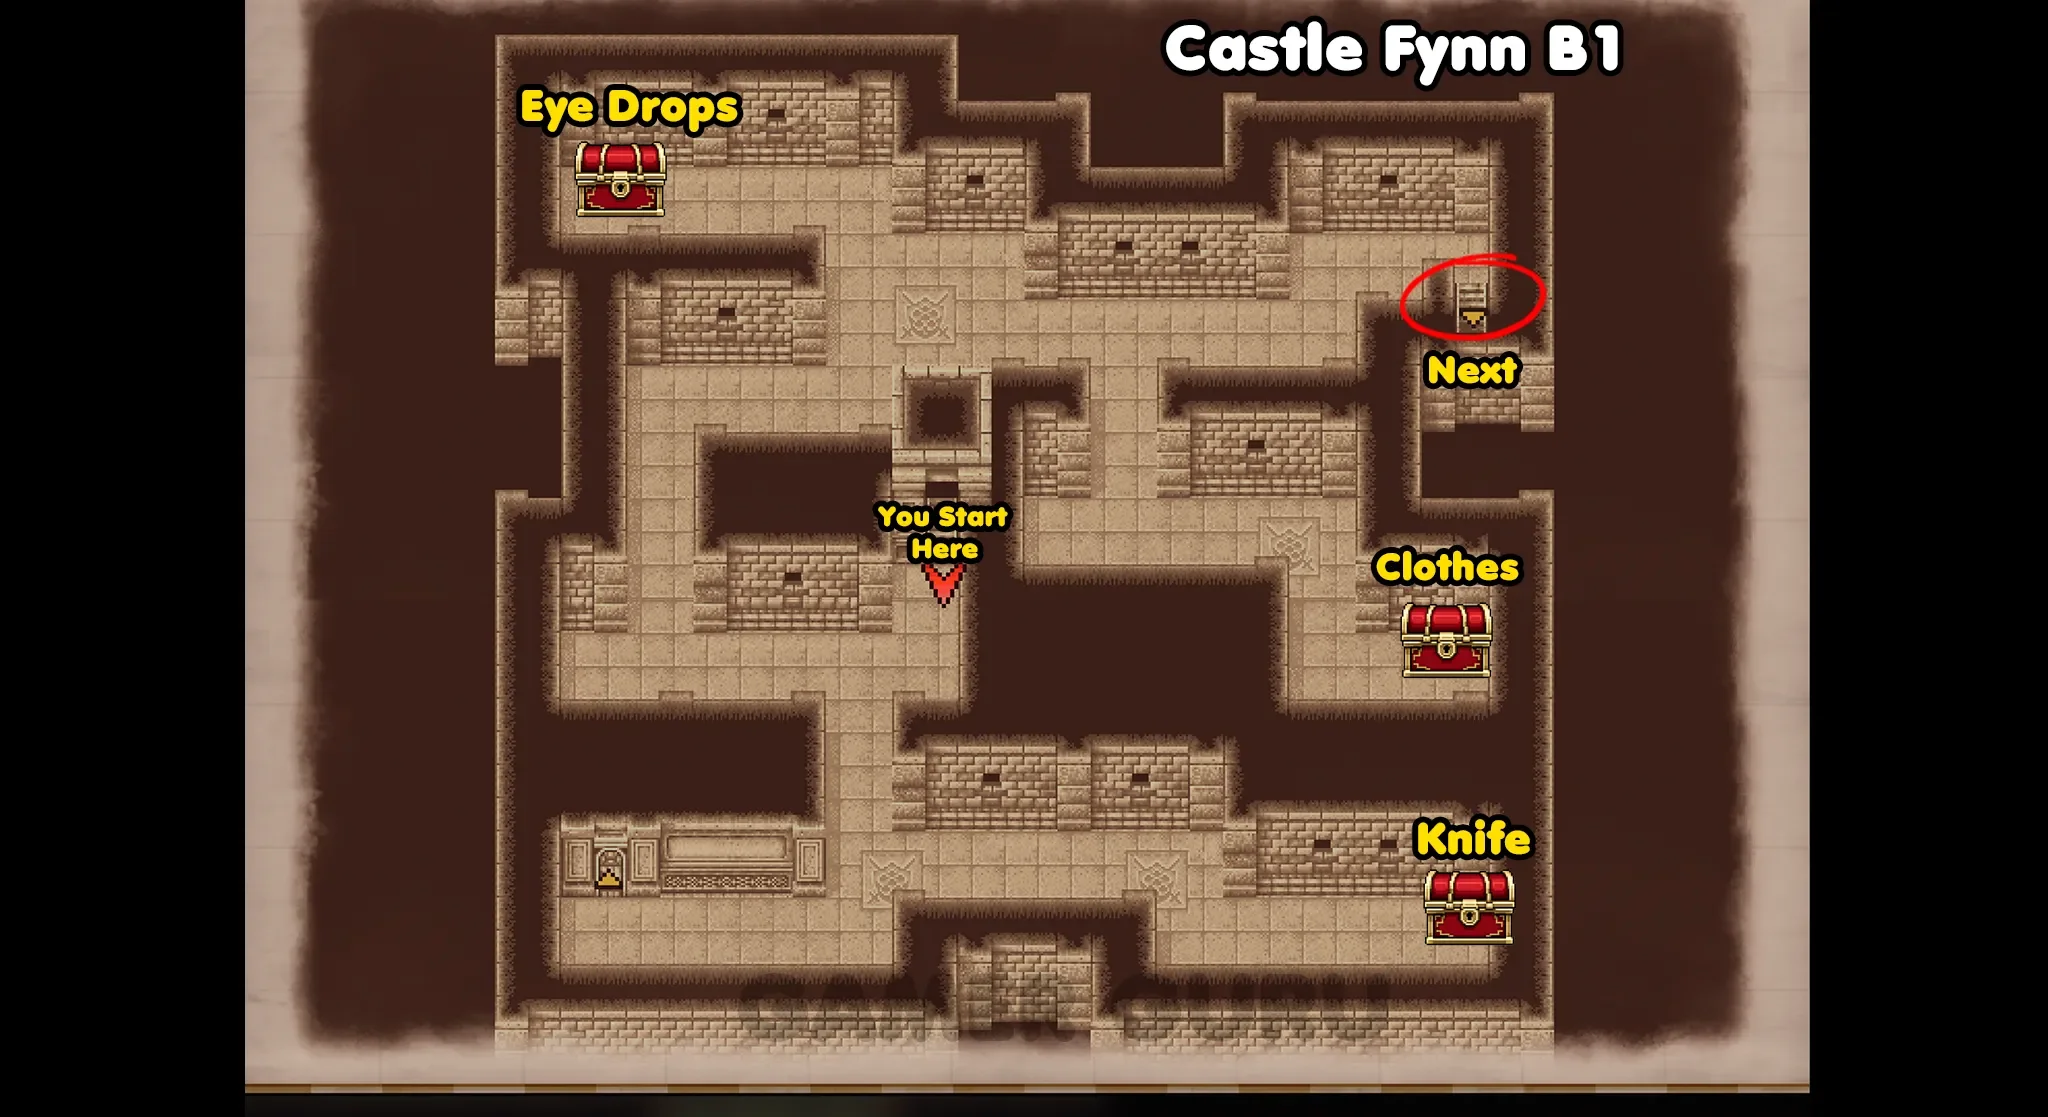
As you can see in B1, there are 3 chests, the one at the bottom right contains a Knife, the one at the top left has Eye Drops and the one in the middle right has Clothes.
After opening all 3, go down the stairs marked “next” at the top right of the room to reach floor B2.
B2
When you reach B2 you will see another 3 chests, the one at the bottom right contains an Ether, the one at the bottom left has a Potion and the one at the top left has a Maiden’s Kiss.
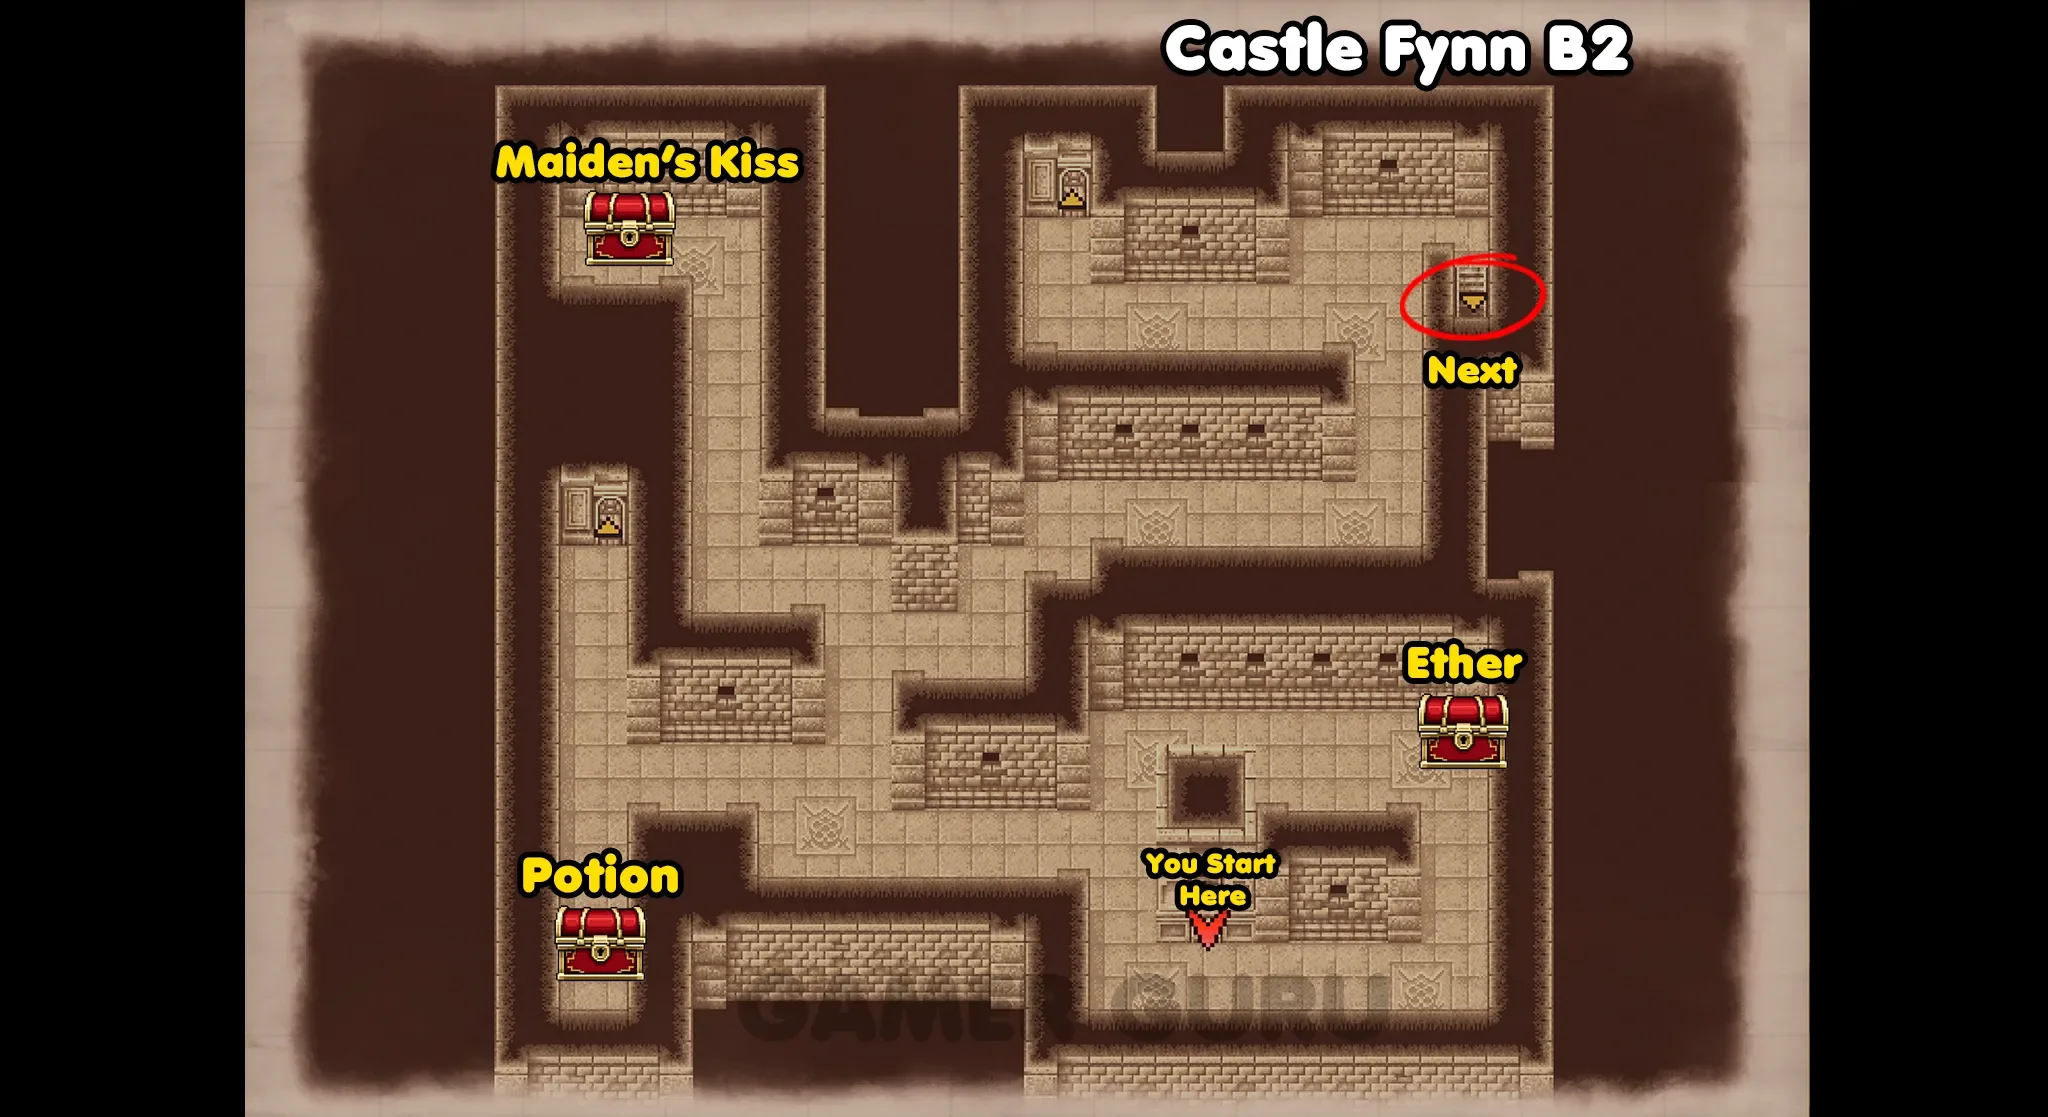
Once you have opened all 3 chests, go down the stairs at the top right of the room to reach B3.
B3
Yet again on B3 it is similar, 3 more chests and a bunch of doors that lead to empty rooms.
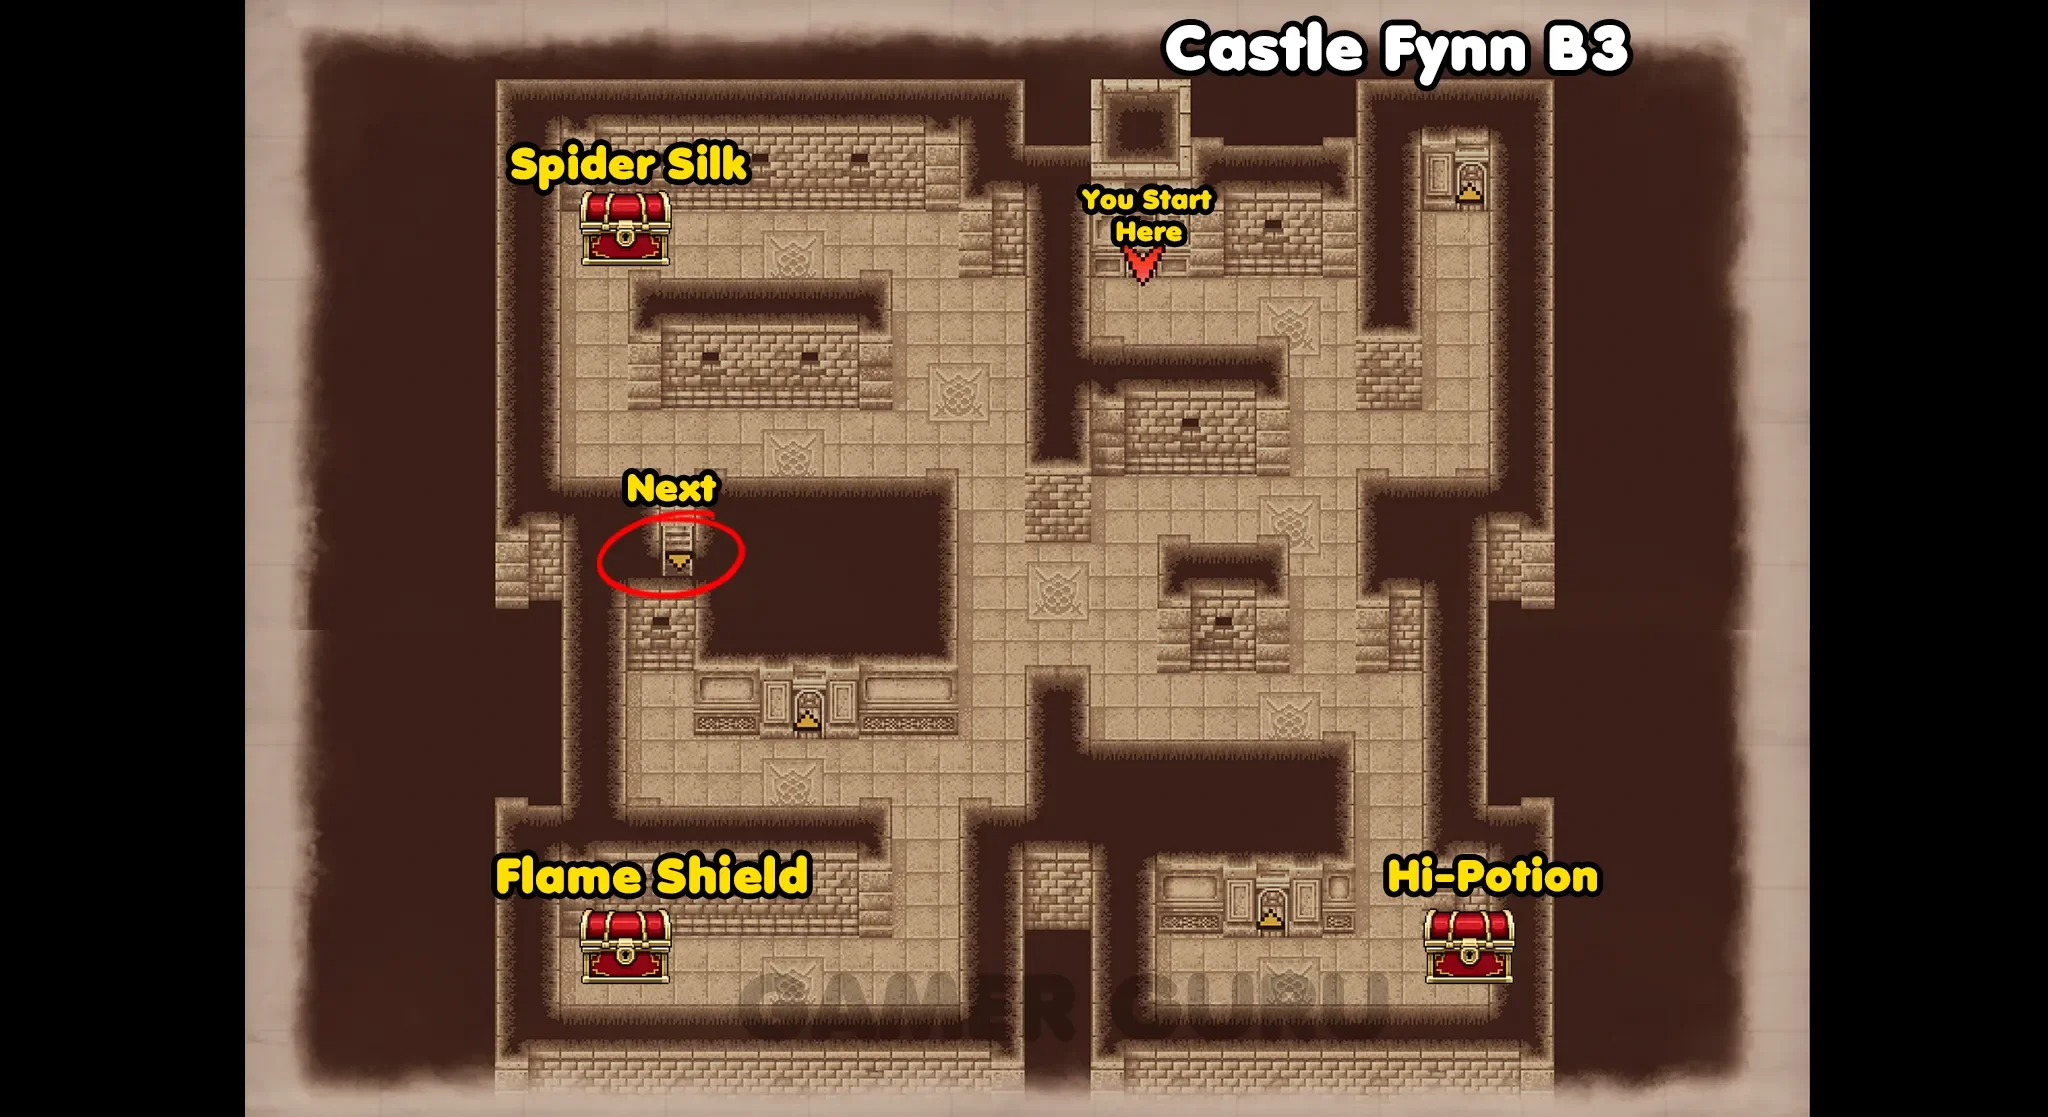
Starting with the chest at the bottom right, it contains a Hi-Potion, the one at the bottom left has a Flame Shield and the one at the top left has a Spider Silk.
After opening all 3 chests, go down the stairs directly below the Spider Silk chest to reach B4.
B4
B4 is also going to have 3 chests, the one at the top contains a Power Staff, but be careful as it is an enemy ambush!
The top right chest has the Flame Armor, and the bottom right one has a Betrayal Fang.

Once you have opened all 3 chests on this floor you can reach B5 by going down the stairs at the bottom right, directly below the Betrayal Fang chest.
B5
B5 is where you will find the final 2 chests for this dungeon.

In the middle of the first room you will find the chest that contains the Orichalcum, but make sure to Quick Save before opening it as it is an ambush where they can easily Petrify all of your party members giving you gave over.
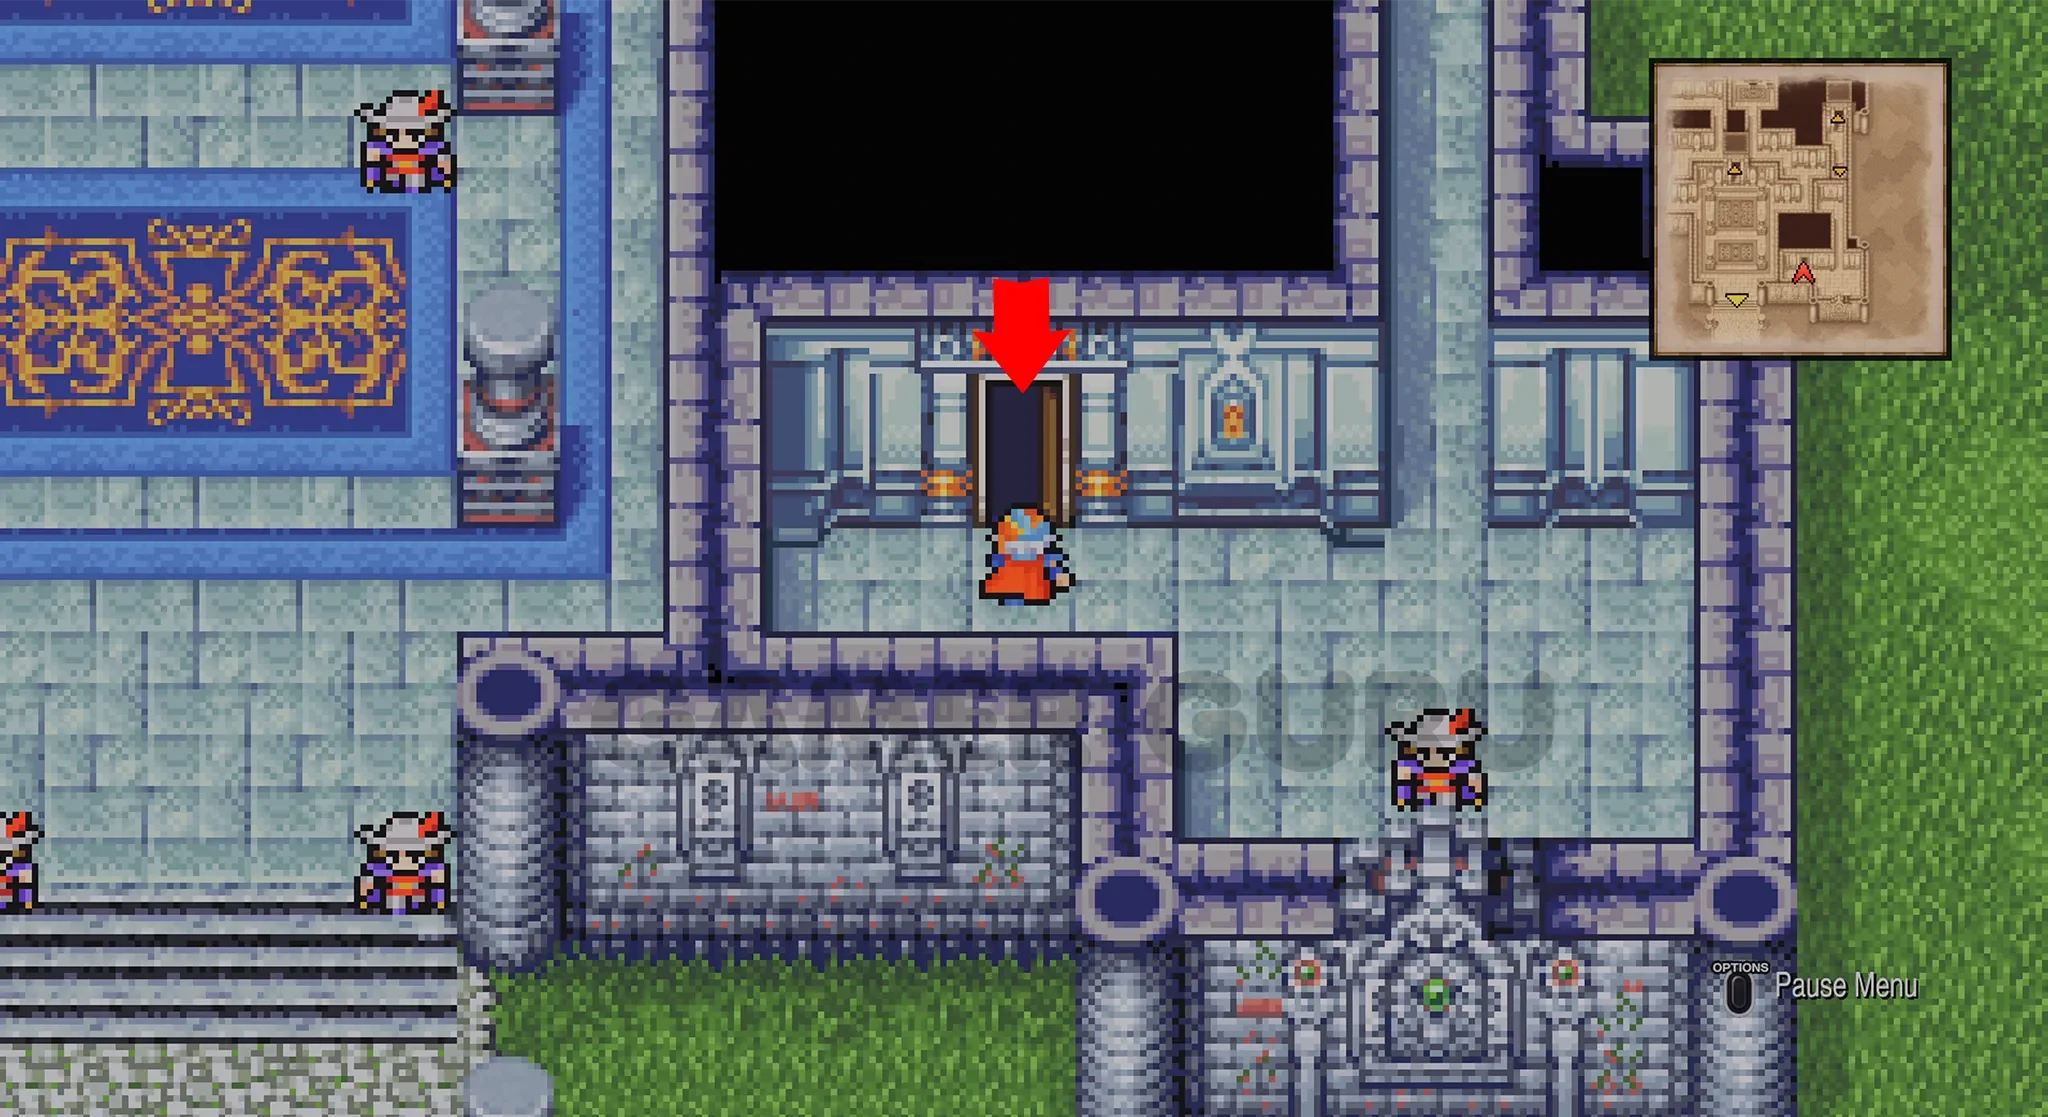
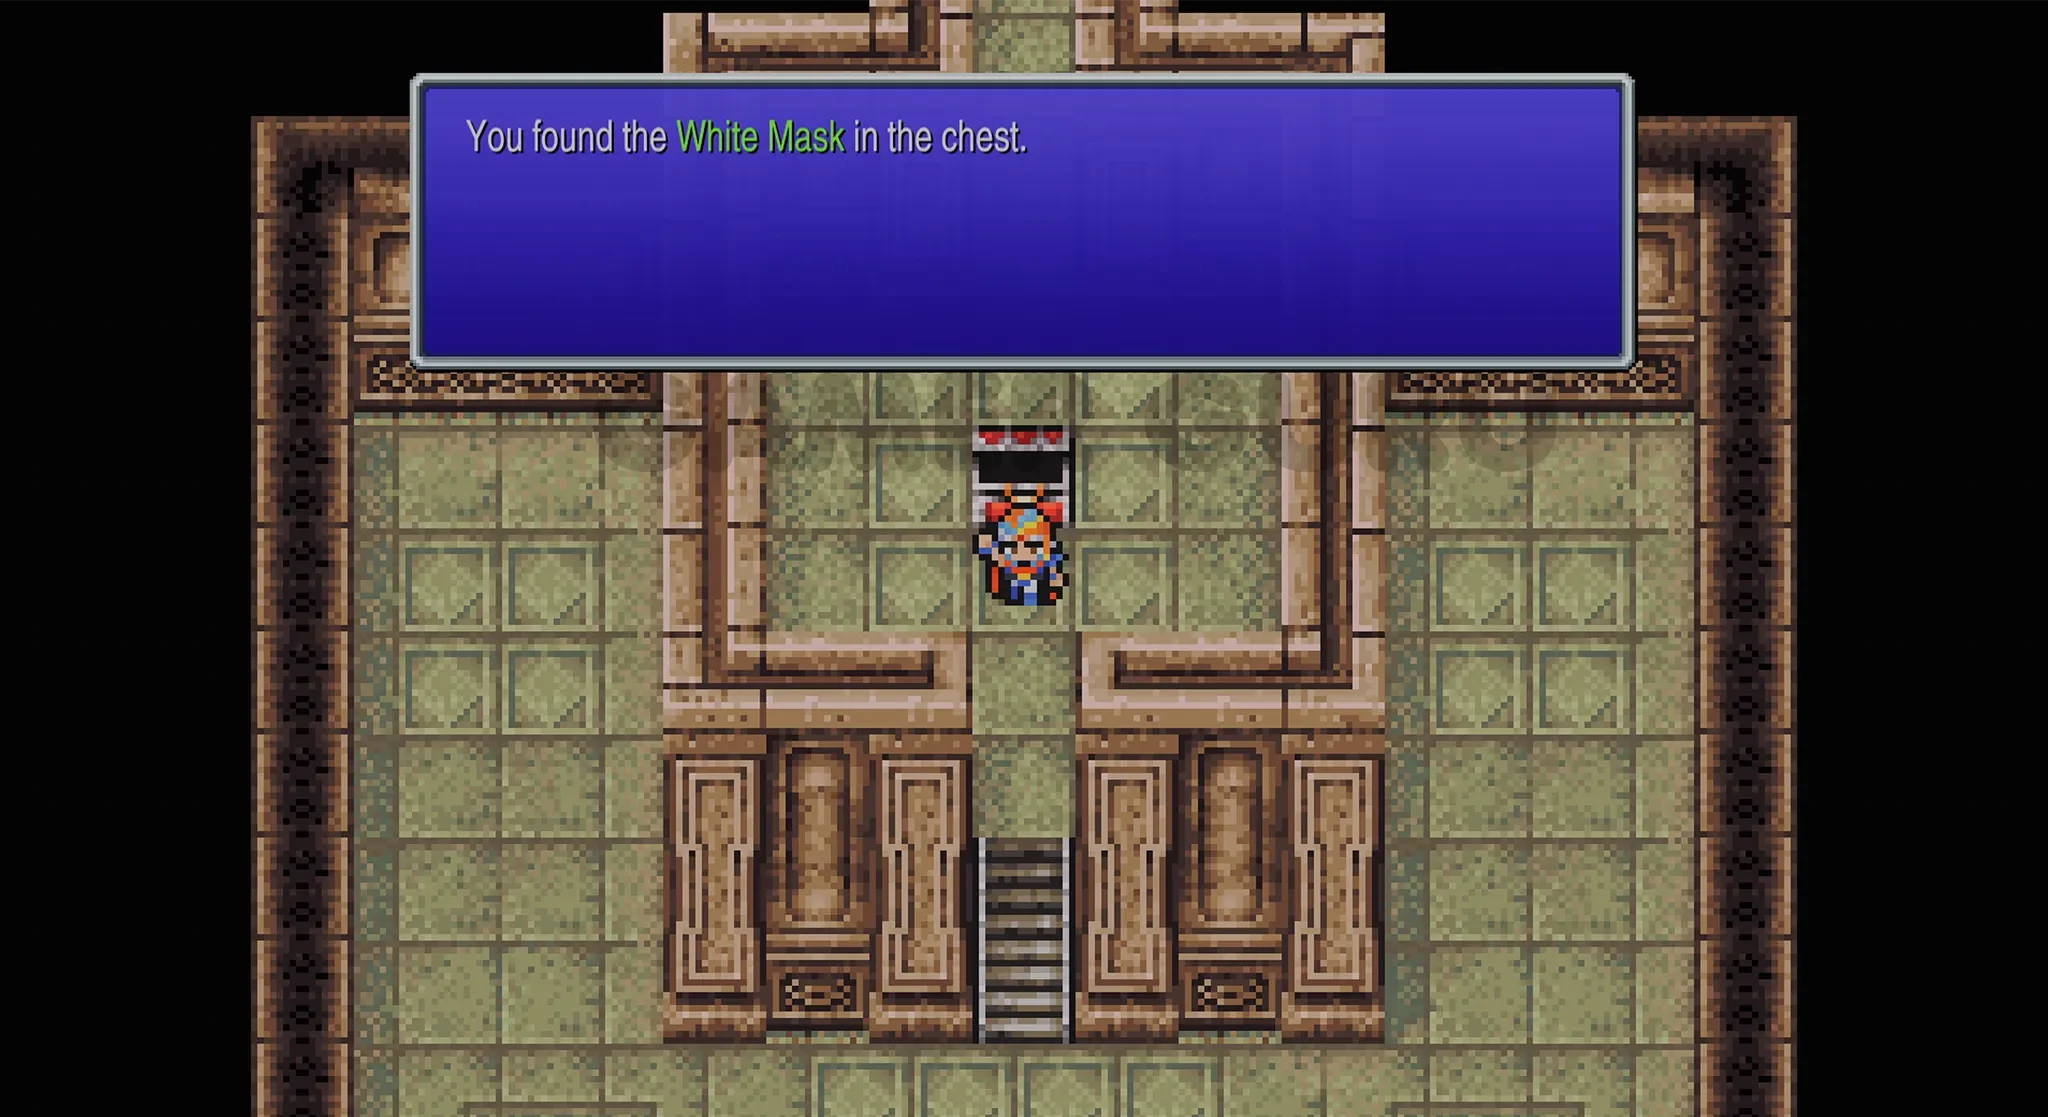
Once you have defeated the ambush, go through the second door from the right at the top to reach the room with the last chest containing the White Mask we need for the Main Story.
You should now have all 27 chests in Castle Fynn.
Exit out of the dungeon using the teleport tile just above the chest.
Our next objective is going to be to head to Mysidia!
• After rescuing Hilda from the Coliseum, she will set up a Rebel Camp just across the small bridge to the west of Gatrea which is technically a Missable Location as it can be skipped, so make sure to visit it at least once before retaking Castle Fynn as it will disappear forever and you need to have visited all location to later get the  "Adventurous Wayfarer" Trophy.
• After taking back Castle Fynn and learning the "Mysidia" Password, make sure to Ask Gordon about Mysidia to learn the "Ultima Tome" Password as it is missable.