
Final Fantasy 2 Pixel Remaster 100% Walkthrough - Mysidian Tower

Now that we have completed the Leviathan Dungeon, our next main objective will be the Mysidian Tower!
Missable Chest and Bestiary Entries Warning!
After completing the Mysidian Tower Dungeon, the following enemies will no longer spawn: Phorusracos, Killer Fish, Sea Snake, Buccaneer, Hell Diver, Antlion, Land Ray and Mine.
So make sure you have defeated at least one of each of these before you complete the tower.
If you have been following this walkthrough we have been pointing these enemies out when we have been past their spawn locations so you should already have them.
But in case you don’t, a quick summary:
Phorusracos: Can be found around where the Dreadnought was.
Killer Fish, Sea Snake, Buccaneer and Hell Diver: Anywhere in the water while sailing on the ship.
Antlion & Land Ray: Anywhere in the Great Desert near the Coliseum.
There is also one chest that will become missable after you complete the Mysidian Tower.
It is the chest in Altair hideout that we mentioned in the very first chapter of this walkthrough, it is hard to miss, but double check to make sure you have it before advancing.
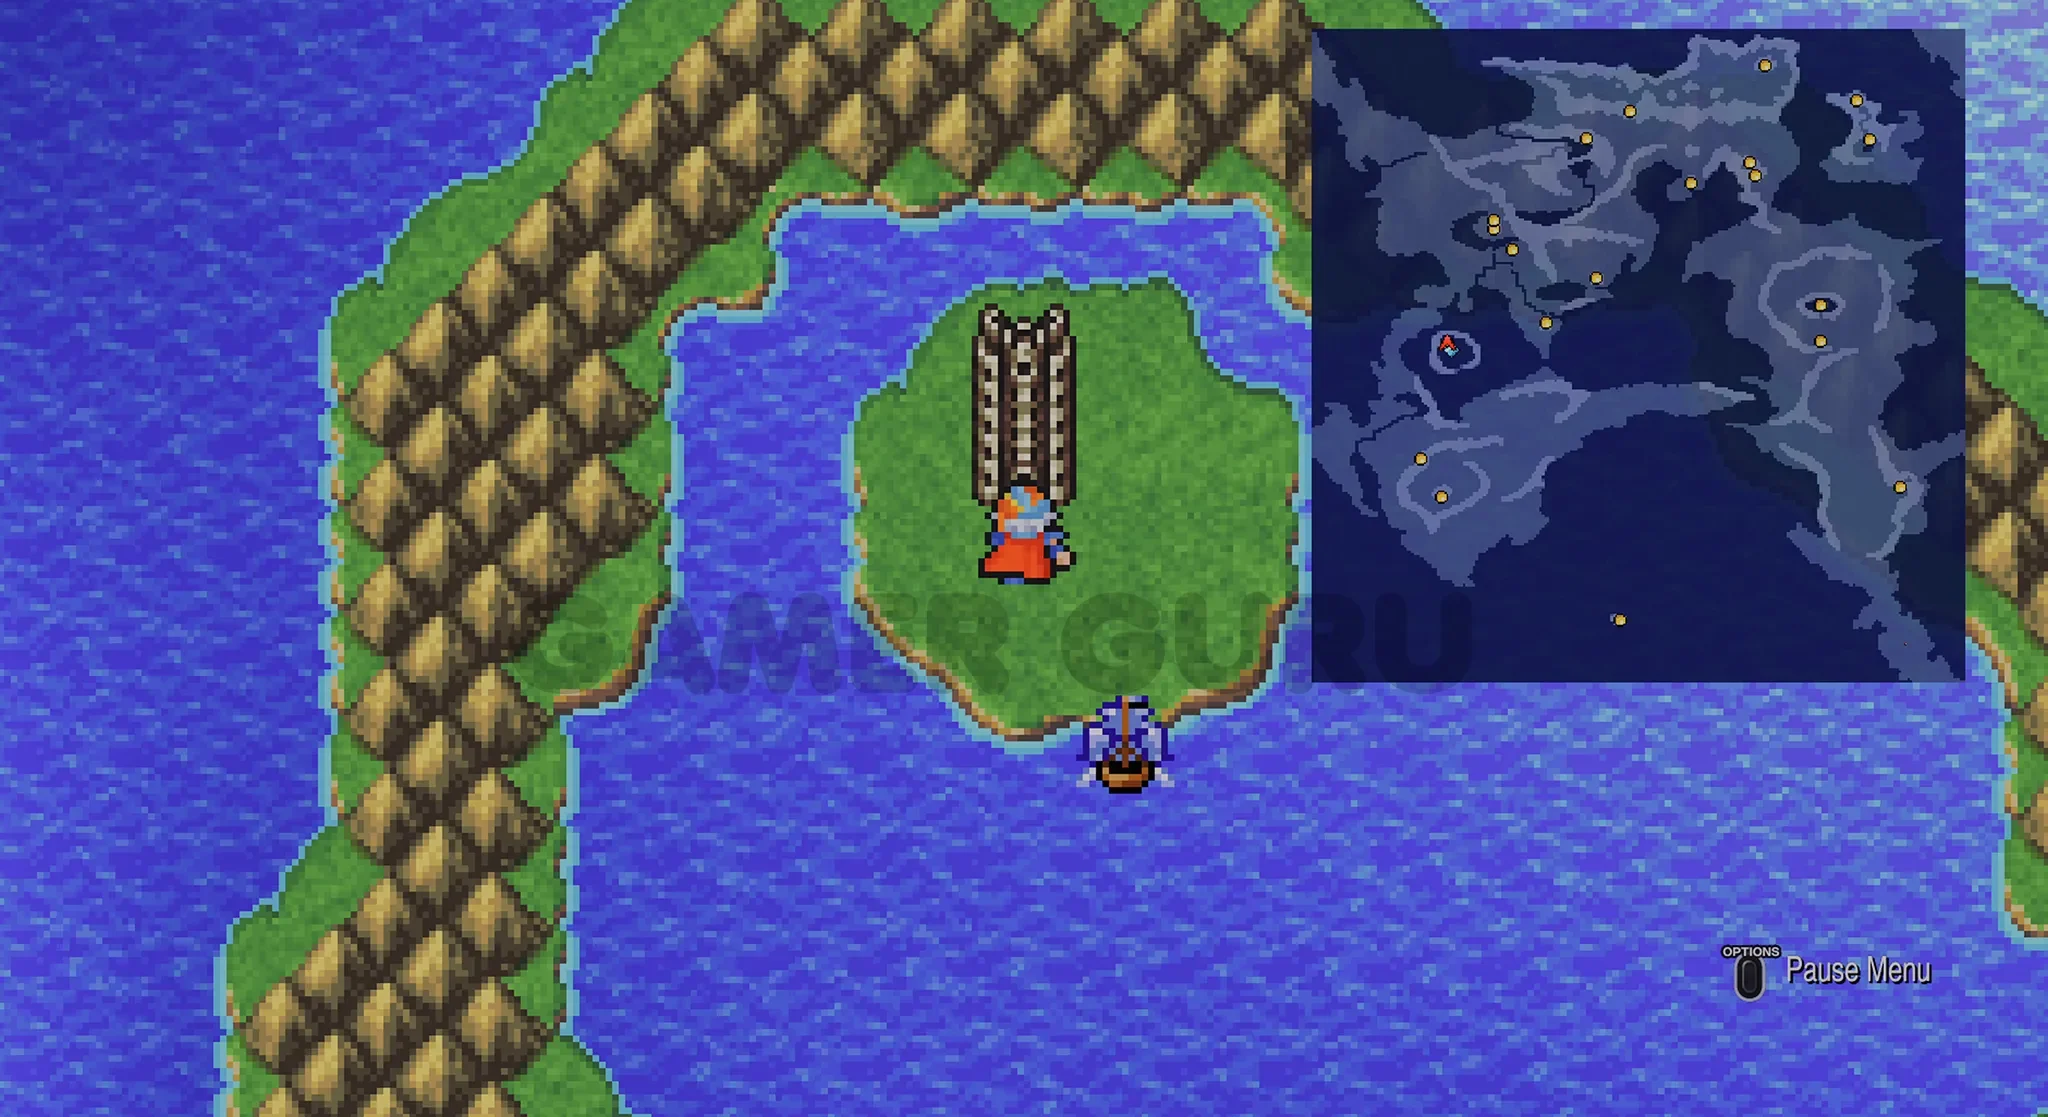
Mysidian Tower
To reach the Mysidian Tower just go to the small island in the middle of the circle of mountains above where you got caught by Leviathan.
1F
In the first floor there are 4 treasure chests, 3 of them will be easy to get, but one will be behind a fake wall.
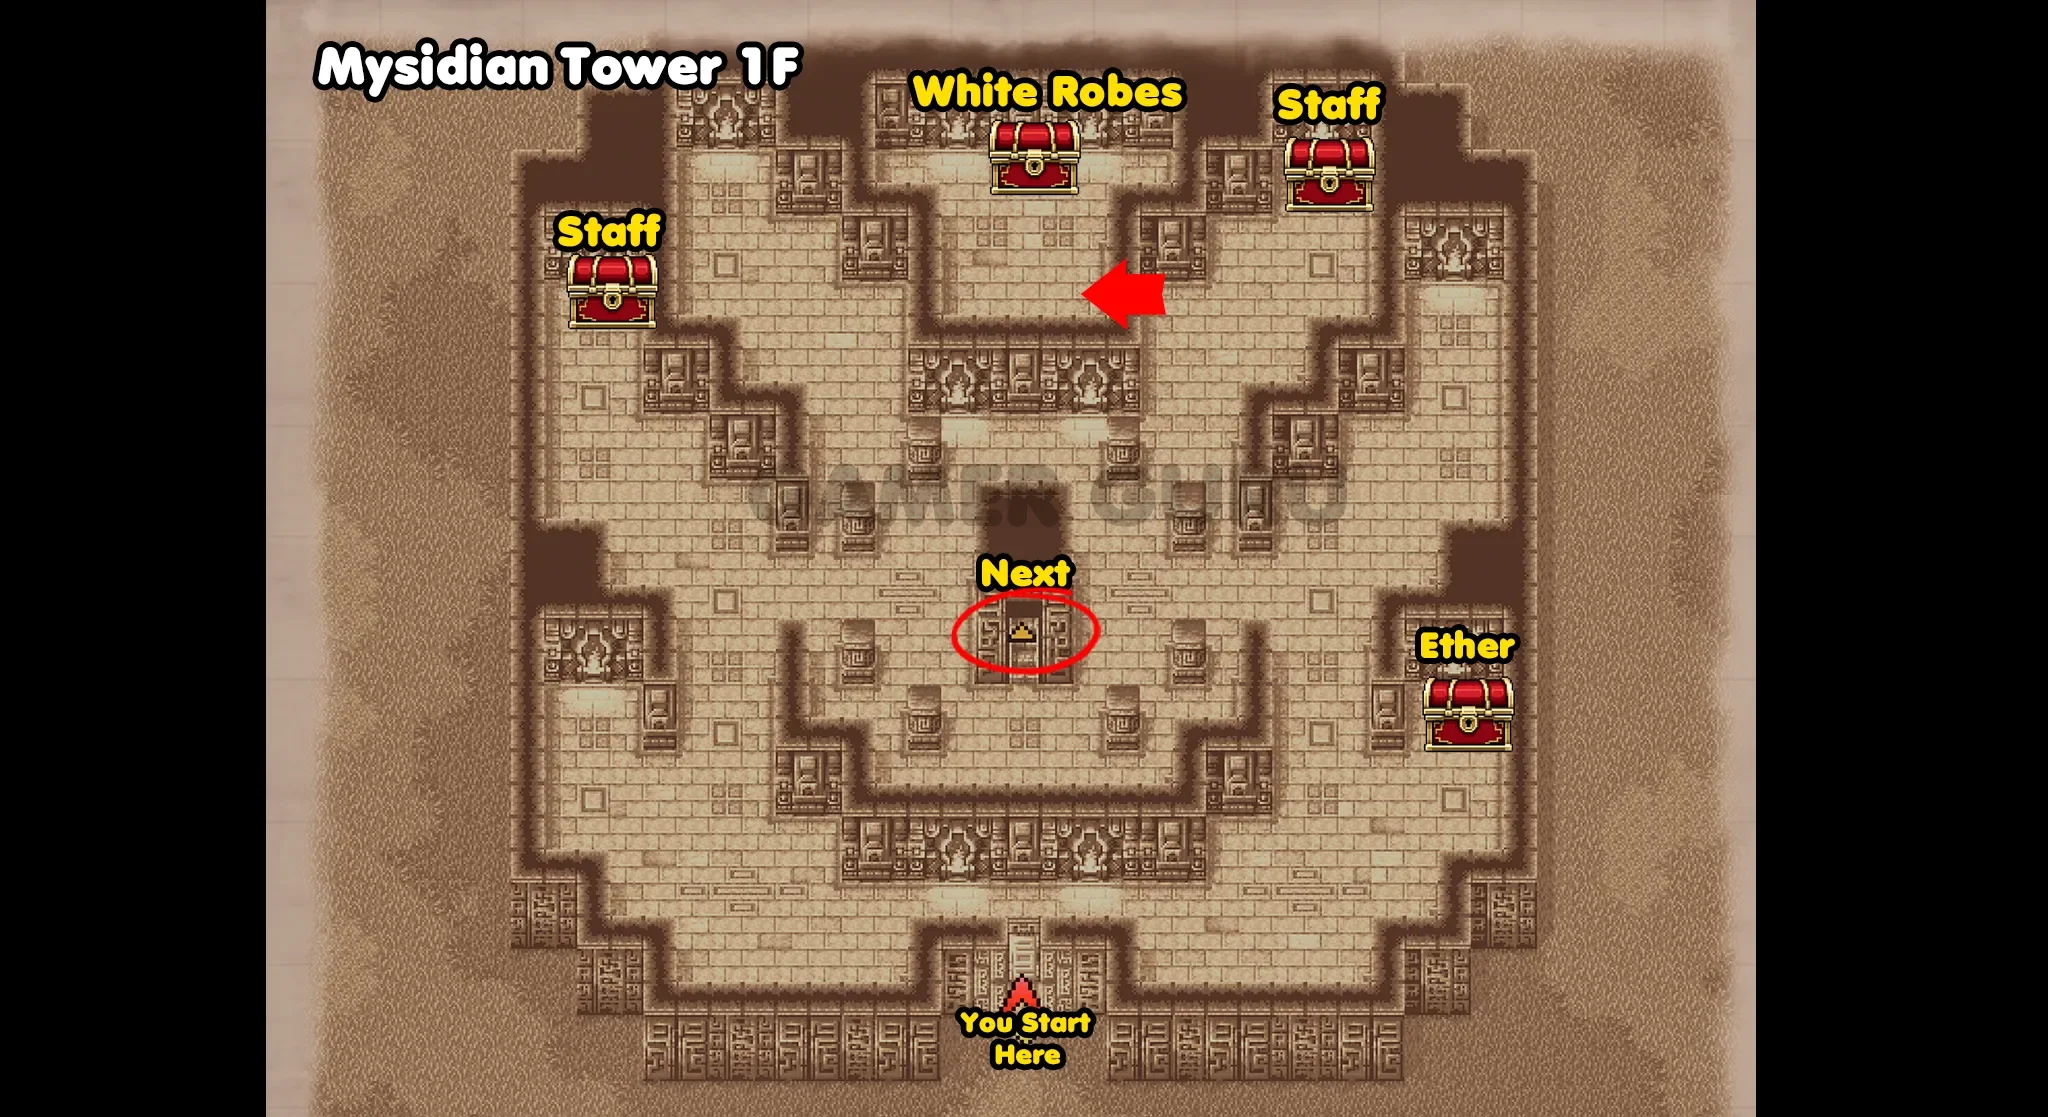
As you can see in the image, the chests that contain the two Staffs and the Ether you can just walk up to and open them, however the one at the top that has the White Robes you need to go through the fake wall that is indicated by the red arrow.
Once you have opened all 4 chests on this floor, you can go up the stairs in the middle of the room to reach 2F.
2F
There are 3 chests to open in 2F, all 3 are easily reached.
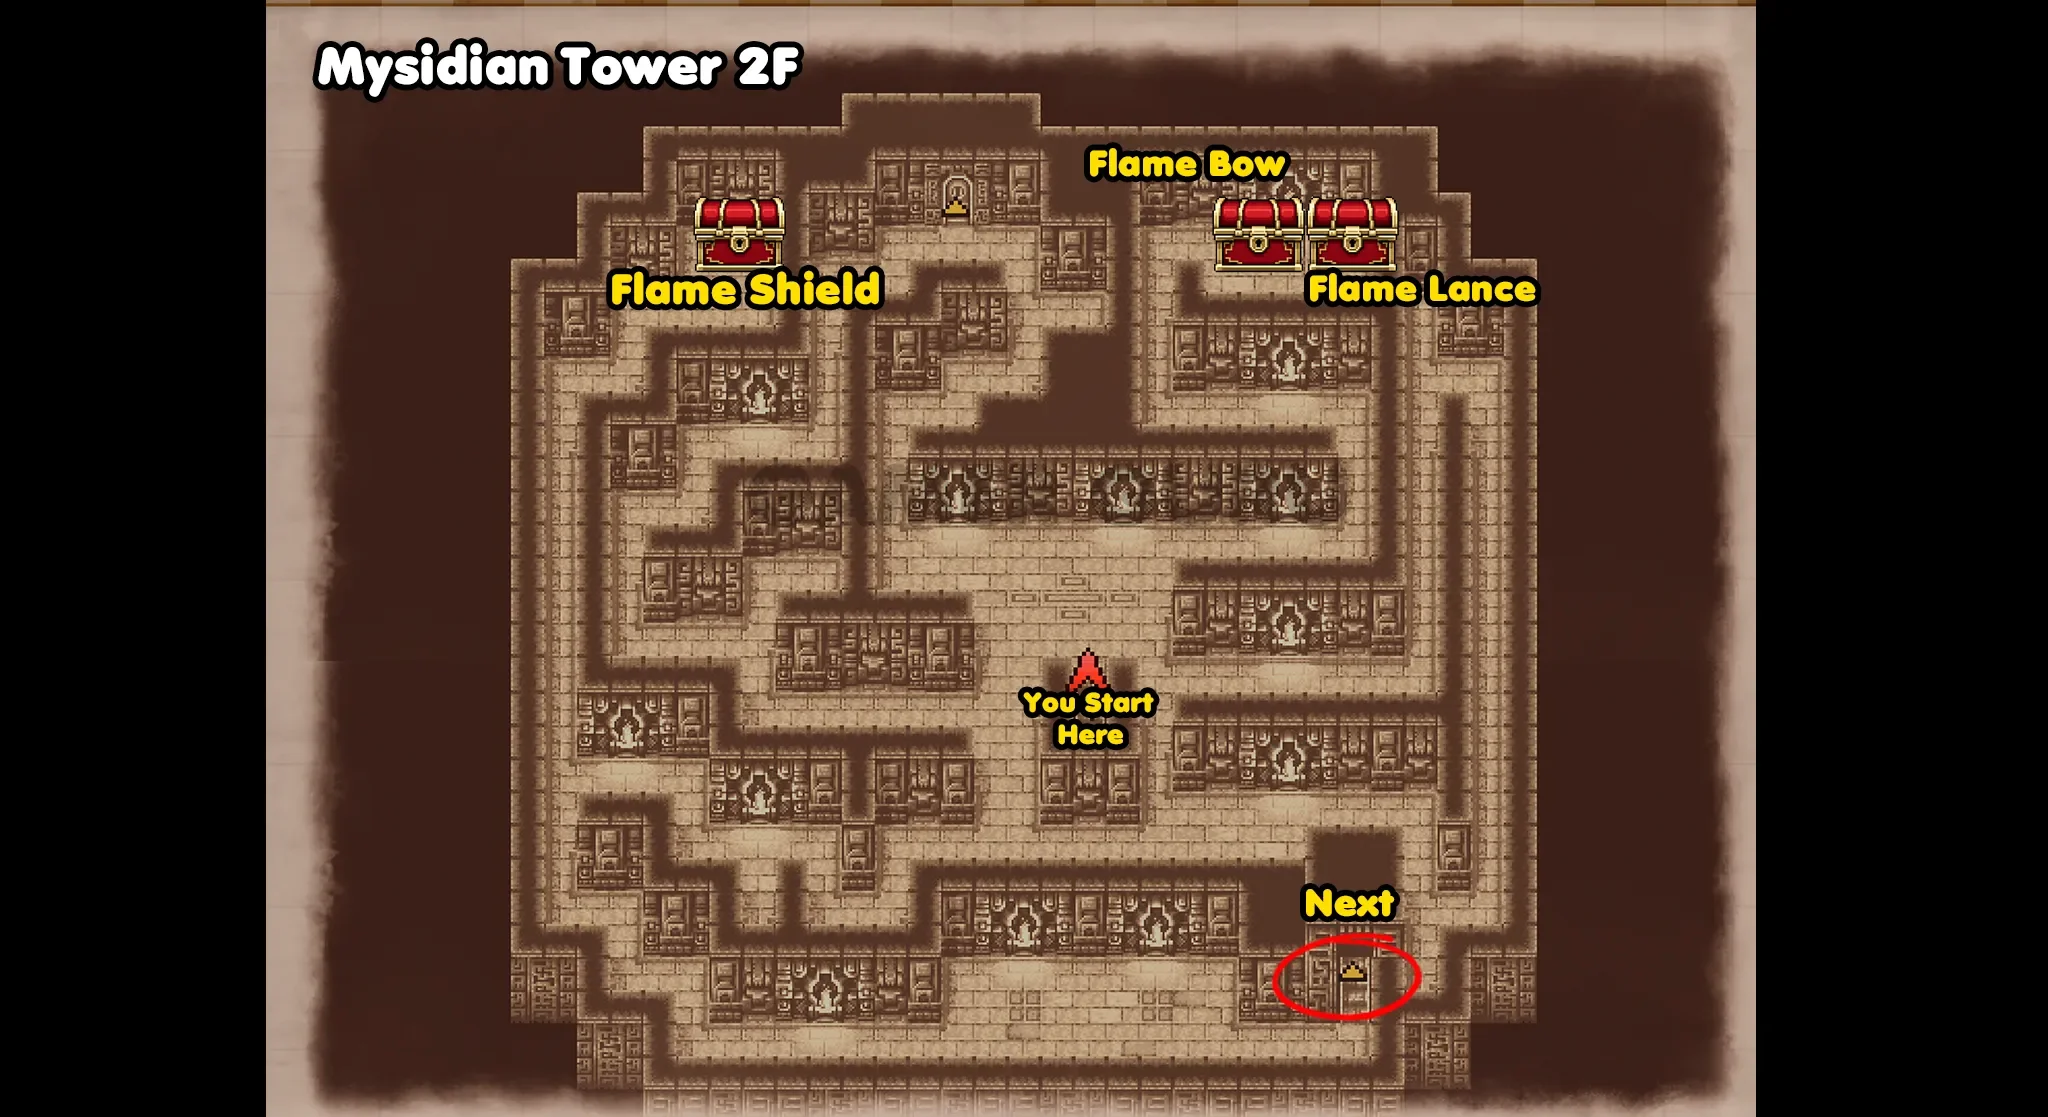
The two chests at the top right contain a Flame Bow and a Flame Lance.
The other chest on the left side of the room has a Flame Shield. Once you have opened all 3 chests you can go up the stairs at the bottom right to reach 3F.
3F
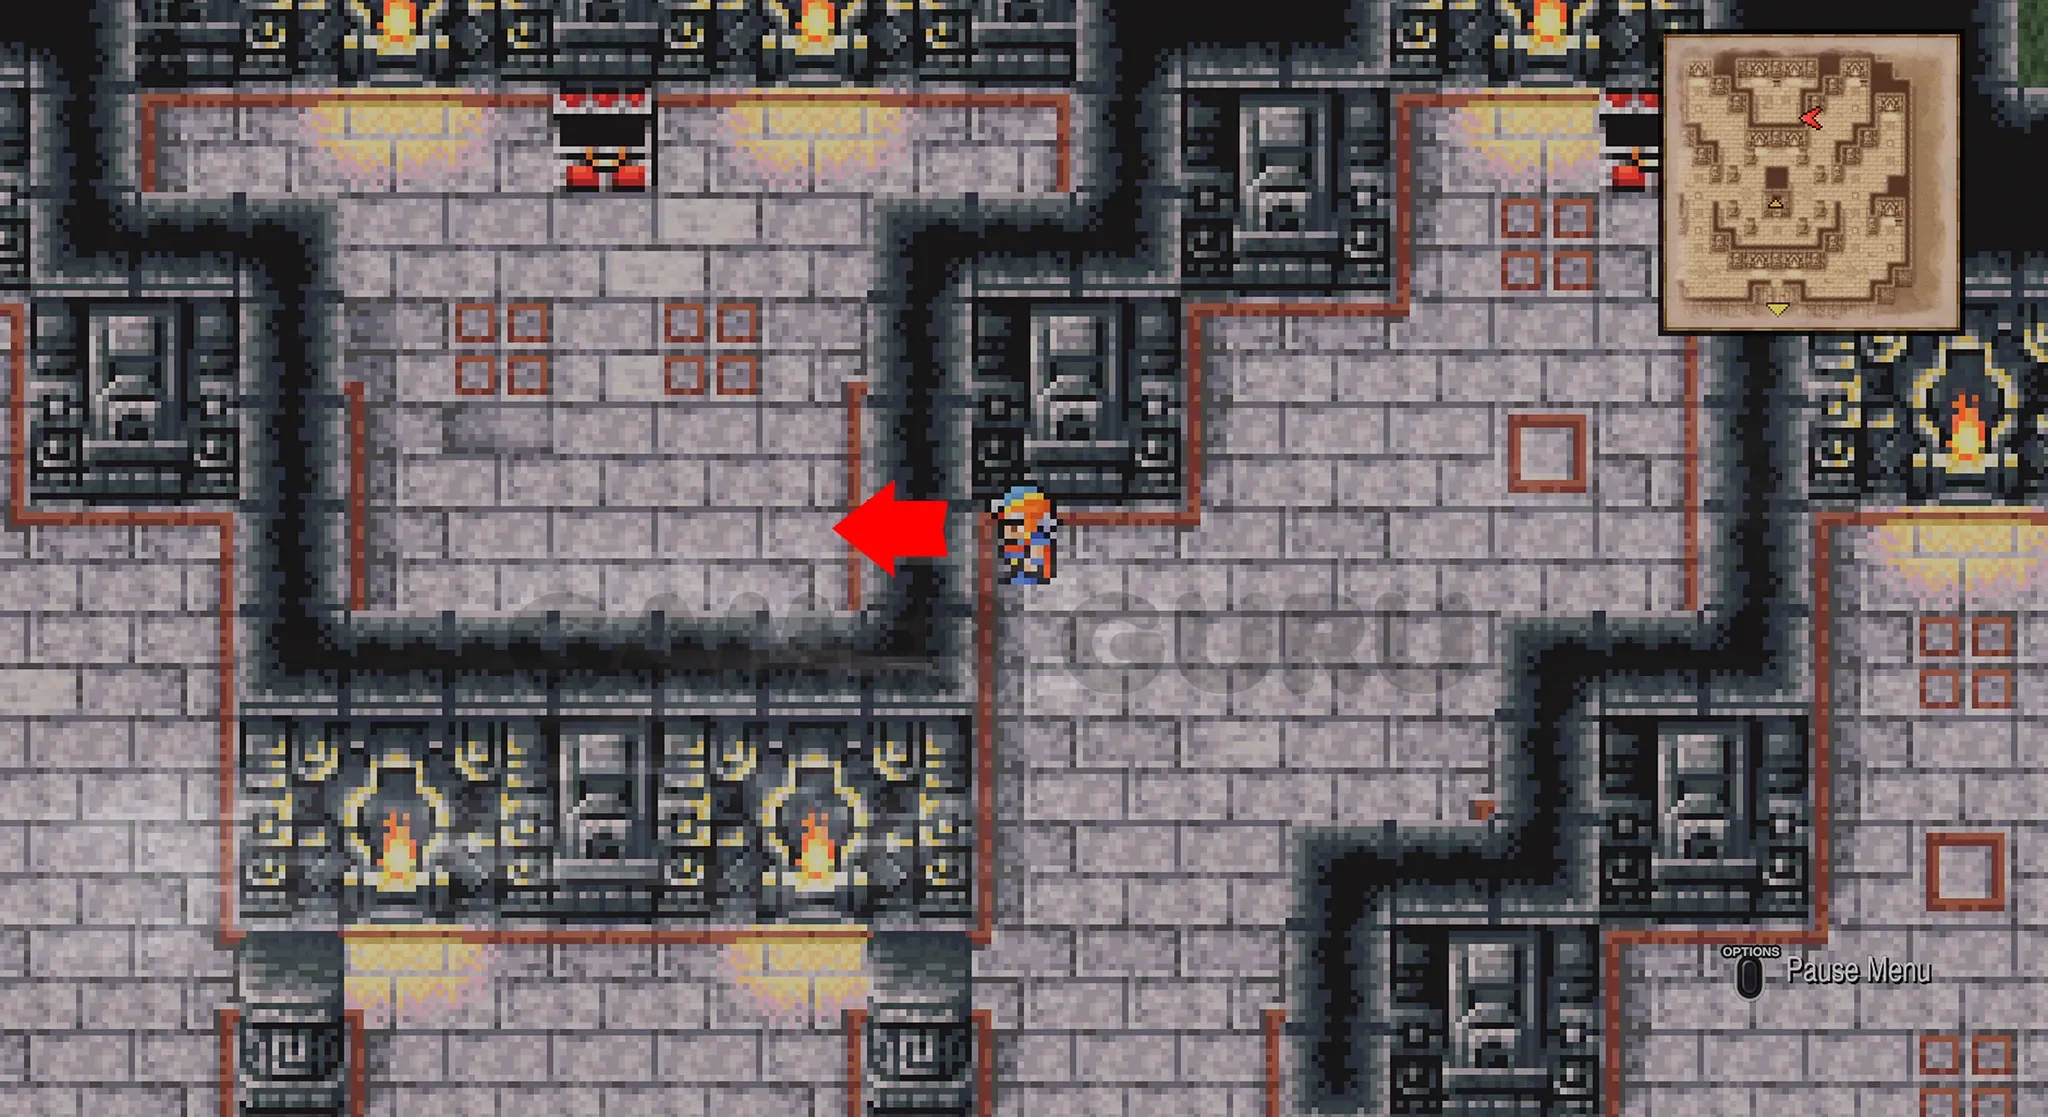
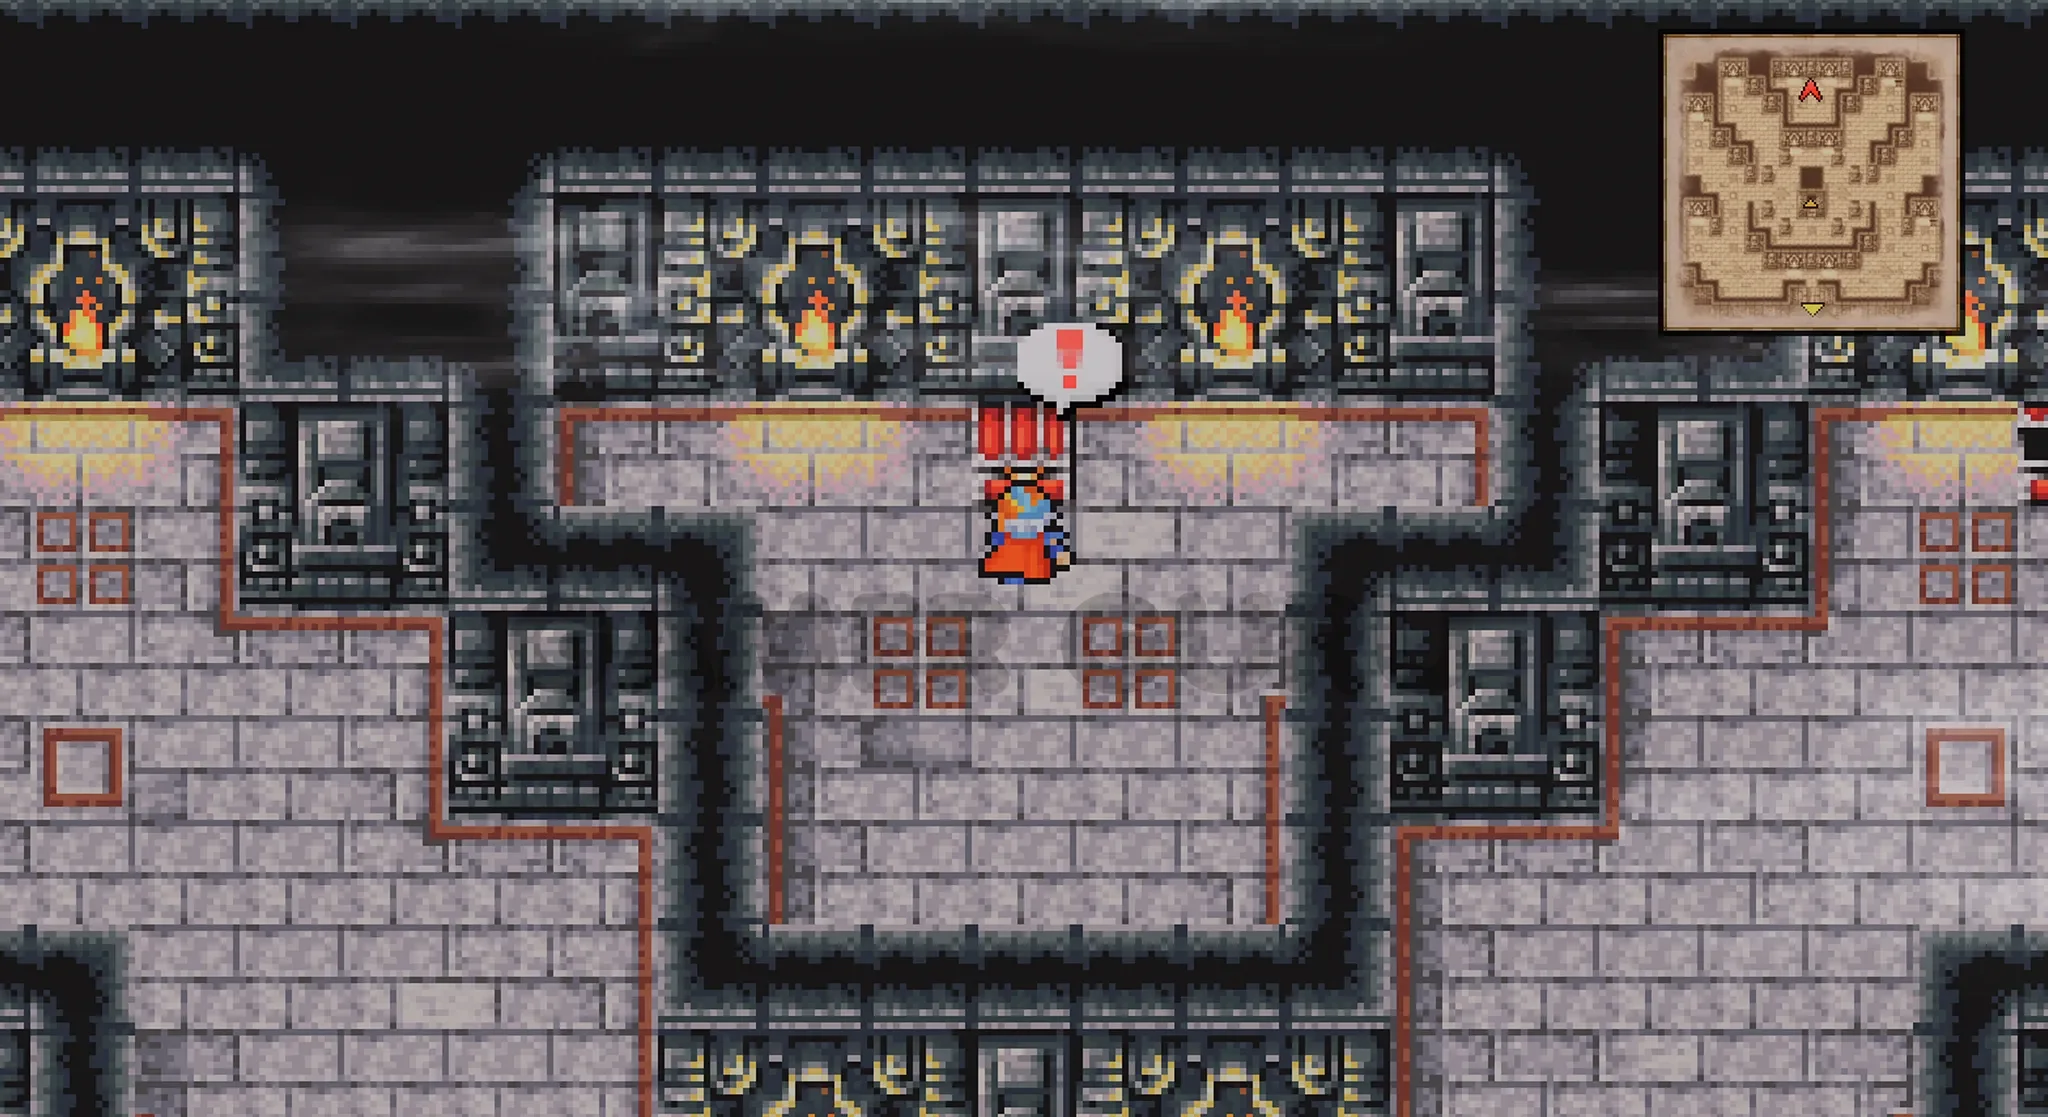
When you first arrive in 3F go directly to the left until the far left most door, go through that left door to appear in the upper part of 3F where you will find the 3 chests.
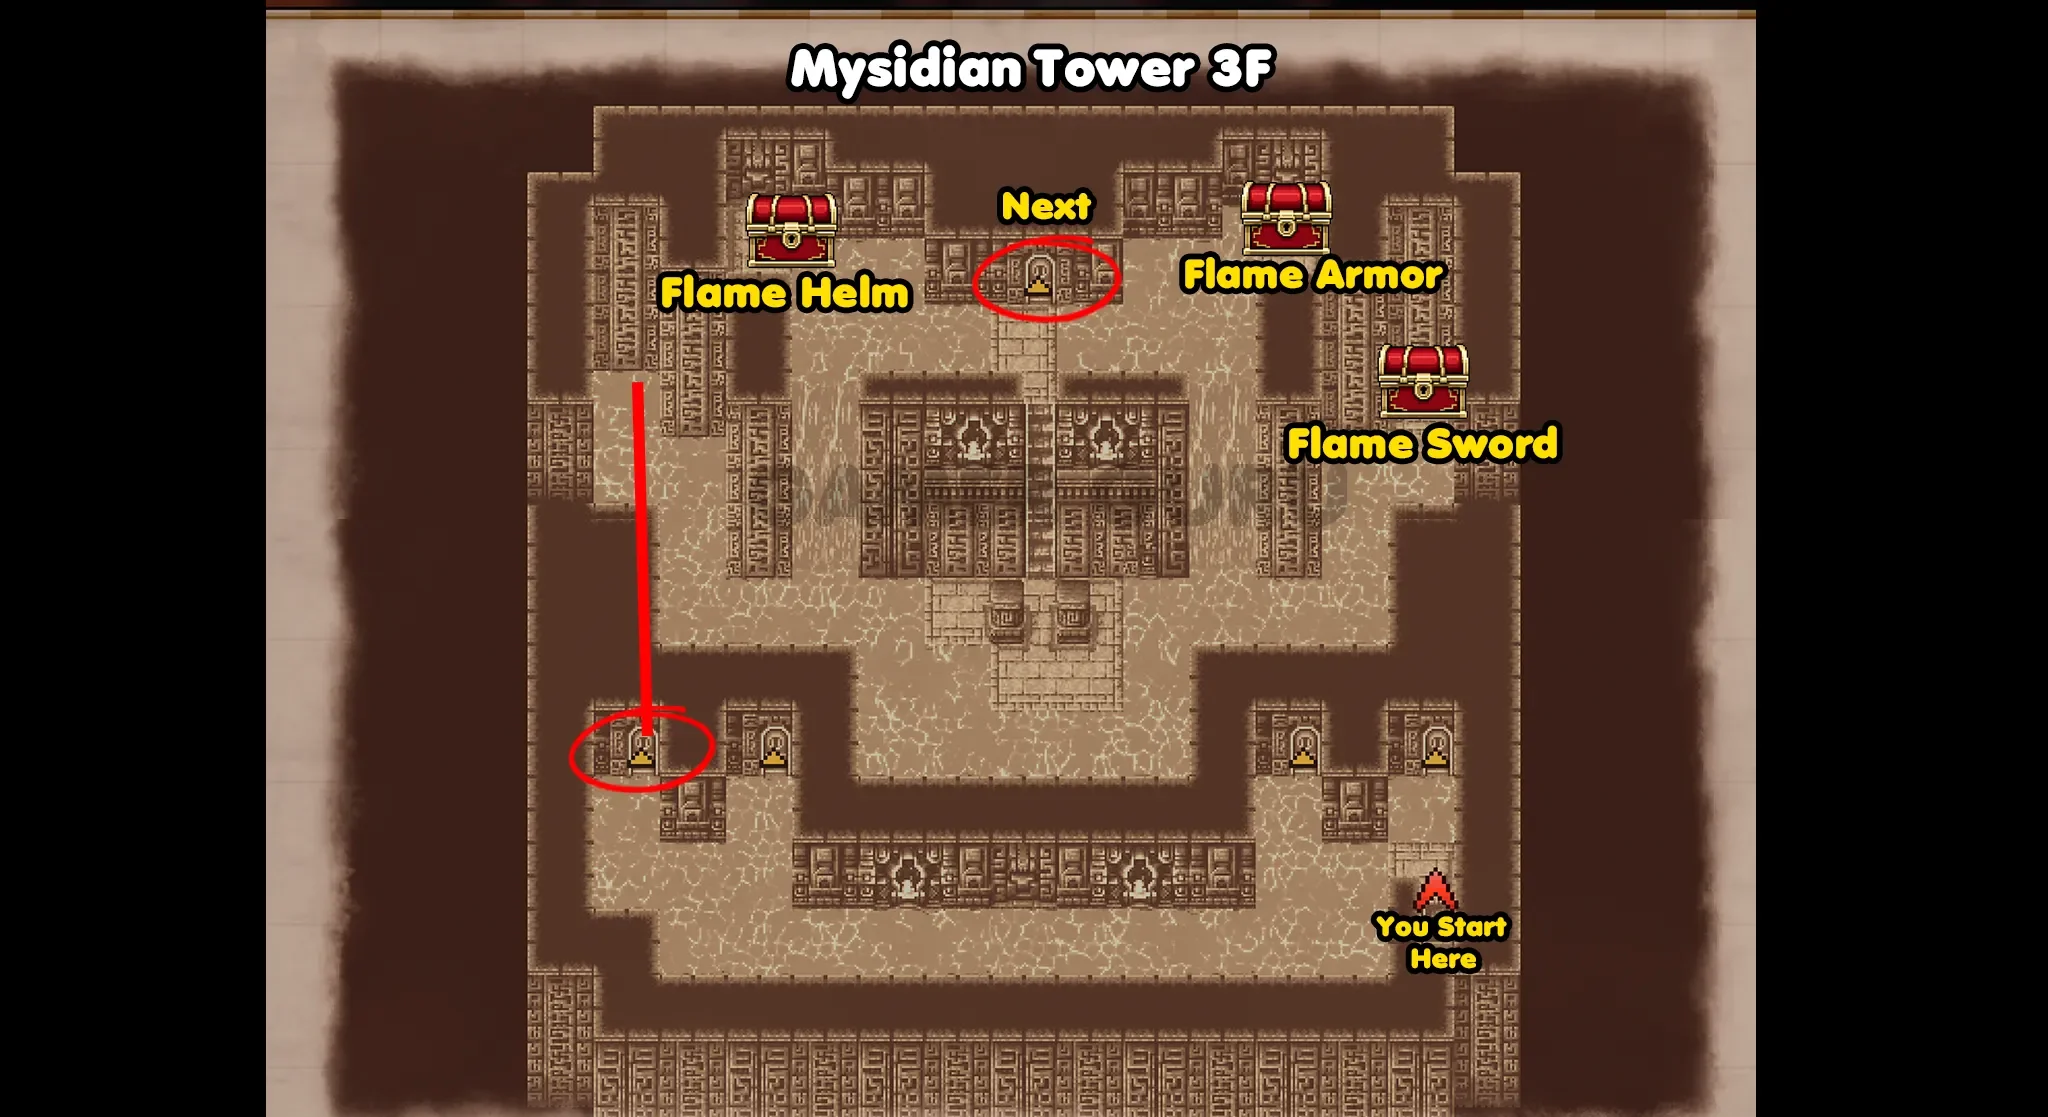
The chest on the lower right has a Flame Sword, then go up the stairs in the middle to reach the last 2 chests, the one on the upper right has Flame Armor and the one on the left contains a Flame Helm.
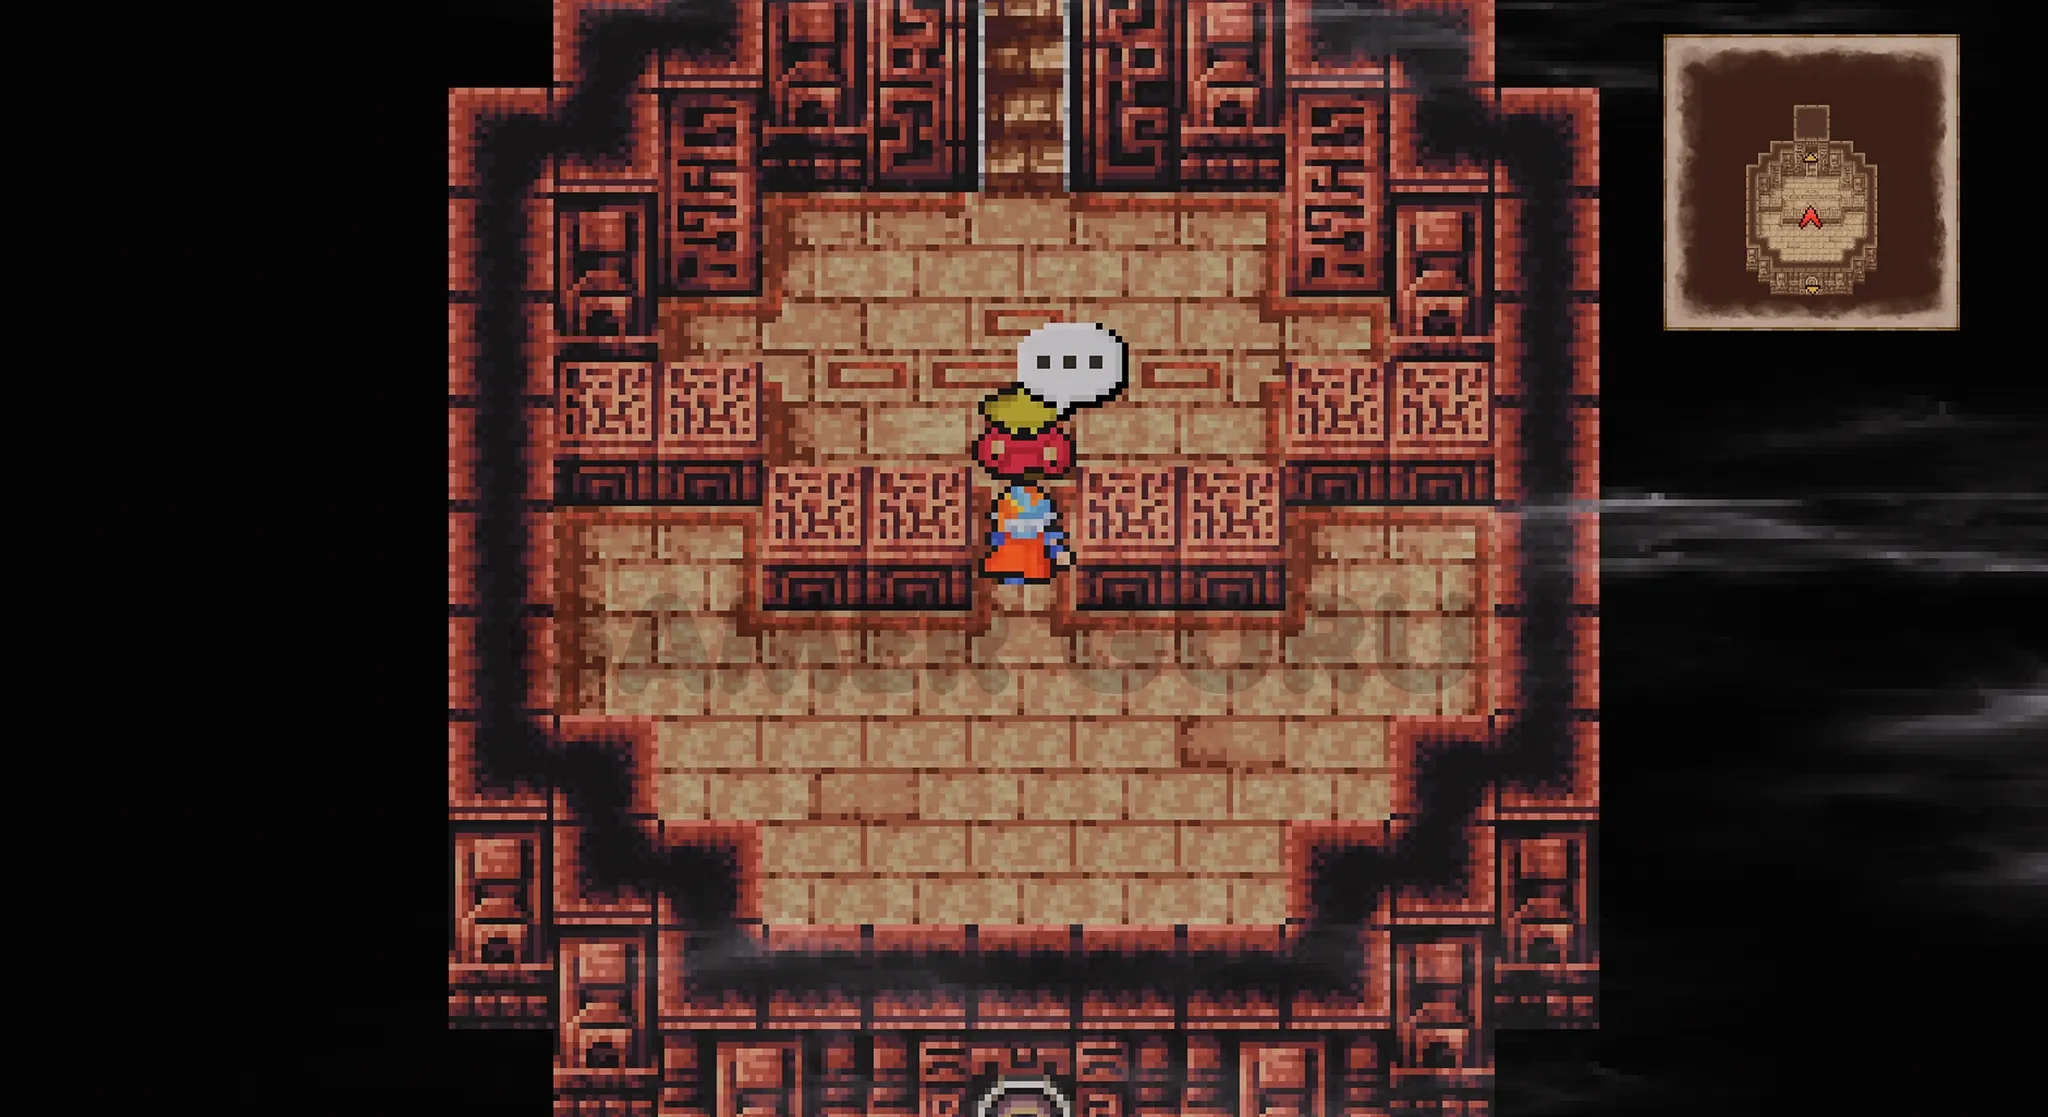
After opening all 3 chests, go through the door at the top to reach the 1st Boss Room of this dungeon.
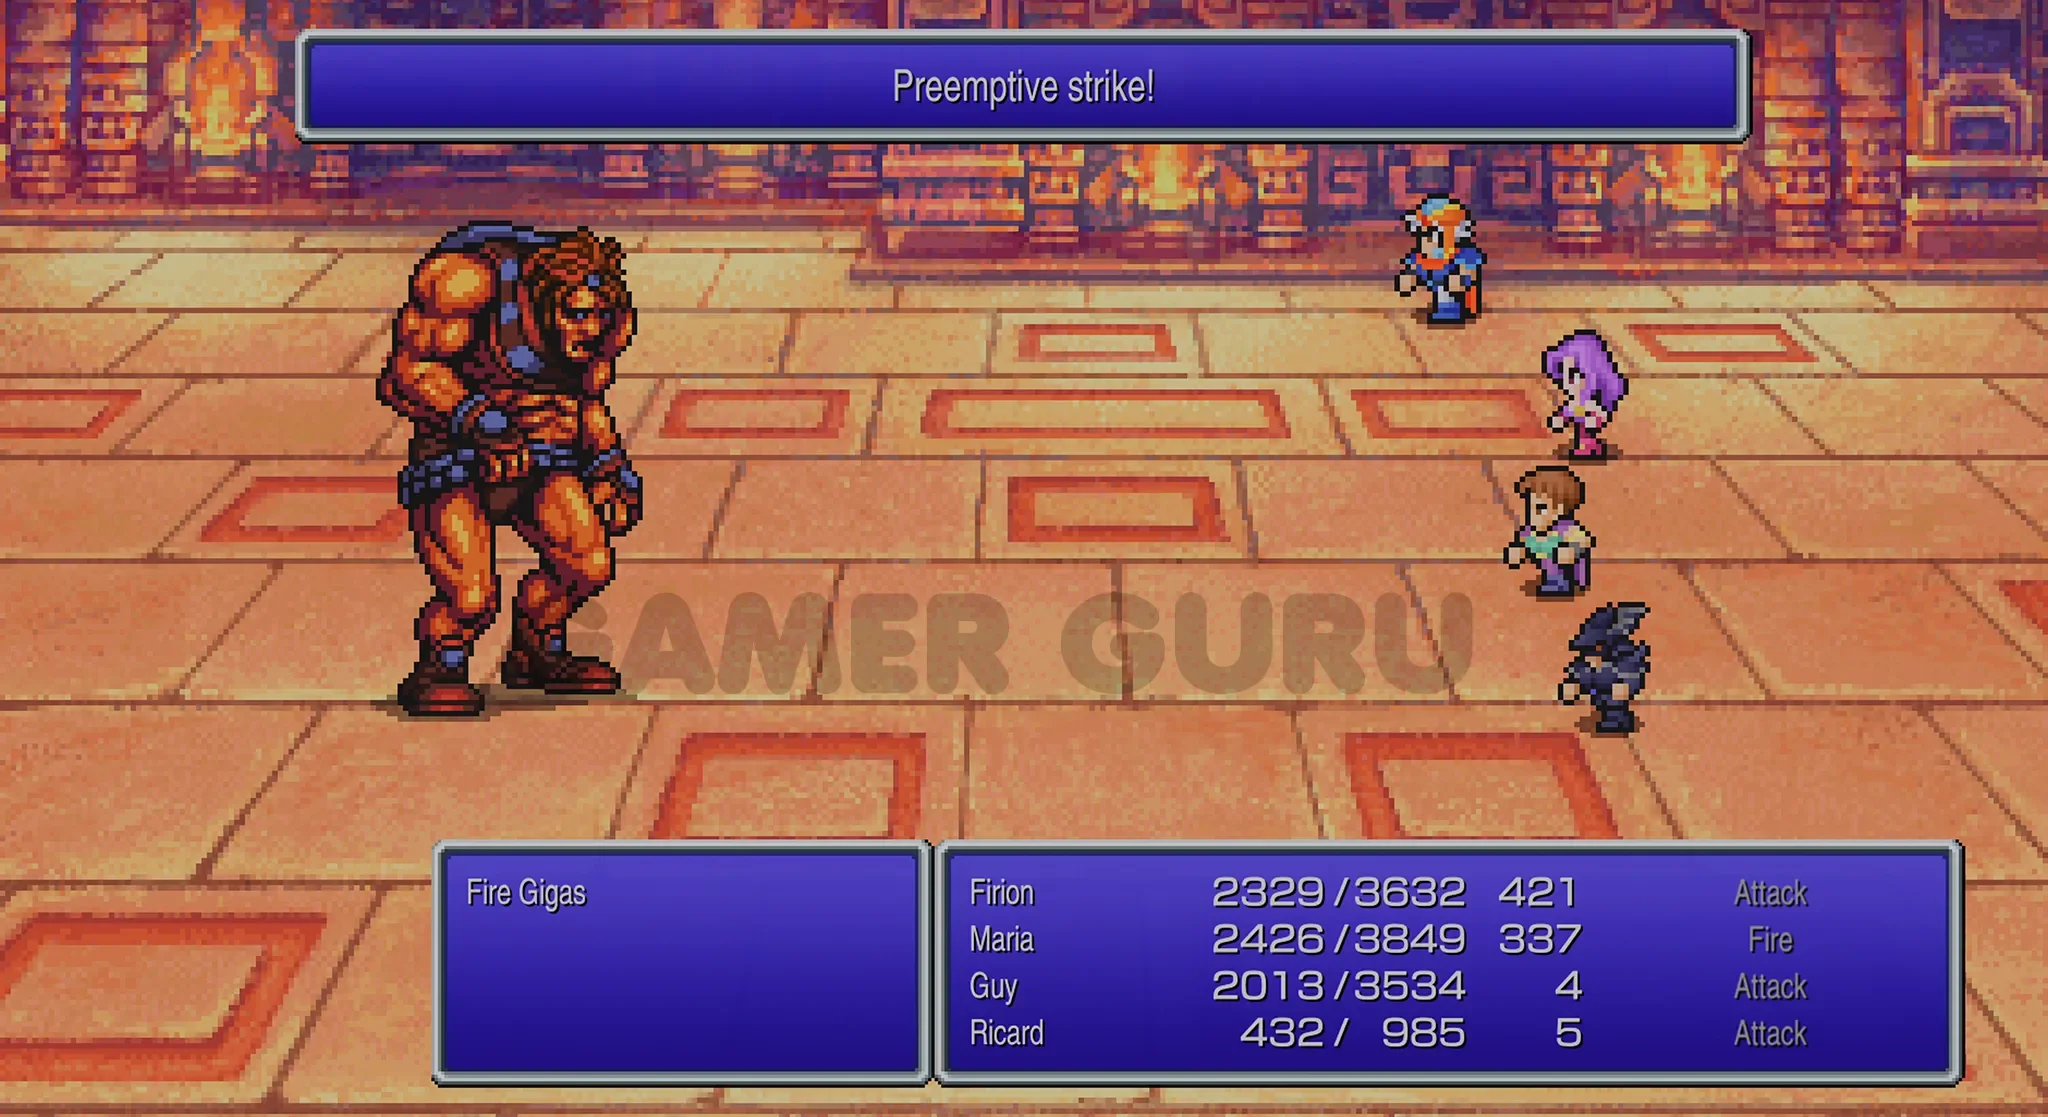
Fire Gigas Boss
The boss in this room is going to be a Fire Gigas so make sure to equip your team with Flame Armor to protect against his fire attacks and also if you have an axe user, make sure he is using the Ogrekiller against this boss for extra damage.
If you black mage has a decent level with Blizzard it will also make this fight a lot easier. Just make sure you DON’T use any fire spells, as fire will heal this boss.
After you defeat the Fire Gigas, continue up through the door to reach 4F.
4F
You will be able to find 3 chests on 4F.
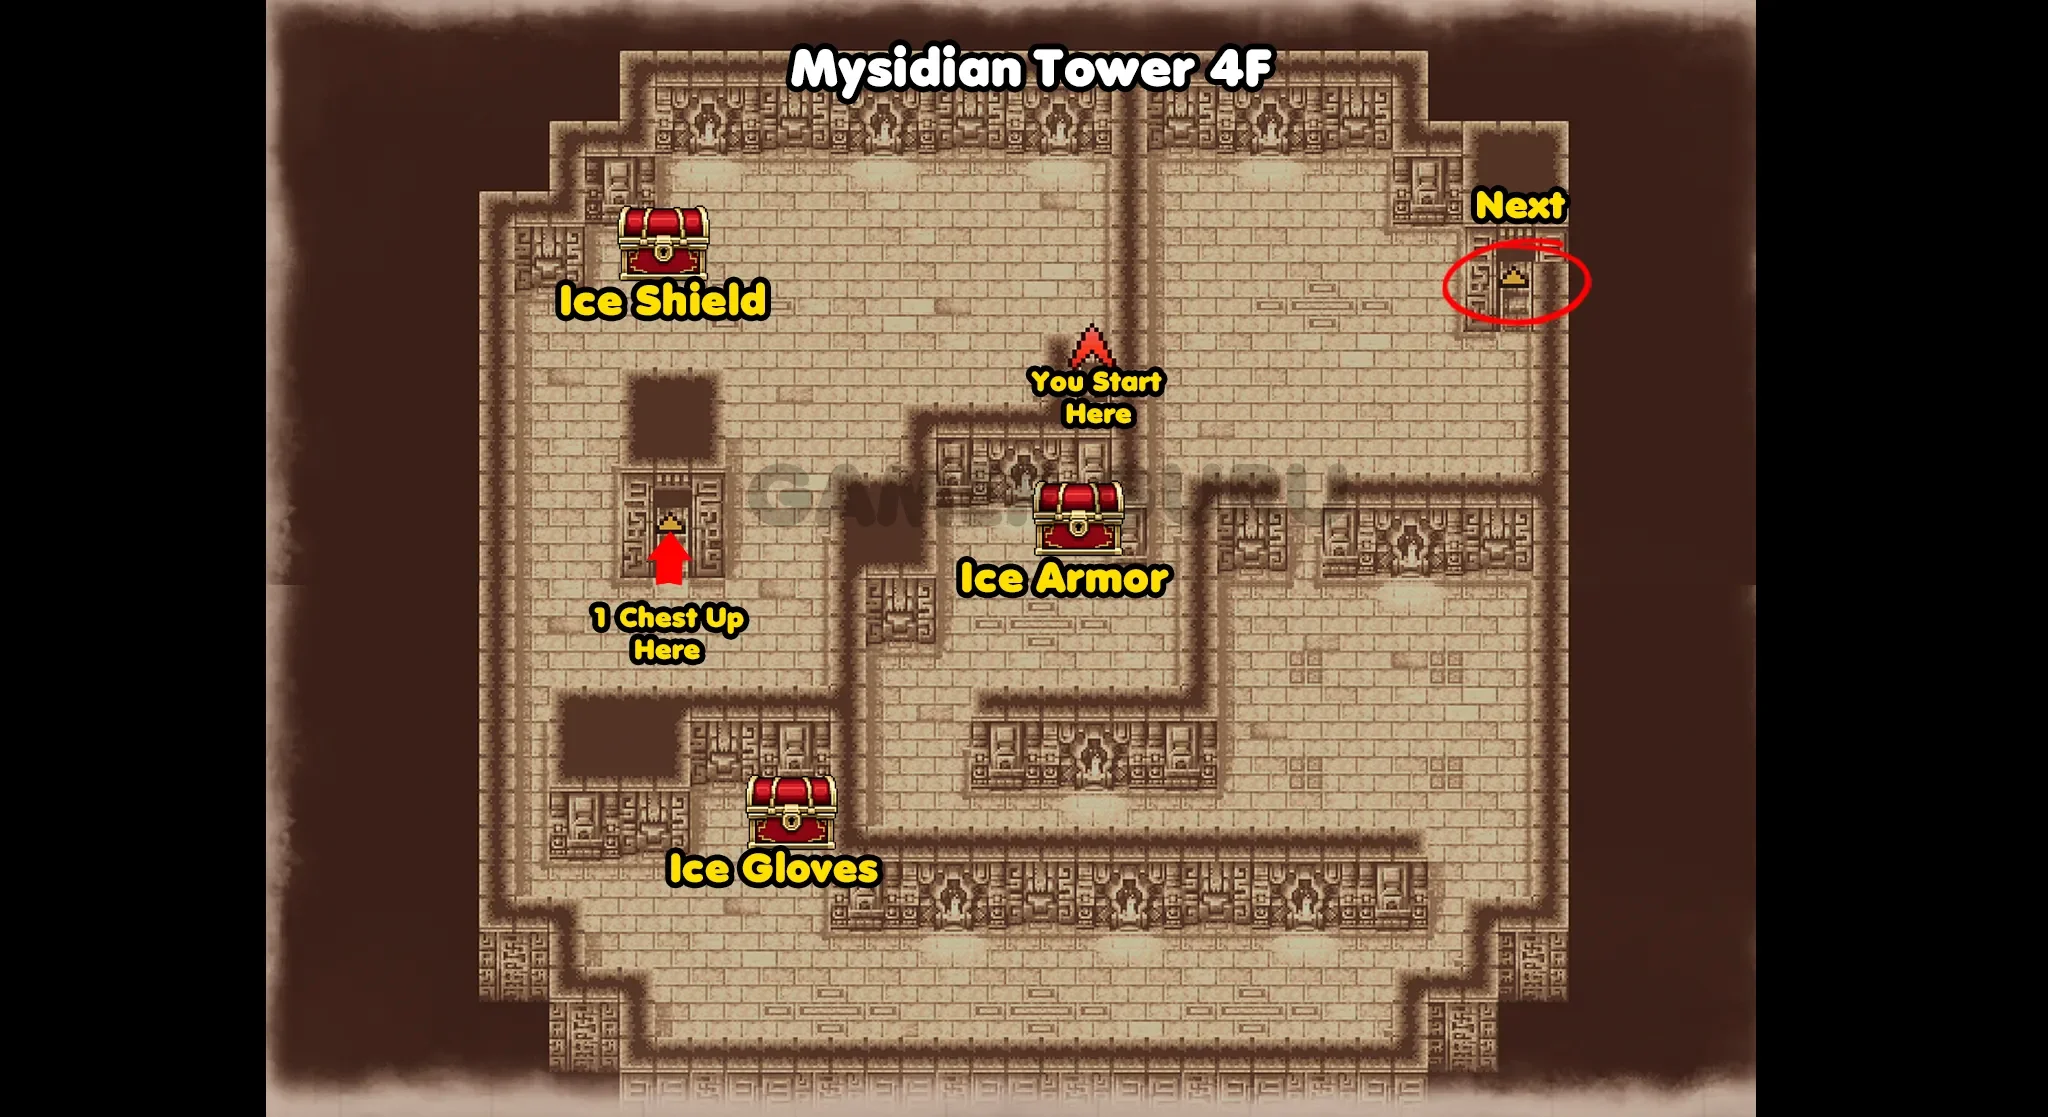
First open the one just to the left of where you enter the floor, this chest will contain an Ice Shield. Now before opening the other chests on this floor, go up the stairs directly below the Ice Shield chest.

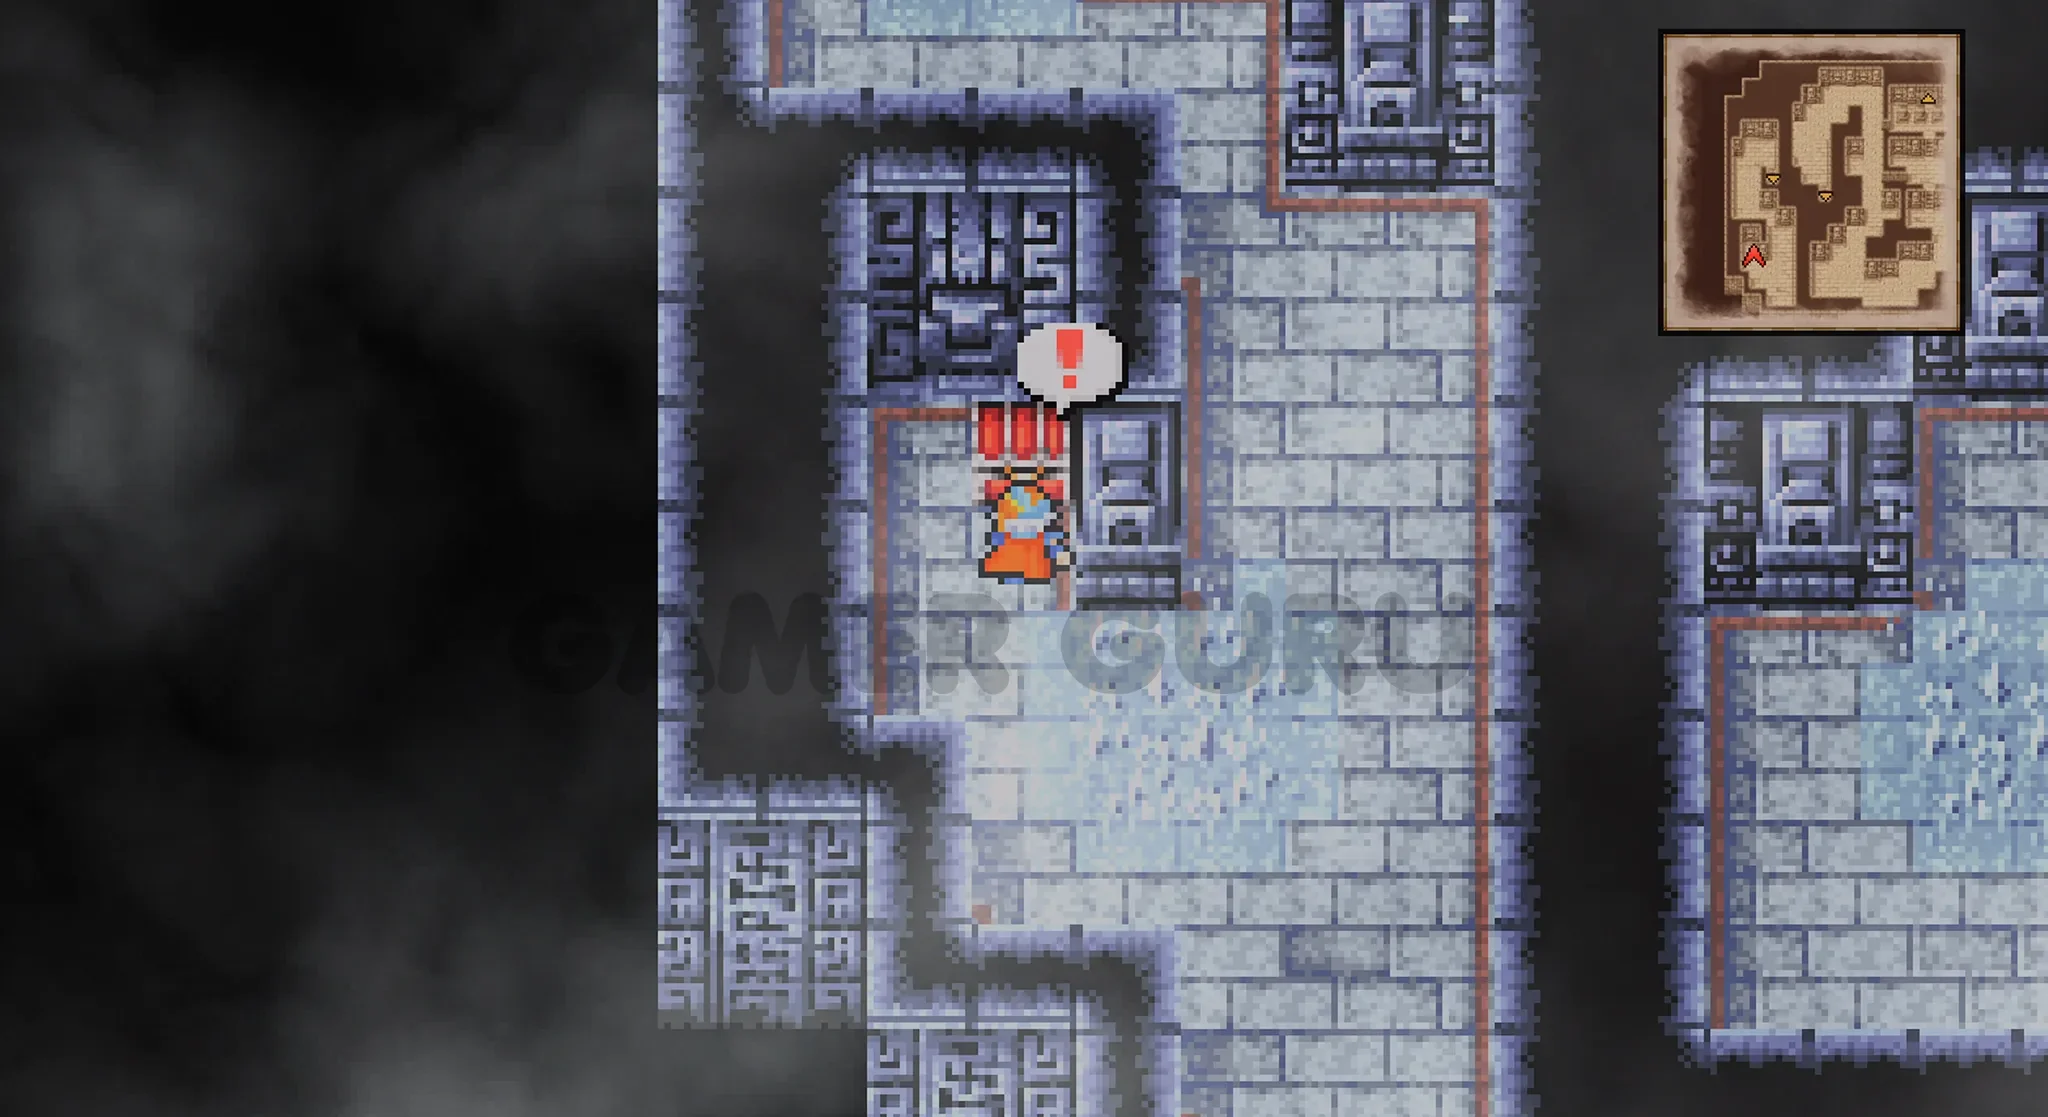
This will take you to a cut off section of 5F where you will find a chest containing the Ice Lance.
Now go back down to 4F to open the other 2 chests. The one at the bottom has Ice Gloves, and the one in the middle has Ice Armor. You can then leave through the stairs at the top right to reach 5F.
5F
This floor technically has 2 chests, but you already opened the one on the left containing the Ice Lance by going up the optional stairs in 4F, so there is now only one more me need to open.
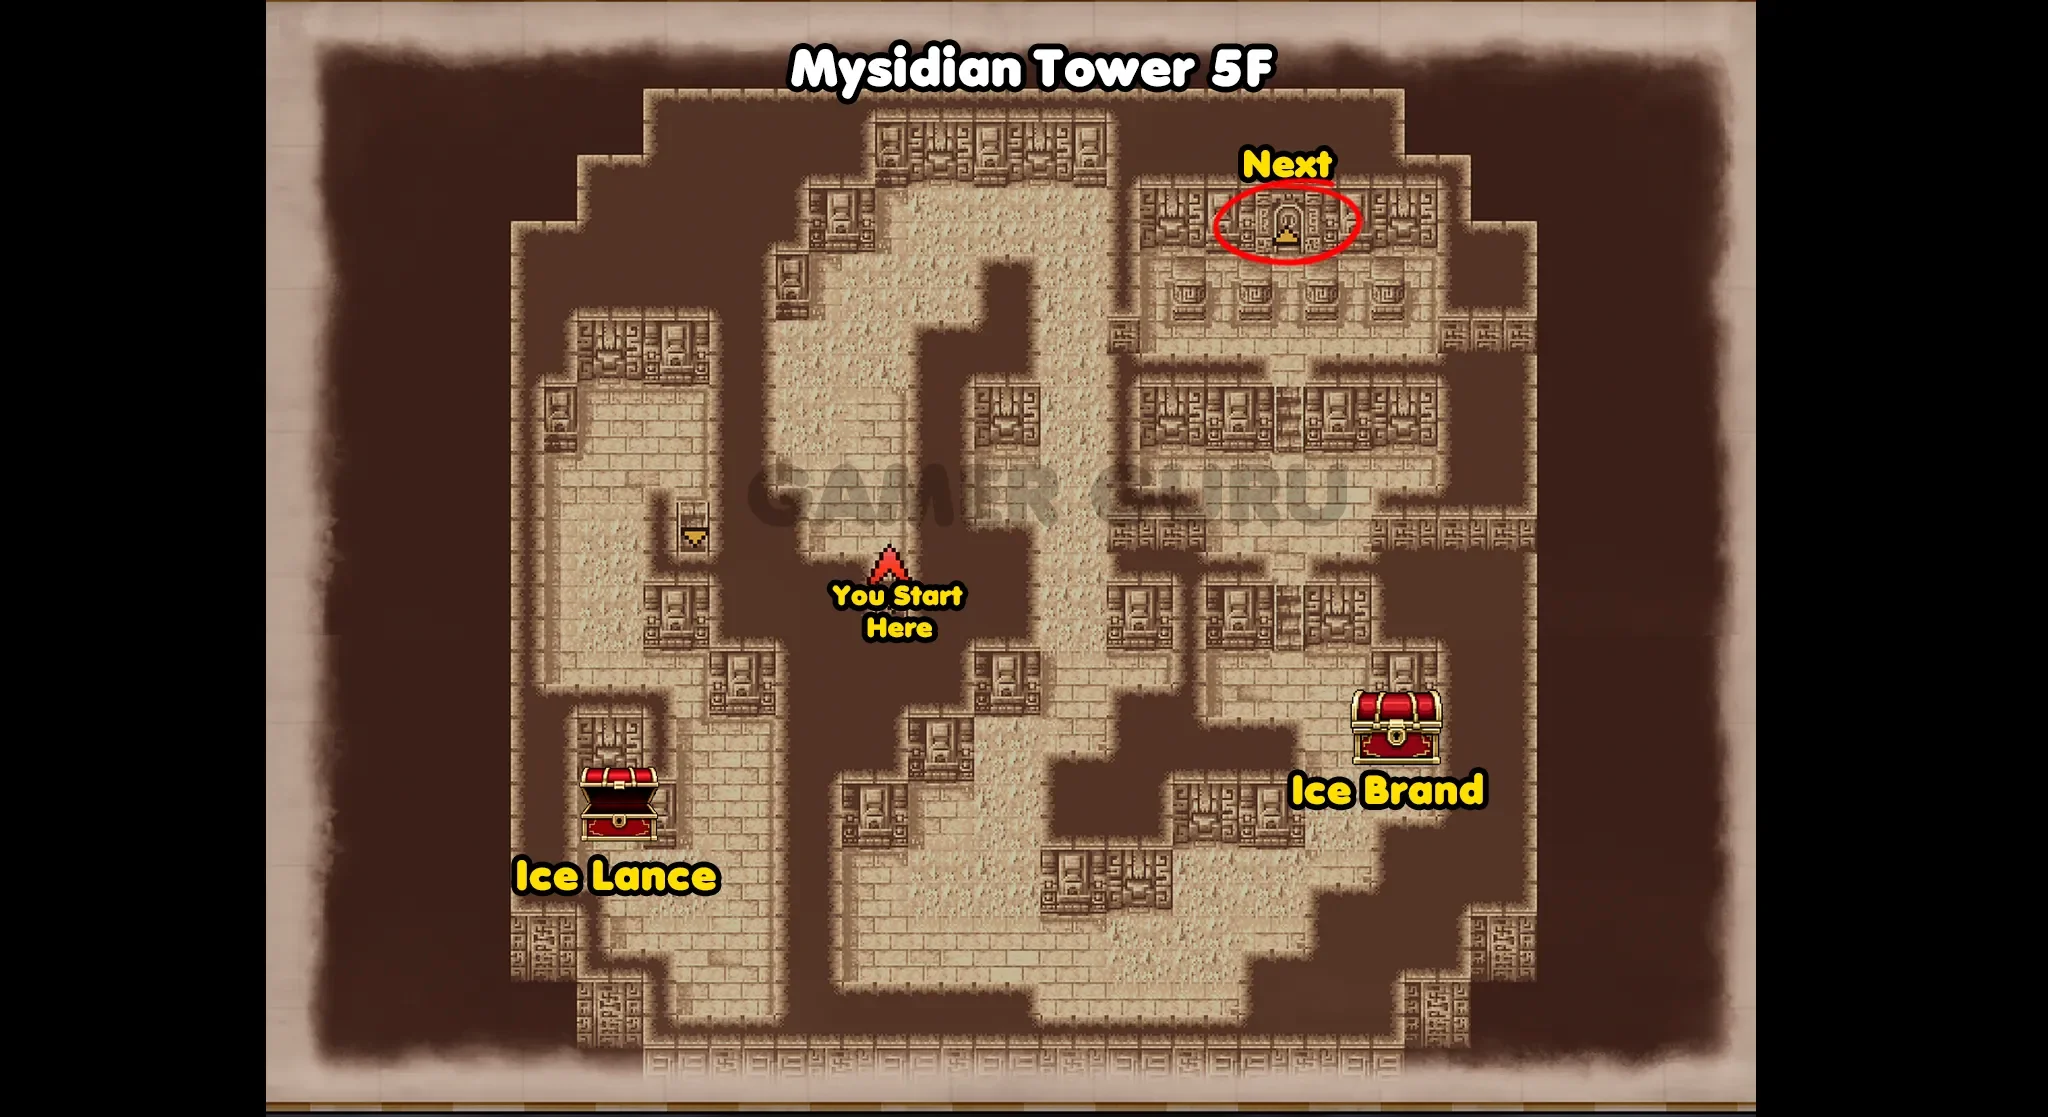
The chest on this floor is directly on the main path, very hard to miss and it contains an Ice Brand.
Once you have opened it continue through the door above to reach the next Boss Room.
Ice Gigas Boss
As you may have guessed, this will be the same as the previous boss fight, except instead of using Blizzard magic, use Fire instead.
And instead of using Flame Armor, use ice resistant equipment and fire weapons.

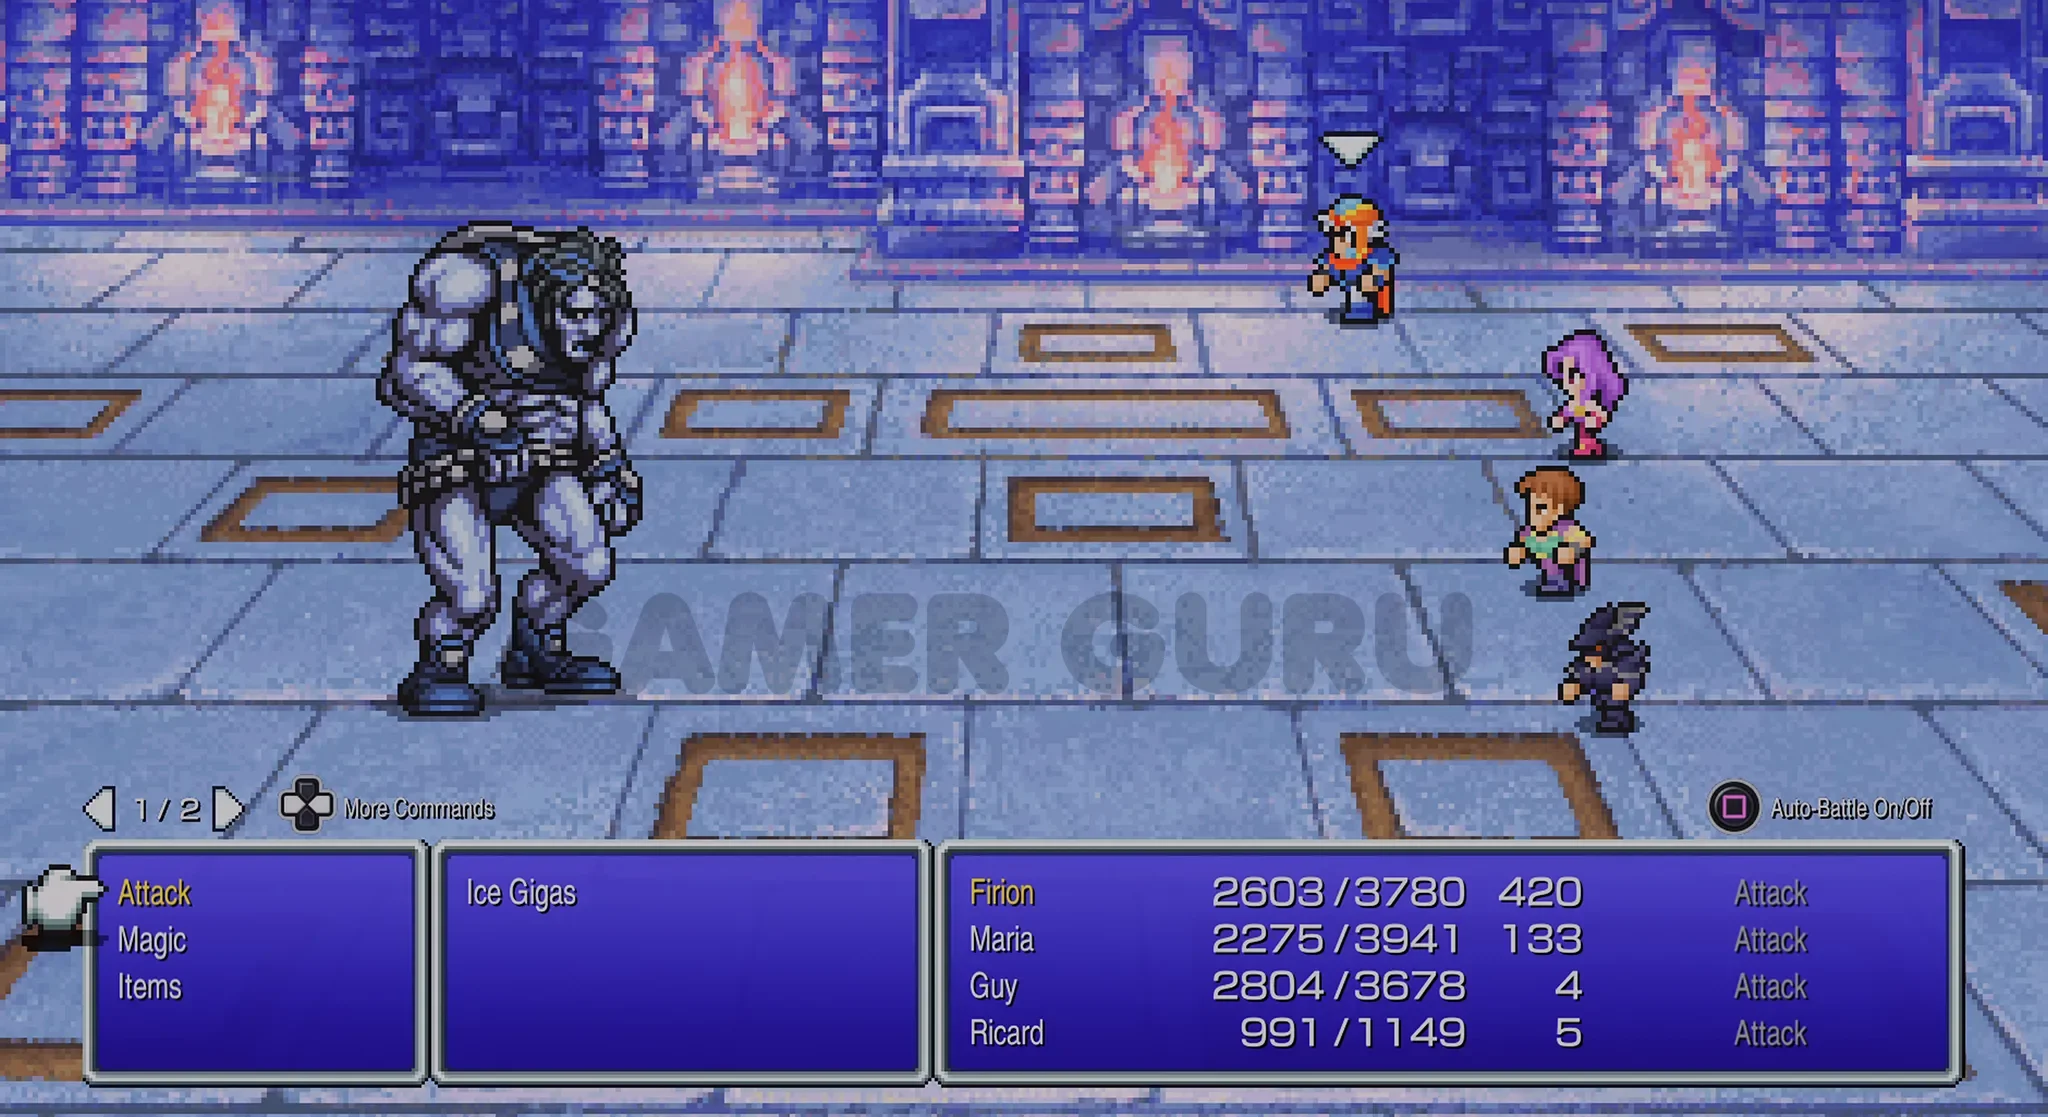
After defeating the boss, continue through the door above to reach 6F.
6F
There are only 2 chests on 6F.
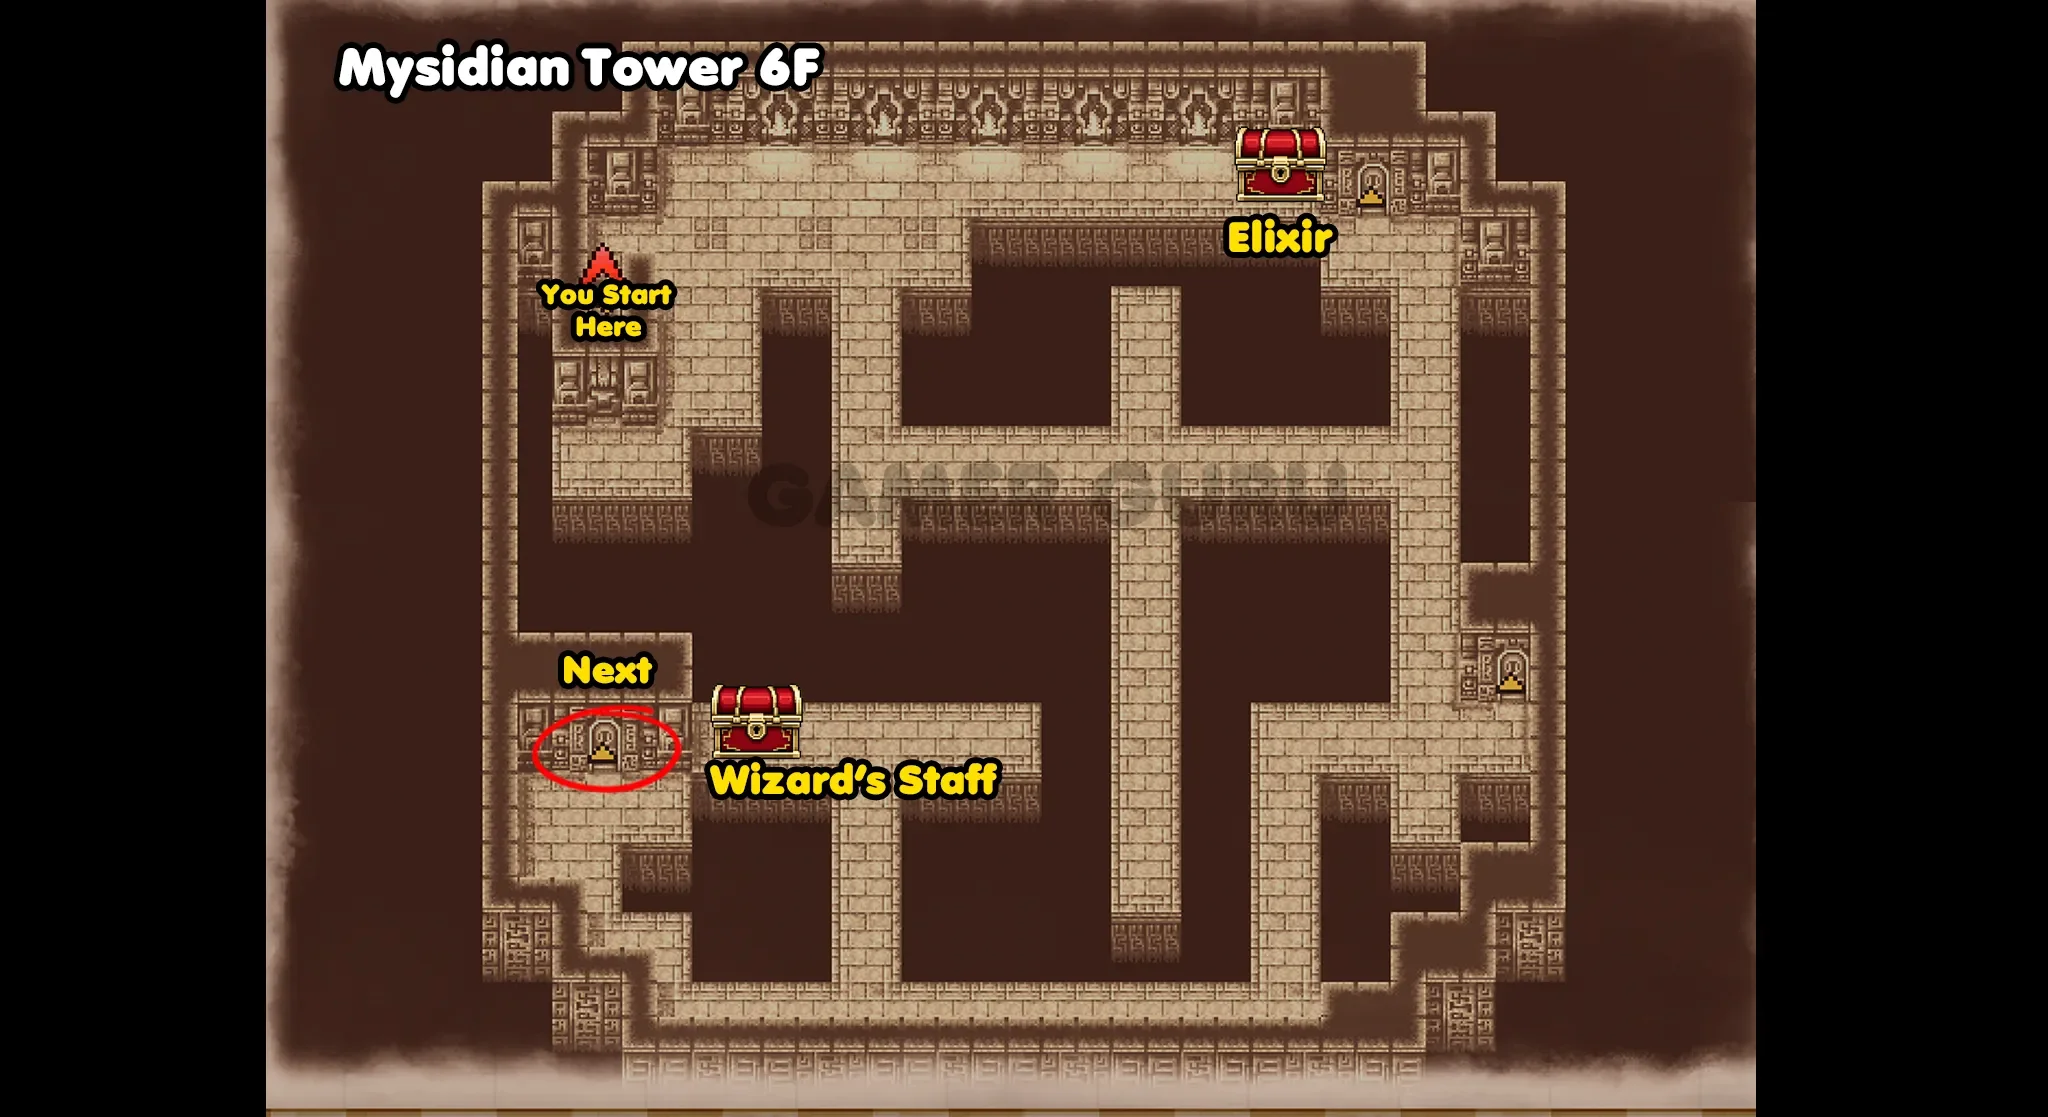
The chest at the top right contains an Elixir, and the one at the bottom left has a Wizard’s Staff.
After opening them both, go through the door at the bottom left to reach 7F (the other doors just lead to empty rooms as usual).
7F
This floor is one of the more simple rooms and it has 3 chests, all easily reached.
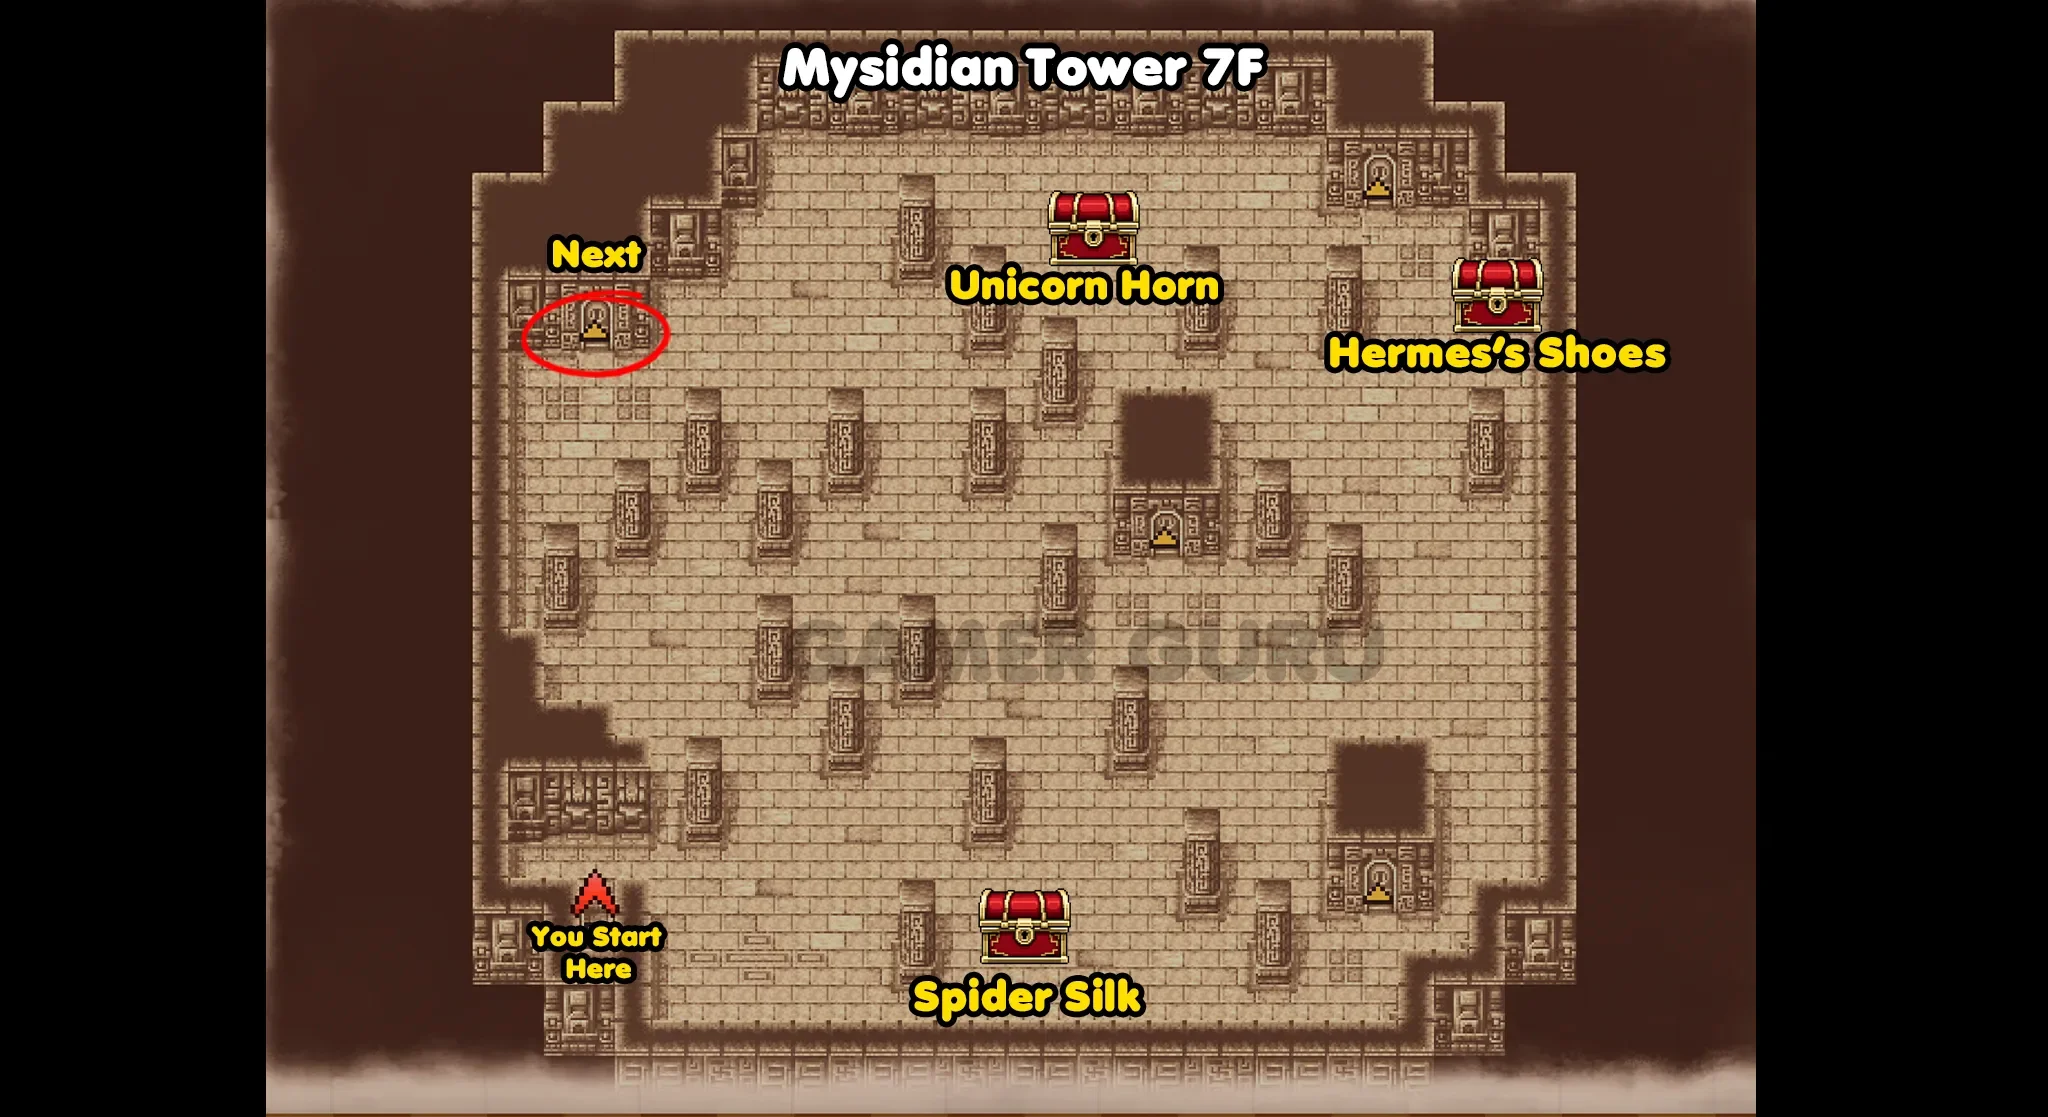
The chest at the bottom contains a Spider Silk, the one on the right has Hermes’s Shoes and the one at the top has a Unicorn Horn.
Once you have opened all 3, go through the door at the top left to reach another Boss Room.
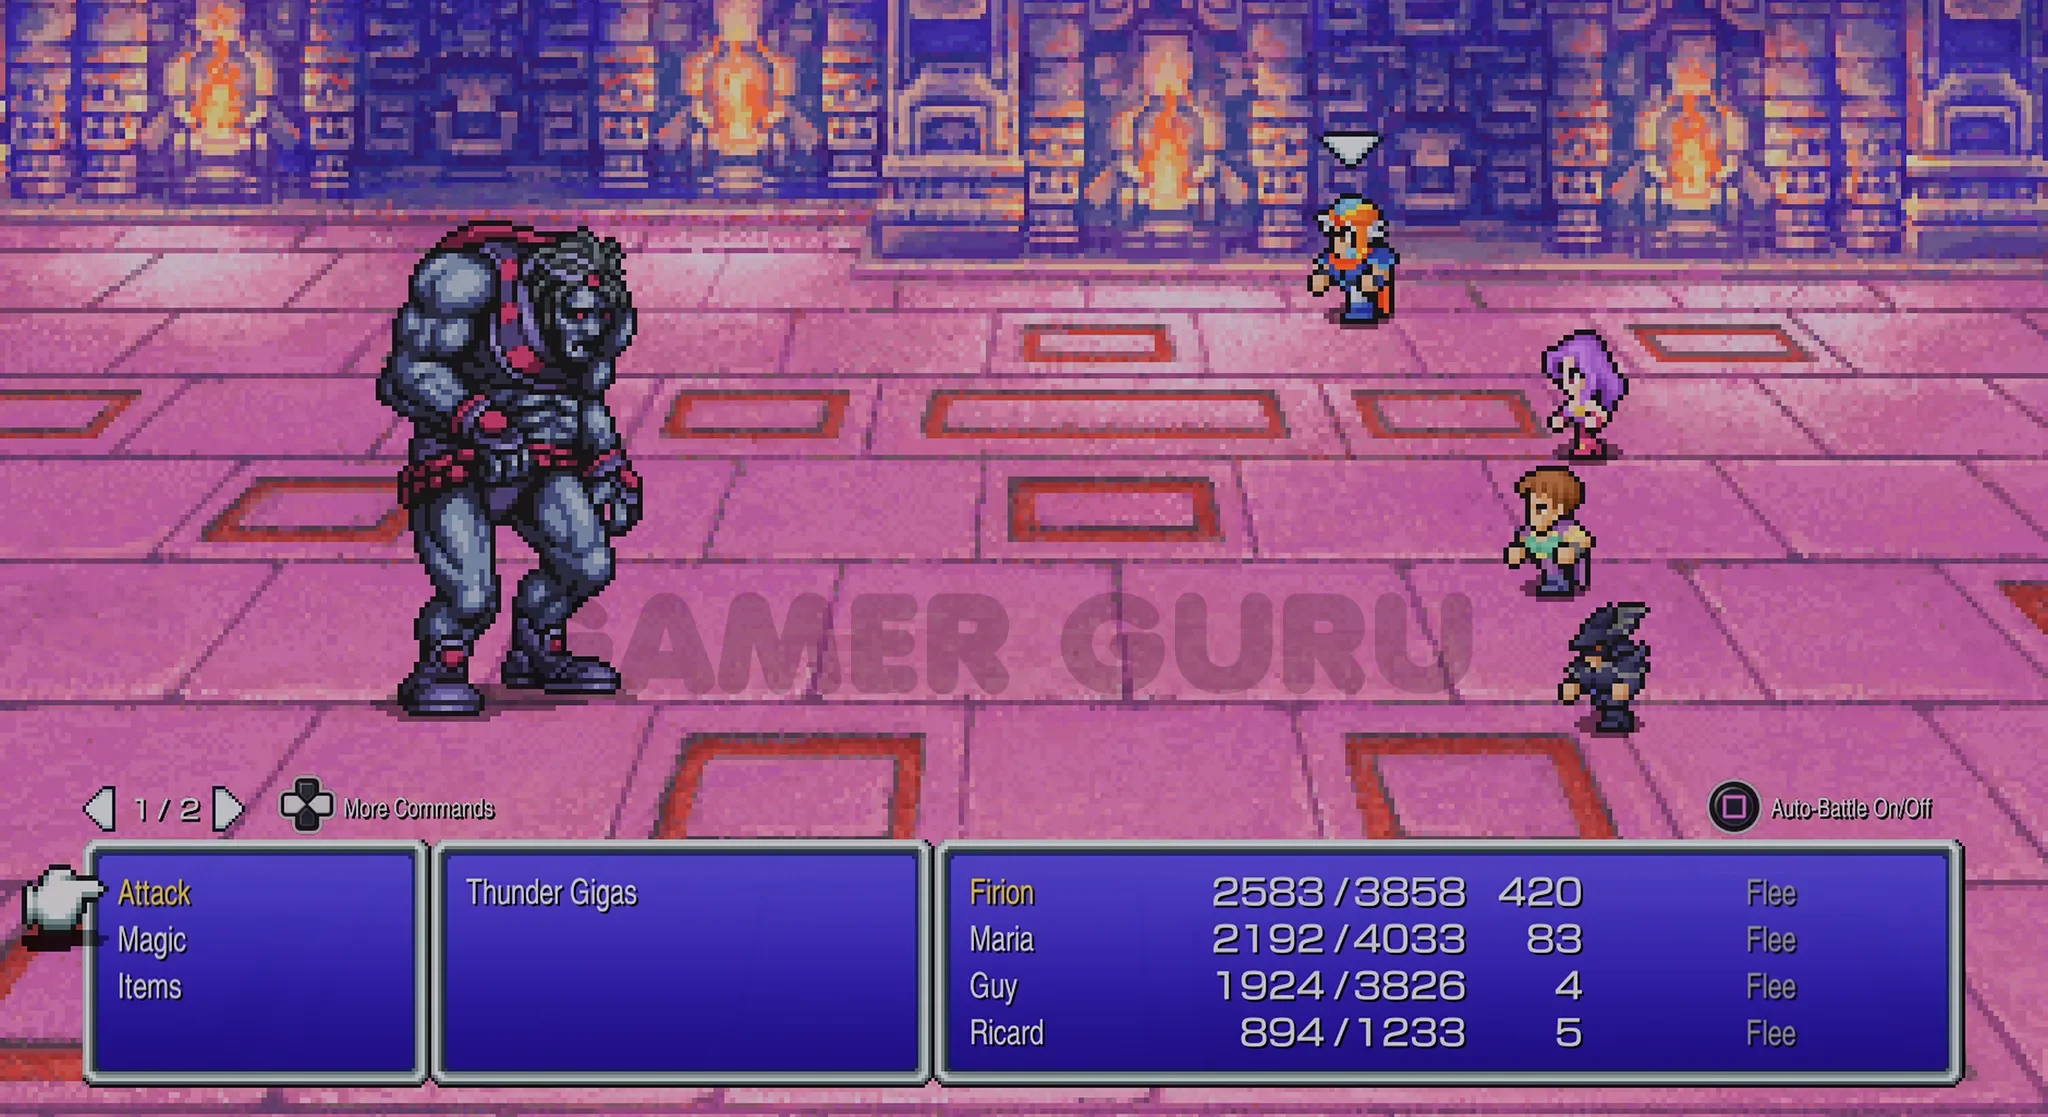
Thunder Gigas Boss Fight
The Thunder Gigas is much more powerful than the previous 2, and his only weakness is to Poison attacks, so make sure to equip the Wizard’s Staff you just got from one of the chests as it is imbued with Poison.
Other than that just be sure to cast Protect and Shell to avoid taking too much damage.
Once you defeat the boss, go through the door above to reach 8F.
8F
8F is also actually a very simple layout, its “puzzle” is that it has many doors that just lead to empty rooms, but thanks to the image below you can see which one the correct door is to reach the next floor.
This floor also has 1 chest so be sure to open it before moving on.

The chest is all the way at the top to the right, it contains a Flare Tome (be careful as it will also be an enemy ambush).
Once you have opened the chest just go through the door directly below the chest on the right to get to 9F (every other door leads to empty rooms).
9F
There are 3 chests on 9F.
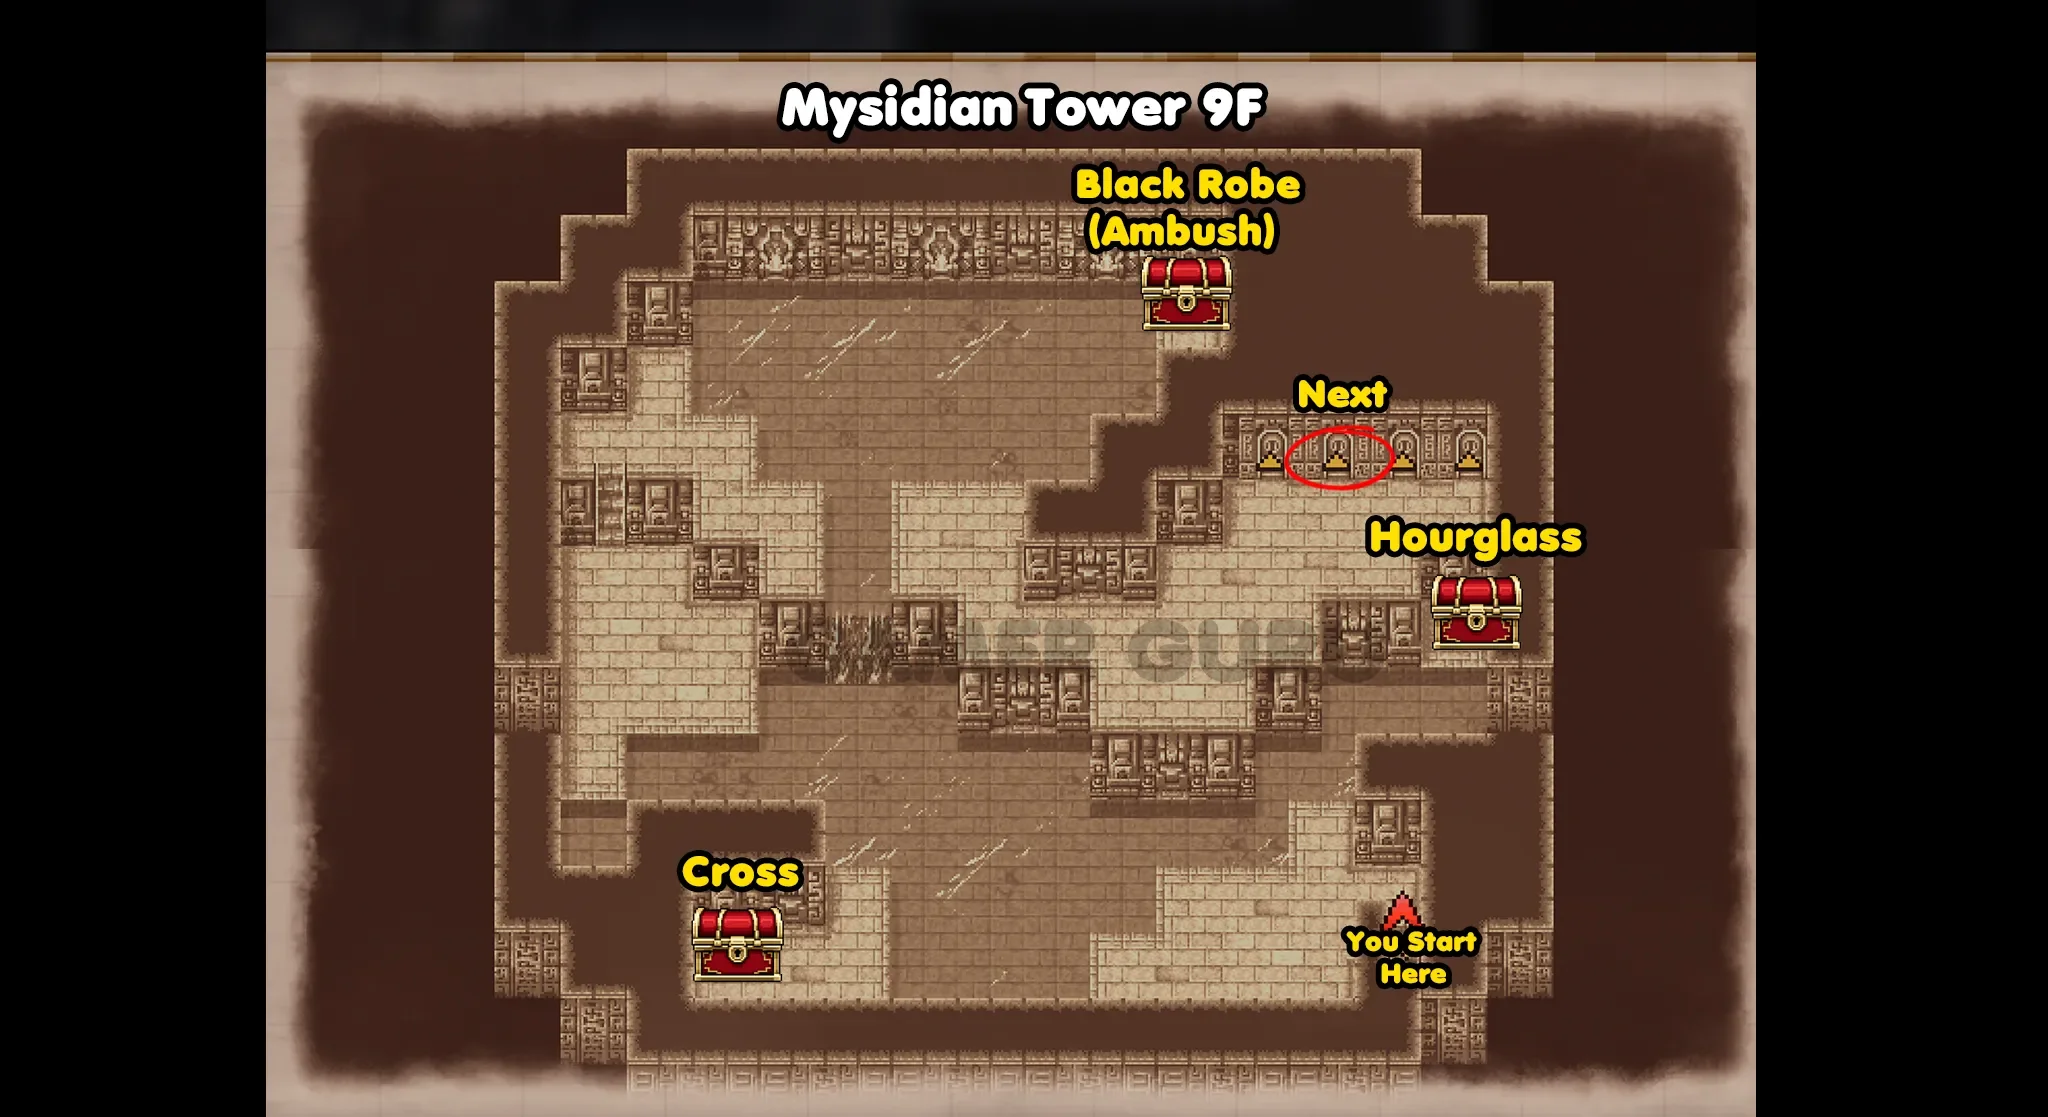
The chest on the right contains an Hourglass, the one on the left has a Cross.
The chest at the top contains the Black Robe but it will also be an ambush, probably the most difficult ambush so far, you will have to fight a White Dragon, so heal up before the fight!
Once you have opened all 3 chests, continue through the second door from the left (the one marked with “next” in the image), to continue advancing to 10F.
10F
When you reach the final room, after Minwu sacrifices himself to open the barrier to the rooms with the Ultima Tome, make sure to interact with the 4 Silver Orbs on each side of the room before interacting with the Gold Orb.
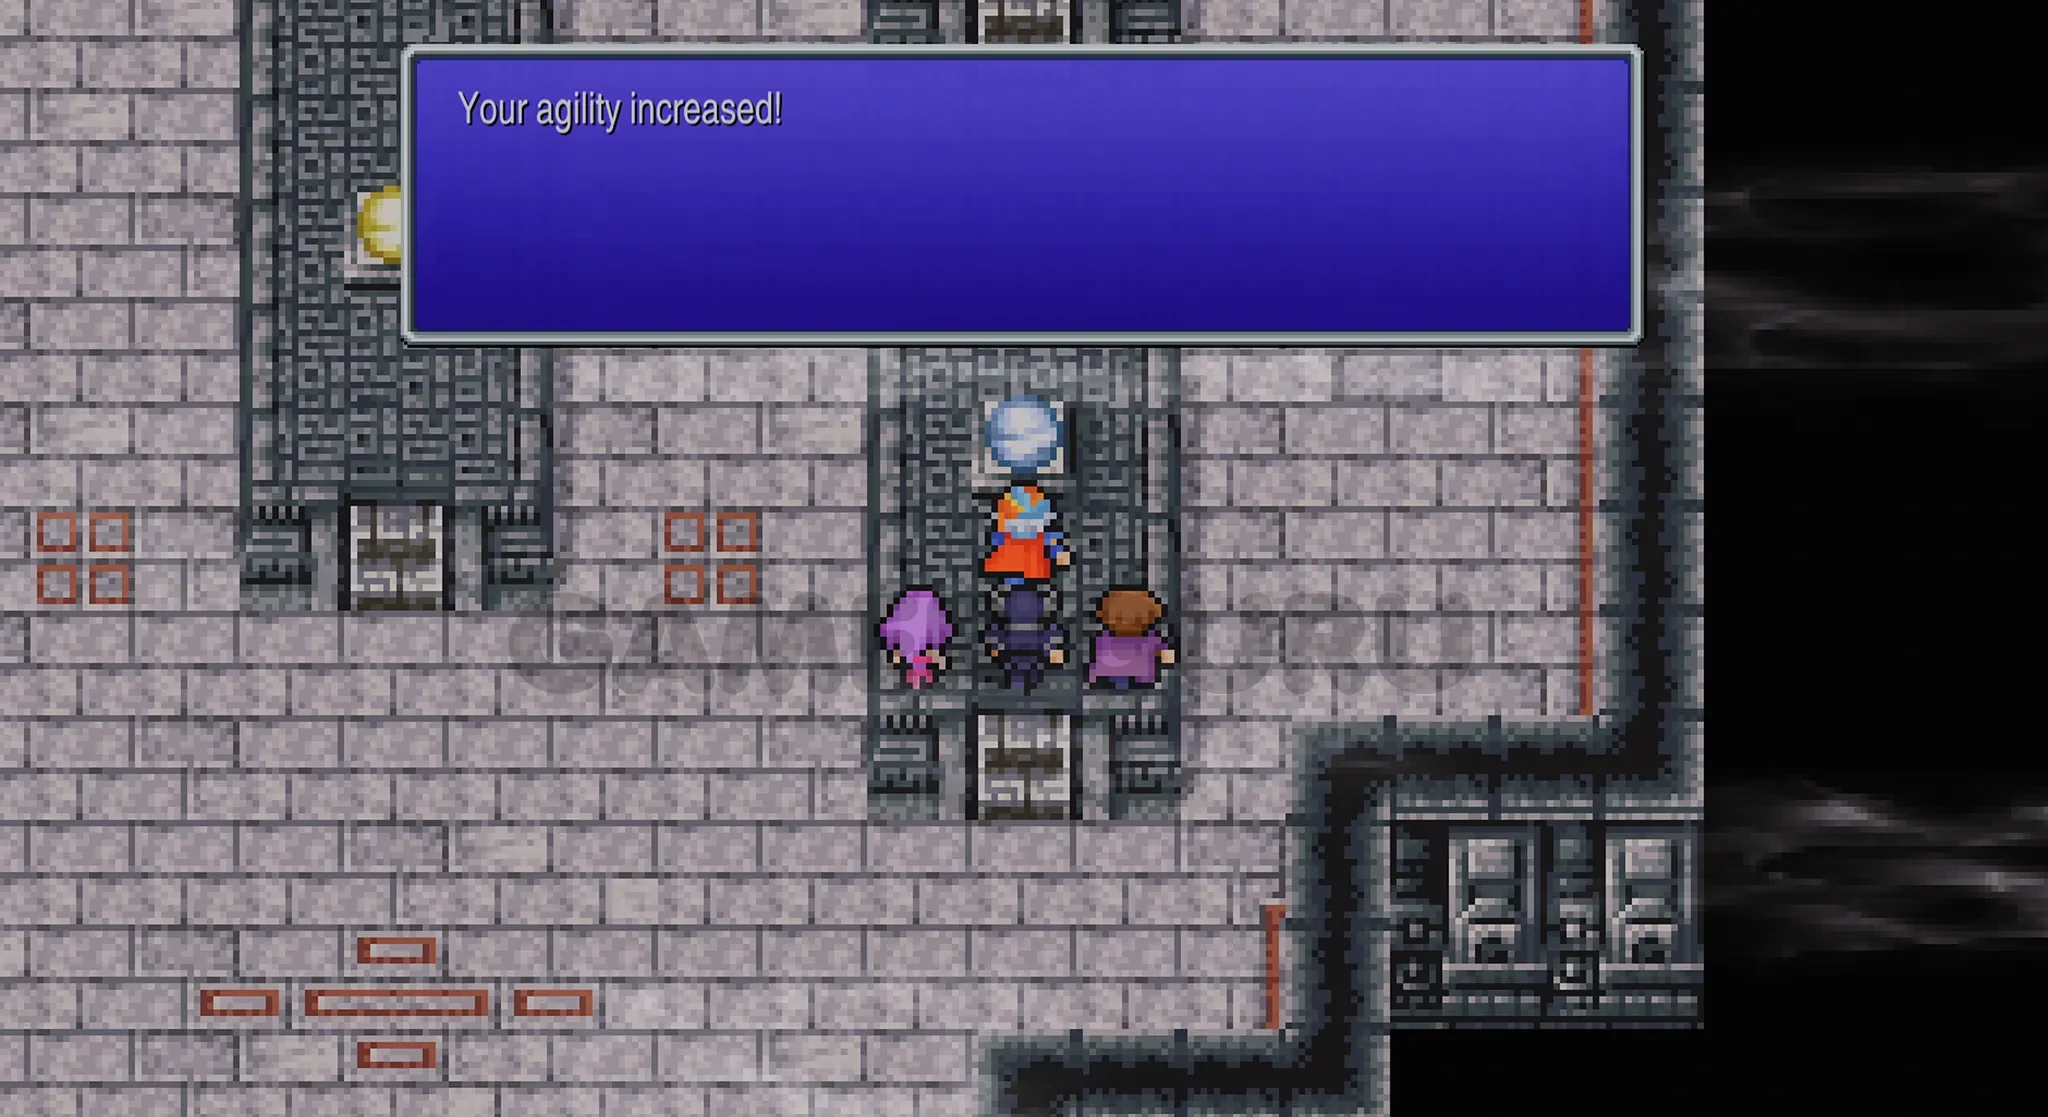
Each one of these Silver Orbs will give you +10 in different stats.
Once you have absorbed all 4 Silver Orbs go ahead and interact with the Gold Orb in the middle to get the Ultima Tome.
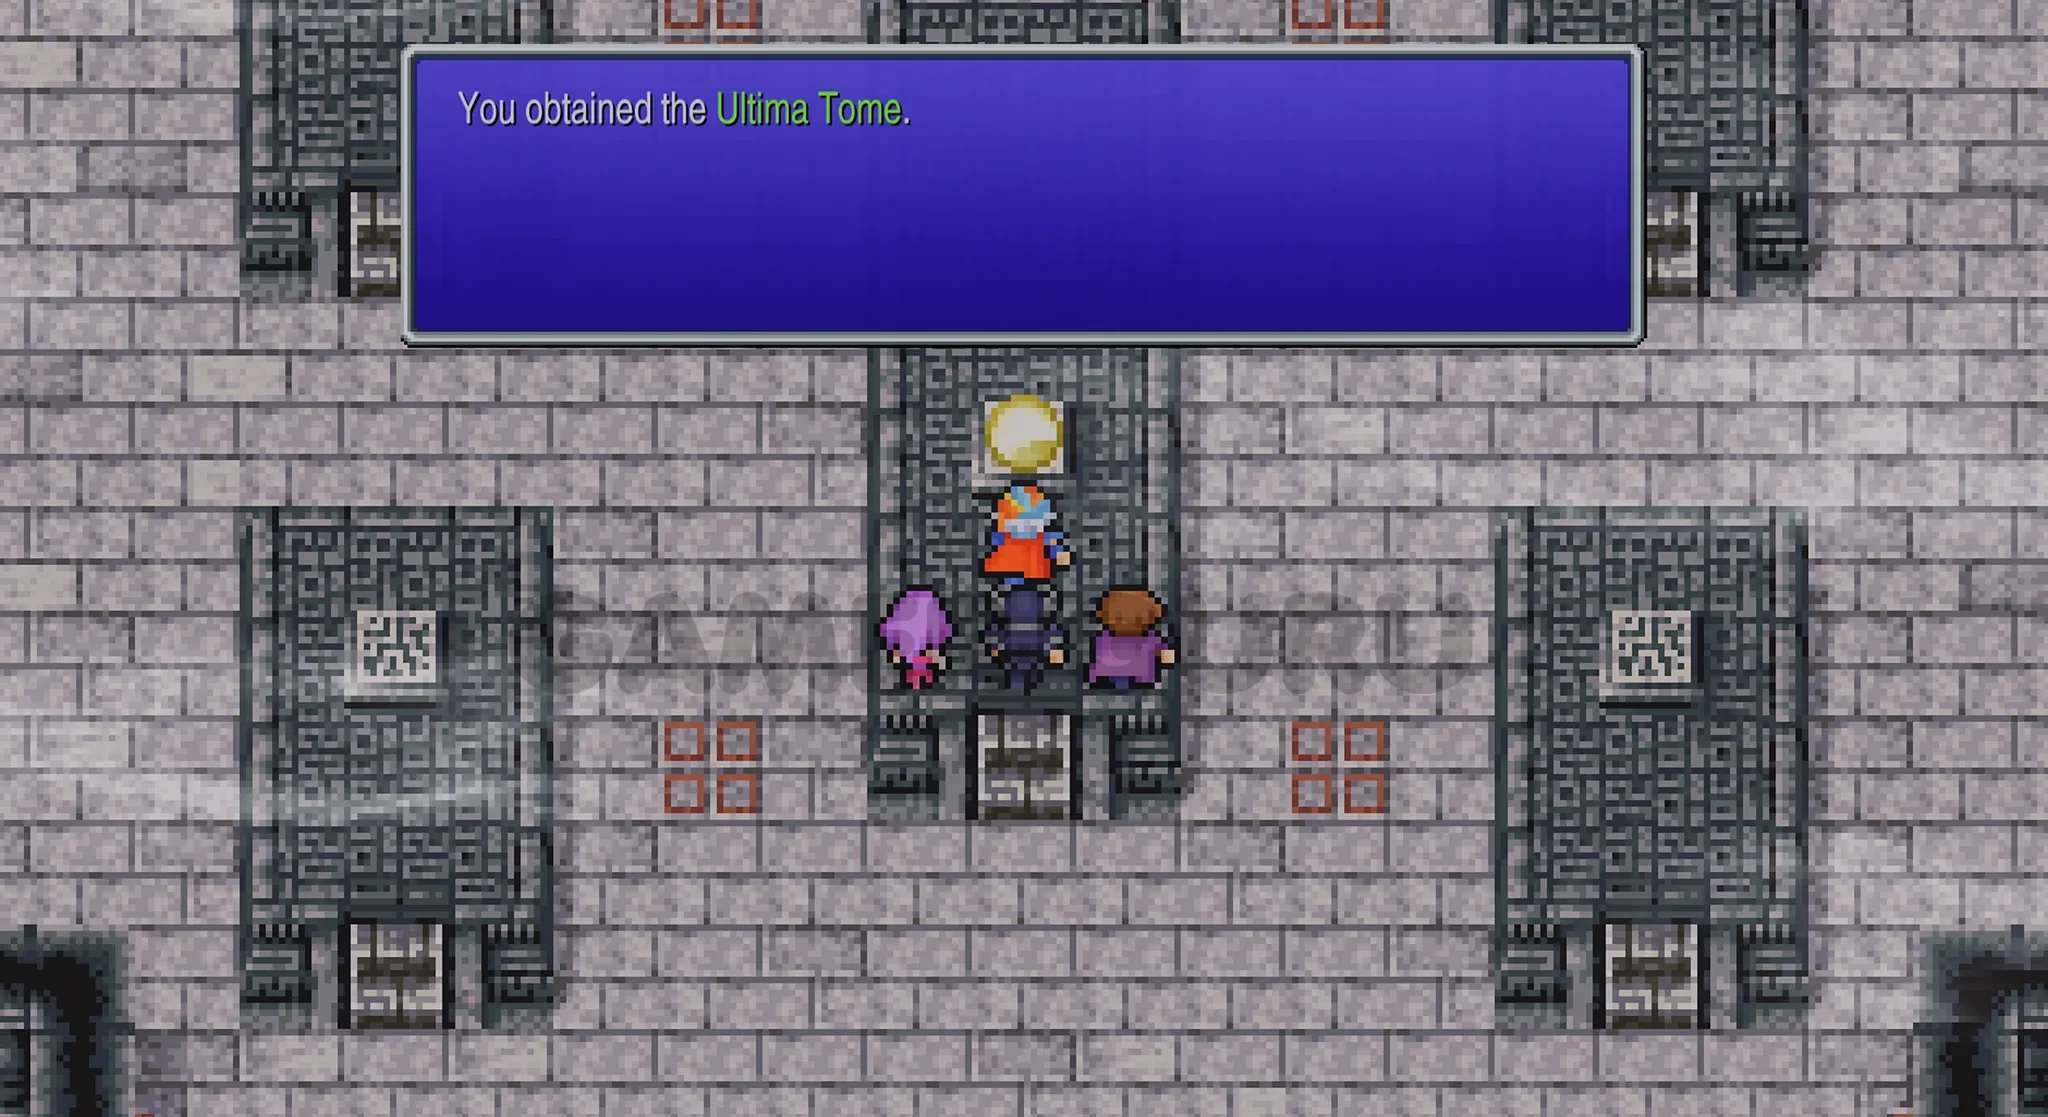
You can now use the Teleport Tile above to exit the dungeon.
You should also have all 24 of the chests for Mysidian Tower, but double check on the menu just to make sure before you leave.
In the next chapter we will be taking on the Cyclone Dungeon!