
Call of The Elder Gods 100% Walkthrough - Chapter 5

Brainwaves Puzzle
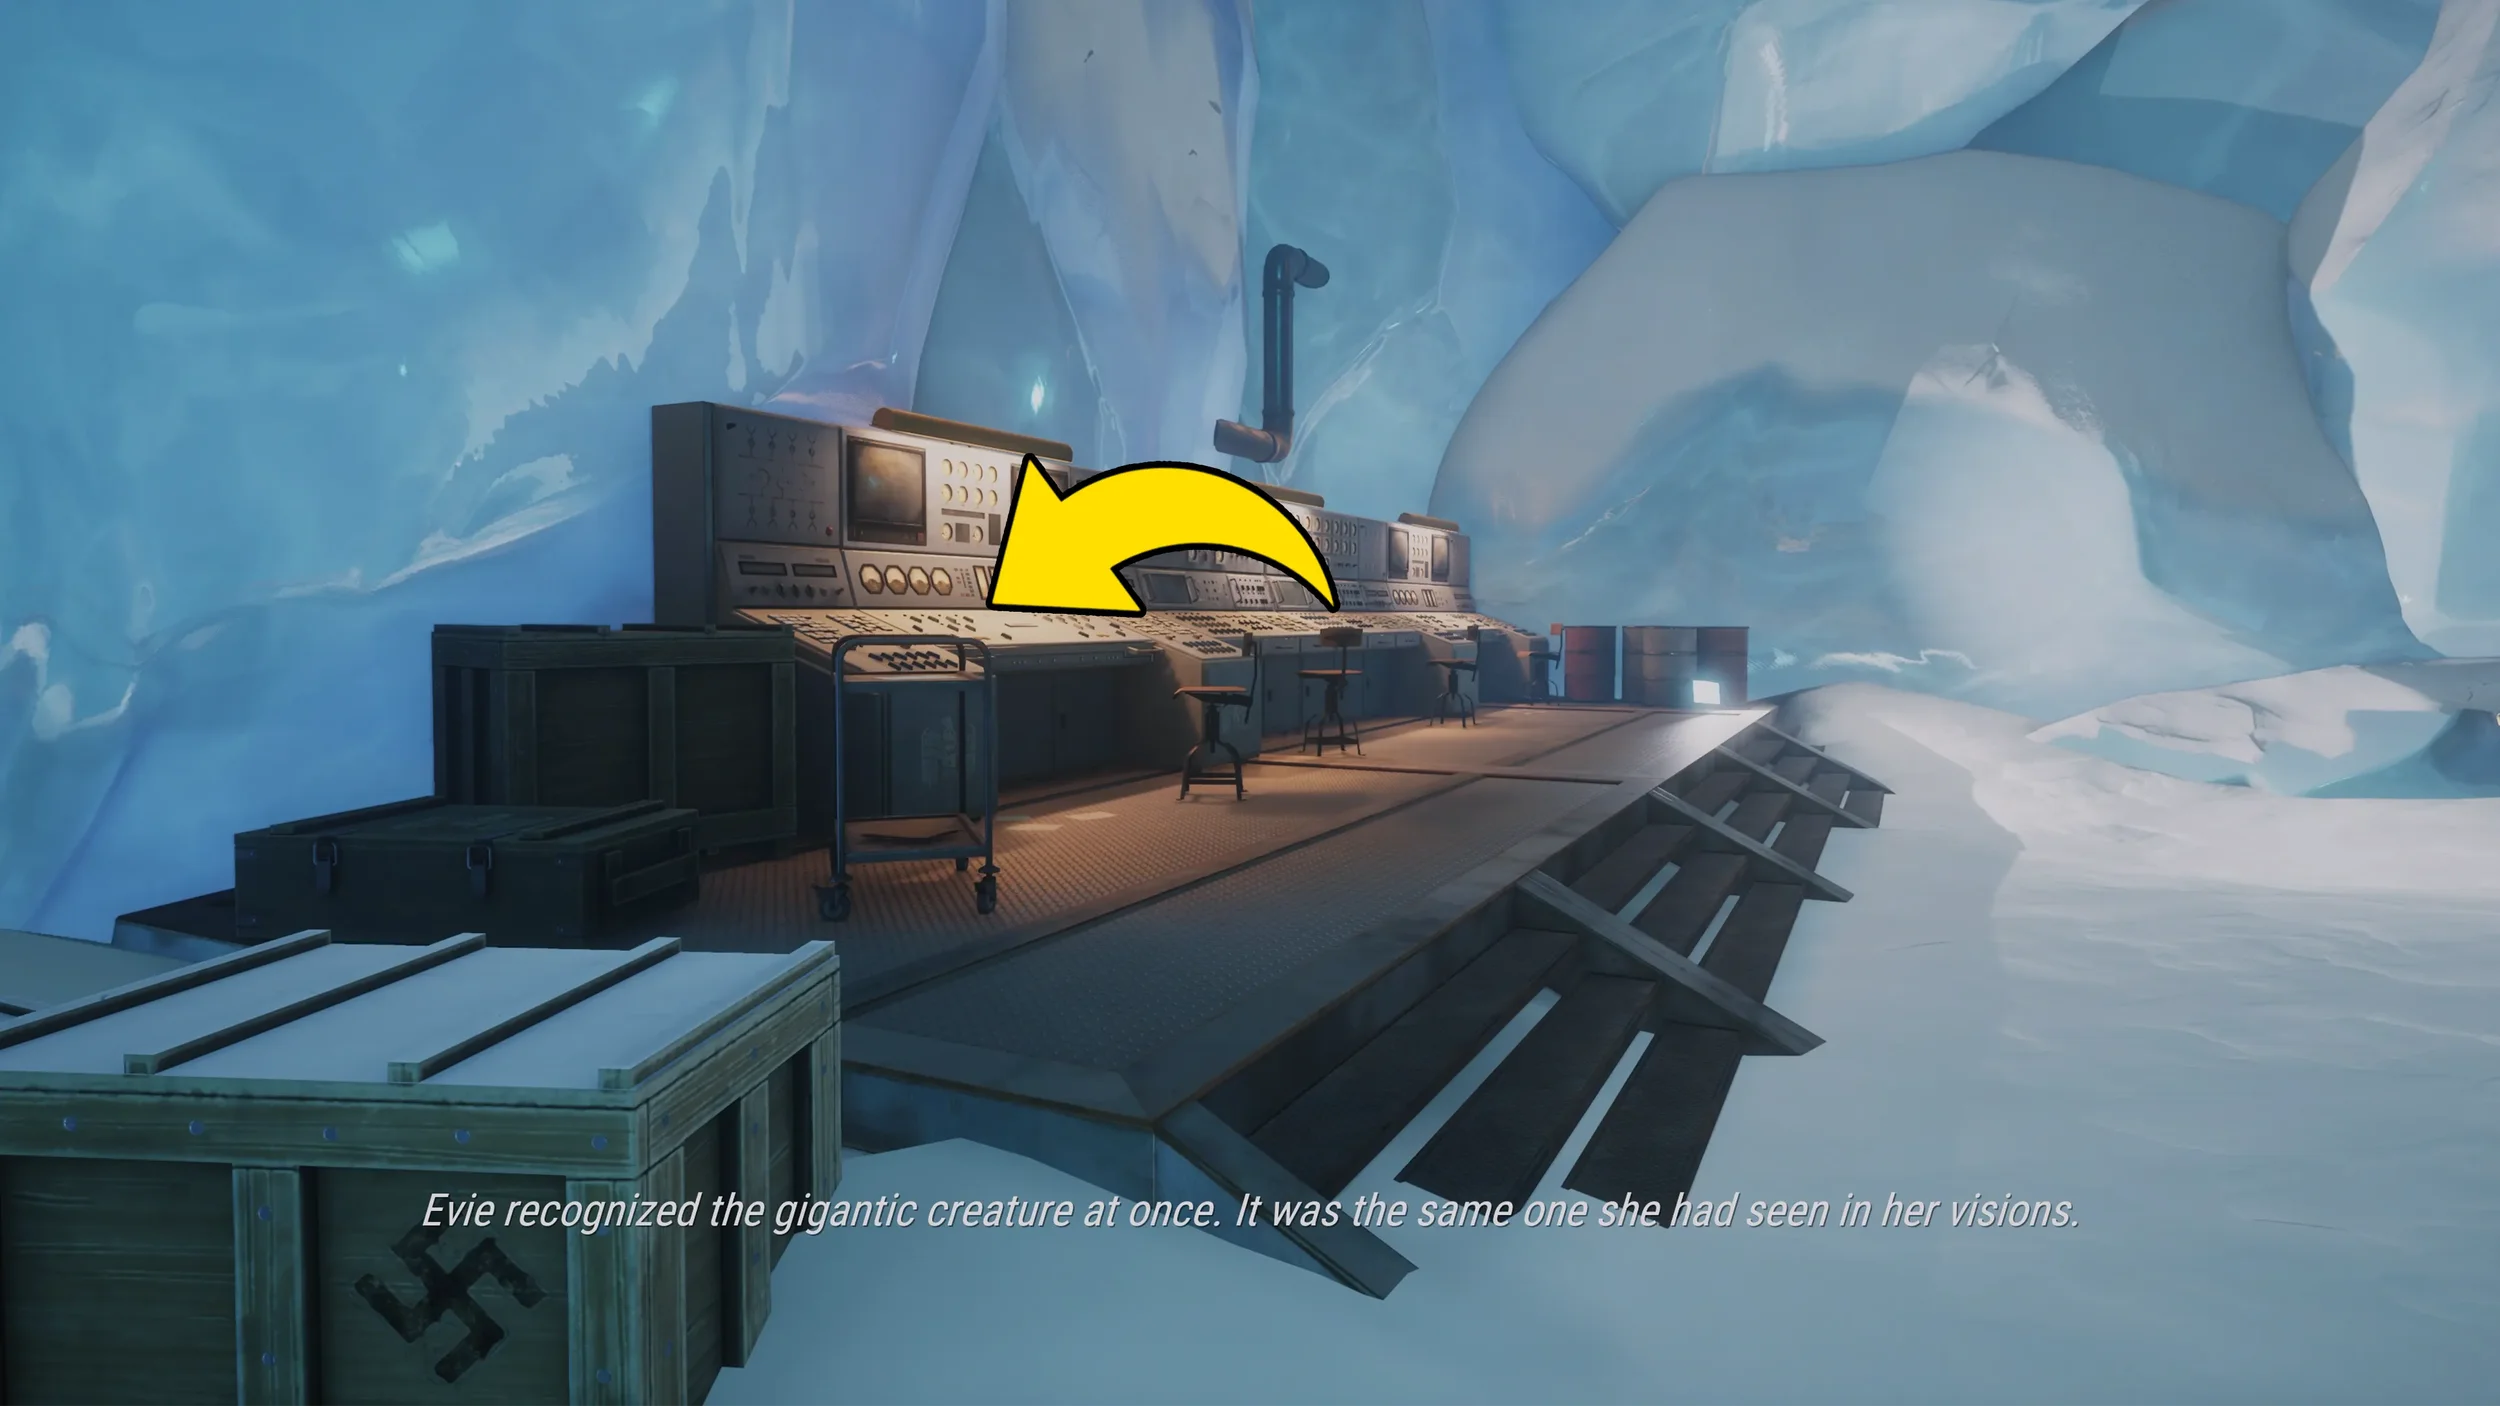
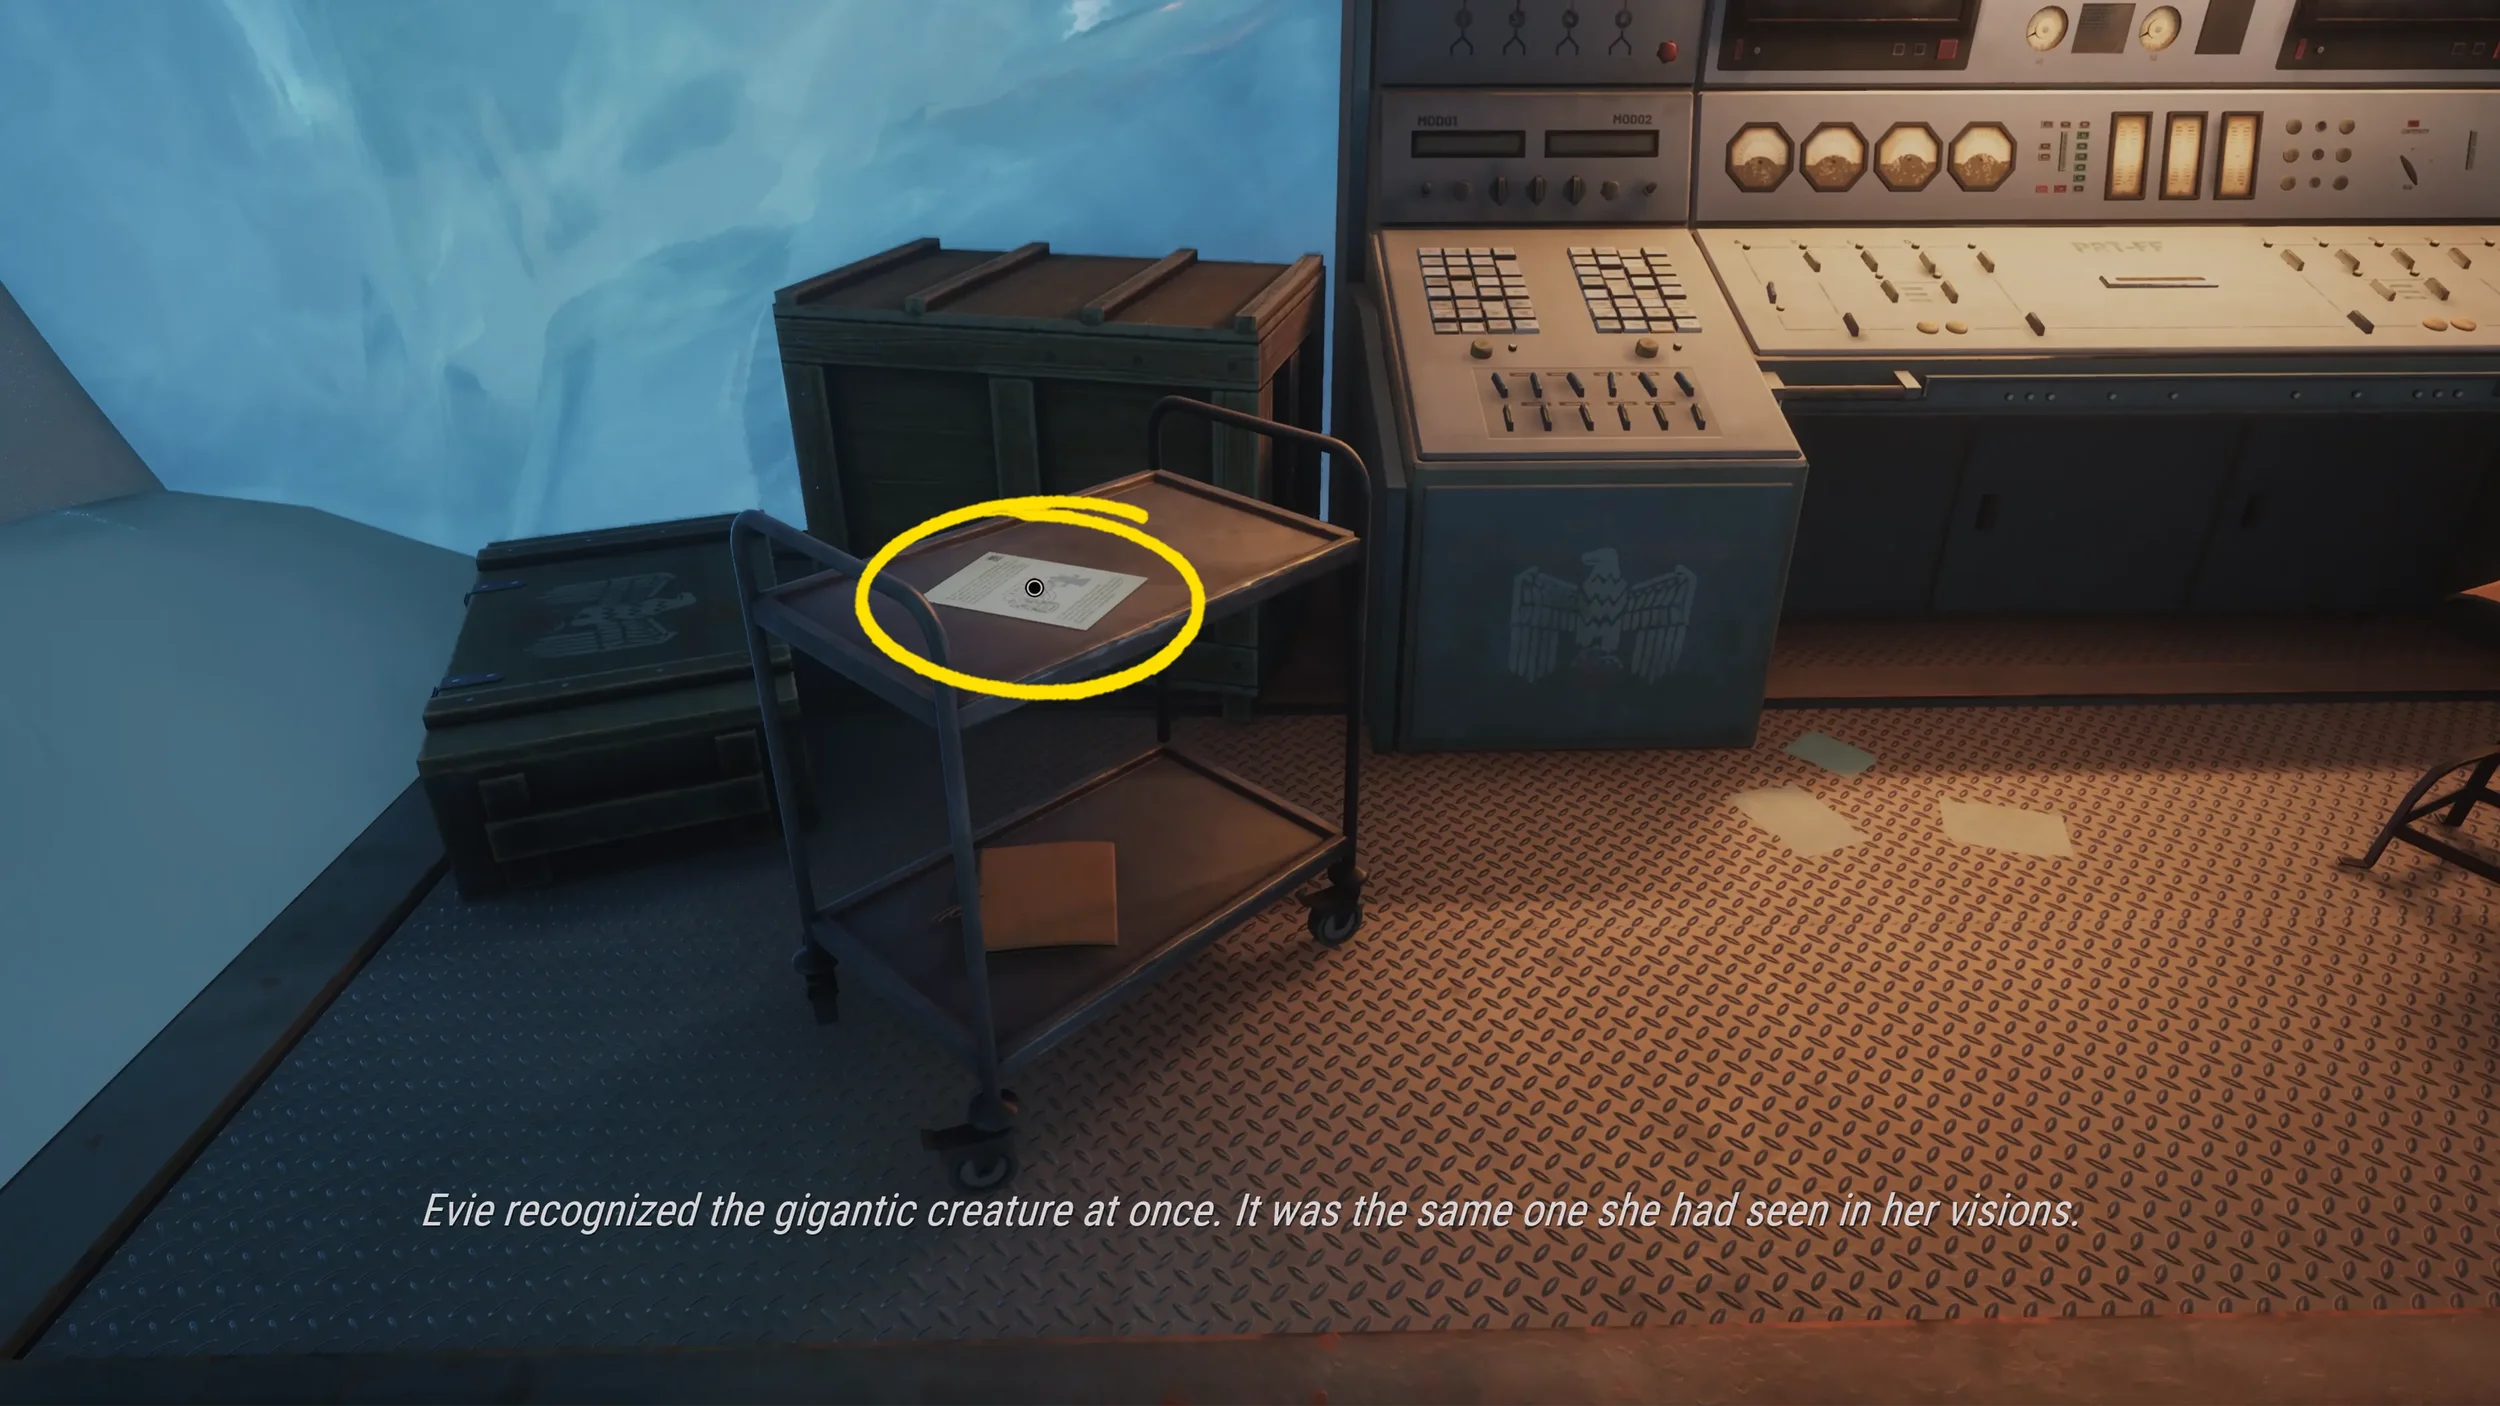
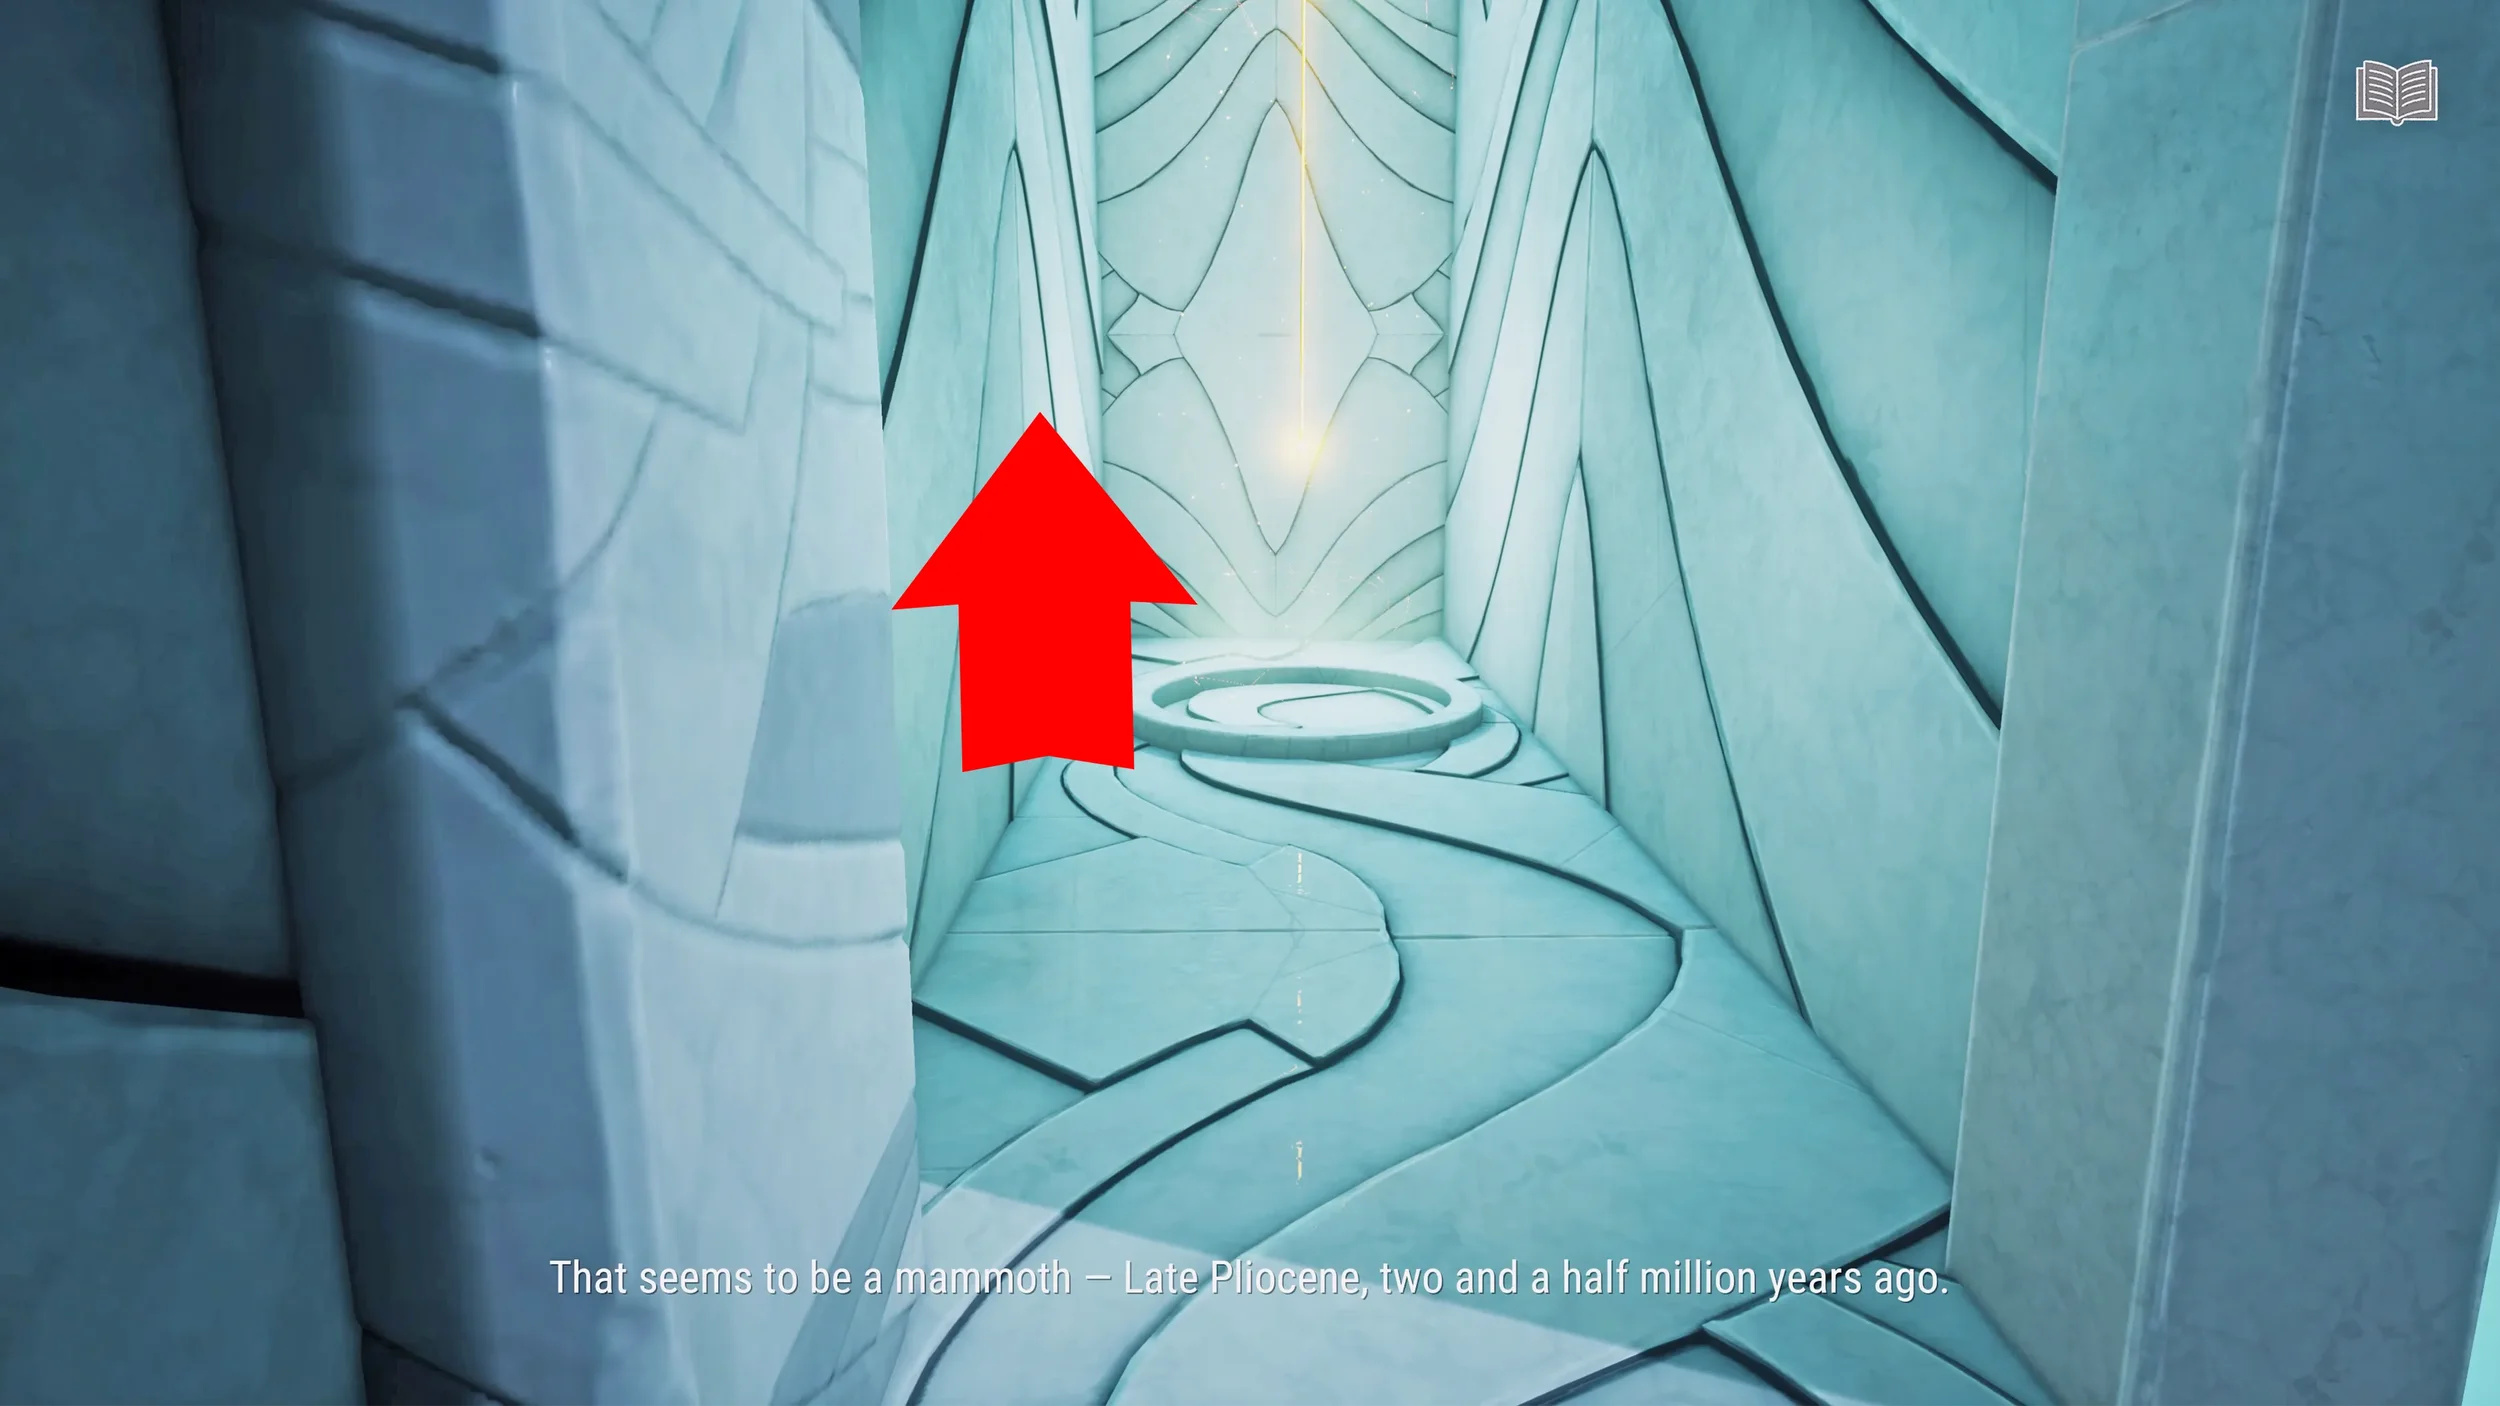
We start off Chapter 5 in an ice cave, shortly after advancing on the main path you will arrive at a room with a giant frozen creature. As soon as you enter this room inspect the piece of paper on the small table to your left, this is going to be the 1st clue for this Chapter.
After getting the clue, go up the metal stairs to reach the Brainwaves Machine, here interact with the chair to get a short dialogue, once the dialogue has ended you will be able to interact the lever to power on the machine.
Next you need to test out combinations on the left panel connecting A with 1, 2, 3, 4, then B with 1, 2, 3, 4,etc…
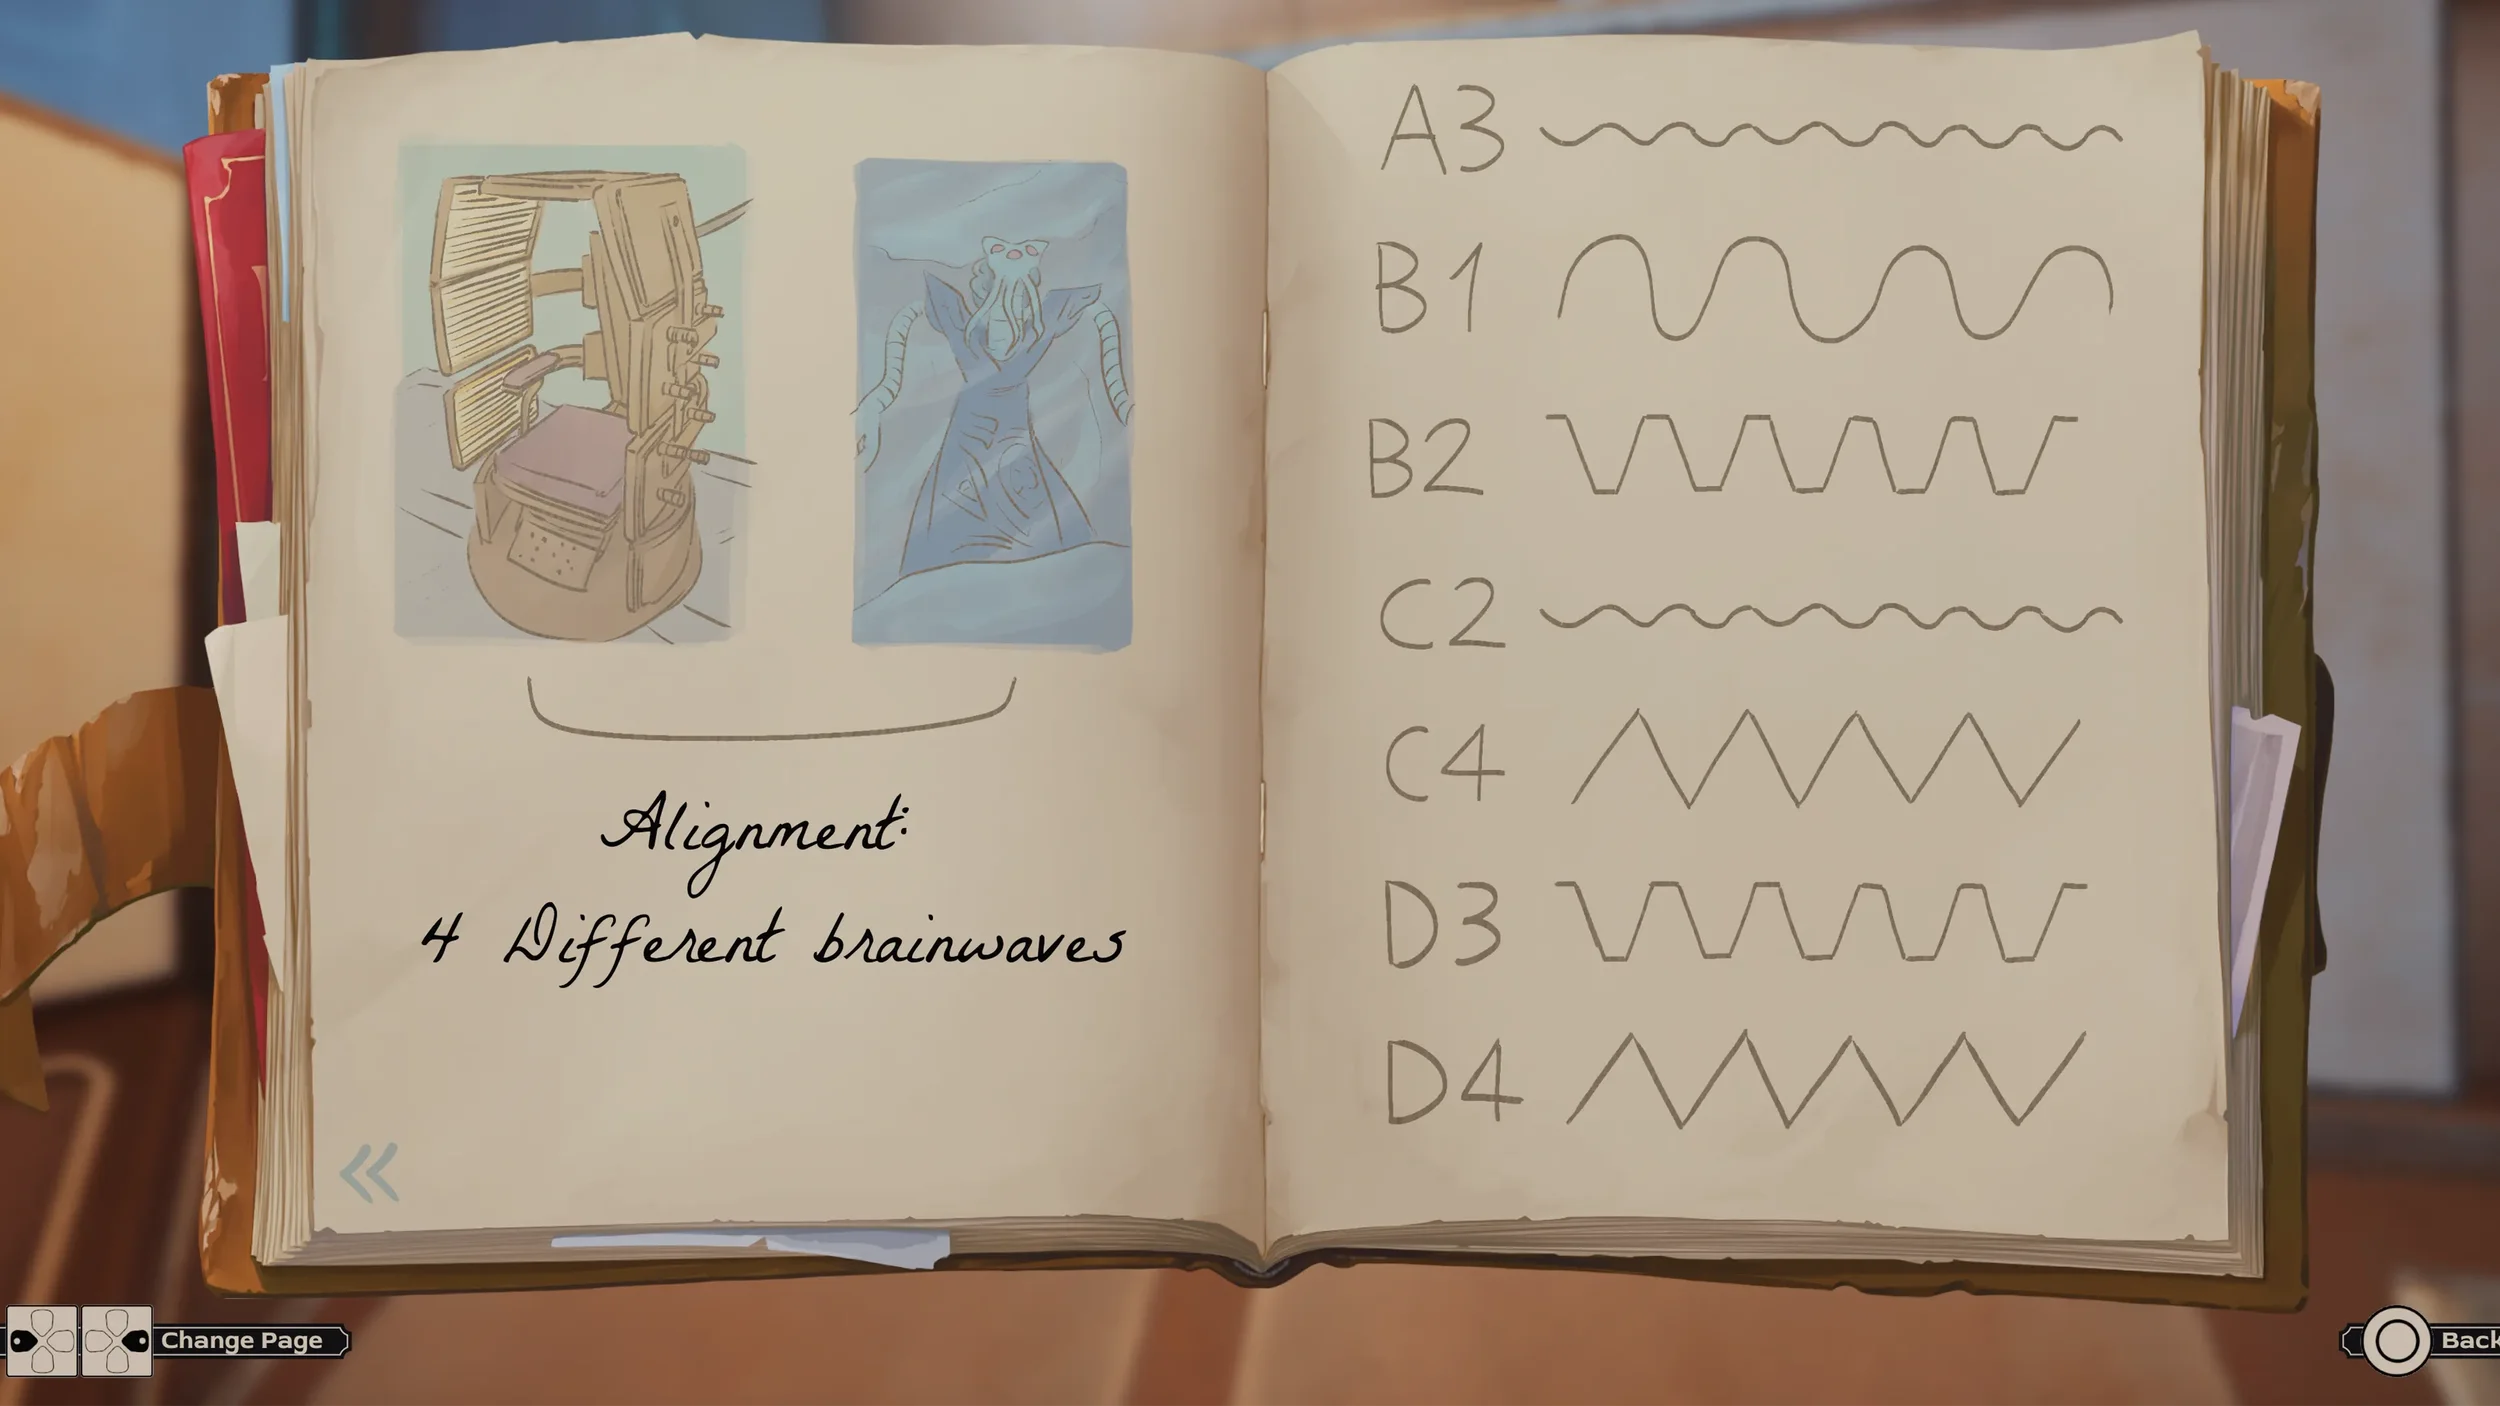
I recommend quickly doing all of the combinations with each letter to make sure you write down all the clues as it only takes a few seconds, but if you just want the combinations that actually count as clues they are: A-3, B-1, B-2, C-2, C-4, D-3 and D-4.
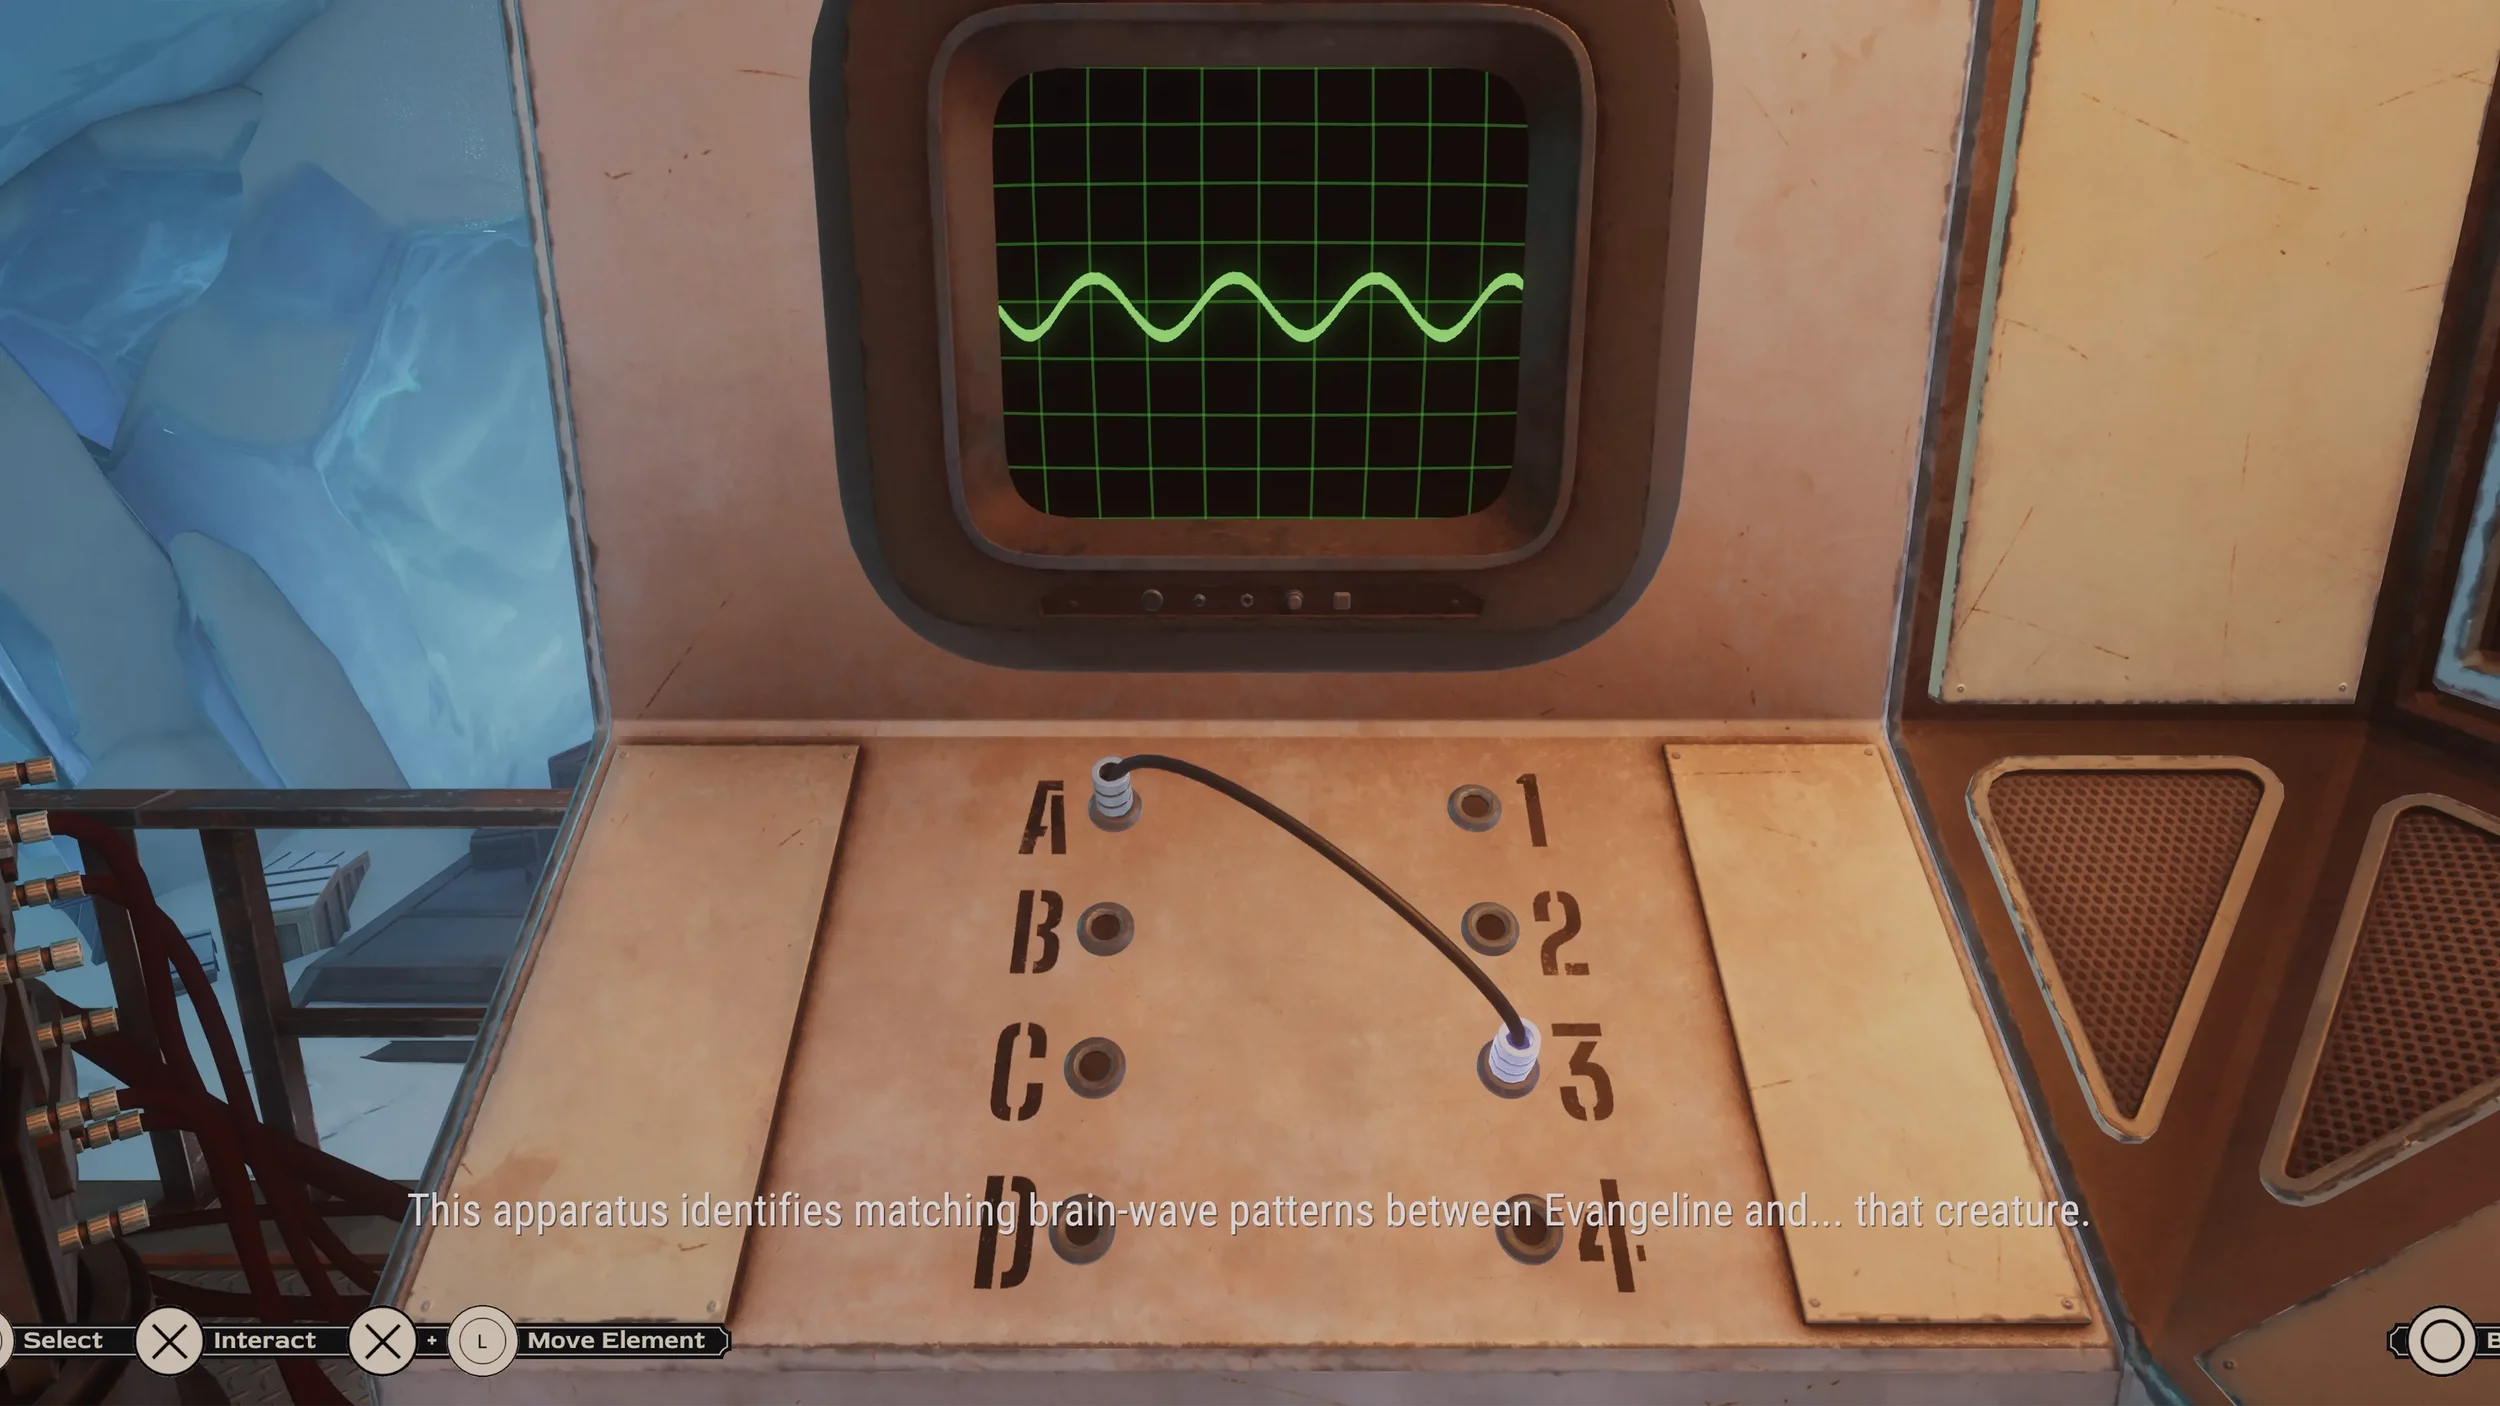
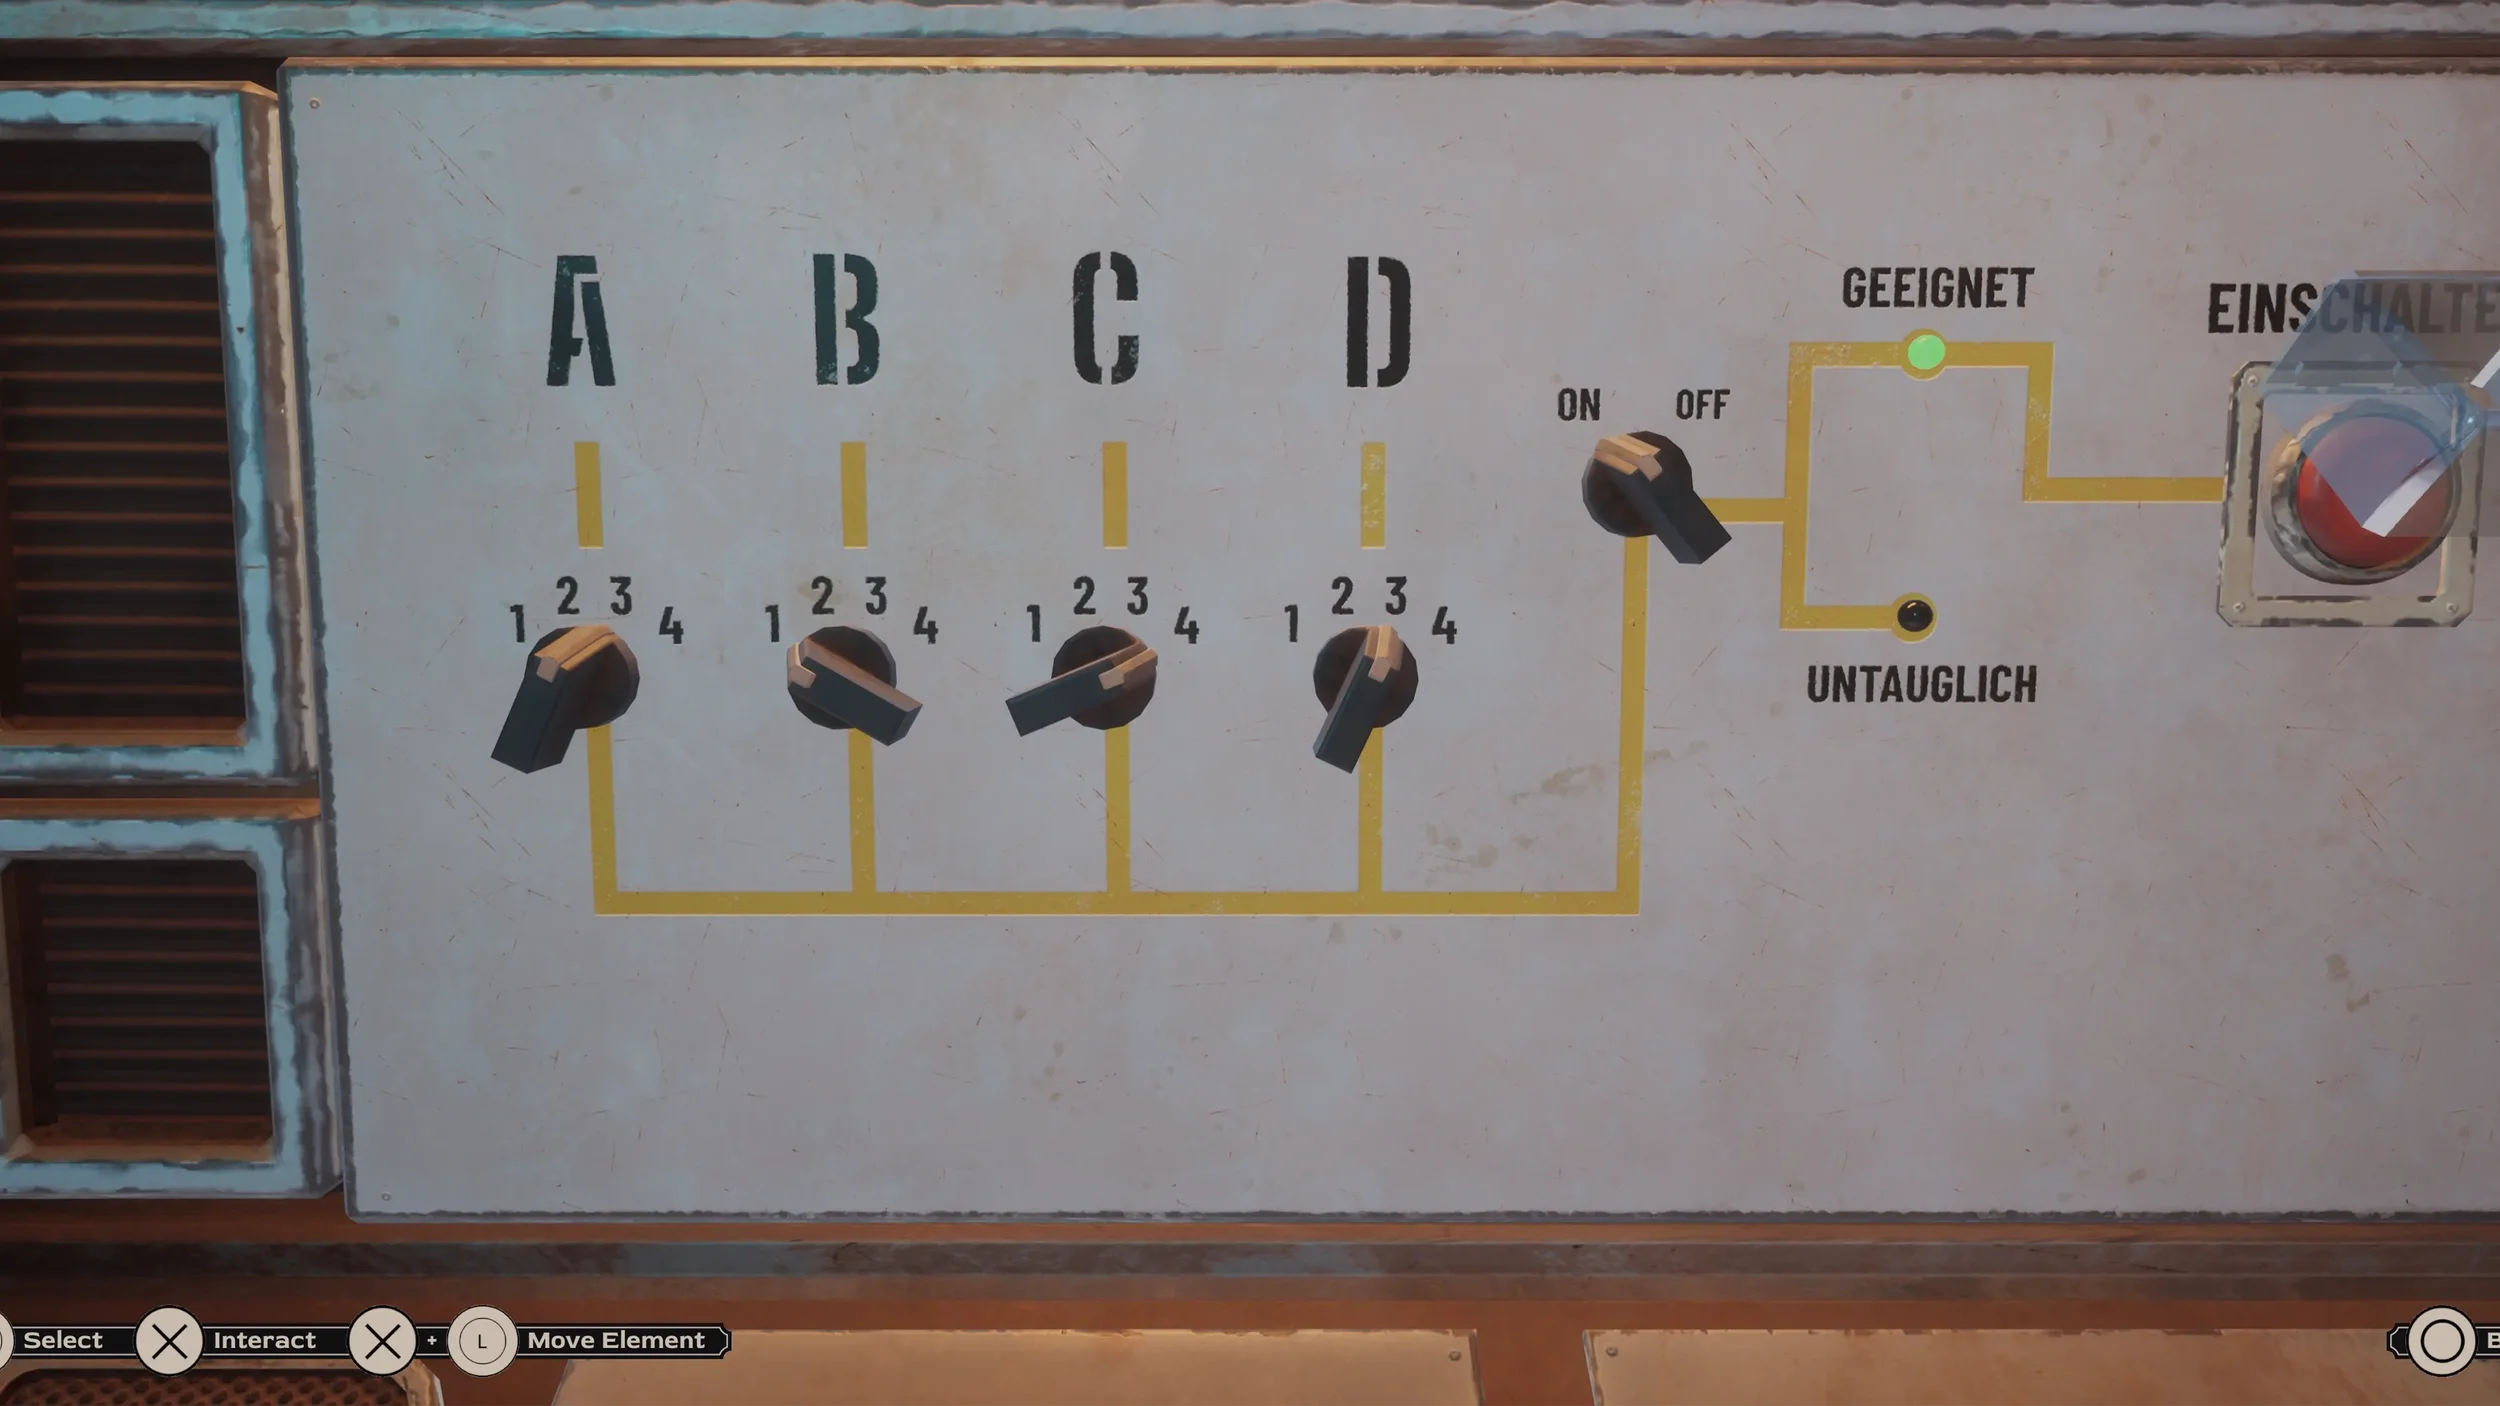
Now that you have written down all of the possible matching brainwave clues it is time to insert them into the dials on the right part of the machine.
So that you don’t waste time testing all the possible combinations, the correct solution from left to right is: A3, B1, C4 and D3, the turn the final dial to On.
Past Pnakotus
You will then wake up in Past Pnakotus, there are many clues we need to find in this section of the Chapter so let’s start!
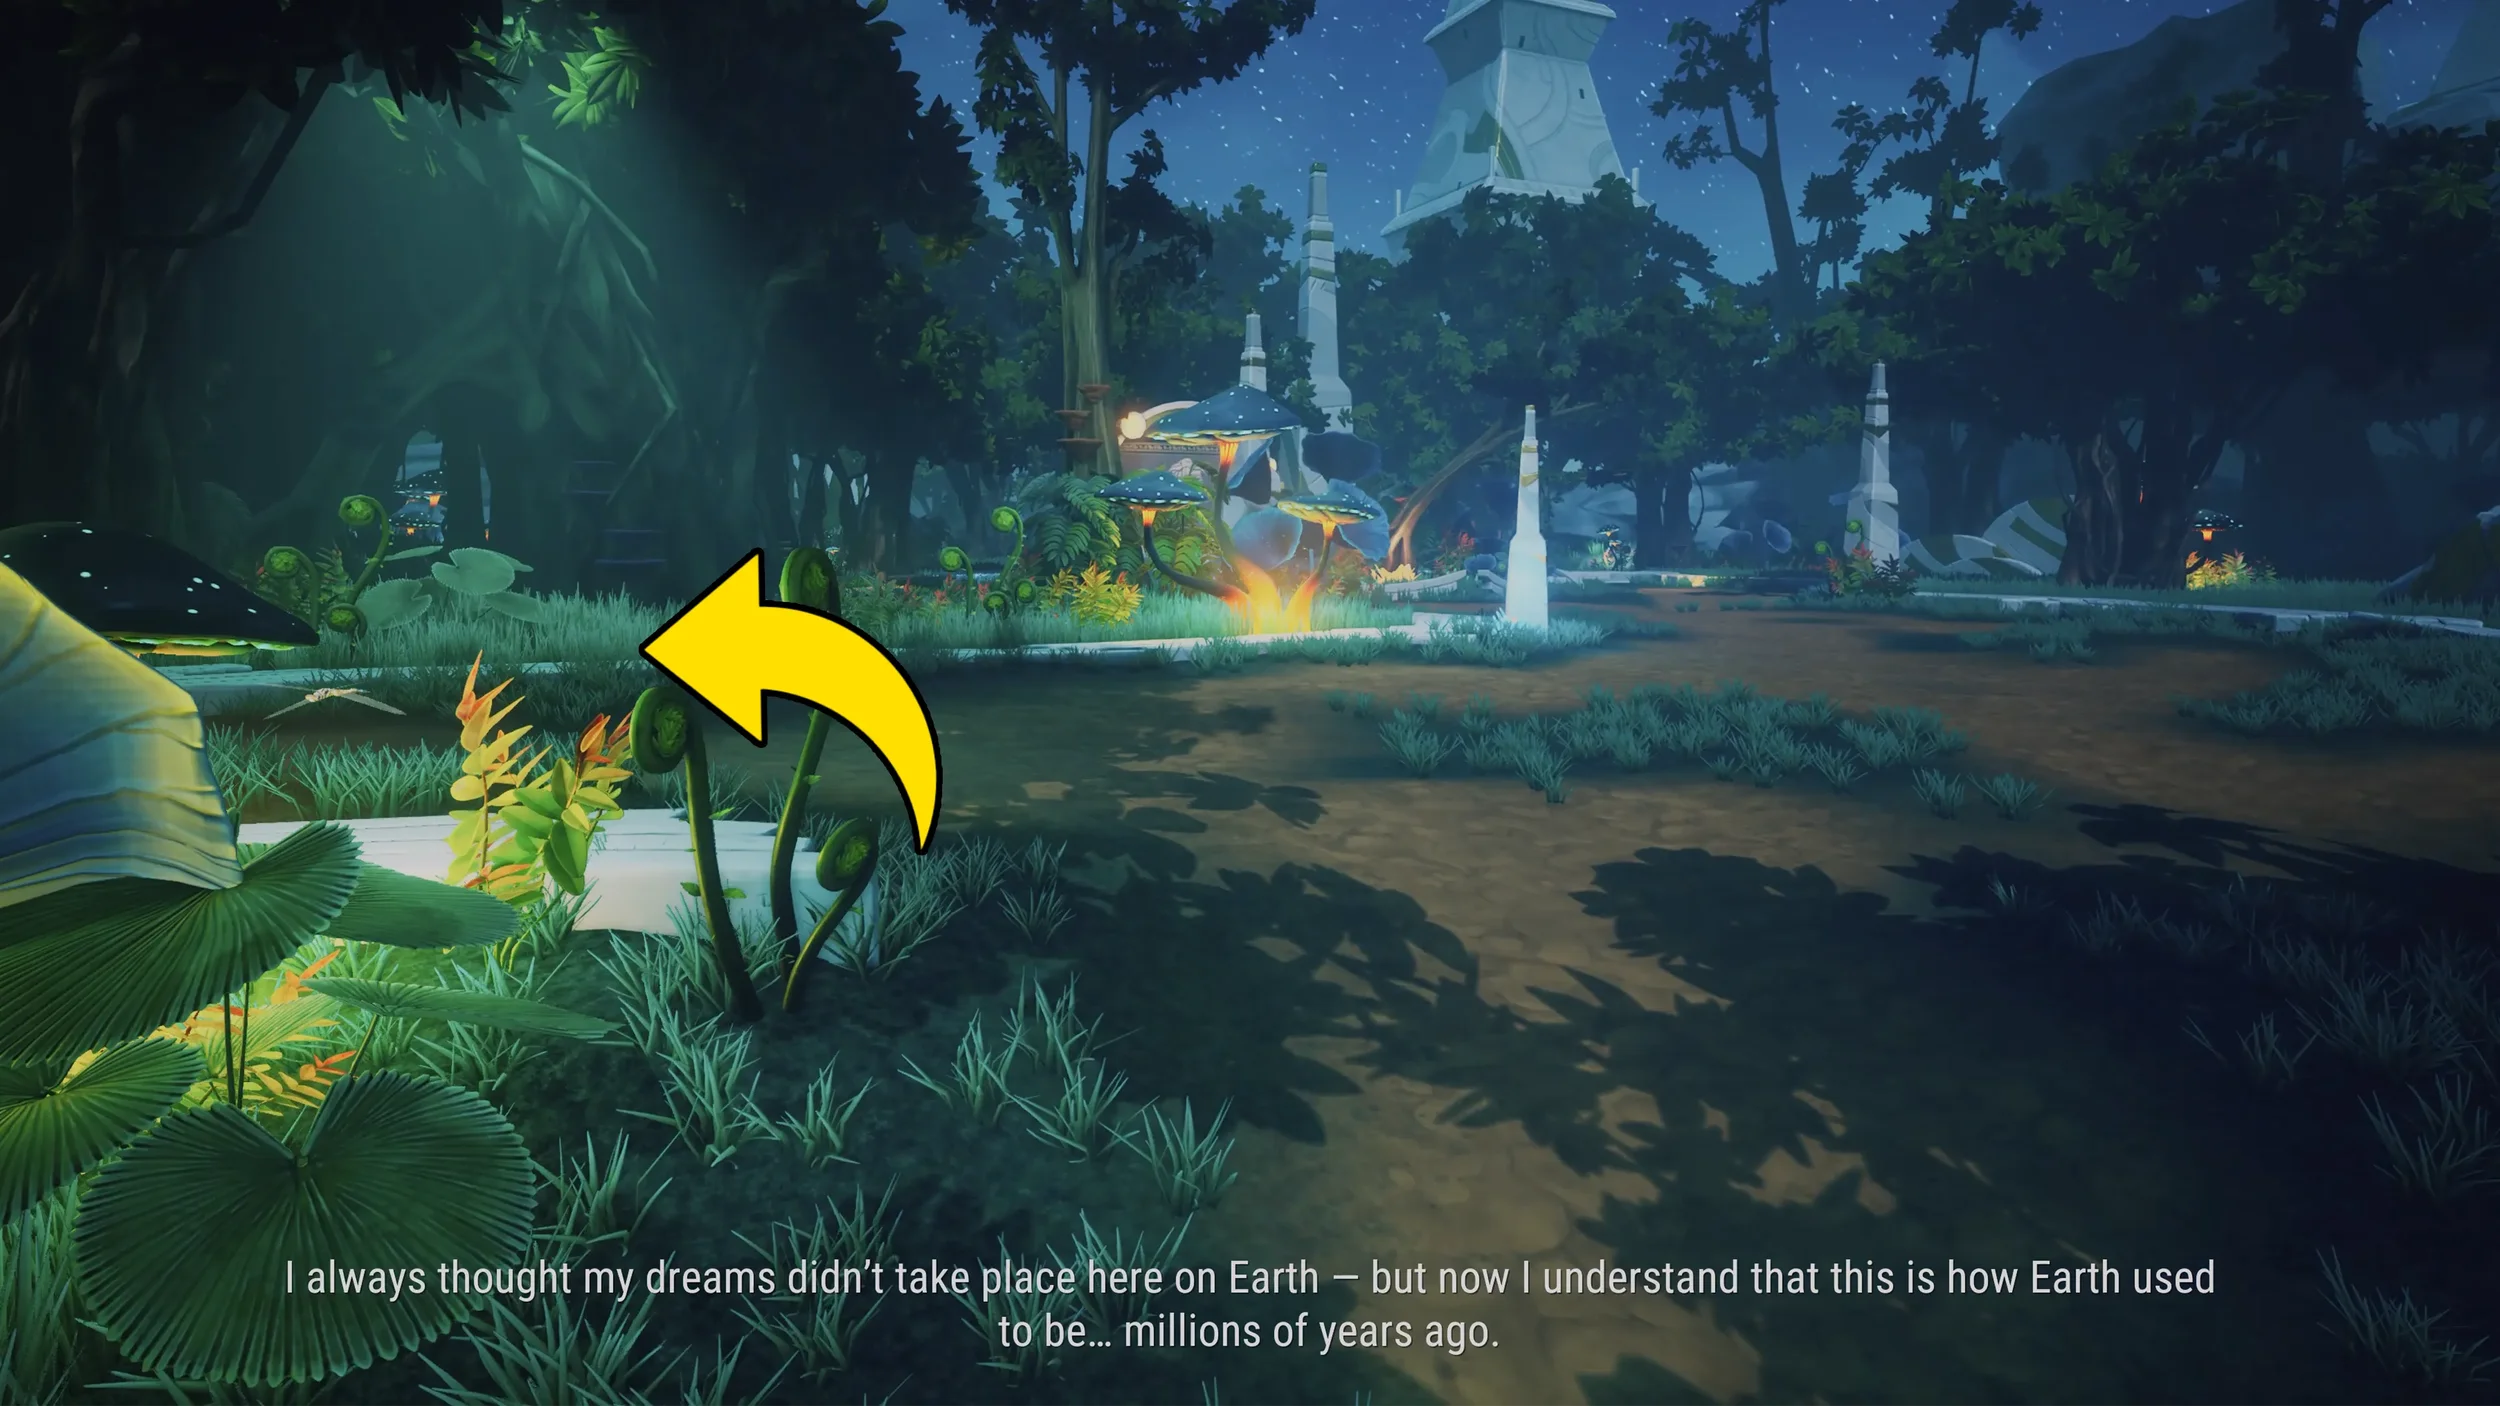
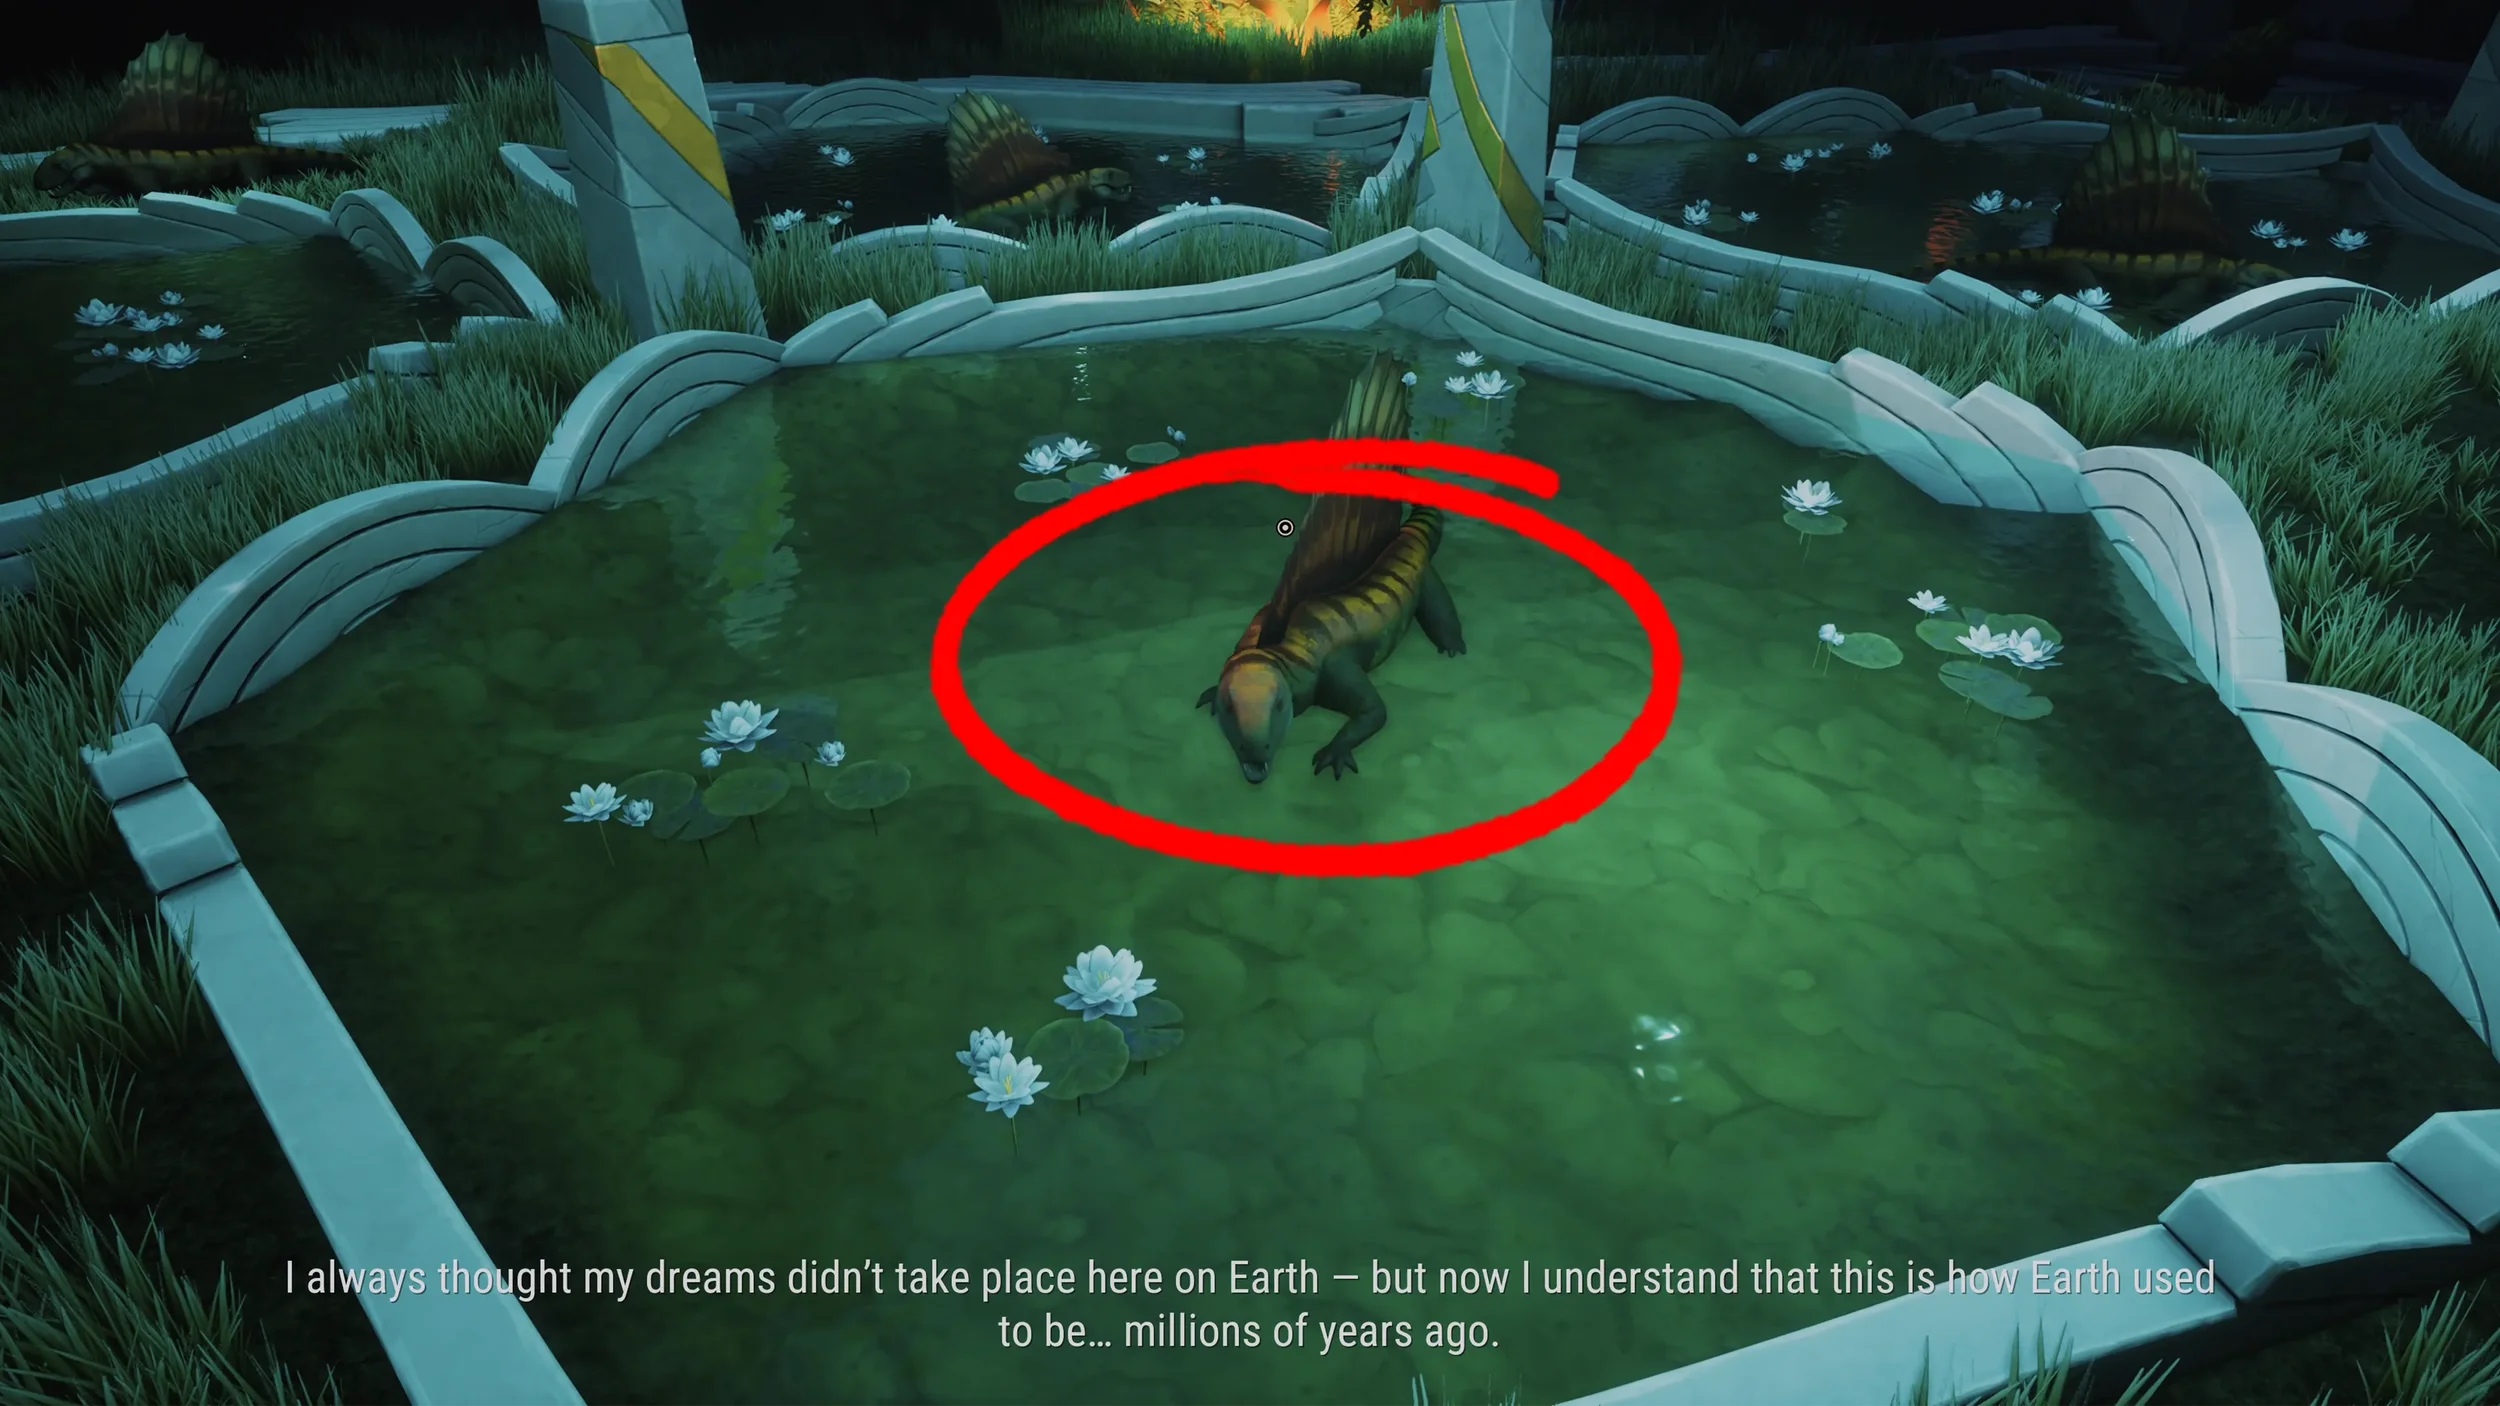
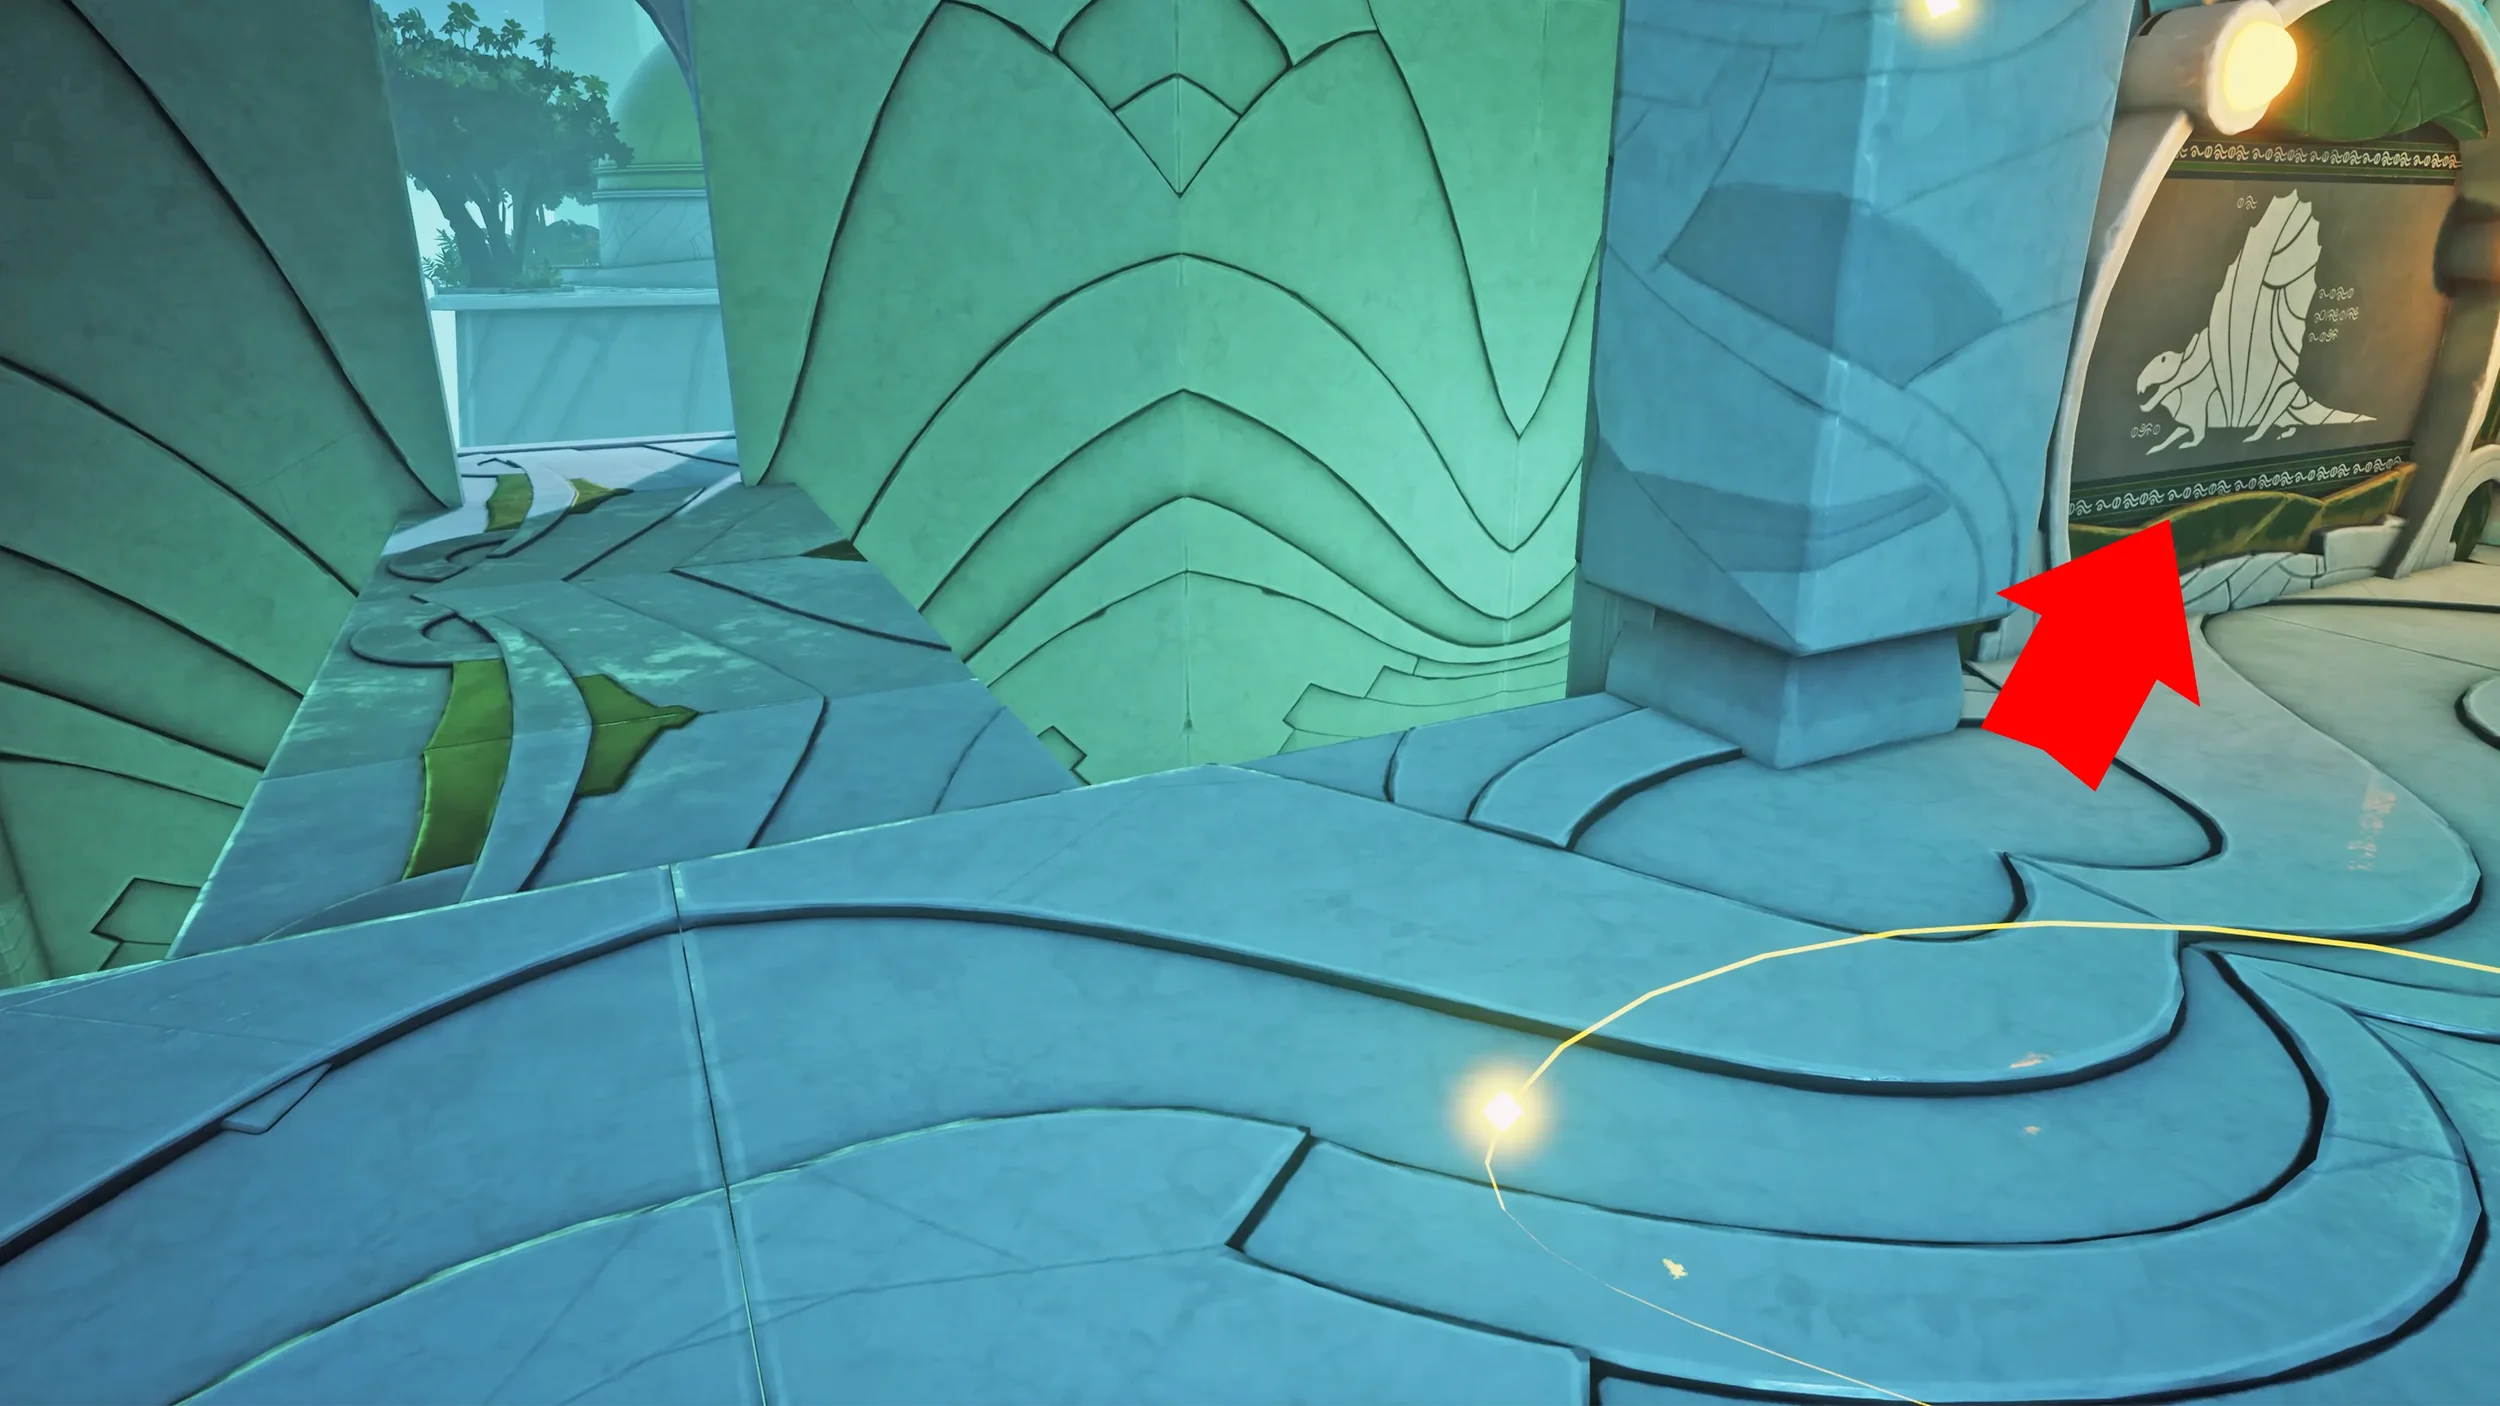
When we reach the crossroads in the outside area, first go to the left to find a Dimetrodon, inspect it to get another clue.
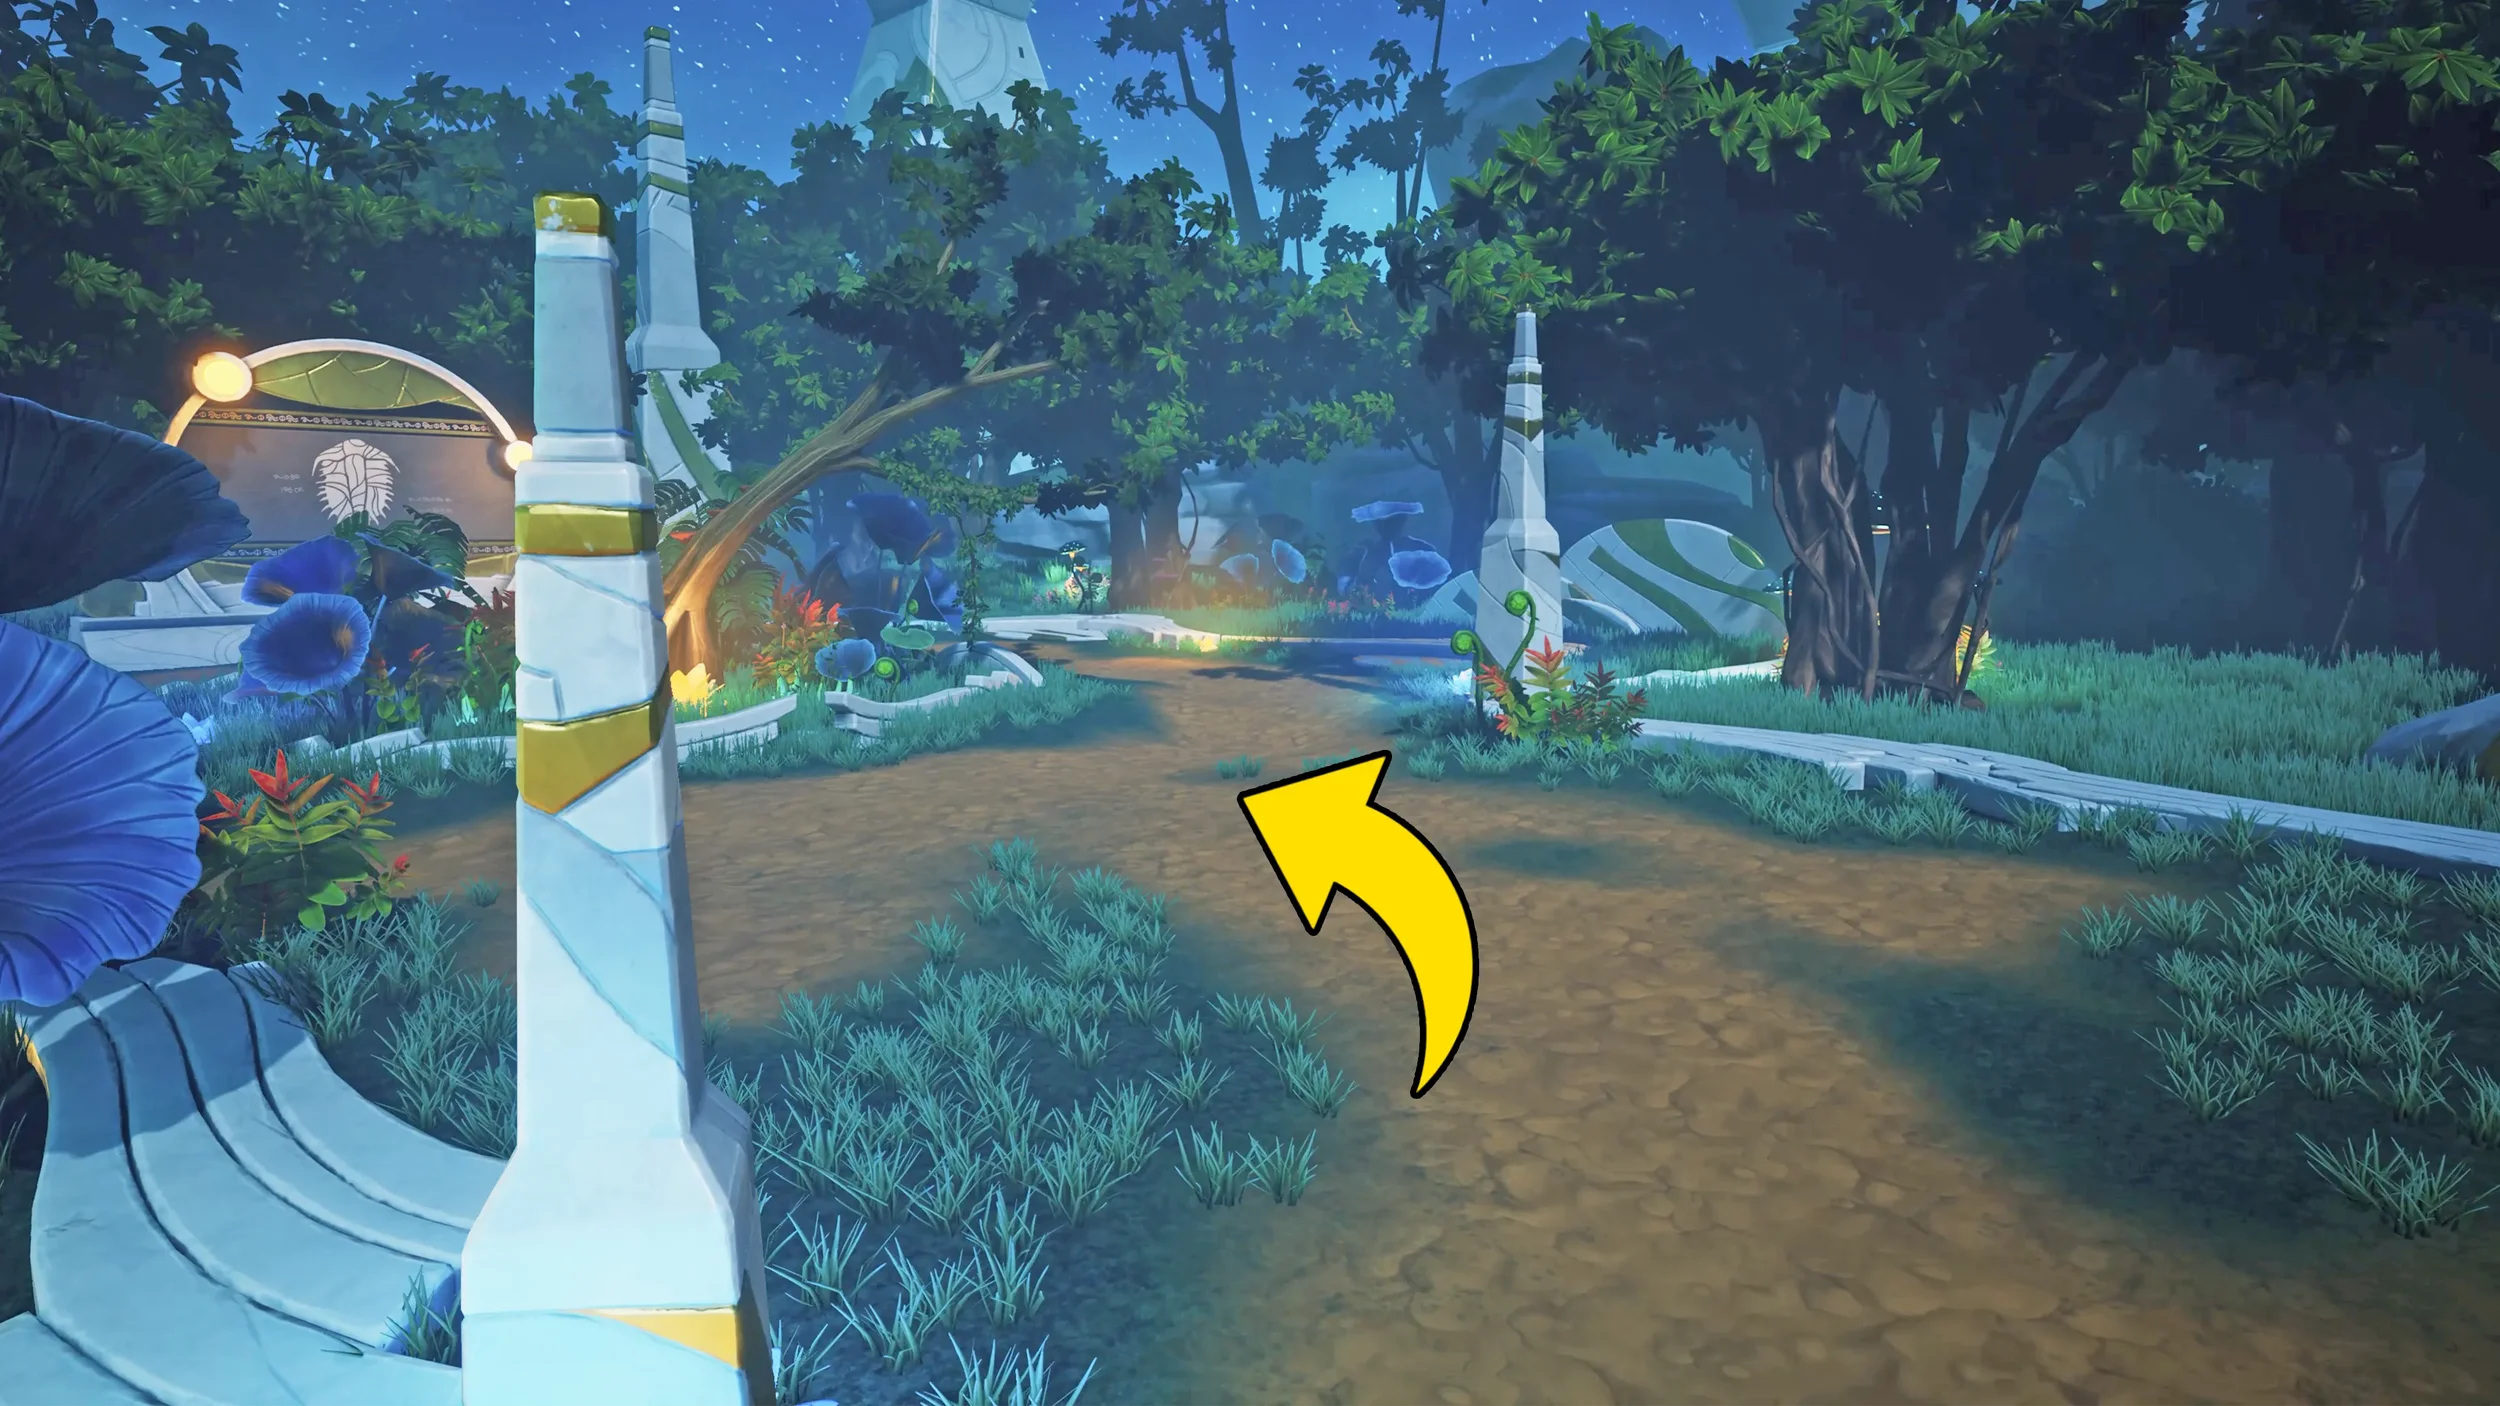
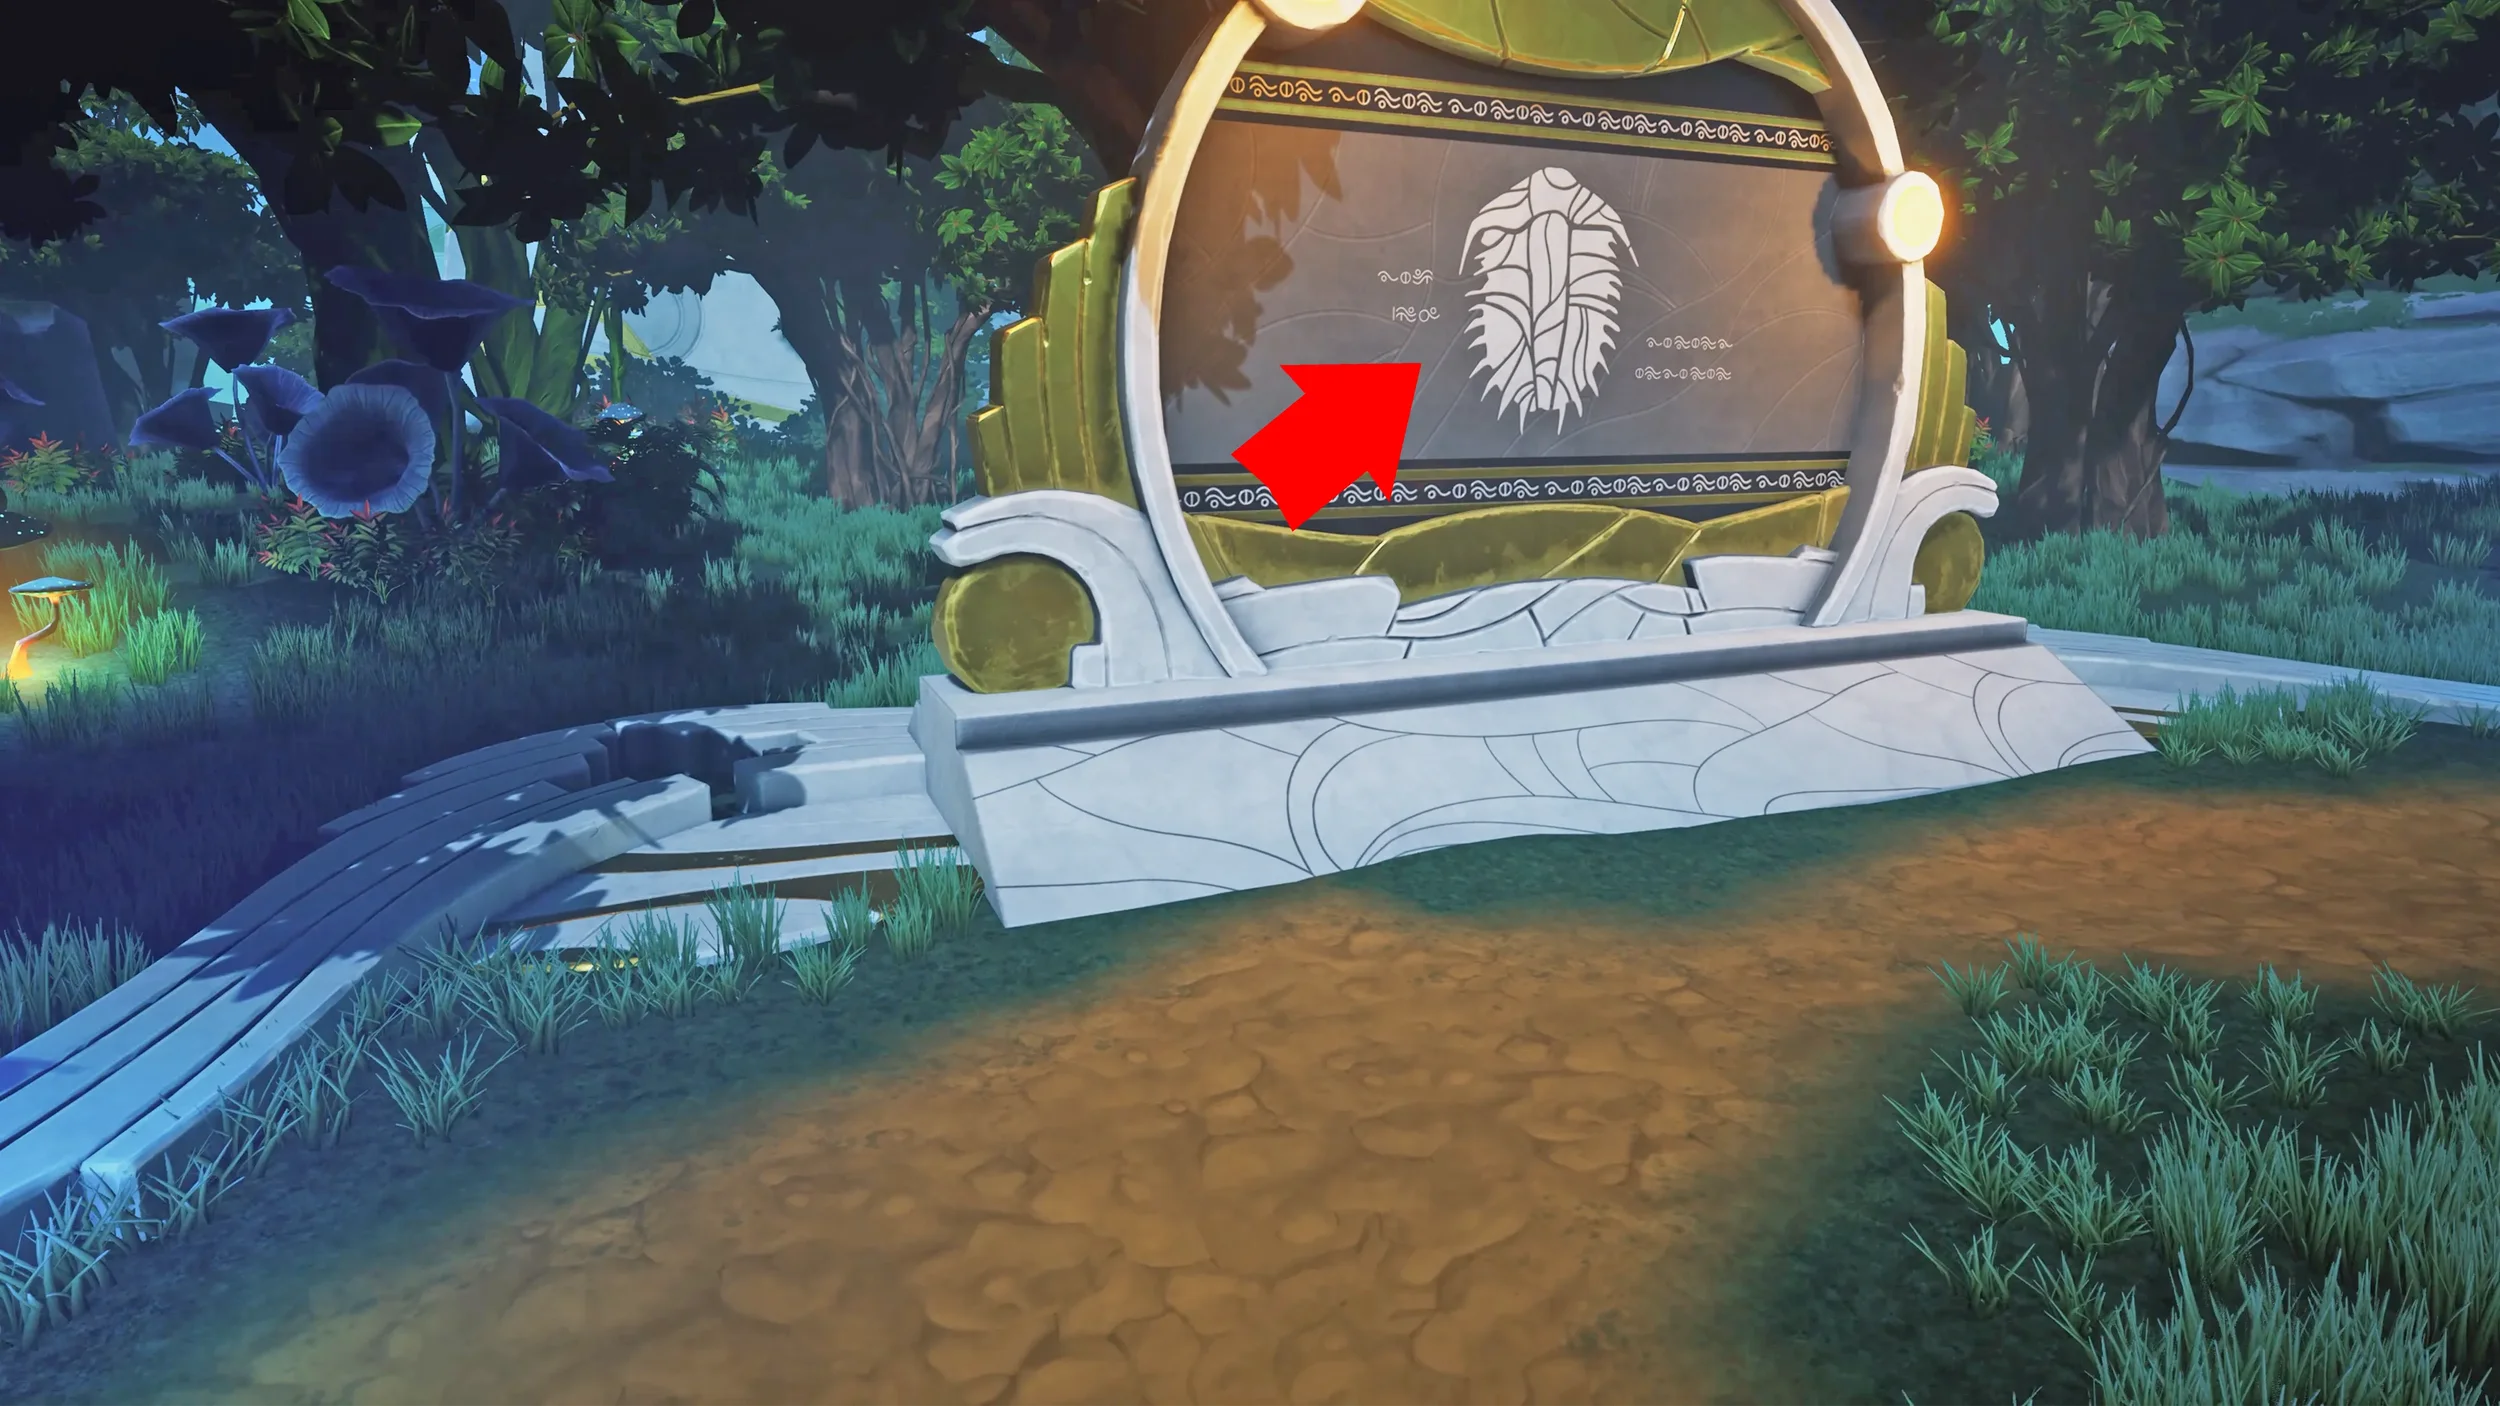
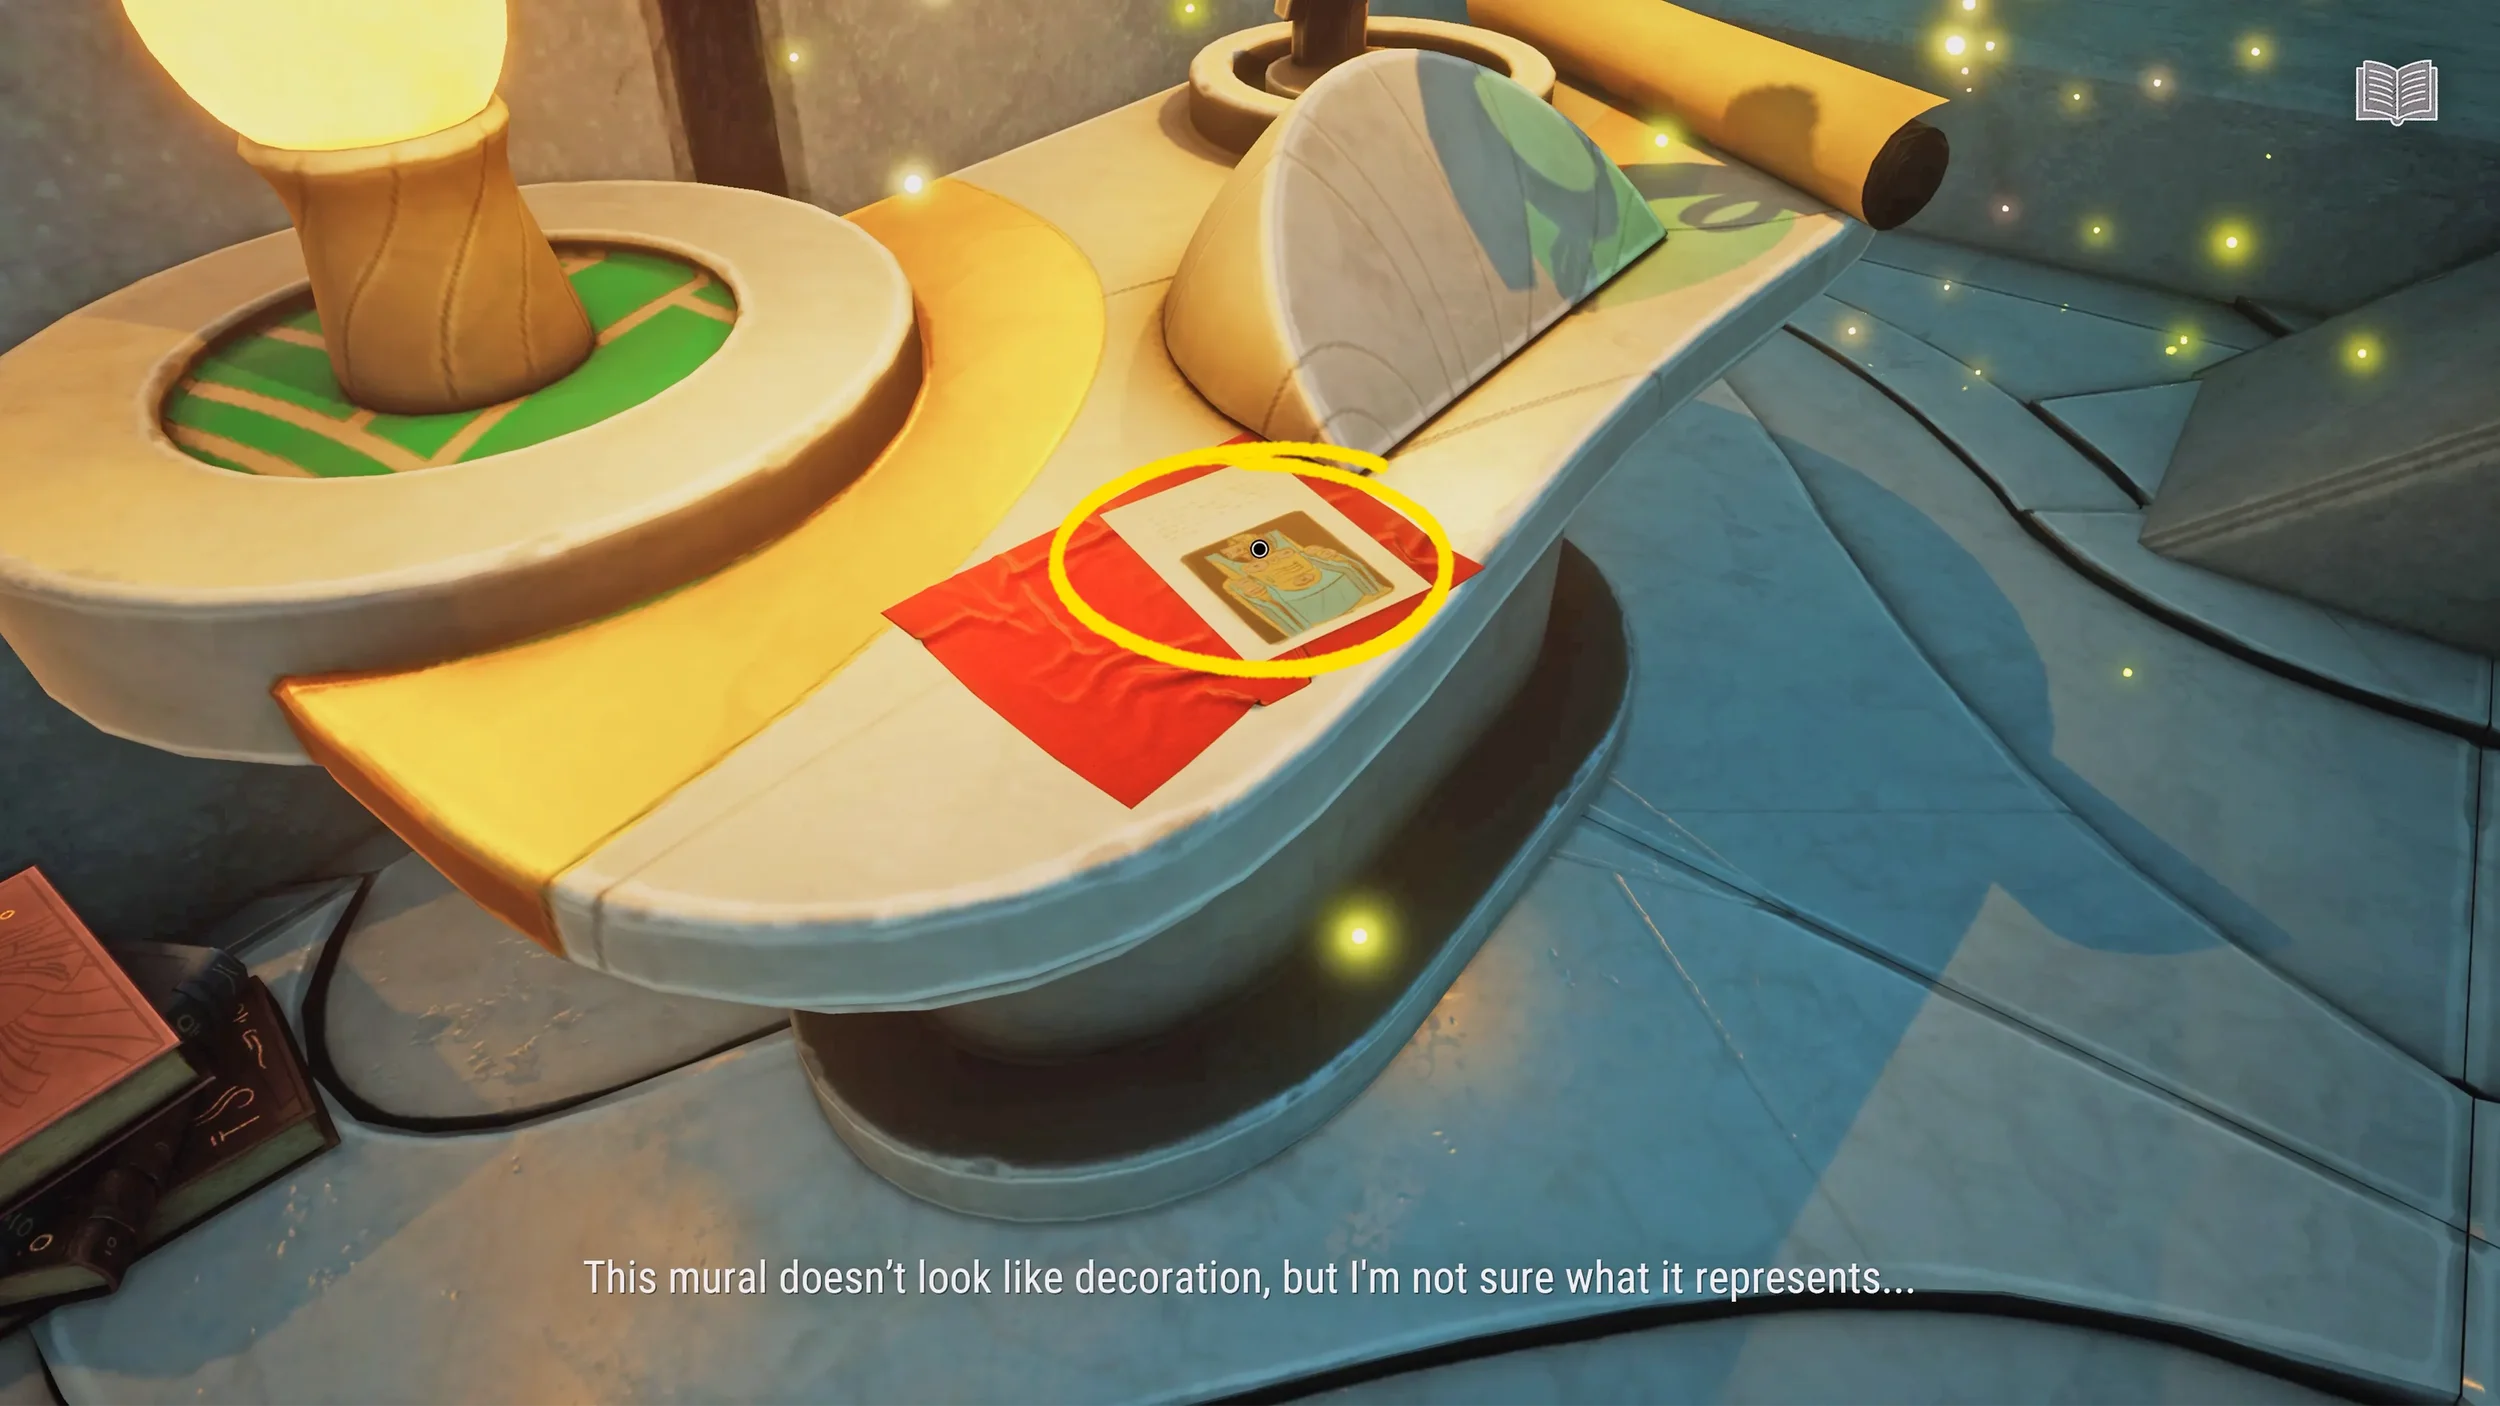
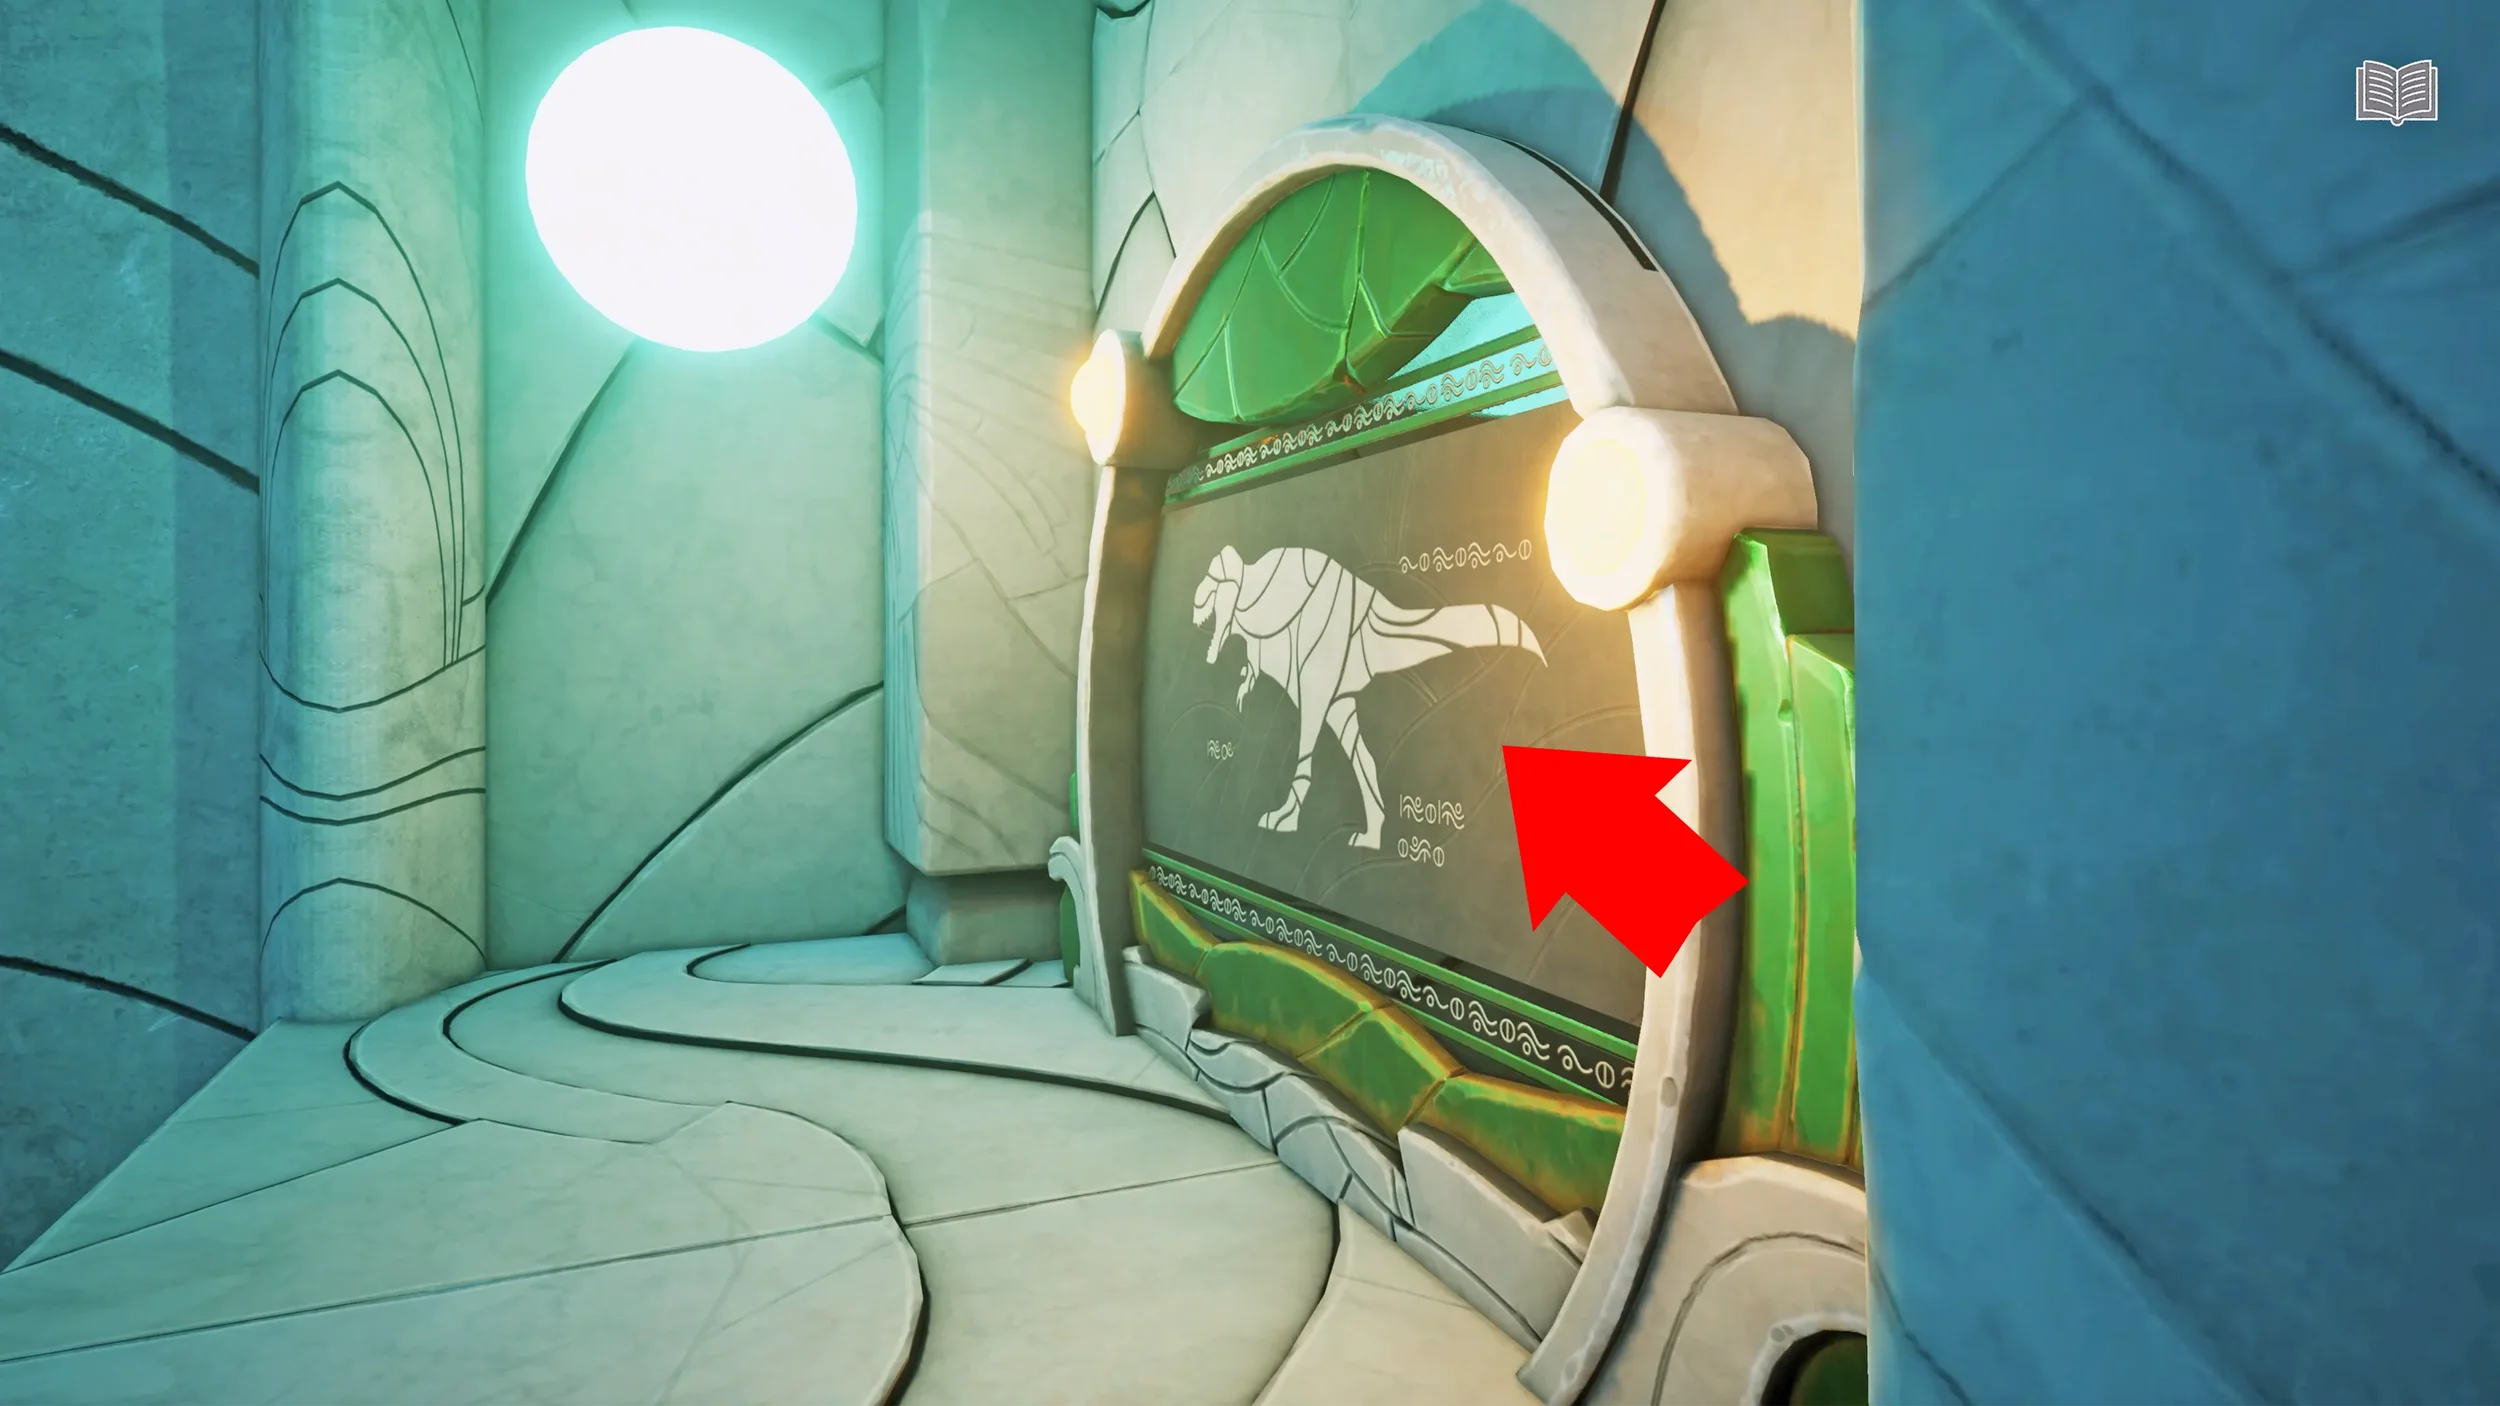
Return to the crossroads and take the next pathway to your left, here you will find your next clue, the Ammonite Mural.
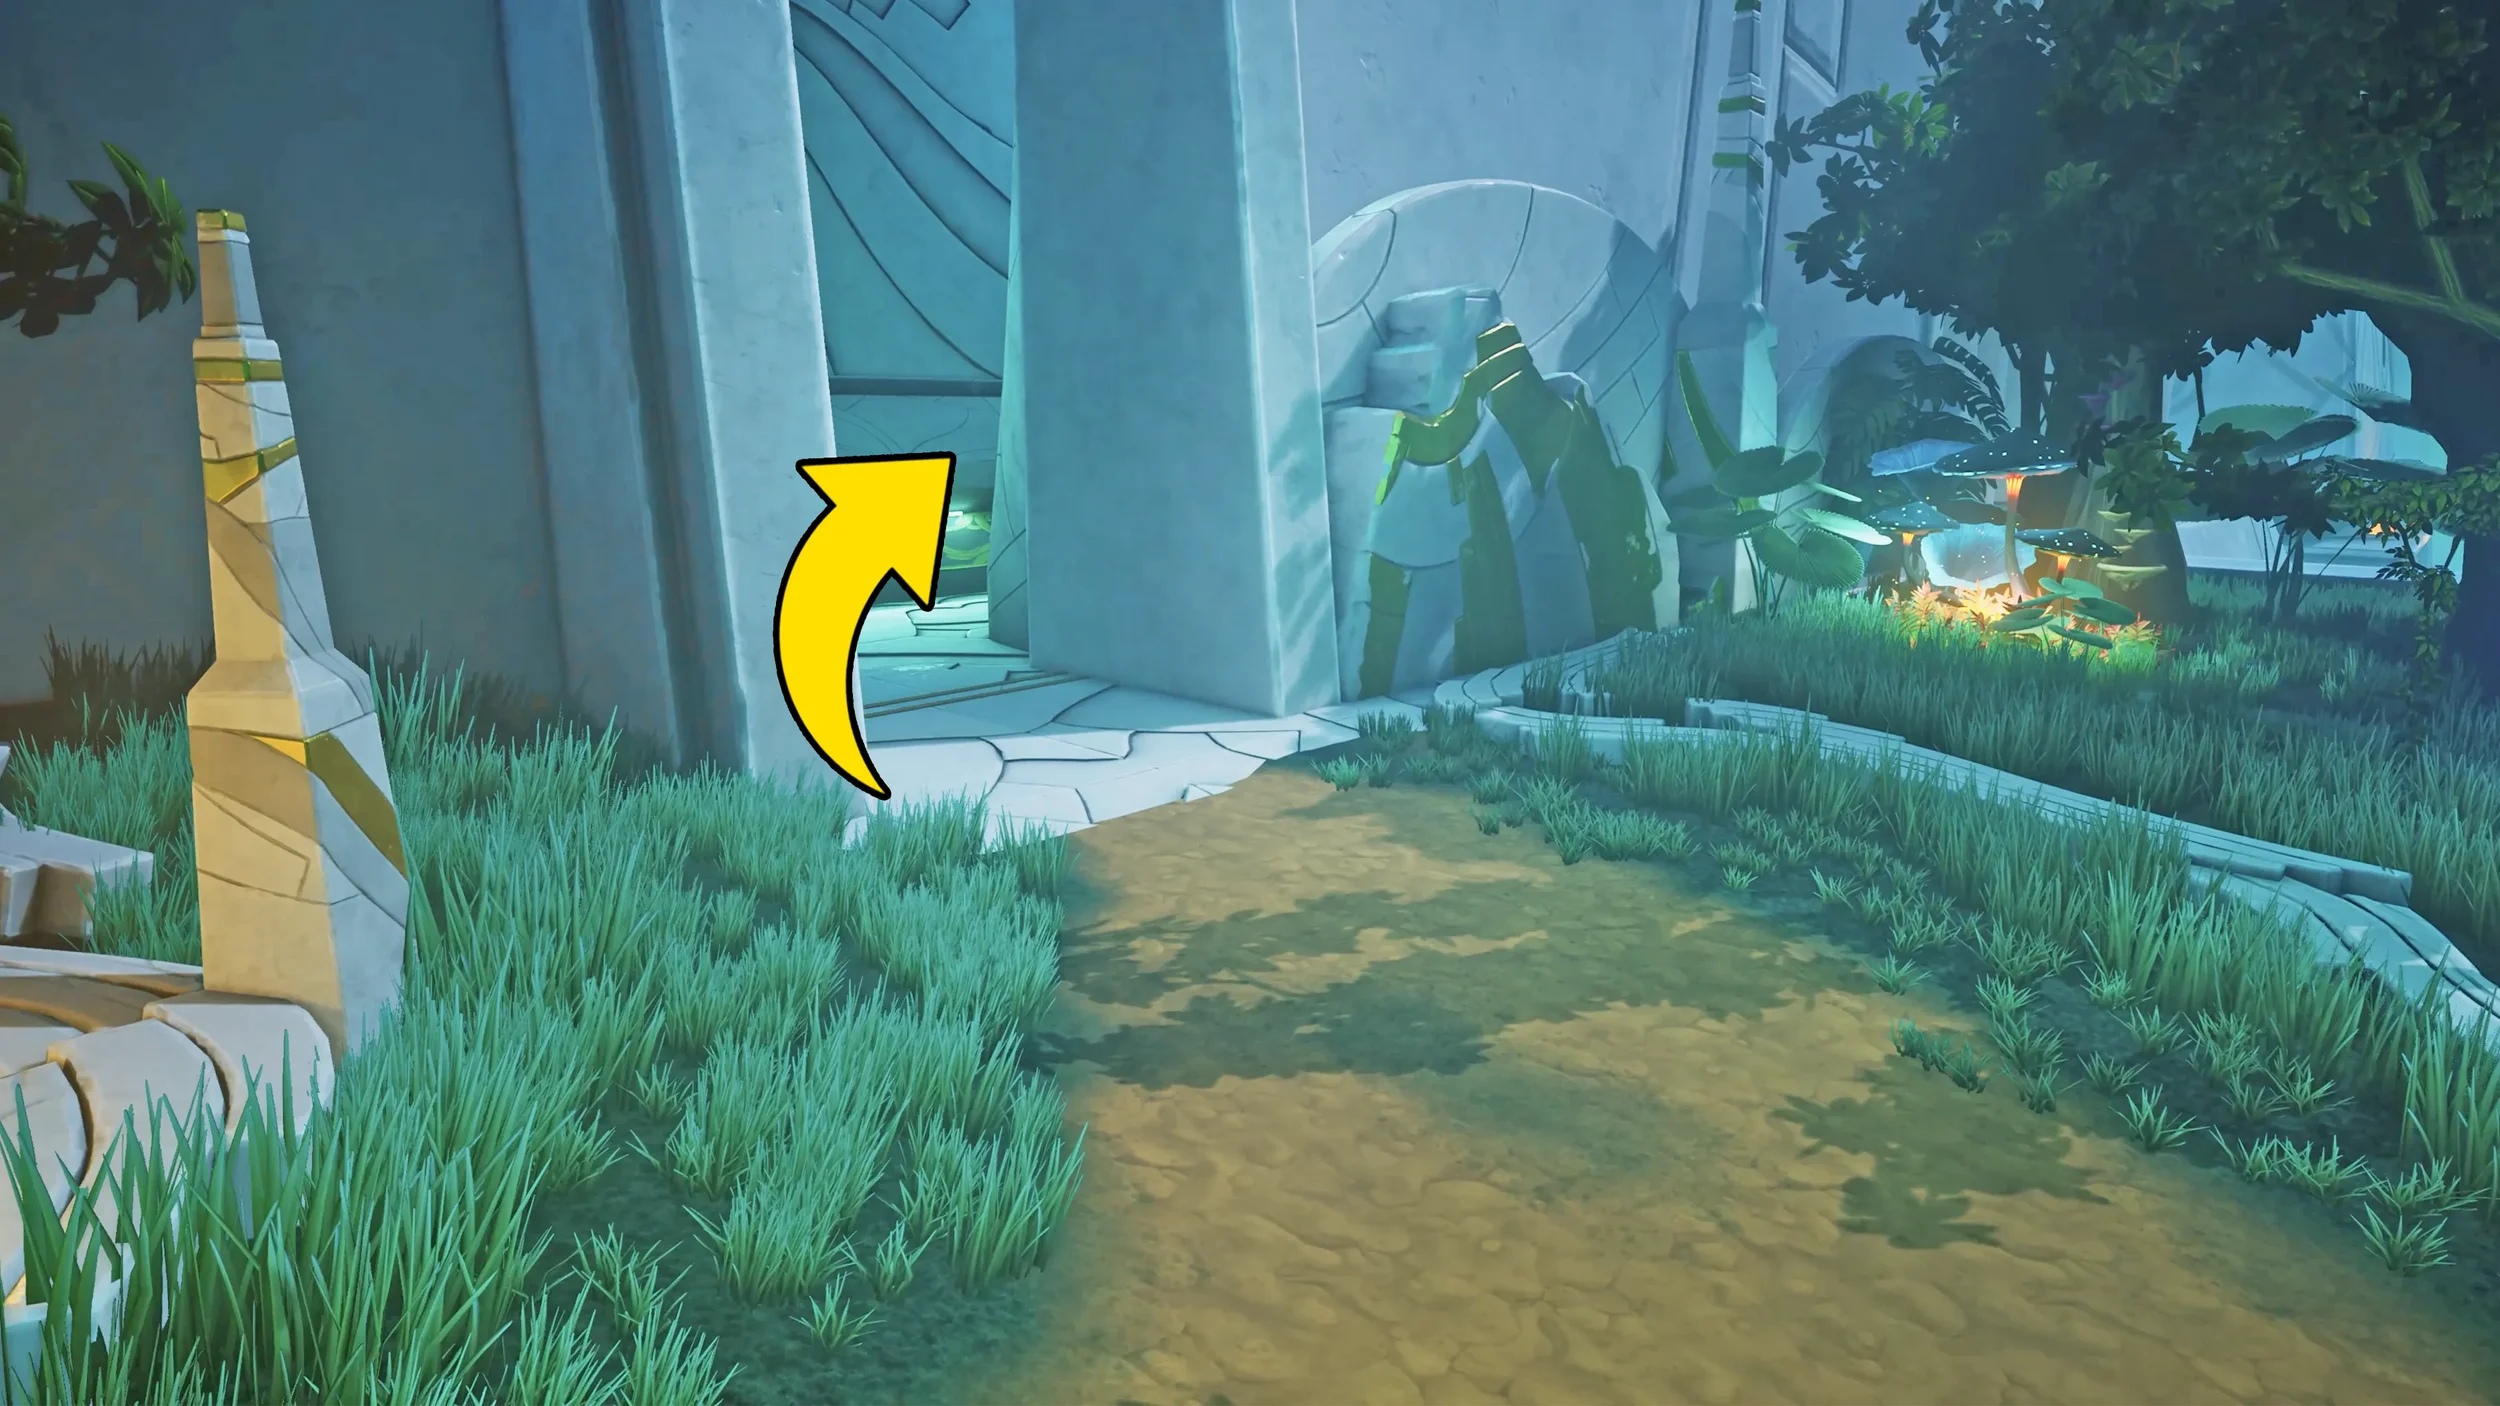
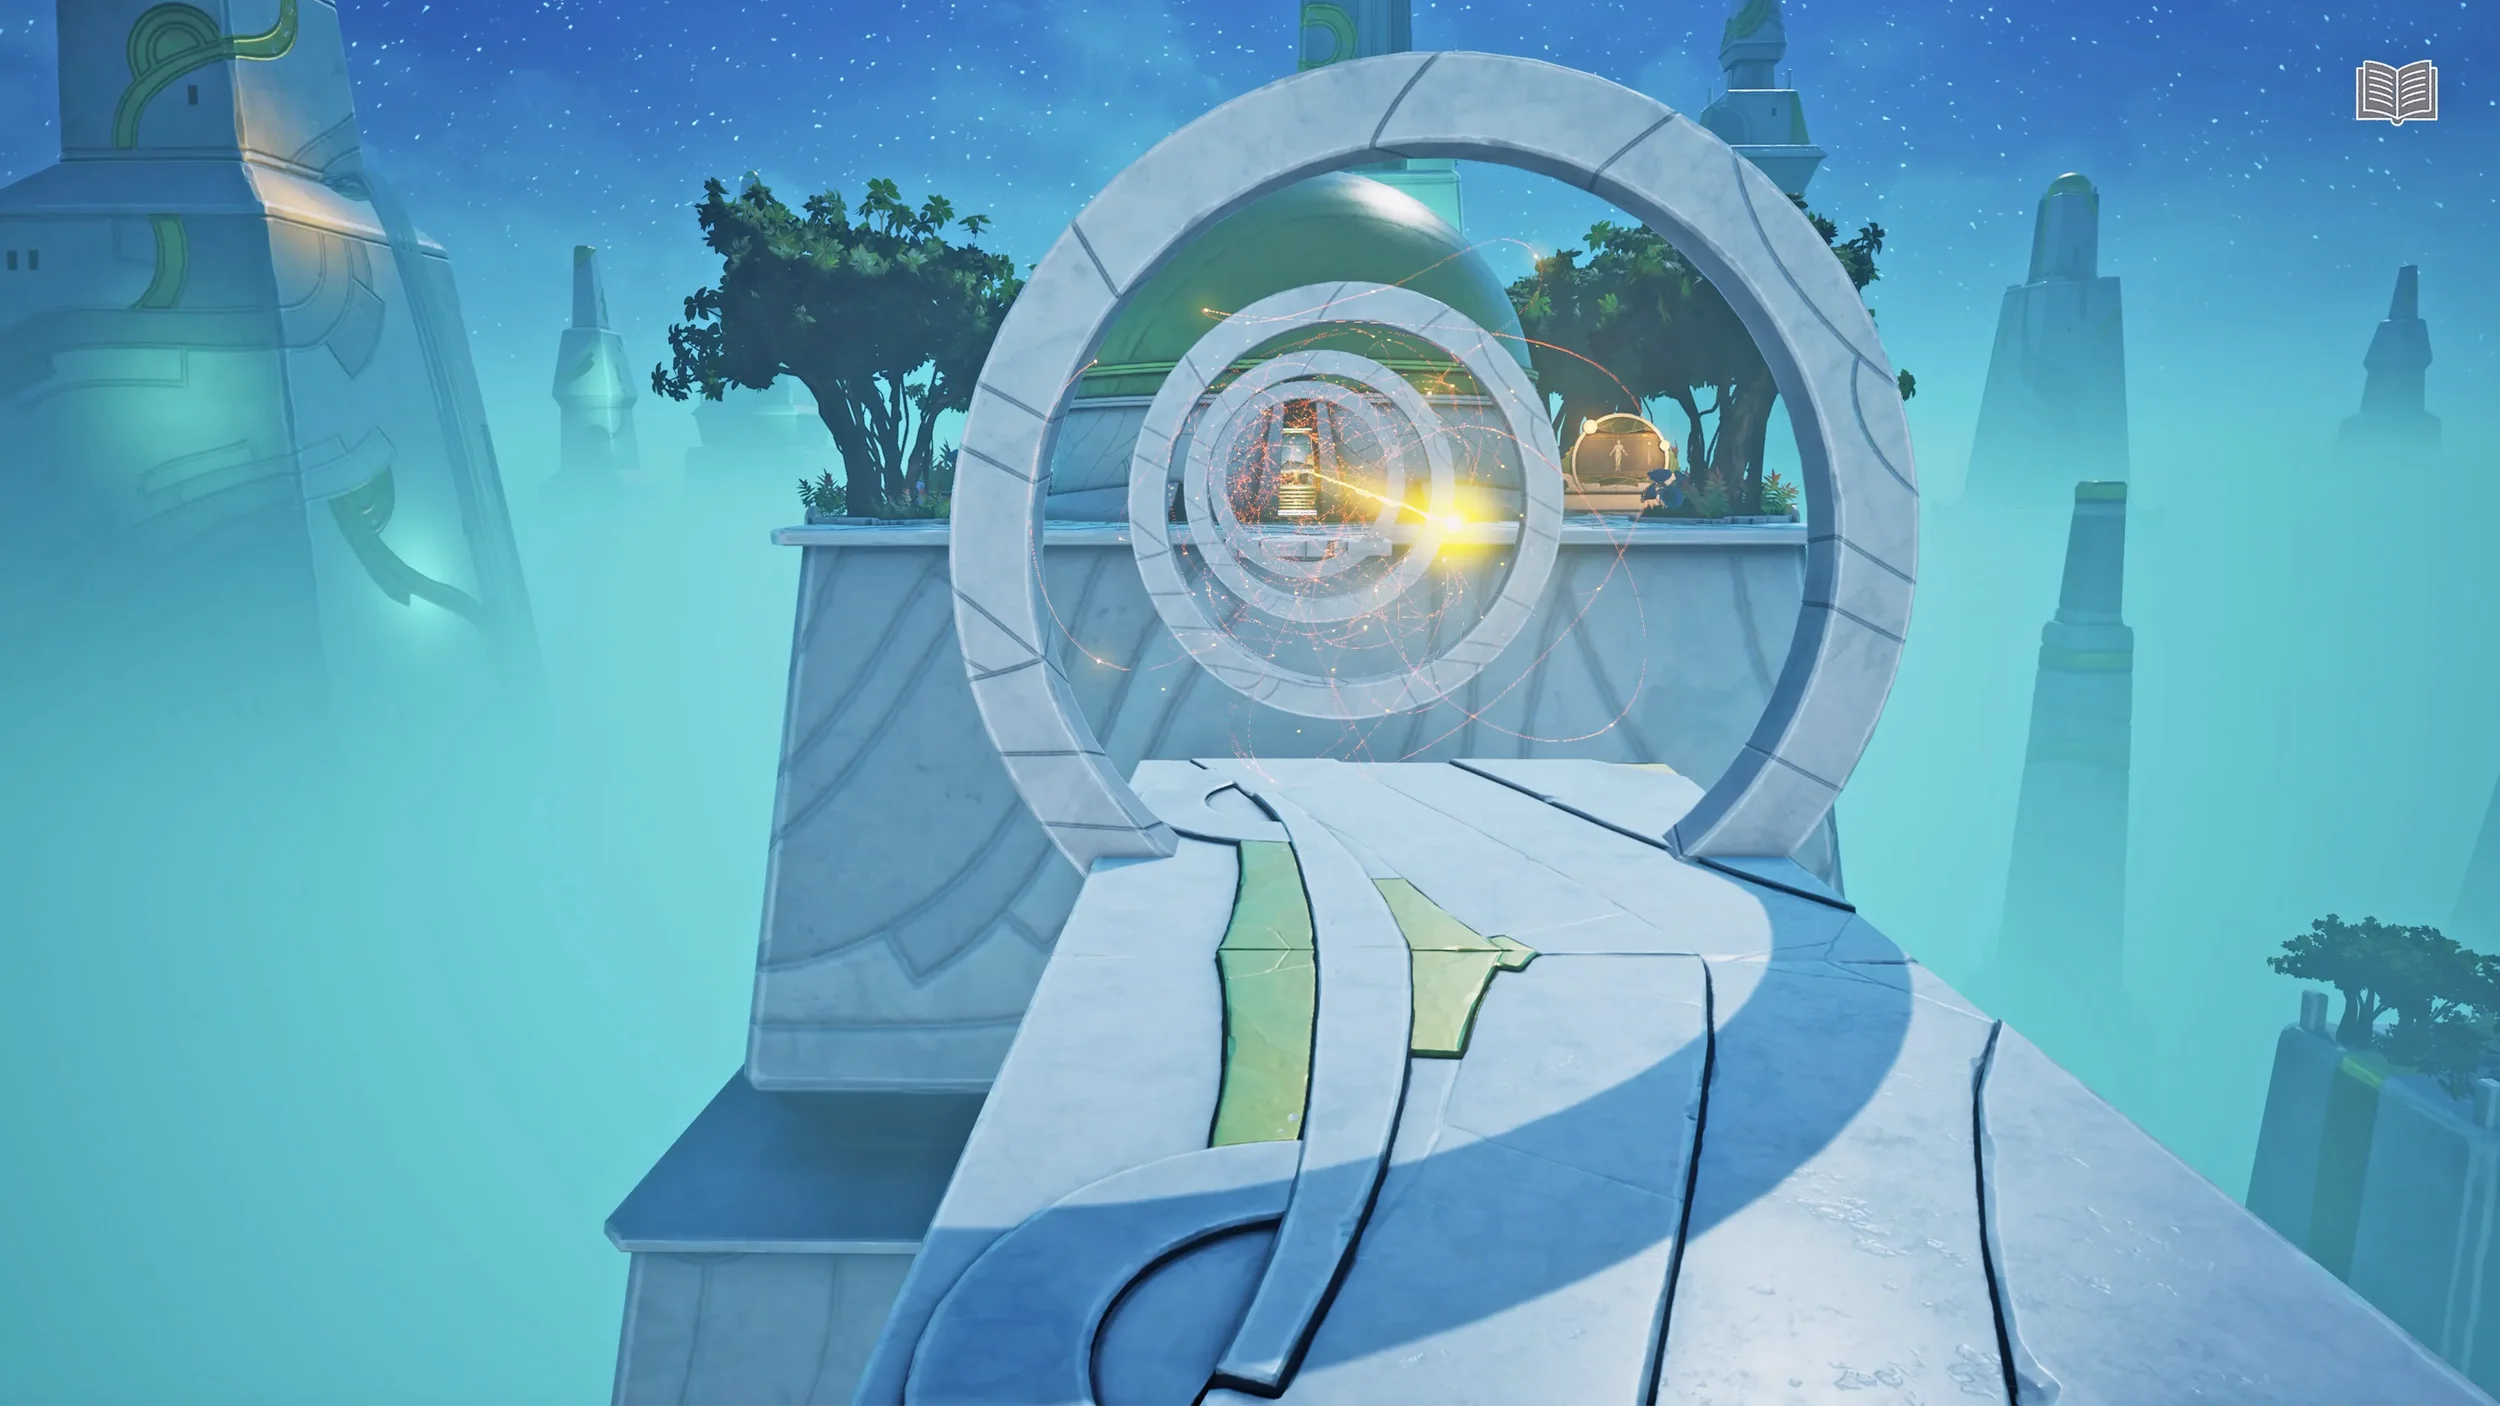
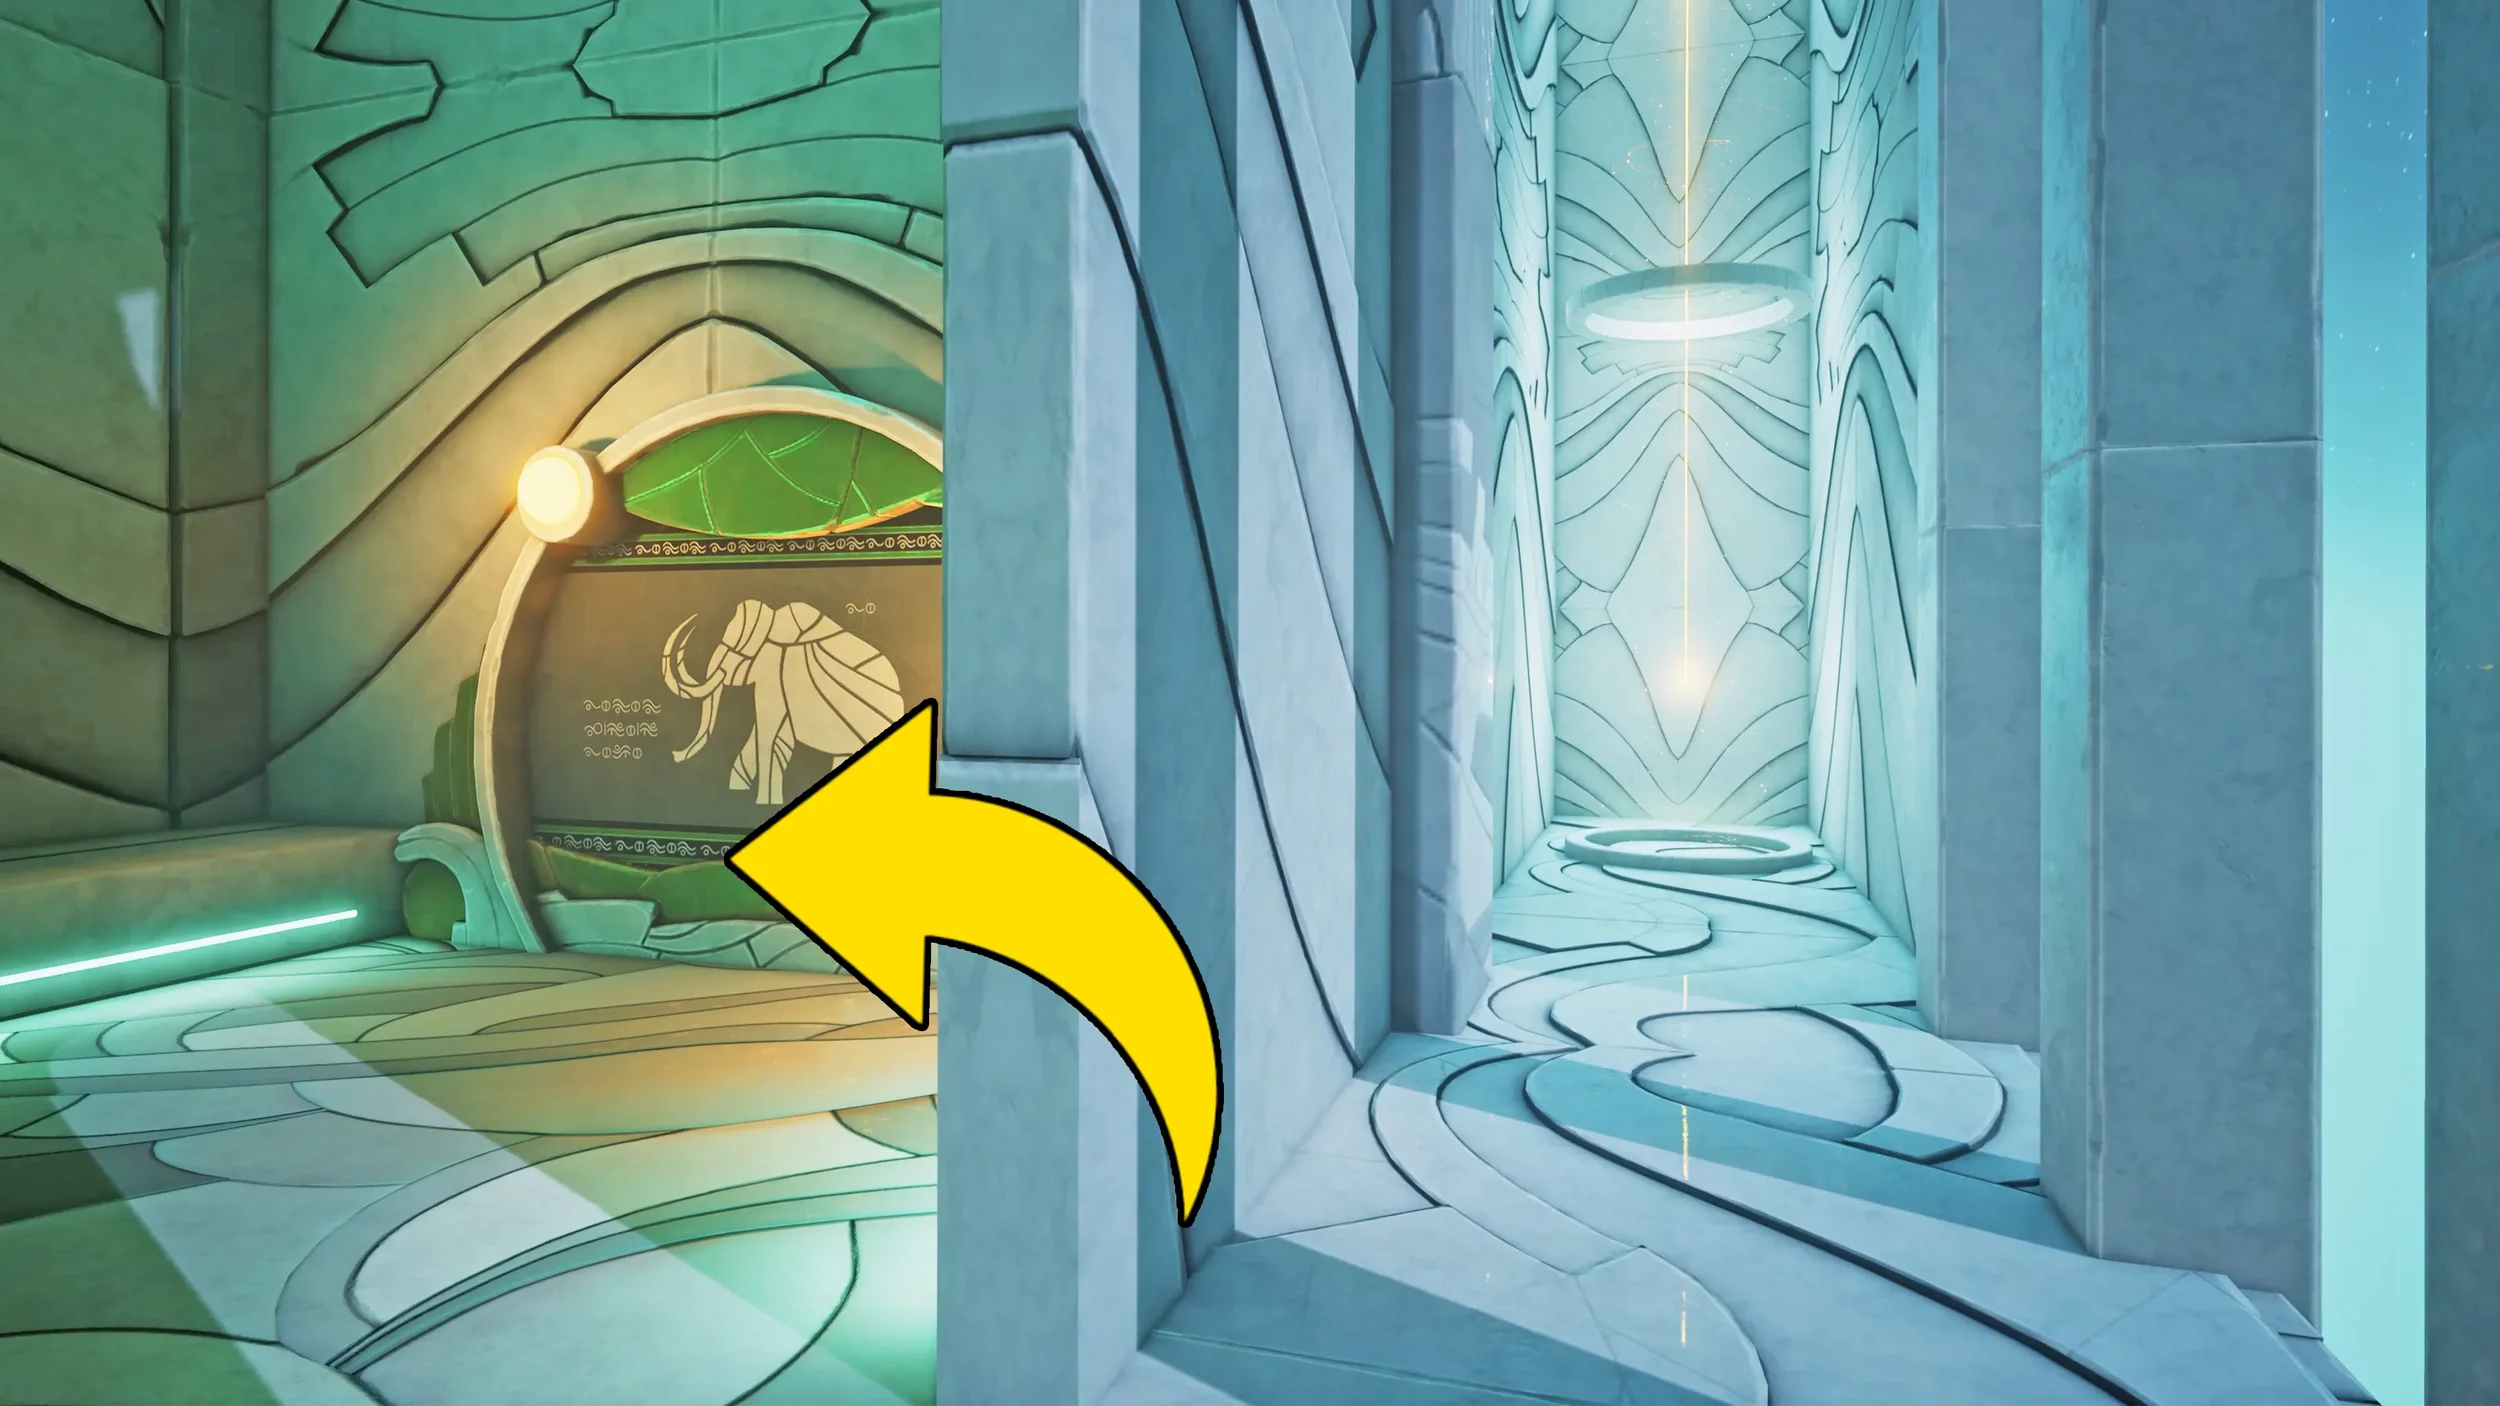
Those are all of the clues in the outside garden area, so we can now continue into the main building, as soon as you go inside you will be in a hallway with a doorway to your left and a beam of light “teleporter” in front of you, for now ignore the doorway and go into the beam of light.
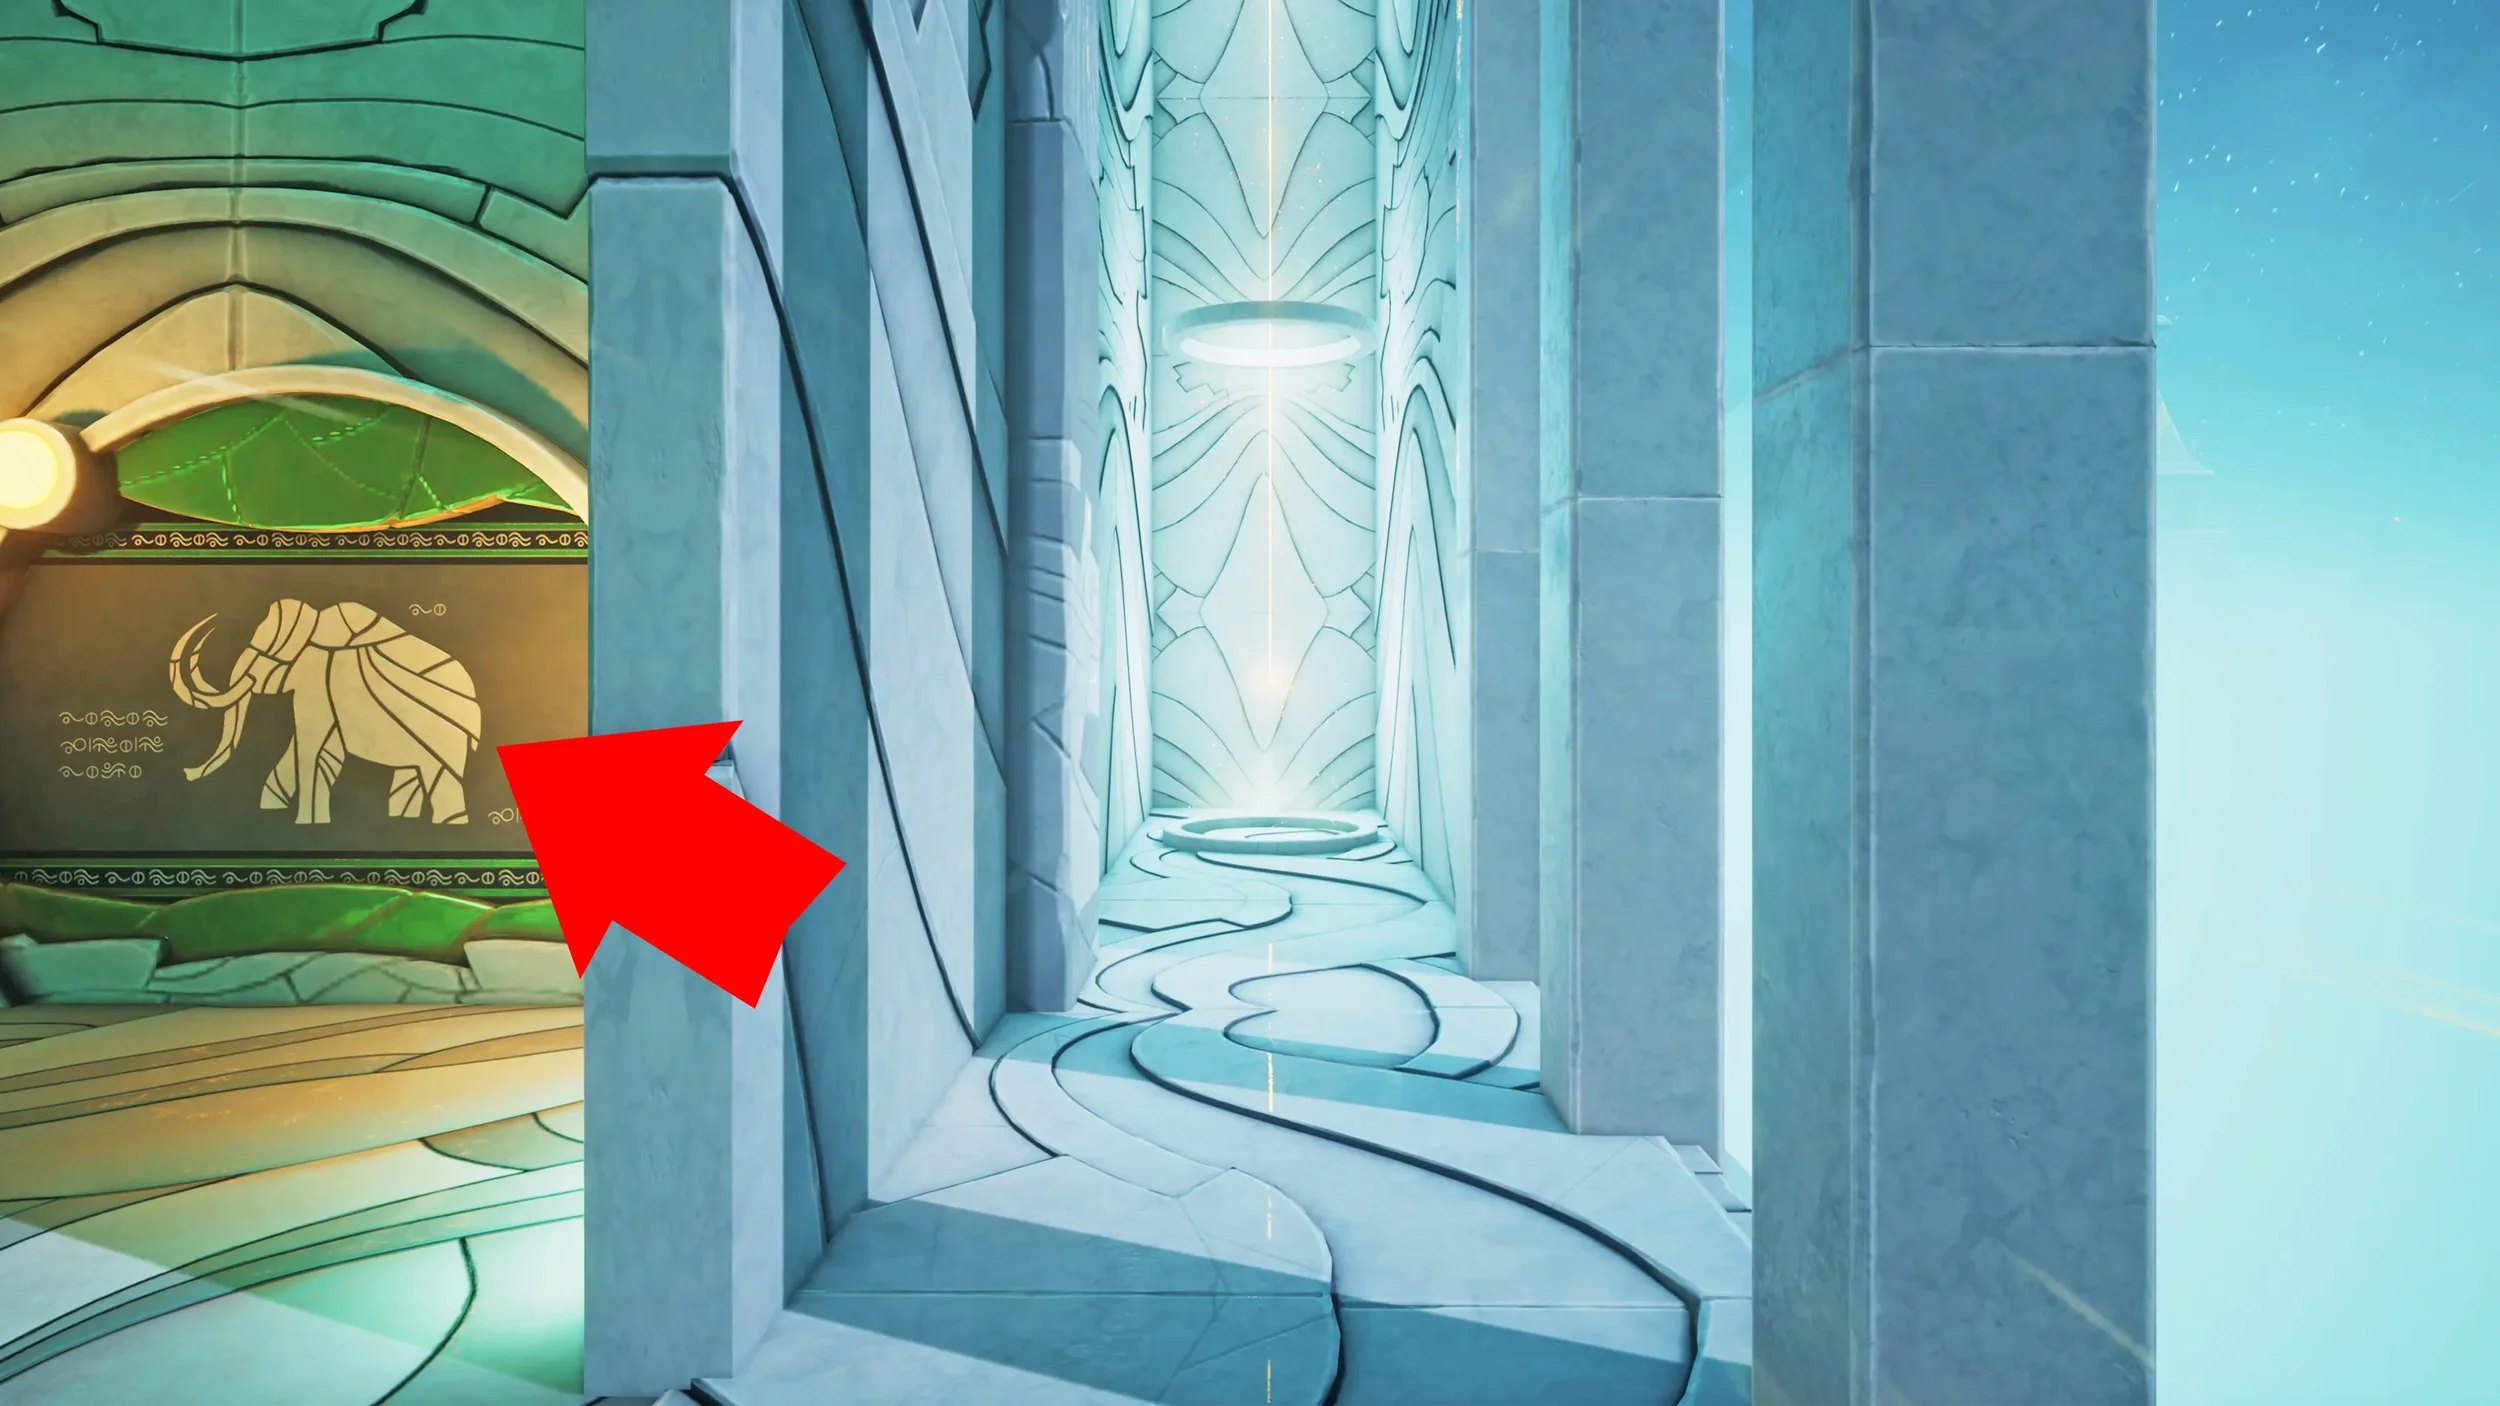
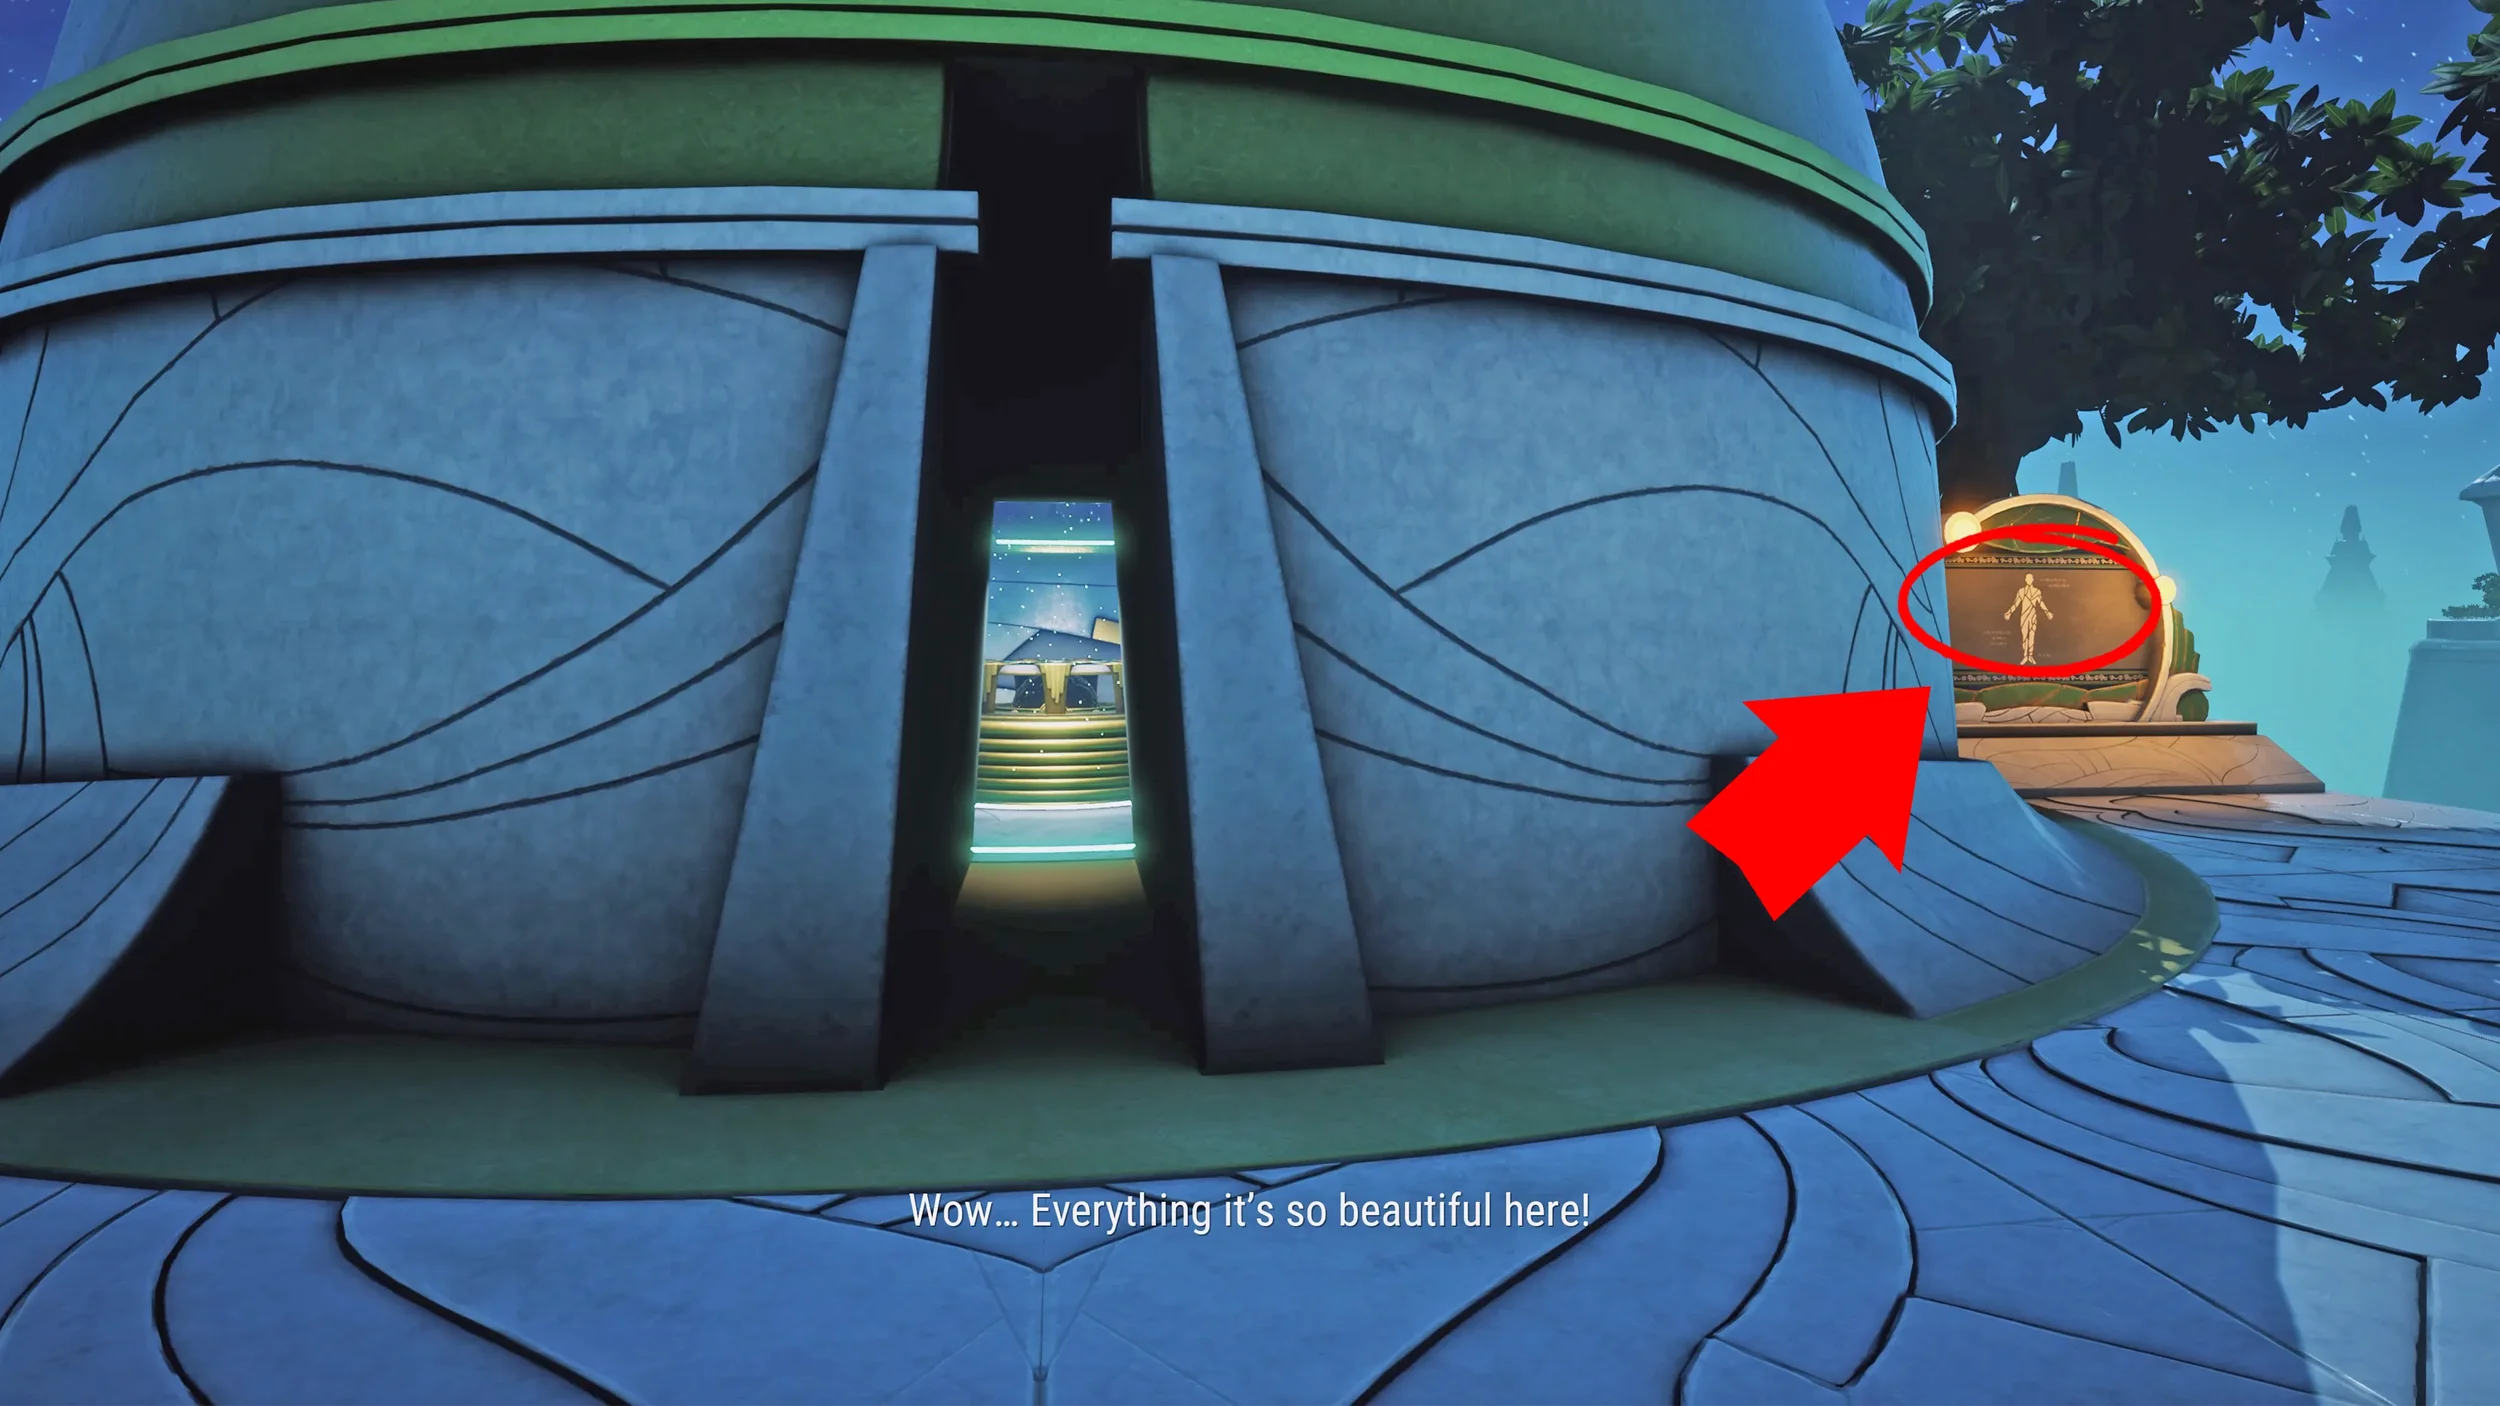
This will take you to another hallway, as soon as you “get off” the beam of light go into the small room on your left to find another mural clue.
(There will also be a machine in this small room but that is for a later puzzle, ignore it for now).
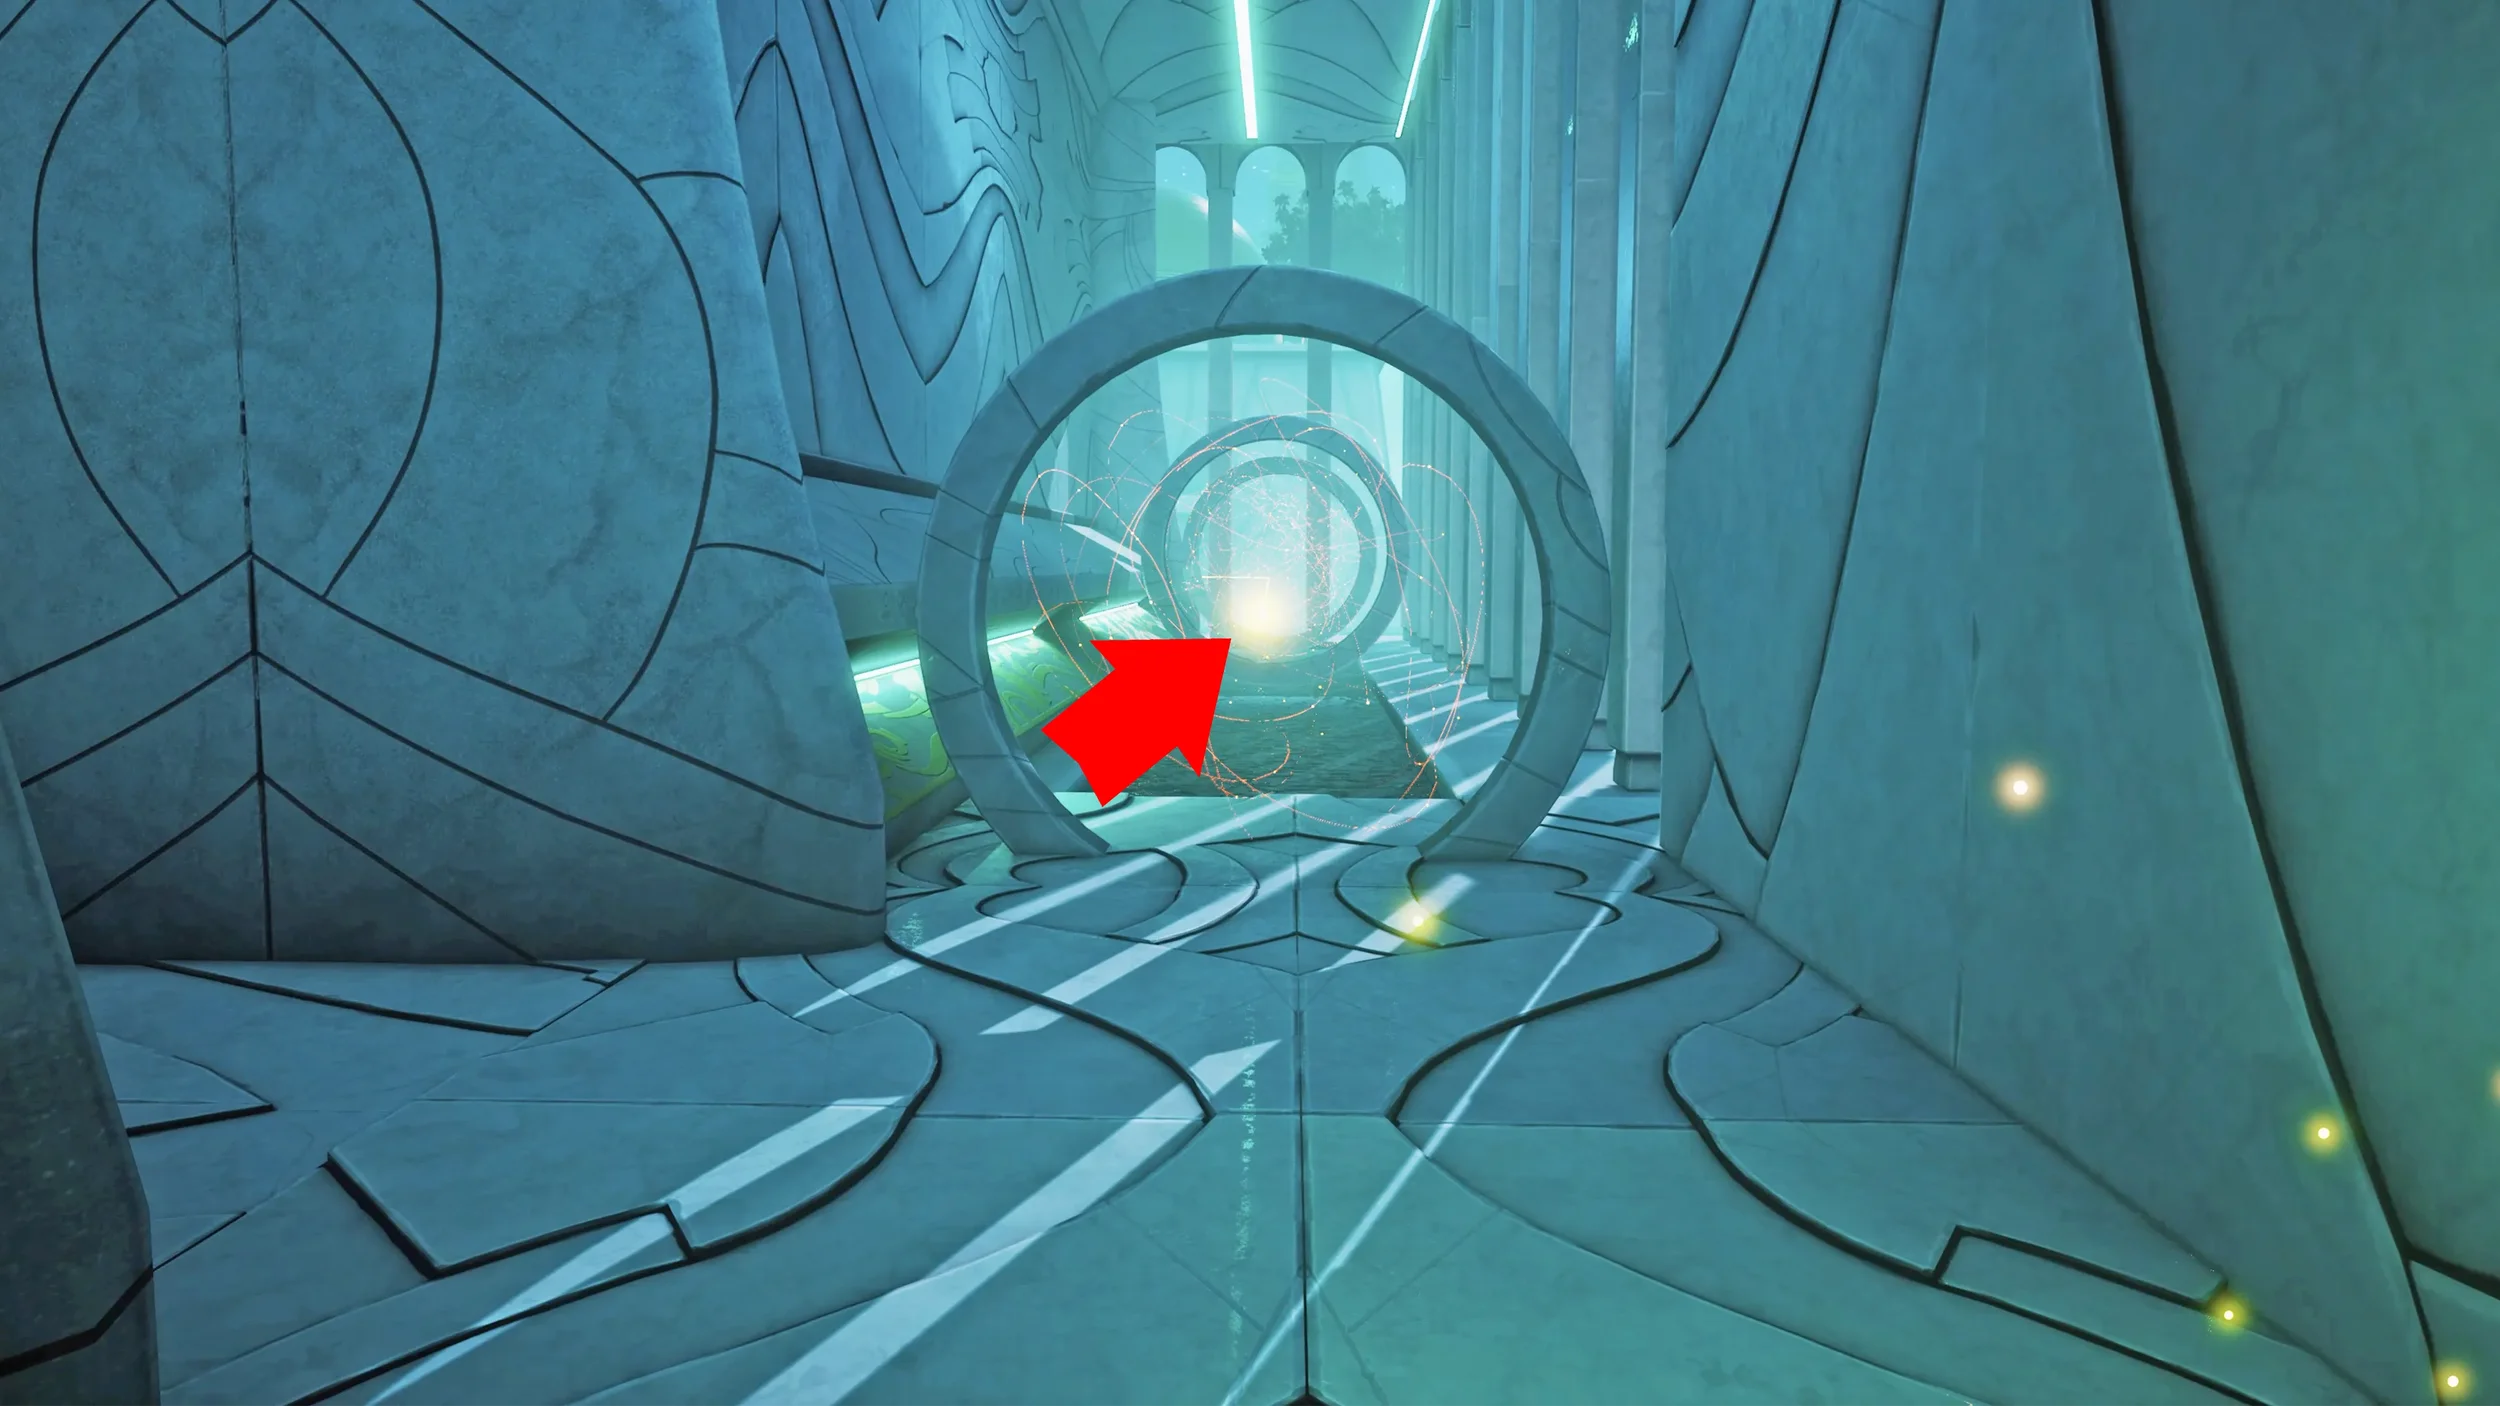
Exit out of the small room and go up the beam of light at the end of the hallway, this takes you to the Observatory, here interact with the telescope to get another clue.
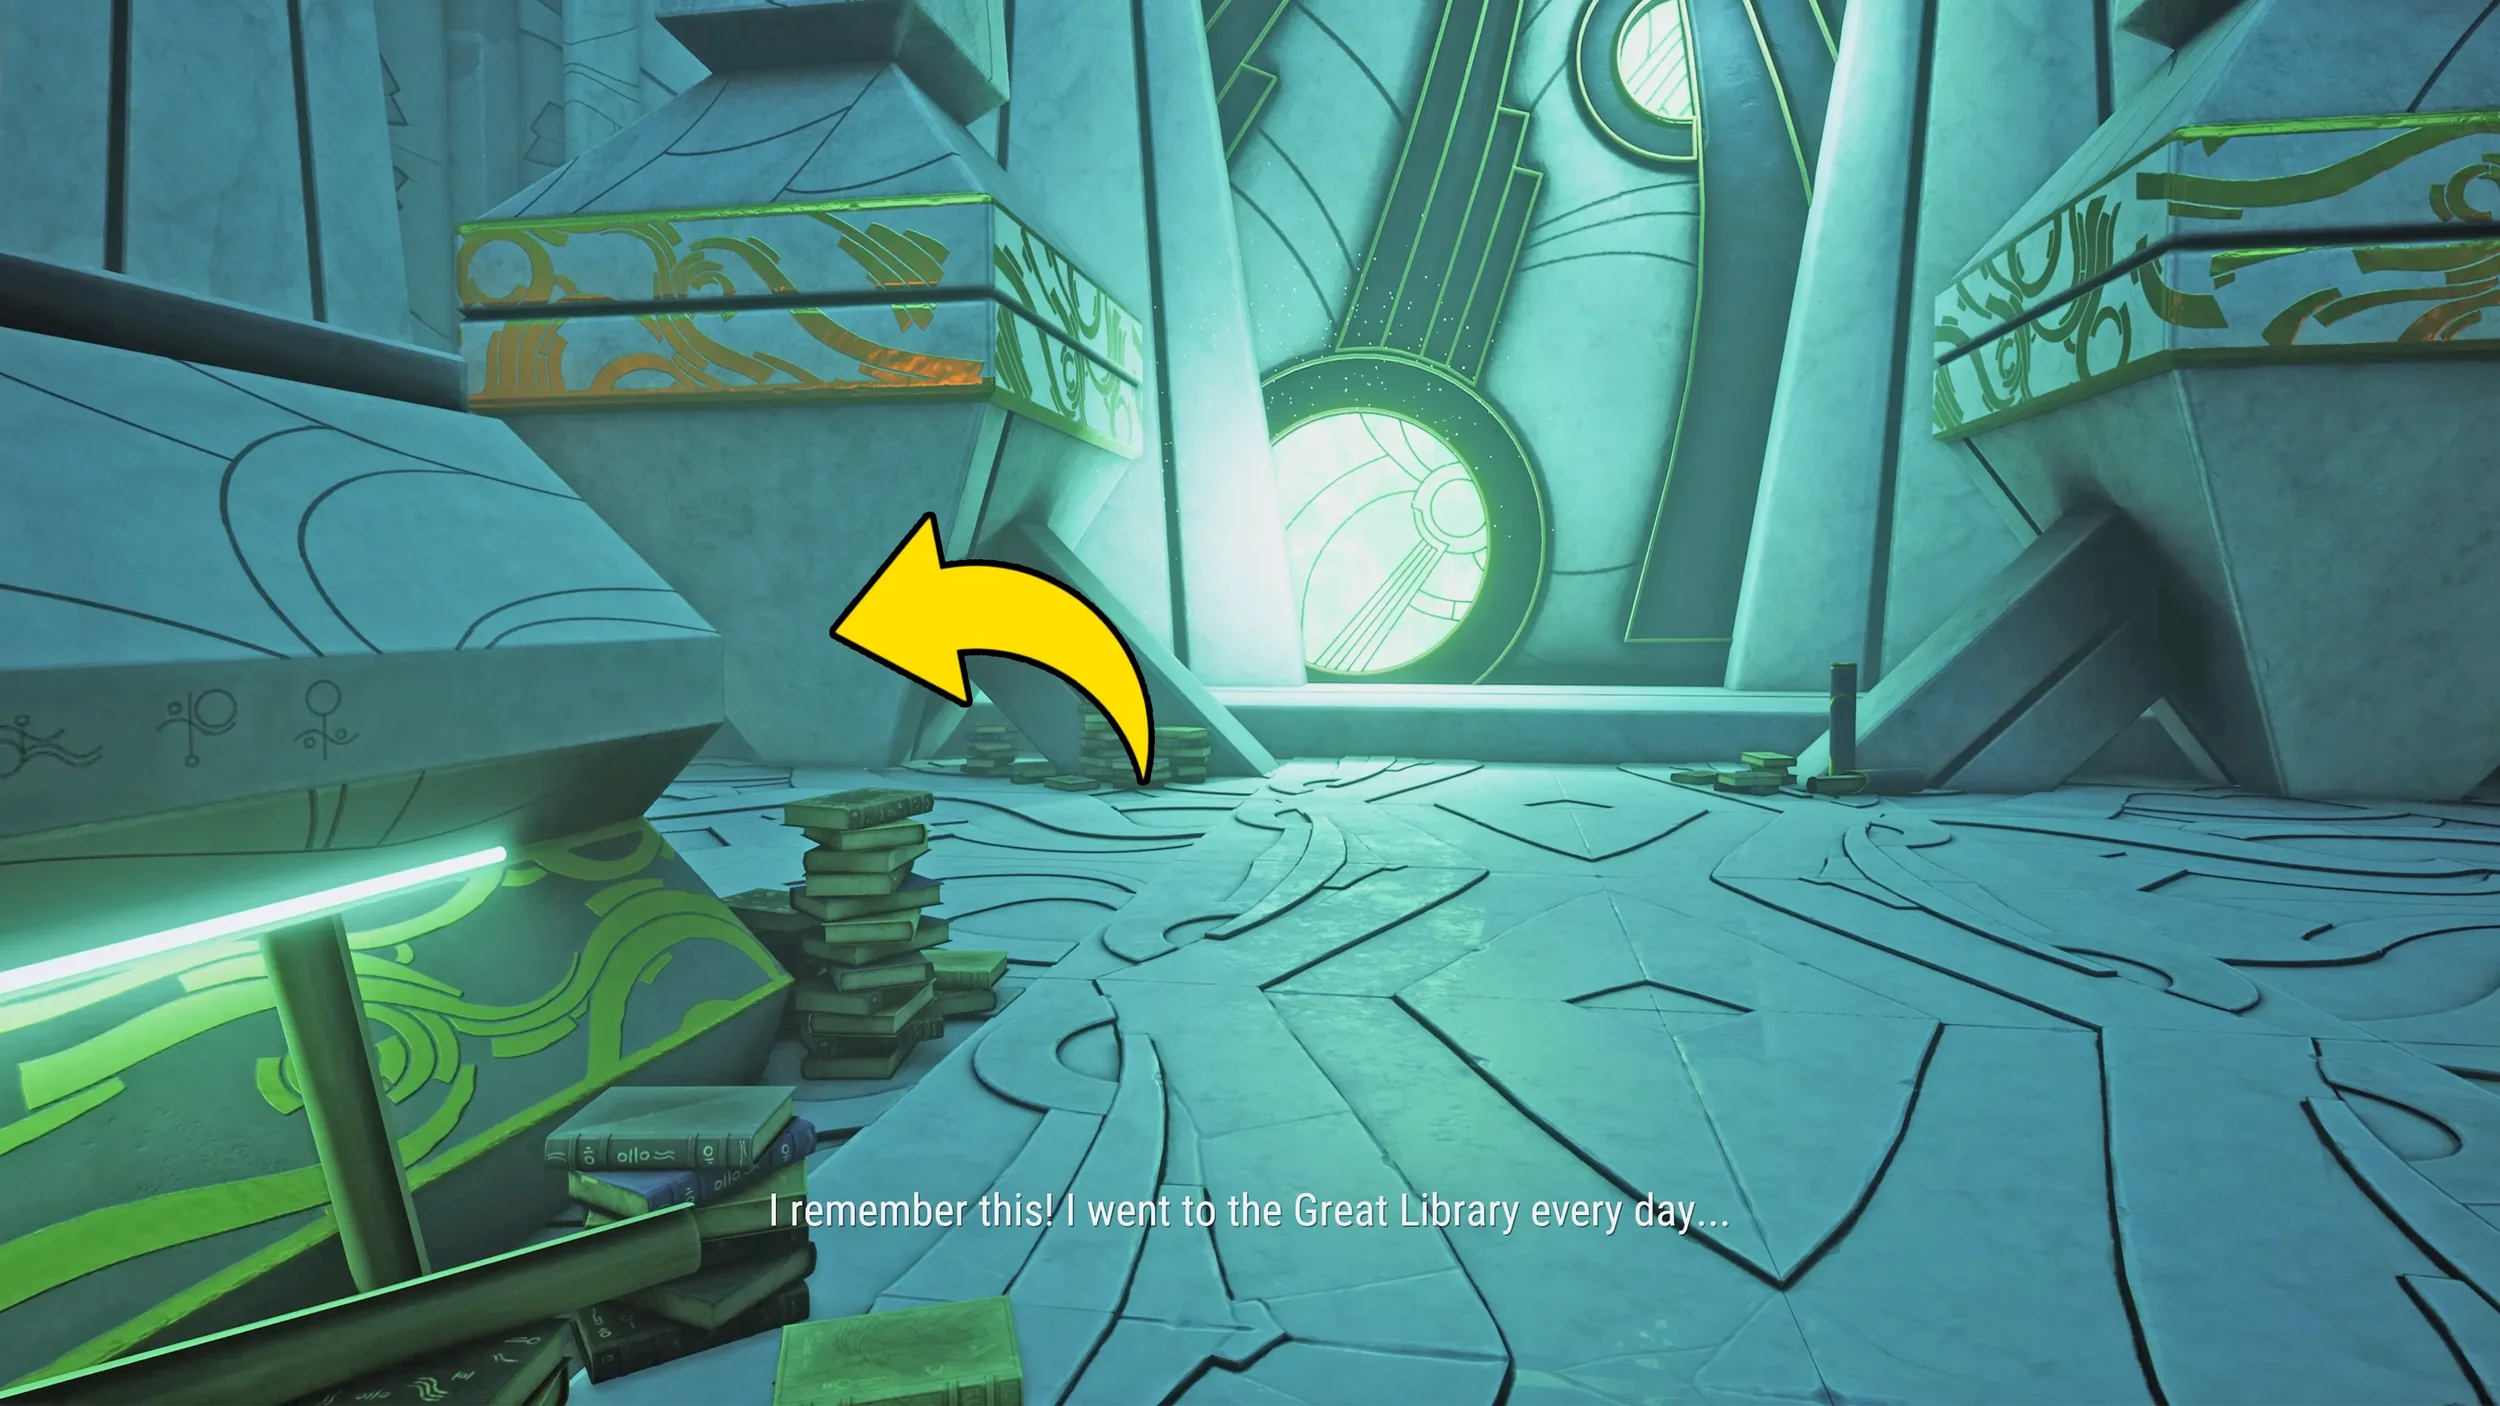
We can now return to the entrance of the building, remember that doorway we ignored on the left when we first entered the building, just before the first beam of light? It is now time to go through that door into the big room with many scrolls and books.
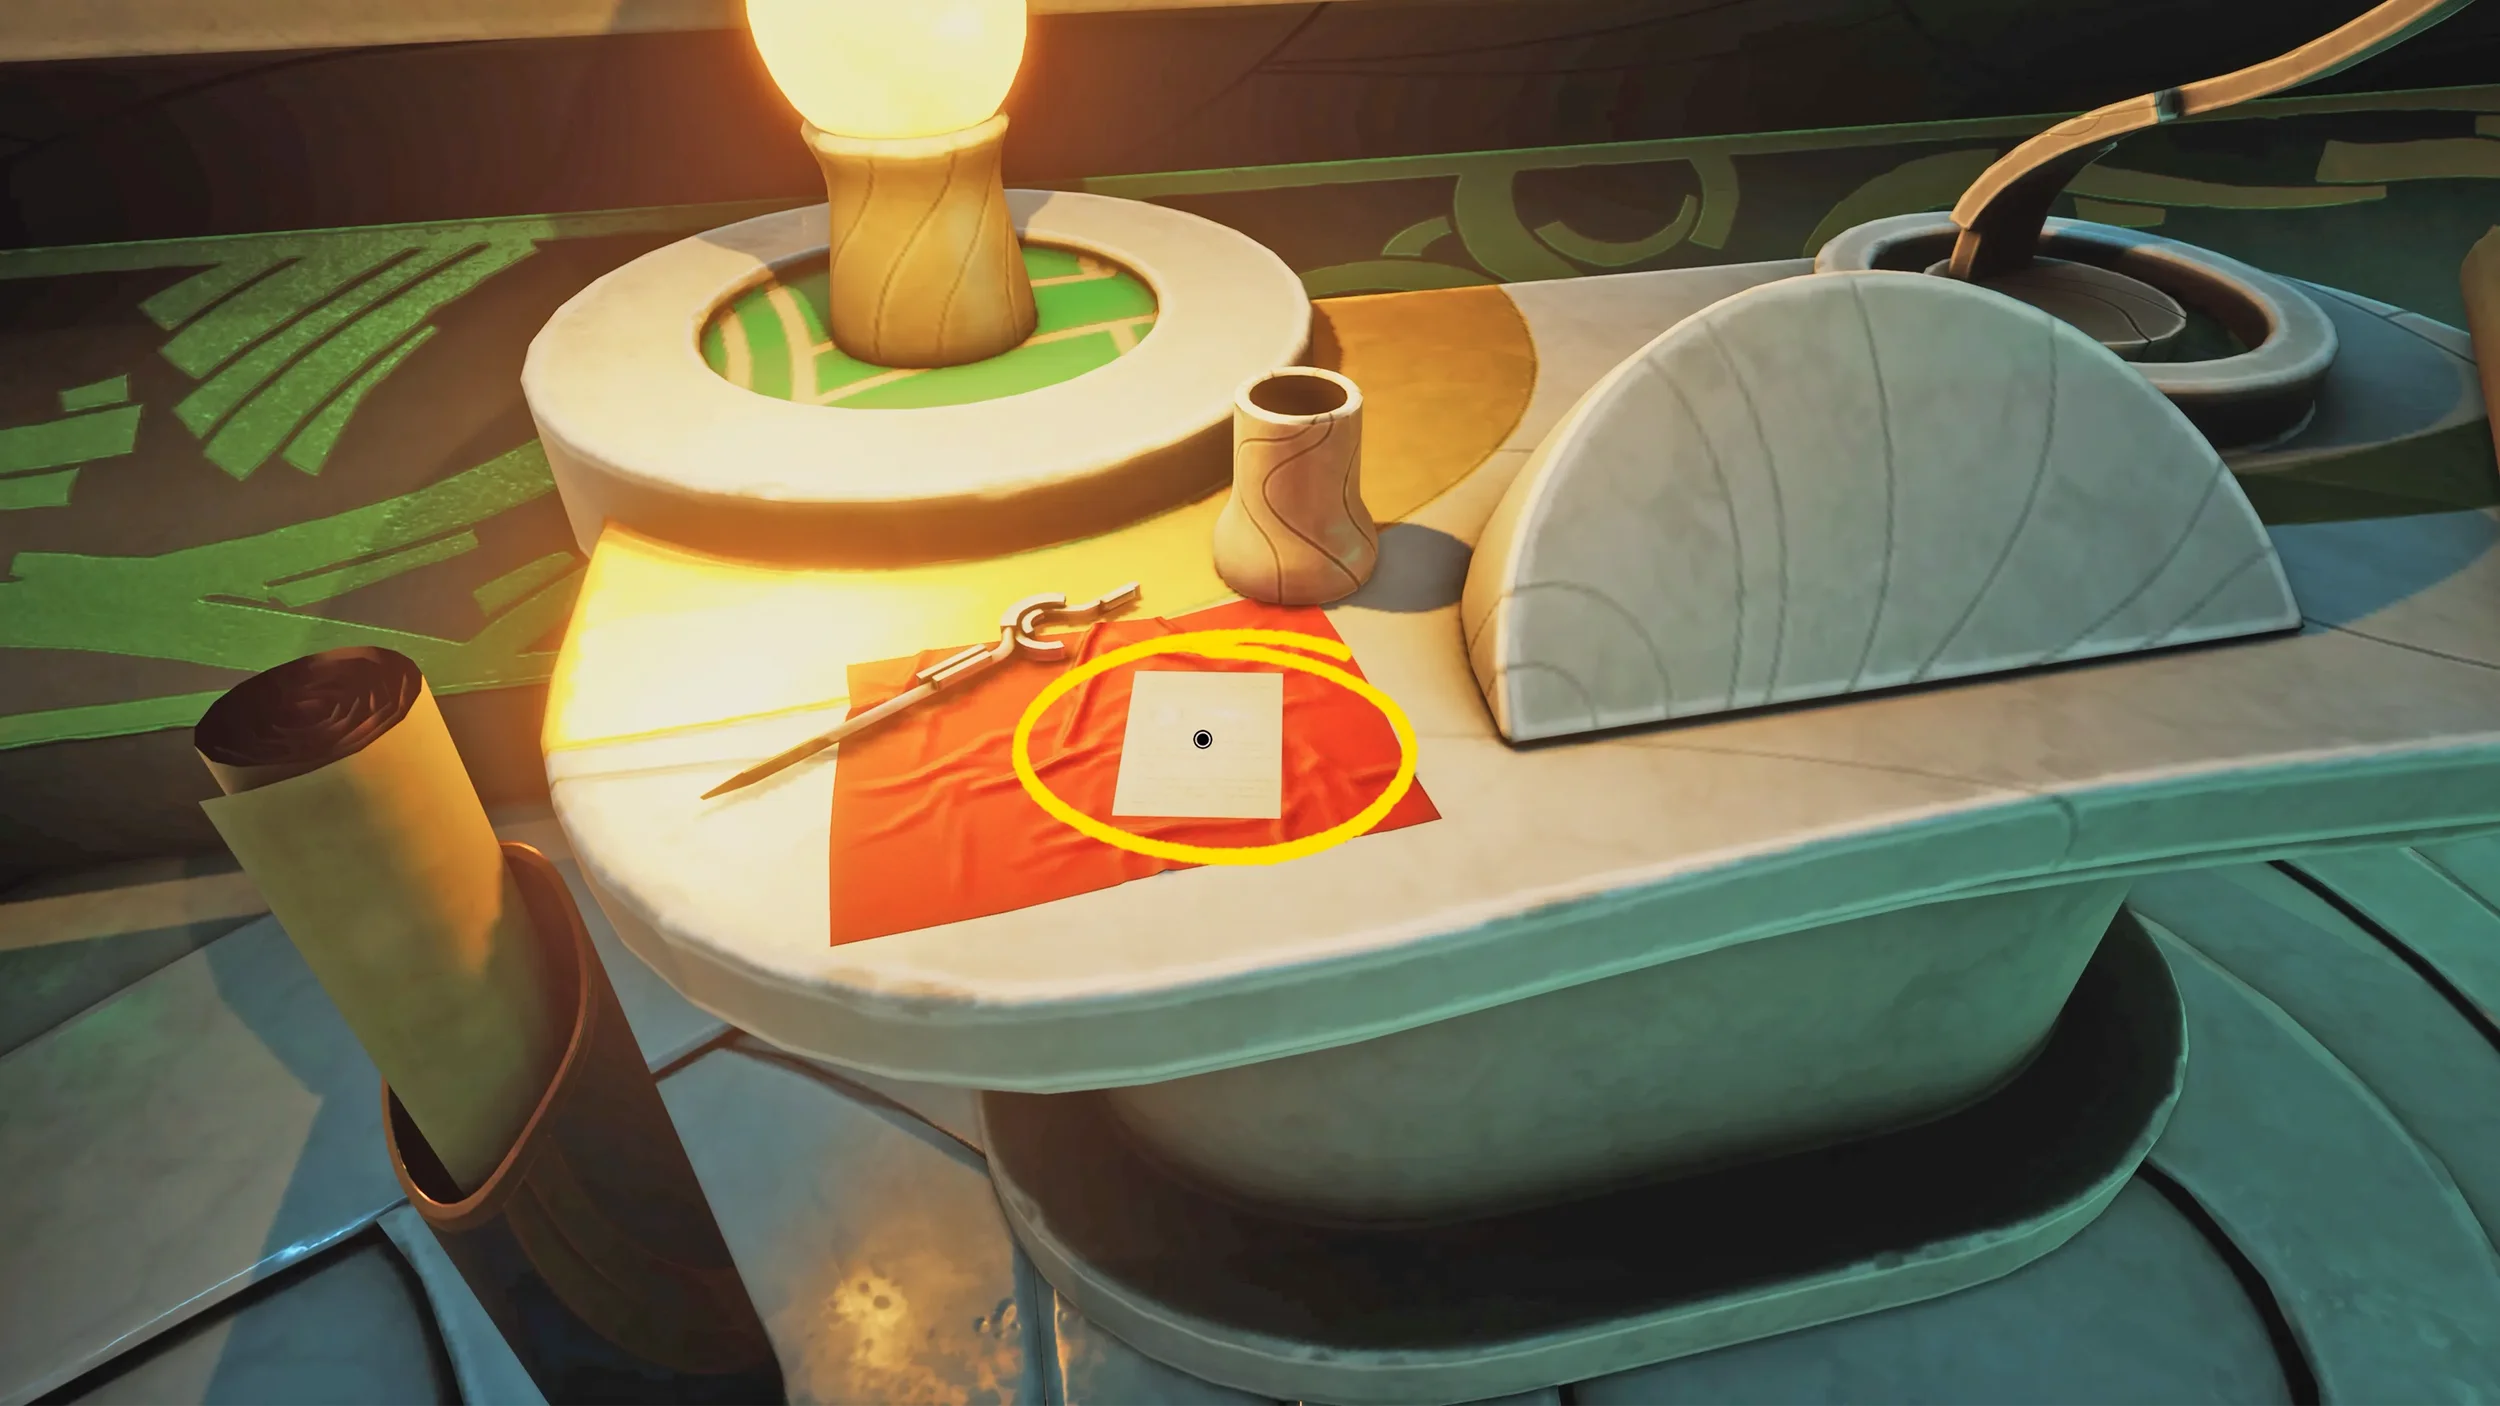
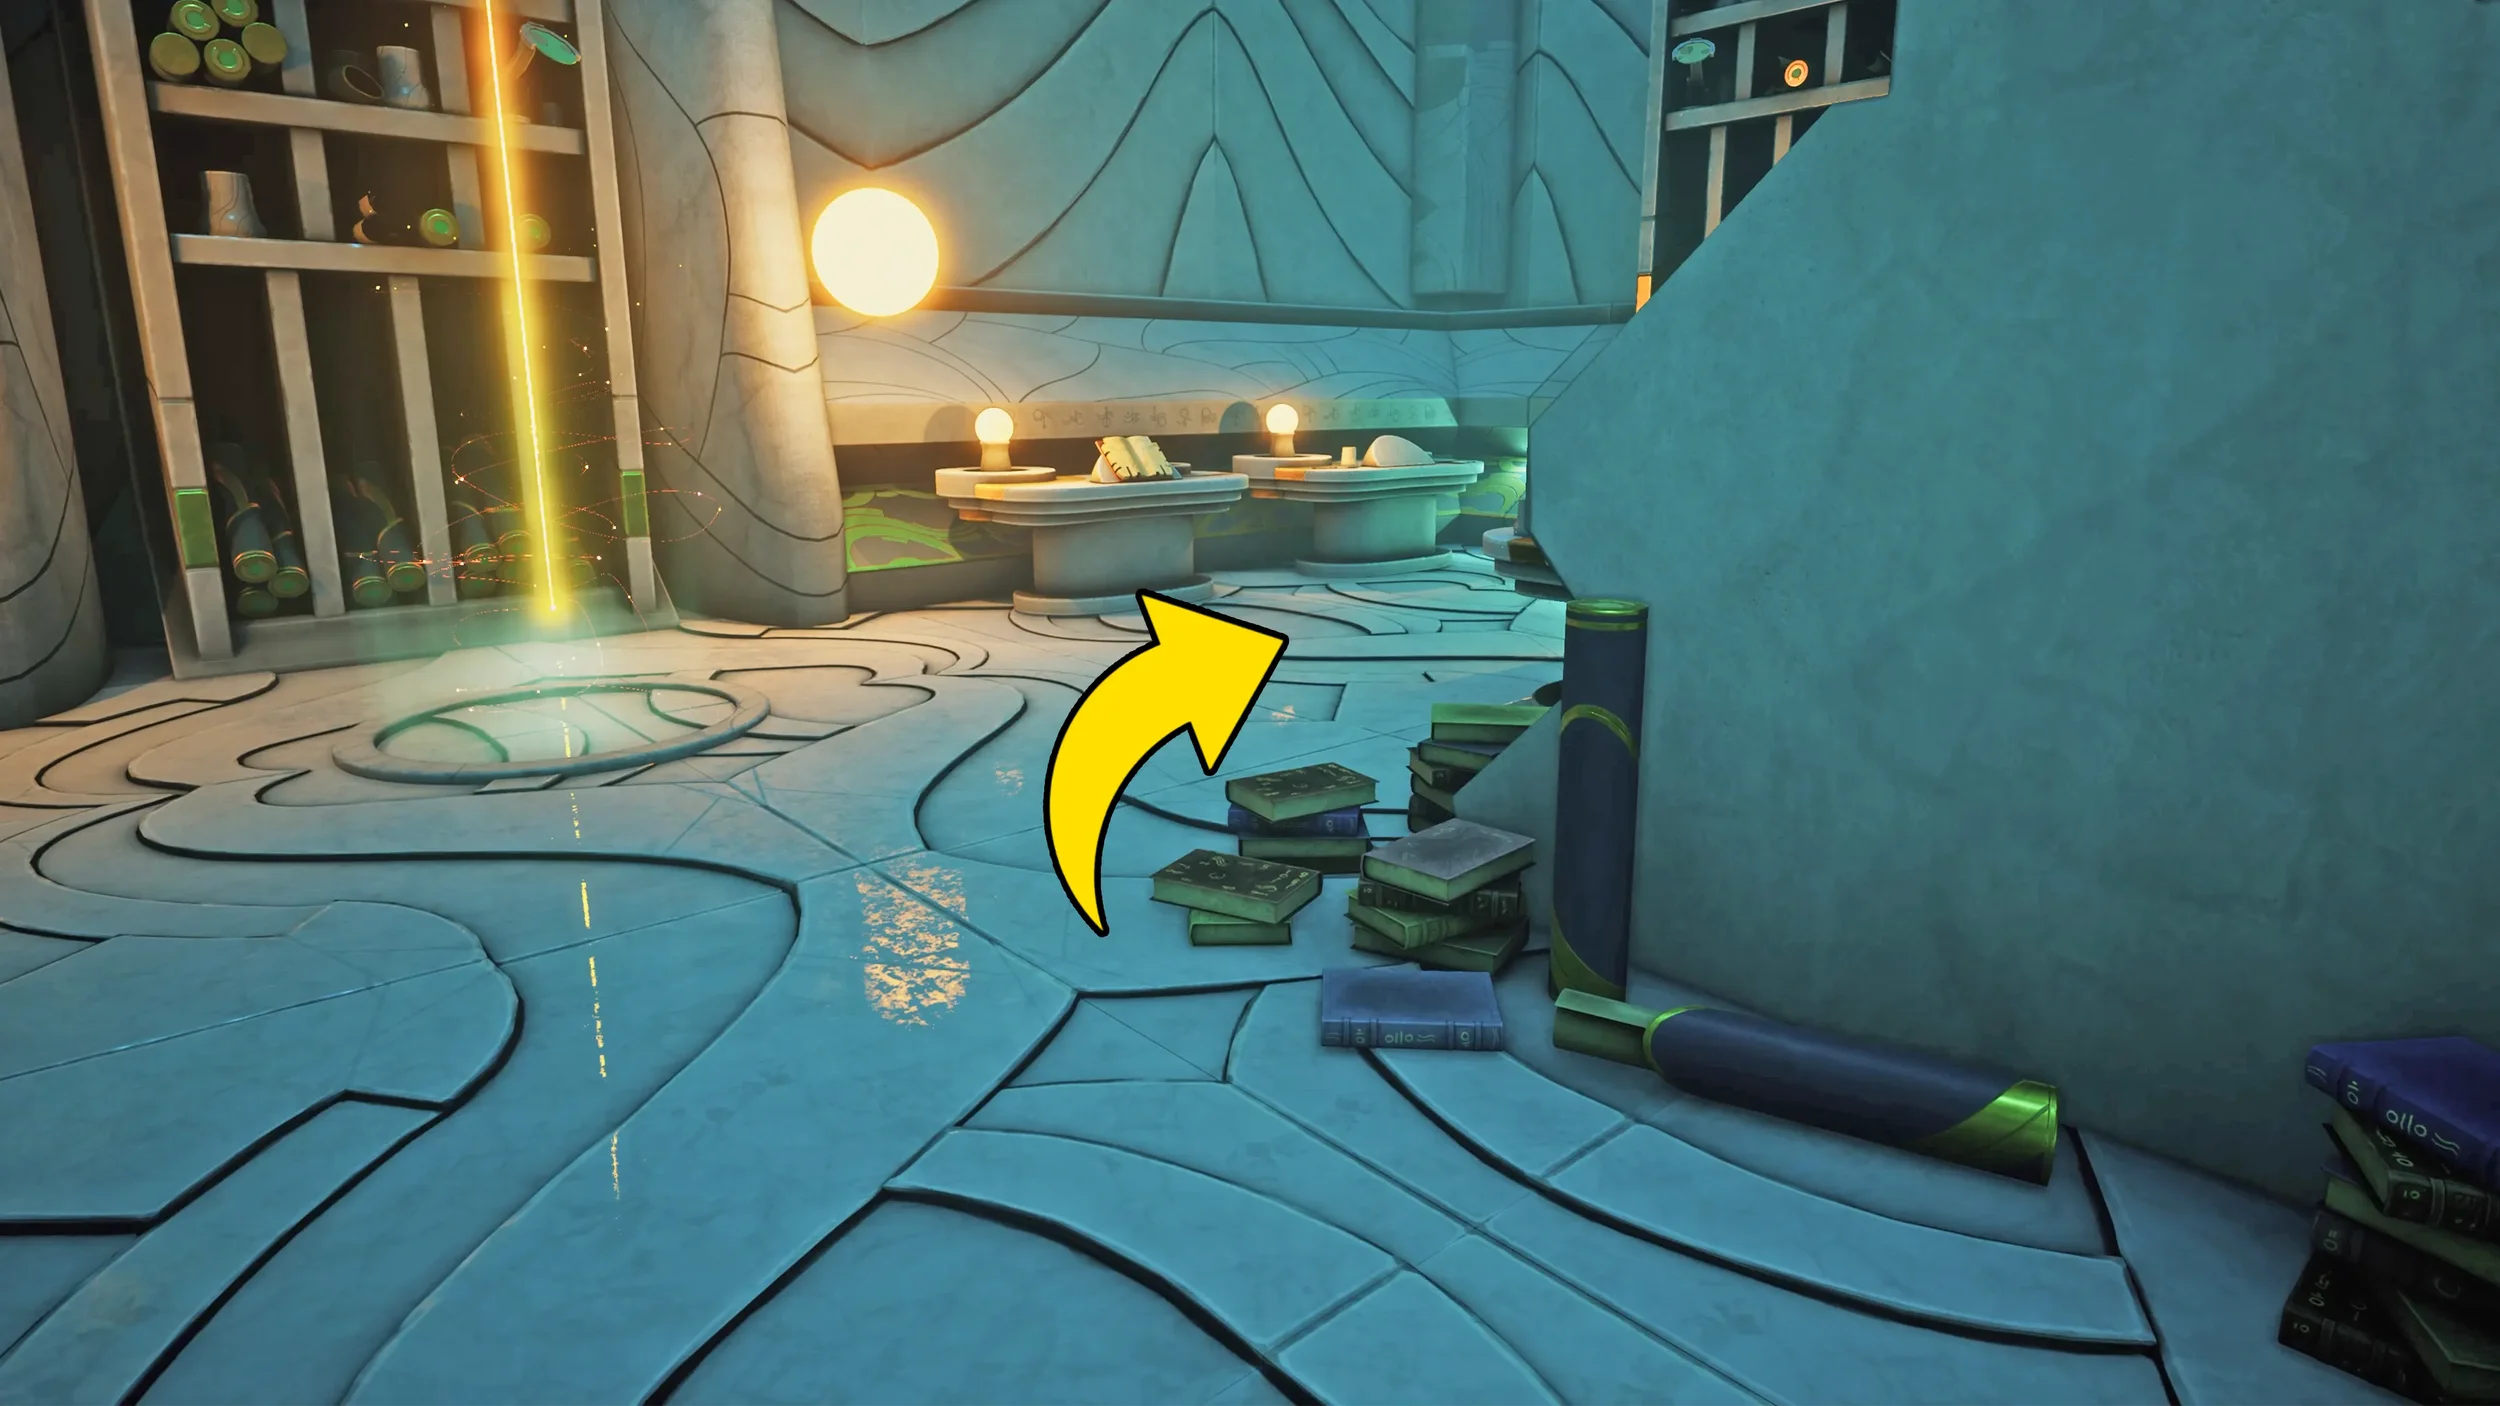
When you enter the room, go to the left to find 3 clues, a paper on a desk to the left, the big solar system mural on the wall and another piece of paper on a desk to the right of the mural.

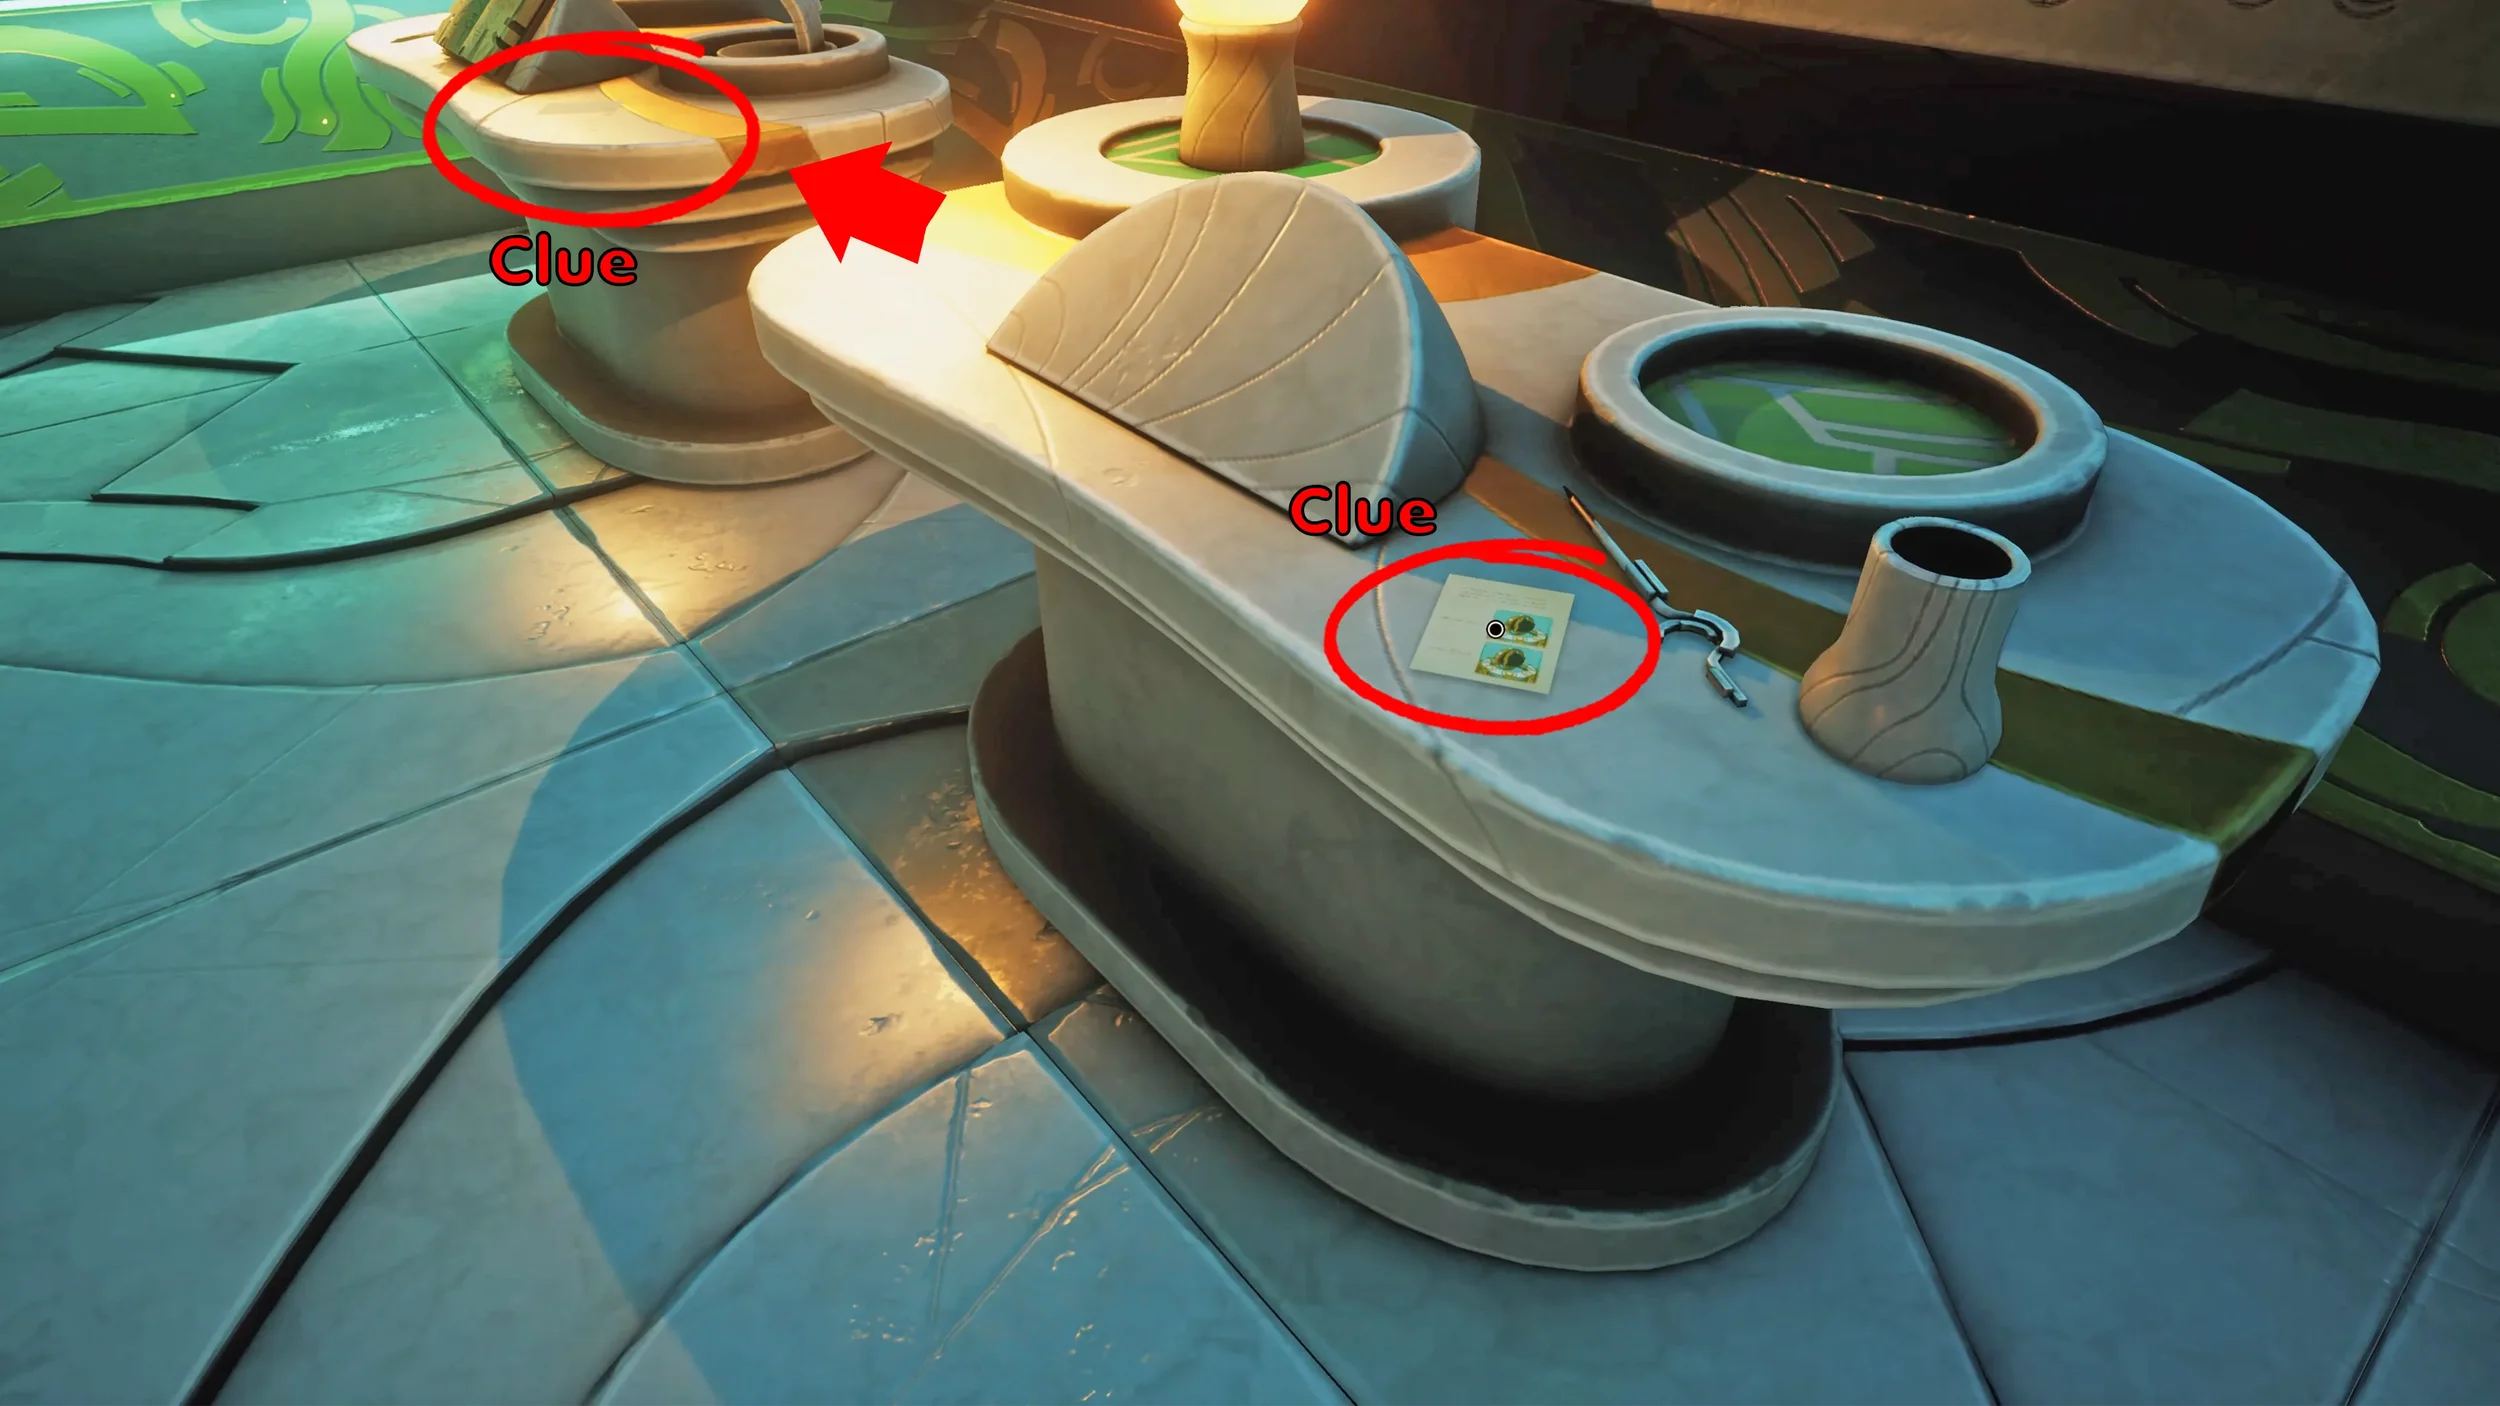
At the other end of the room, go to the right of the vertical beam of light to find 2 more clues on the two desks on the right side.
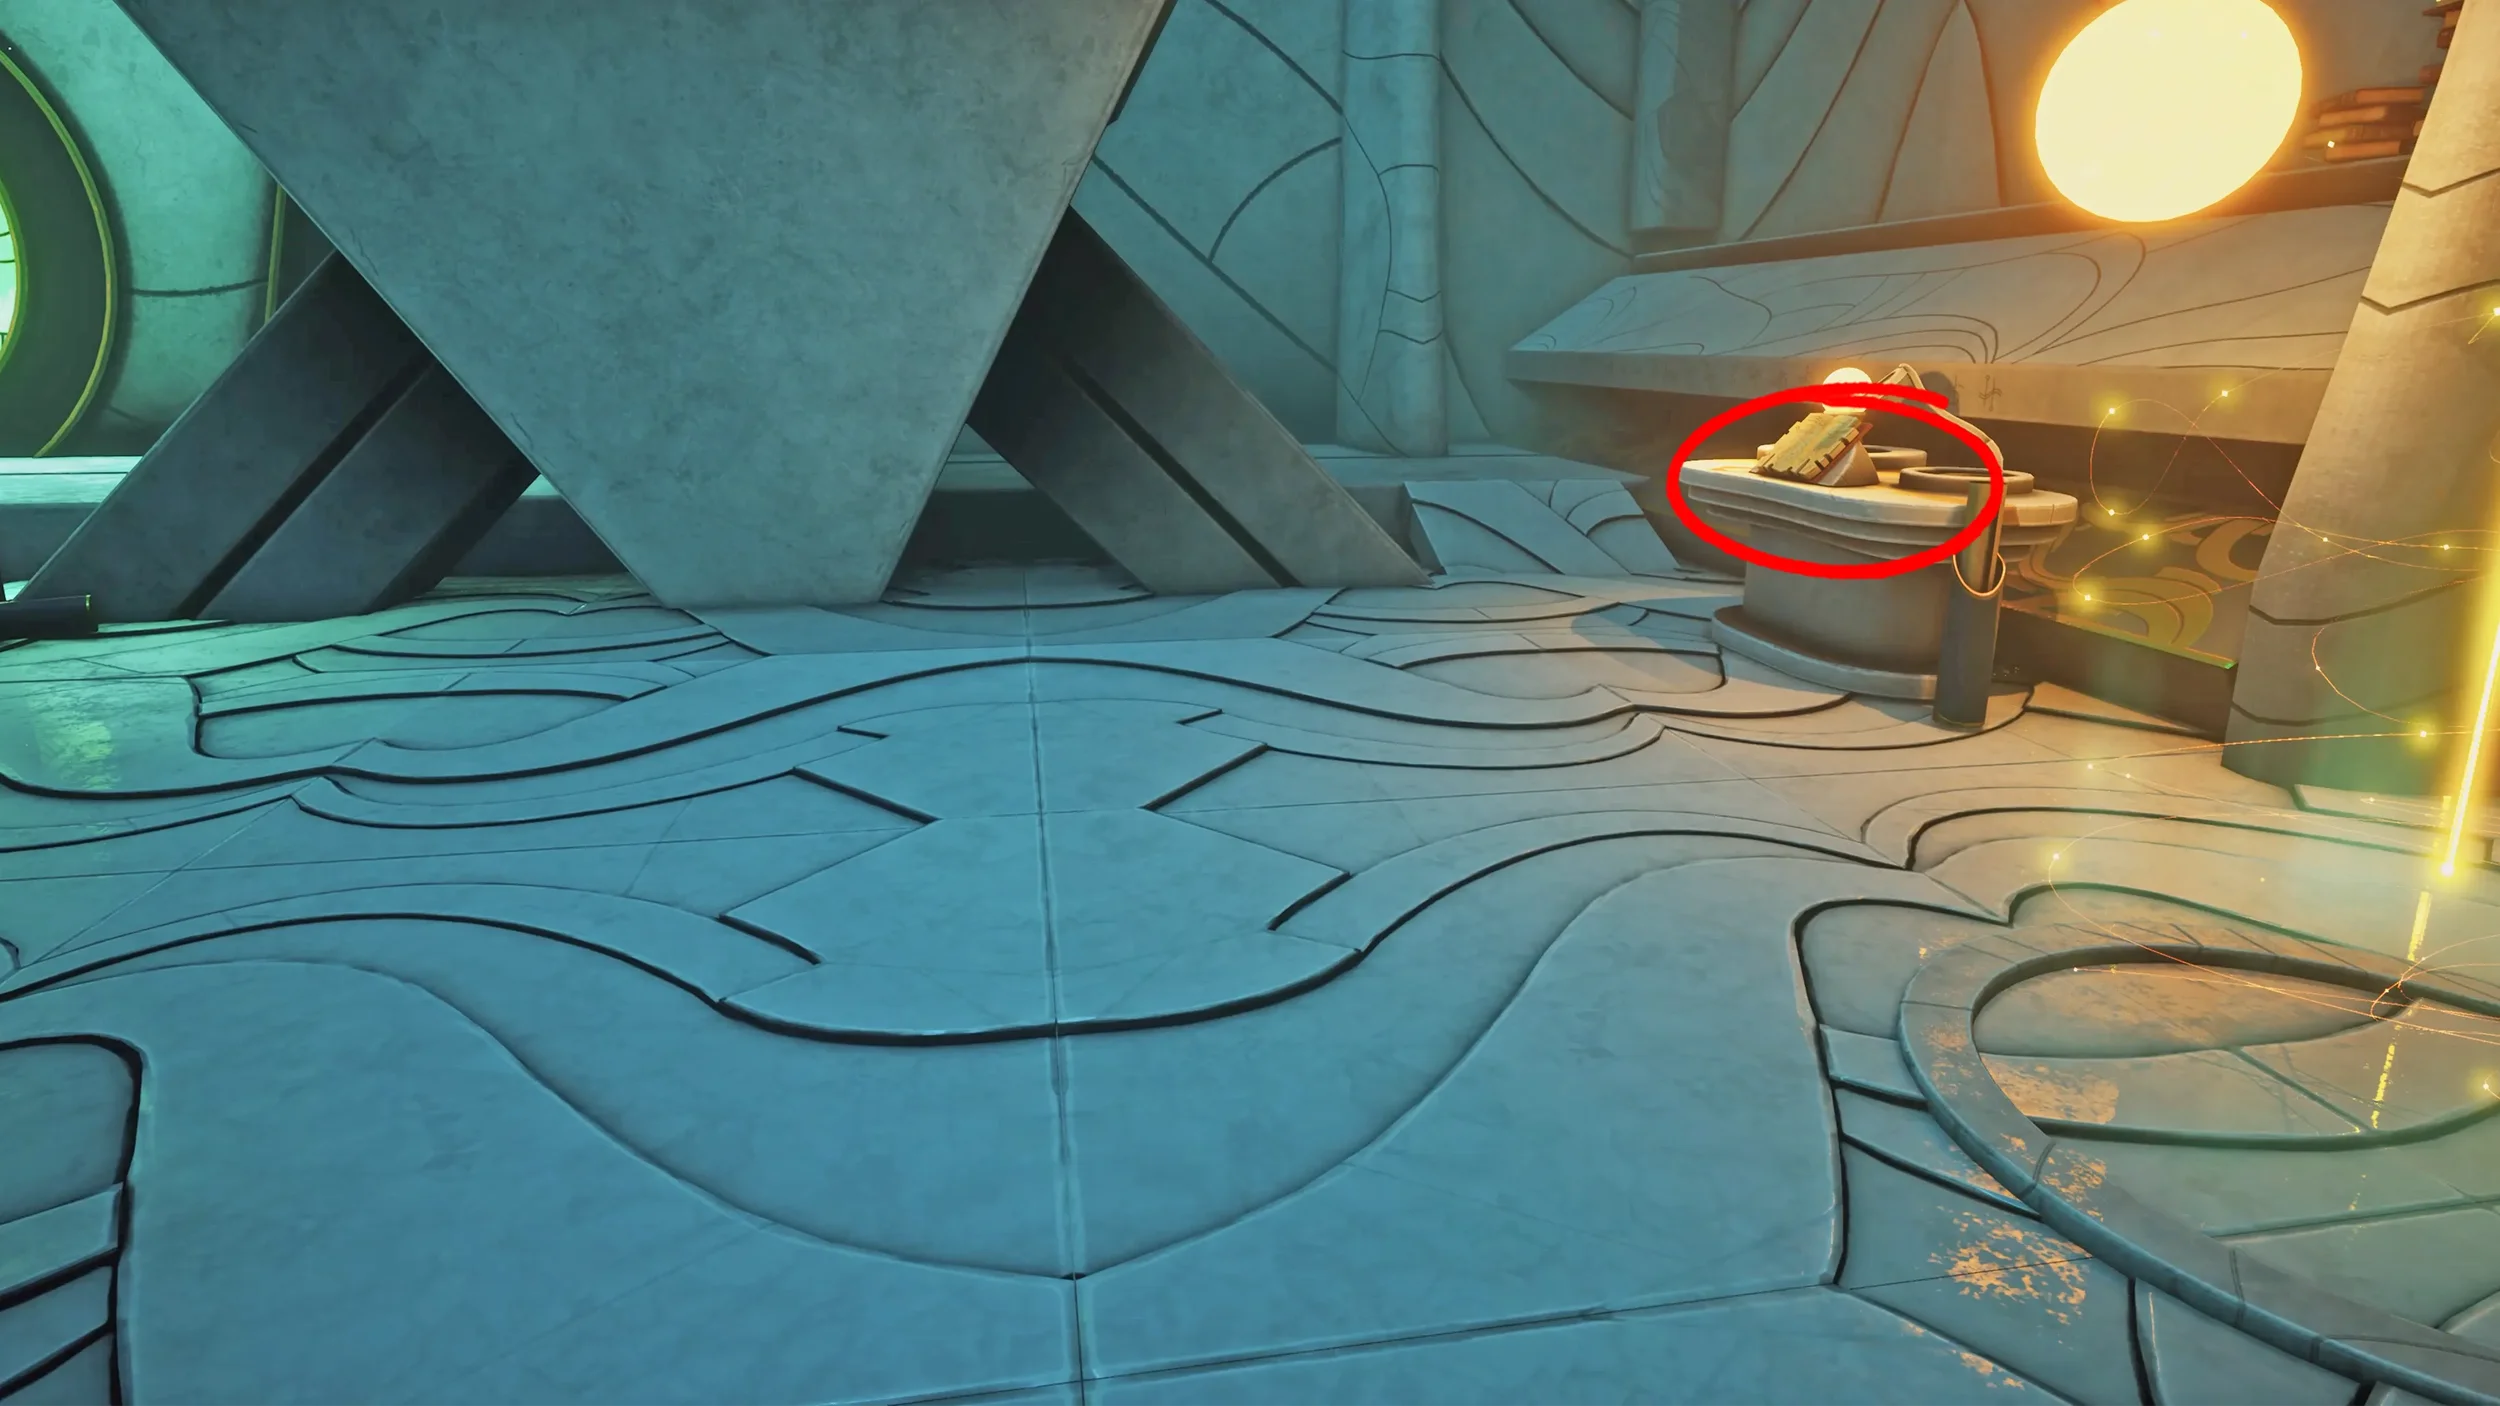
To the left of the vertical beam of light you can find 2 more clues on another desk (there are 3 pieces of paper but only 2 of them are actually clues).

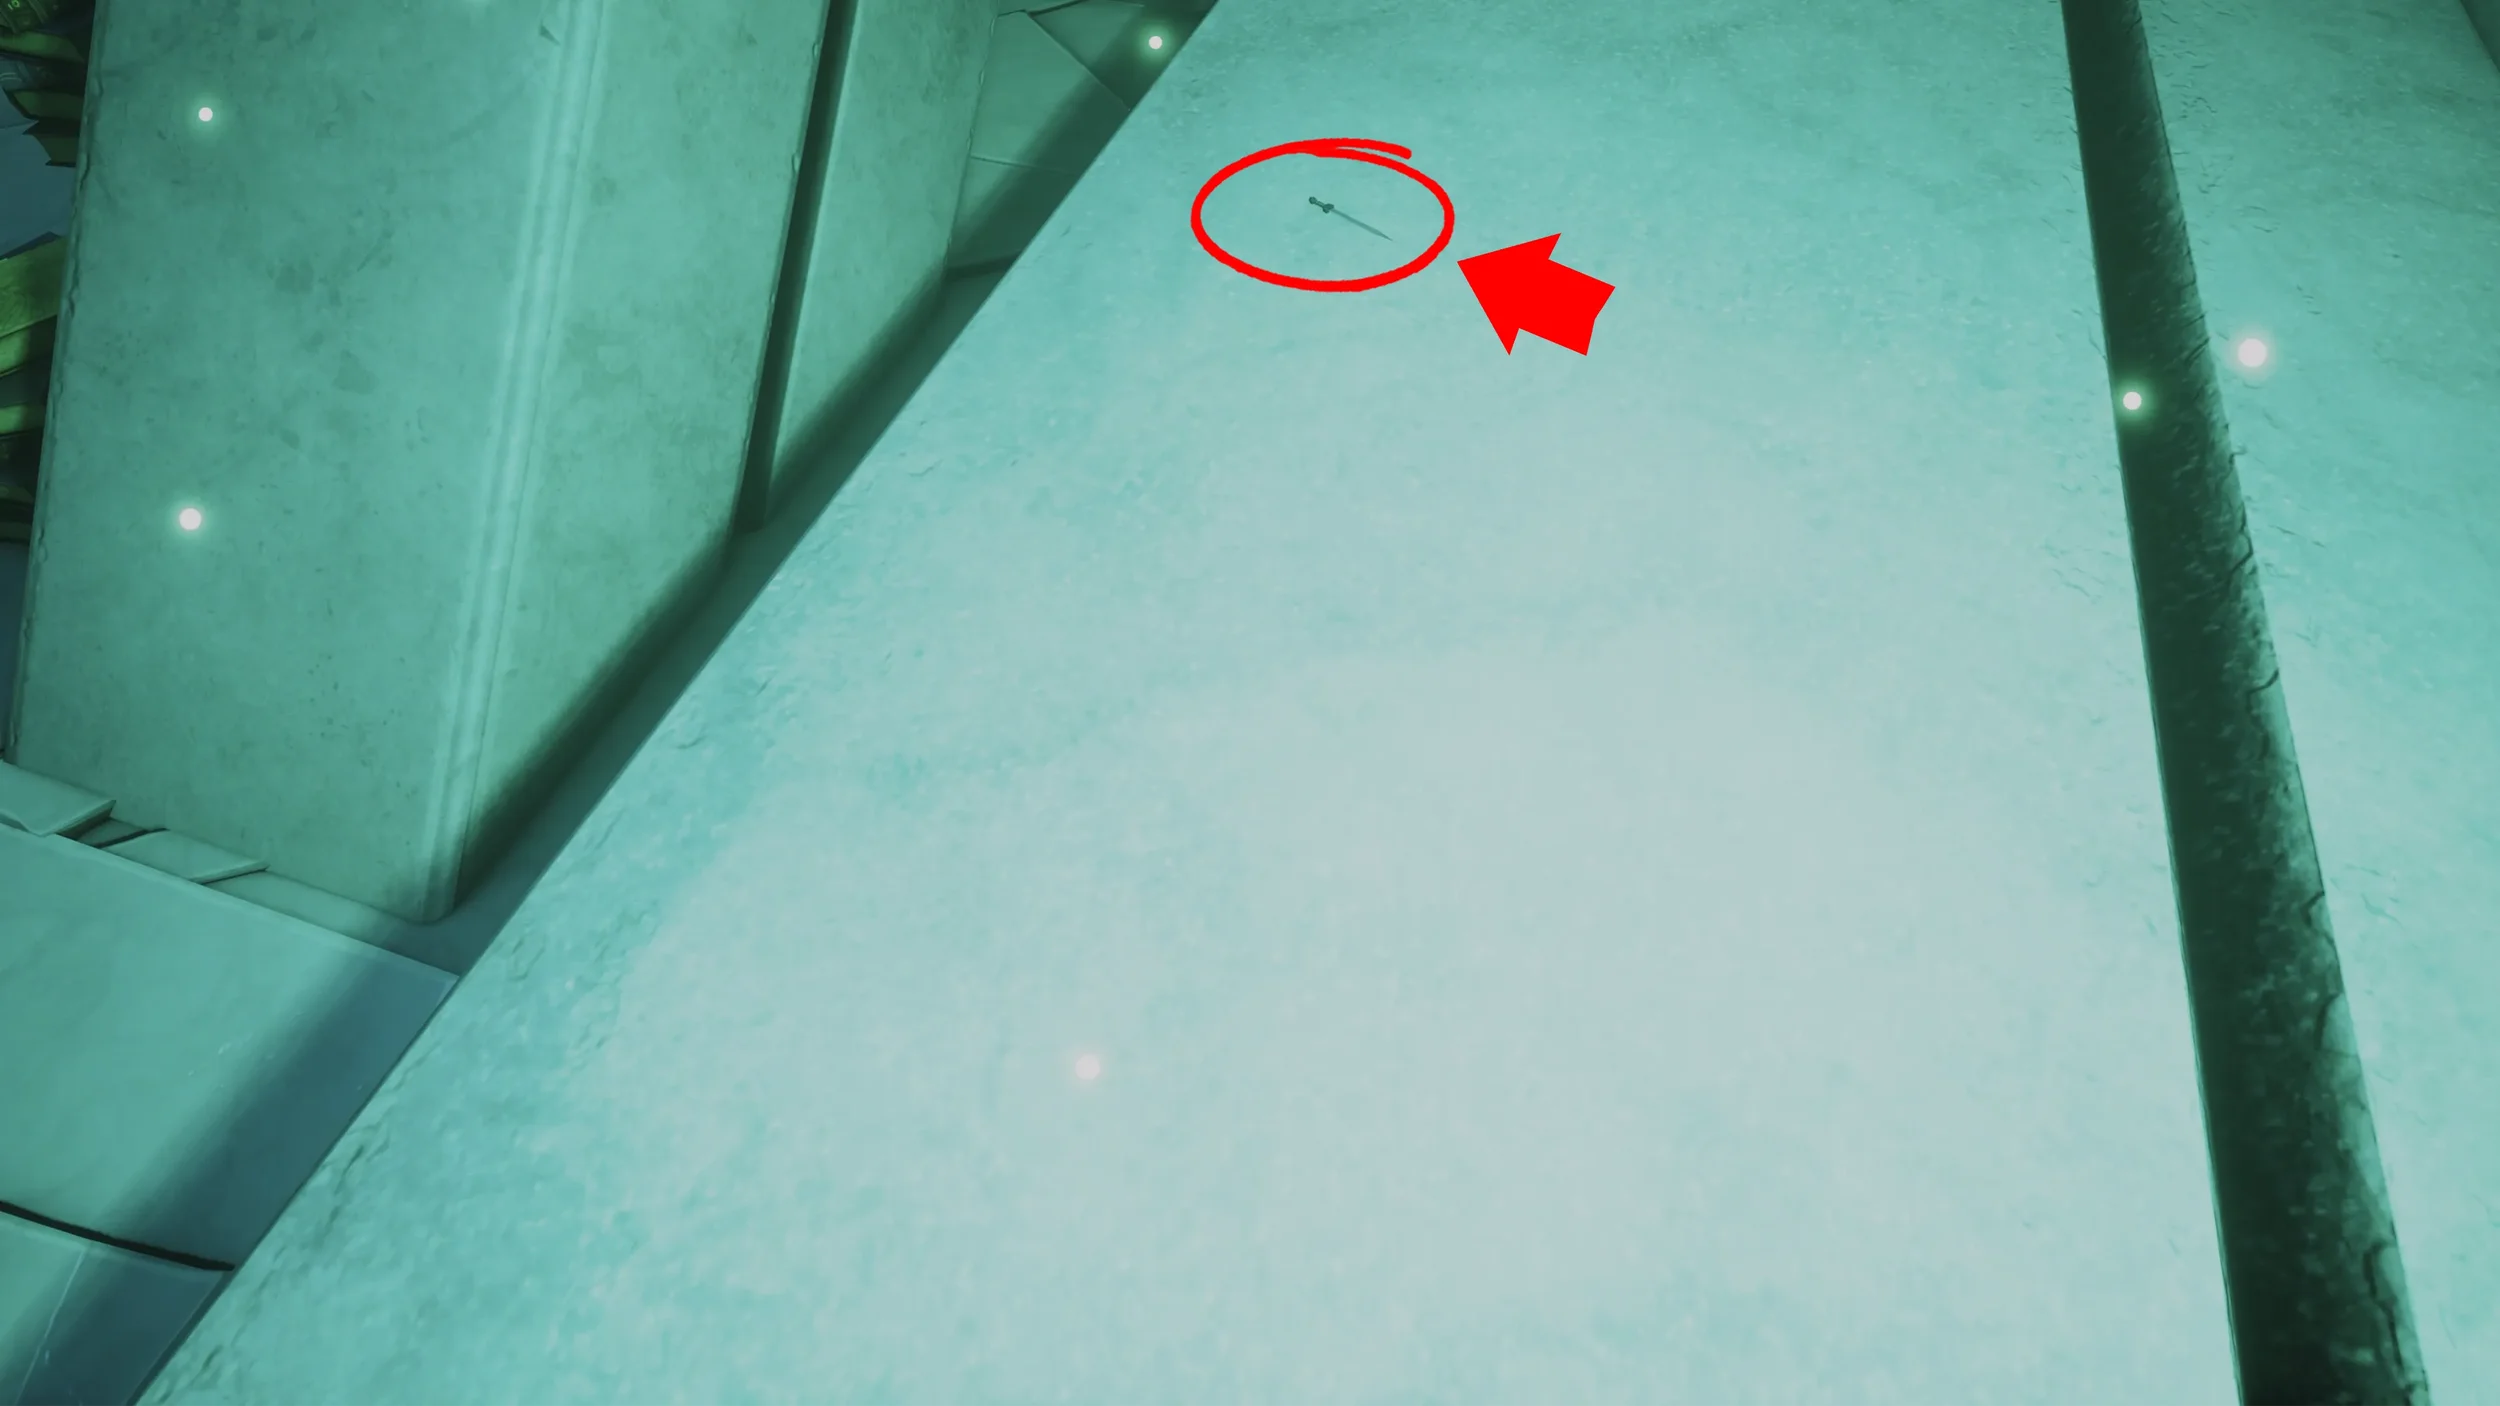
In this same room is also where we are going to be able to find the Secret Object for this Chapter. For this simply go up the small ramp to the left of the vertical beam of light to reach the ledge where we will find the small Roman Sword.
 "Roman Quaestor" Trophy.

We can now go up the vertical beam of light. As soon as you reach the top floor you will see 2 more clues, 2 murals, one on each side of the beam of light, make sure to inspect them both.

Shortly after this area you will go through another beam of light that will take you across to a small building, but just before going into the building, inspect the mural clue to its right.
Constellations Puzzle
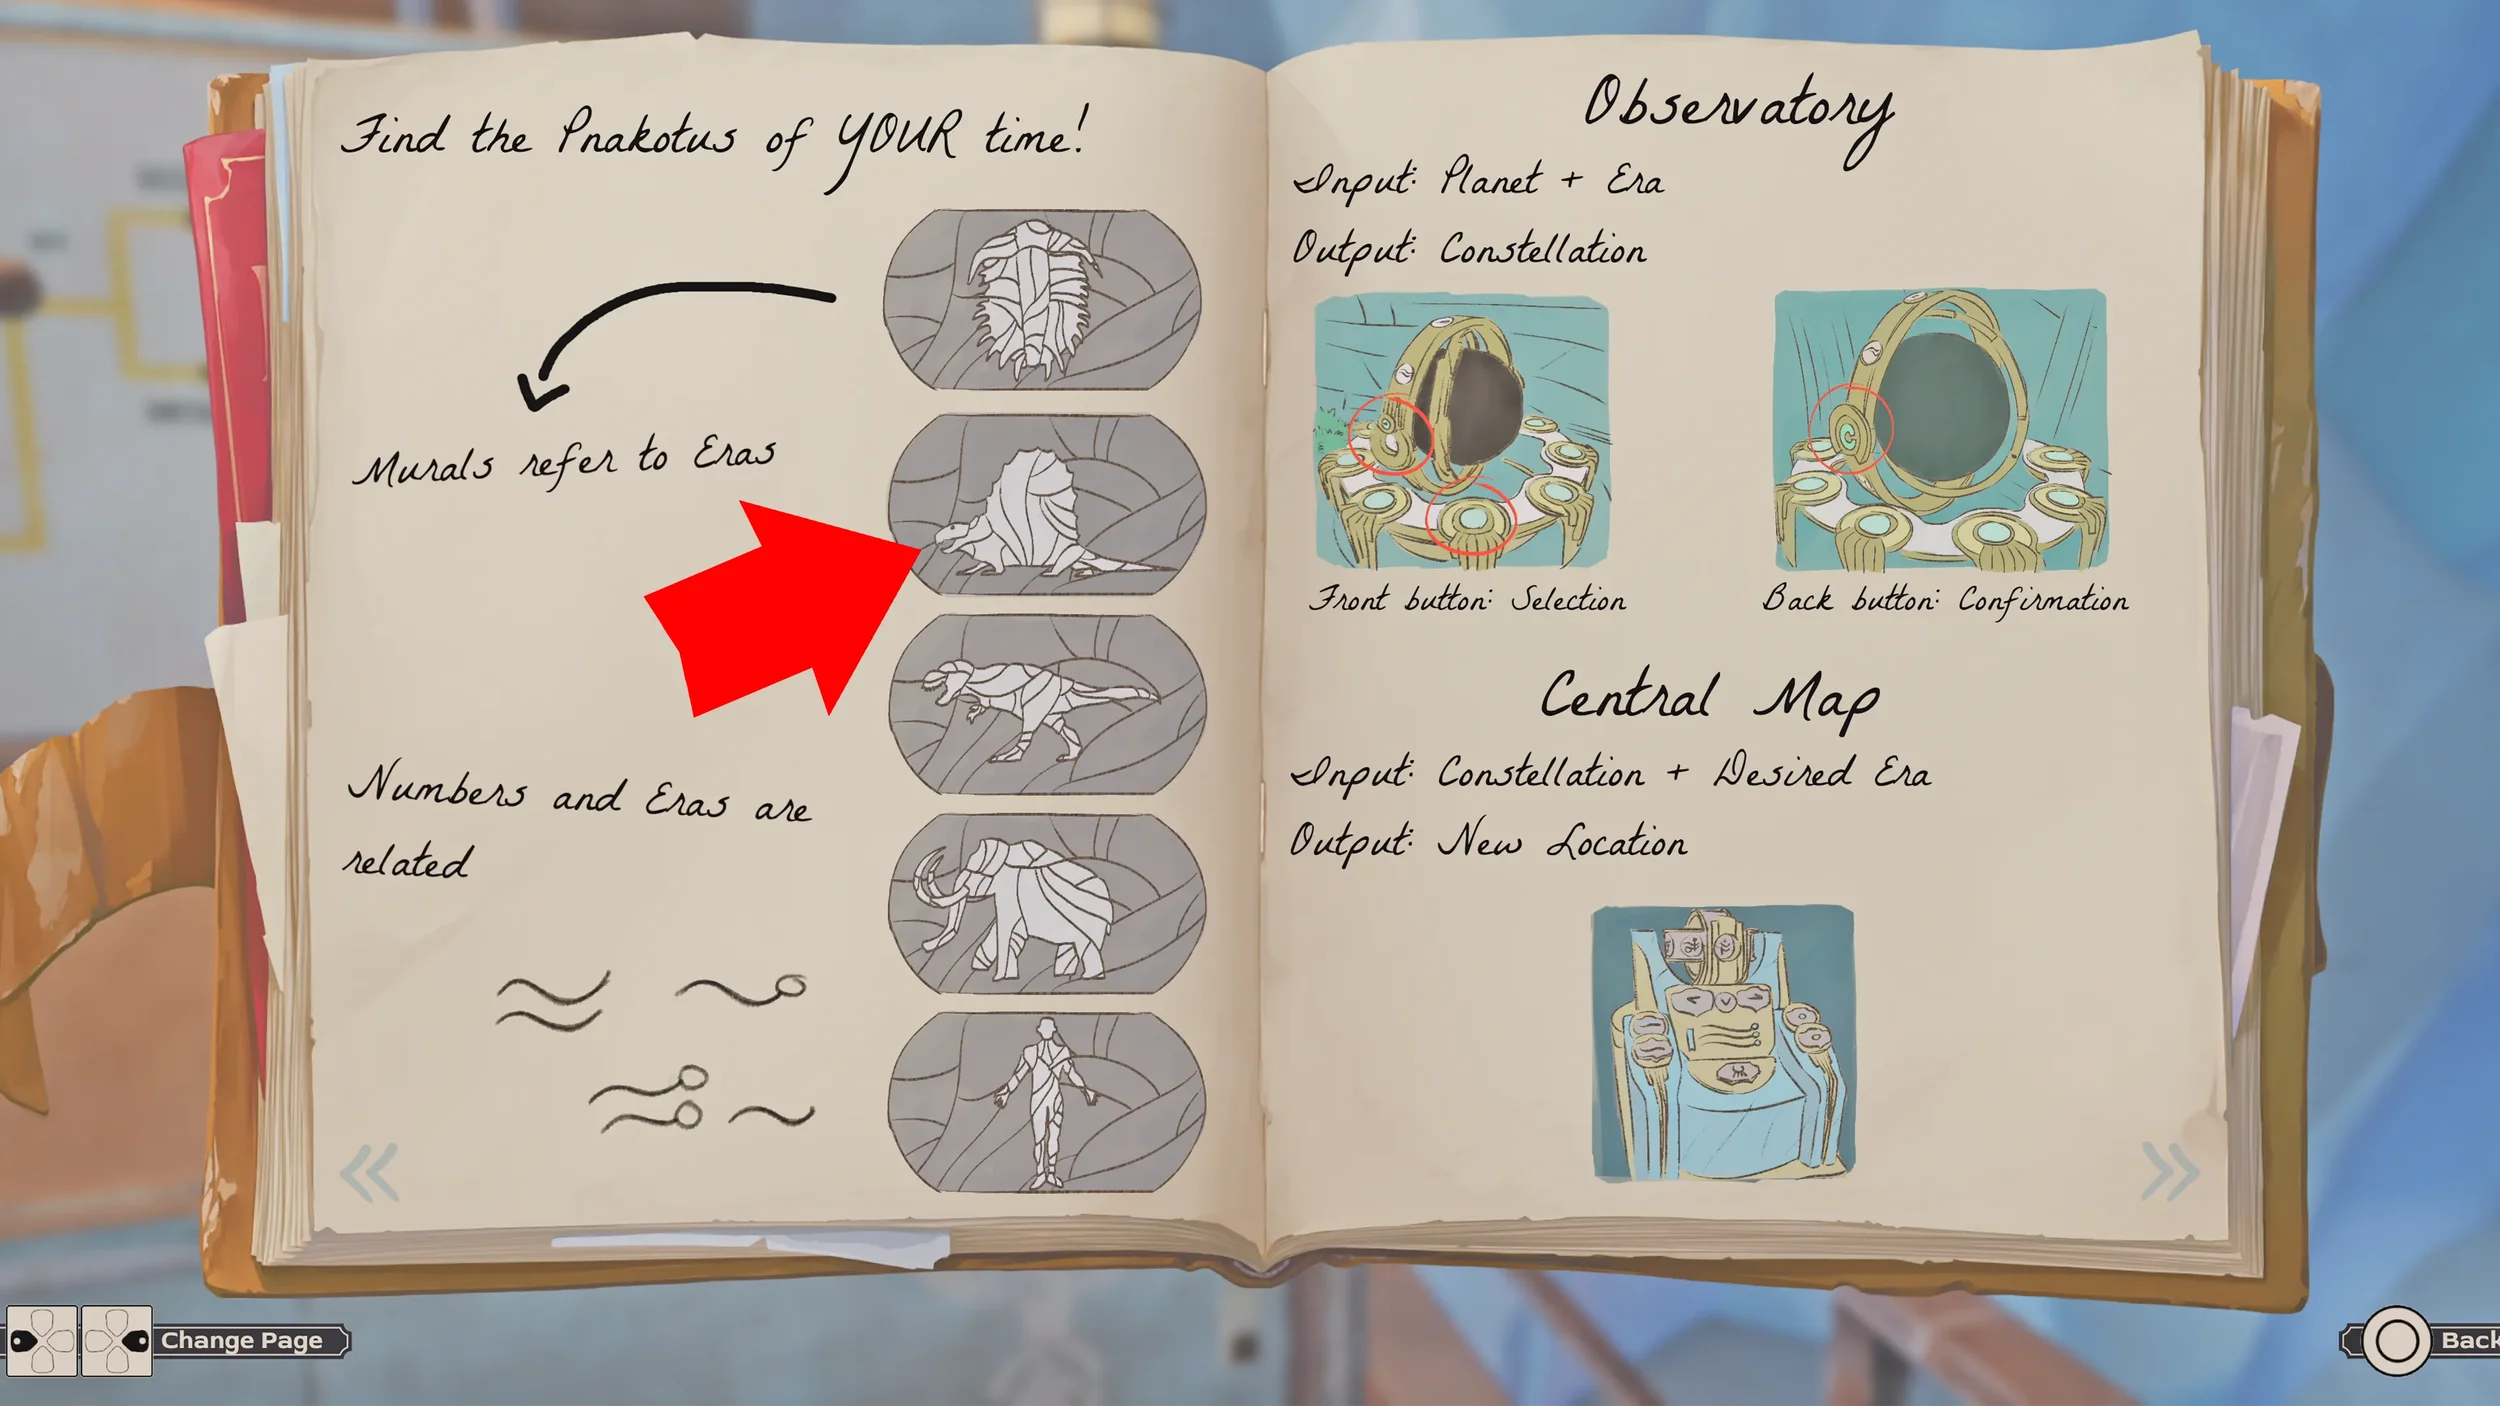
Head inside the small building to reach the first part of the Constellations Puzzle. What we need to do is input into the machine the current Planet we are on and what Era we are in.
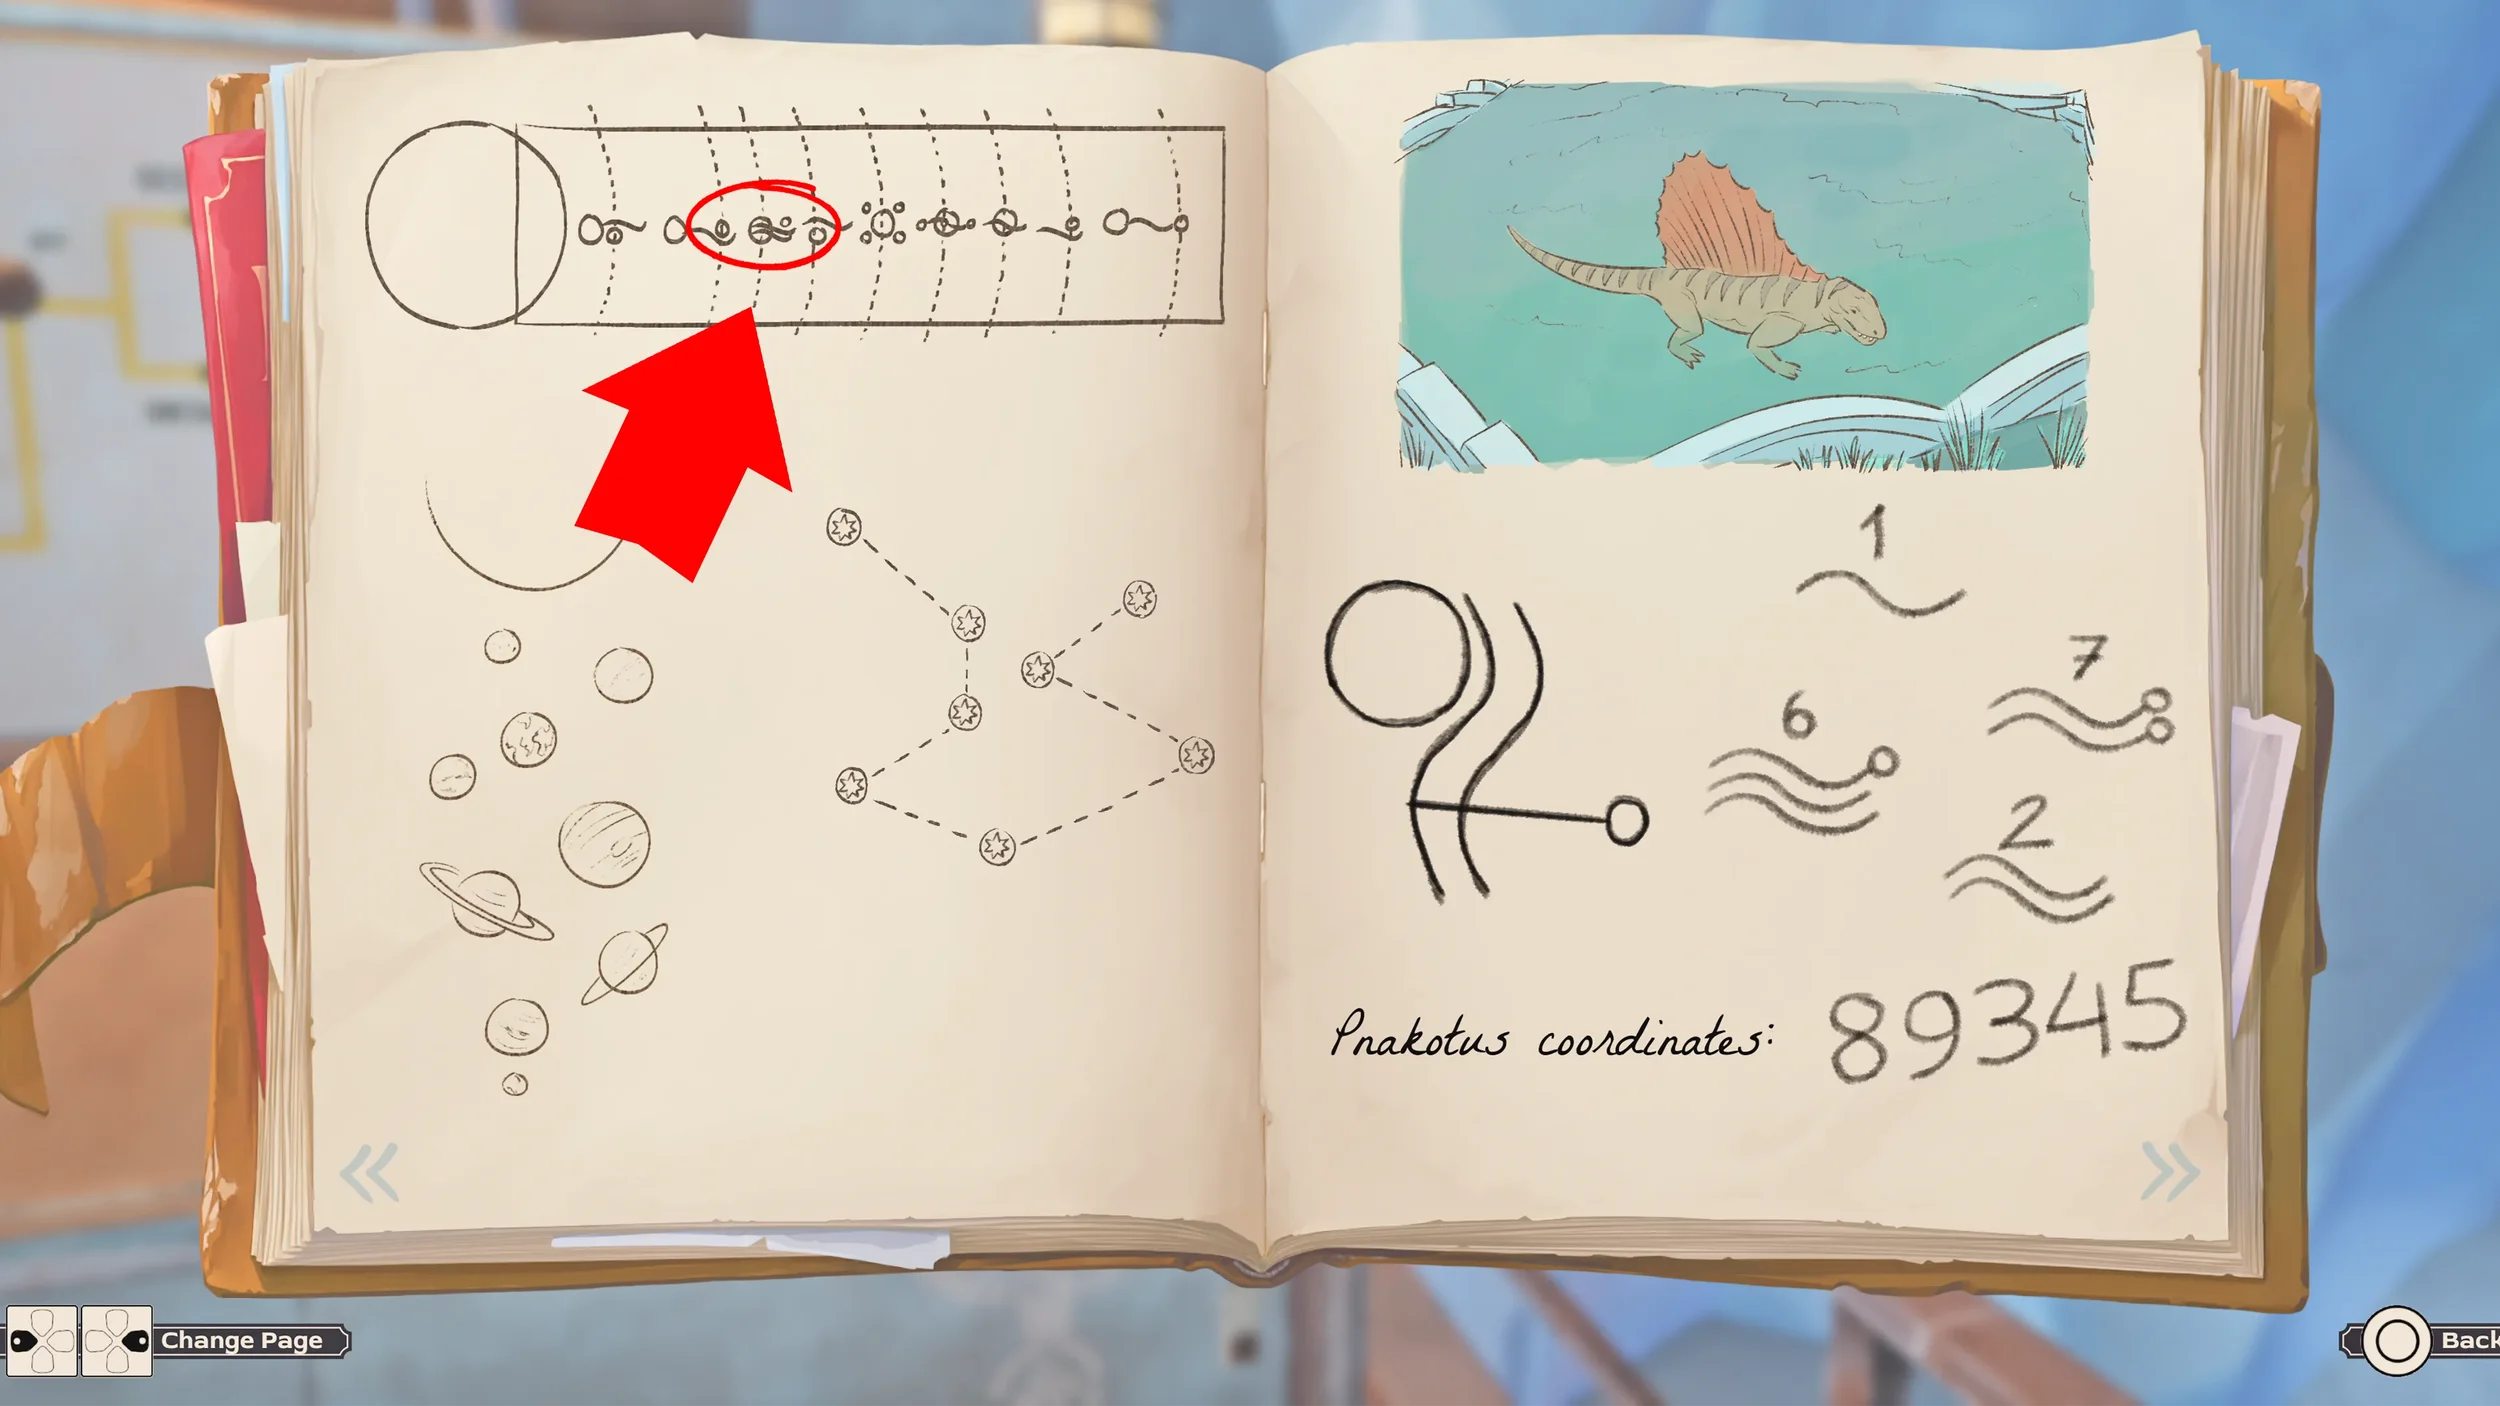
Thanks to all of the clues we have found we know that we are in the SECOND Era, we know this because of the murals, the 2nd mural down (which represents Era 2) in our clues Journal shows a Dimetrodon, and as we saw in the garden area there are currently living Dimetrodons in our current Era, therefore we are in Era 2.
And as for the Planet it is mentioned various times that Pnakotus is located on Planet Earth, so knowing that the Earth is the 3rd Planet from the Sun in our Solar System, we can use the Solar System Mural to see what symbol represents the Earth.
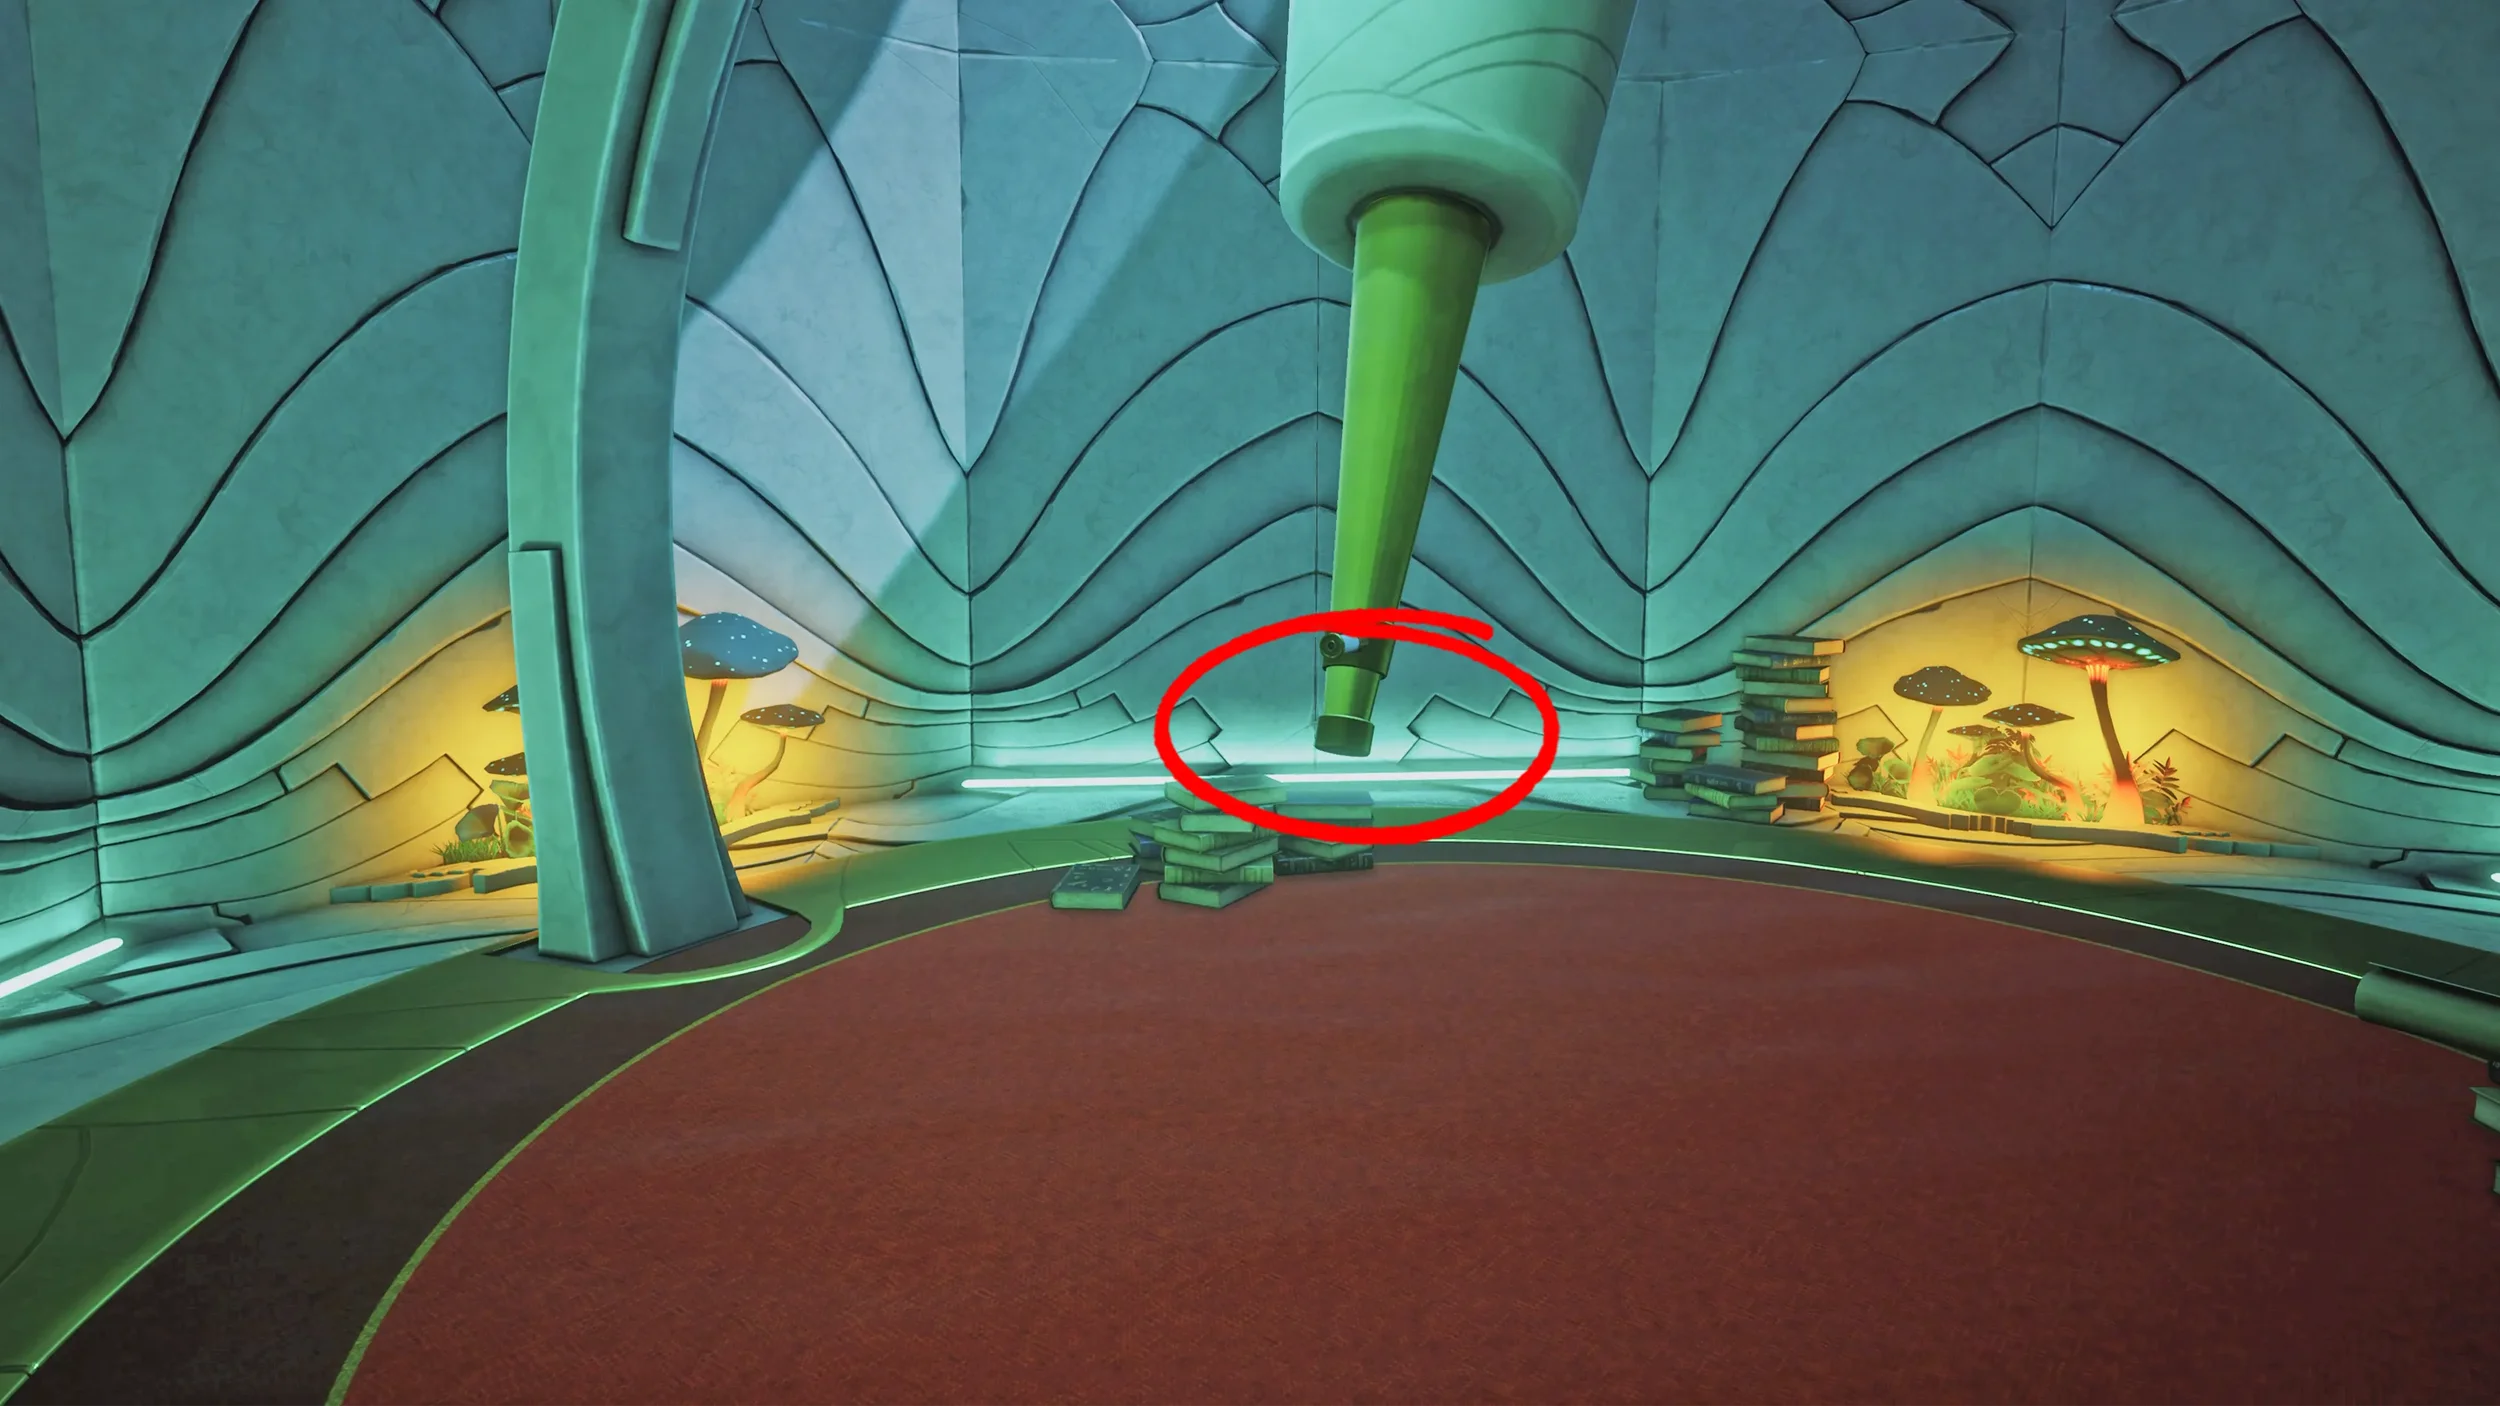
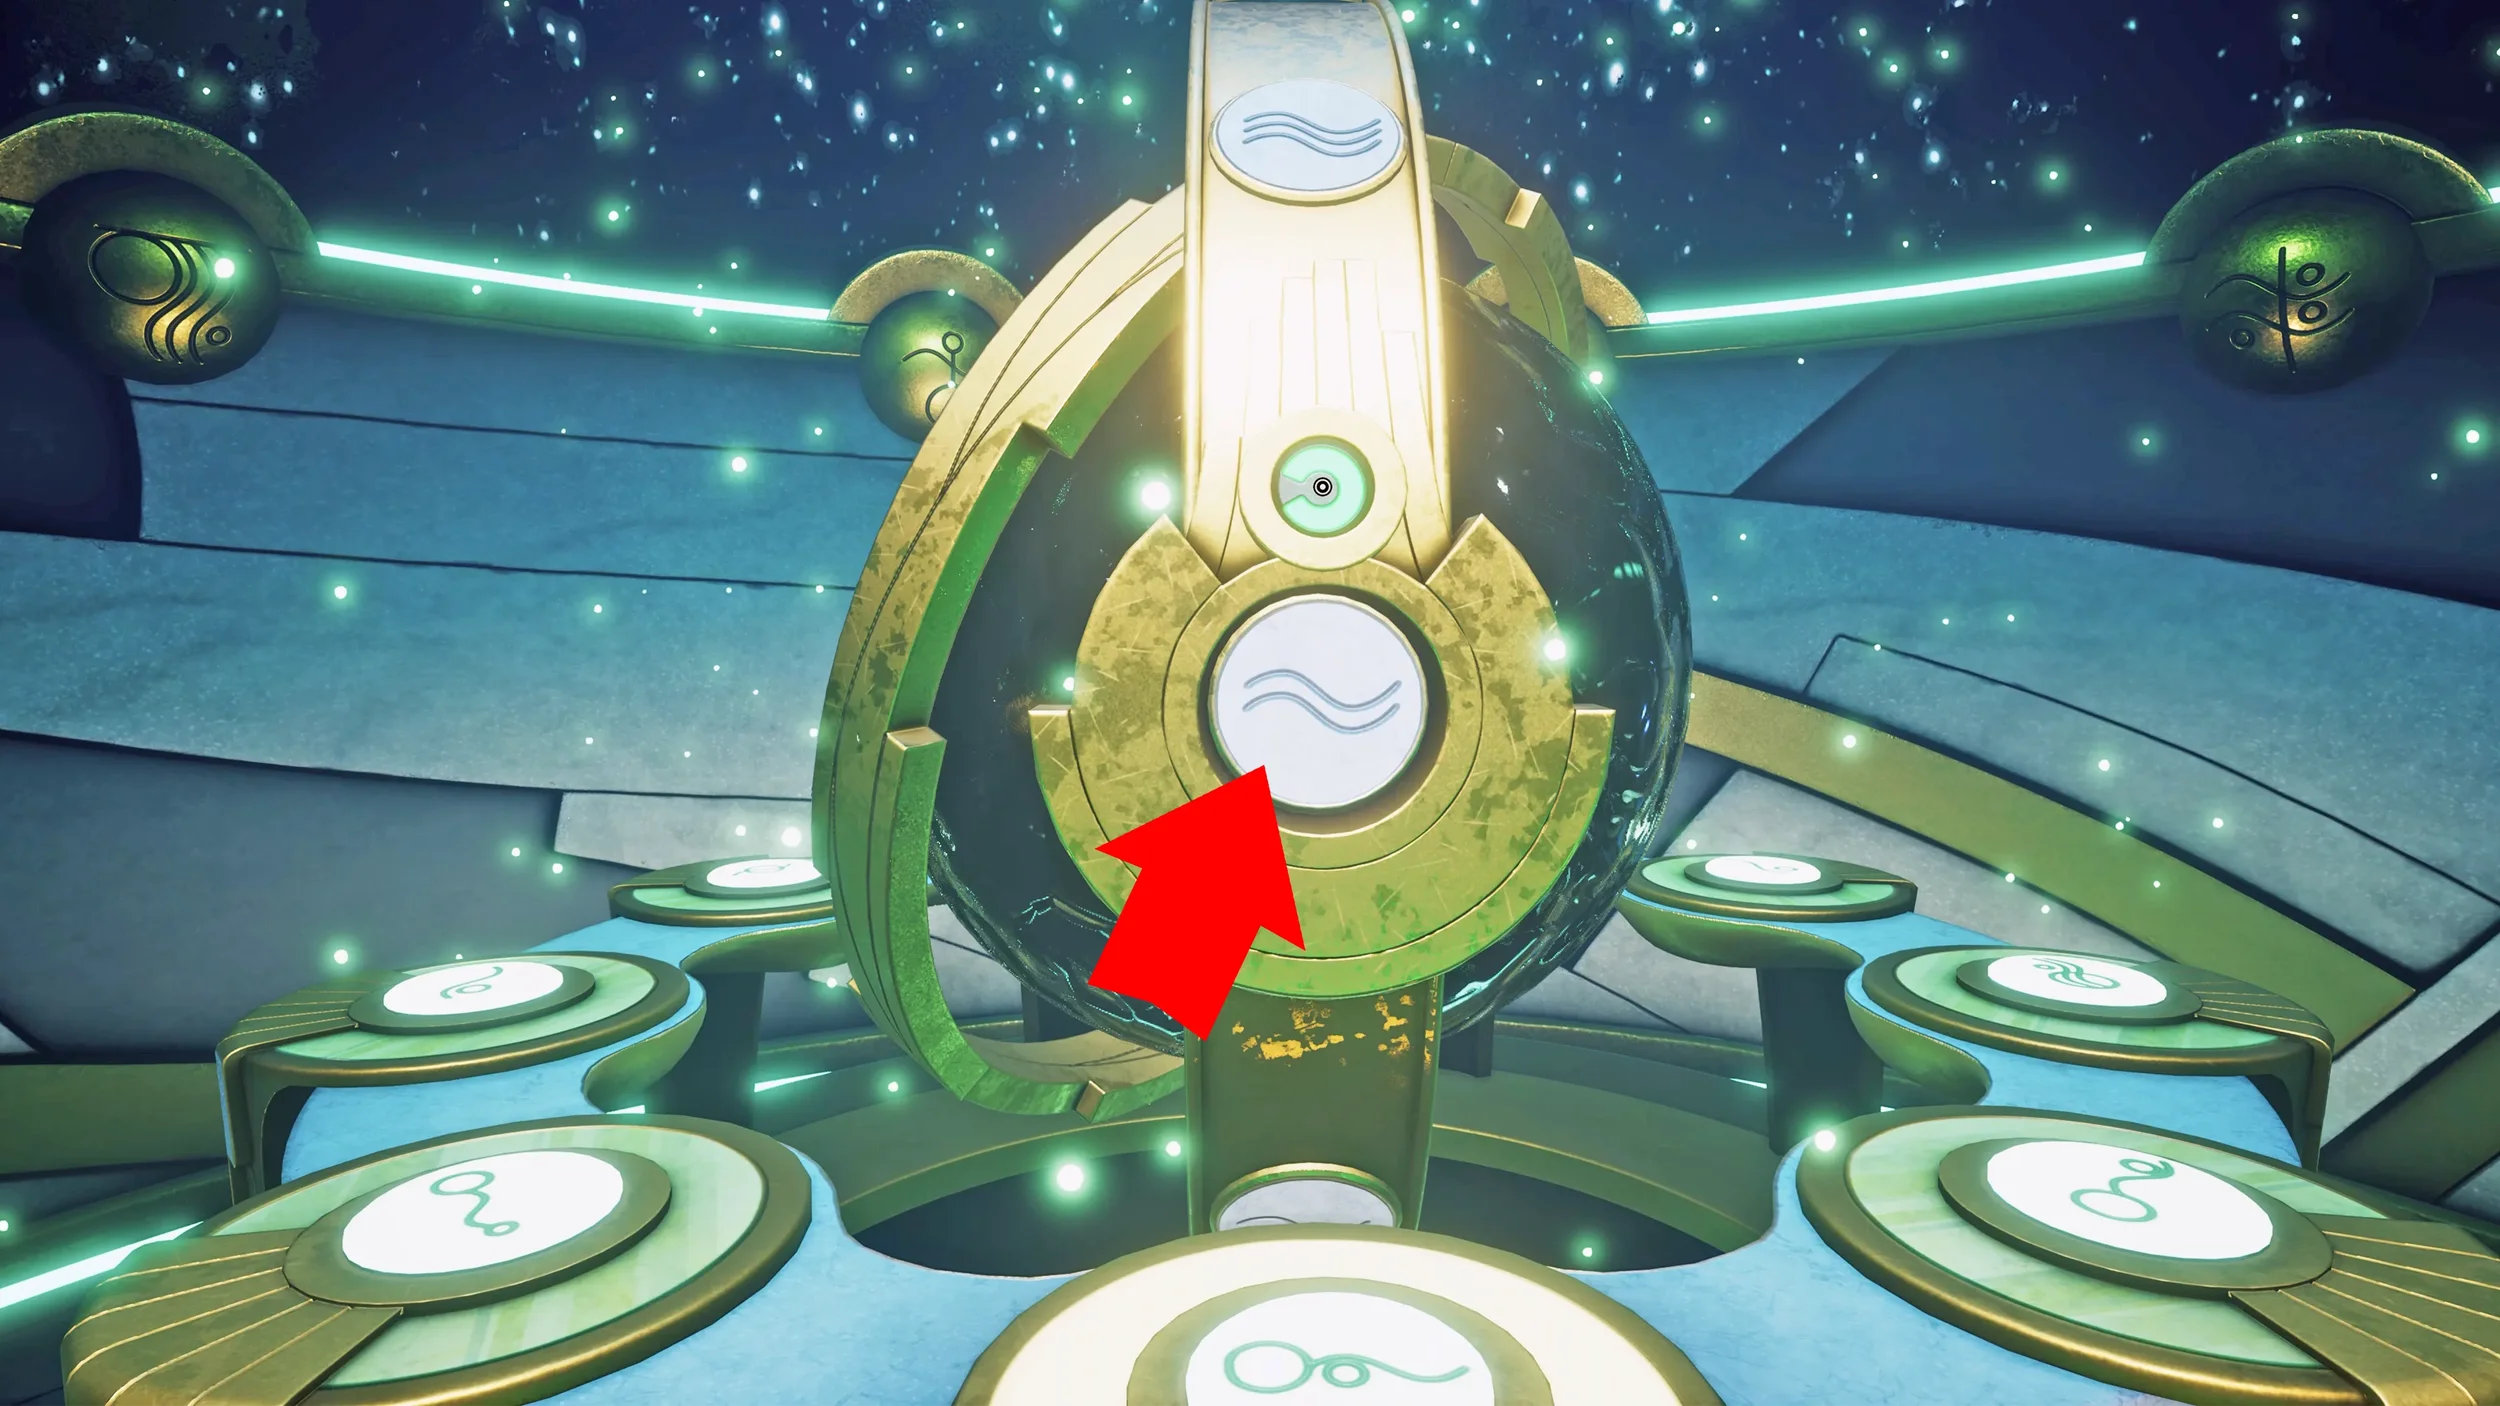
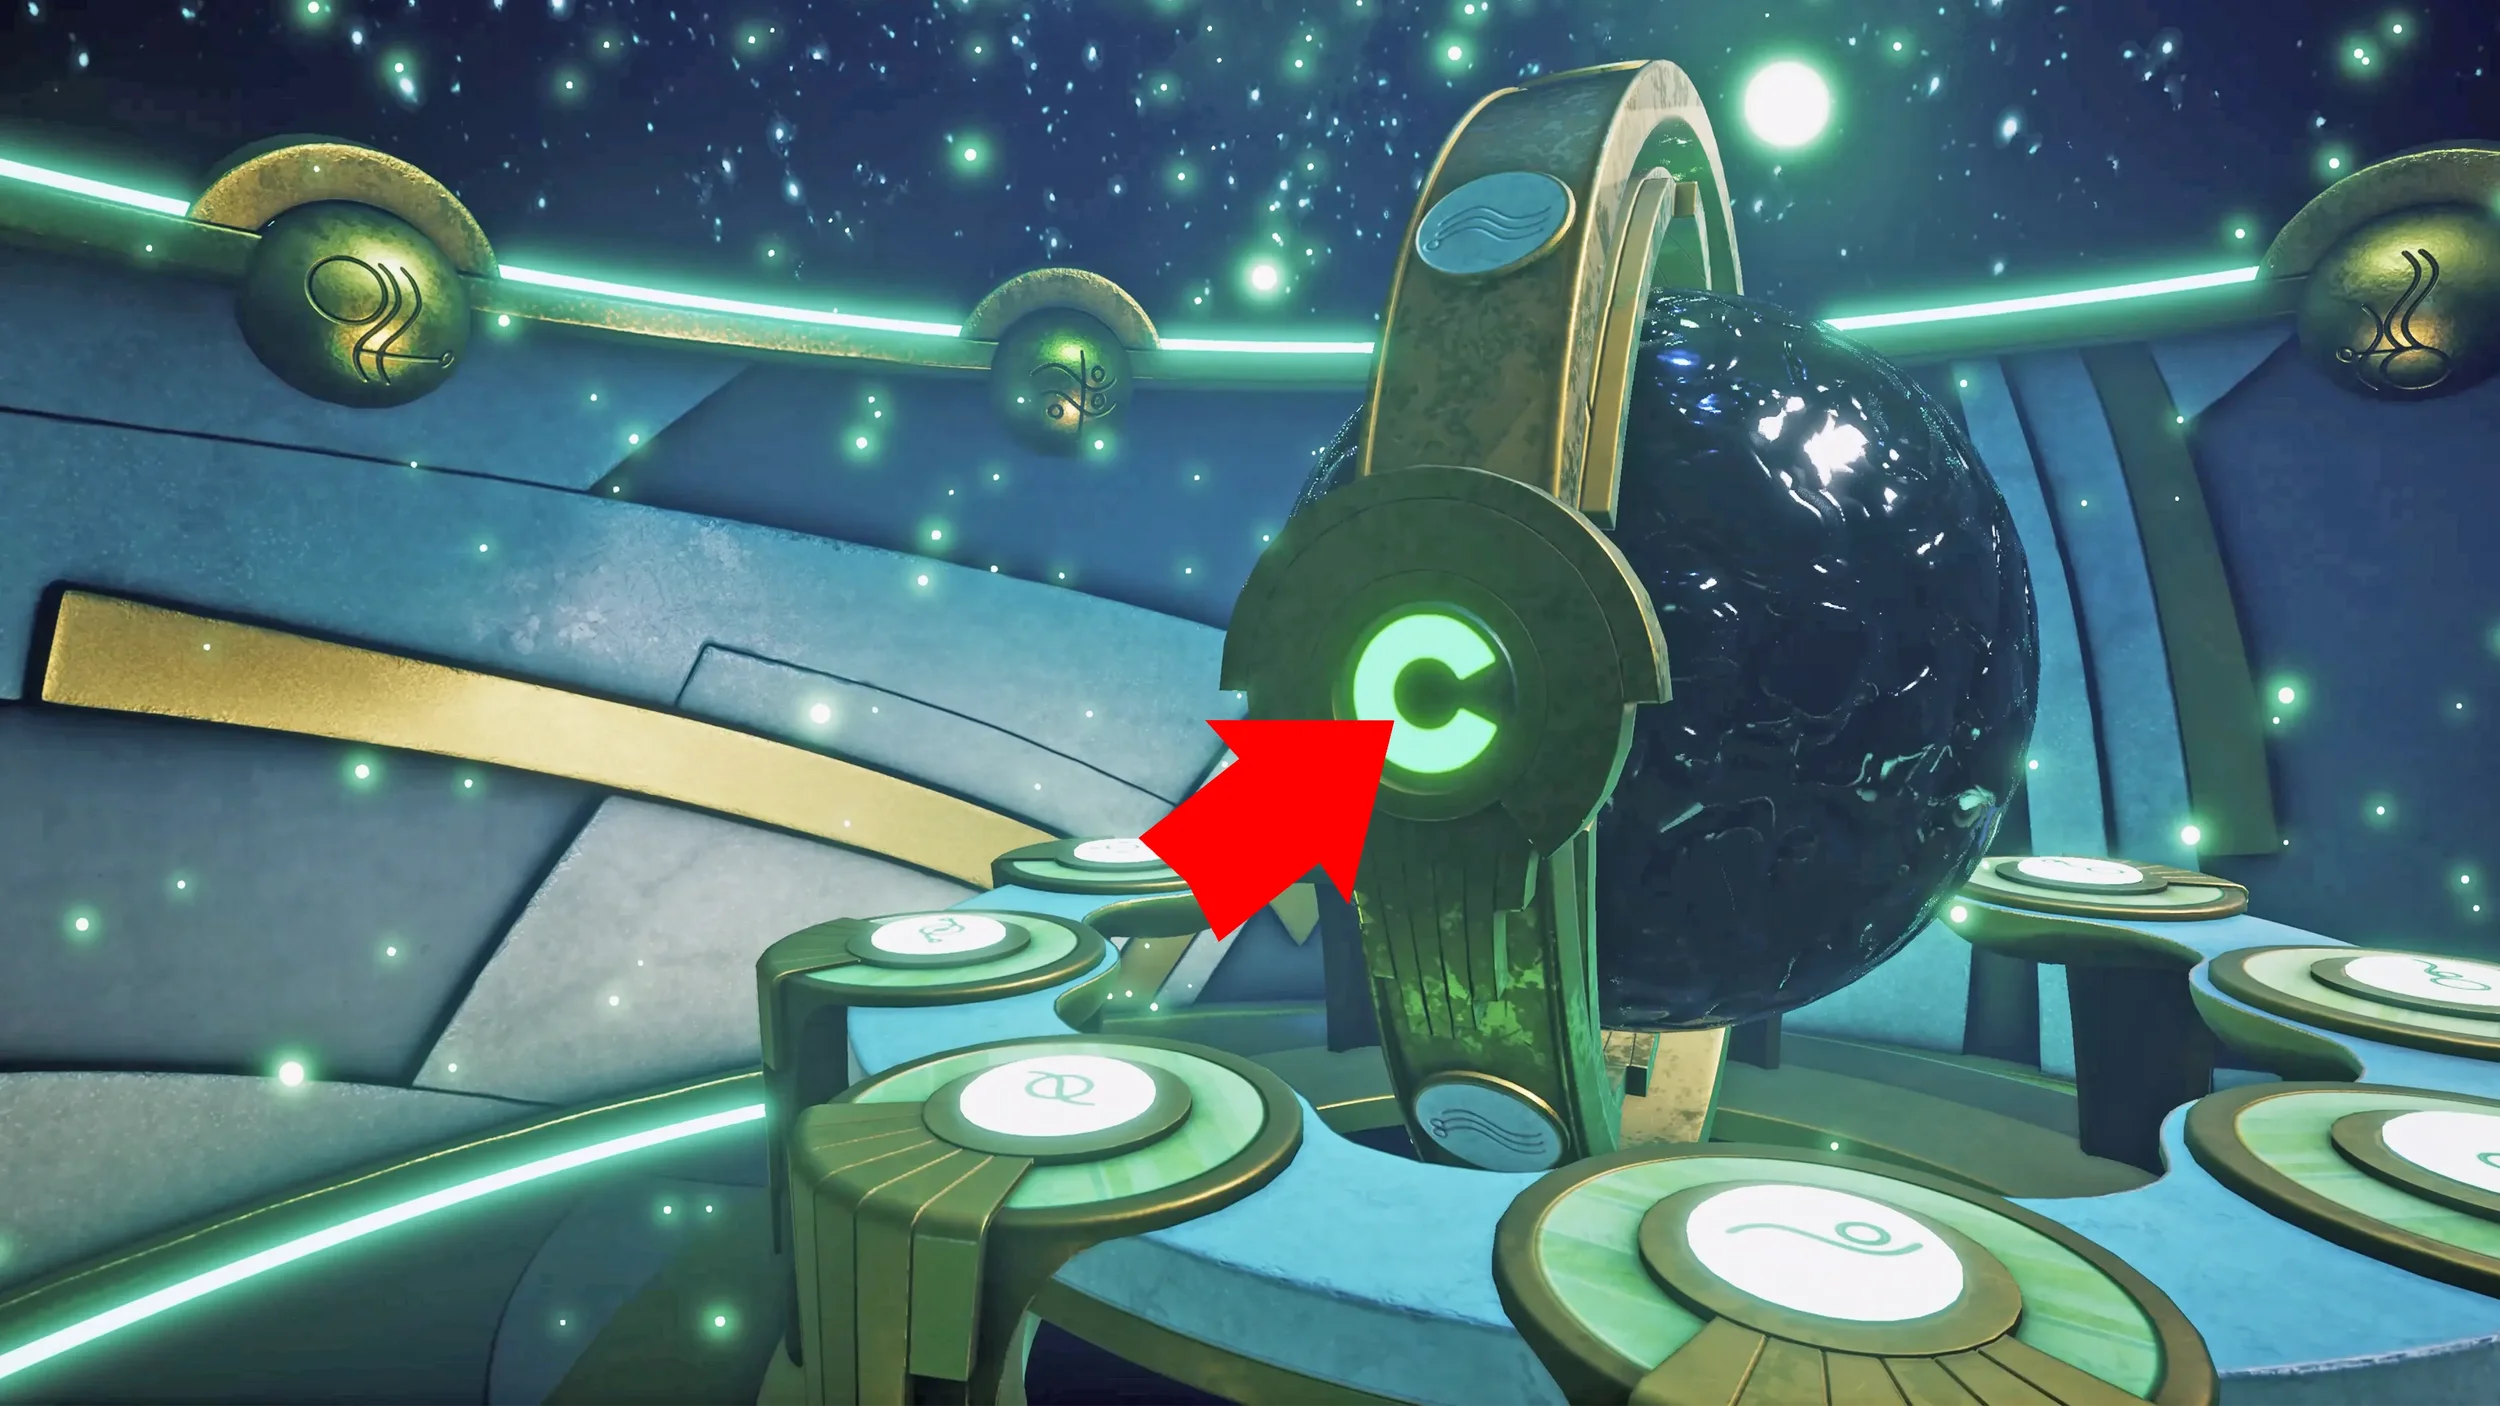
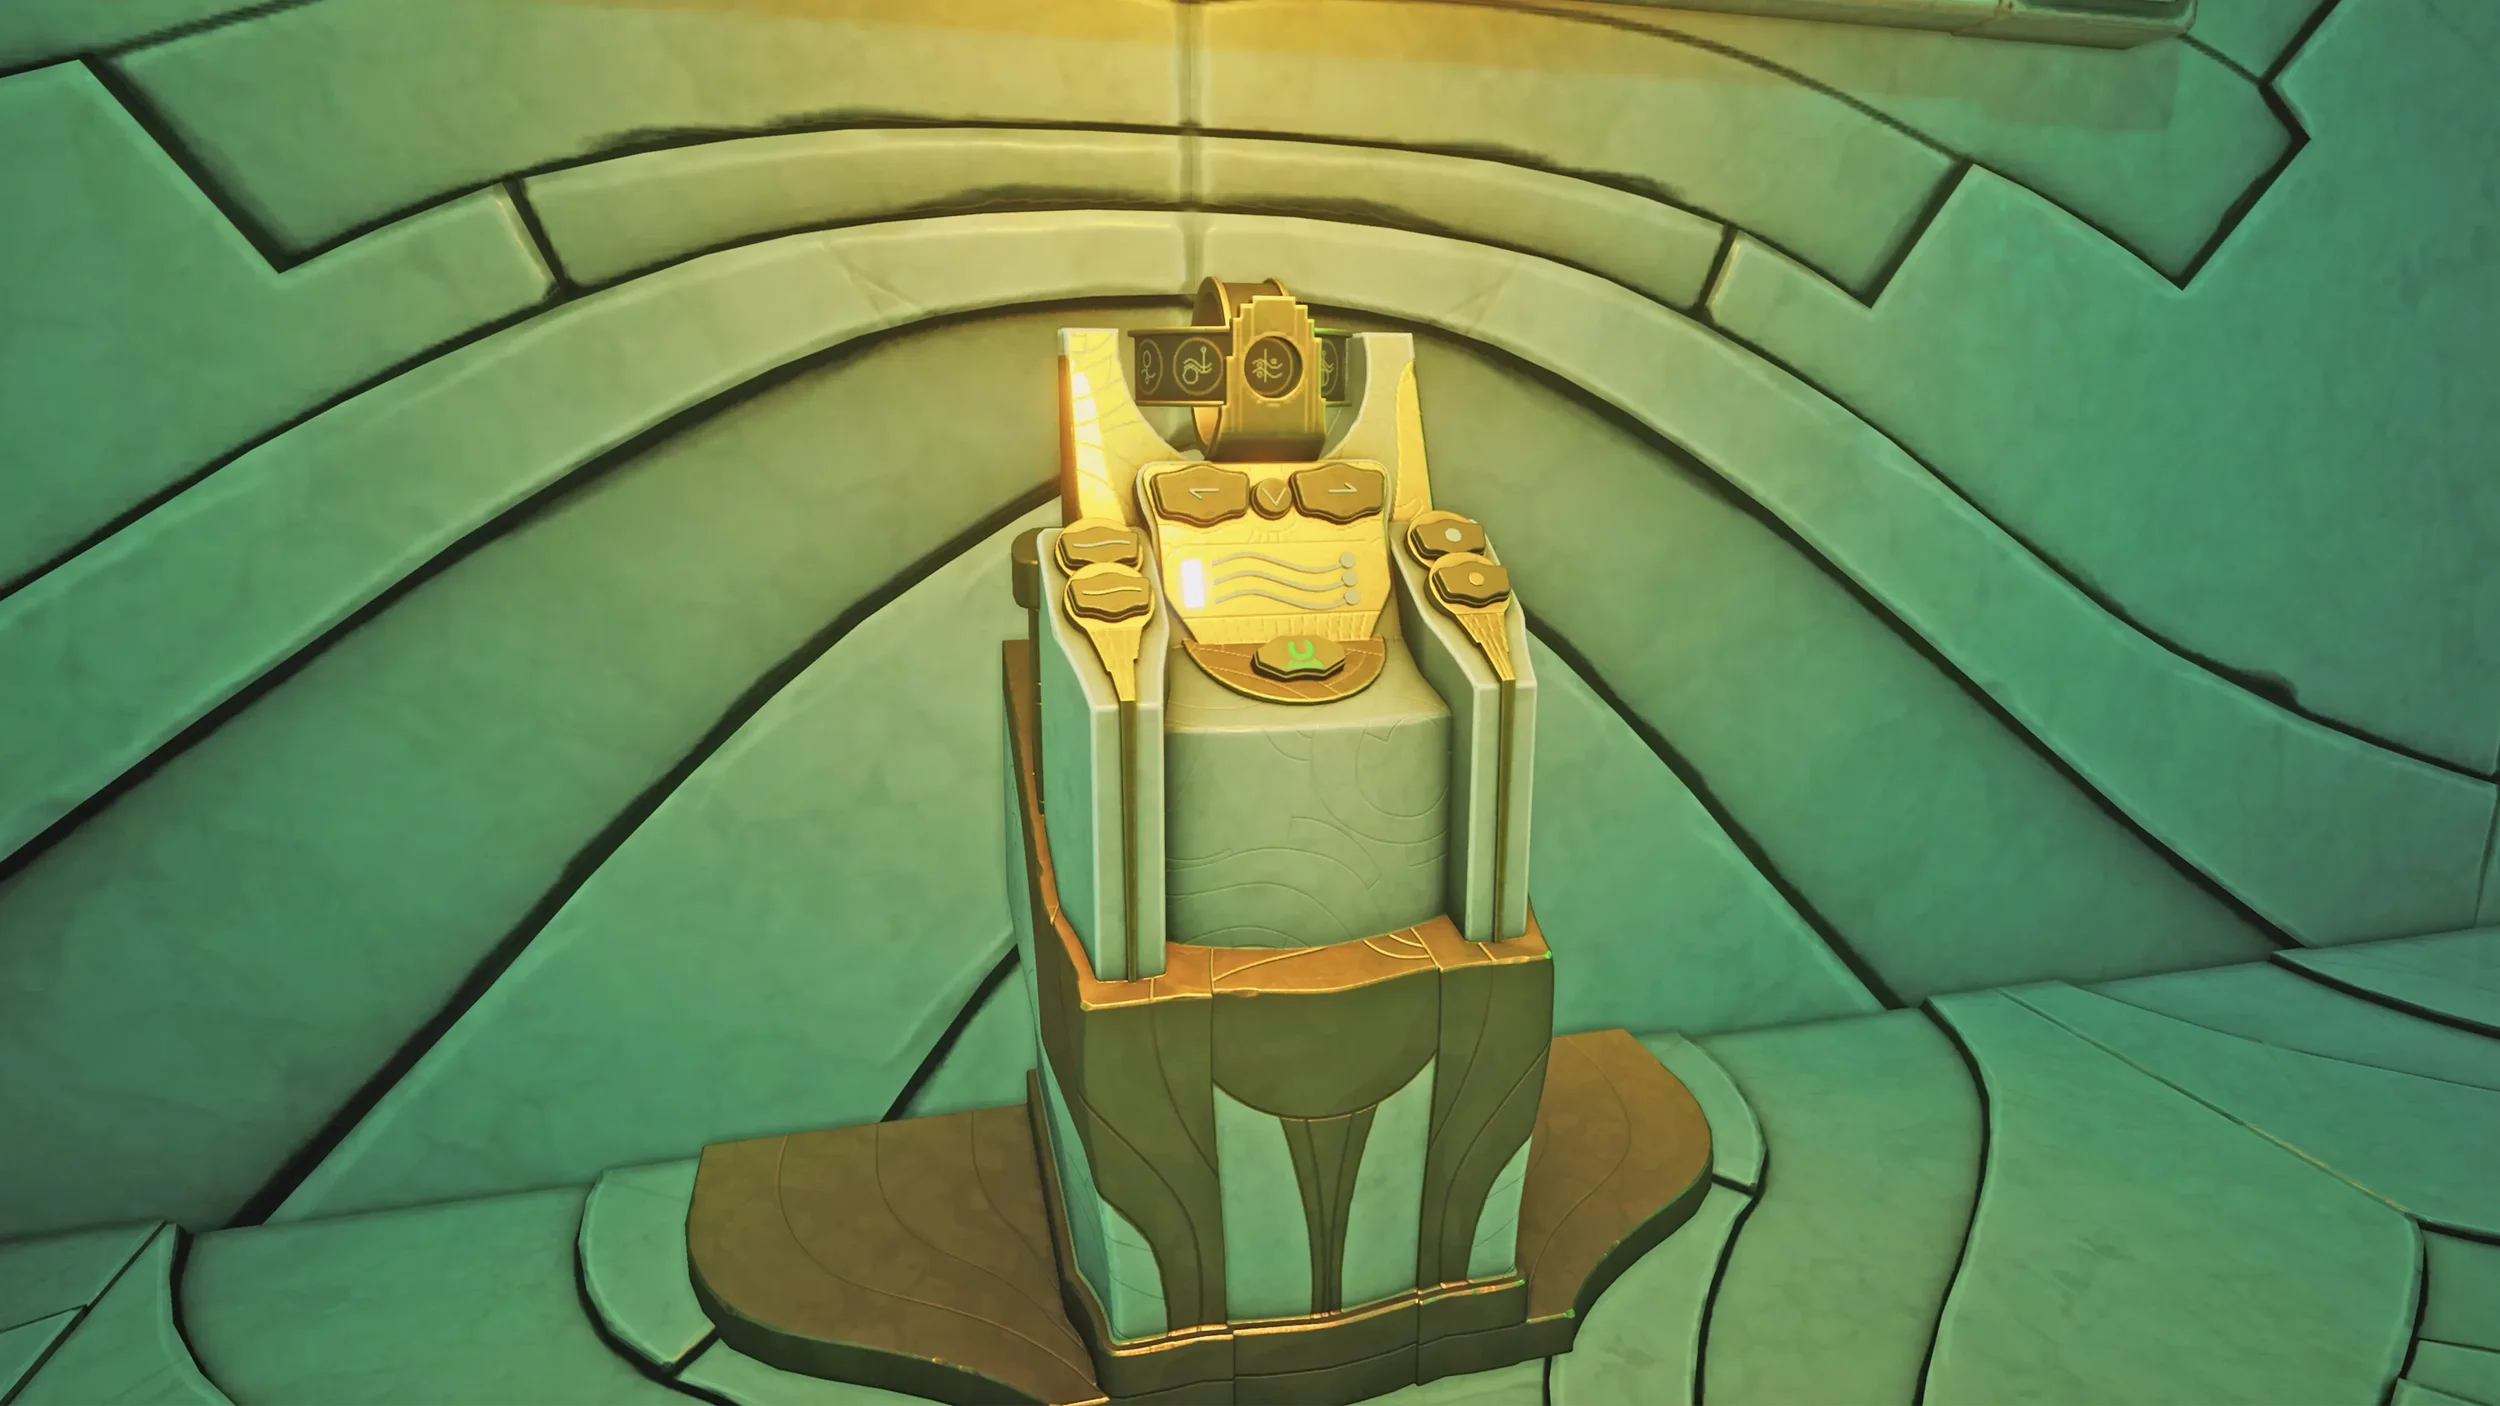
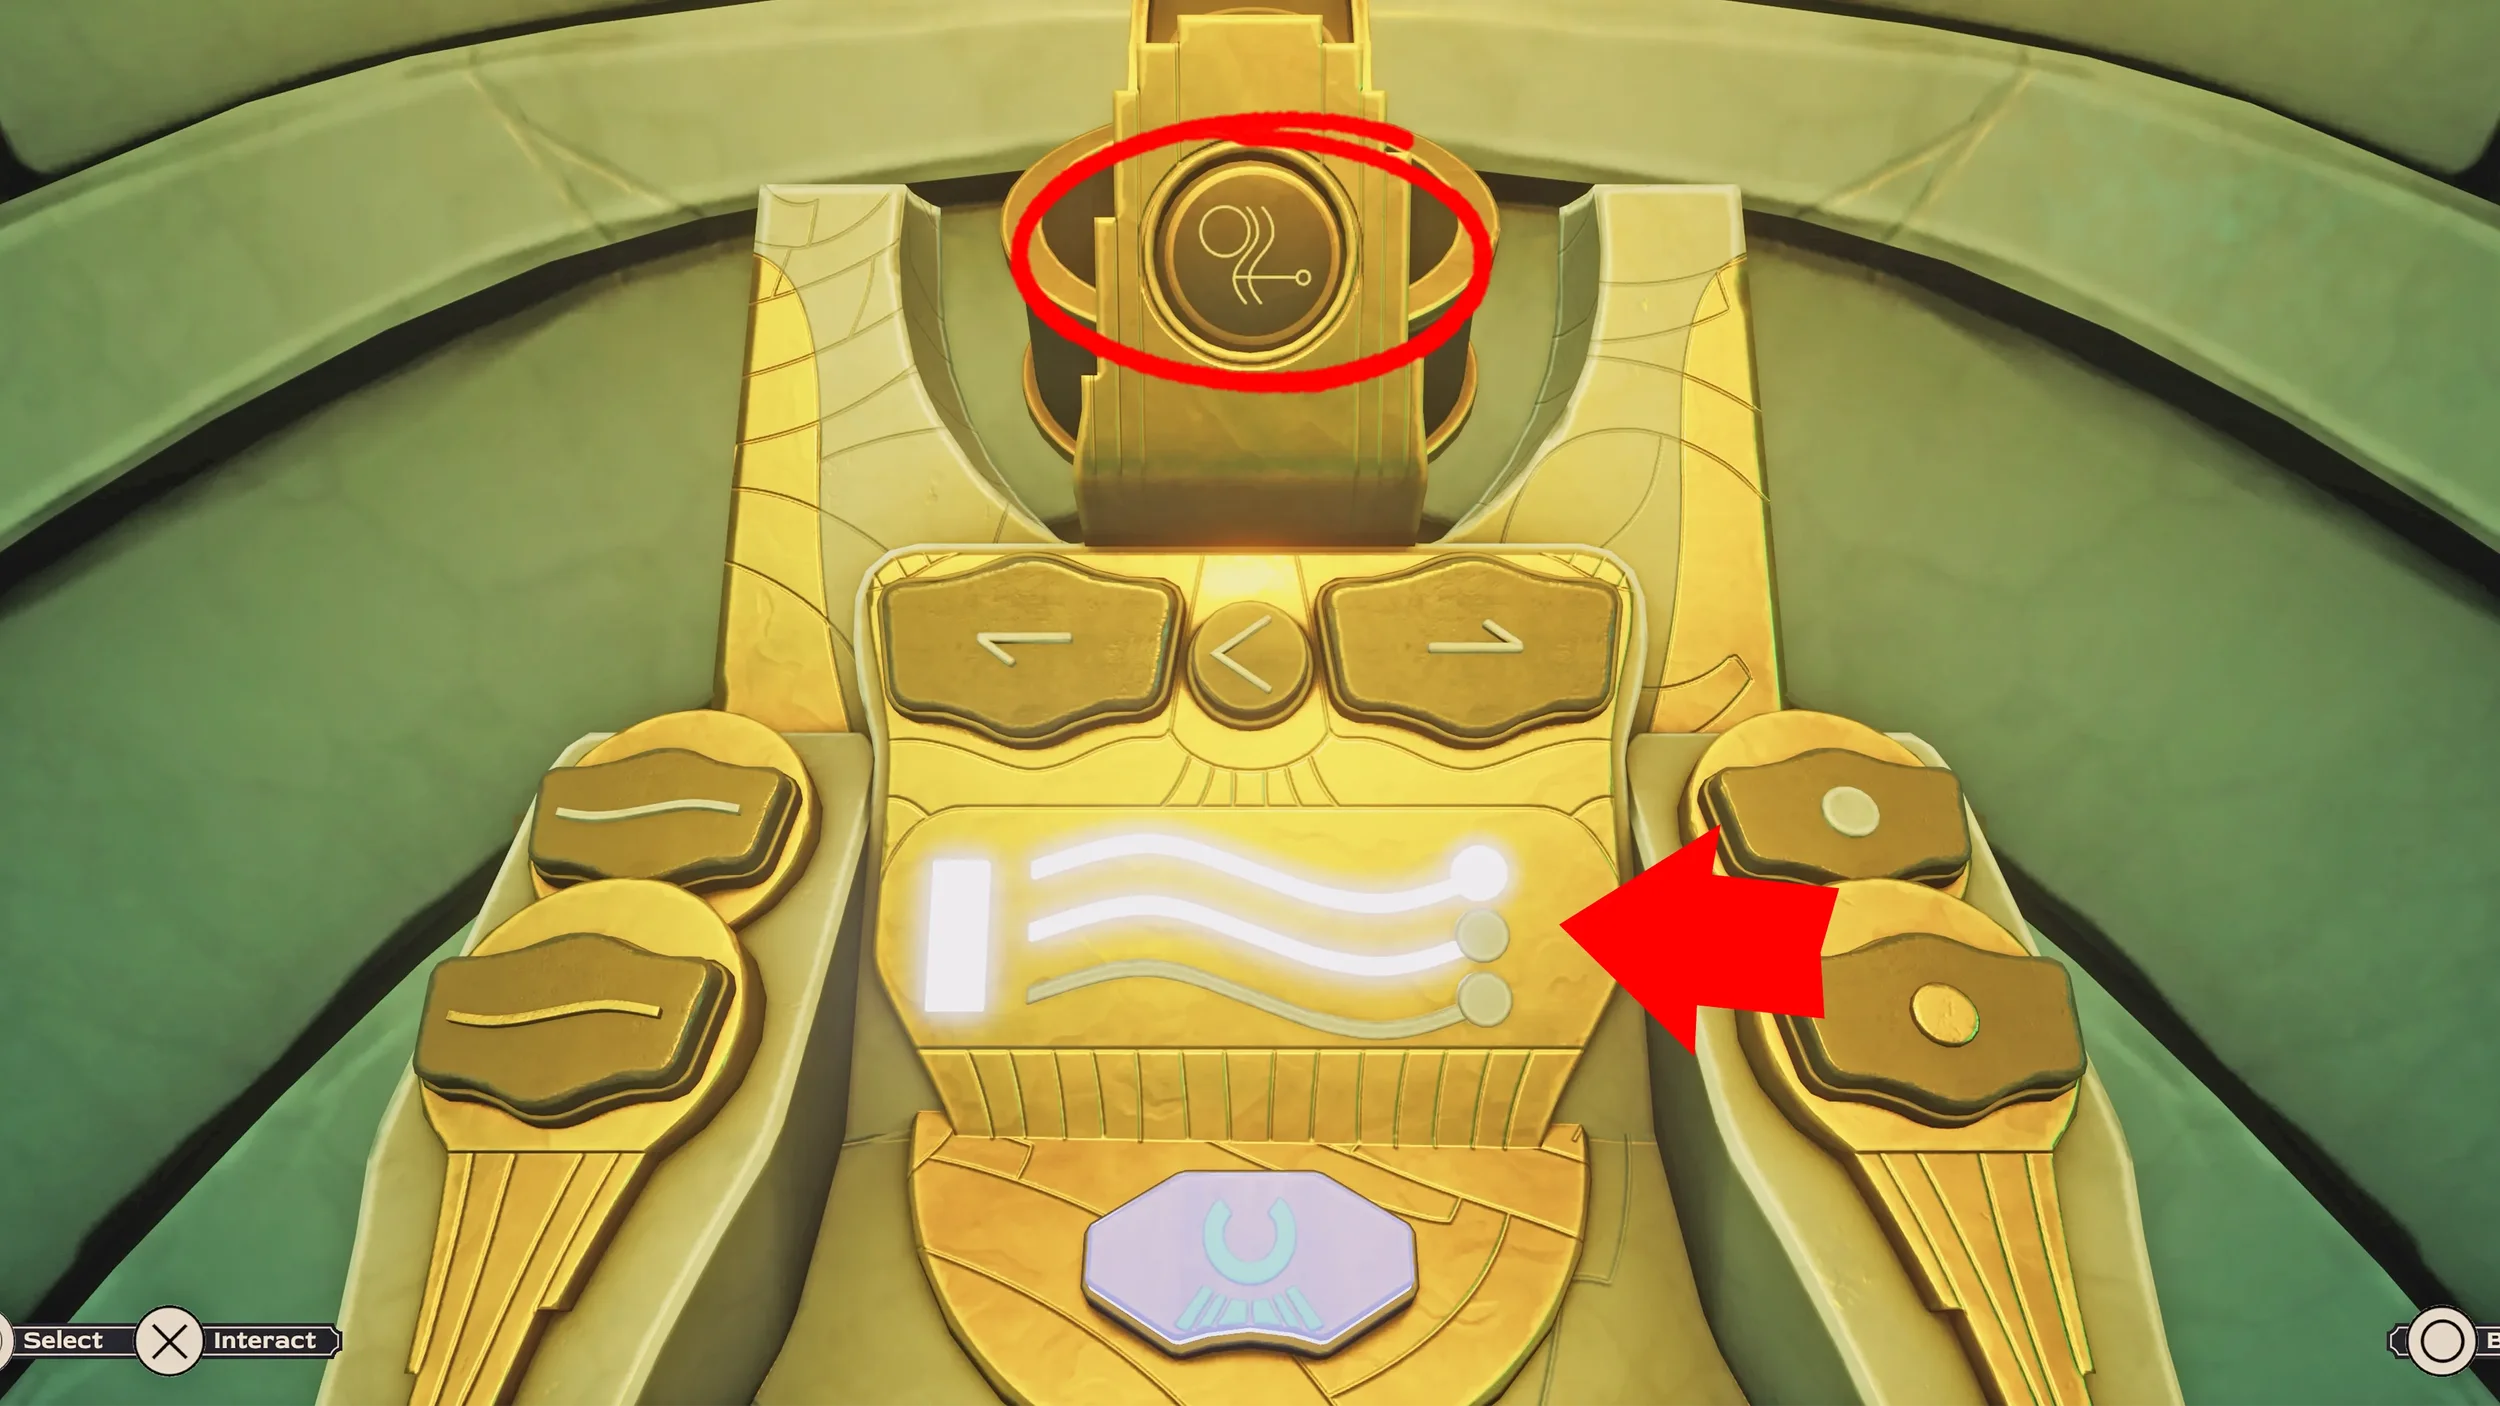
So now we need to input the answers into the machine, first let’s start by inputting the Era (2), press the button on the vertical part of the machine until it is showing the 2 wavy lines as seen in the image below, this represents the number 2.
Then, for the Planet, find the symbol that we now know represents Earth and press it (it is on the right hand side of the machine).
We can then press the button on the back of the machine so that it lights up the ceiling with the correctly aligned Constellations.
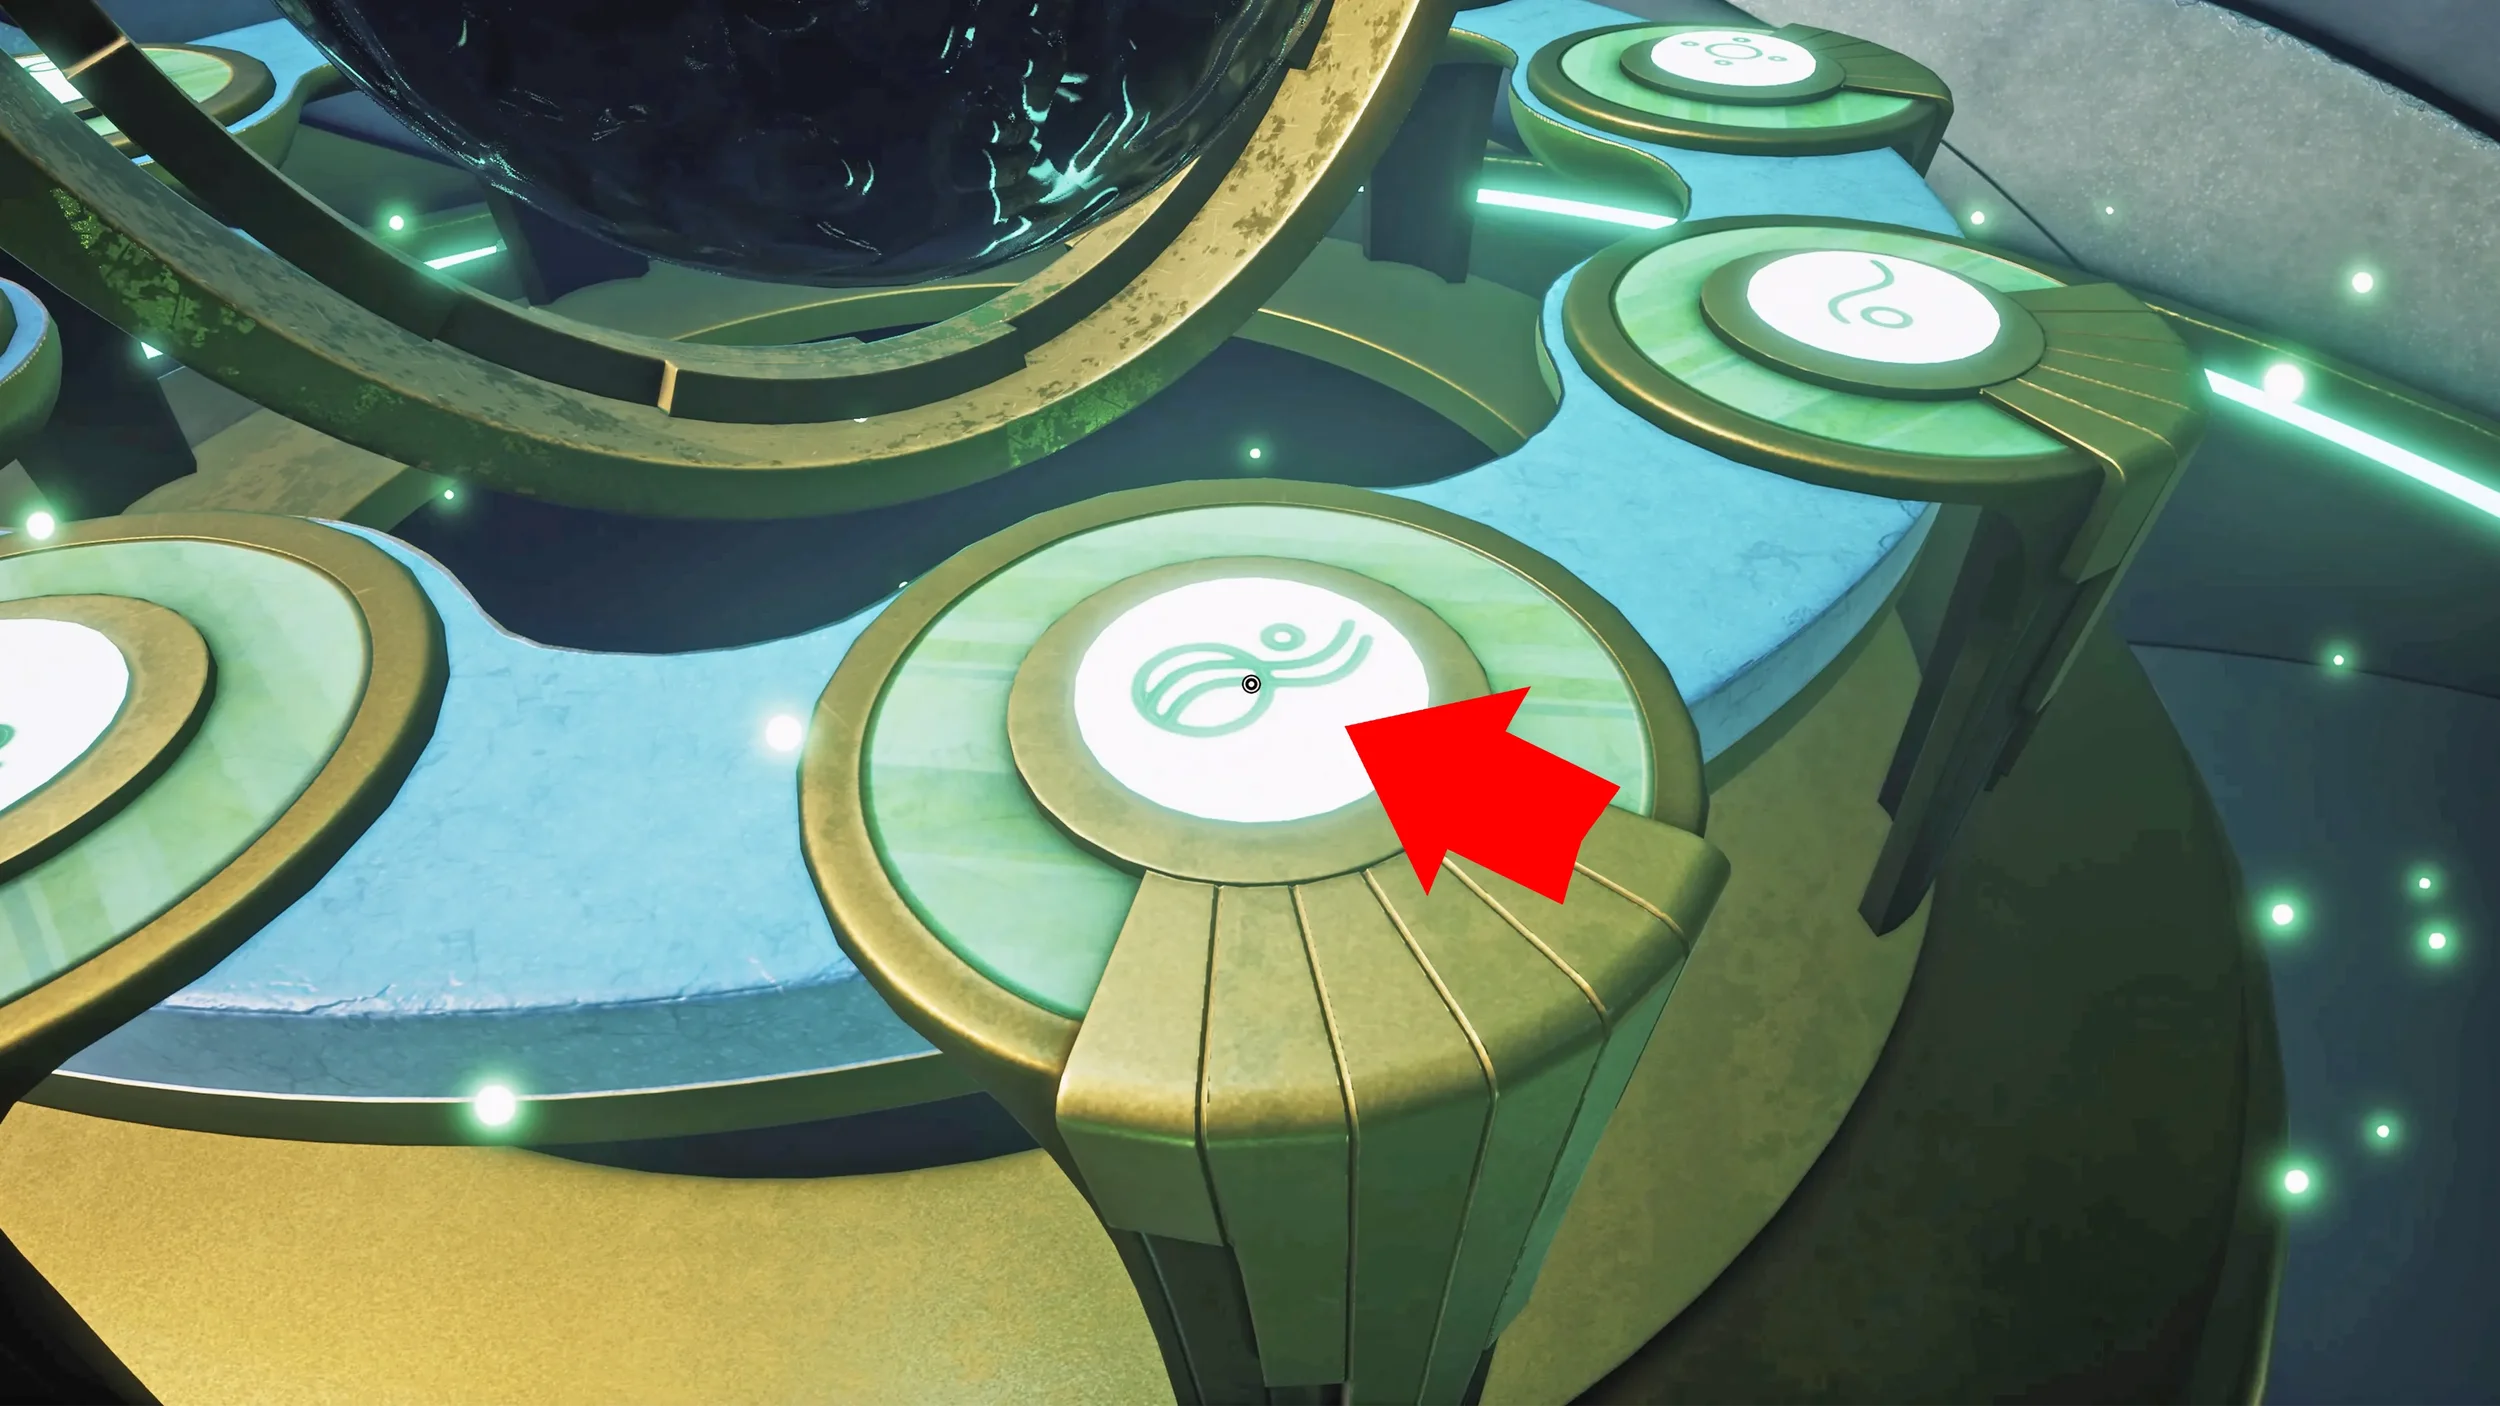
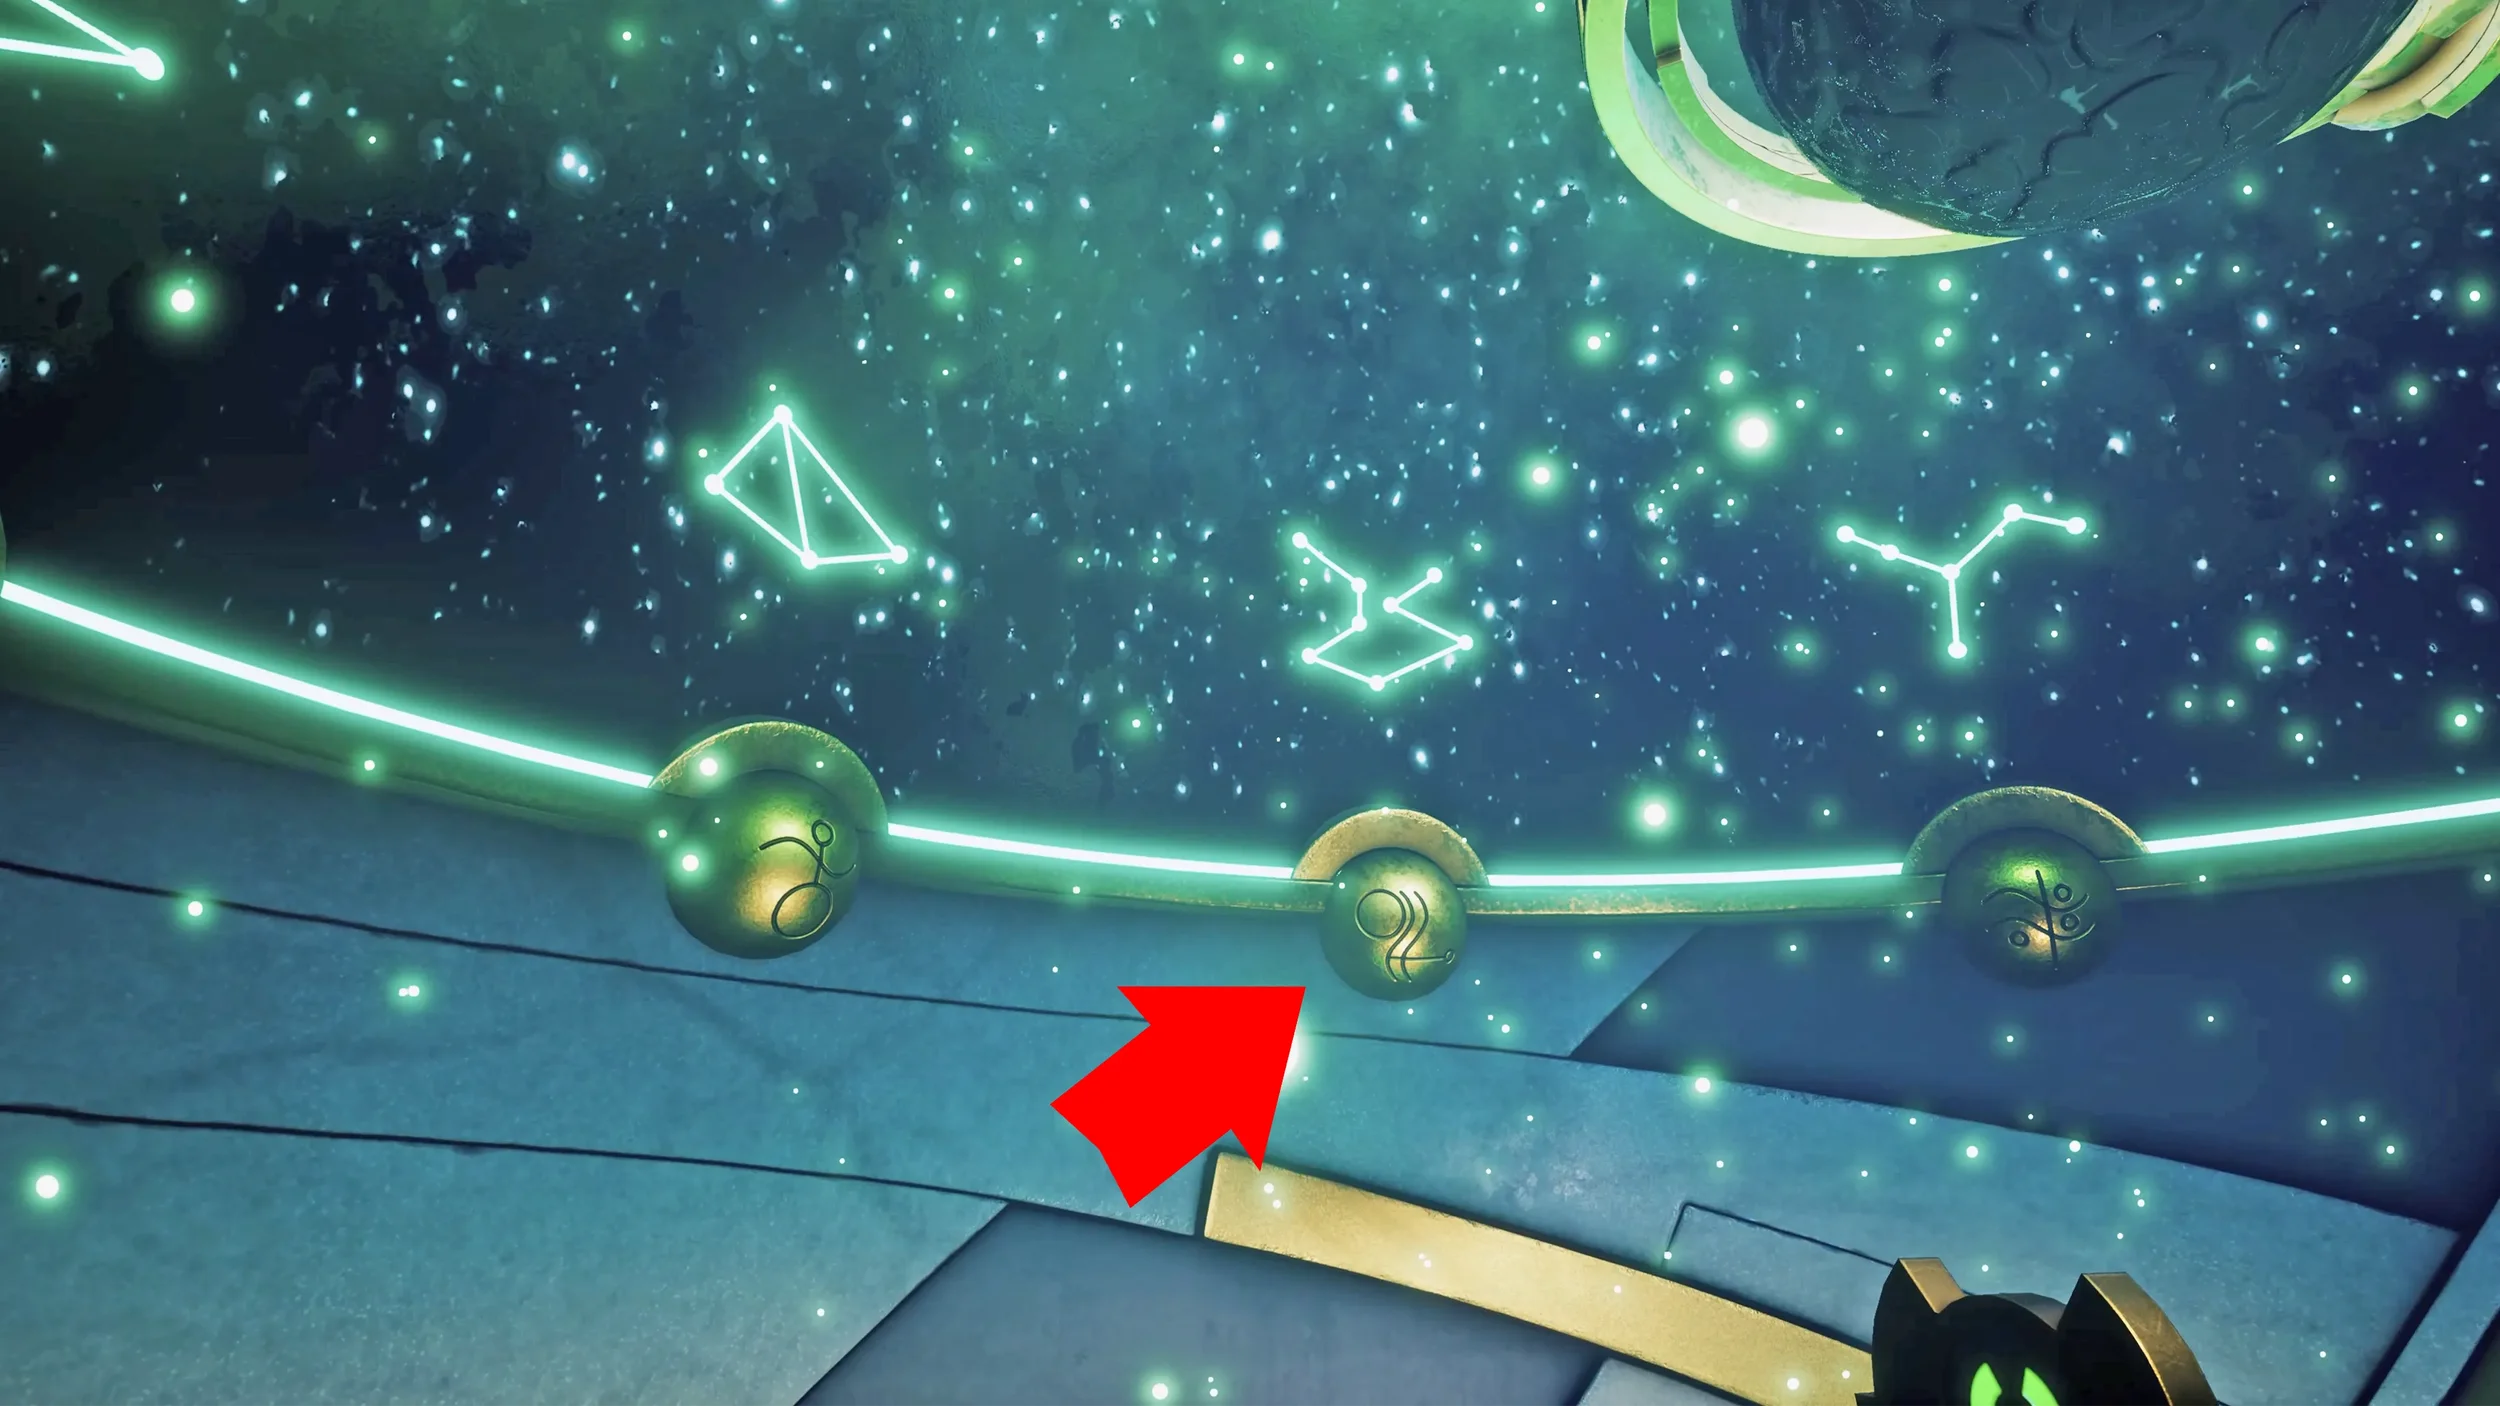
Now all that is left to do is look at the Constellations to find the one that matches the one we saw through the telescope earlier, when we locate it make sure to actually inspect the gold orb directly below it to write down the clue.
That is it for this part of the puzzle, we now need to return back to the entrance of the main building and take the 1st beam of light again, head back inside the room to its left (the one where we found a mural earlier and mentioned there was a machine for a later puzzle), it is now time to interact with the machine in this room to solve the next part of the puzzle.
To solve this part of the puzzle we need to input into the machine the Constellation Symbol we got as a result from the previous puzzle (the symbol on the gold orb) and we also need to number of the Era we want to go to, in this case Era 5, which is the modern Era.
By using the buttons at the top of the machine, select the correct symbol and rotate it so it is the same as in the image, and then add lines and dots using the bottom part of the machine to write the number 5, this is represented by 2 Lines and 1 Dot. Once everything is inputted correctly, just press the button at the bottom.
 "Velh-kan..." Trophy.
Spaceship Puzzle
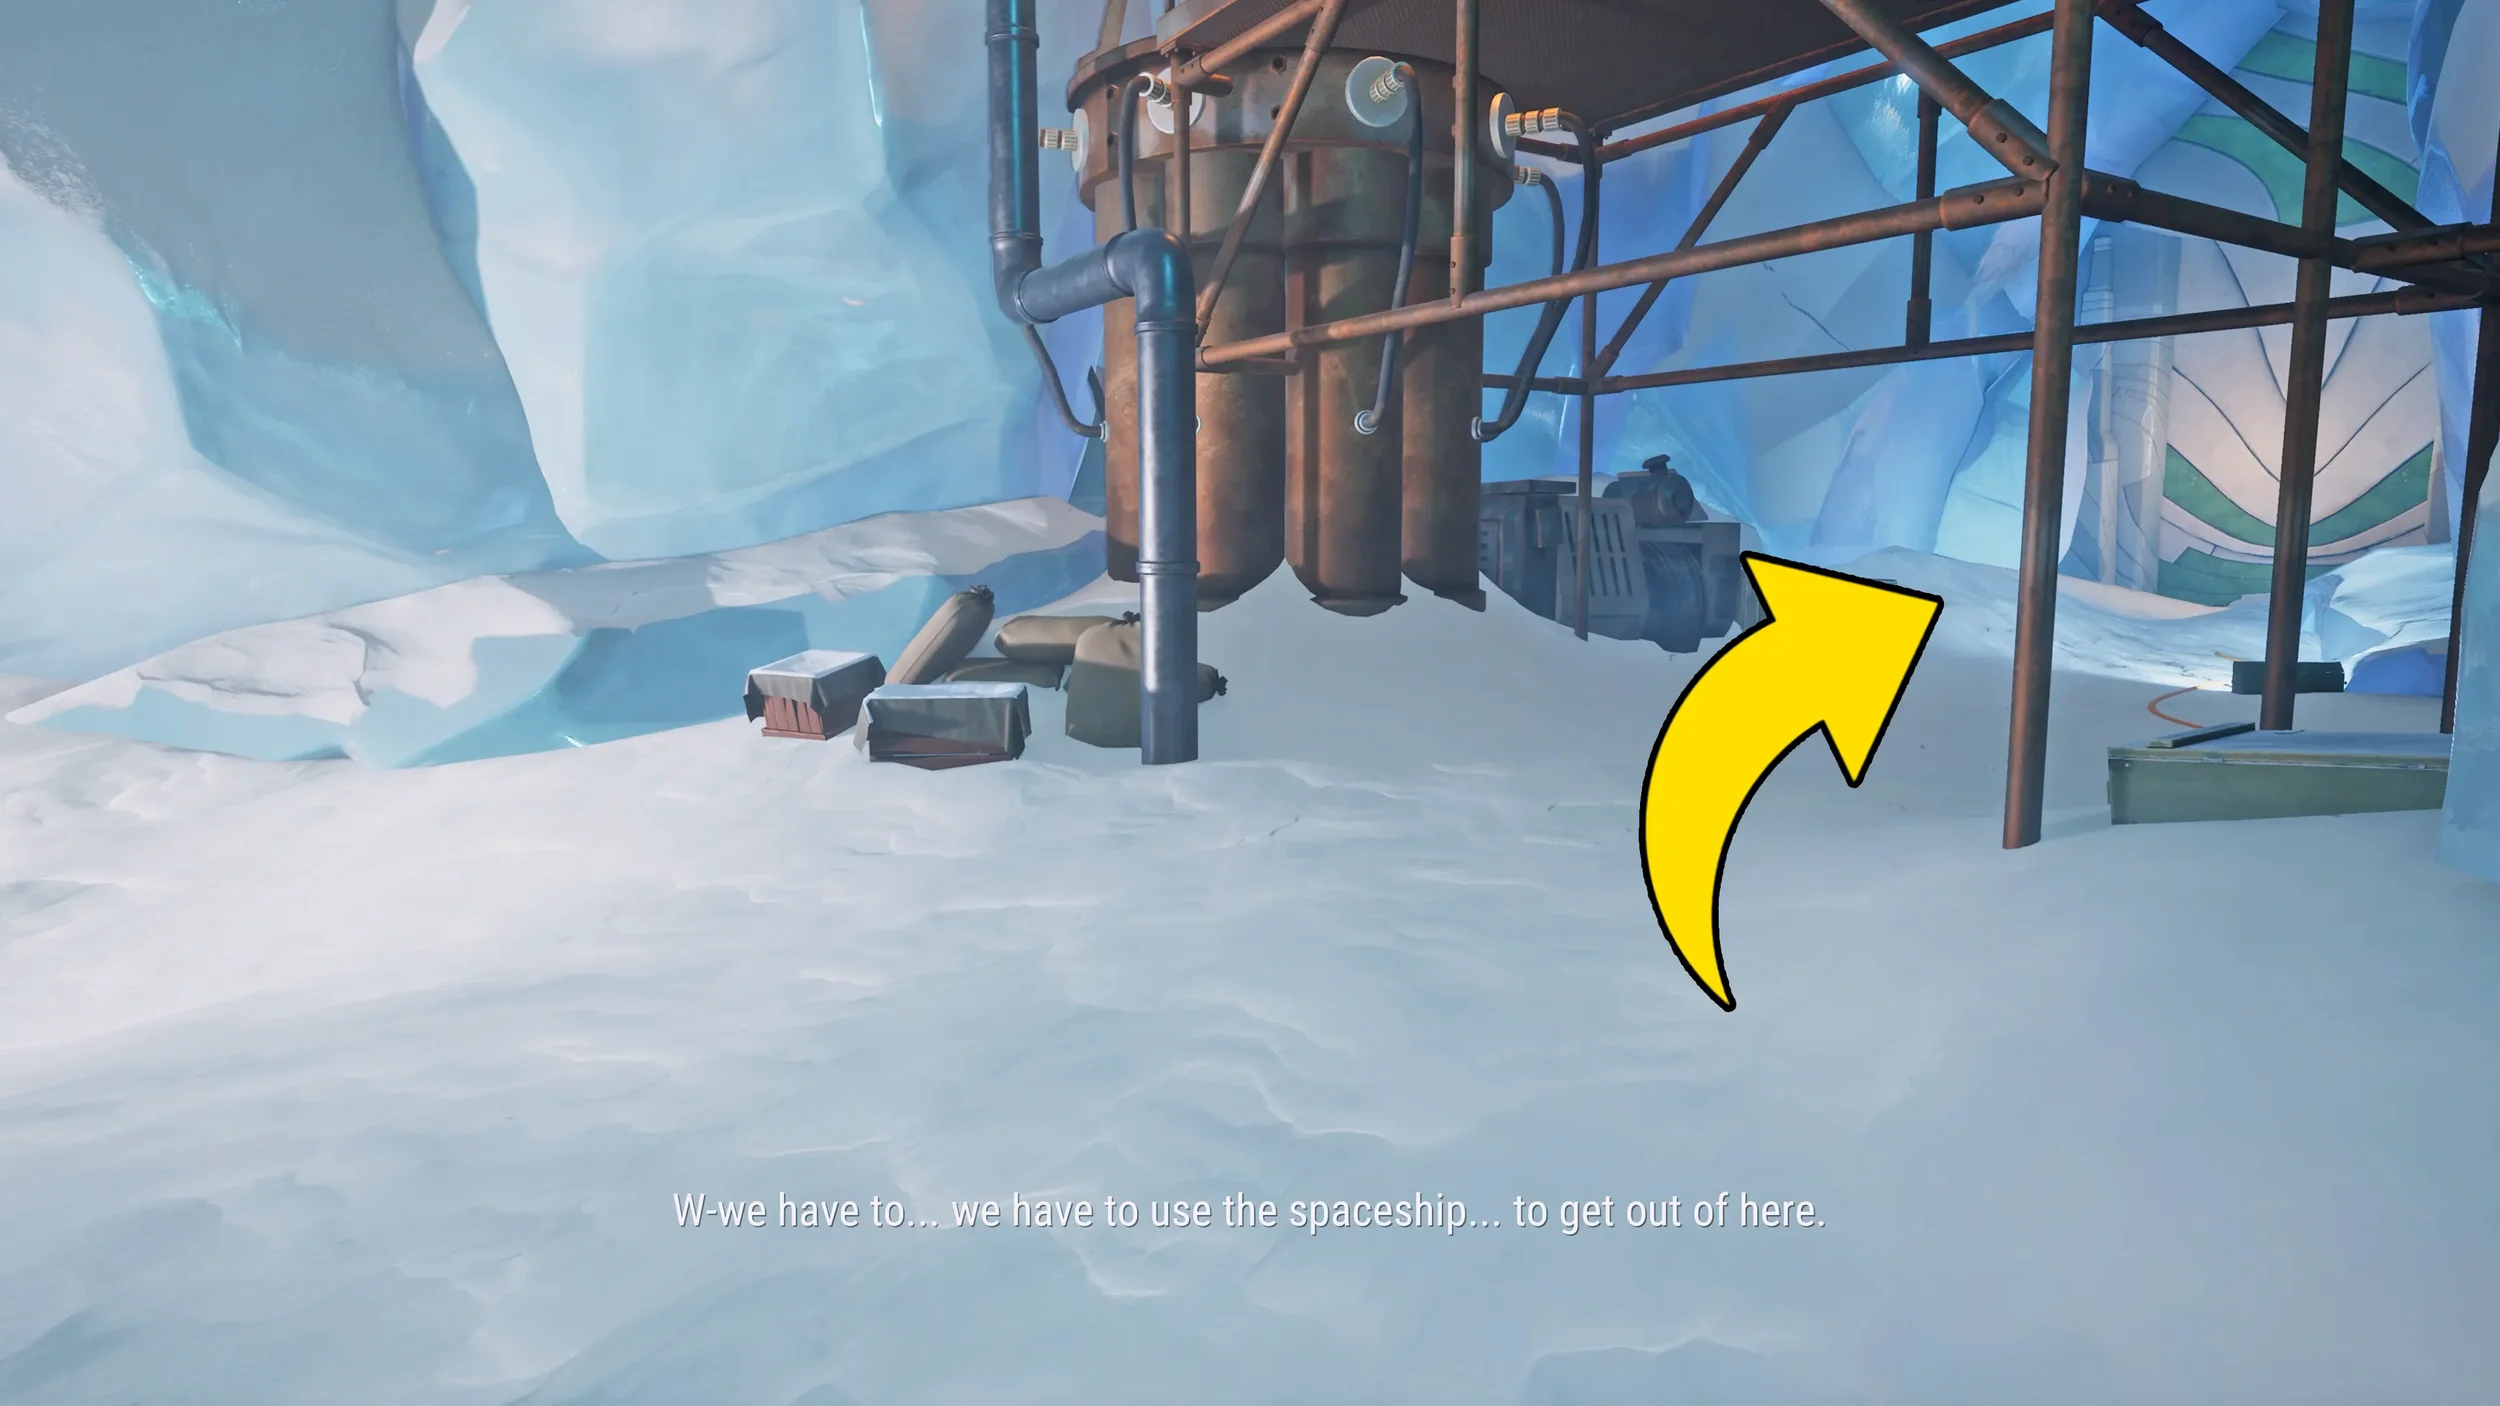
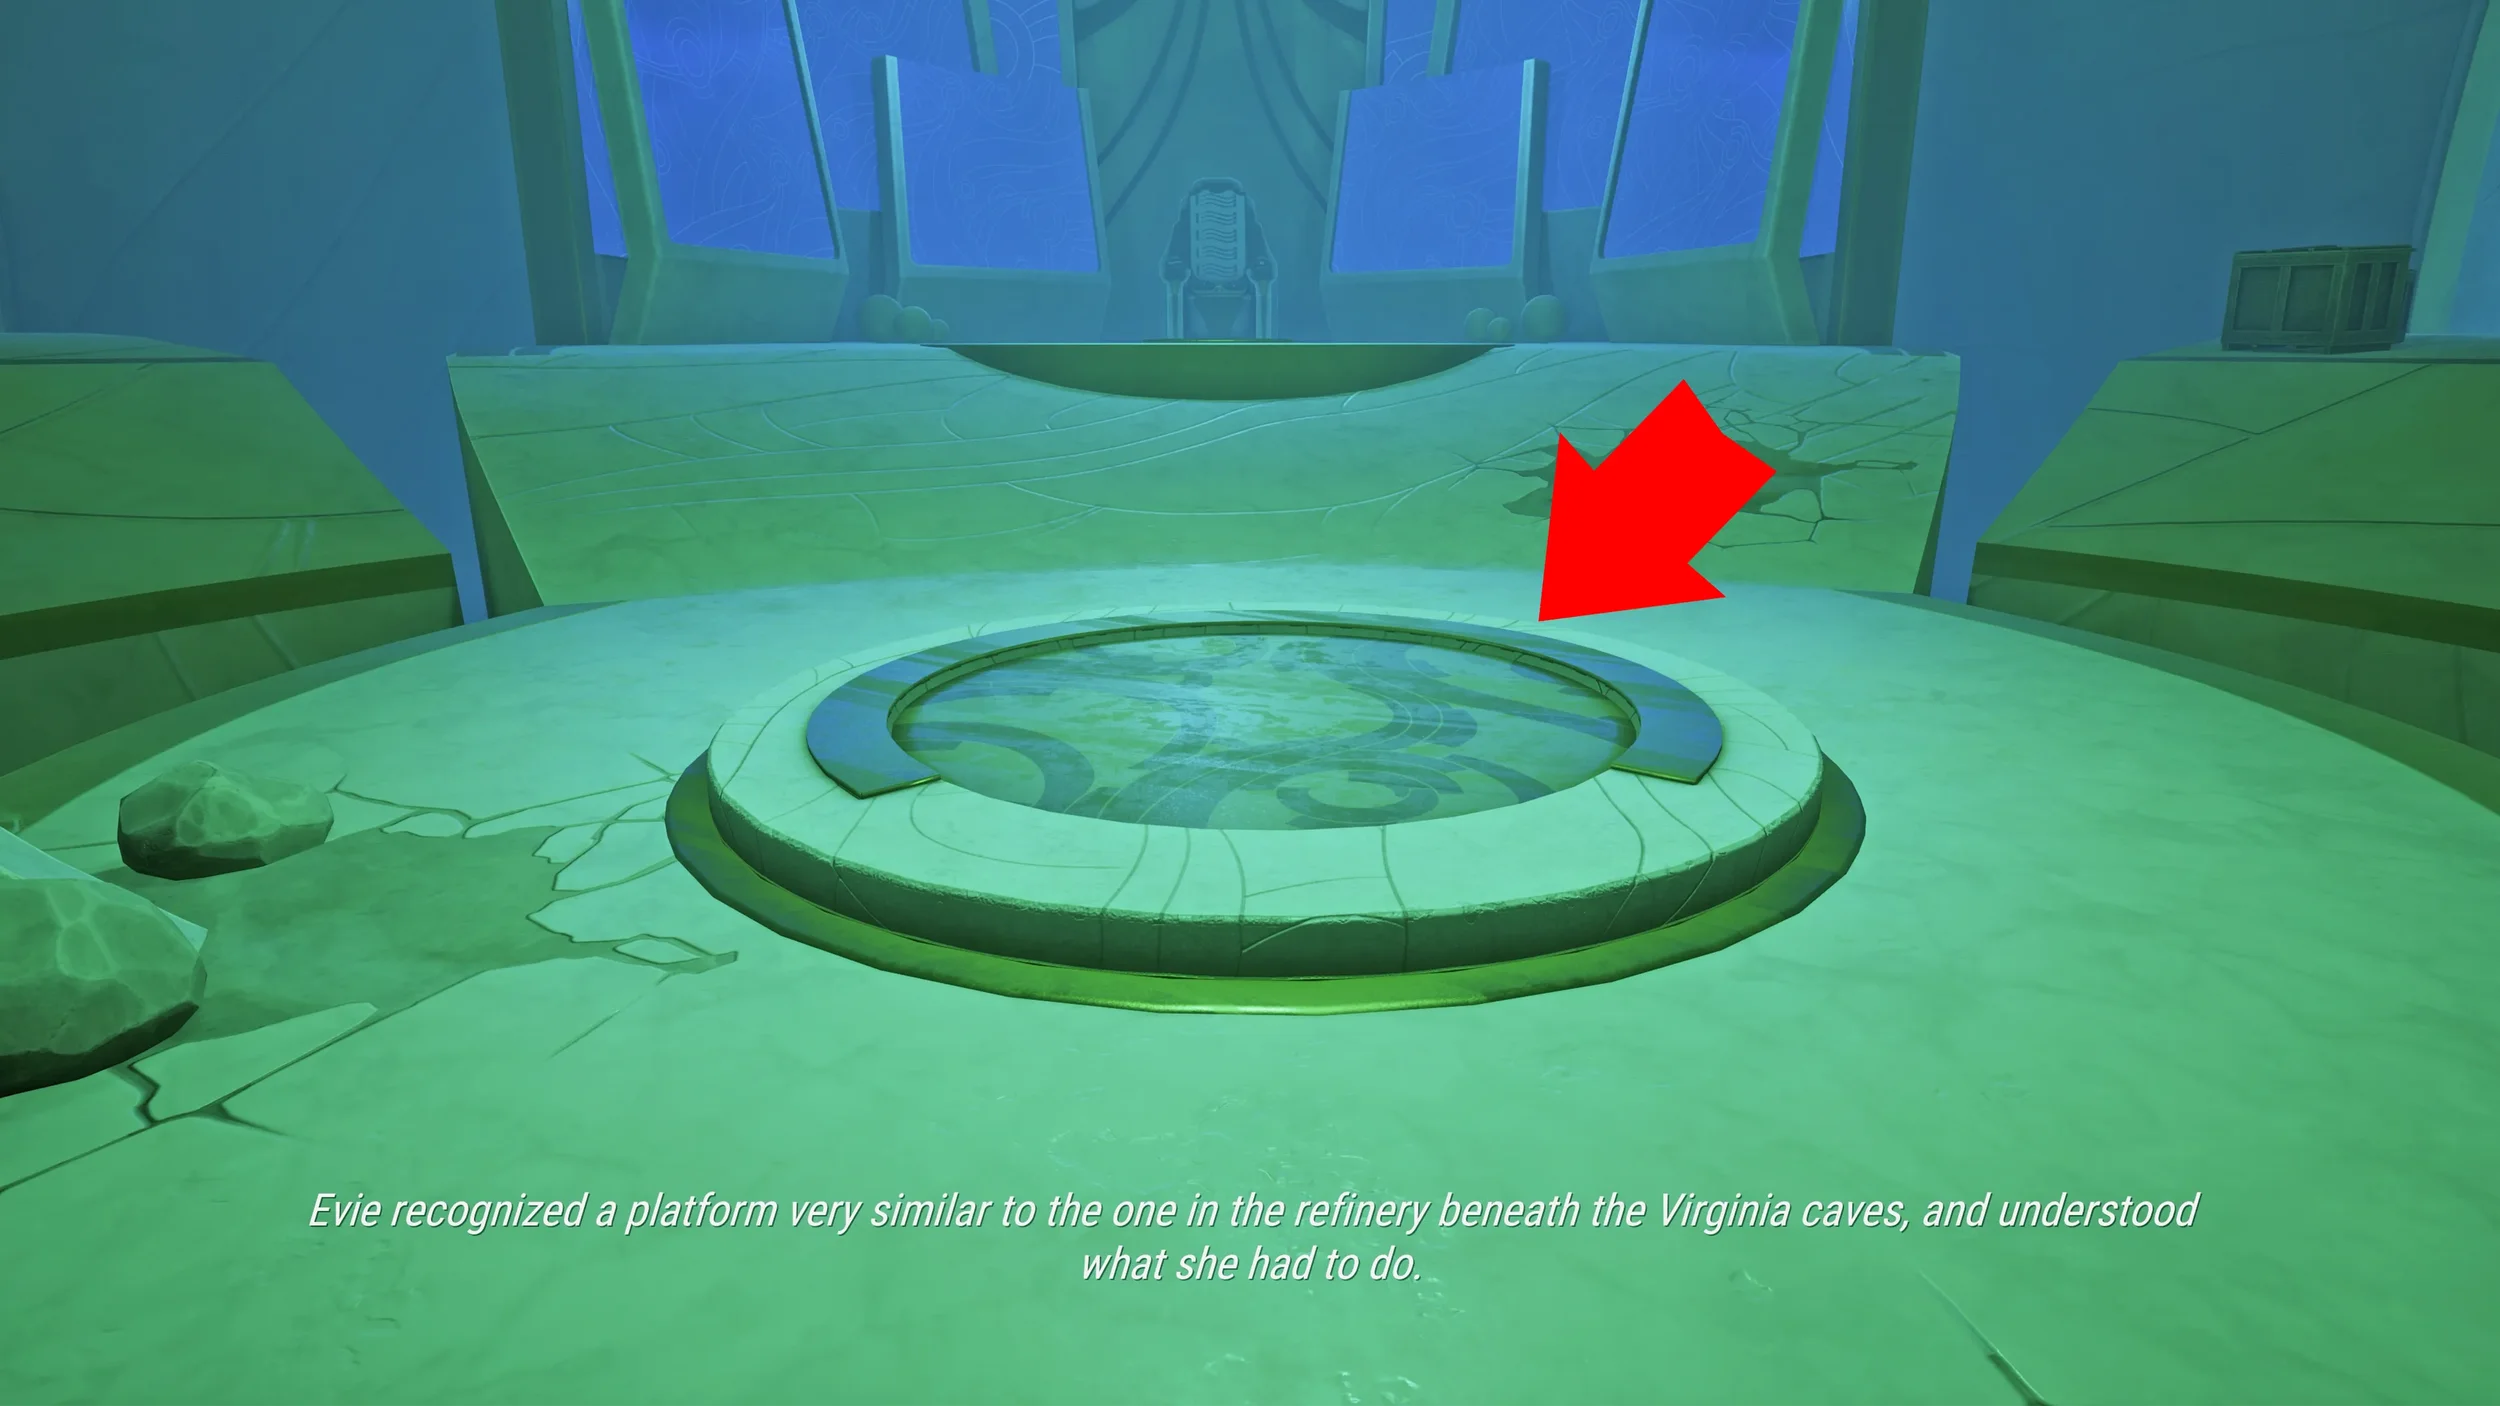
You will now wake back up in the ice cave in your original timeline, go down the metal stairs and head through the door under where the Brainwave Machine is, this will lead you to the Spaceship Control Room. In the Control Room stand on the circle on the ground to power up the Spaceship.
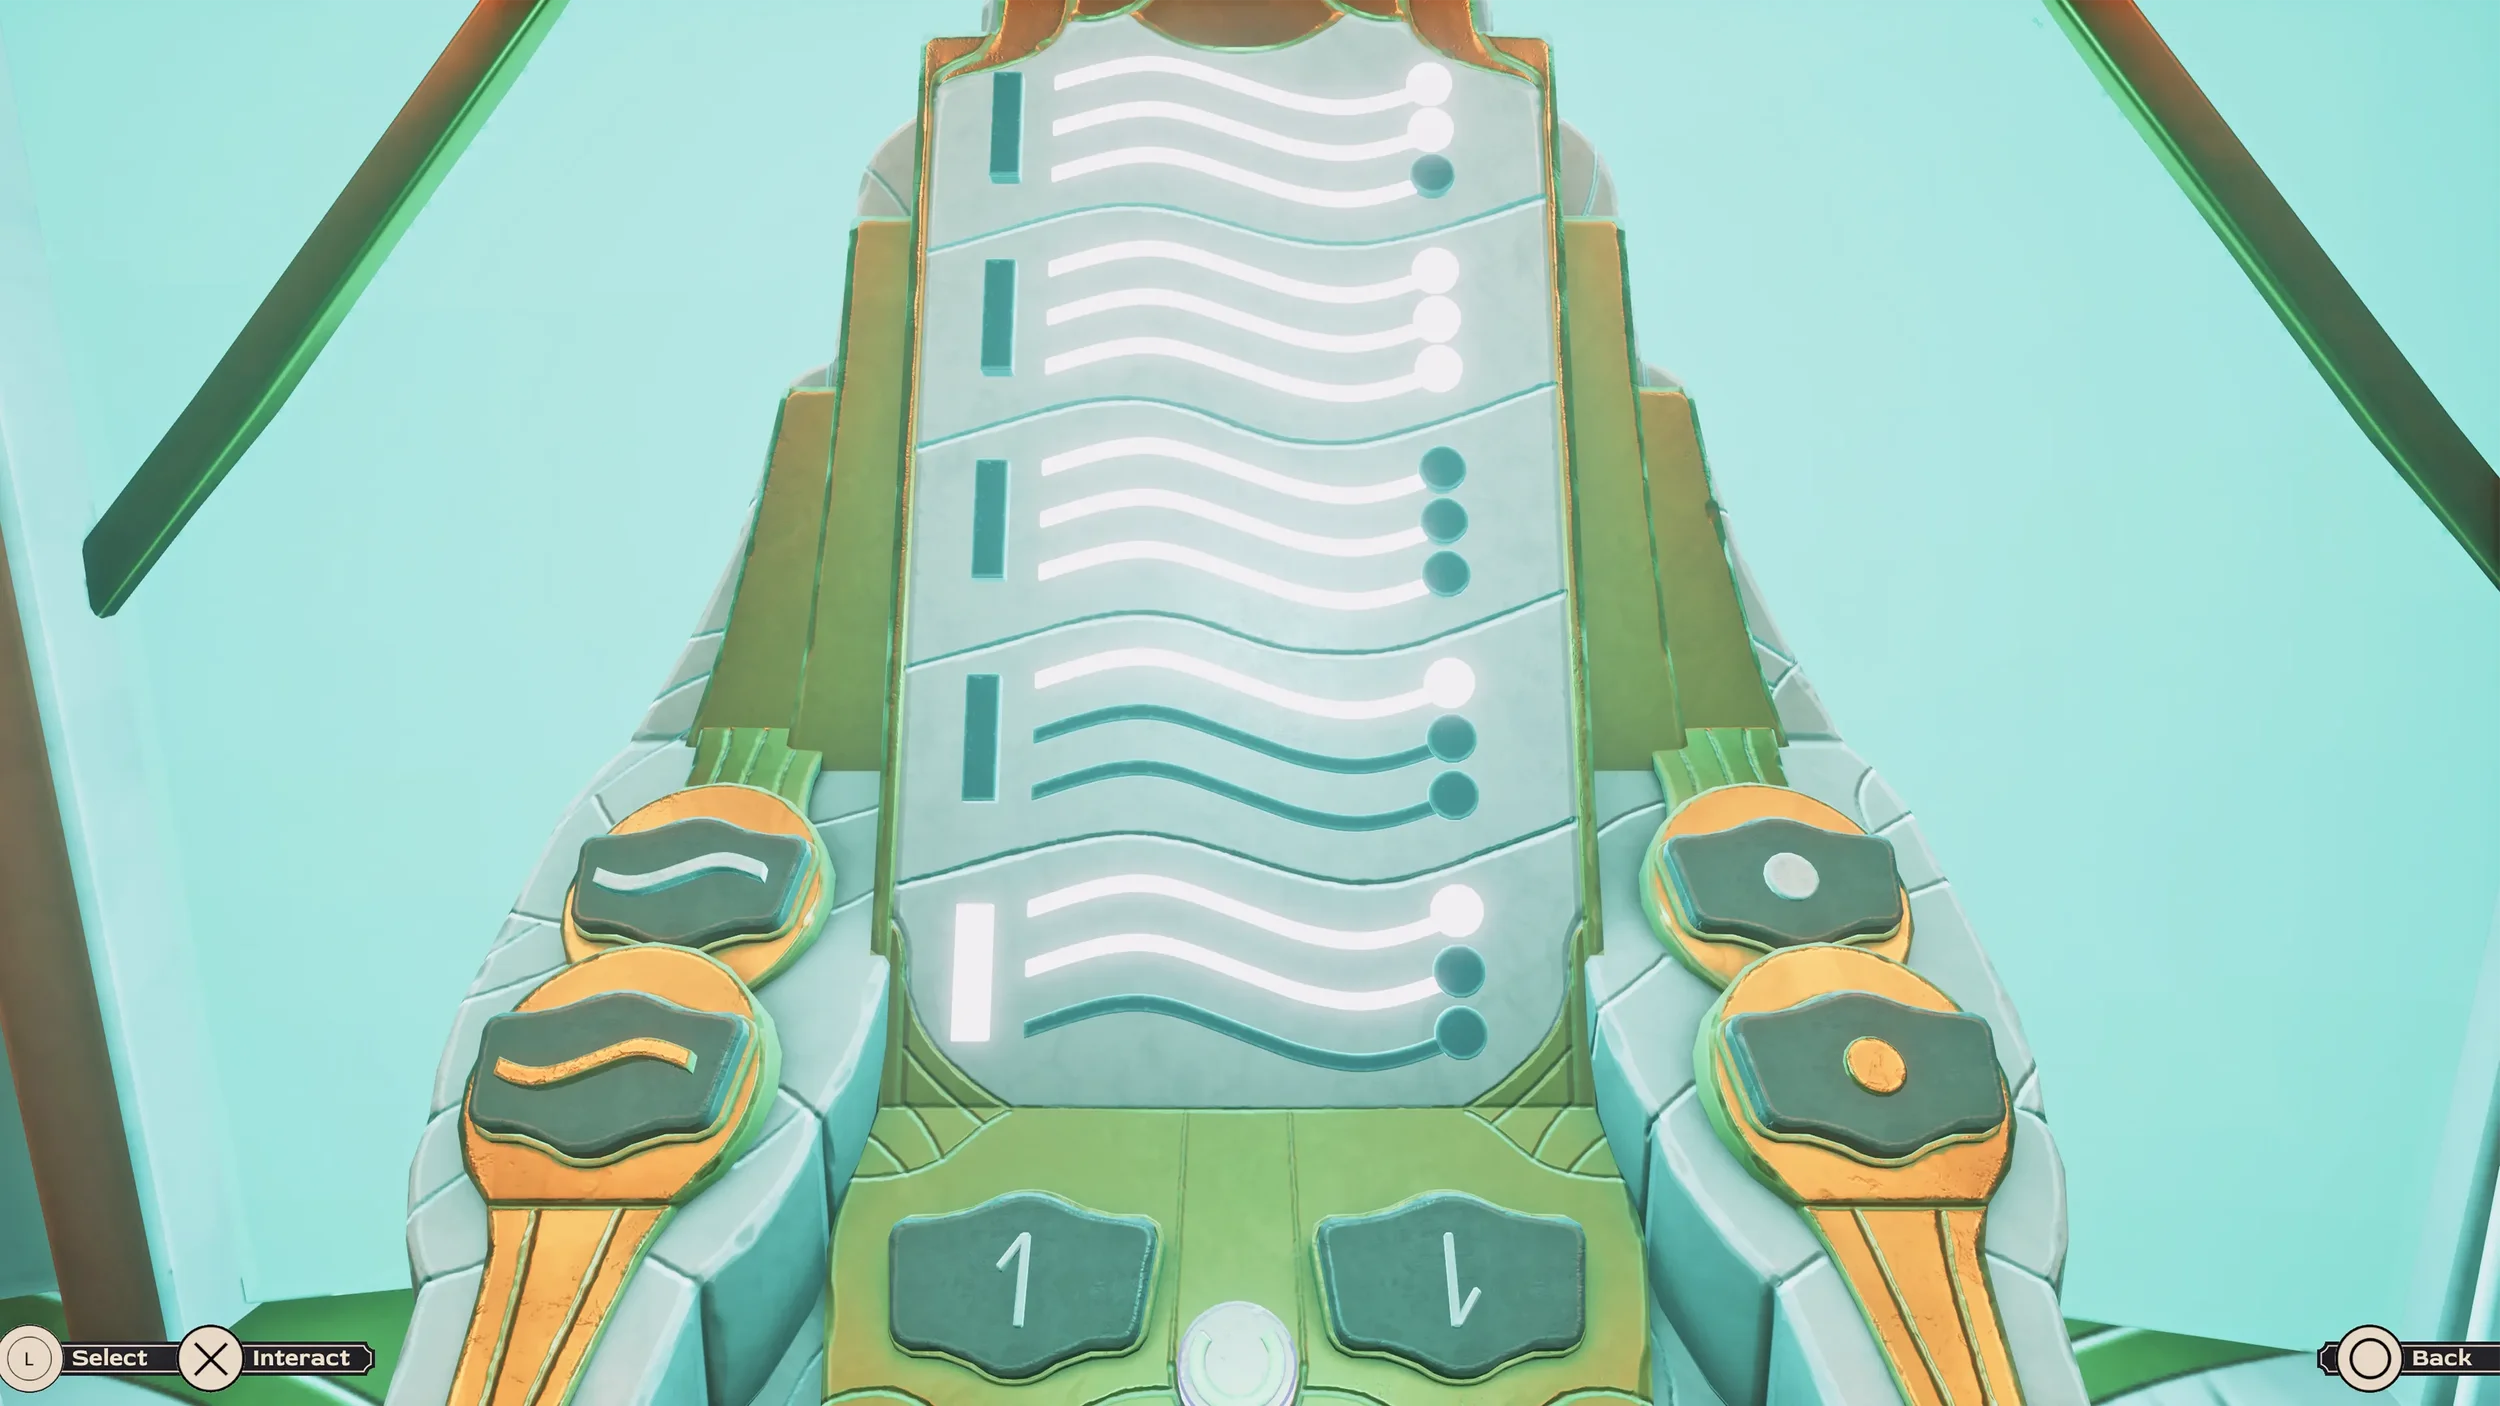
Now we just need to input the number we got from the previous puzzle (89345, it will now be written down in your Journal Clues) into the machine in this room using lines and dots as we did before.
Here is what the final solution looks like:
After solving the puzzle, a lever will appear in the middle of the Control Room just behind you, when you pull this lever you will wake up in the “future”.
Leave Me The F Alone Trophy
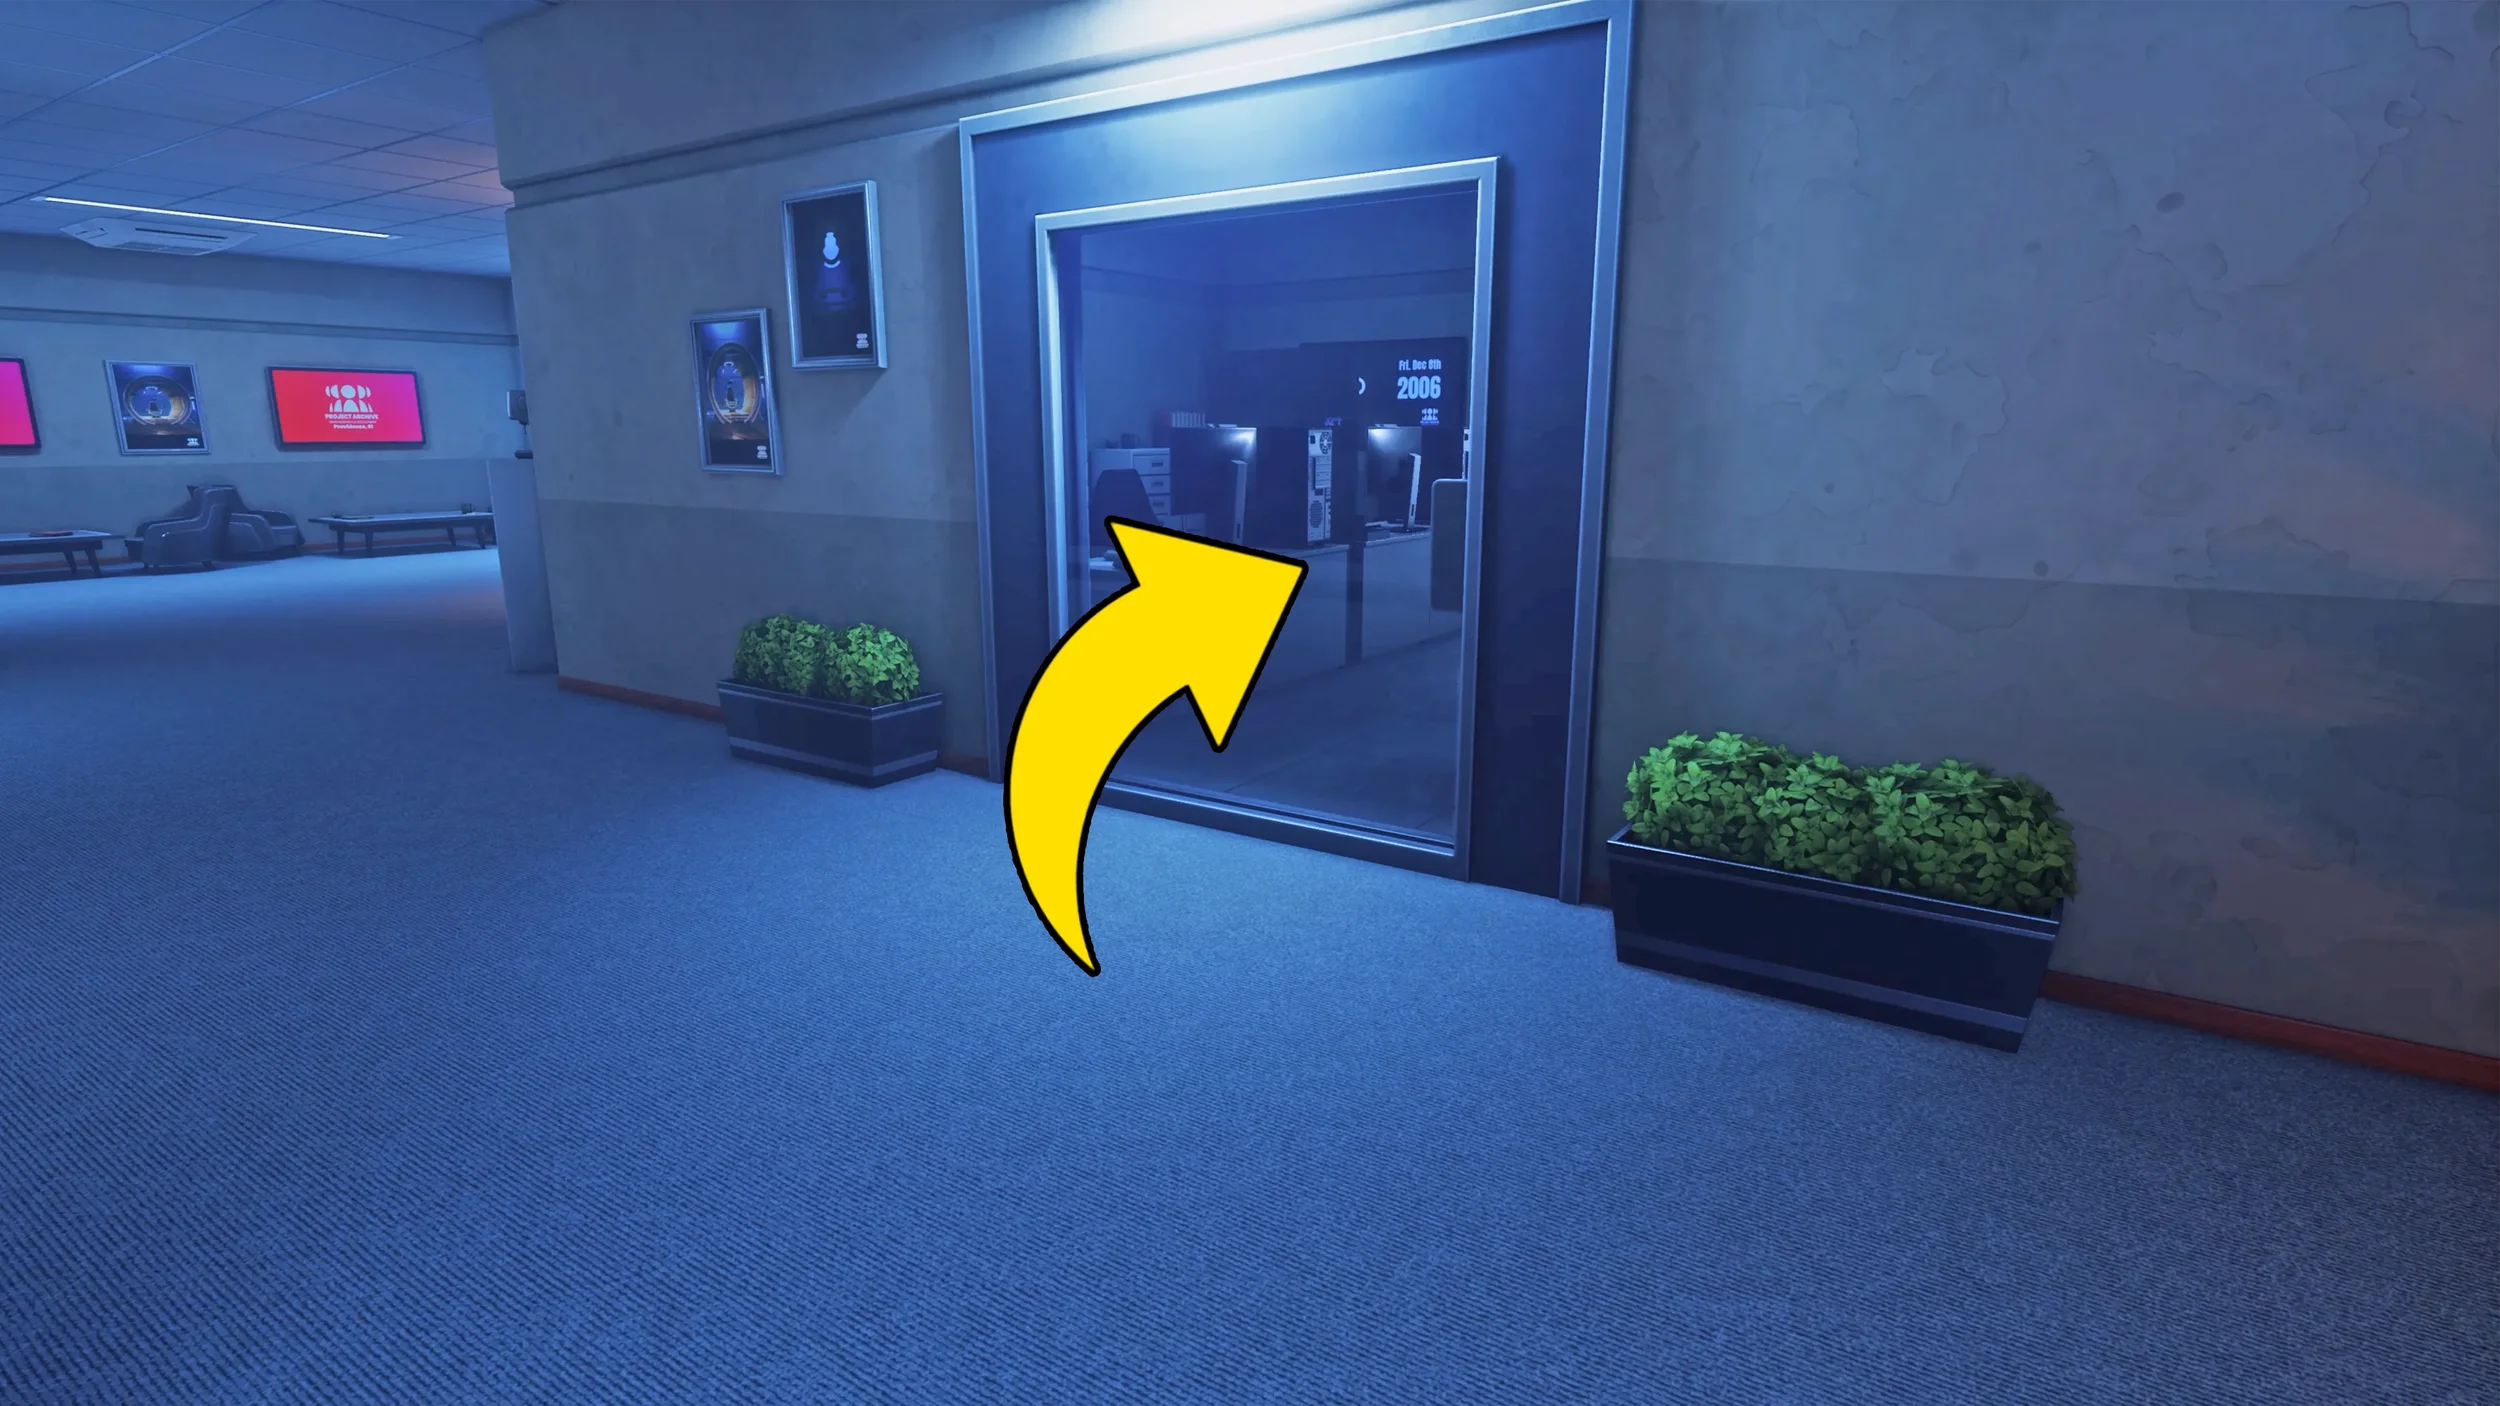
As soon as you wake up in the future, exit the room through any of the doors (they lead to the same place), and go to the left, then enter the first office on your right.
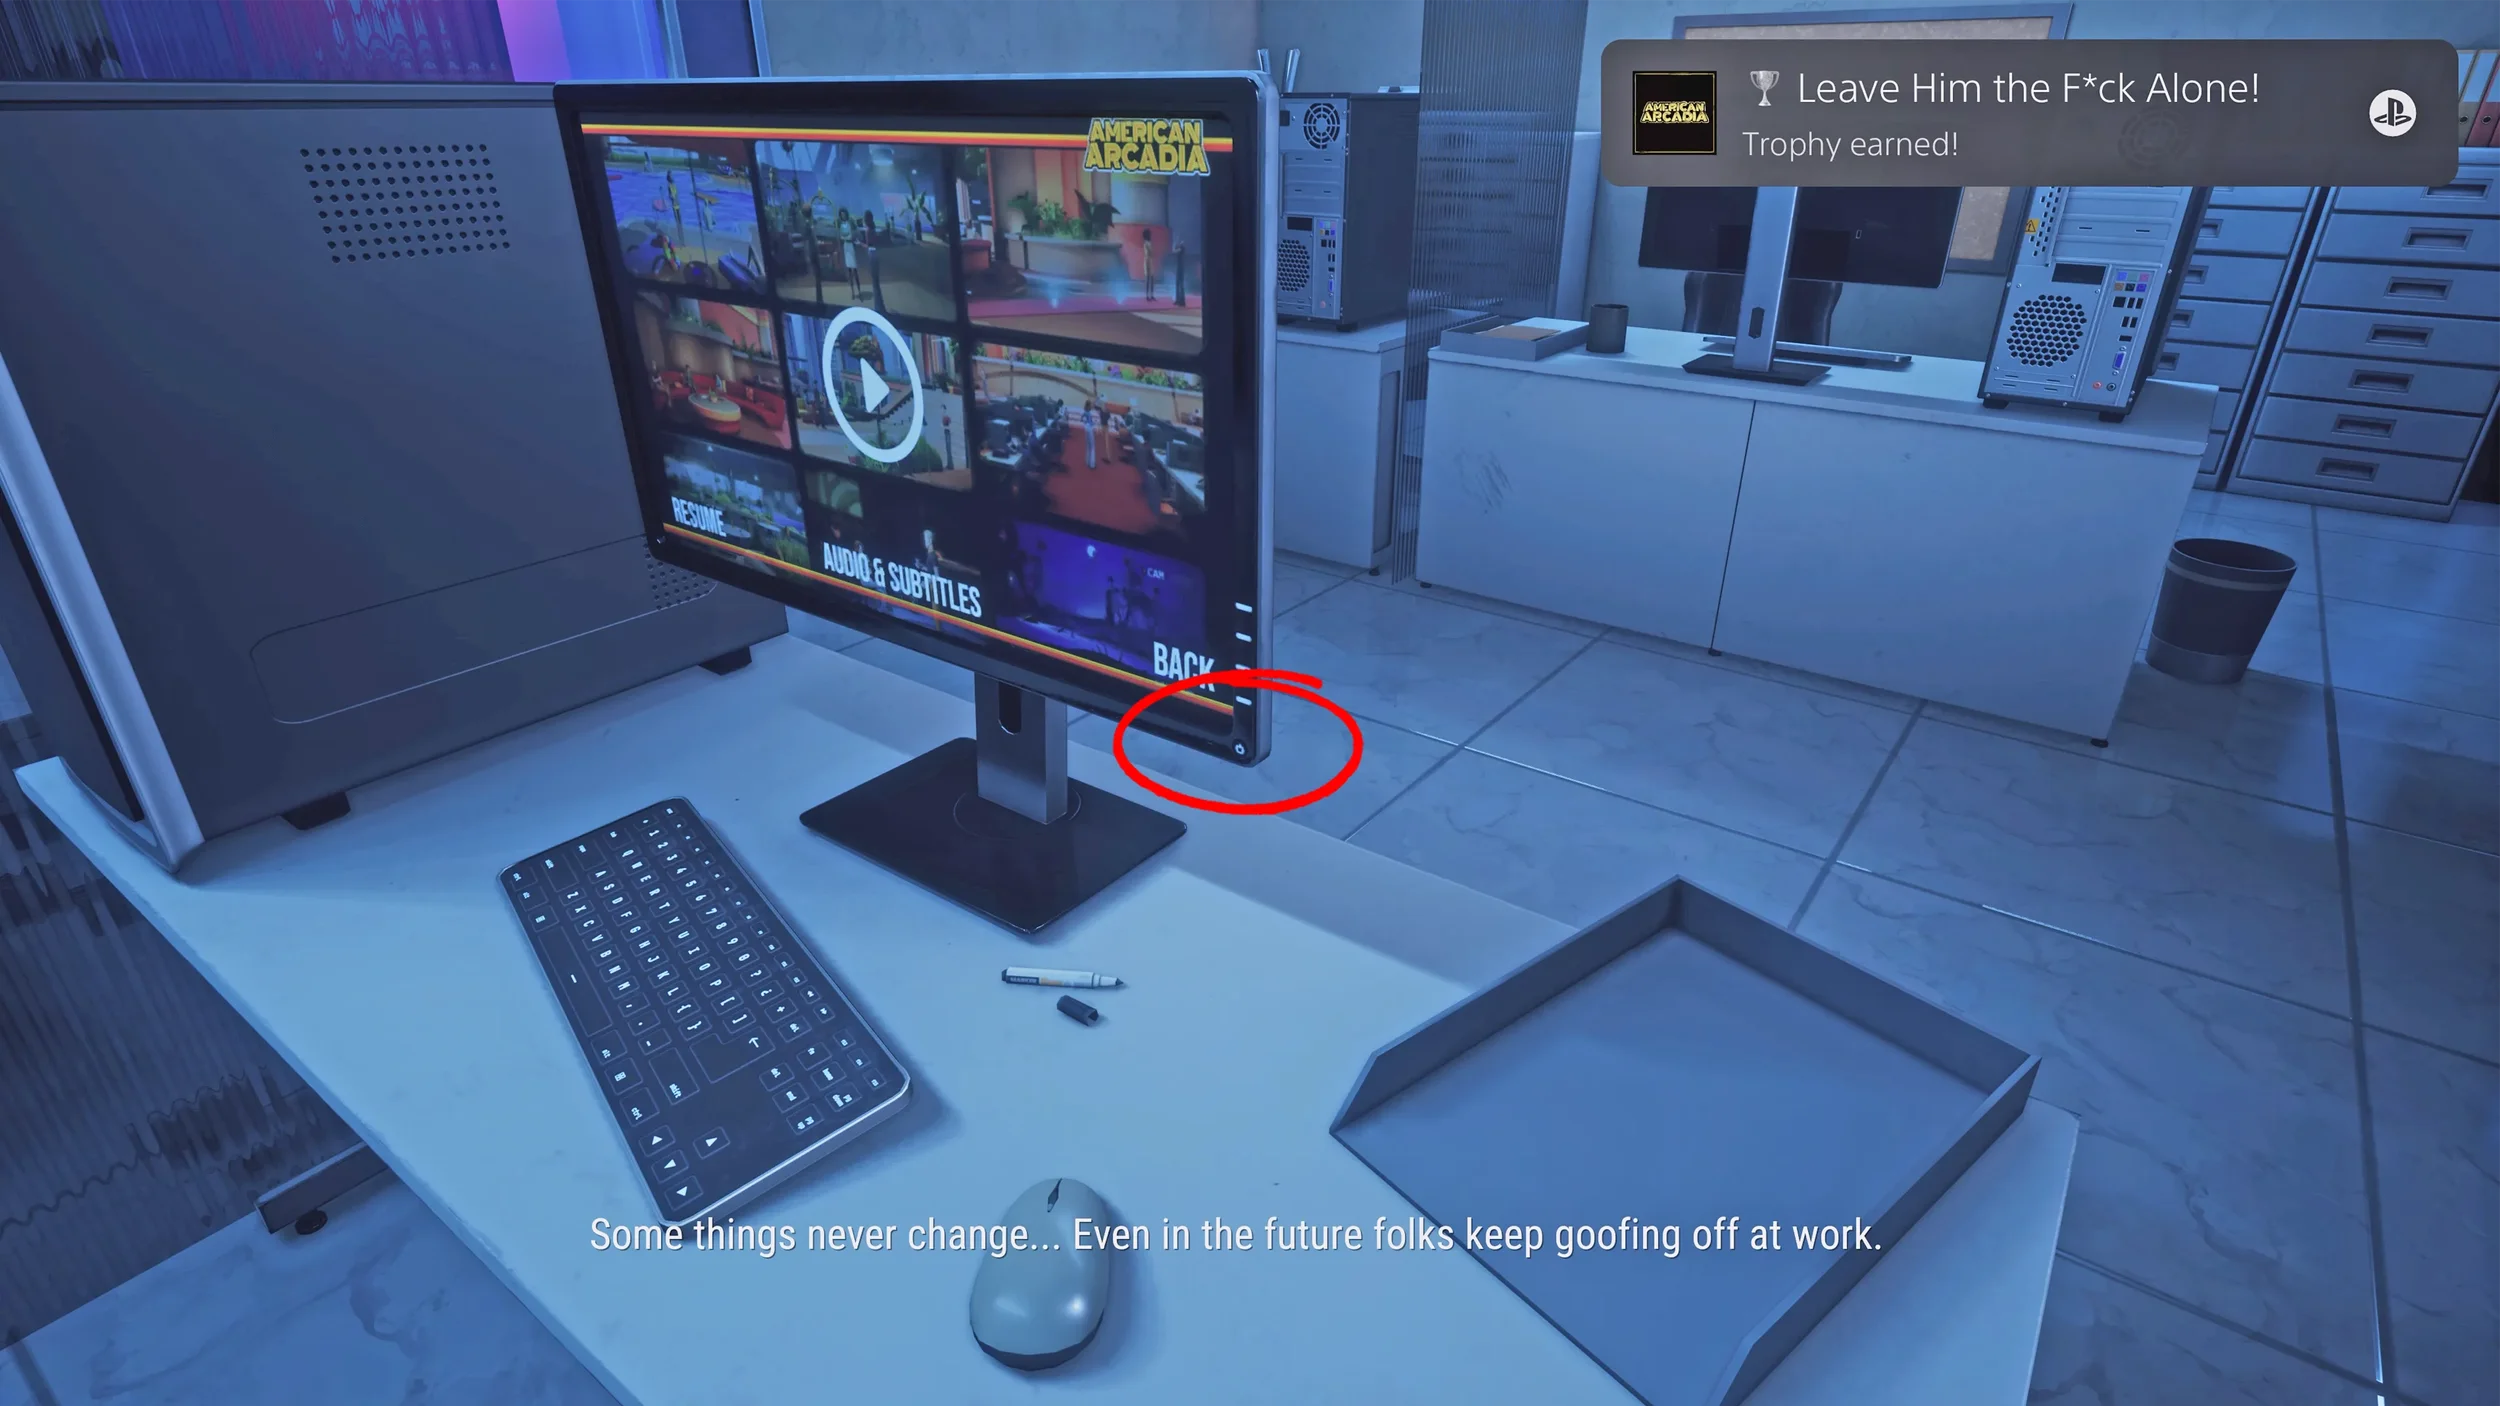
"Leave Me The F Alone" Trophy.

Cables Machine Puzzle
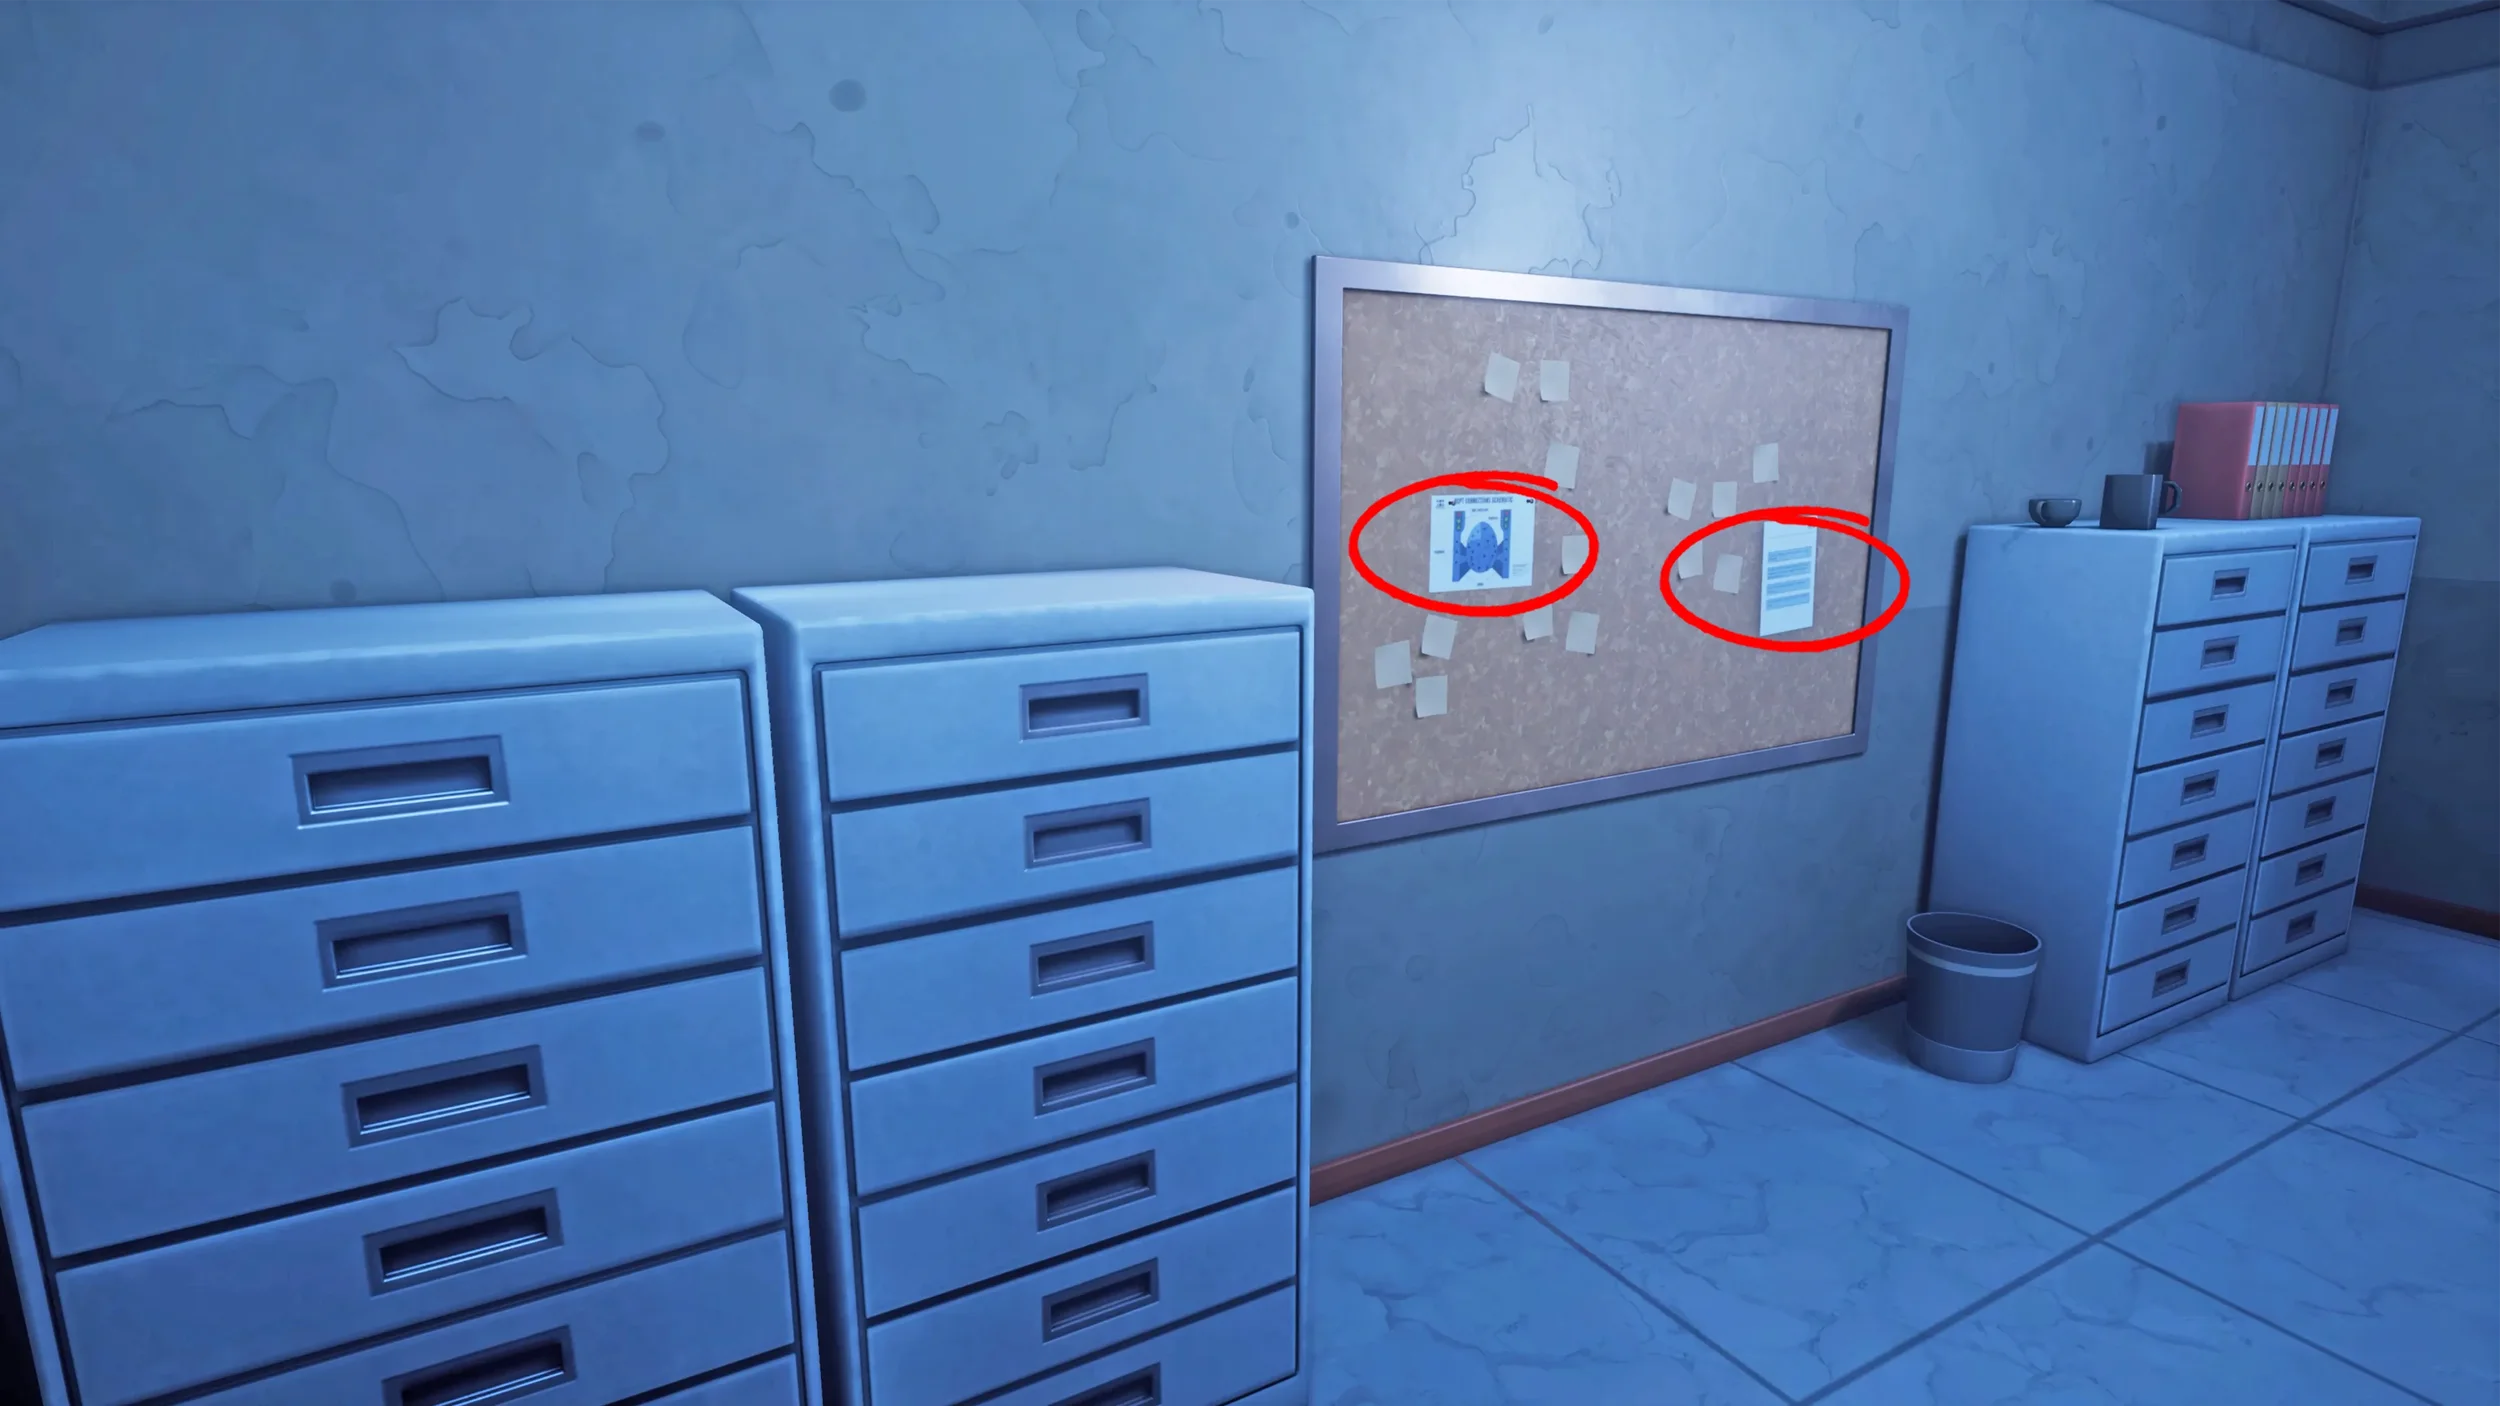
Before leaving the room where we just got the Trophy, there are 2 clues we can find here.
Both of them are pinned to the board on the opposite side of the room, make sure to inspect them both.
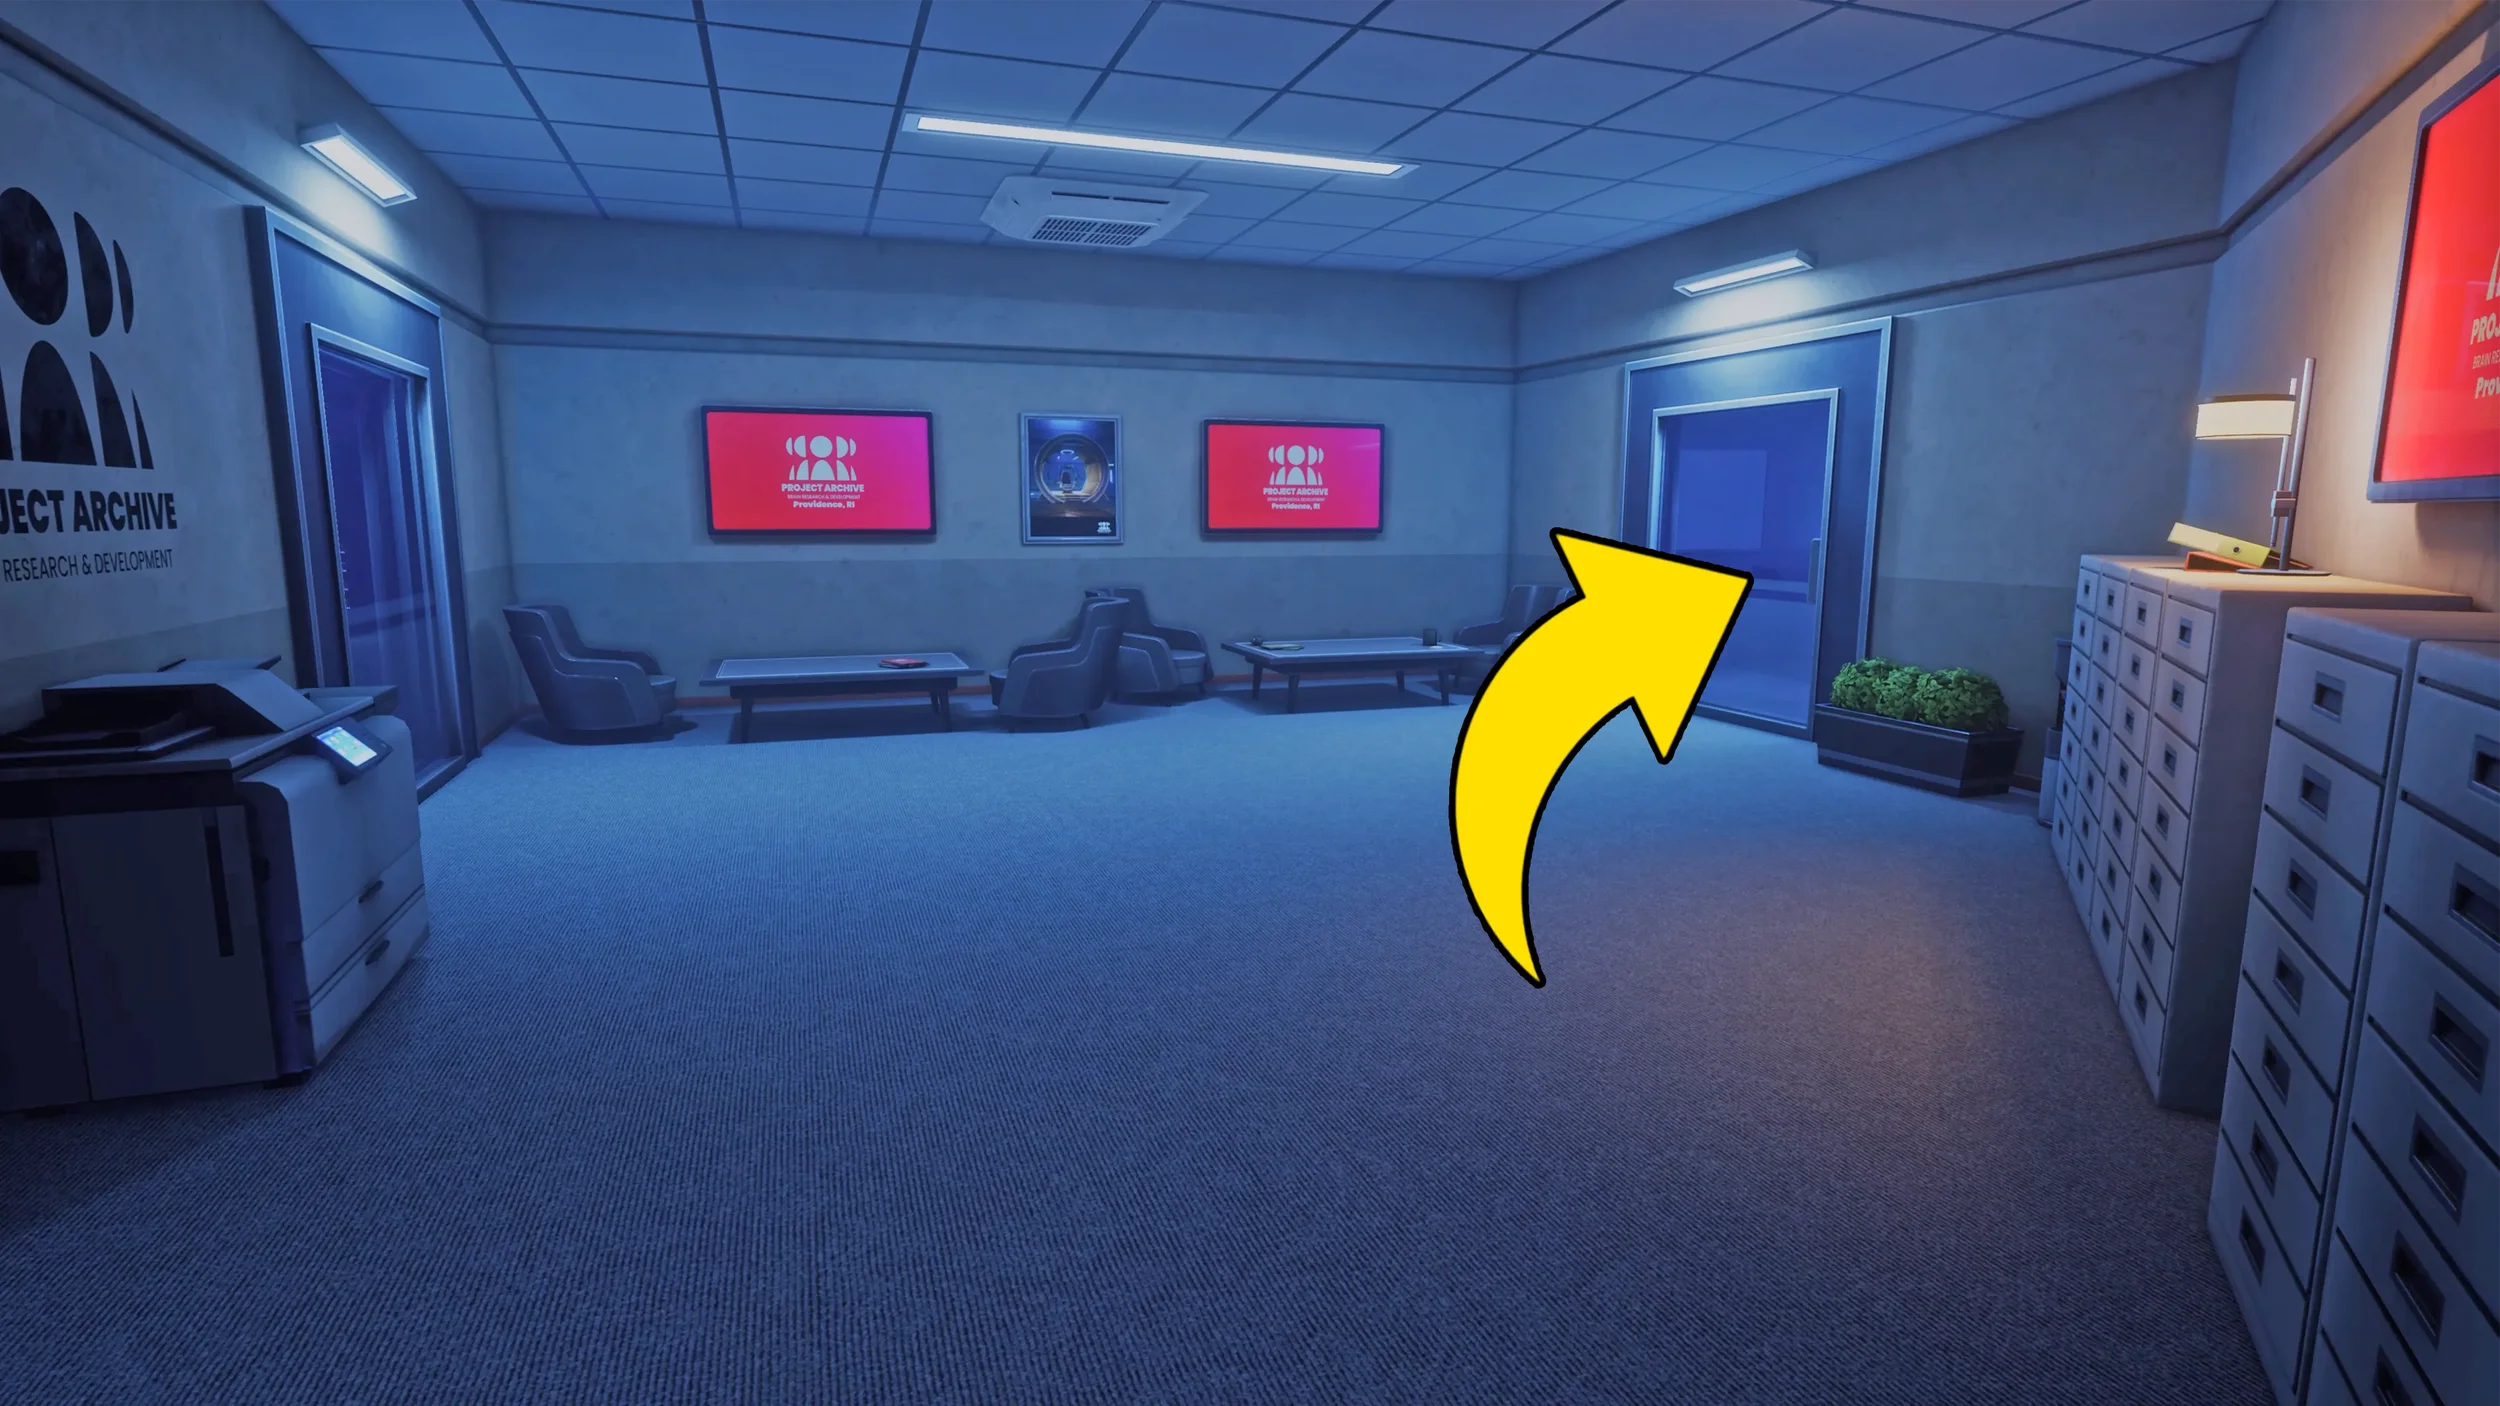
Exit this room and go to your right, then go inside the last door on the right to enter another office.
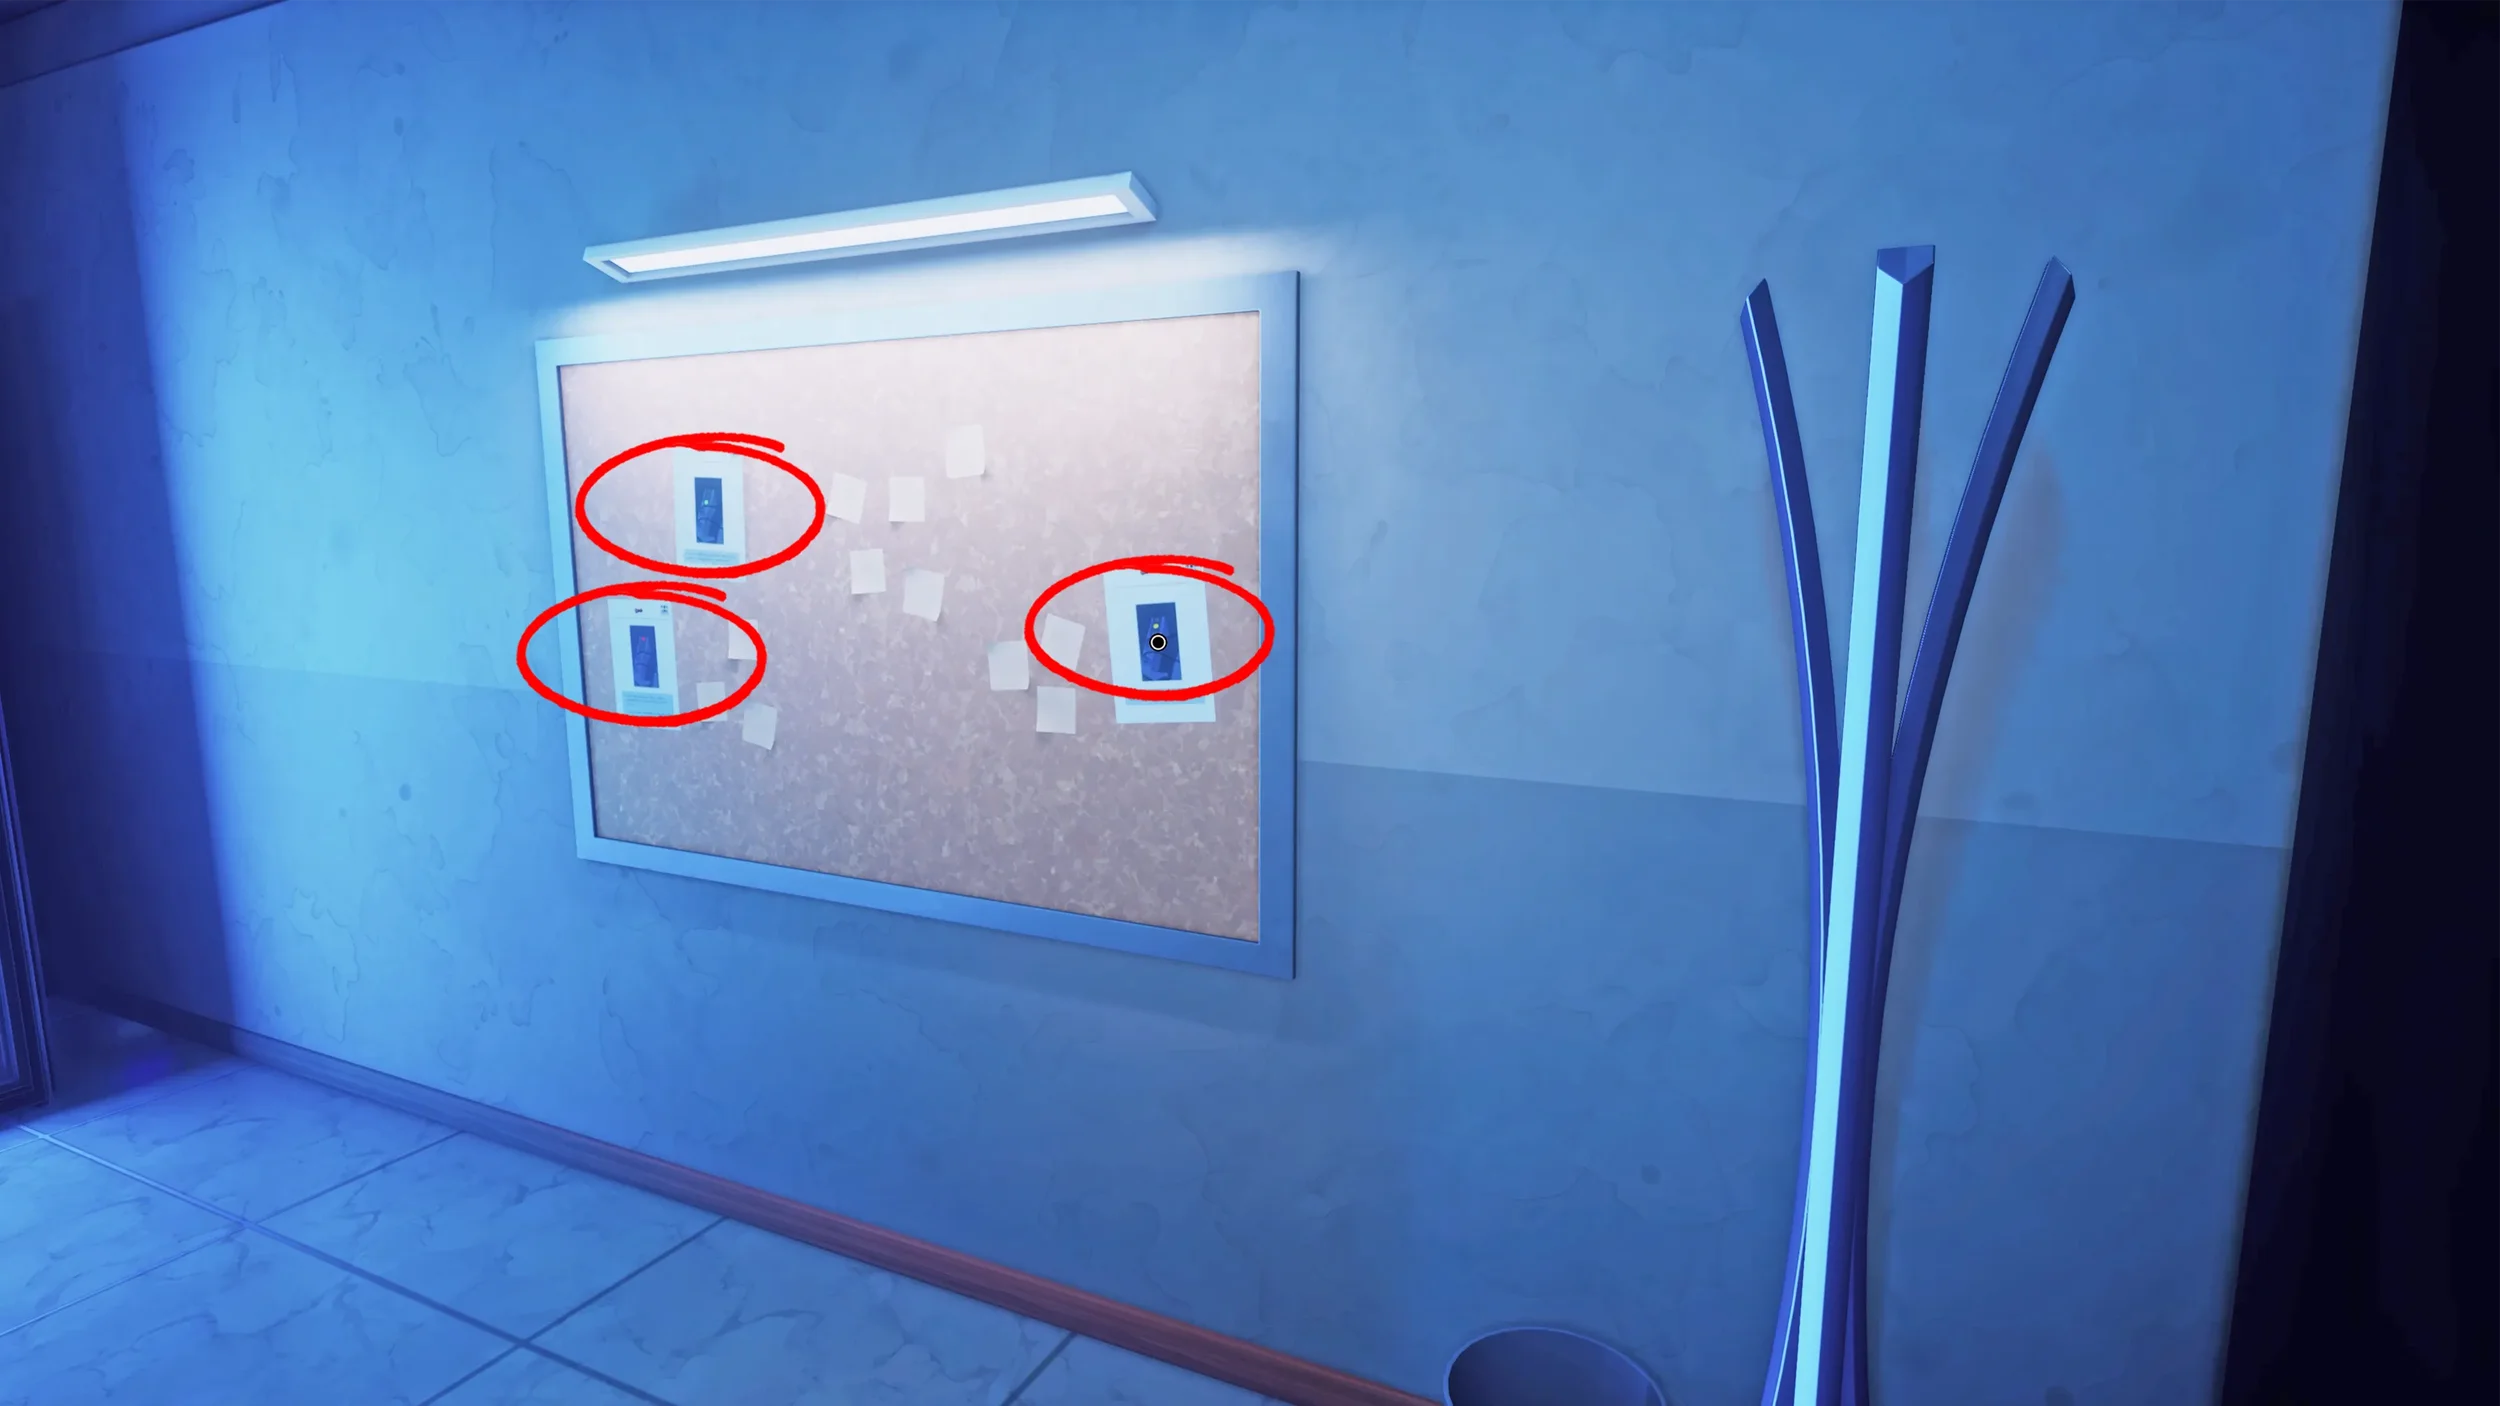
Inside this office you will find another 3 clues pinned to a board.
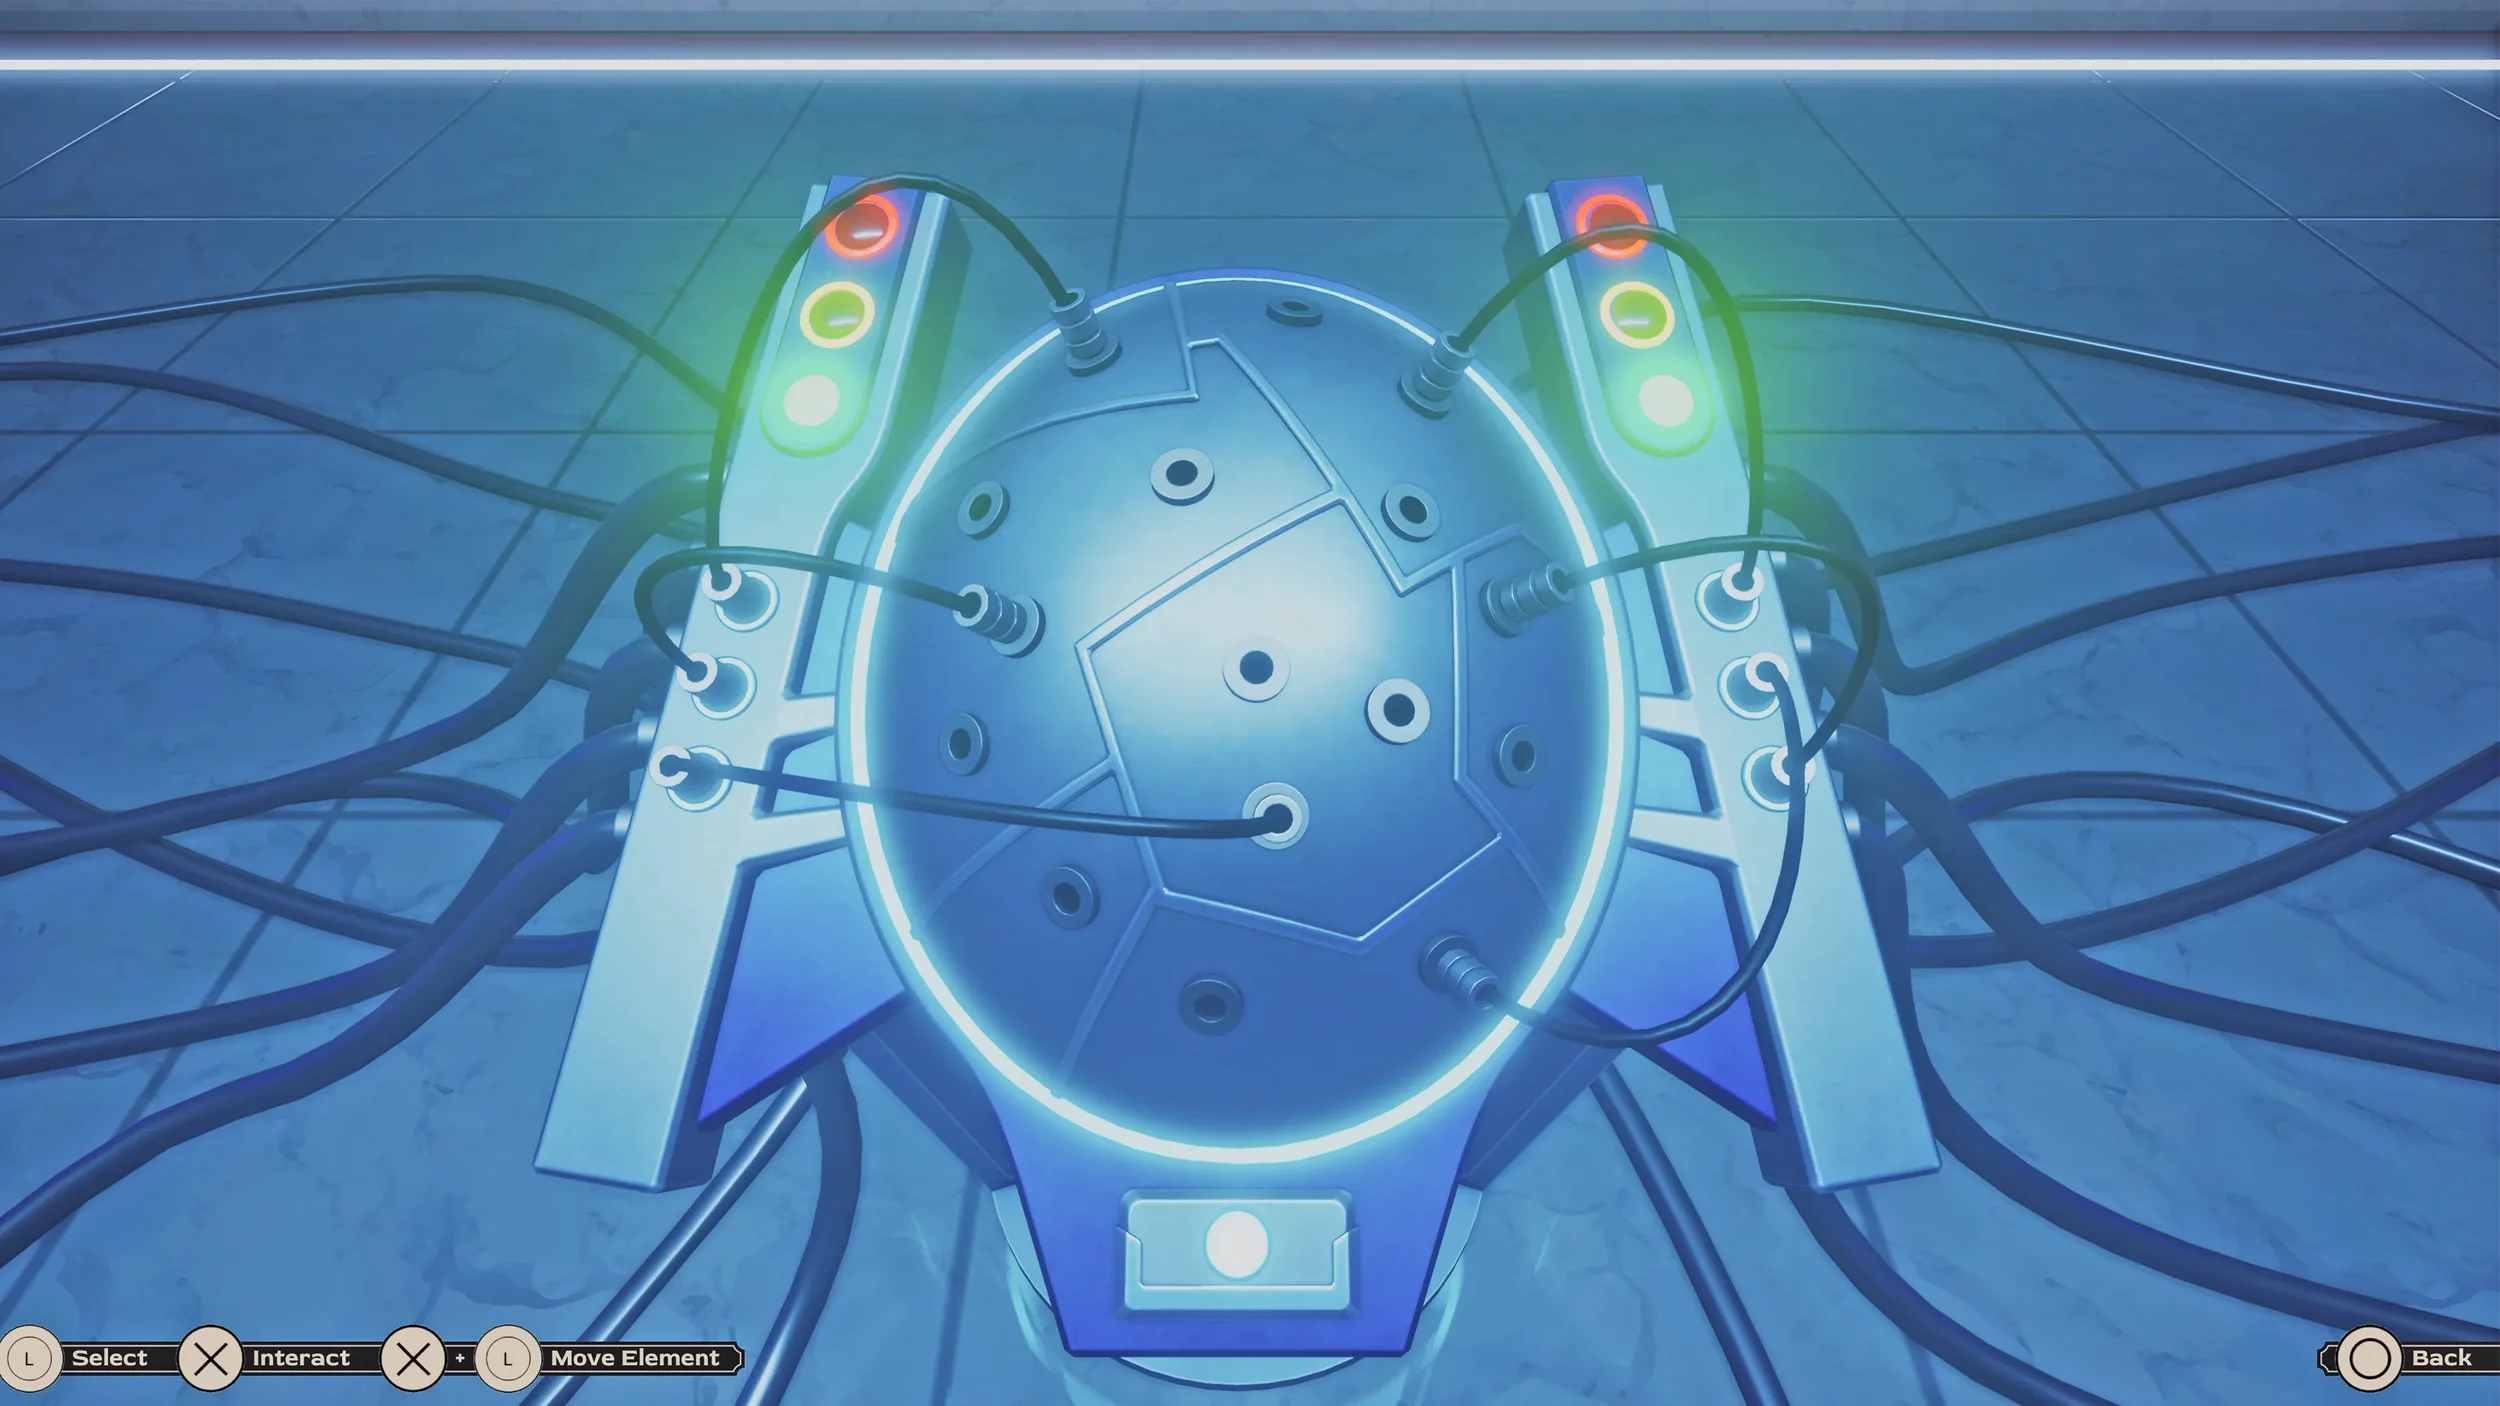
You now have all of the clues in this Chapter, so it is time to solve the final puzzle, there isn’t really much more to explain about this puzzle that isn’t already explained in the clues.
It is a logic puzzle that has the rules written out in the Clues Journal:
Red Light: A cable is plugged in a region with no correct sockets (the red light overrides the Green Light).
Yellow Light: All cables are plugged into valid regions.
Green Light: At least one cable is plugged into a valid socket.
If you don’t want to waste time figuring this out I will leave an image here showing the solution so you can just copy it:
Now all that is left to do is walk back to the chair you started in to finish this Chapter, just one more Chapter left.
"Imposter Syndrome" Trophy and the "This Timeline's Getting Pretty Confusing..." Trophy for finishing Chapter 5.
Chapter 4 ⮨ ➥ Chapter 6