
Call of The Elder Gods 100% Walkthrough - Chapter 4

Unspeakable Cults Trophy
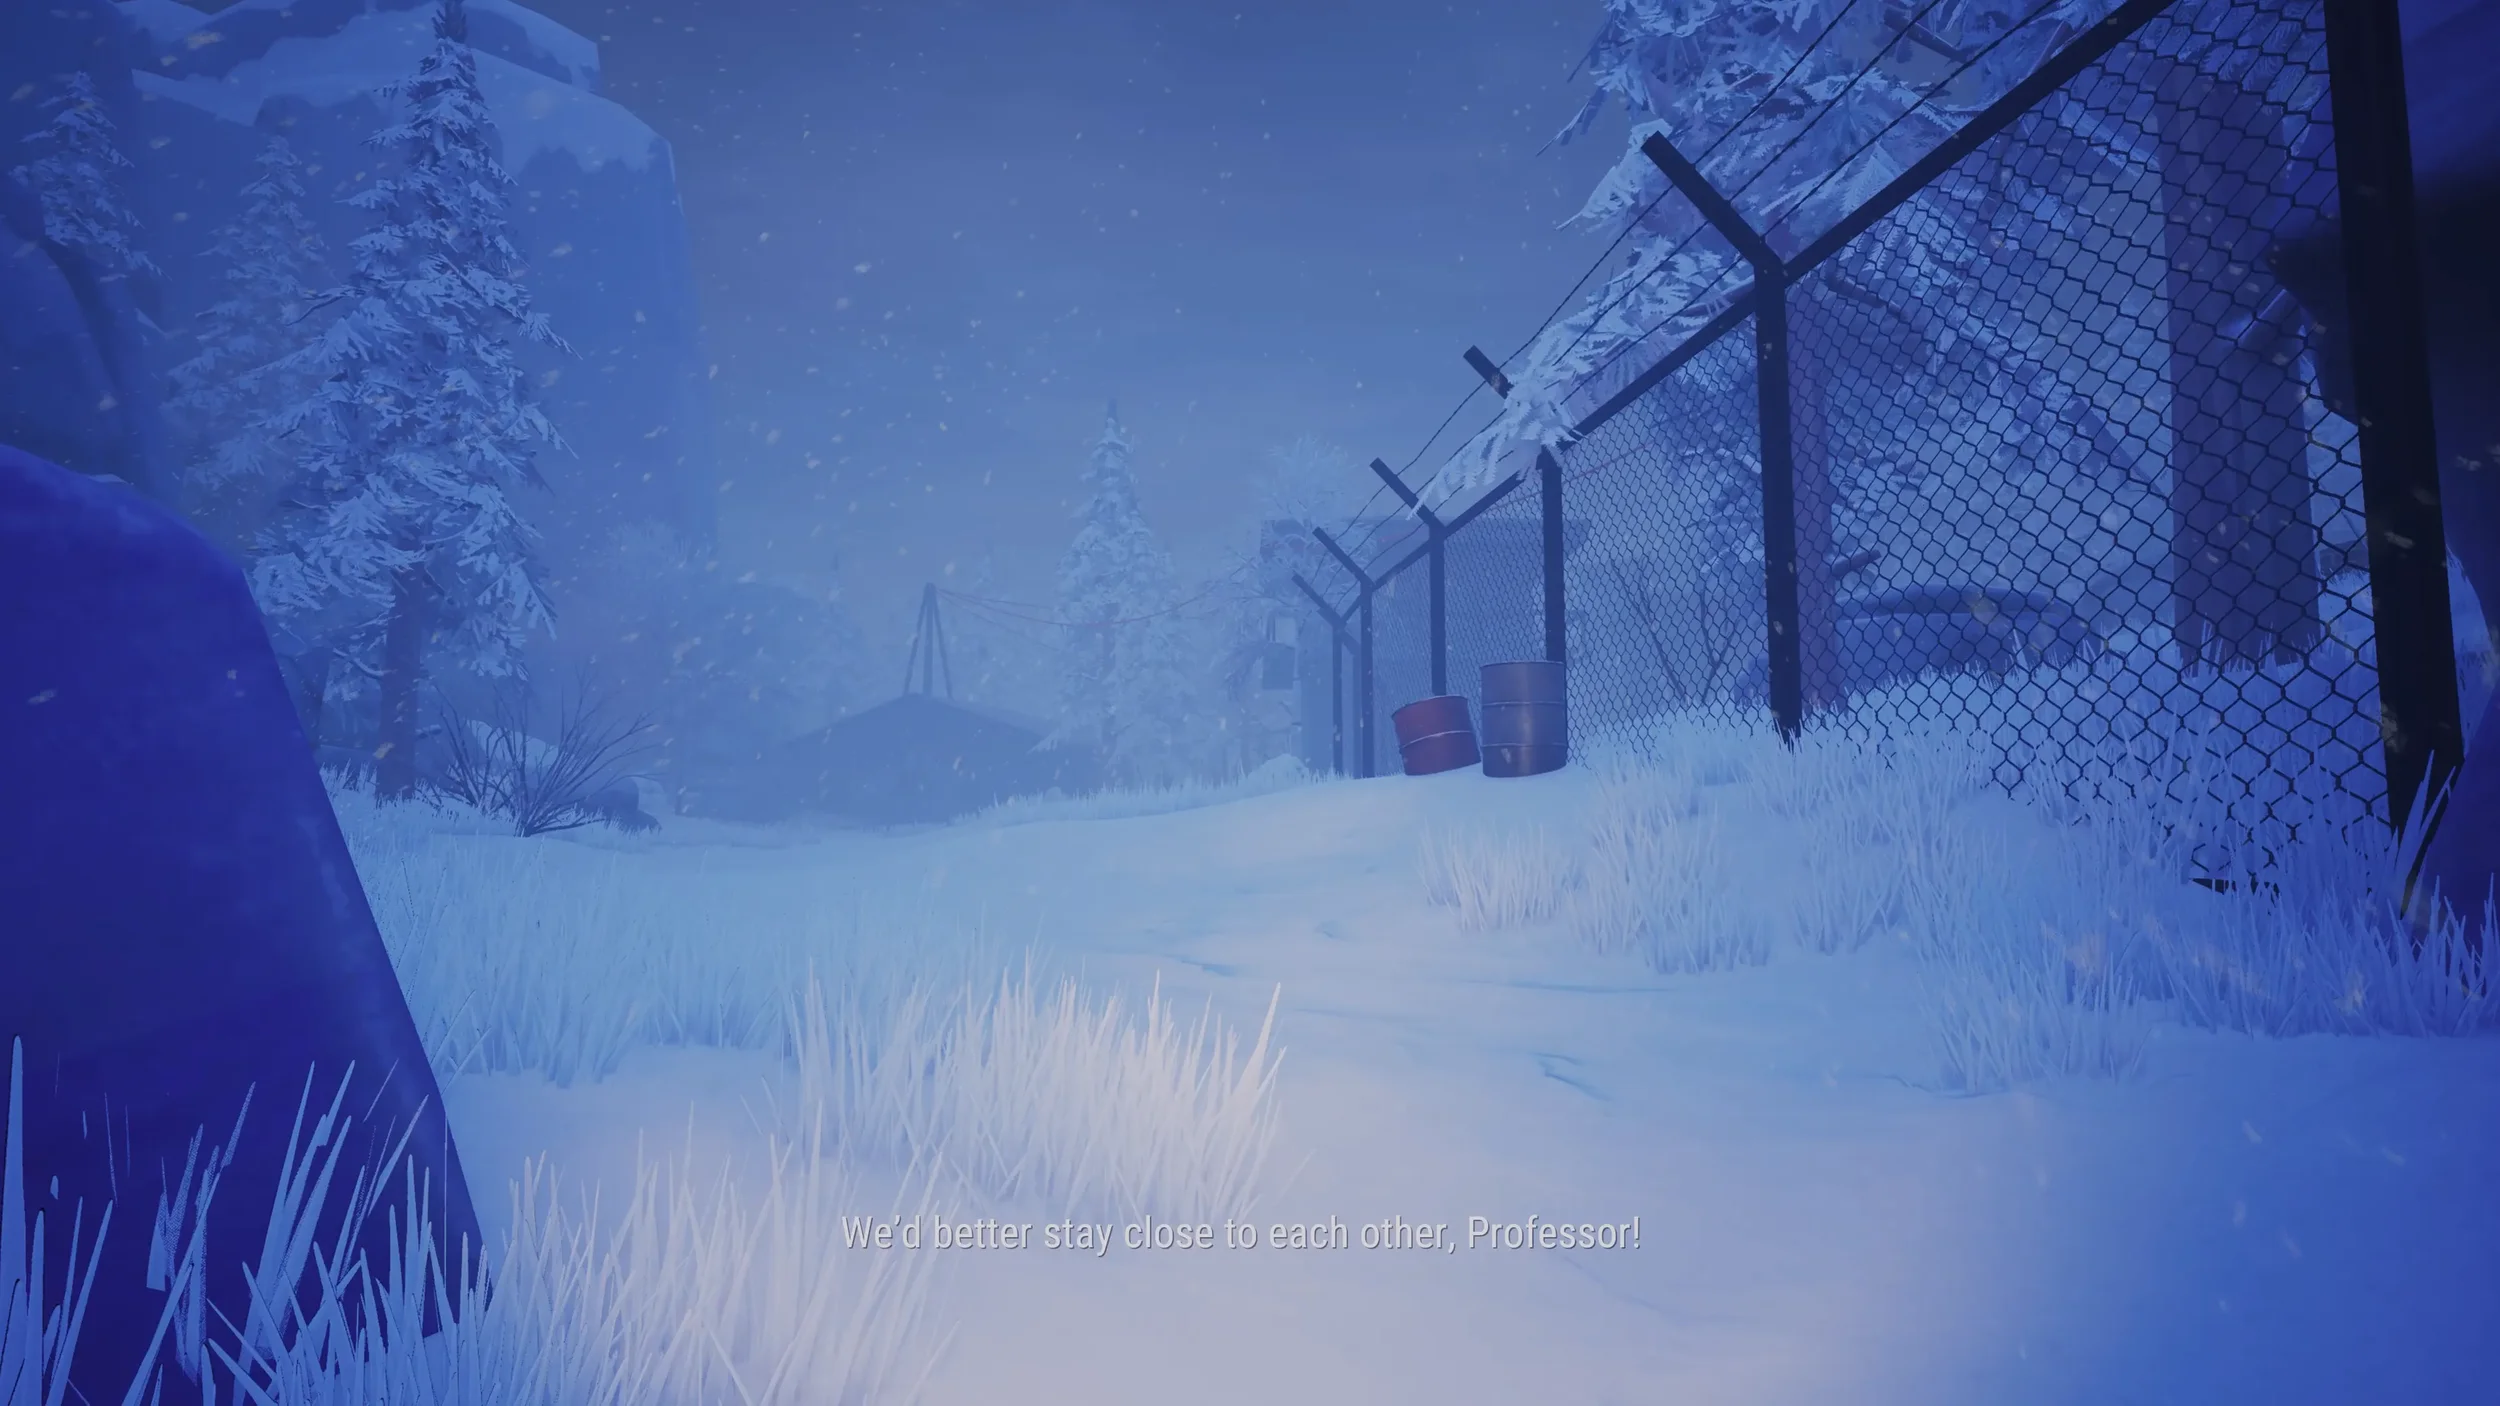
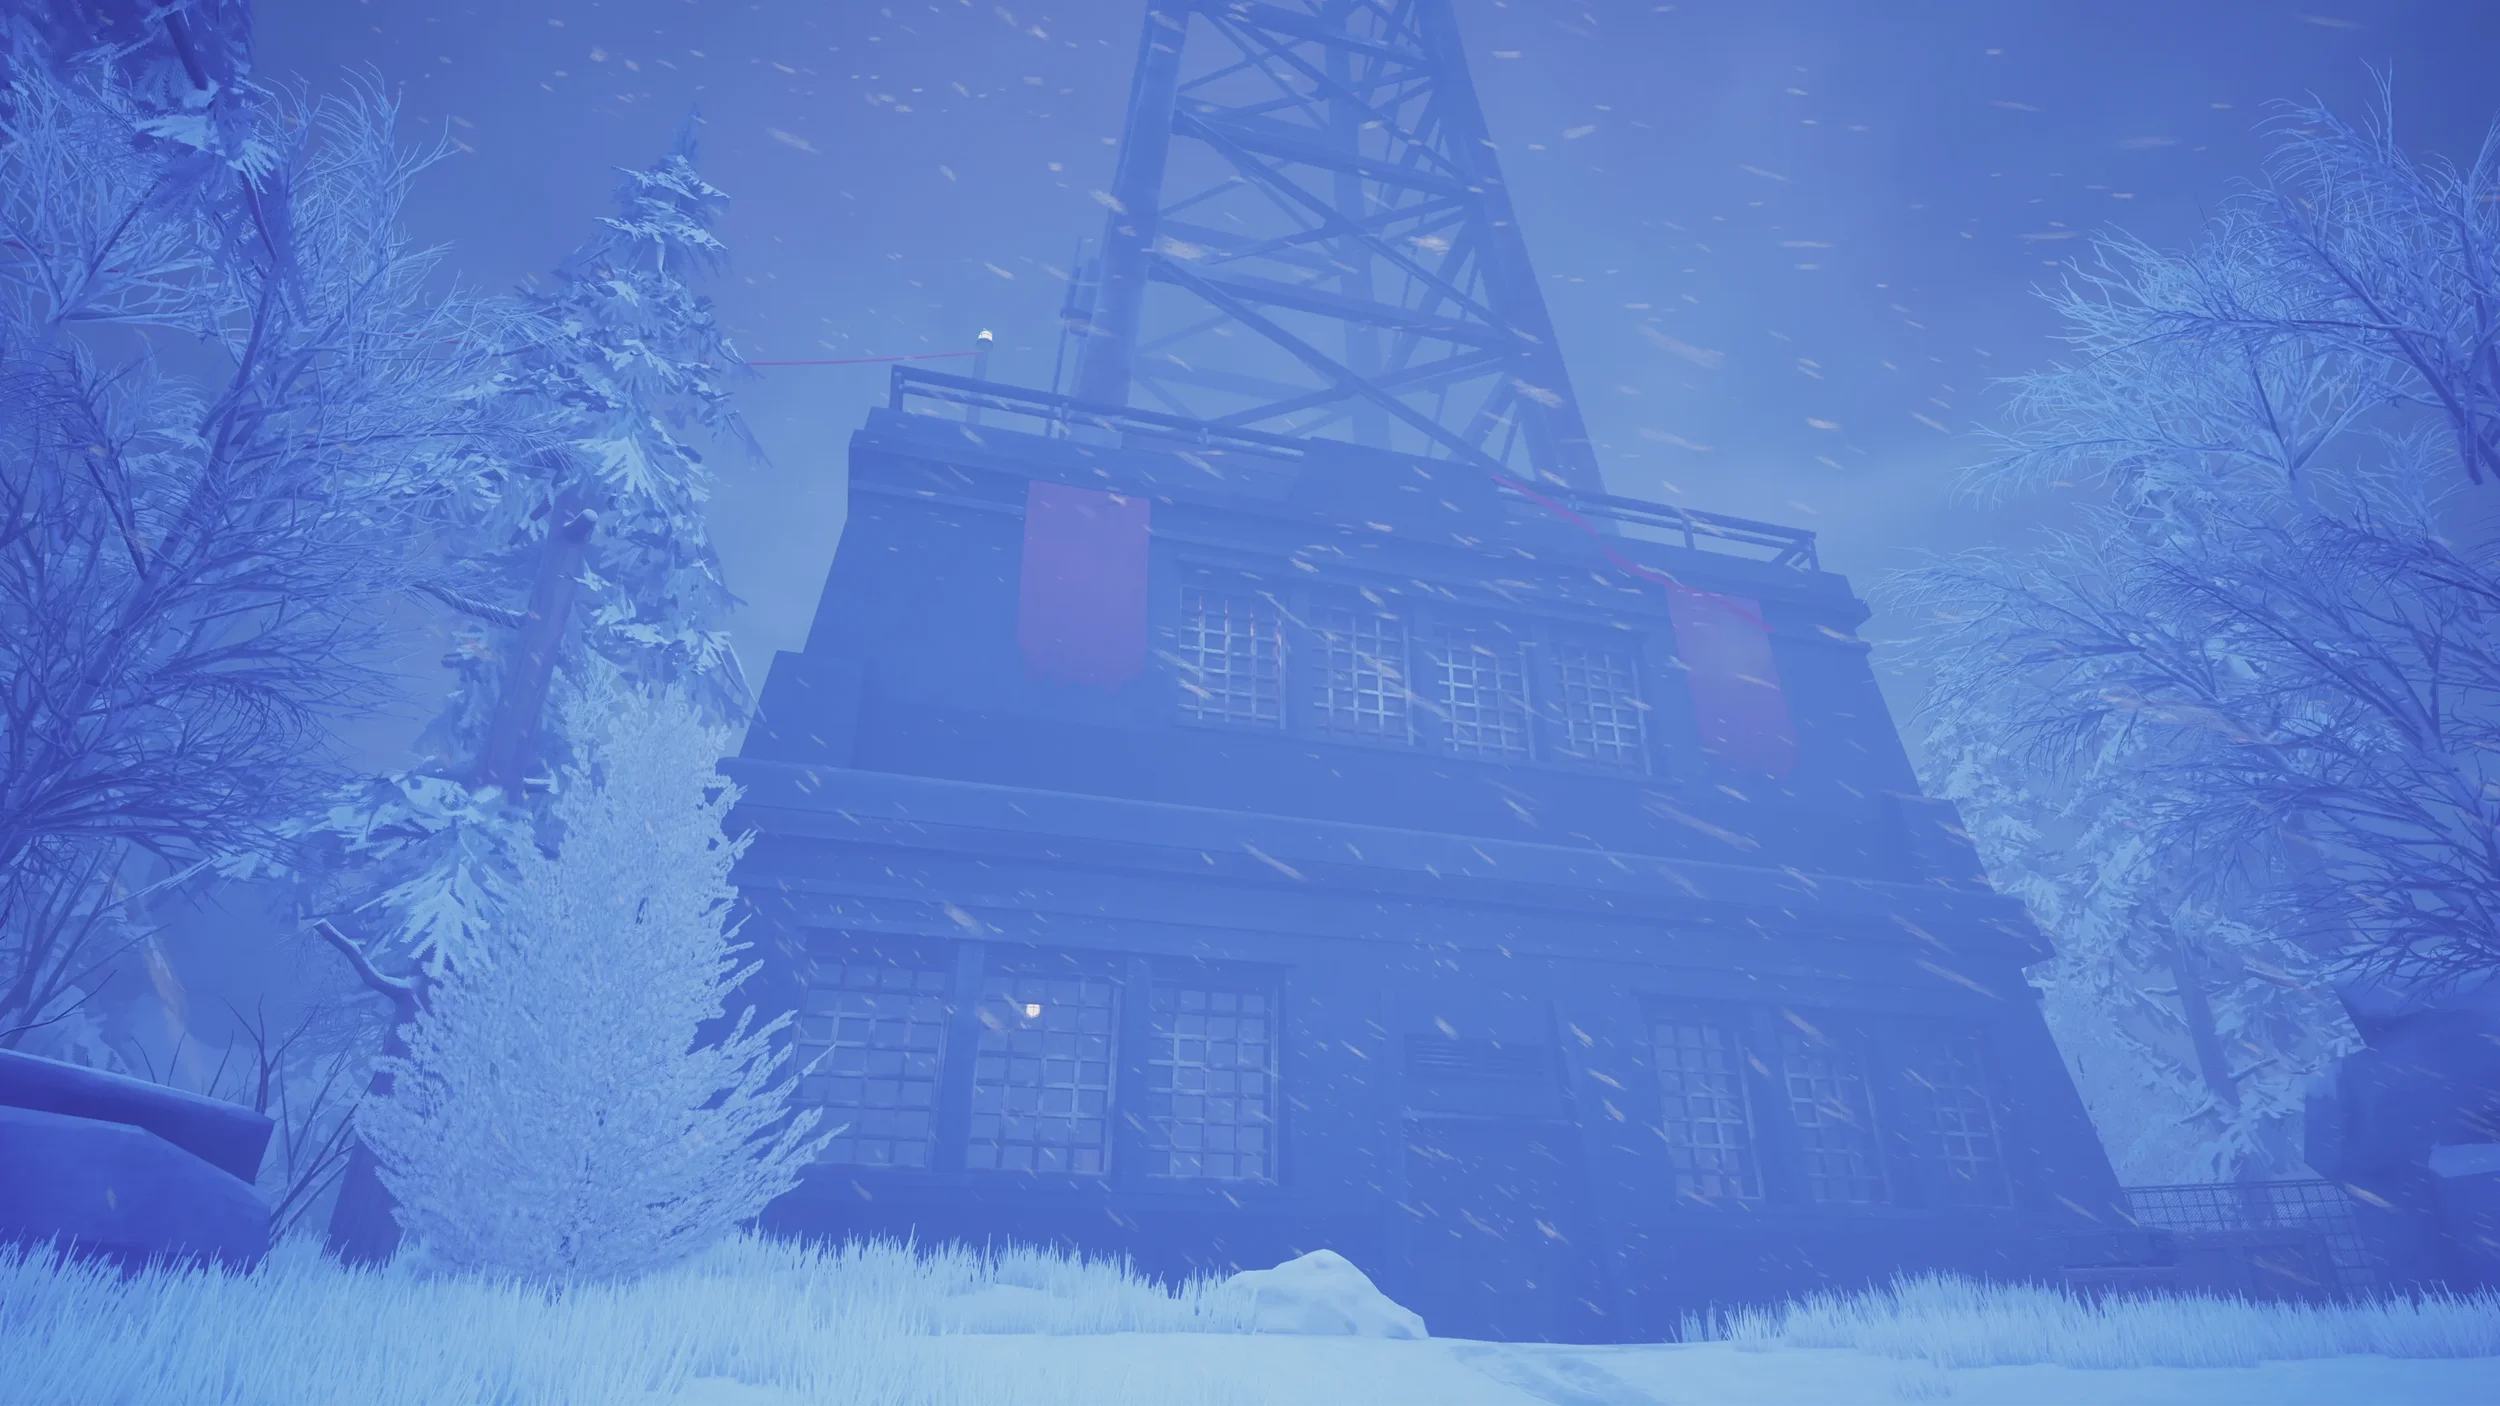
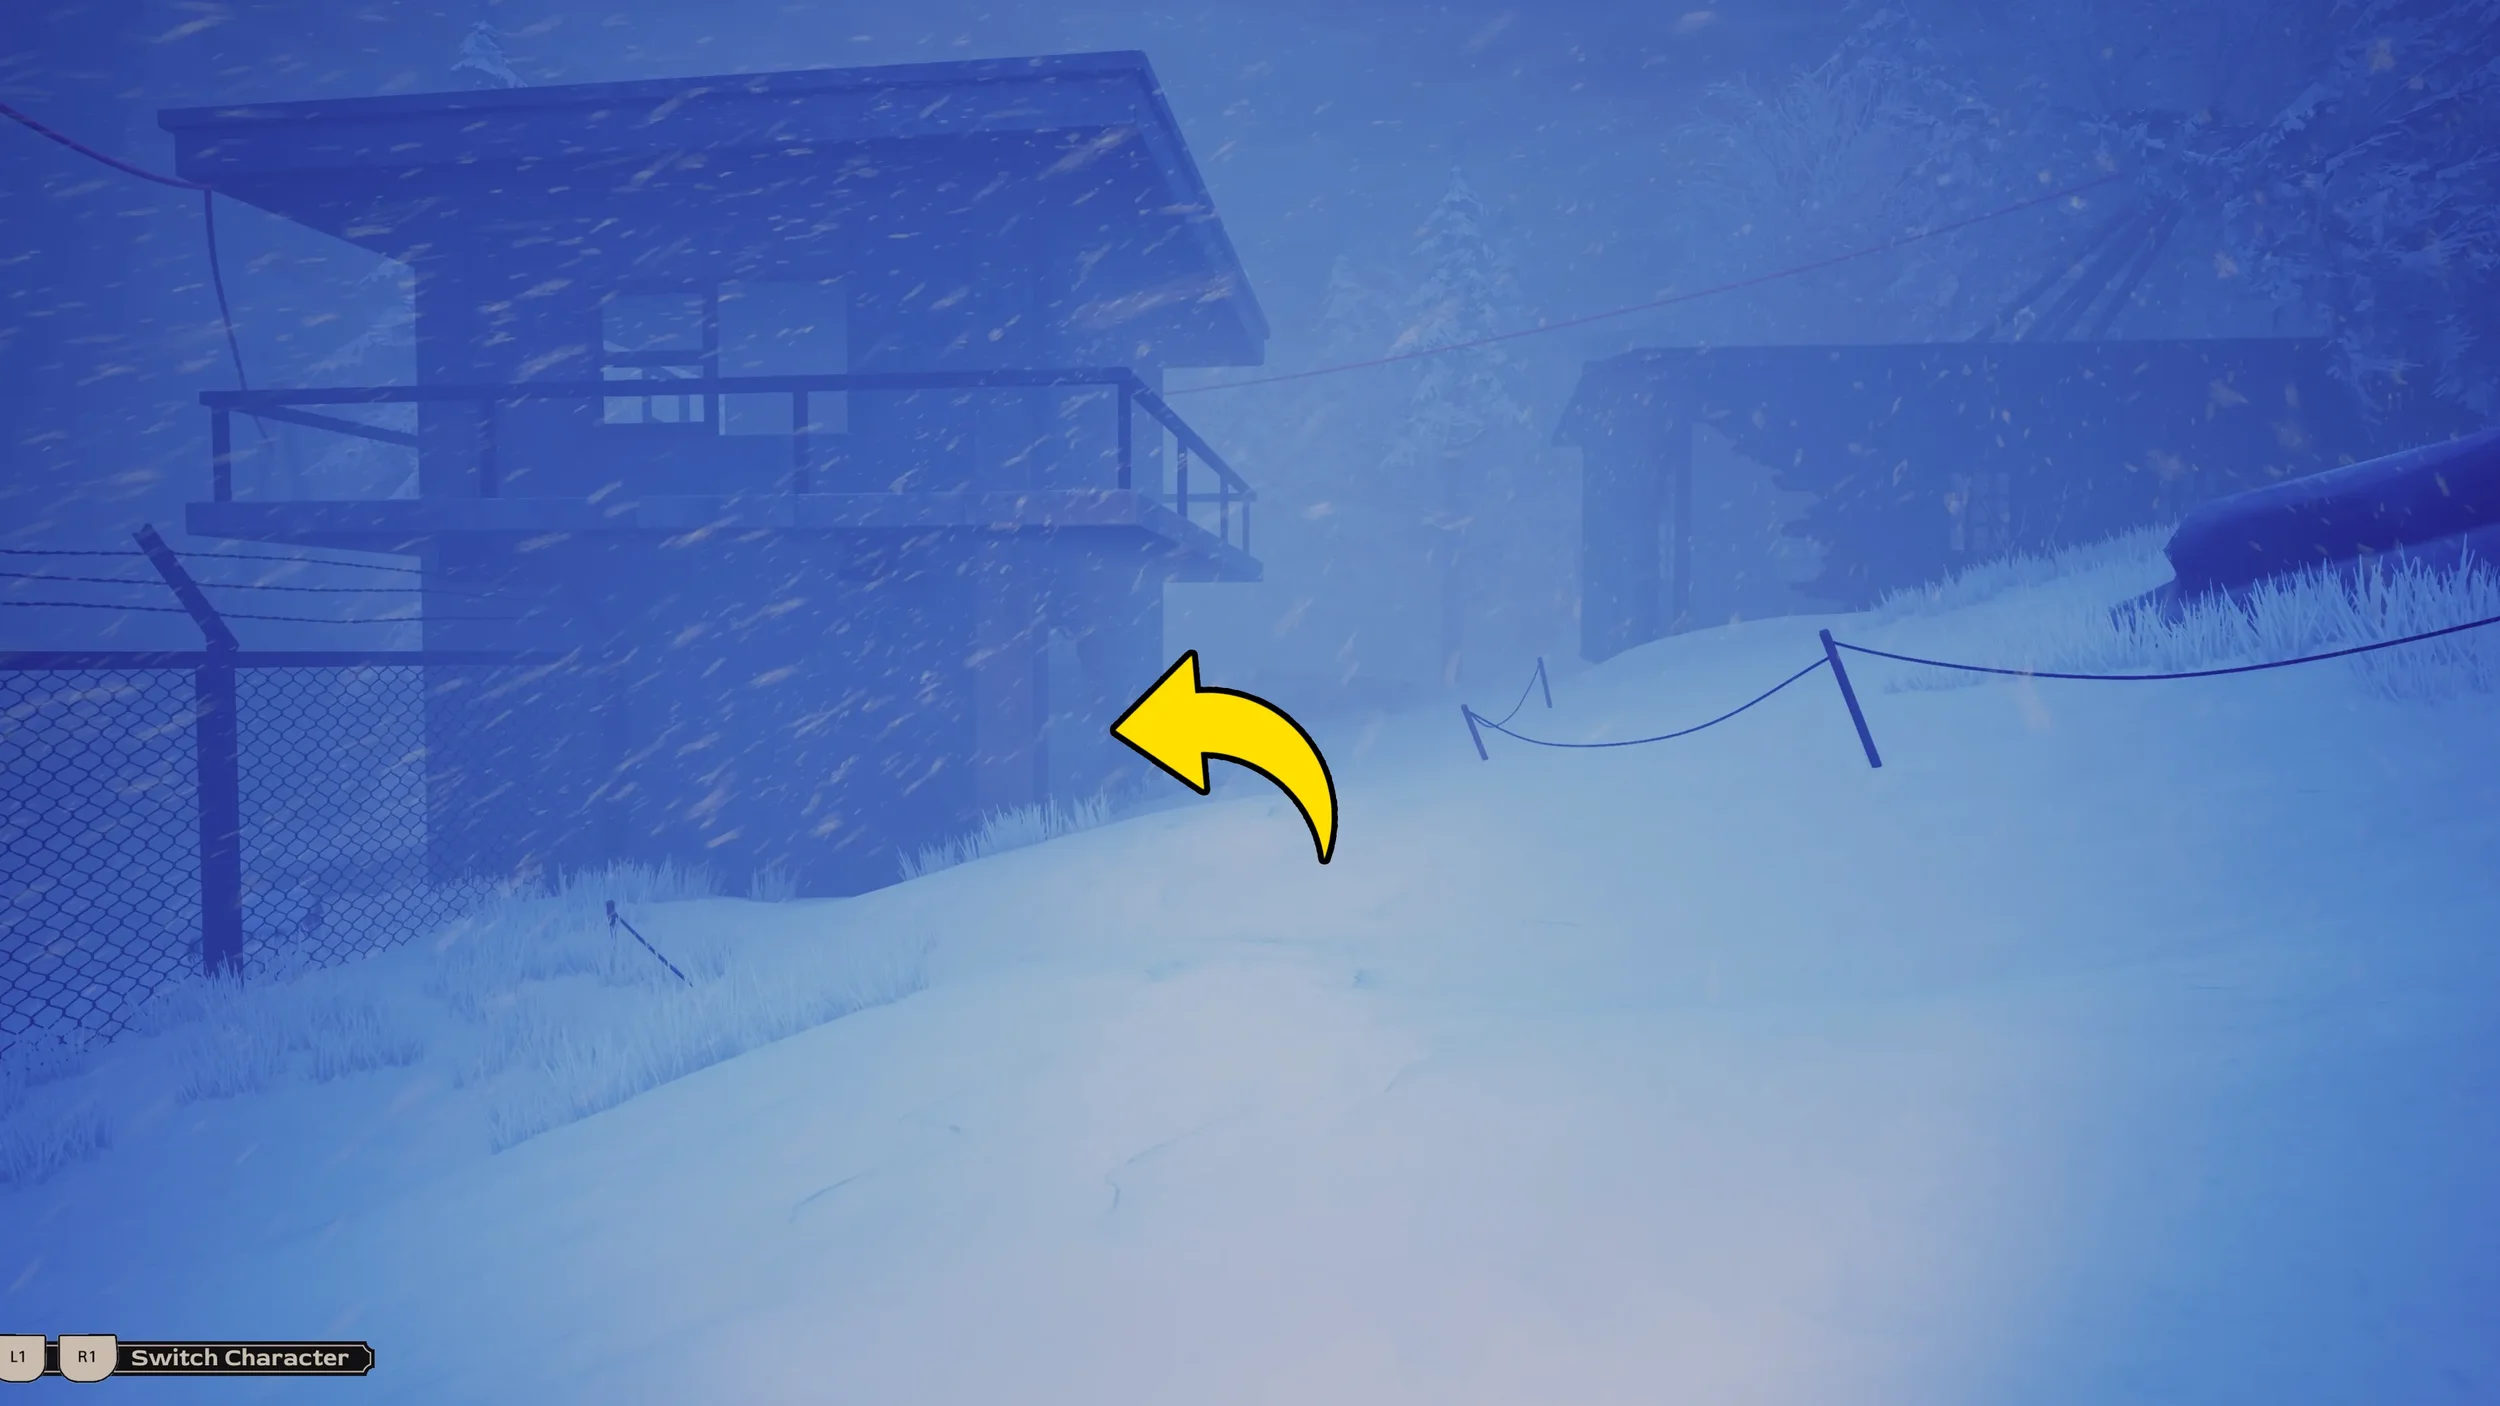
You will start Chapter 4 in an open snowfield, keep walking forward on the main path and you will soon reach a metal fence.
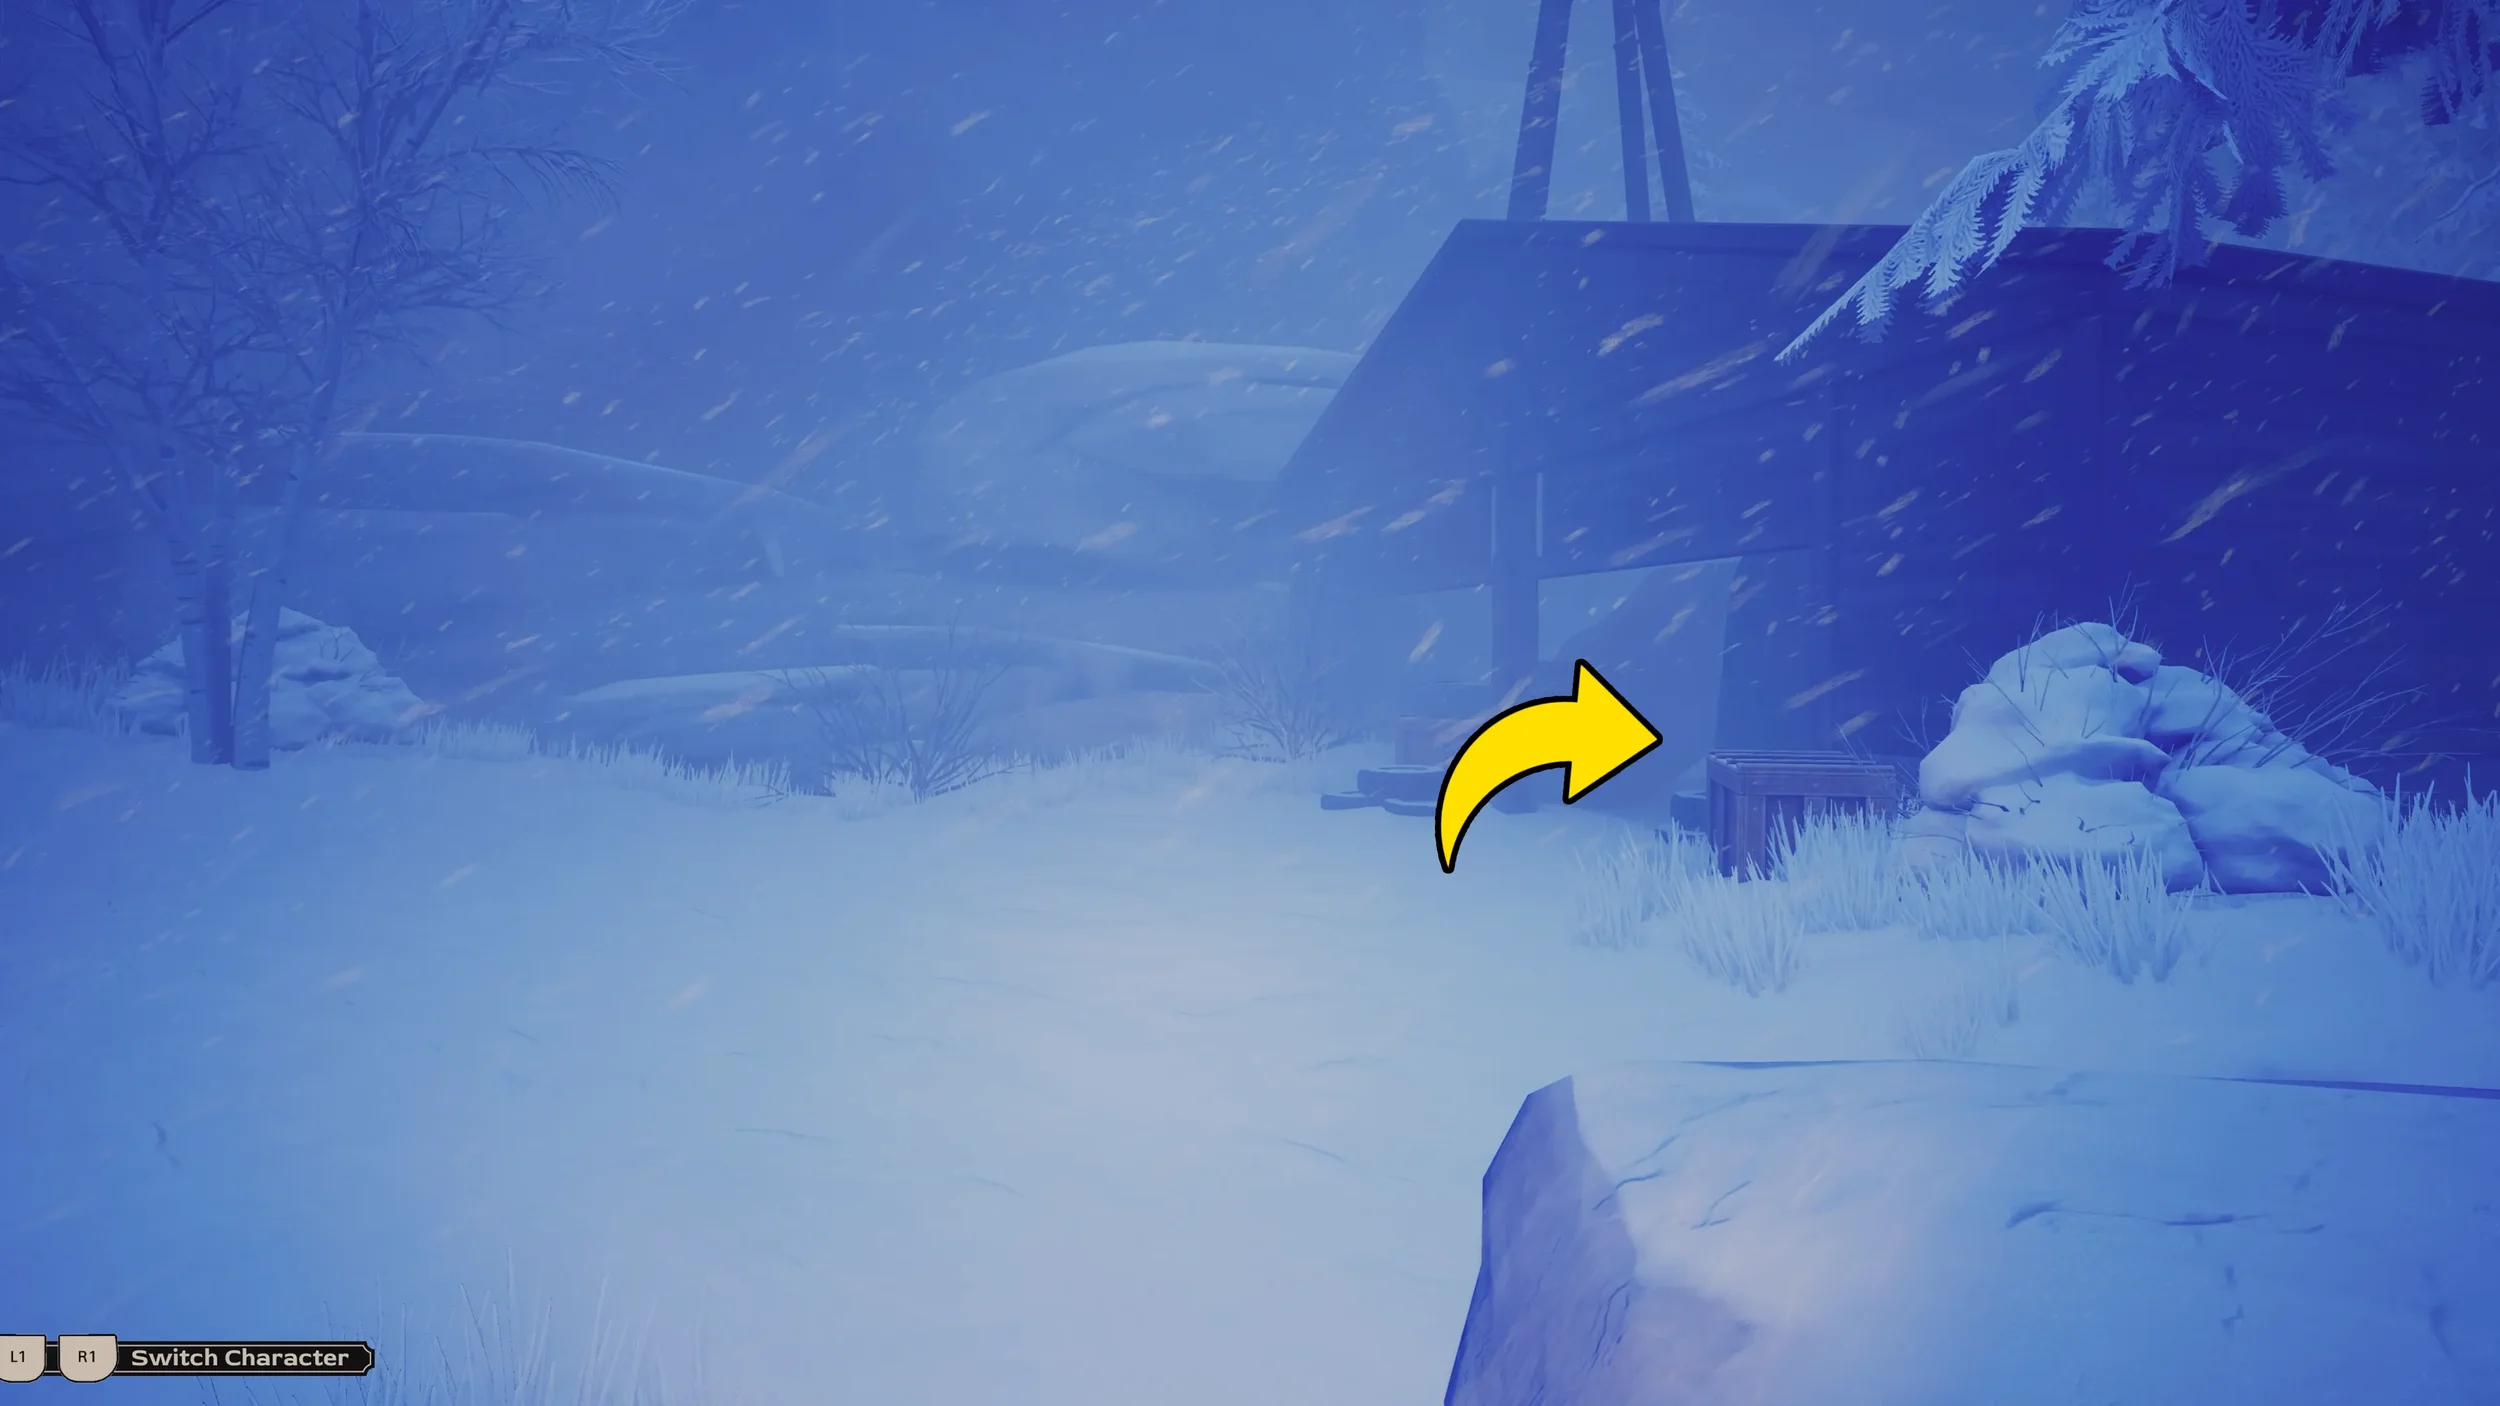
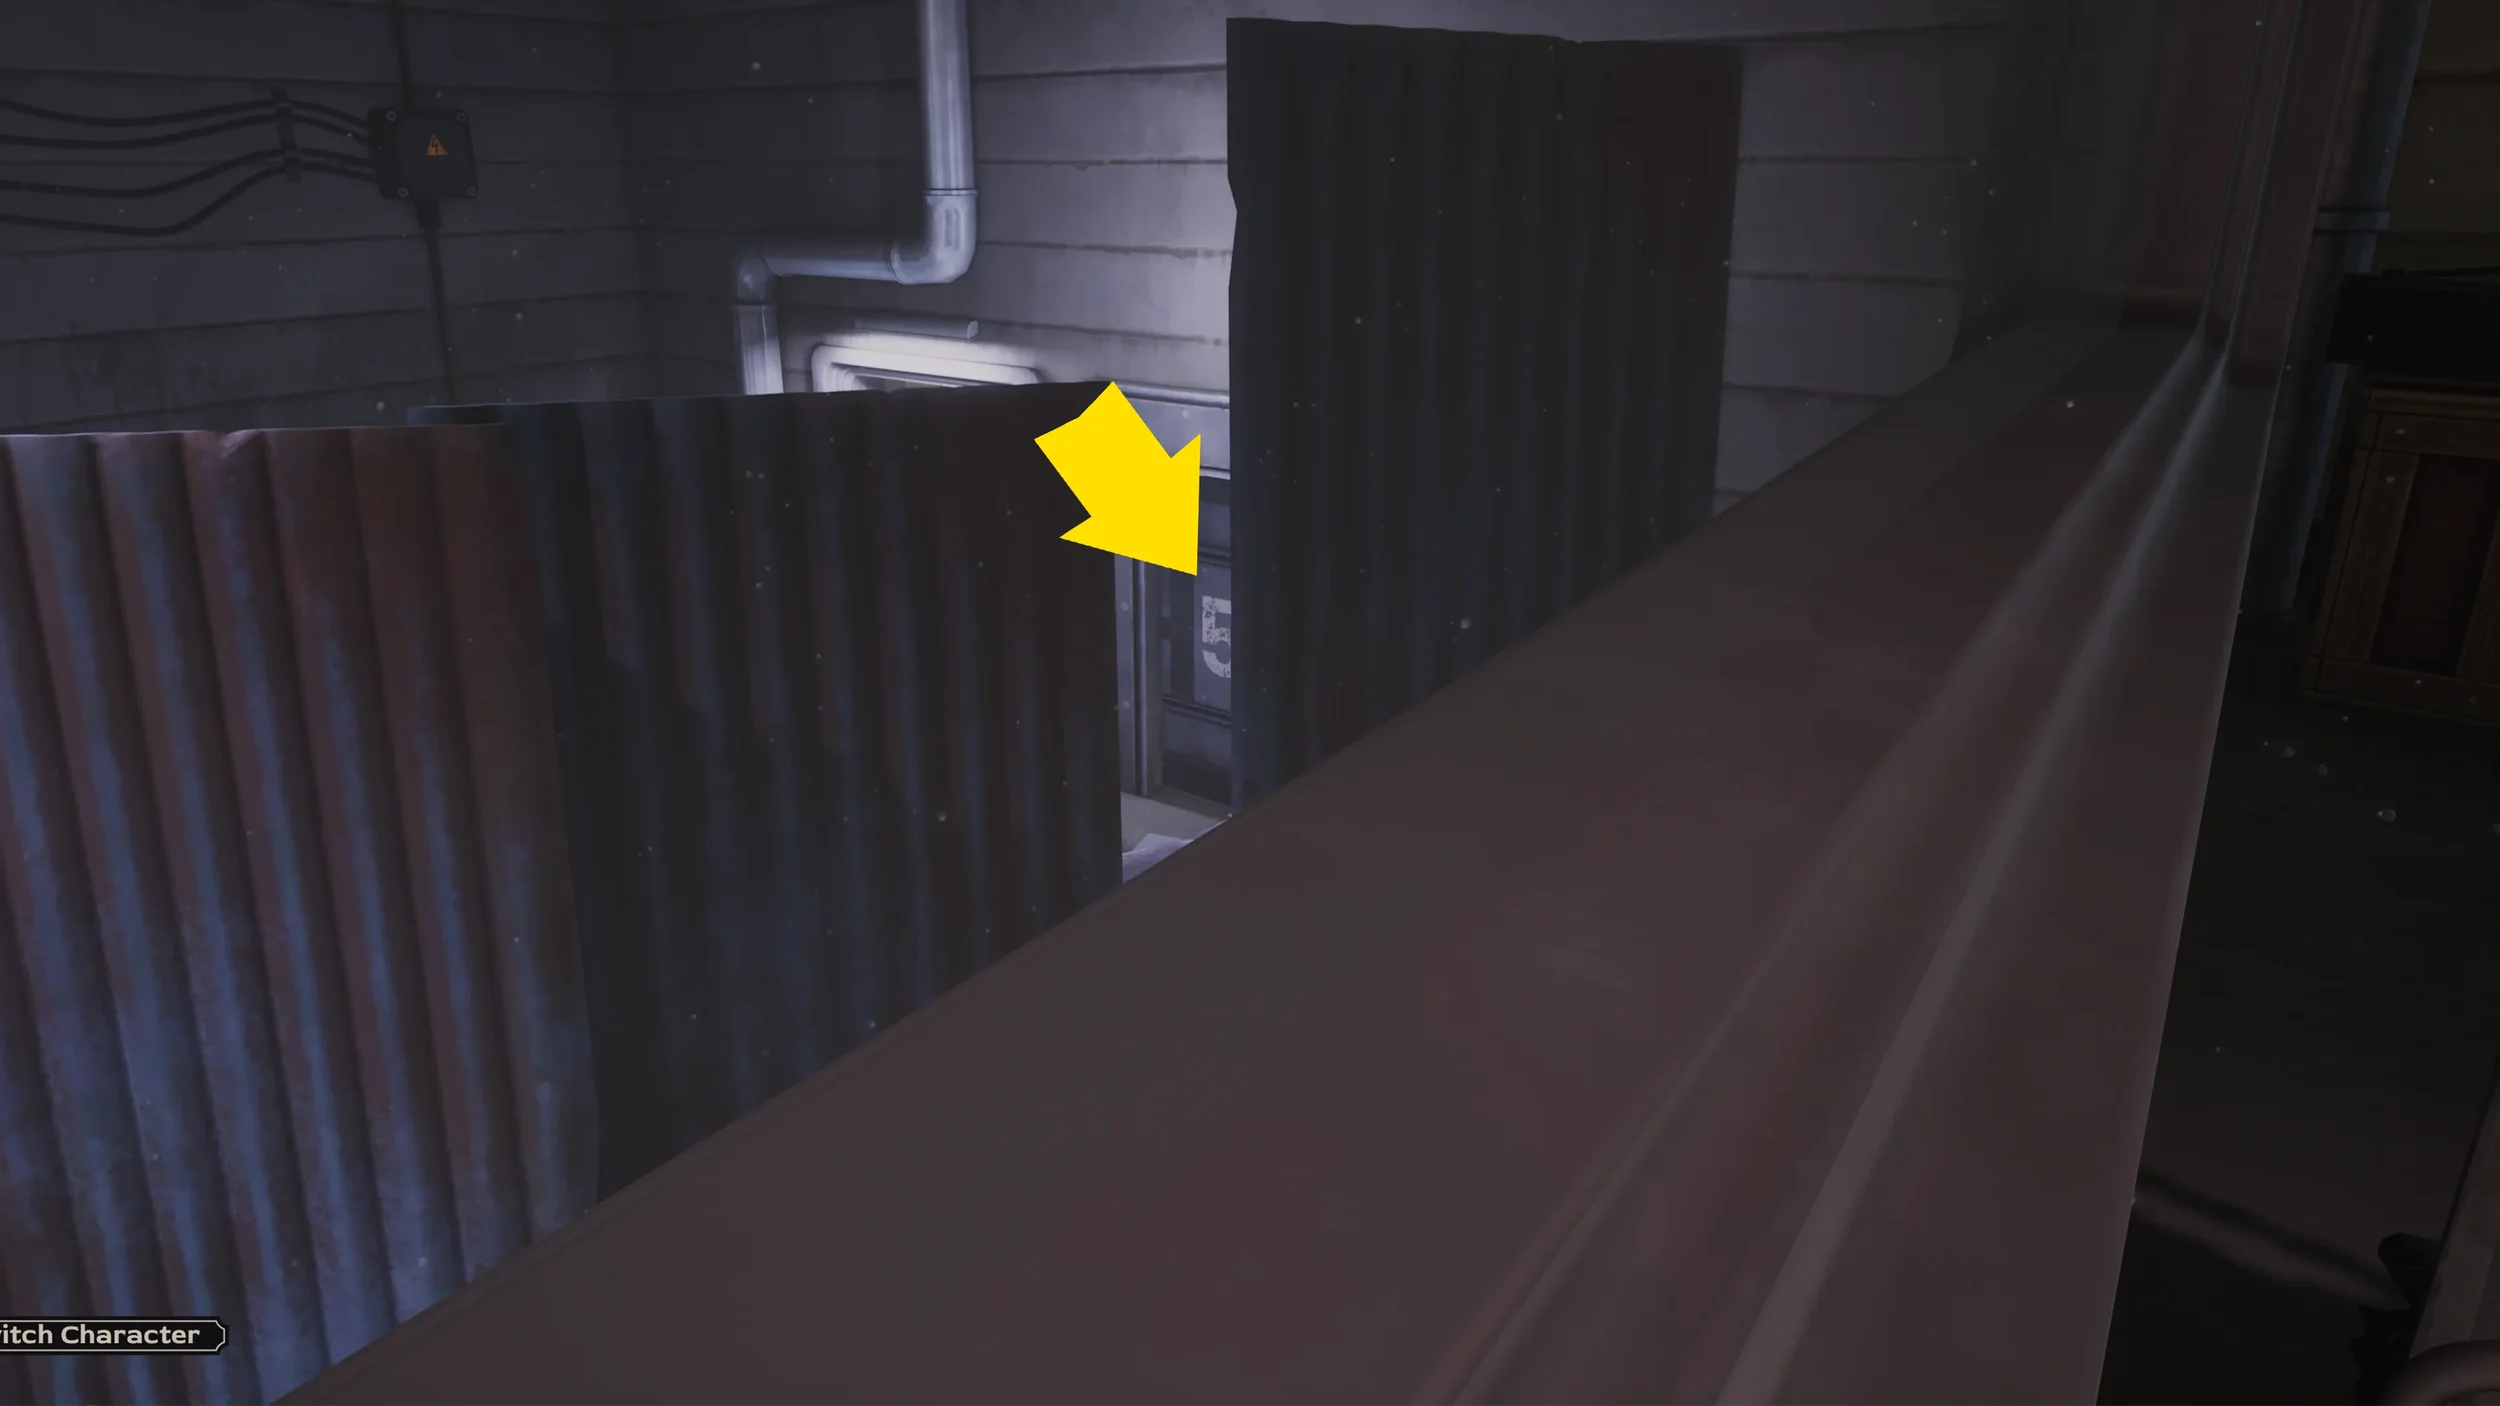
Follow the metal fence to the left until you see 2 buildings ahead, for now go through the one on the right hand side to reach the next area.
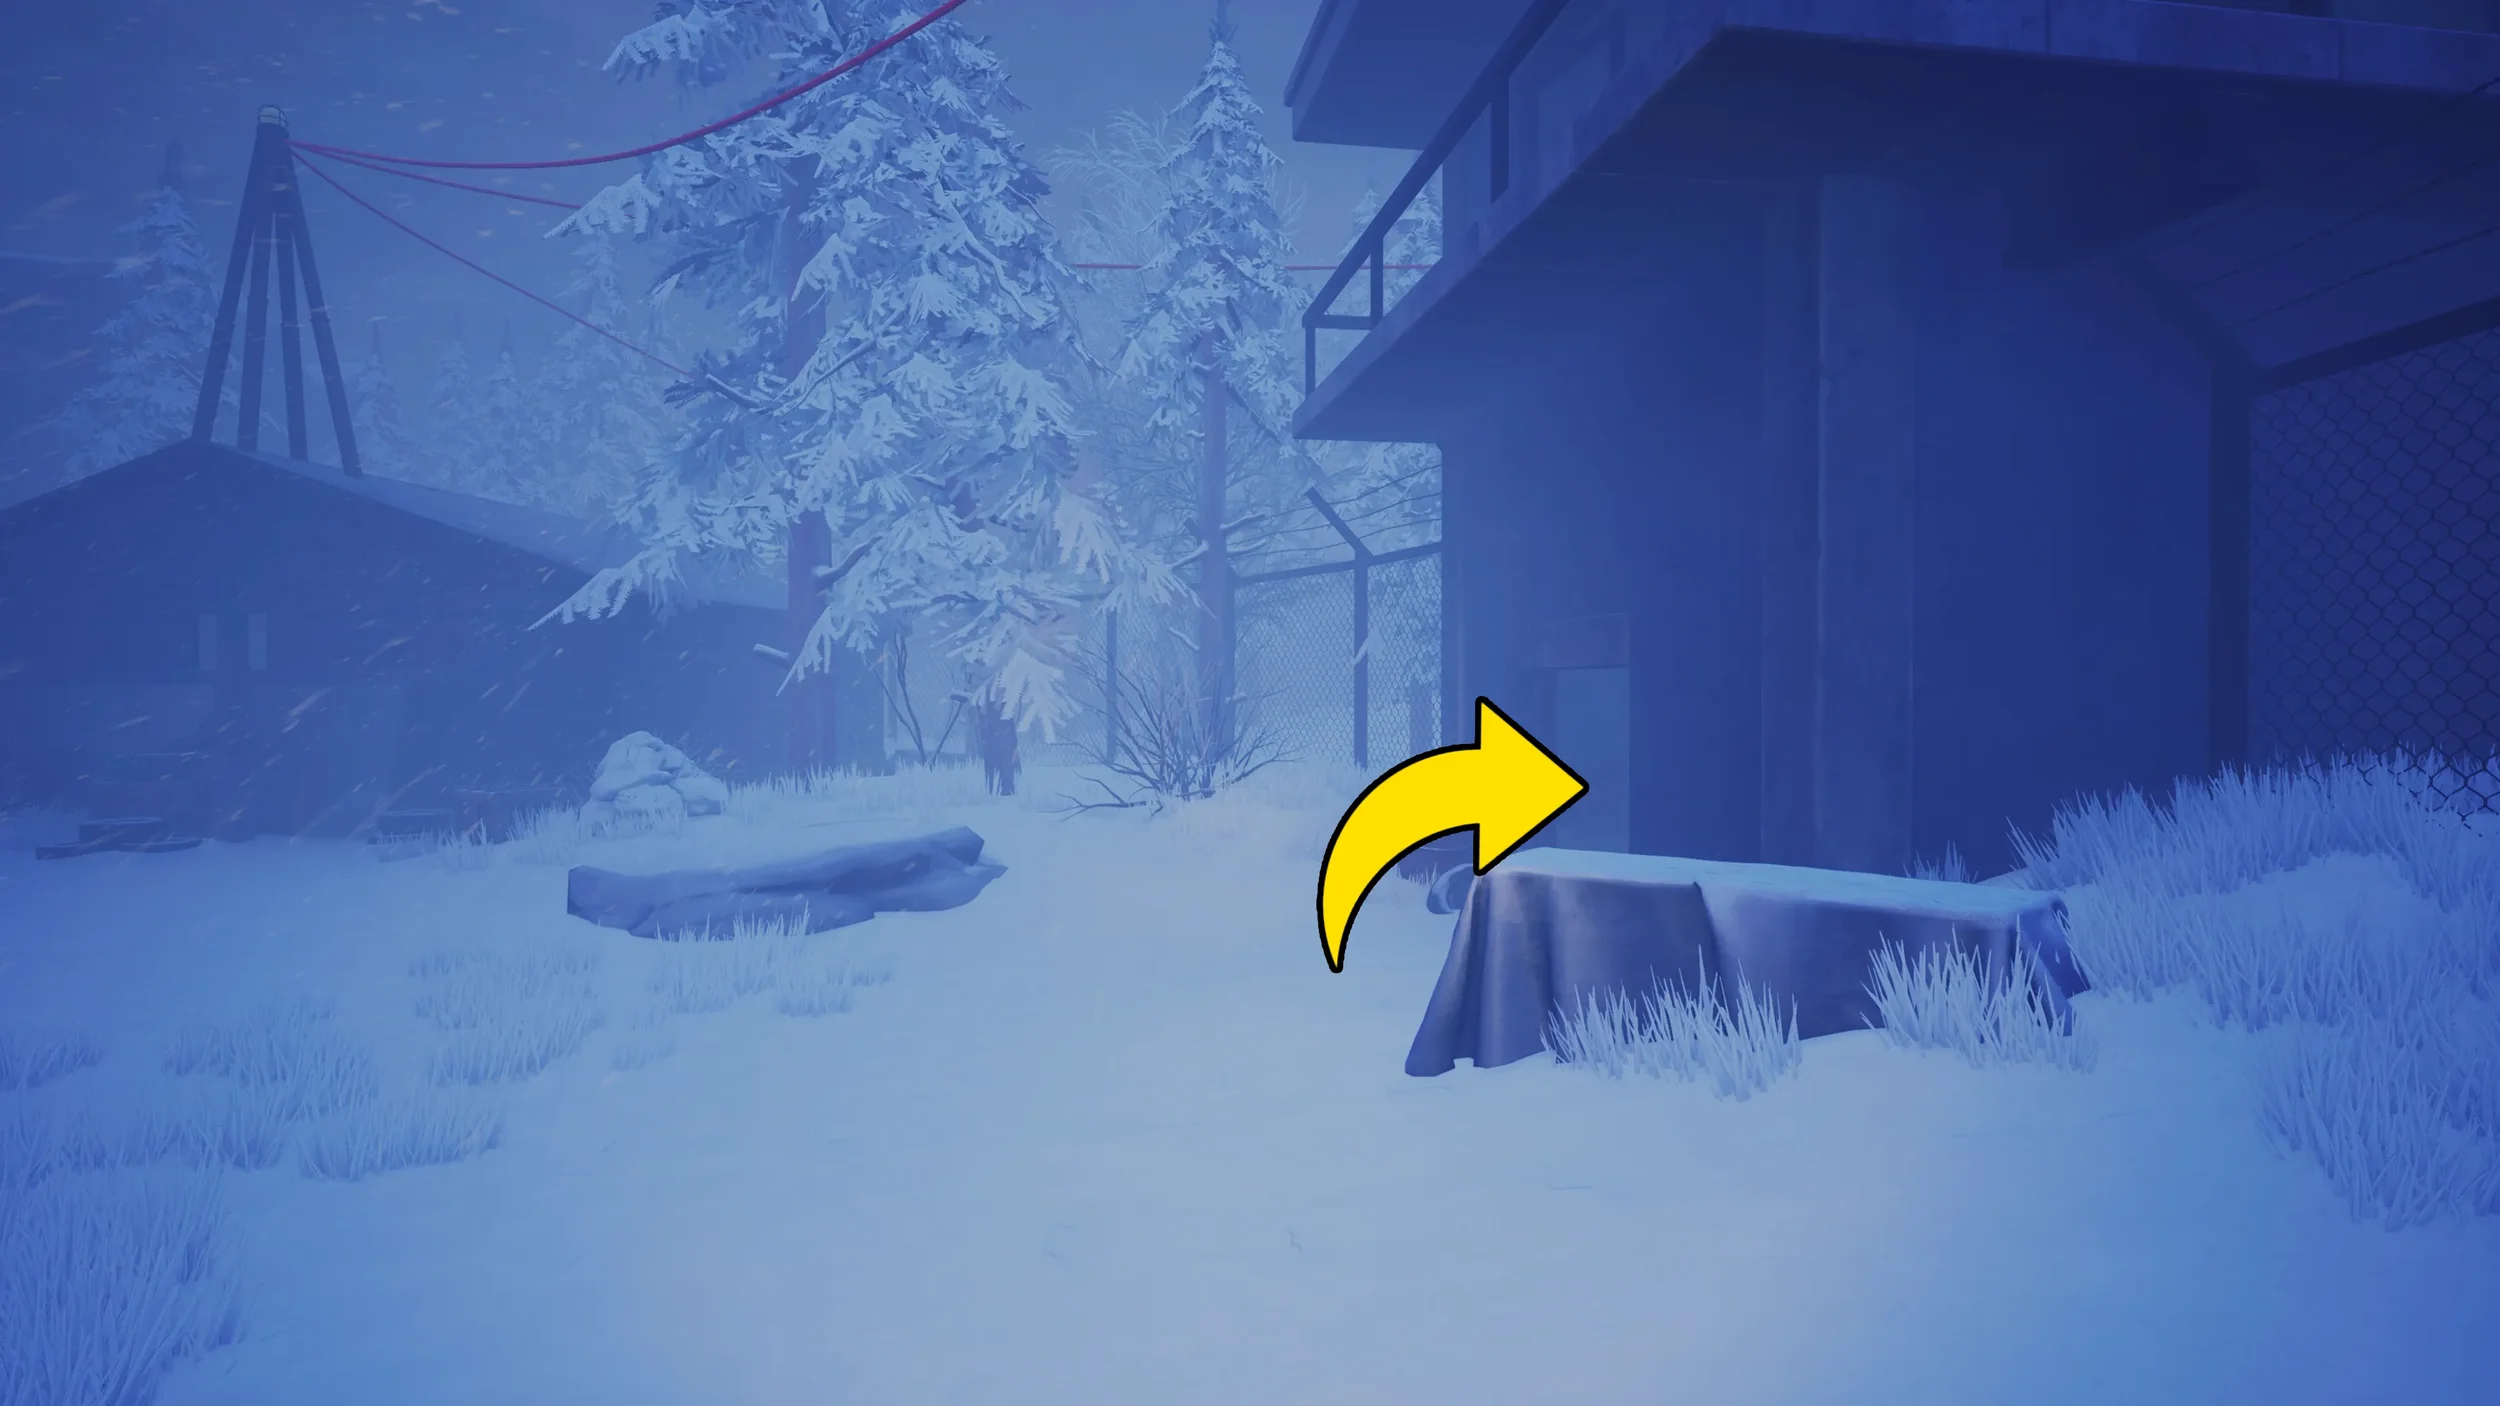
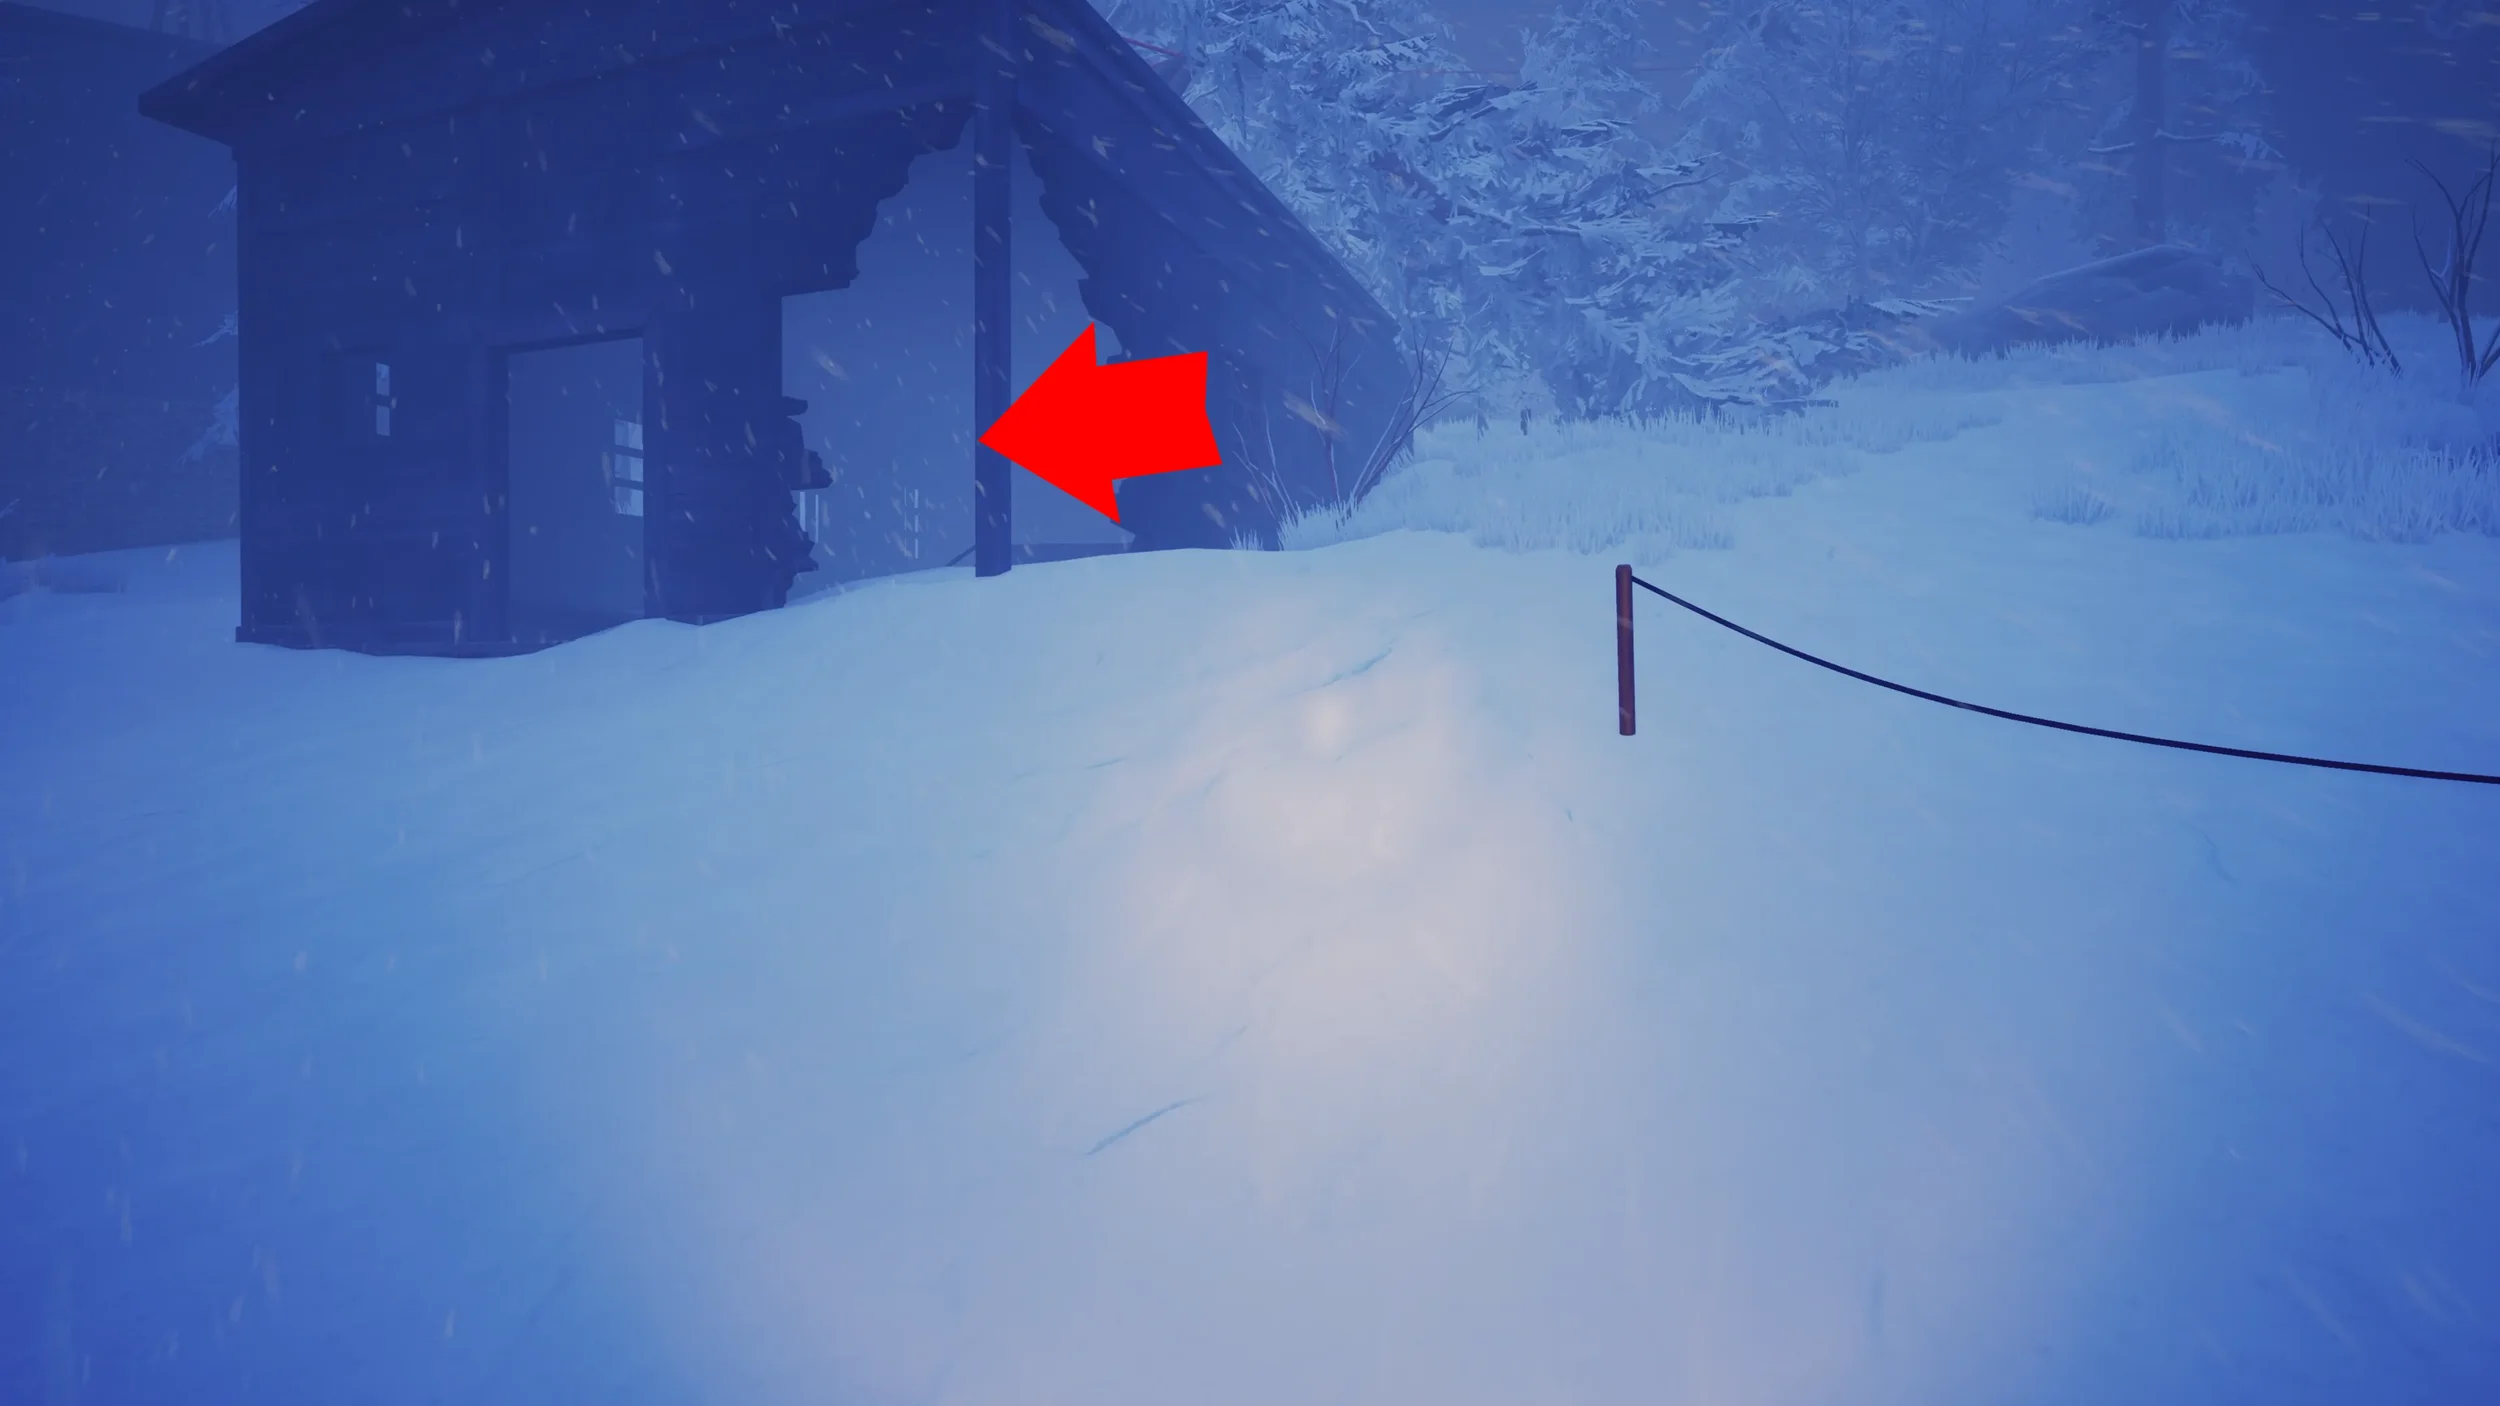
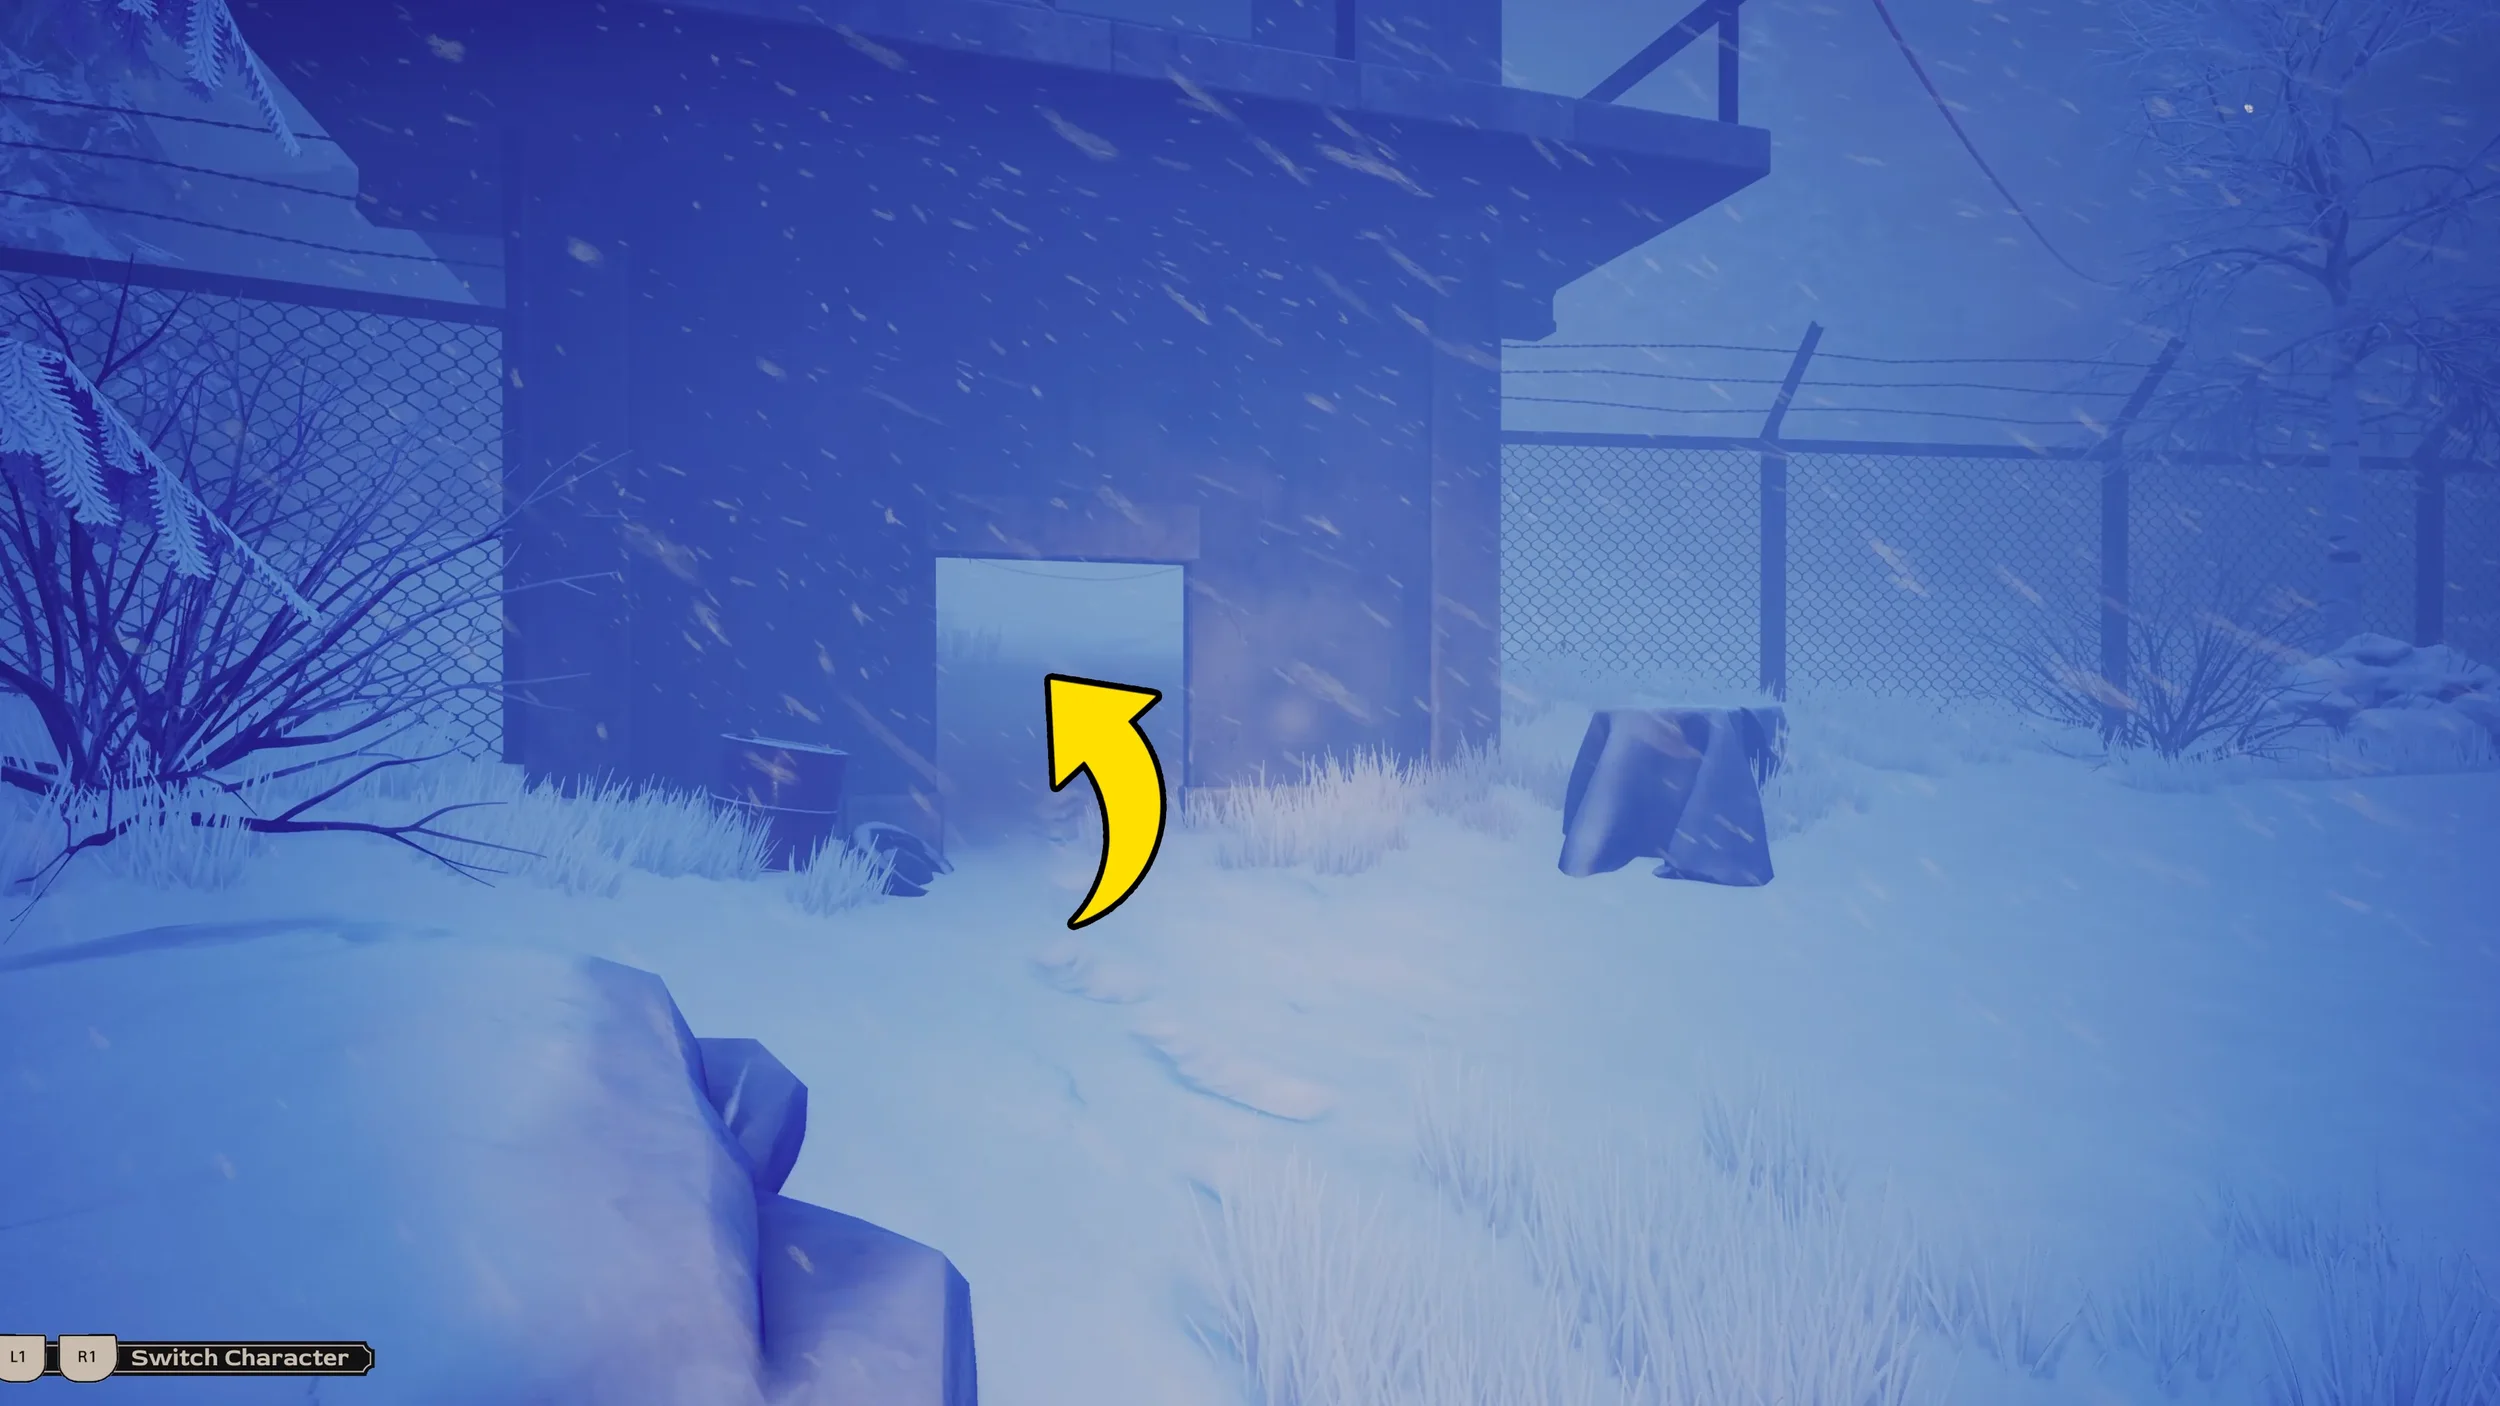
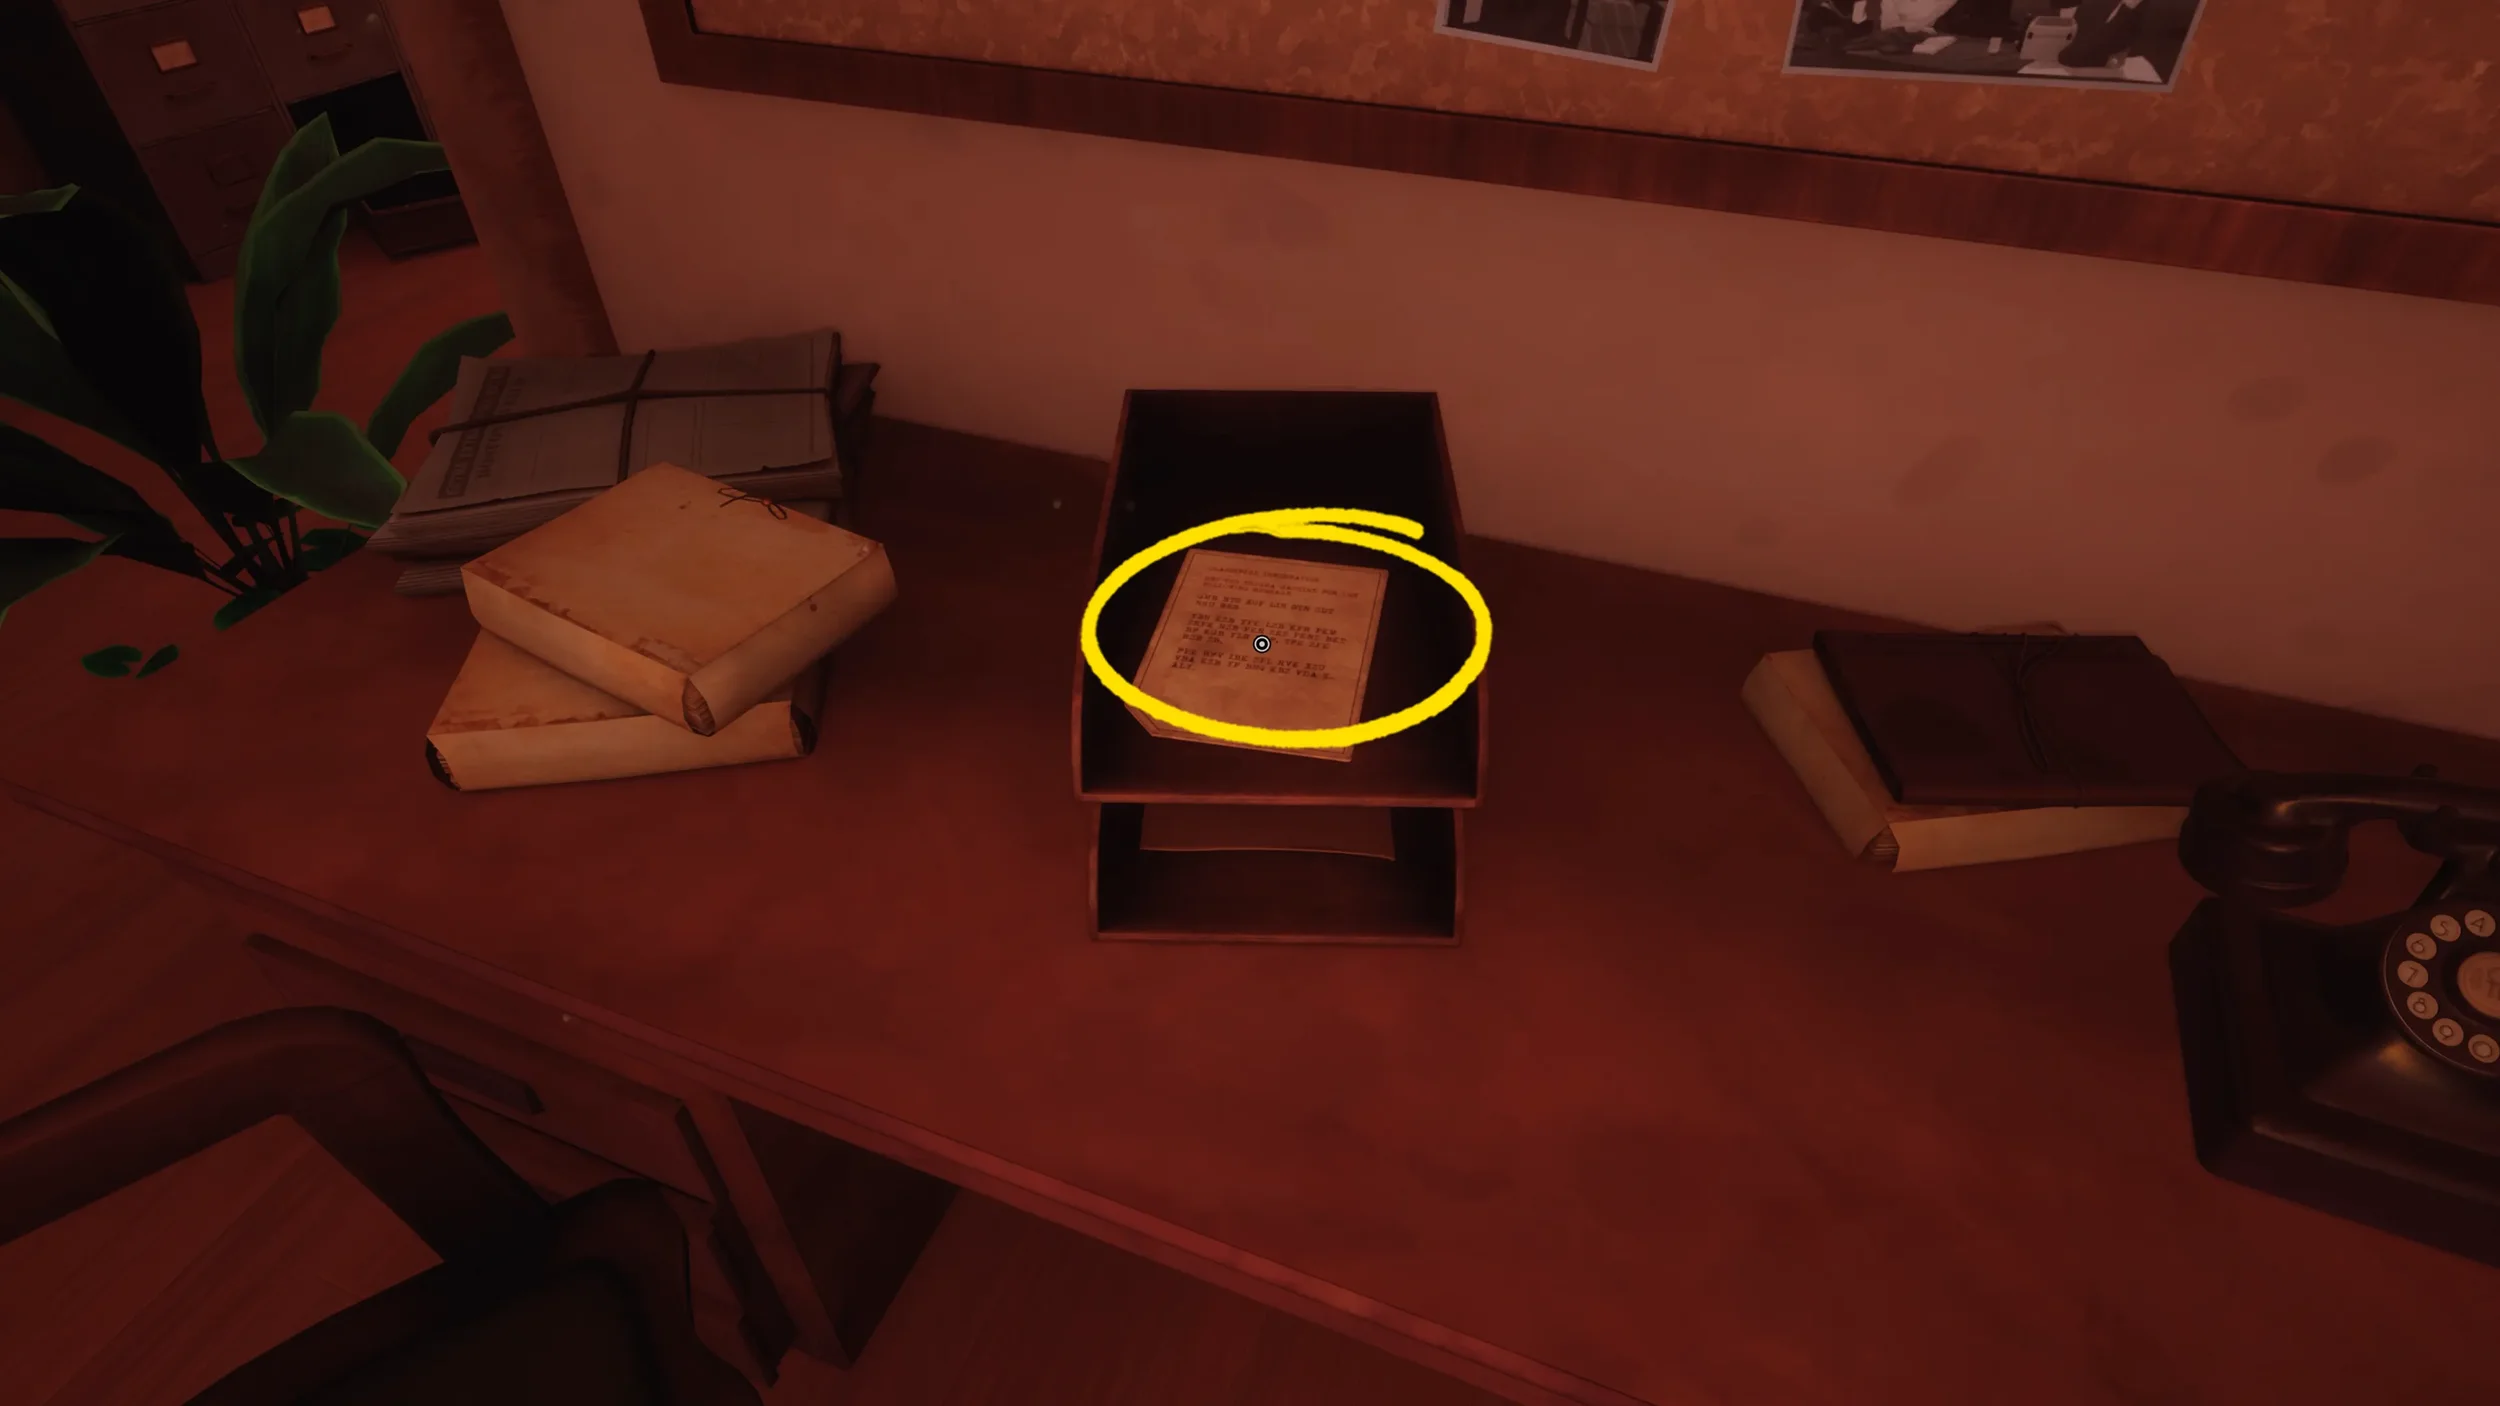
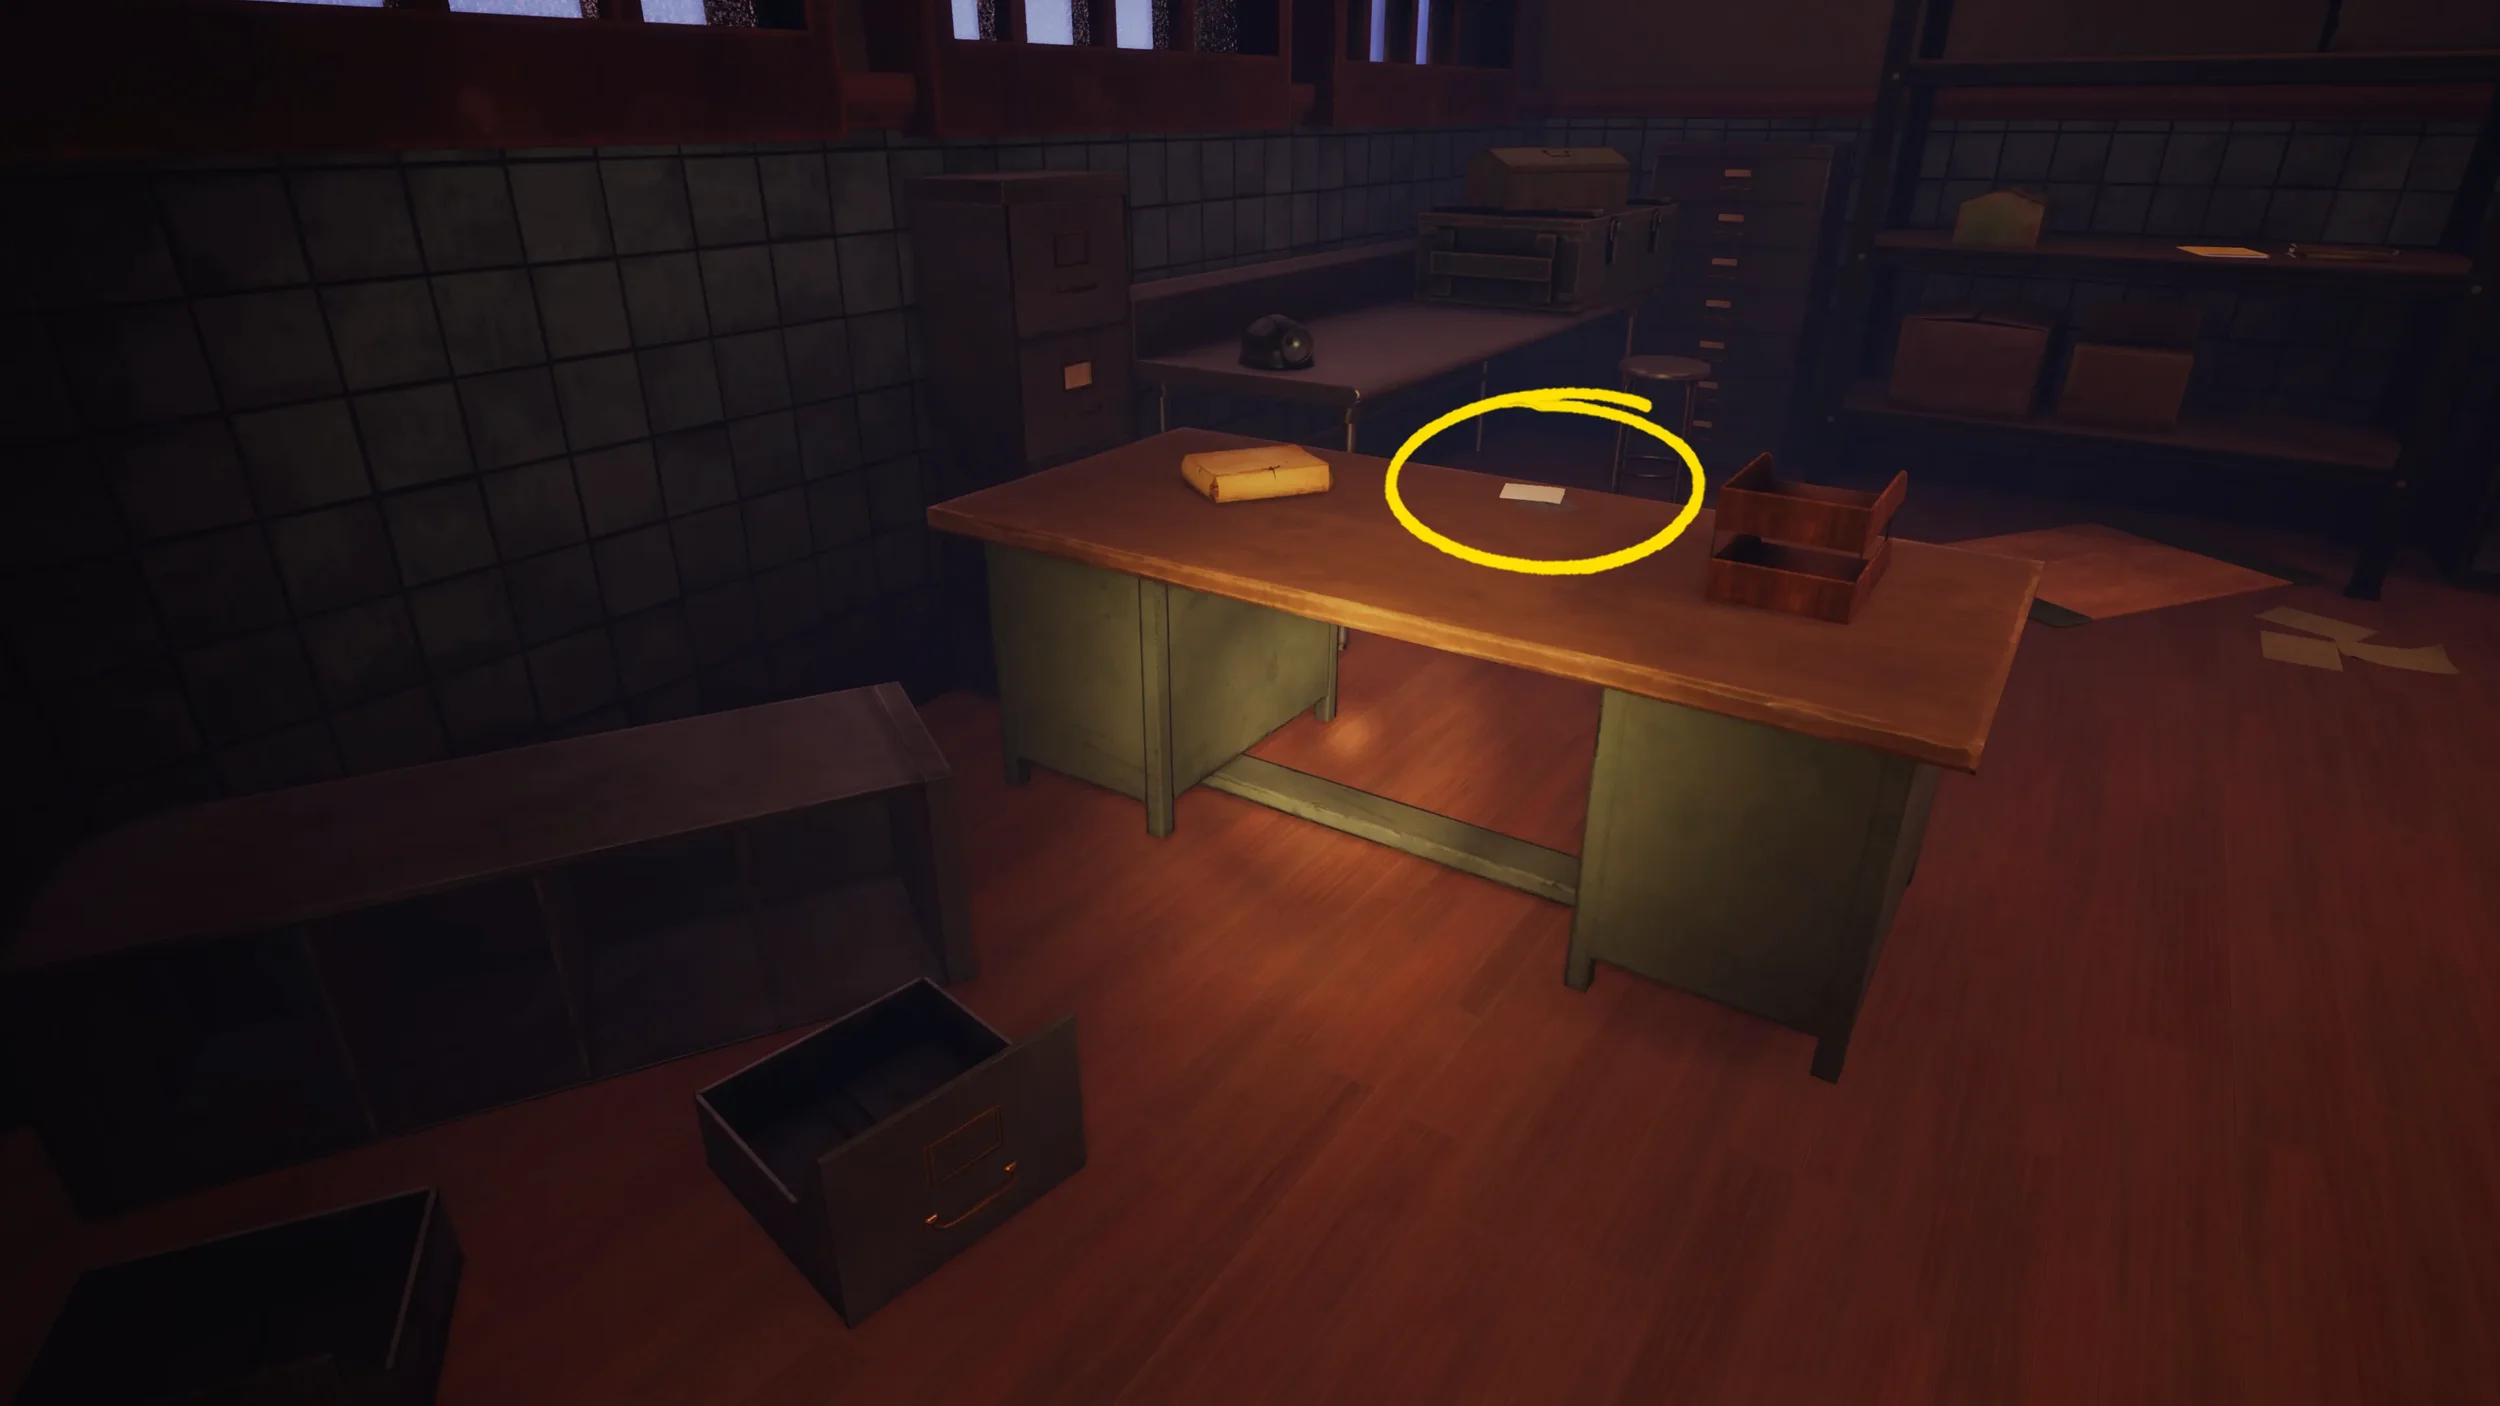
As soon as you go through the previous building you will be able to see another destroyed building slightly to your left, a bunker with many beds.
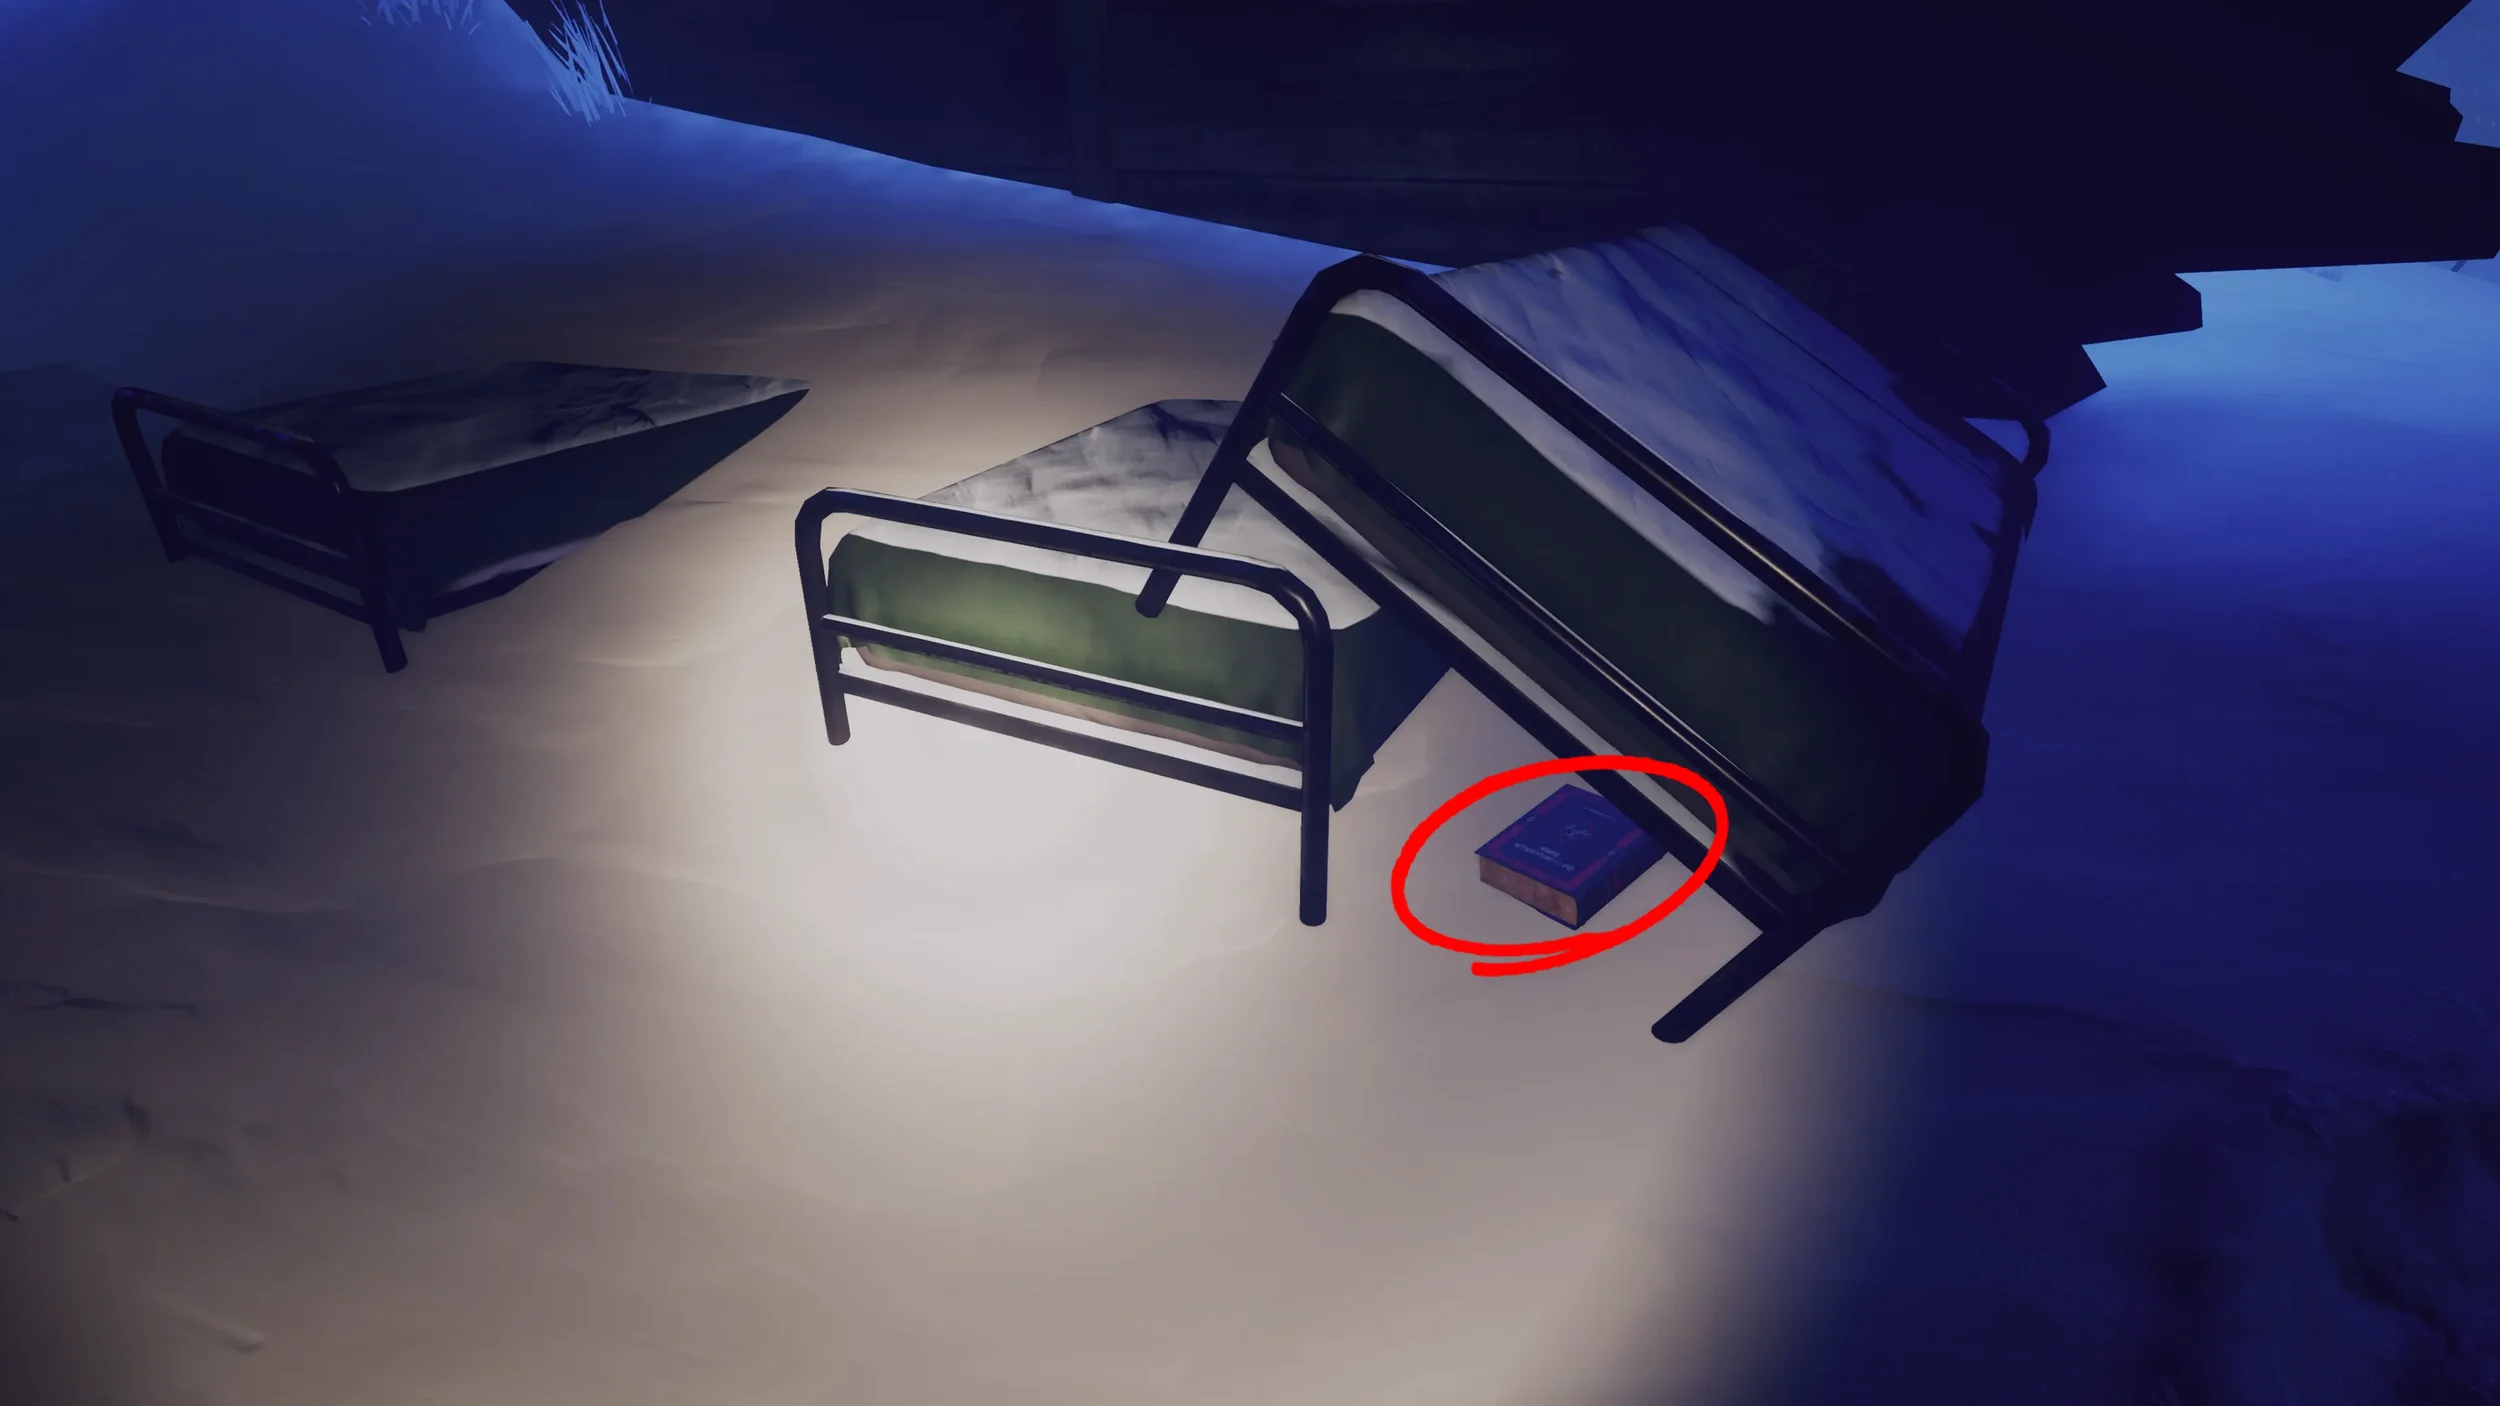
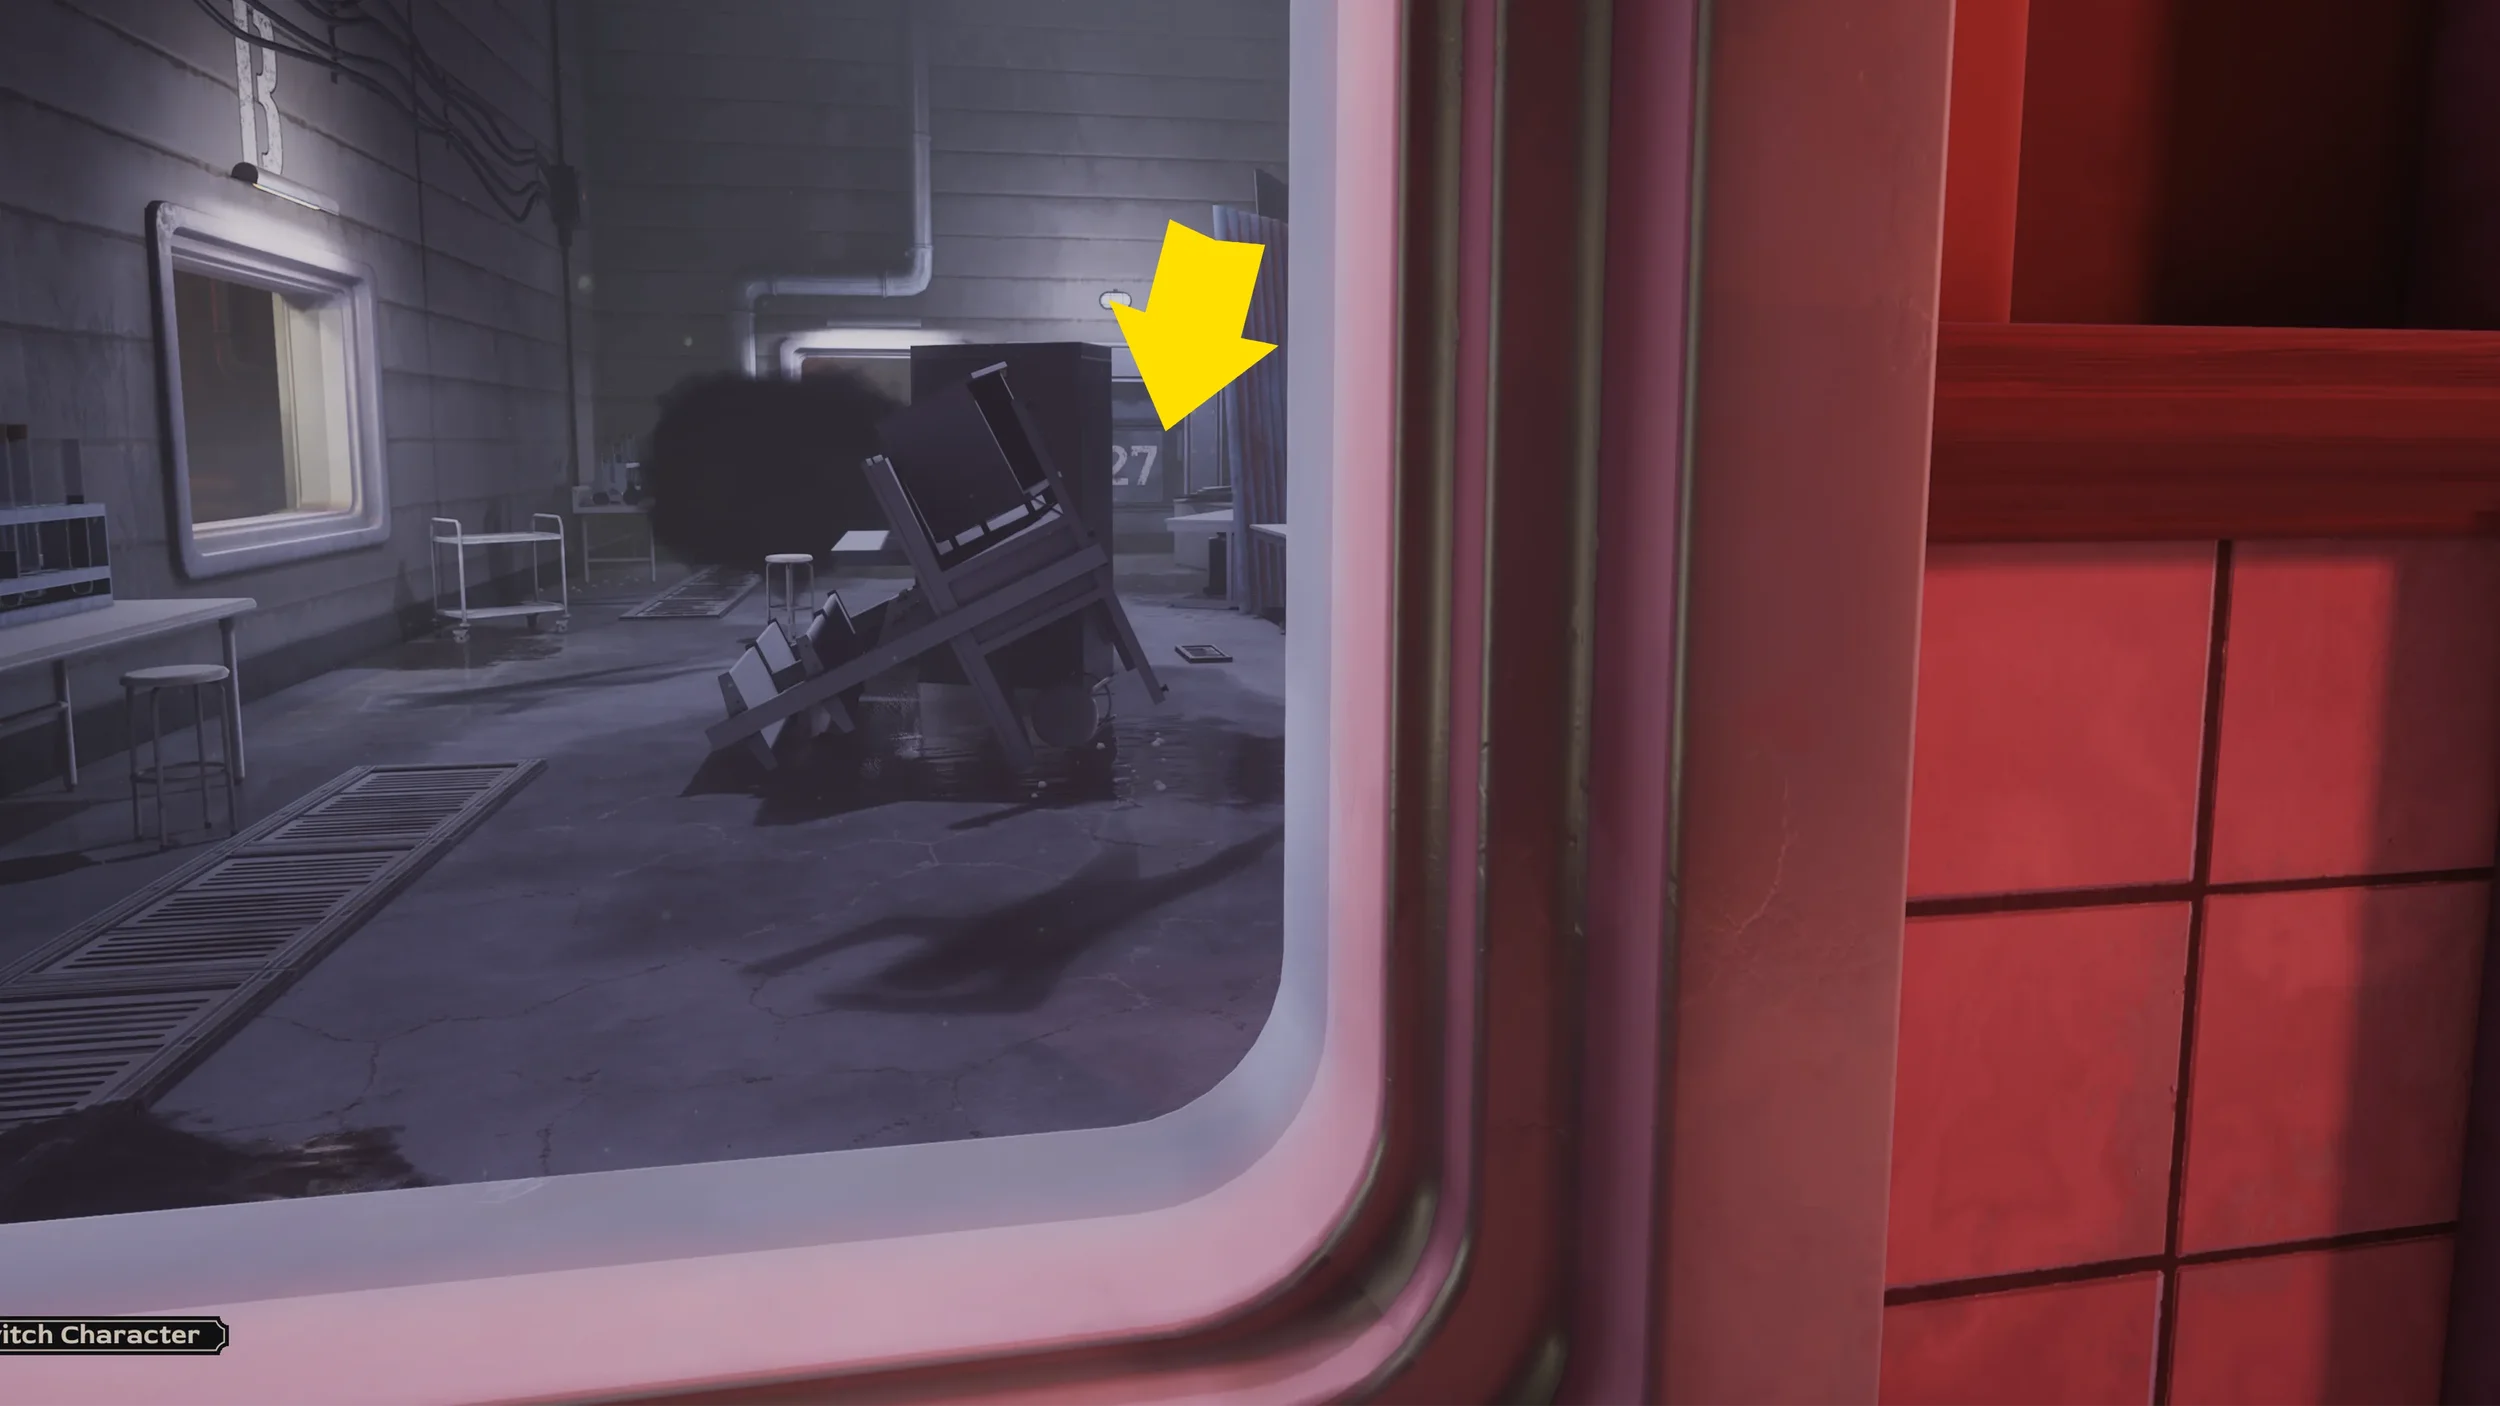
Go inside this bunker and look under the first bed on the right to find the Book which is this Chapter’s Secret Object.
 “Unspeakable Cults” Trophy.
Turning On The Power
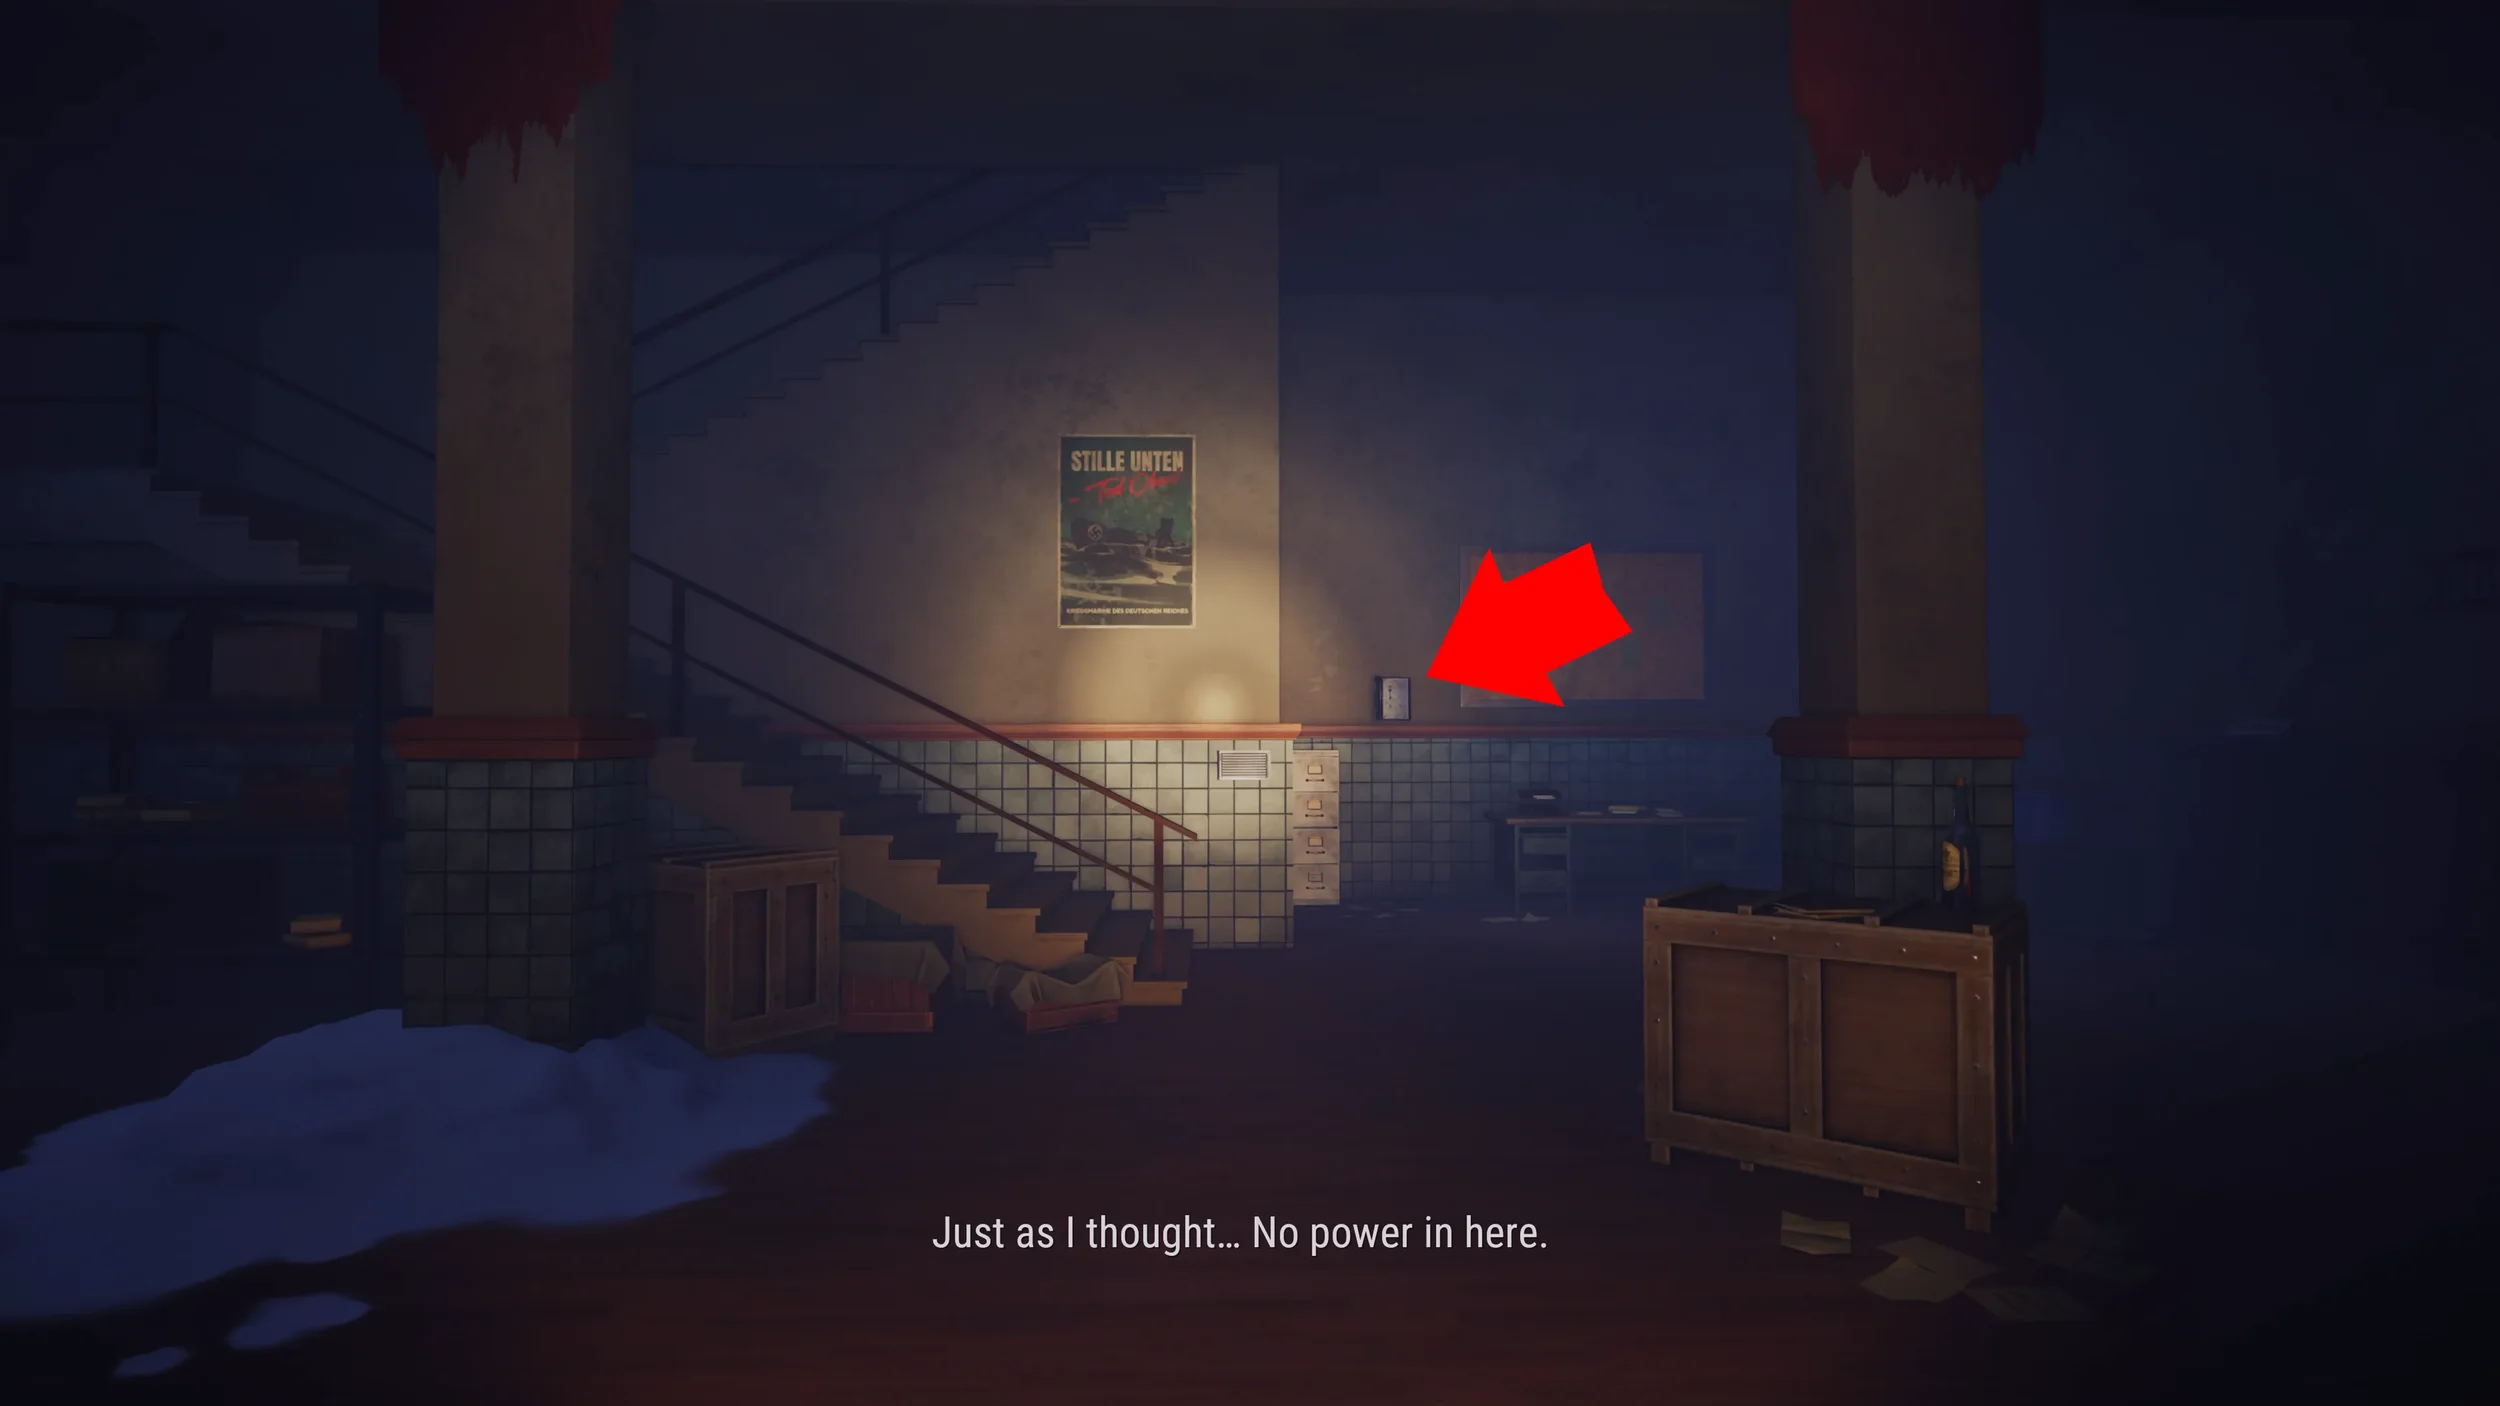
Our next objective is going to be to turn on the power to the main Antenna Building, for this we are going to need to find the Key to the Generator Room.
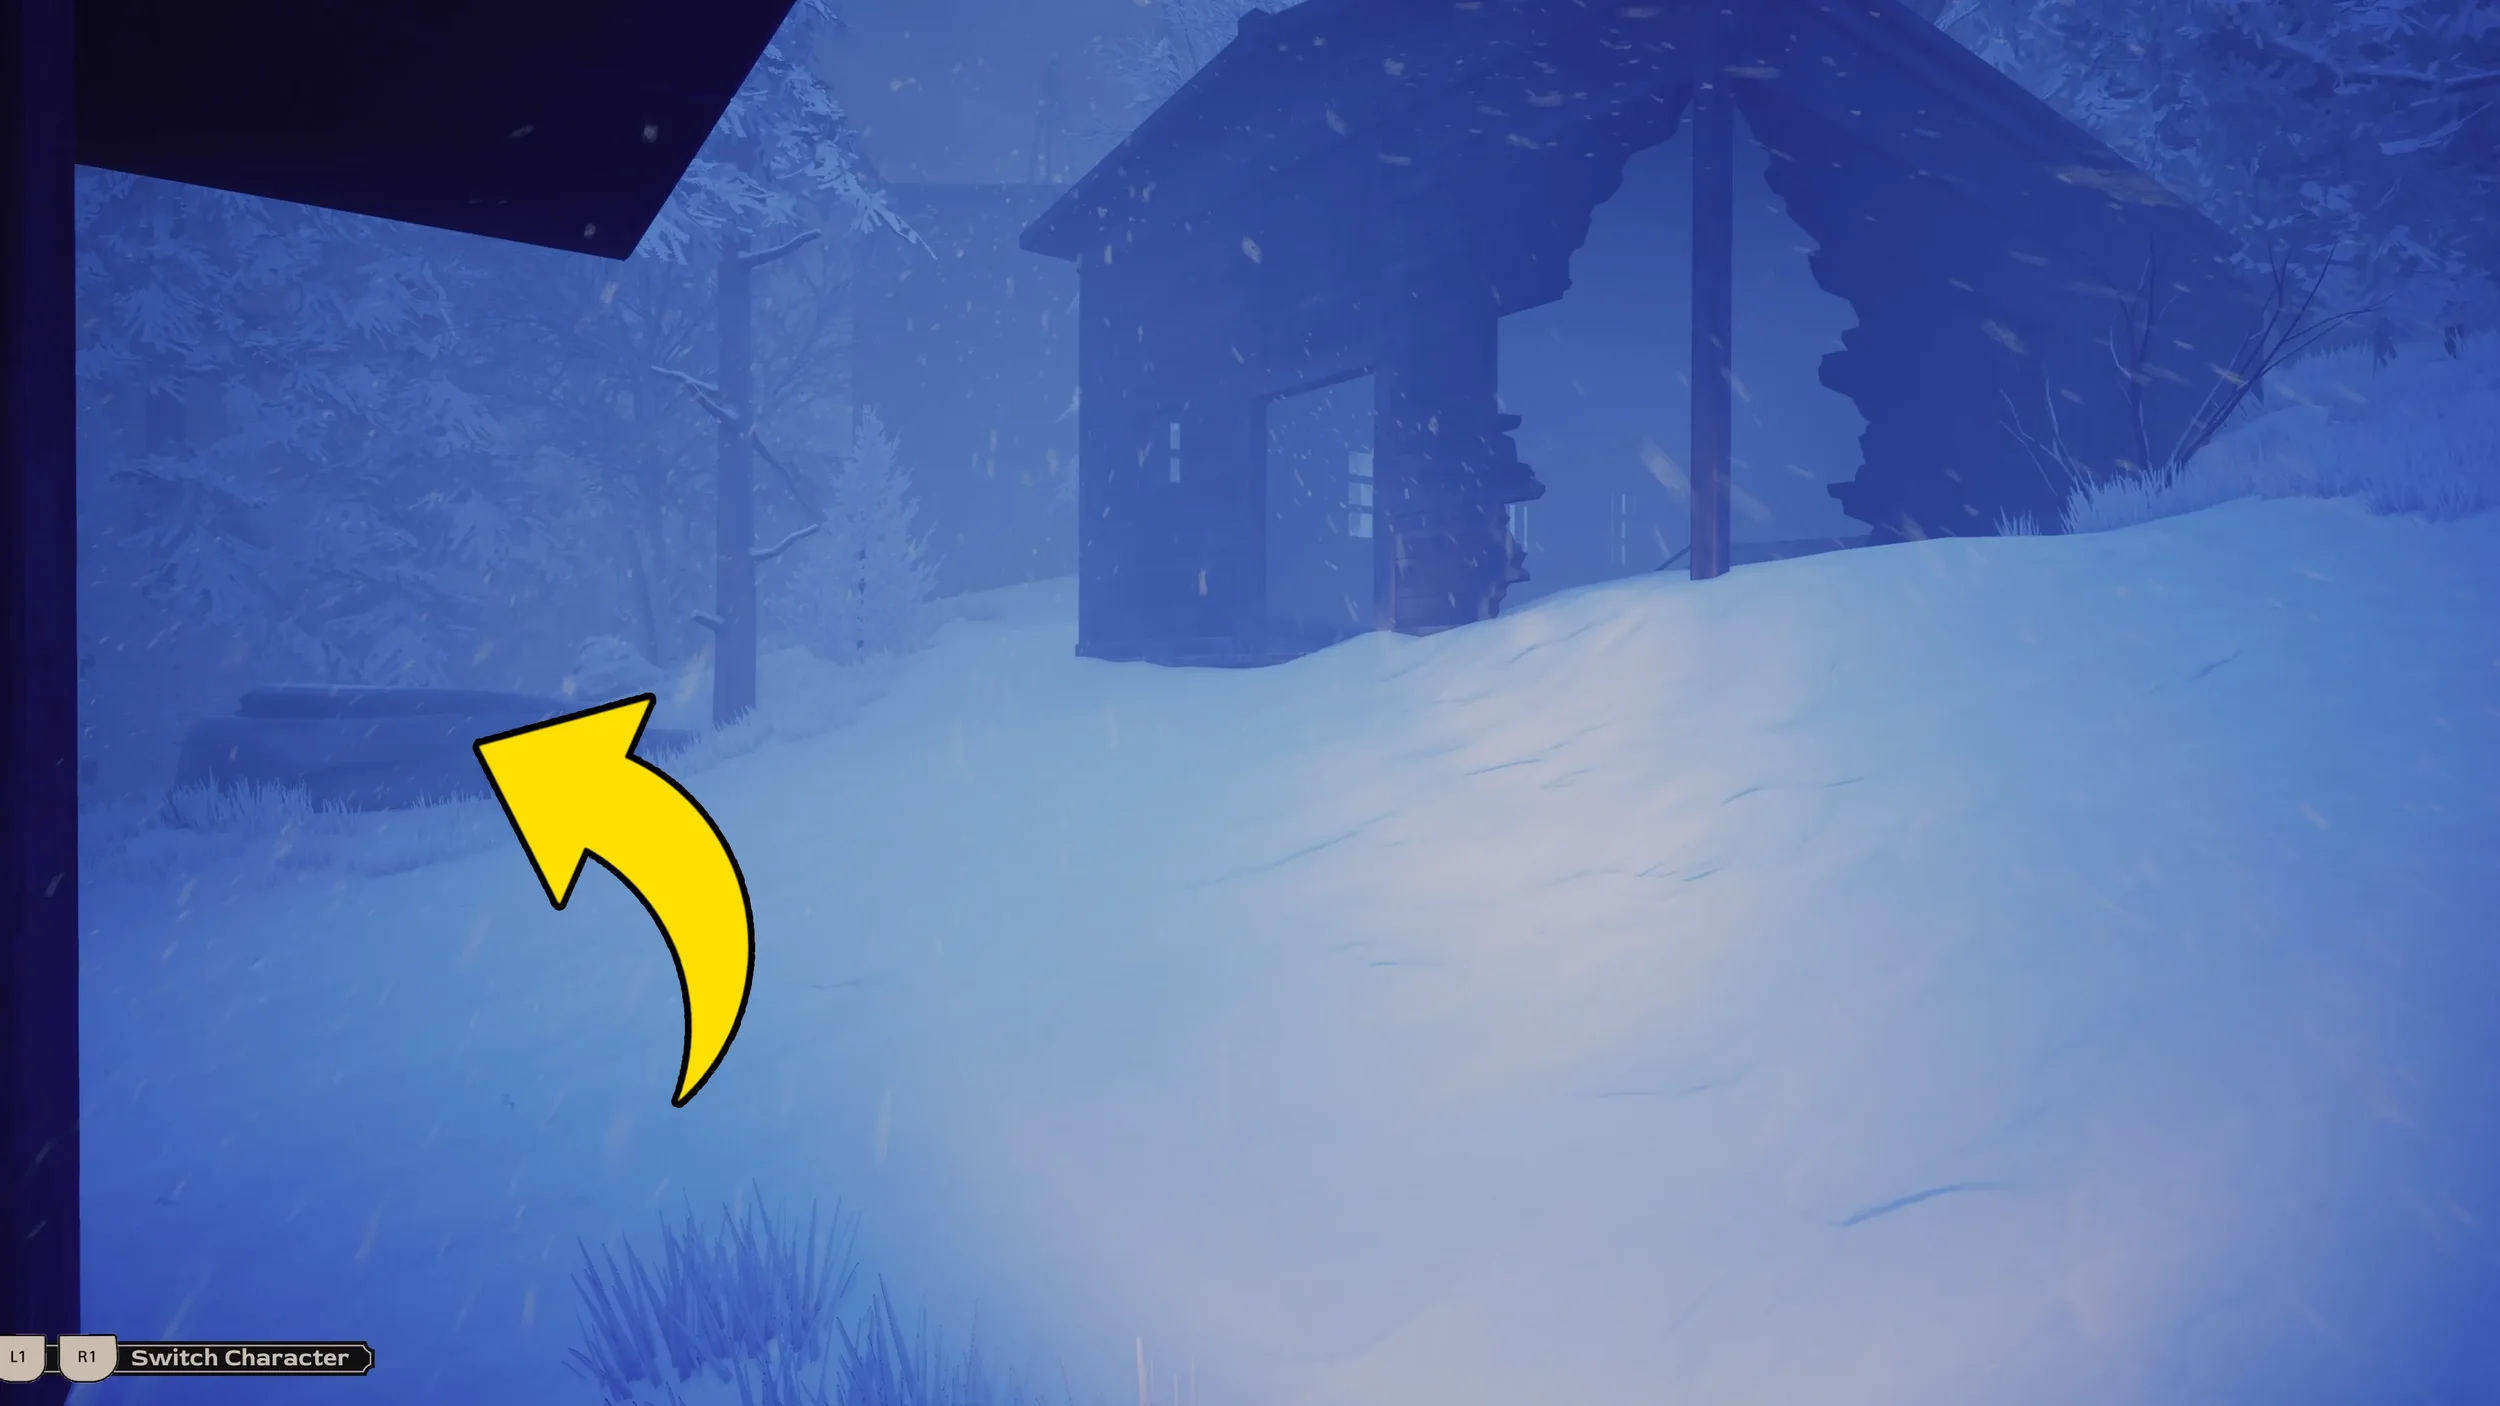
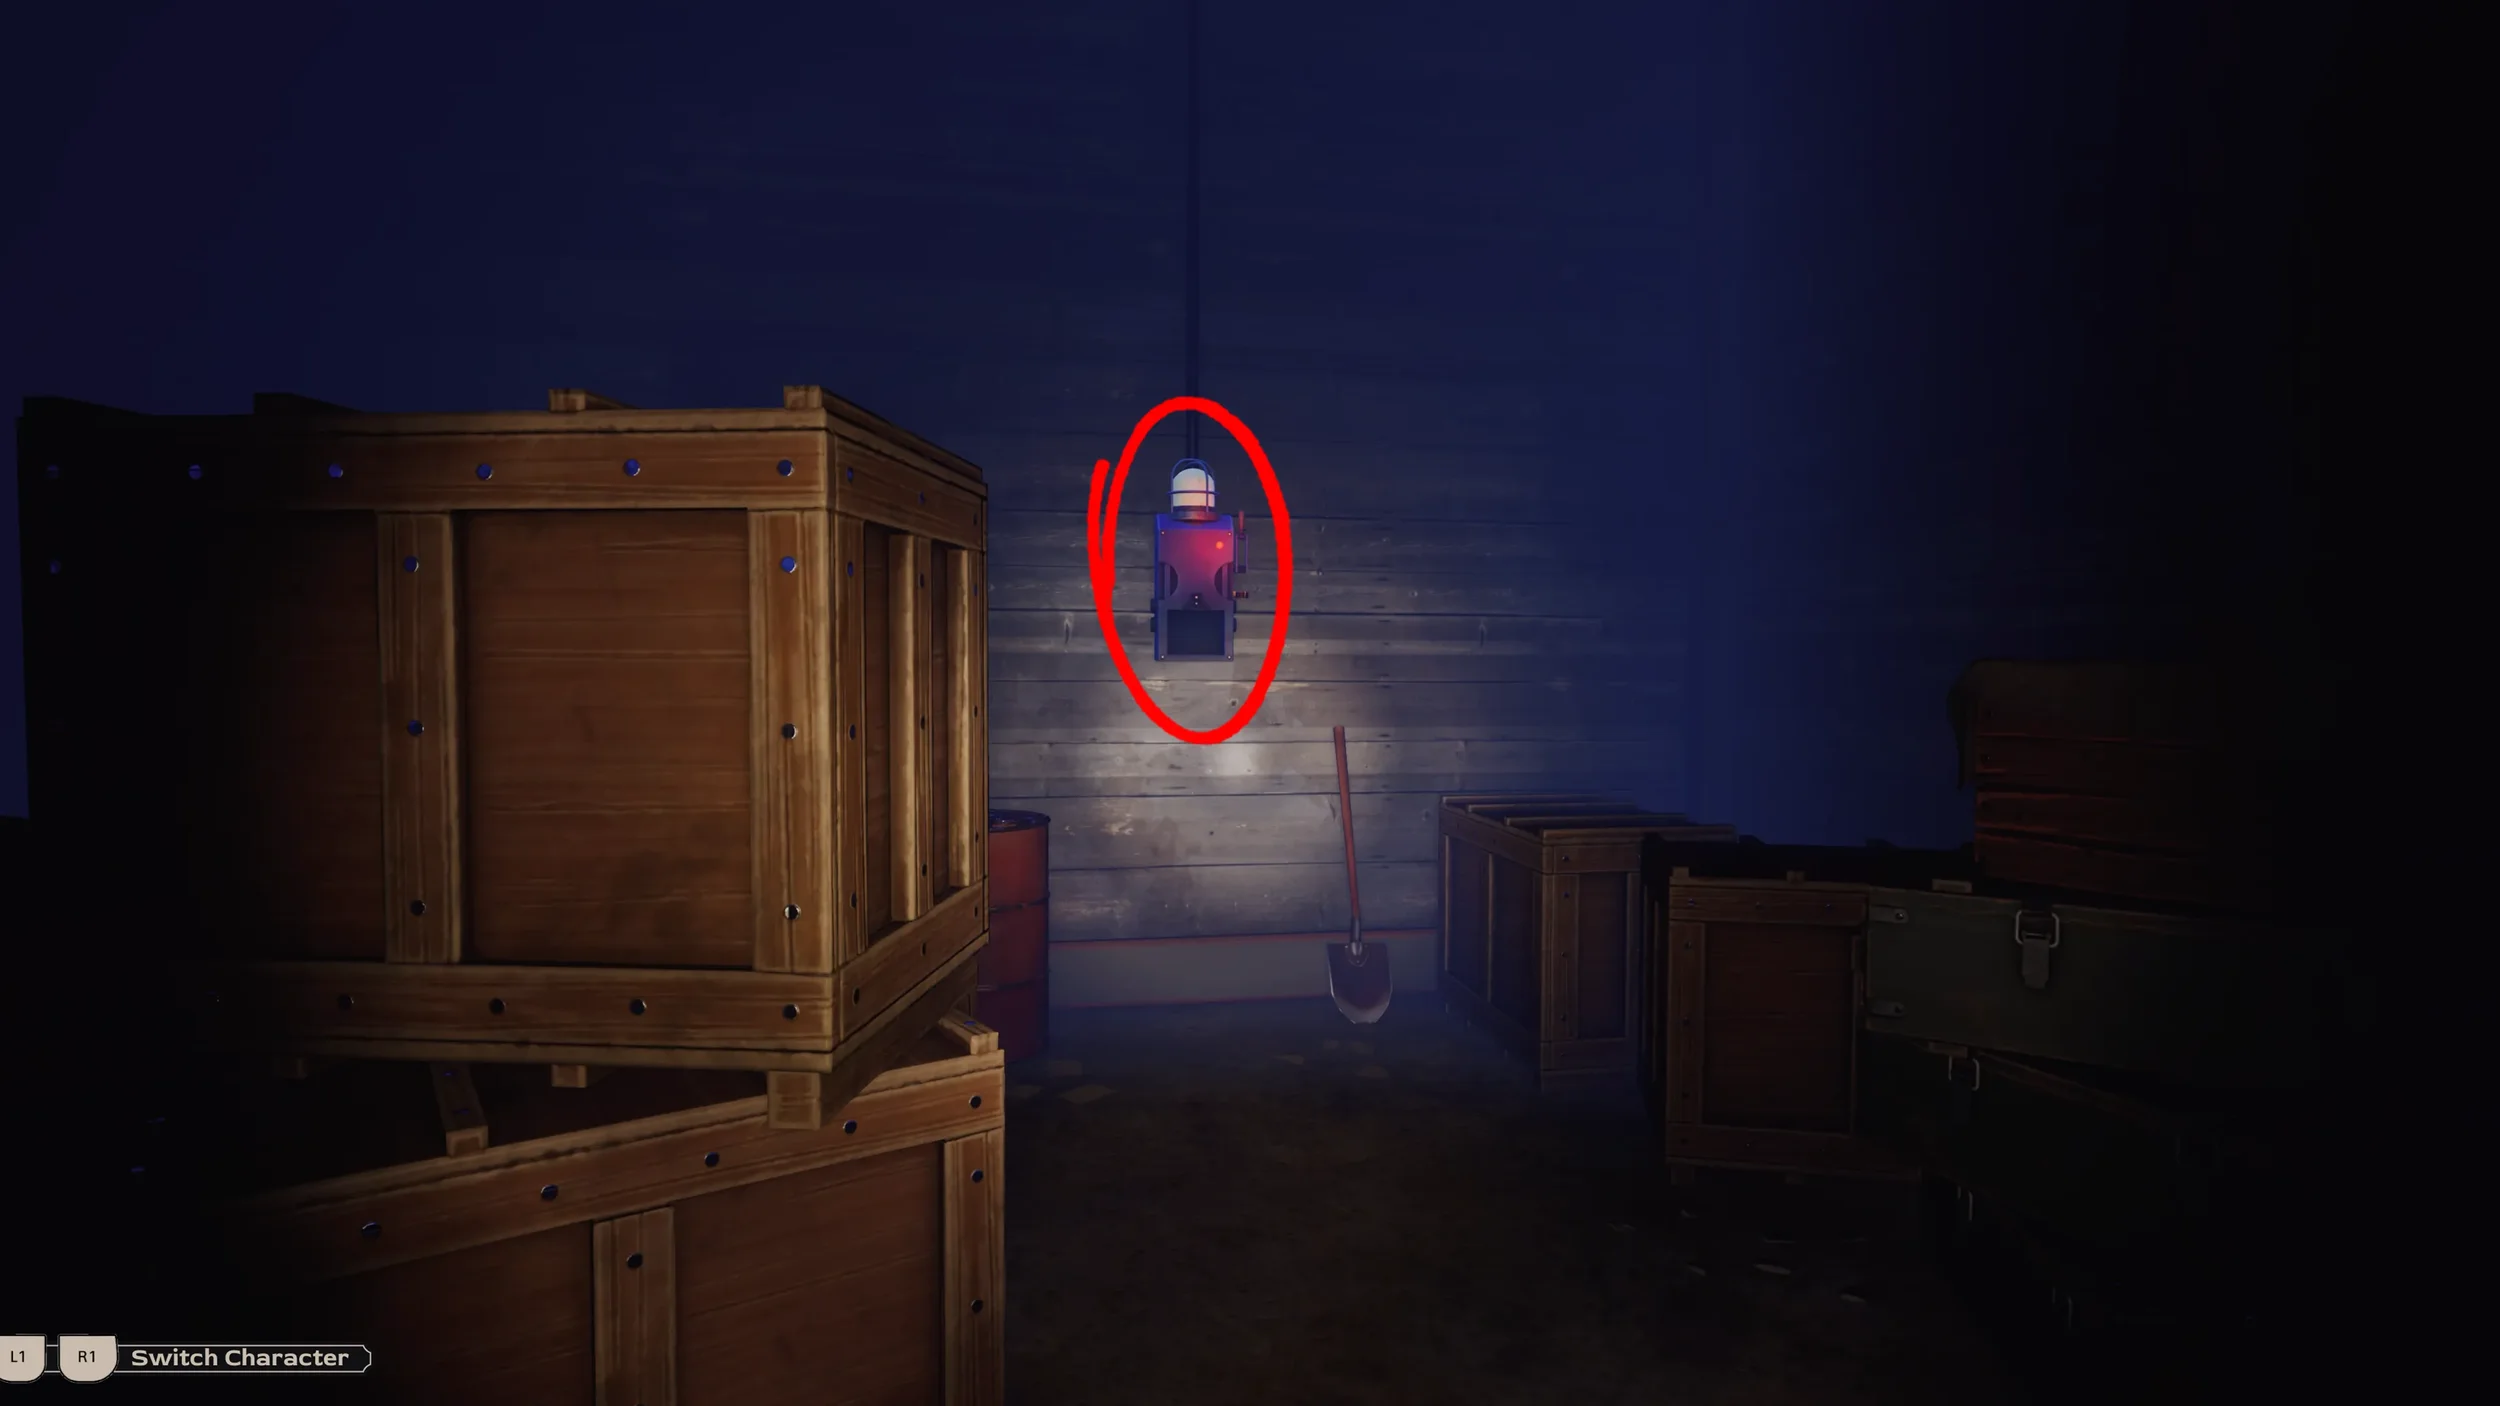
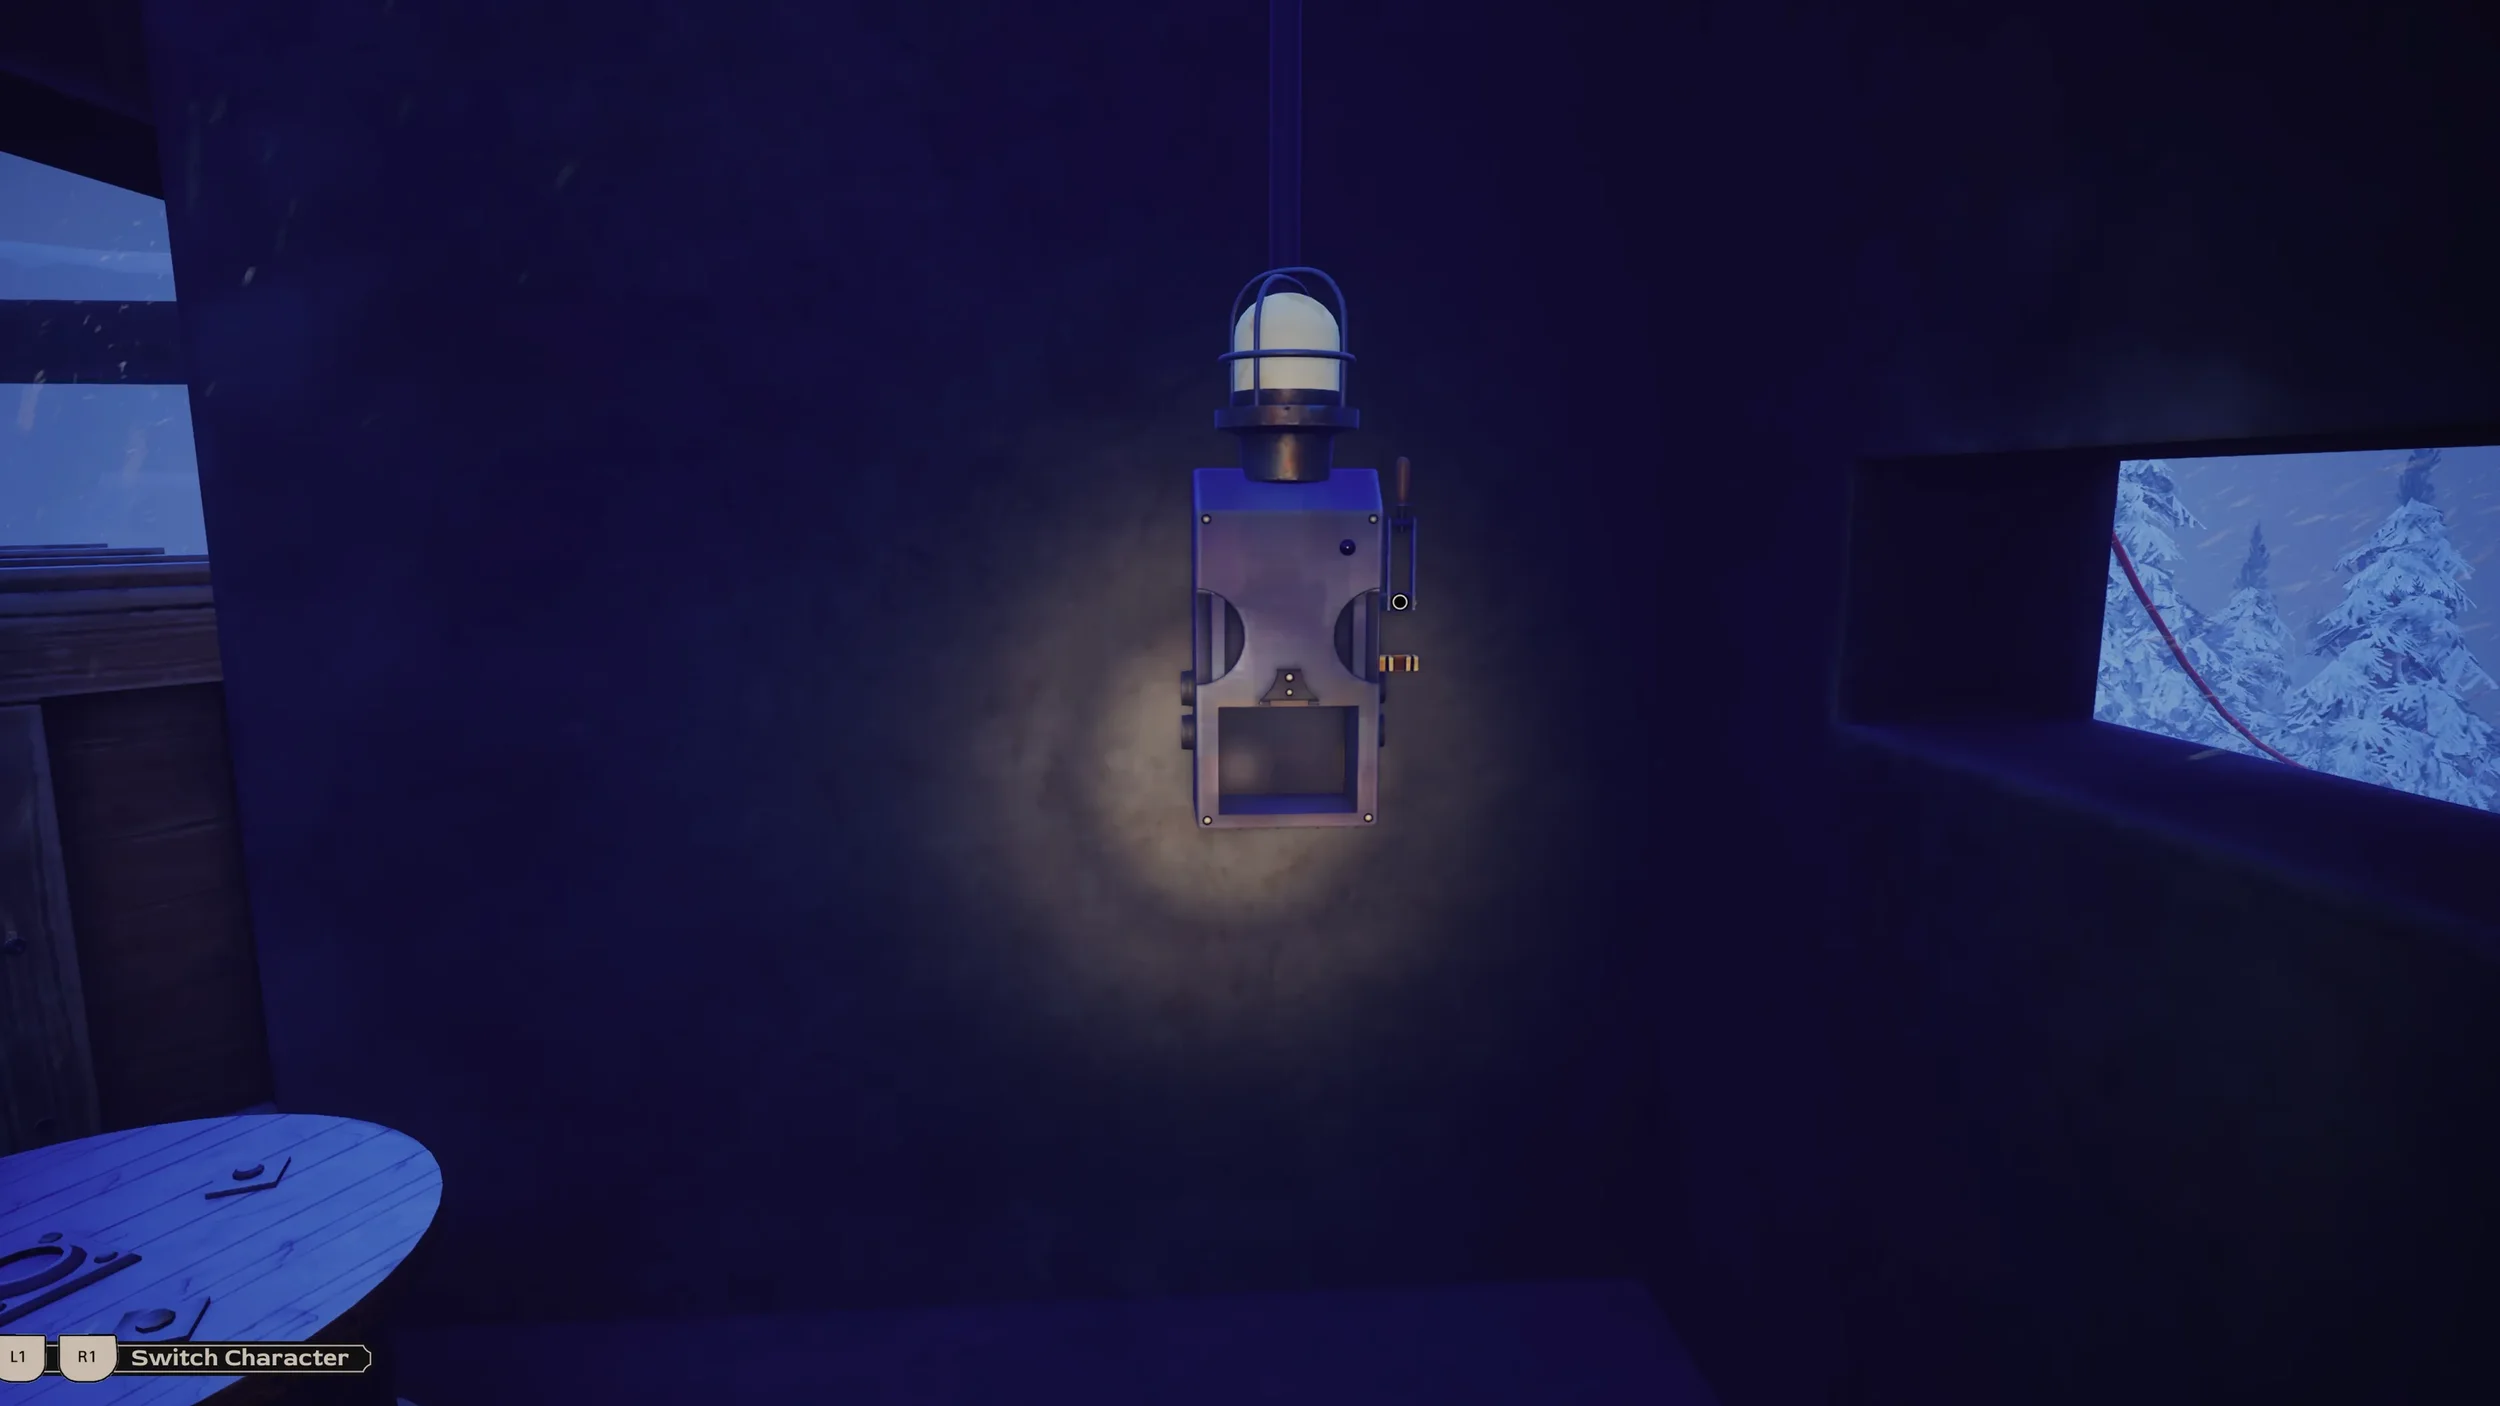
Exit out of the bunker where we found the Book and keep climbing up the main path hill and you should see the big Antenna Building, go inside and on the far wall directly in front of you as soon as you enter is where you will find the Key to the Generator Room.
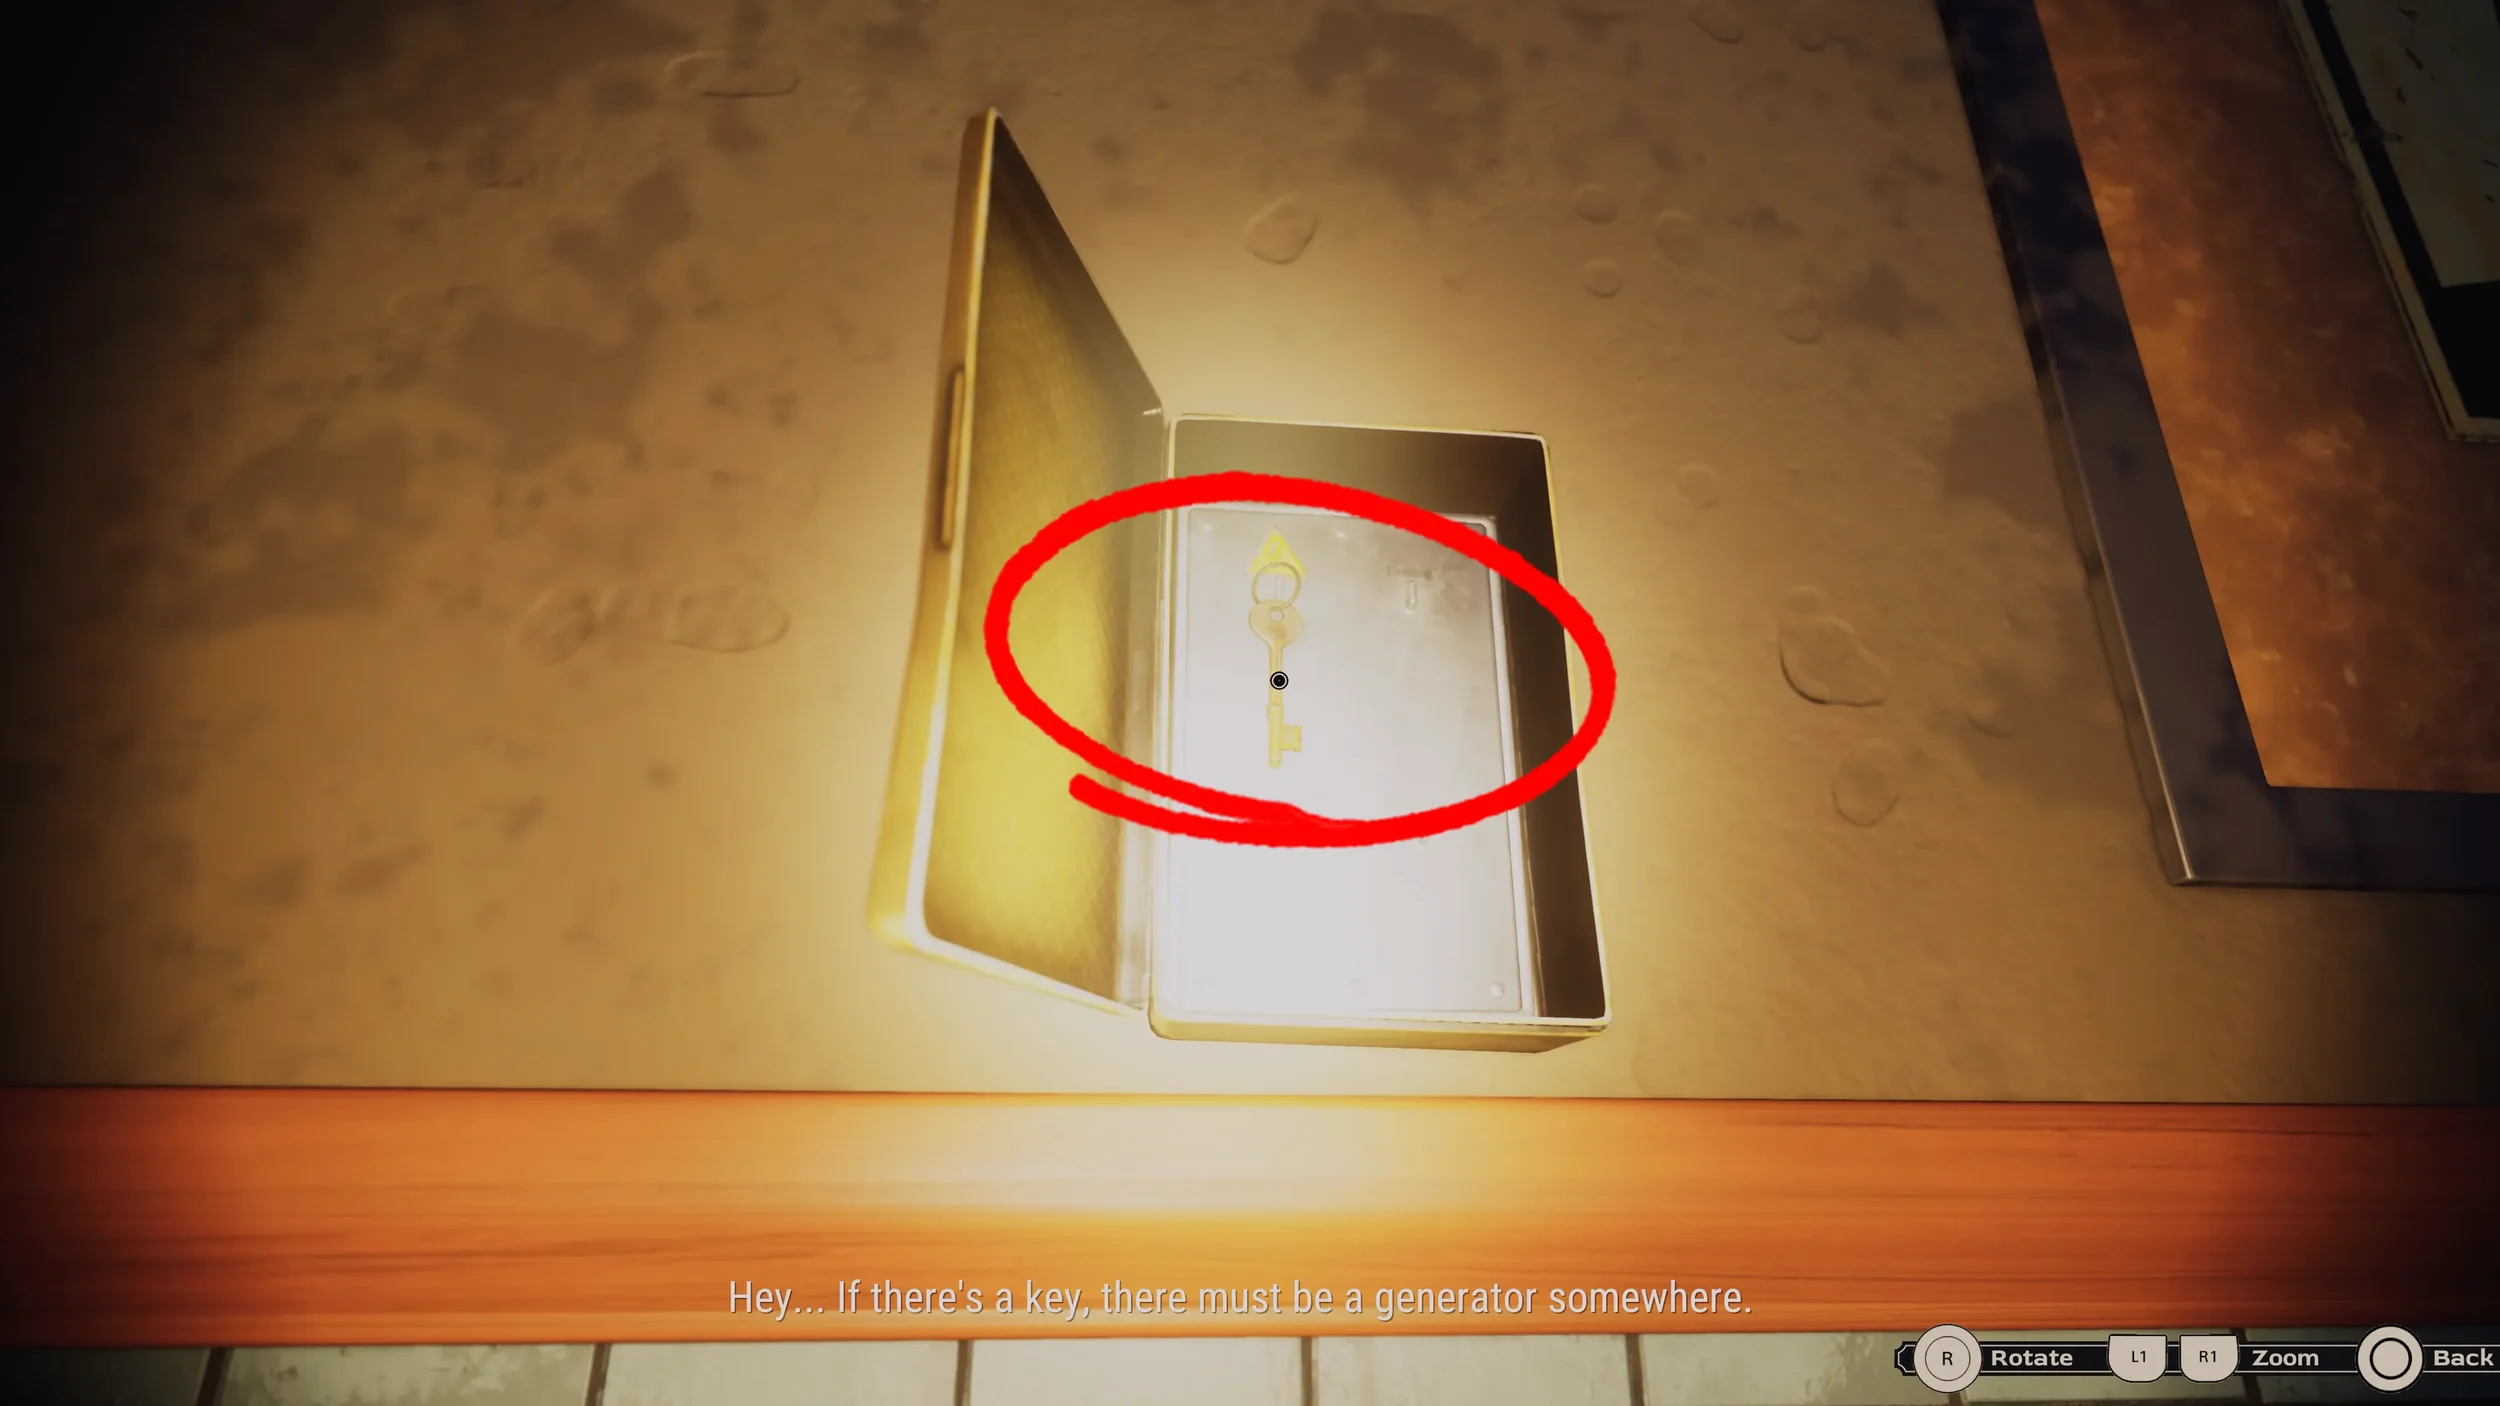
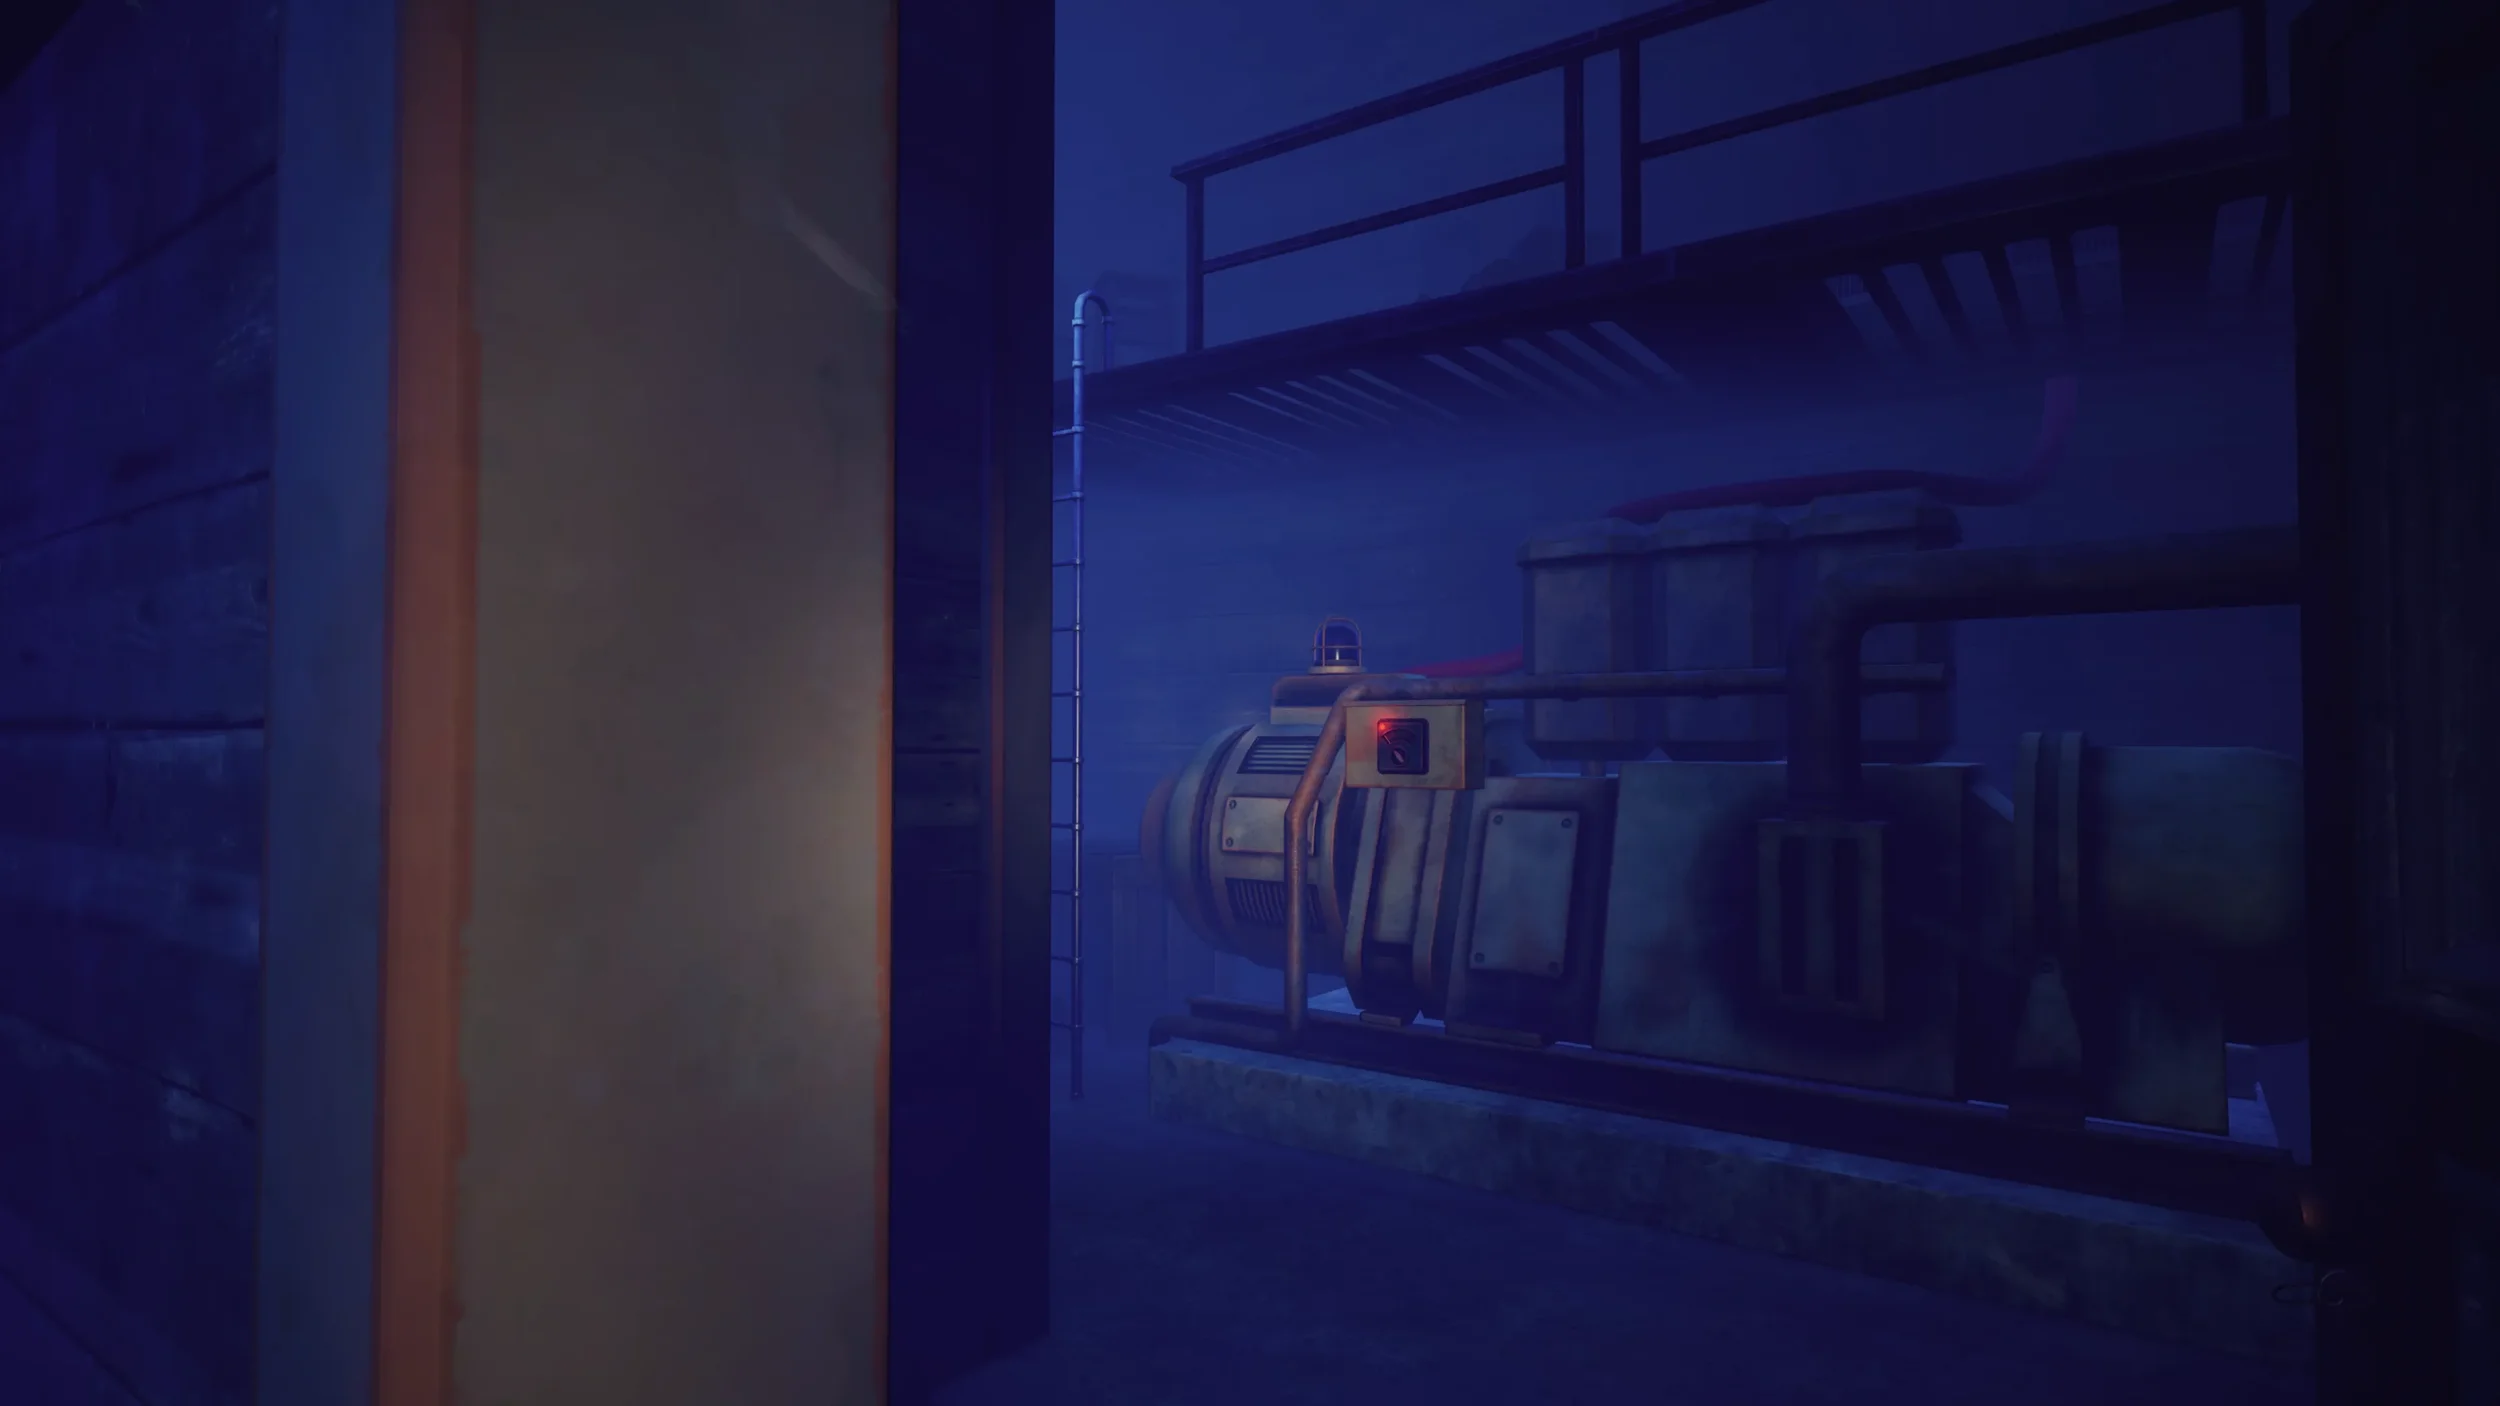
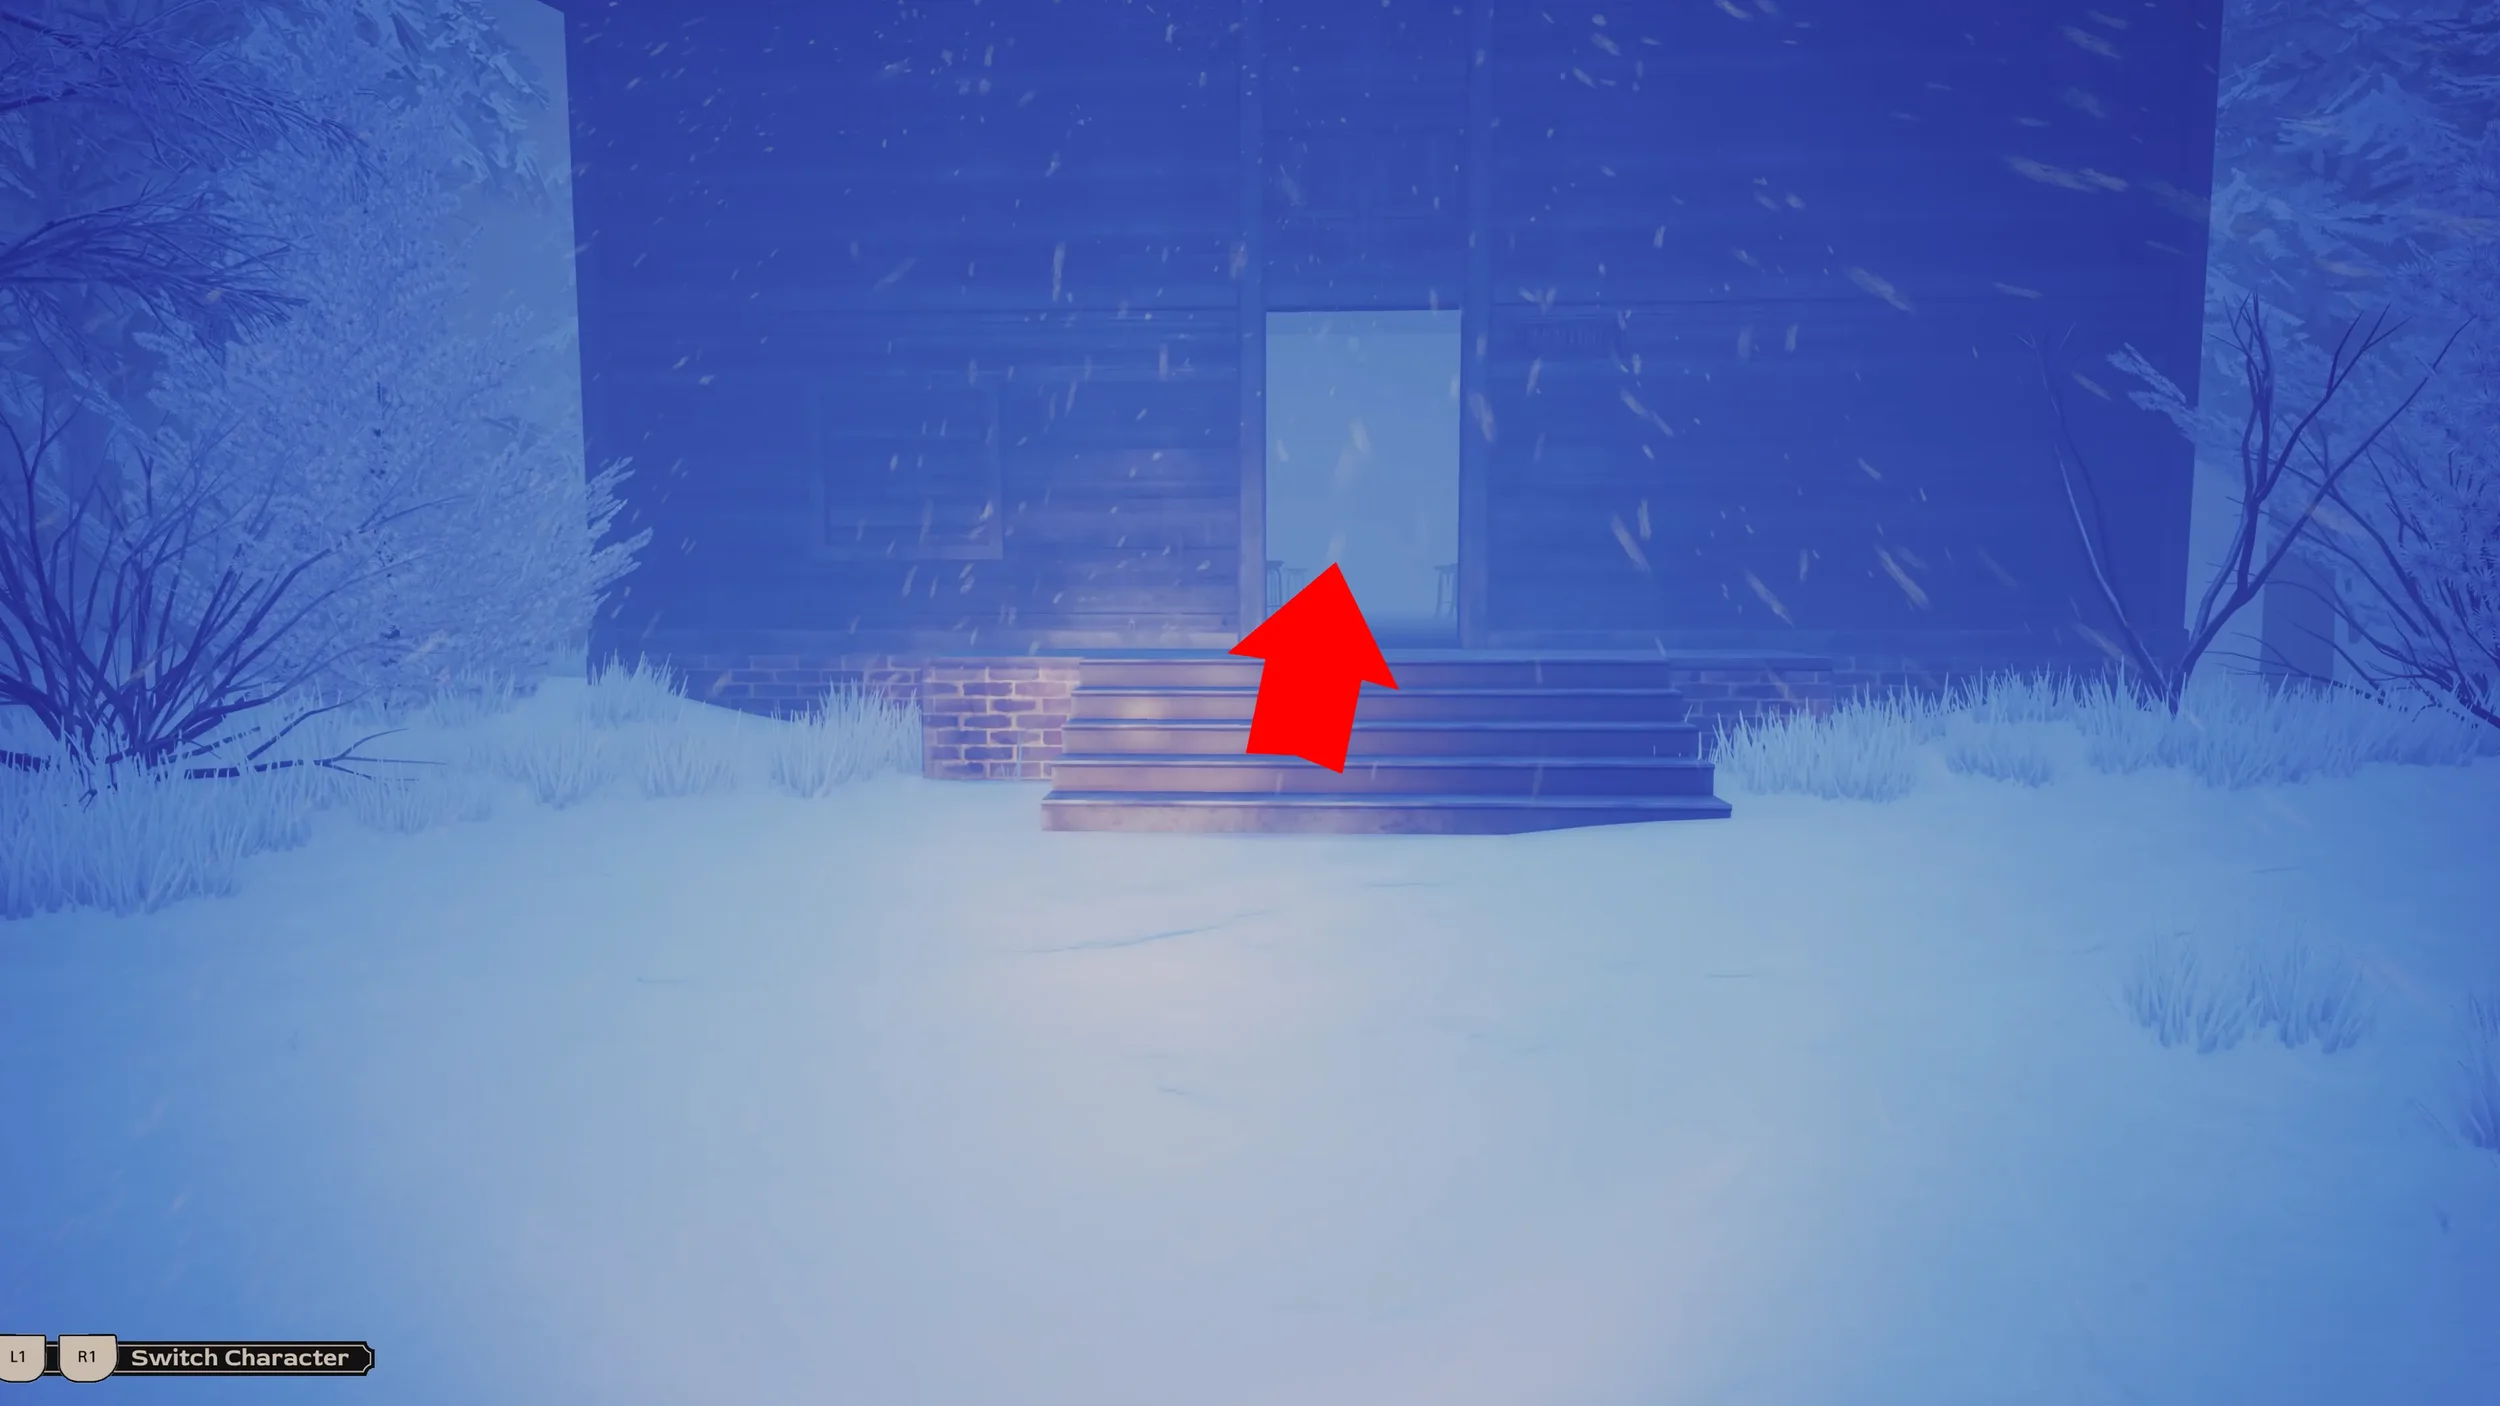
Now that we have the Key, exit back out of the Antenna Building through the same door that we just came through, go down the hill again slightly and you will see the Generator Building on your left hand side, use the Key we just got to go inside this building.
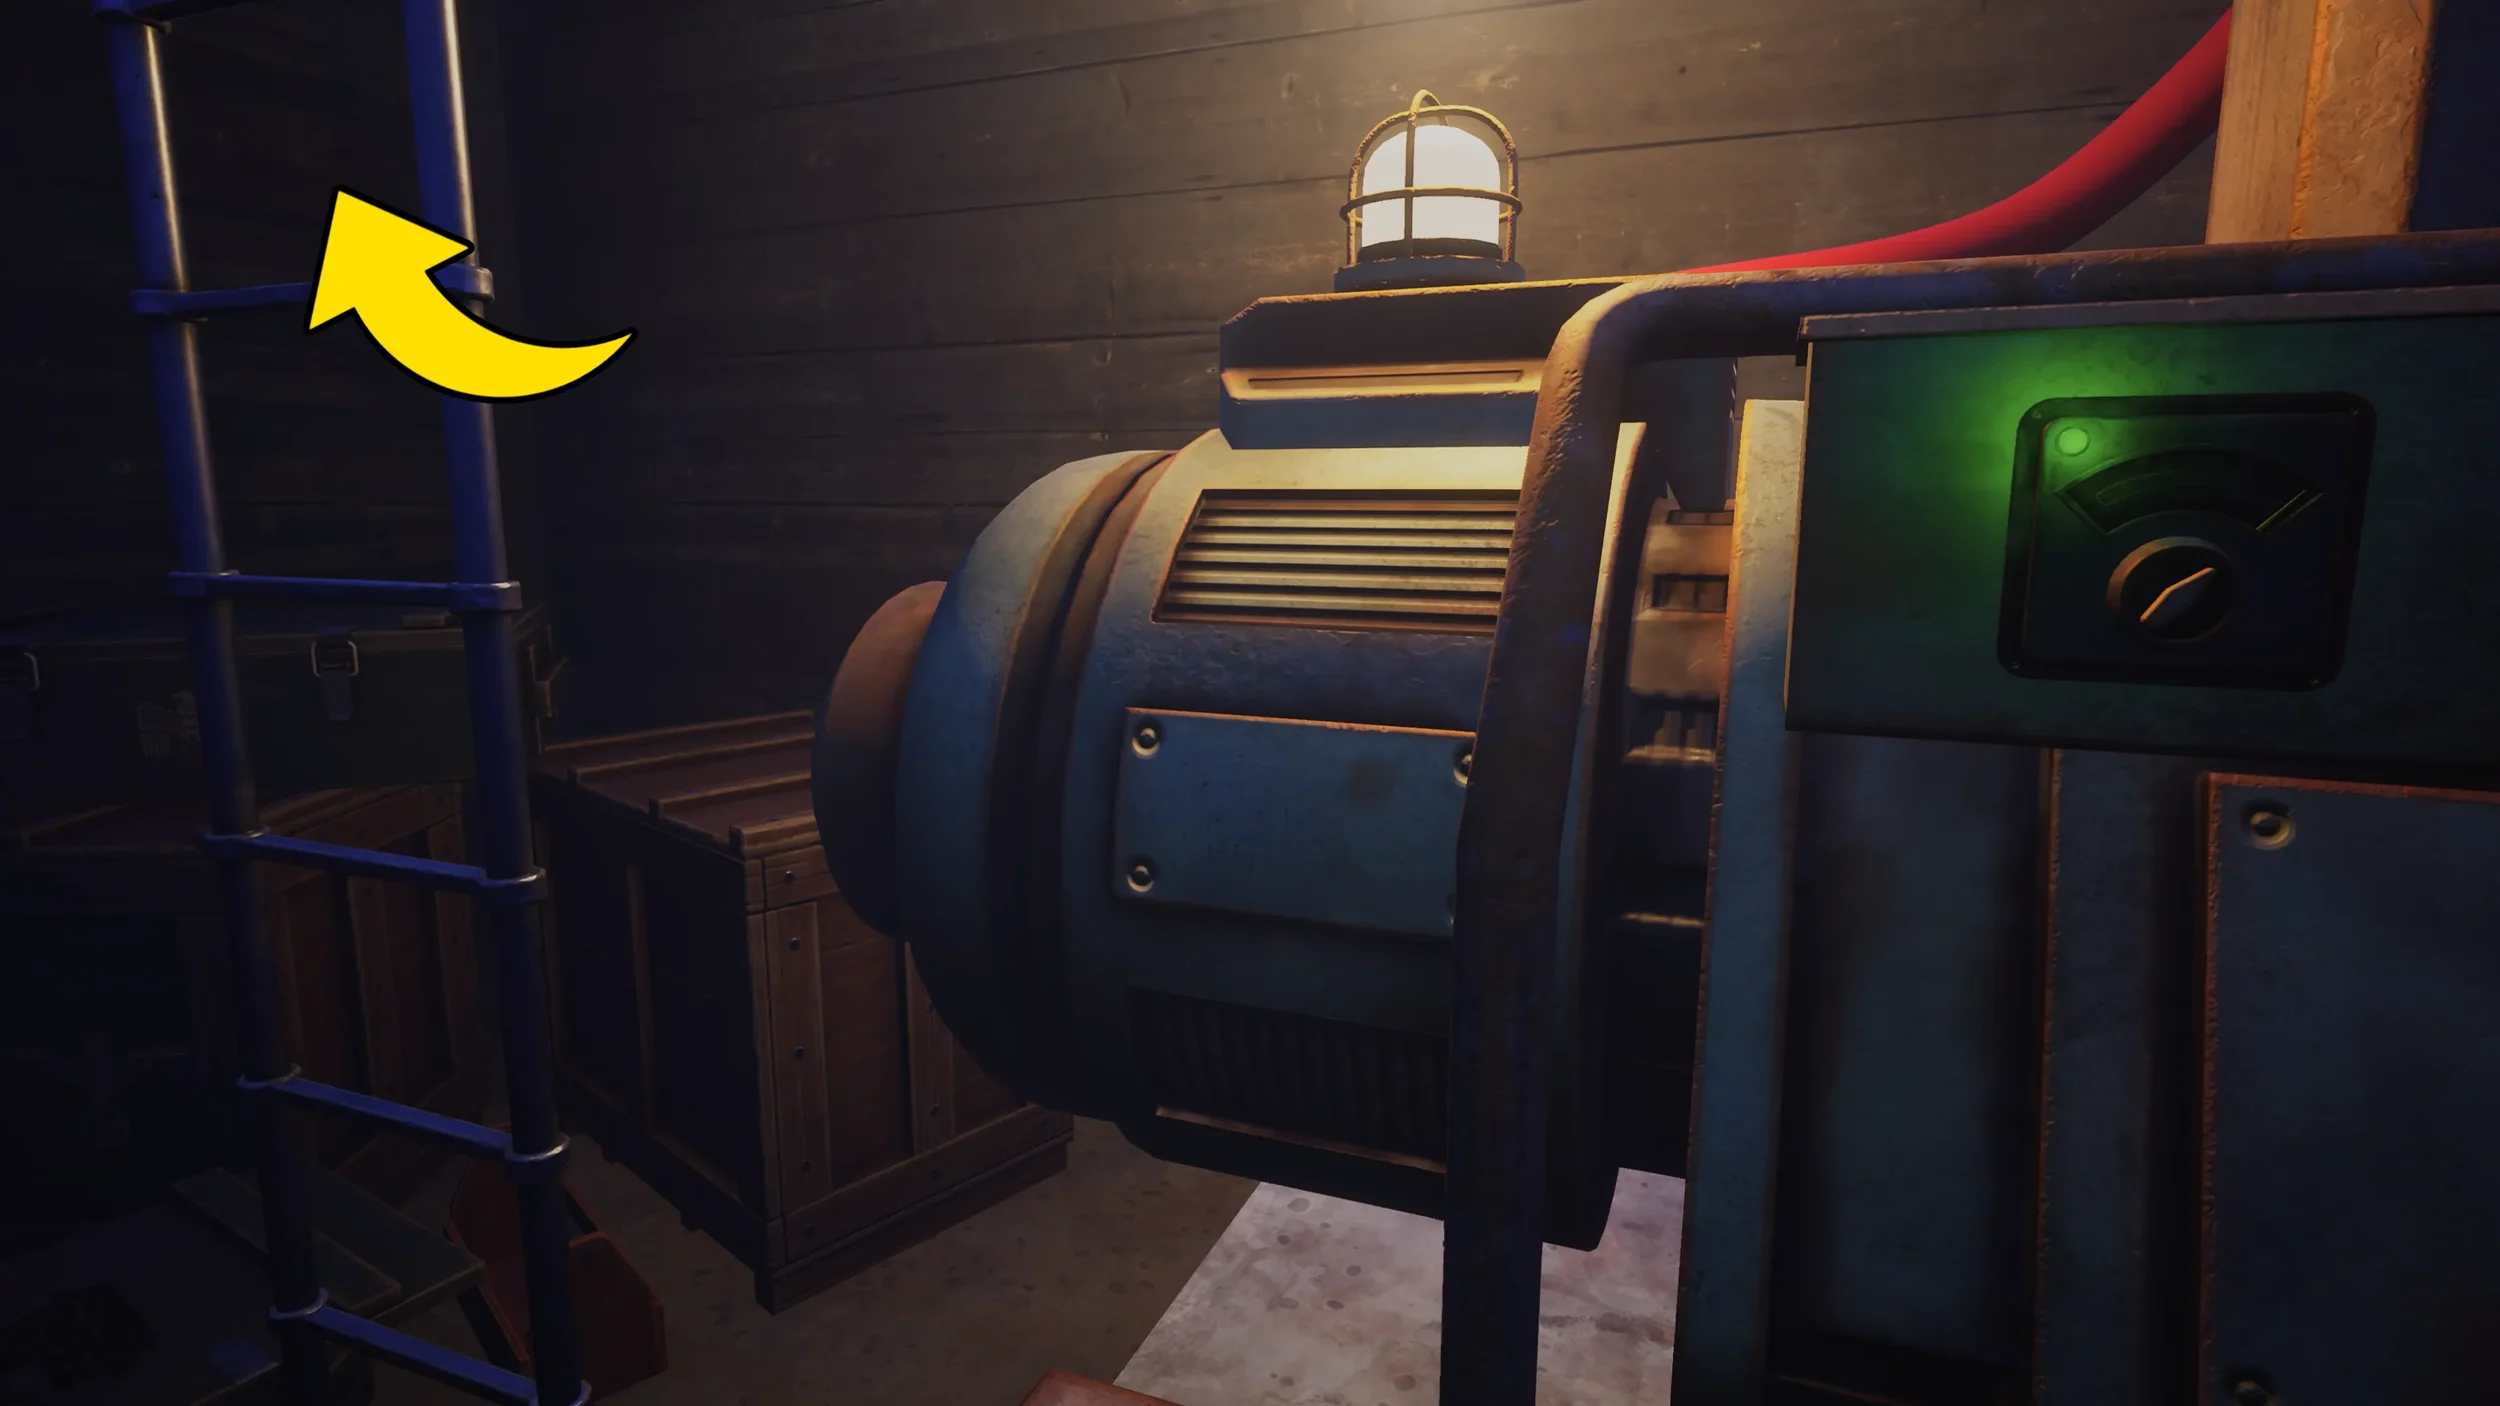
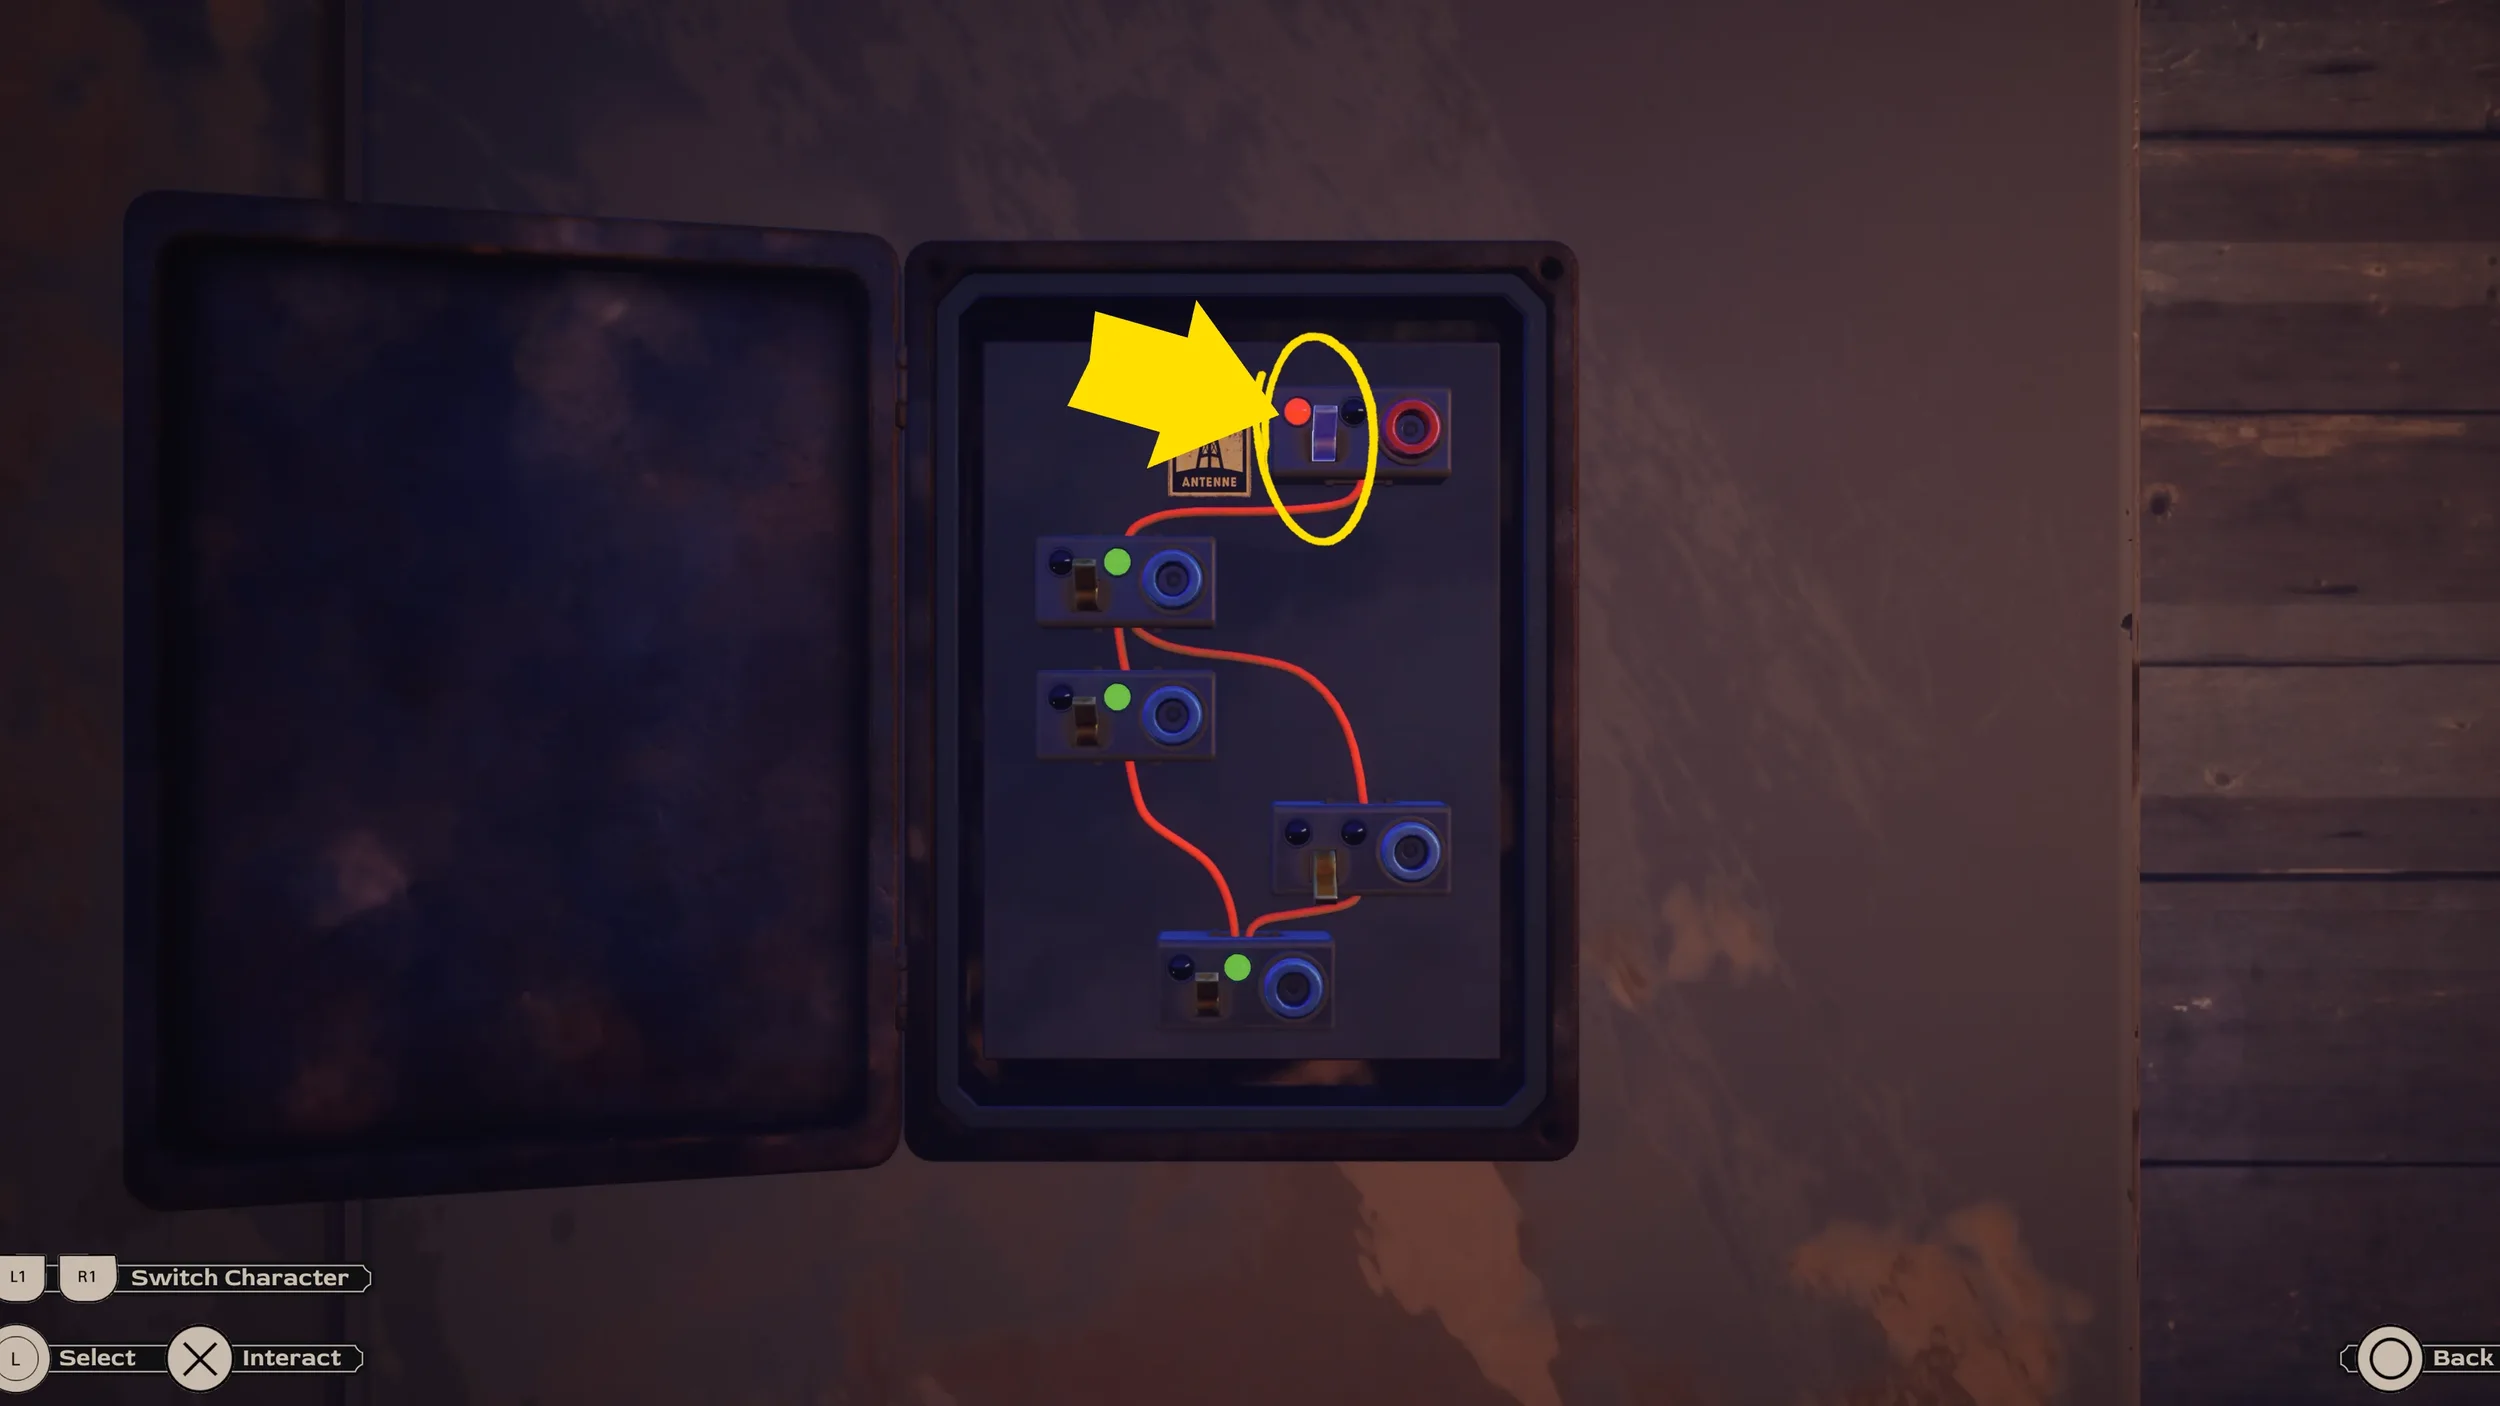
Interact with the Generator to attempt to turn it on, then after a short conversation go up the ladder next to the Generator. On the upper level you need to attempt to open the Fuse Box just to be told that you need to find a Screwdriver, the Screwdriver can be found on the table directly to the right of the Fuse Box.
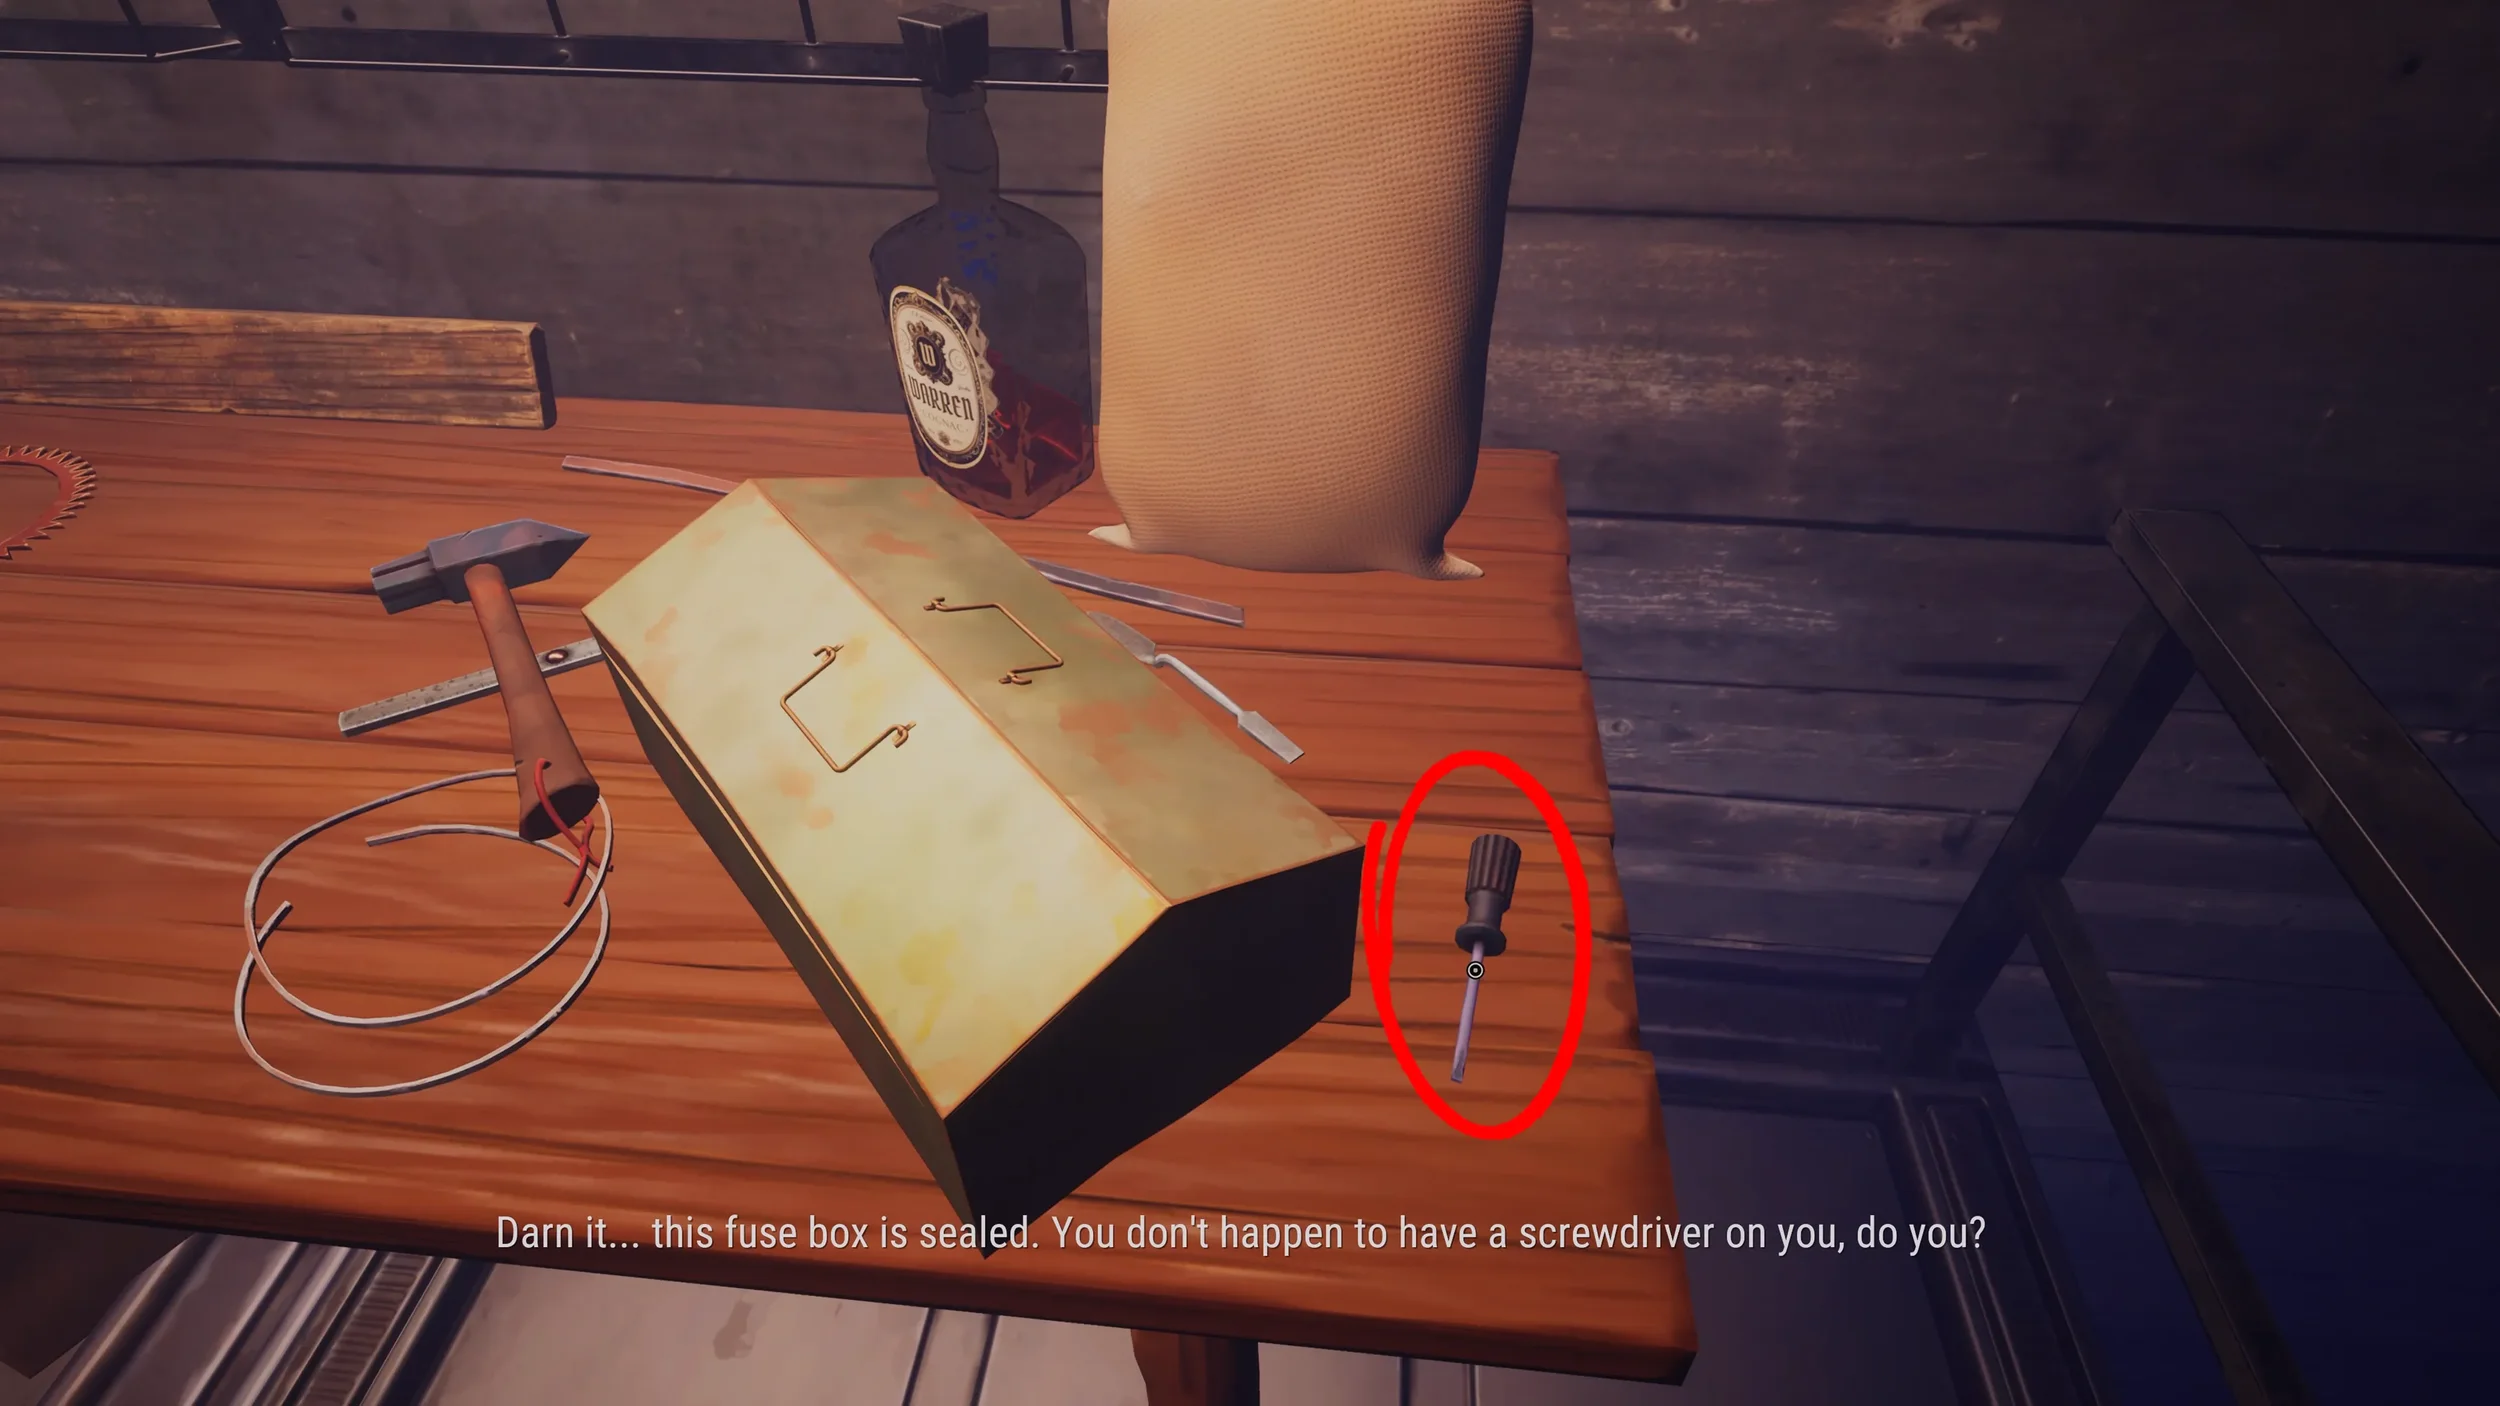
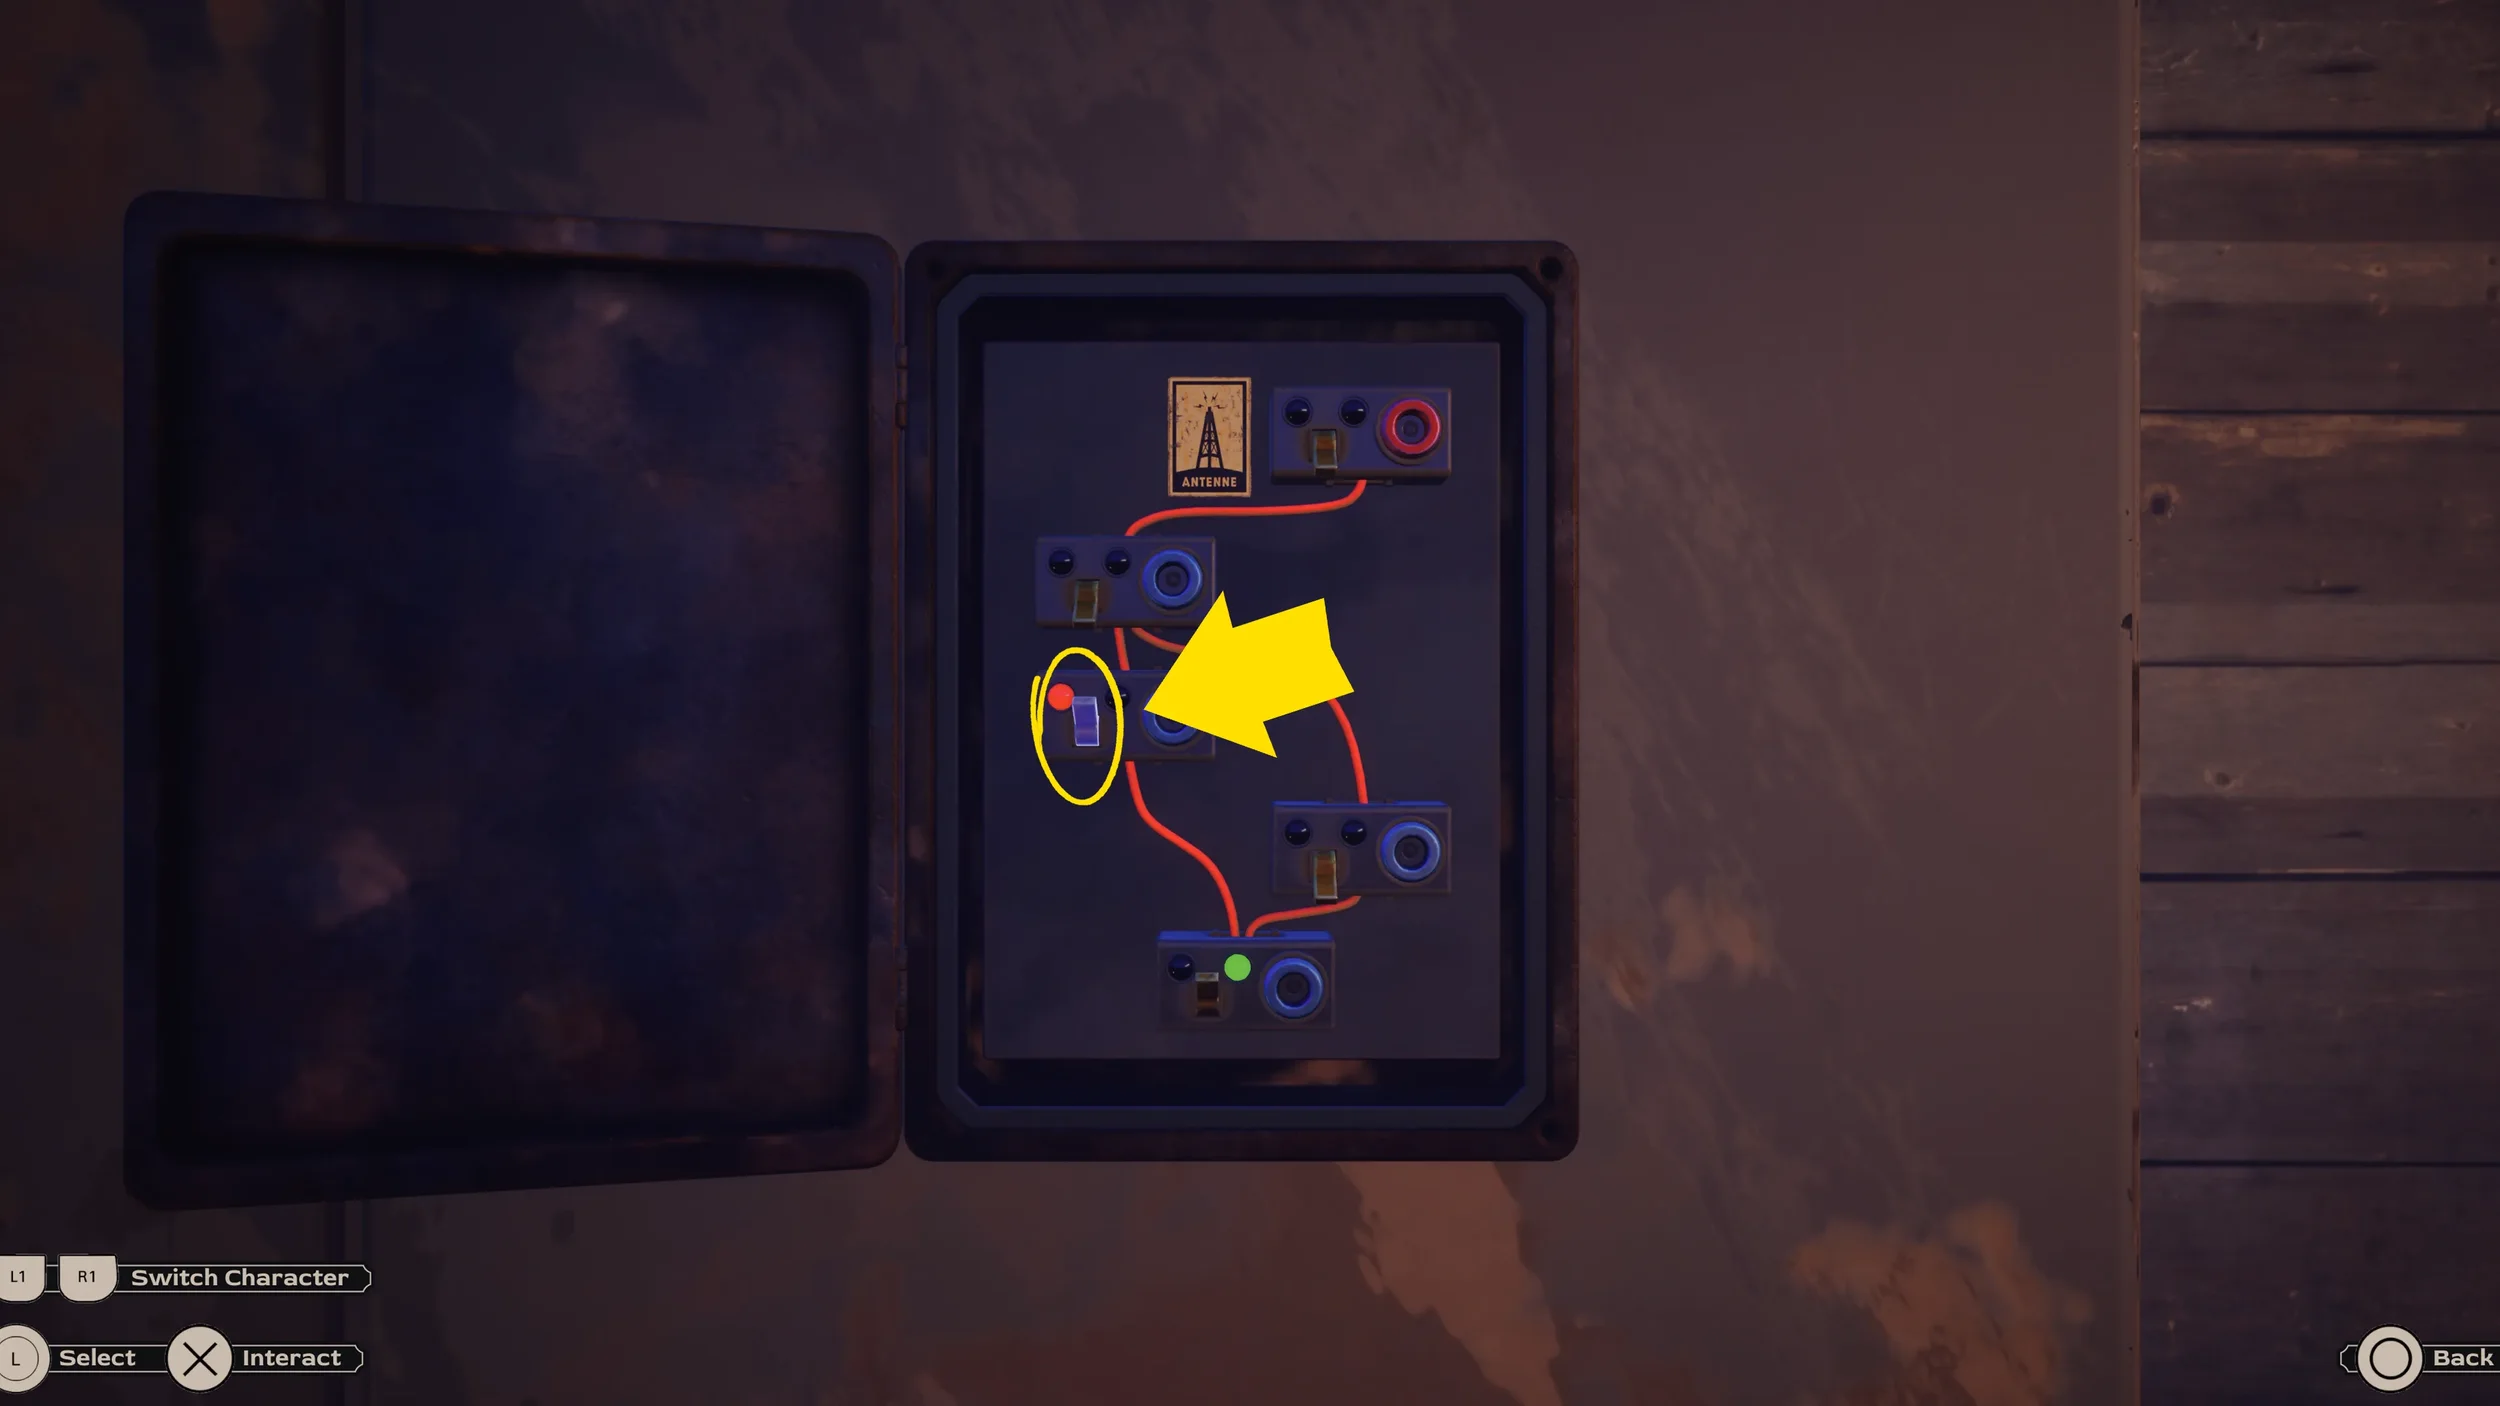
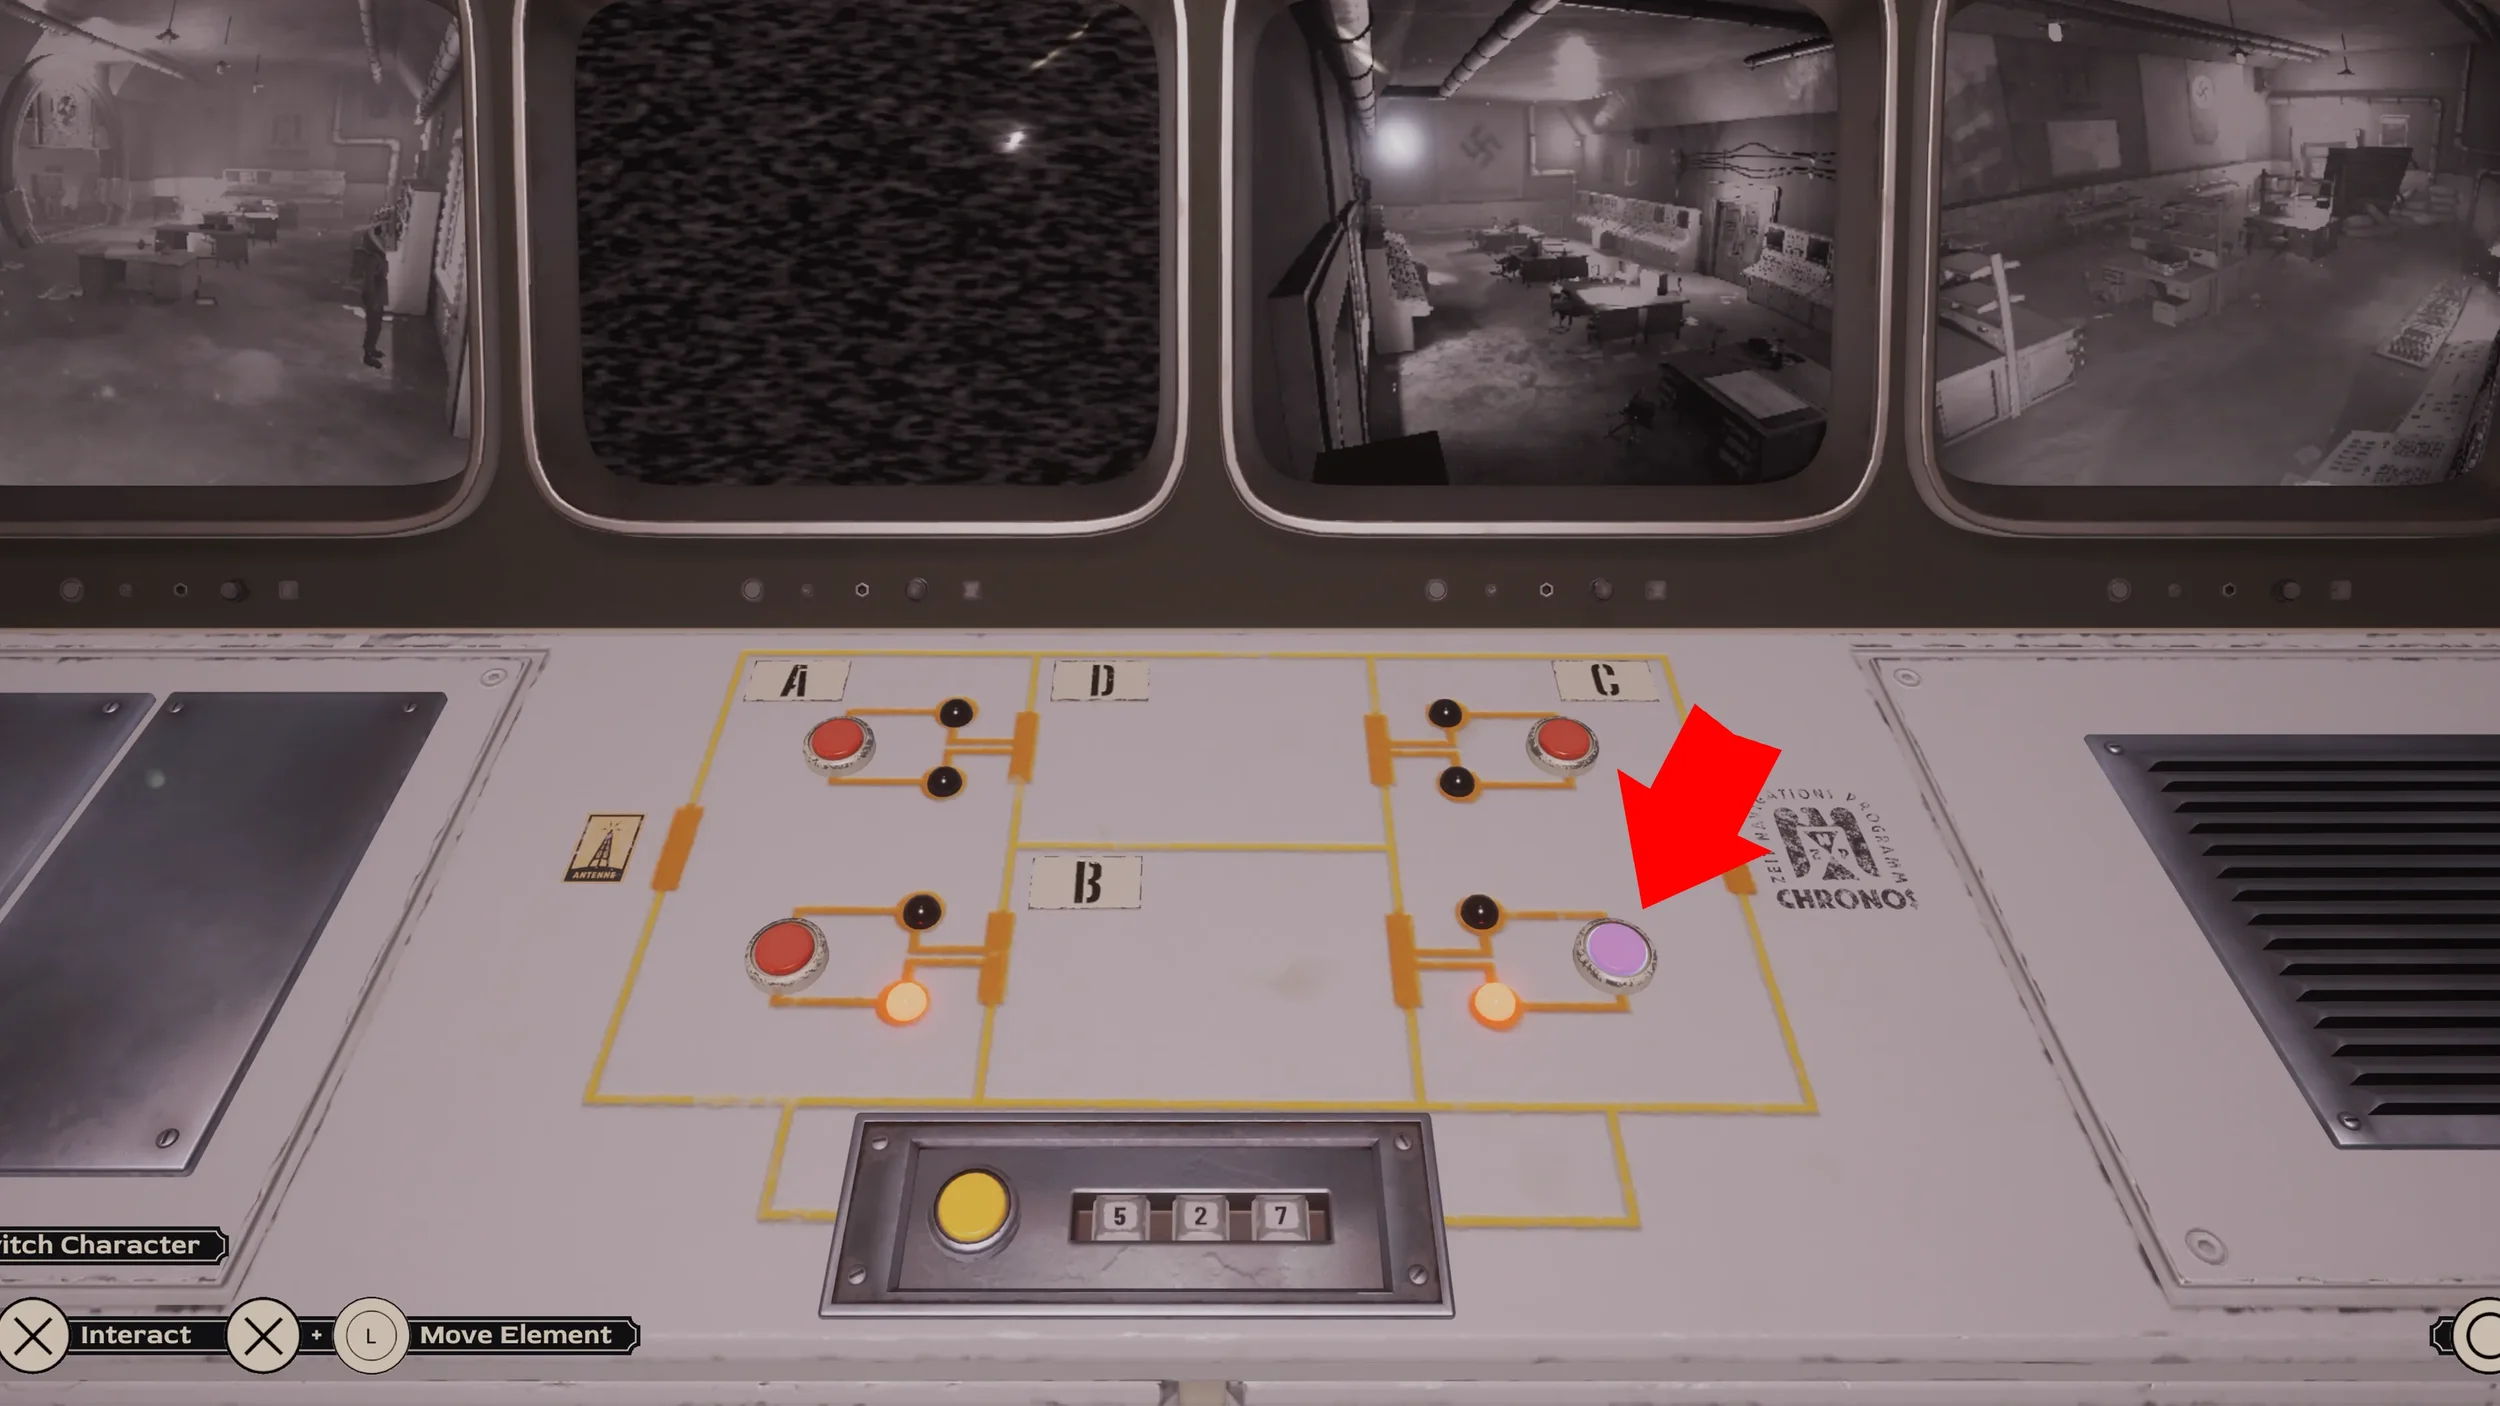
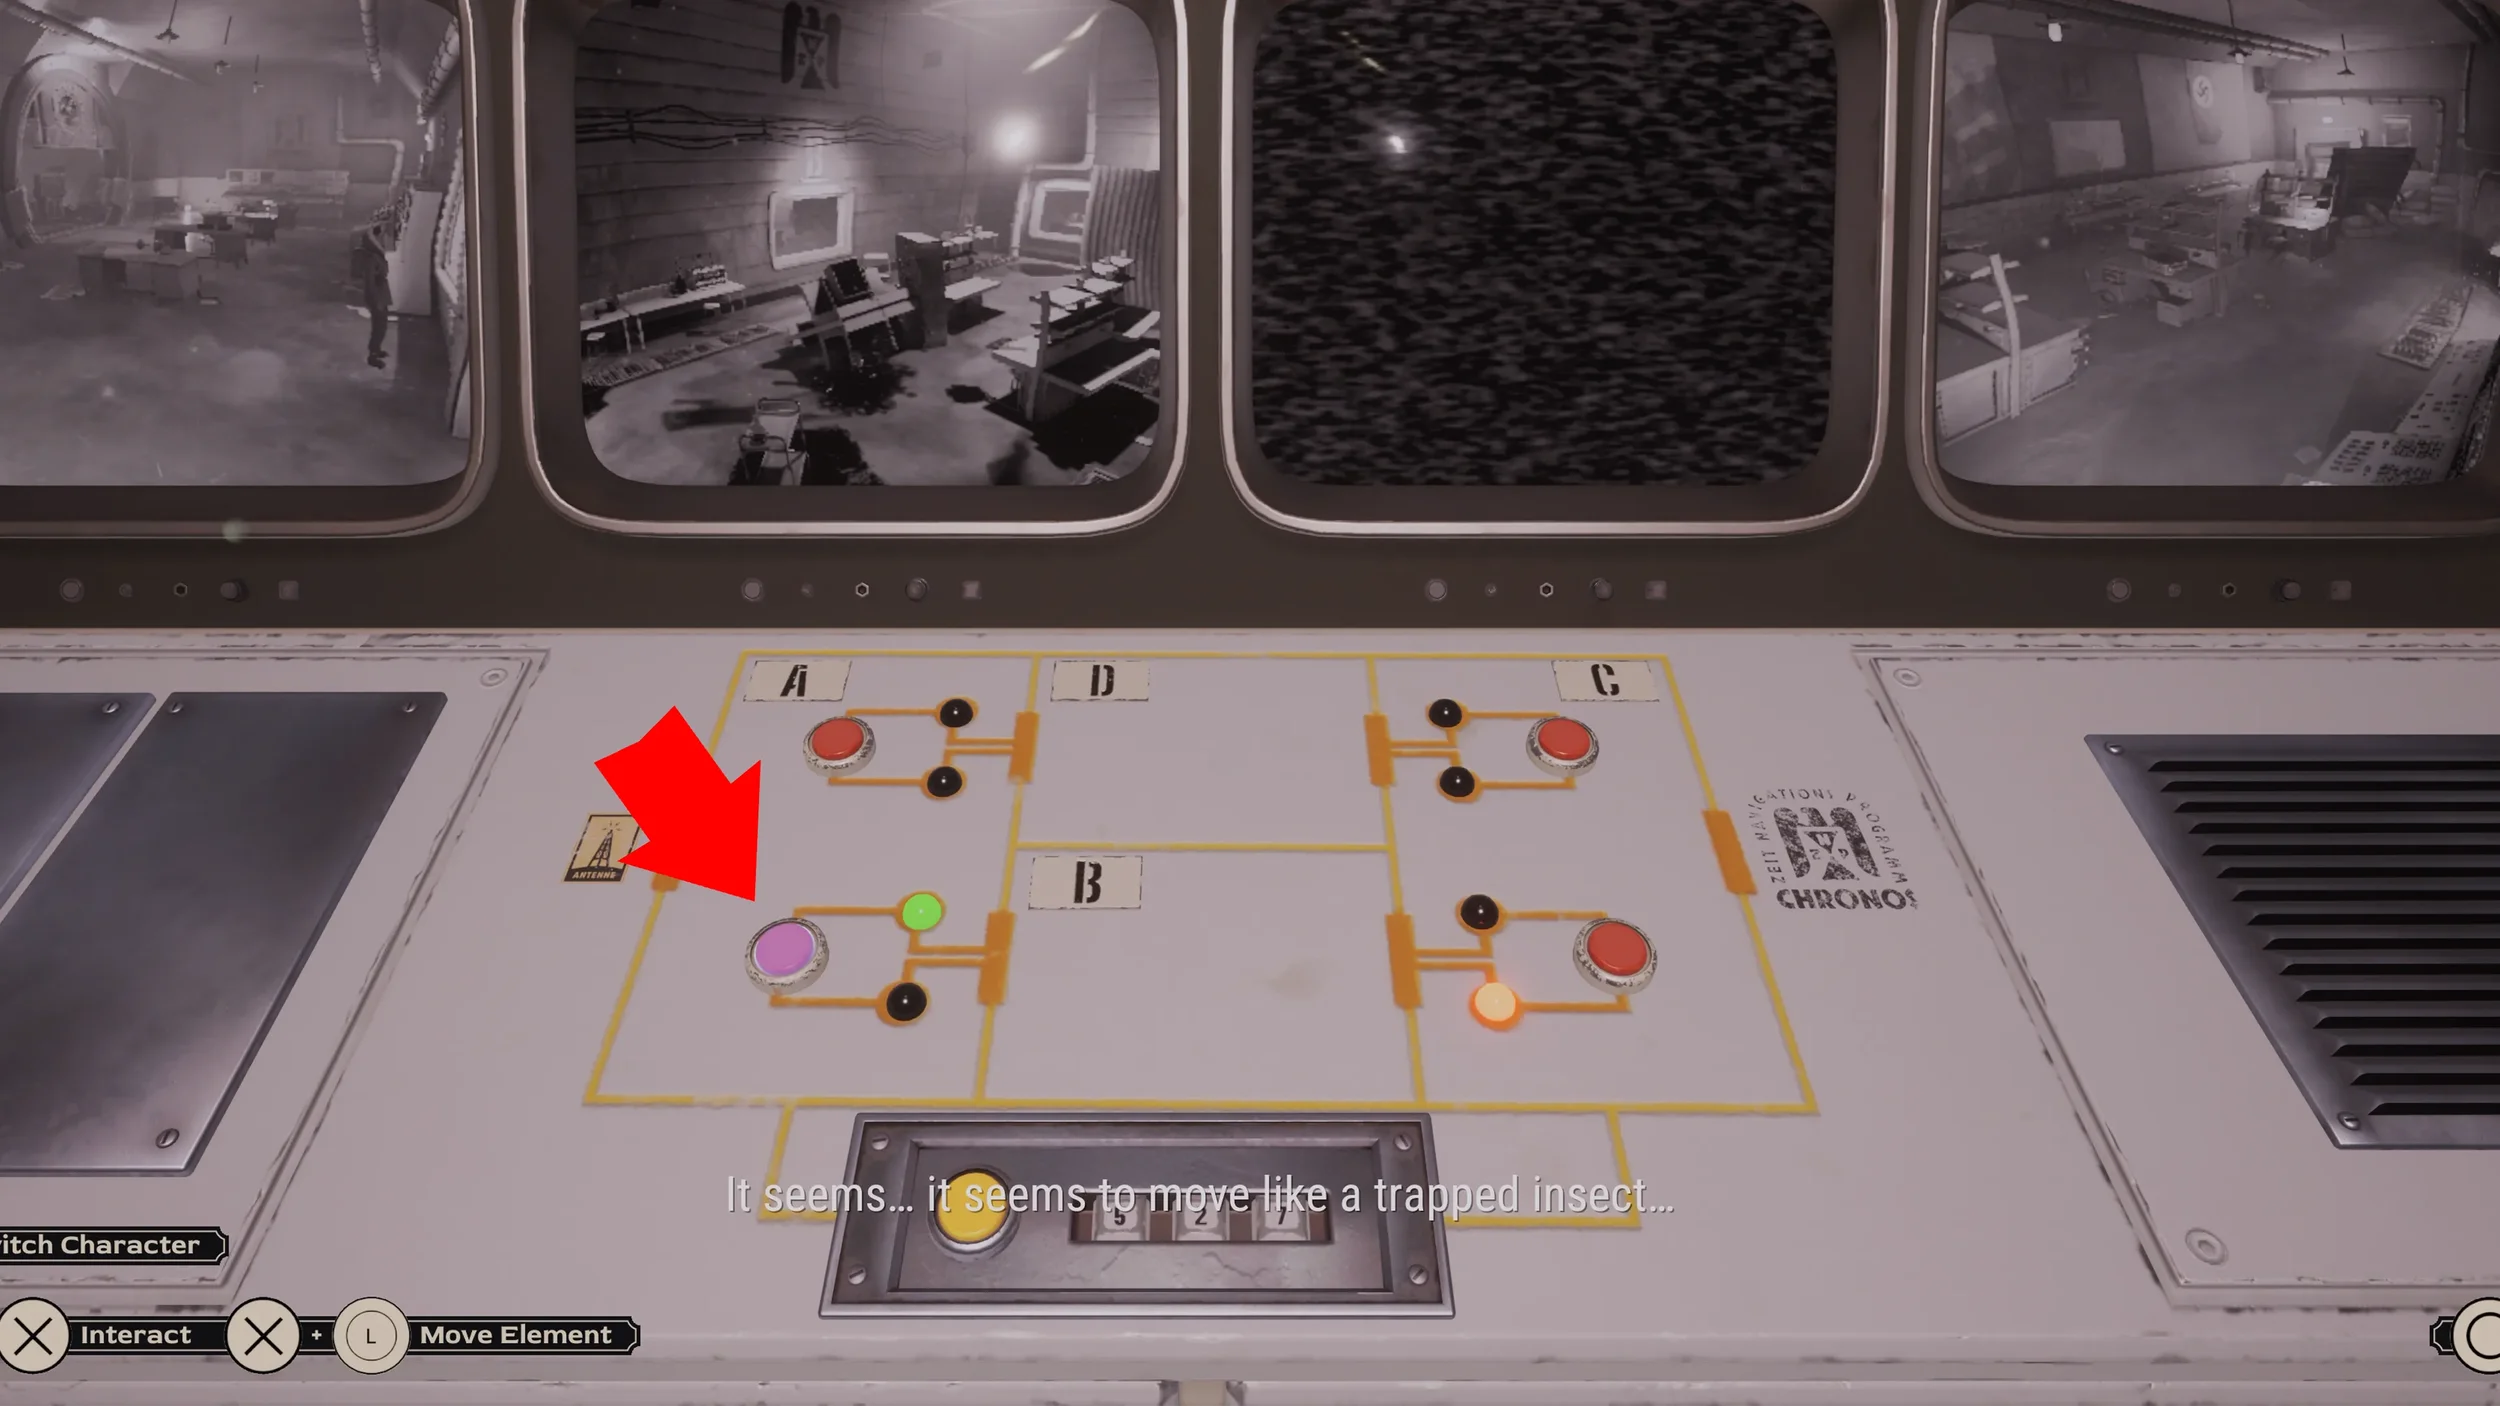
Now that you have the Screwdriver you will be able to open the Fuse Box by interacting with all 4 corners of the cover. Once it is open flip the Bottom Switch first, then press R1 to switch to the Professor.
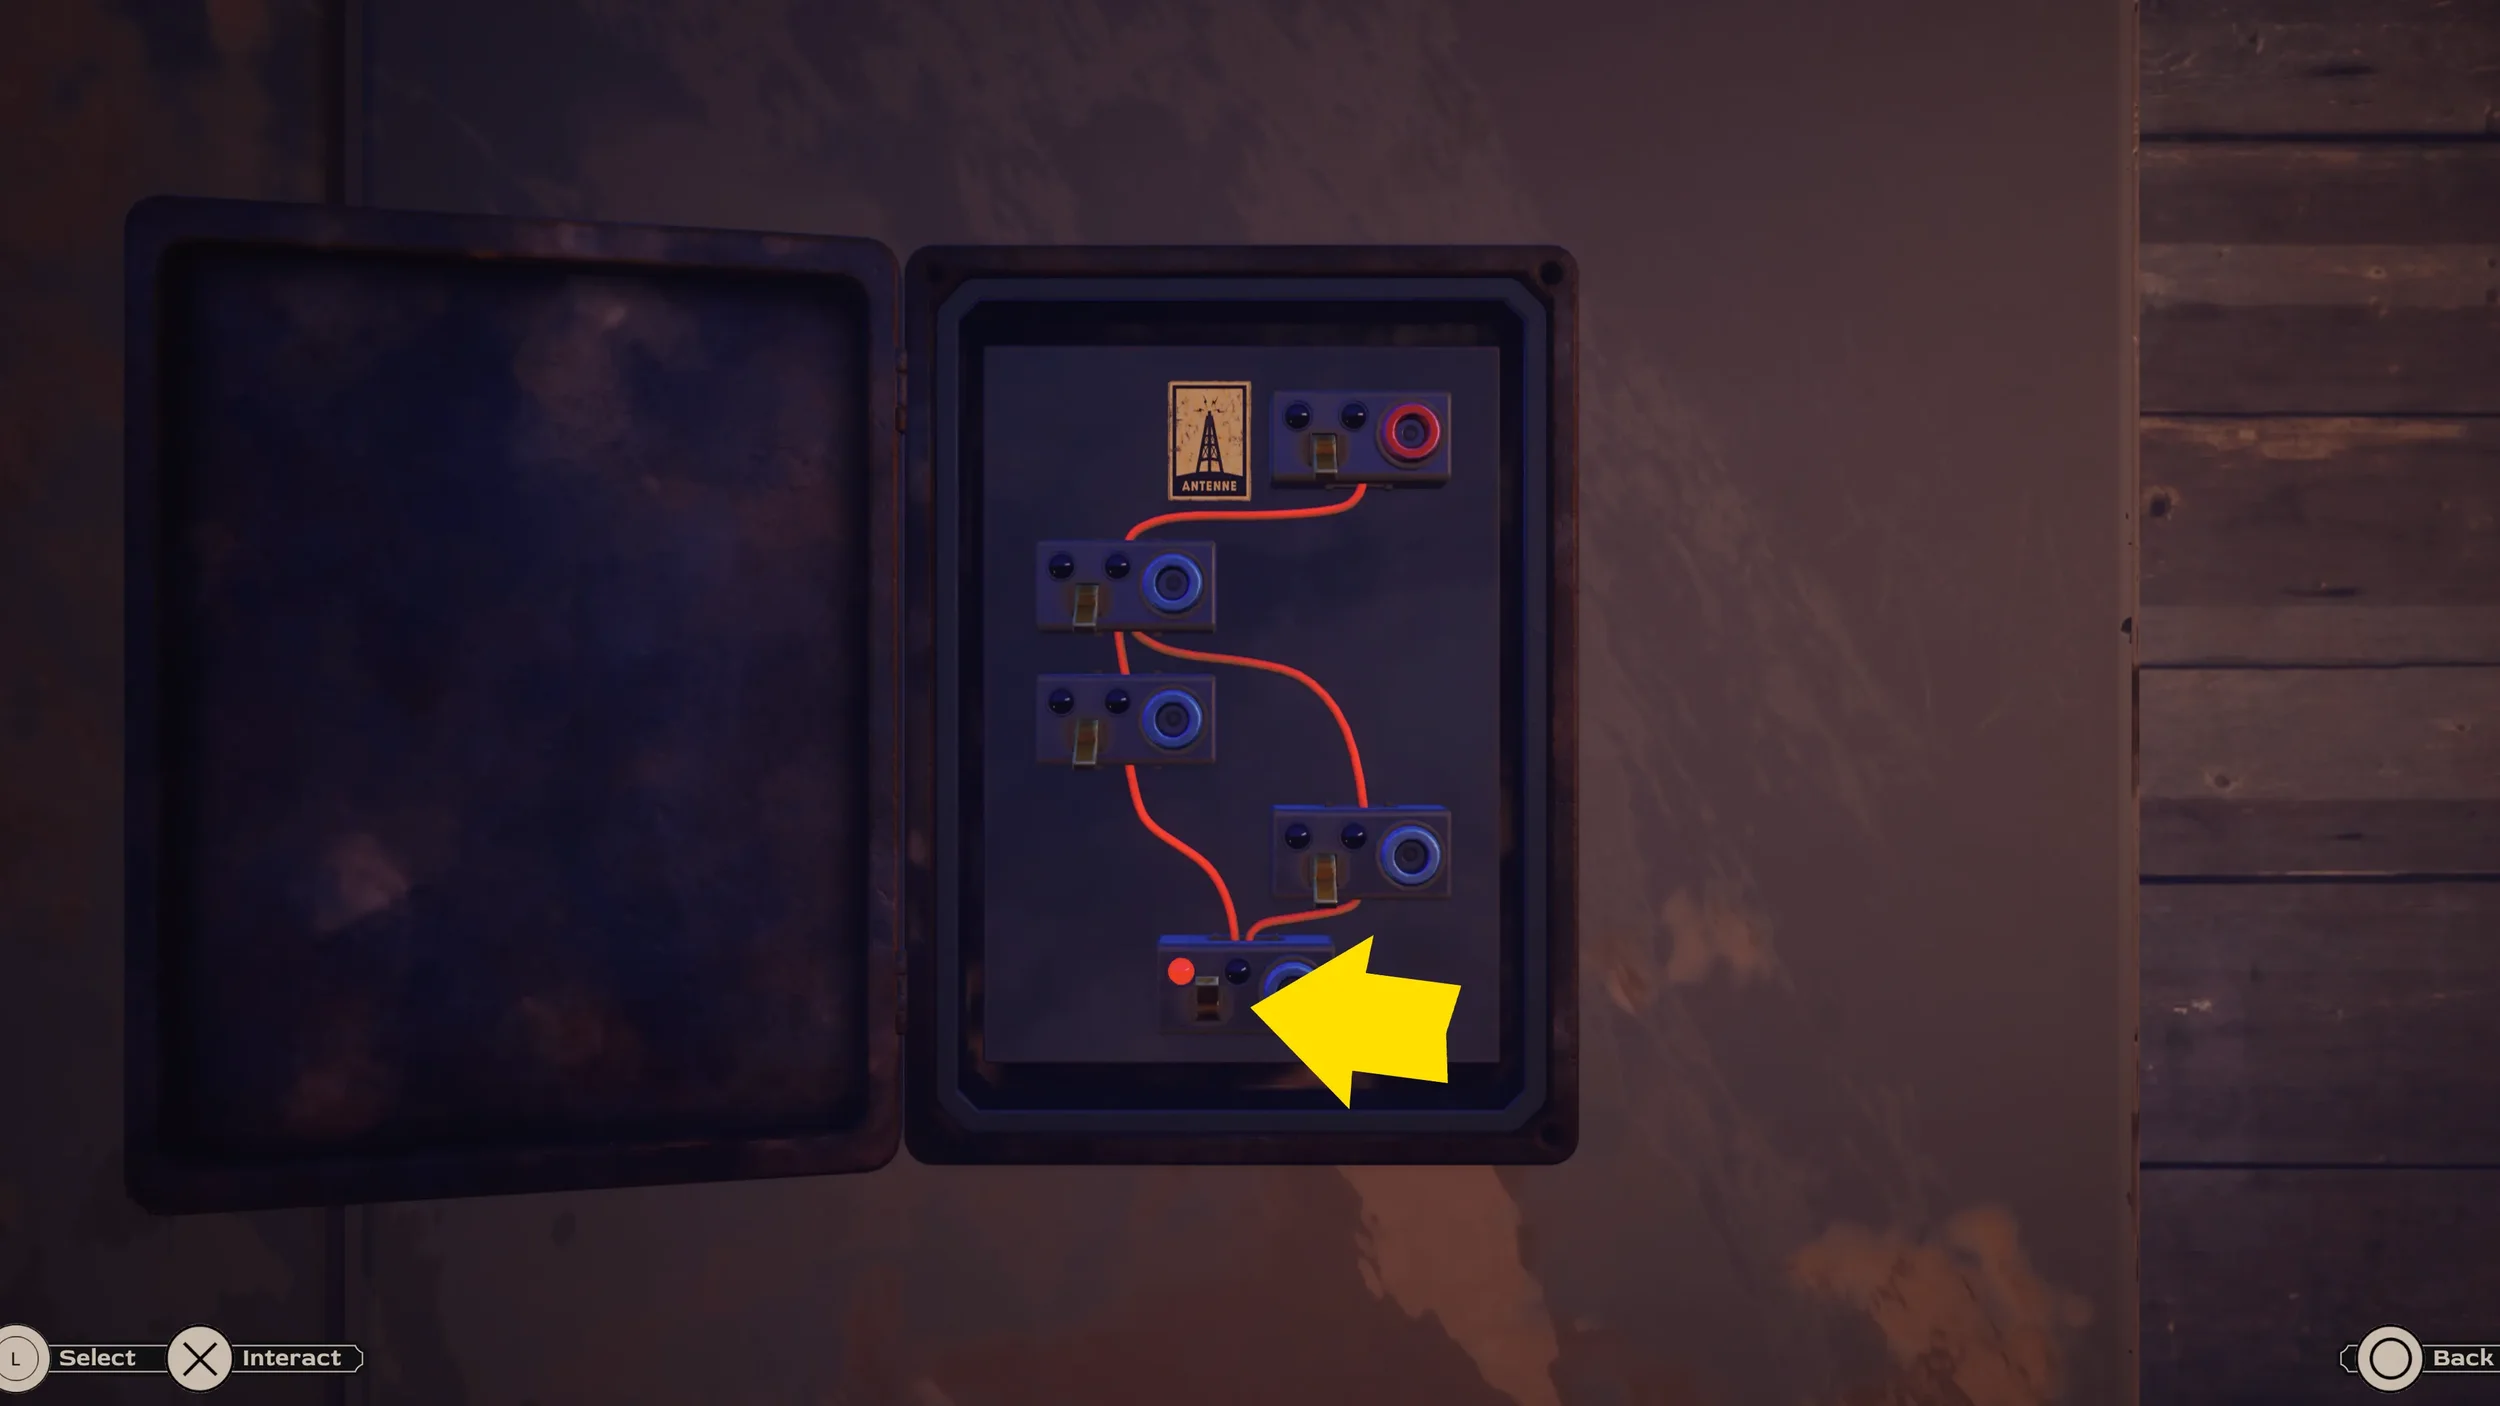
The way this puzzle works is that each Switch is linked to a specific Lever, so we need to flip the correct Switches with Eva then after each one change to the Professor and activate its corresponding Lever.
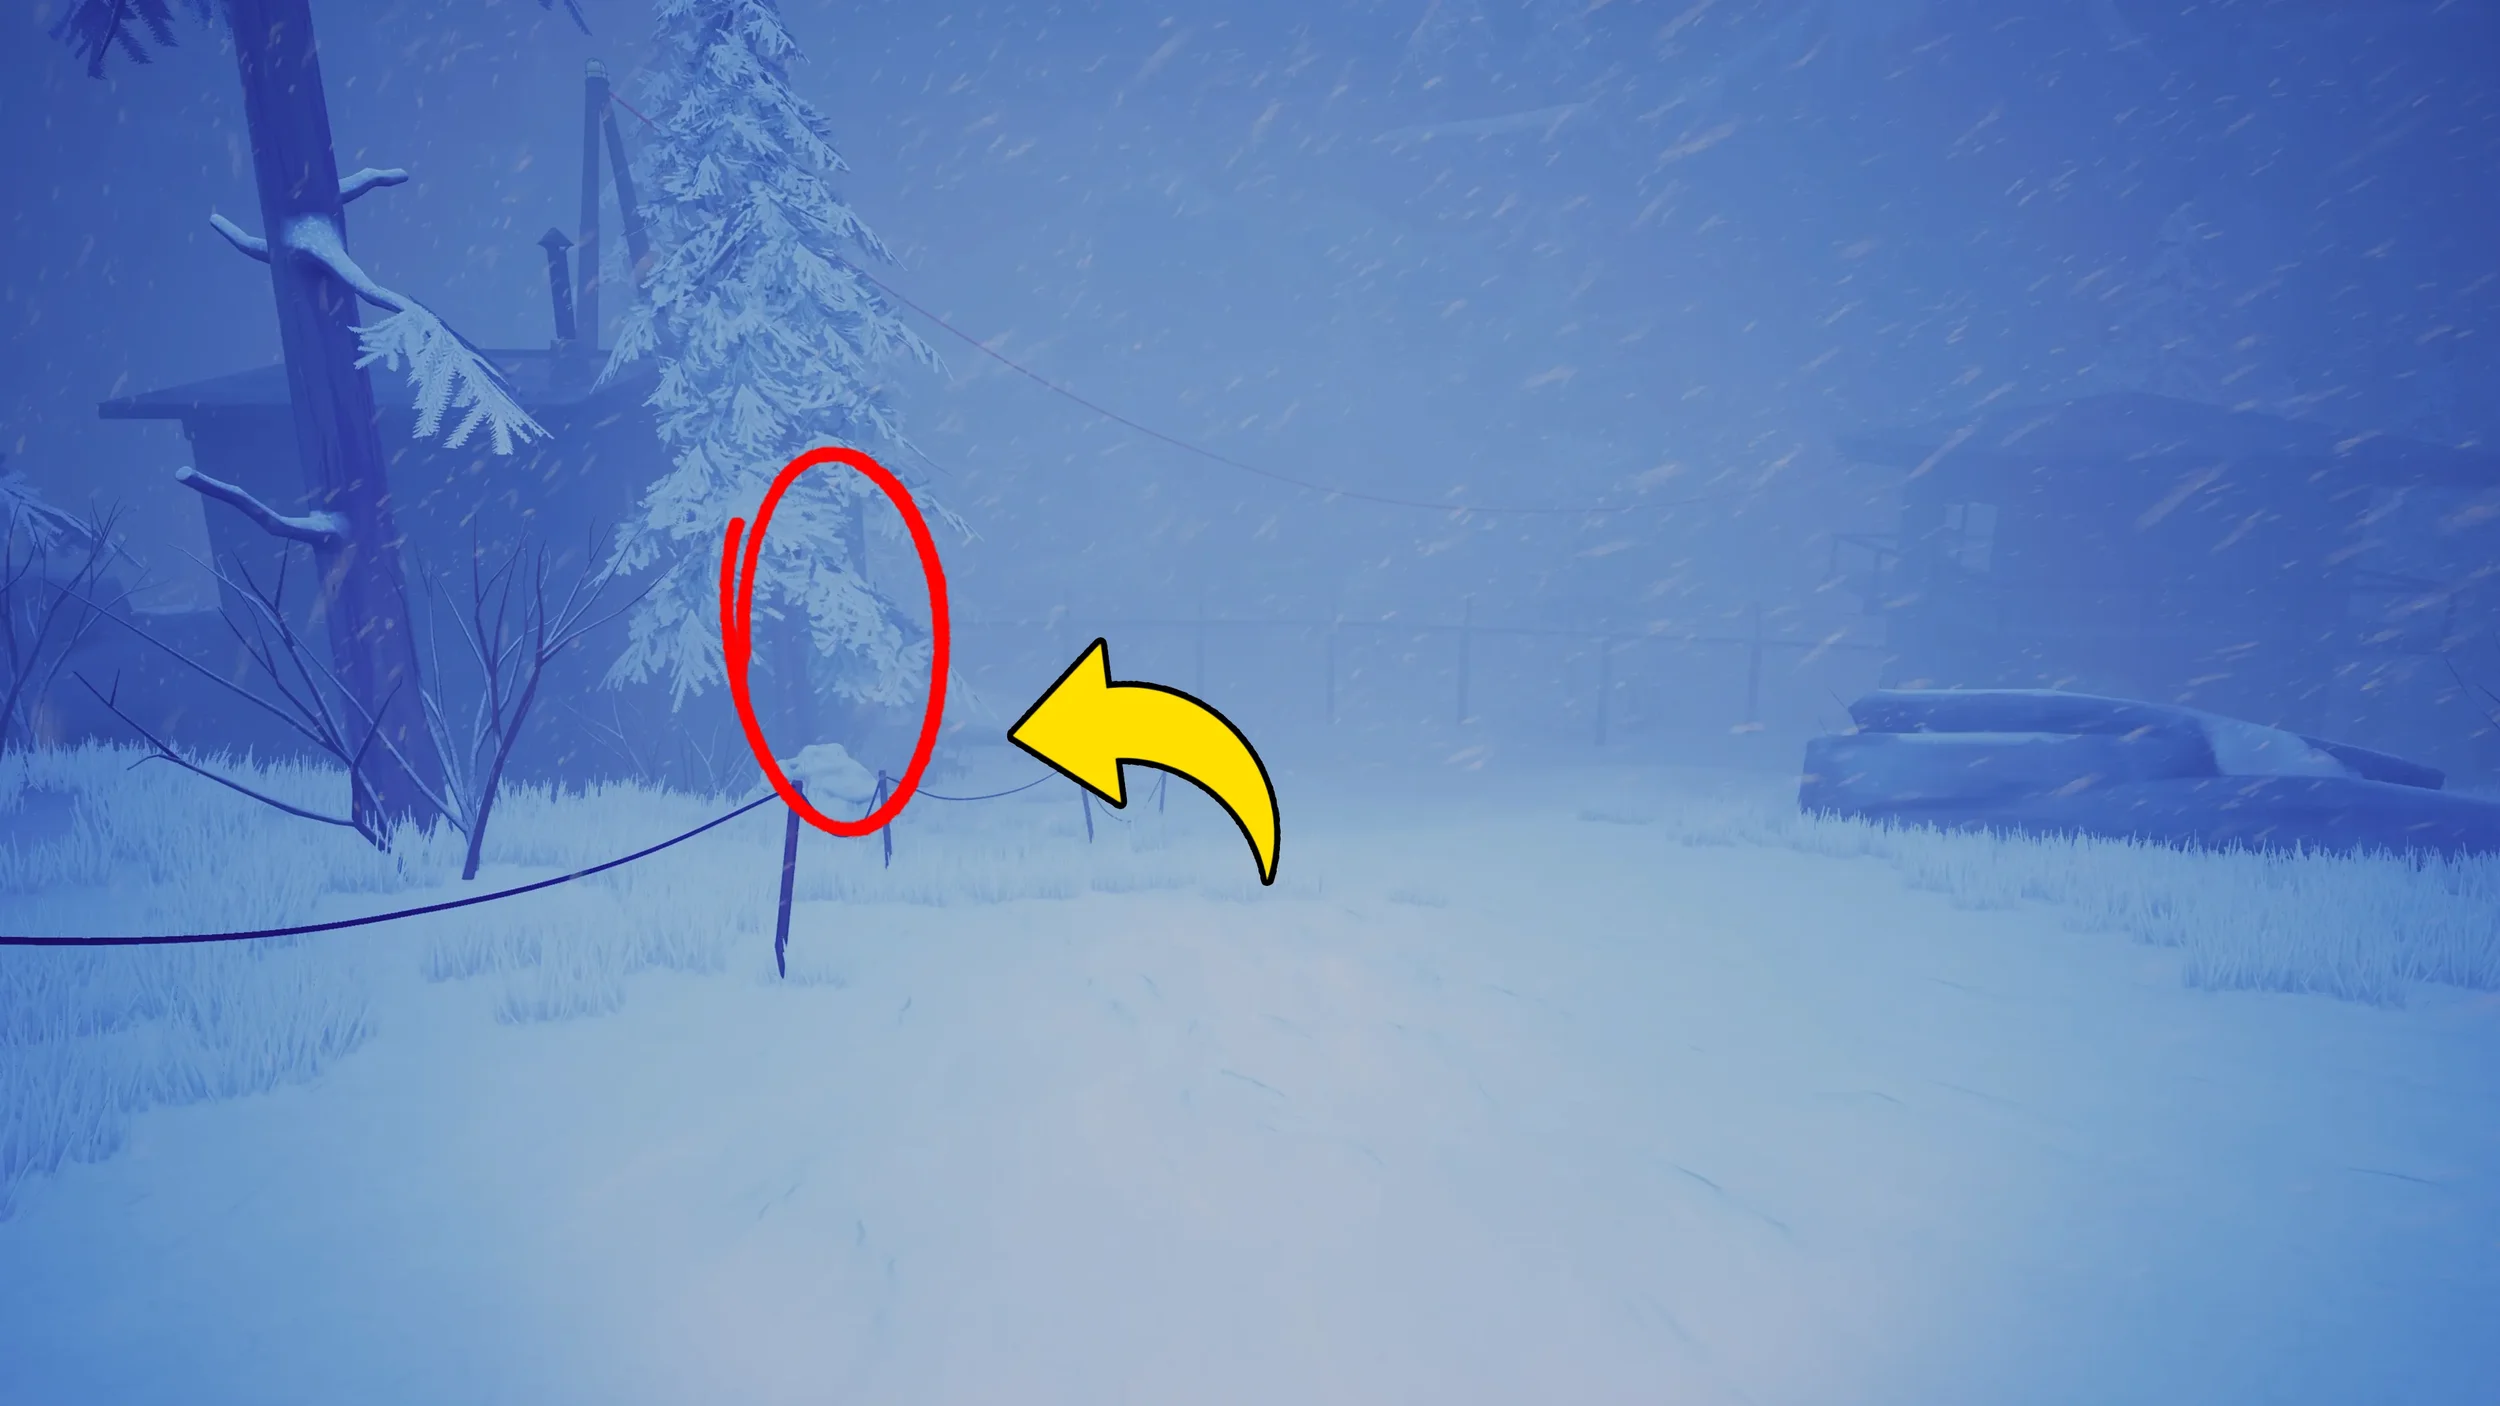
While controlling the Professor exit out of the Generator Building and go back through the first broken building you first came through at the start of the Chapter on the left.
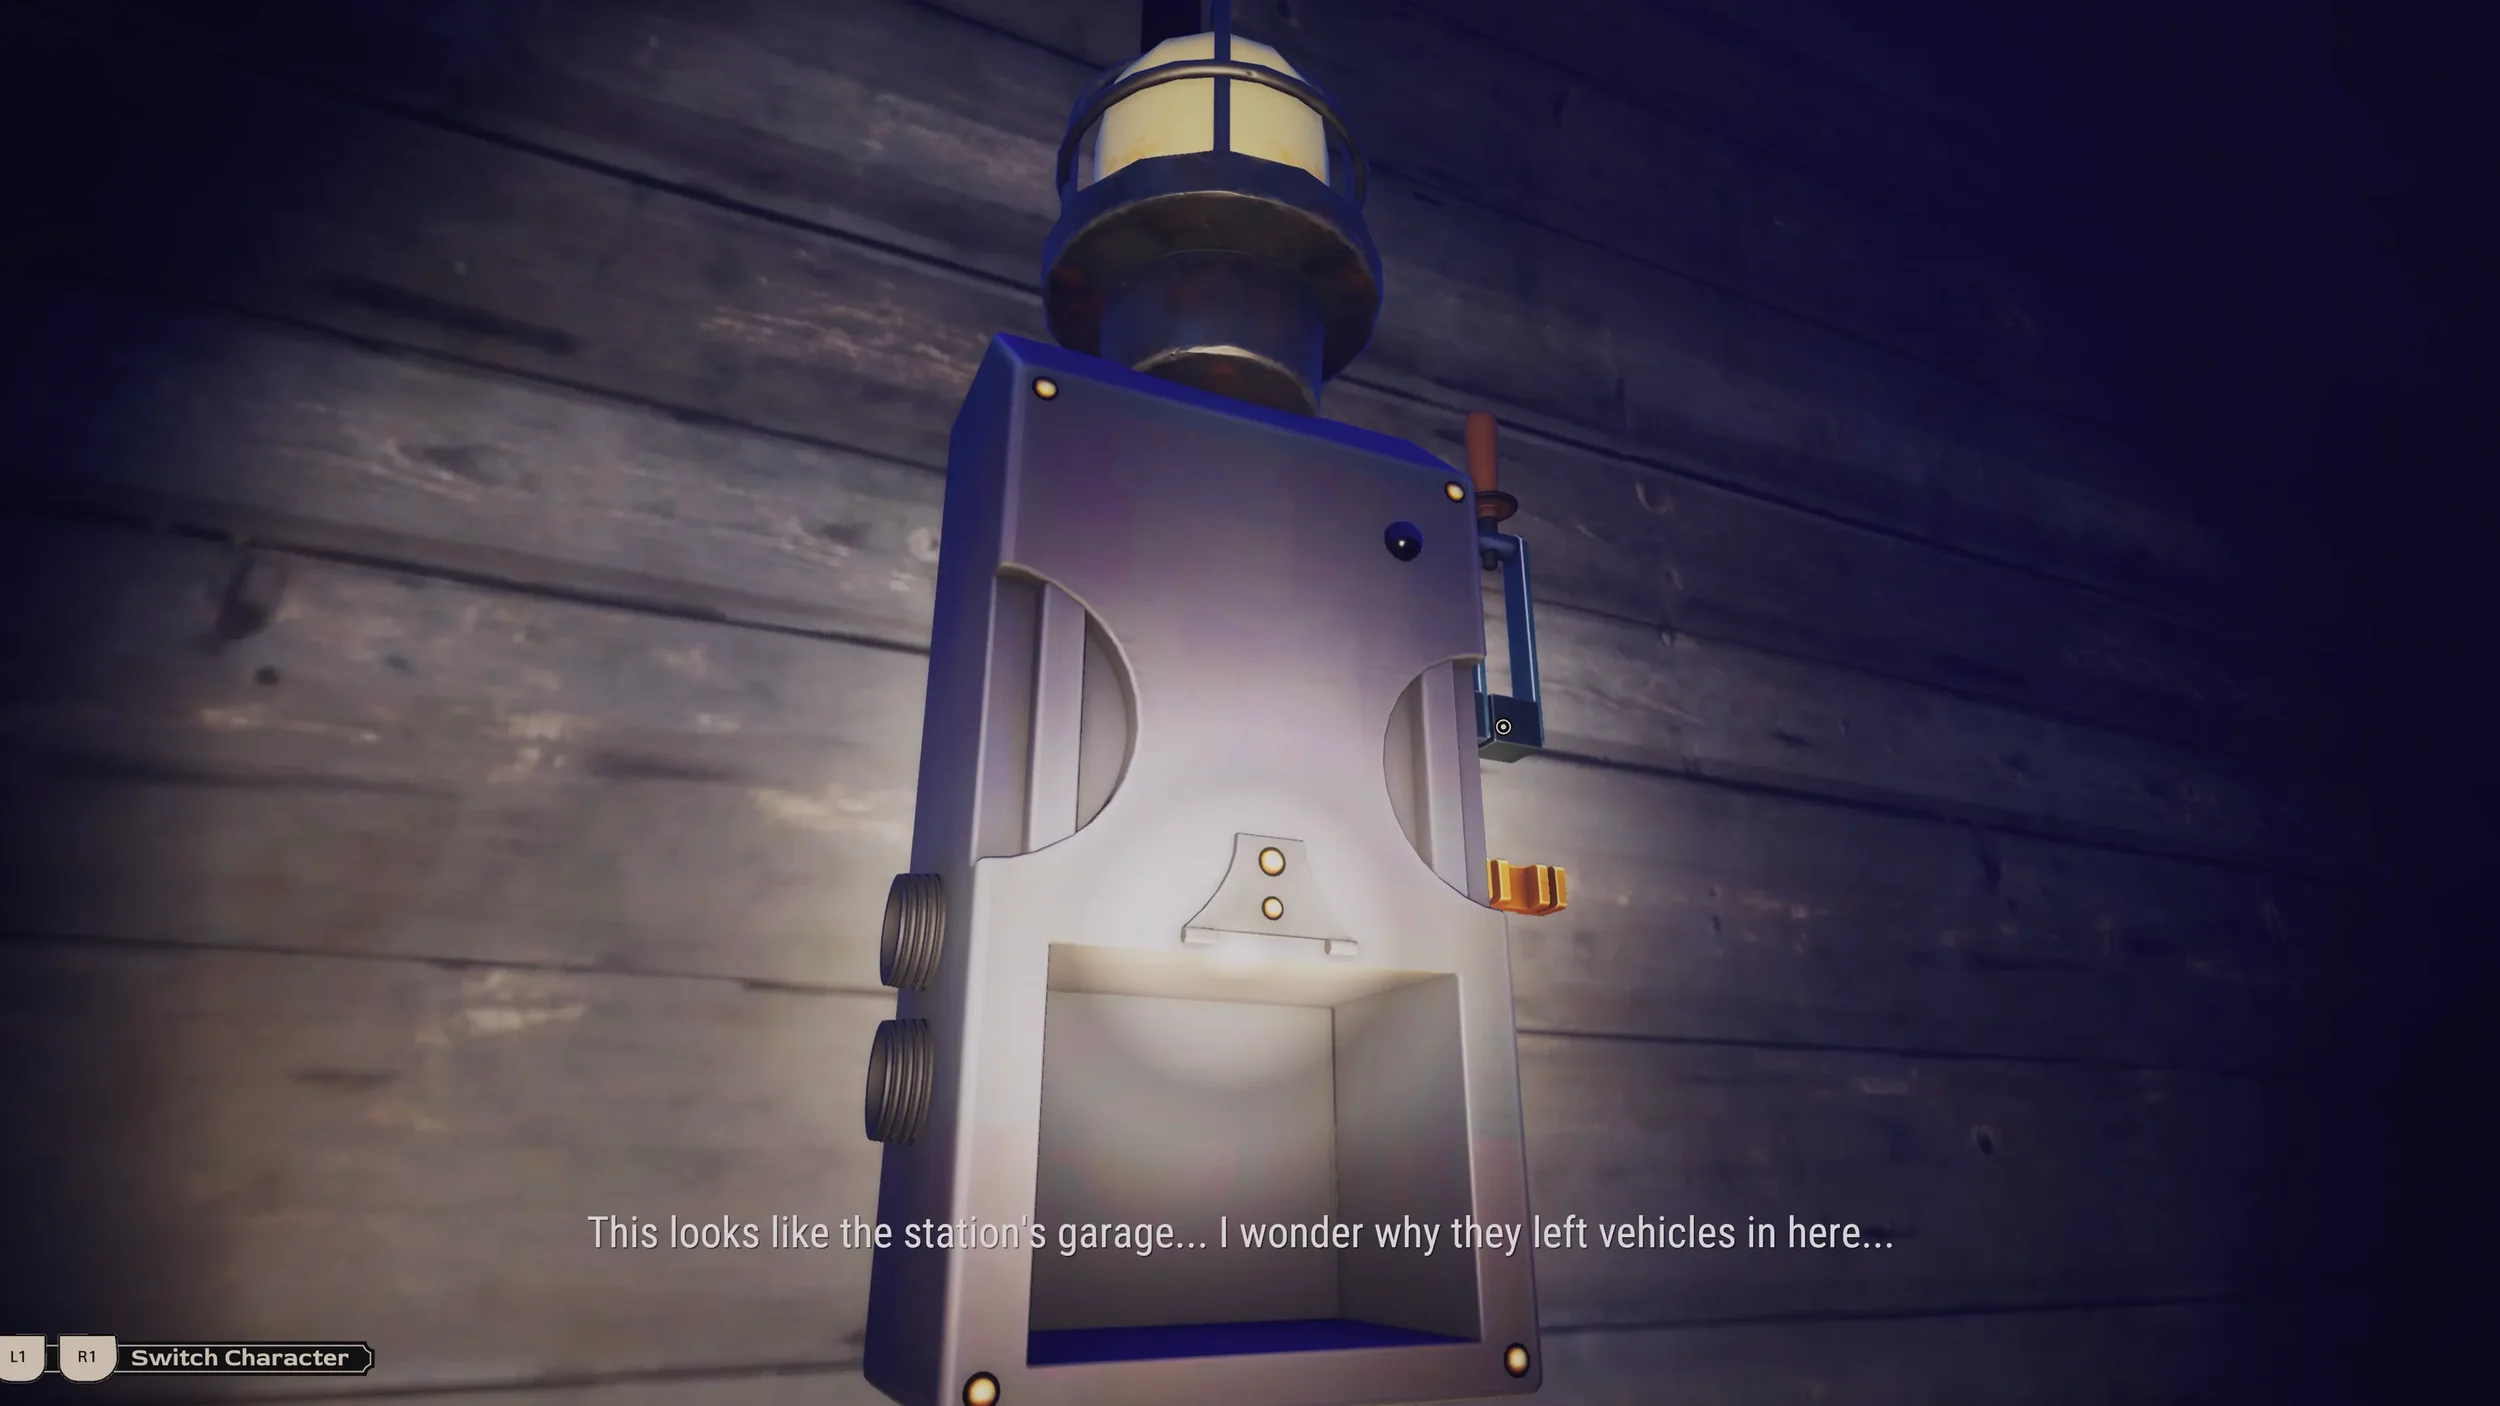
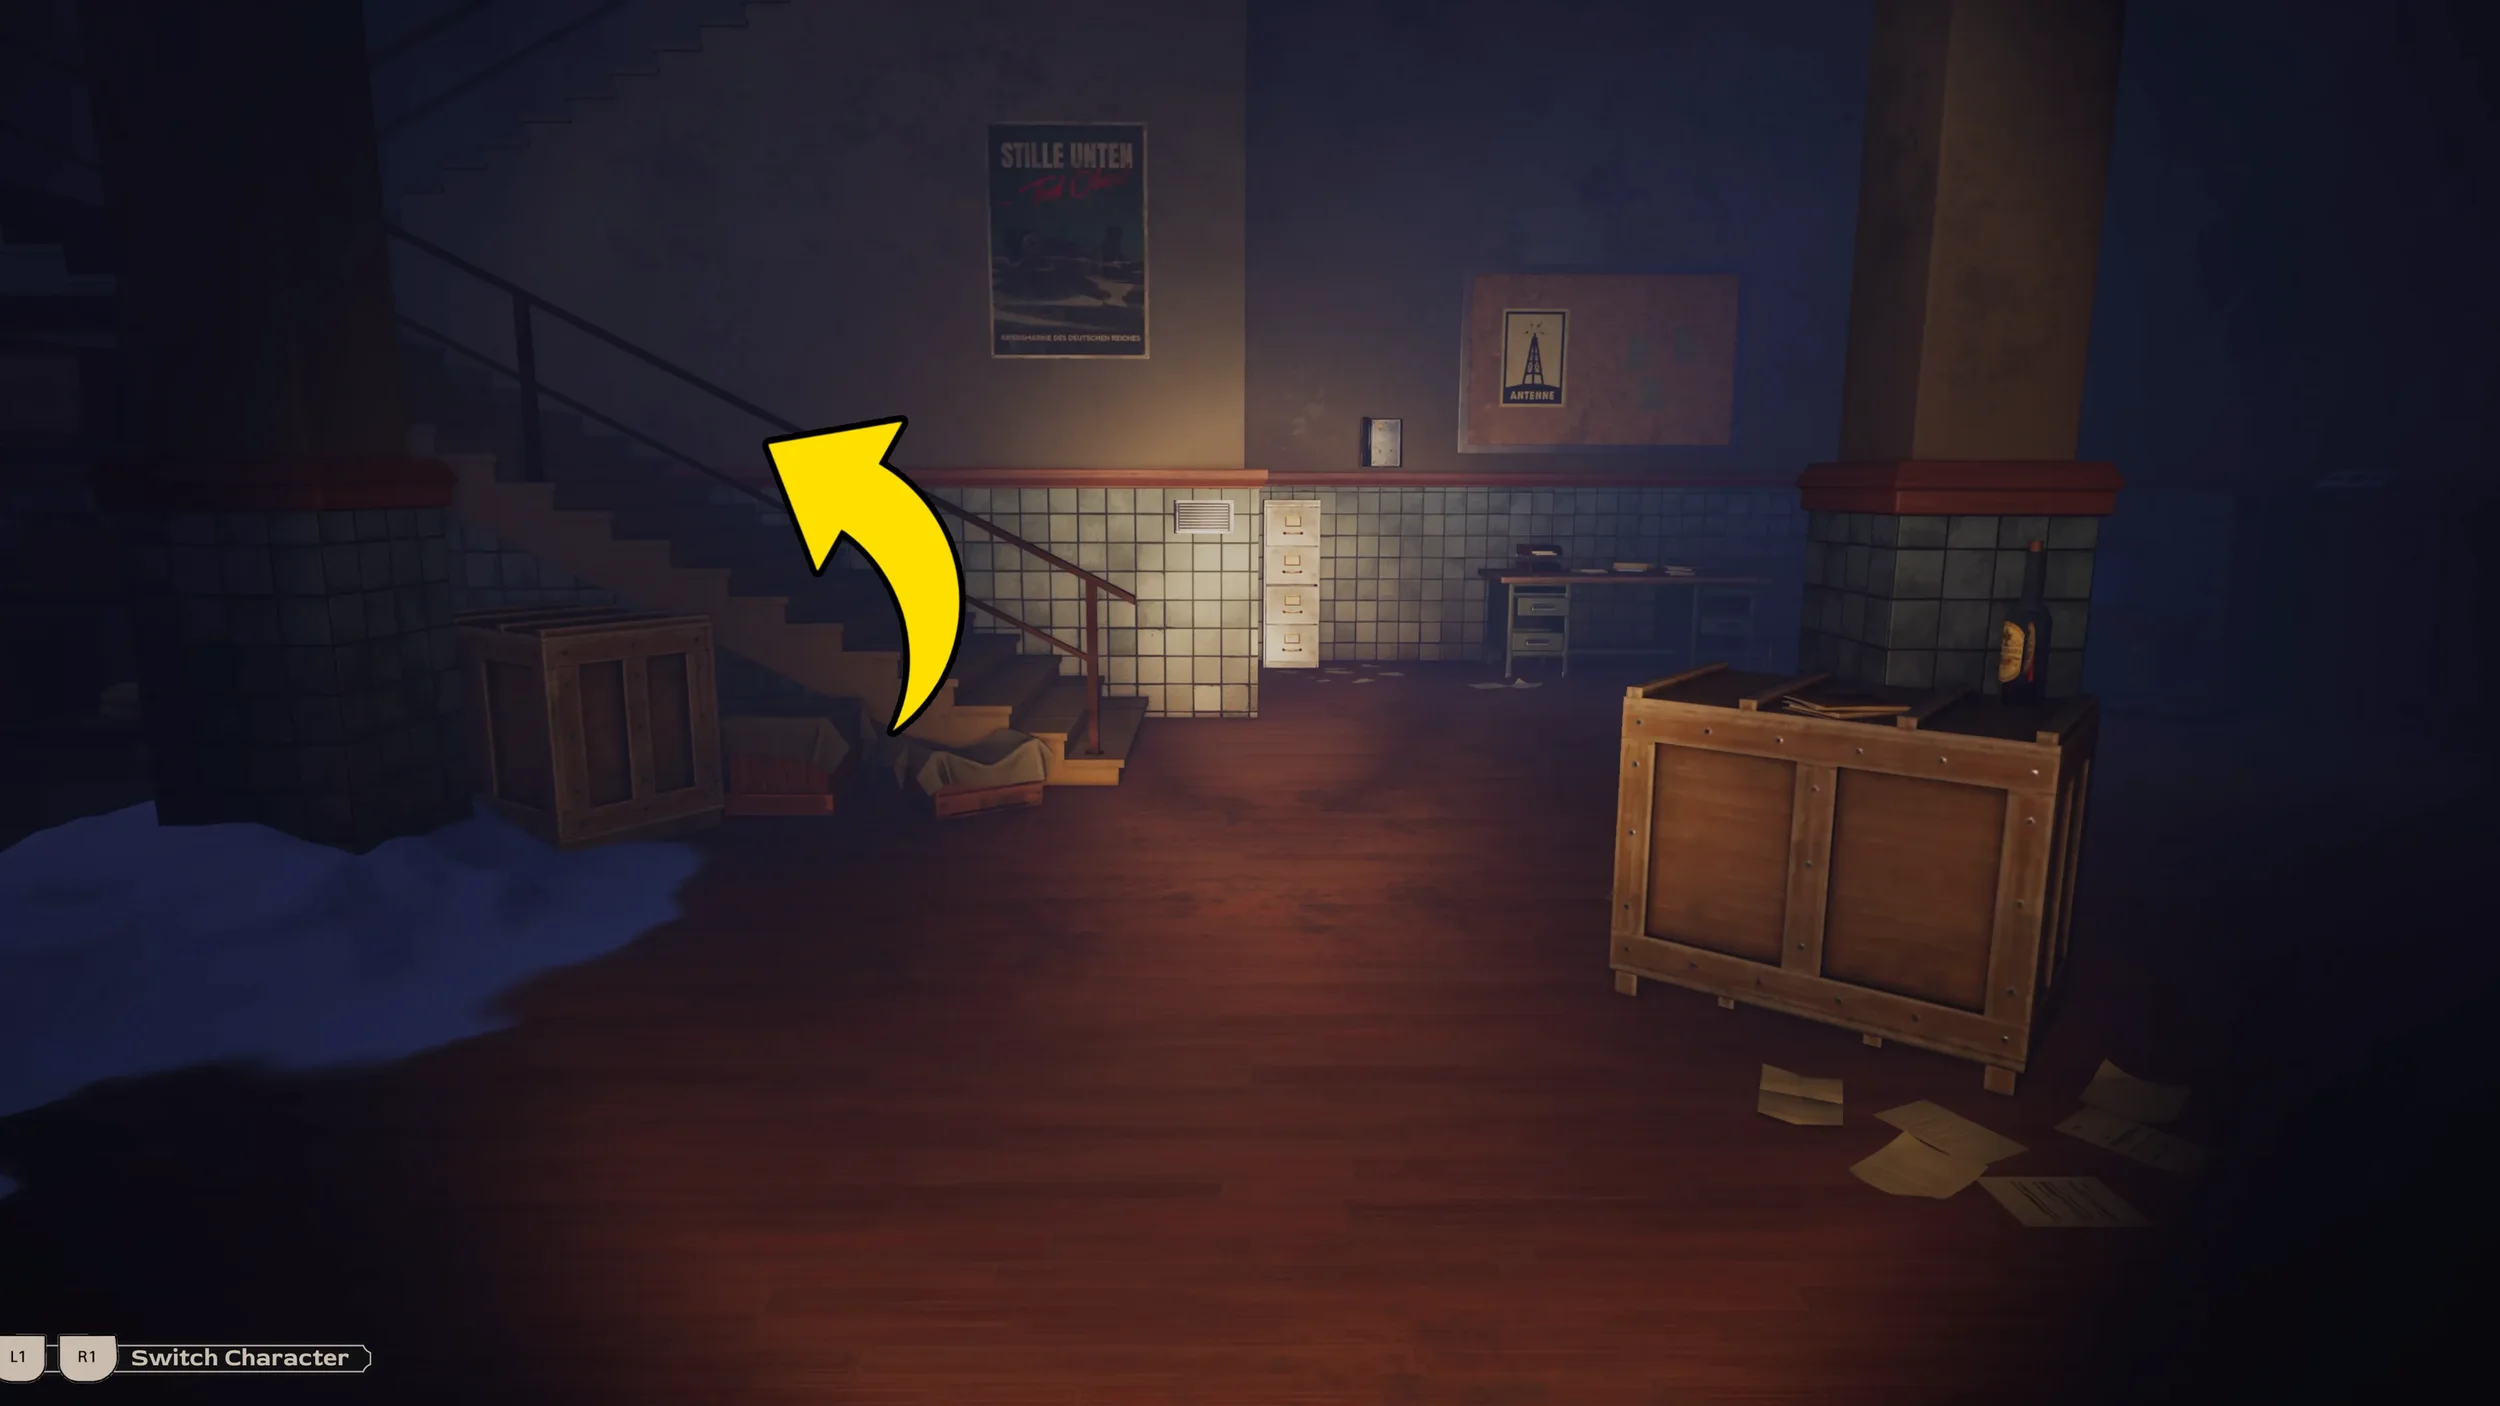
As soon as you get to the other side of the building, go into the Garage on your right hand side, inside interact with the 1st Lever.
Press R1 to change back to Eva, now flip the 2nd Switch (the next one up on the left side), and then change back to the Professor again.
Now that you are controlling the Professor again, go back through the building we just came through, this time when you get to the building where we found the Secret Object earlier, go to the left from there until you see another building. Go inside to find the 2nd Lever.
After pulling the 2nd Lever, switch back to Eva again, now flip the 3rd Switch (the one just above the previous one), then switch to the Professor.

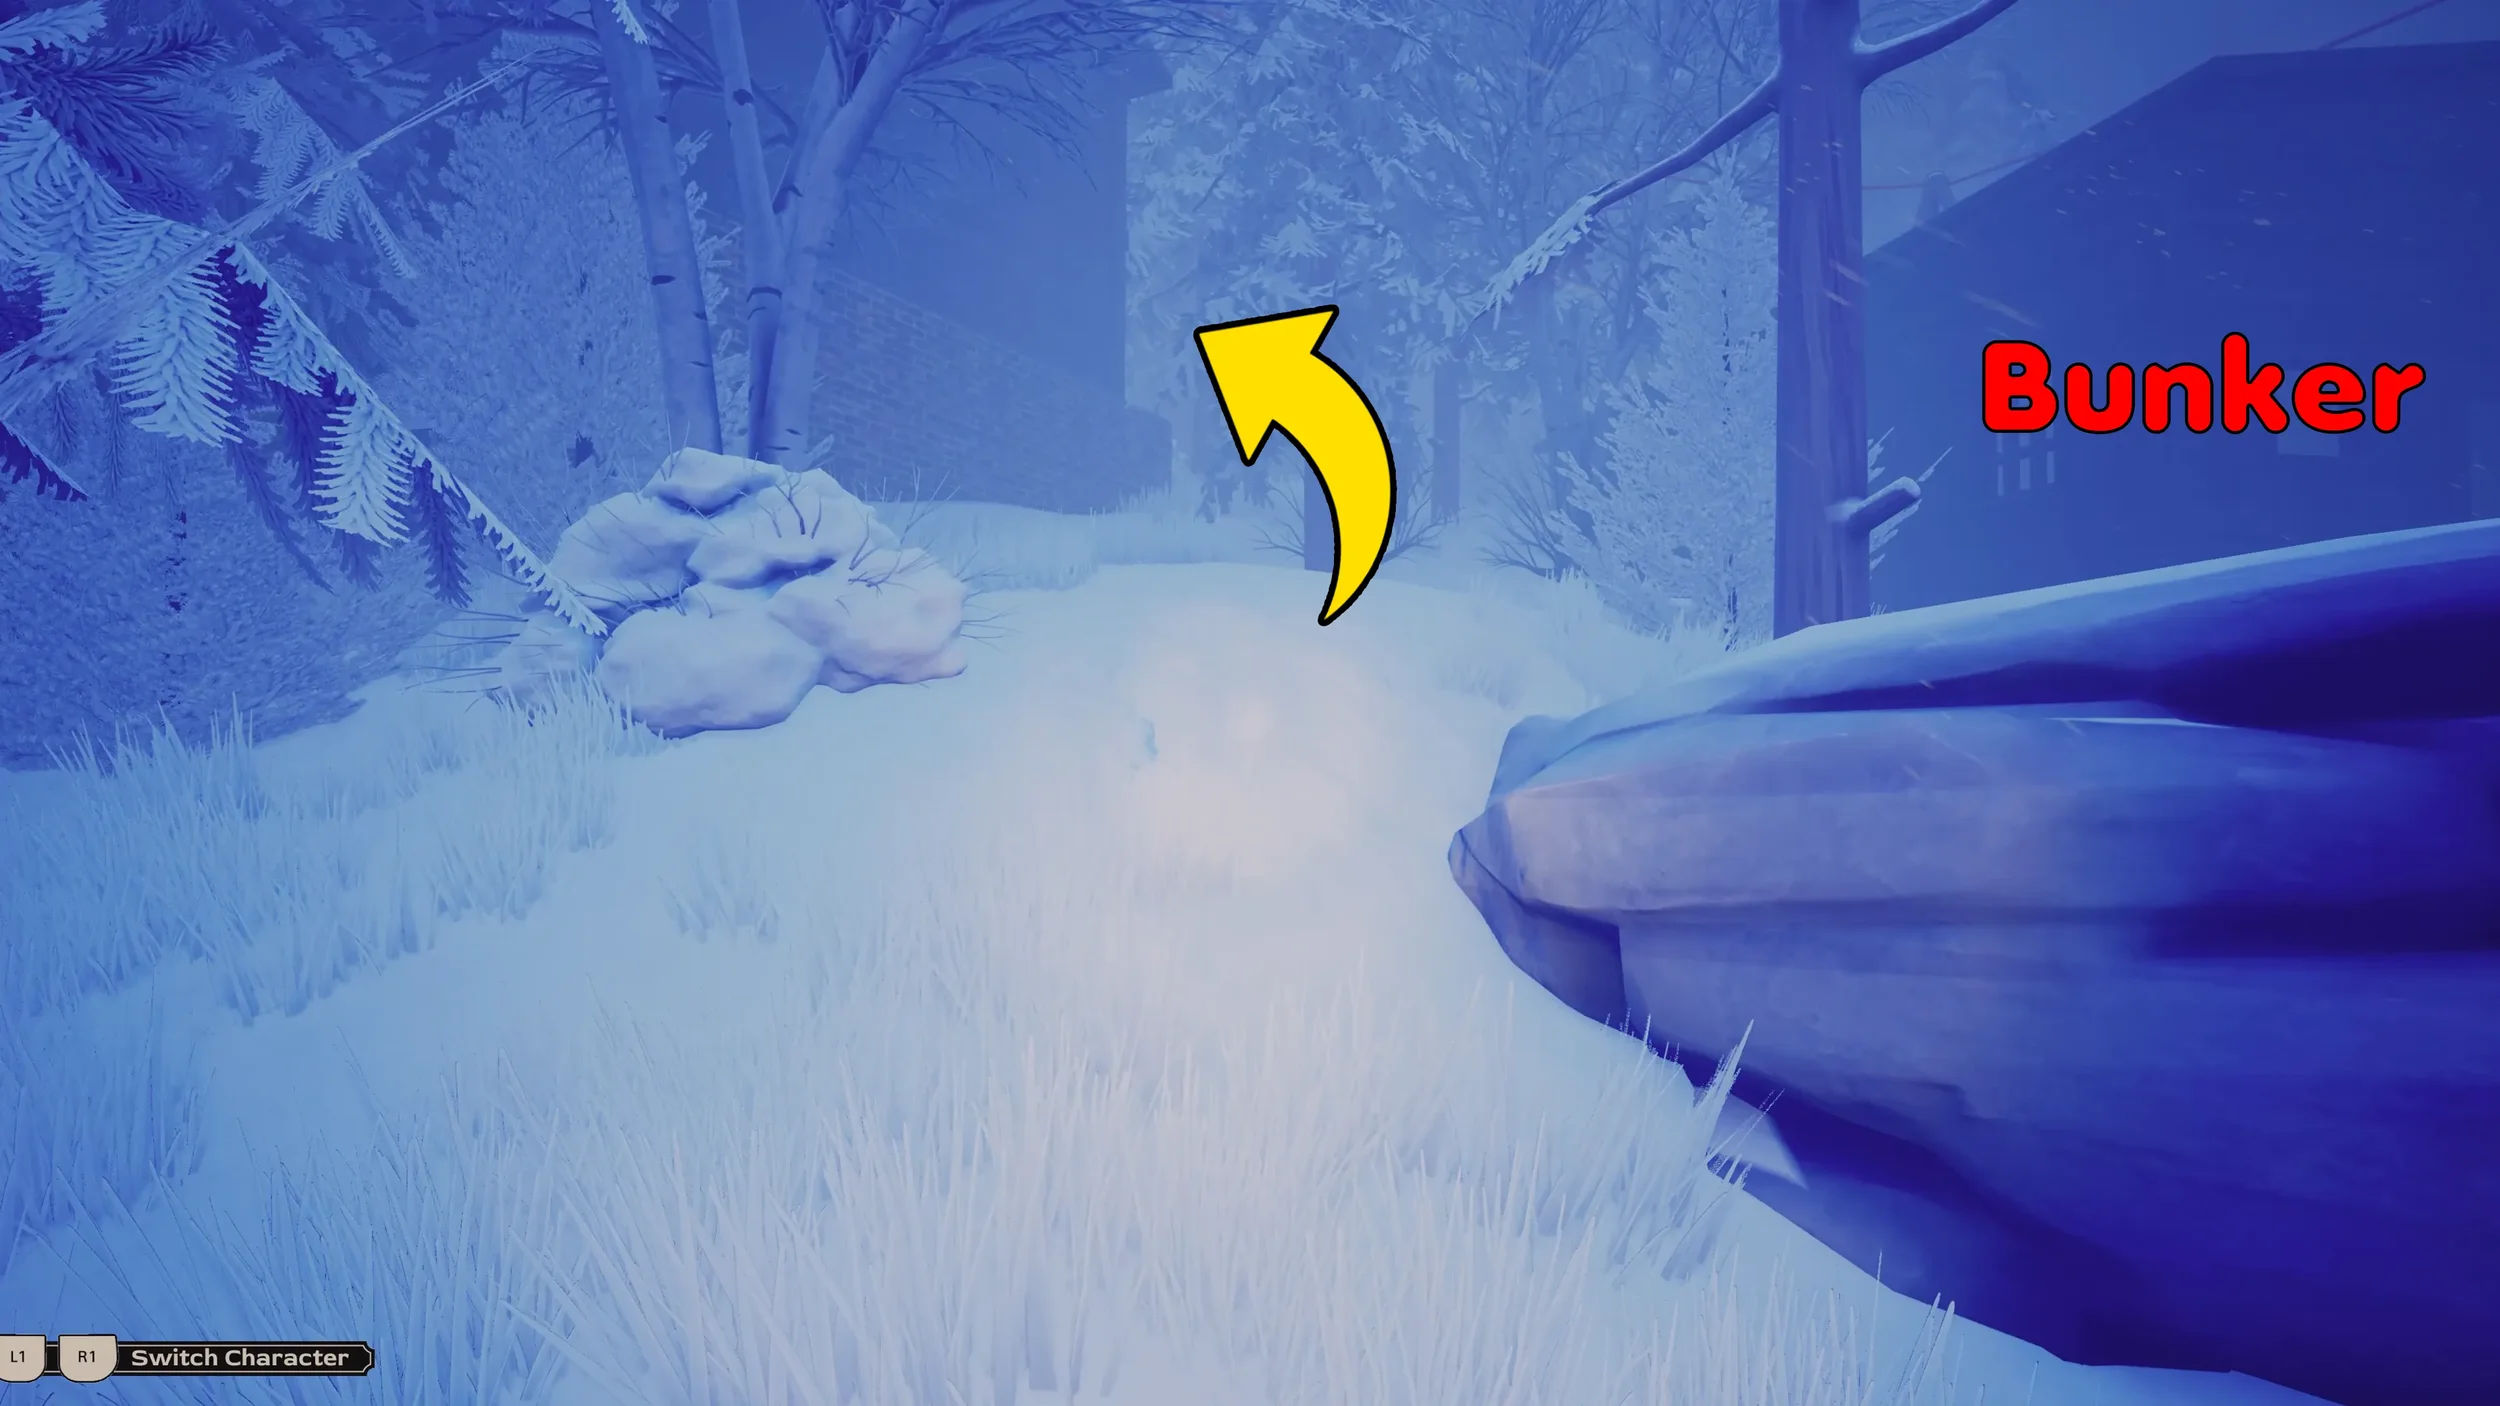
Exit the building where we pulled the 2nd Lever and head back towards the bunker were we found the Secret Object again, this time we need to go up the hill slightly and to the left from the bunker to find the building that has the 3rd Lever.
After pulling the 3rd Lever change back to Eva to flip the Final Switch (the one at the very top), then switch back to the Professor one last time to find the 4th Lever.
As the Professor, go back up the main hill and go inside the big Antenna Building, once inside go up the stairs to reach the 2nd floor, here go through the door on the left to go out onto the balcony area.
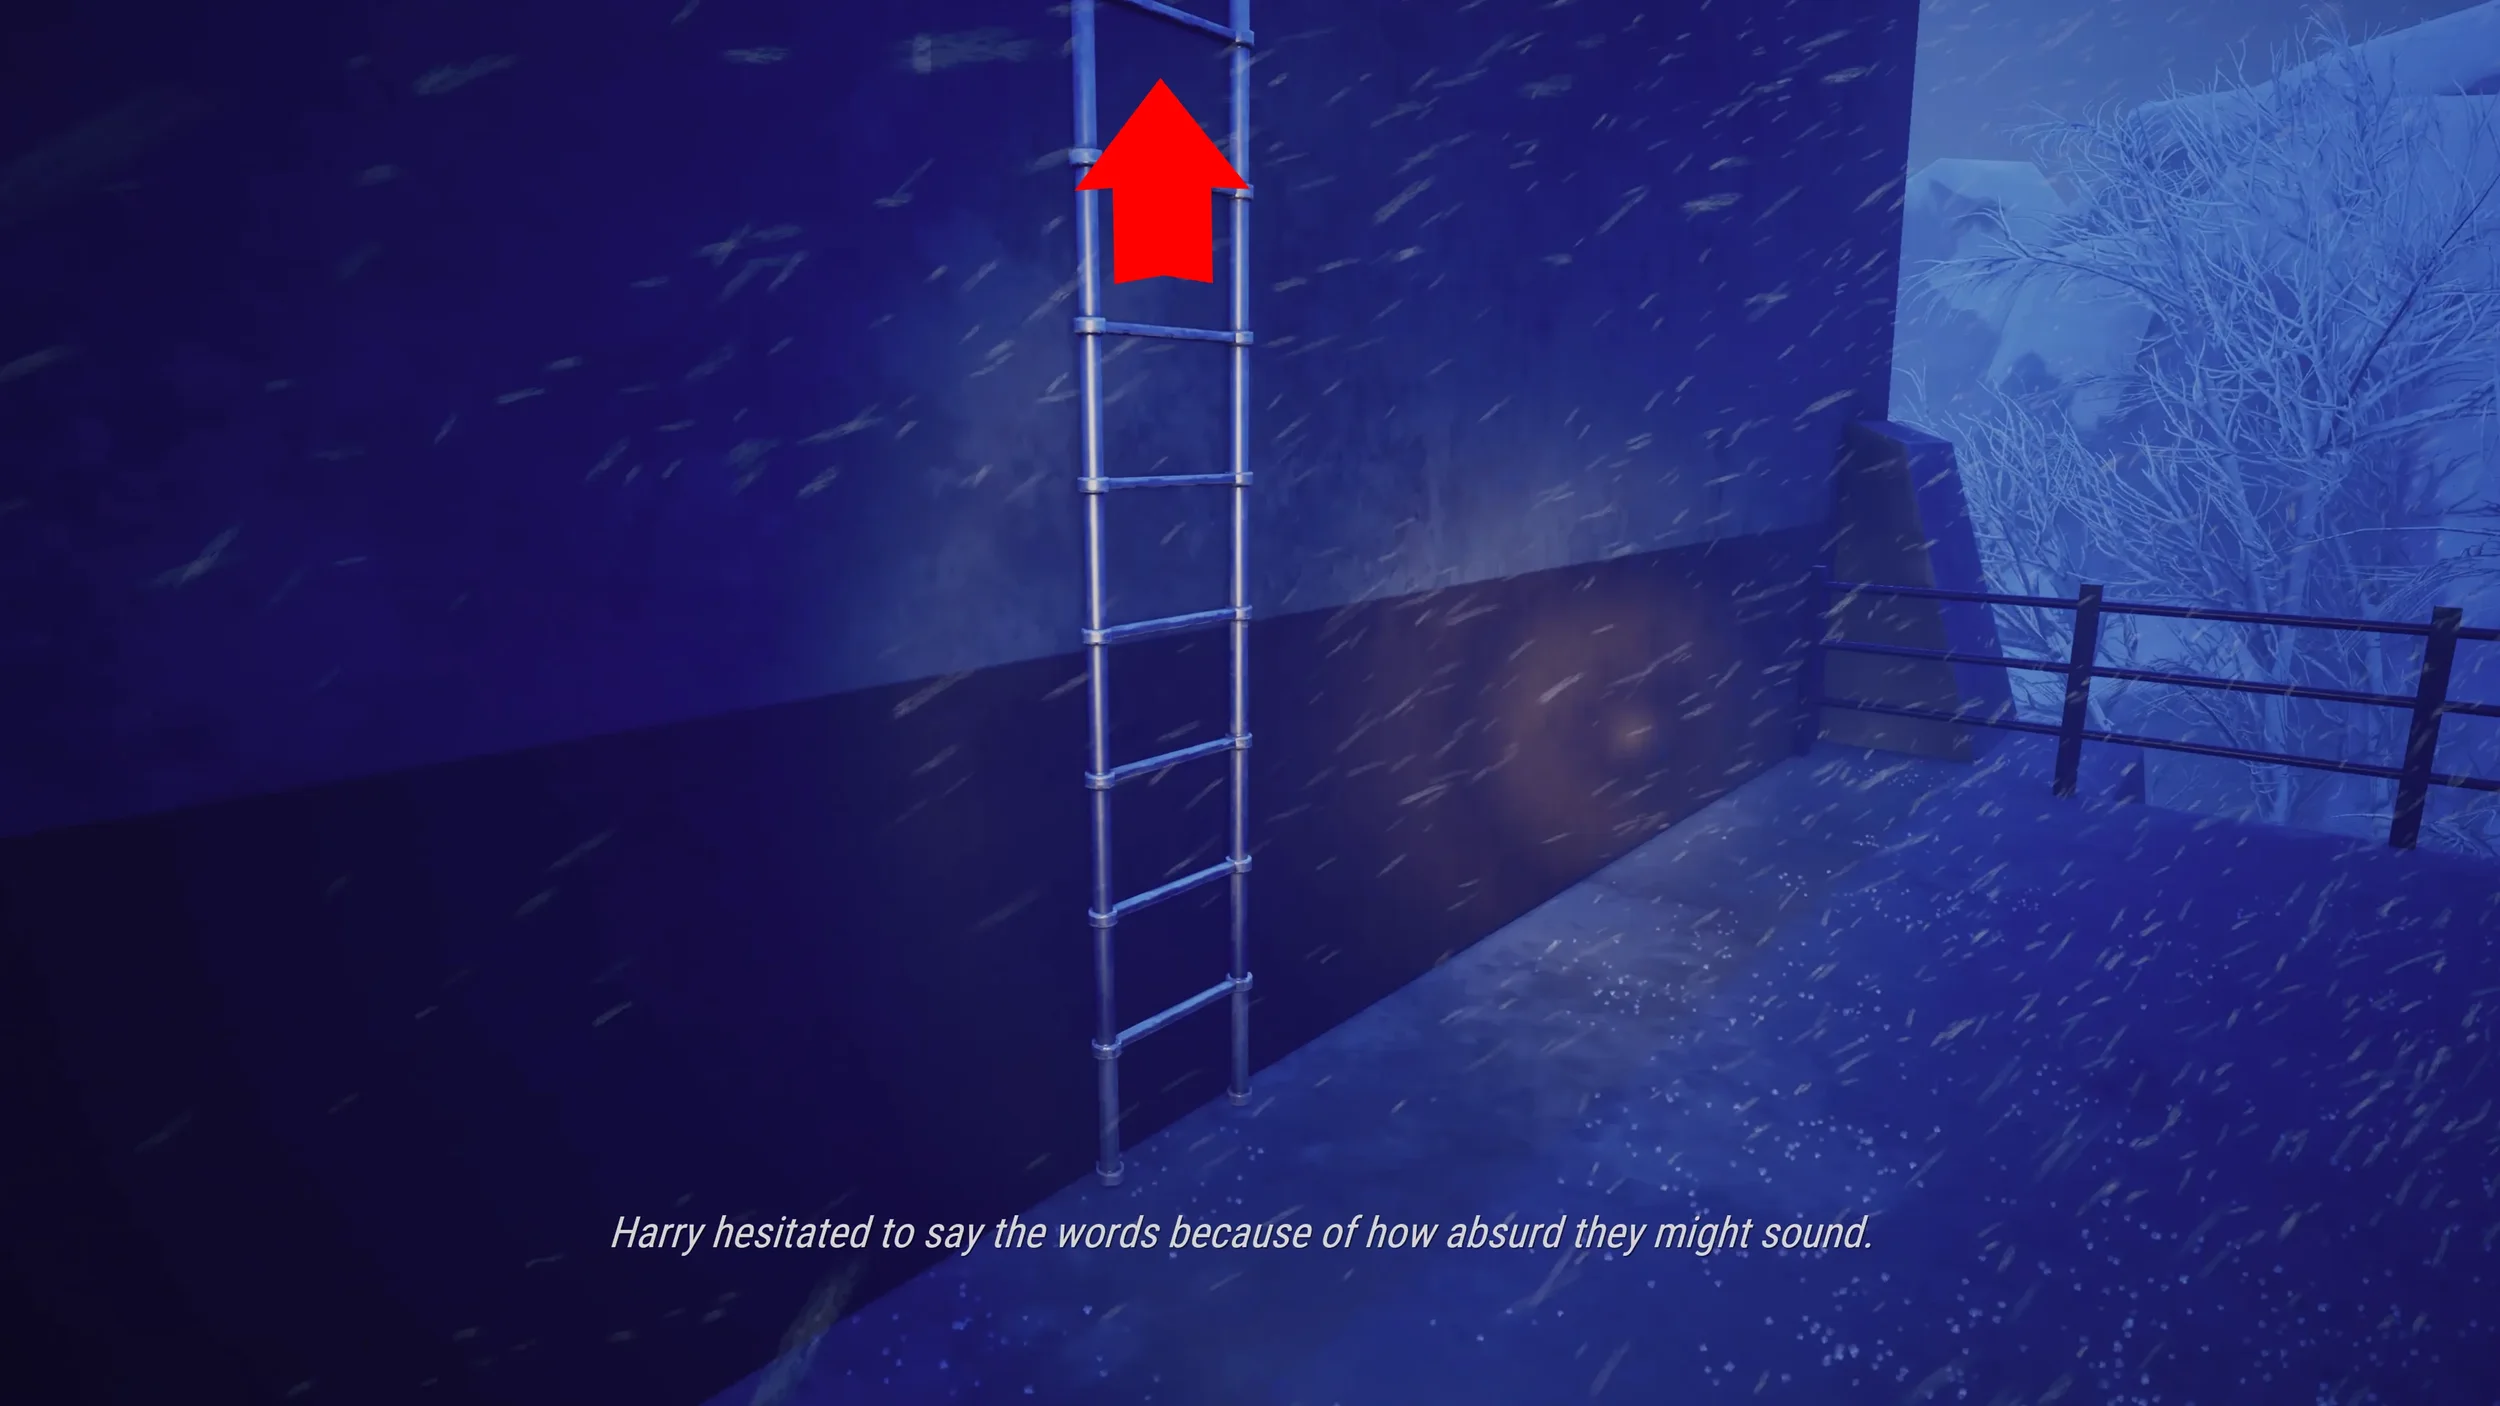
Out here you will see a ladder, go up this ladder to reach the roof, which is where you will find the 4th Lever.
After pulling the final Lever, go back down the ladder and into the Antenna Building, as soon as you get inside you will be teleported into a flashback from the Professor.
This City Is Afraid of Me Trophy
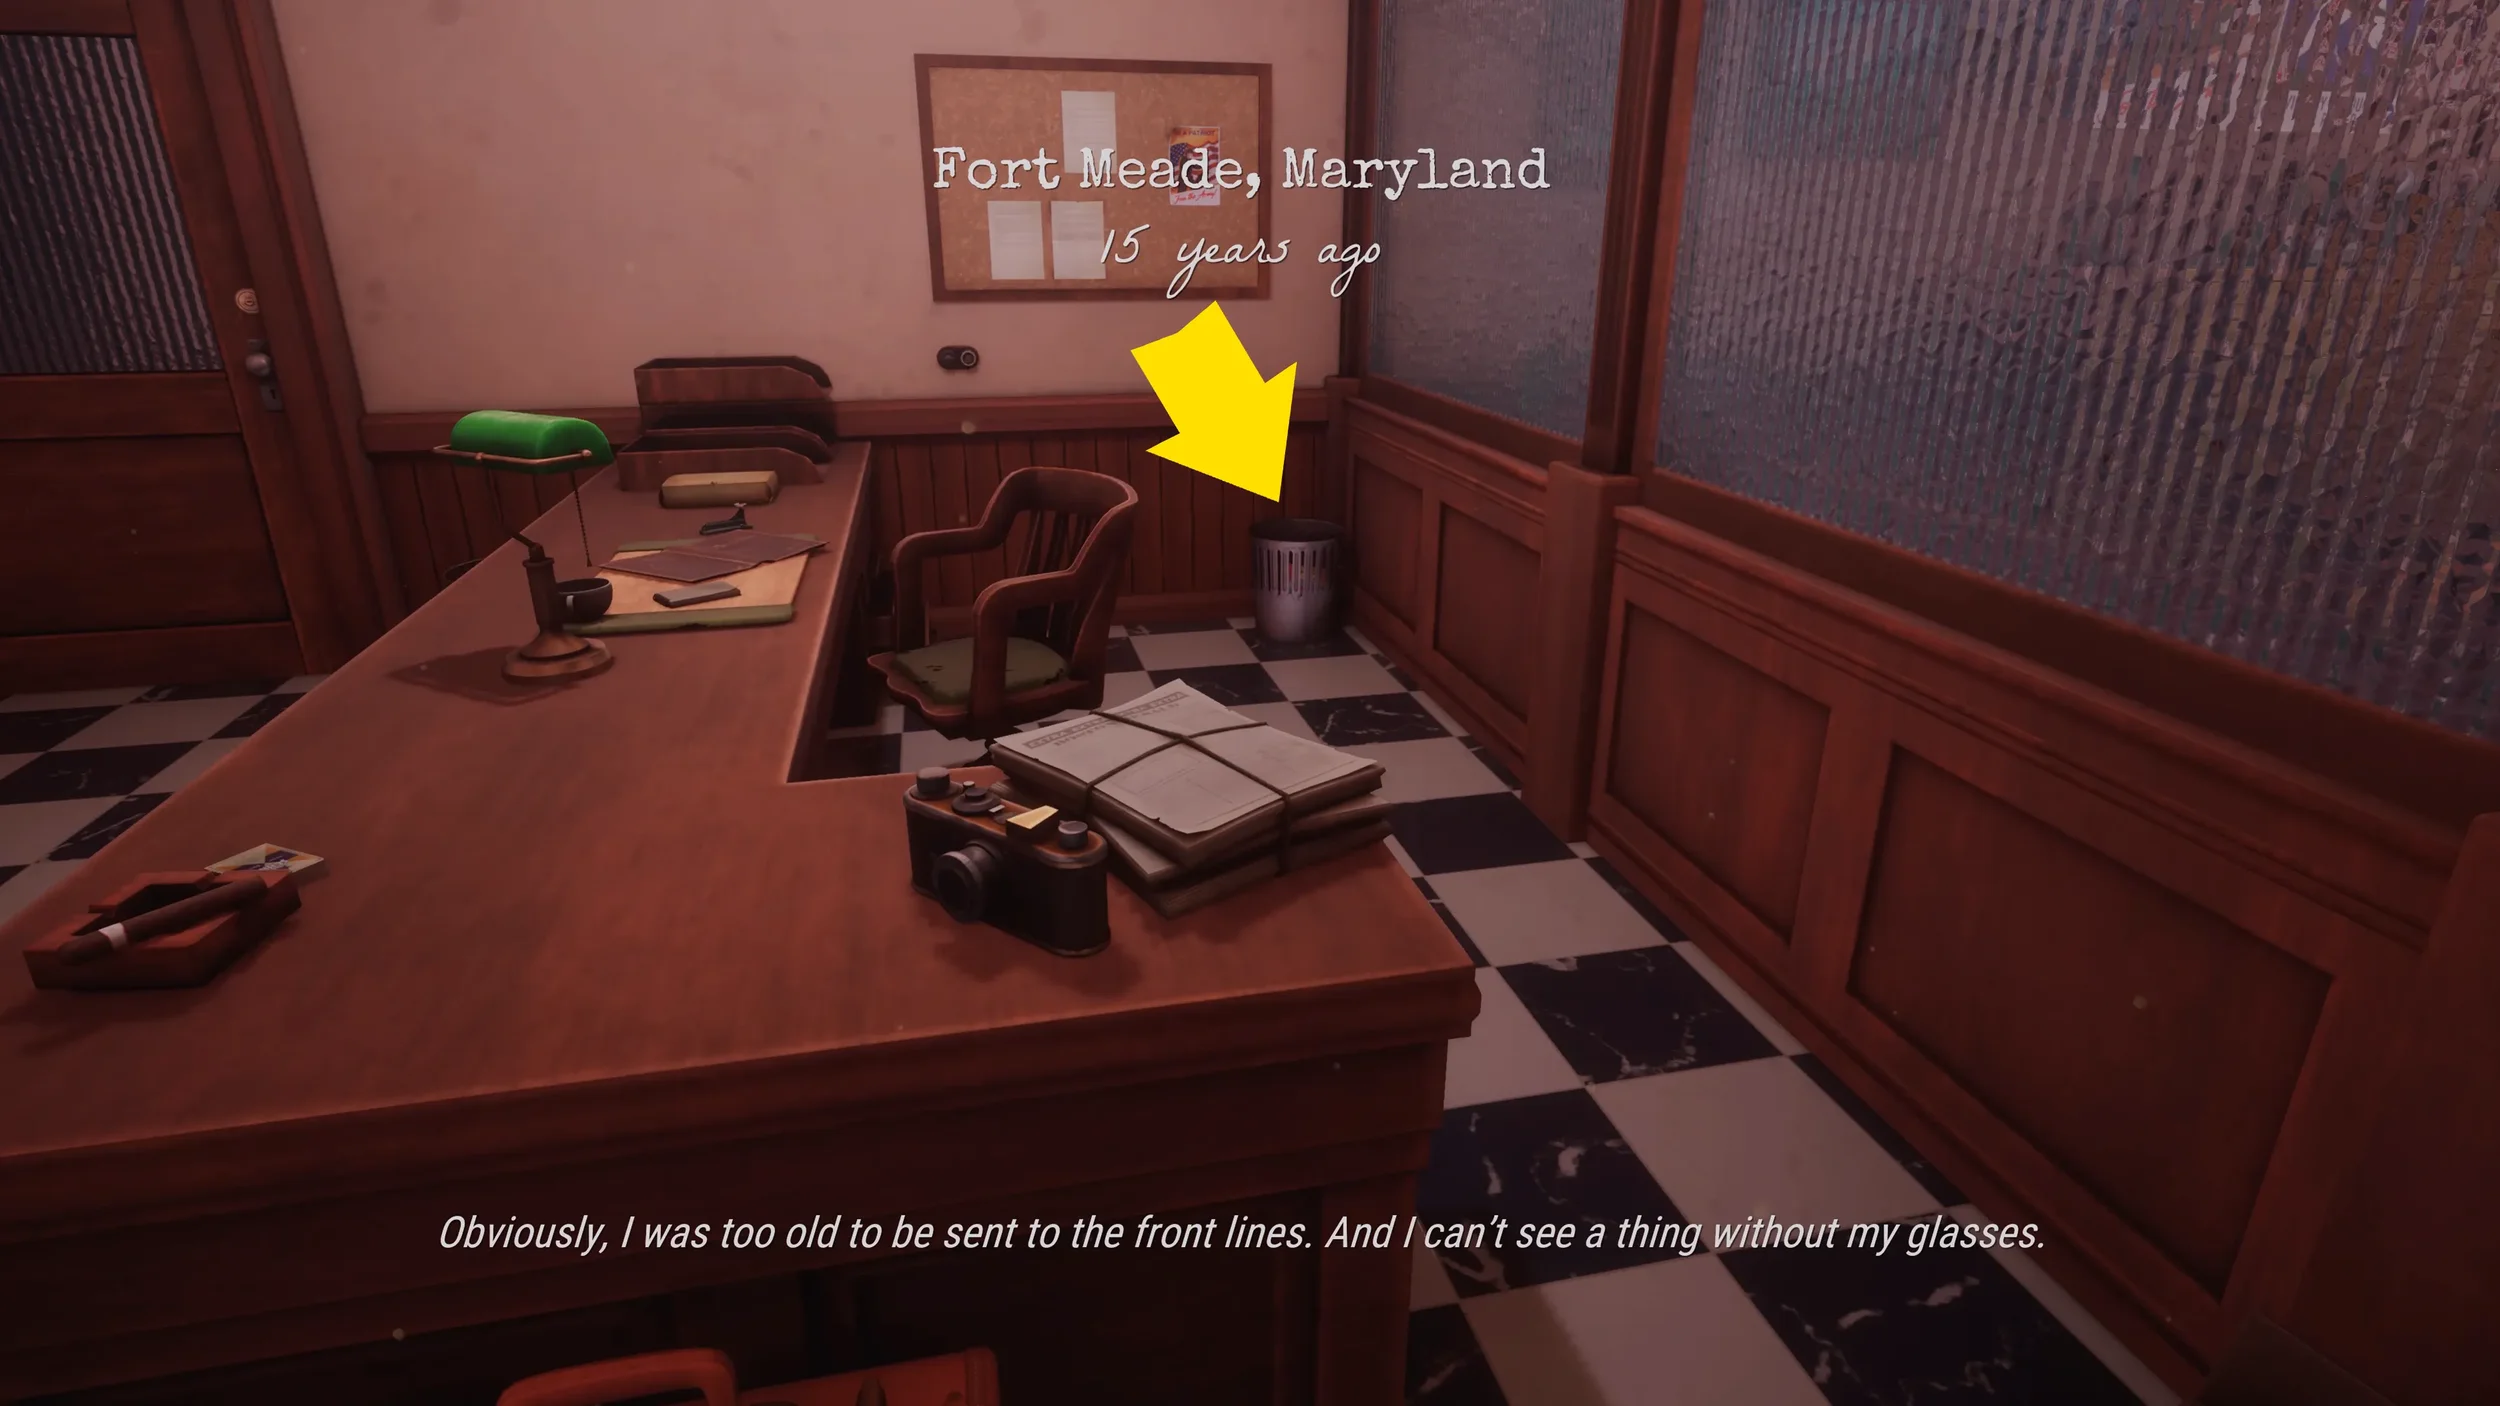
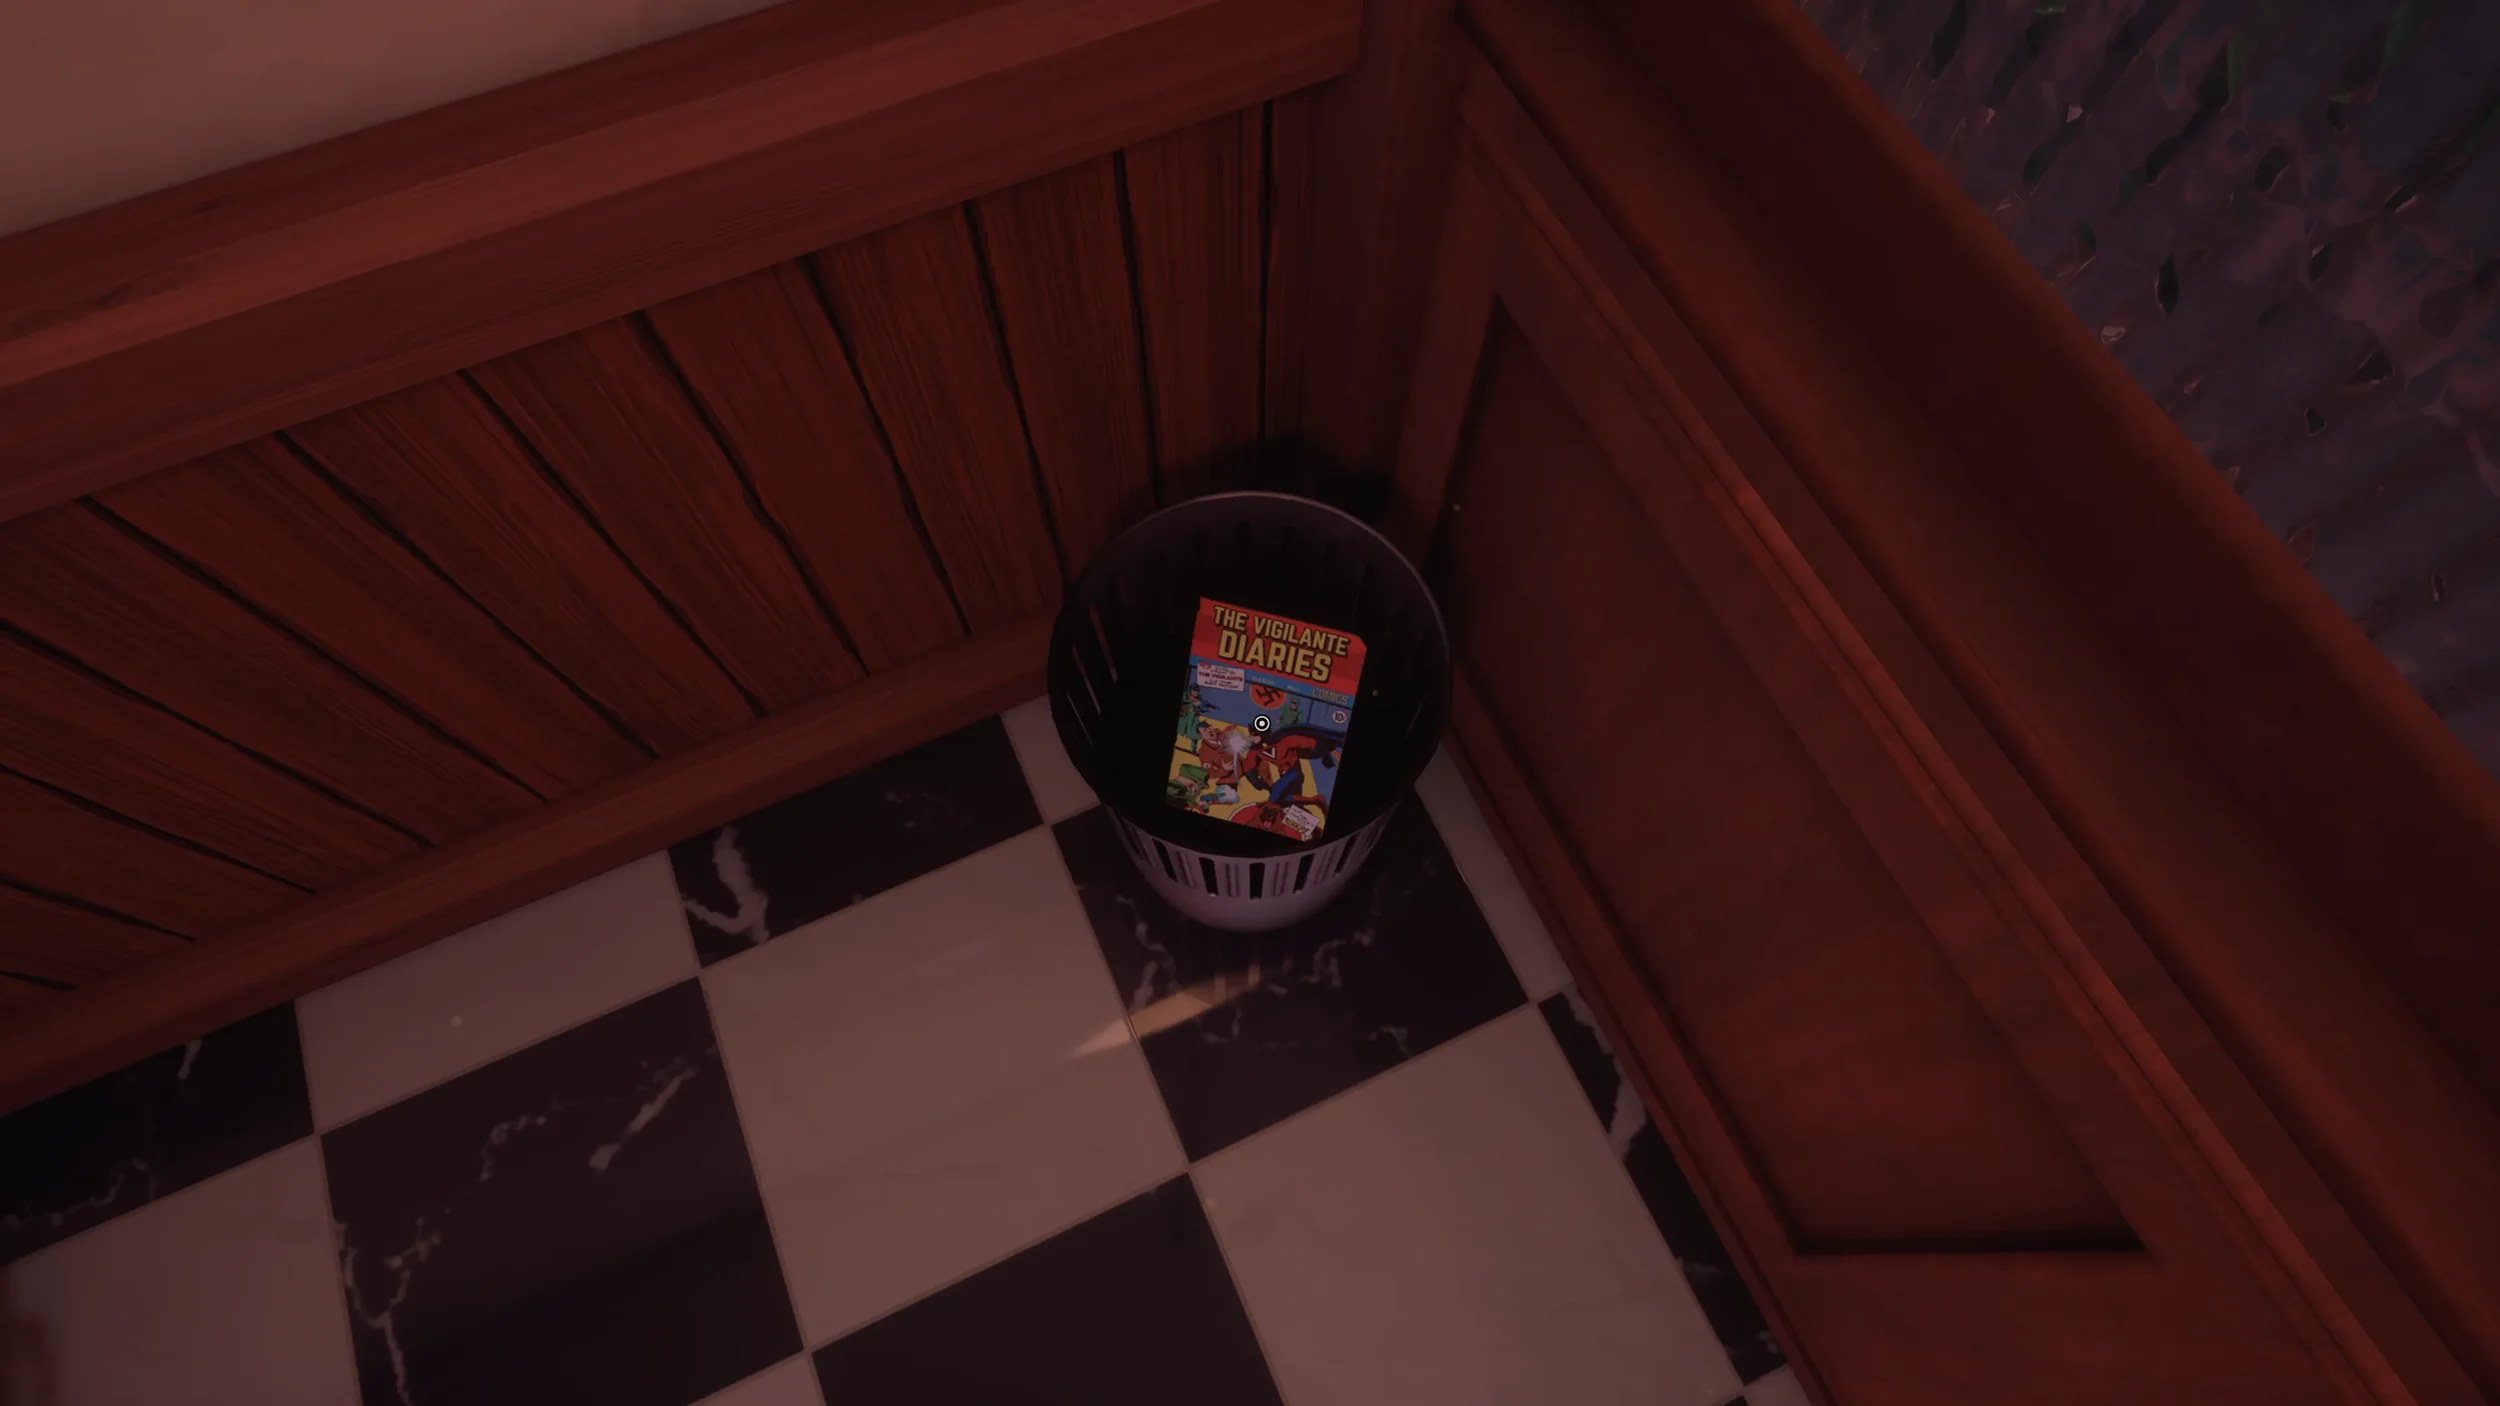
As soon as you enter the flashback, look in the bin behind the reception desk on your left to find the Comic Book.
"This City Is Afraid of Me" Trophy.
Encrypted Message Puzzles
When you reach the next room, go through the door on the right, in this flashback scene there are only 2 clues you need to worry about finding, and they are both on the desks where the Decipher Machine is, so make sure to inspect them both.
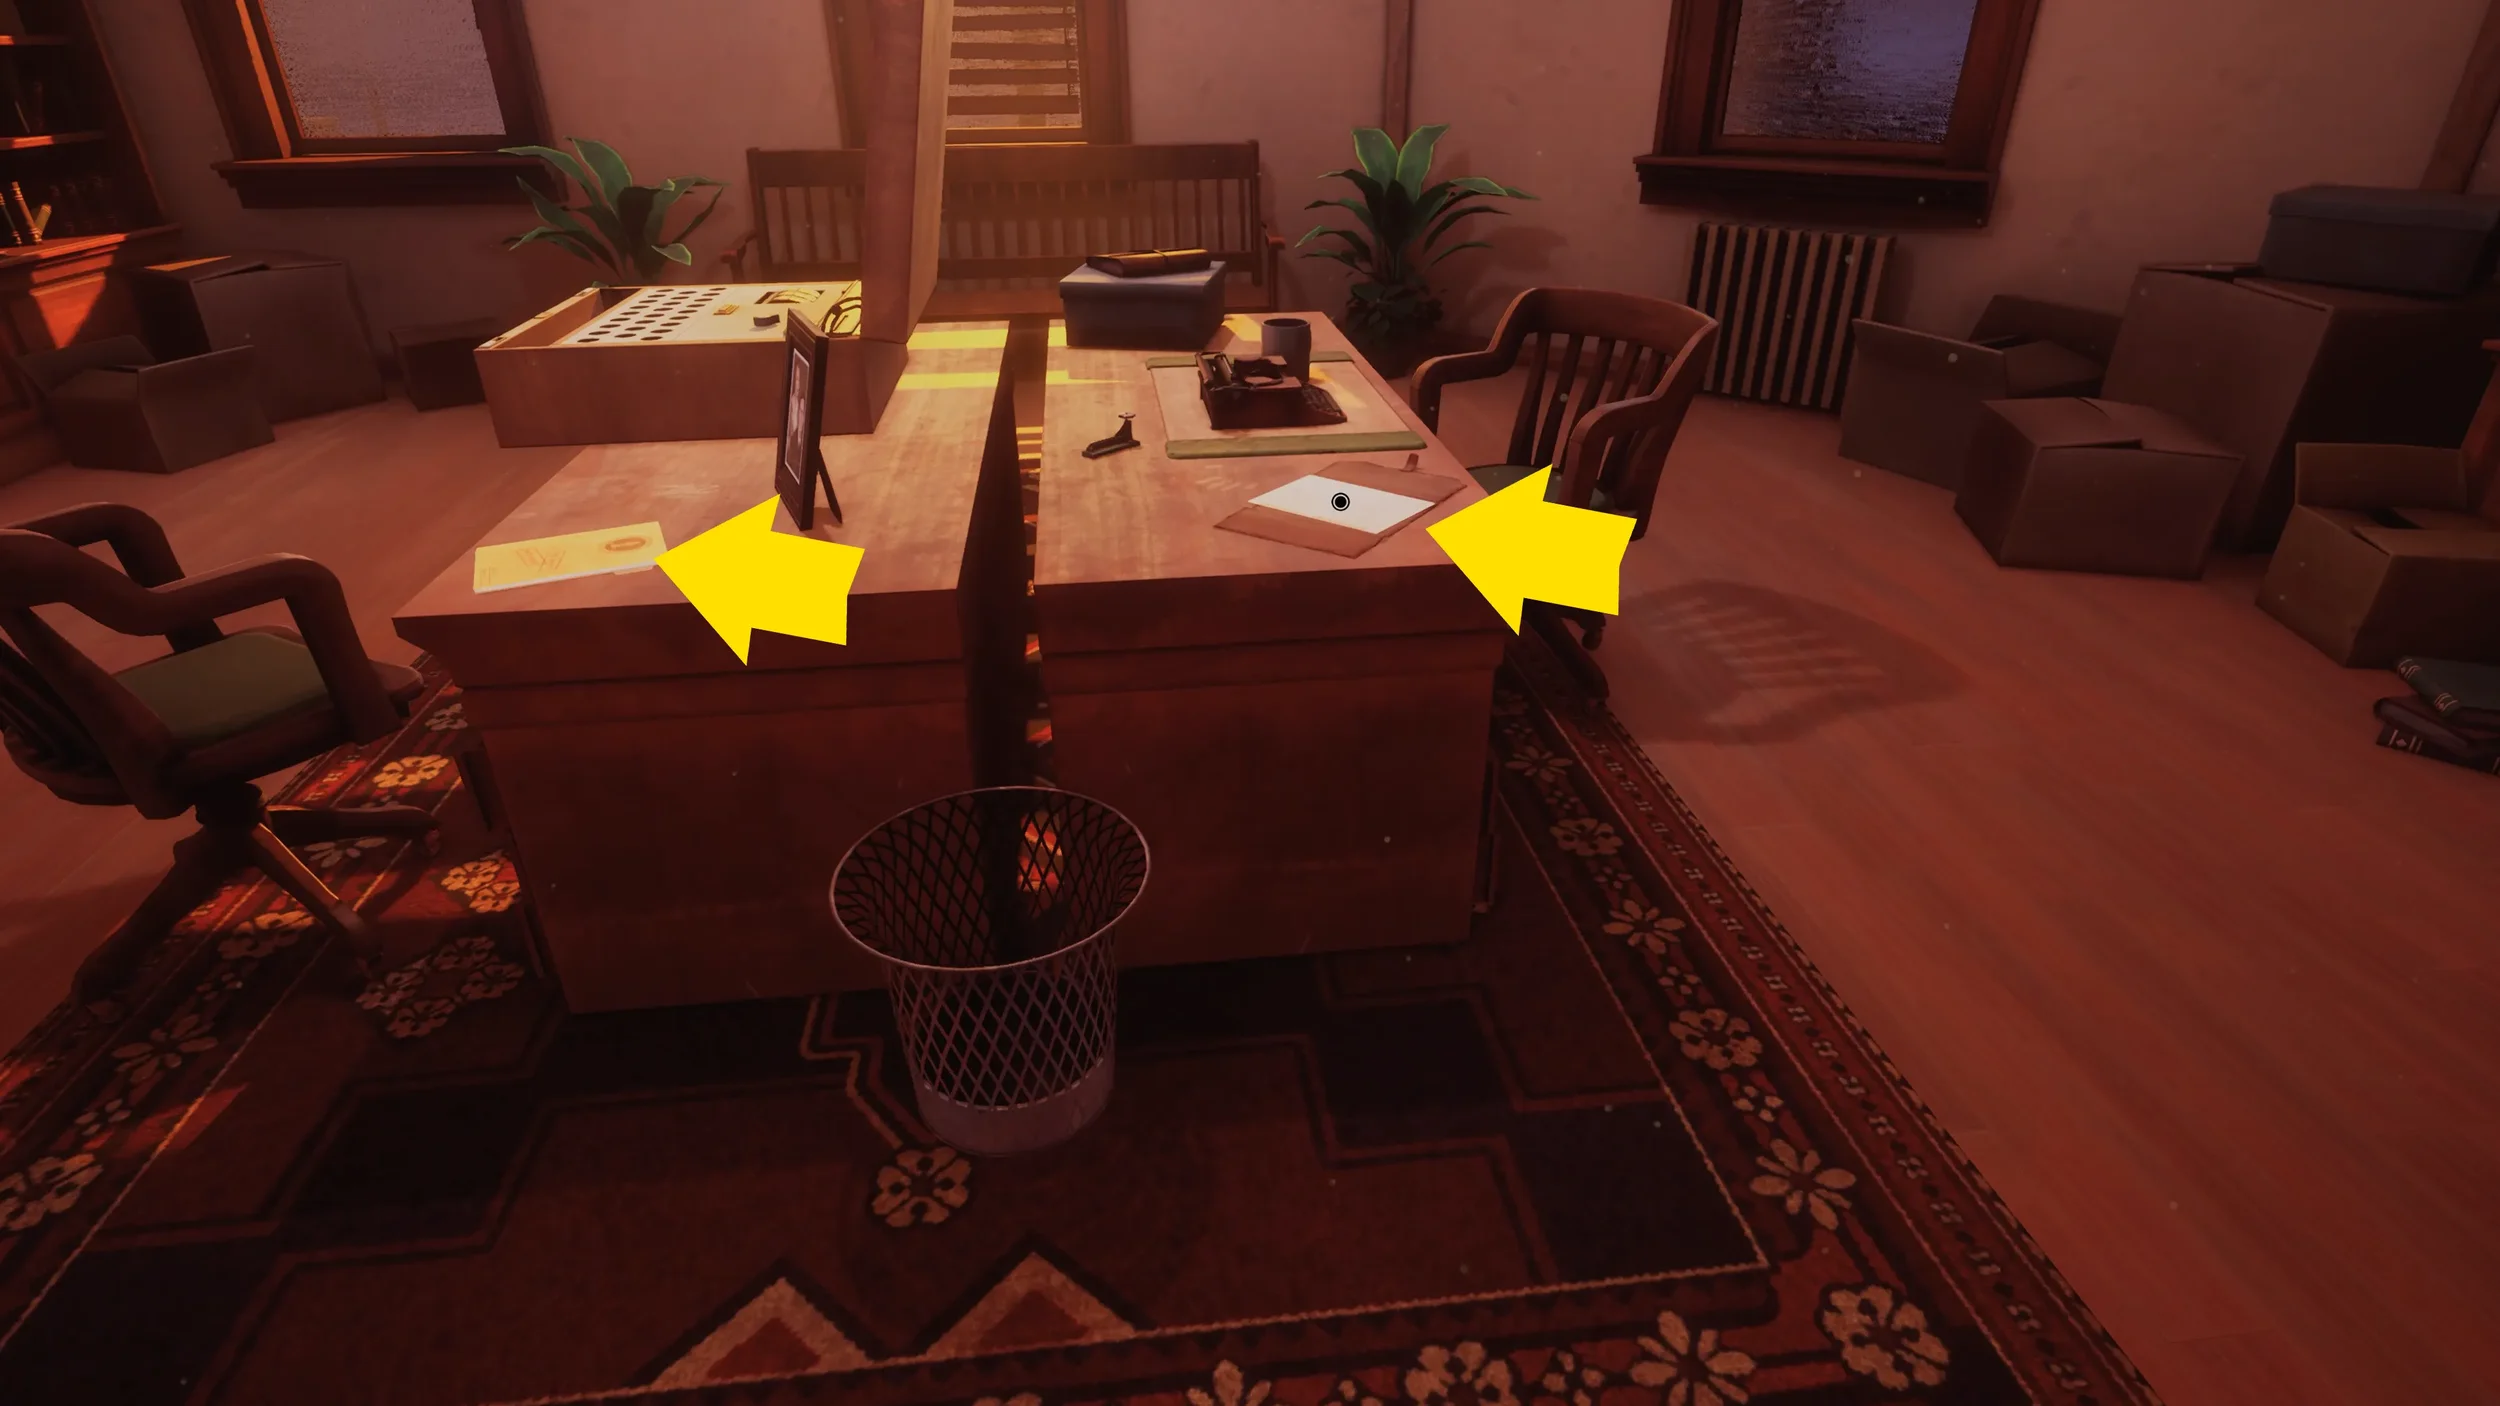
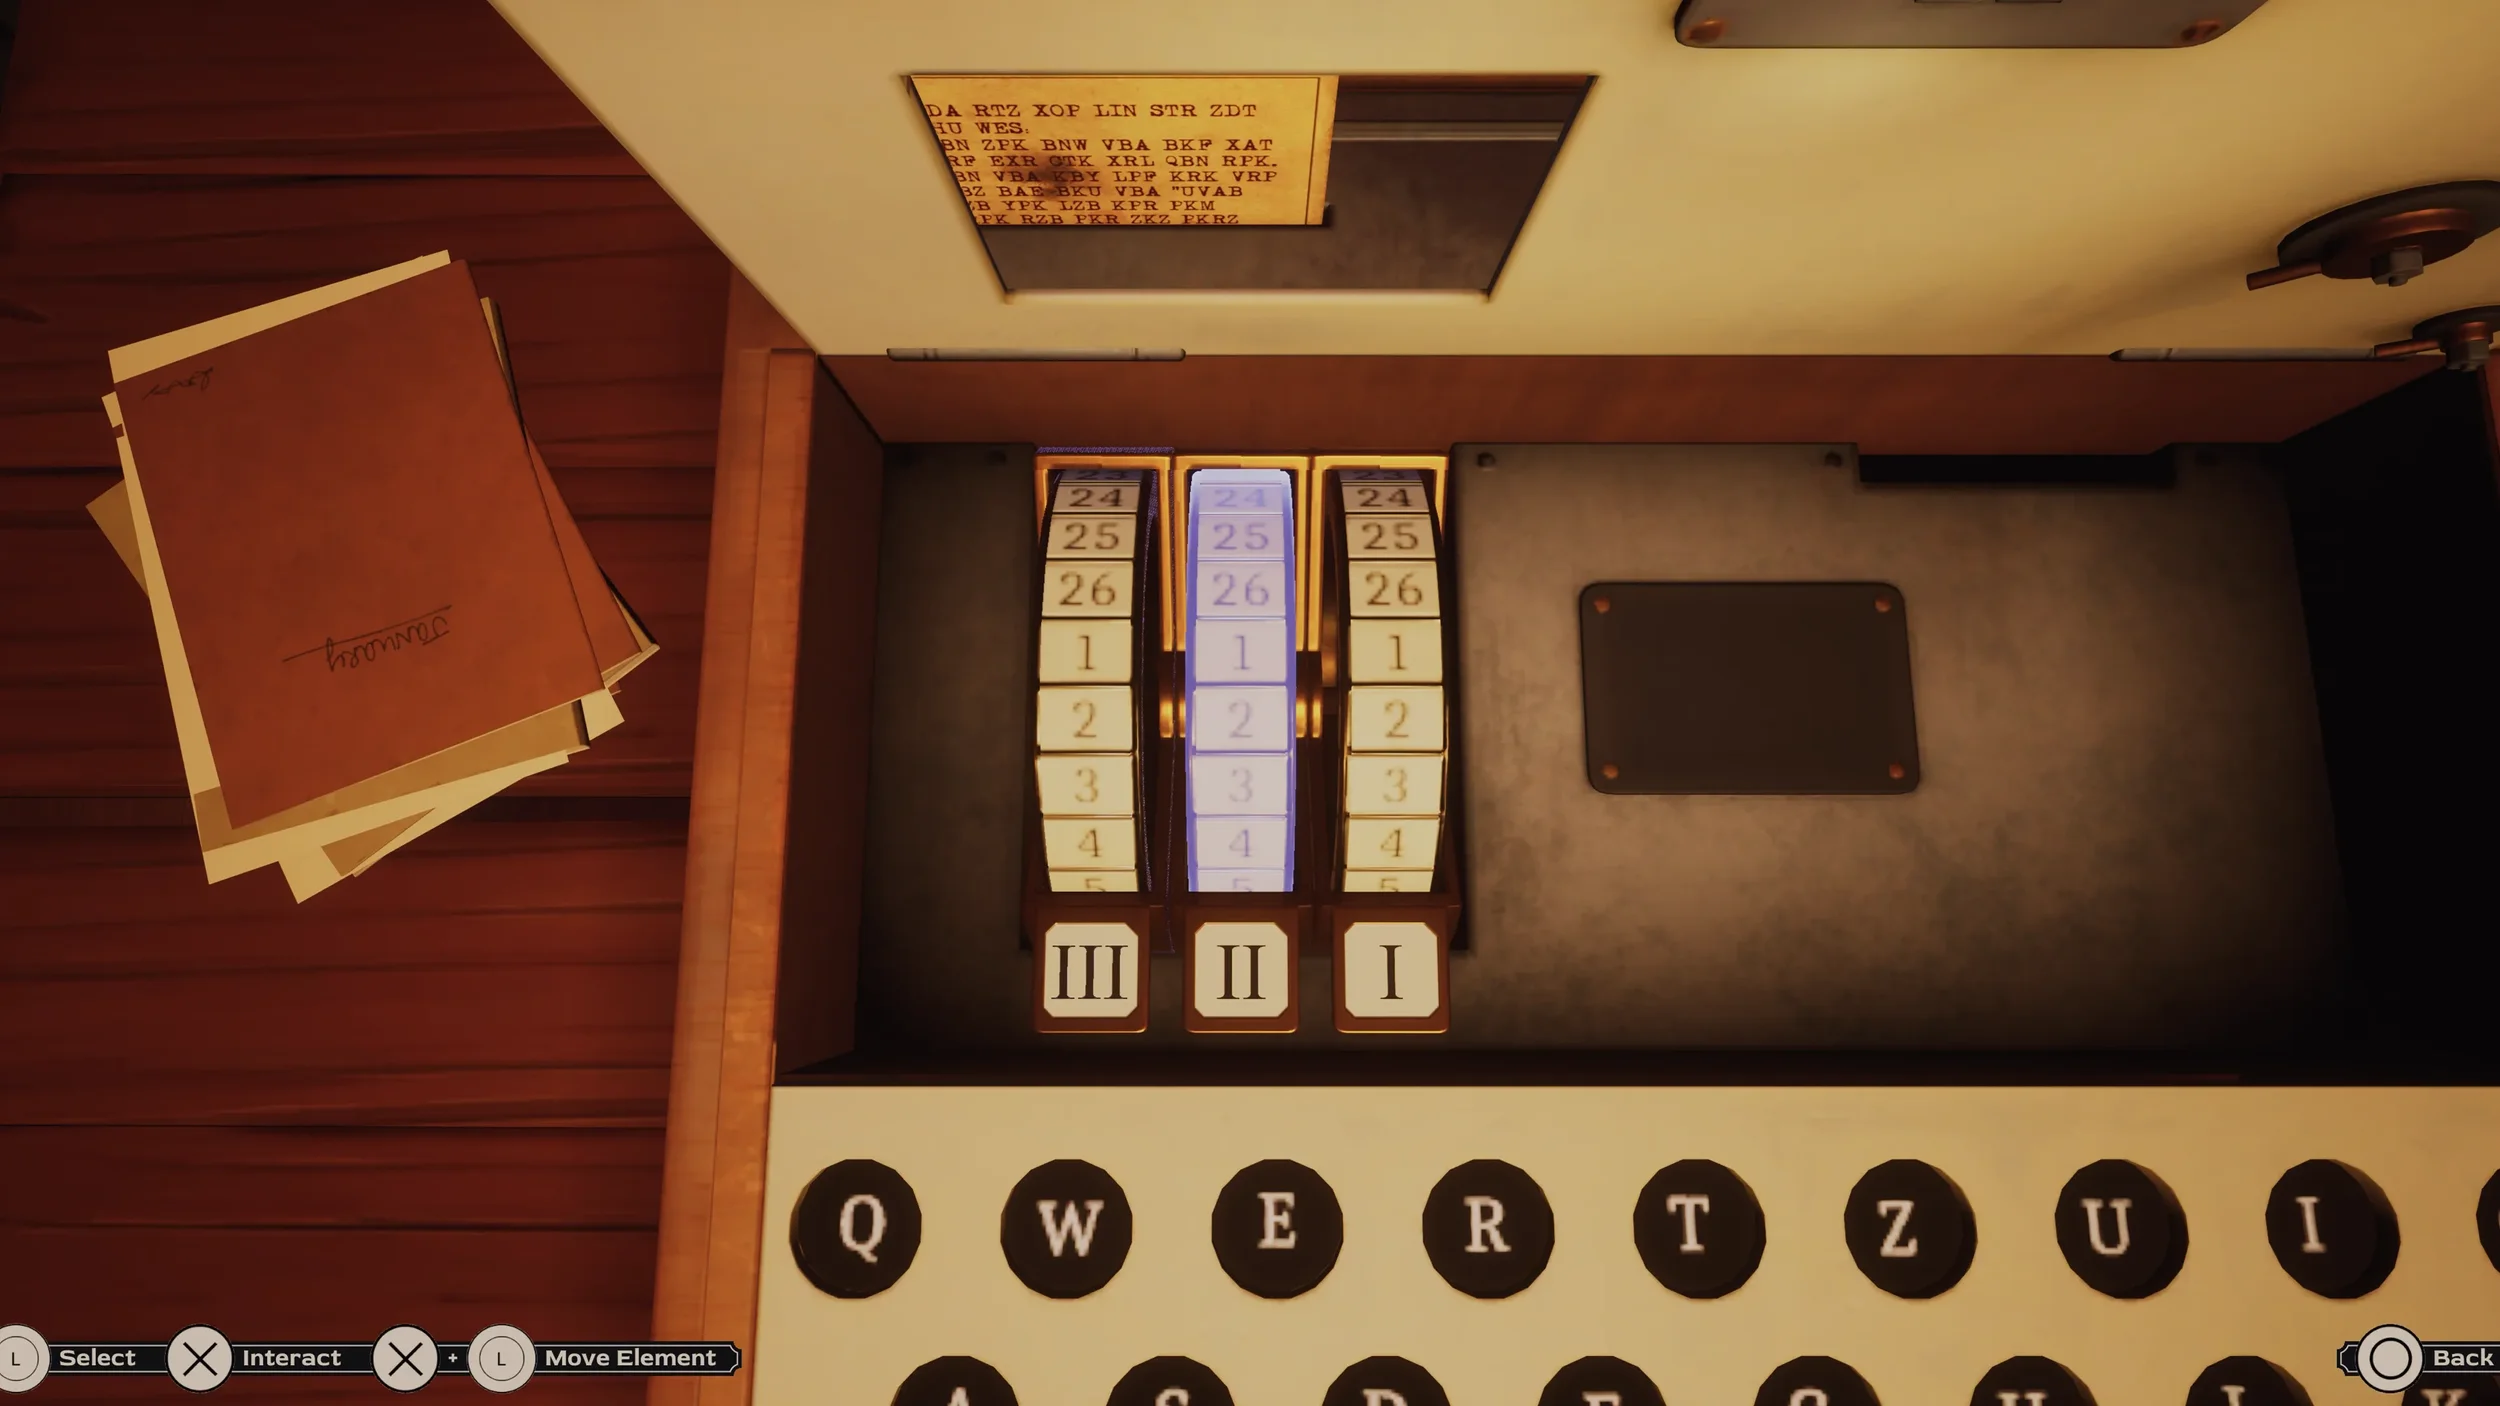
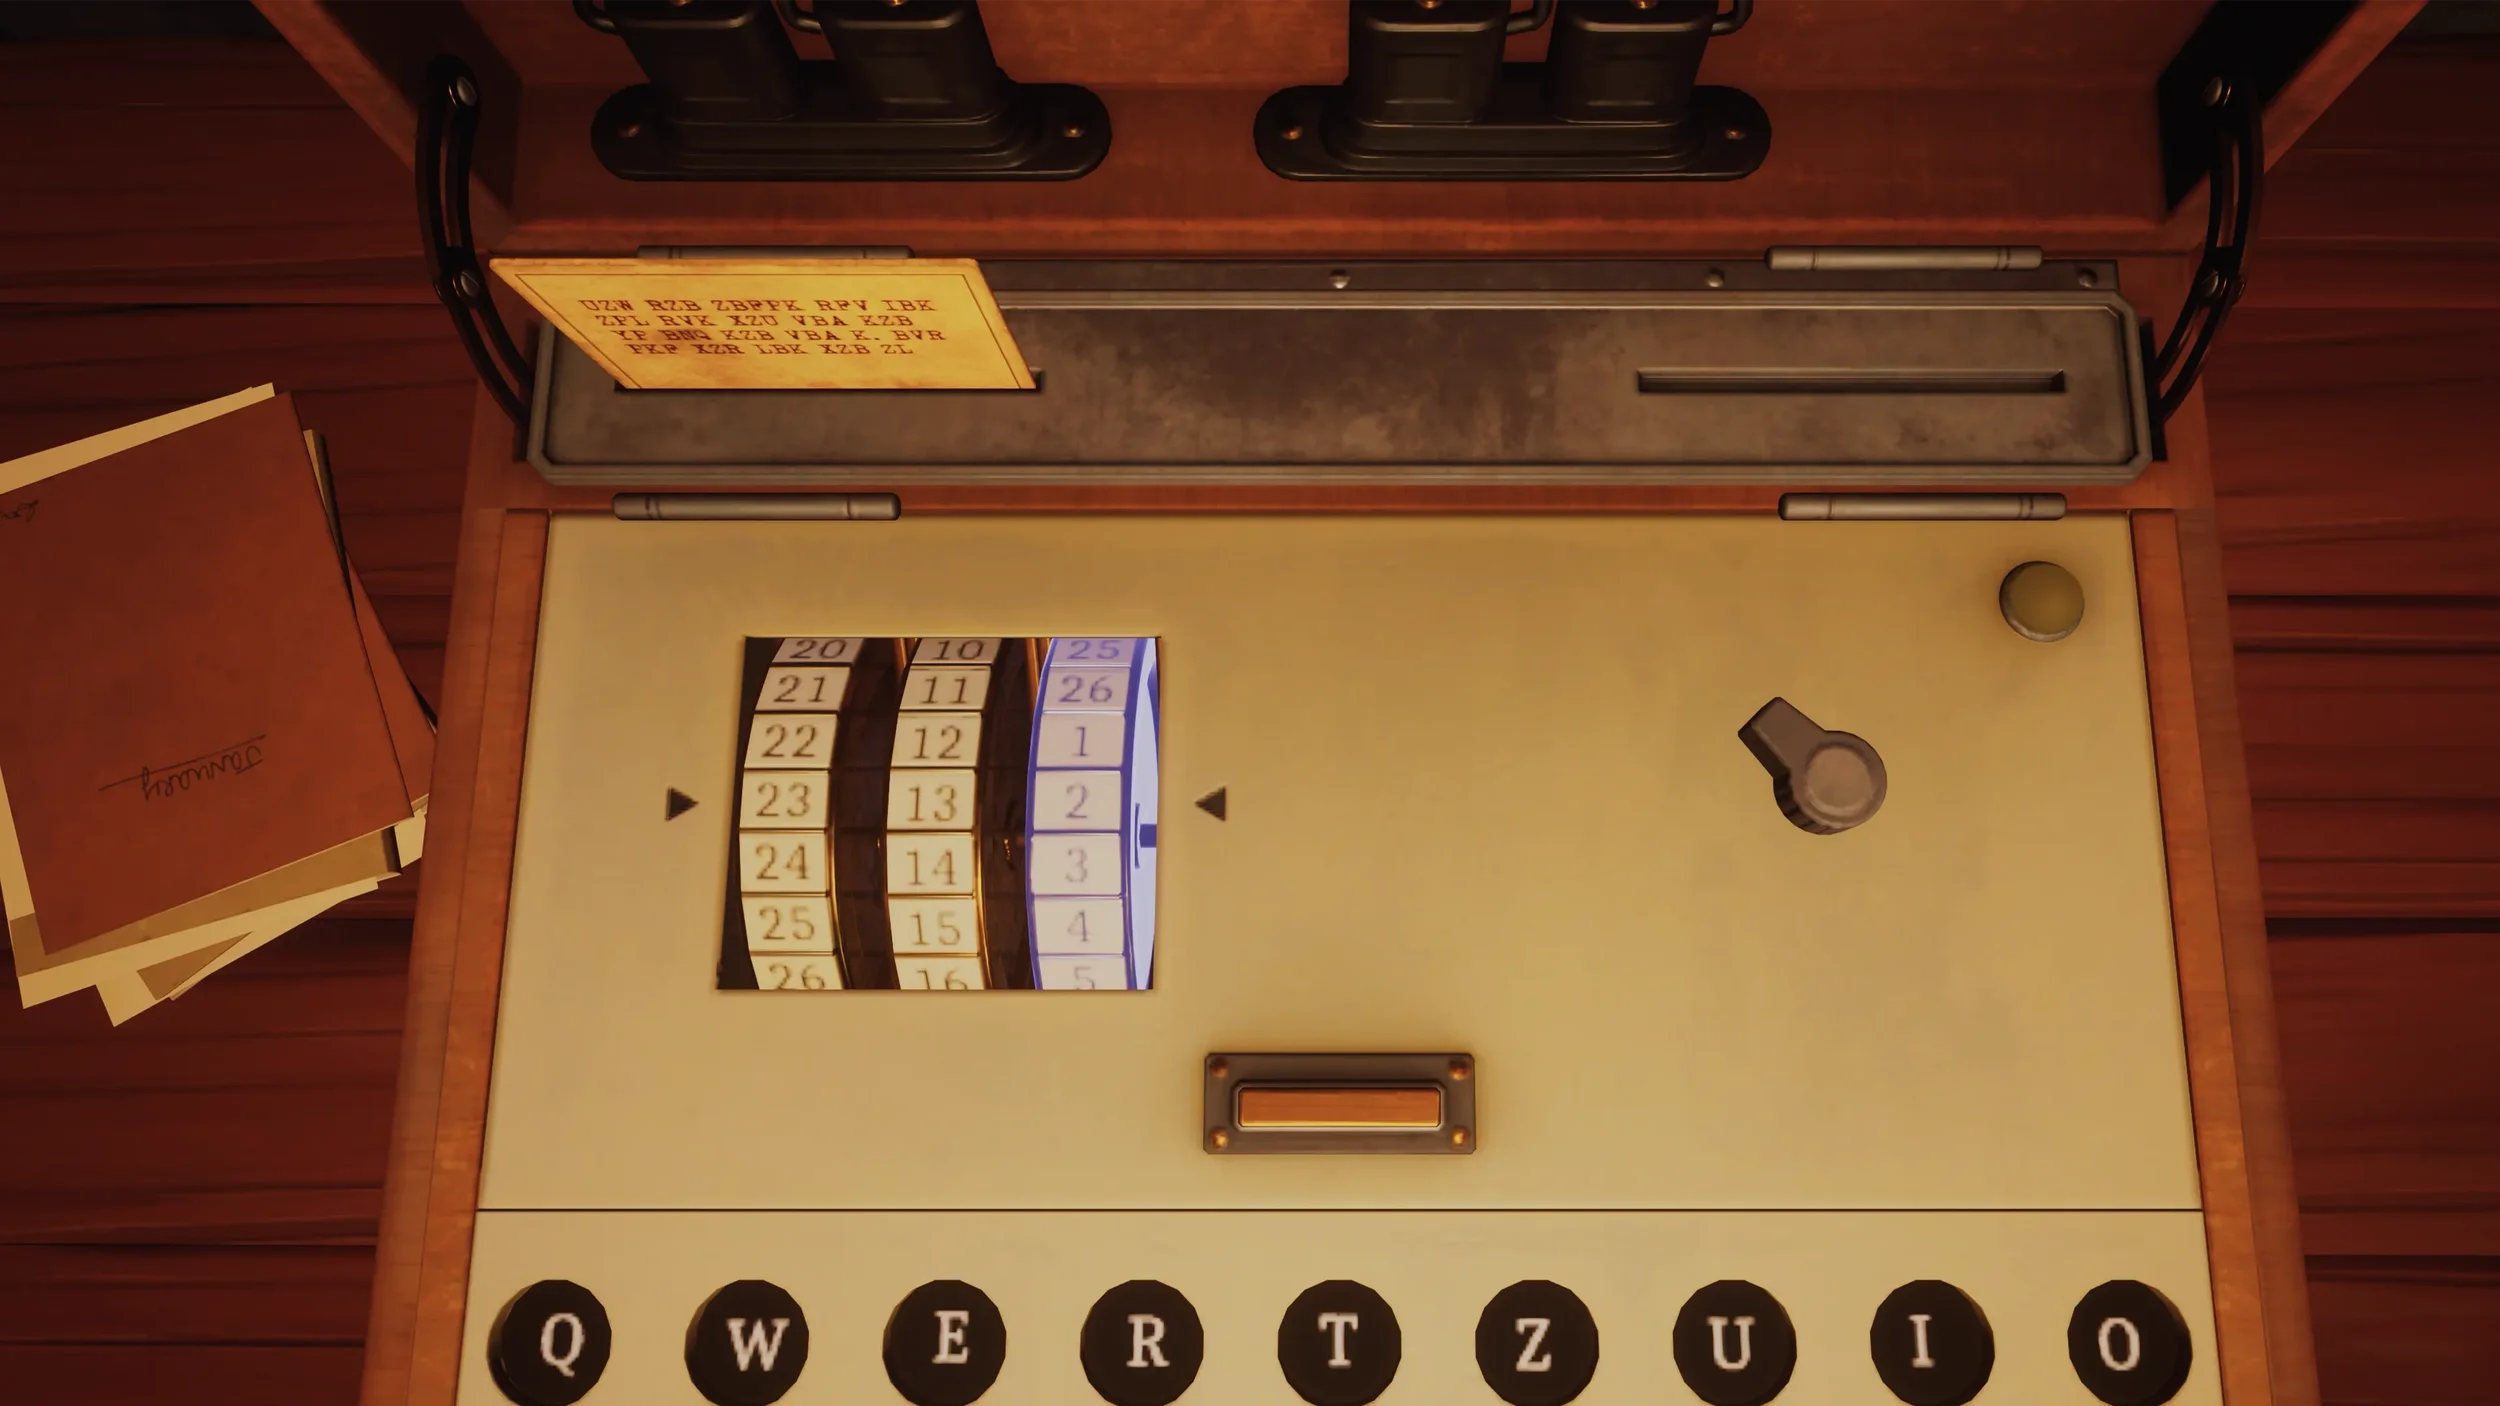
Now pick up the Encrypted Message from the desk on the right and place it into the Decipher Machine.
The way the Machine works is fairly simple, you just need to look at the first 3 letters on the Encrypted Message (in this case “GMR”) and see what row that corresponds to on the chart table we just picked up.
Then simply input the info from that row into the Machine.
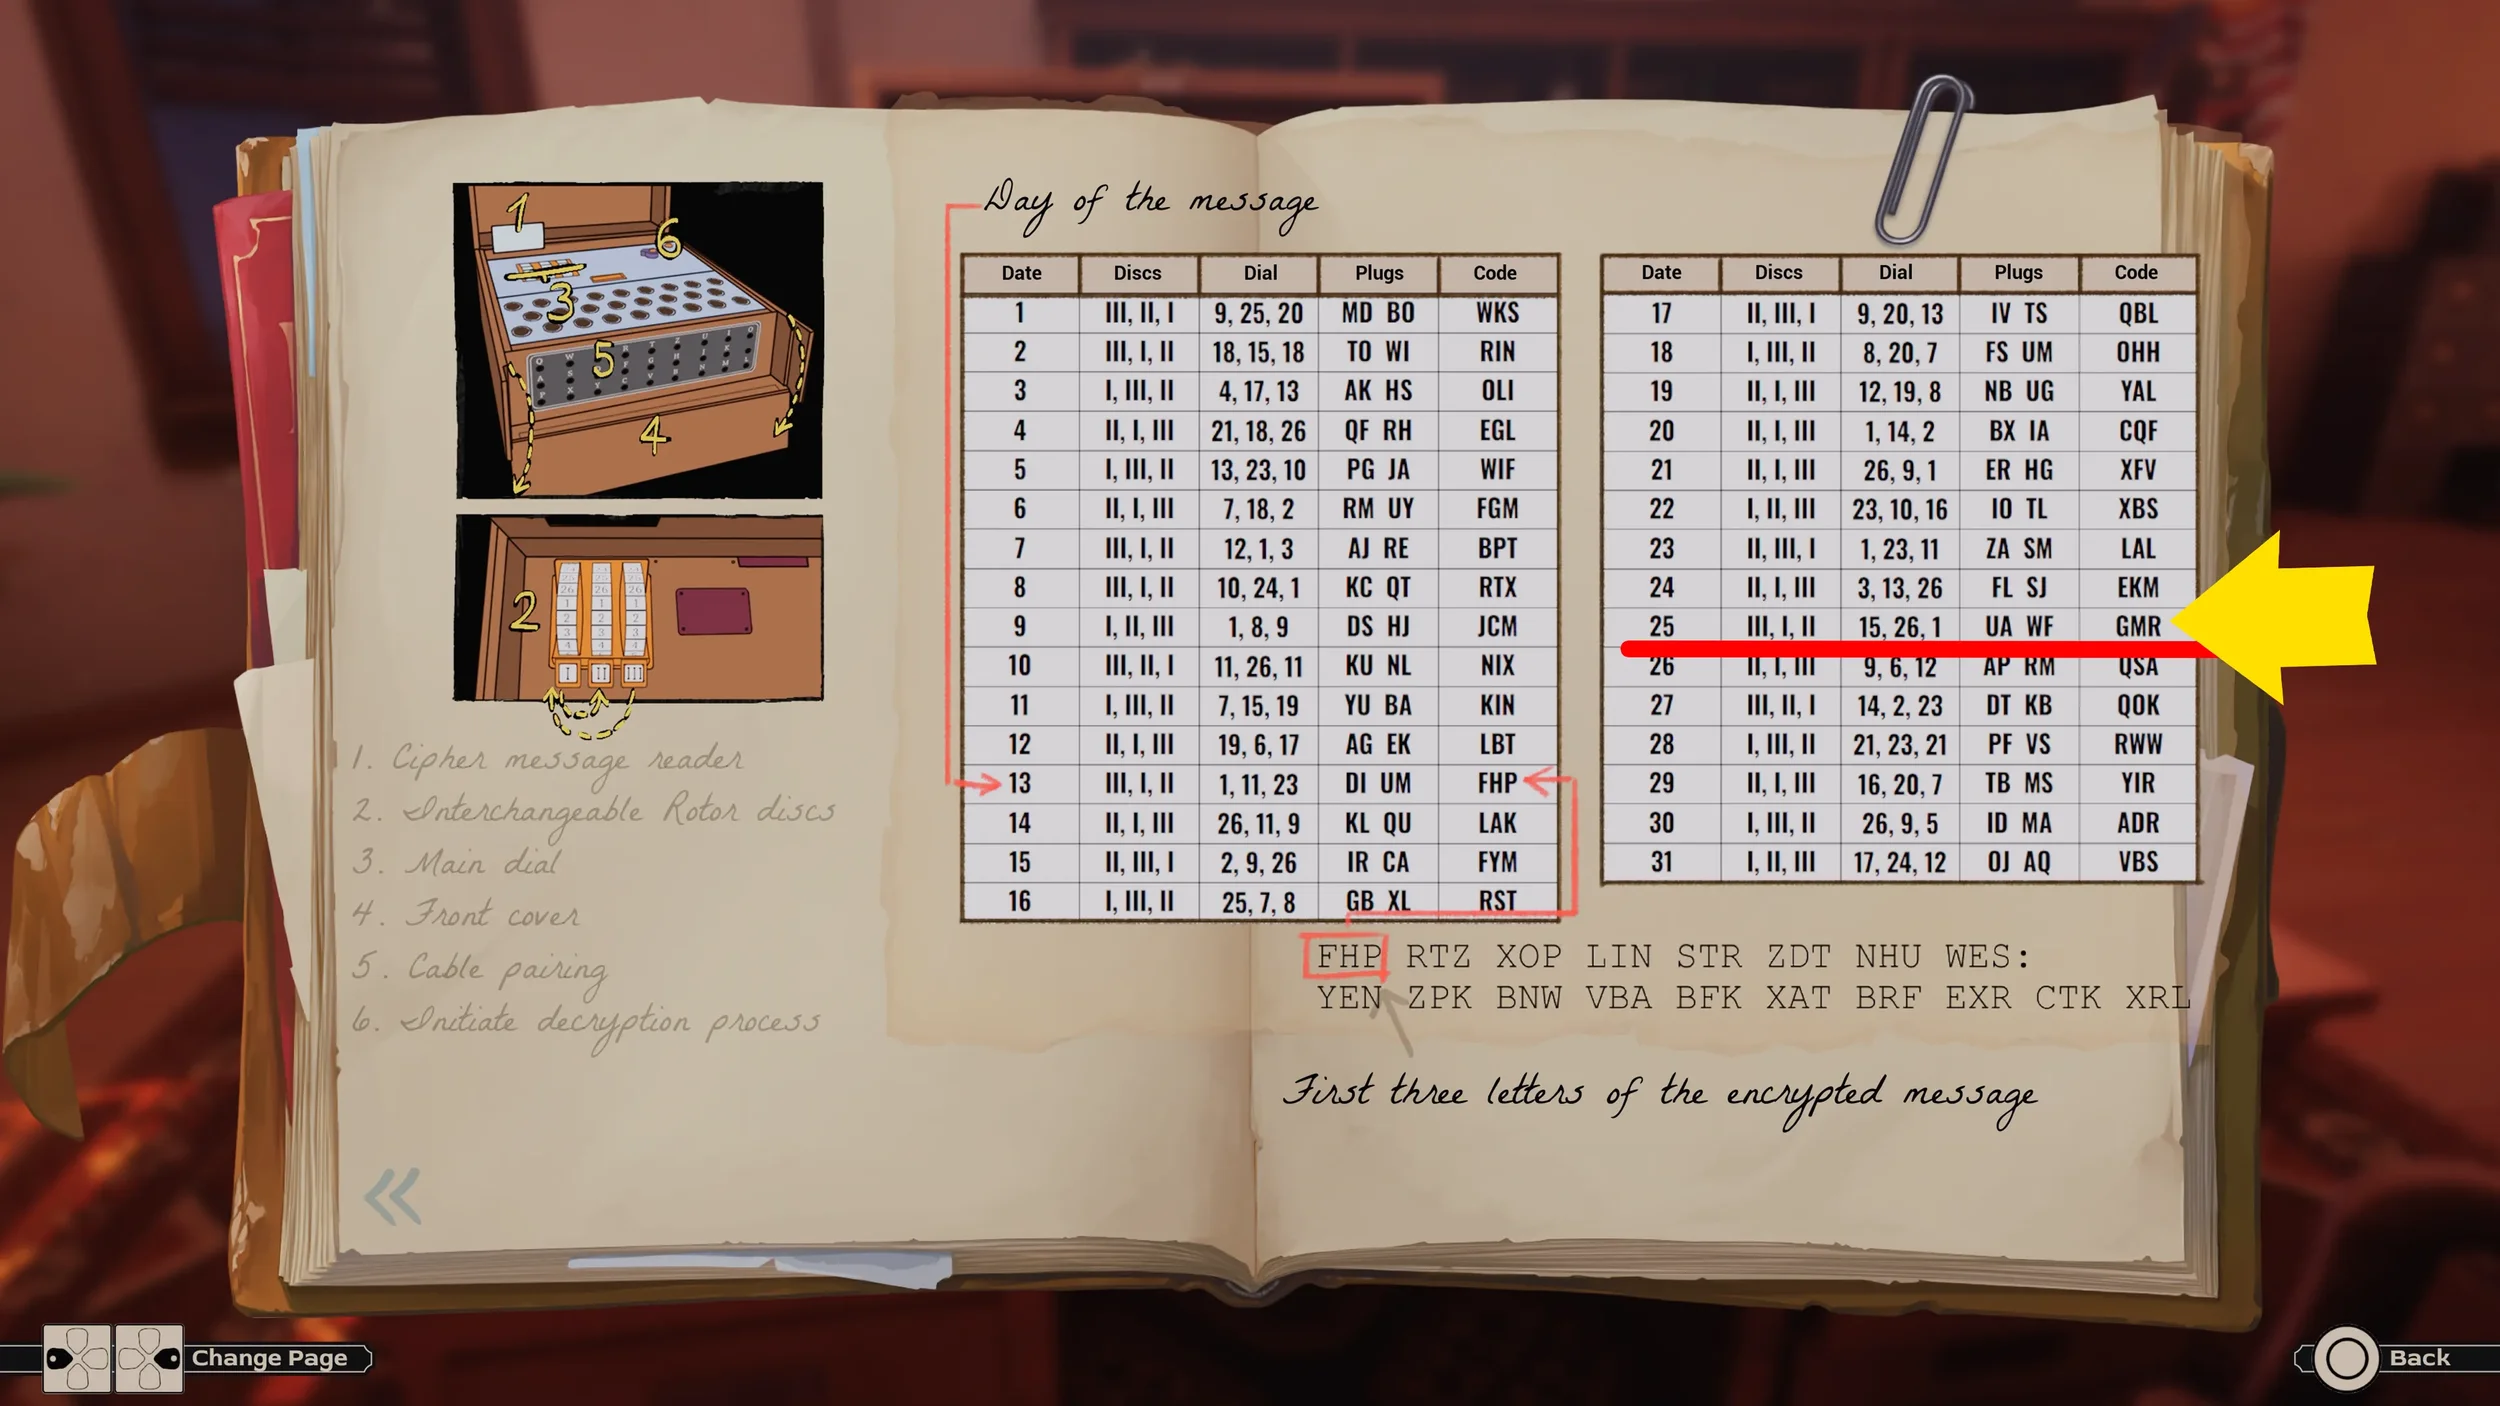
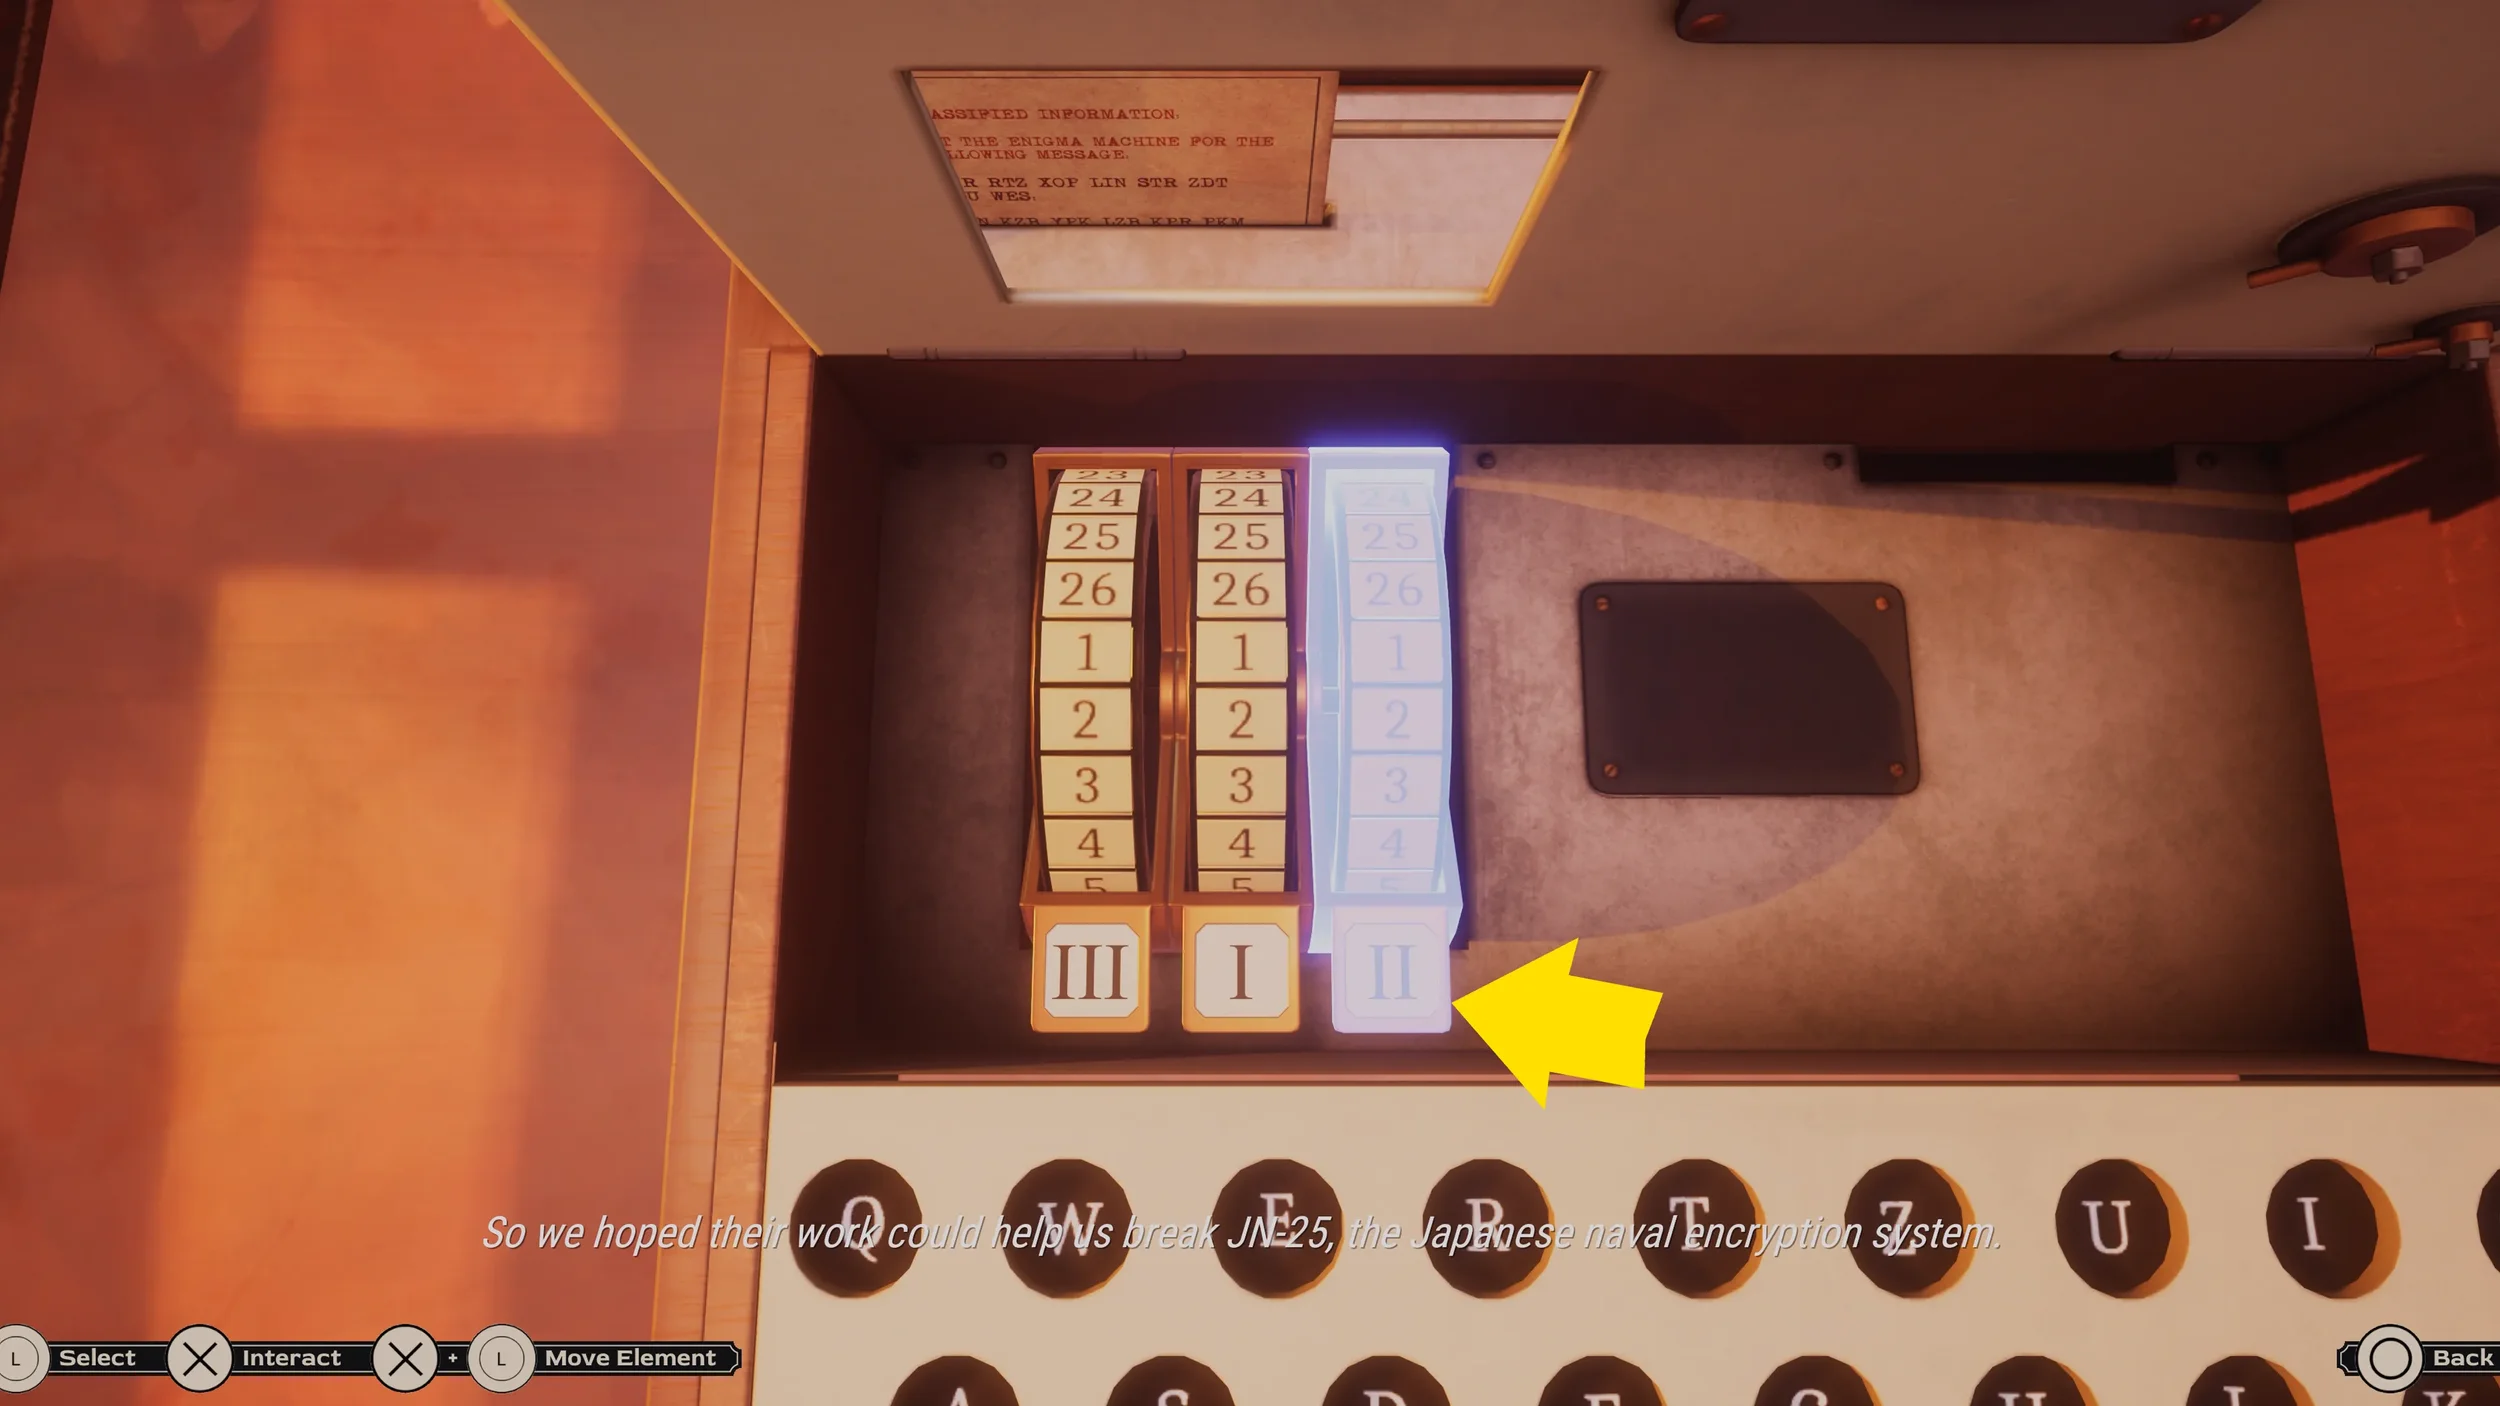
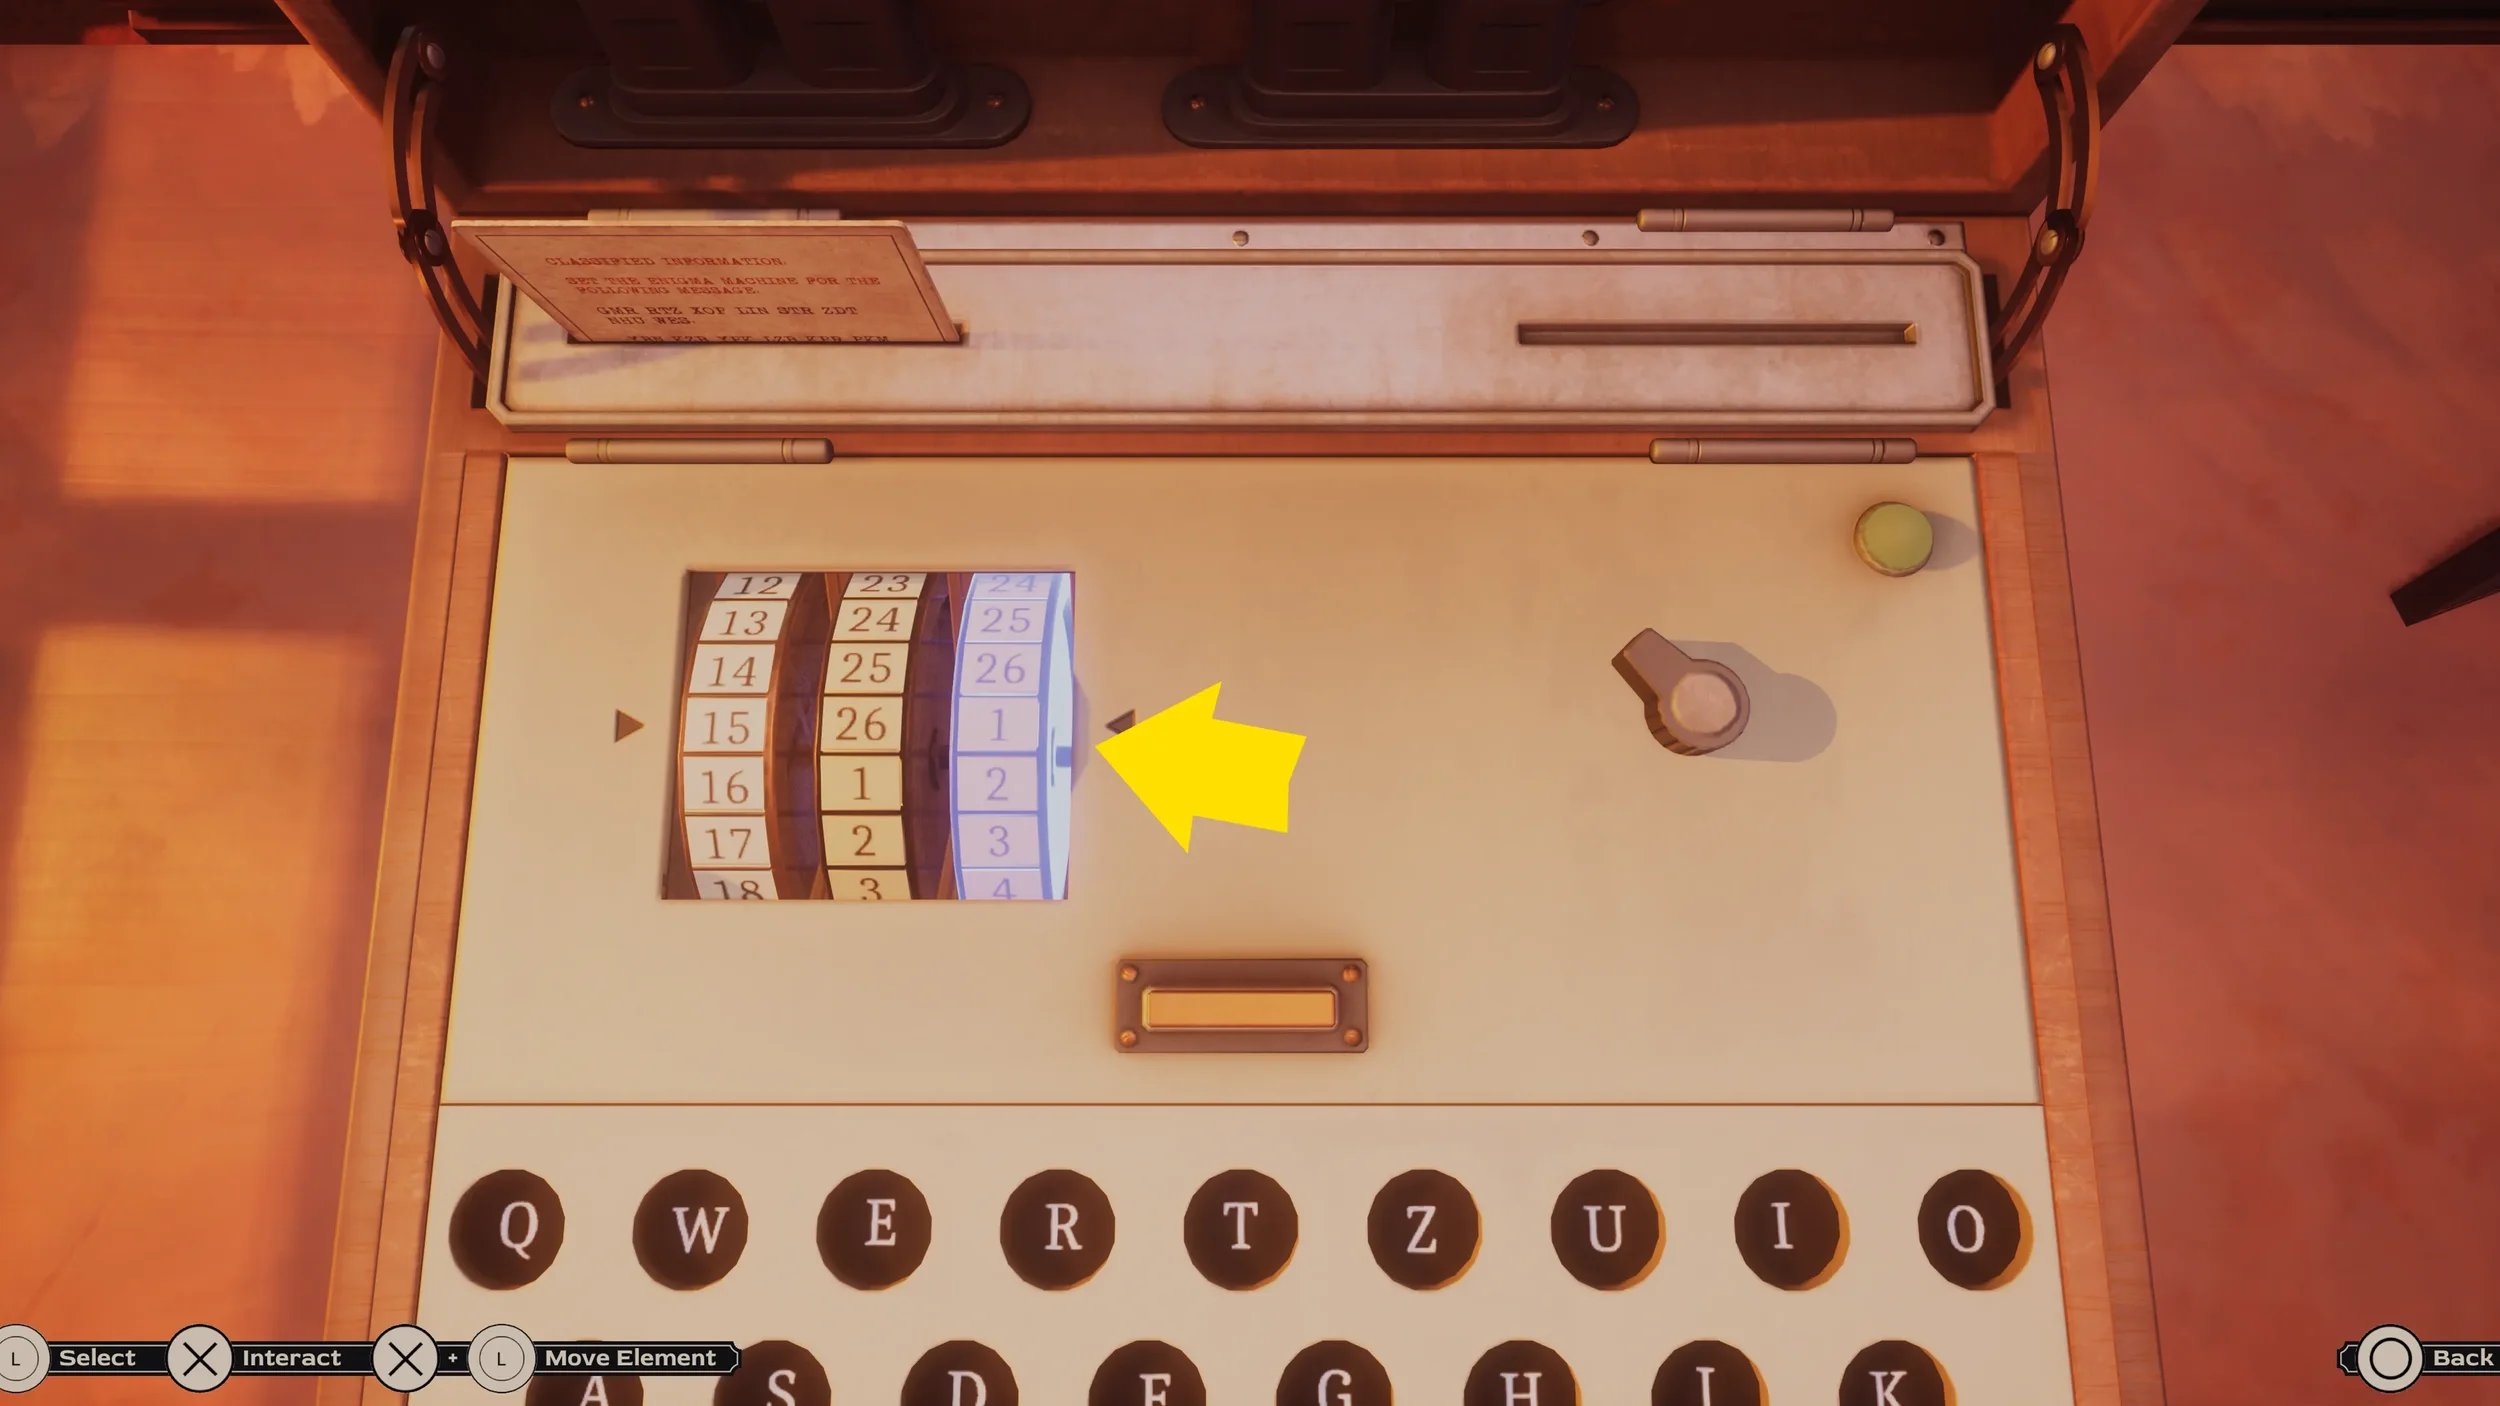
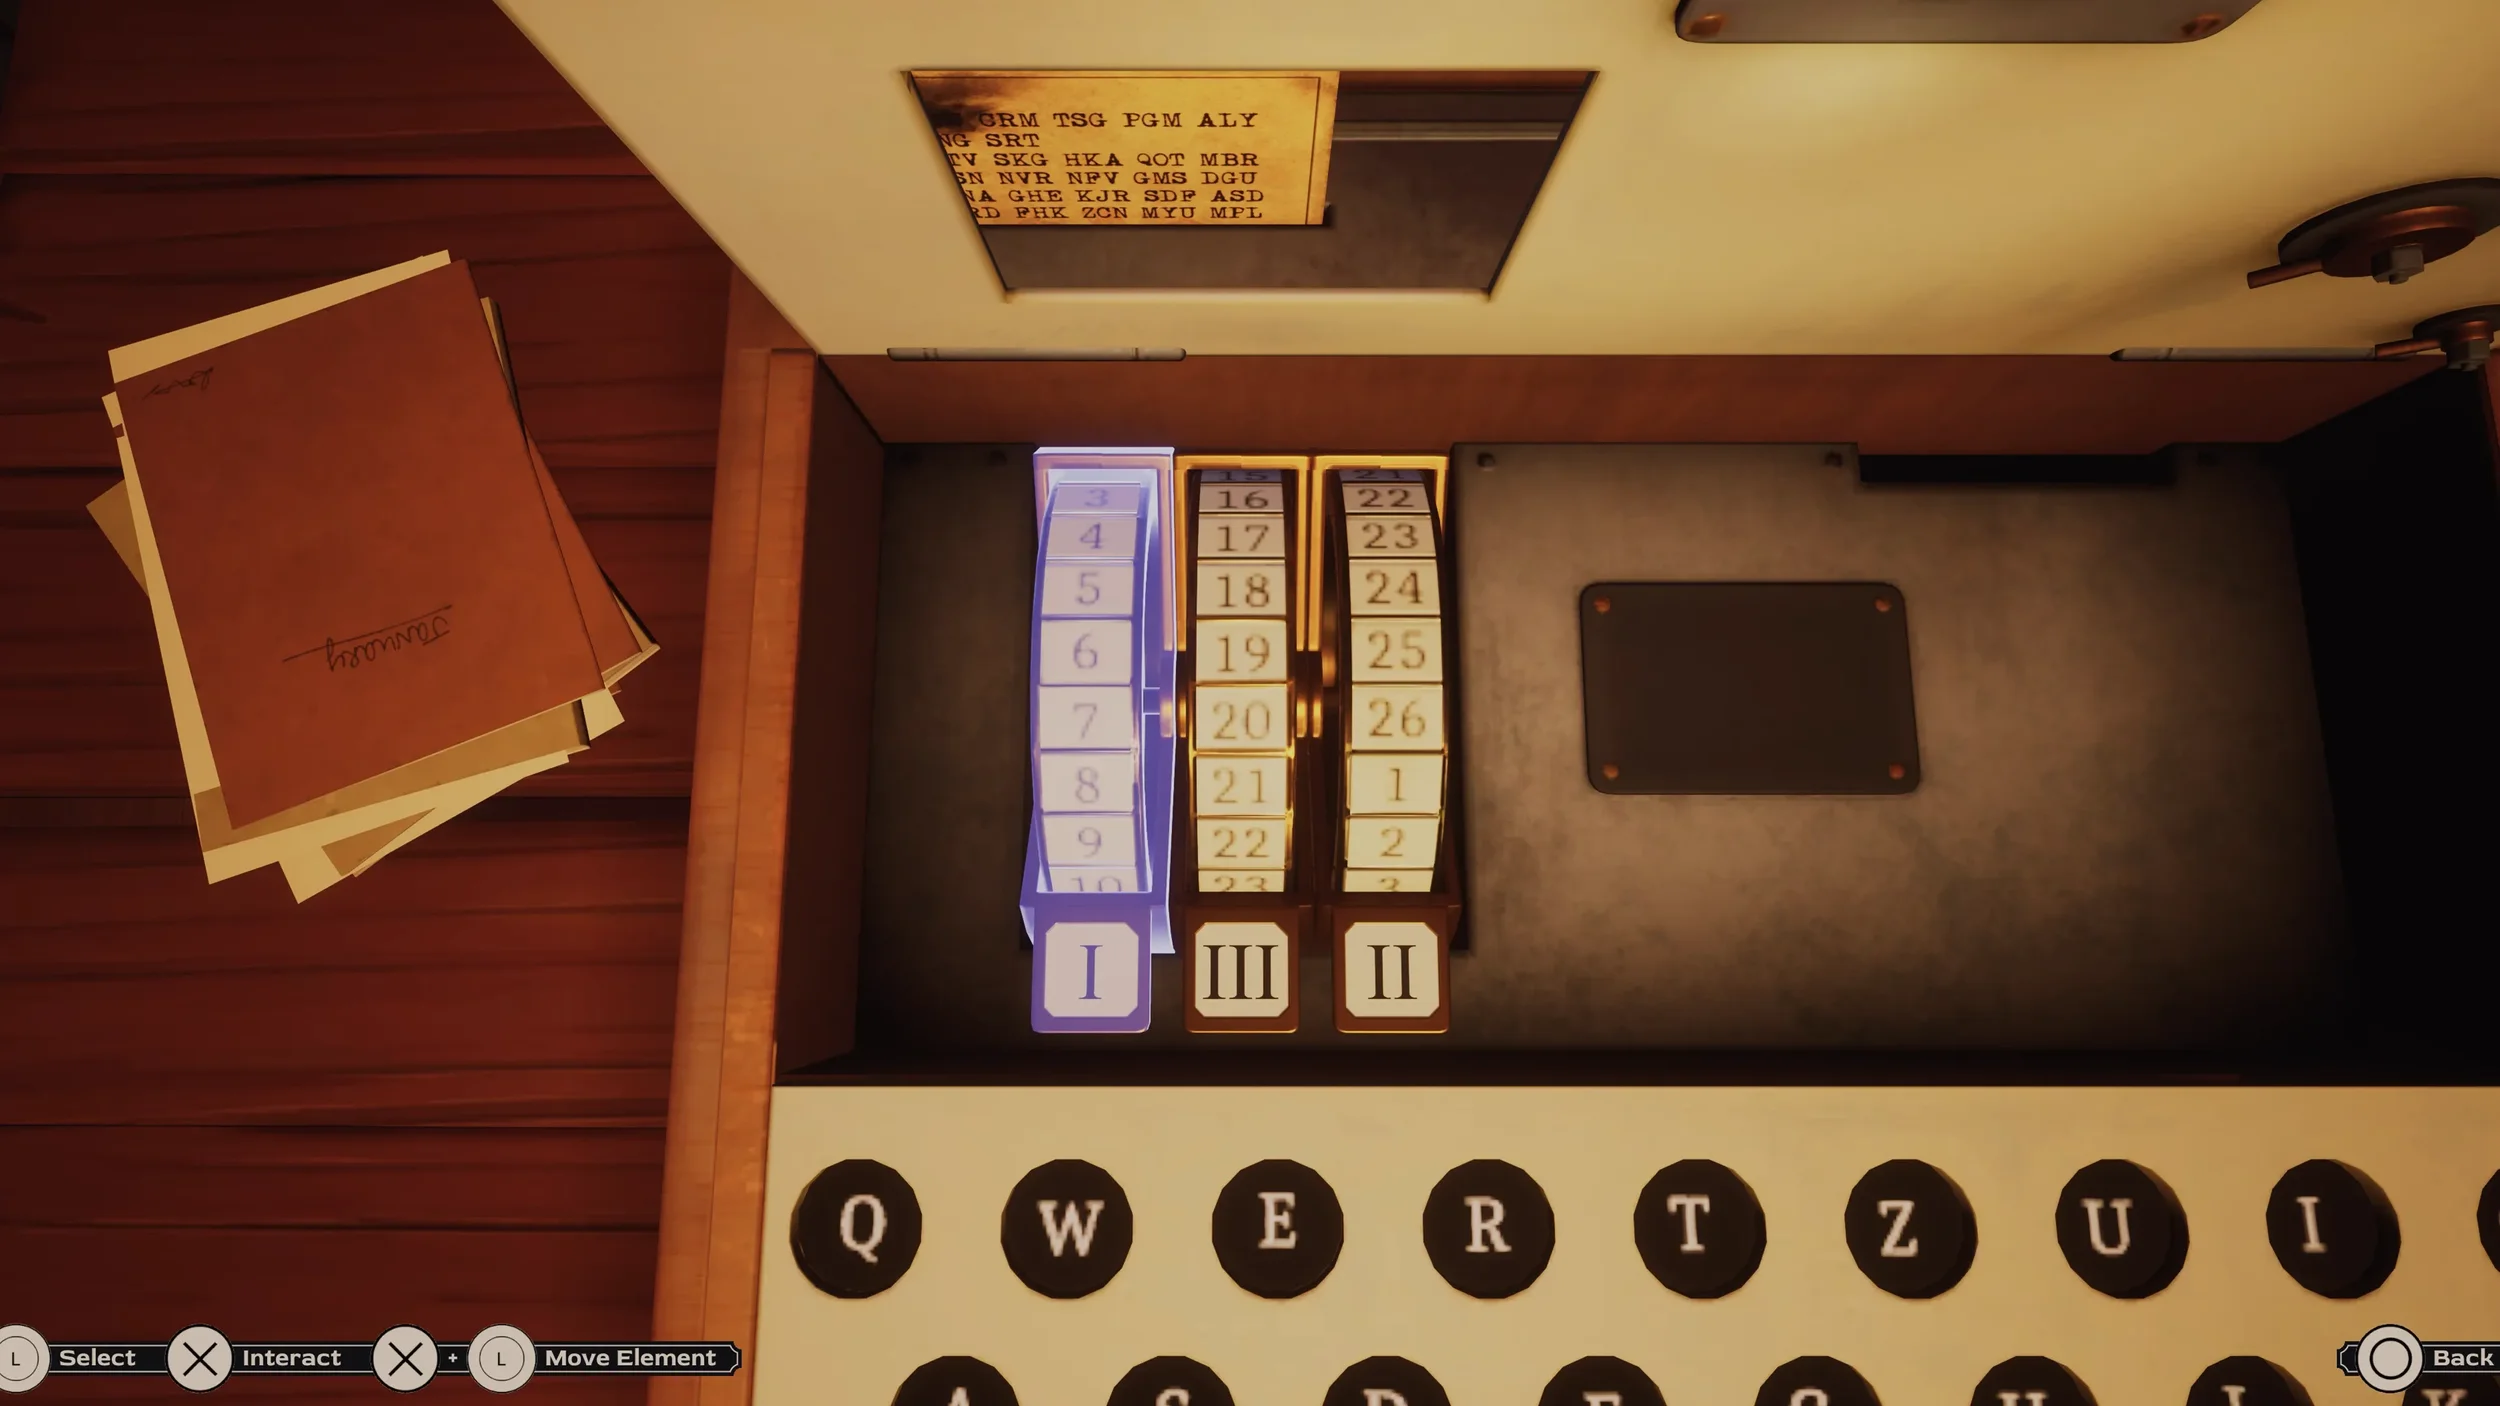
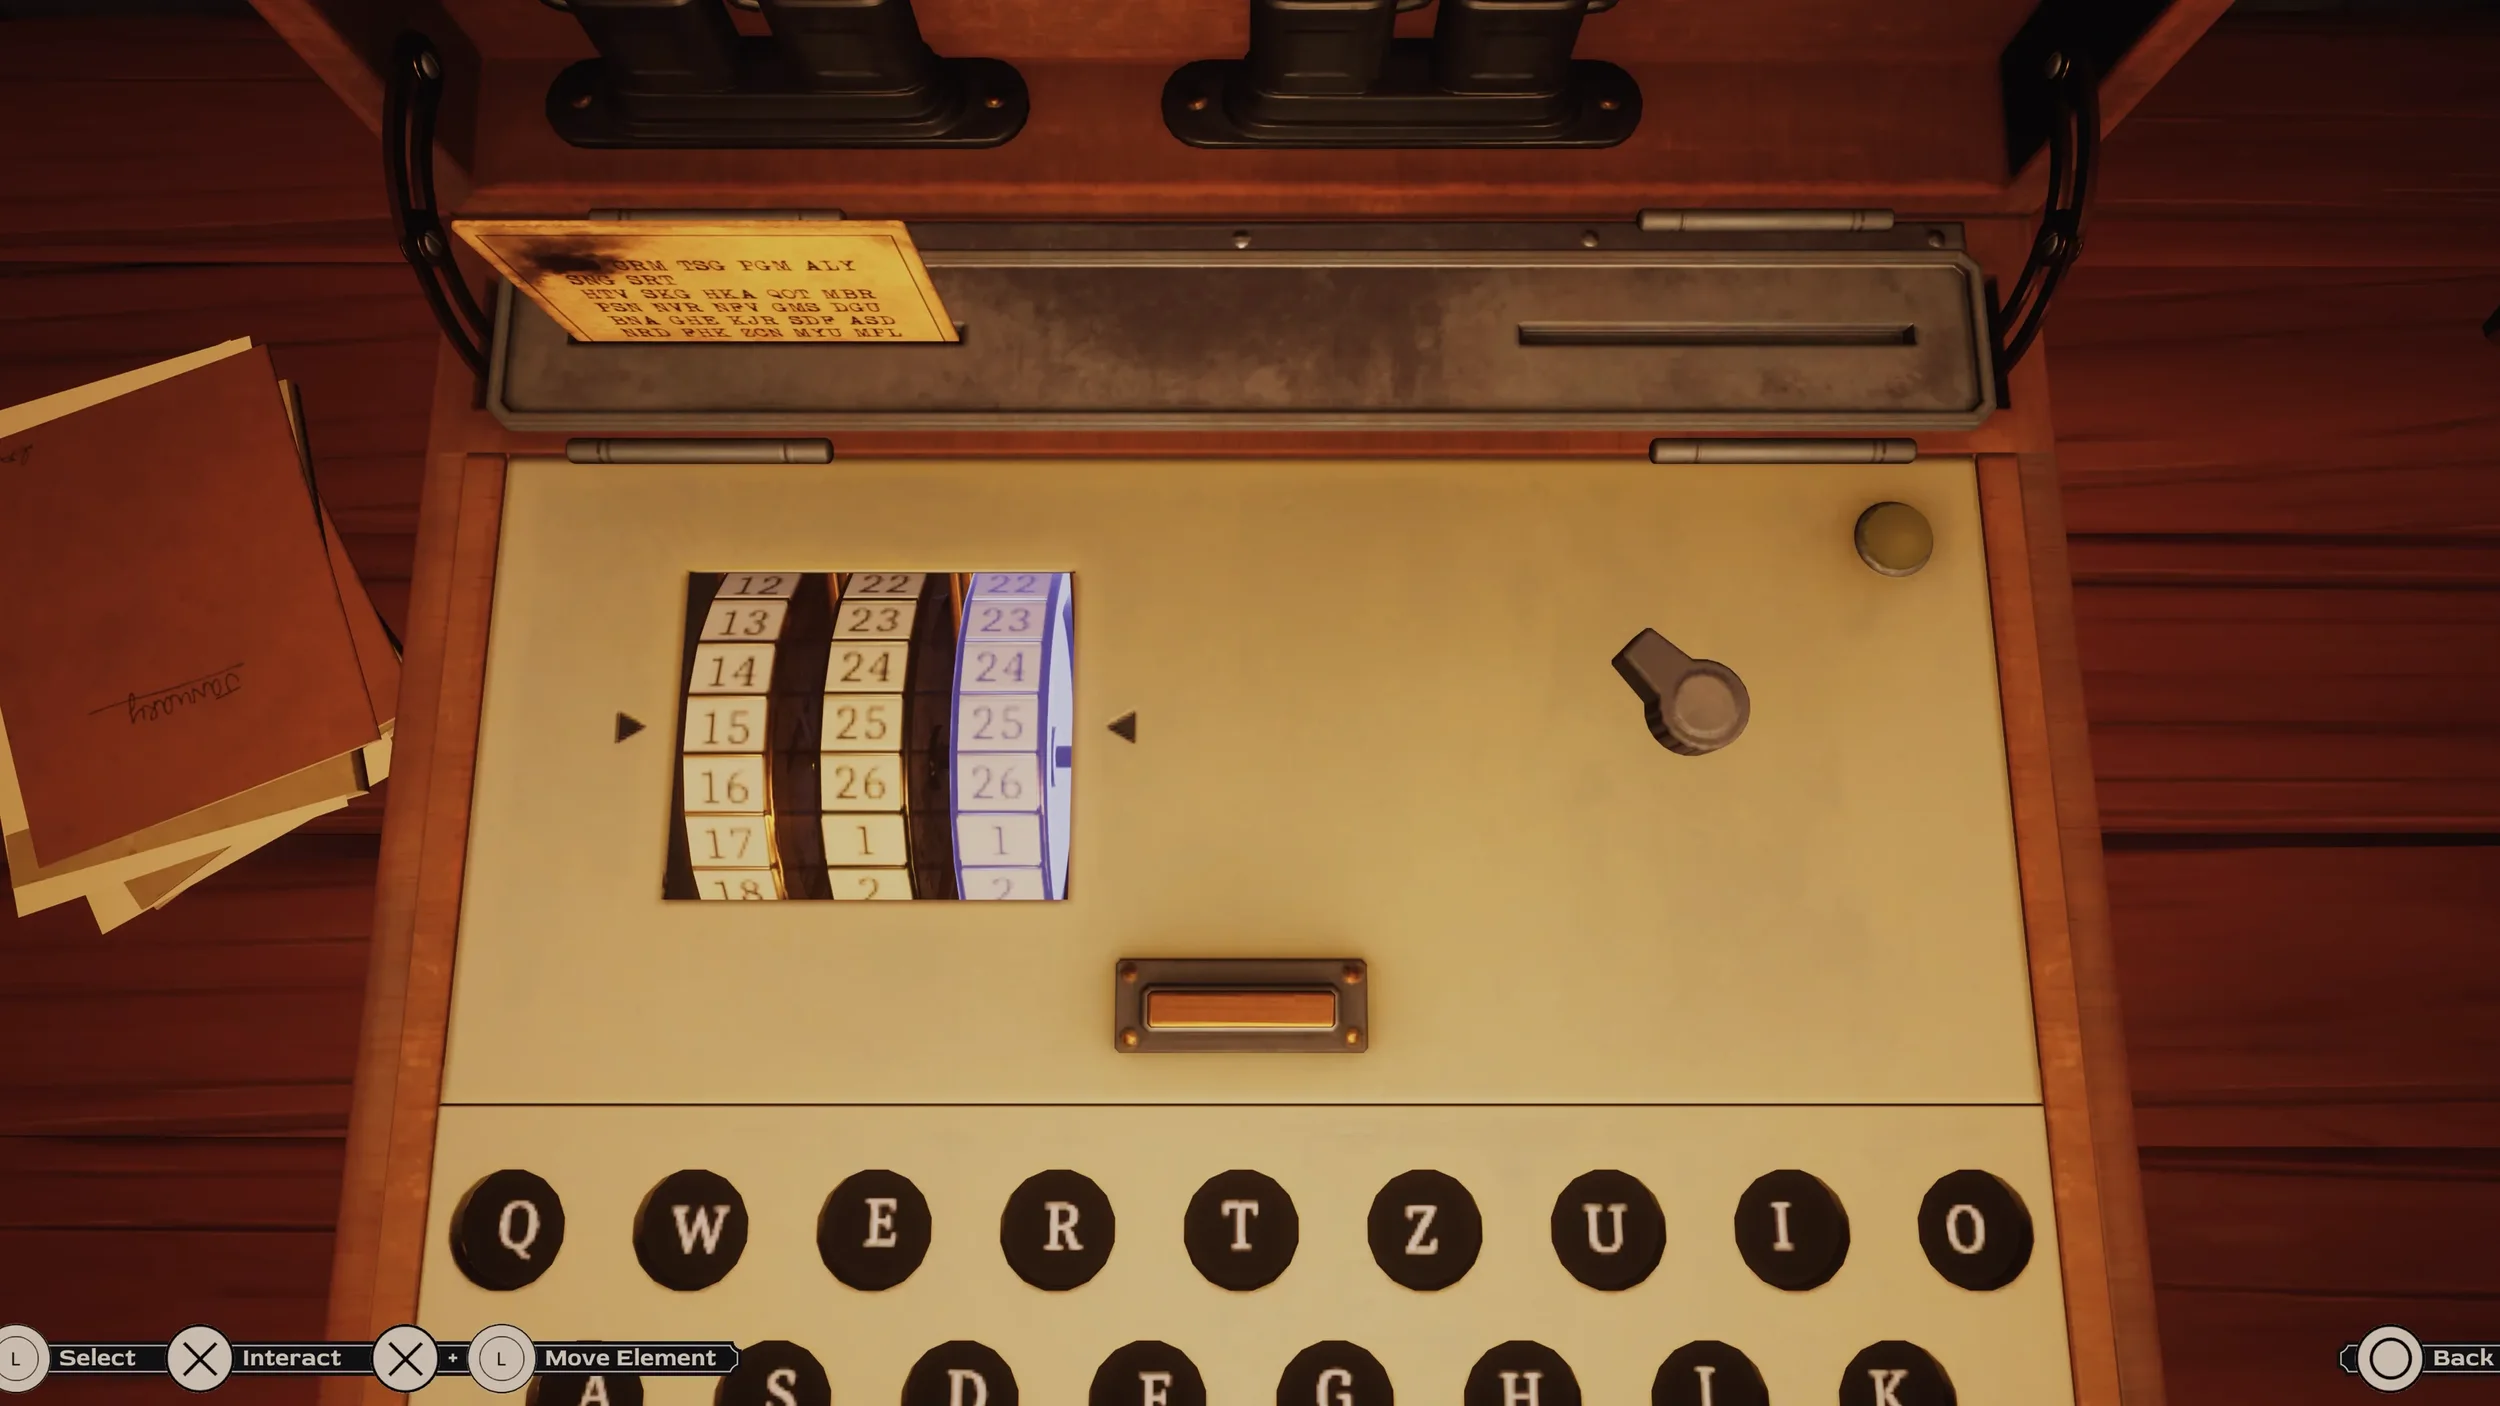
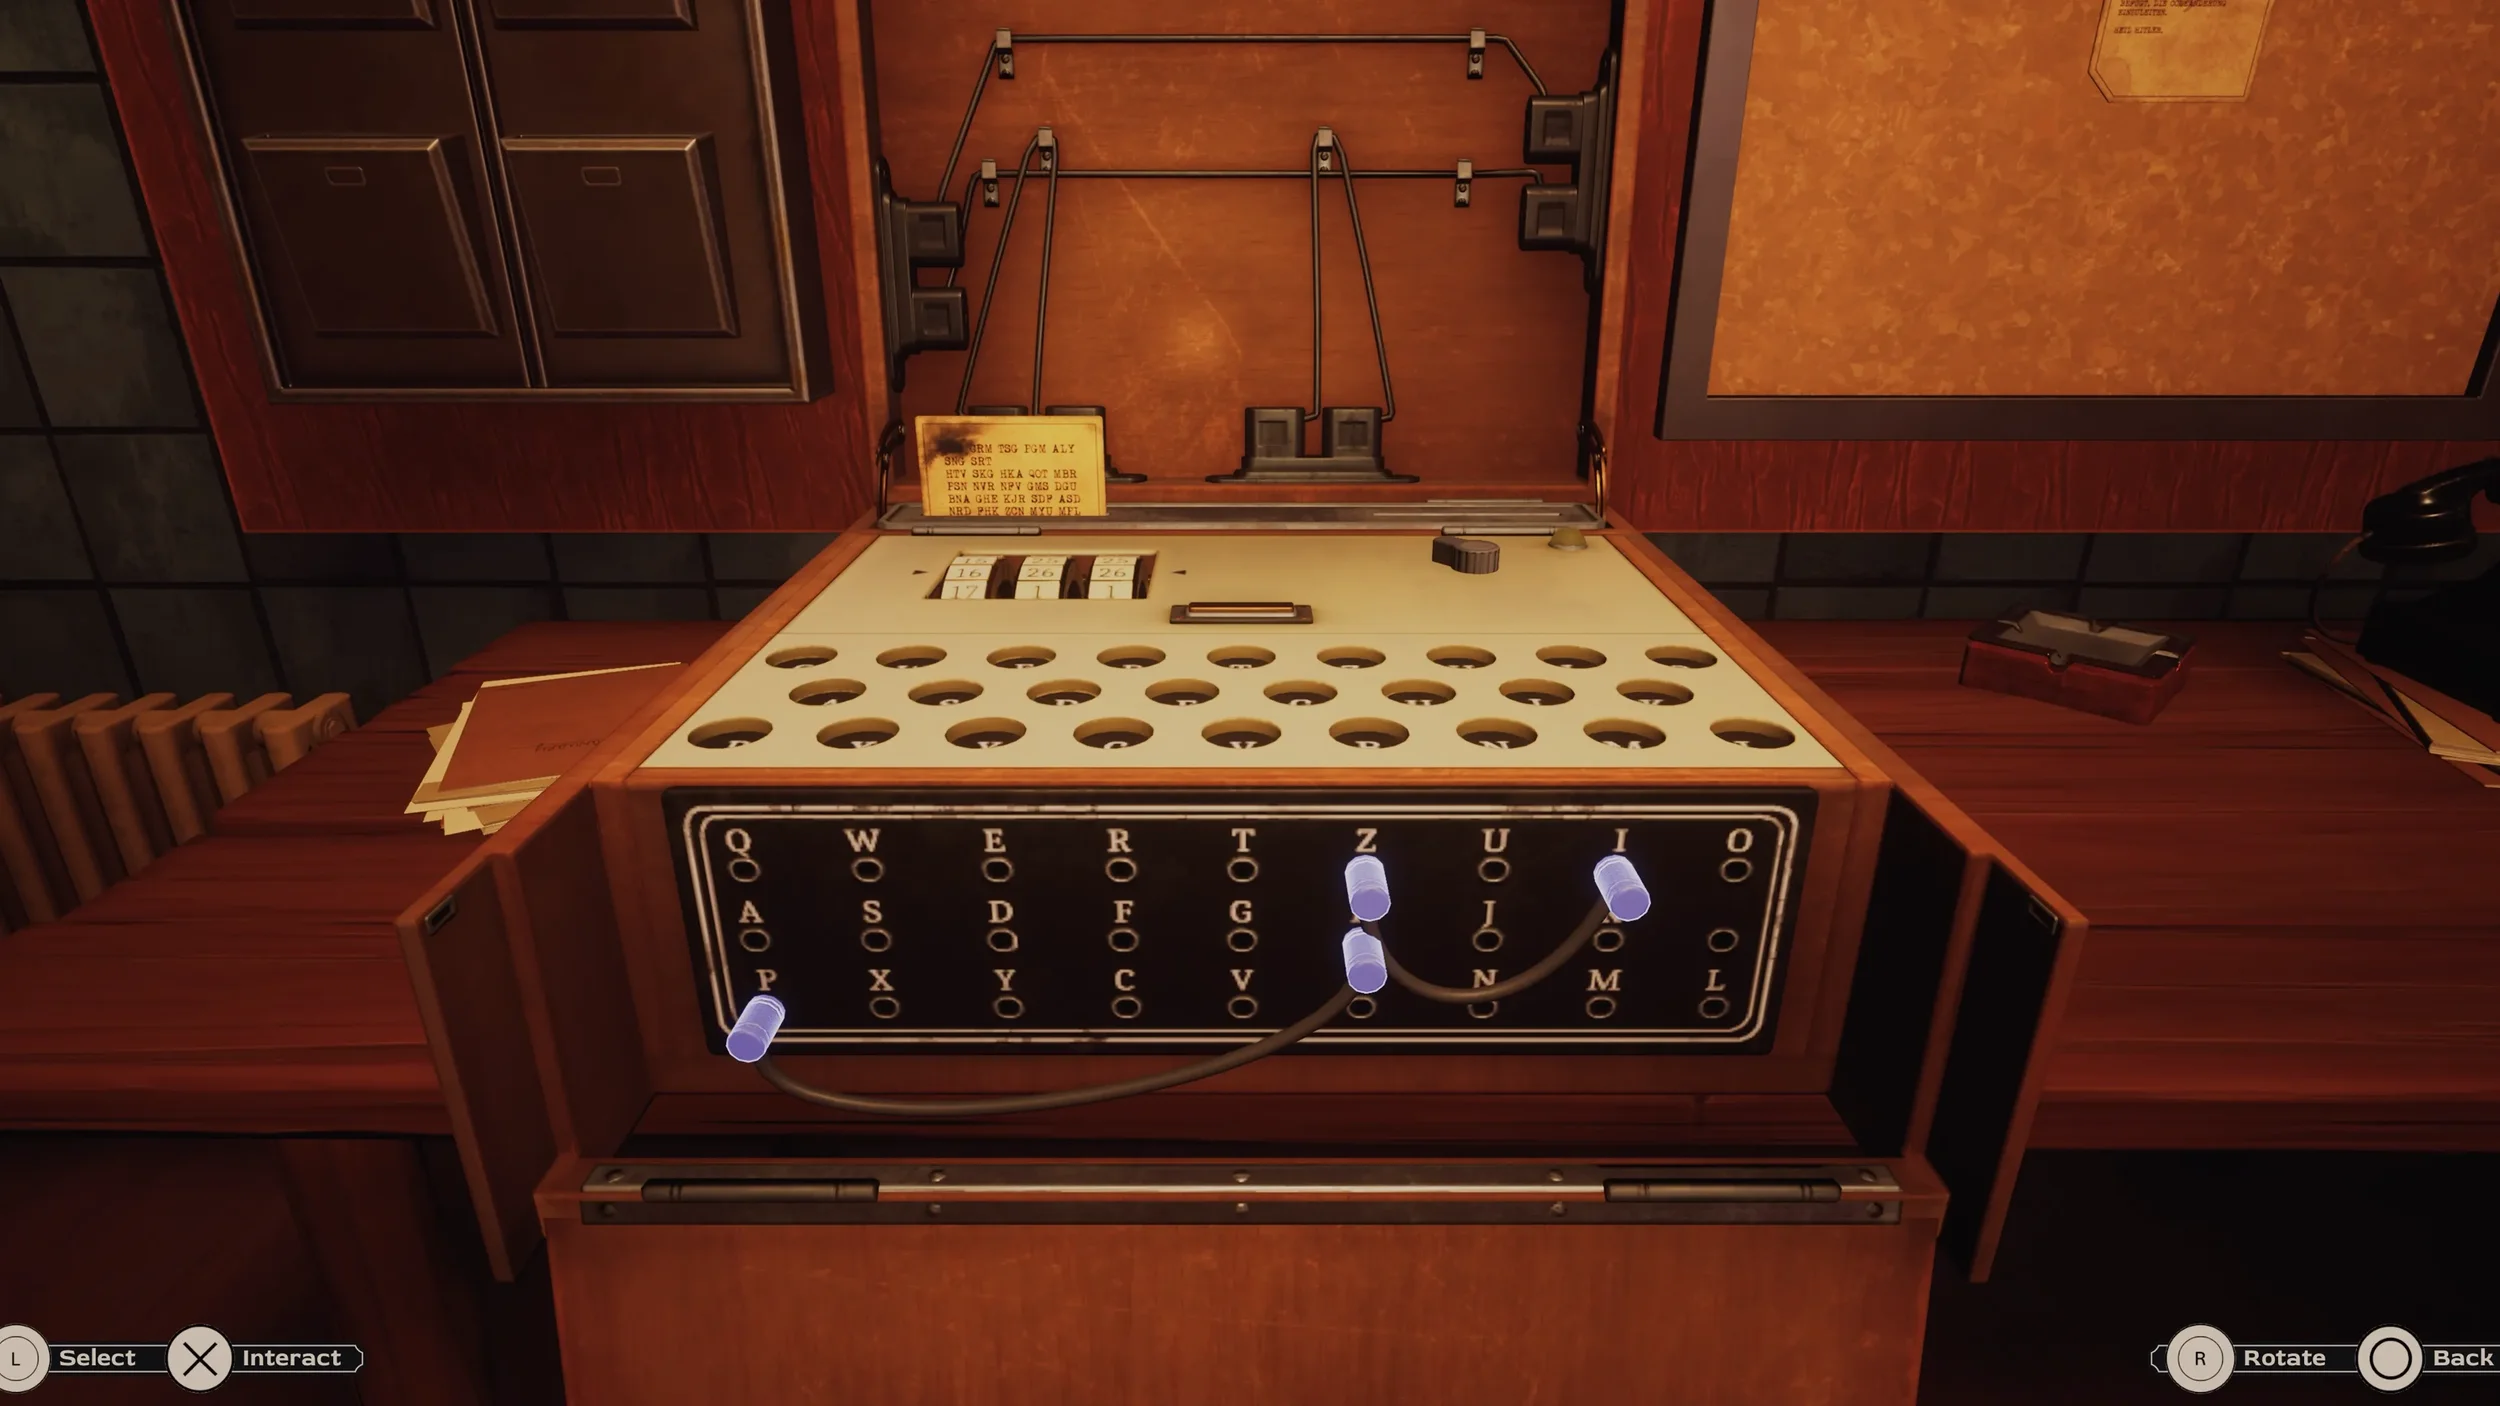
First open the upper part of the case to reveal the bigger “I” “II” “III” dials, and arrange them in the correct order for our row (in this case III - I - II), then close the upper part of the case, next set the smaller dials to 15 - 26 - 1. Now all that is left to do is open the lower part of the case and connect the specific letters together using the cables, so connect the U with the A, and then the W with the F.
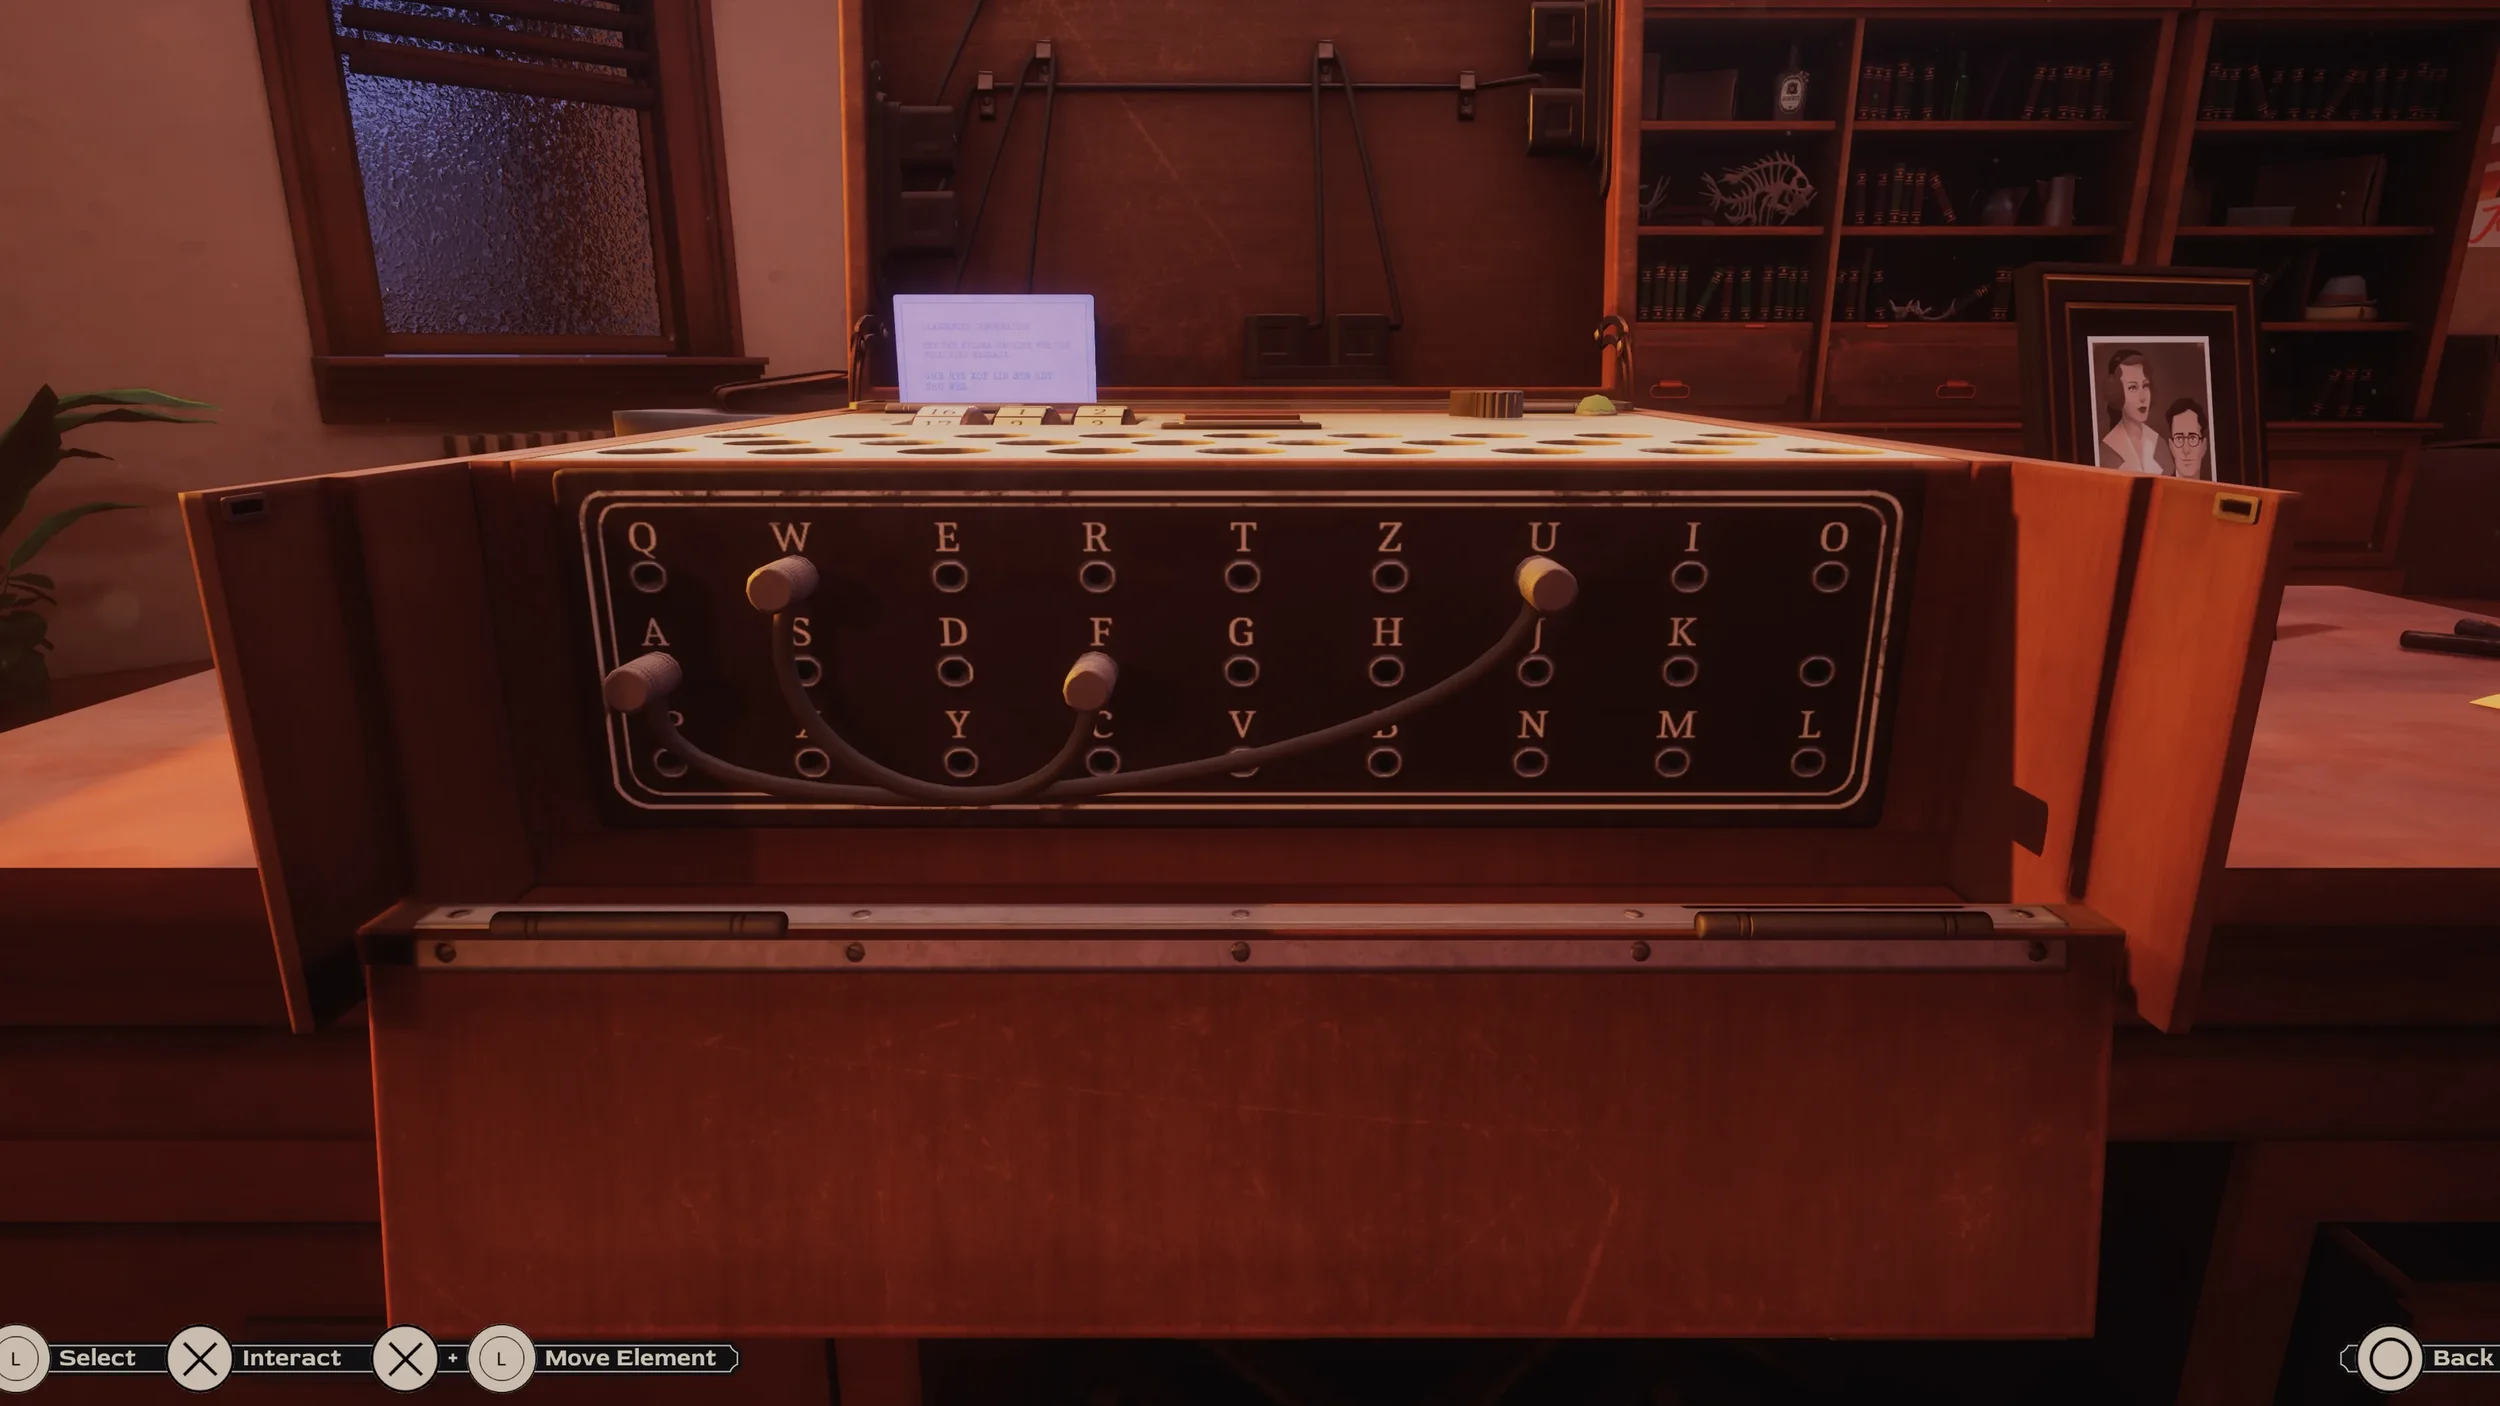
Once everything is set correctly just press the button on the upper right part of the Machine (just to the right of the dials), to complete the puzzle.
After solving the puzzle the phone will ring, answer it to end the flashback section of this Chapter.
 “Secret Agent” Trophy.
The next thing we need to focus on is gathering all of the clues scattered around the Antenna Building to decipher 3 more Encrypted Messages to get the combination to open the metal door downstairs.
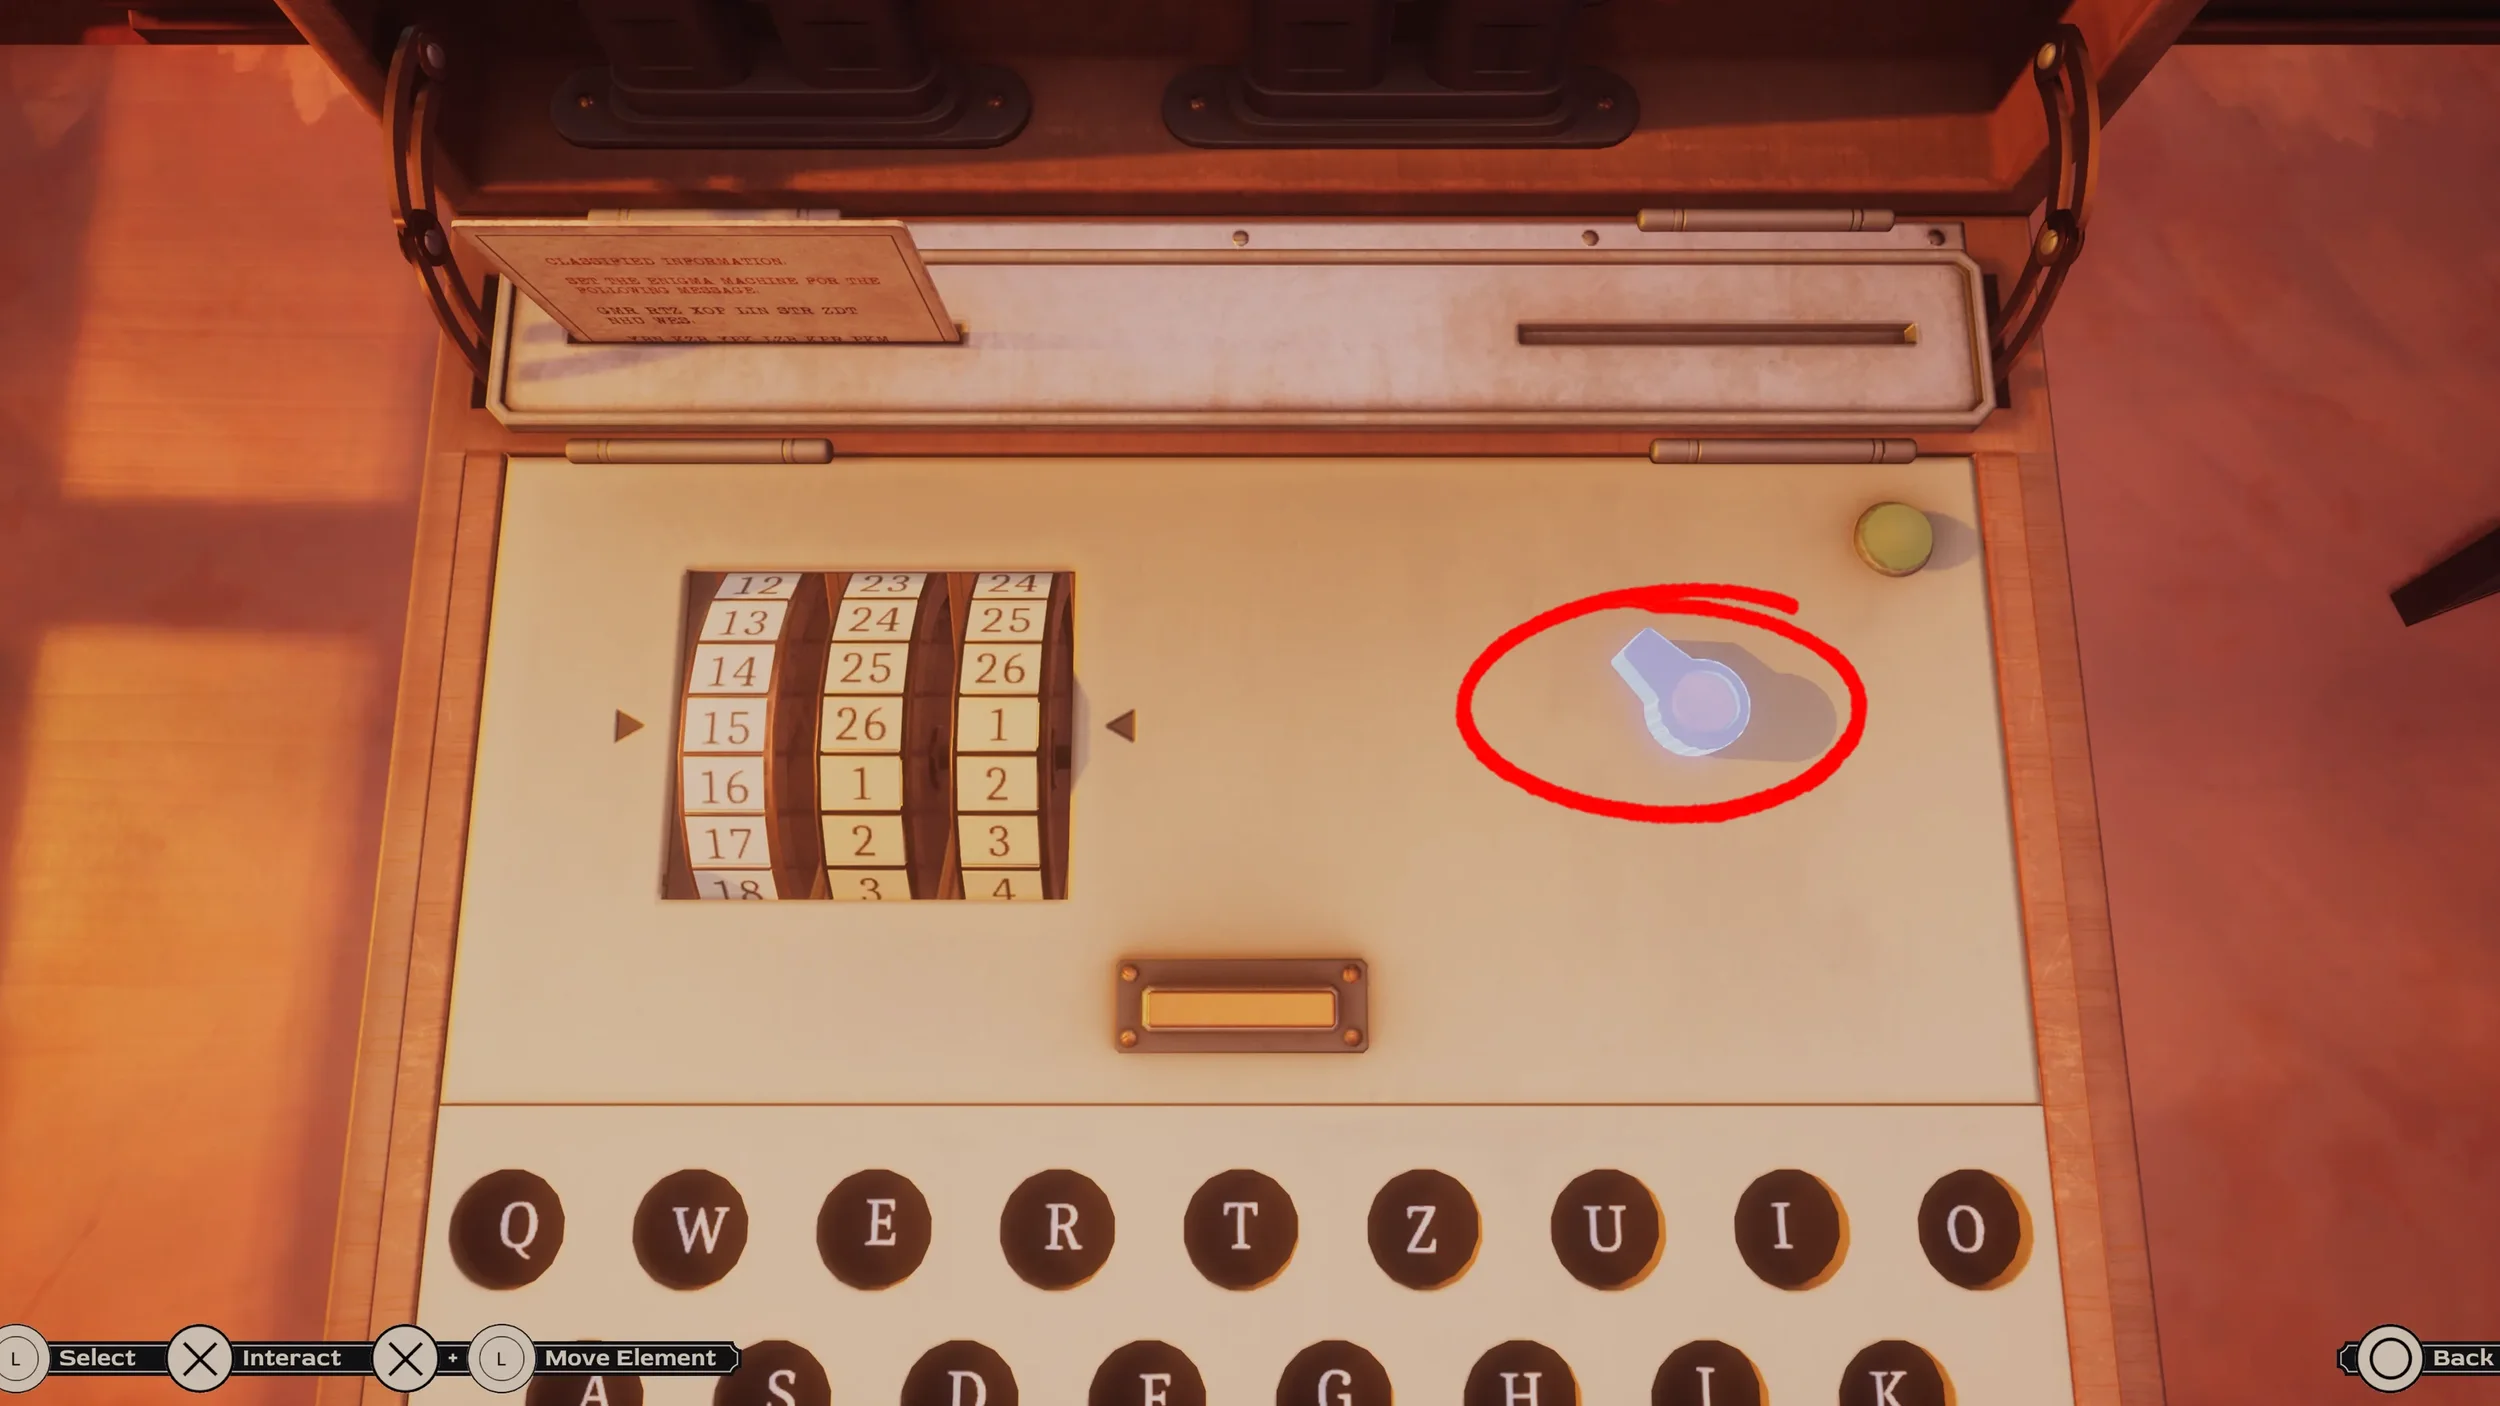
On this upper floor there are 6 items we need to get, 2 clues, 3 Encrypted Messages and the Spare Cabe.
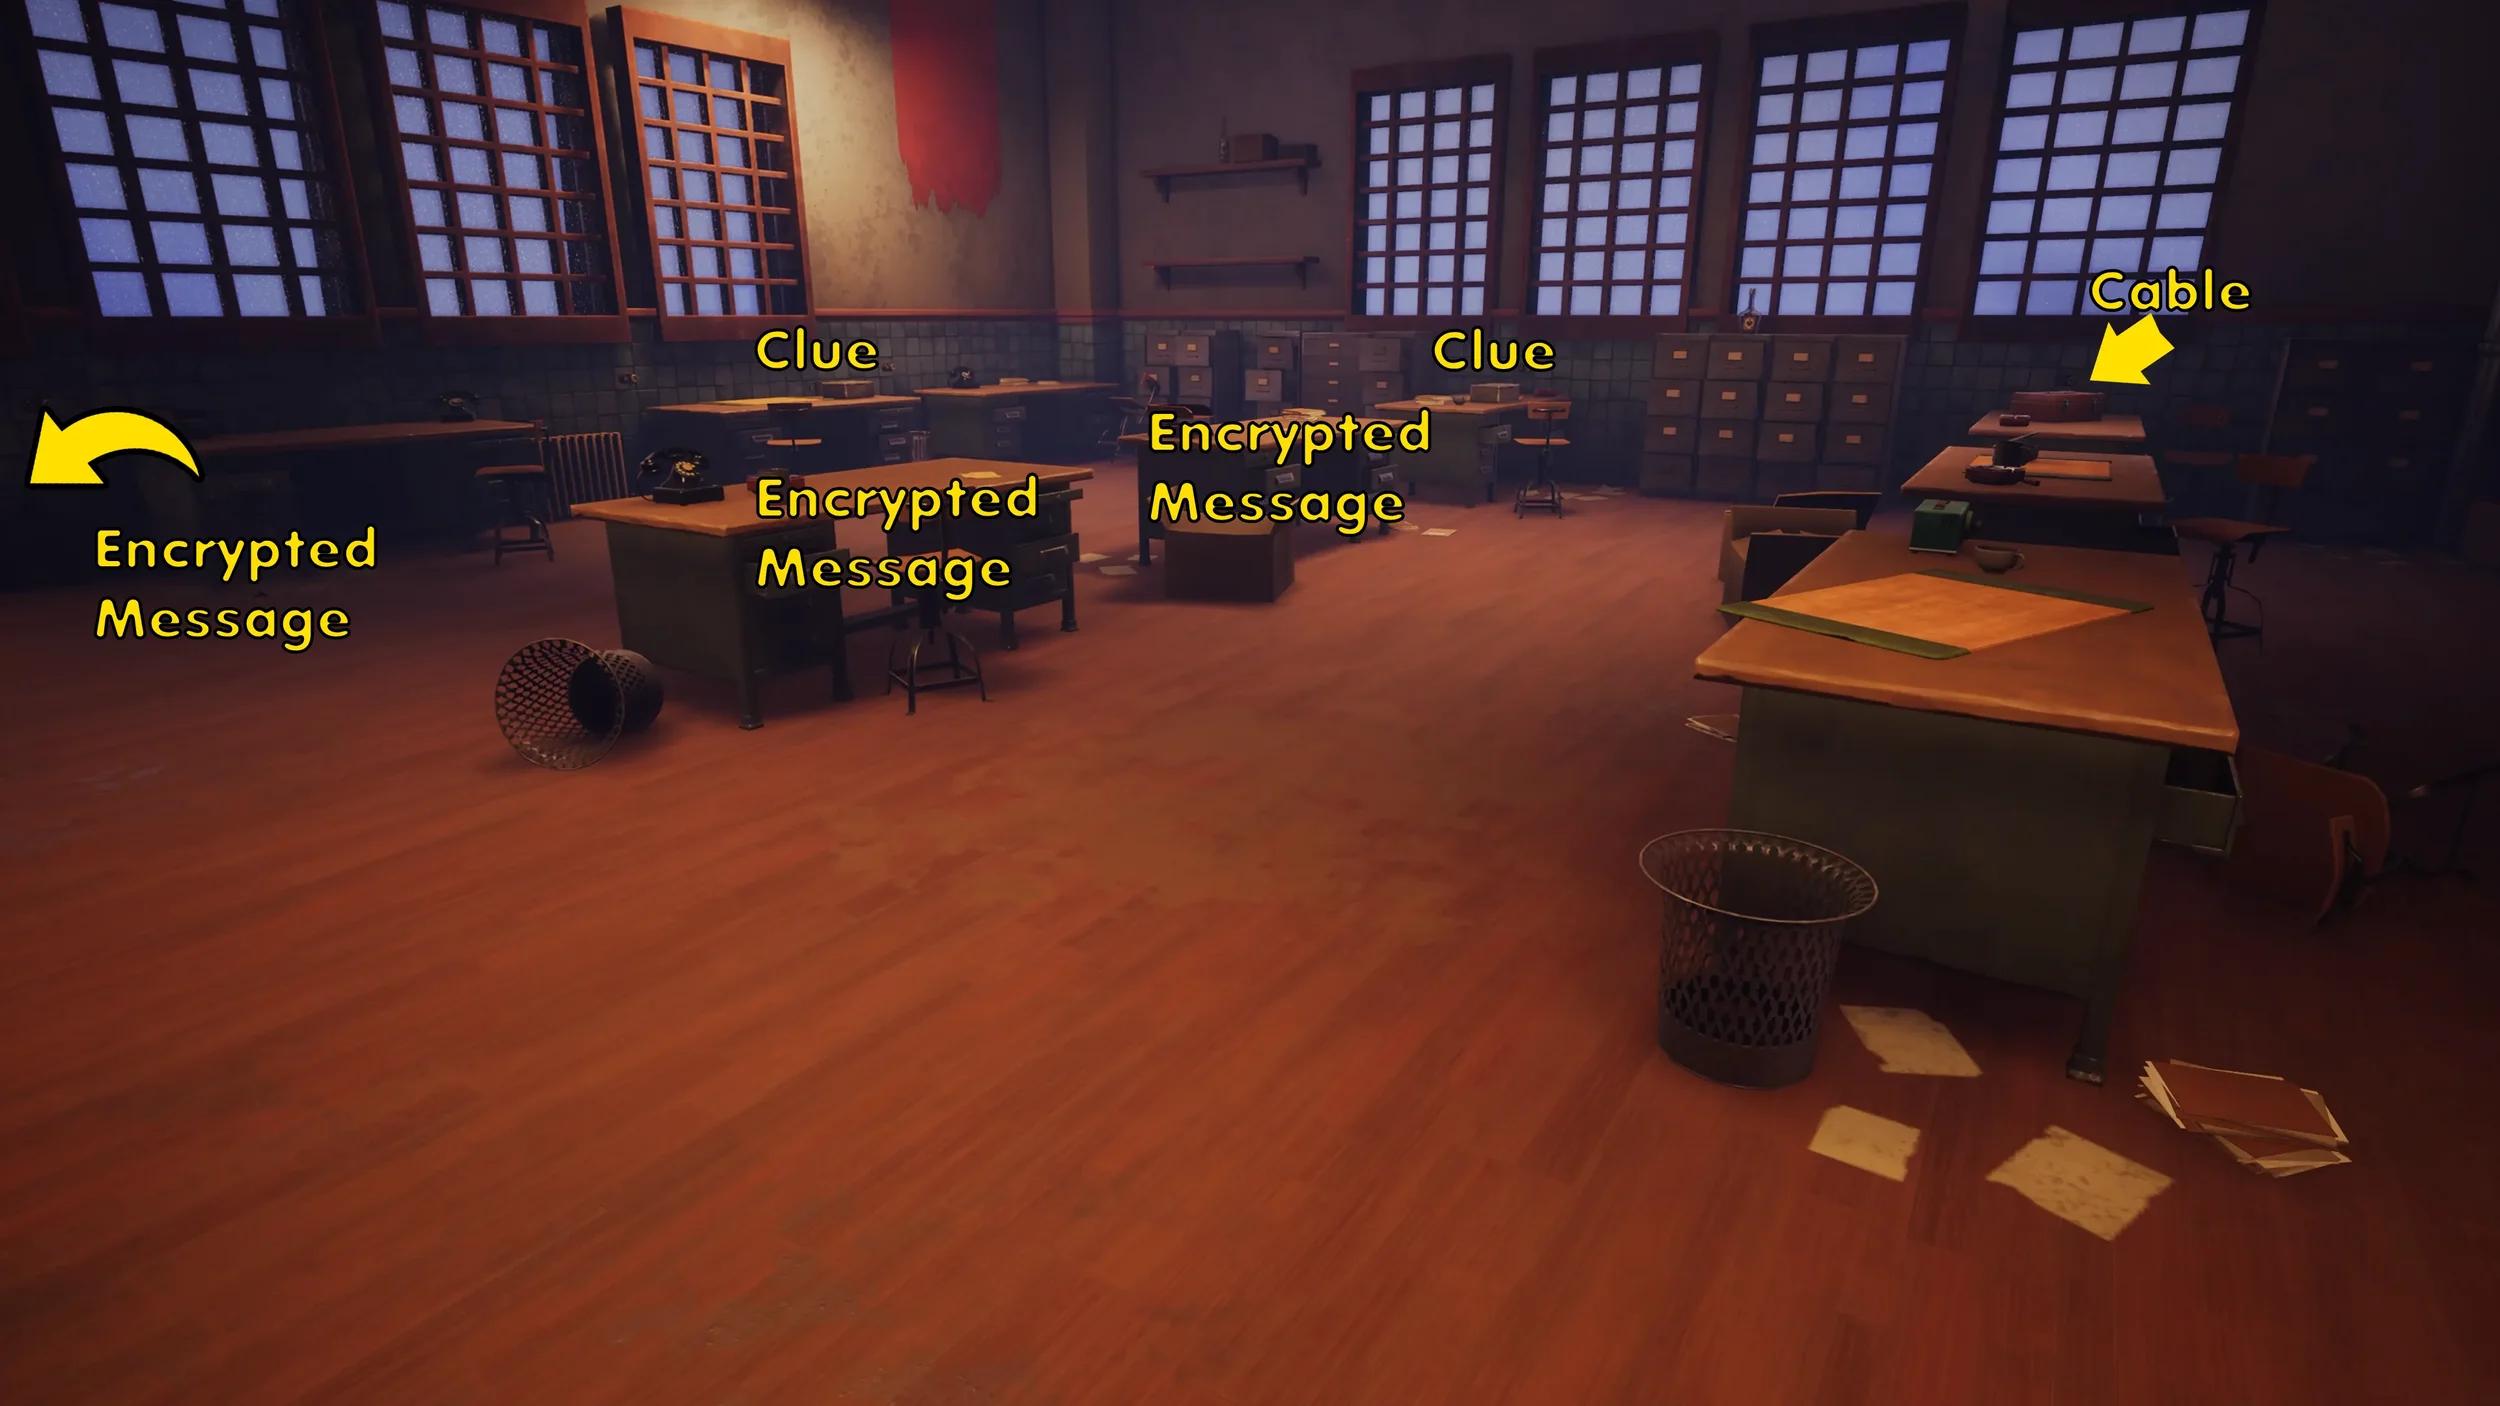
Once you have picked up all 6 of the items from the top floor it is time to go down the stairs to the lower floor.
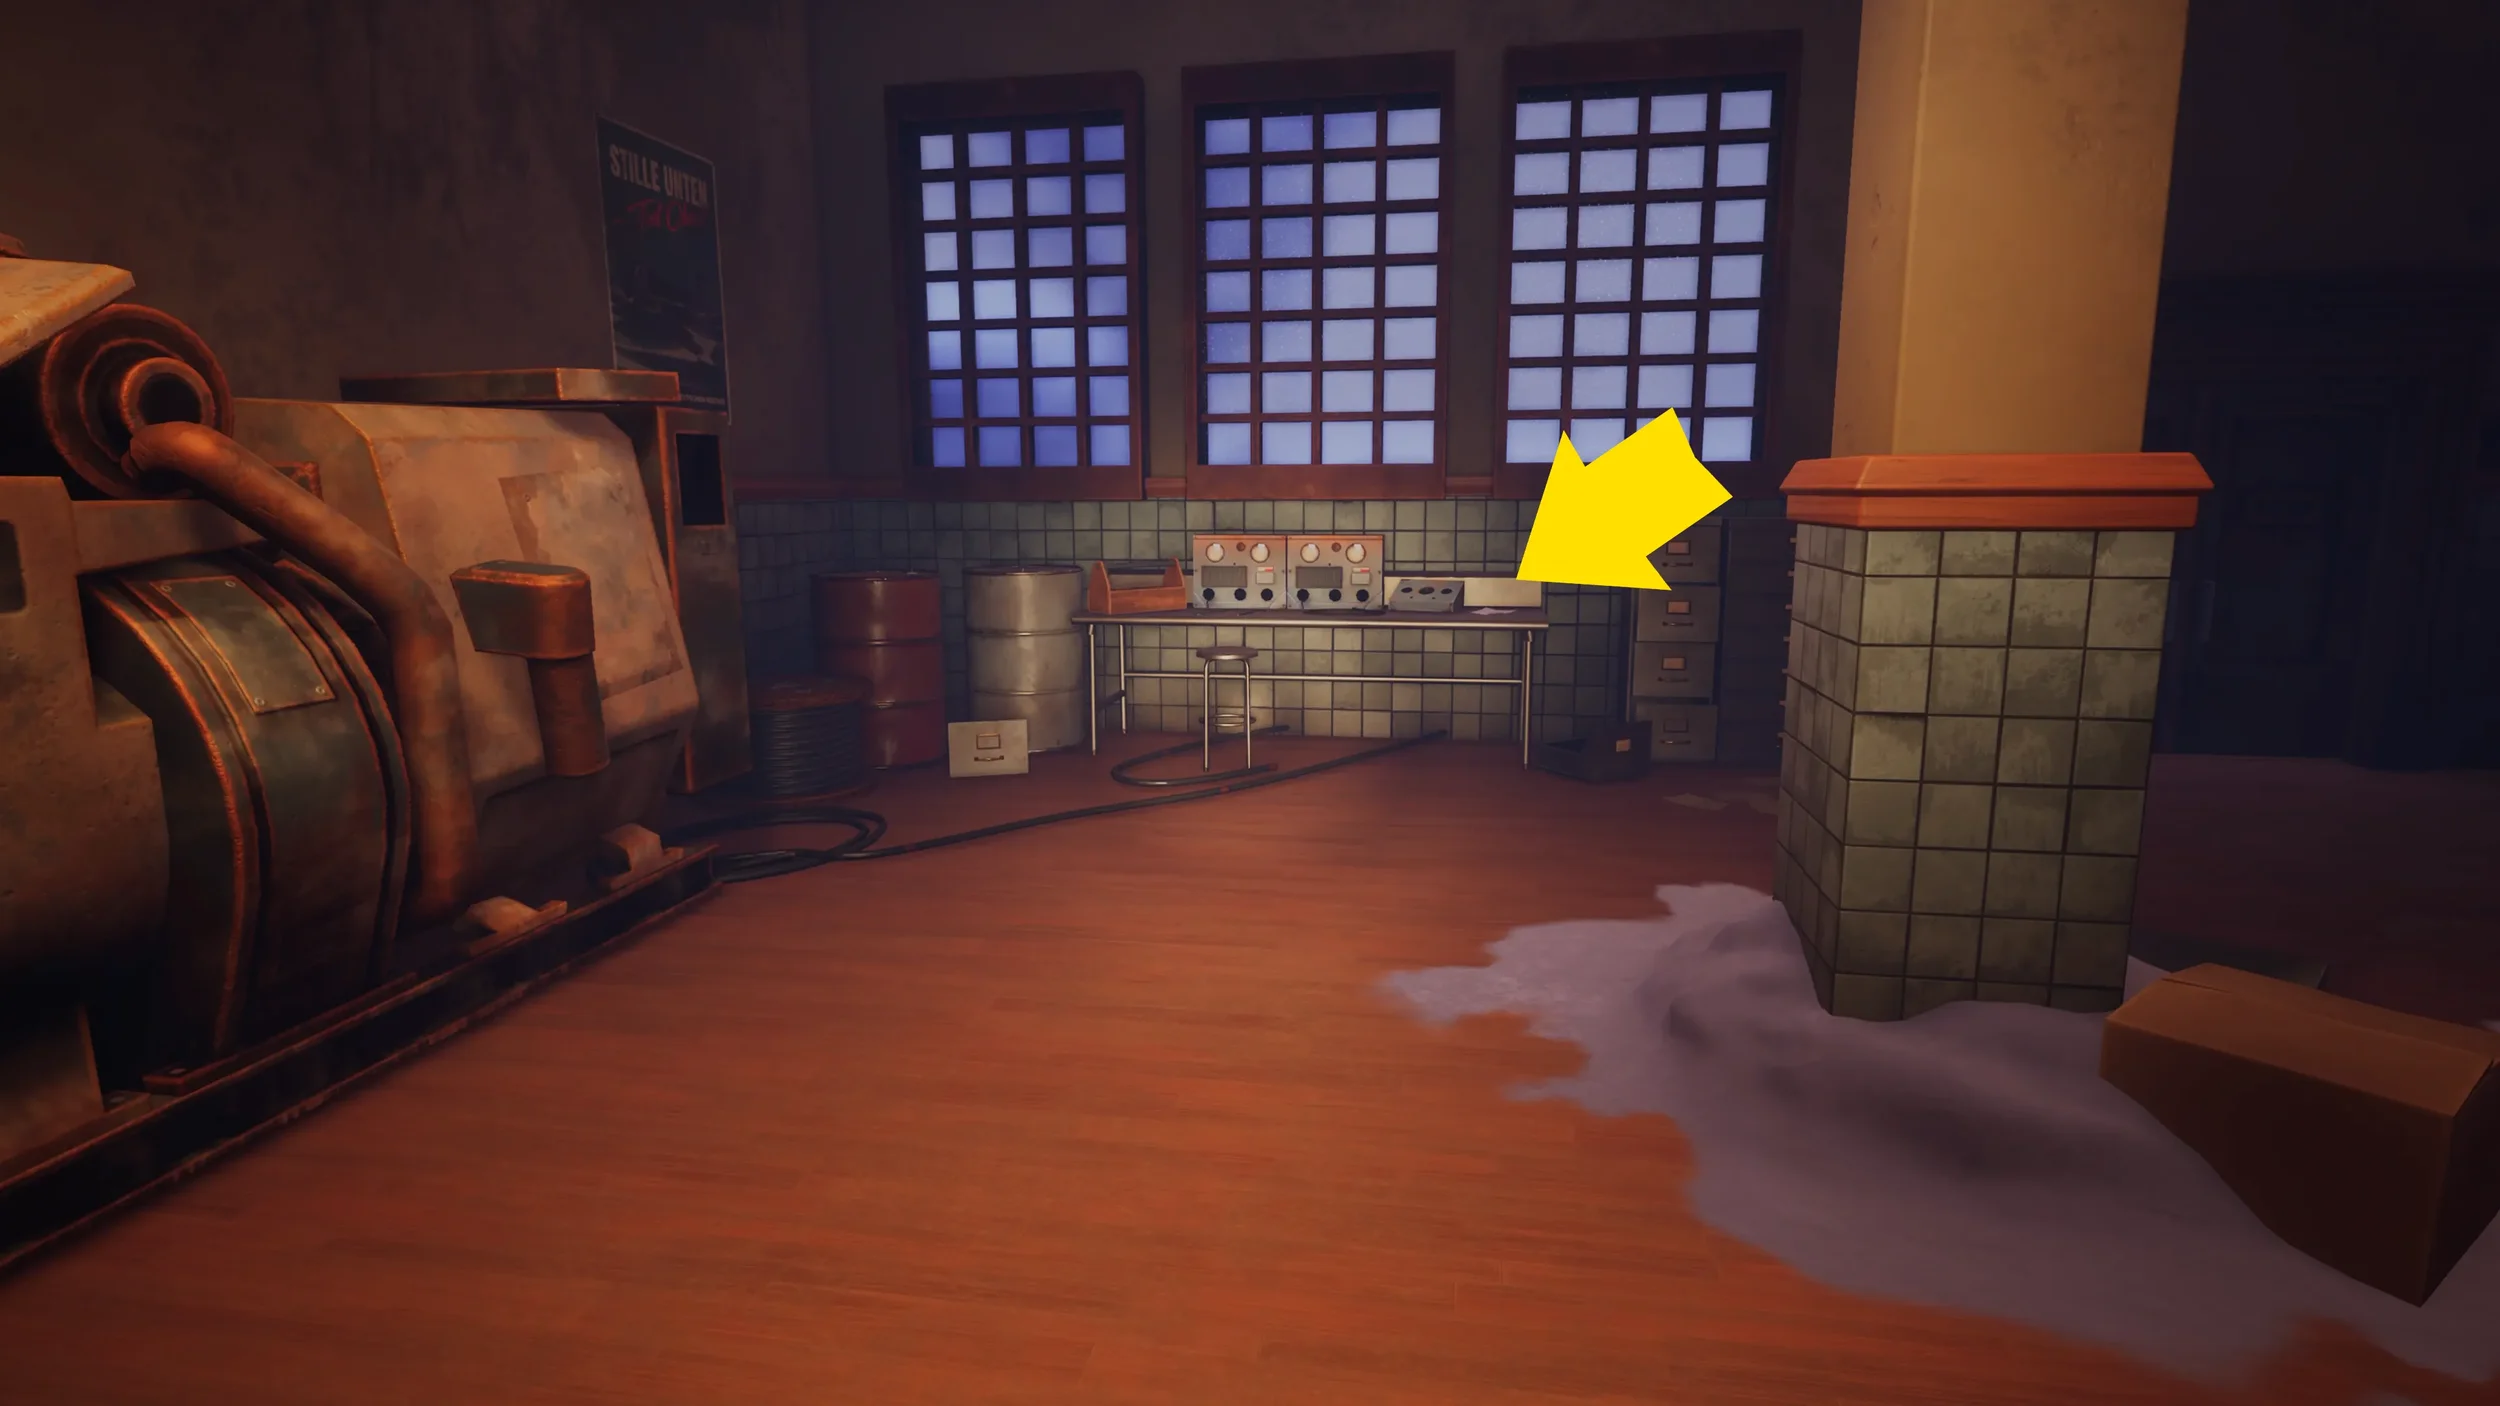
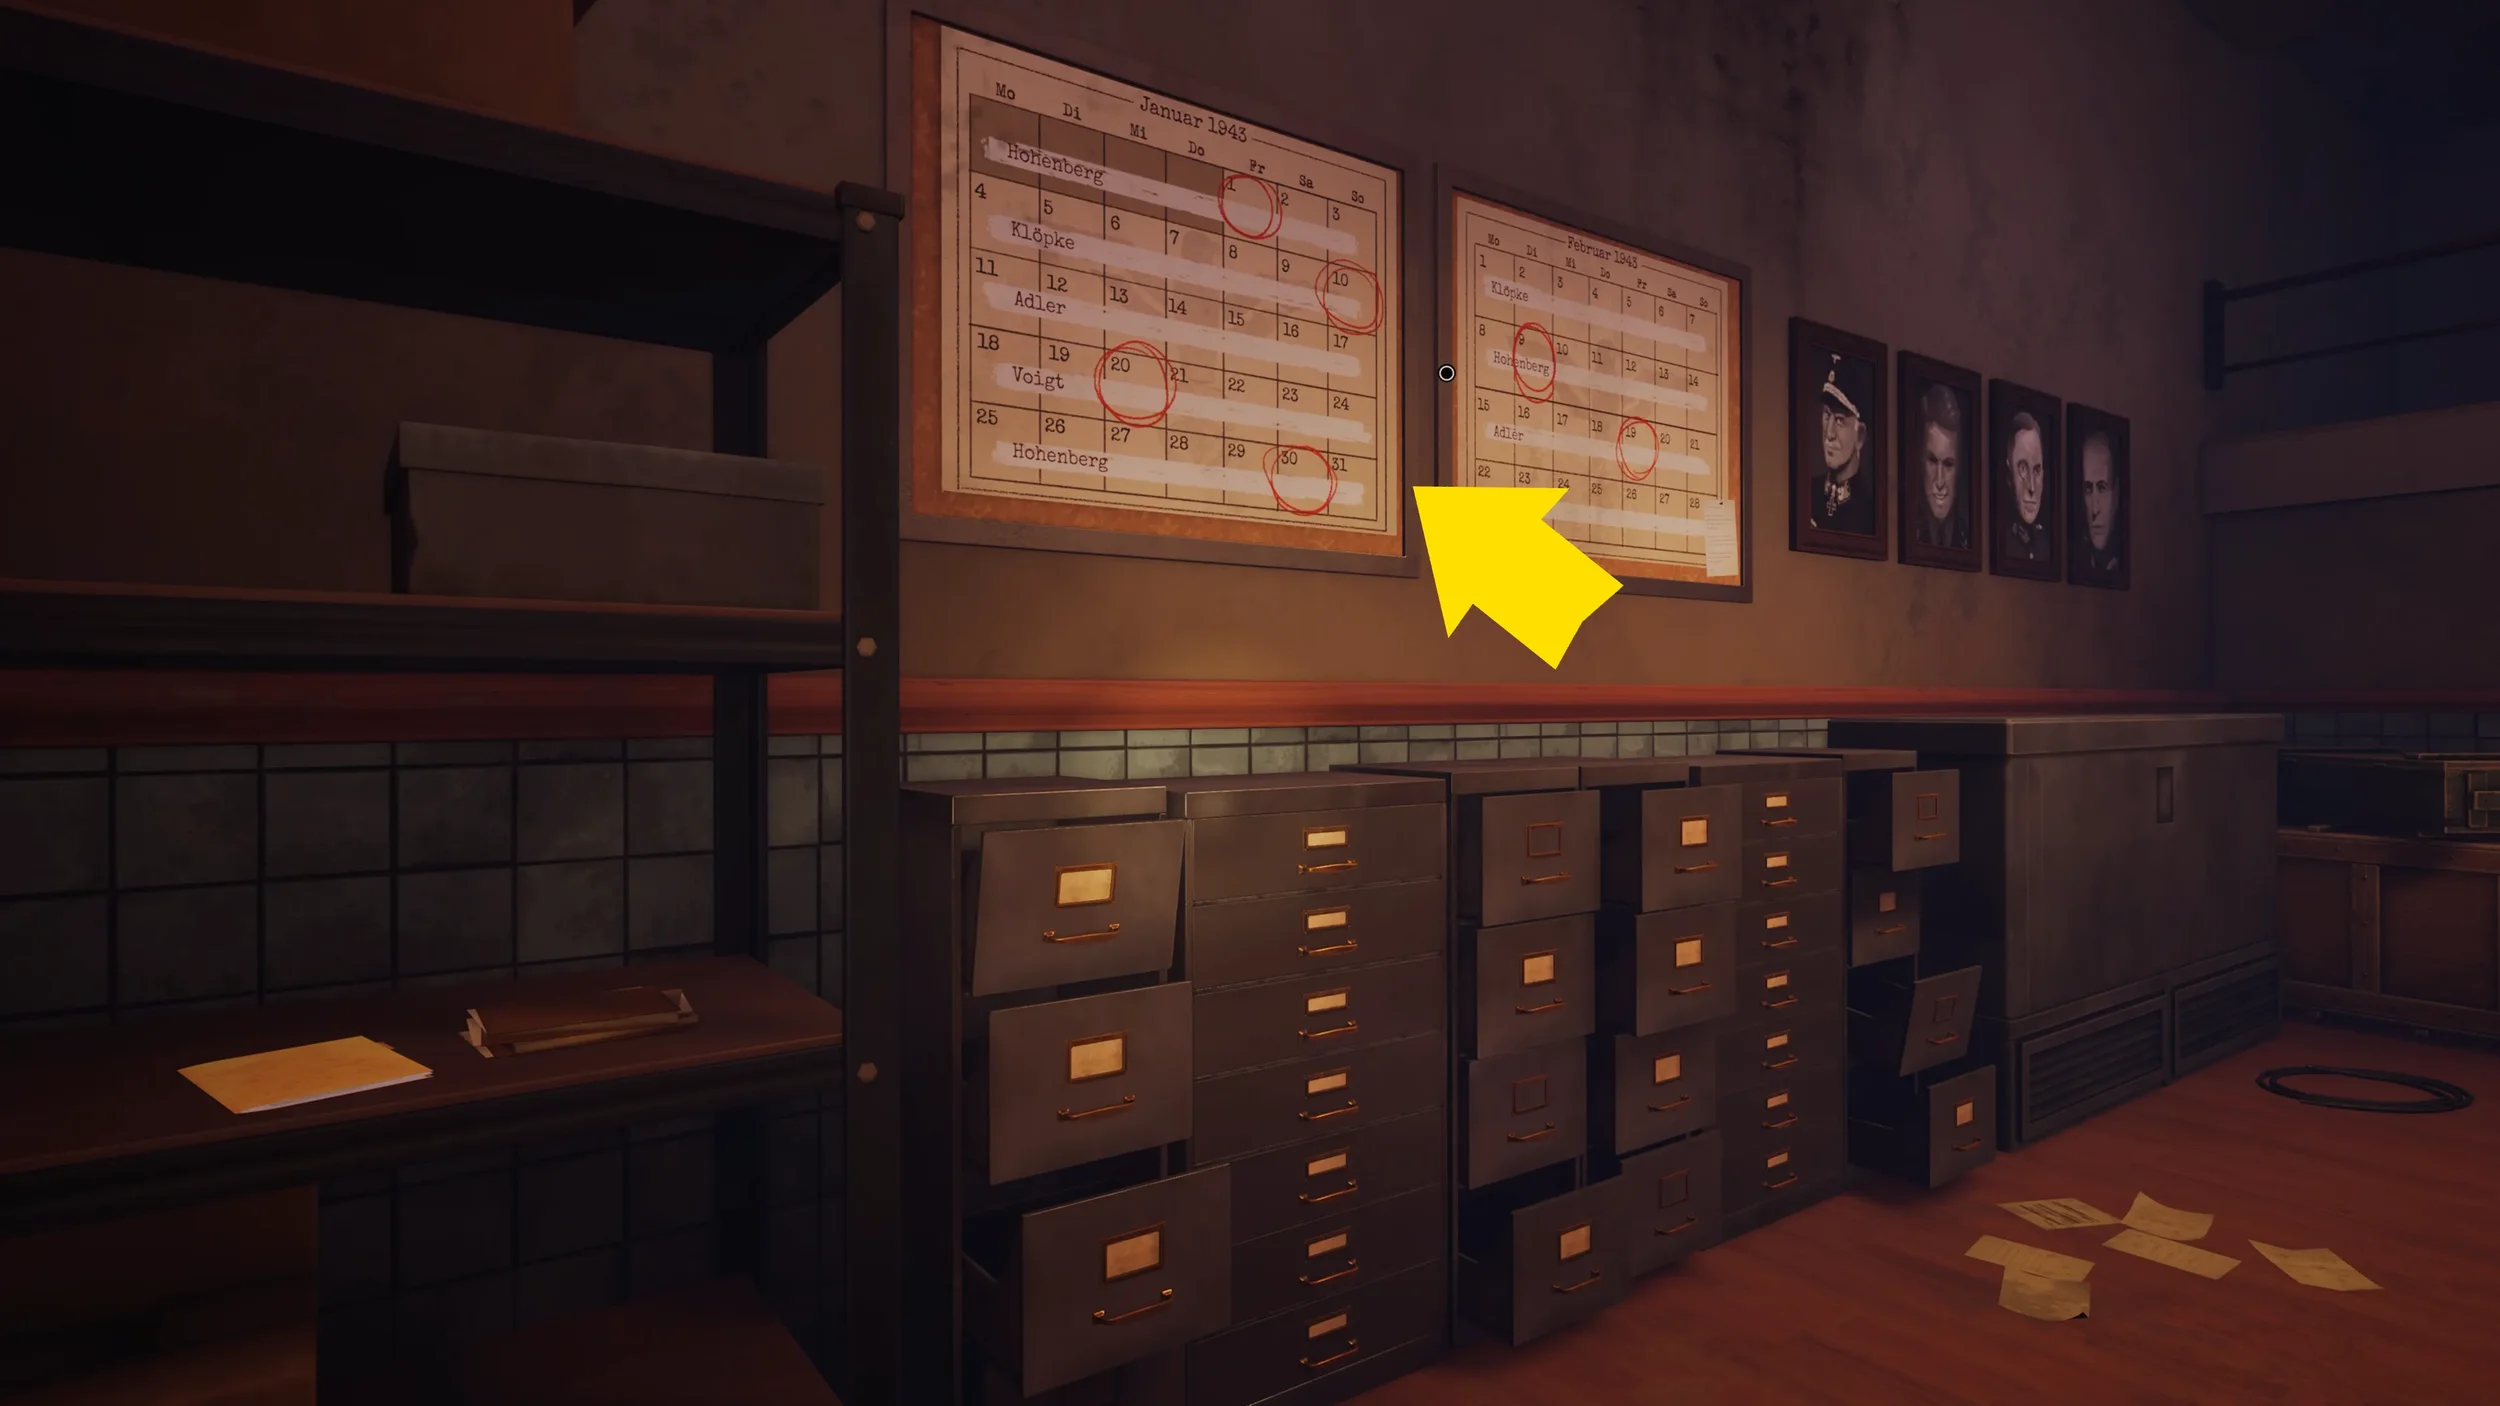
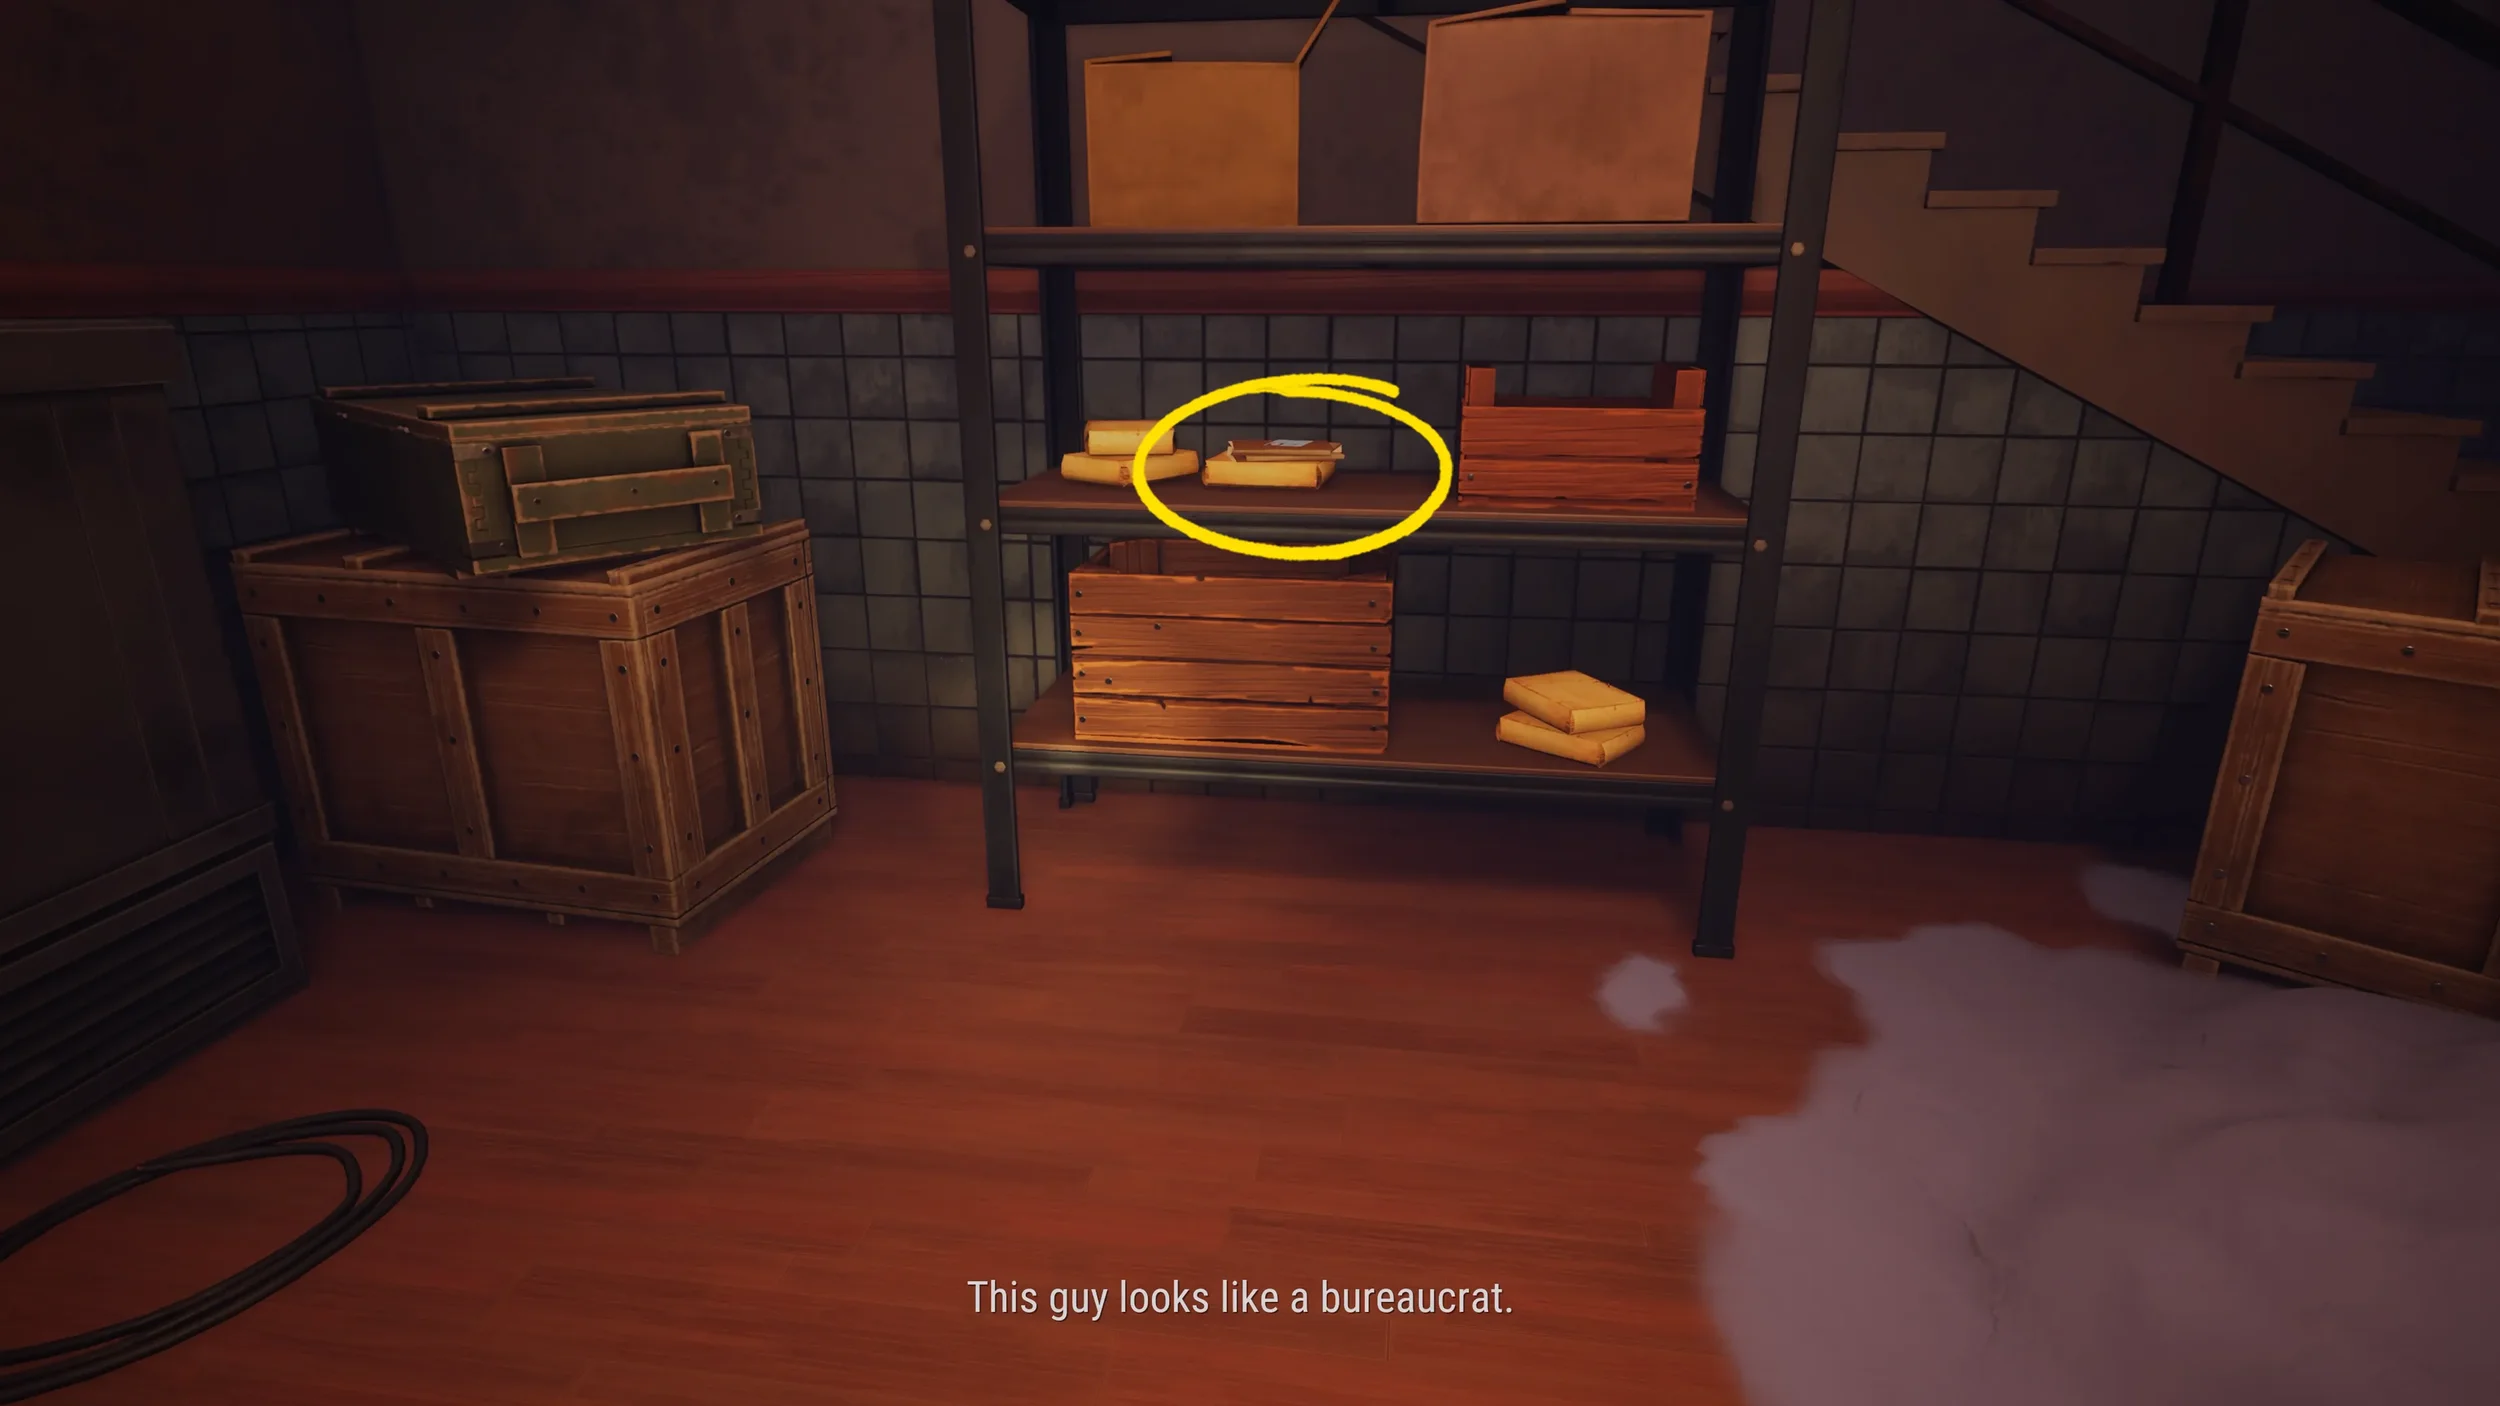
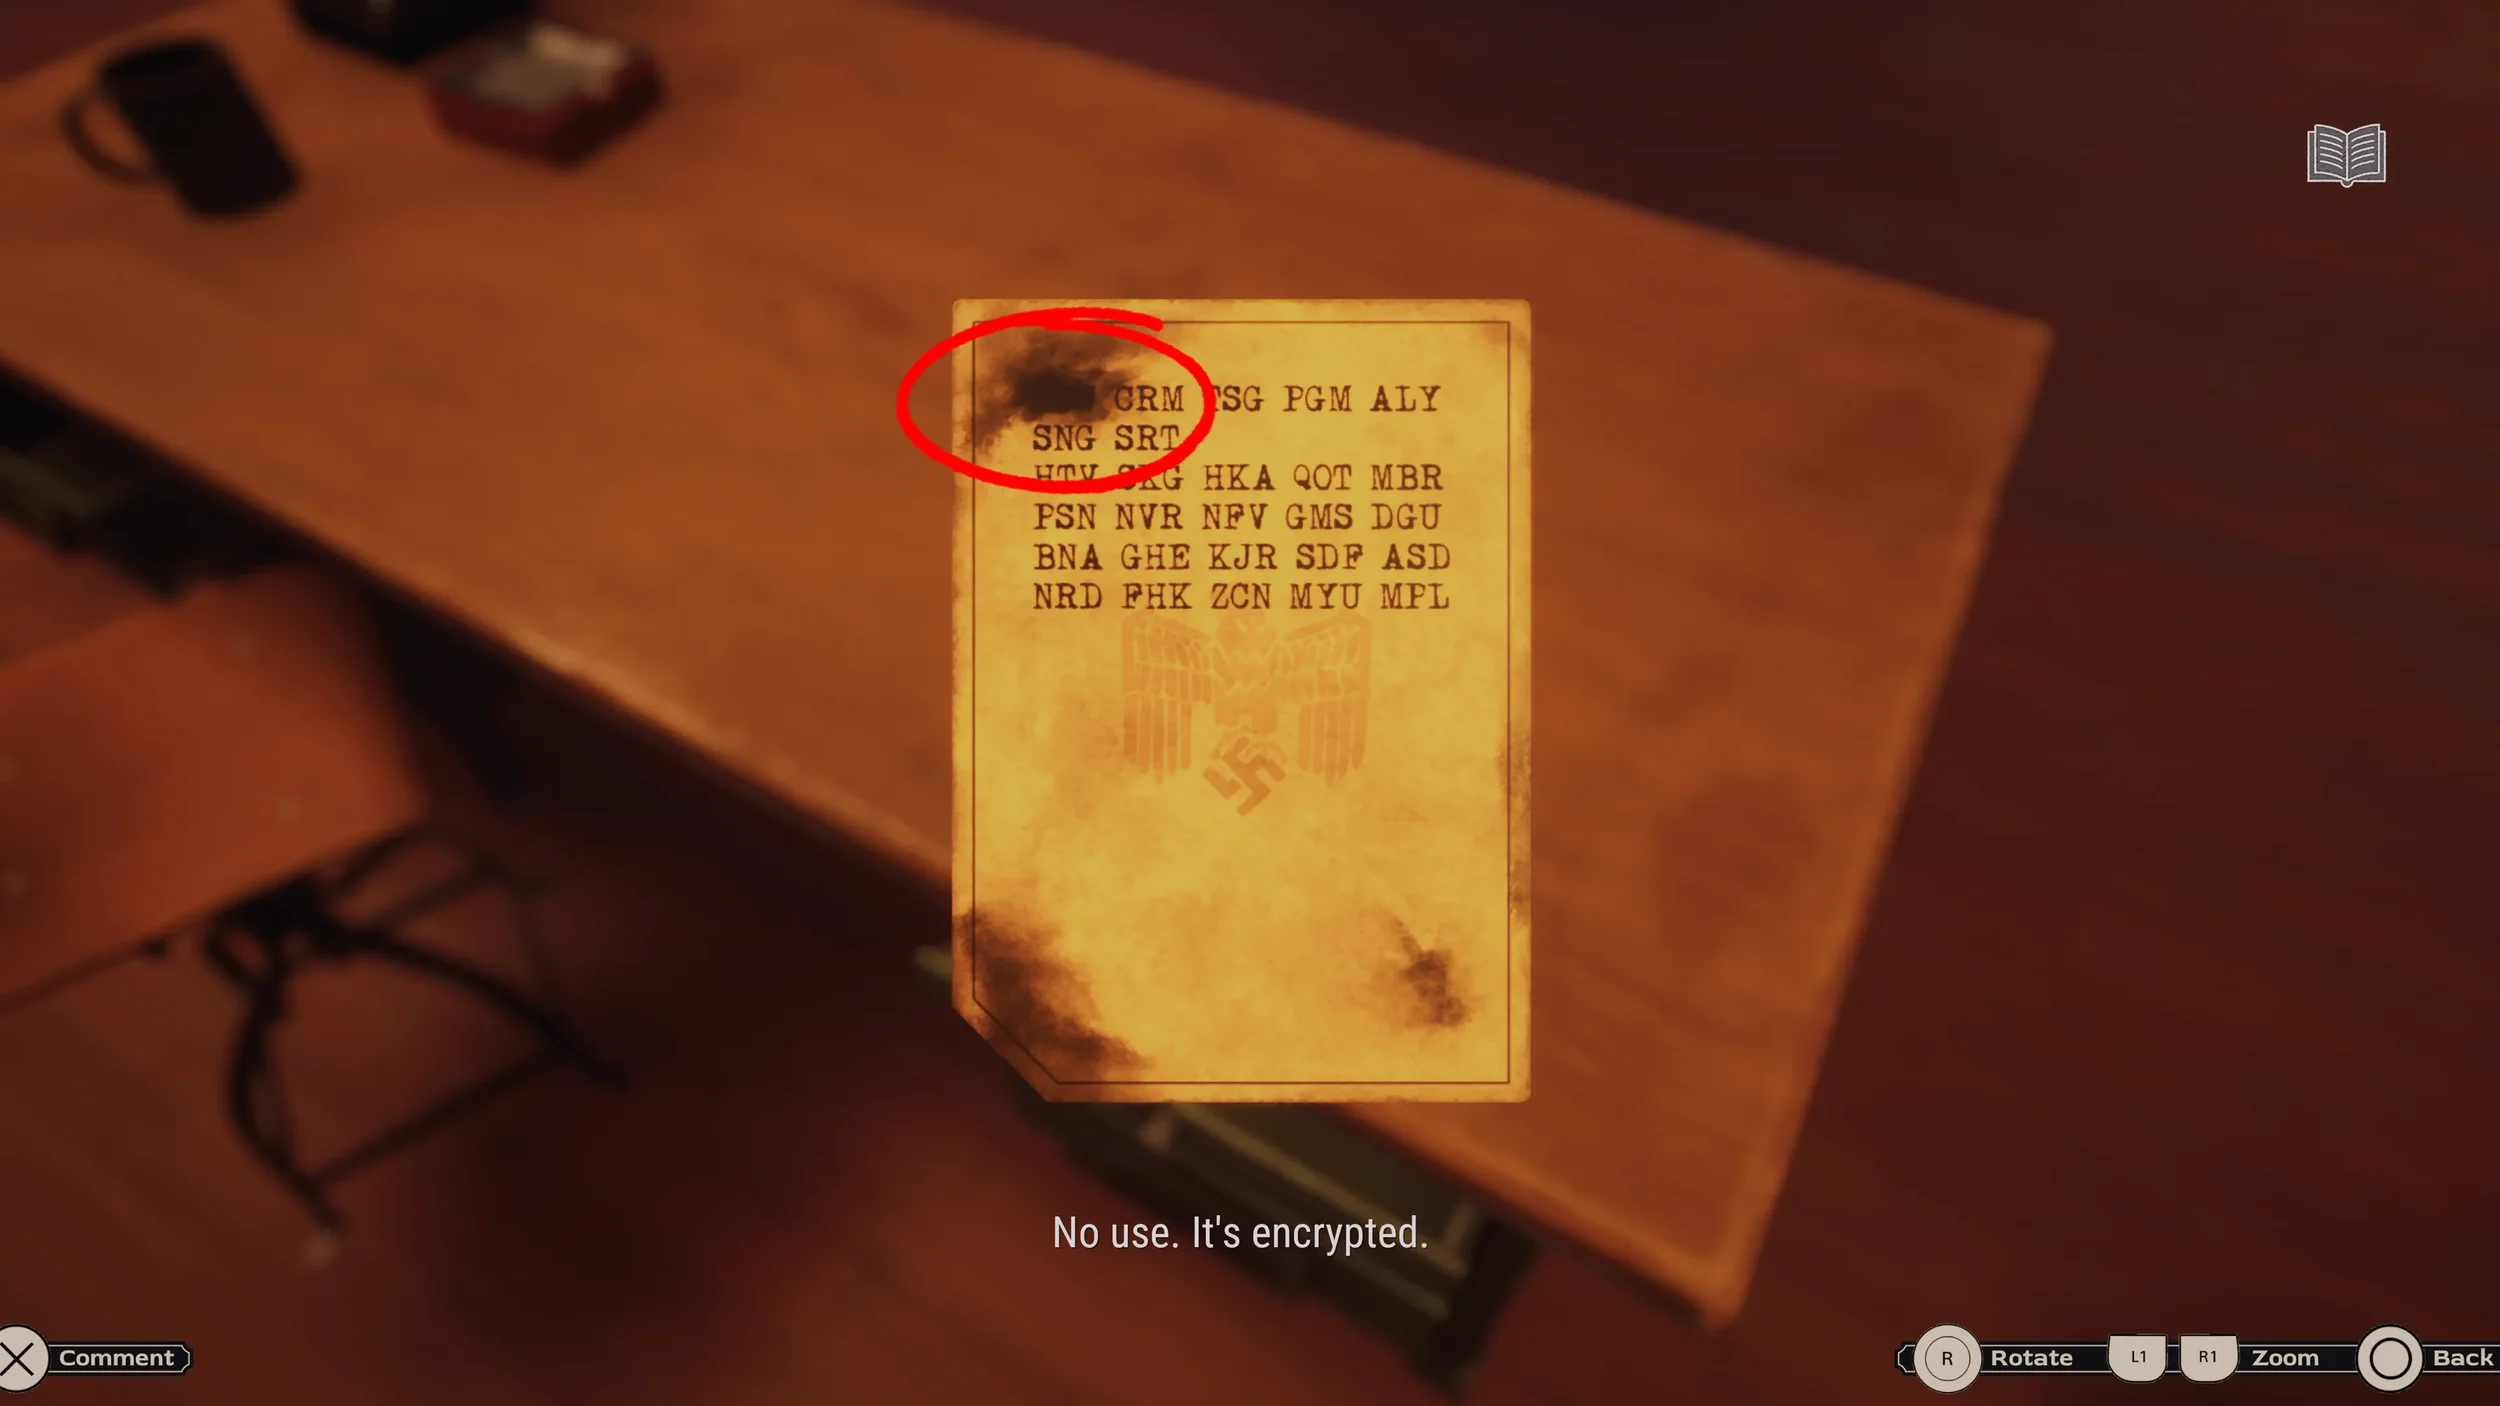
Downstairs there are 4 more clues we need to inspect, the 1st one can be found just to the right of the generator, the 2nd is on the desk near the back end of the room, the 3rd is the Calendar on the back wall and finally the 4th clue is the ID Paper on the shelves to the right of the Calendar.
Now that we have all of the clues it is time to head back upstairs and interact with the Decipher Machine, first lets Decipher the Encrypted Message that starts with “BDA”, this one is done exactly the same as the one we just solved in the flashback, just get the info we need from the correct row in the Calendar clue we found.

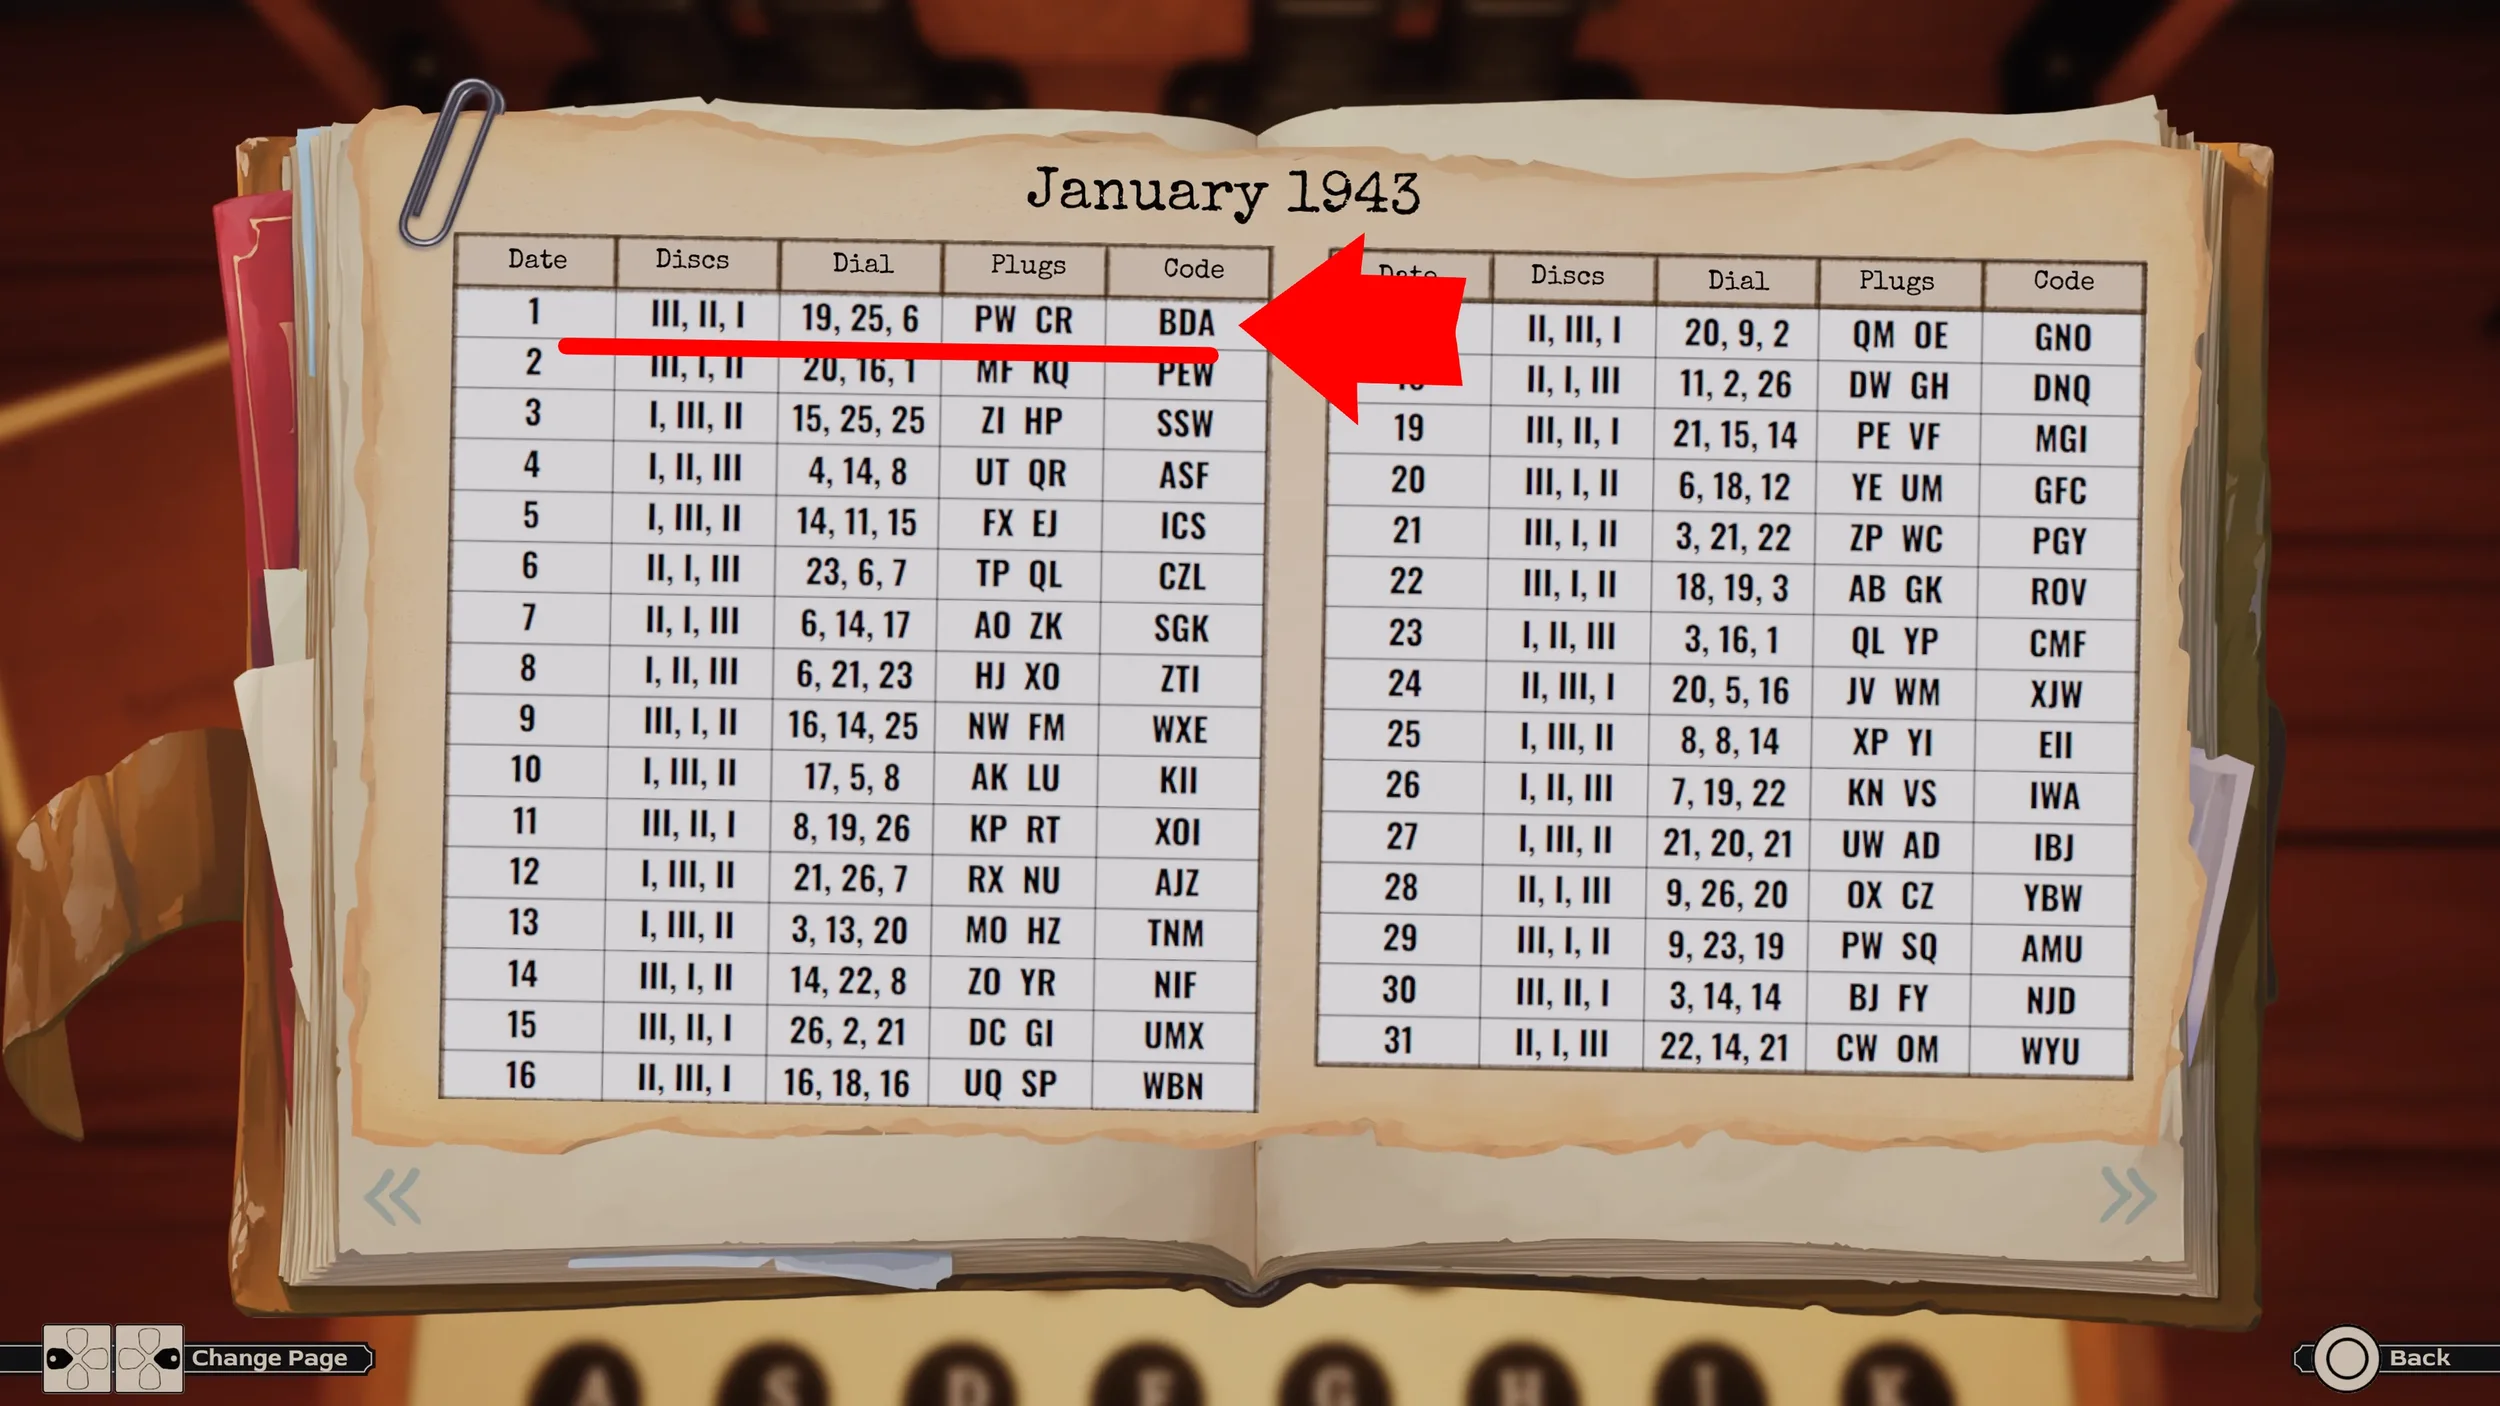
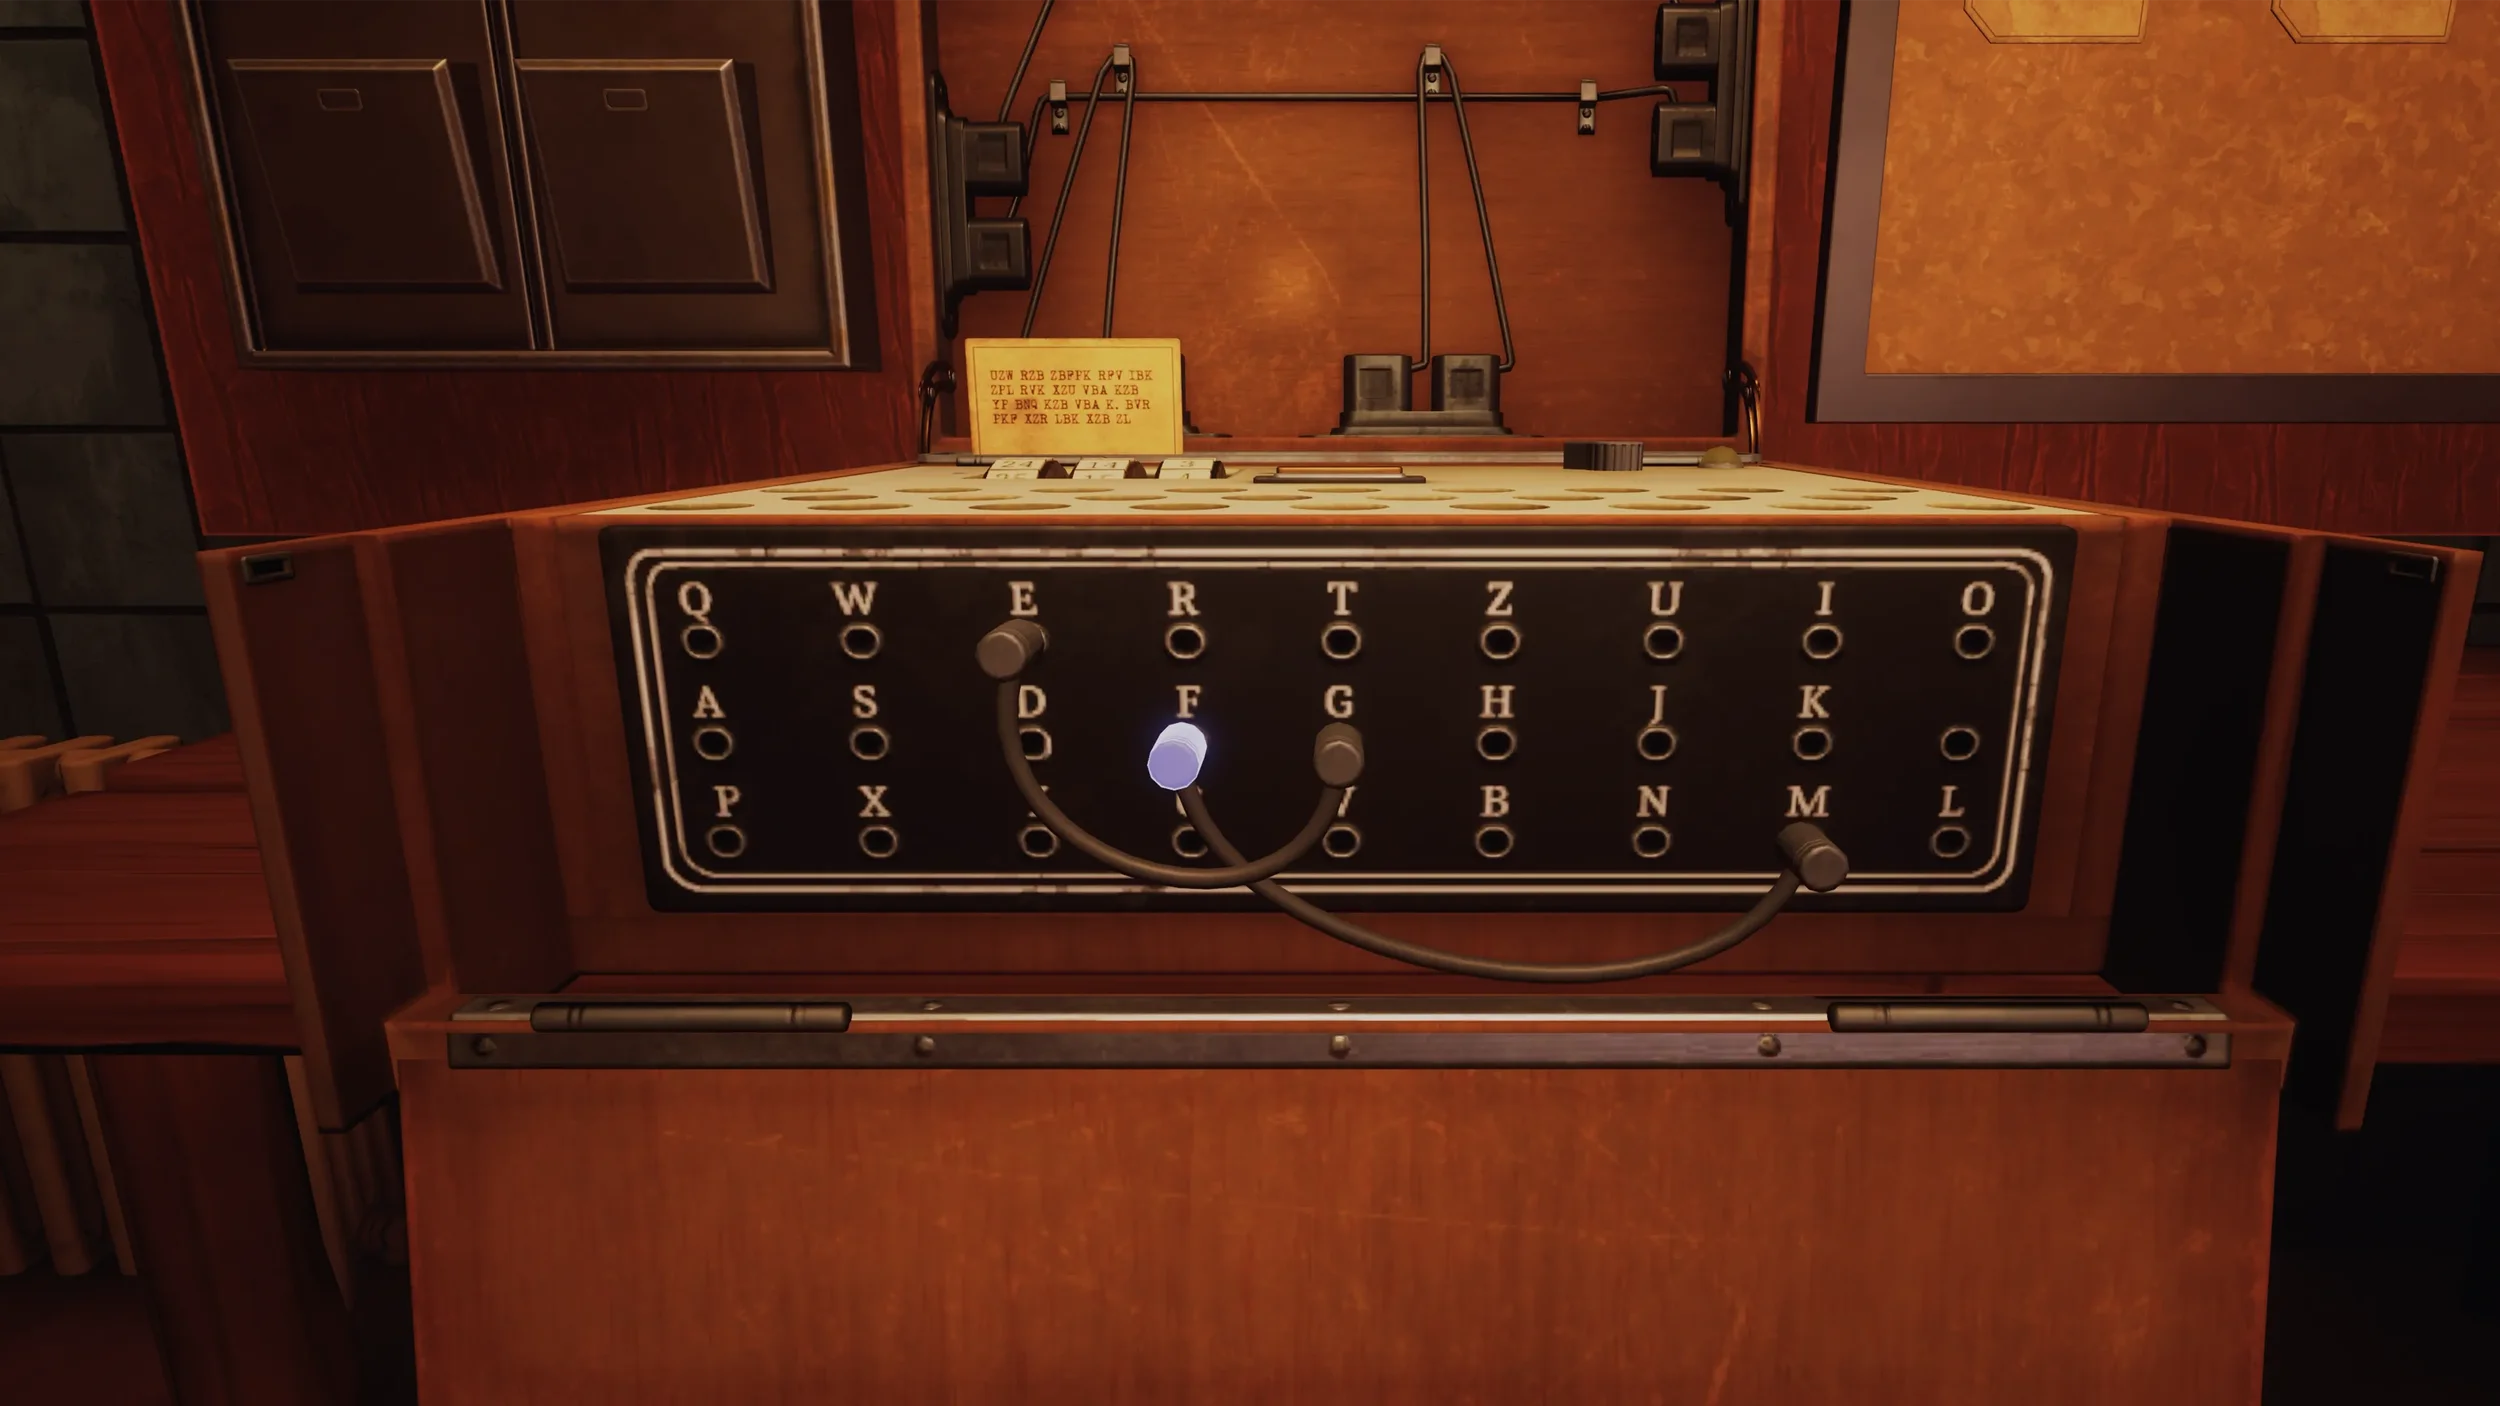
So to solve it open up the upper case and set the bigger dials to III - II -I , then close the case and set the smaller dials to 19 - 25 - 6, then using the cables, connect the P to the W and the C to the R, then press the button on top to solve the encryption (make sure the correct Encrypted Message is inserted into the machine first).
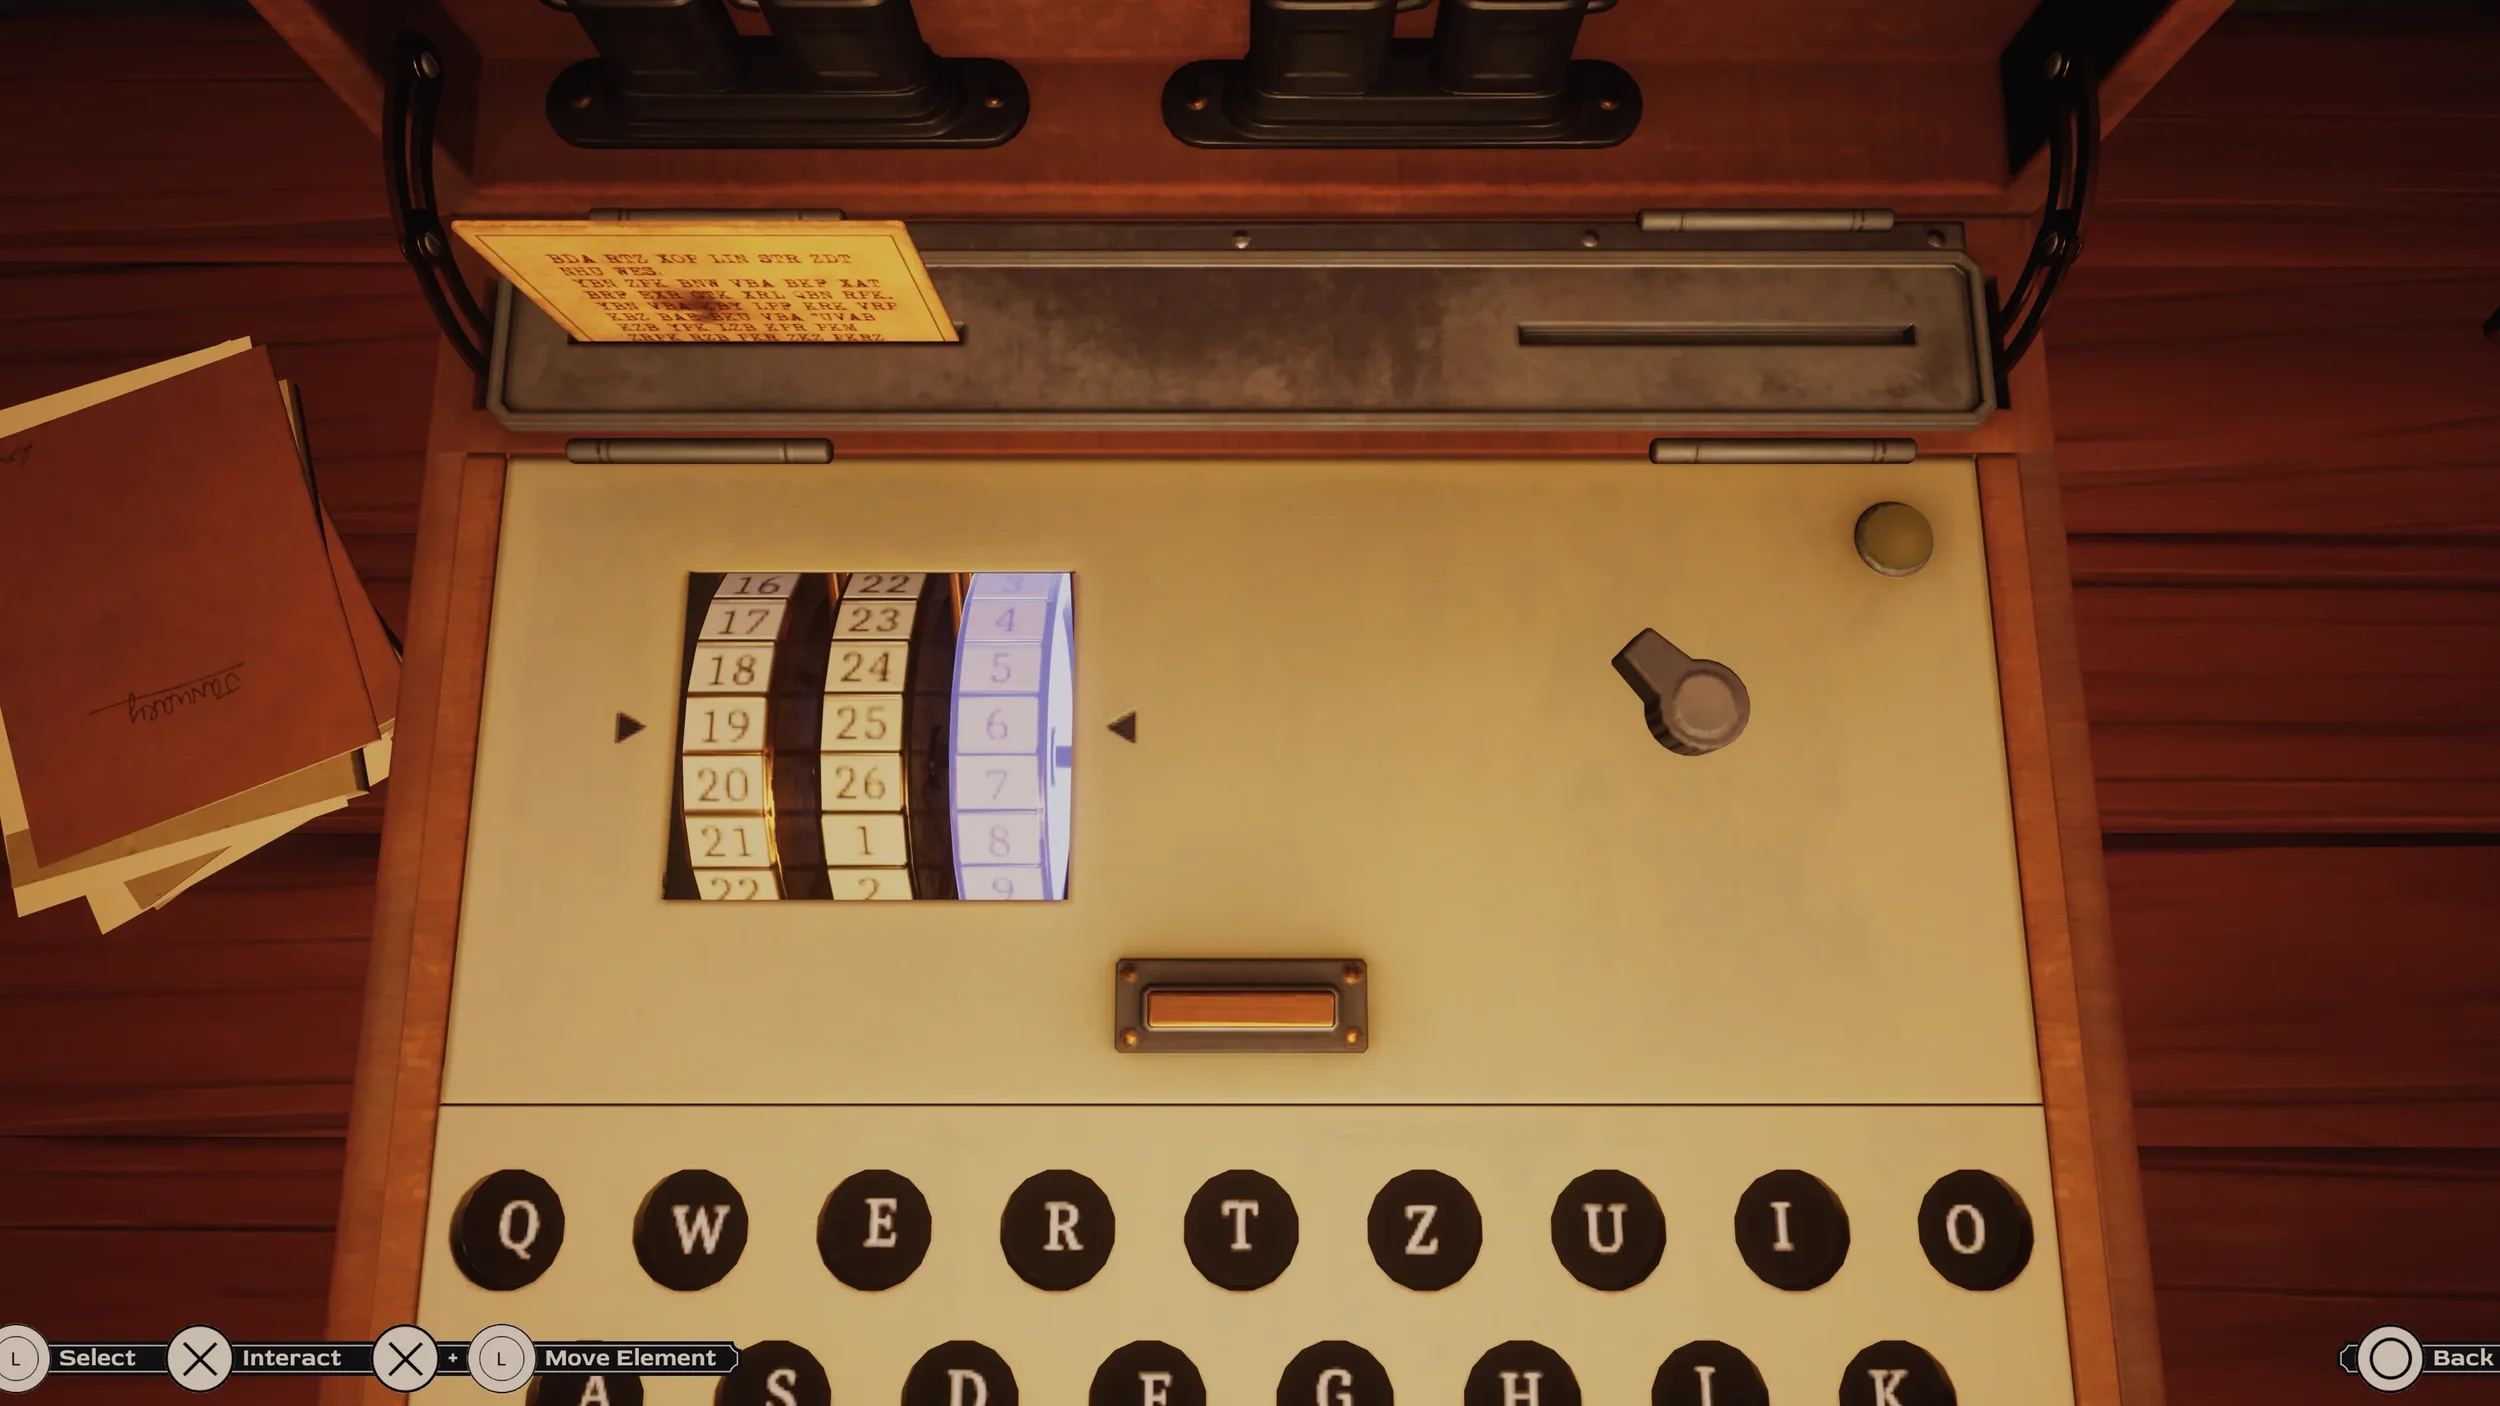
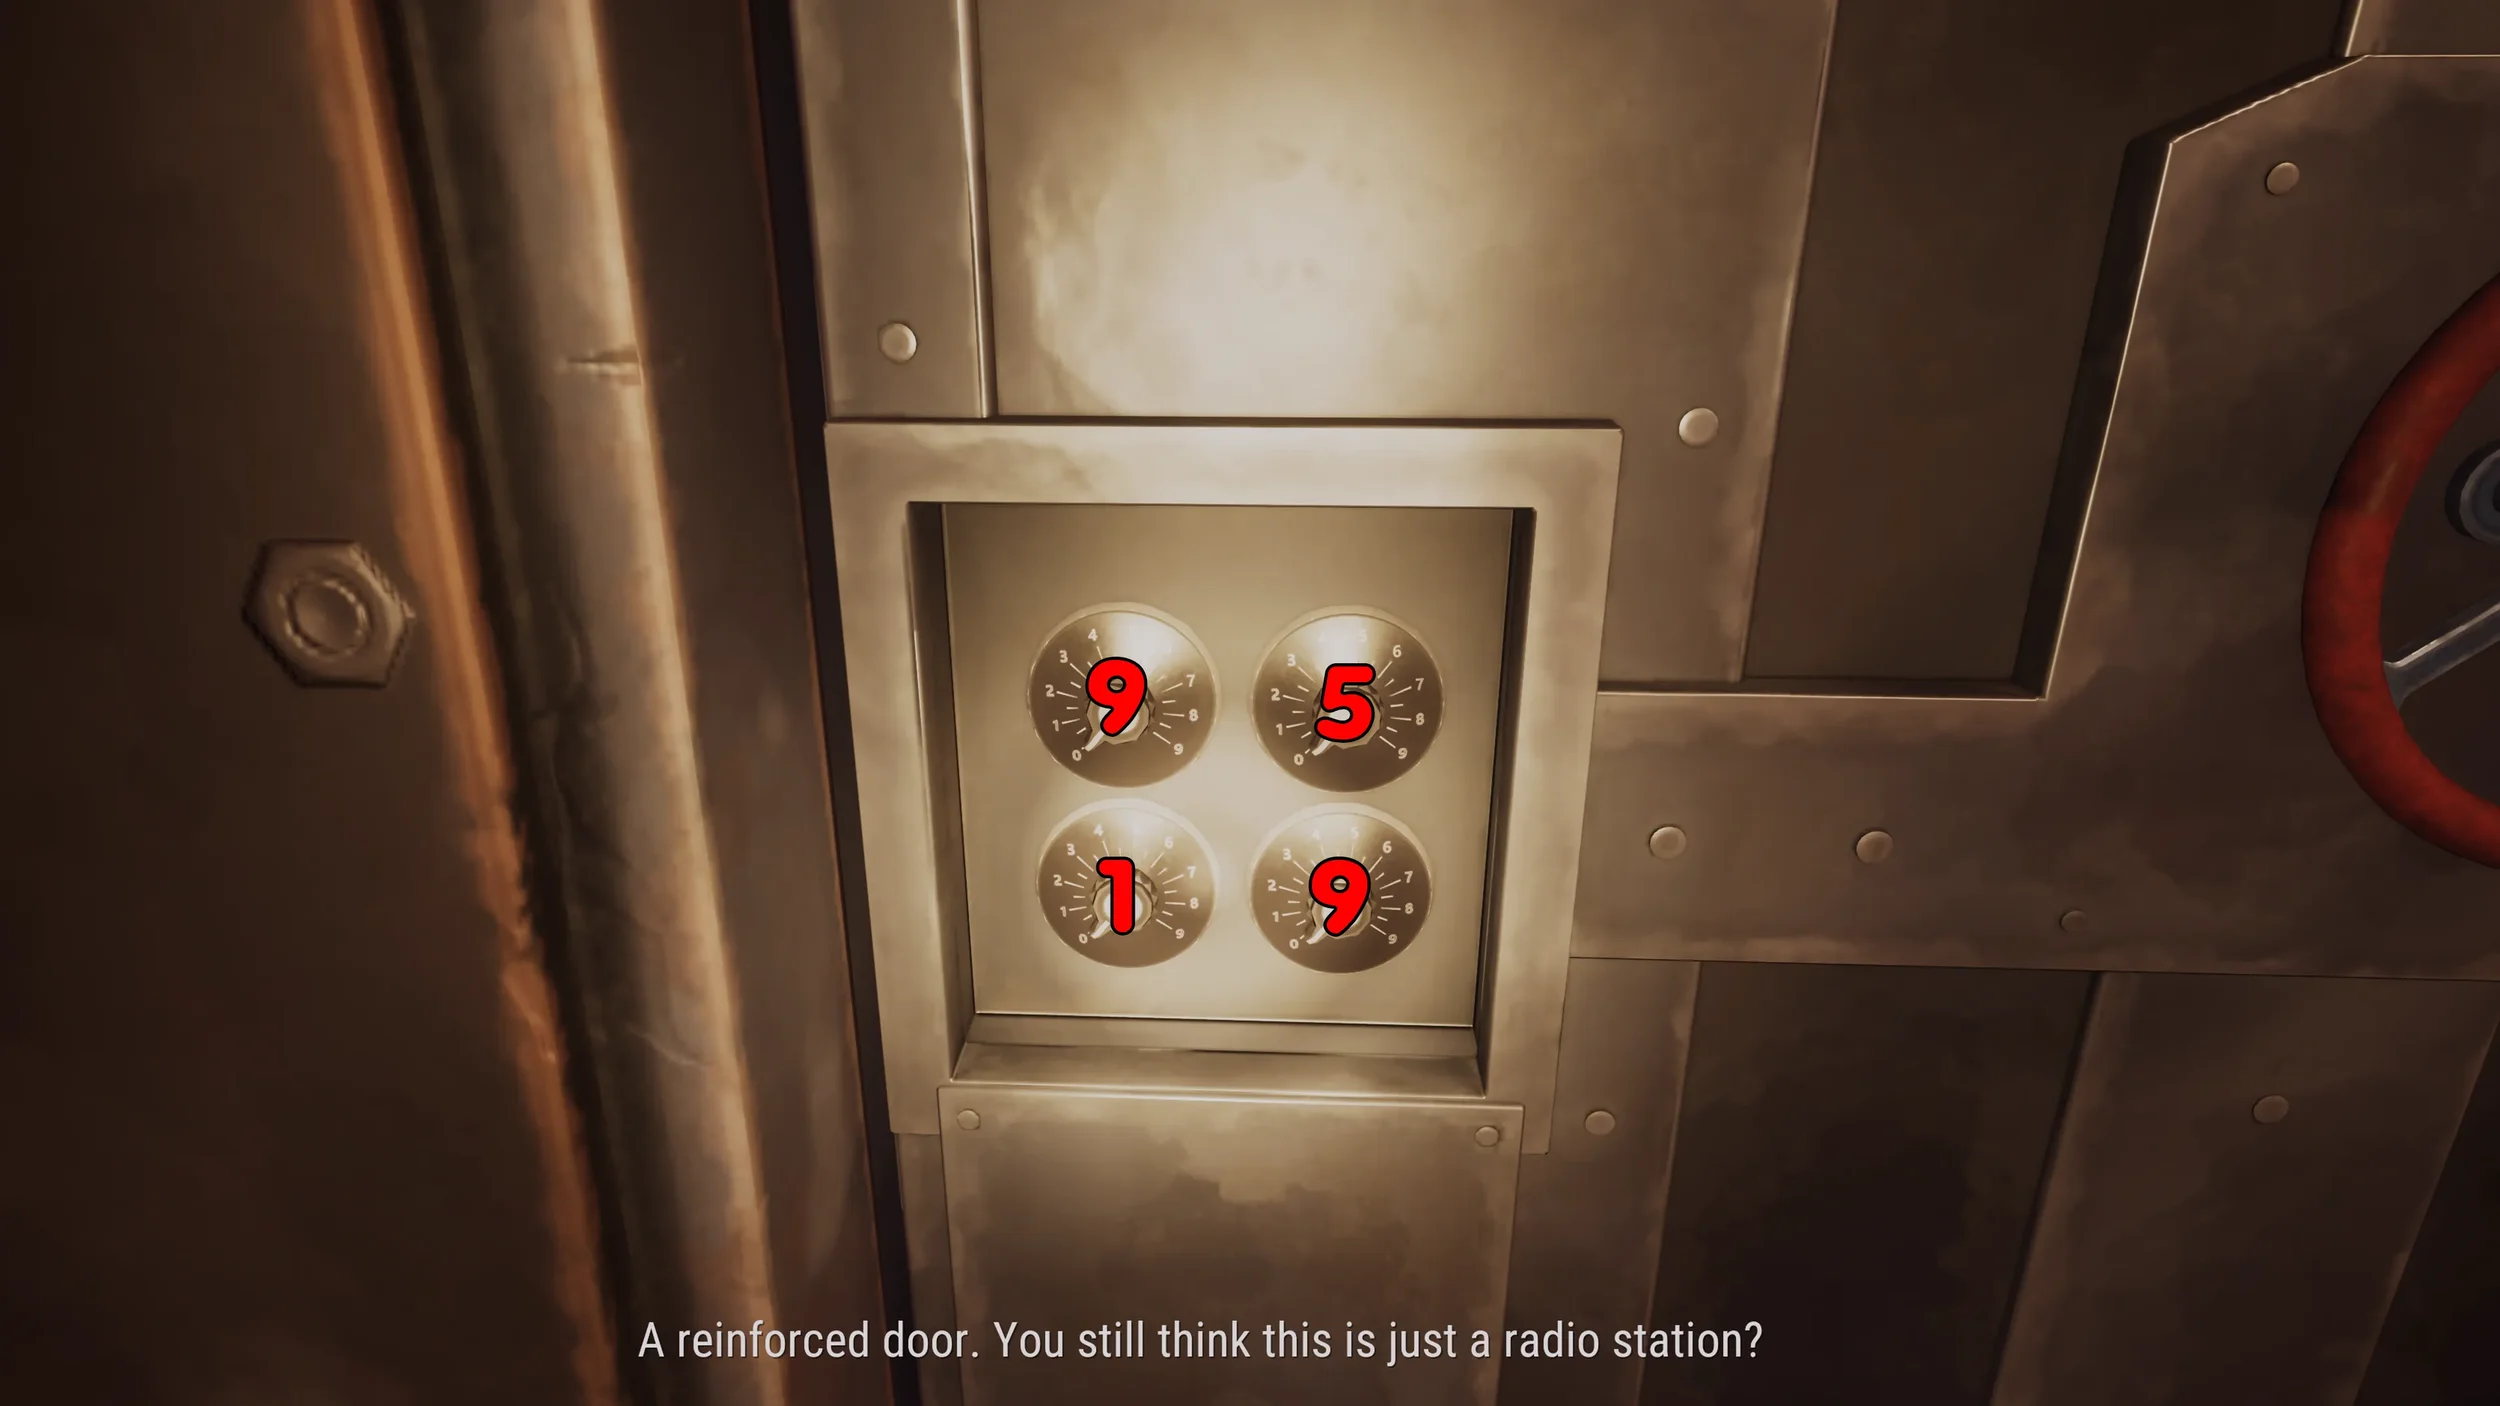
The message says that the code for the metal door is the General’s Assigned Number + the current day, so those are the 2 things we need to find out.
Next lets decipher the Encrypted Message that has the first 3 letters blurred out, to find out what the letter are (and what row in the chart to use) we need to pay attention to the clue that mentions that the Code instructions arrived yesterday, but the General’s Number won’t arrive until tomorrow.
So we already know that the Code Instructions arrived on the 1st of January from the previous Encrypted Message, so if yesterday was the 1st it means the day this clue was written was the 2nd so tomorrow will be the 3rd of January.
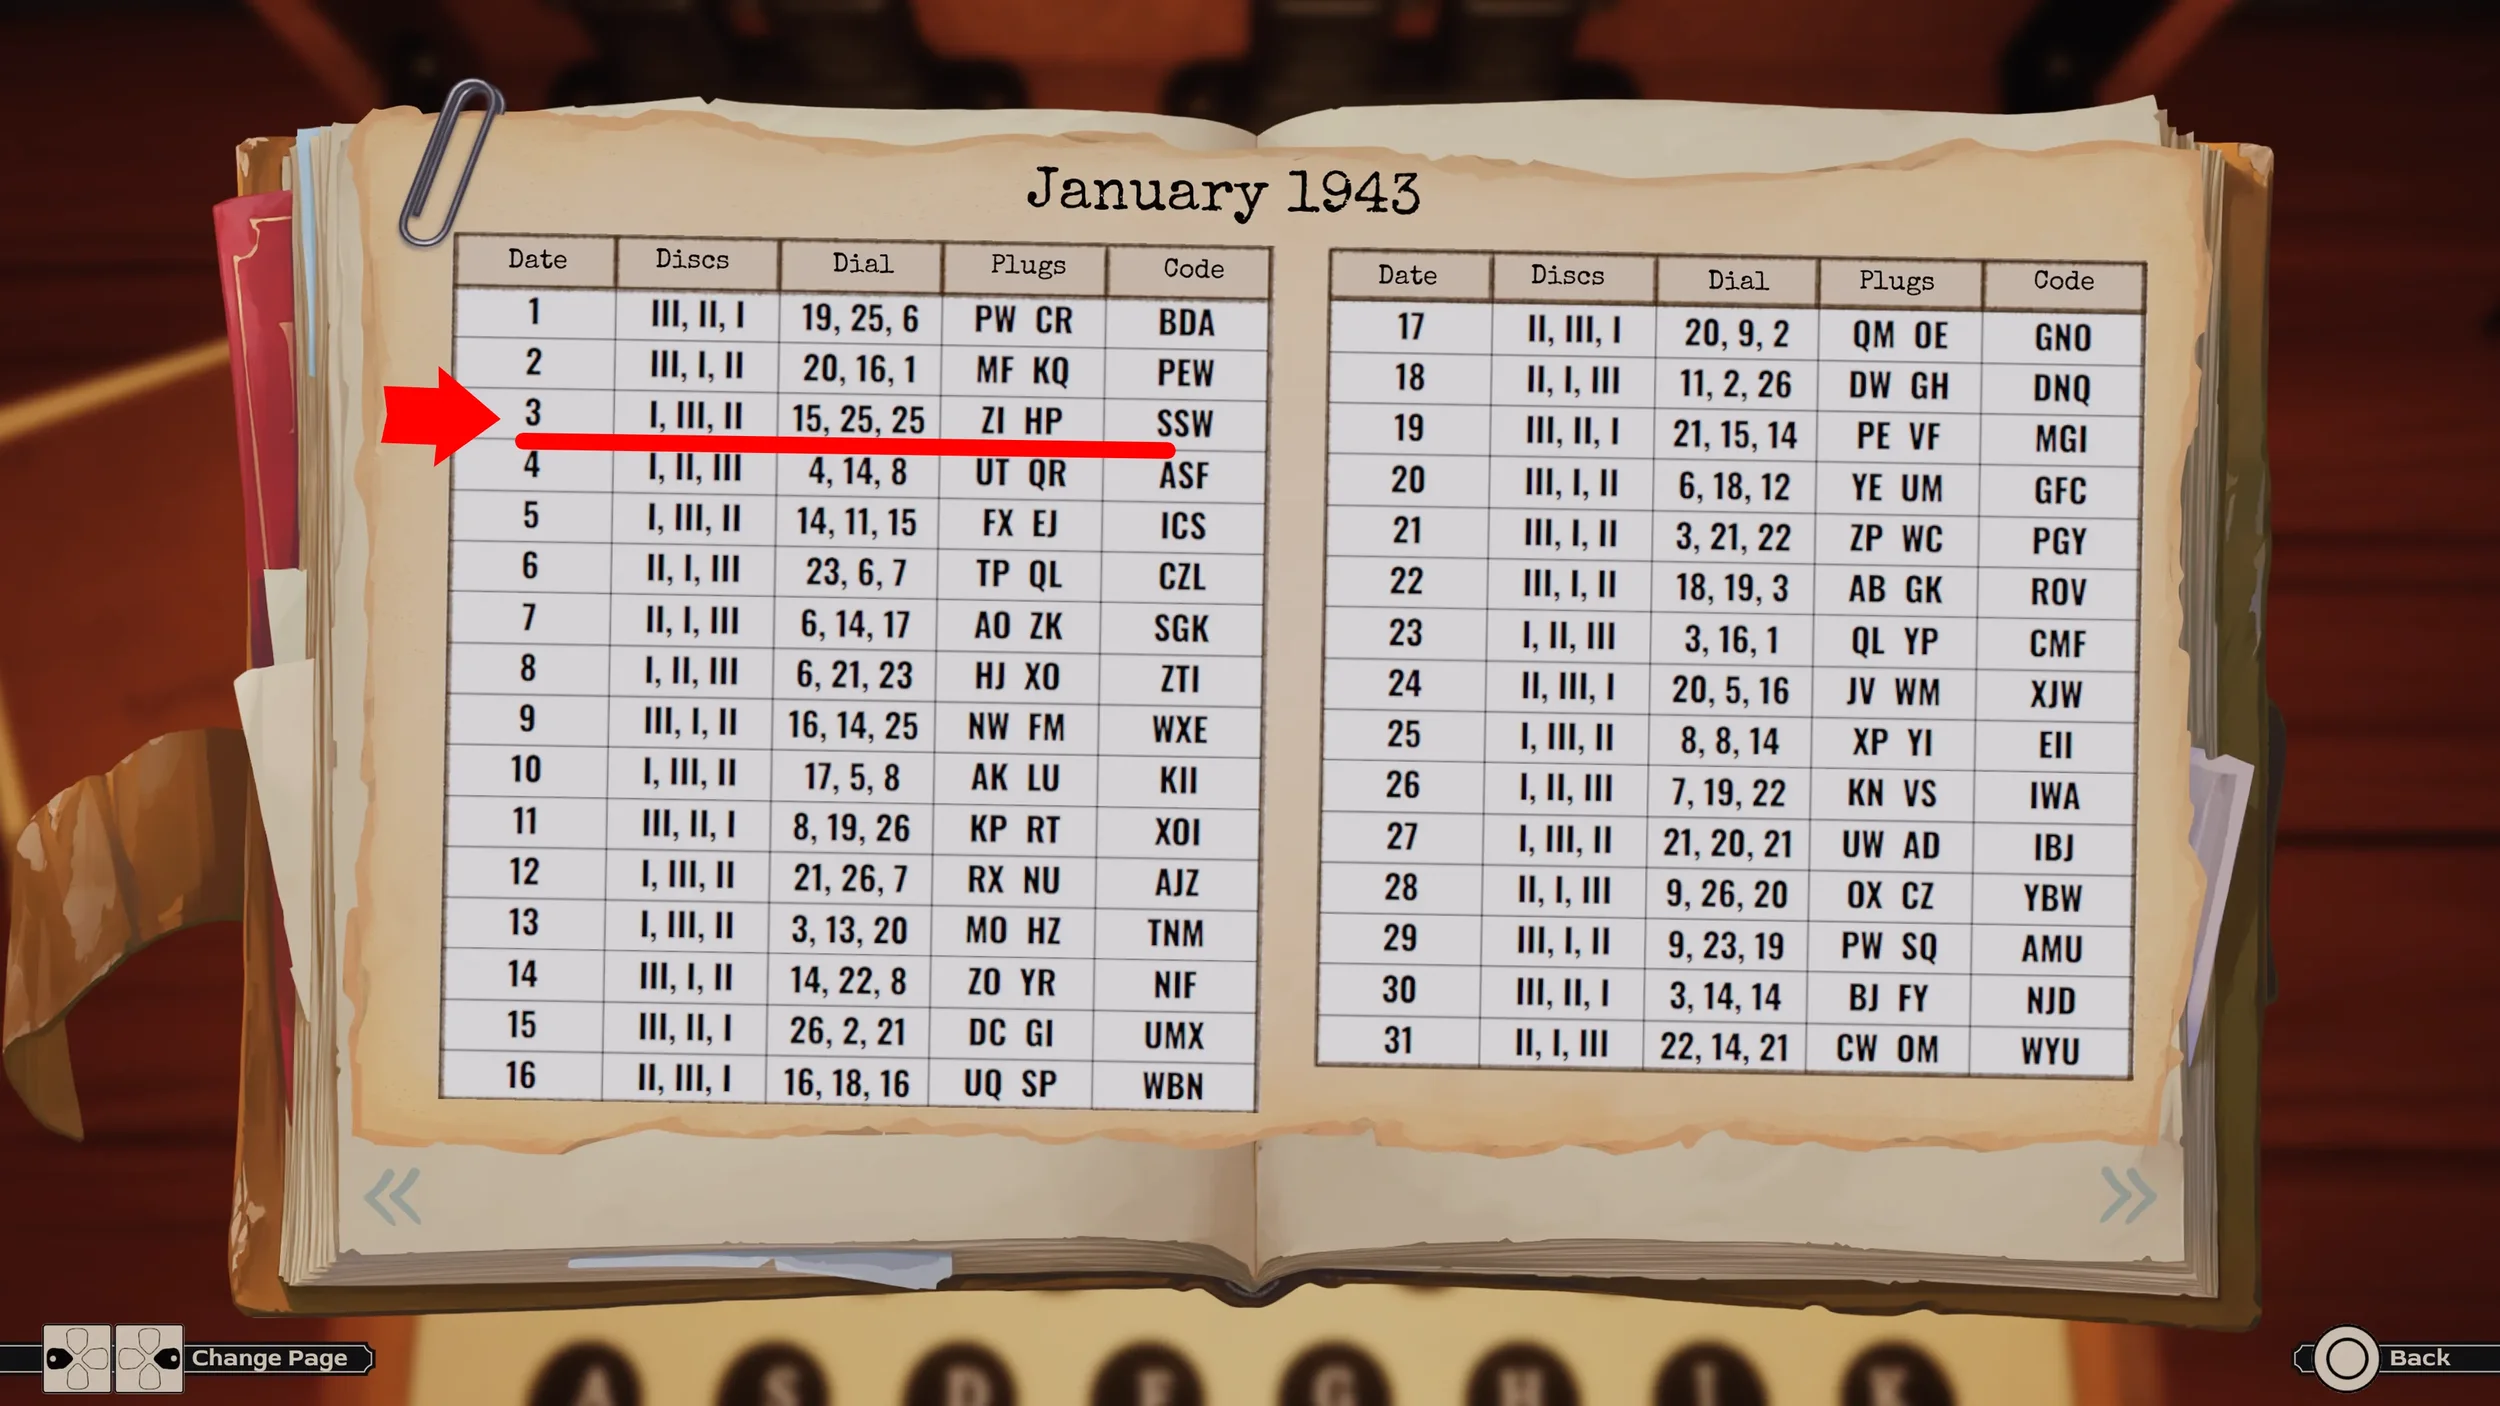
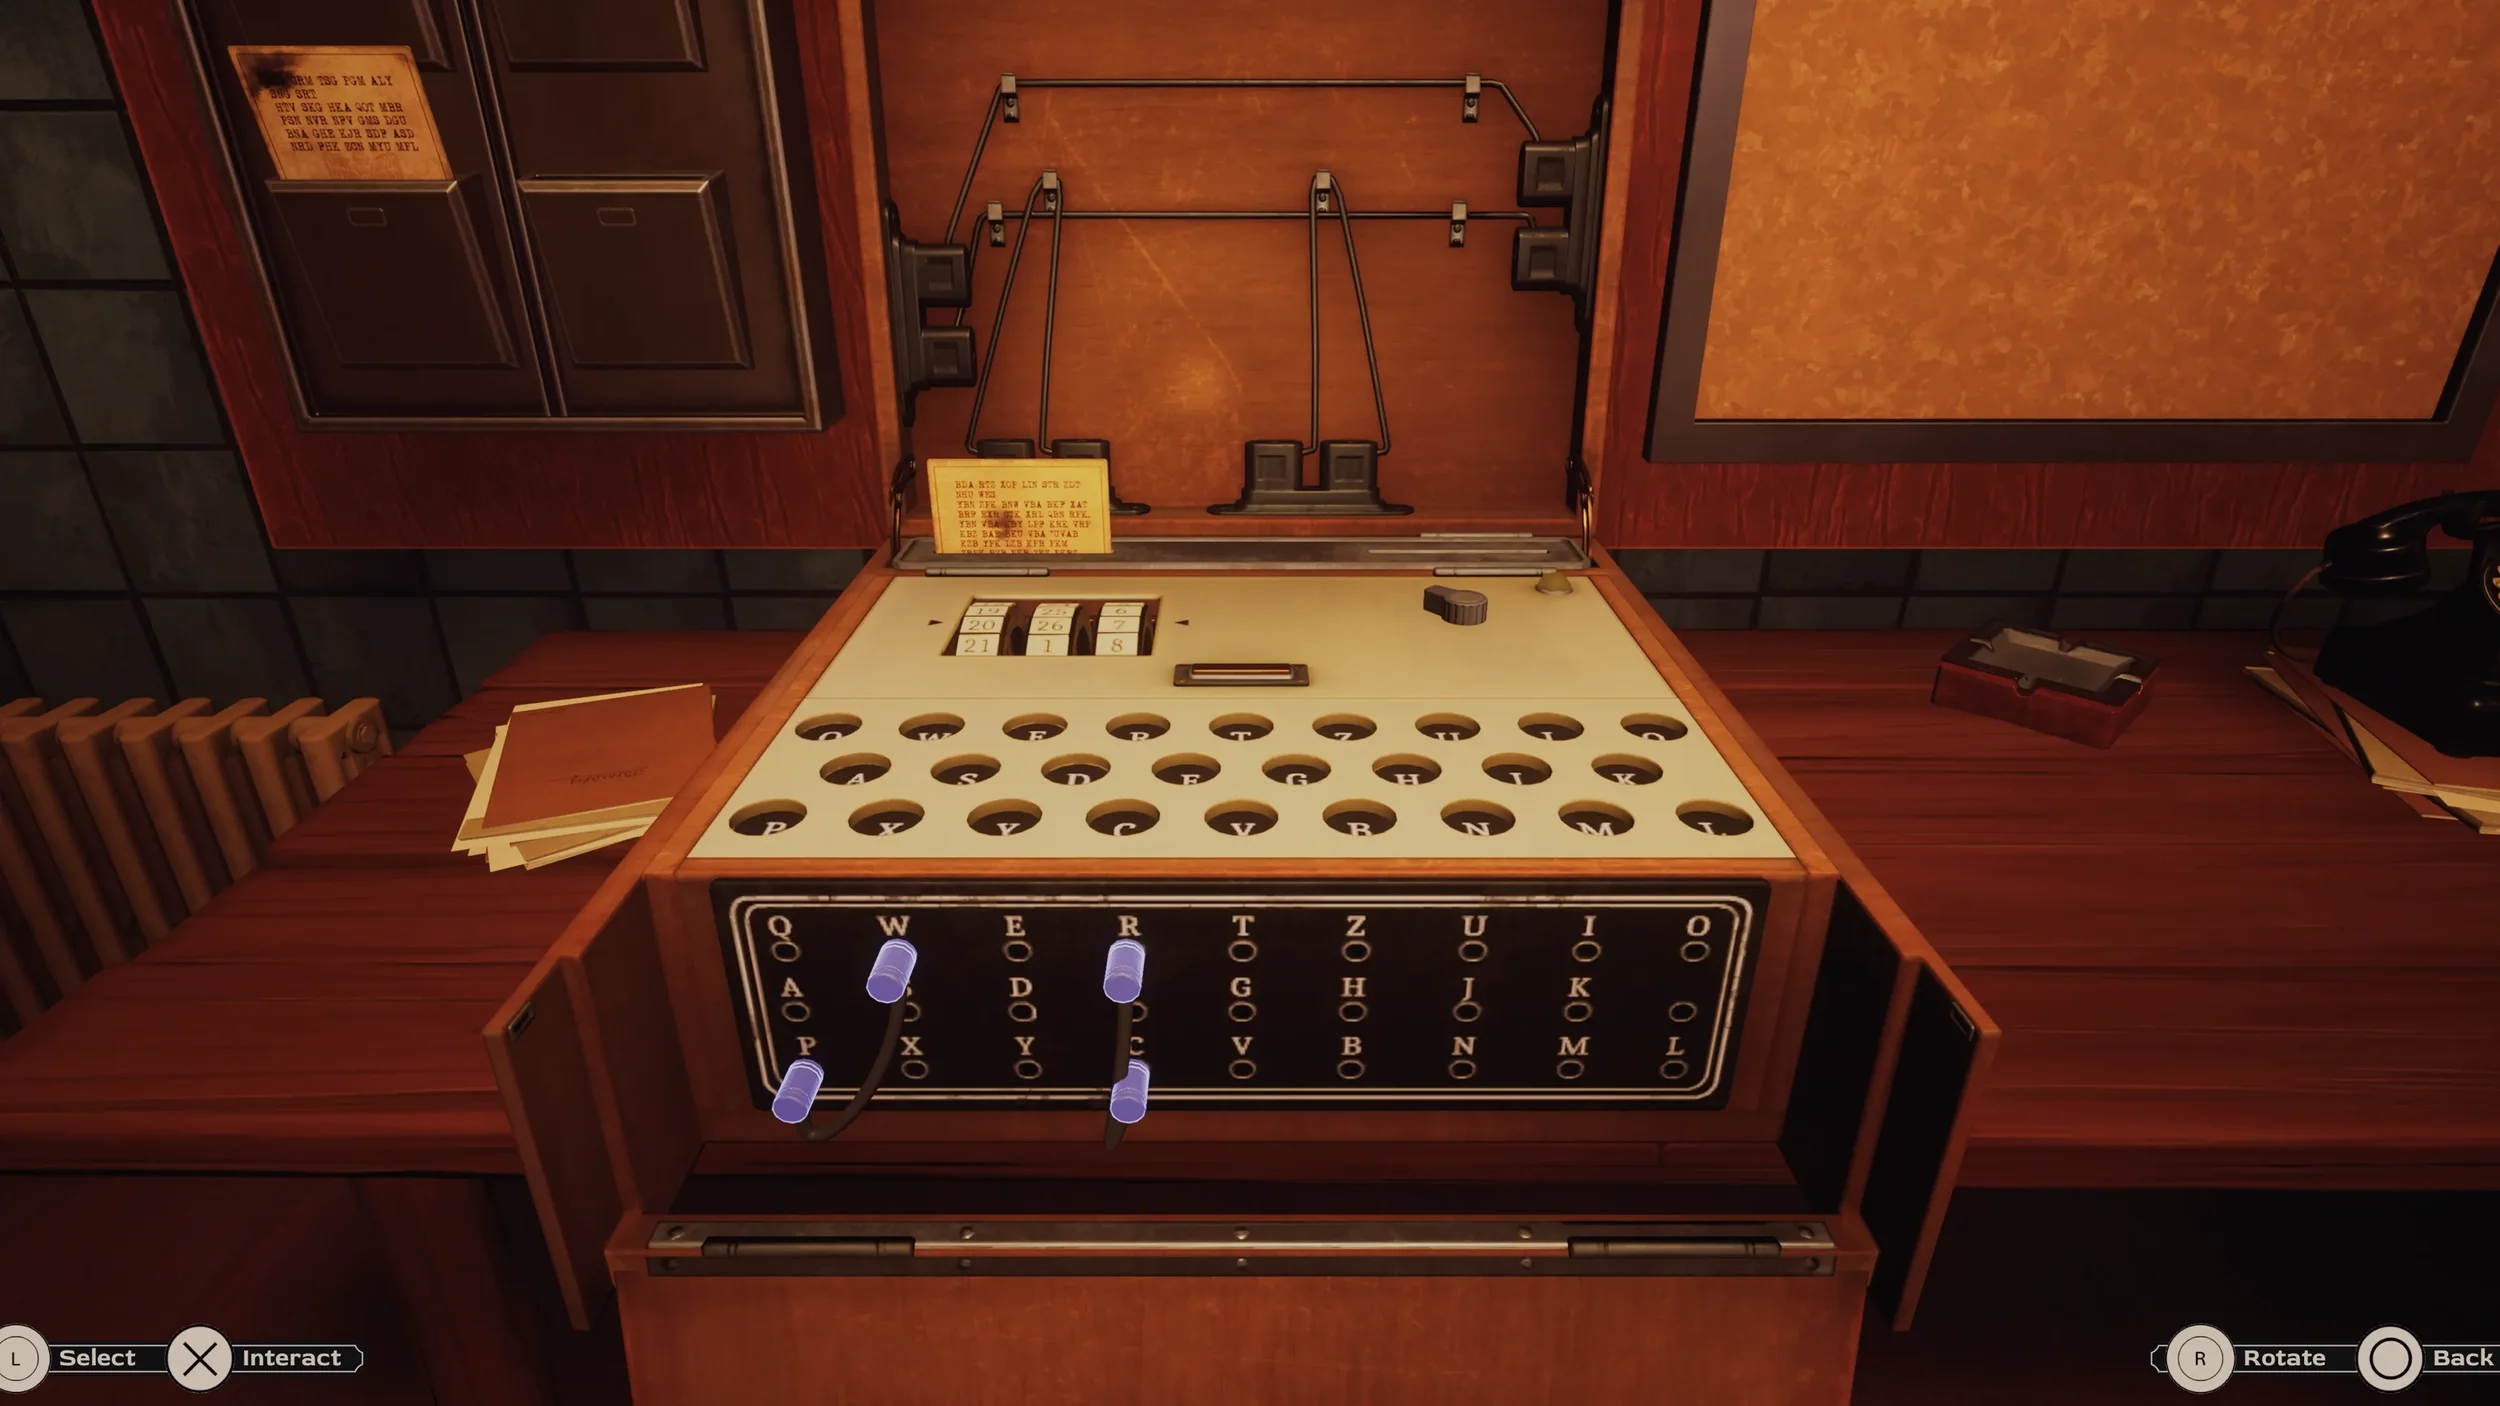
This means that the 3 blurred out letters at the start of the Encrypted Letter are SSW, so same as before solve the letter using the info from the correct row of the chart. Set the bigger dials to I - III - II, the smaller dials to 15 - 25 - 25 and then connect the Z to the I and the H to the P.
The decoded message gives us the General’s Assigned Number (95), so now we just need to find out the “current day” part to know the code to the metal door.
We can find this out by looking at the Calendar clue, the red circles are the days the code changes, here we can see that the last red circle is on February 19th.
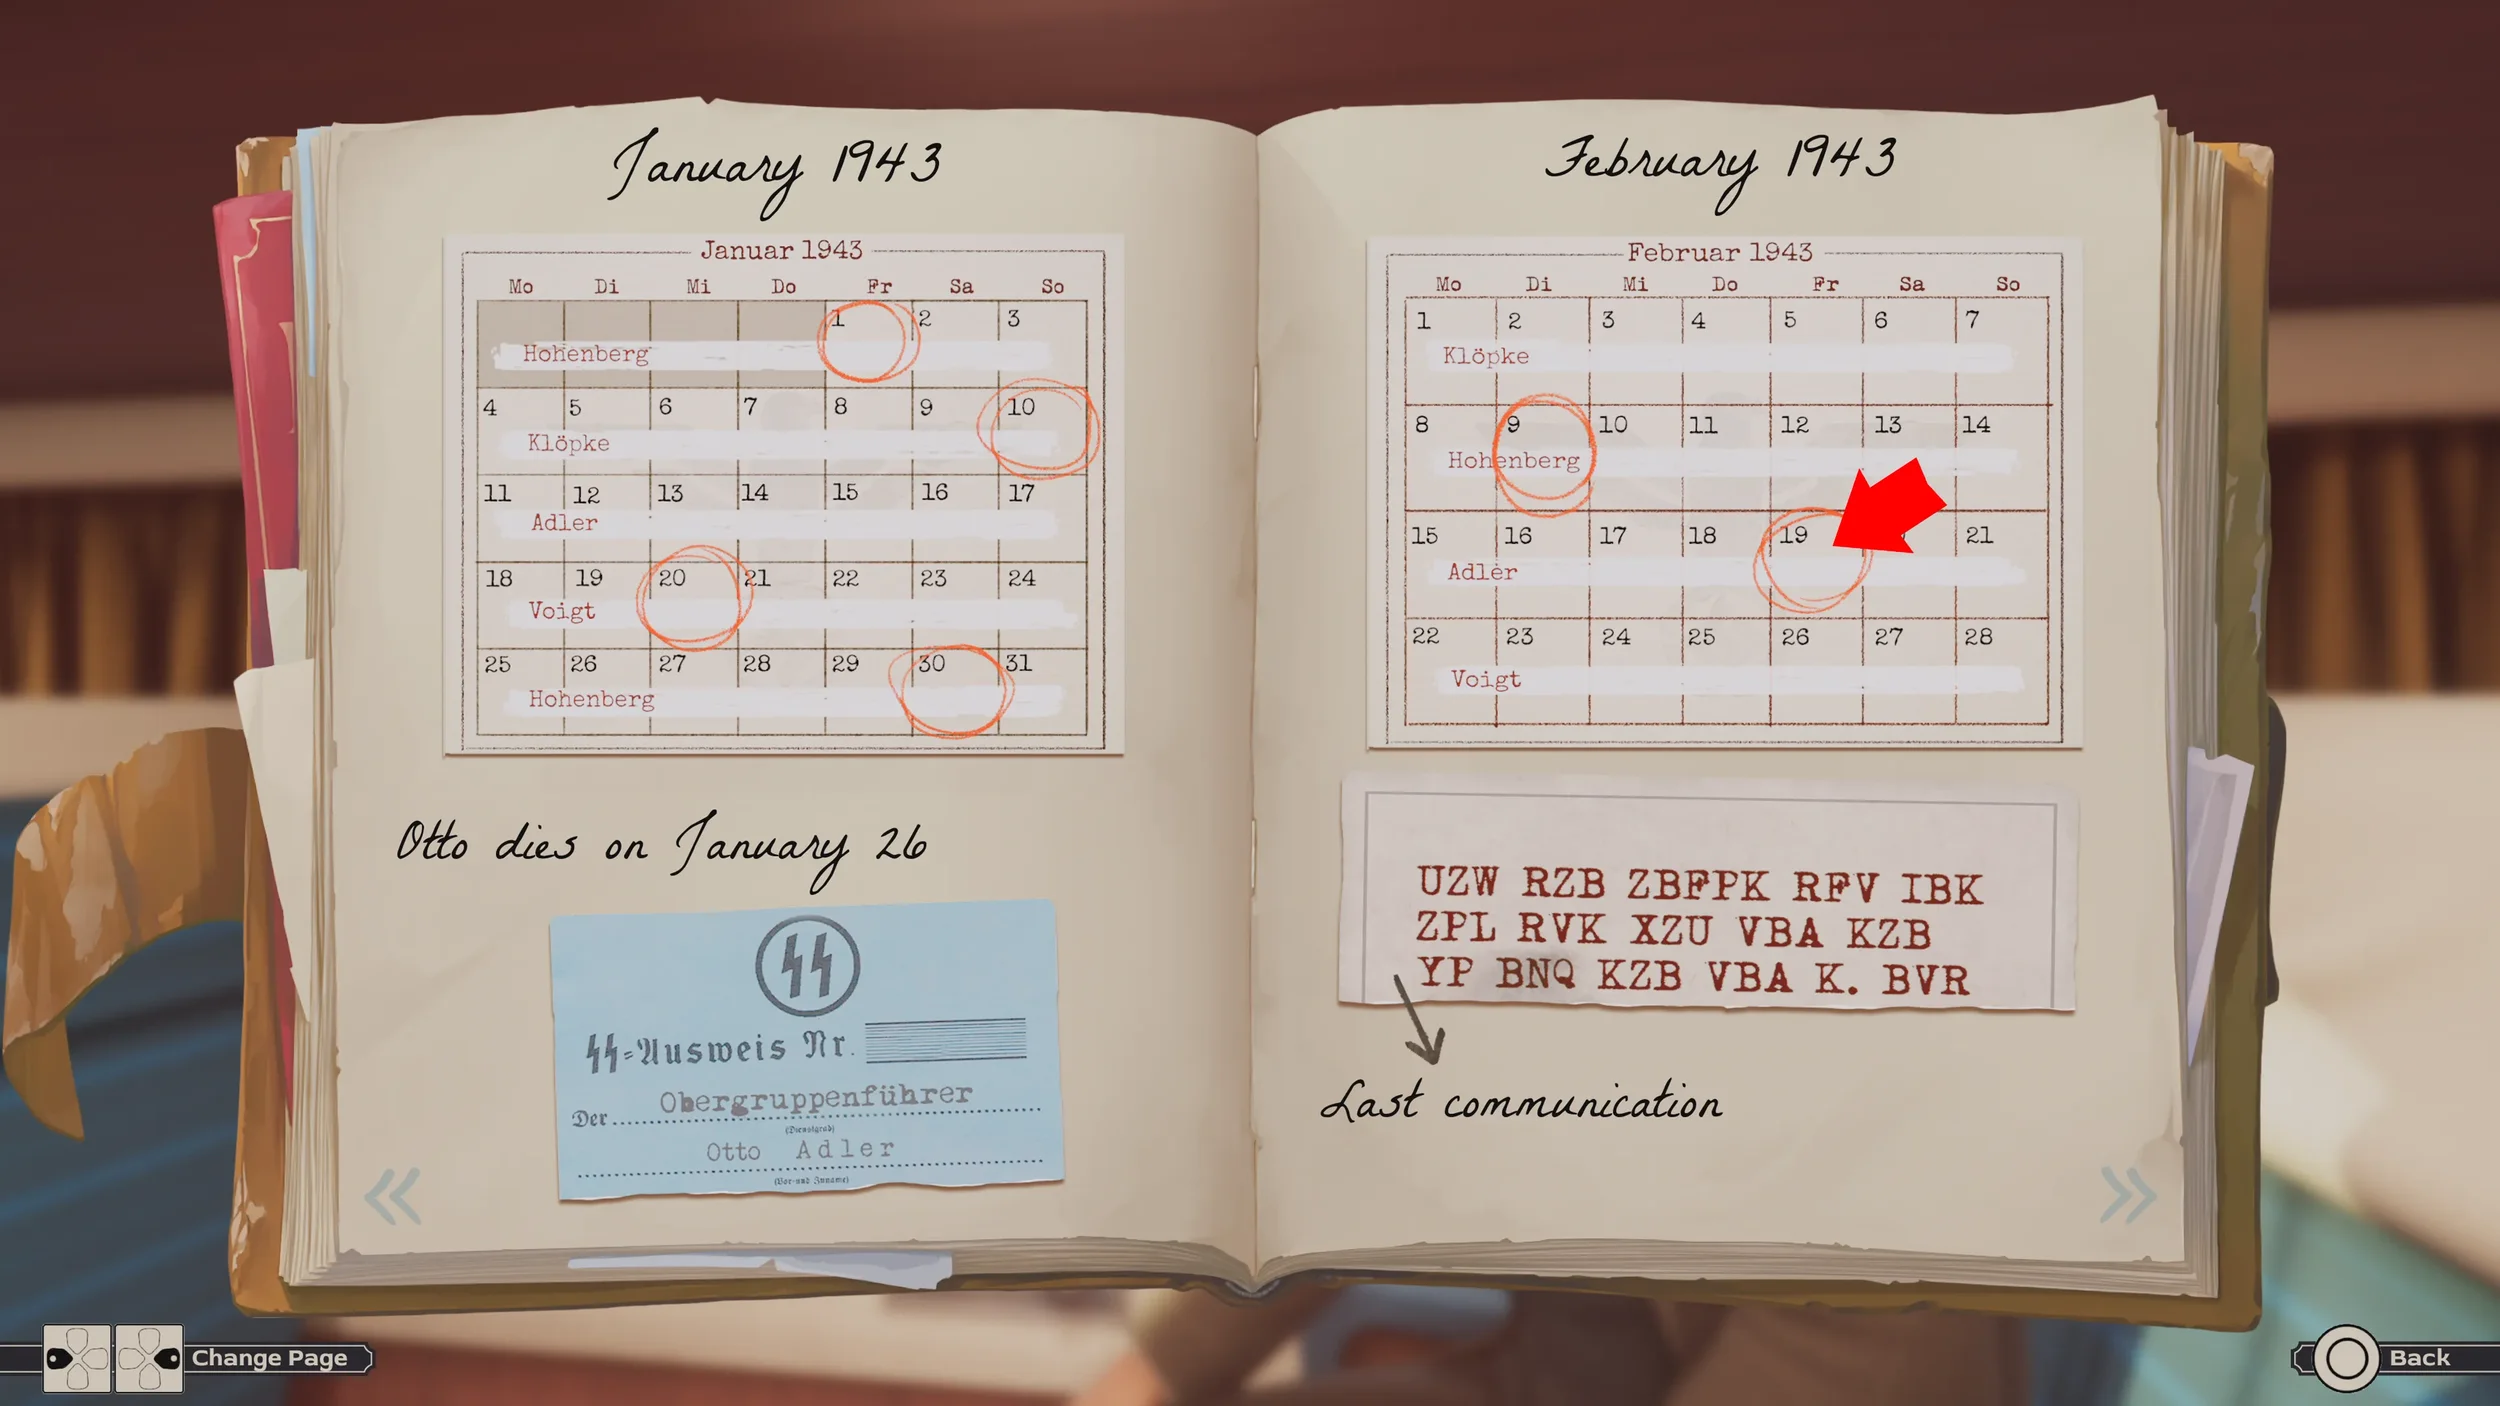
So we now have the General’s Number (95) AND the current day (19) so we know the code to open the metal door downstairs is 9 5 1 9.
But before opening the door make sure to also decipher the 3rd Encrypted Message, while it isn’t needed for the code but it does count as a clue so if you are going for 100% completion be sure to decipher this one too.
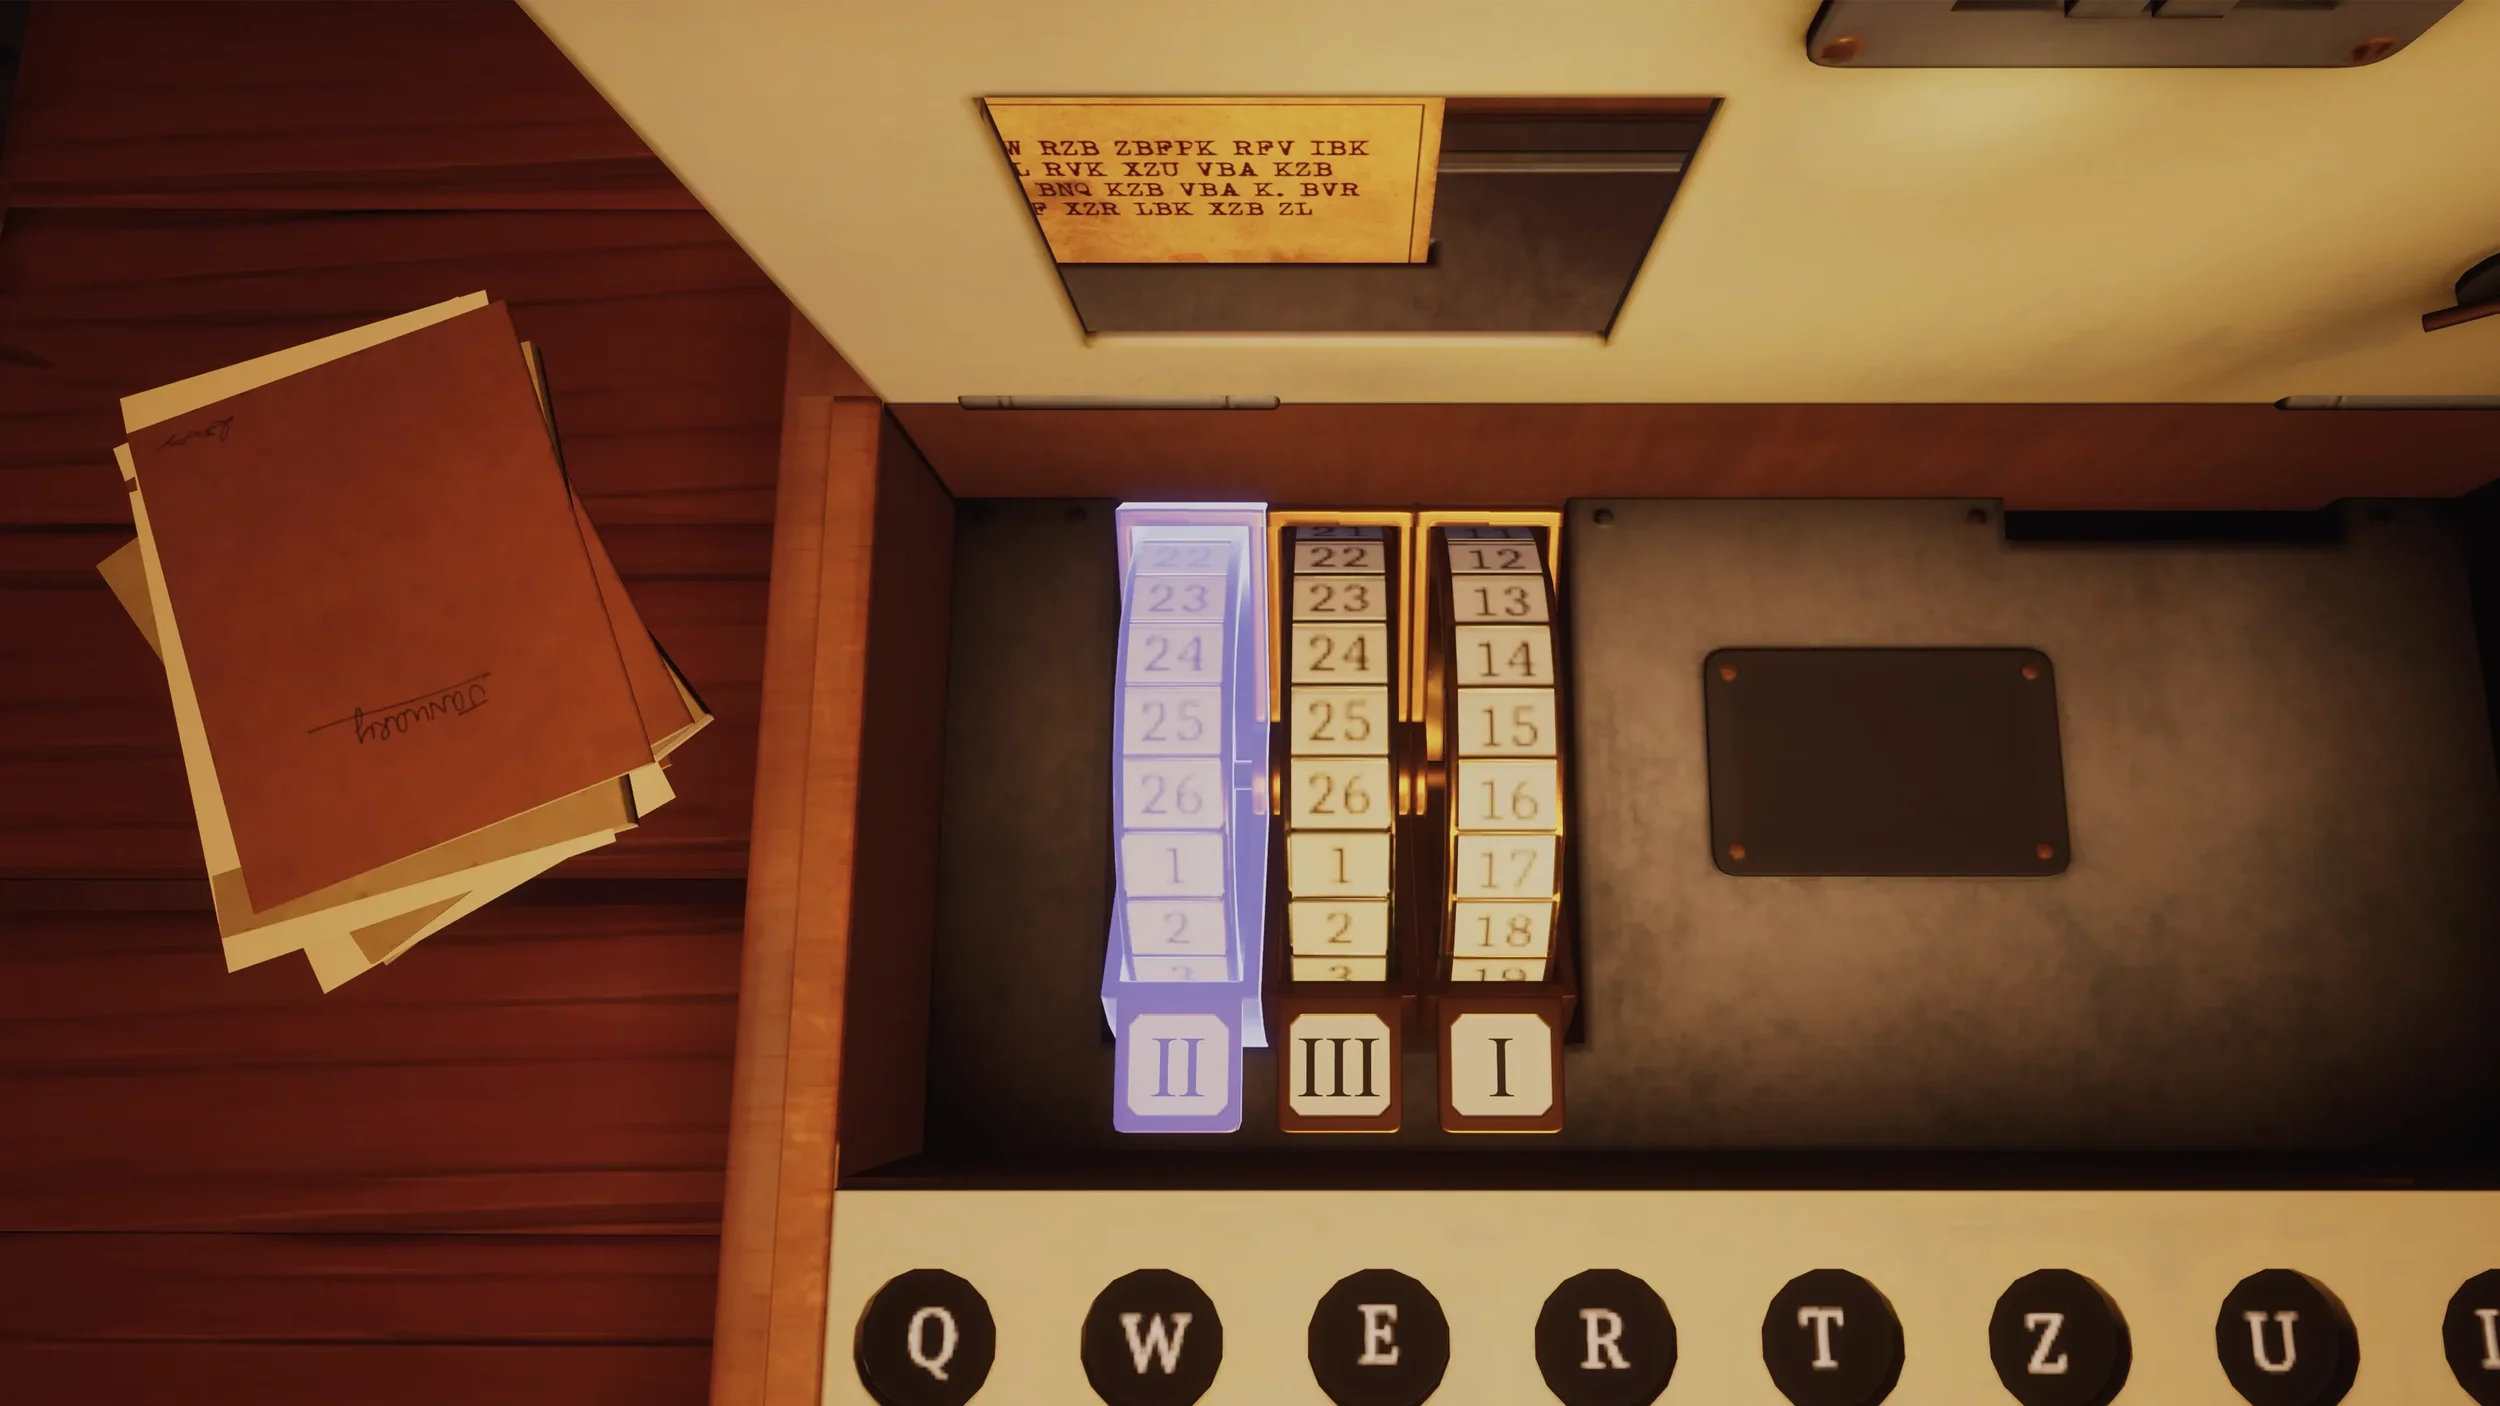
This one is very easy as we can see the first 3 letters are UZW so we can find the row with the needed info on the February Calendar, Date 25.
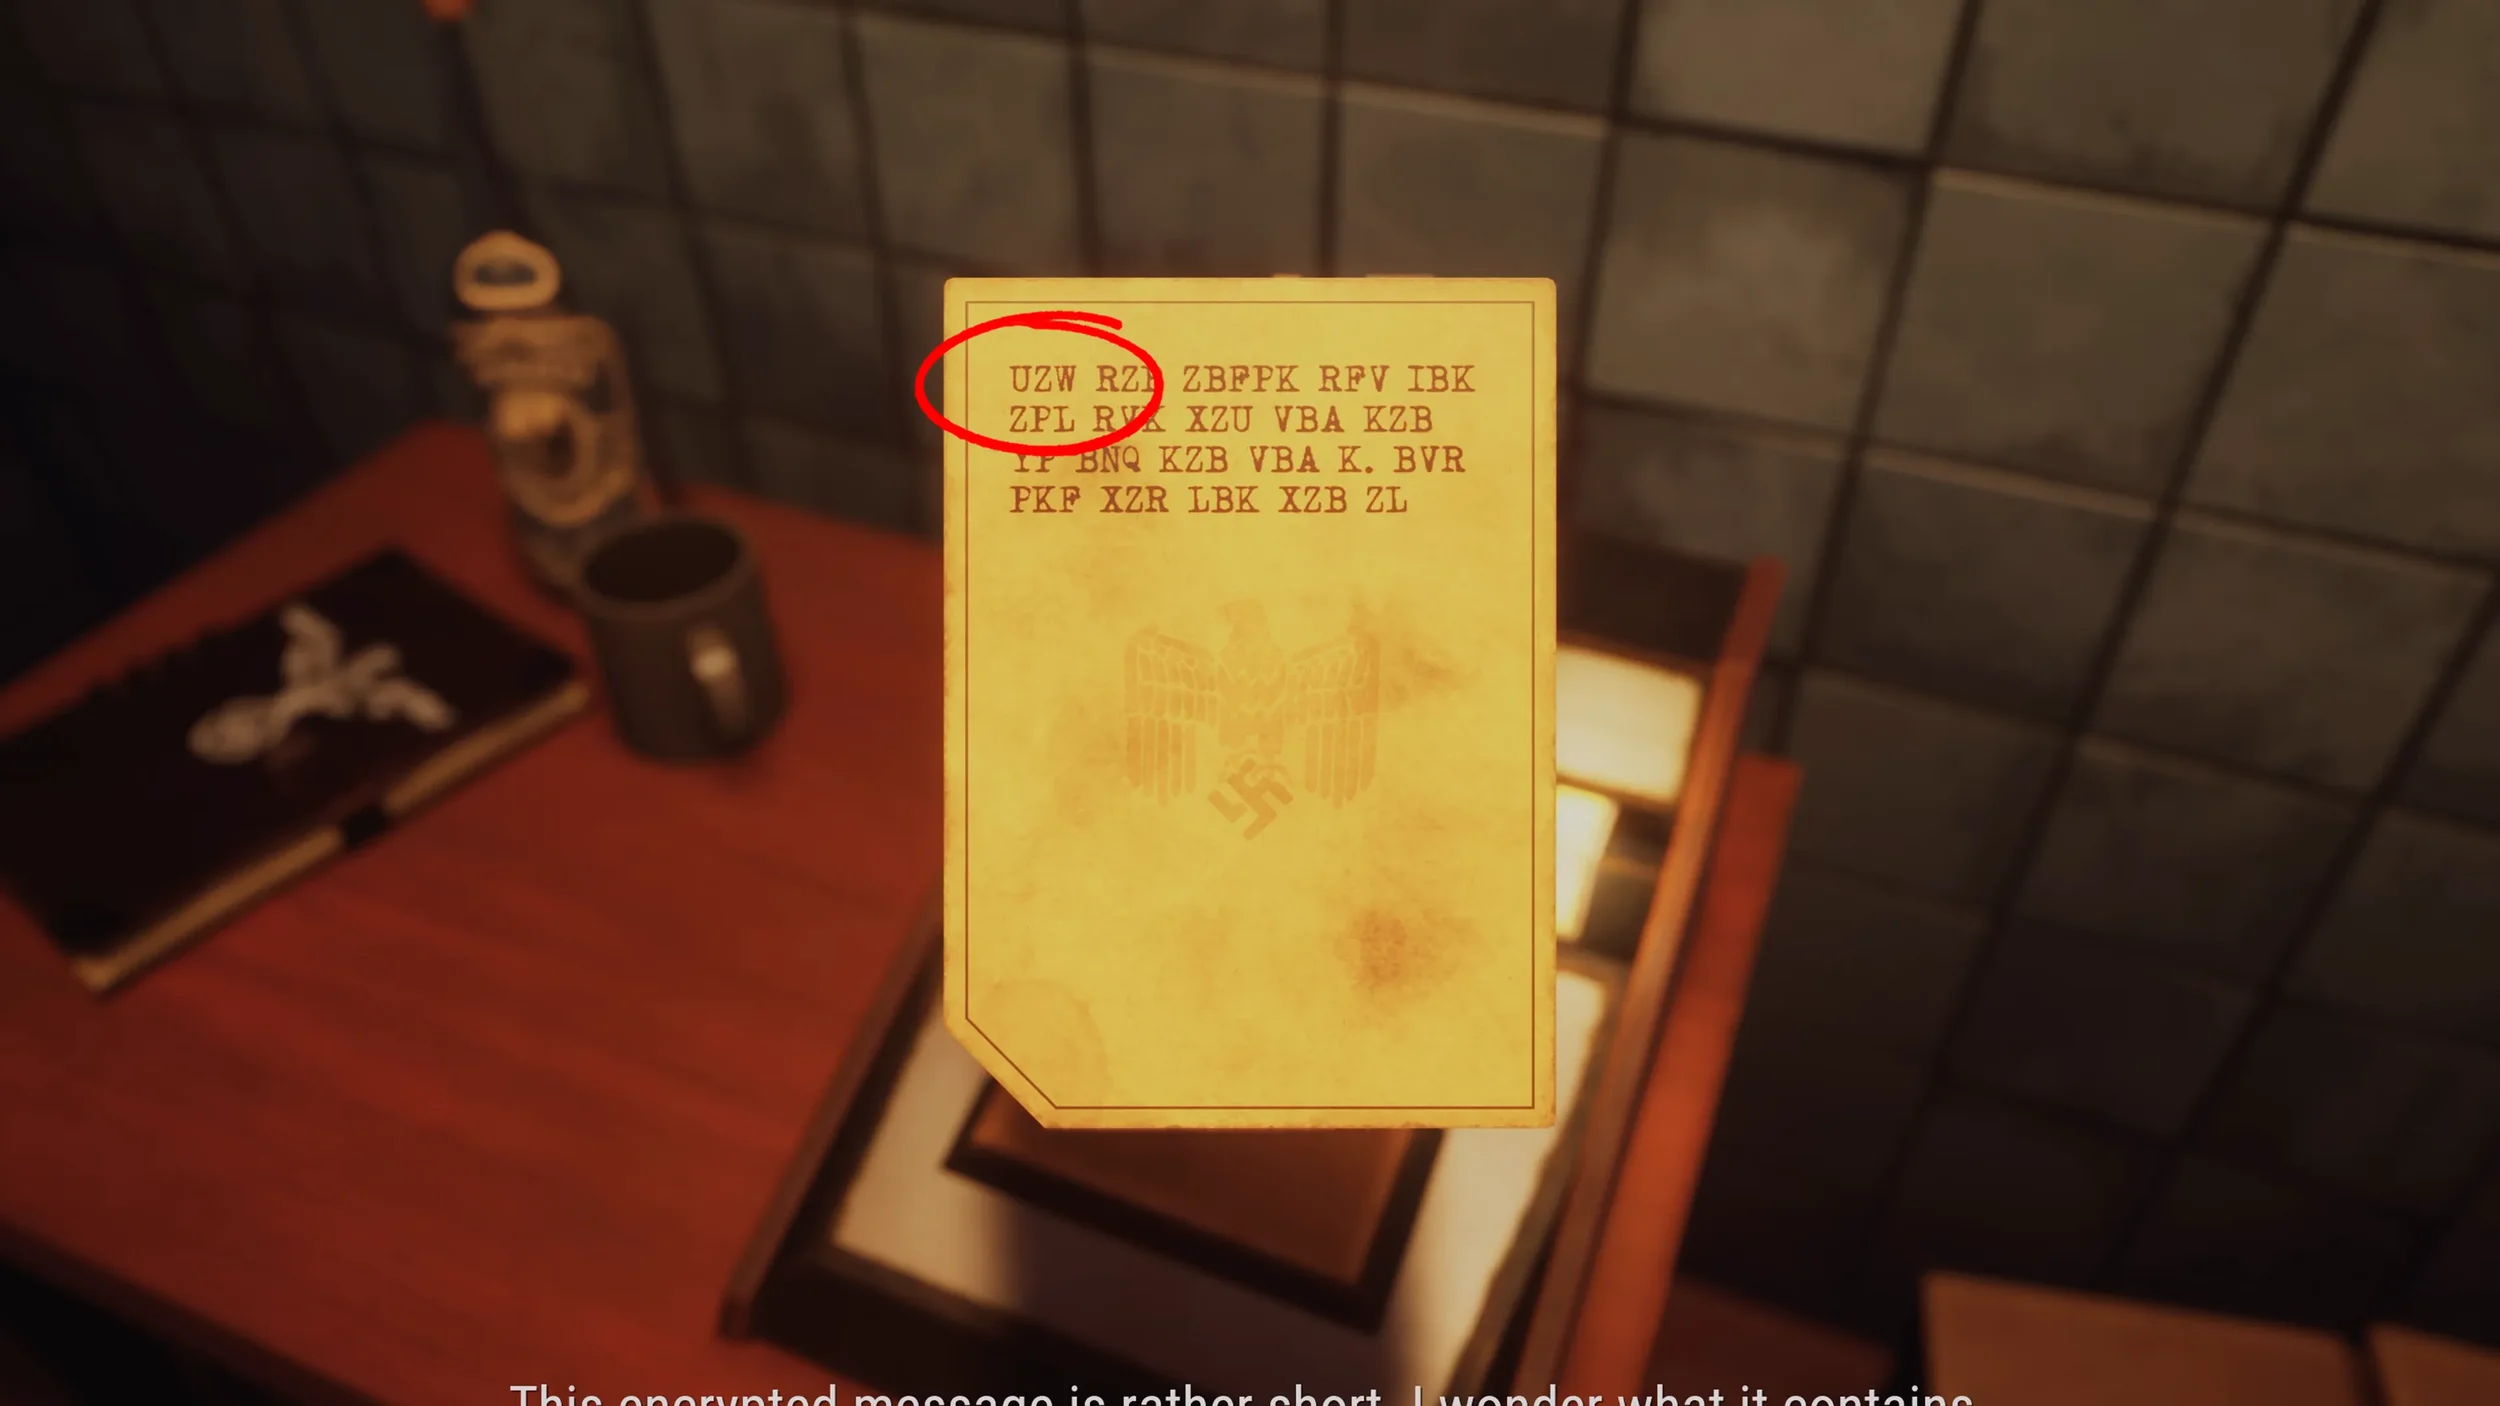
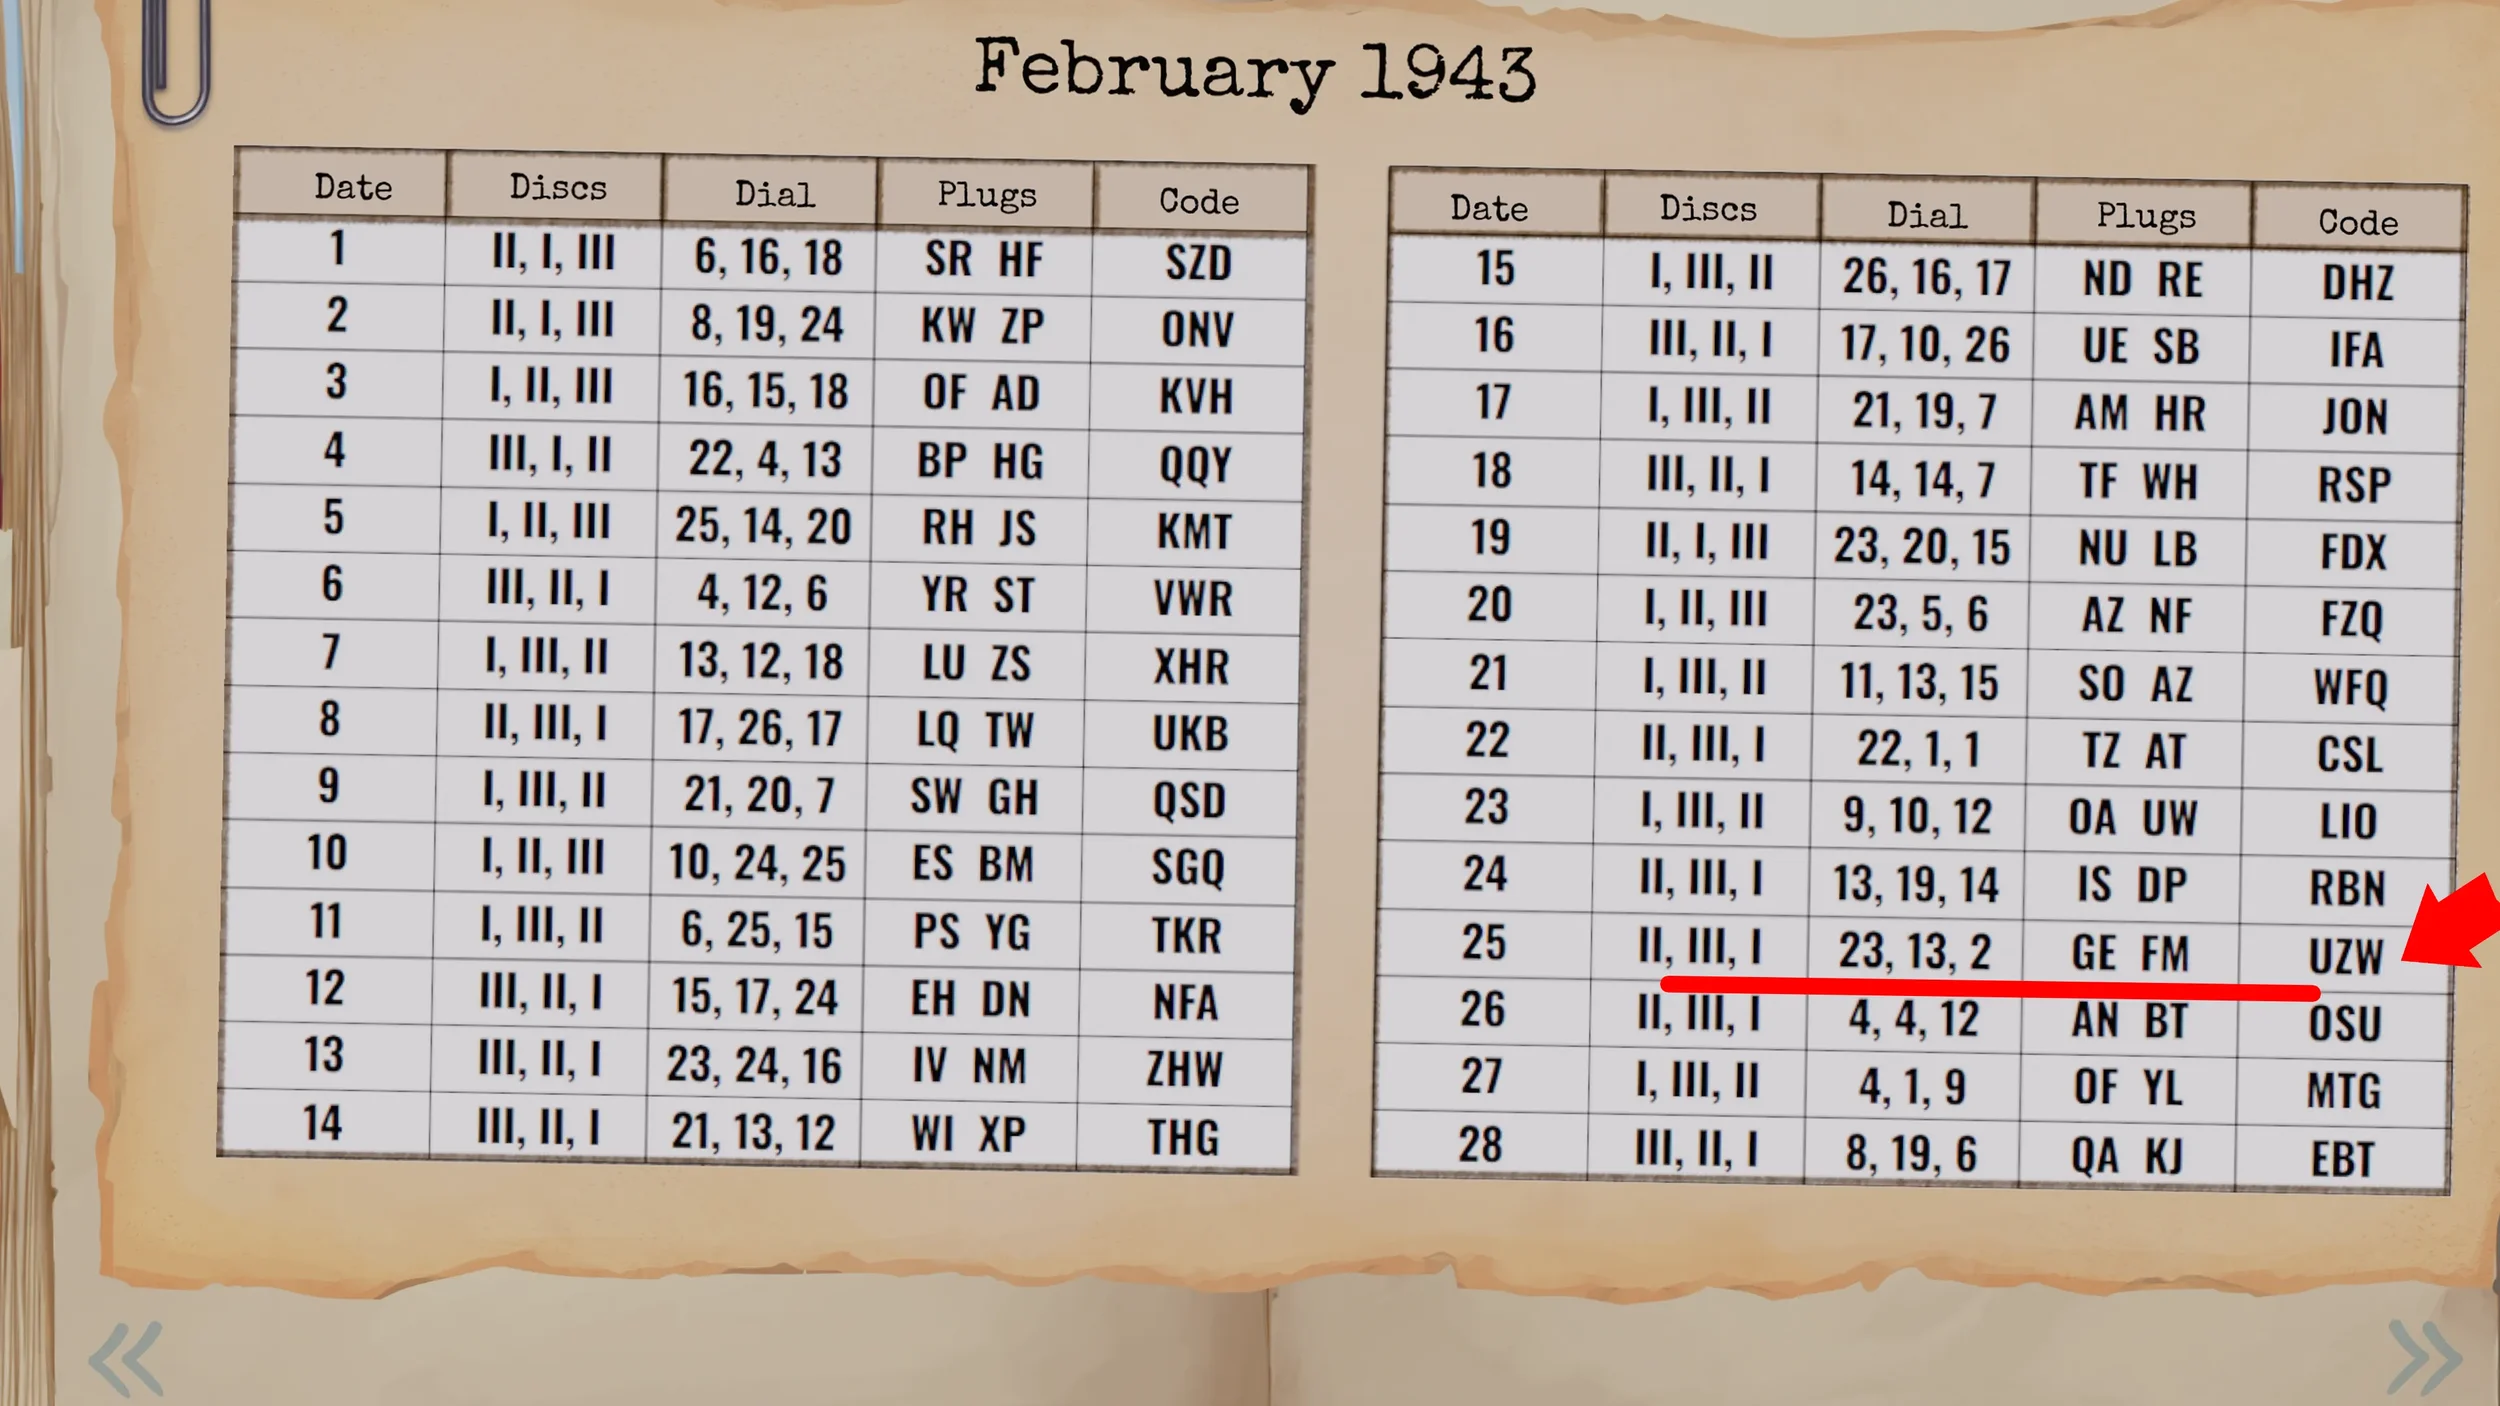
Insert the Encrypted Message into the machine, set the bigger dials to II - III - I, the smaller dials to 23 - 13 - 2, then use the cables to connect the G to the E and the F to the M to decipher the final Encrypted Letter.
Now that you have deciphered all 3 of the Encrypted Messages you can go back down the stairs to open the metal door (code: 9519) that leads to the Laboratory.
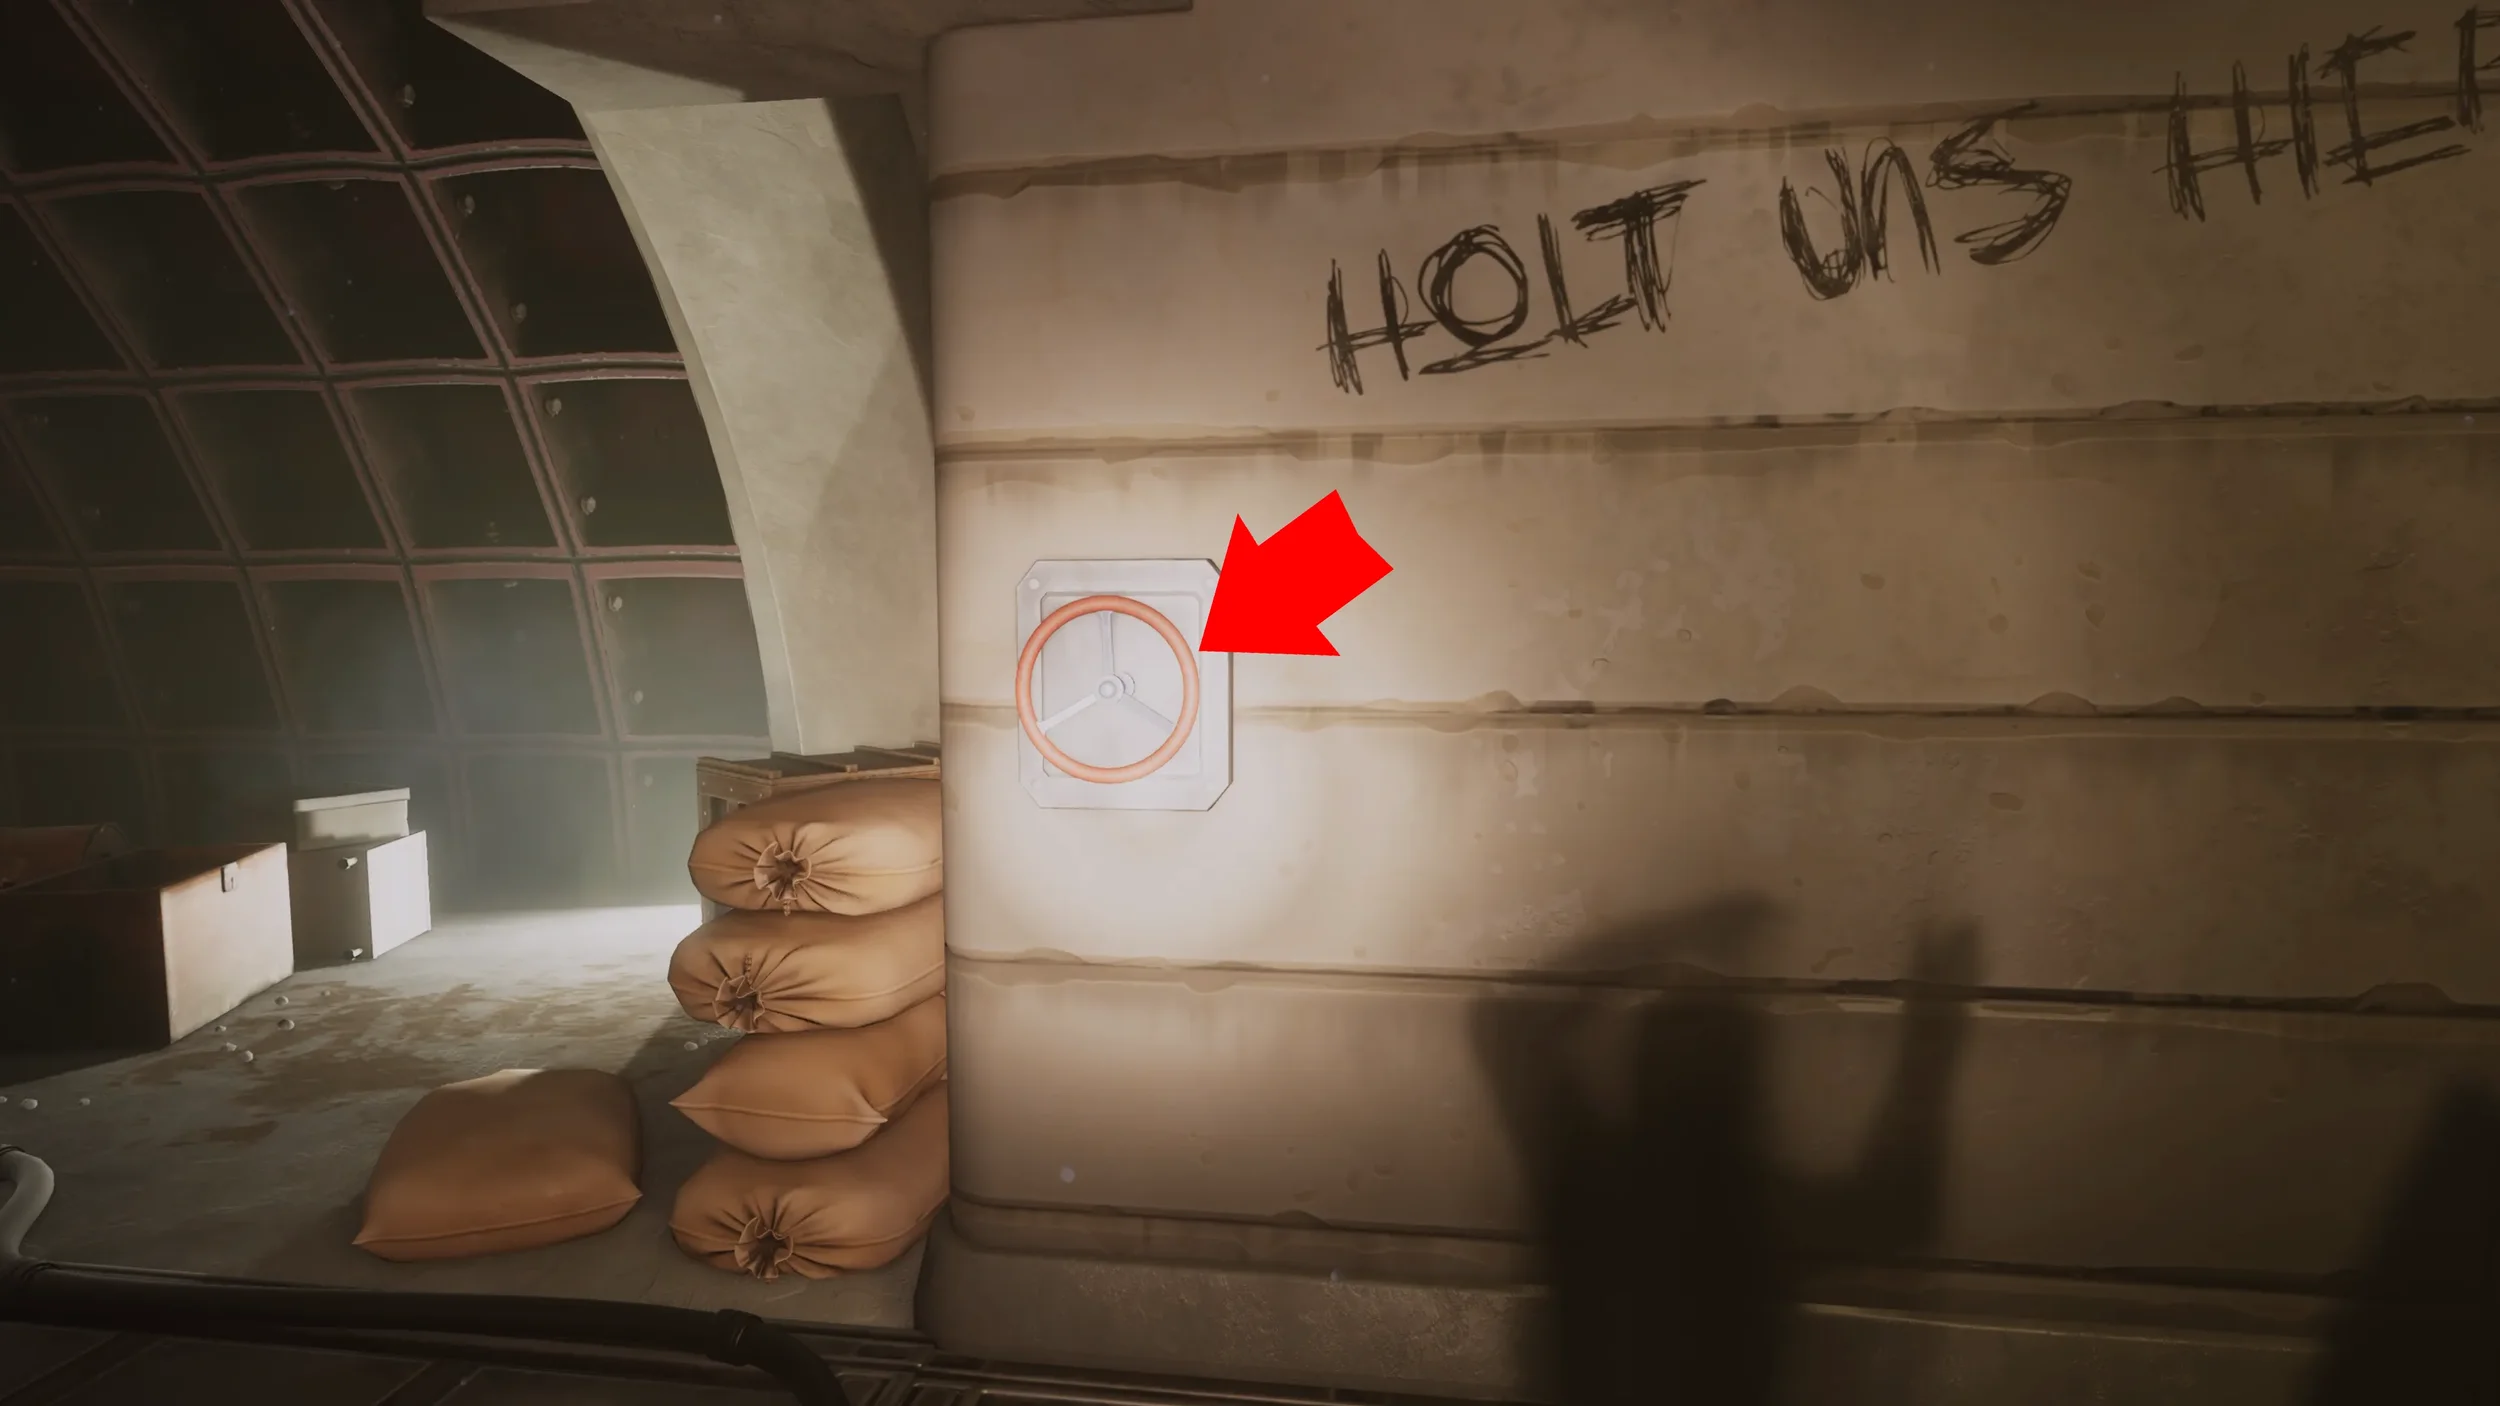
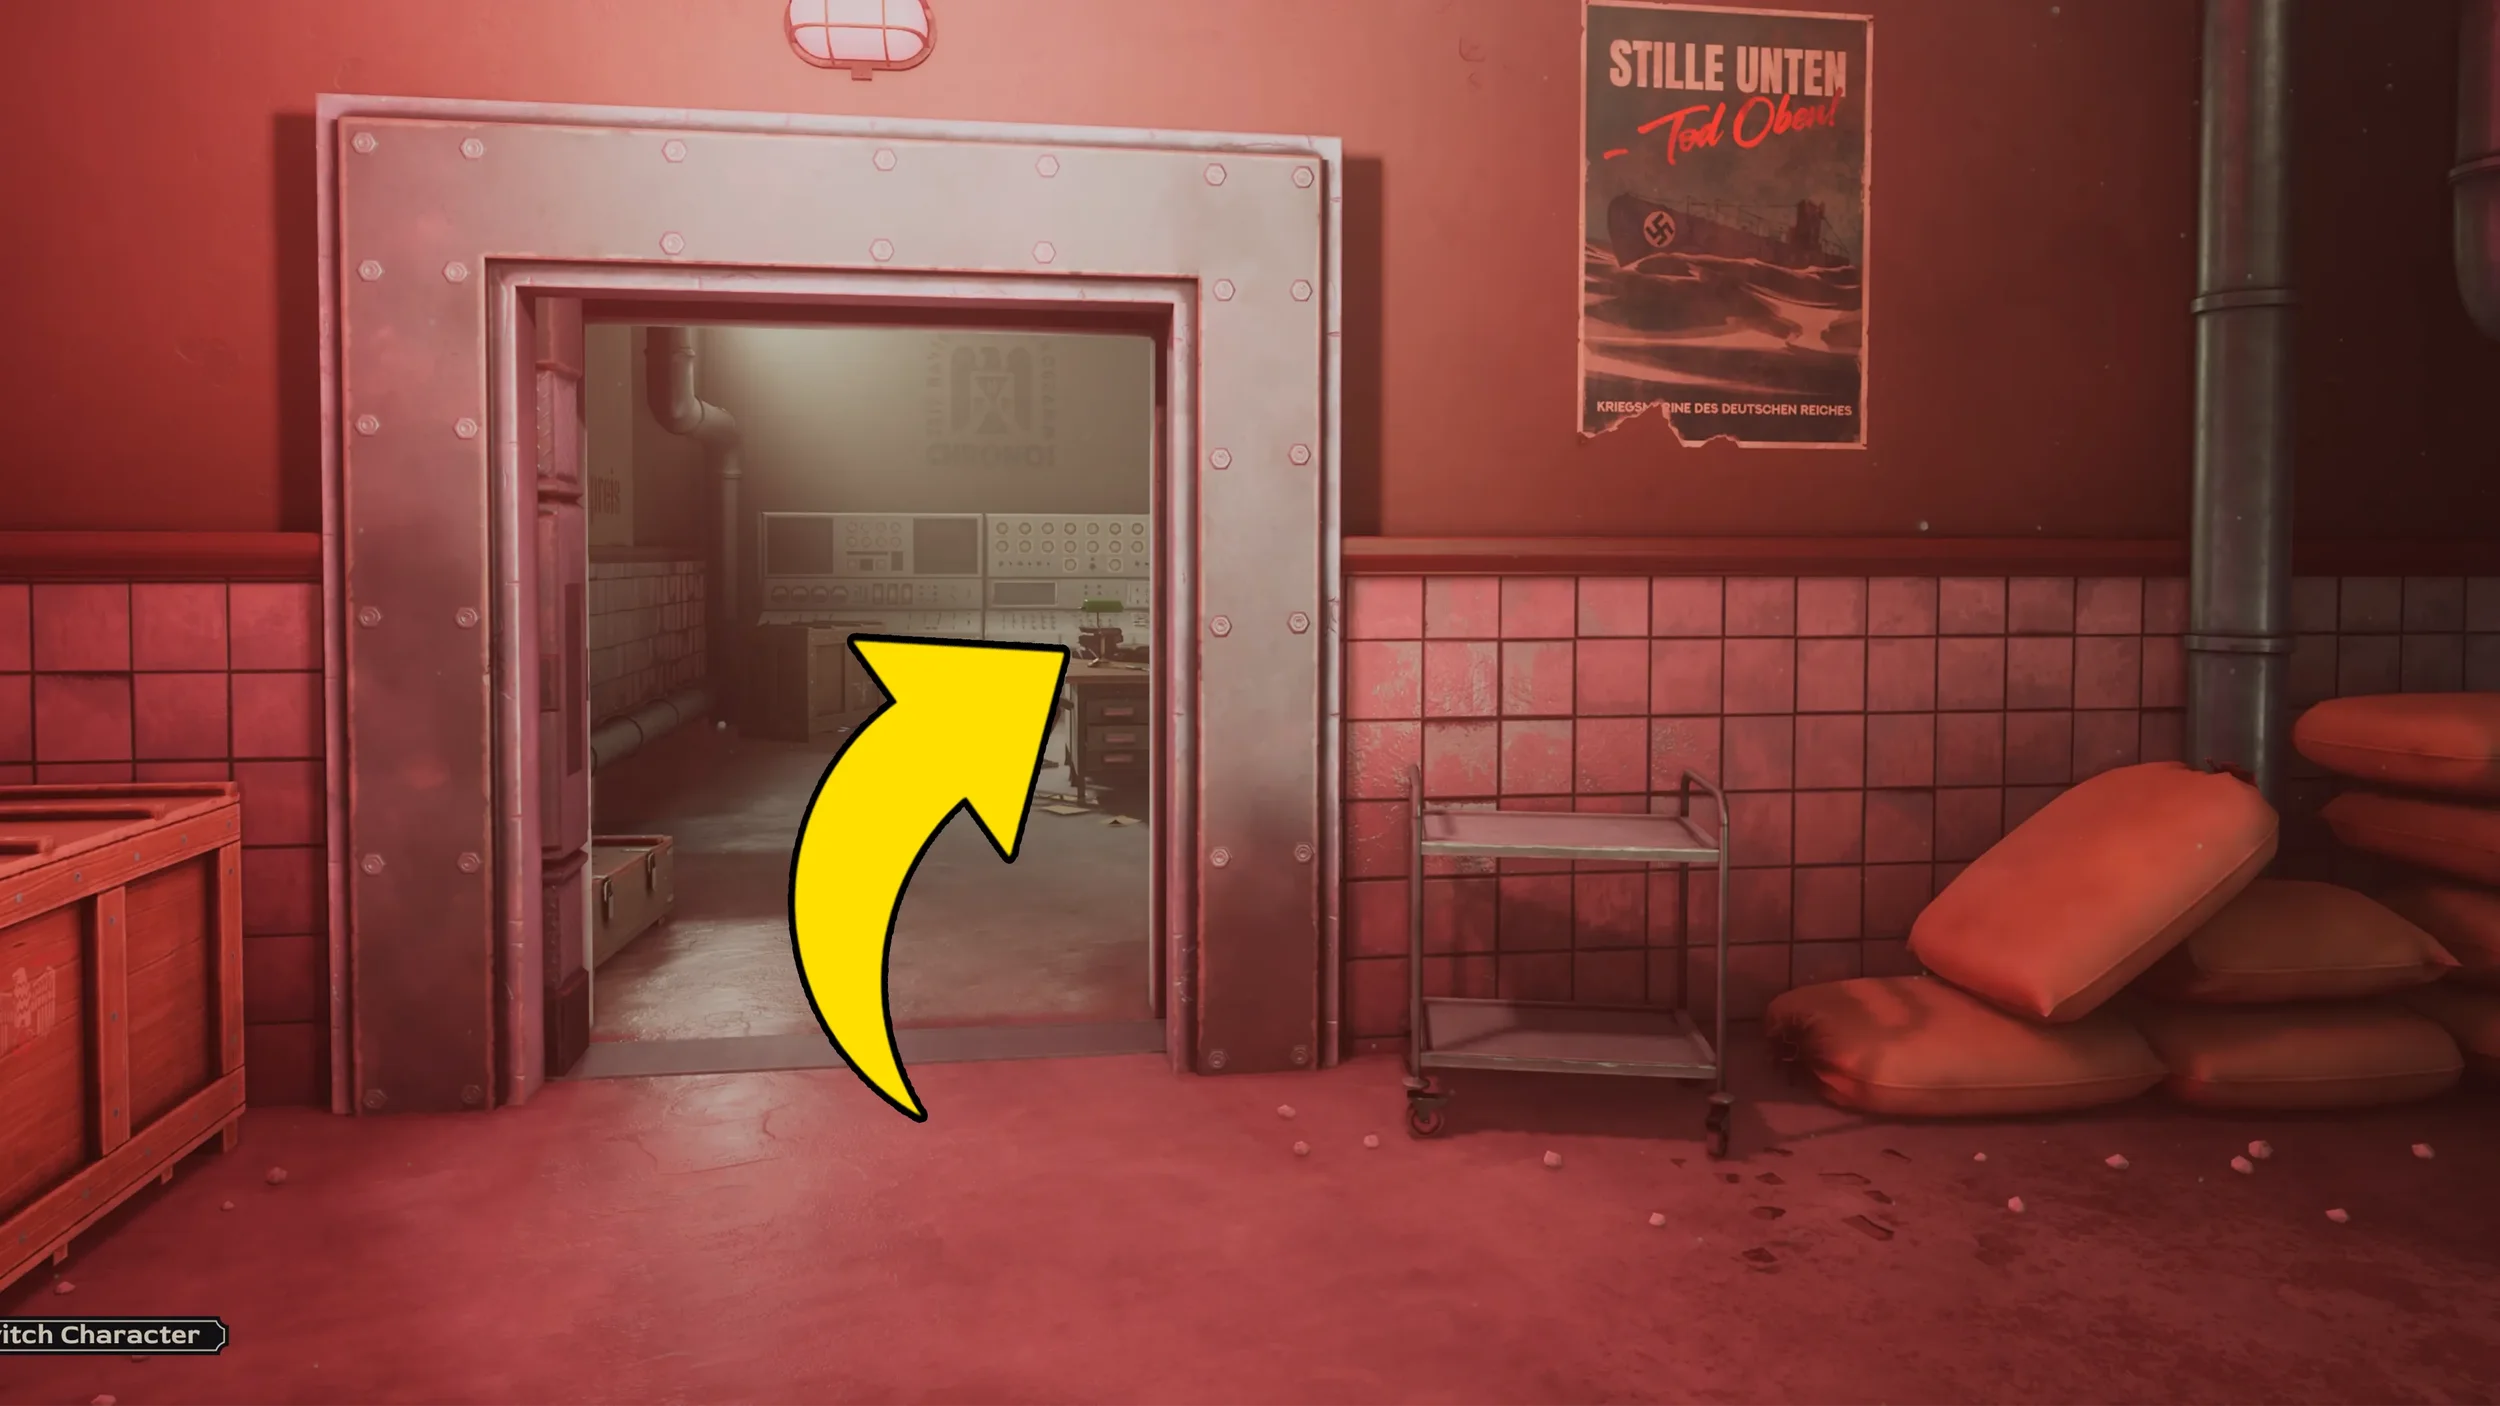
After going through the metal door you will soon reach a closed vault door, simply interact with the nearby valve on the right to open the door.
In this next room if you approach the glass, you will see there is a “smoke monster” in one of the rooms. For now inspect the map on the wall to your right (this isn’t a clue but sometimes it won’t let you advance without inspecting this).
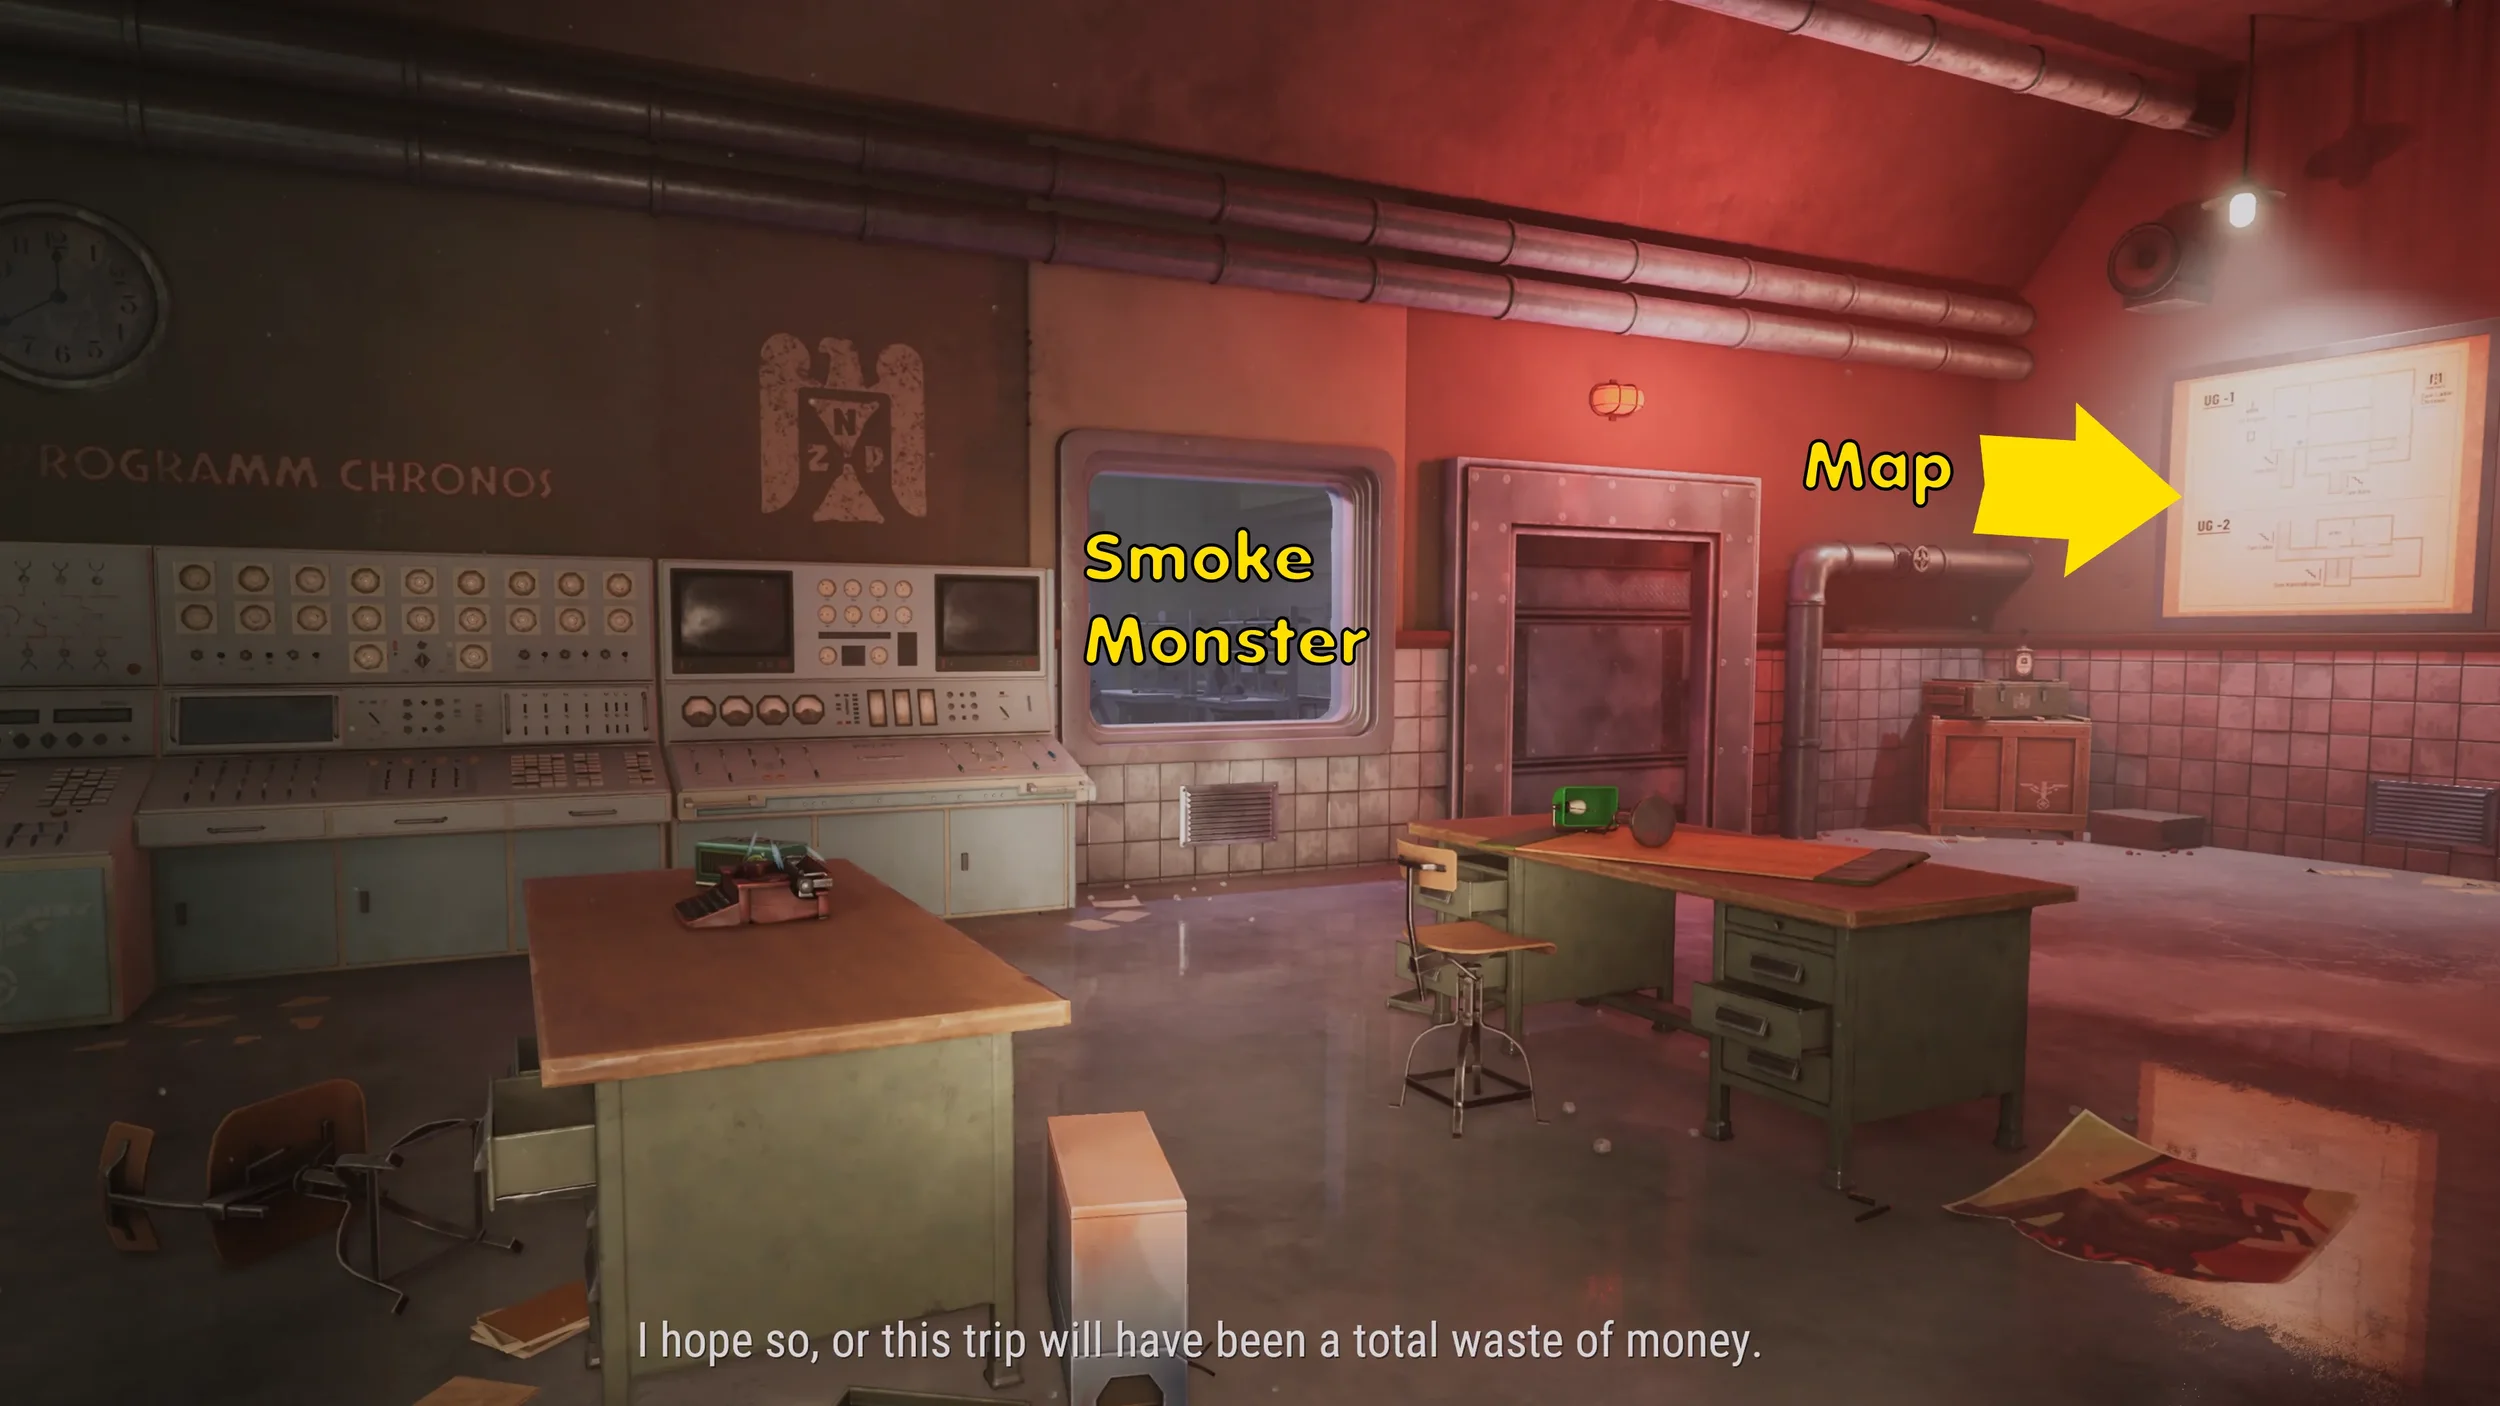
Then go through the door on the right of the Lab to find another Diving Suit similar to the one we used in Chapter 2.
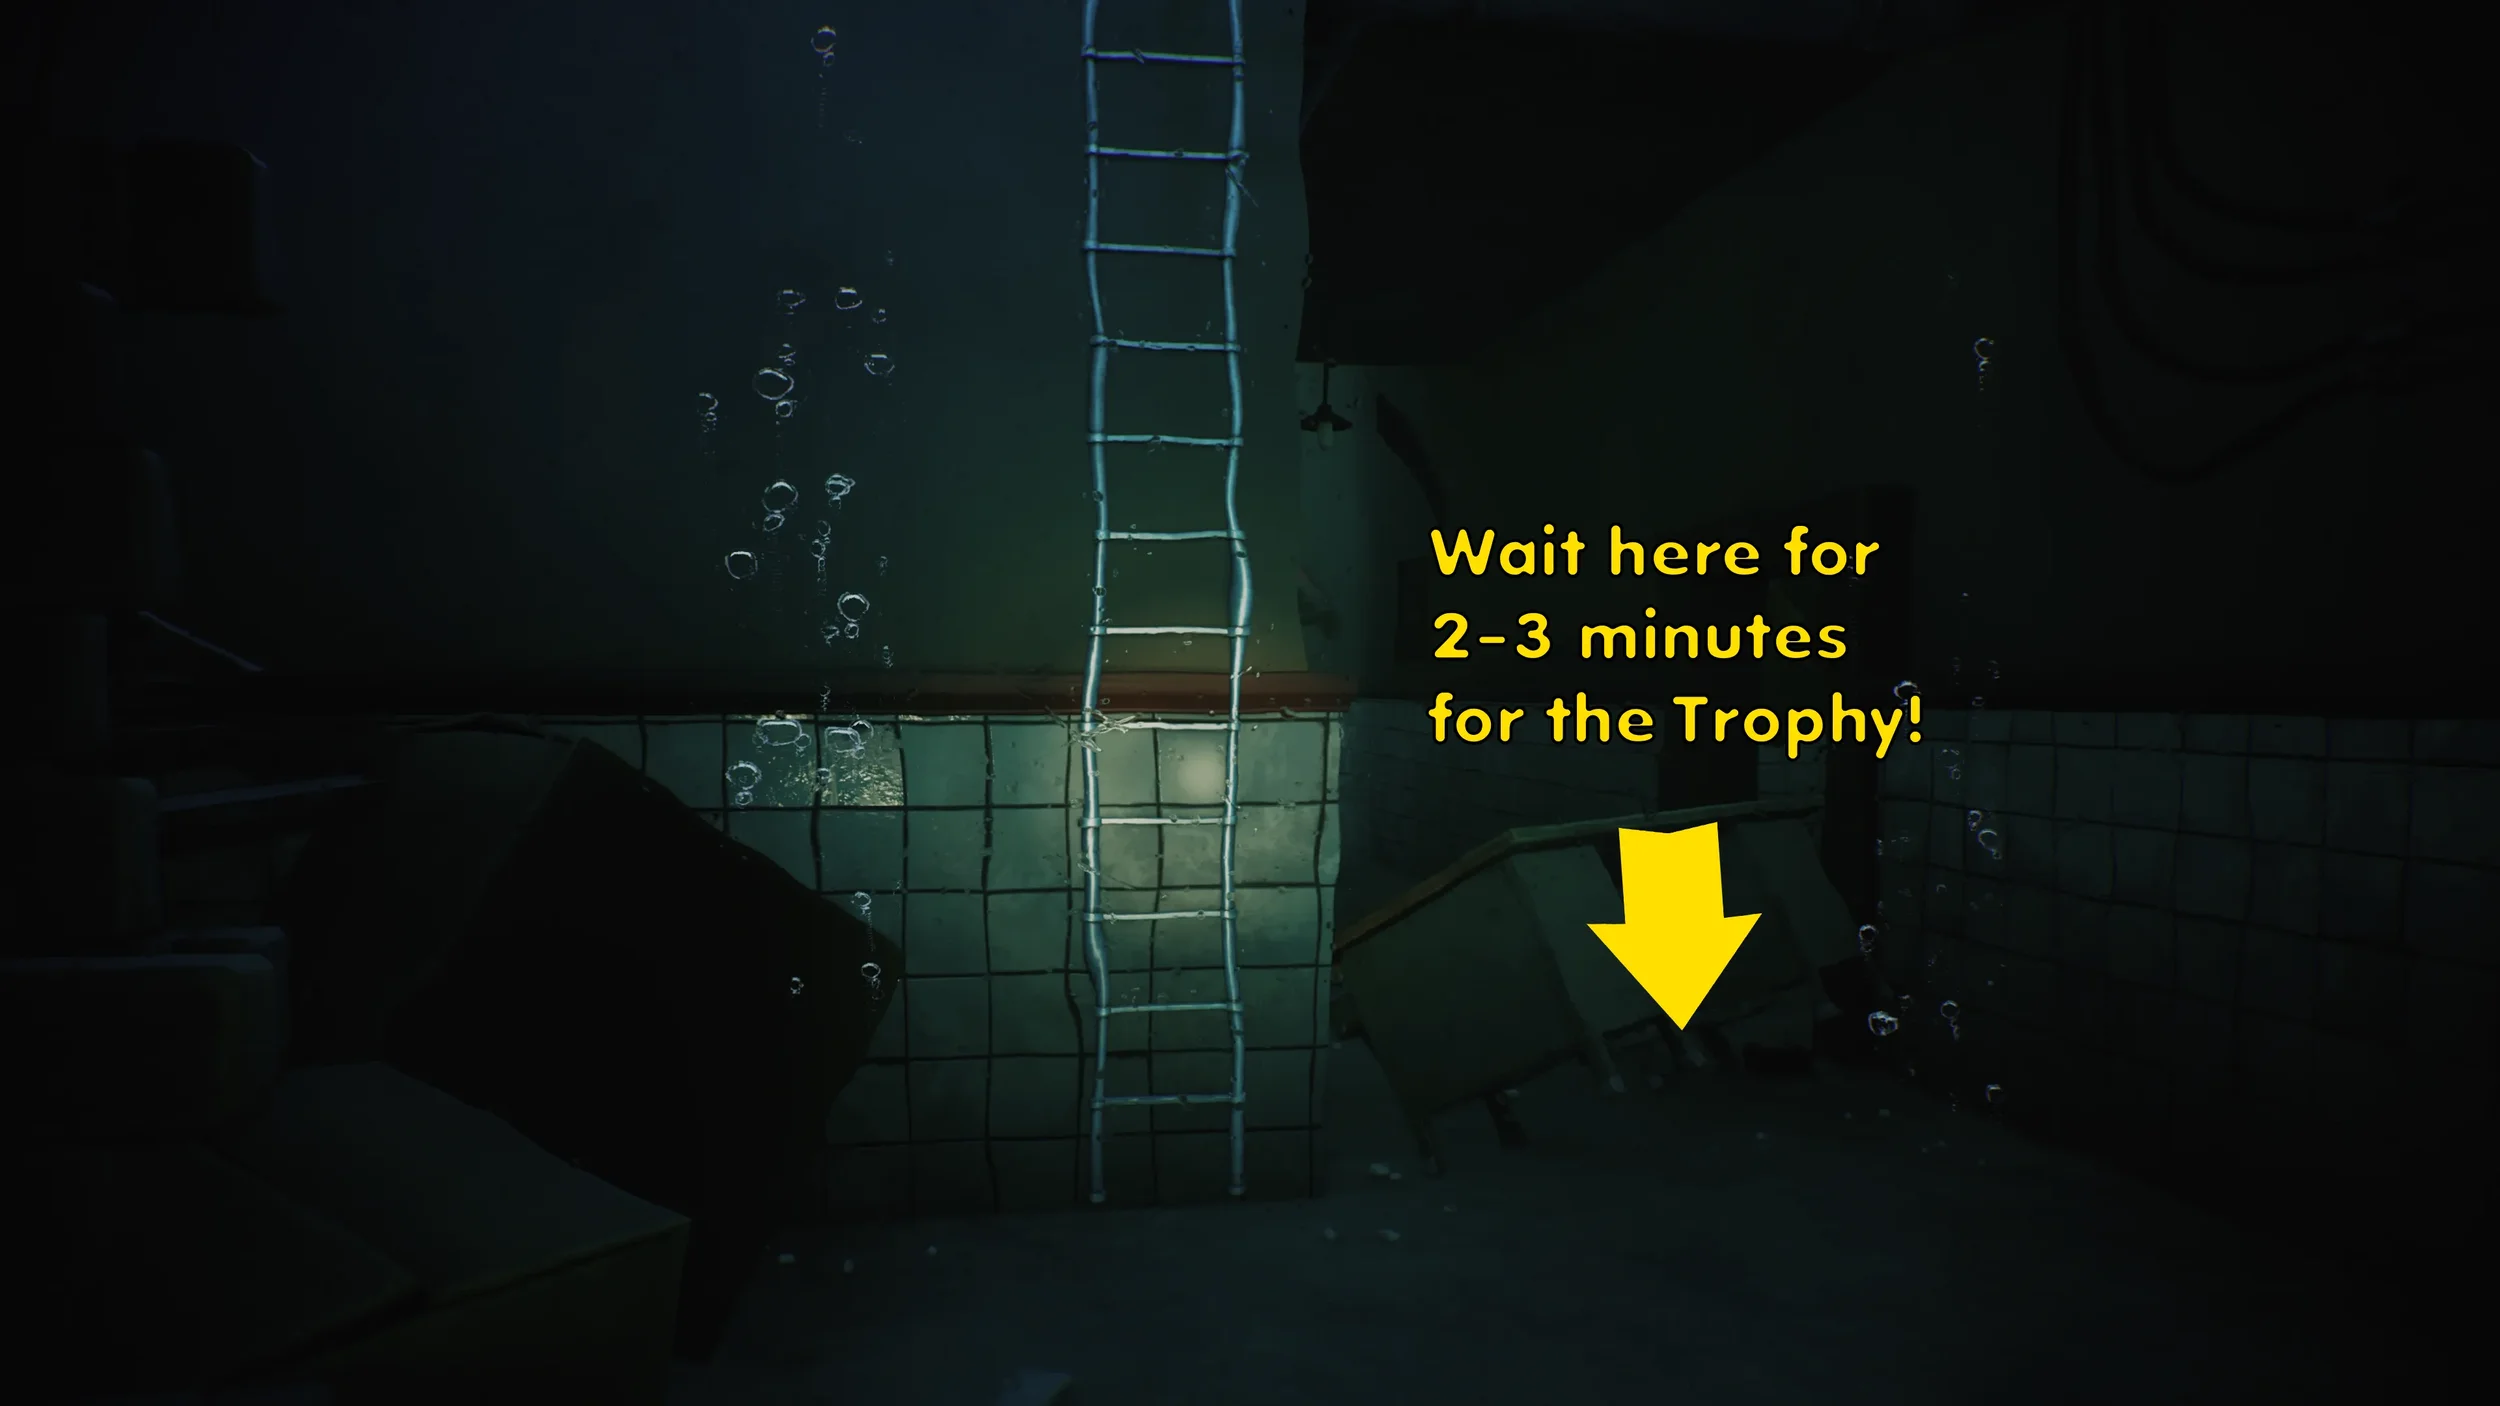
I Can Hold My Breath For Ten Minutes! Trophy
“I Can Hold My Breath For Ten Minutes!” Trophy.
(This will only work if you have advanced far enough in the water so that the Professor says something along the lines of “I can hold my breath for 10 more minutes”, if you wait near the start of the water section it won’t work).
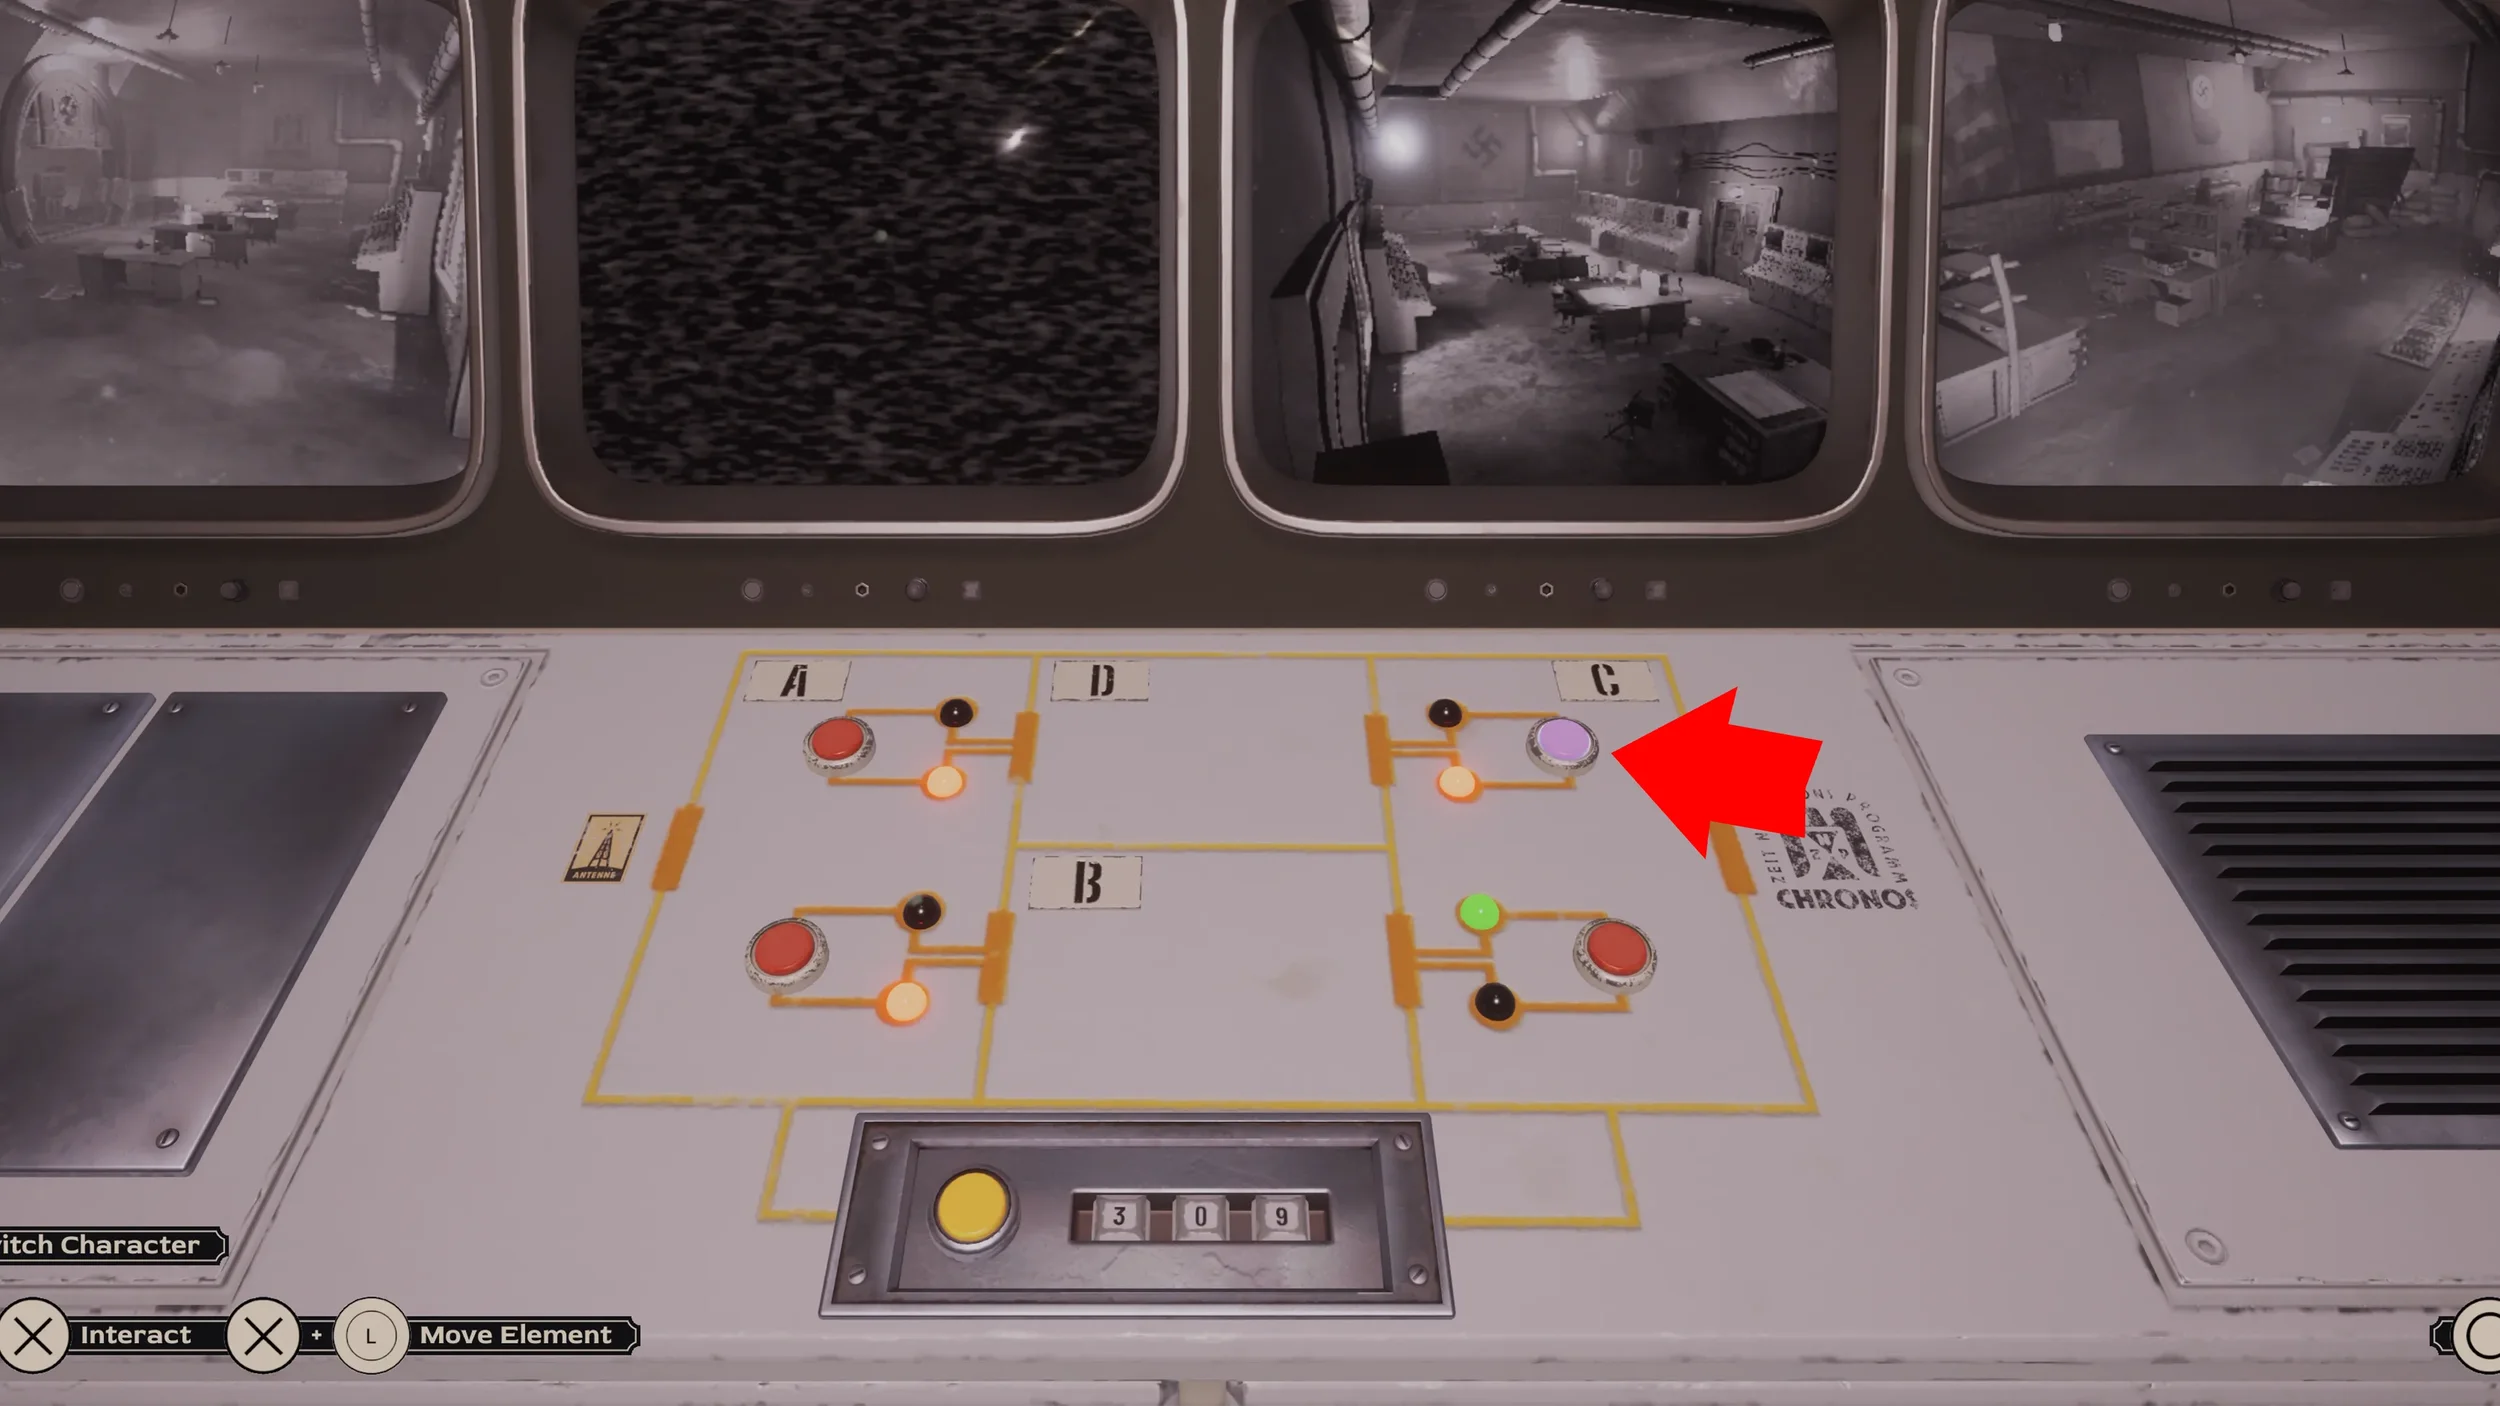
Smoke Monster Rooms Puzzle
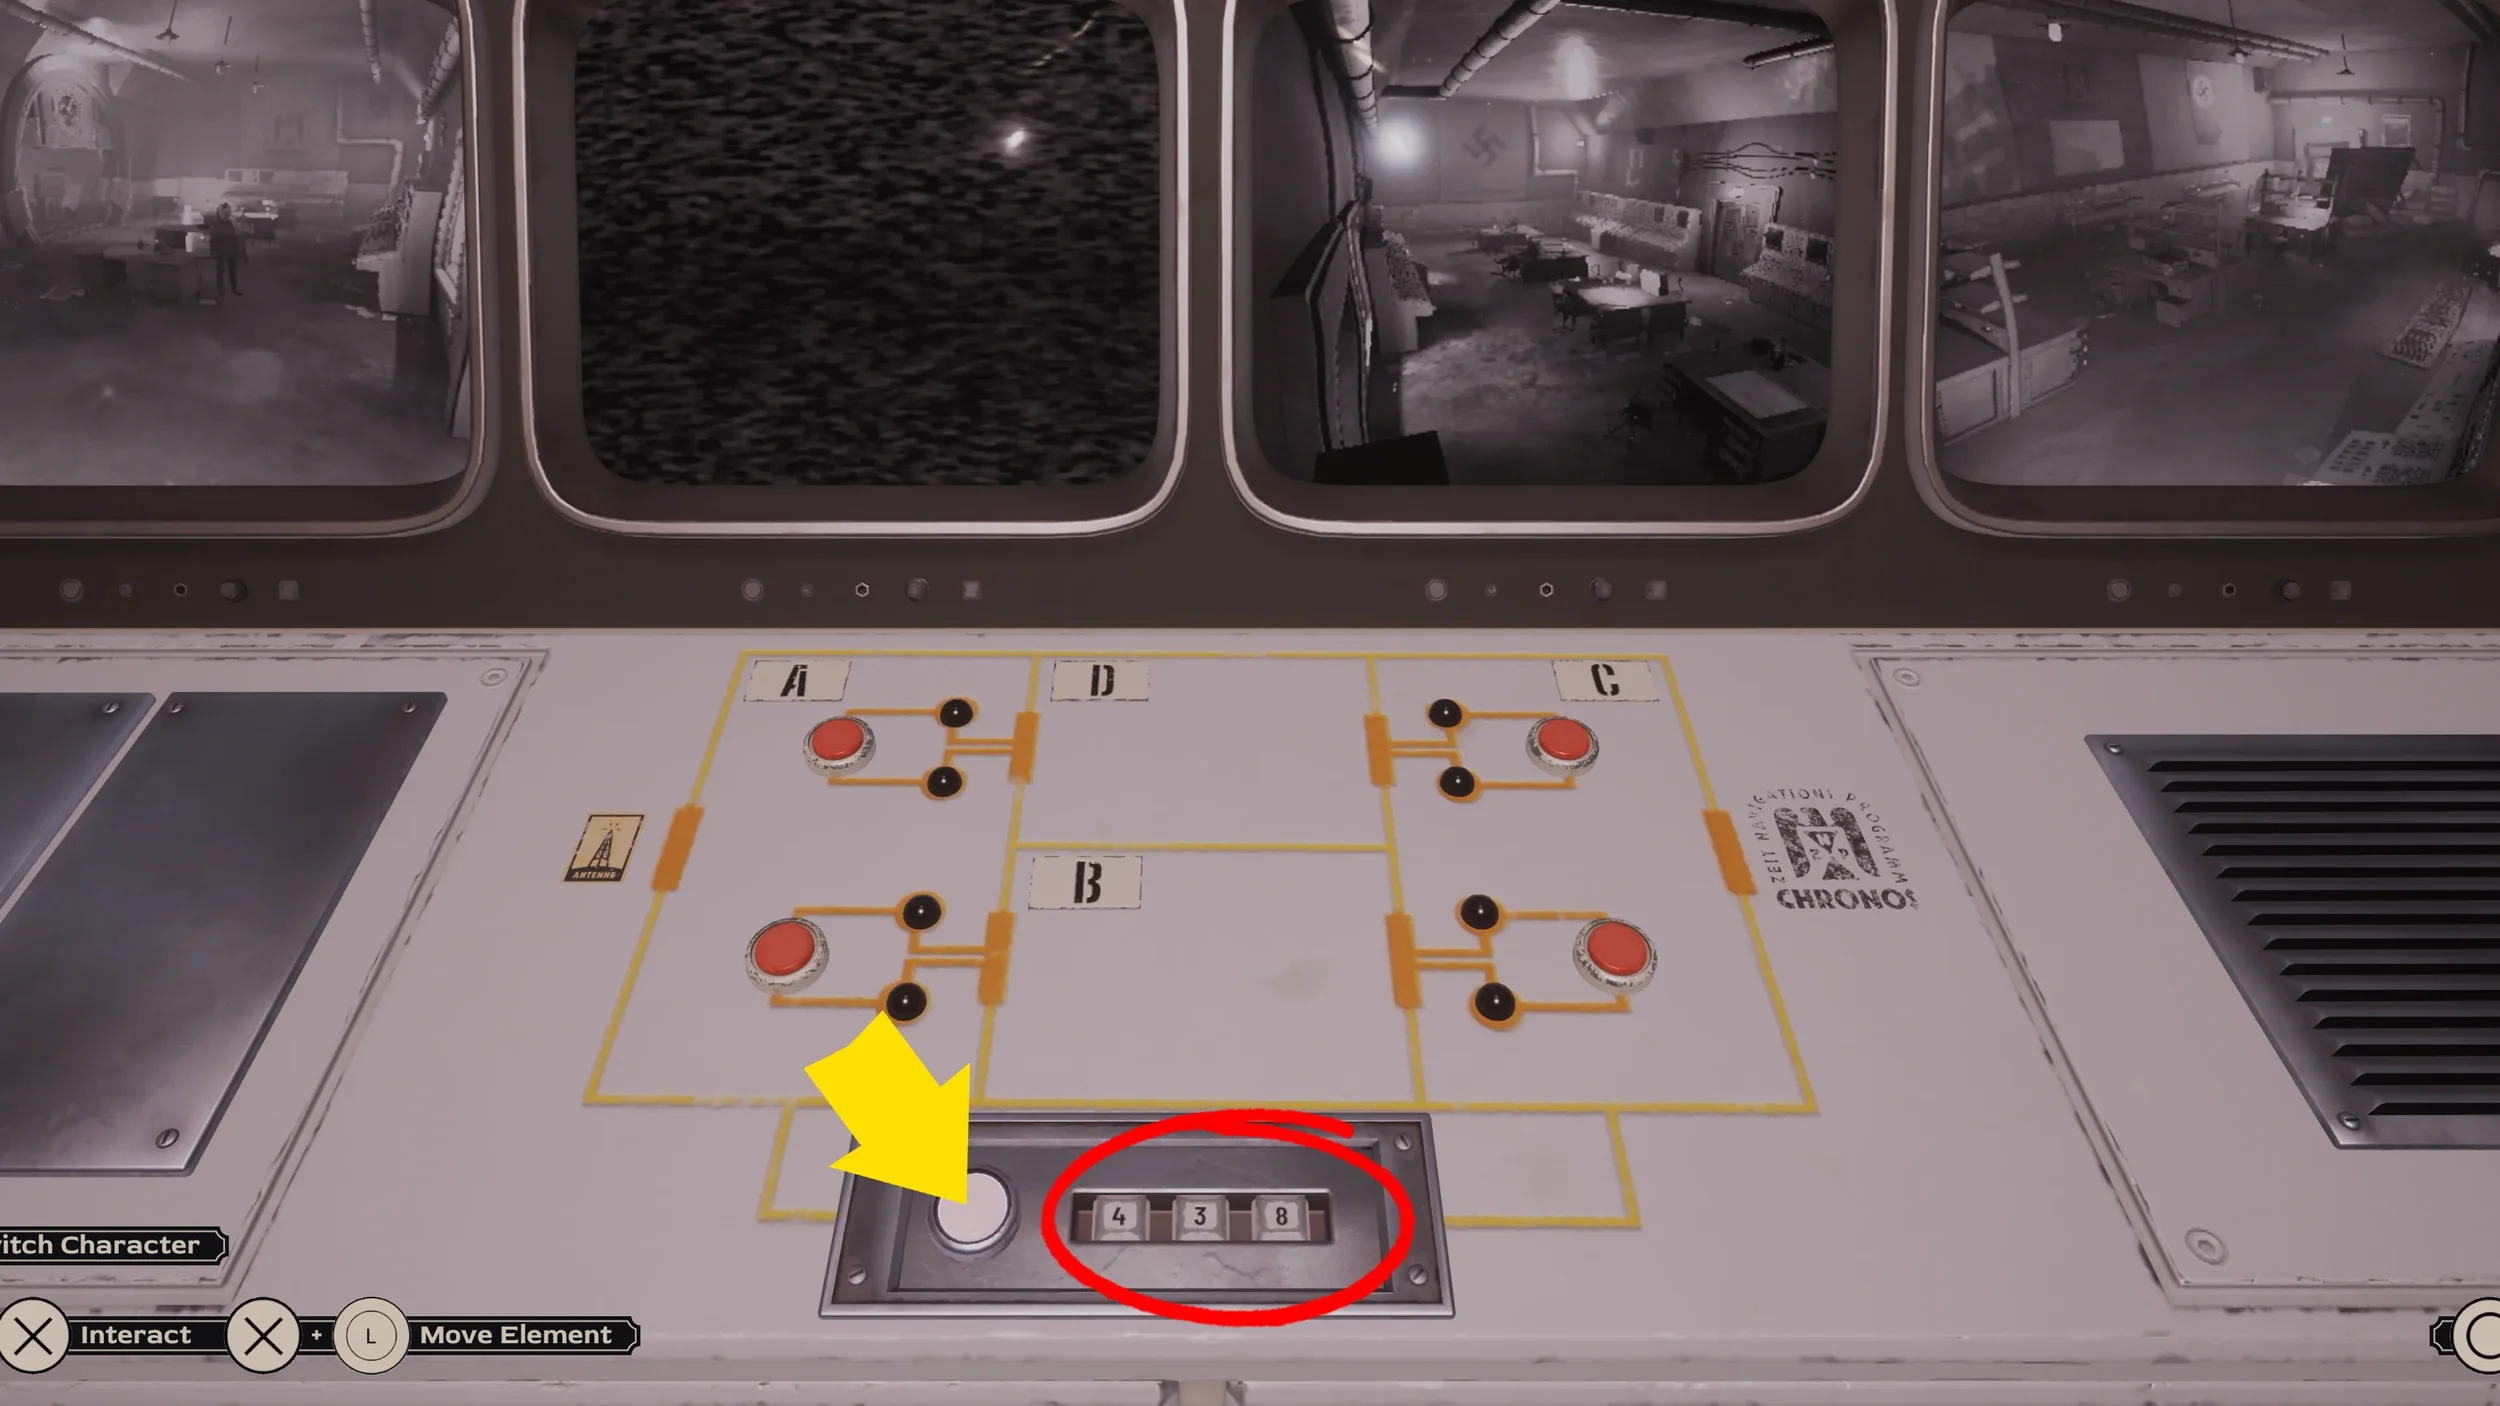
Once you go up the ladder you will be in the Control Room, from here we can control what doors we want to open, the objective of the puzzle is to open the correct doors to allow Eva to reach the other side while making sure the she is never in the same room as the Smoke Monster.
The Smoke Monster will always move through the latest door you open (assuming the door is connected to the room it is currently in).
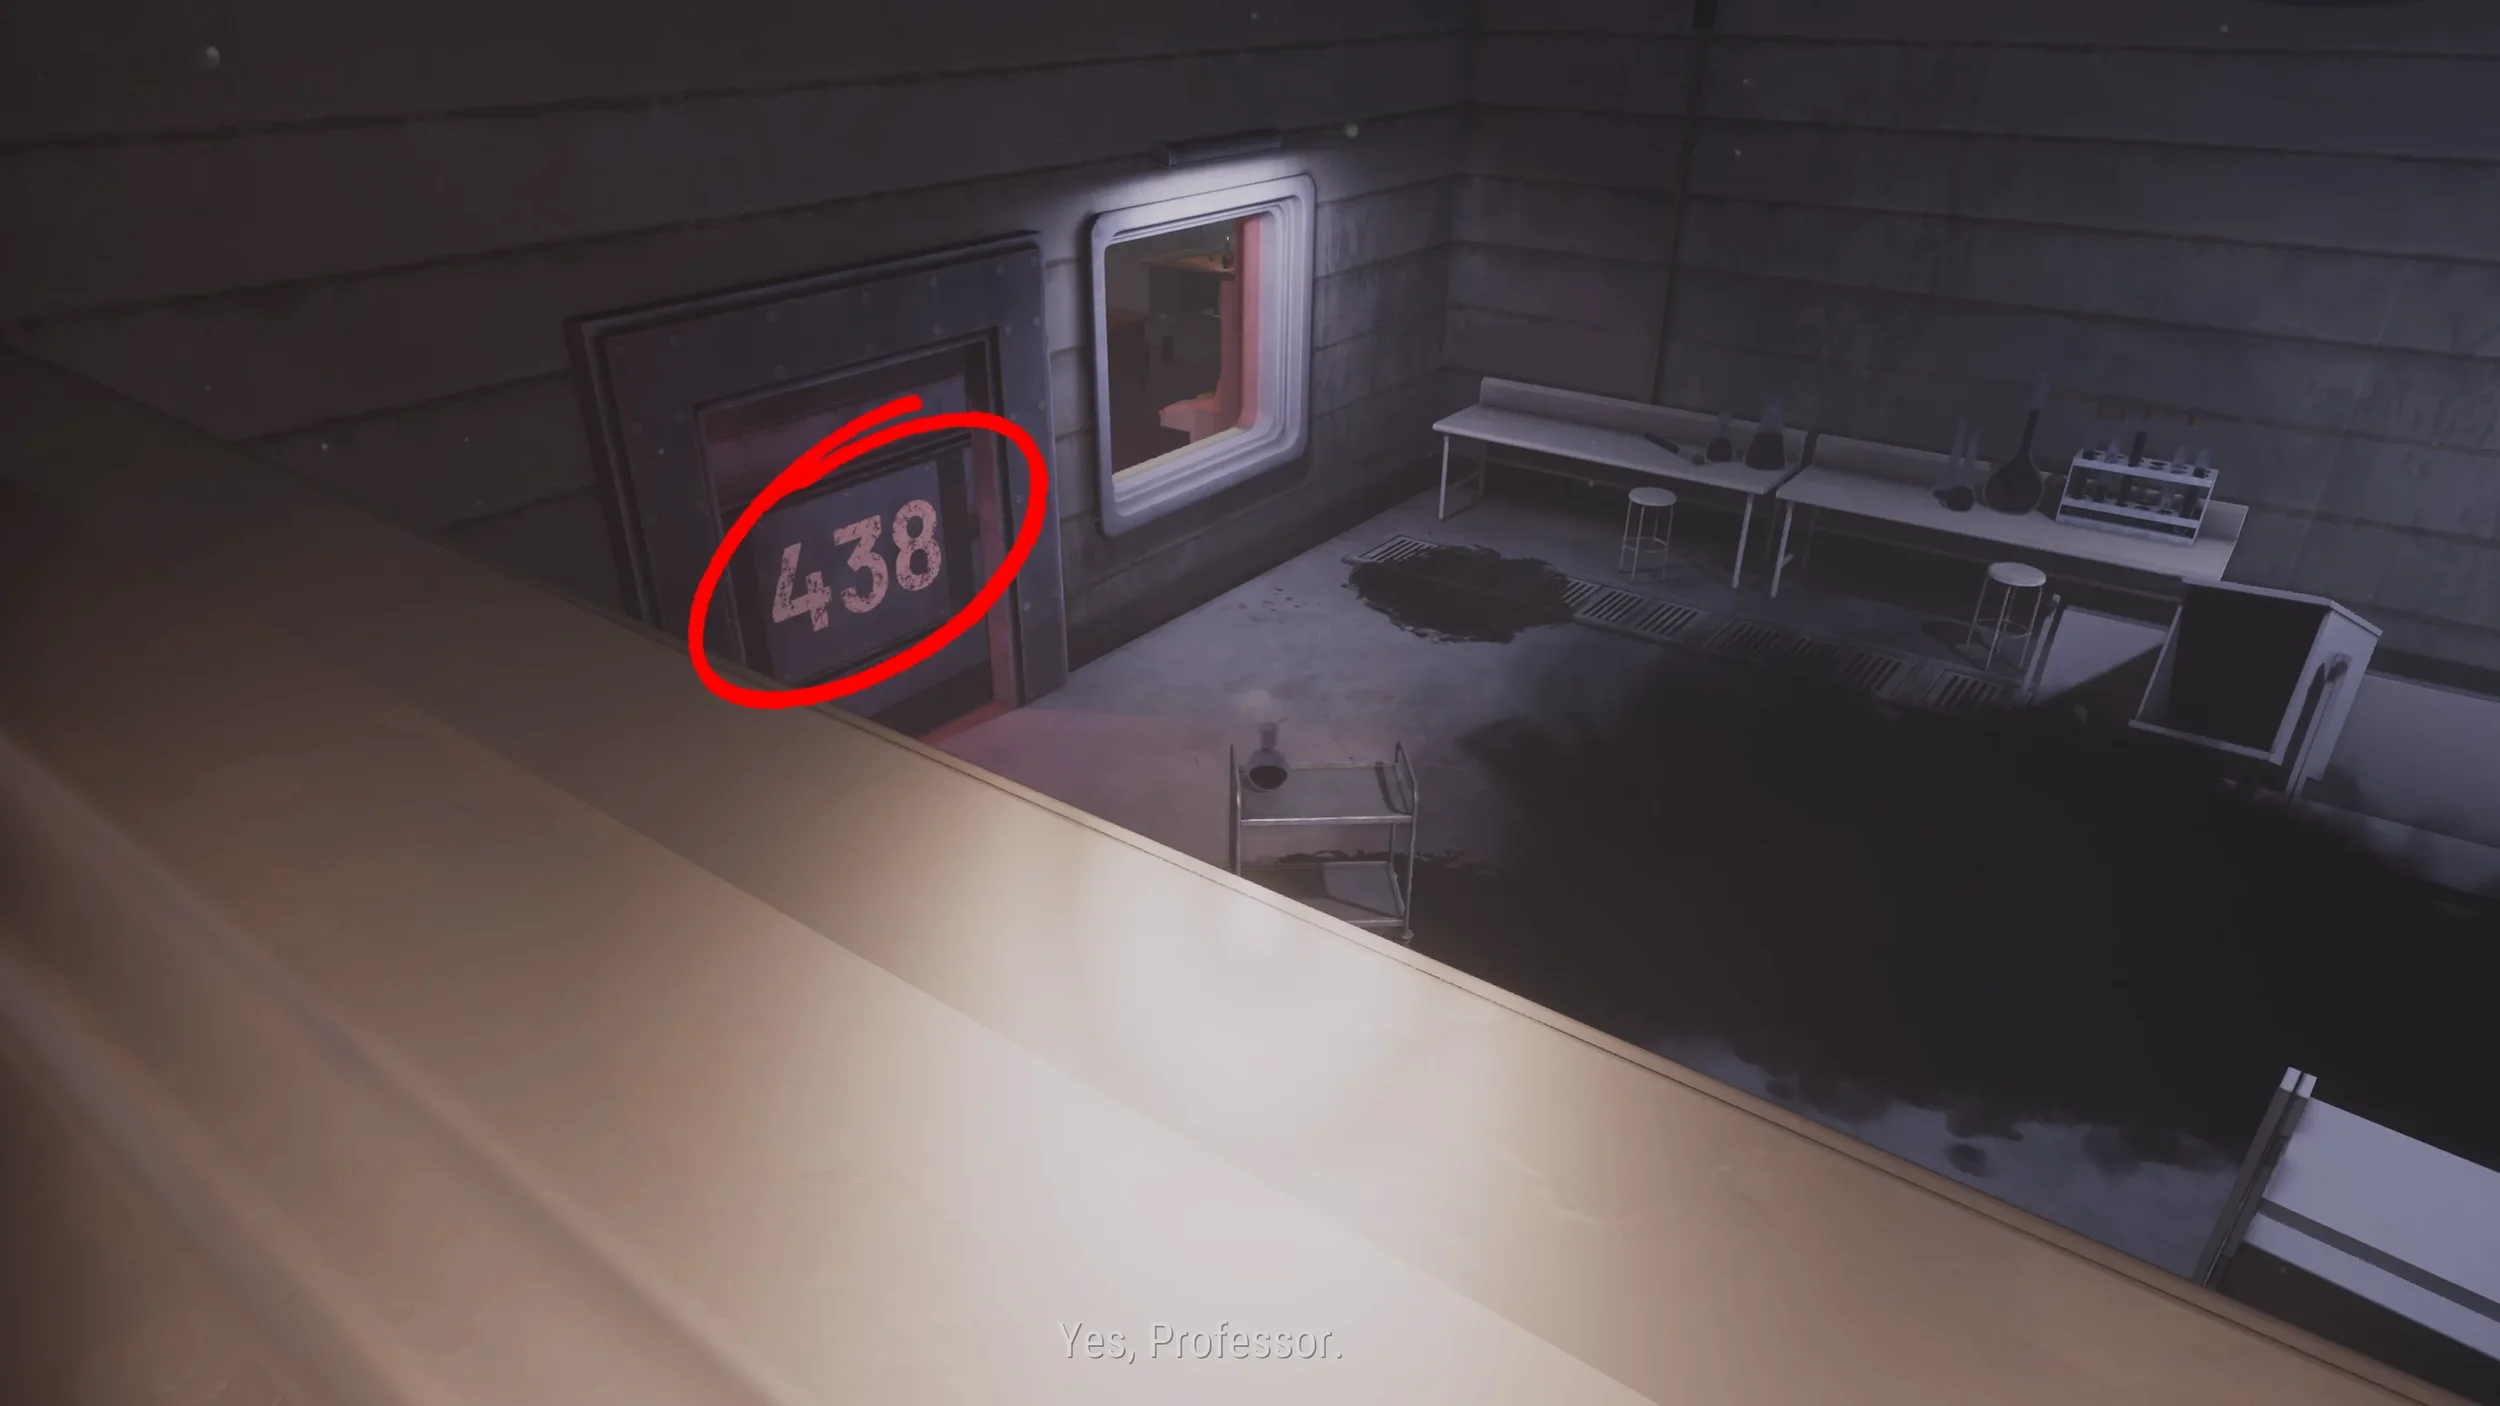
To open each door we will first need to learn the code to each one. The code to the 1st door can be seen by looking down to the left through the glass from the Control Room with the Professor (438).
Input this code into the Control Panel and then press the Yellow Button to unlock this door (it is now unlocked but DON’T open it as this would allow the Smoke Monster to reach Eva).
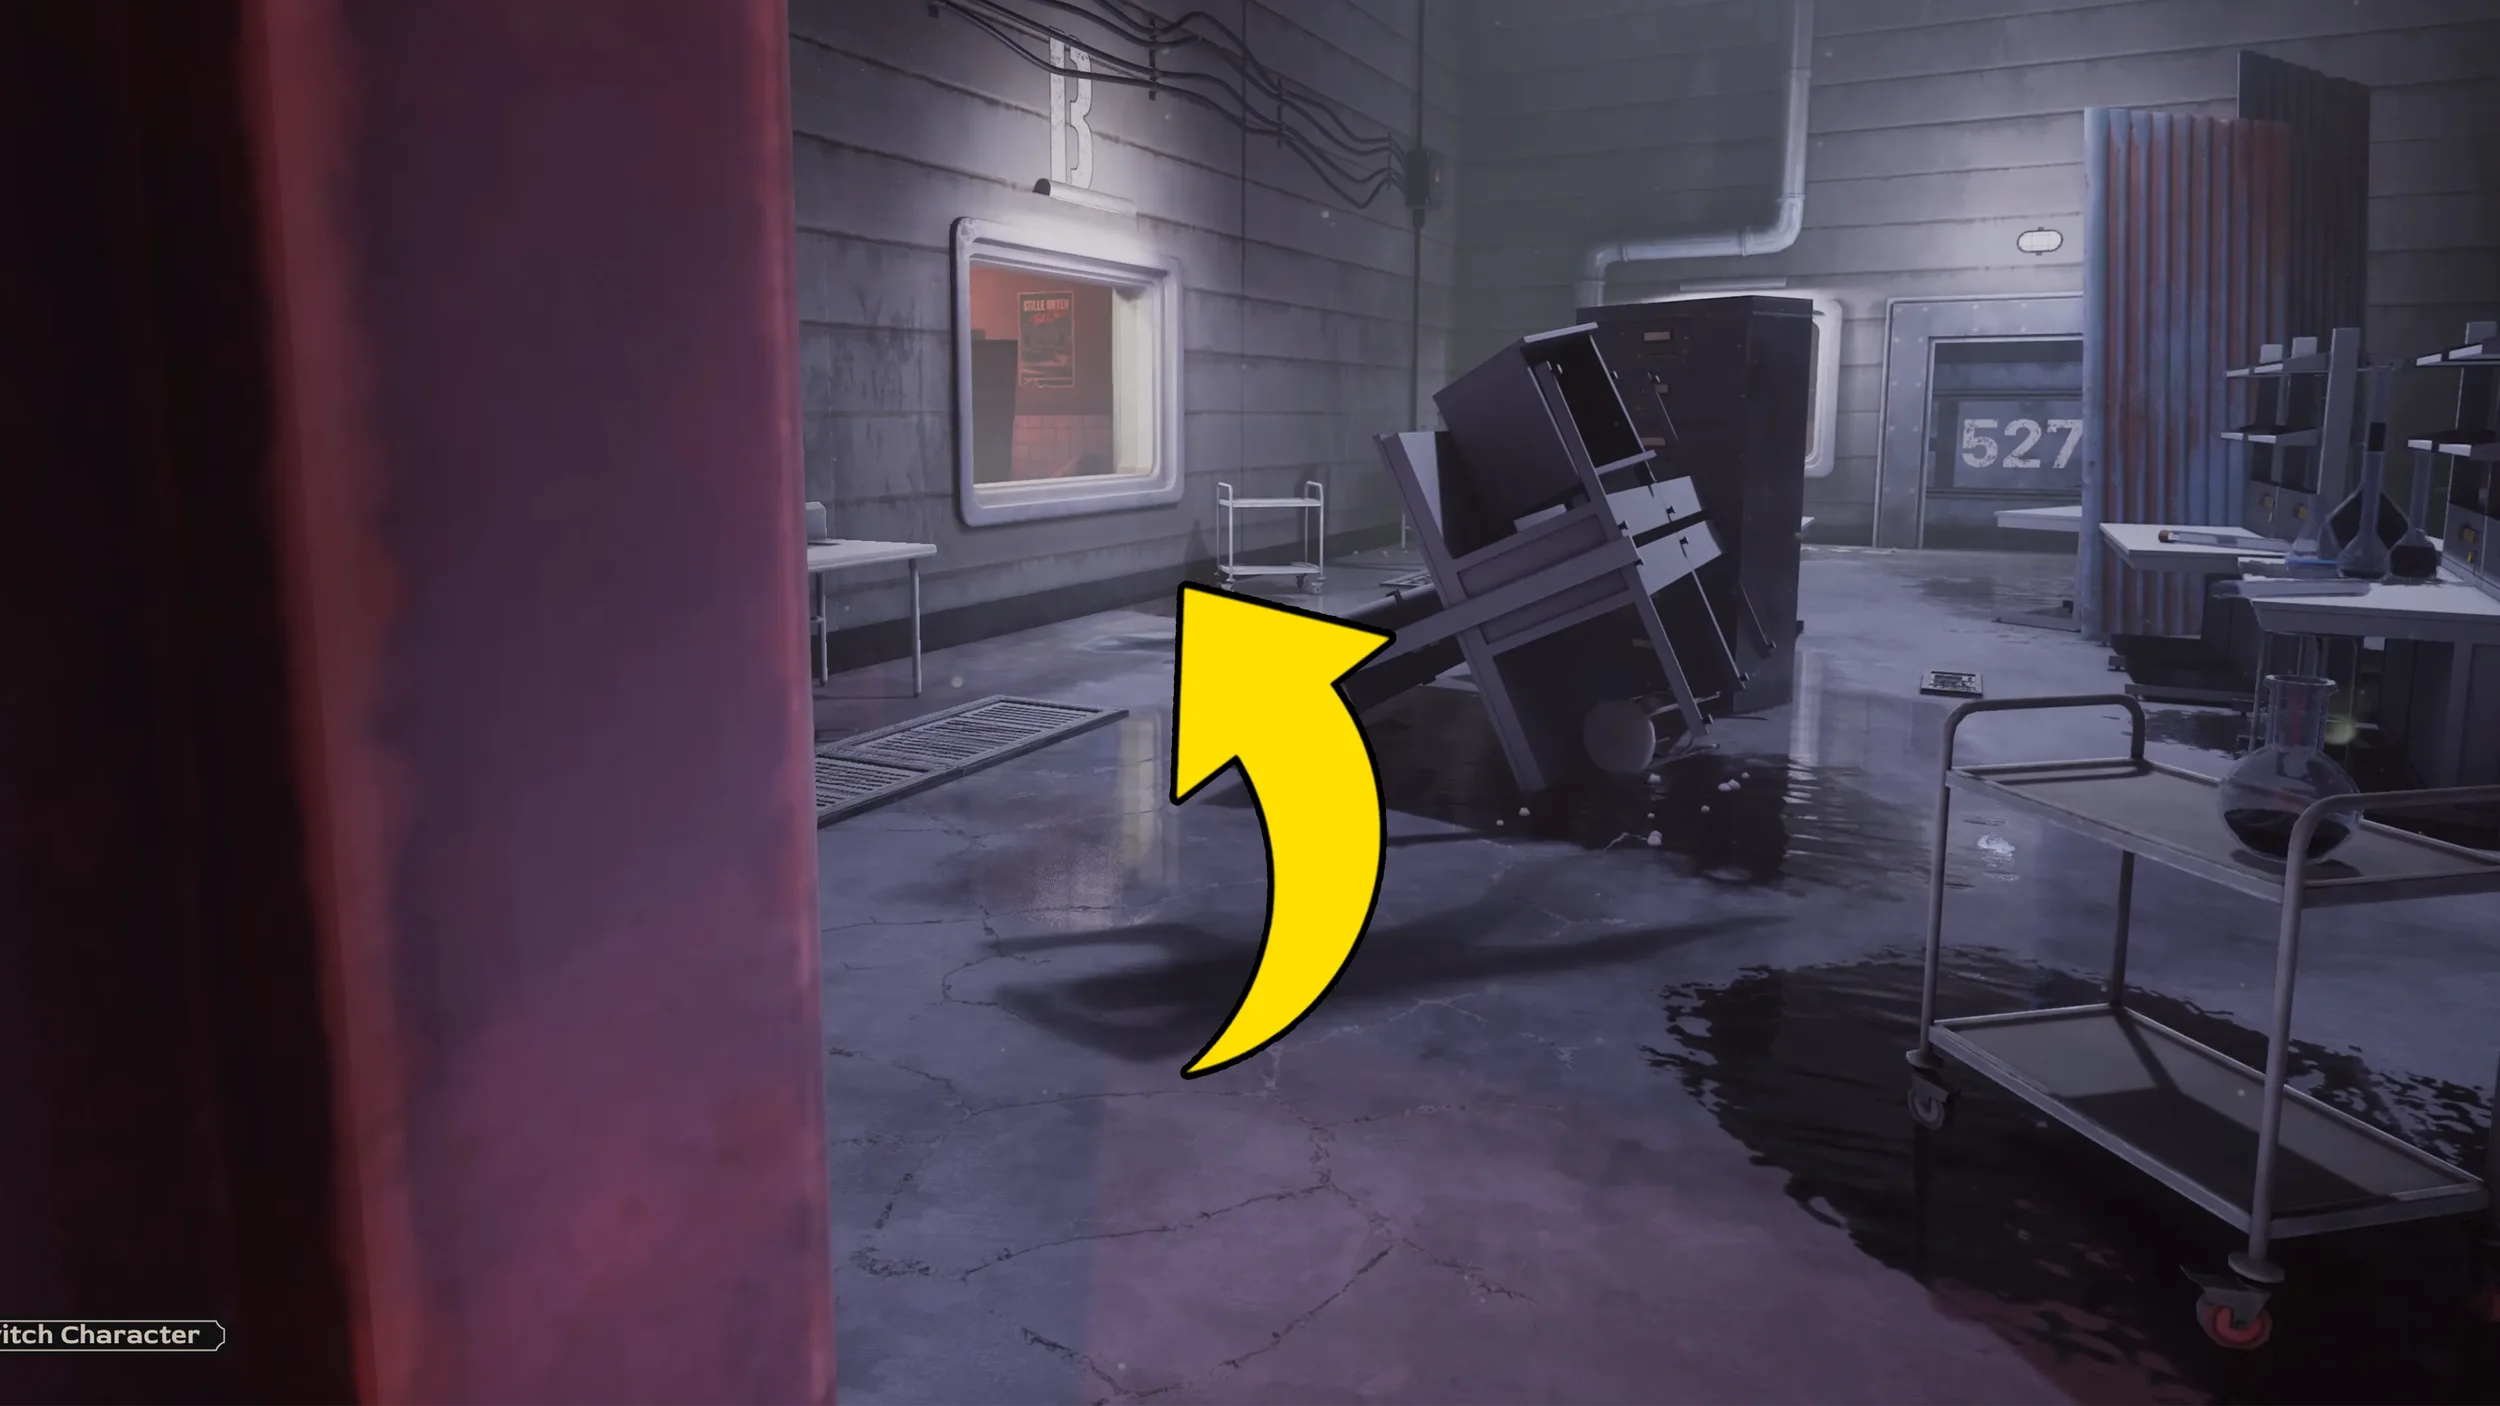
Now look down to the right through the glass as the Professor to see the 1st digit (5) of this doors number, then press R1 to switch to Eva, while controlling Eva look through the glass to see the 2nd and 3rd digits (27) of the door’s number.
Switch back to the Professor to input this number (527) into the Control Panel and press the Yellow Button to unlock the 2nd door.
We now need to open the door we just unlocked by pressing the Bottom Right Red Button, this will force the Smoke Monster into Room C.
Now press the Bottom Left Red Button to open the 1st door we unlocked.
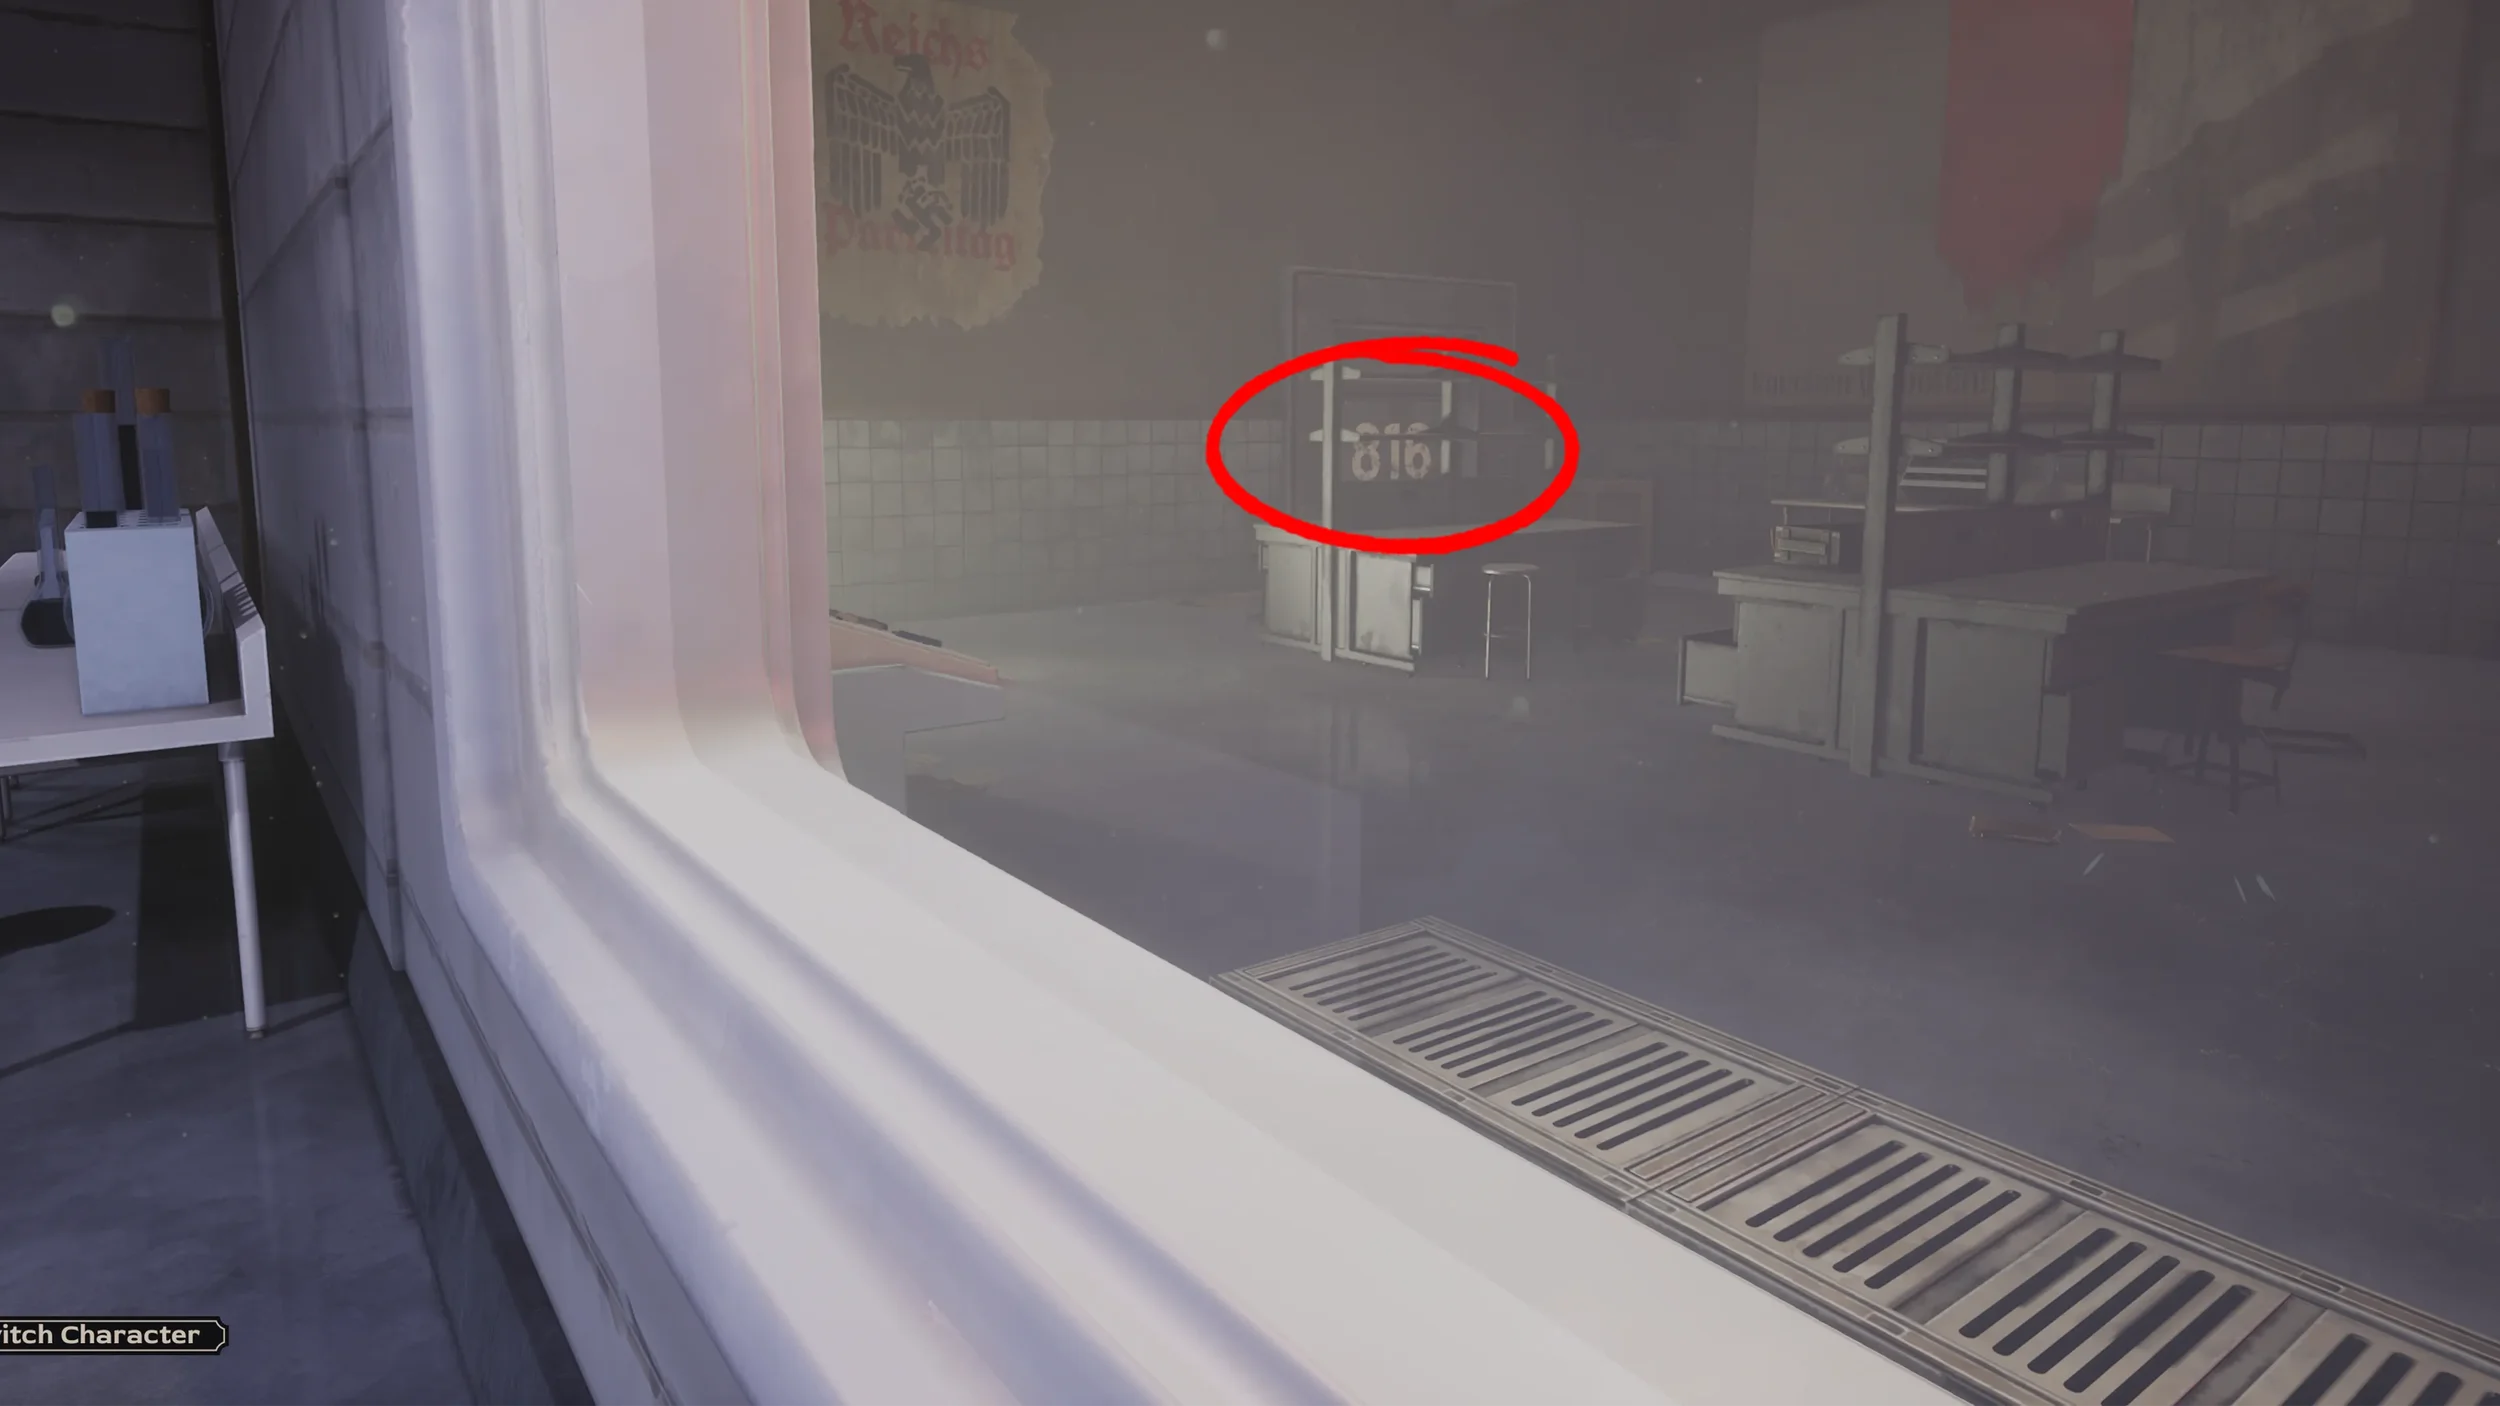
Now switch back to Eva, she will now safely be able to walk into Room B, look through the glass on the left side of Room B to see the code for the 3rd door (816).
Before switching back to the Professor make sure you walk Eva back out to the room where she started at as we will be closing the door to Room B.
Switch back to the Professor and input the 3rd door’s code (816) into the Control Panel to unlock it.
After unlocking the 3rd door press the Top Left Red Button to open this new door, switch to Eva and go inside Room D, from in here you will now be able to see the code for the final door (309).

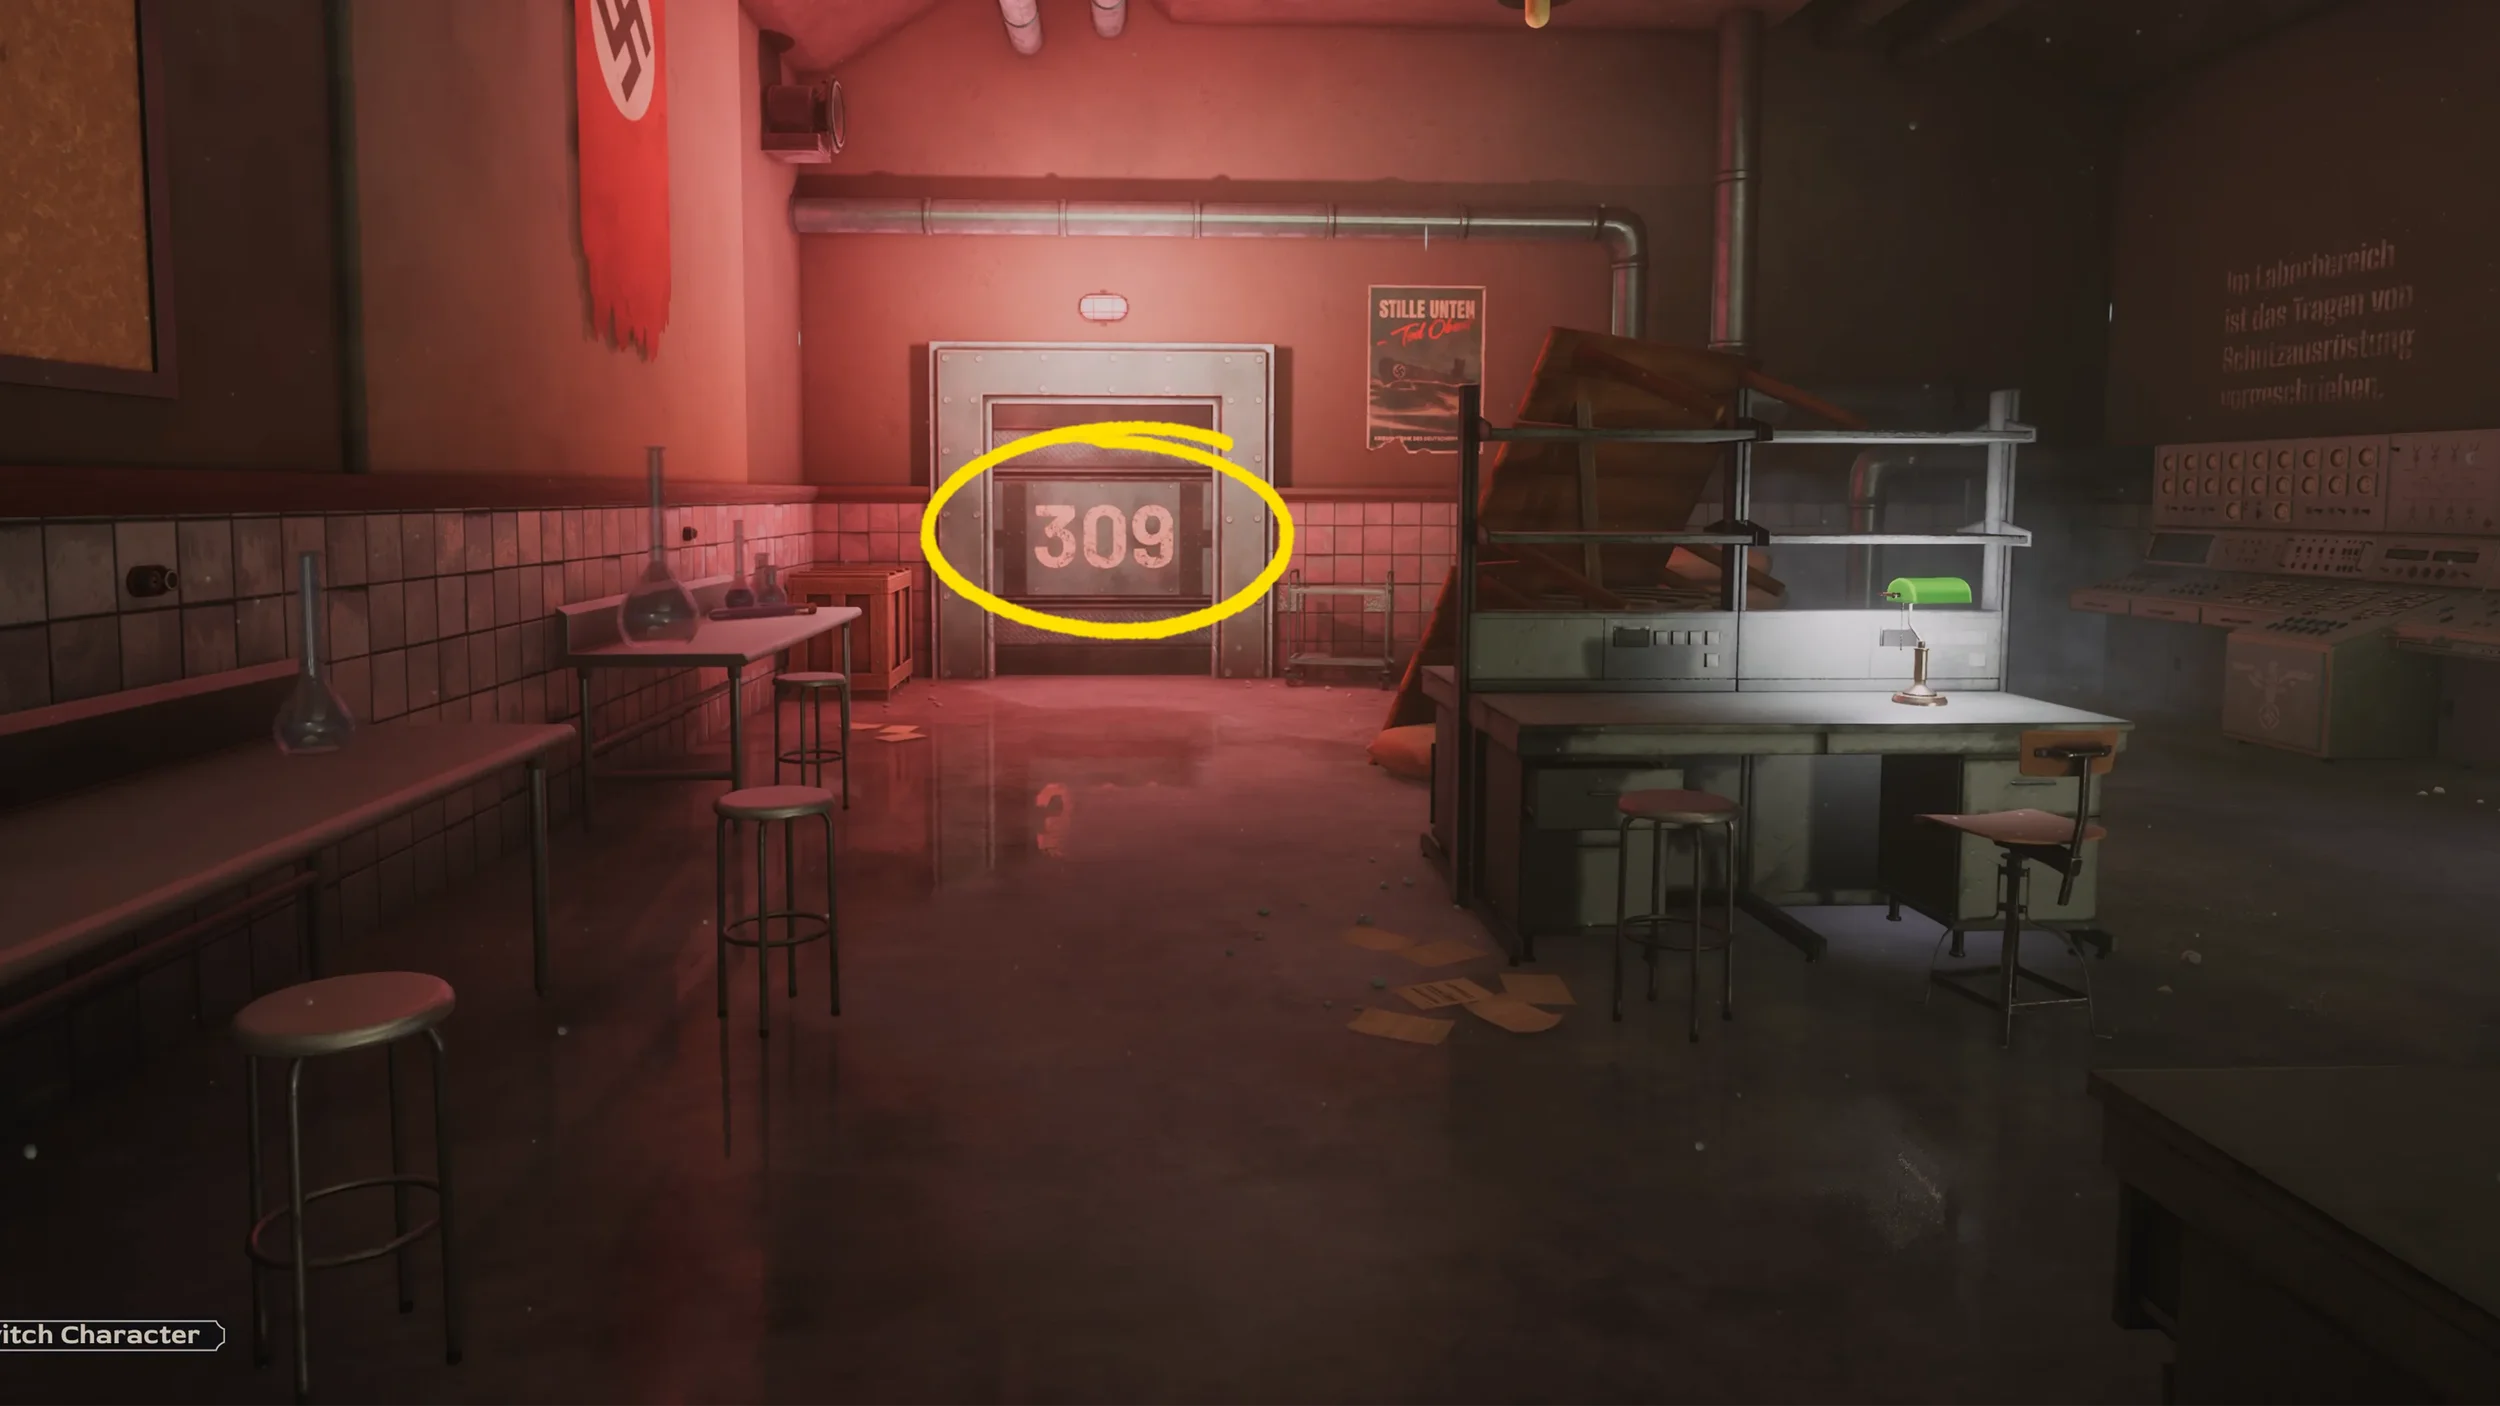
Switch back to the Professor, but before opening this last door make sure to press the Bottom Right Red Button to send the Smoke Monster back into Room B so that when you open the final door Eva and the Smoke Monster don’t end up in the same room.
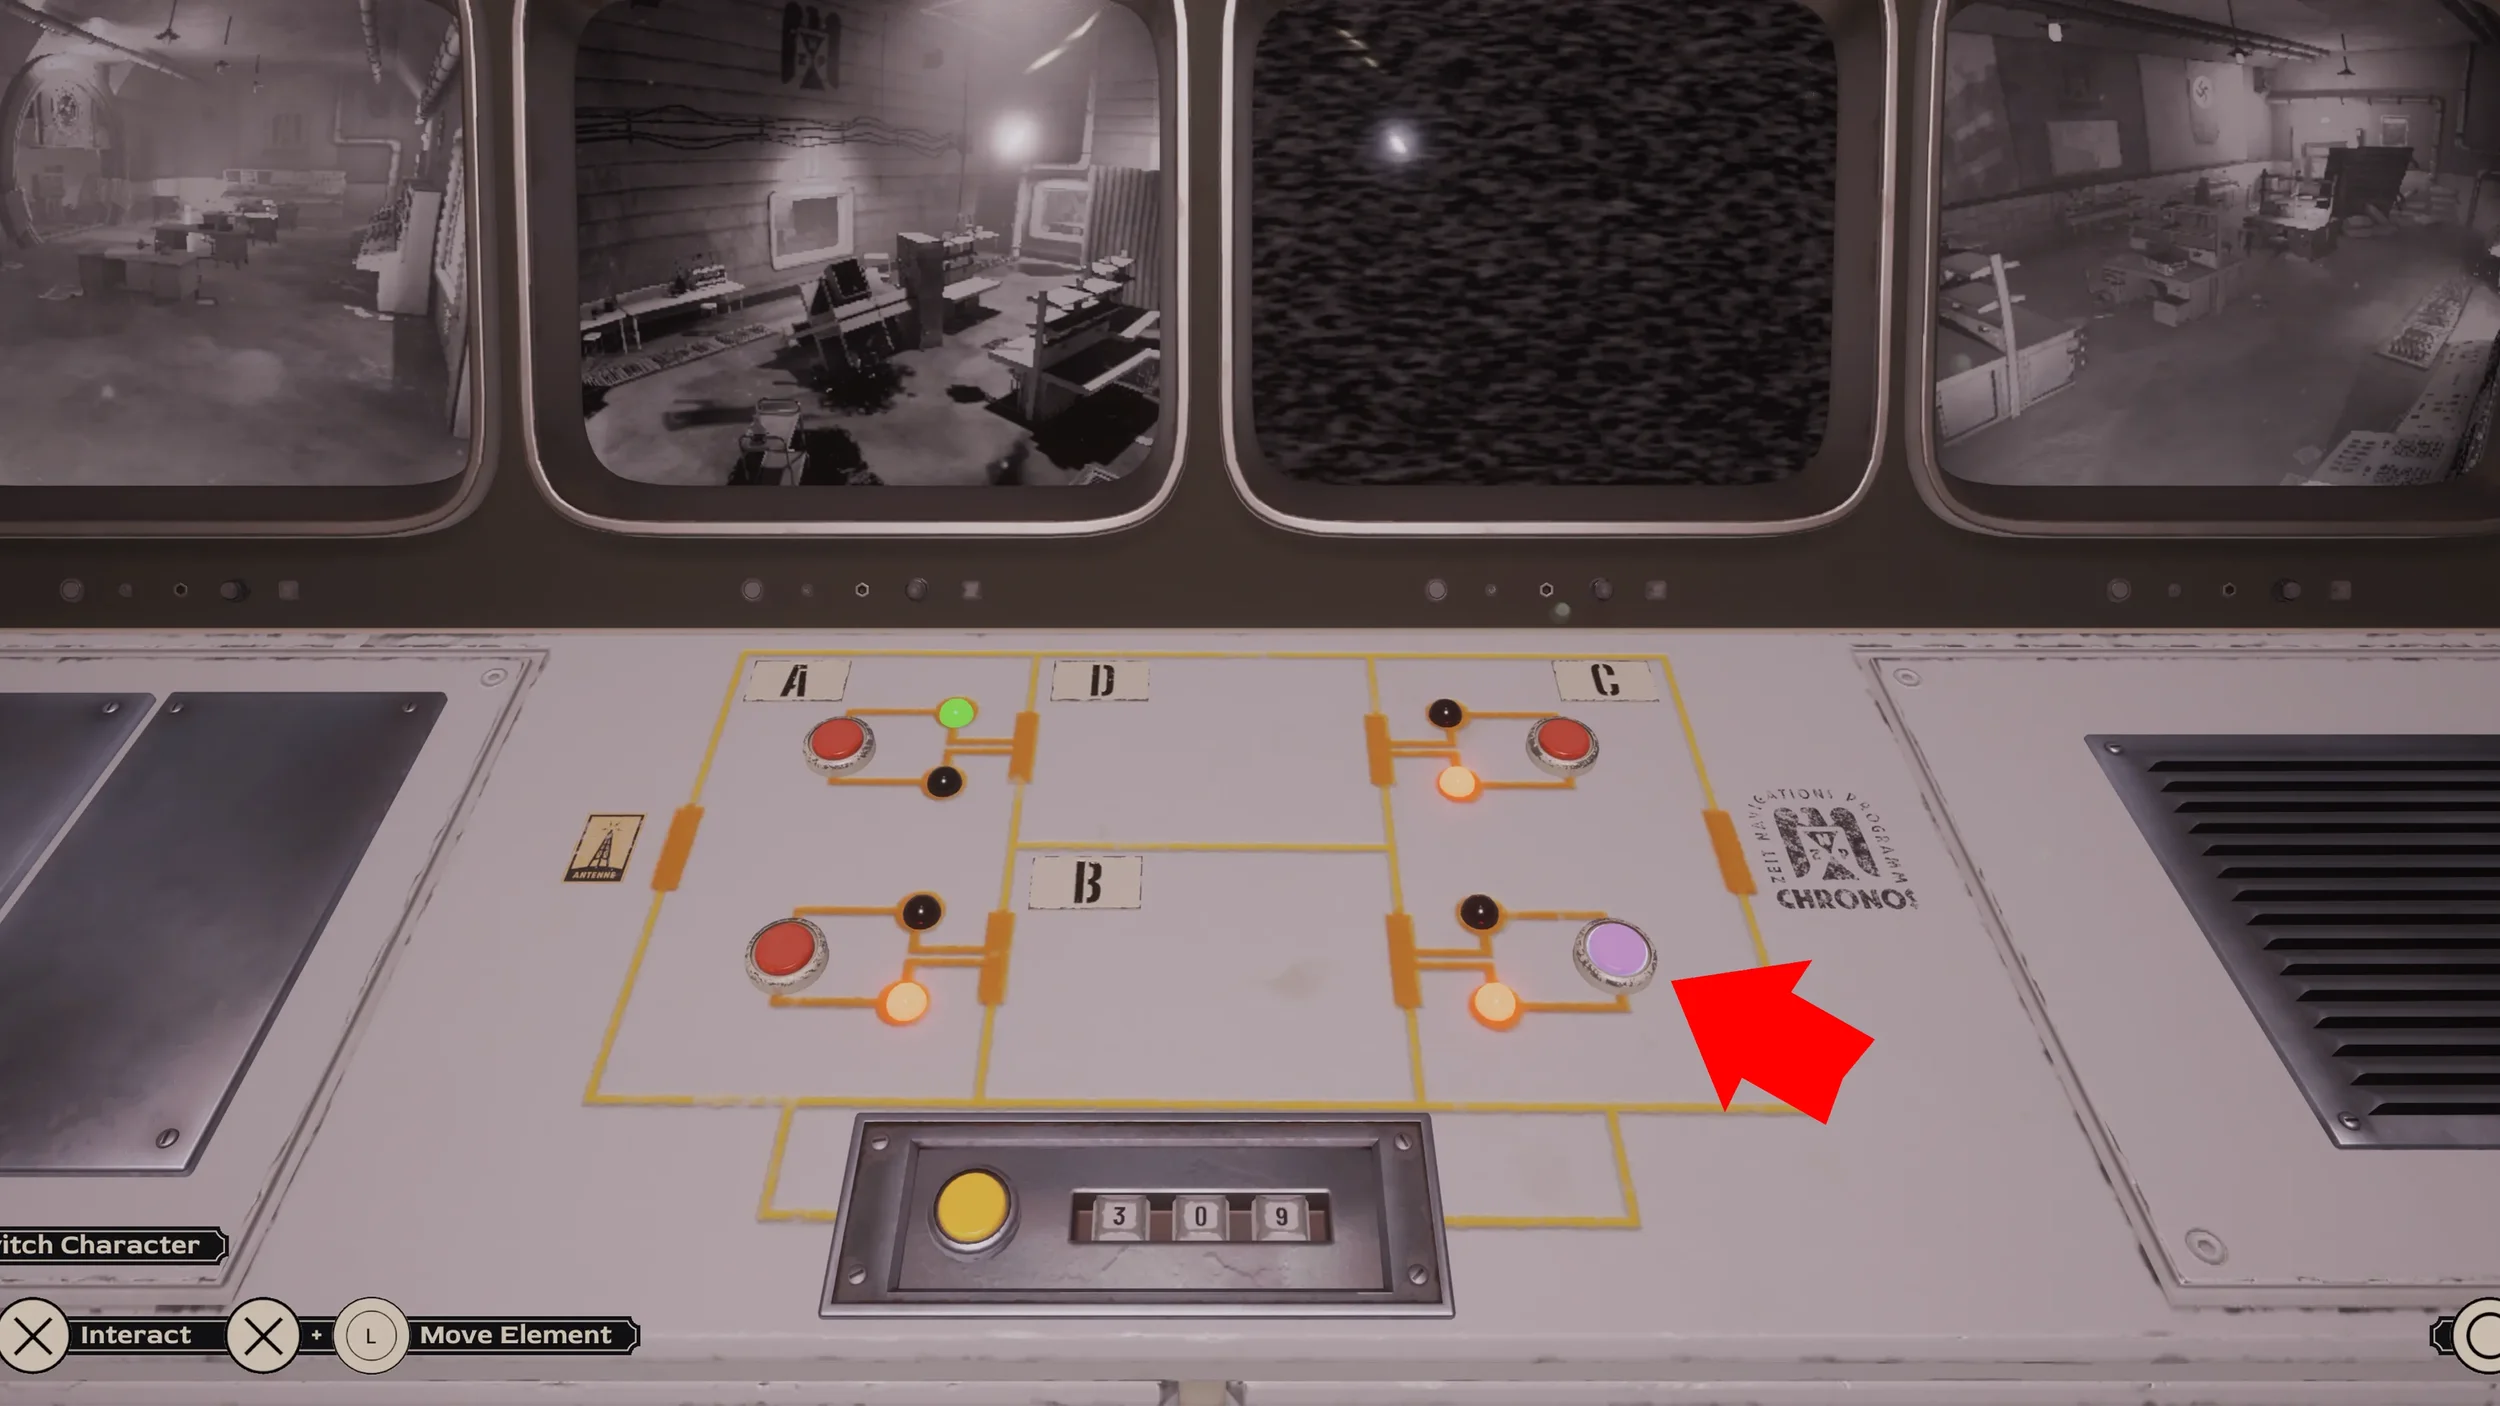
Now that the Smoke Monster is safely in Room B you can insert the final door’s code (309), unlock the door and press the Top Right Red Button to open the final door.
Switch back to Eva one last time, go through the newly opened door to reach Room C, in here interact with the valve at the far end of the room to open the door that allows the Professor to join up with us again.

Now just go through the door to the left of the valve to finish the Chapter.
“Navigation Program” Trophy for completing Chapter 4.
Chapter 3 ⮨ ➥ Chapter 5