
Call of The Elder Gods 100% Walkthrough - Chapter 1

You will begin Chapter 1 just outside of Everhart Manor, there is nothing of interest in this first outdoors area so go ahead and enter the building through the open window.
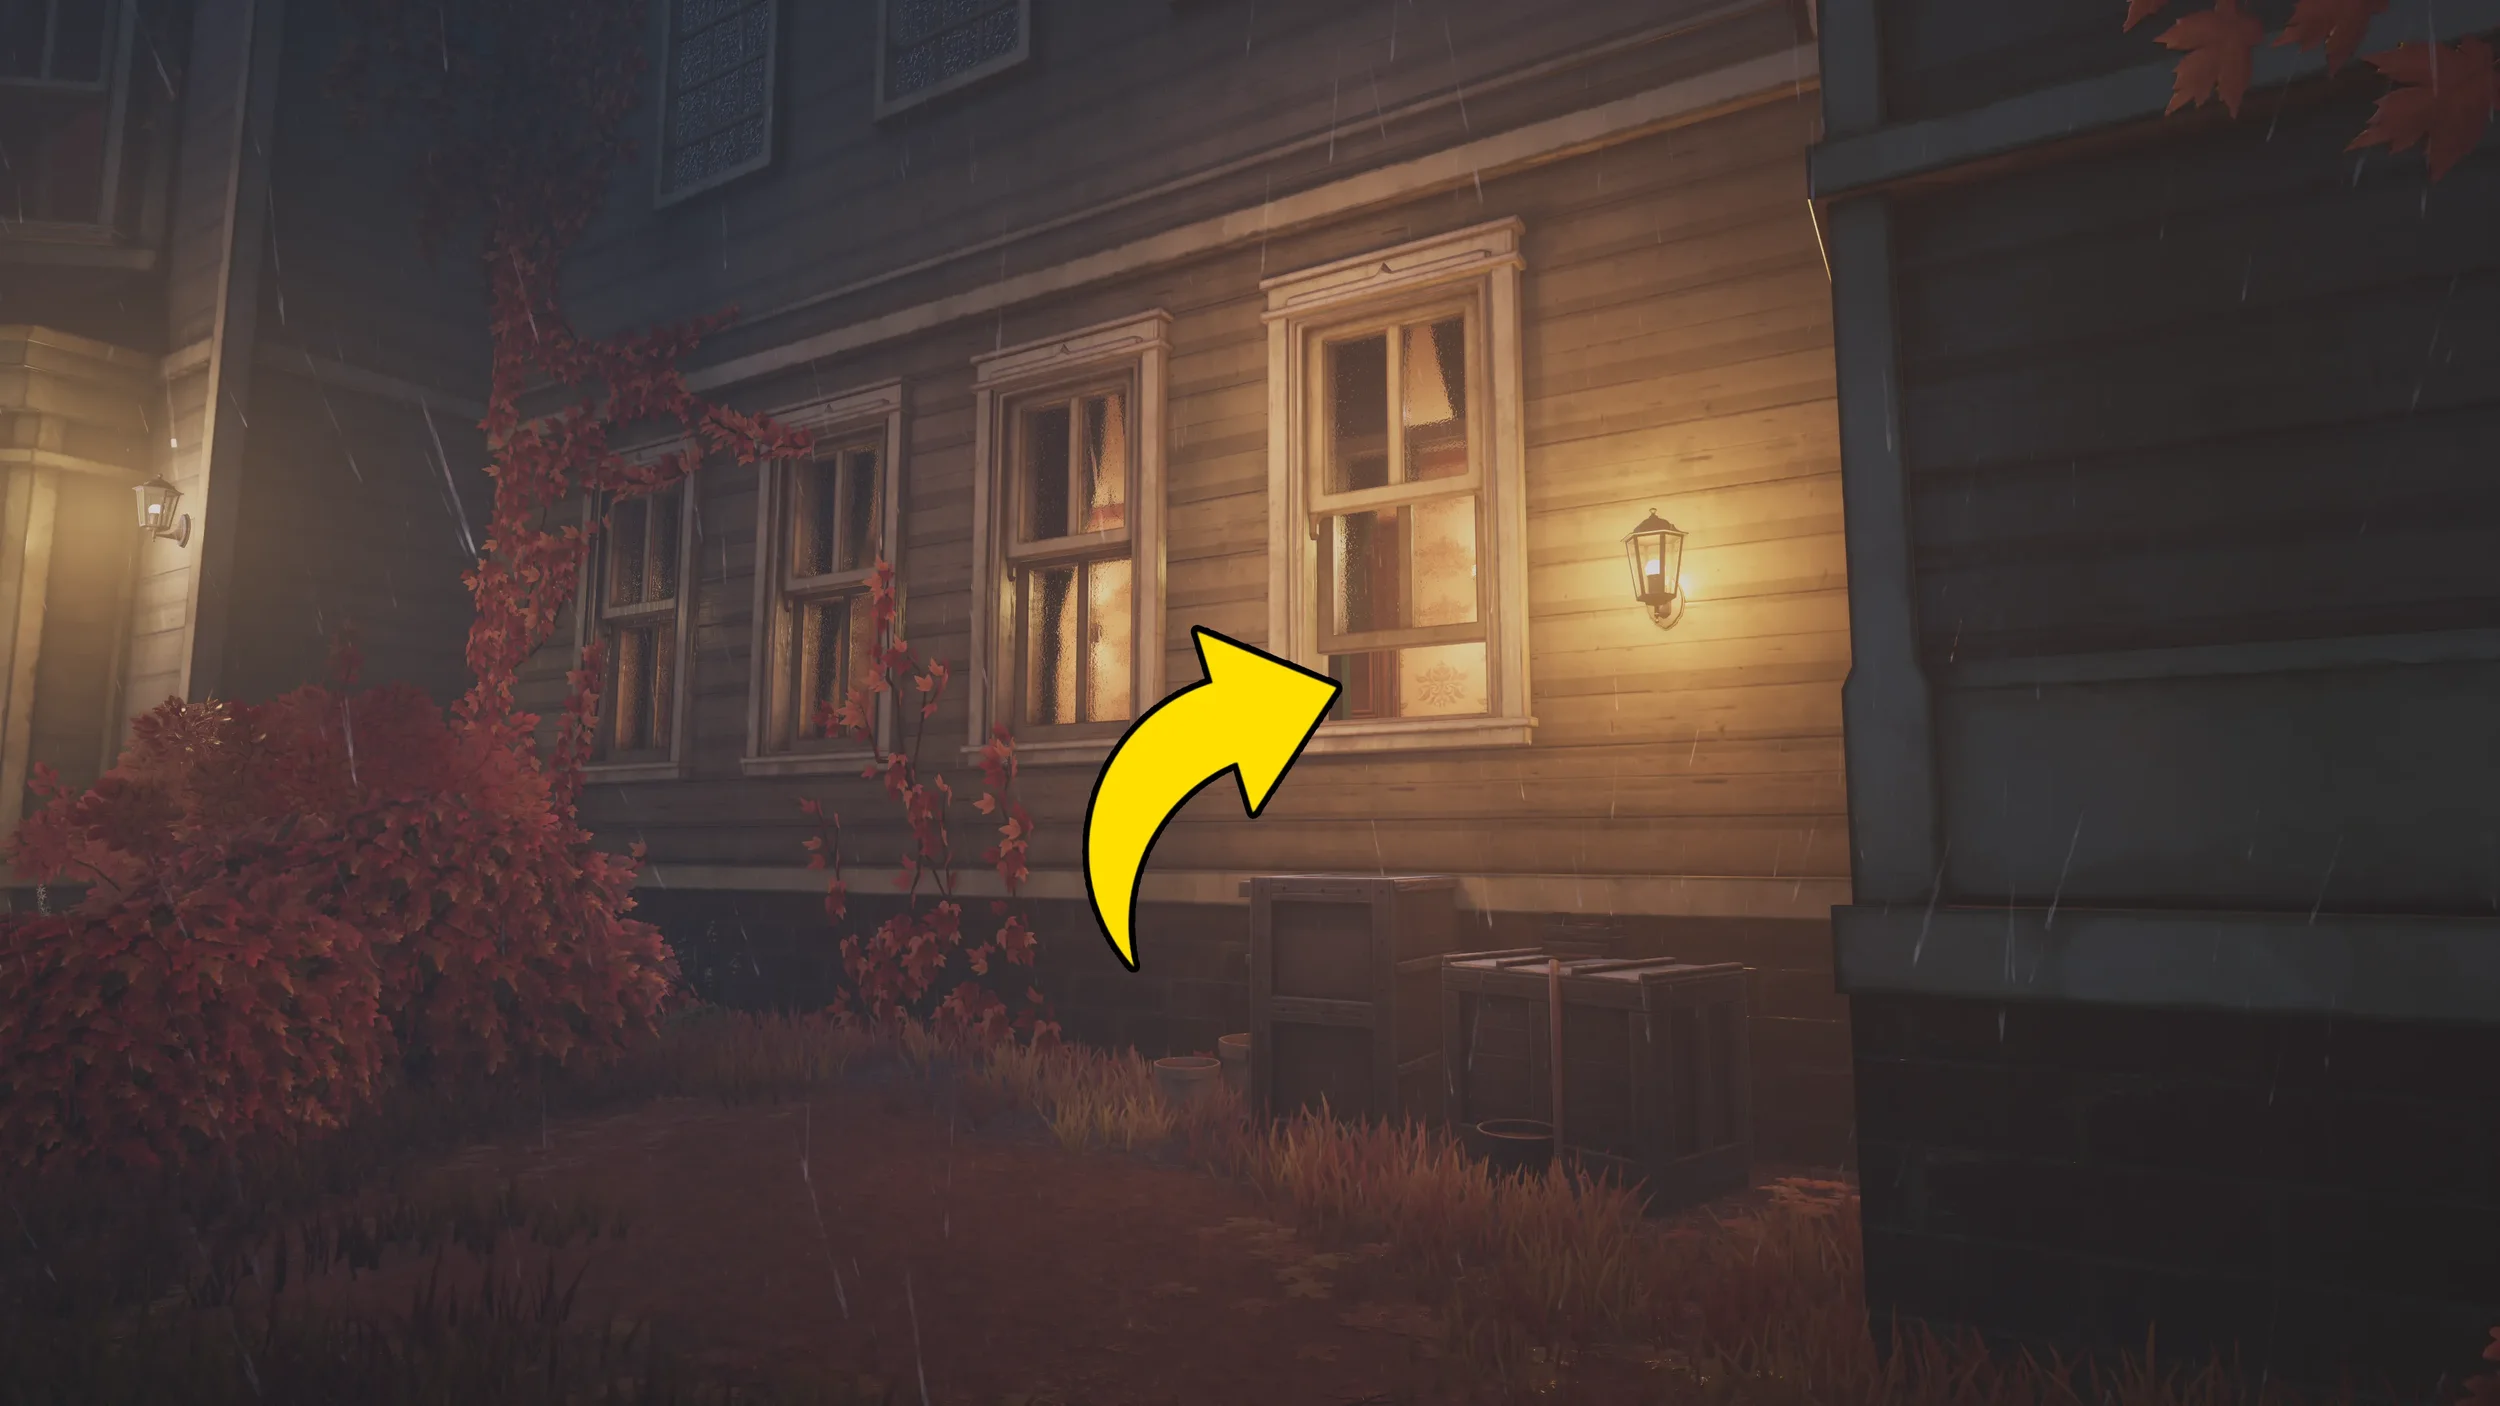
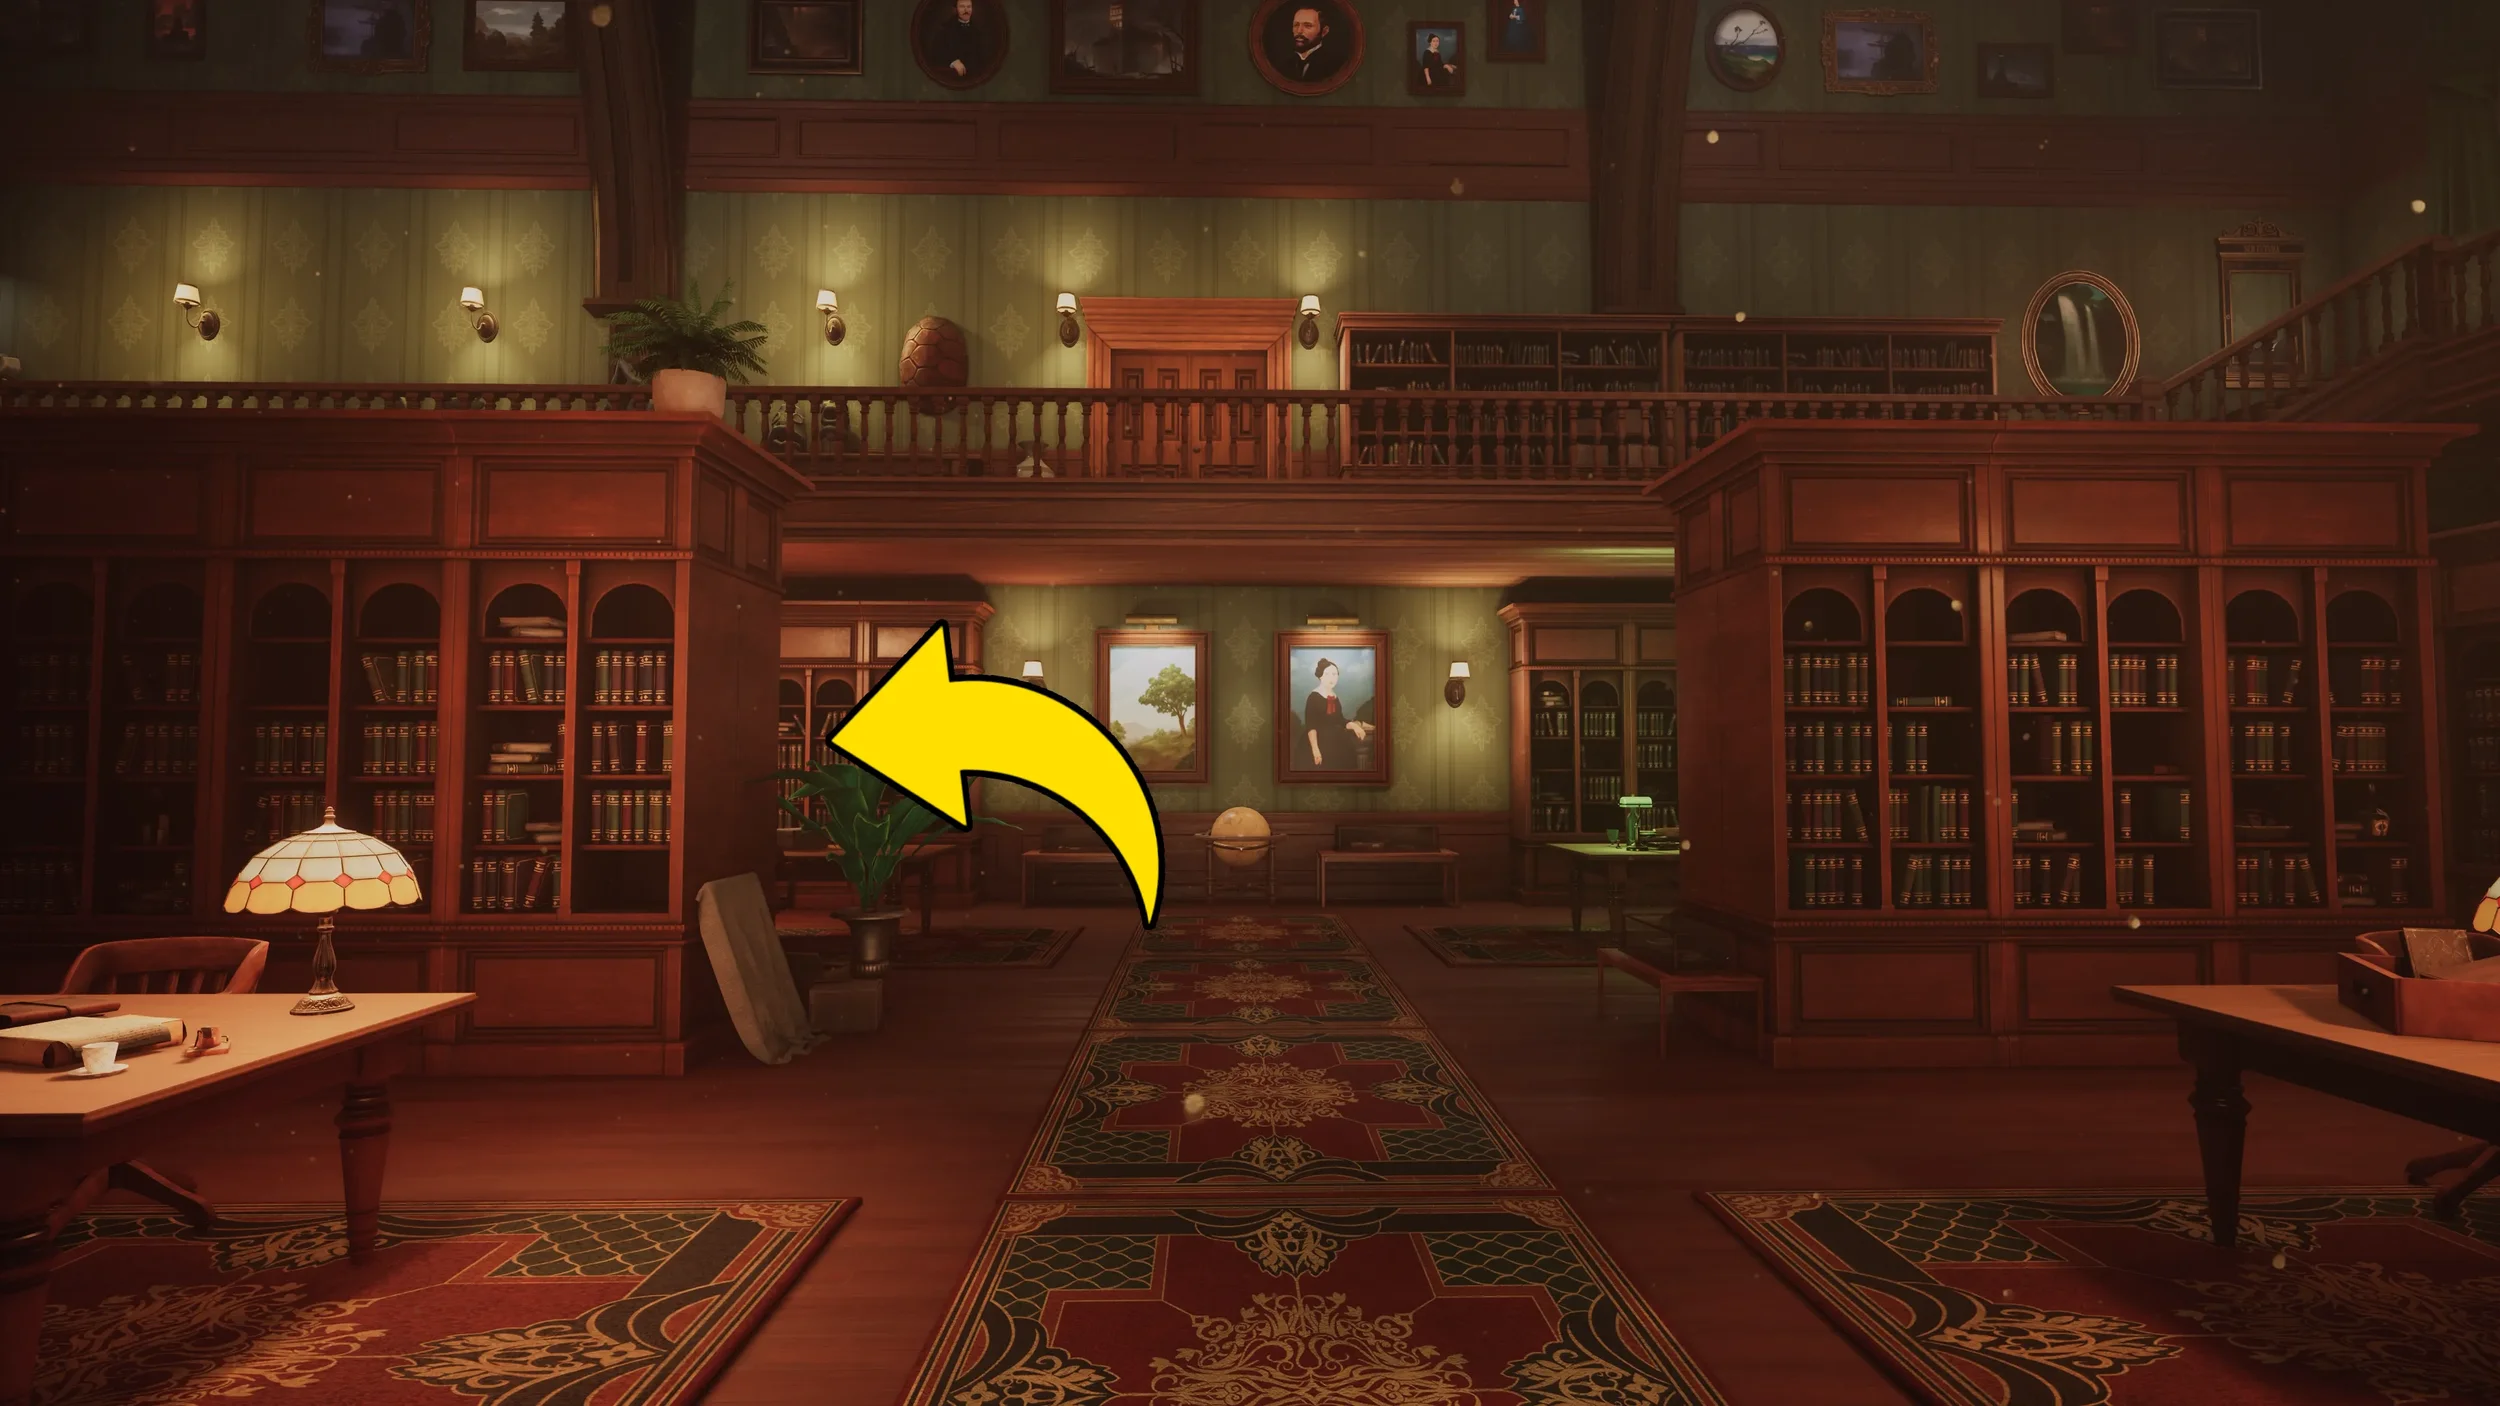
Once you are inside go through the first two doors until you find yourself inside the main Library area of the building.
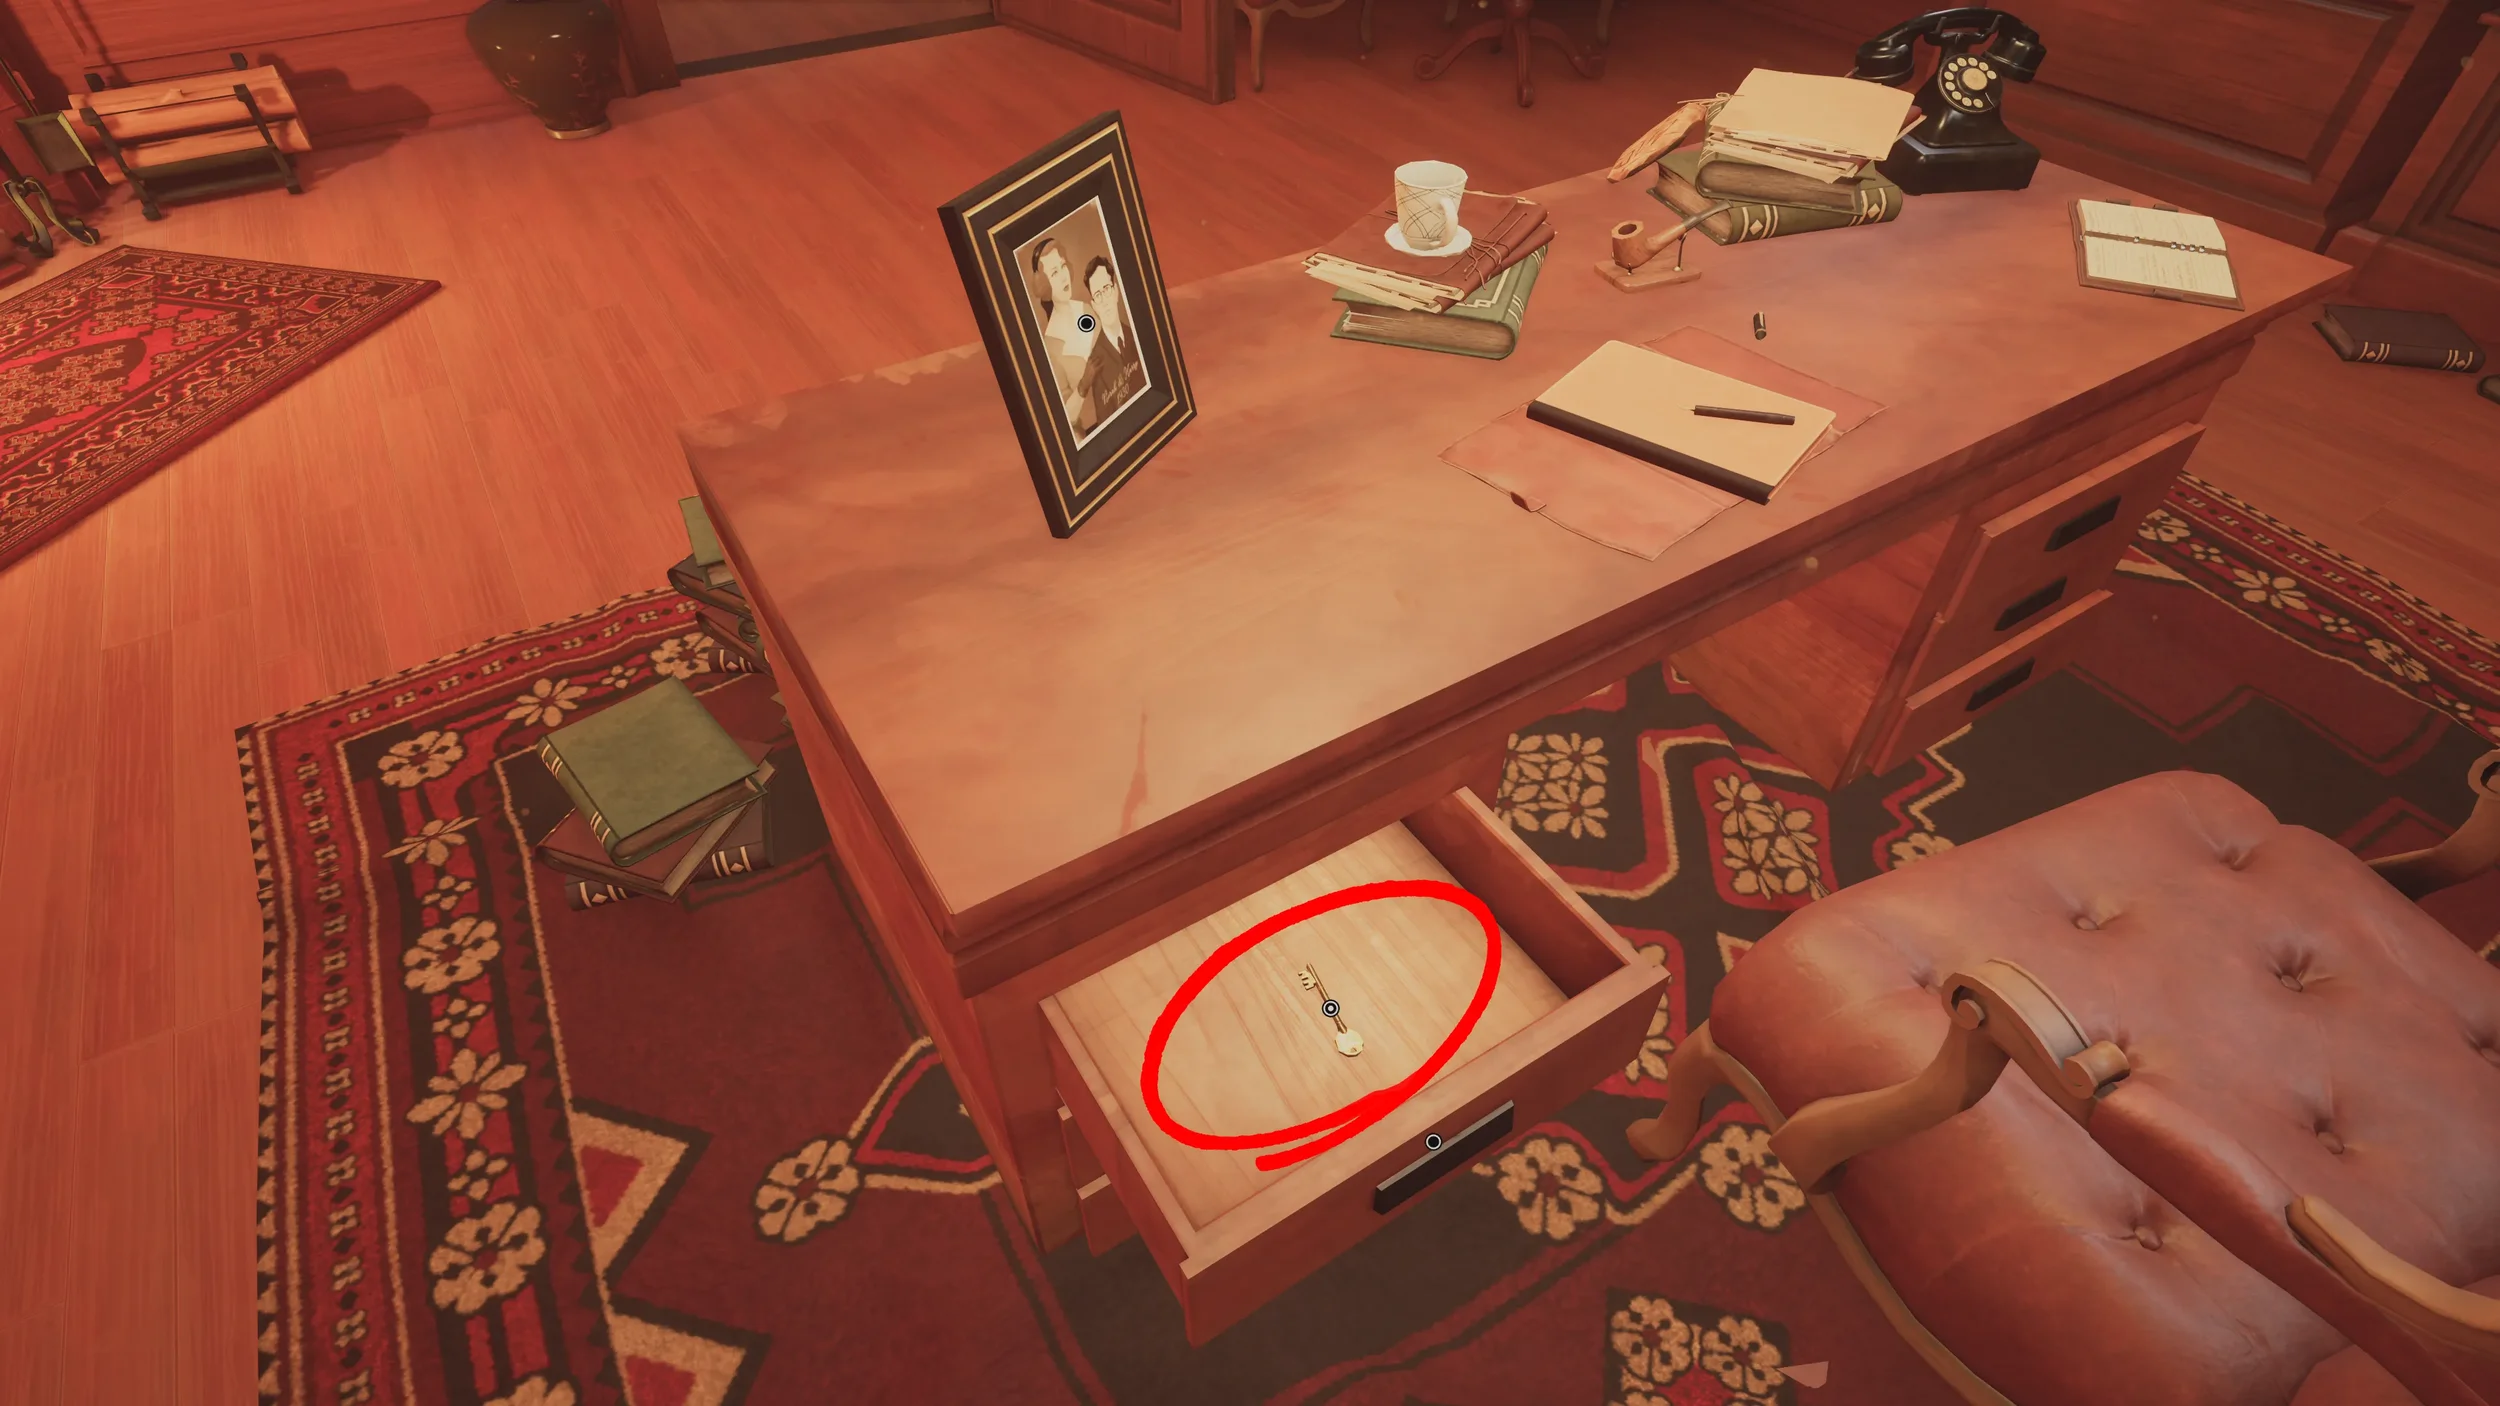
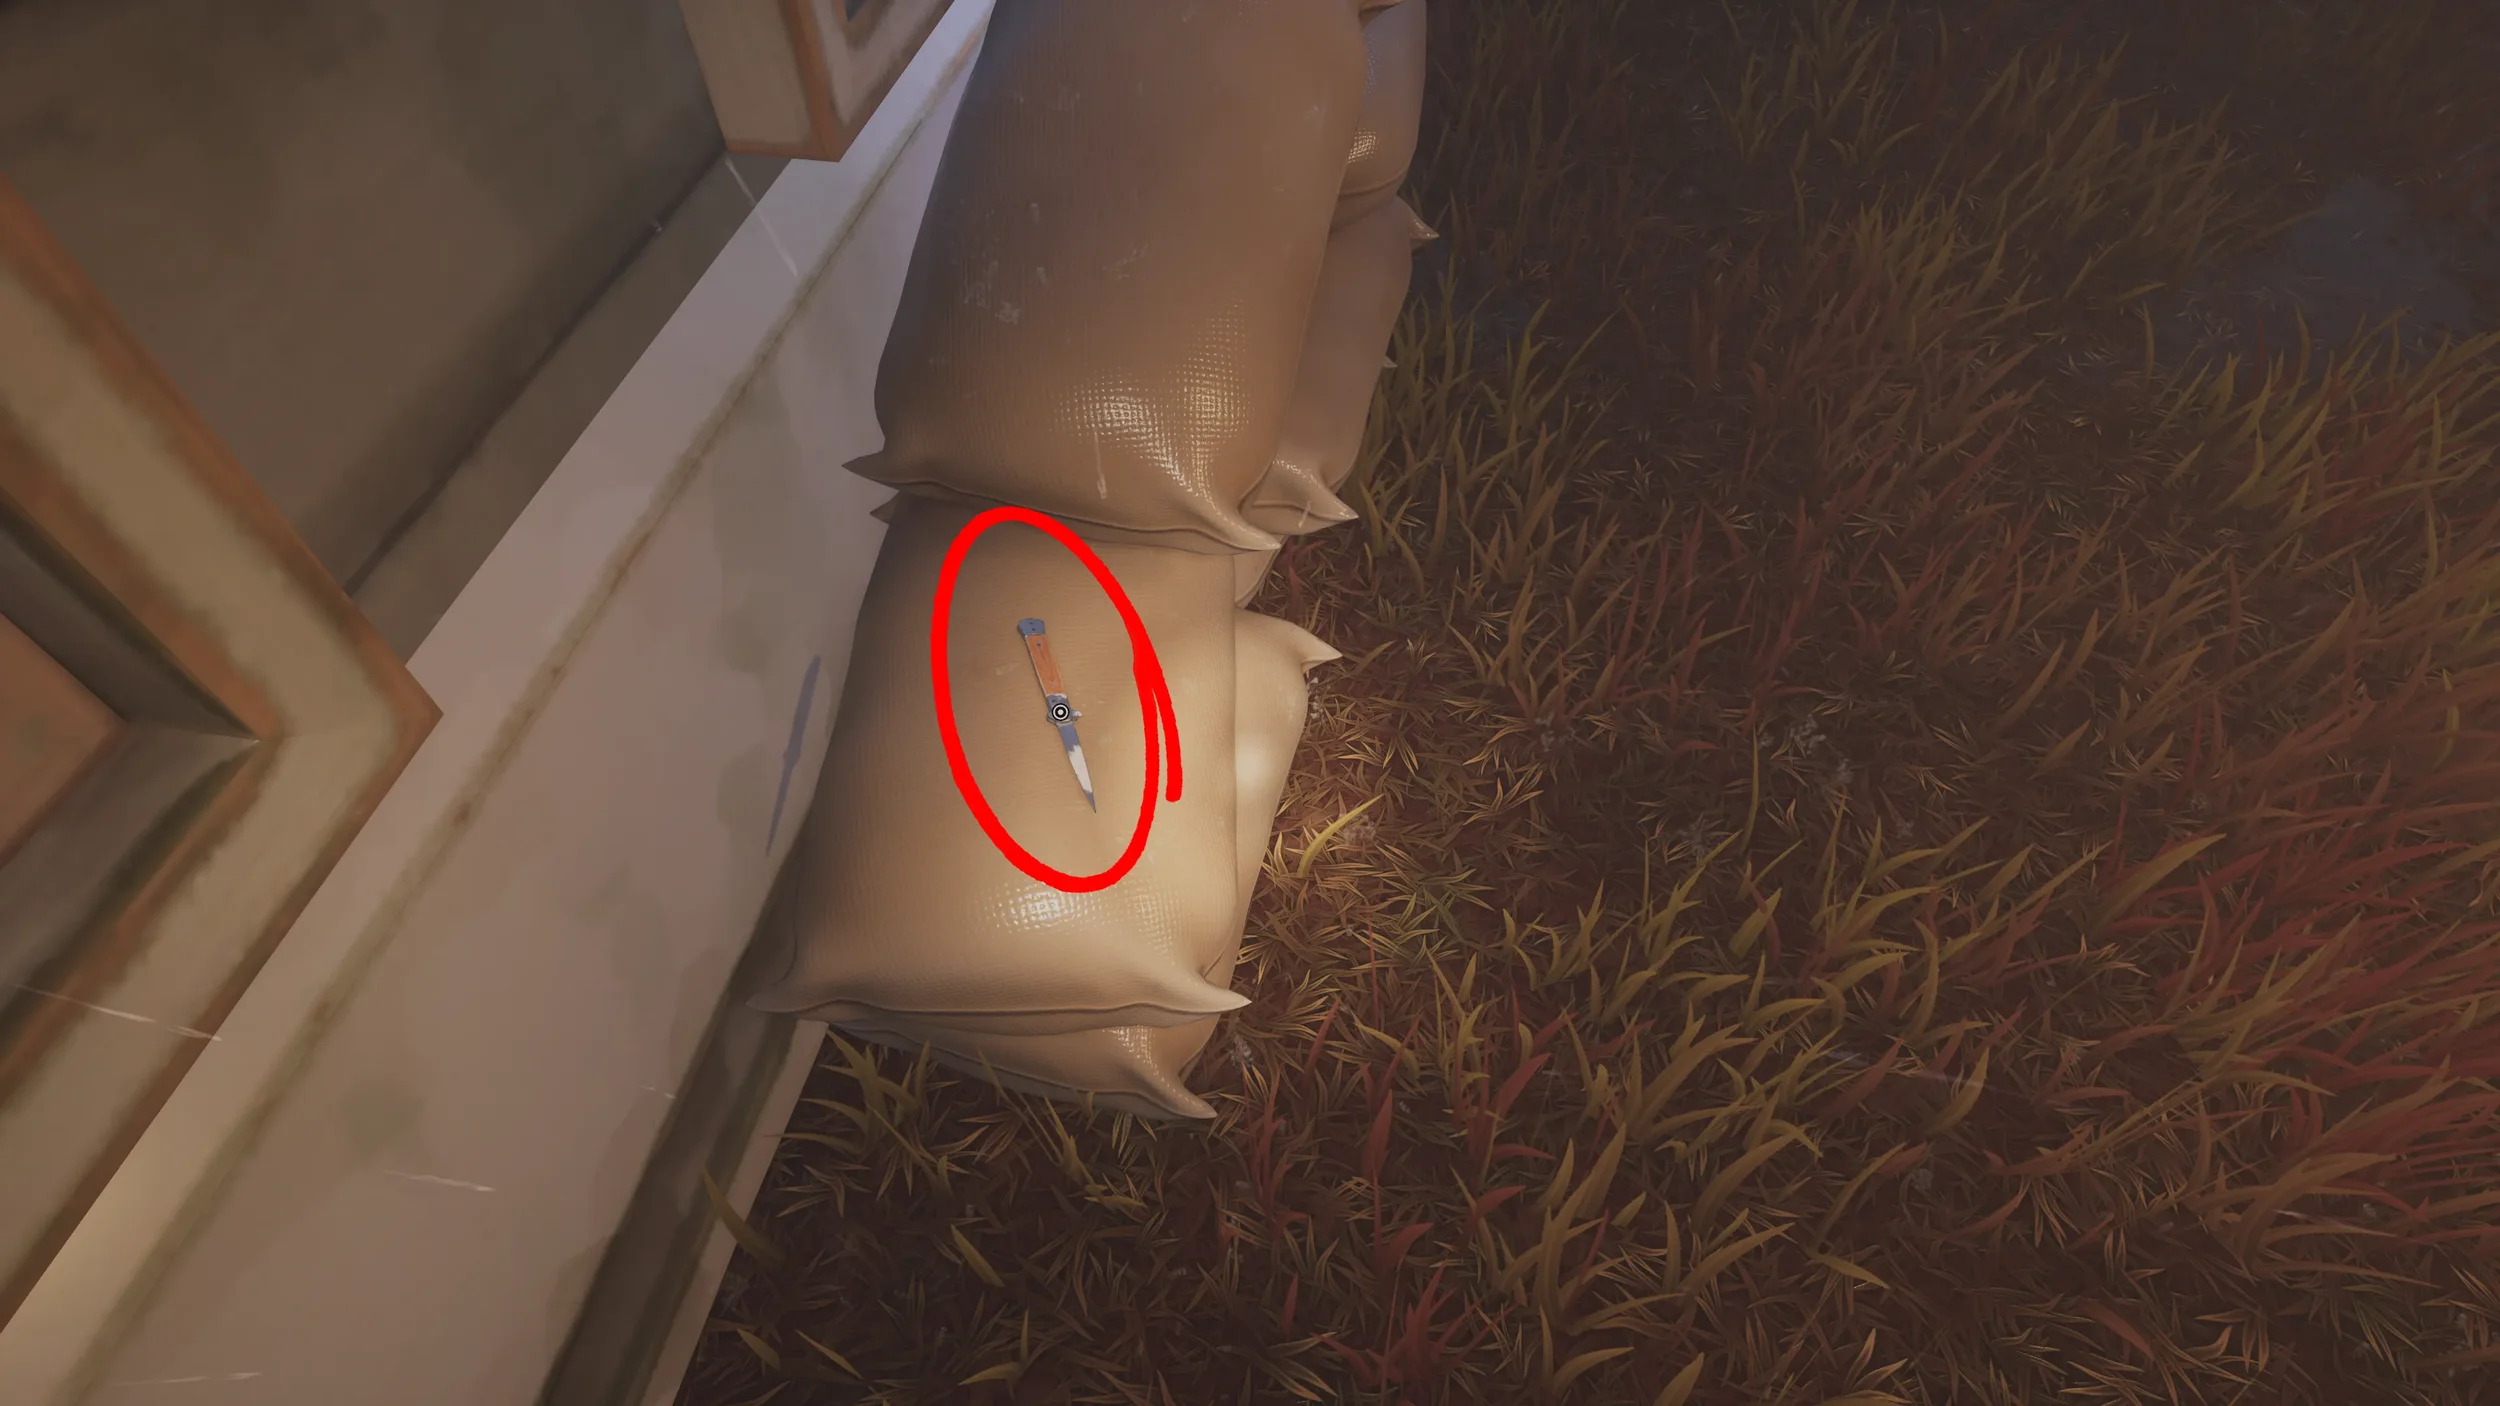
The first thing we need to do is pick up the key from the desk draw in the Professor’s Office, this room is found on the left side from the entrance.
 “The Terrible Old Man” Trophy.

For now leave the dark room (there are more clues in this area but we will be getting those later when we actually need them for that specific puzzle to keep things in order).
“The Terrible Old Man” Trophy so make sure to inspect it.
 “The Terrible Old Man” Trophy!
Garden Faces Puzzle
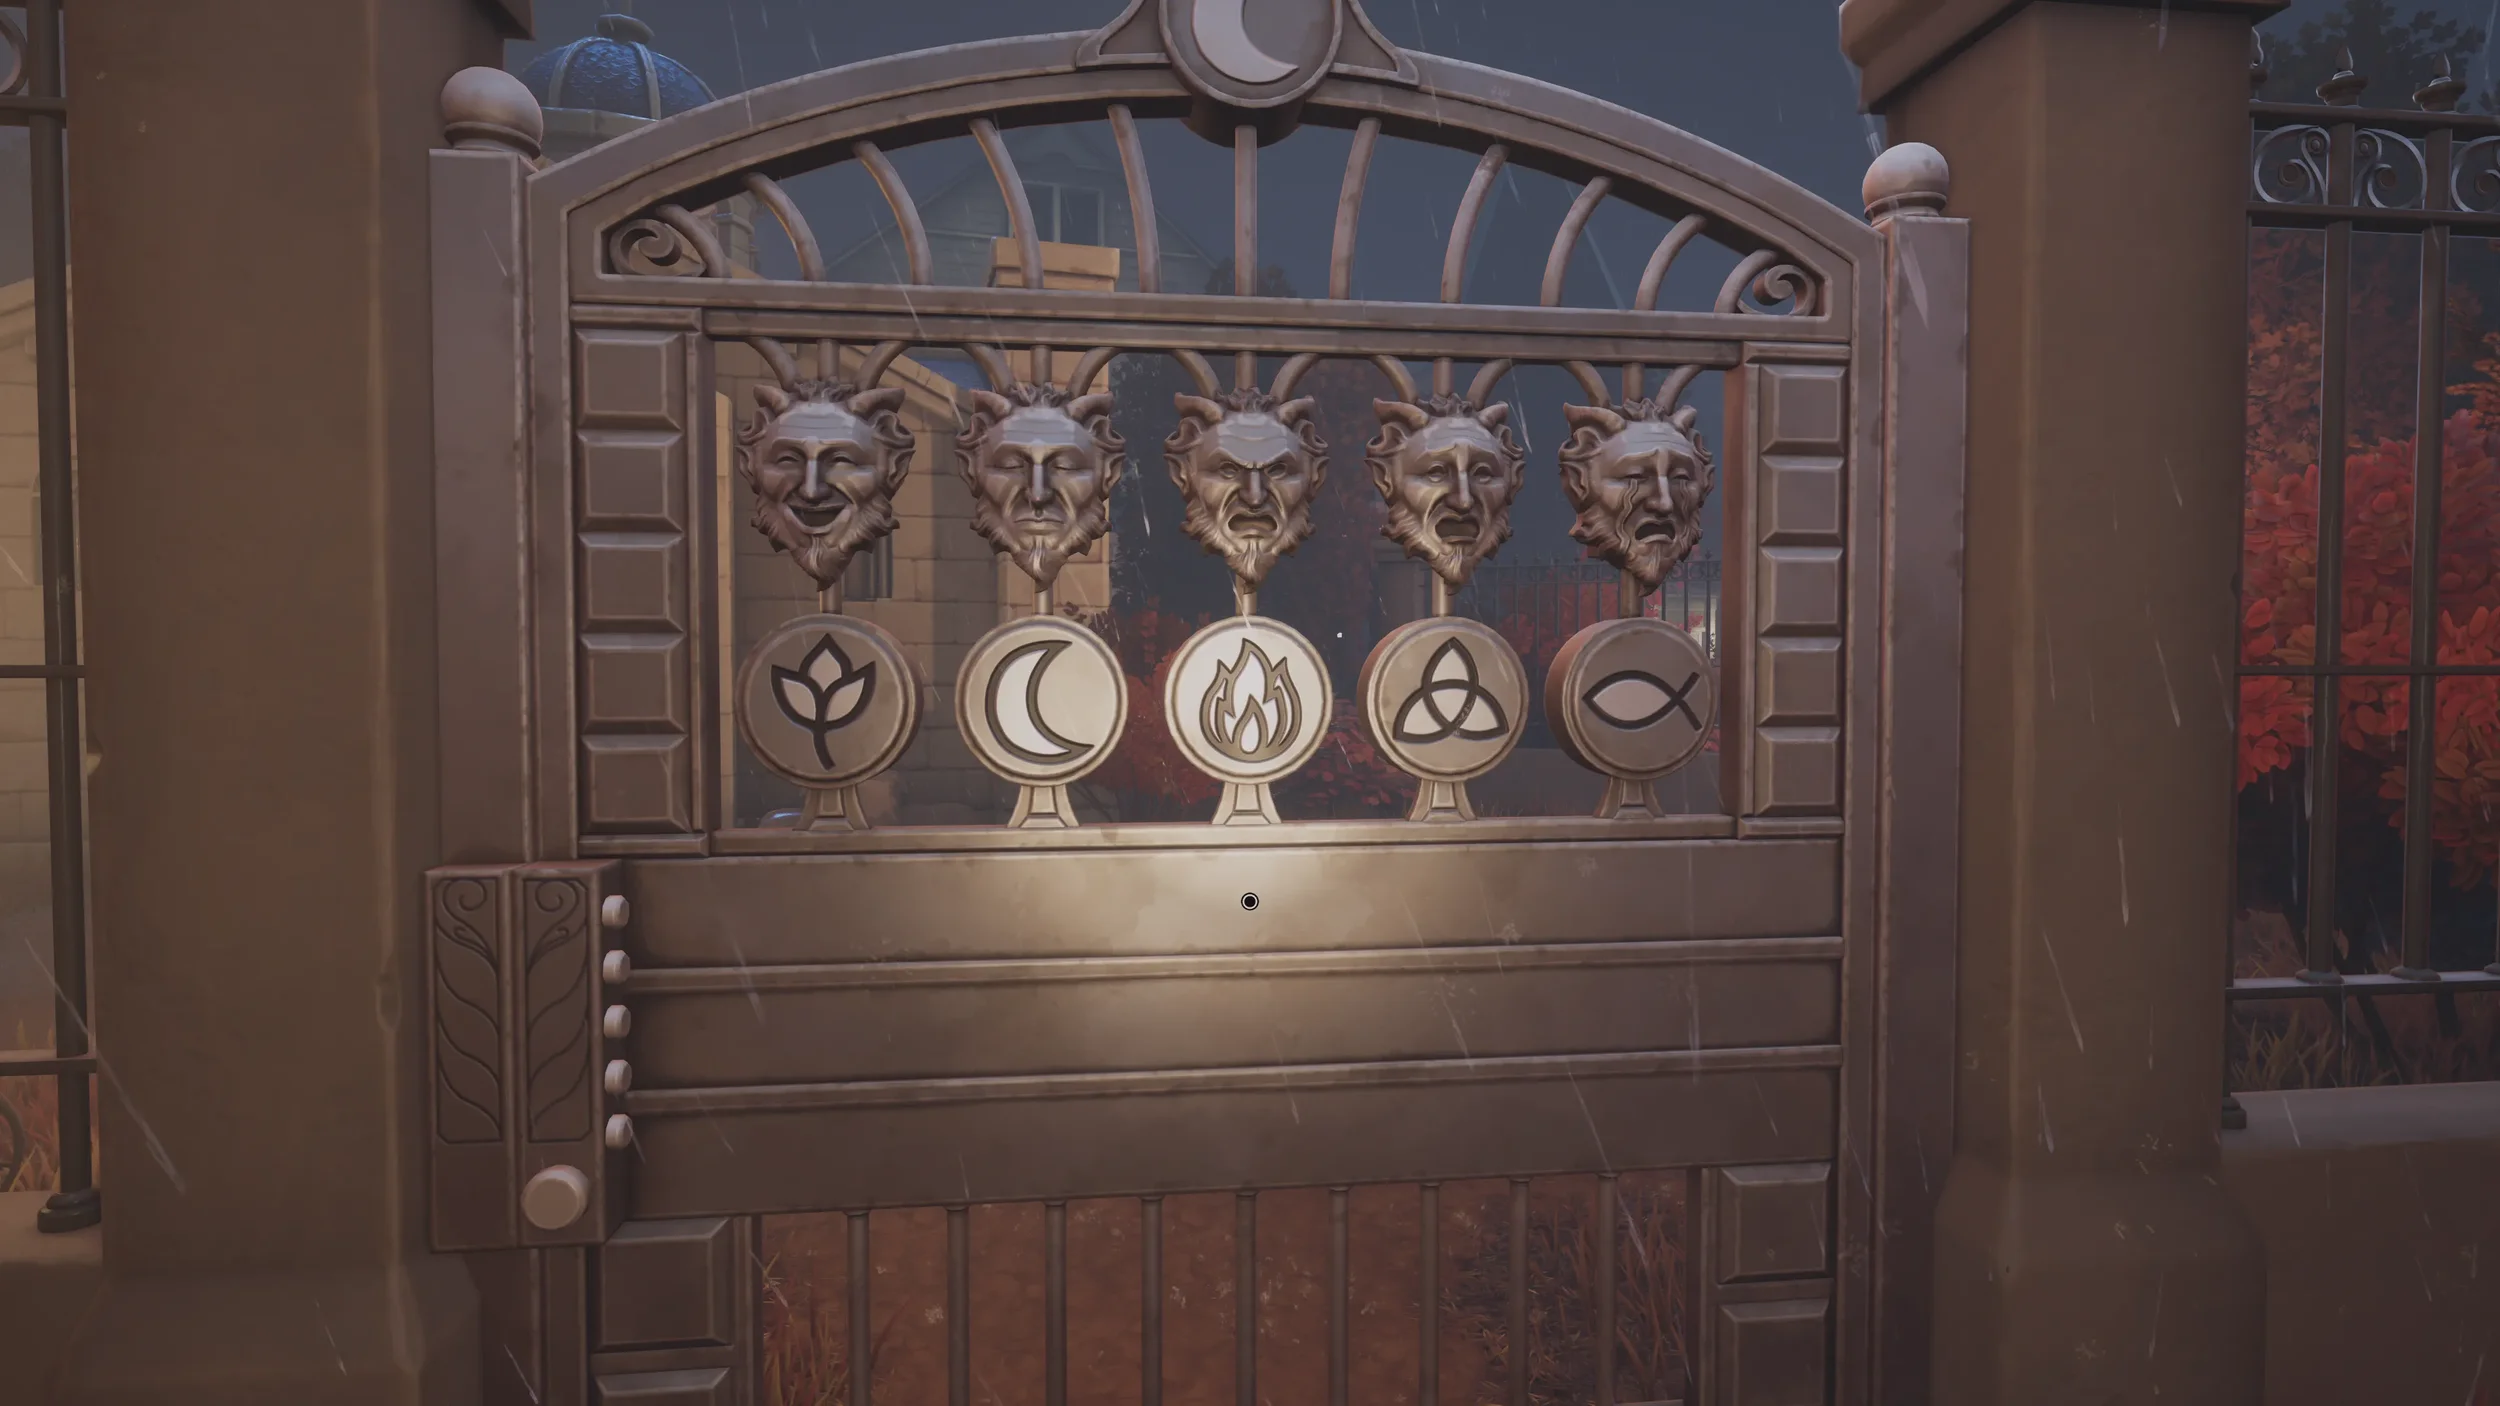
For the main puzzle in this Garden we will need to direct the Faces on the Vases to their corresponding symbol.
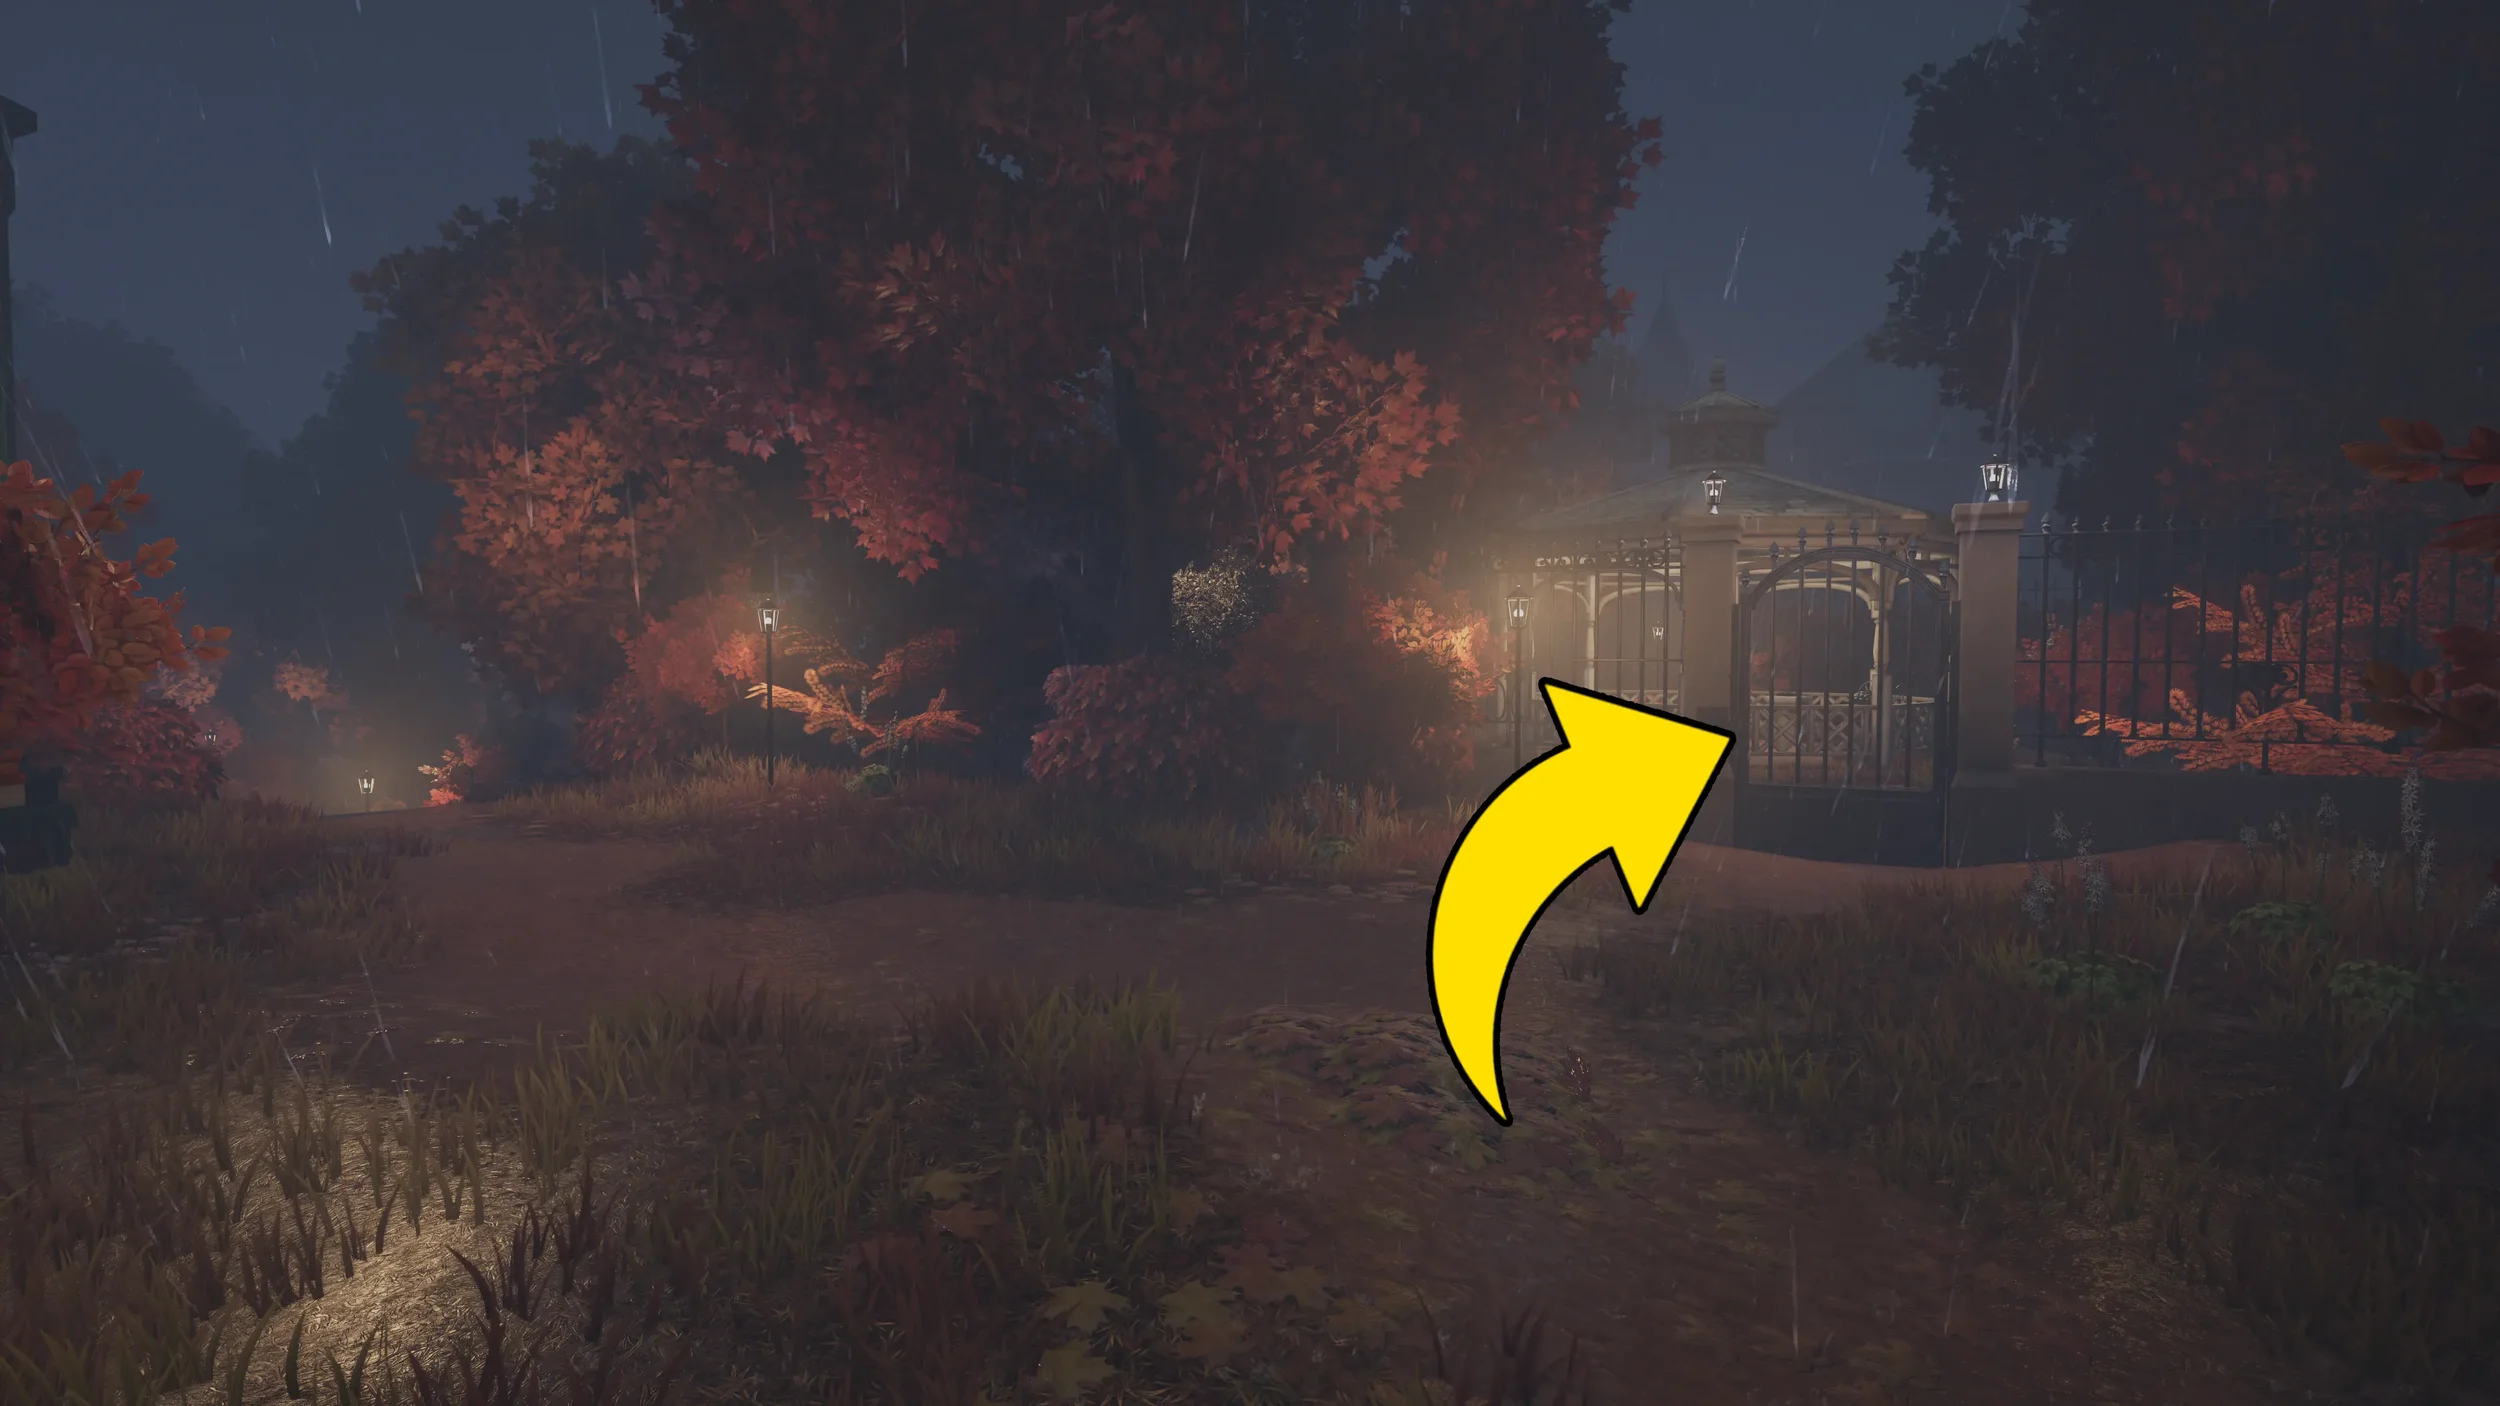
But before we start solving the puzzle make sure to inspect the gate at the far end of this area before opening it, as inspecting the gate will write down a clue that becomes missable once you open the gate (if you do miss anything don’t worry as there is Chapter Select).
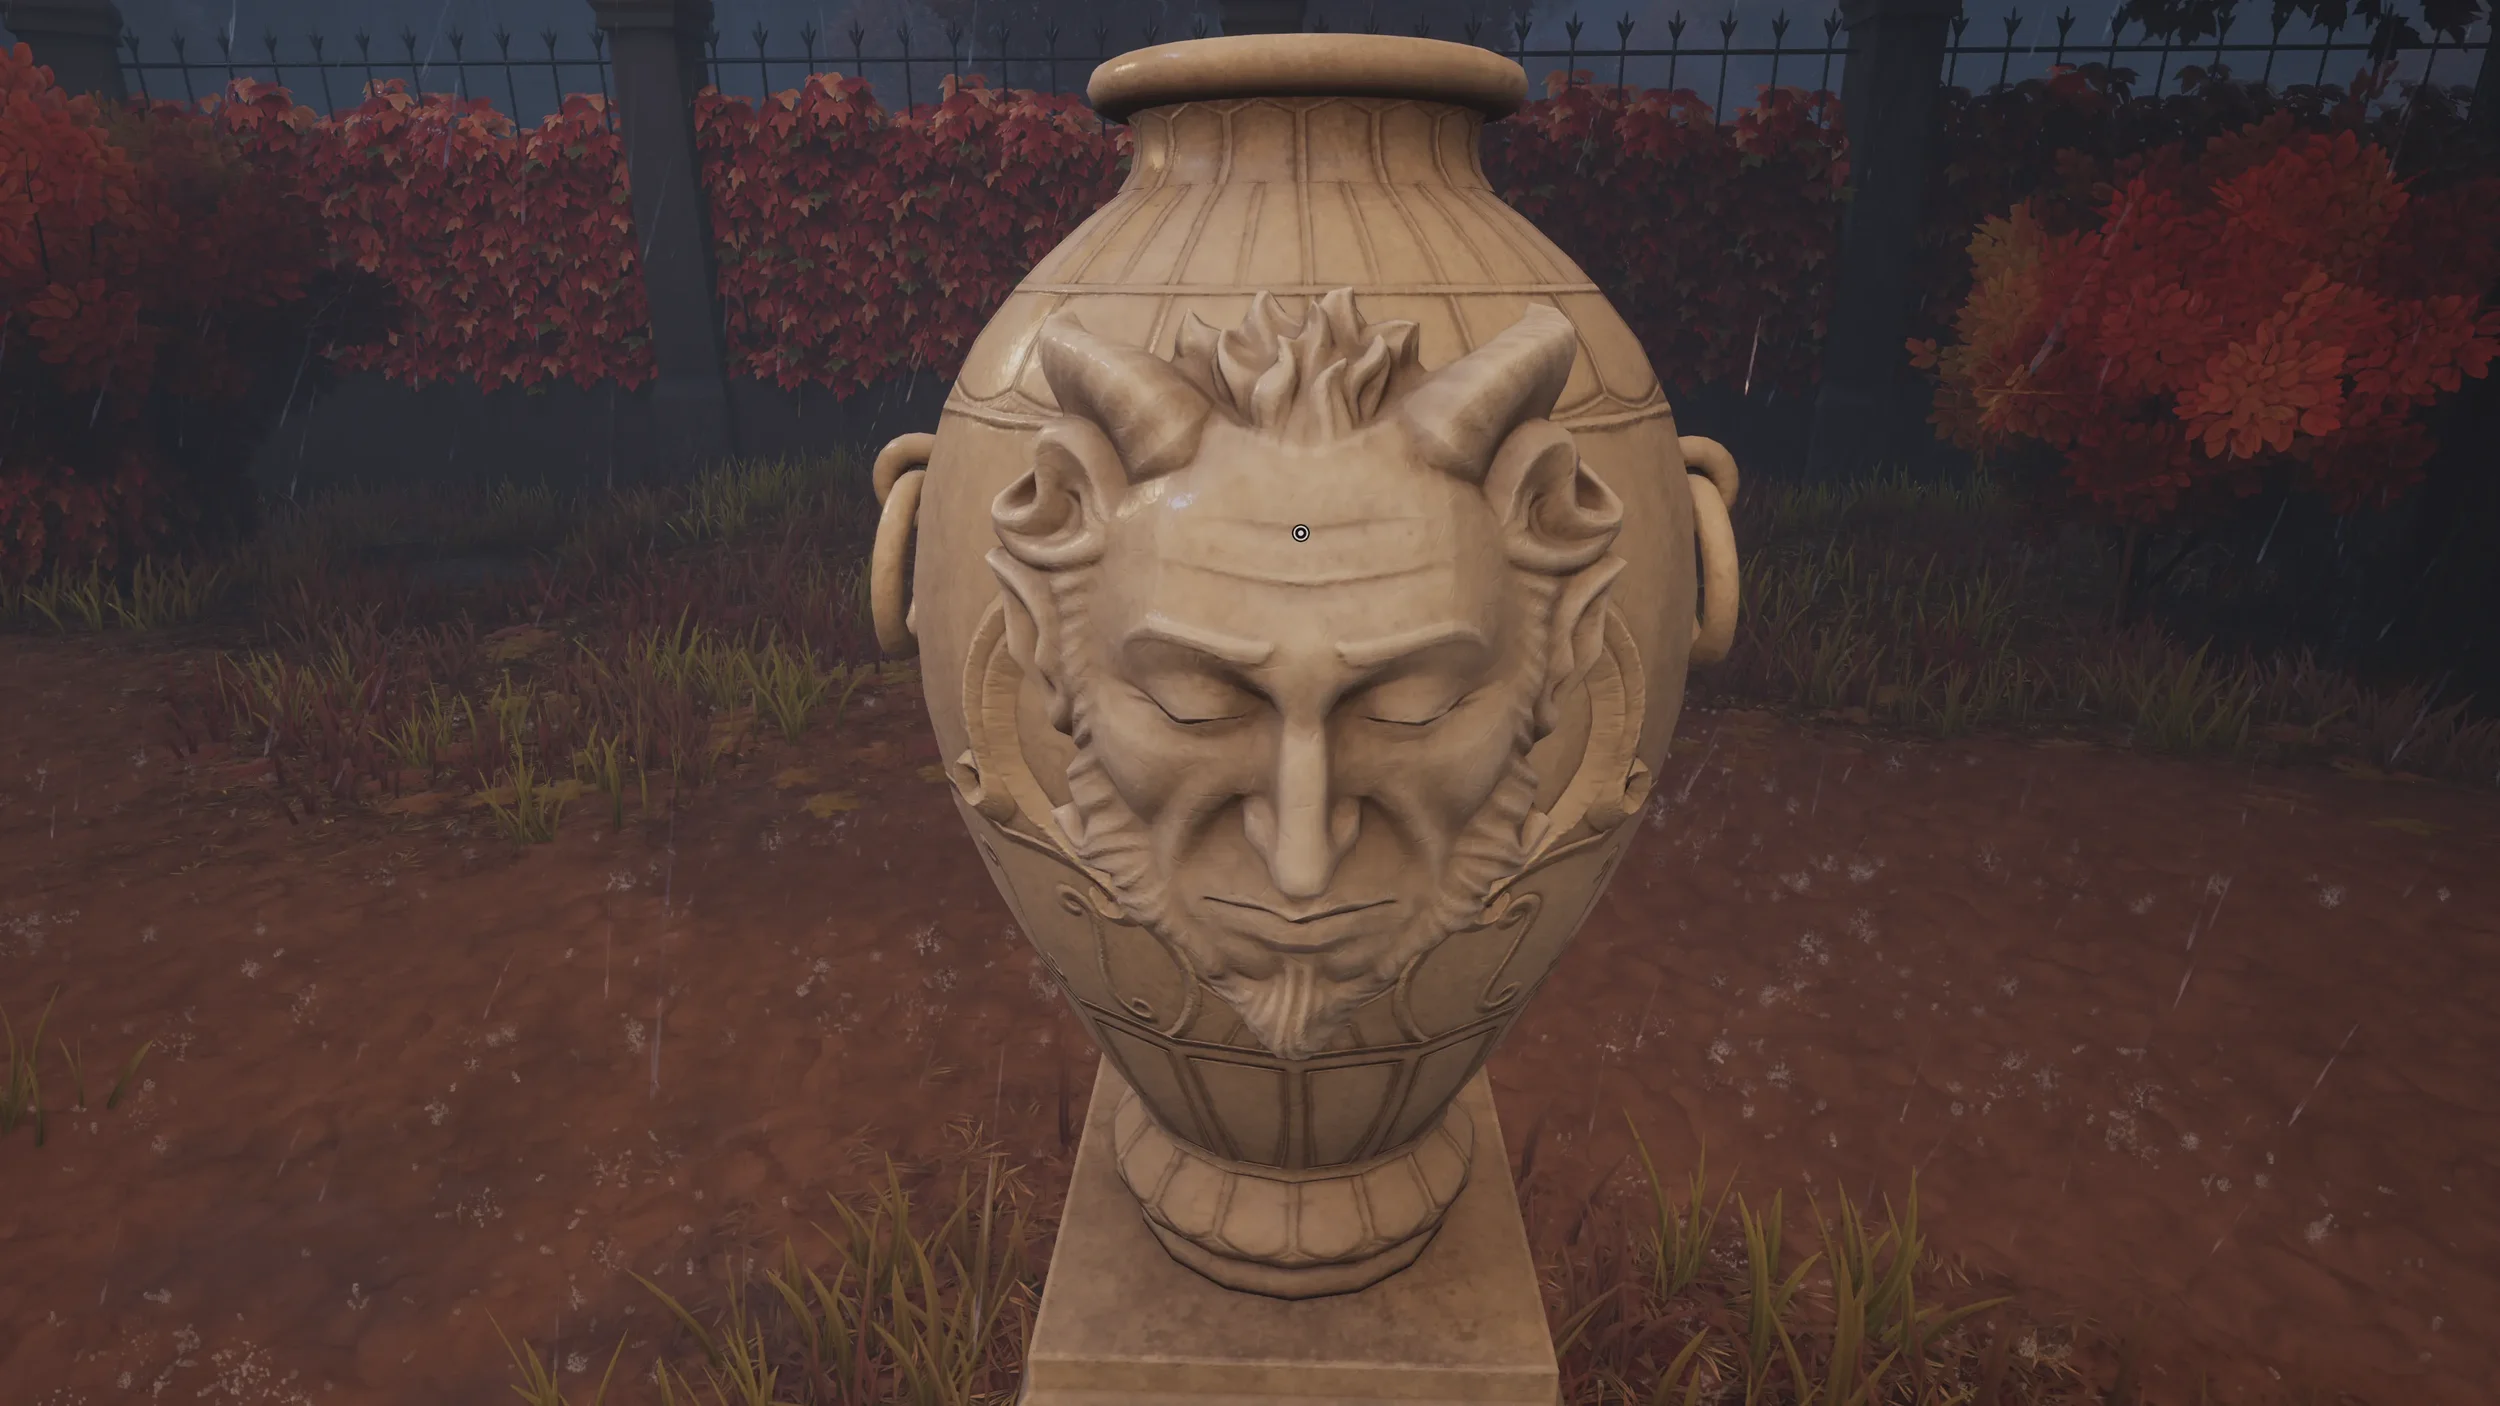
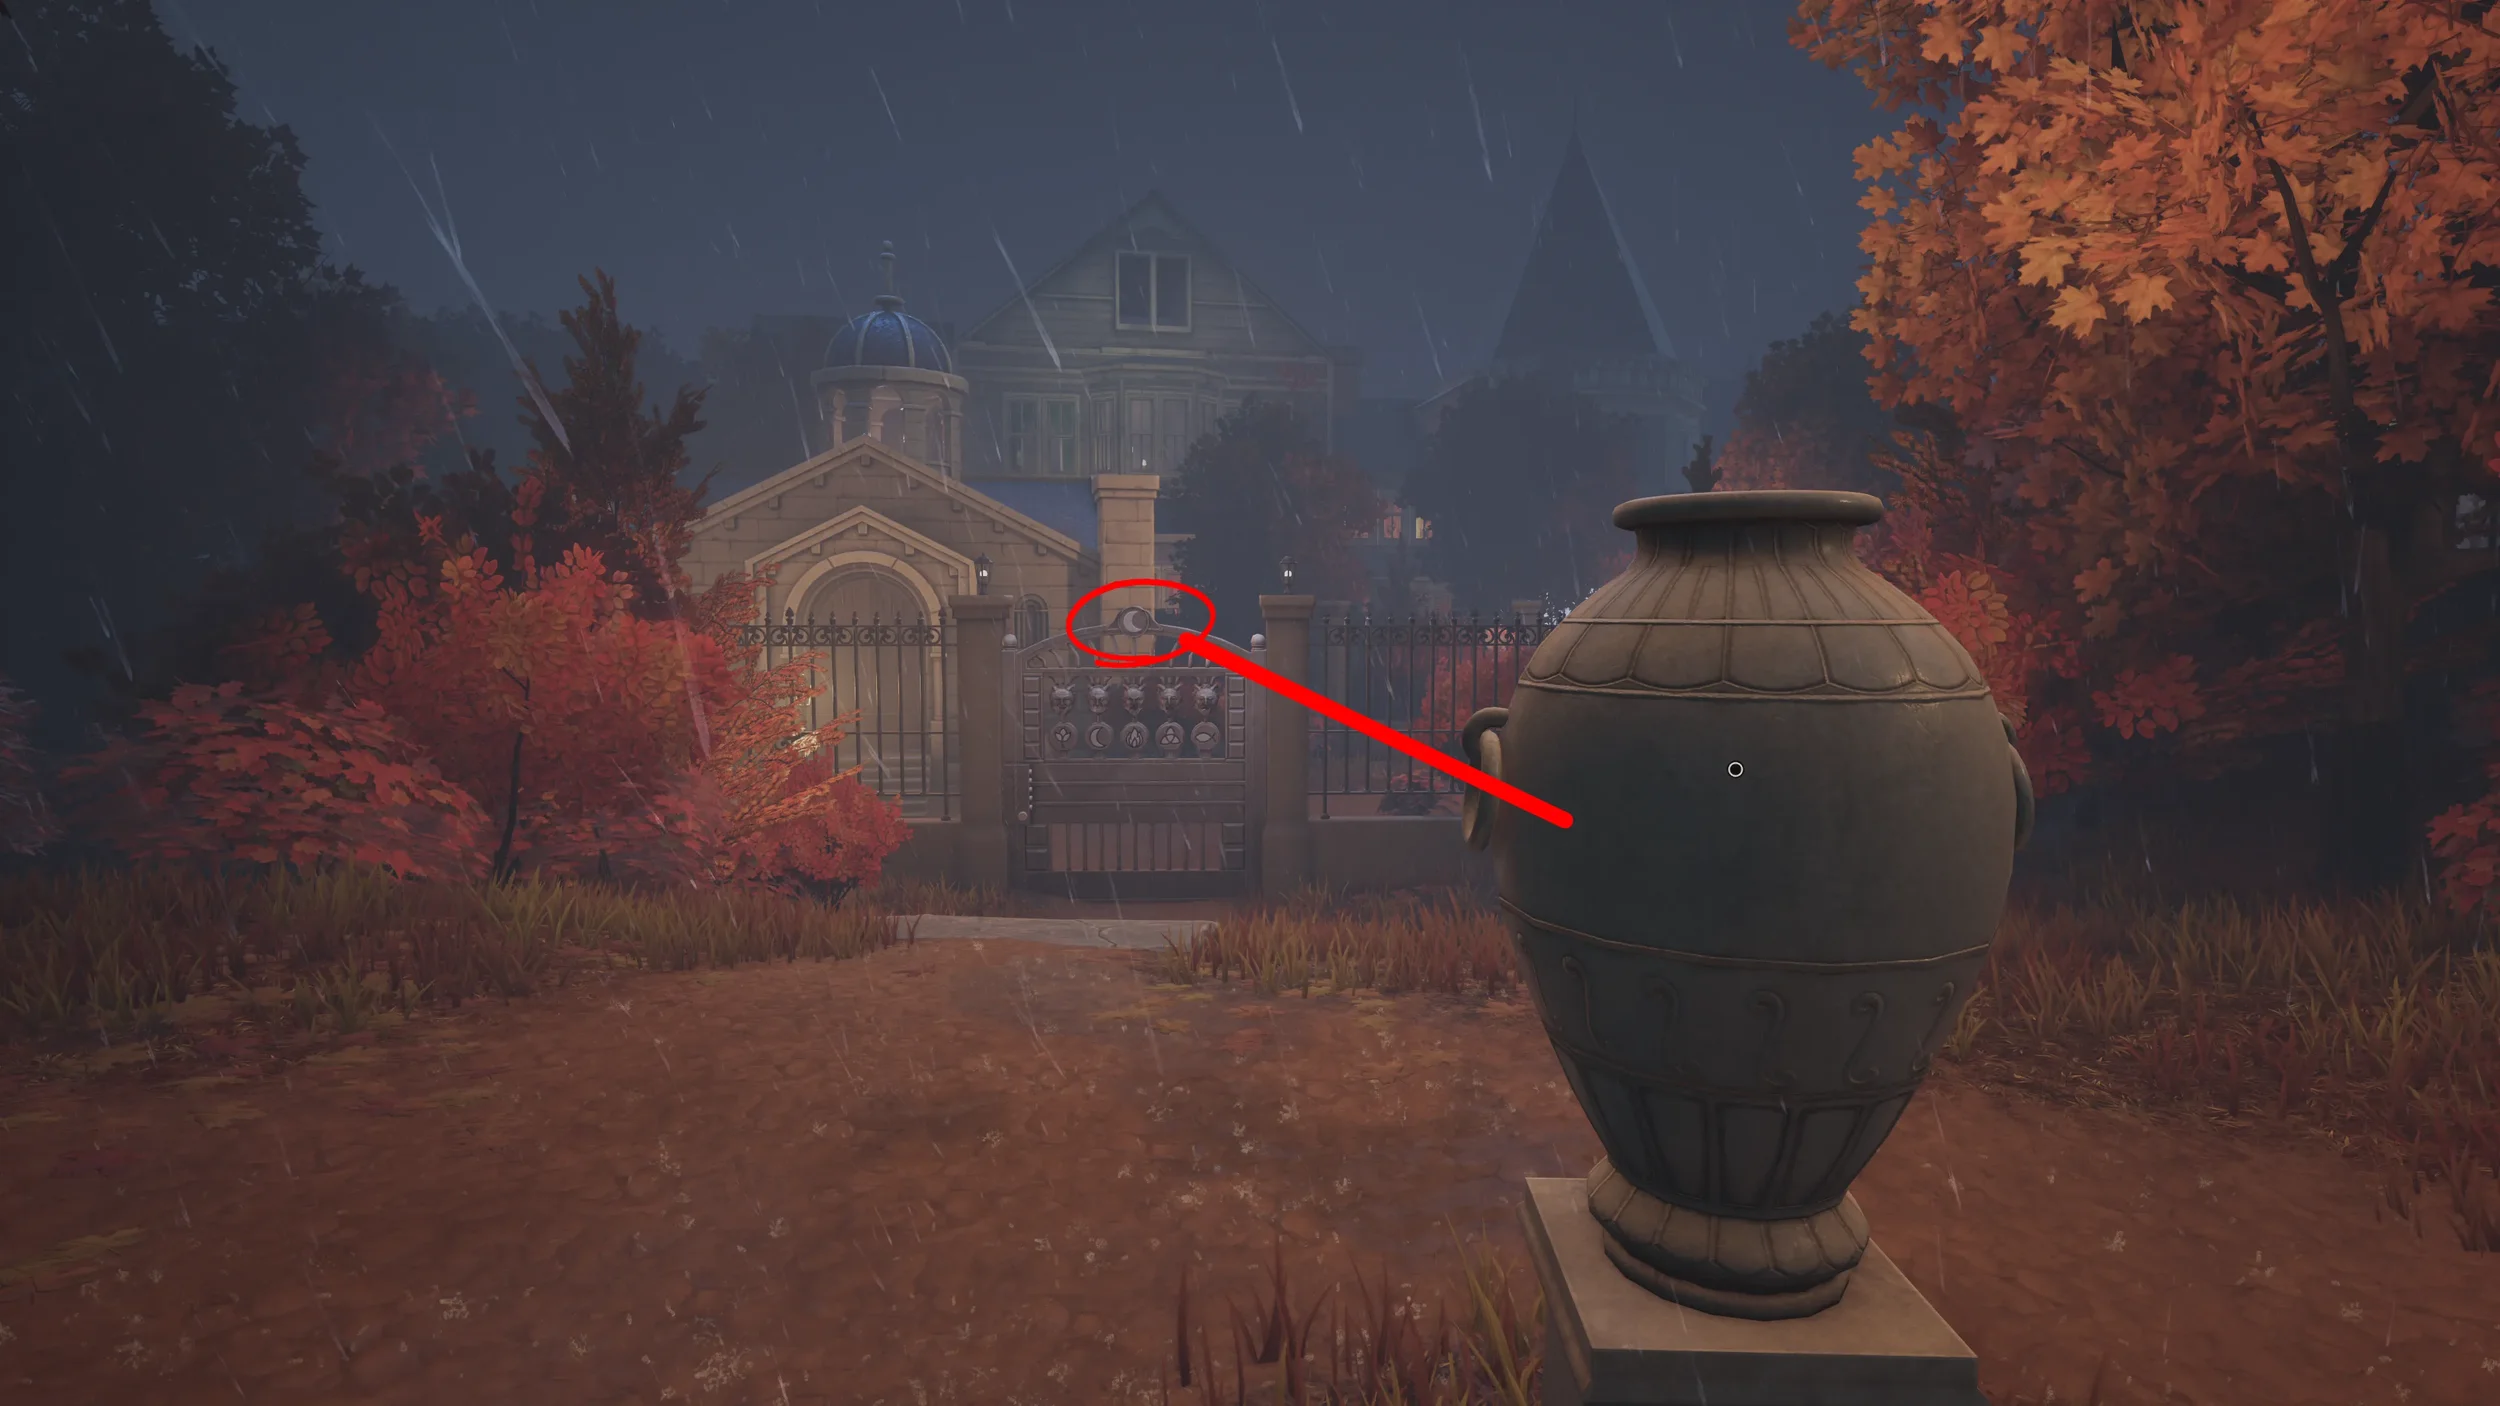
Let’s start with the vase closest to the gate (the one with the sleepy face), this one needs to face the Moon symbol, the Moon symbol can be found on top of the actual gate itself, so simply rotate the vase until the face is facing the Moon symbol on top of the gate.
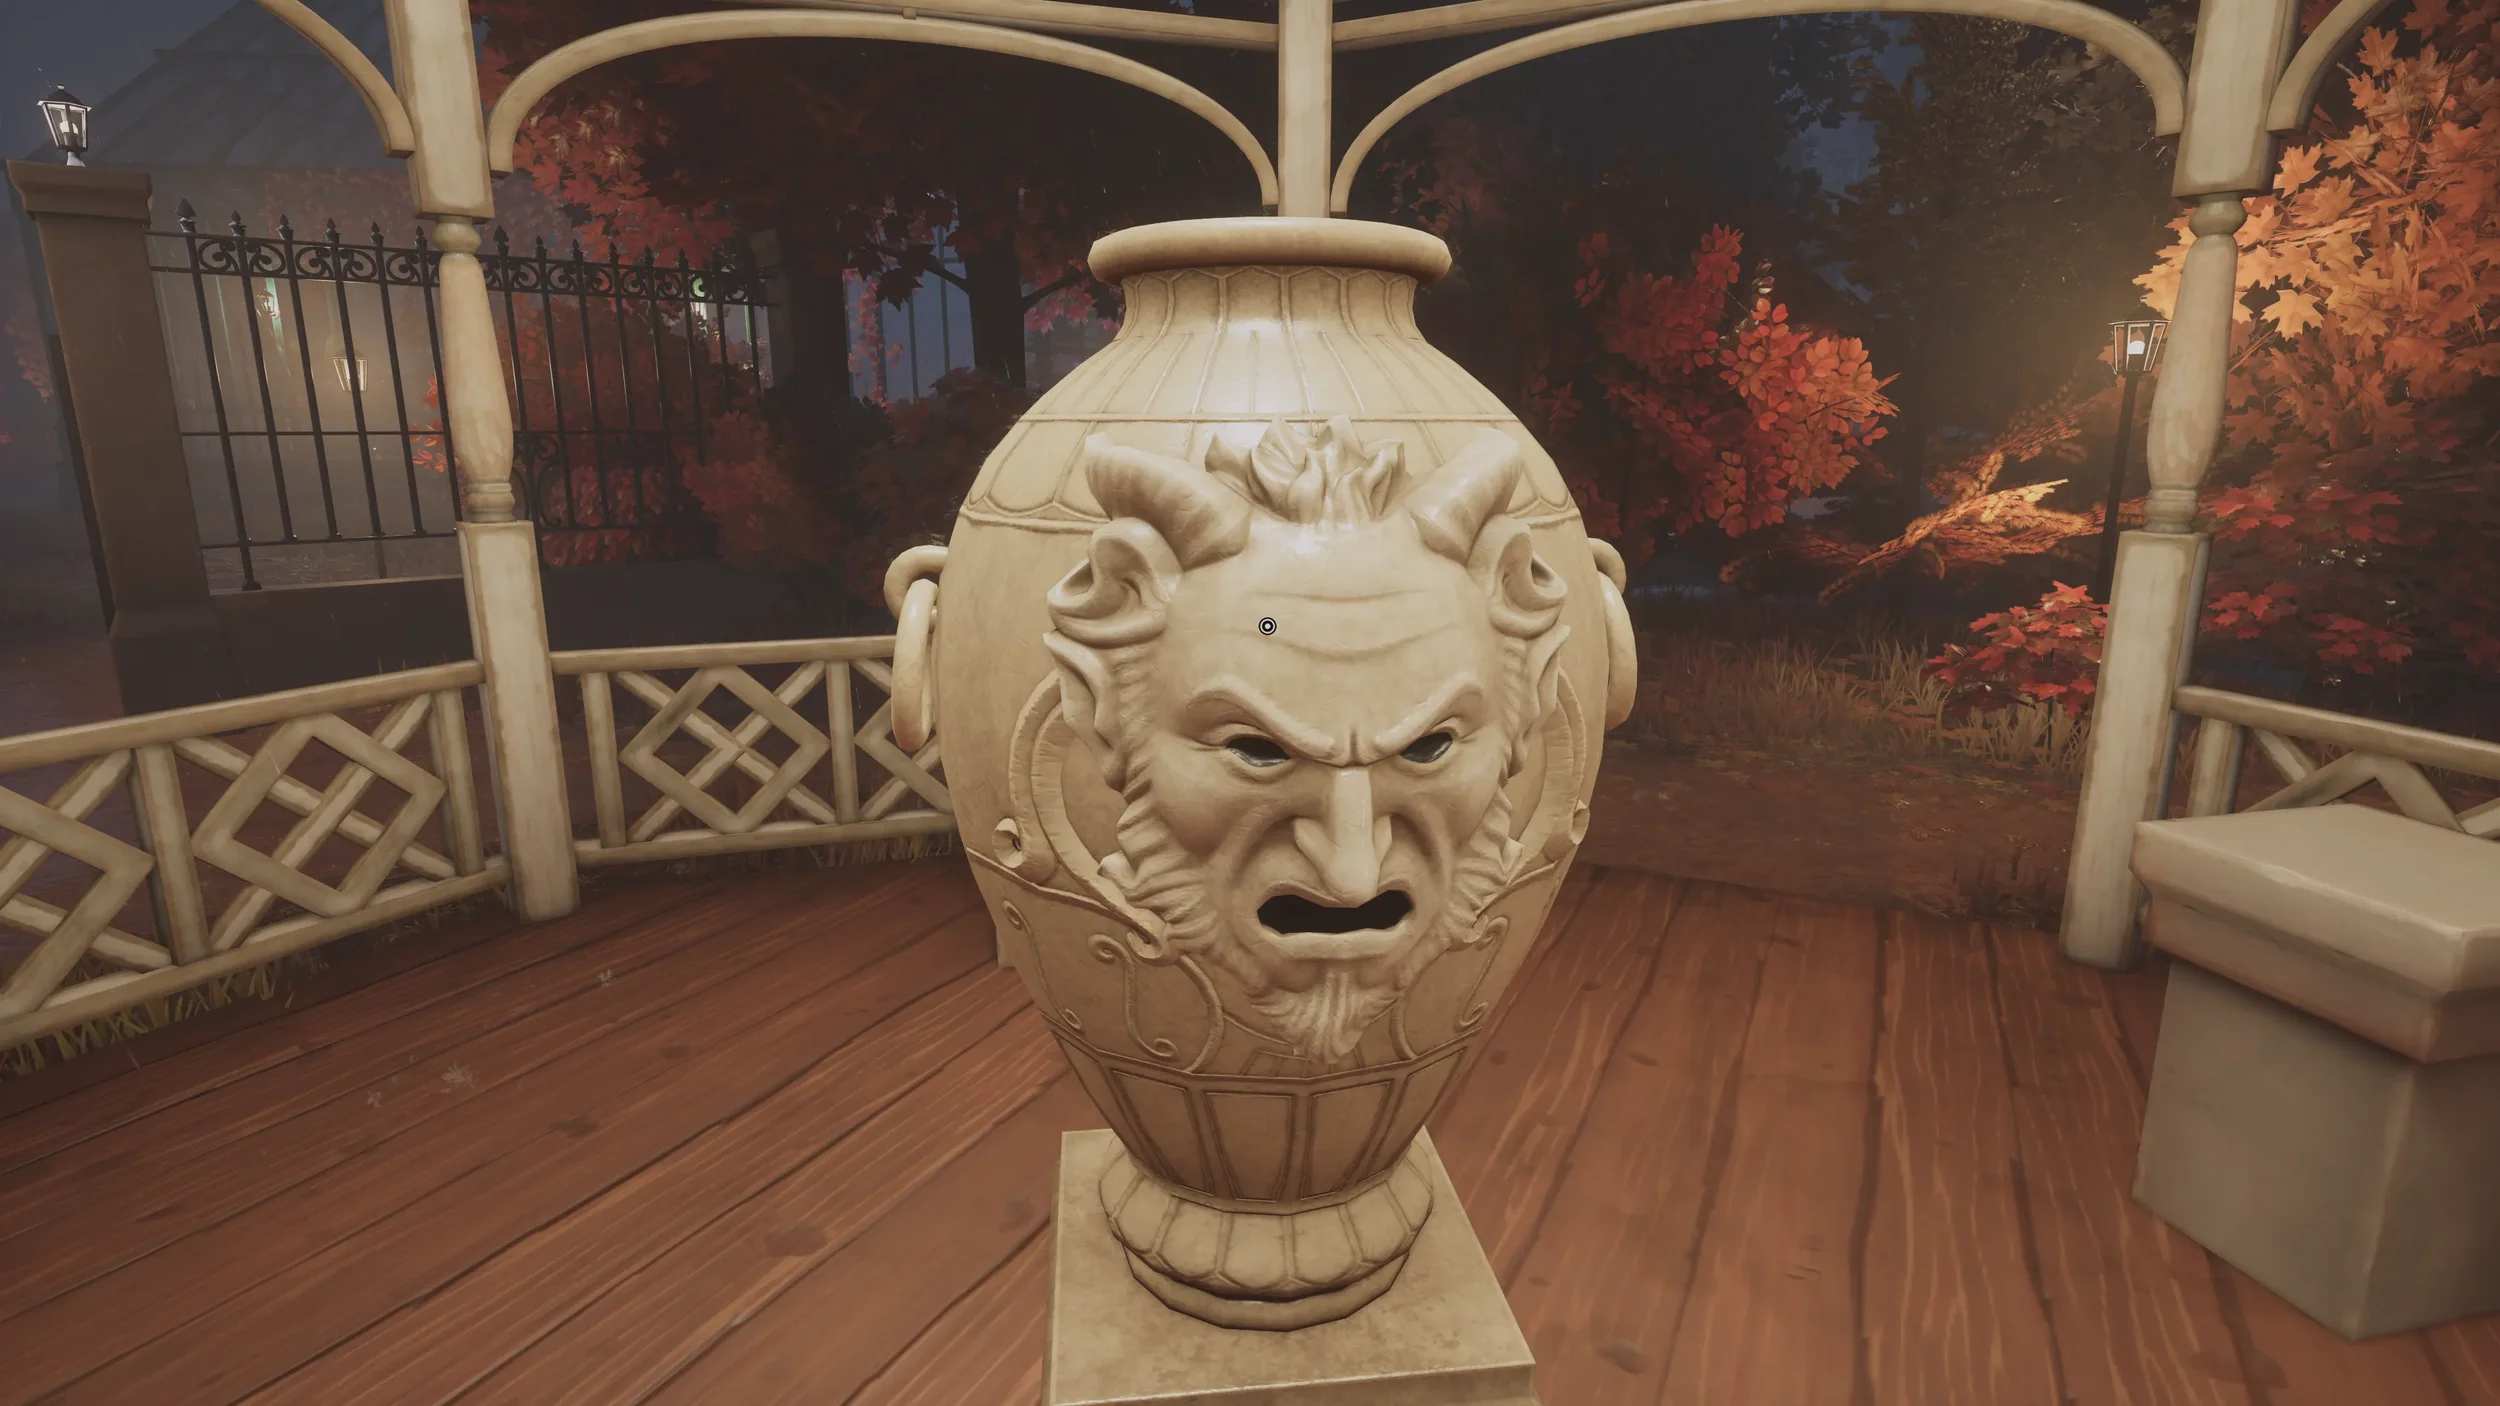
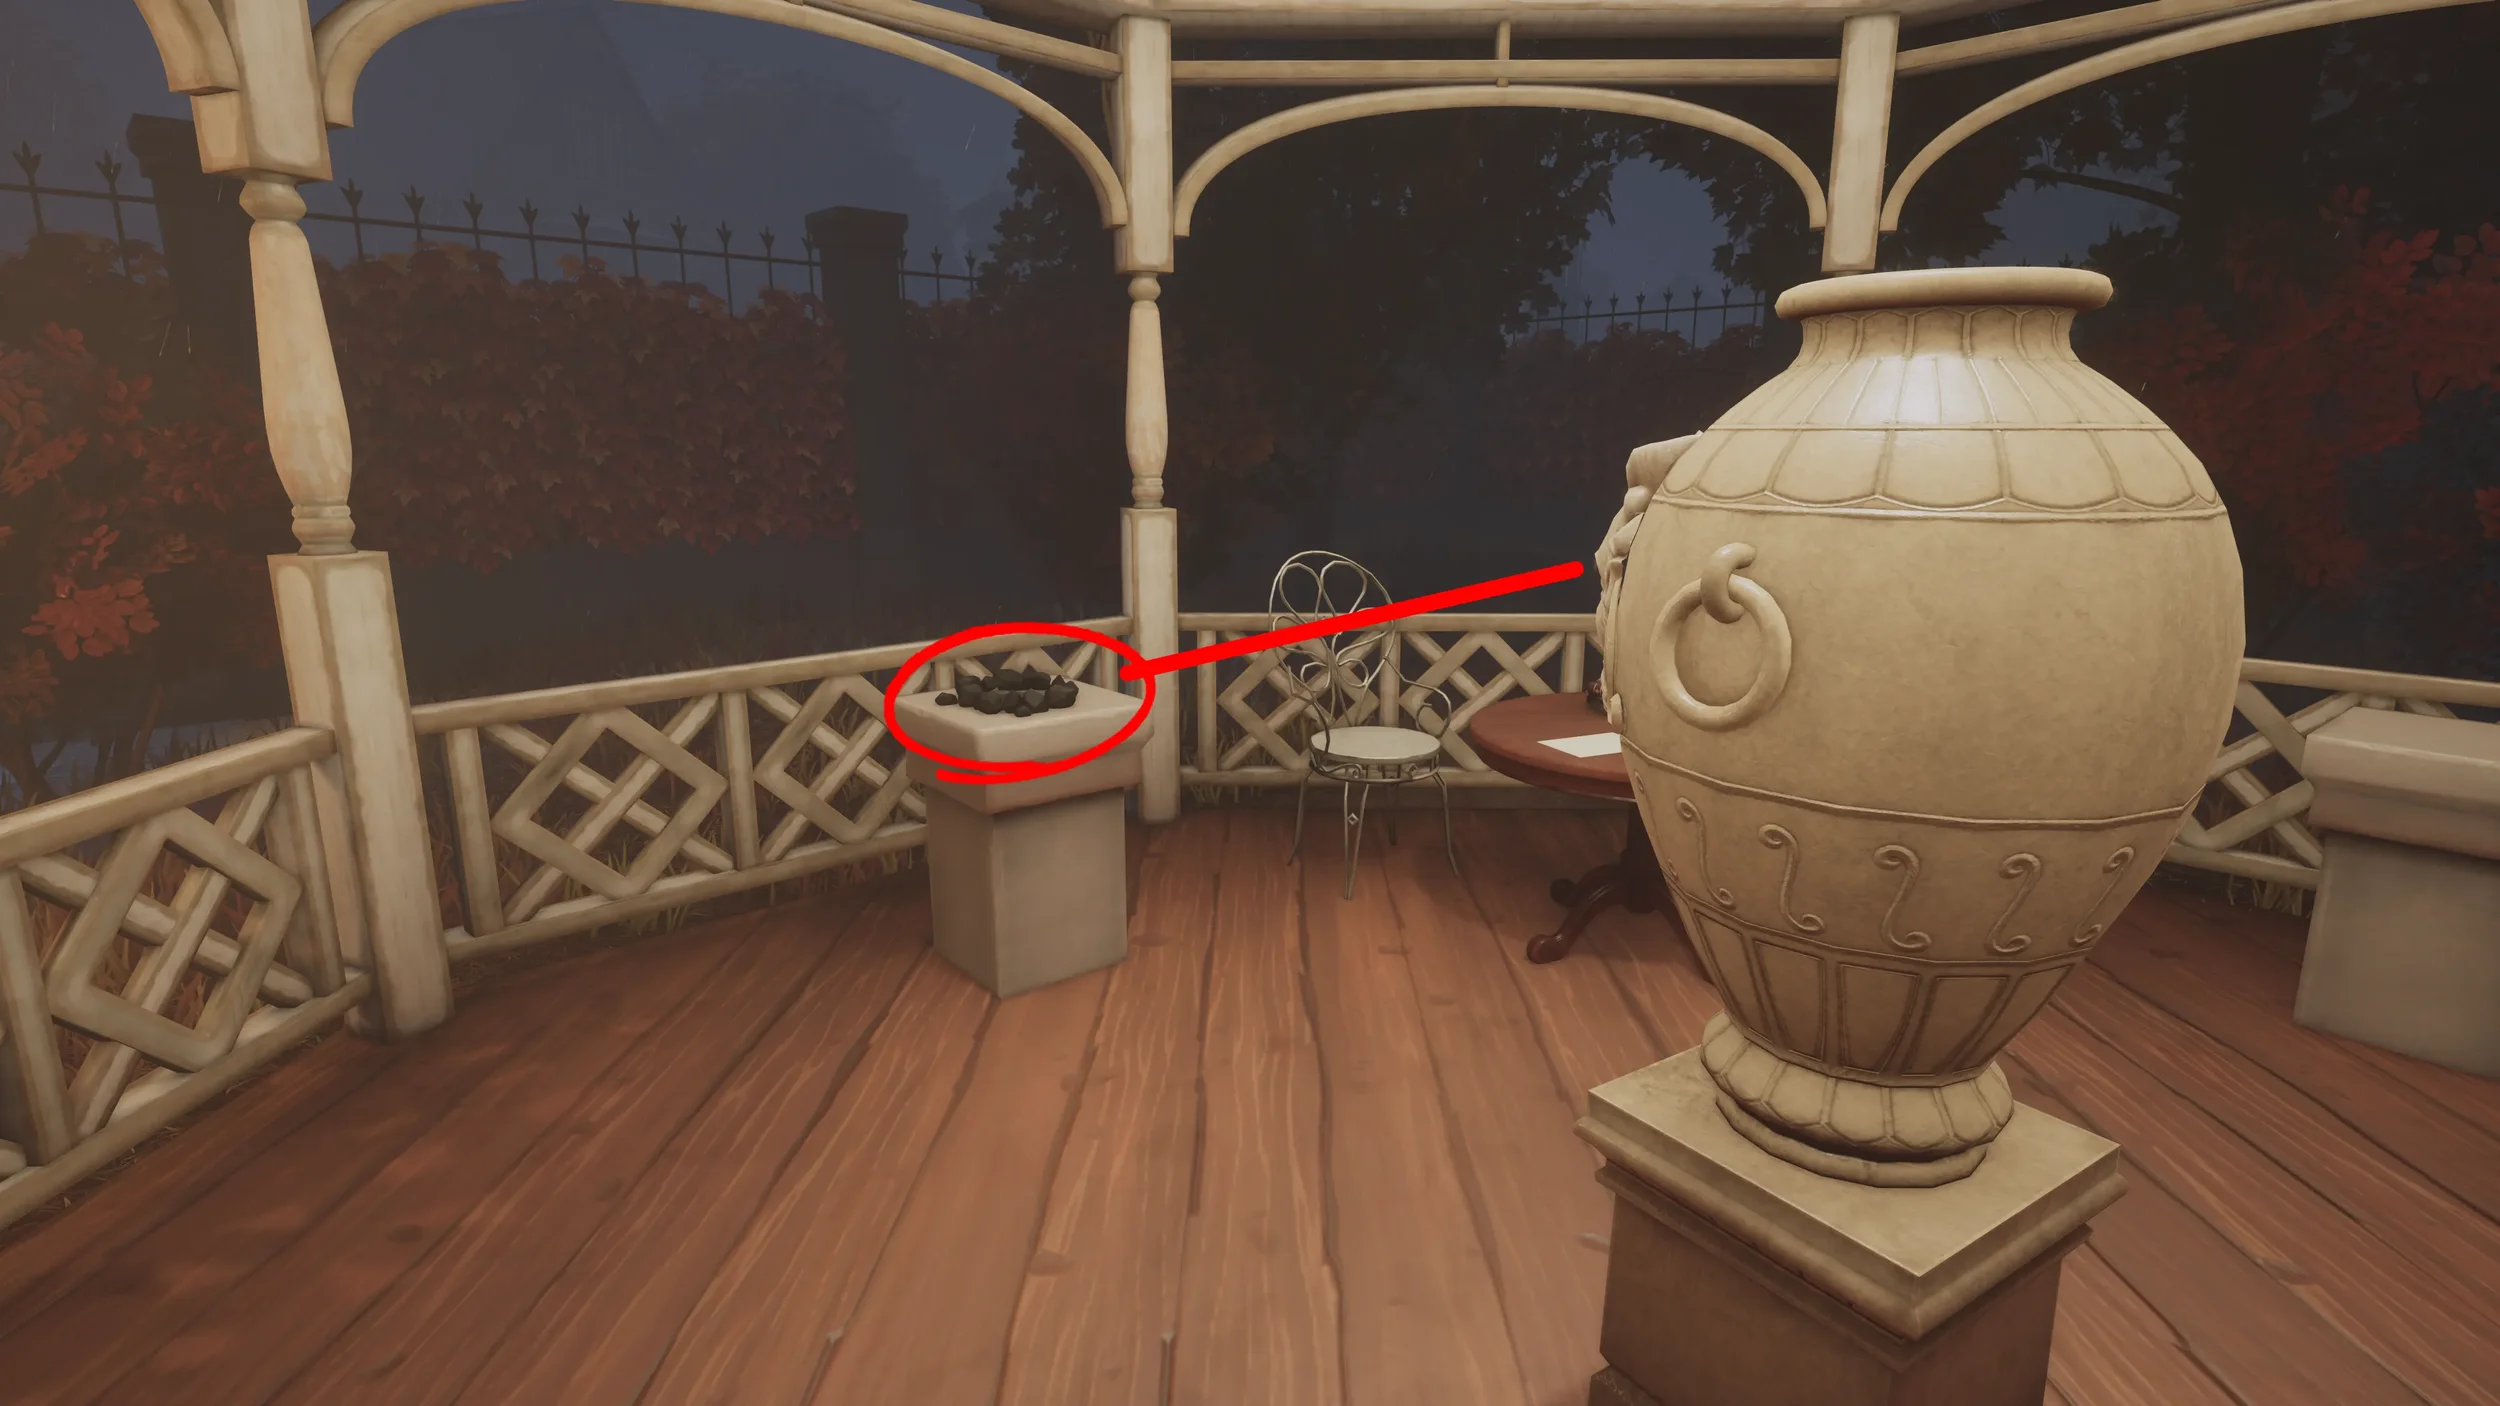
Next go through the other gate that you can see next to the Greenhouse, through here under the gazebo area you will find the next vase, this is the one with the angry face and it needs to be facing the Fire symbol, you may notice there isn’t actually any fire nearby but there is a small pile of ashes on a pedestal, this is where you need to face the vase.
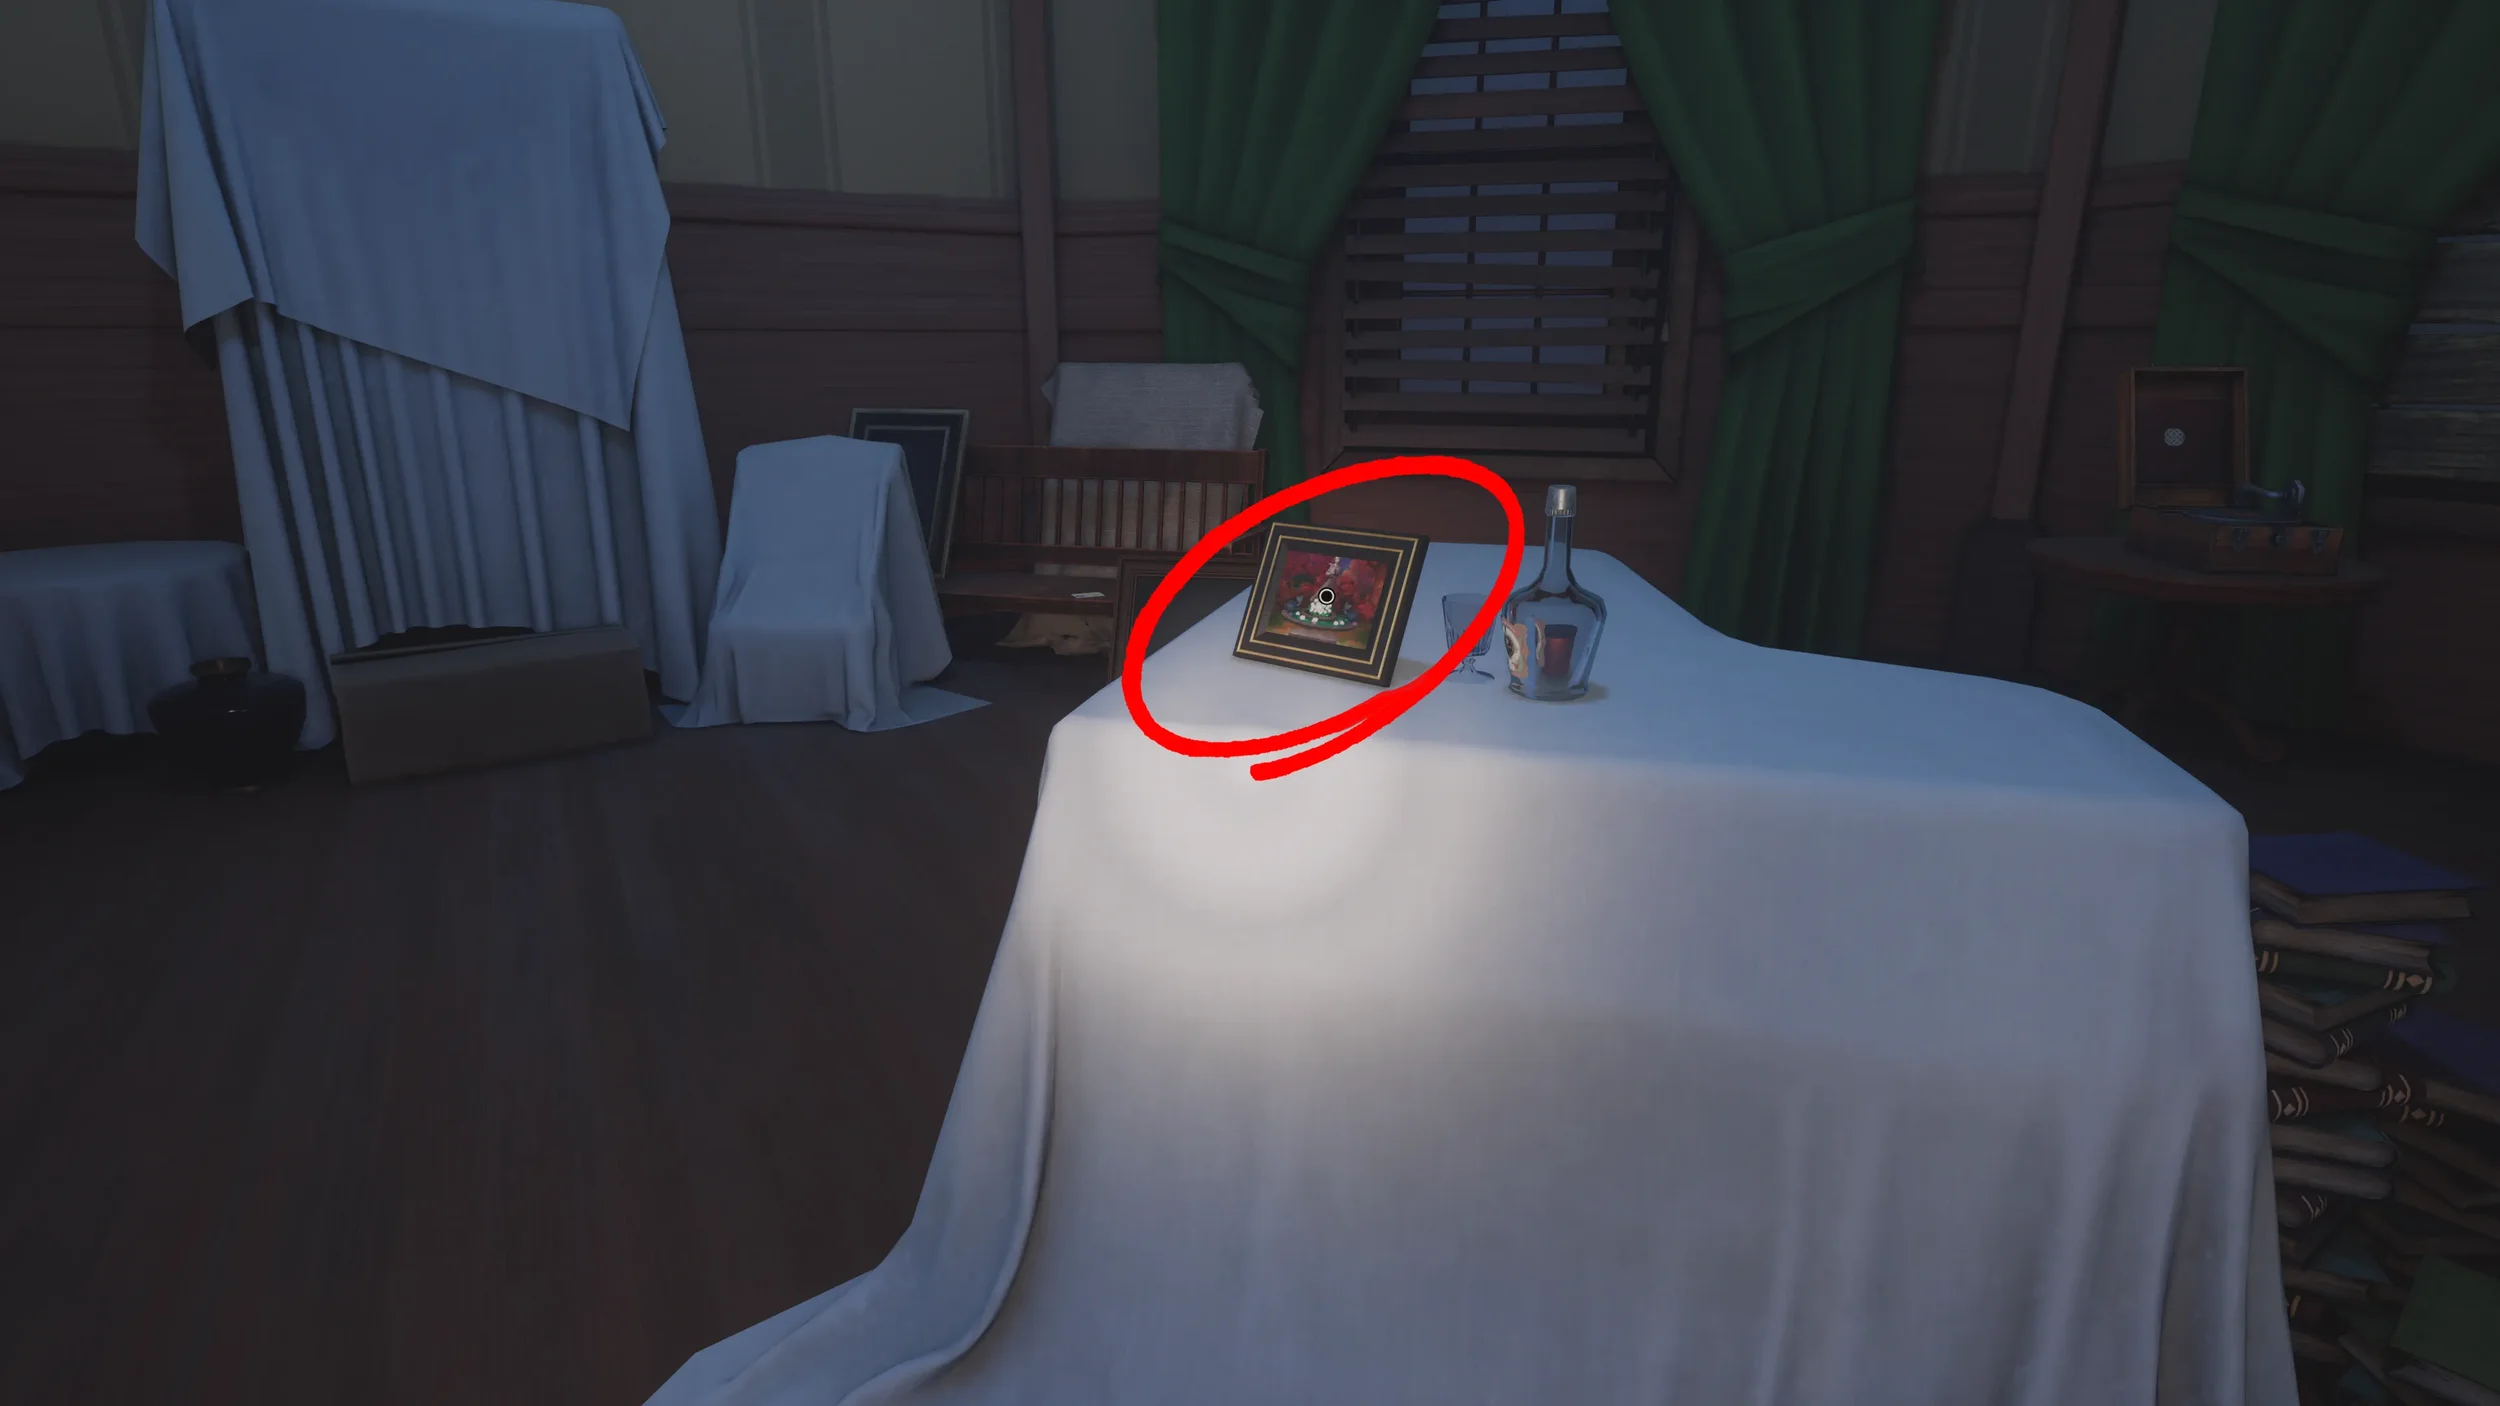
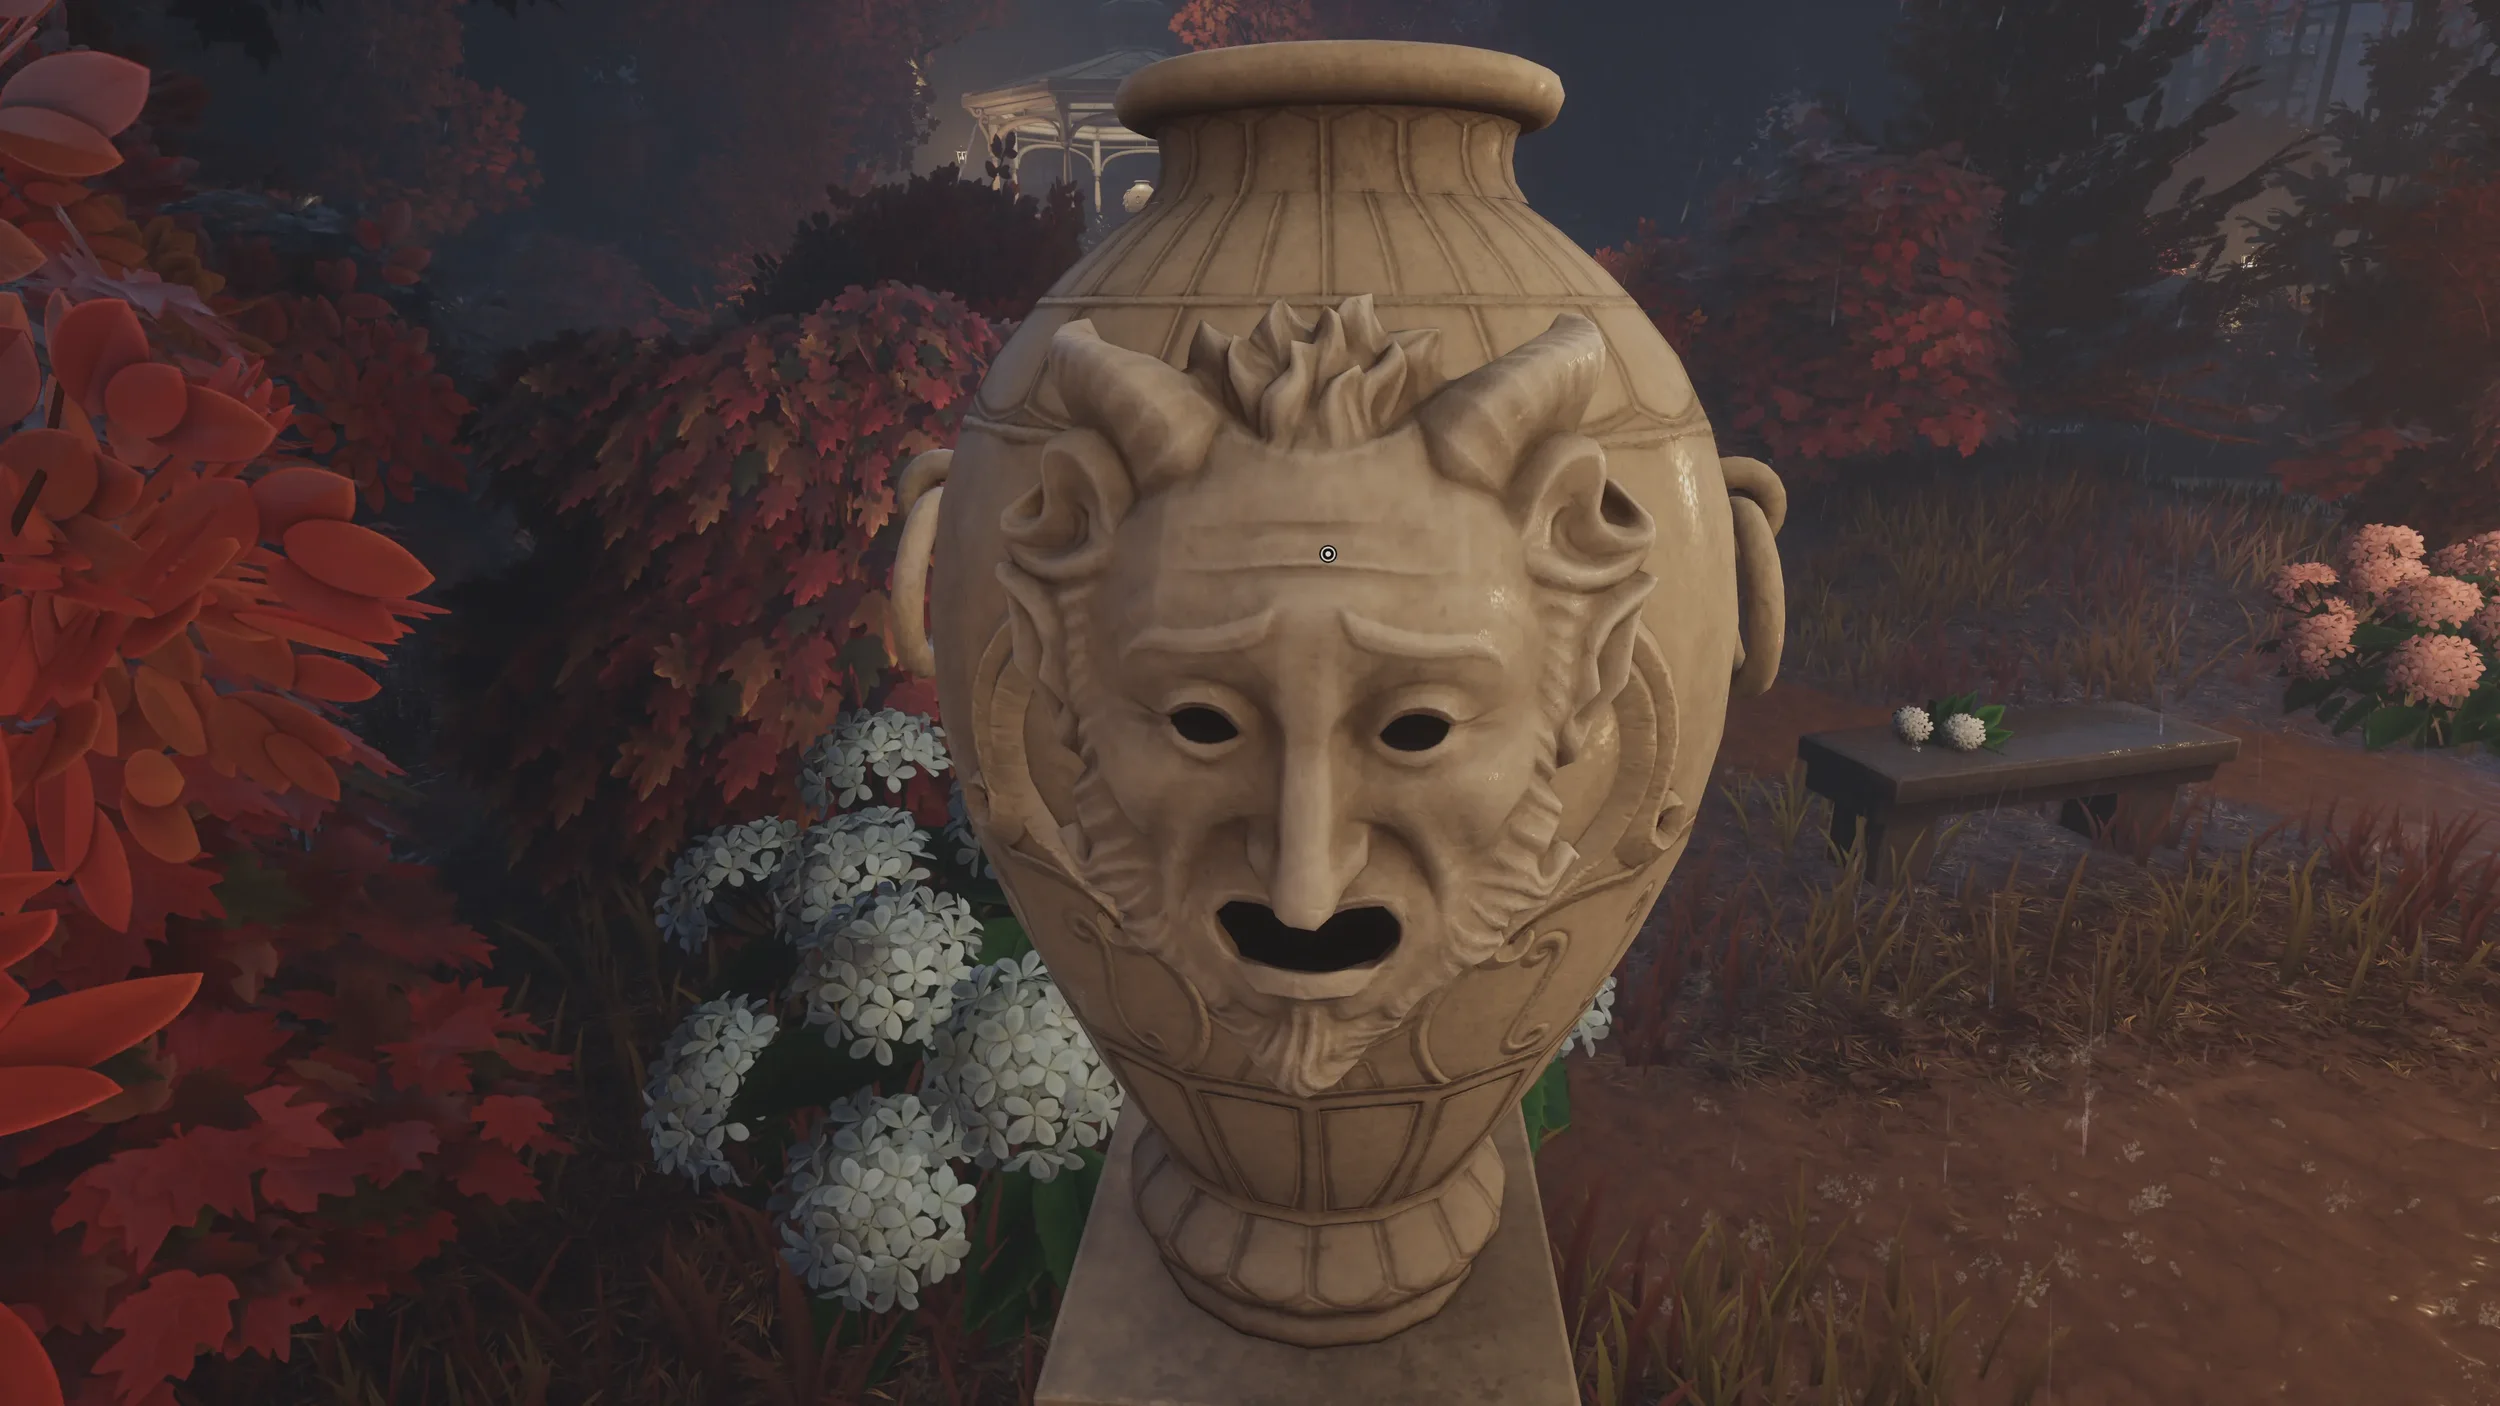
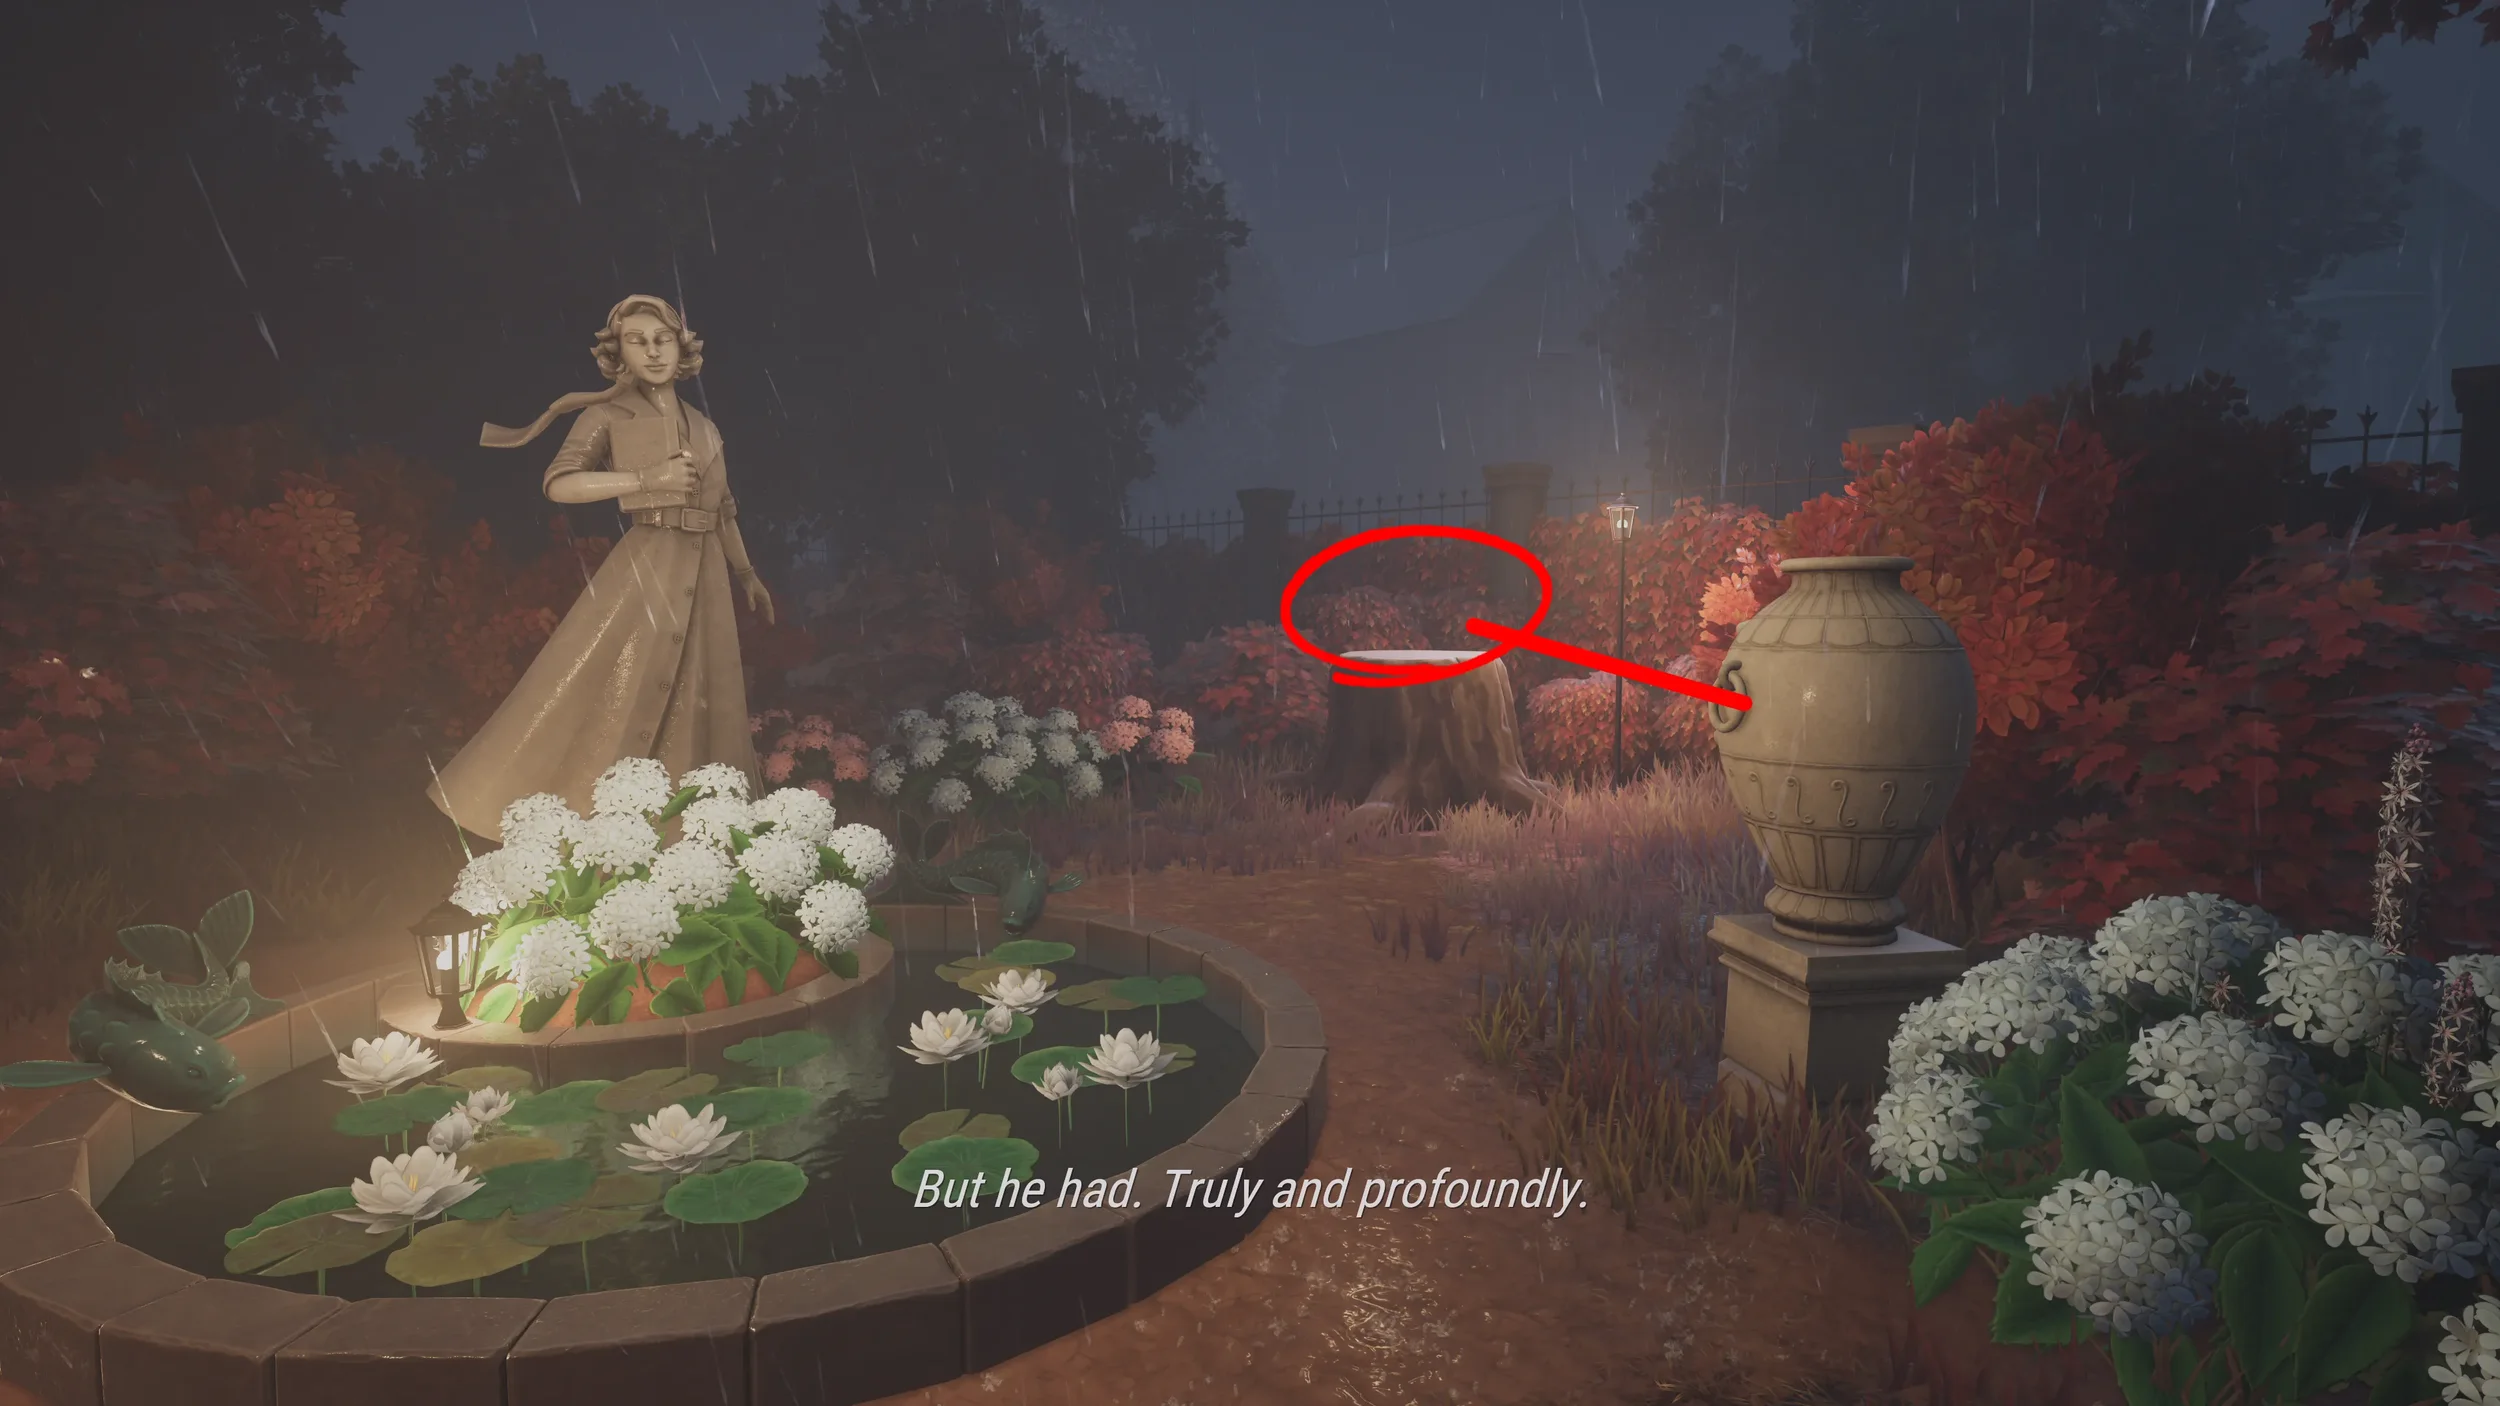
From the gazebo keep going down the same path until you see a statue of Norah, to the right of the statue you will see the 3rd vase, the one that has the scared face, this one needs to be directed at the Triquetra symbol, to solve this is why we picked up the Photograph clue in the dark room earlier, if you look closely at the Photograph you will see that the tree that used to be next to the statue (that is now cut down) had the Triquetra symbol on it, so face the vase towards the tree stump.

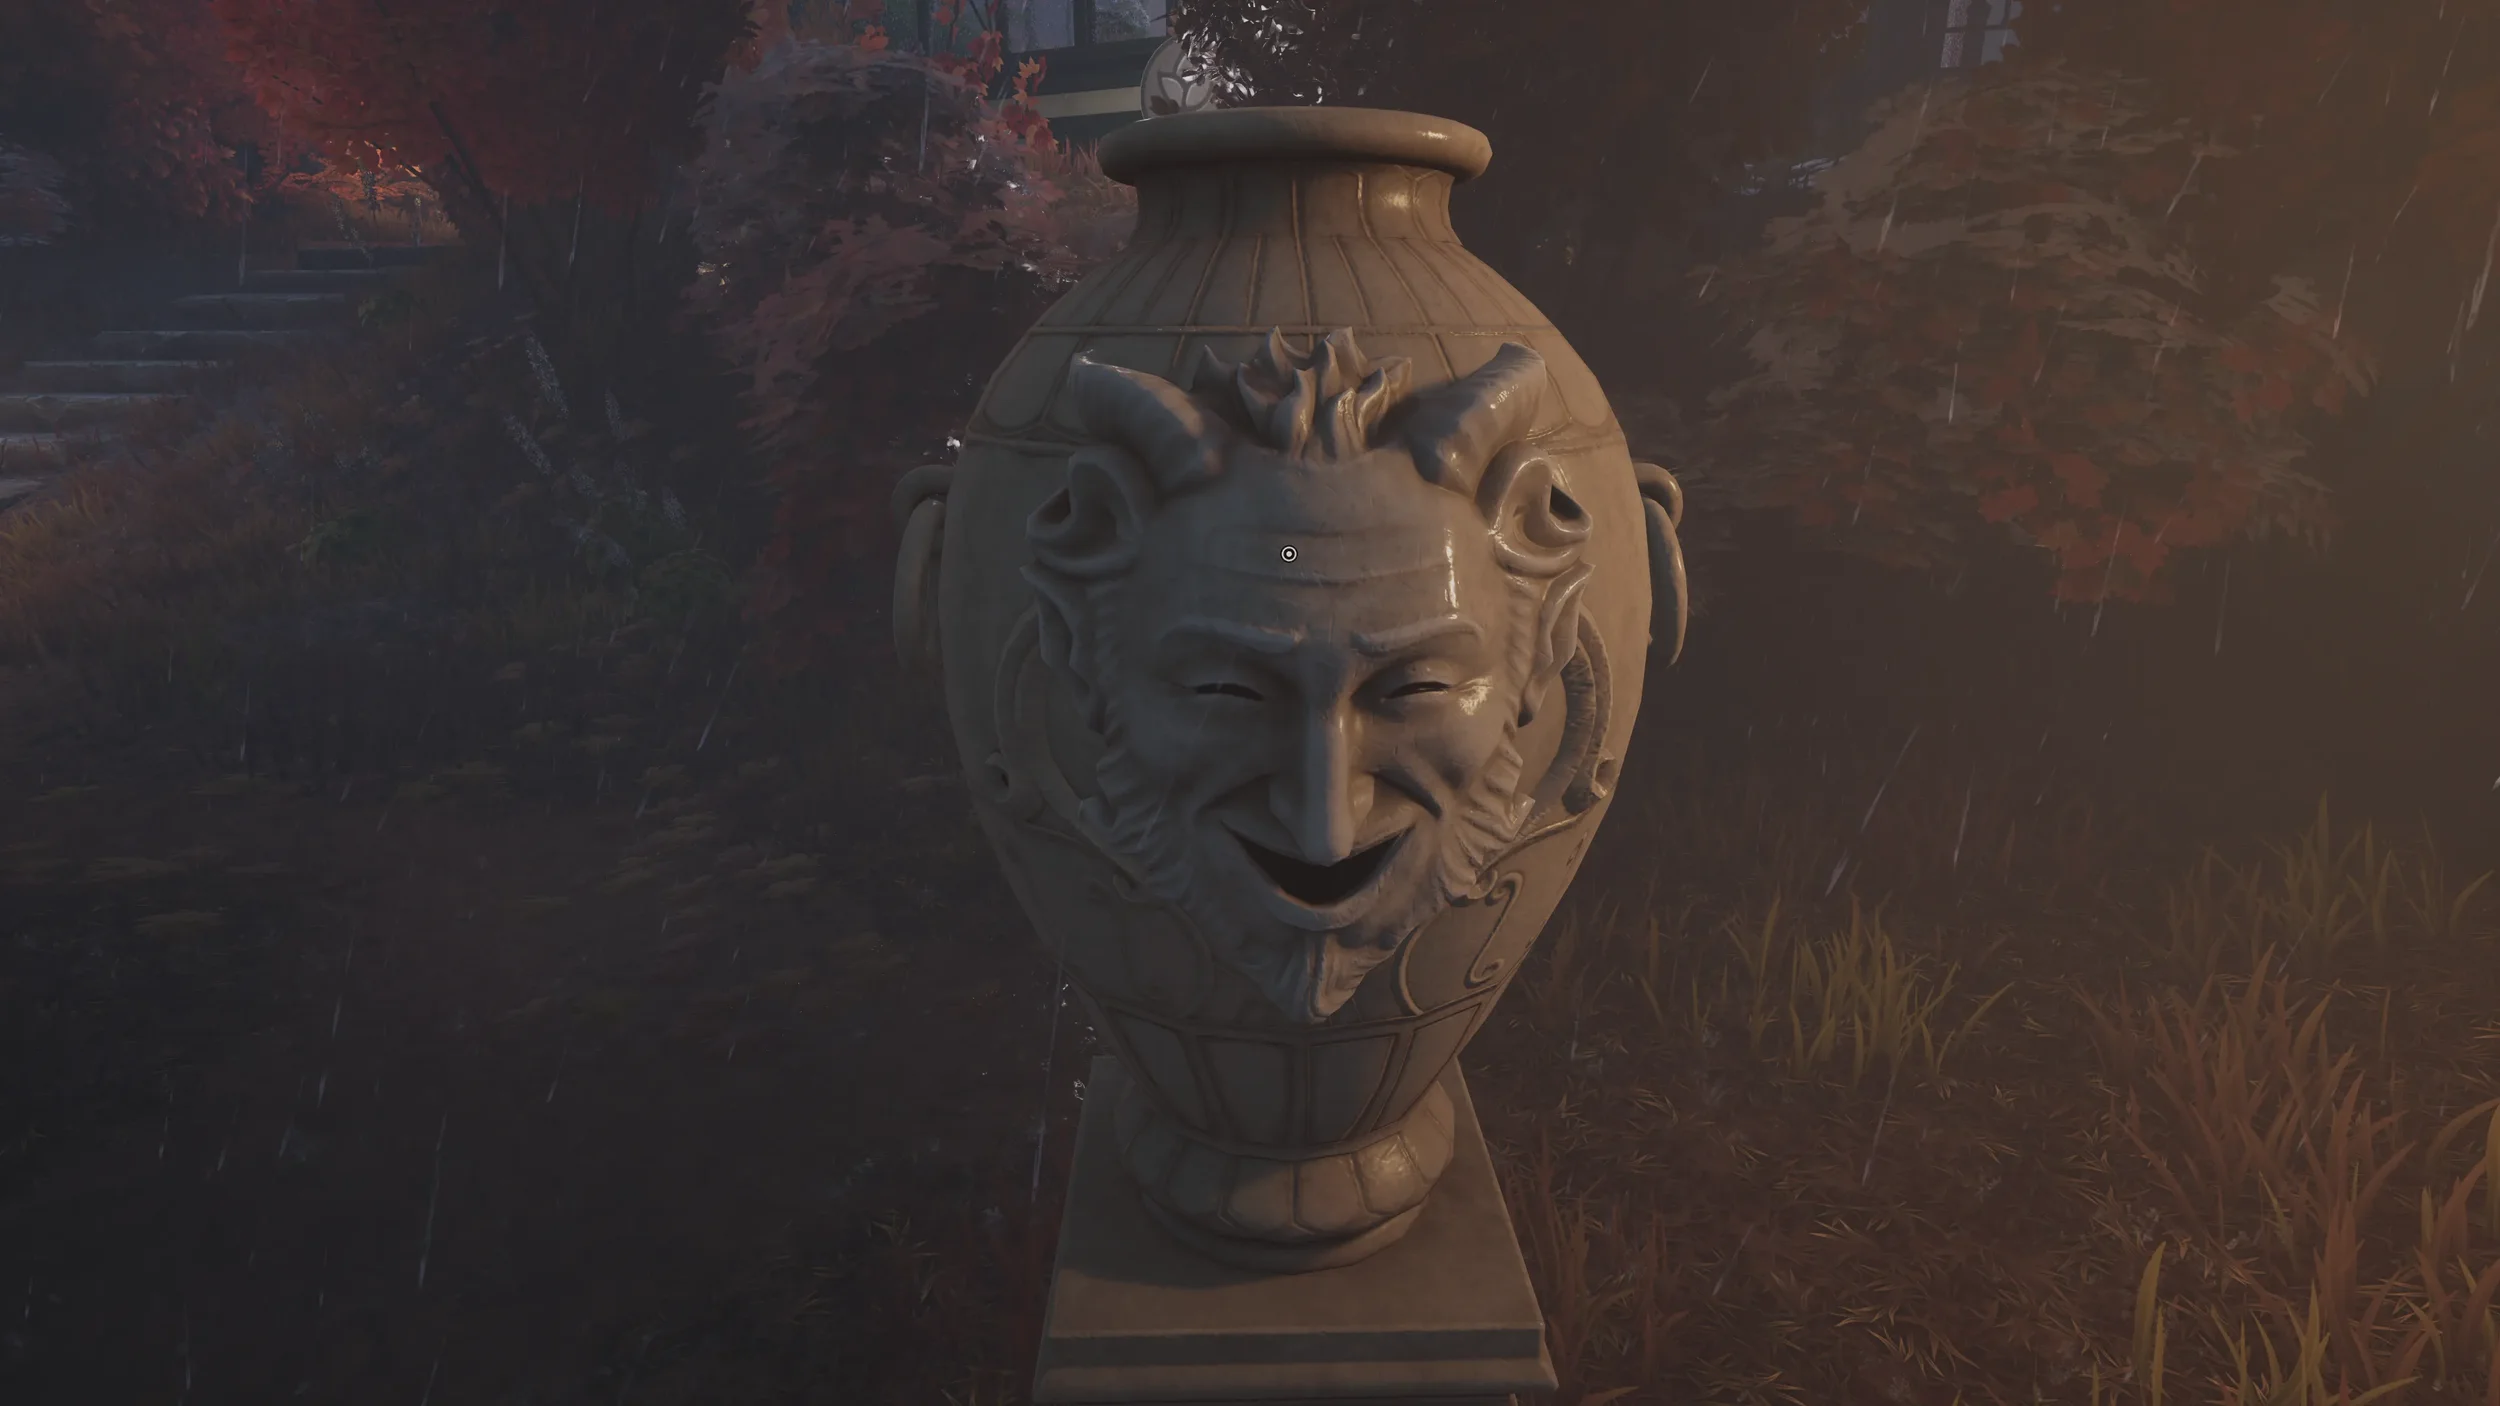
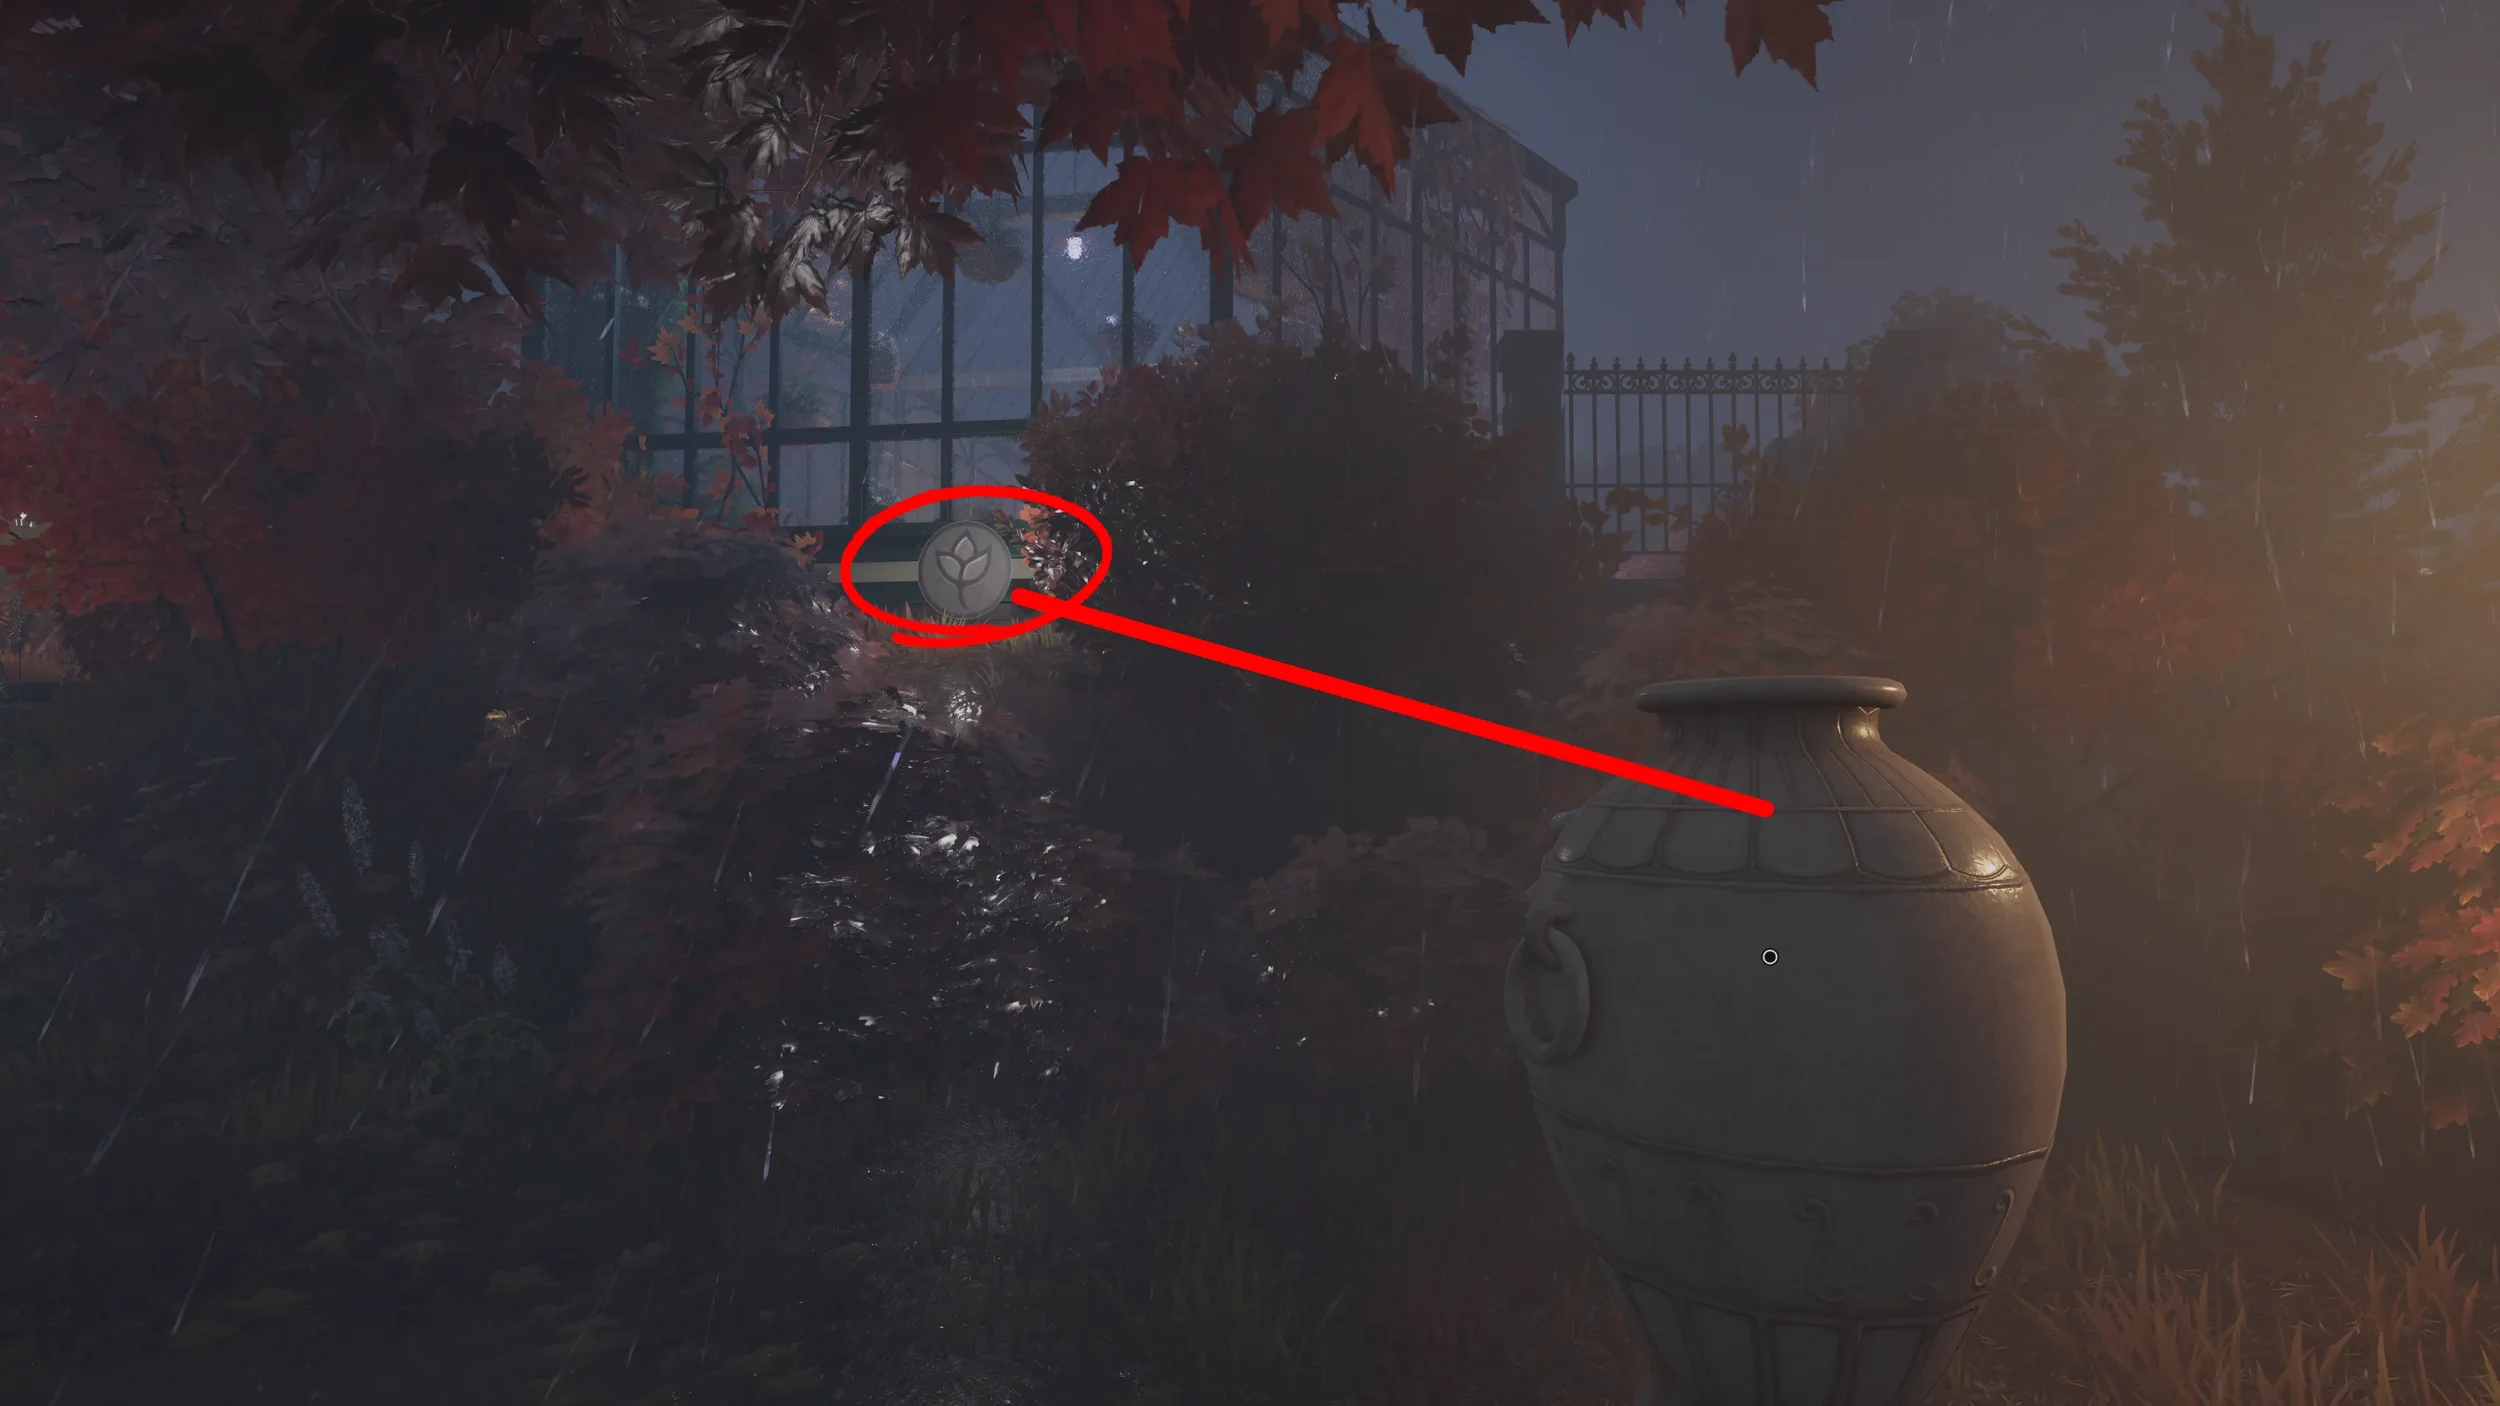
The vase with the happy face can be found just under the Greenhouse, before crossing back over the small bridge.
This one needs to be facing the Leaf symbol which can be seen by looking up at the Greenhouse.
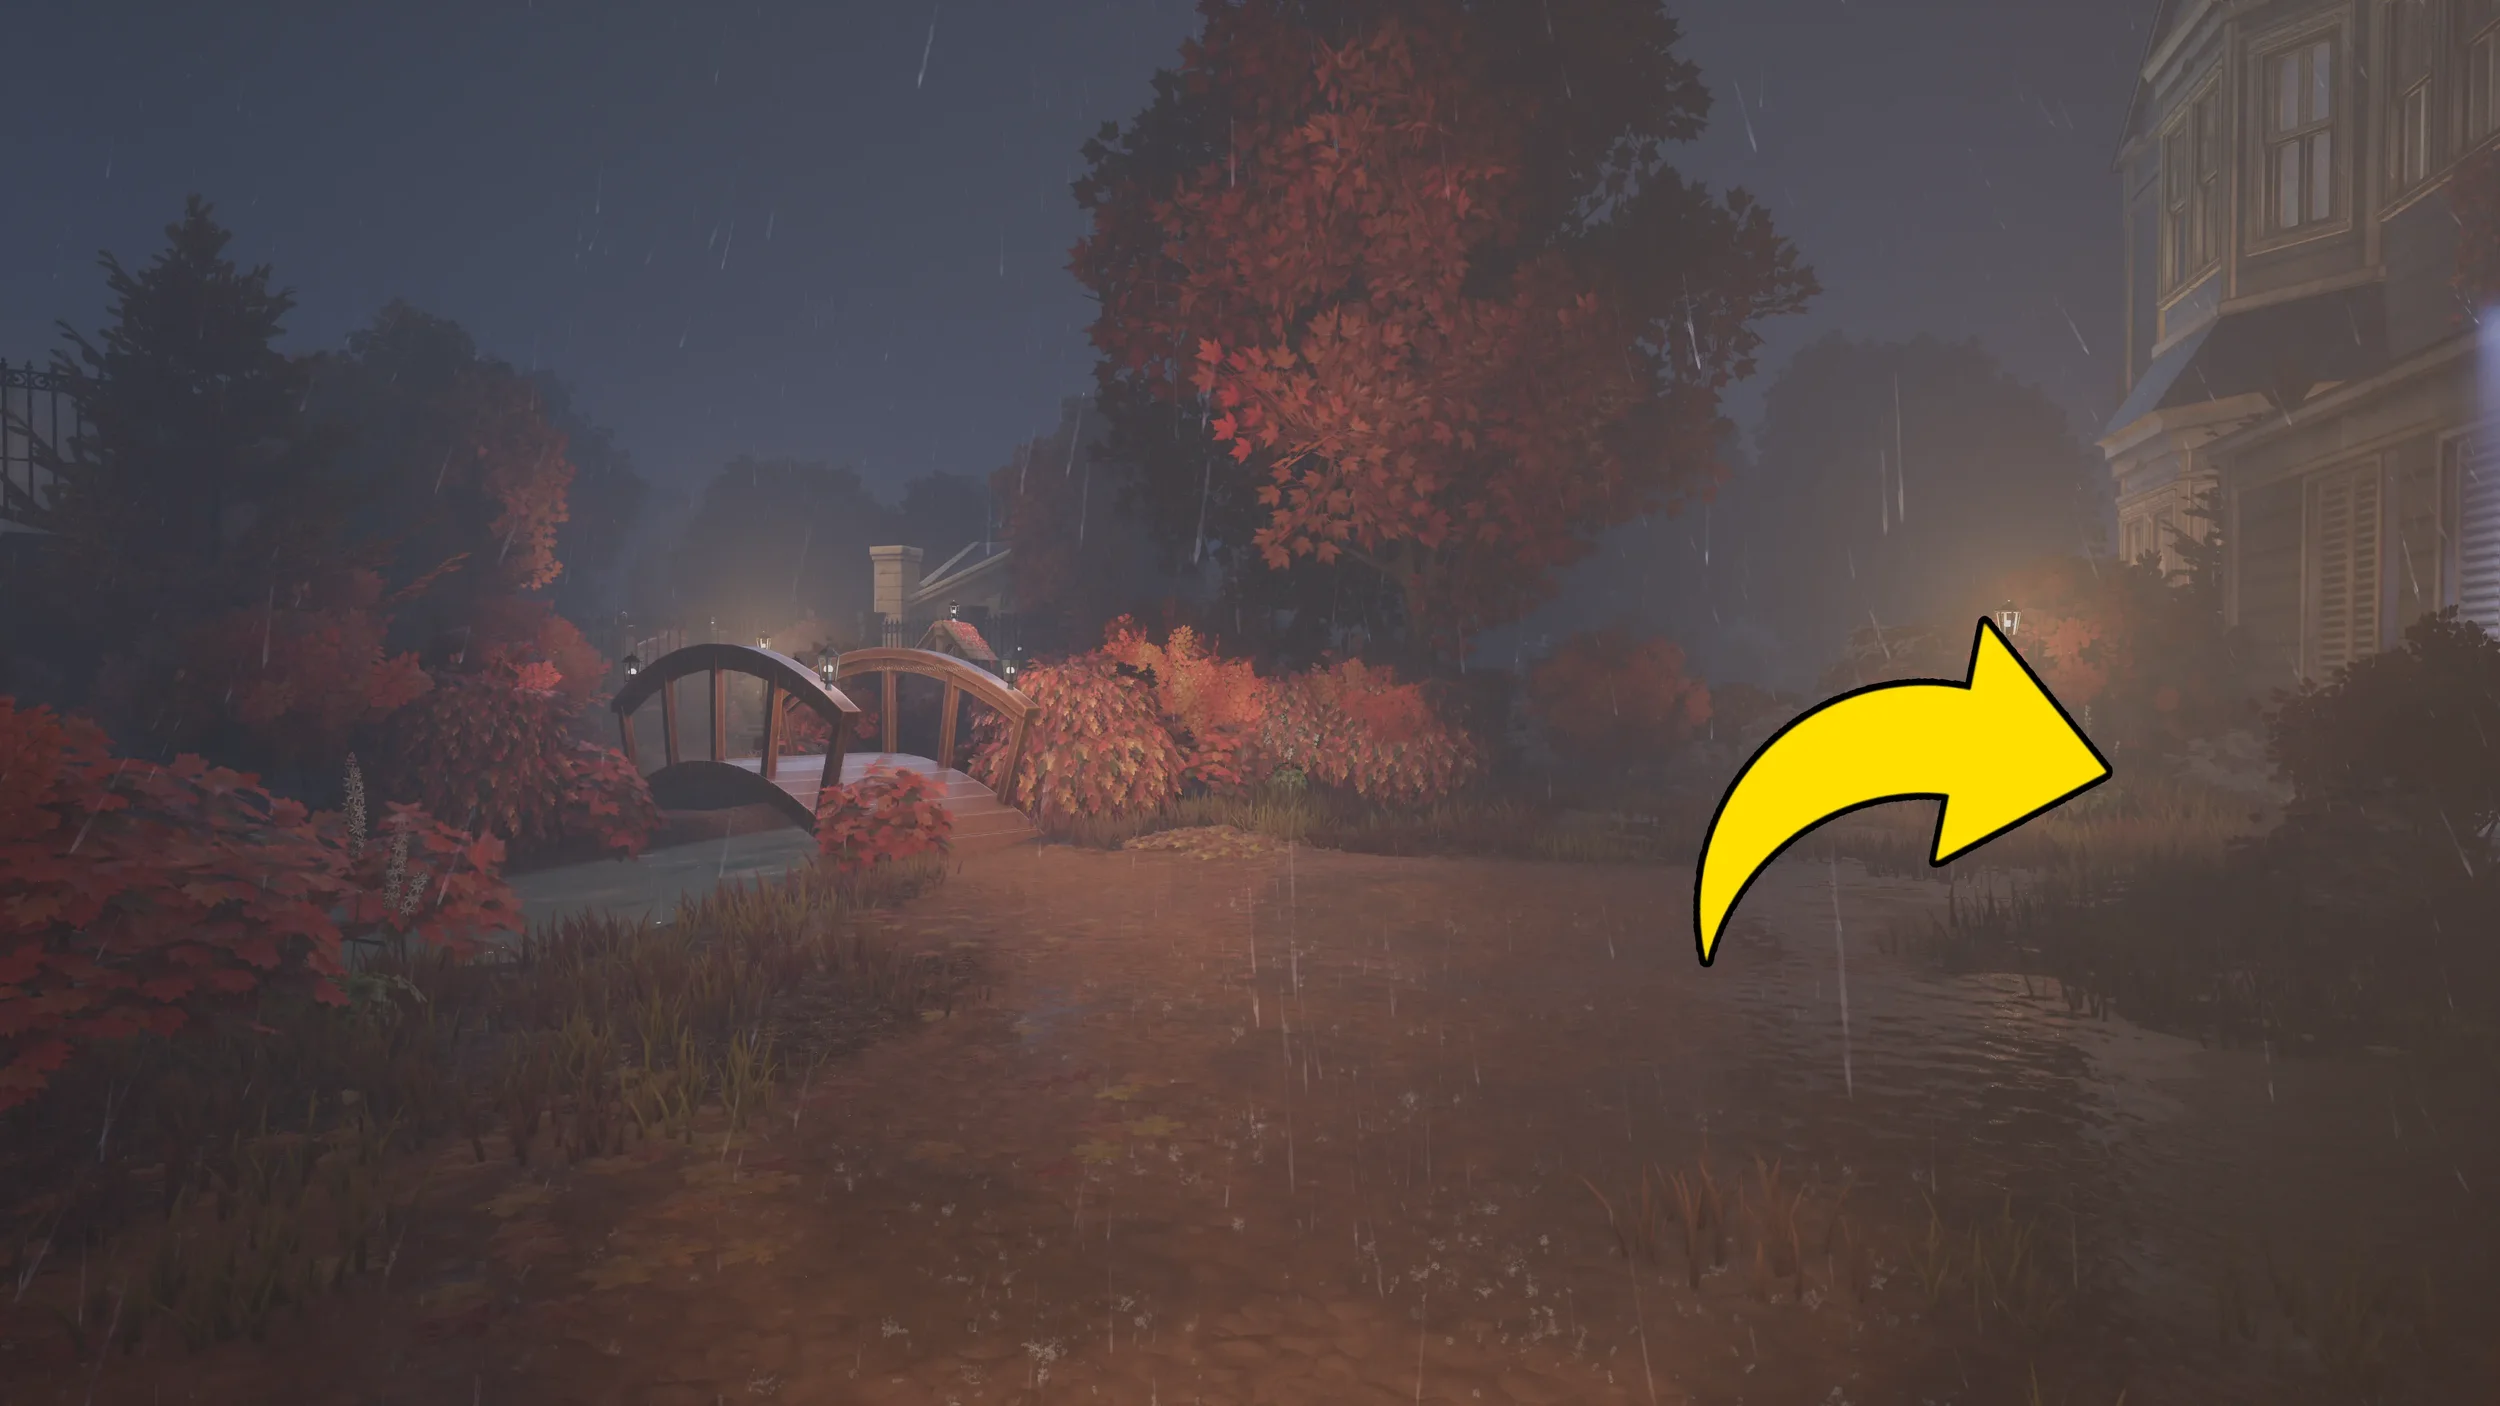
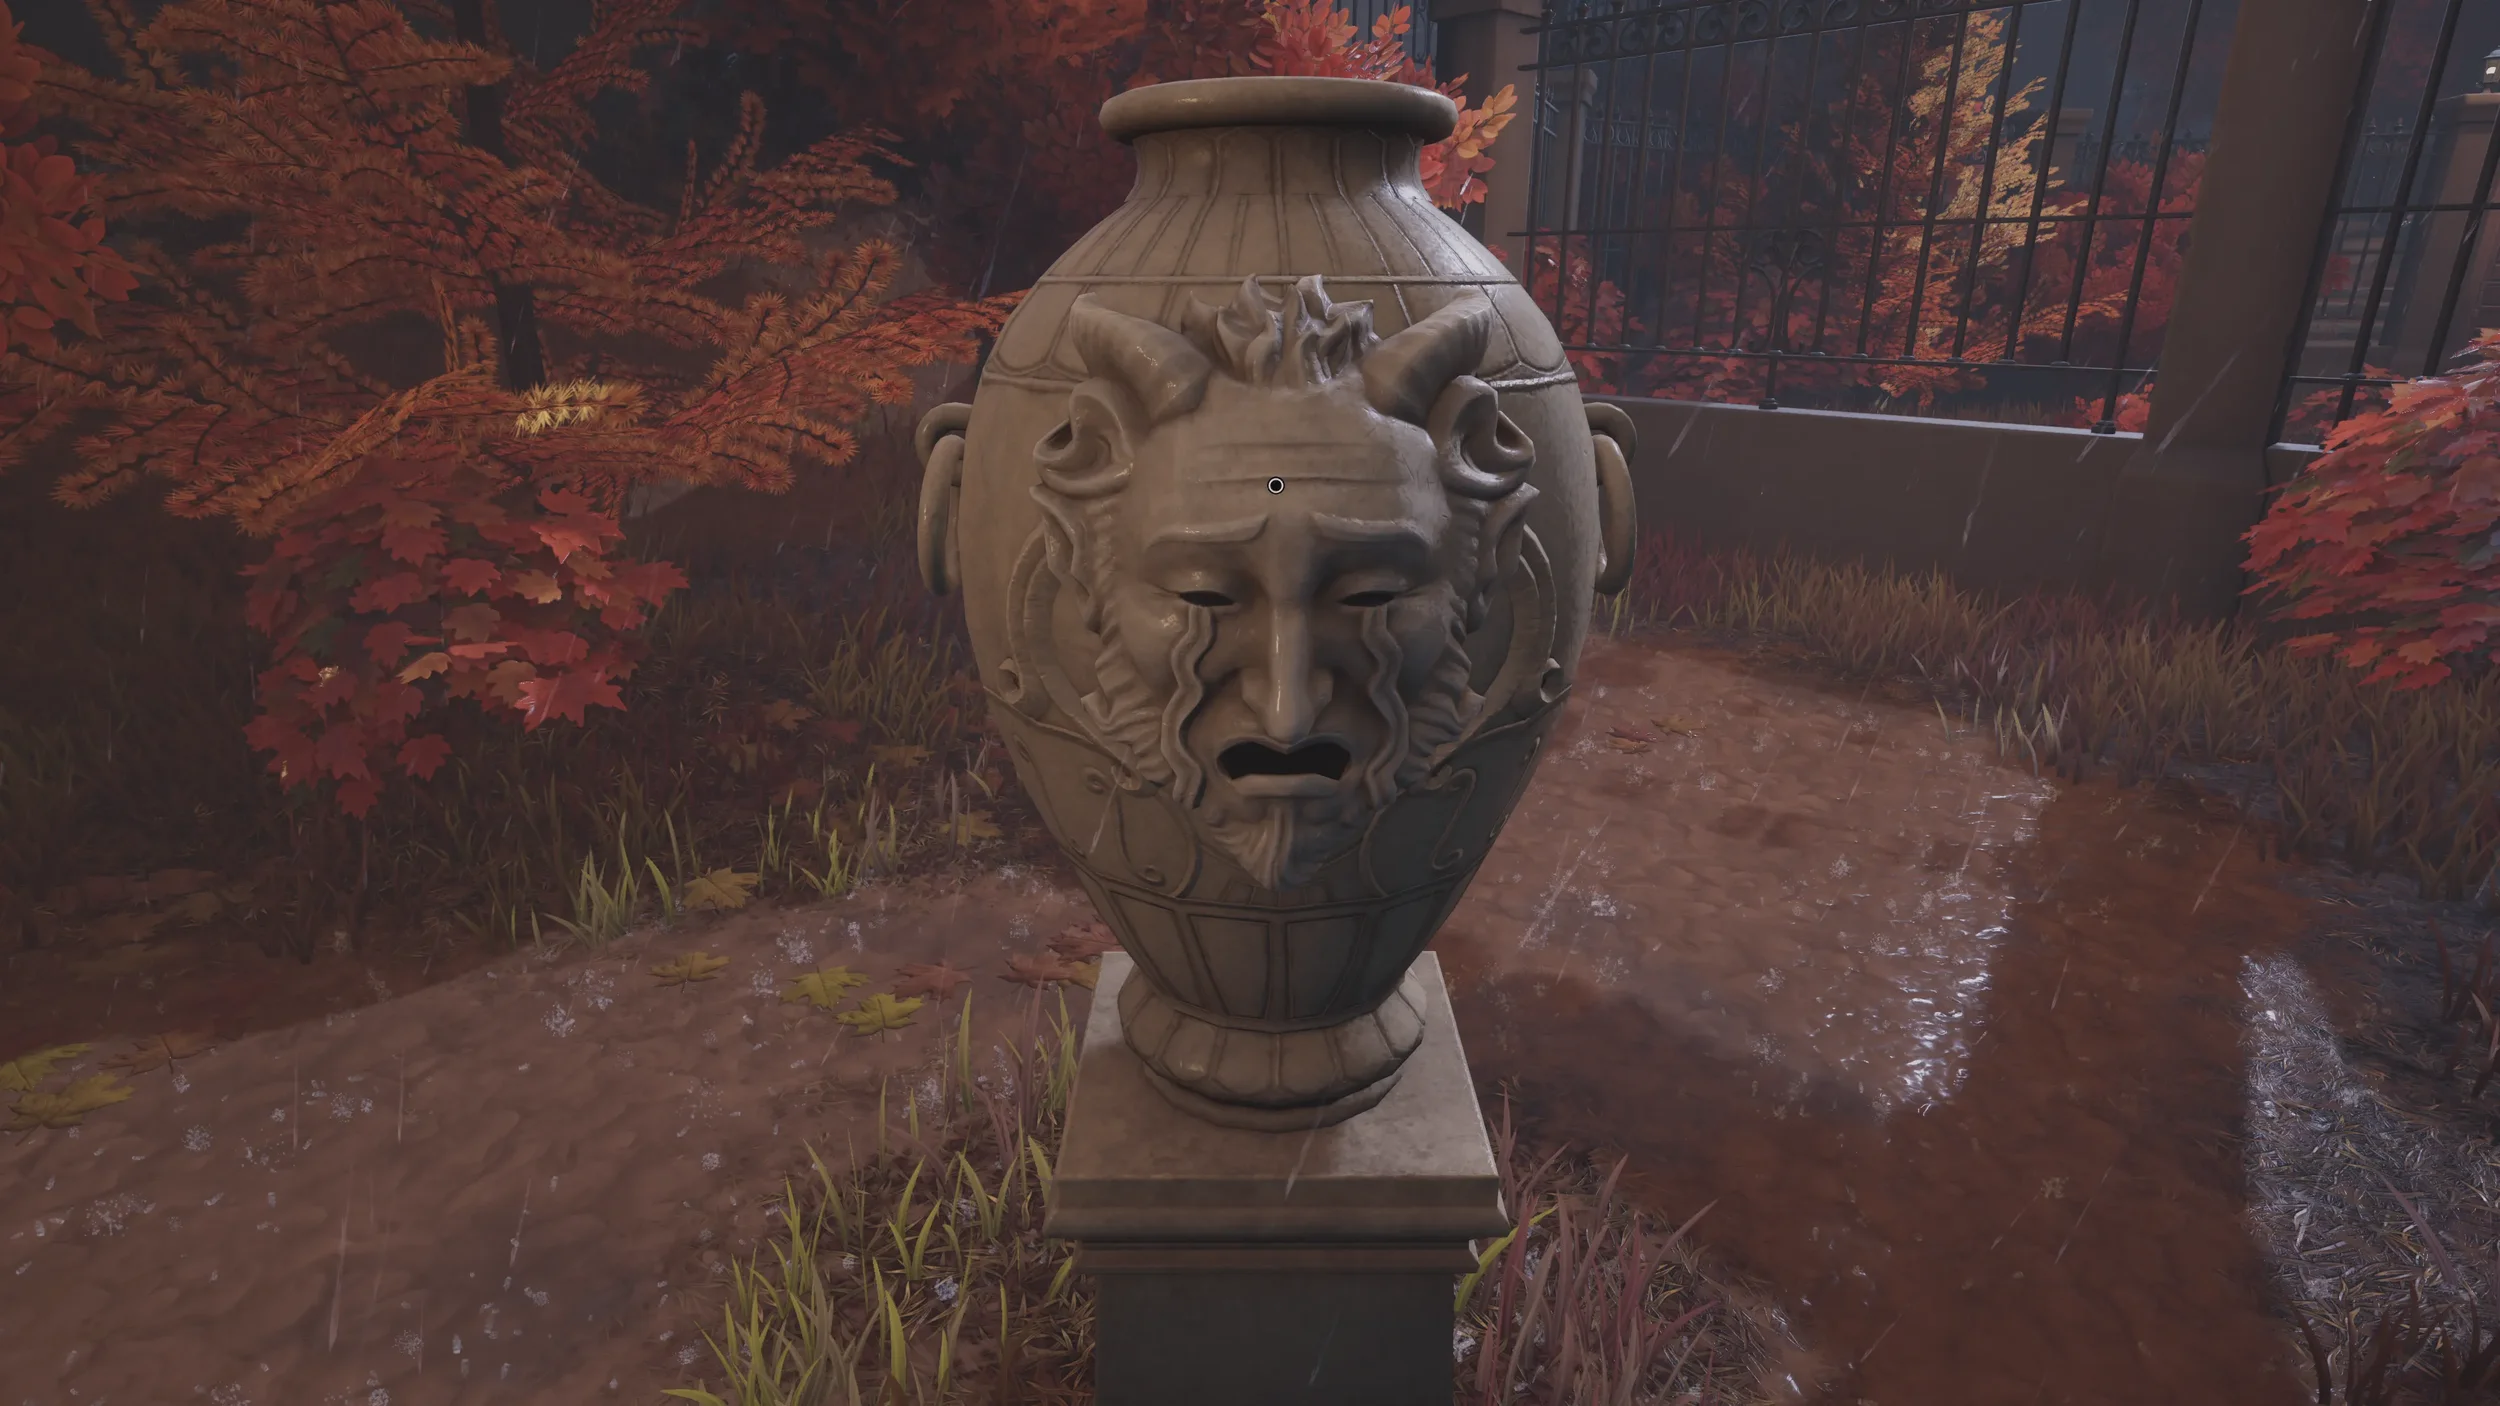
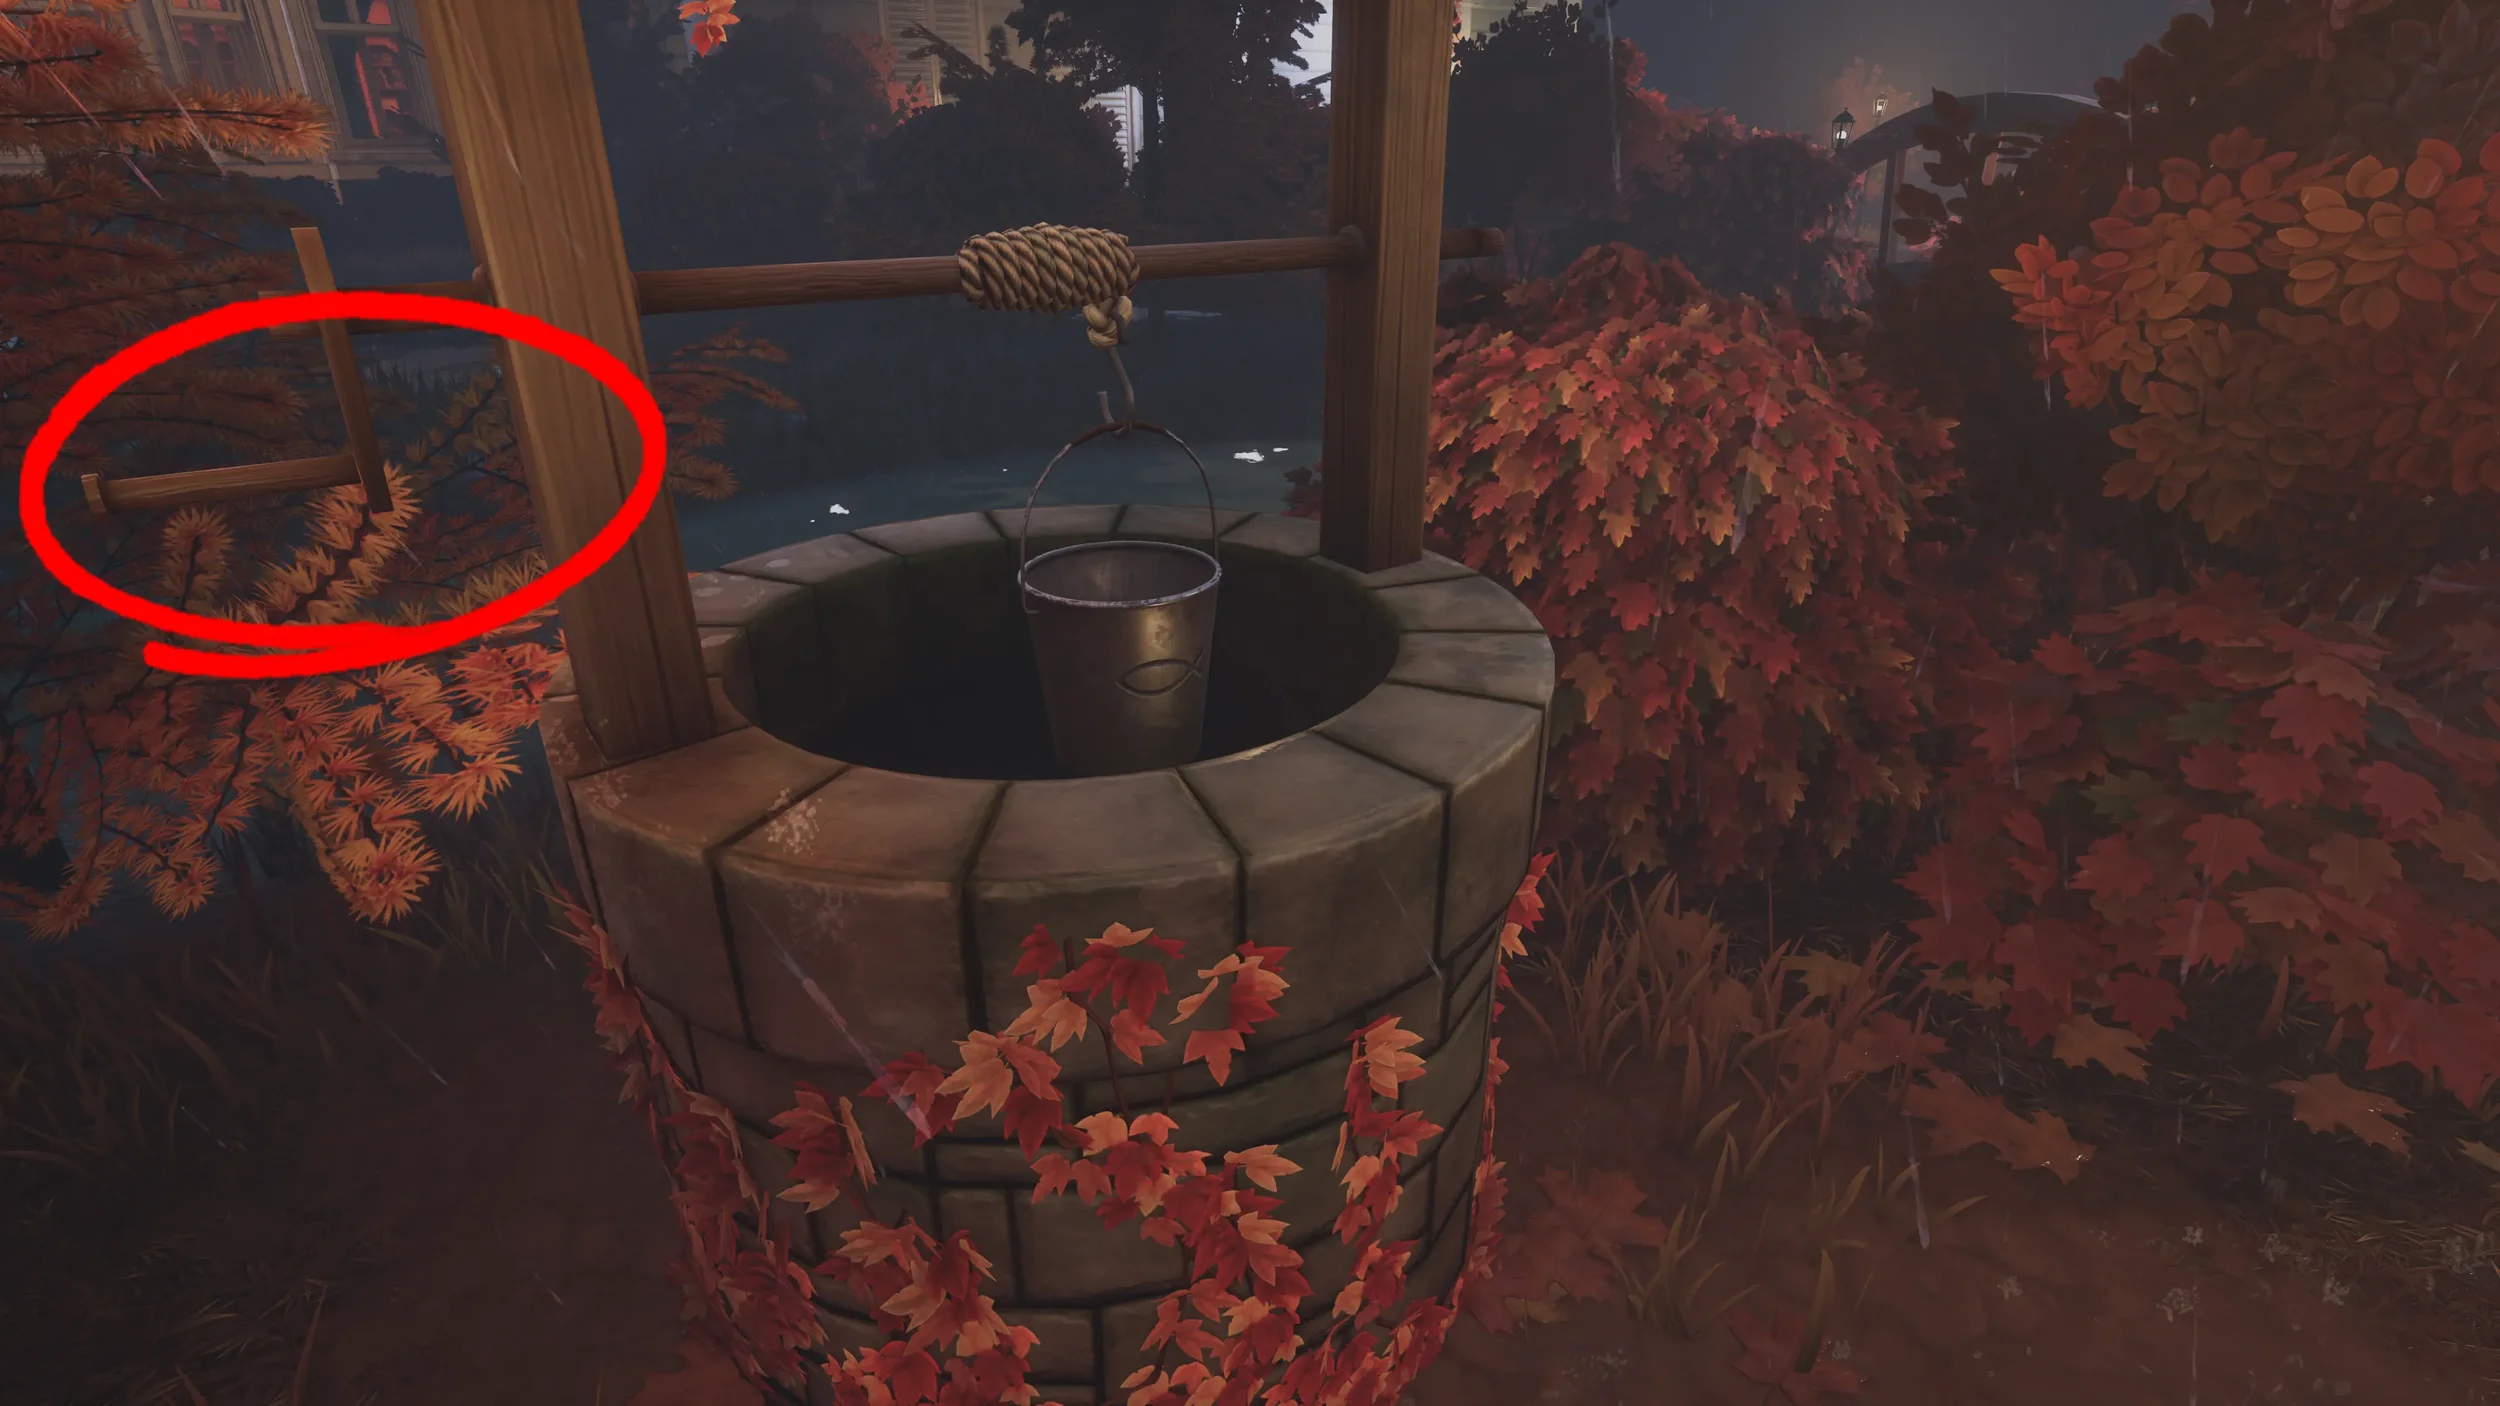
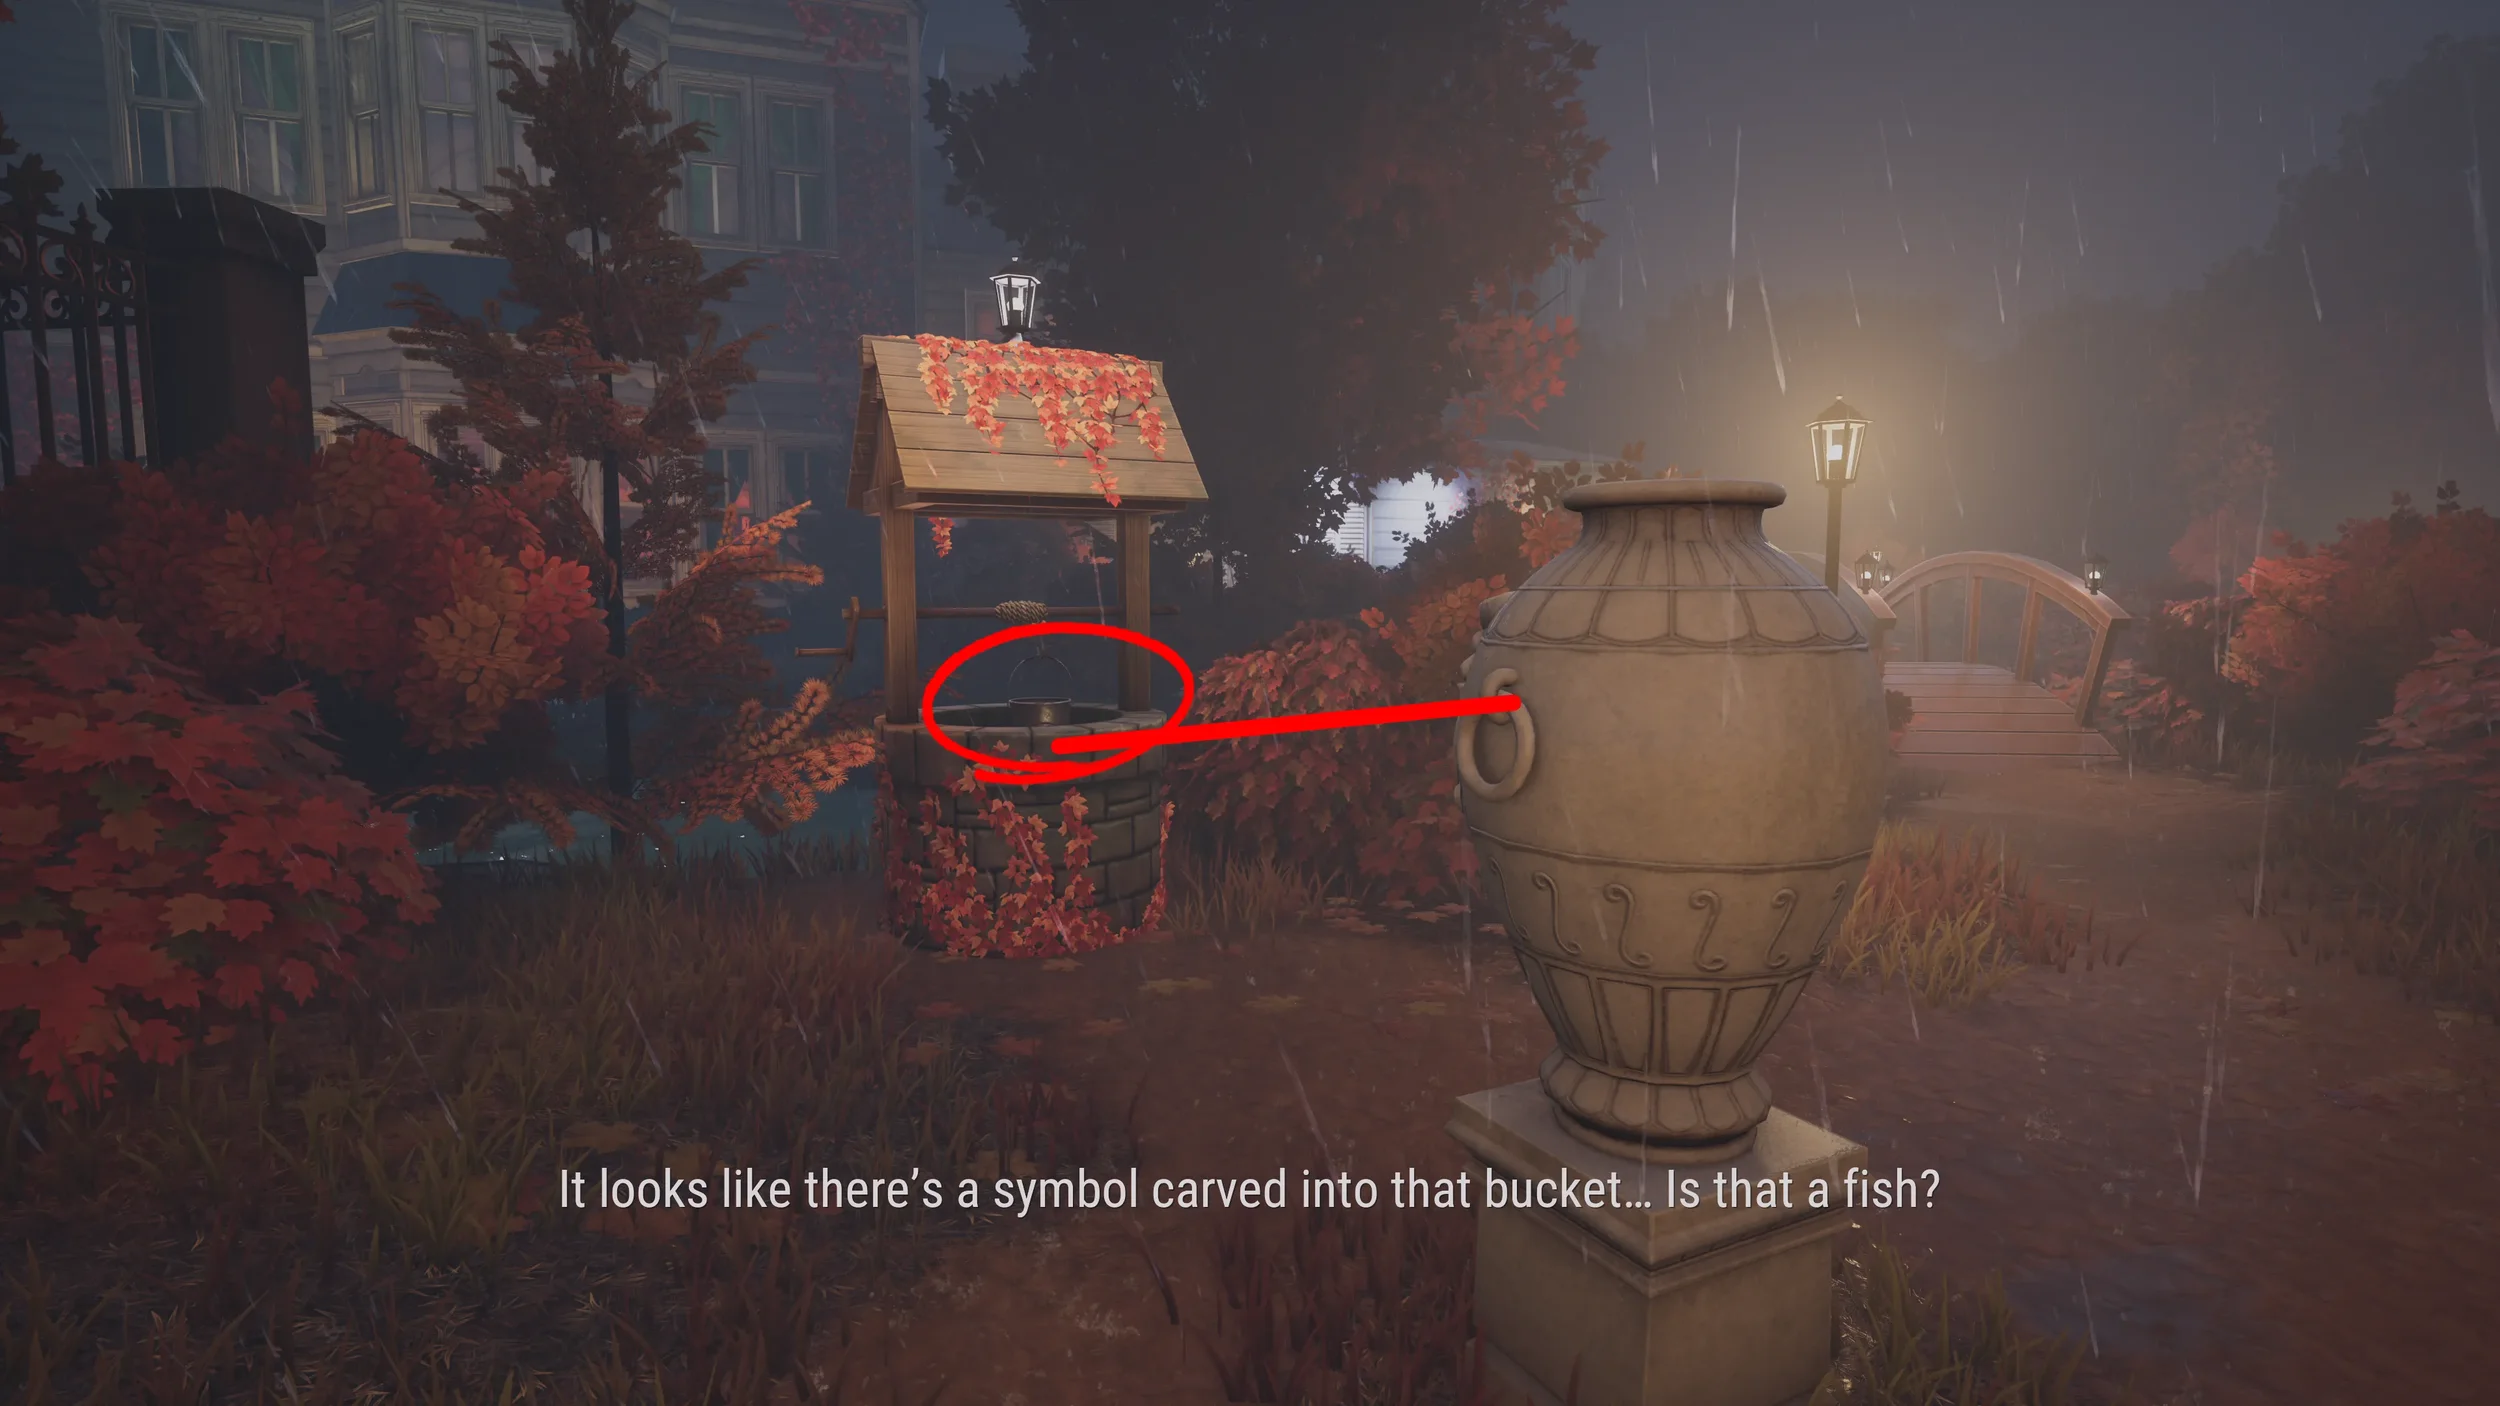
The final vase, the one with the crying face, is across the bridge that is found if you head to the right as soon as you exit the manor, this one needs to face the Fish symbol, to find the Fish symbol you need to interact with the lever on the well to raise up a bucket that has the Fish symbol on it.
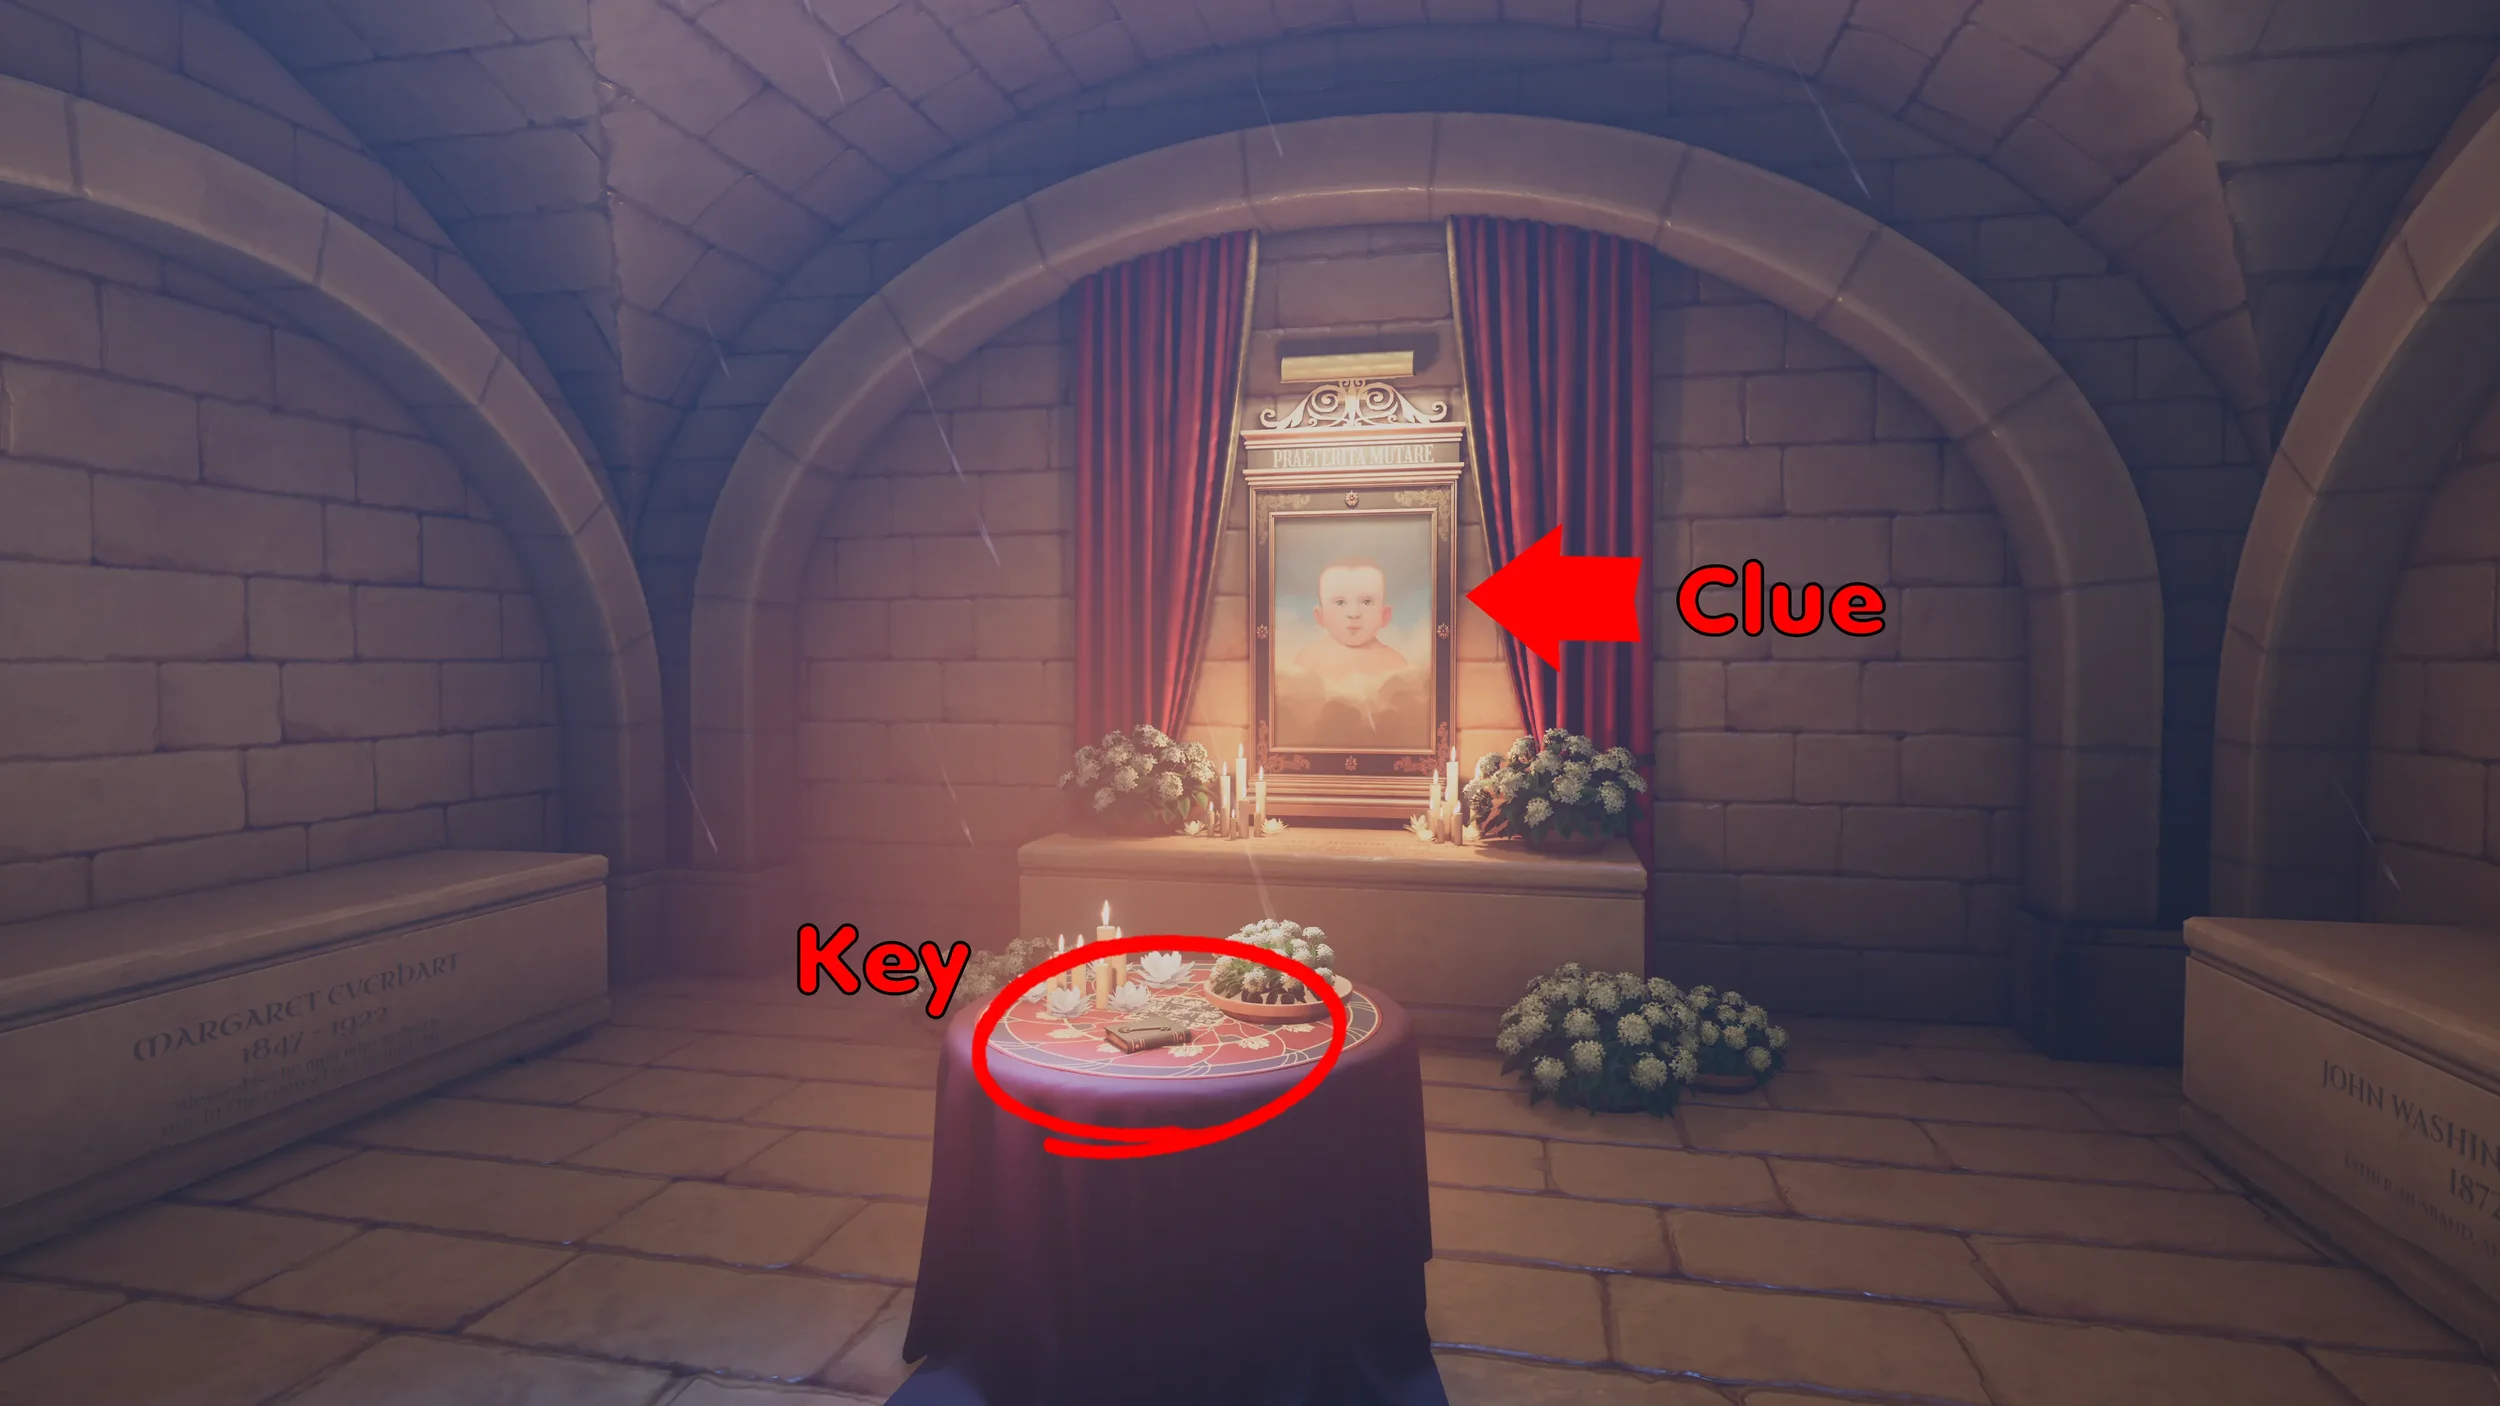
You will now be able to open the gate with the many faces on it, go through the gate and into the small building, inside you will find the Key to open the Greenhouse, also make sure to inspect the baby’s portrait on the wall, this is another clue for the next puzzle.
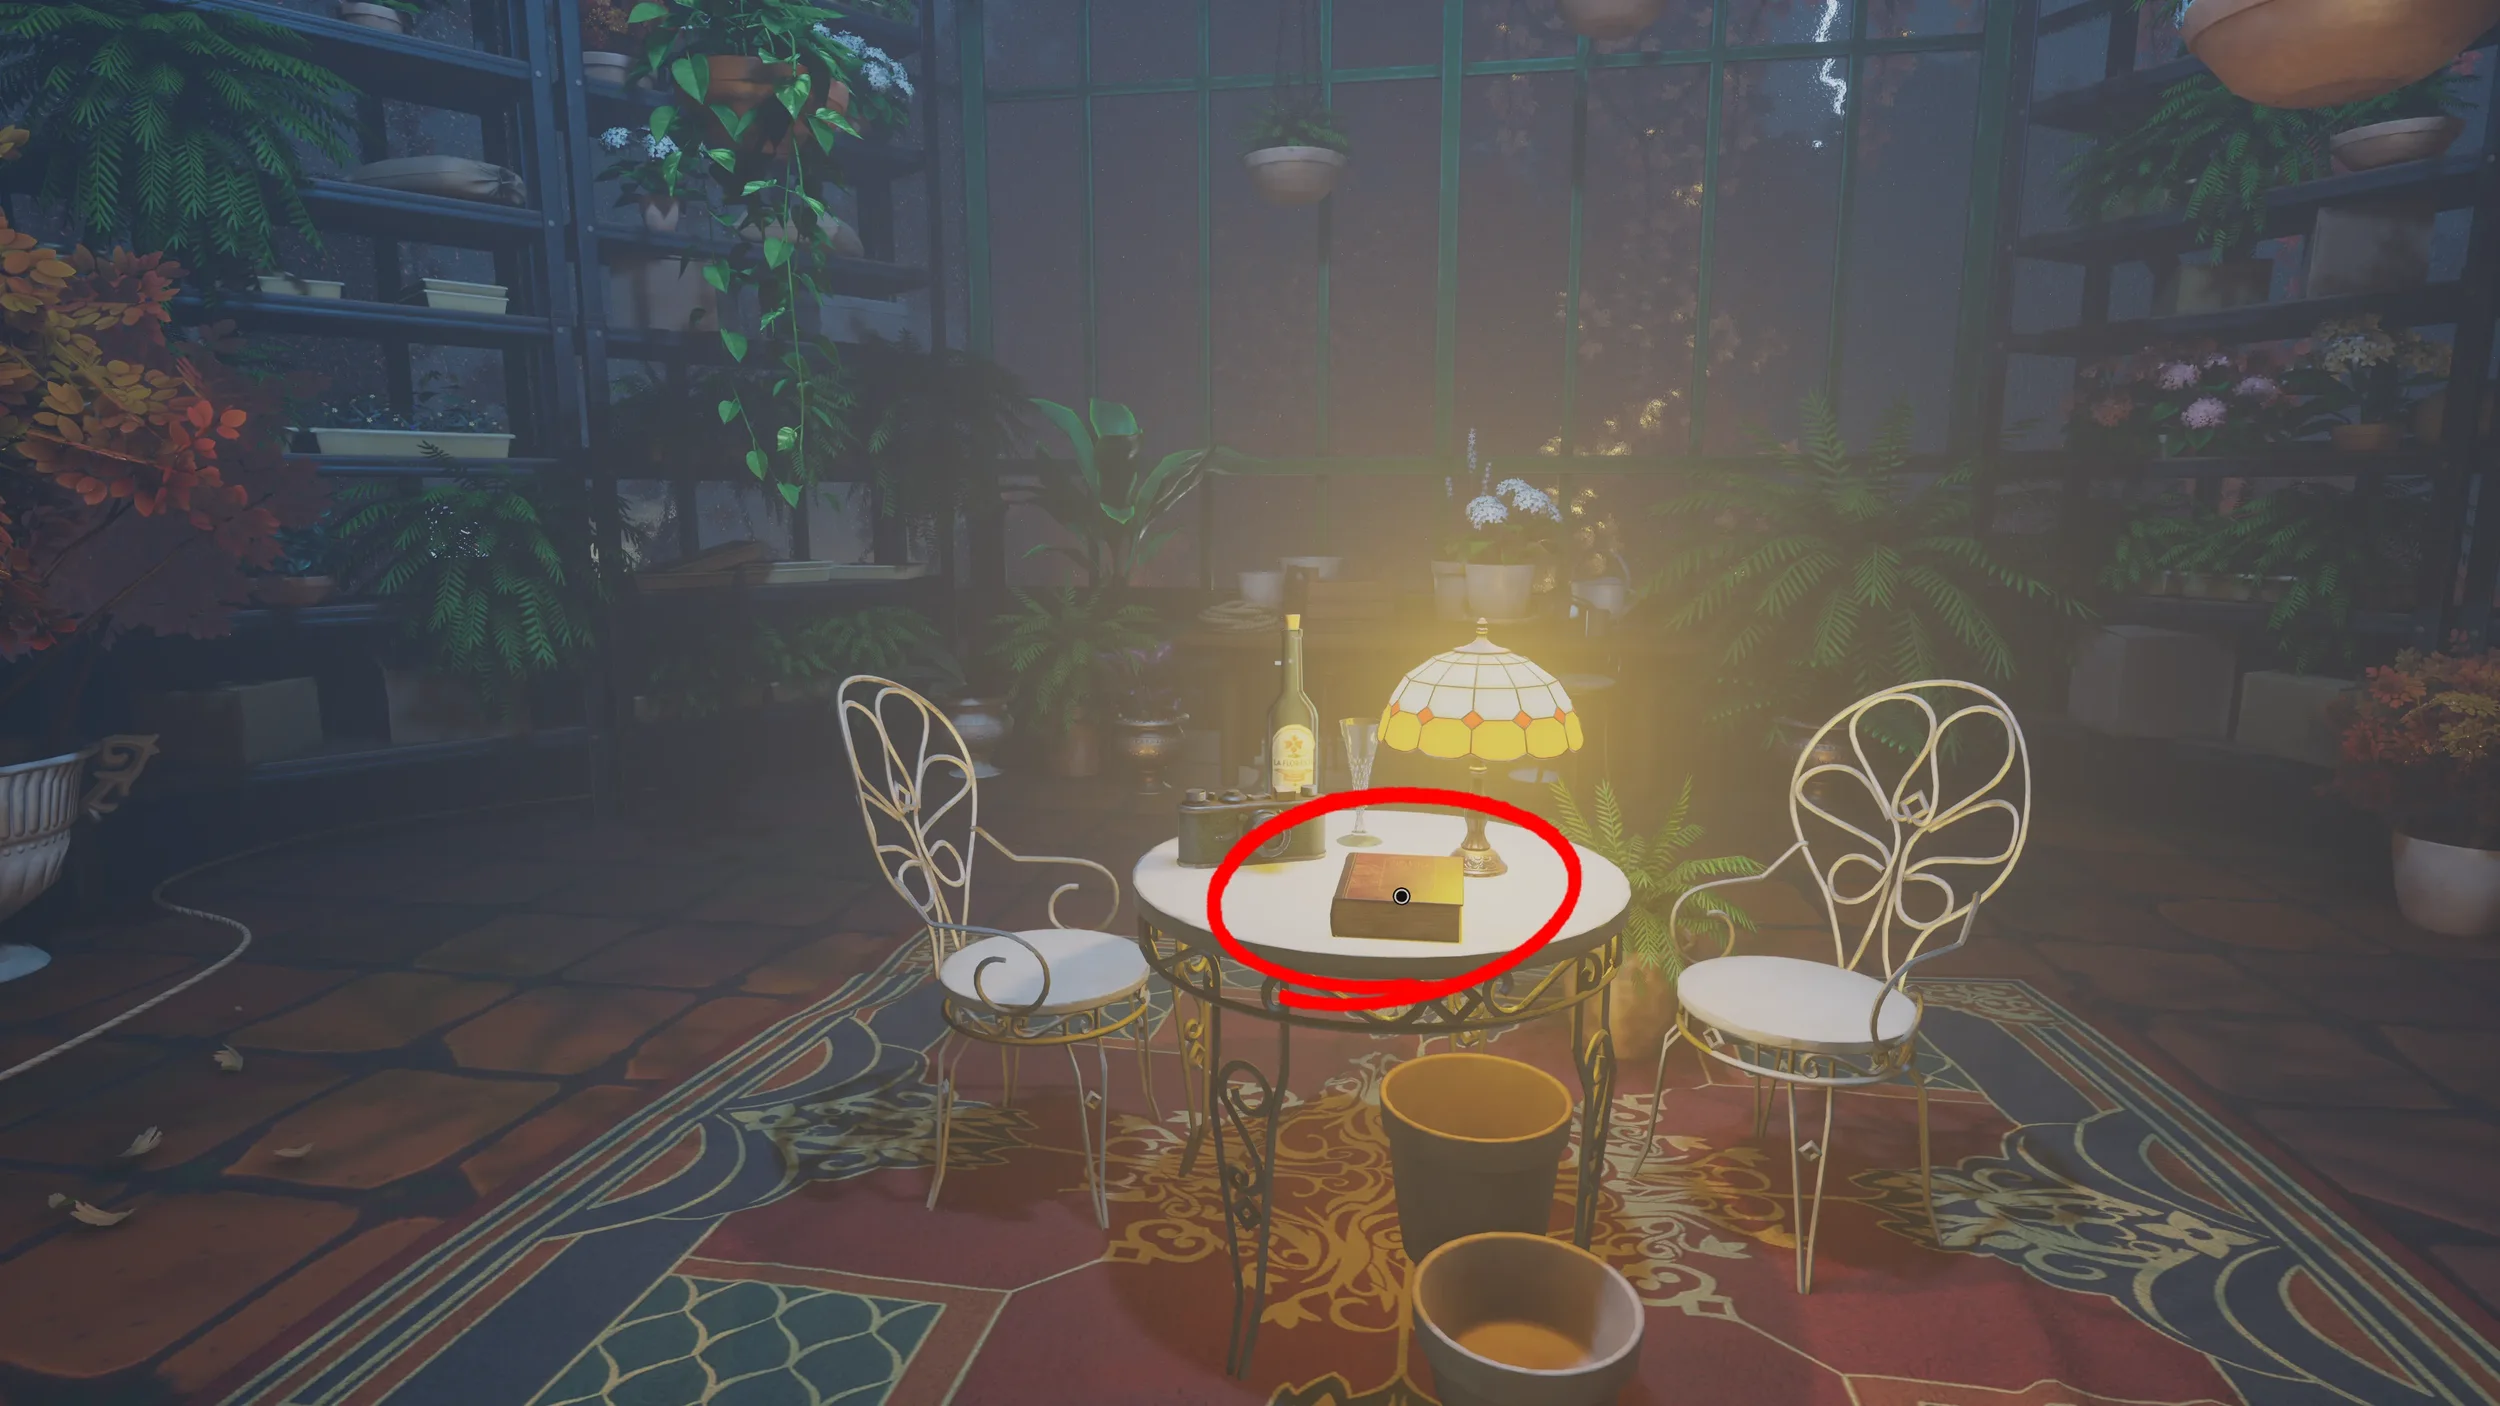
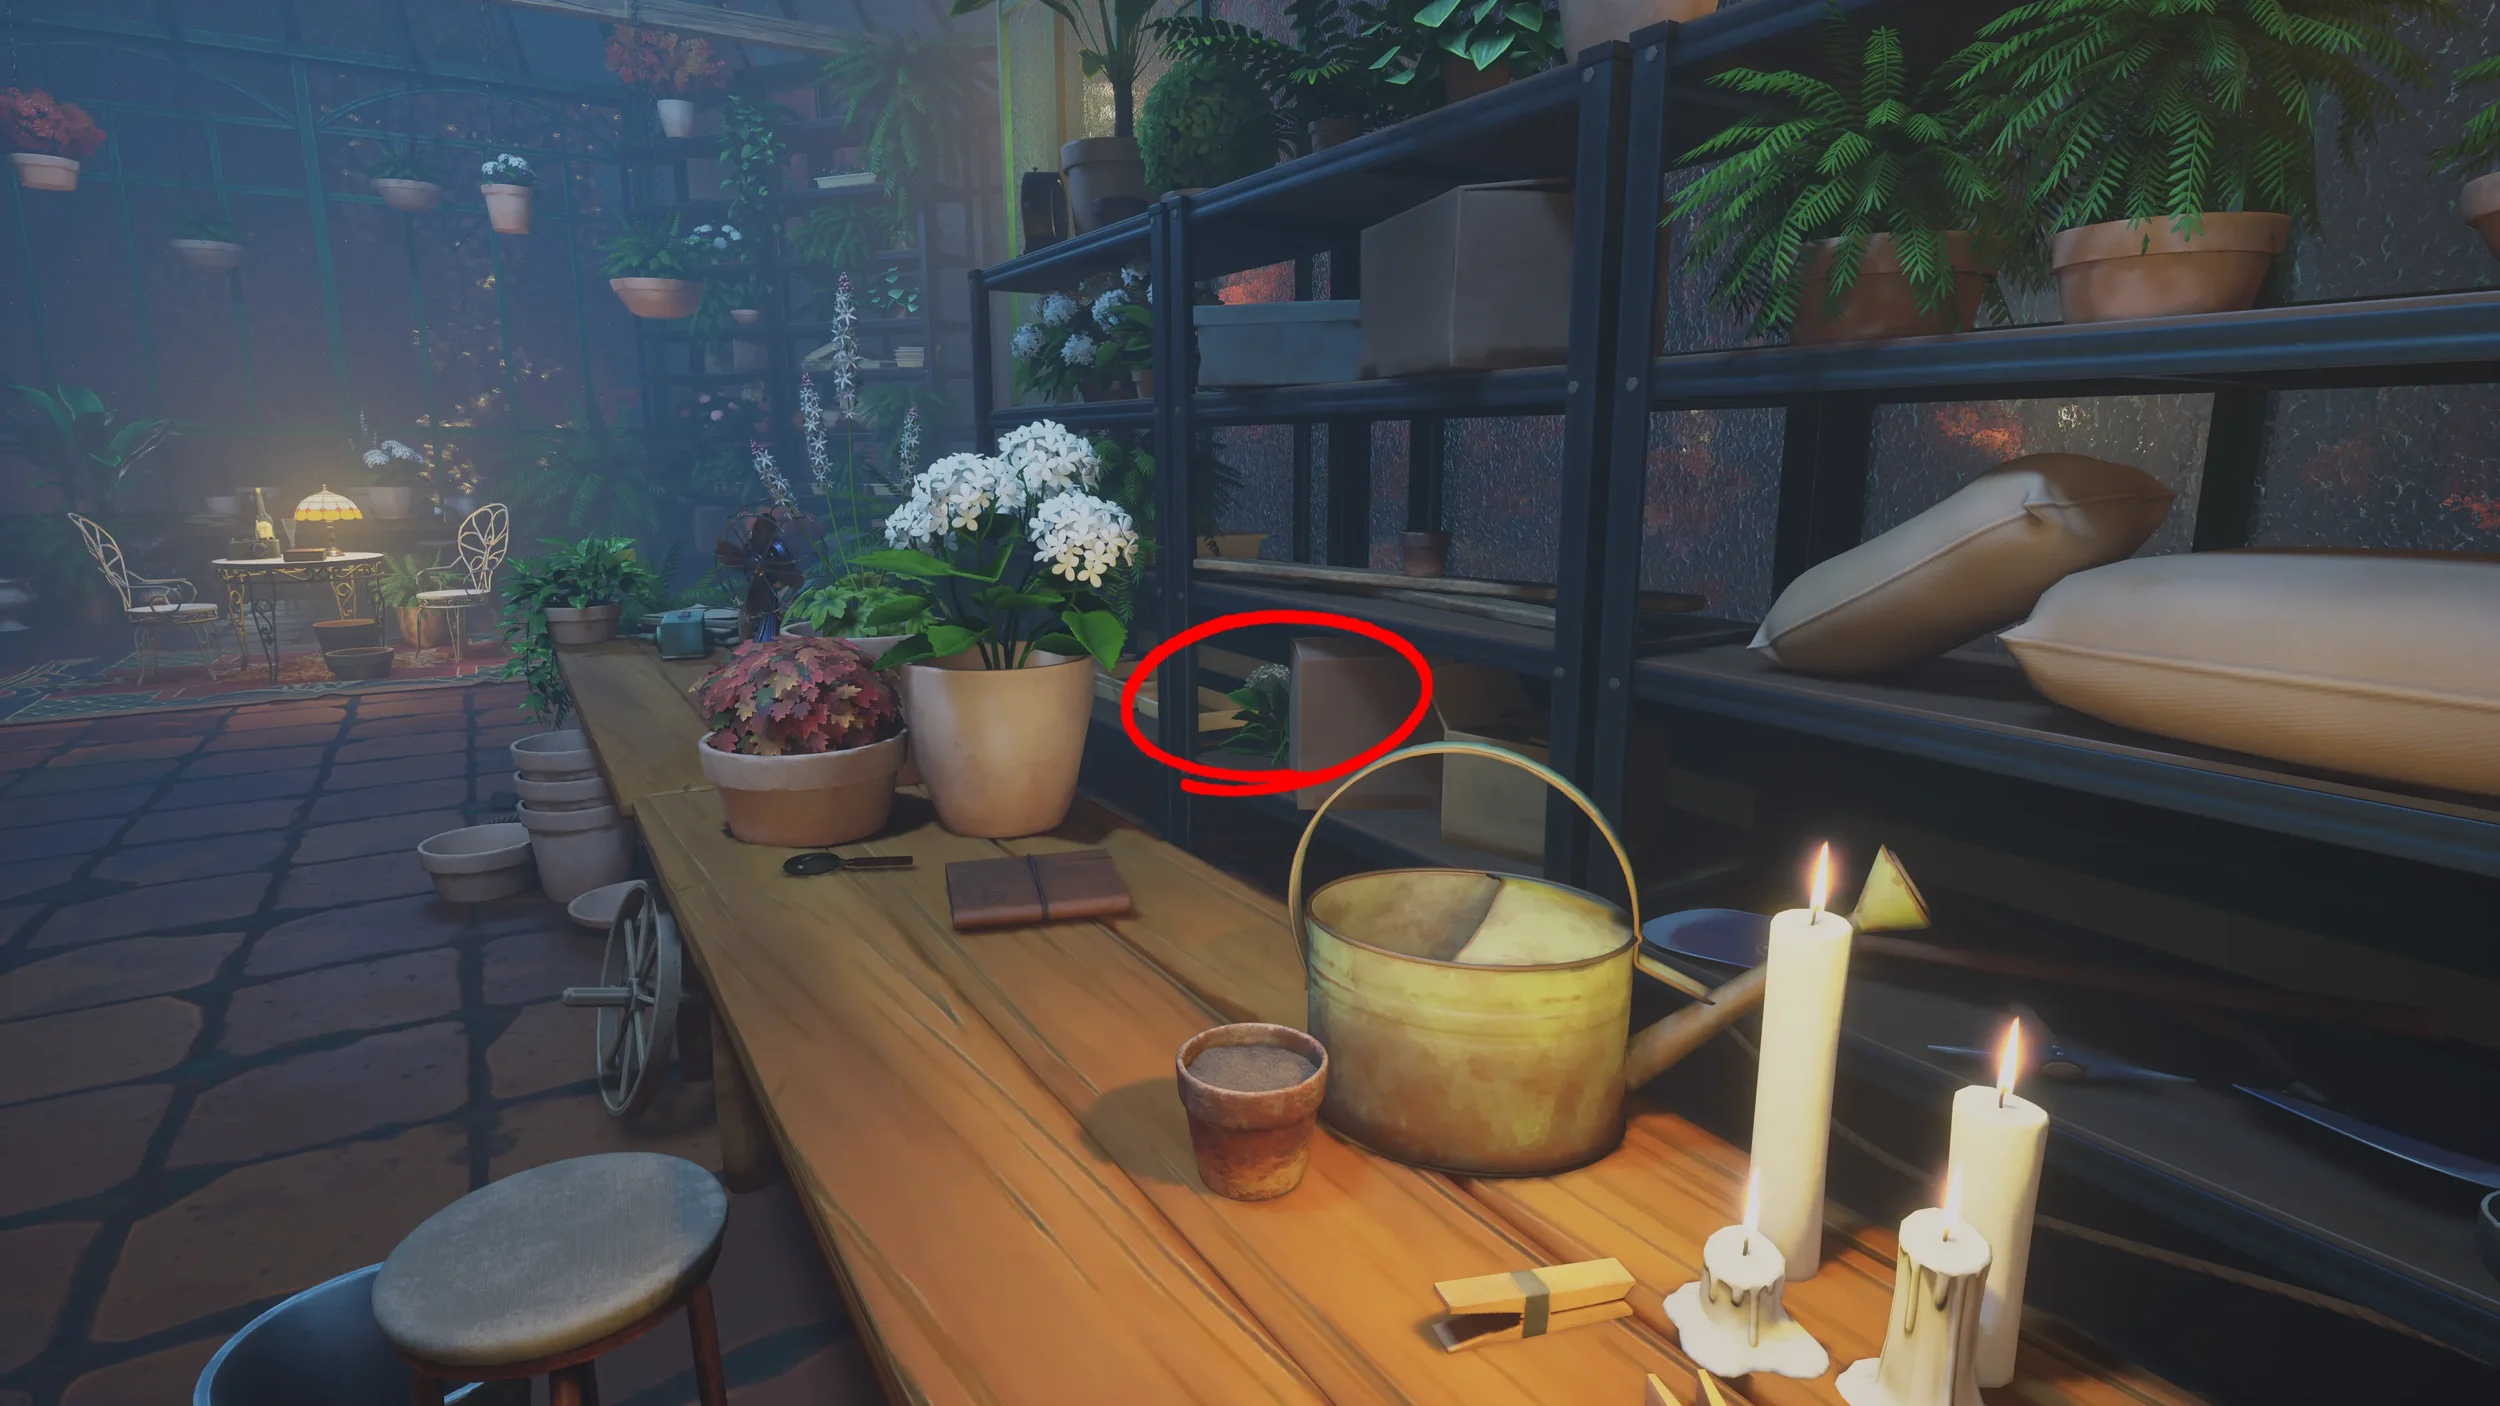
Now that you have the Key, use it to enter the Greenhouse, on the small table at the far end of the Greenhouse there is a Book you need to pick up, this is required for the next puzzle.
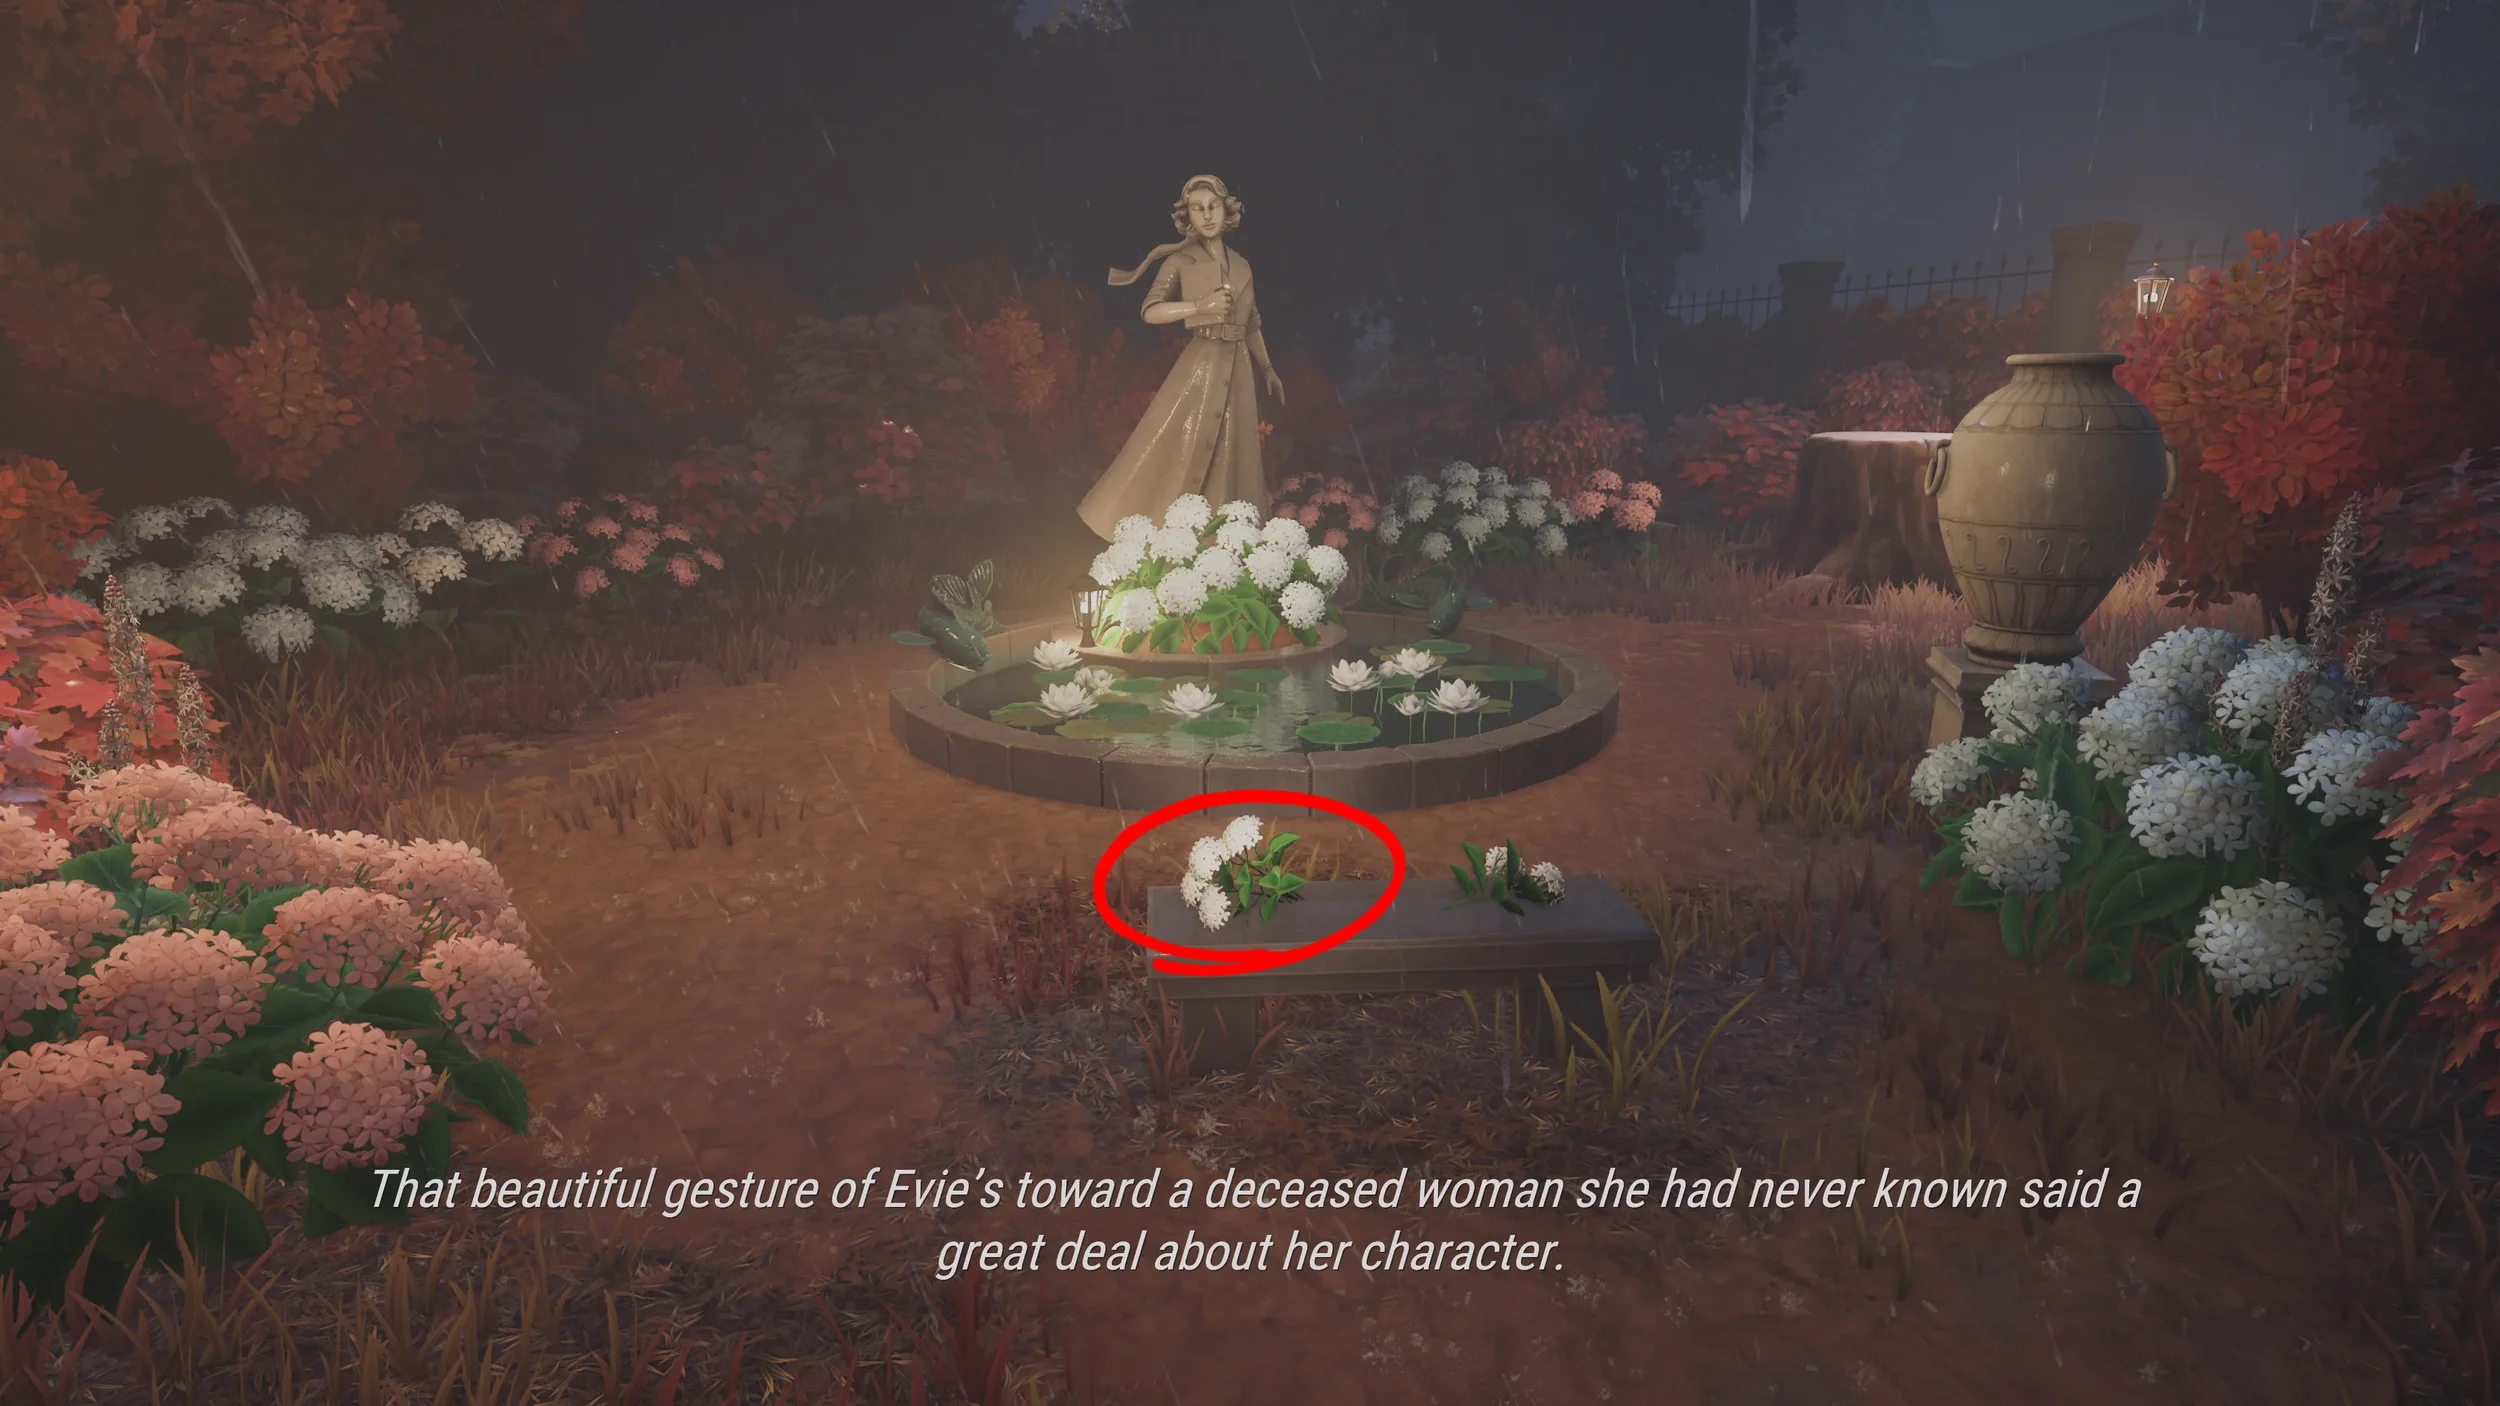
Bouquet Trophy
 “Bouquet” Trophy, pick them up and place them on the bench in front of Norah’s Statue nearby to where the scared face vase is, this will trigger a short dialogue and get you the Trophy.
Bookshelf Puzzle
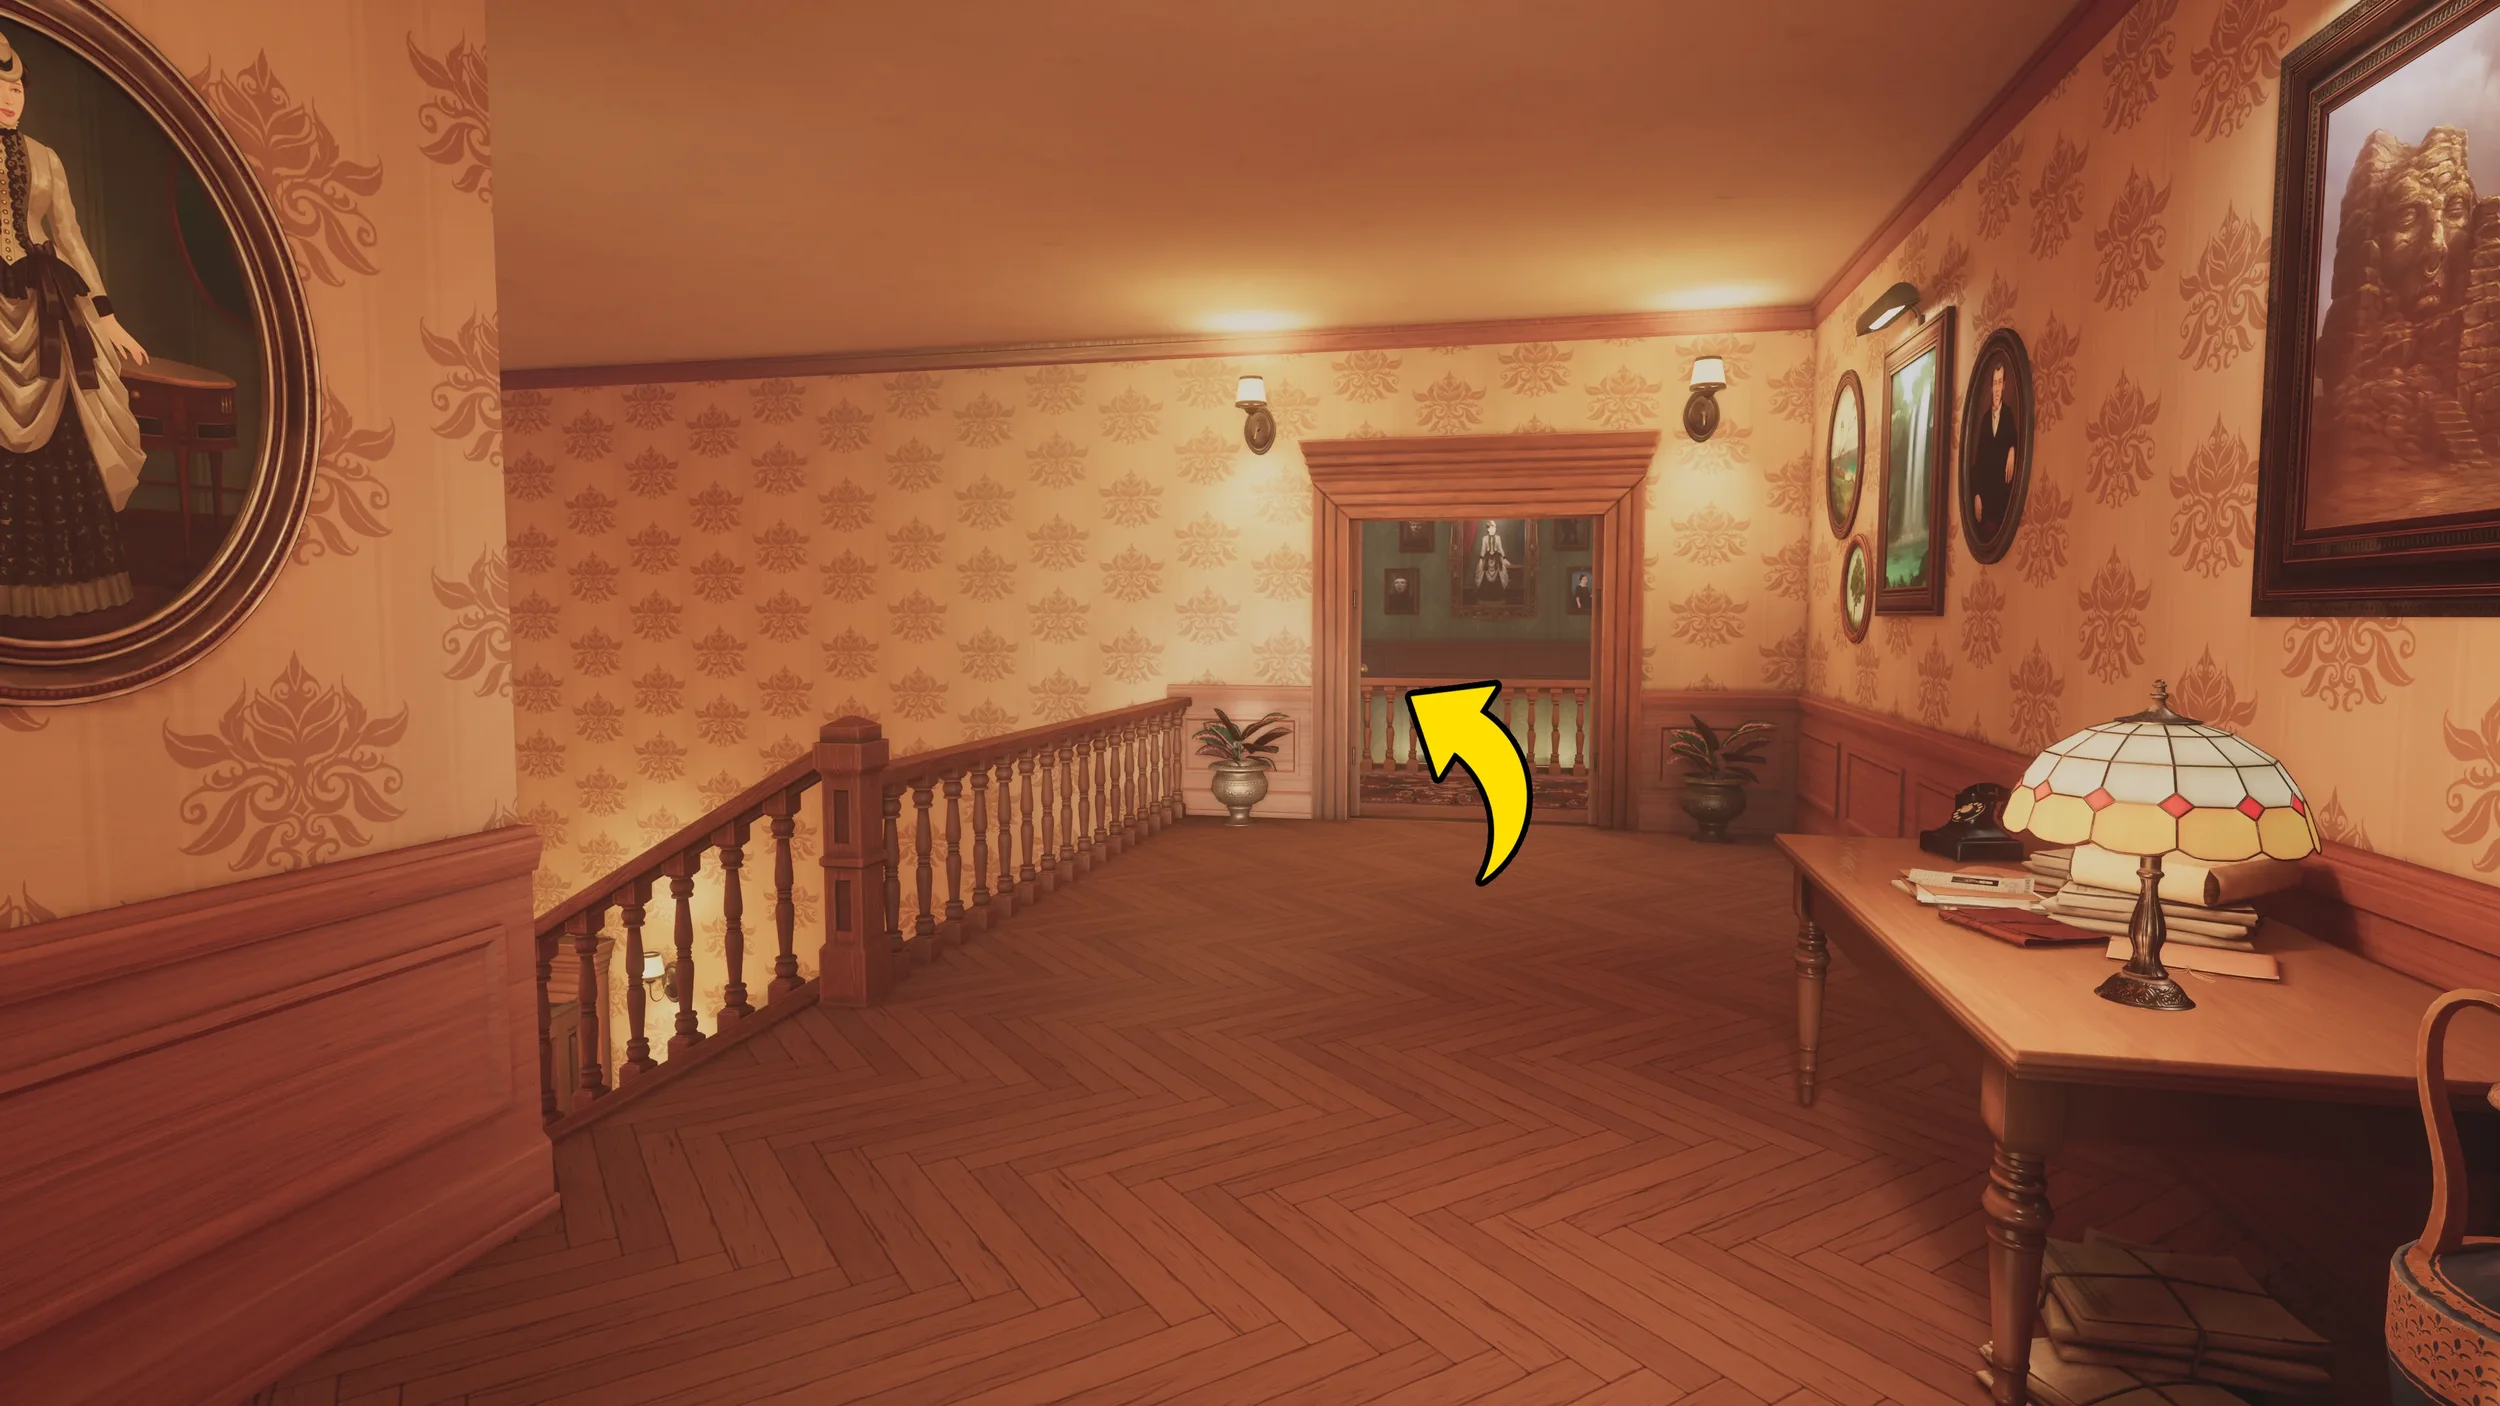
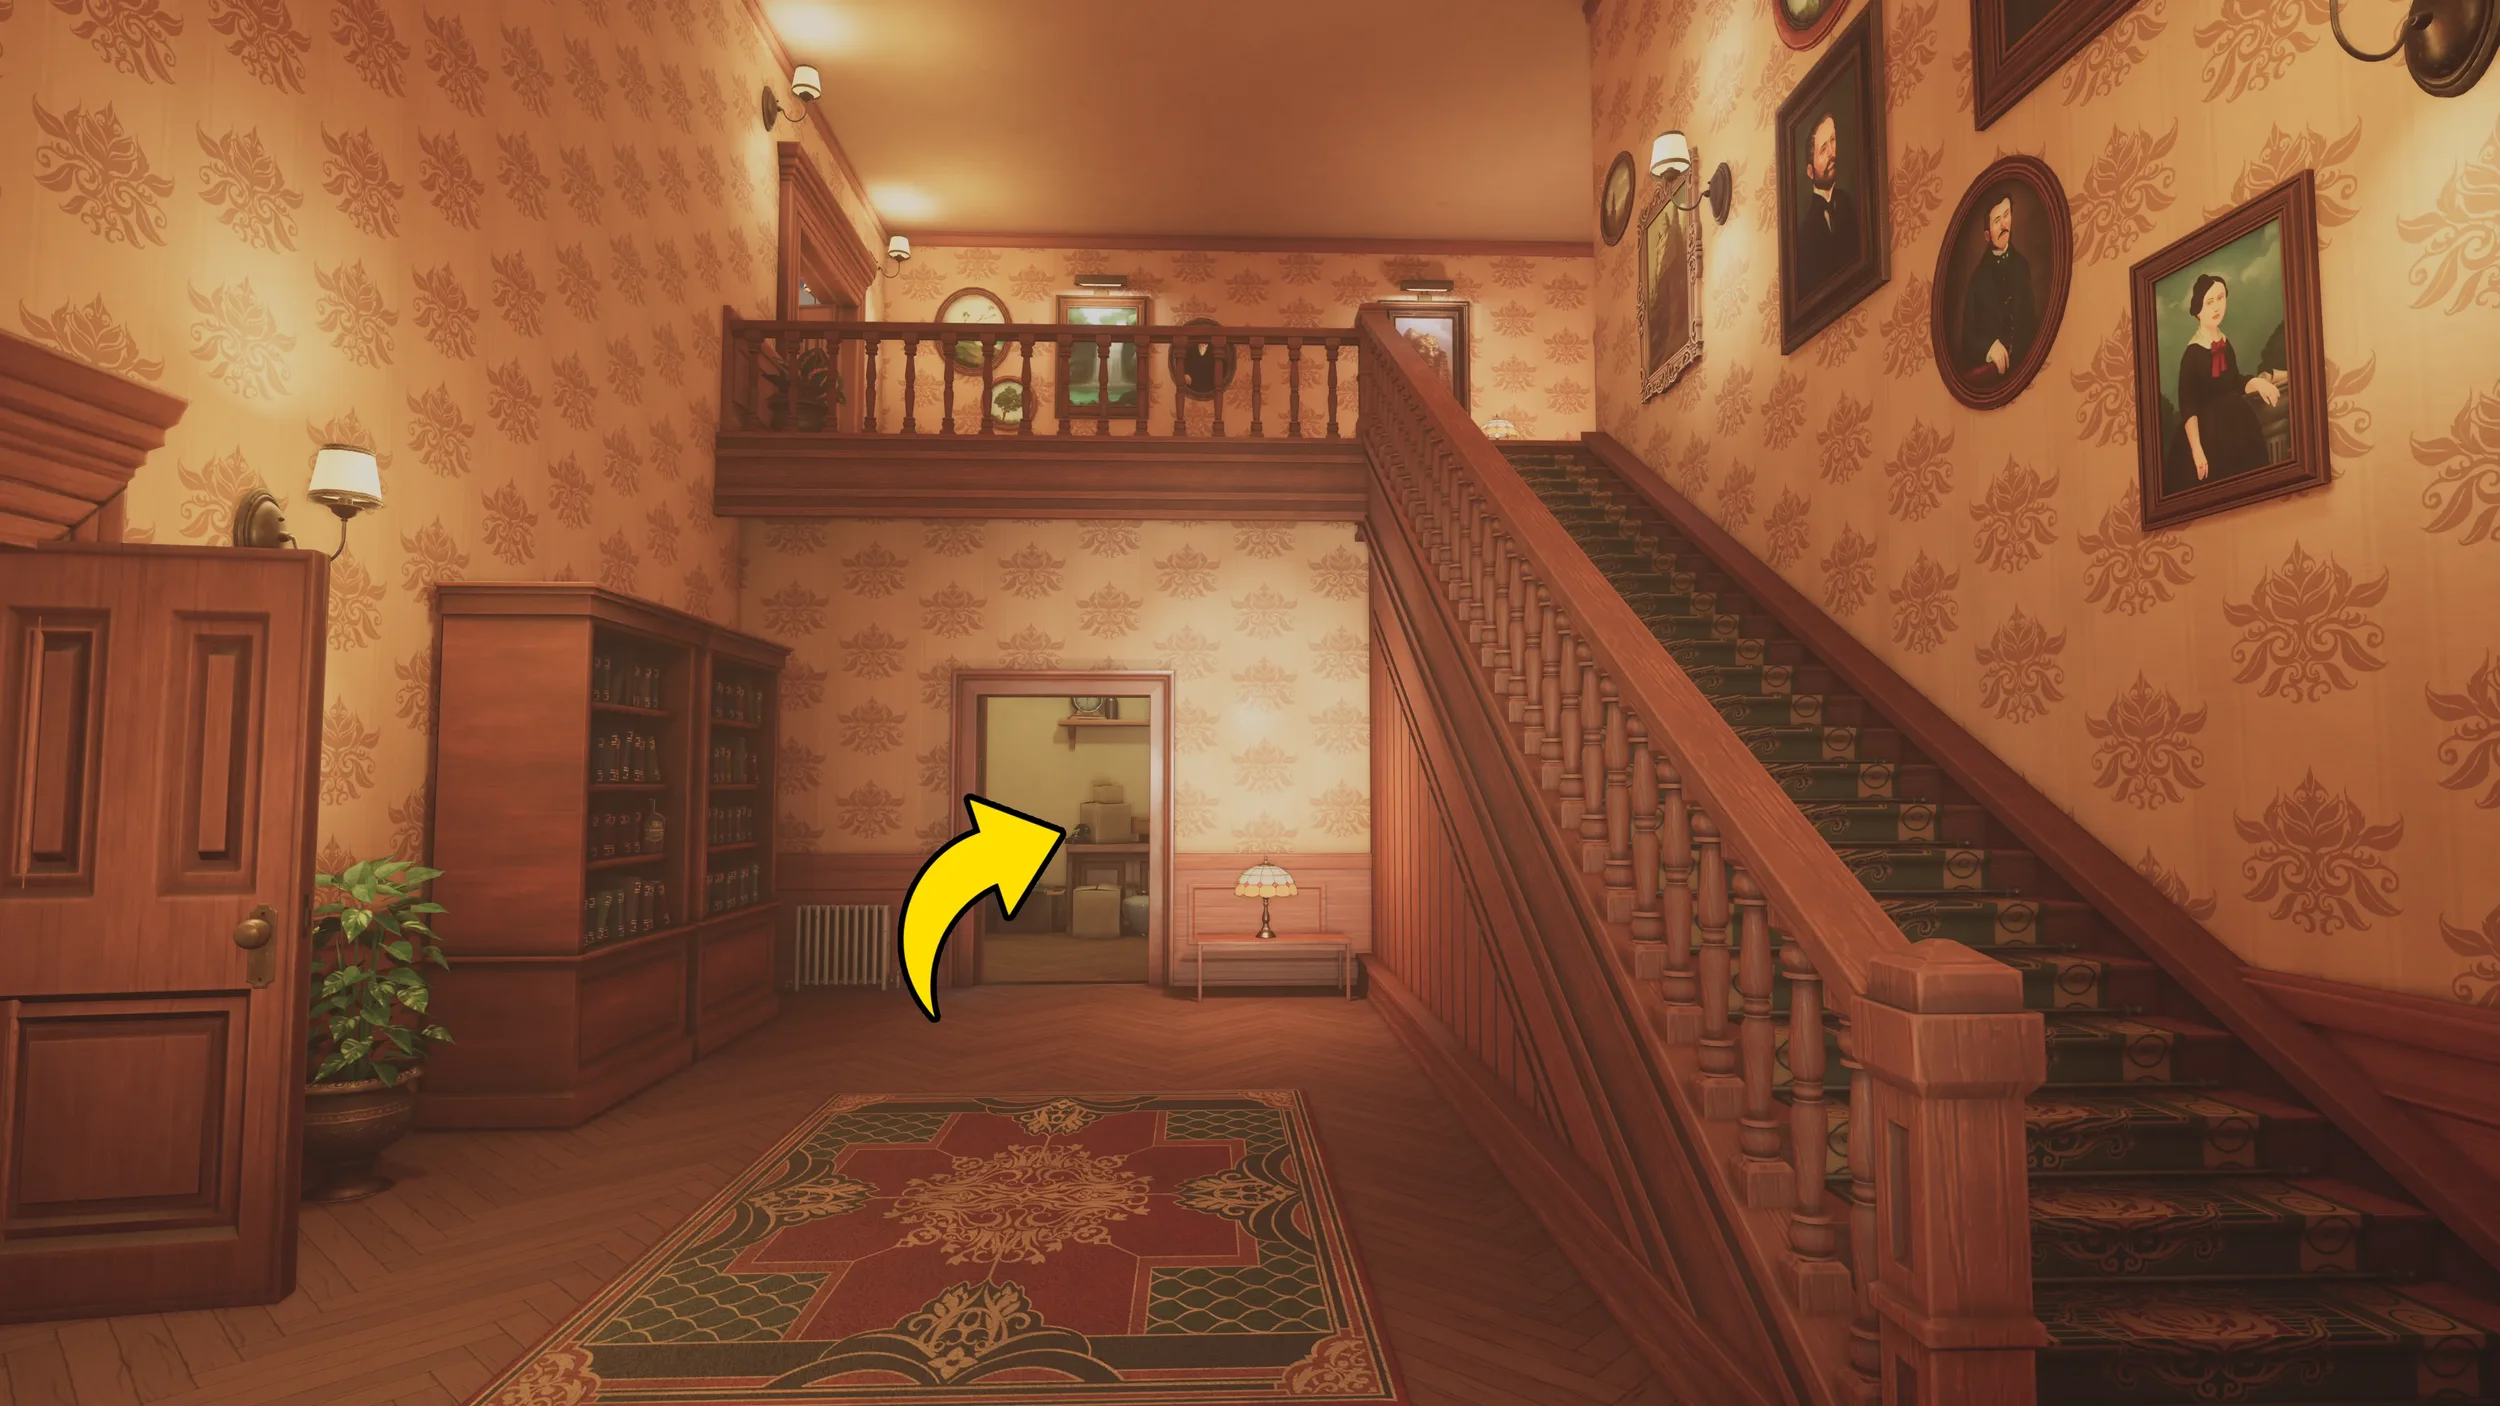
The next thing we need to do is gather all of the remaining clues to solve the Bookshelf Puzzle, as soon as you head back inside the manor, when you reach the stairs, go through the door directly in front of you.
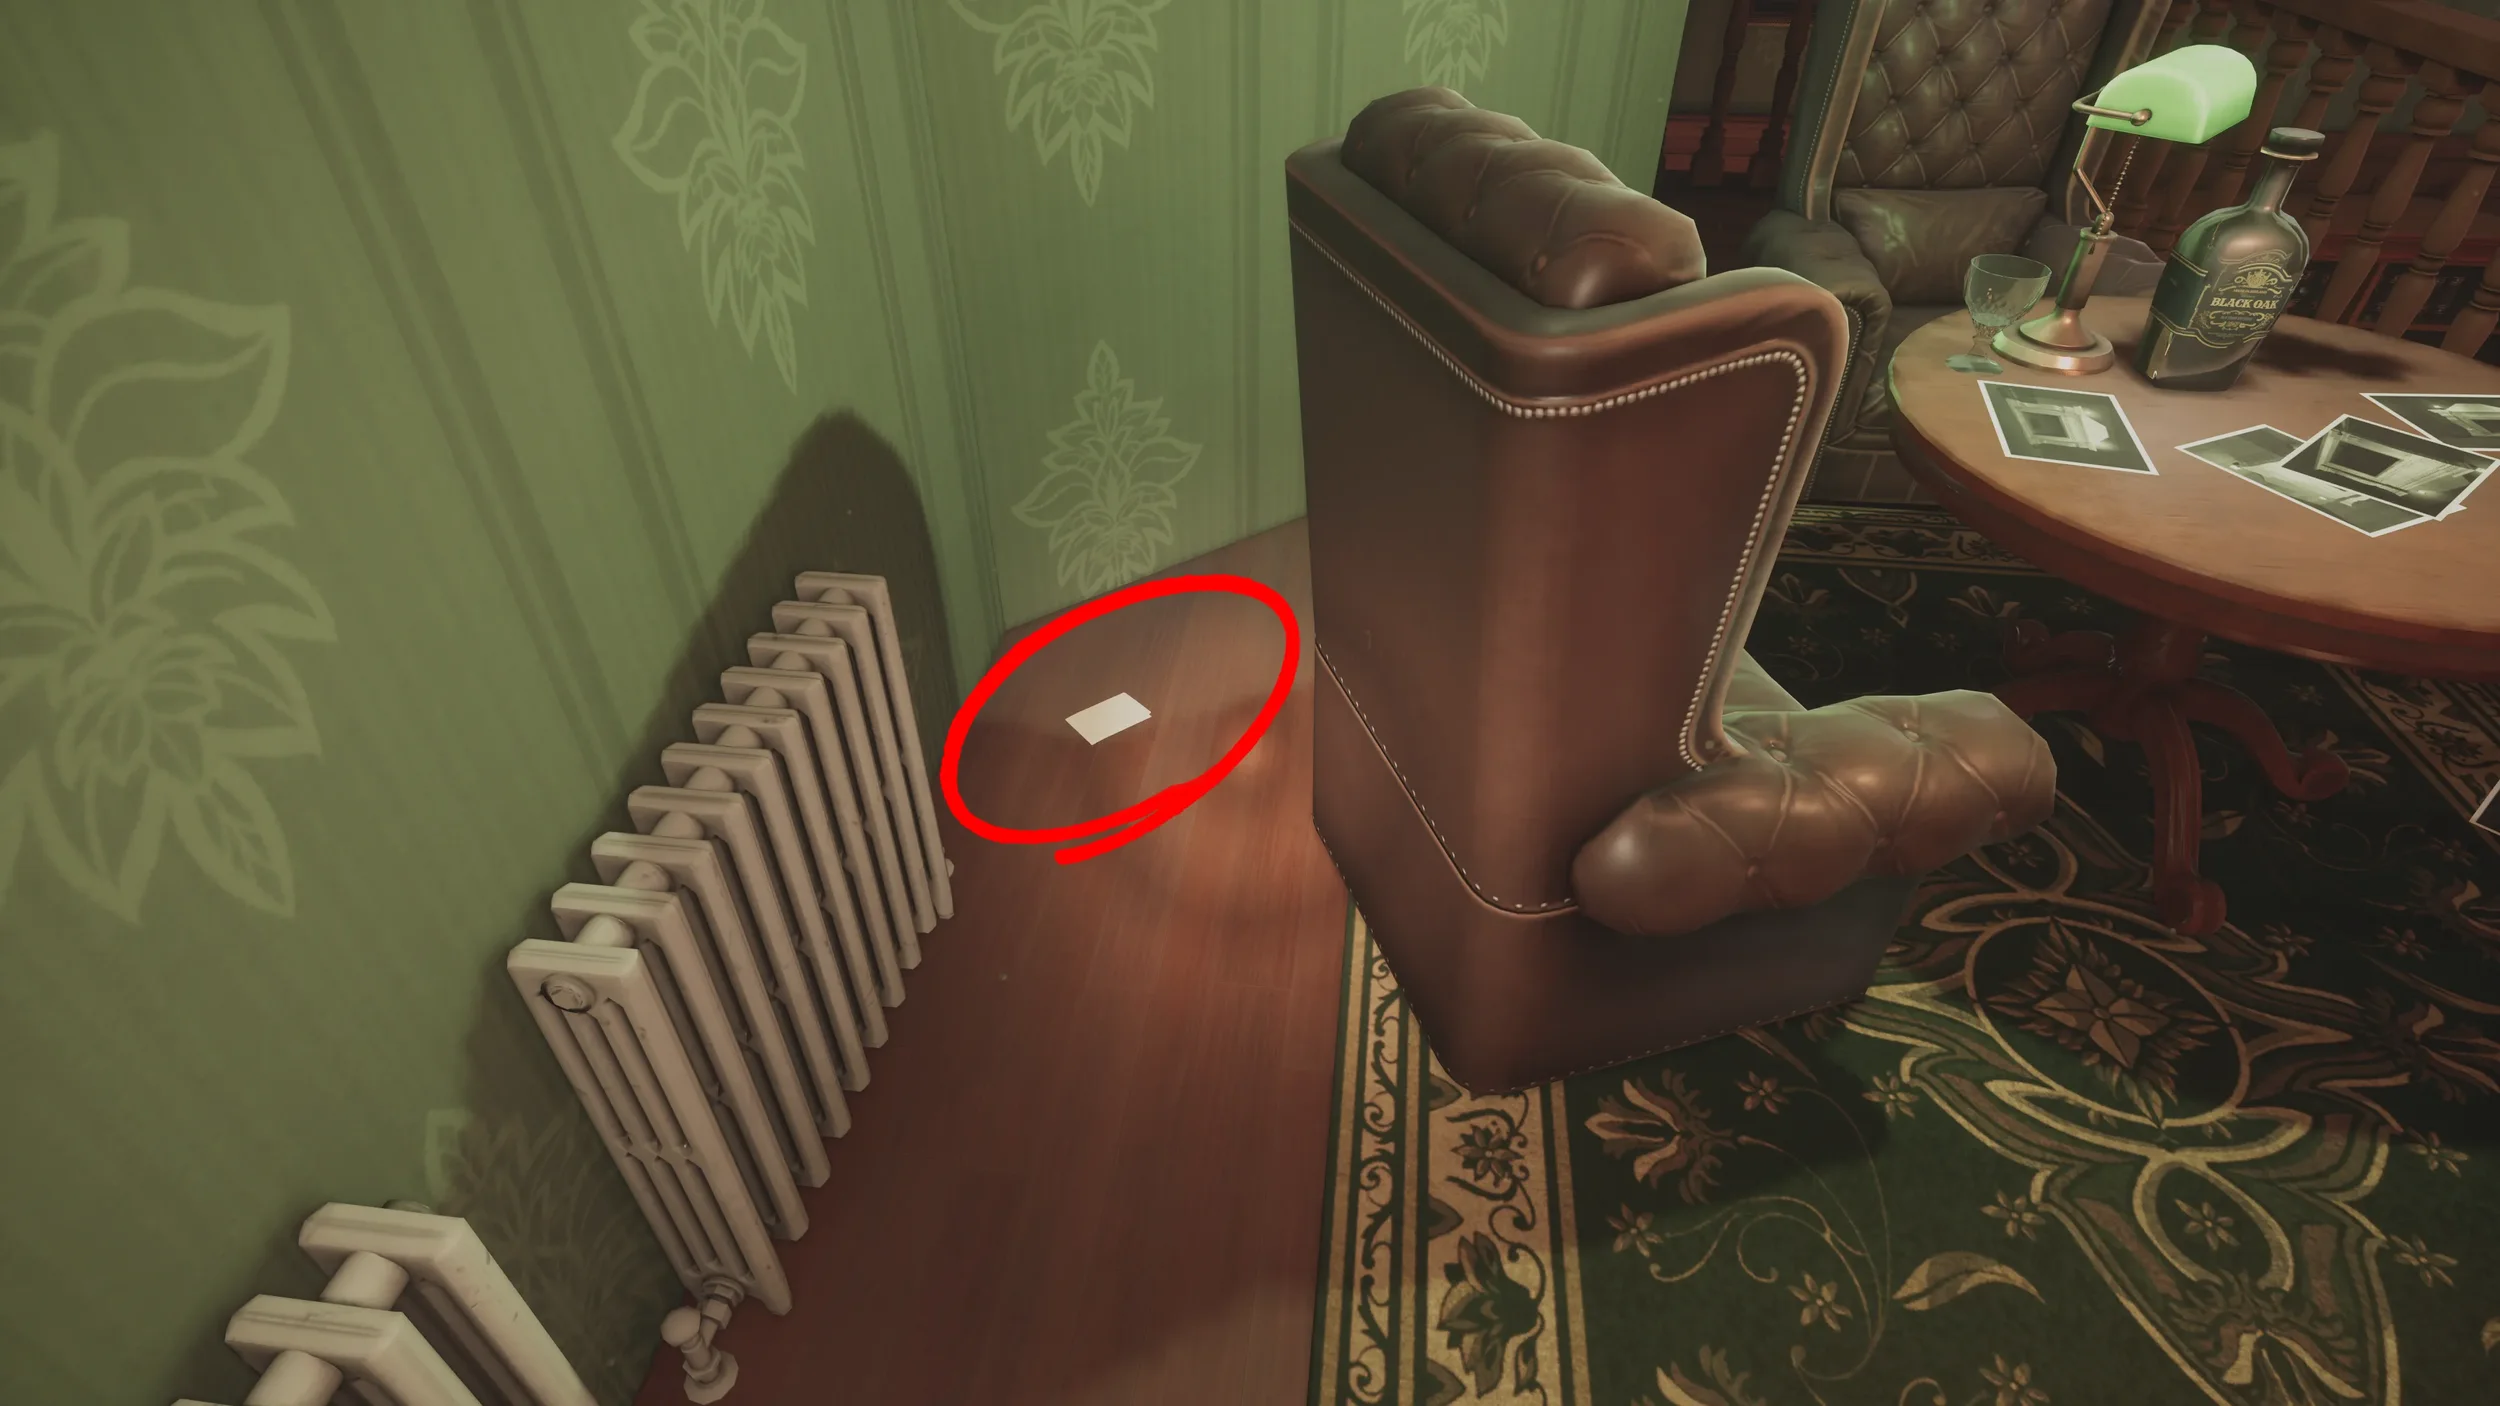
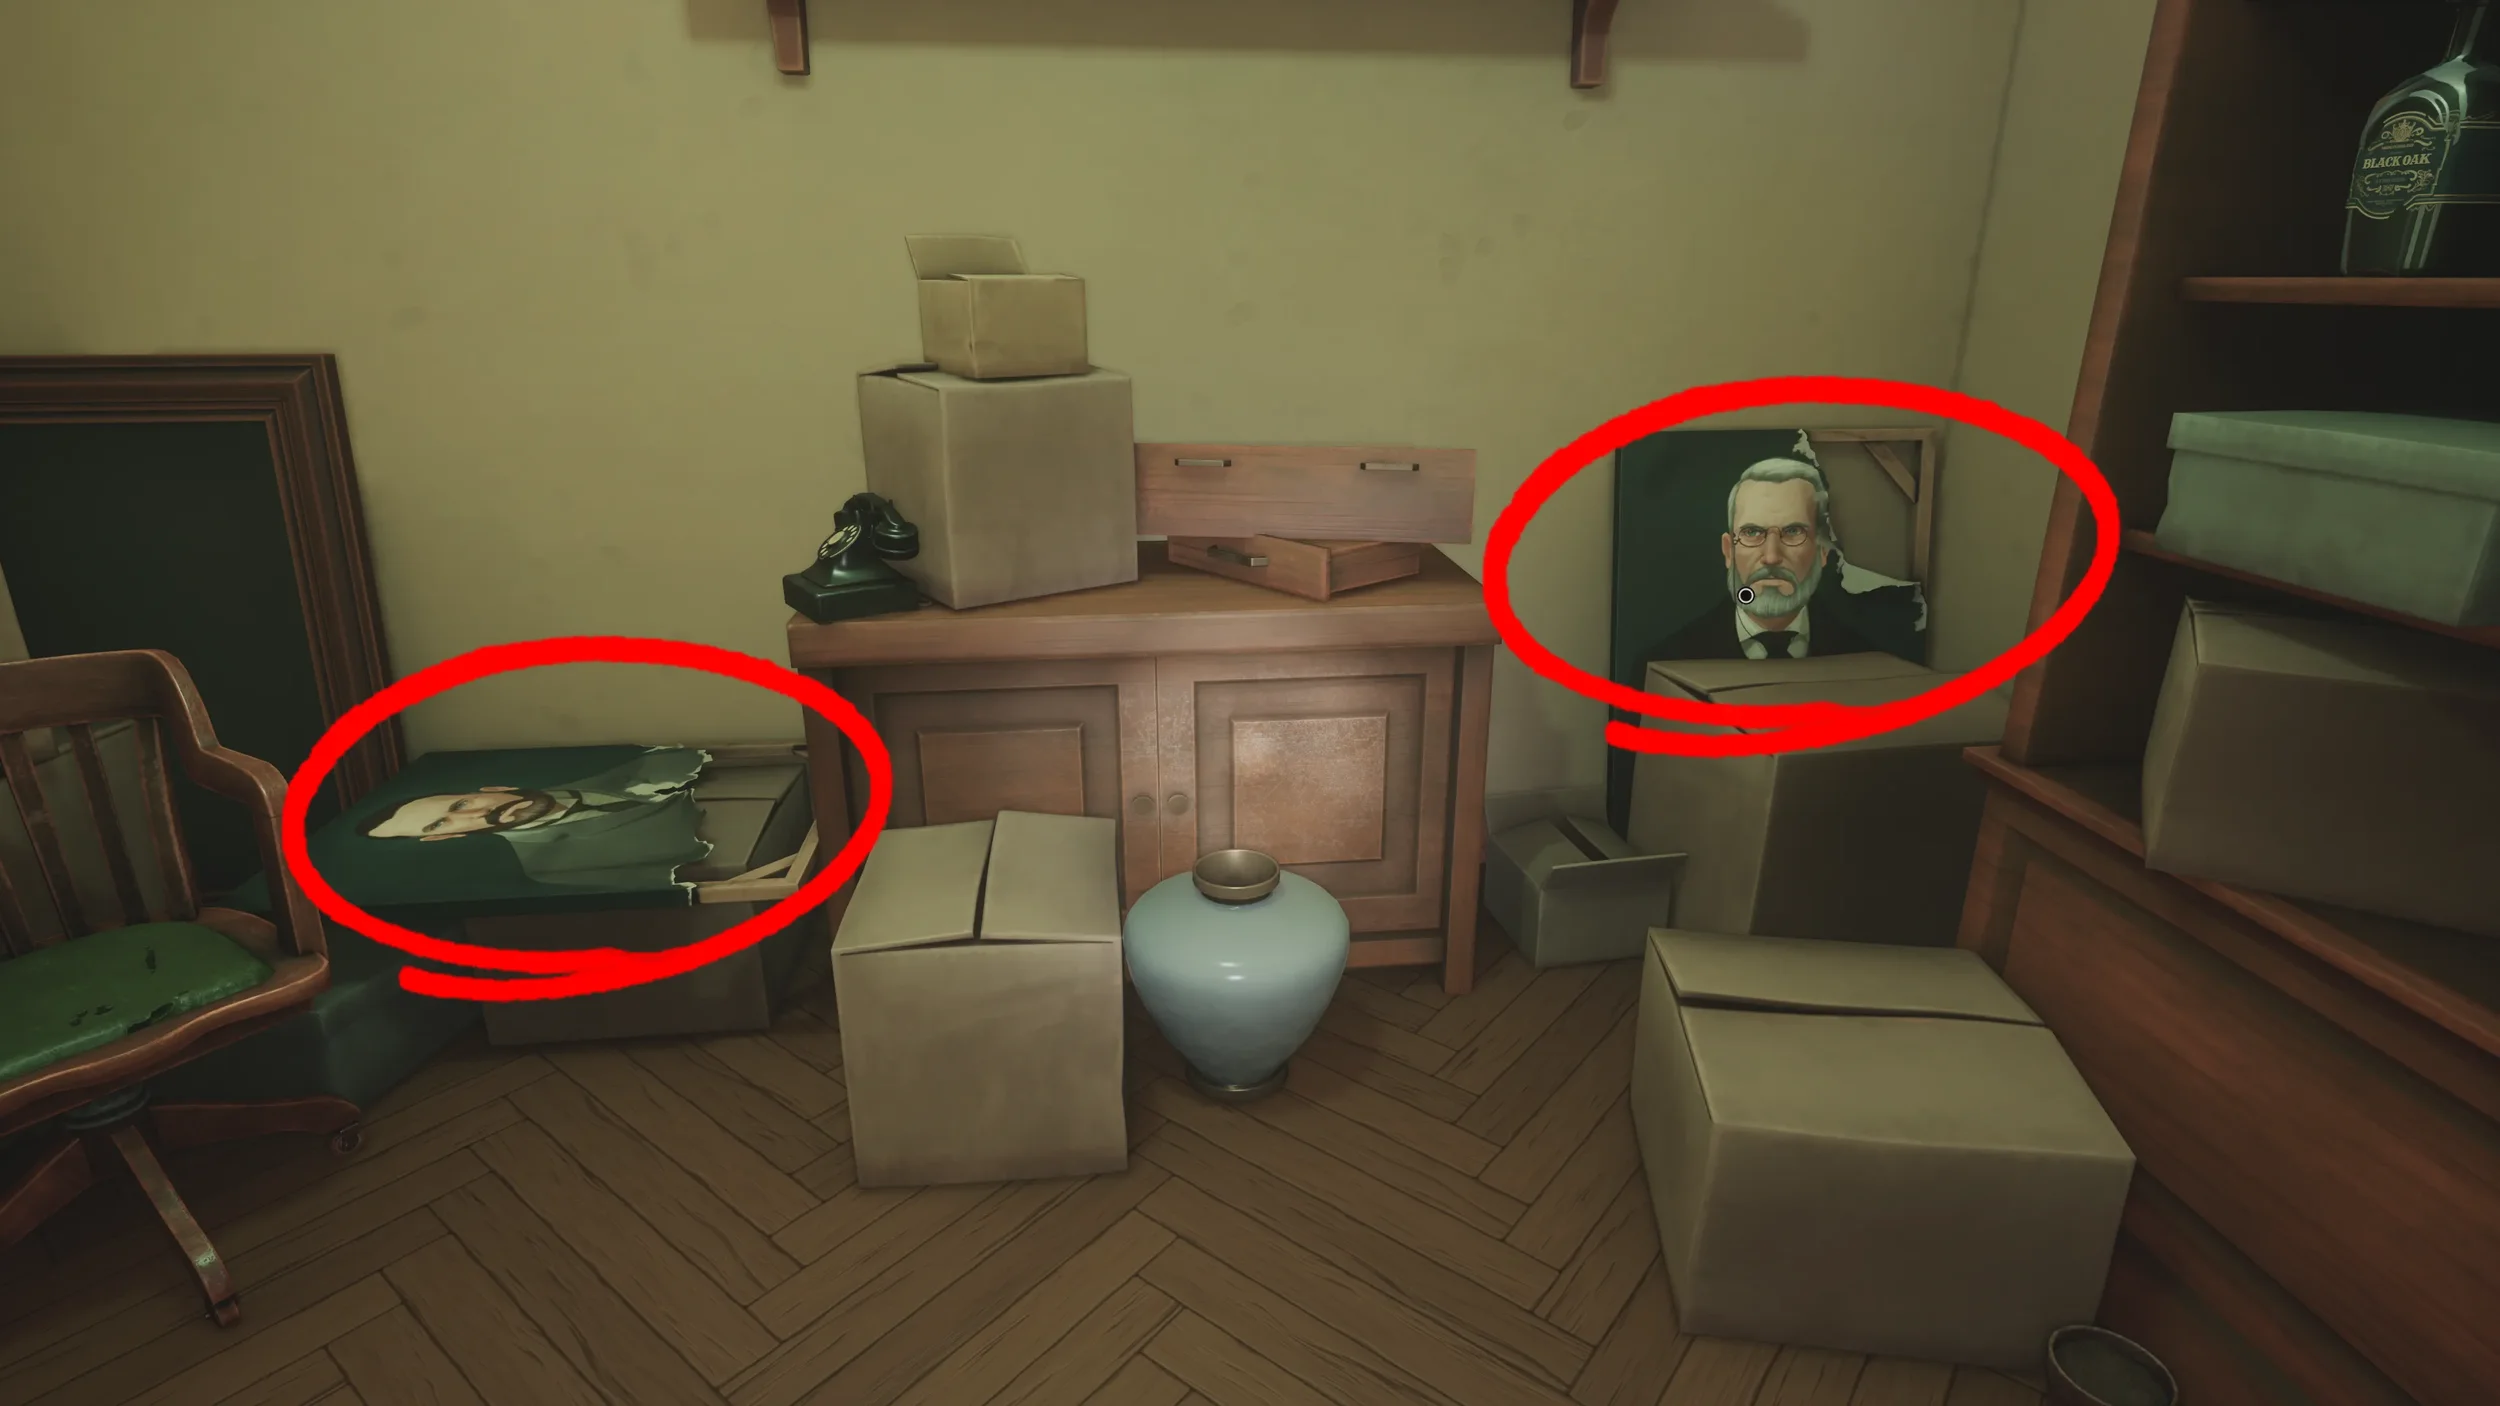
Inside this room you will find 2 Broken Paintings, these are both clues so interact with them both.
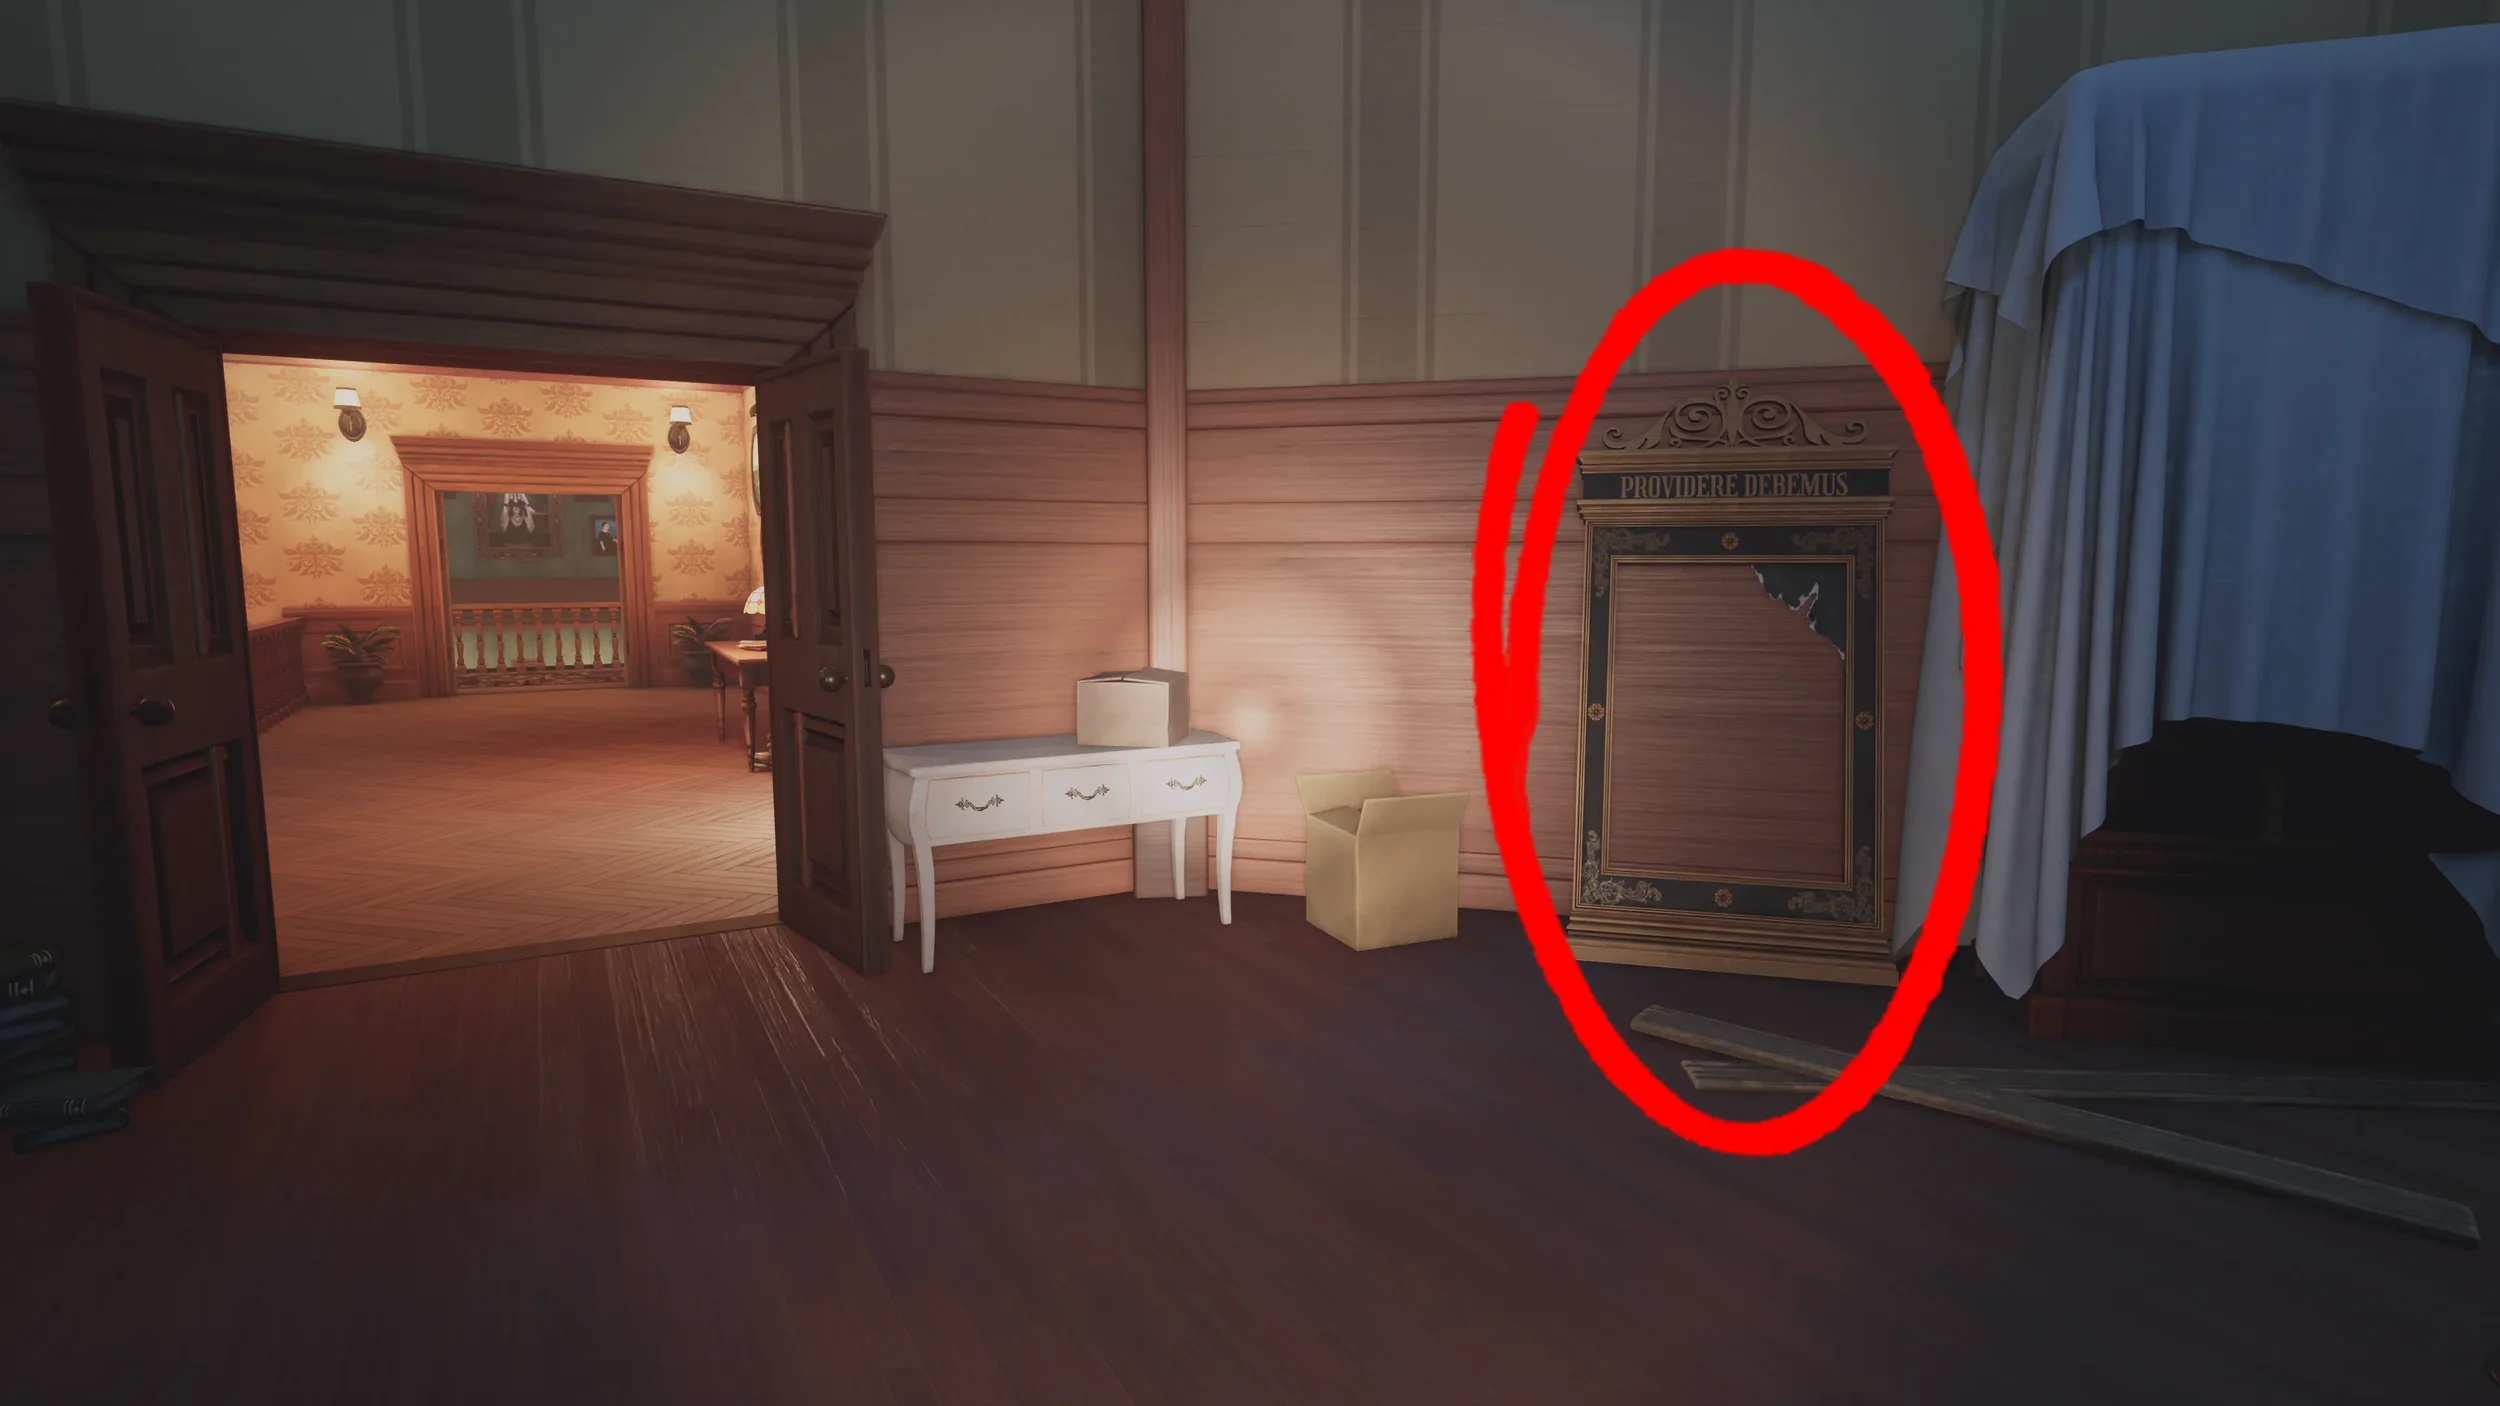
Now exit back out of the room and head up the stairs into the dark room again, to the left of the entrance door you will find a Broken Frame, this is another clue so interact with it as well.
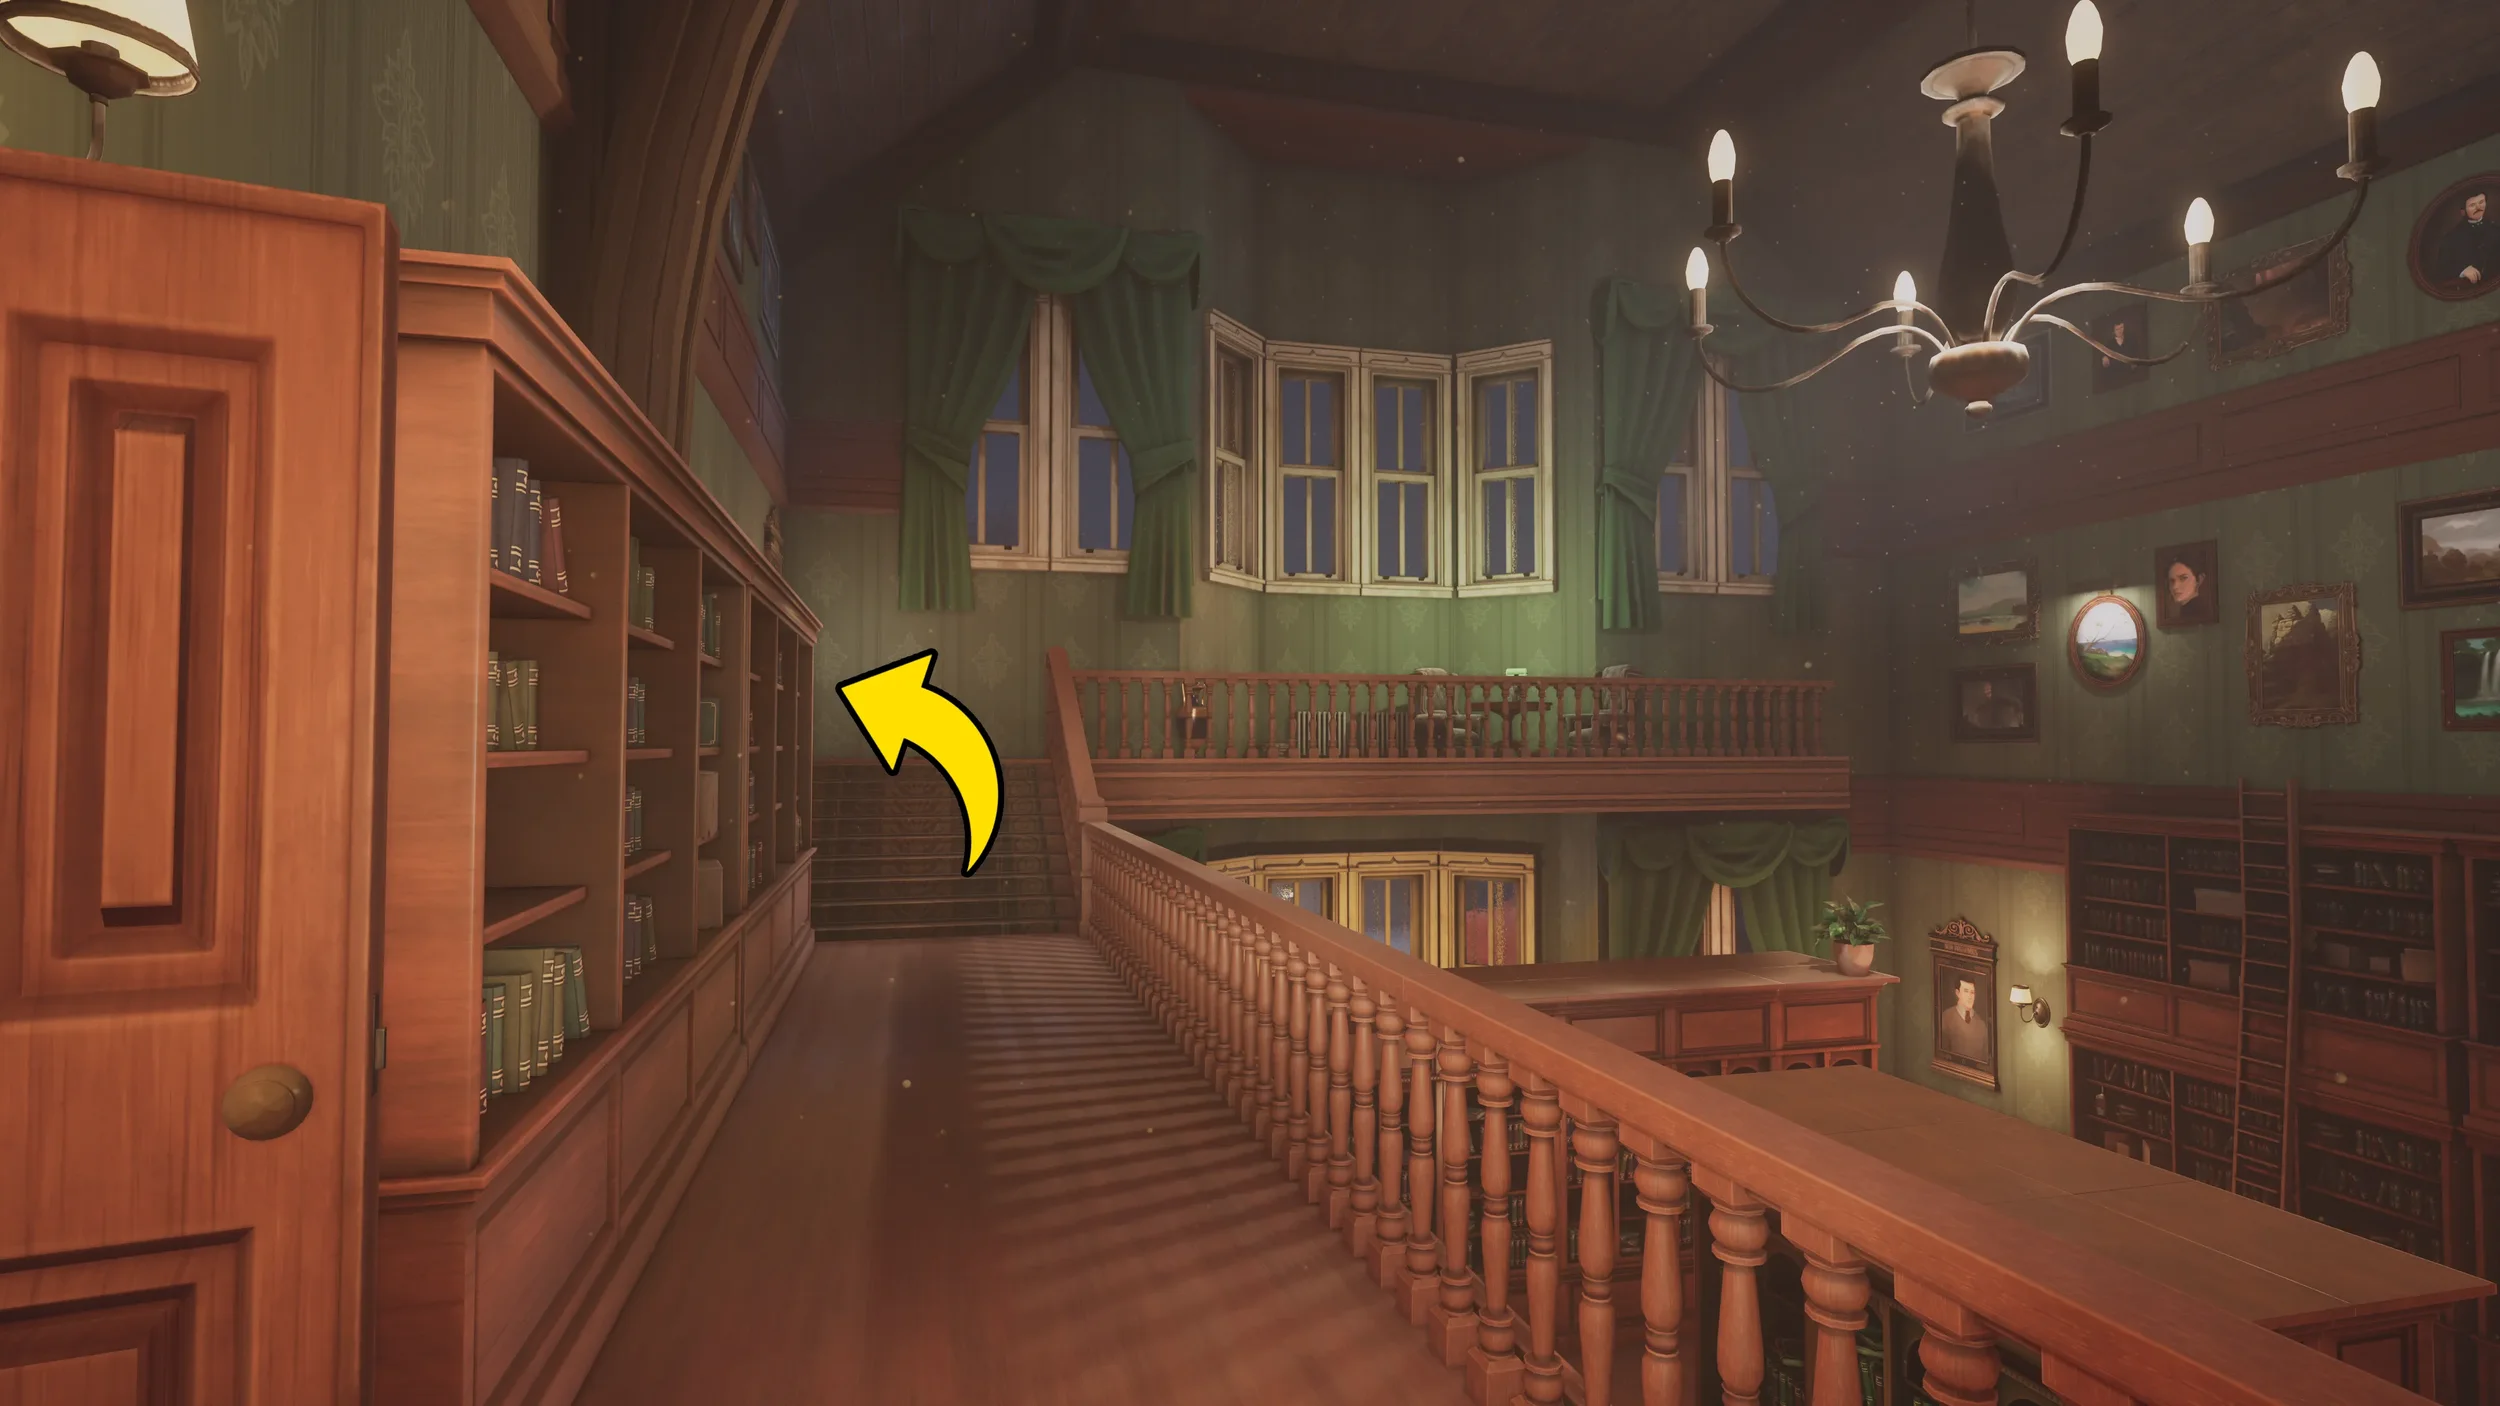
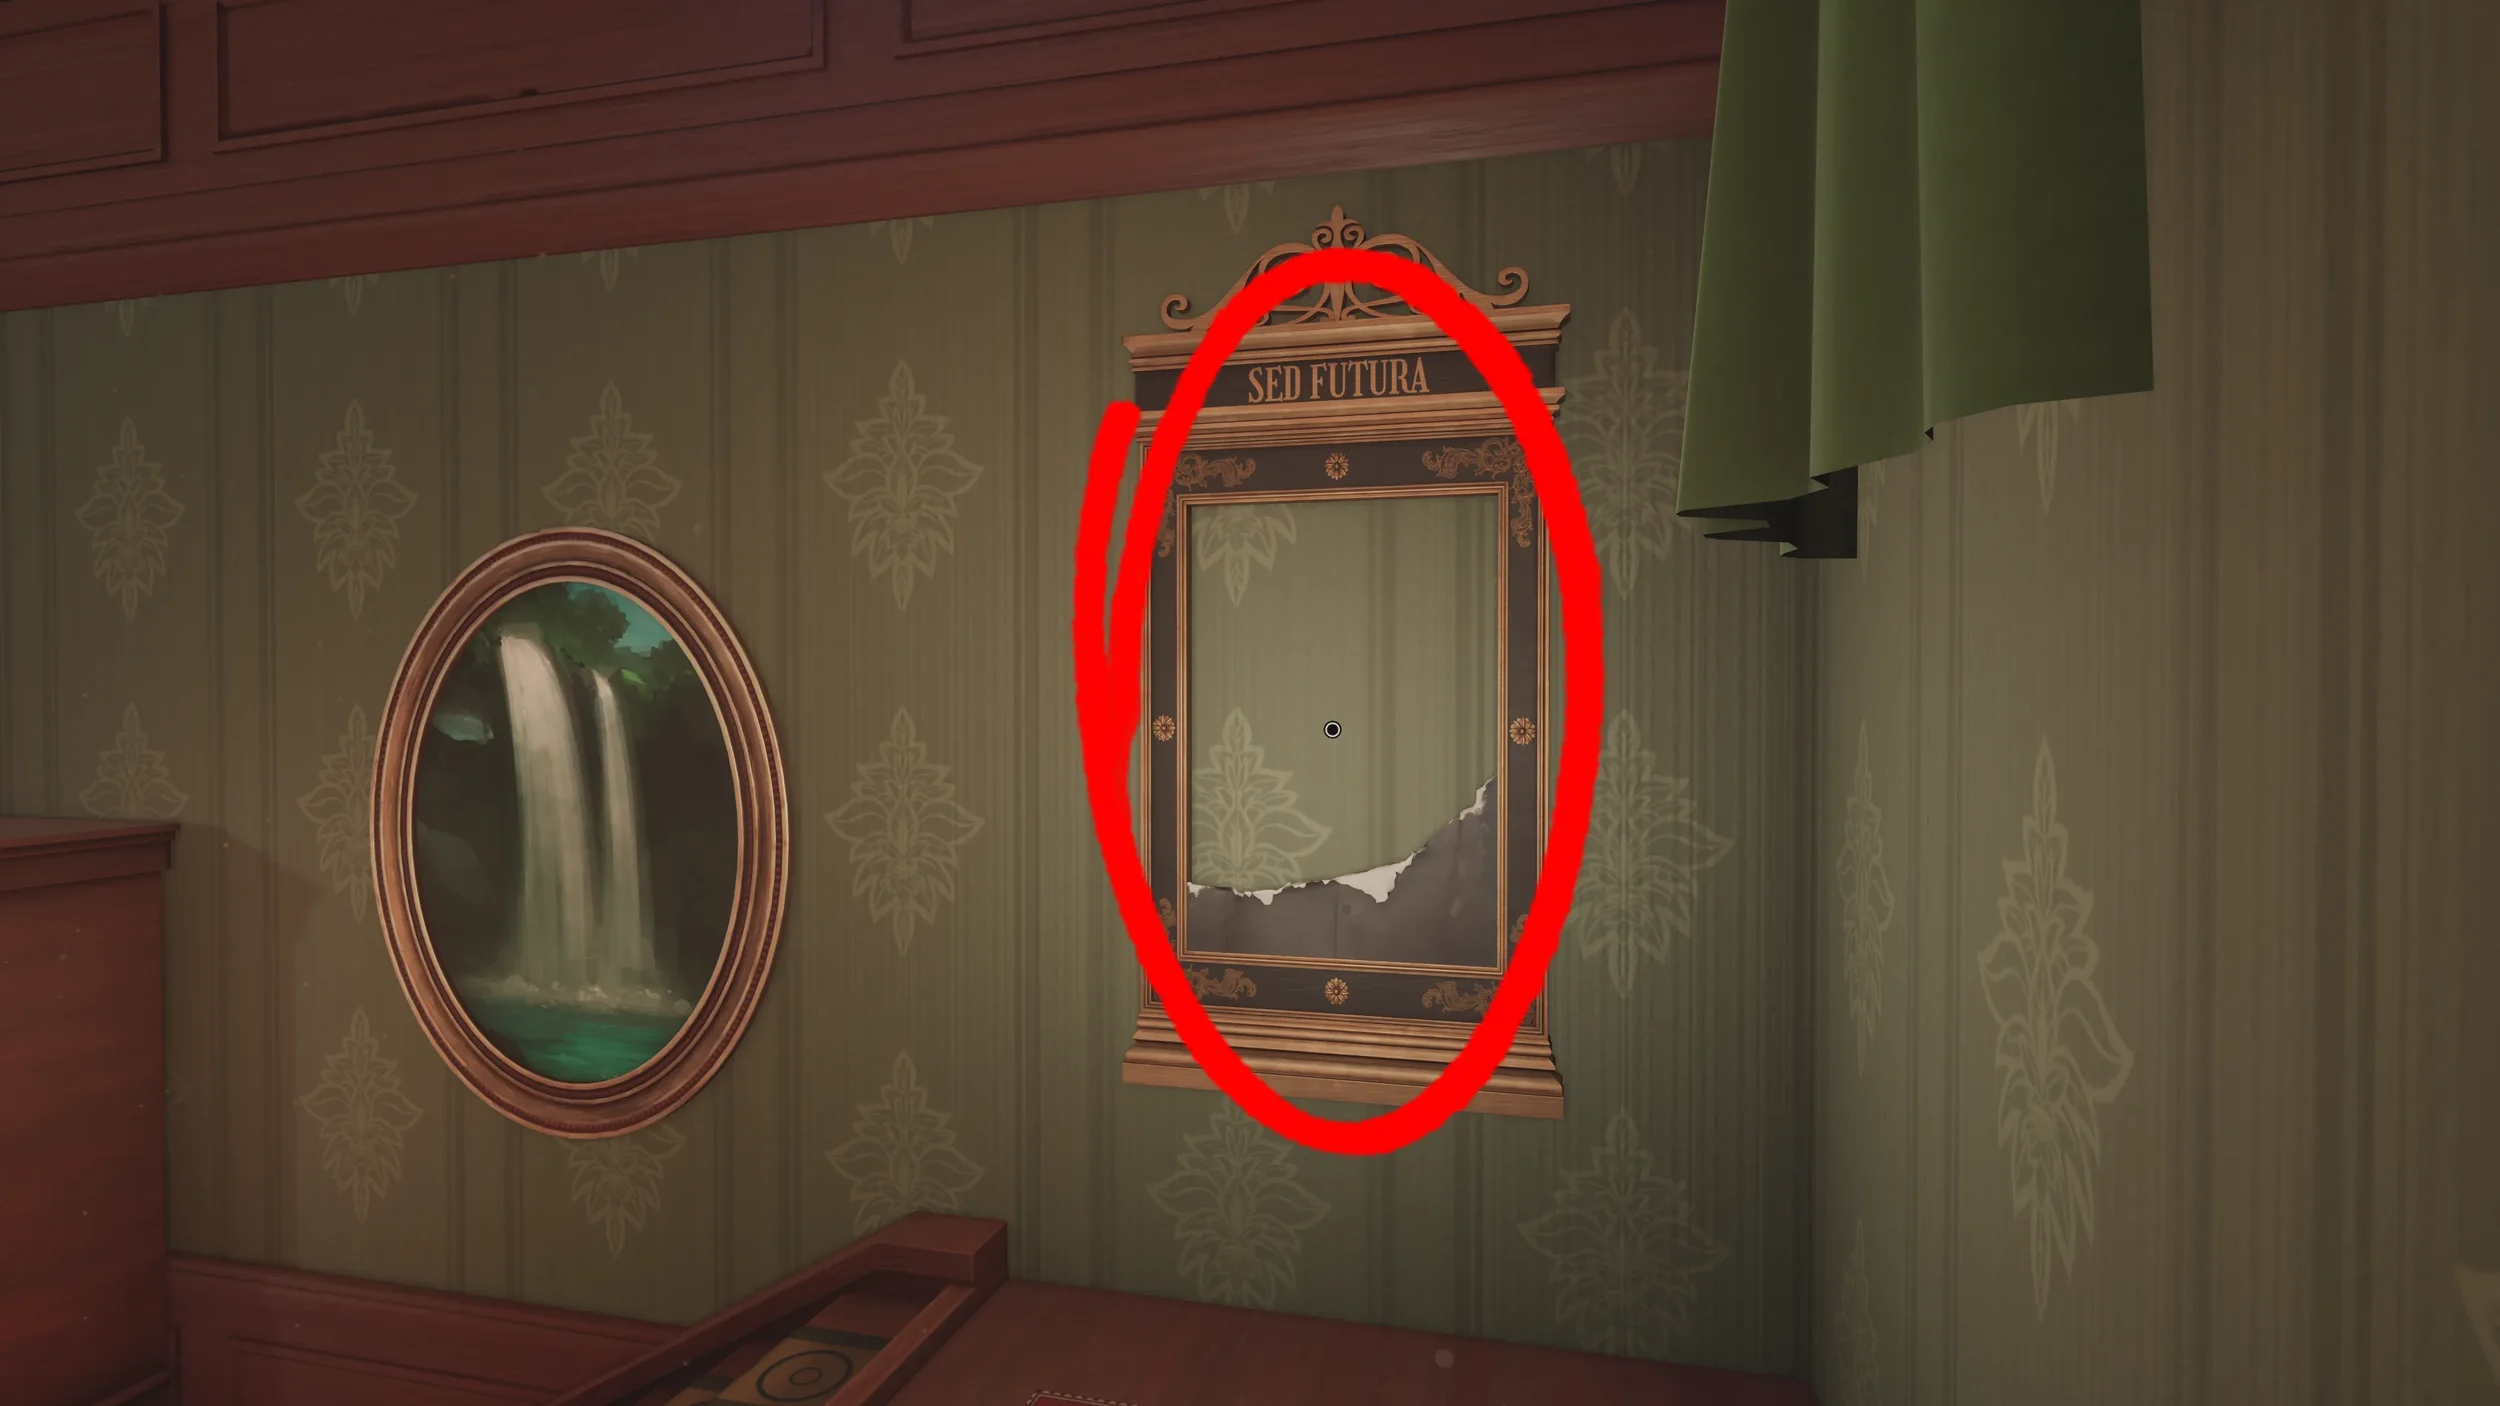
To find the next clue head back onto the indoors balcony area from earlier and go to the left where you will find another Broken Frame on the wall.
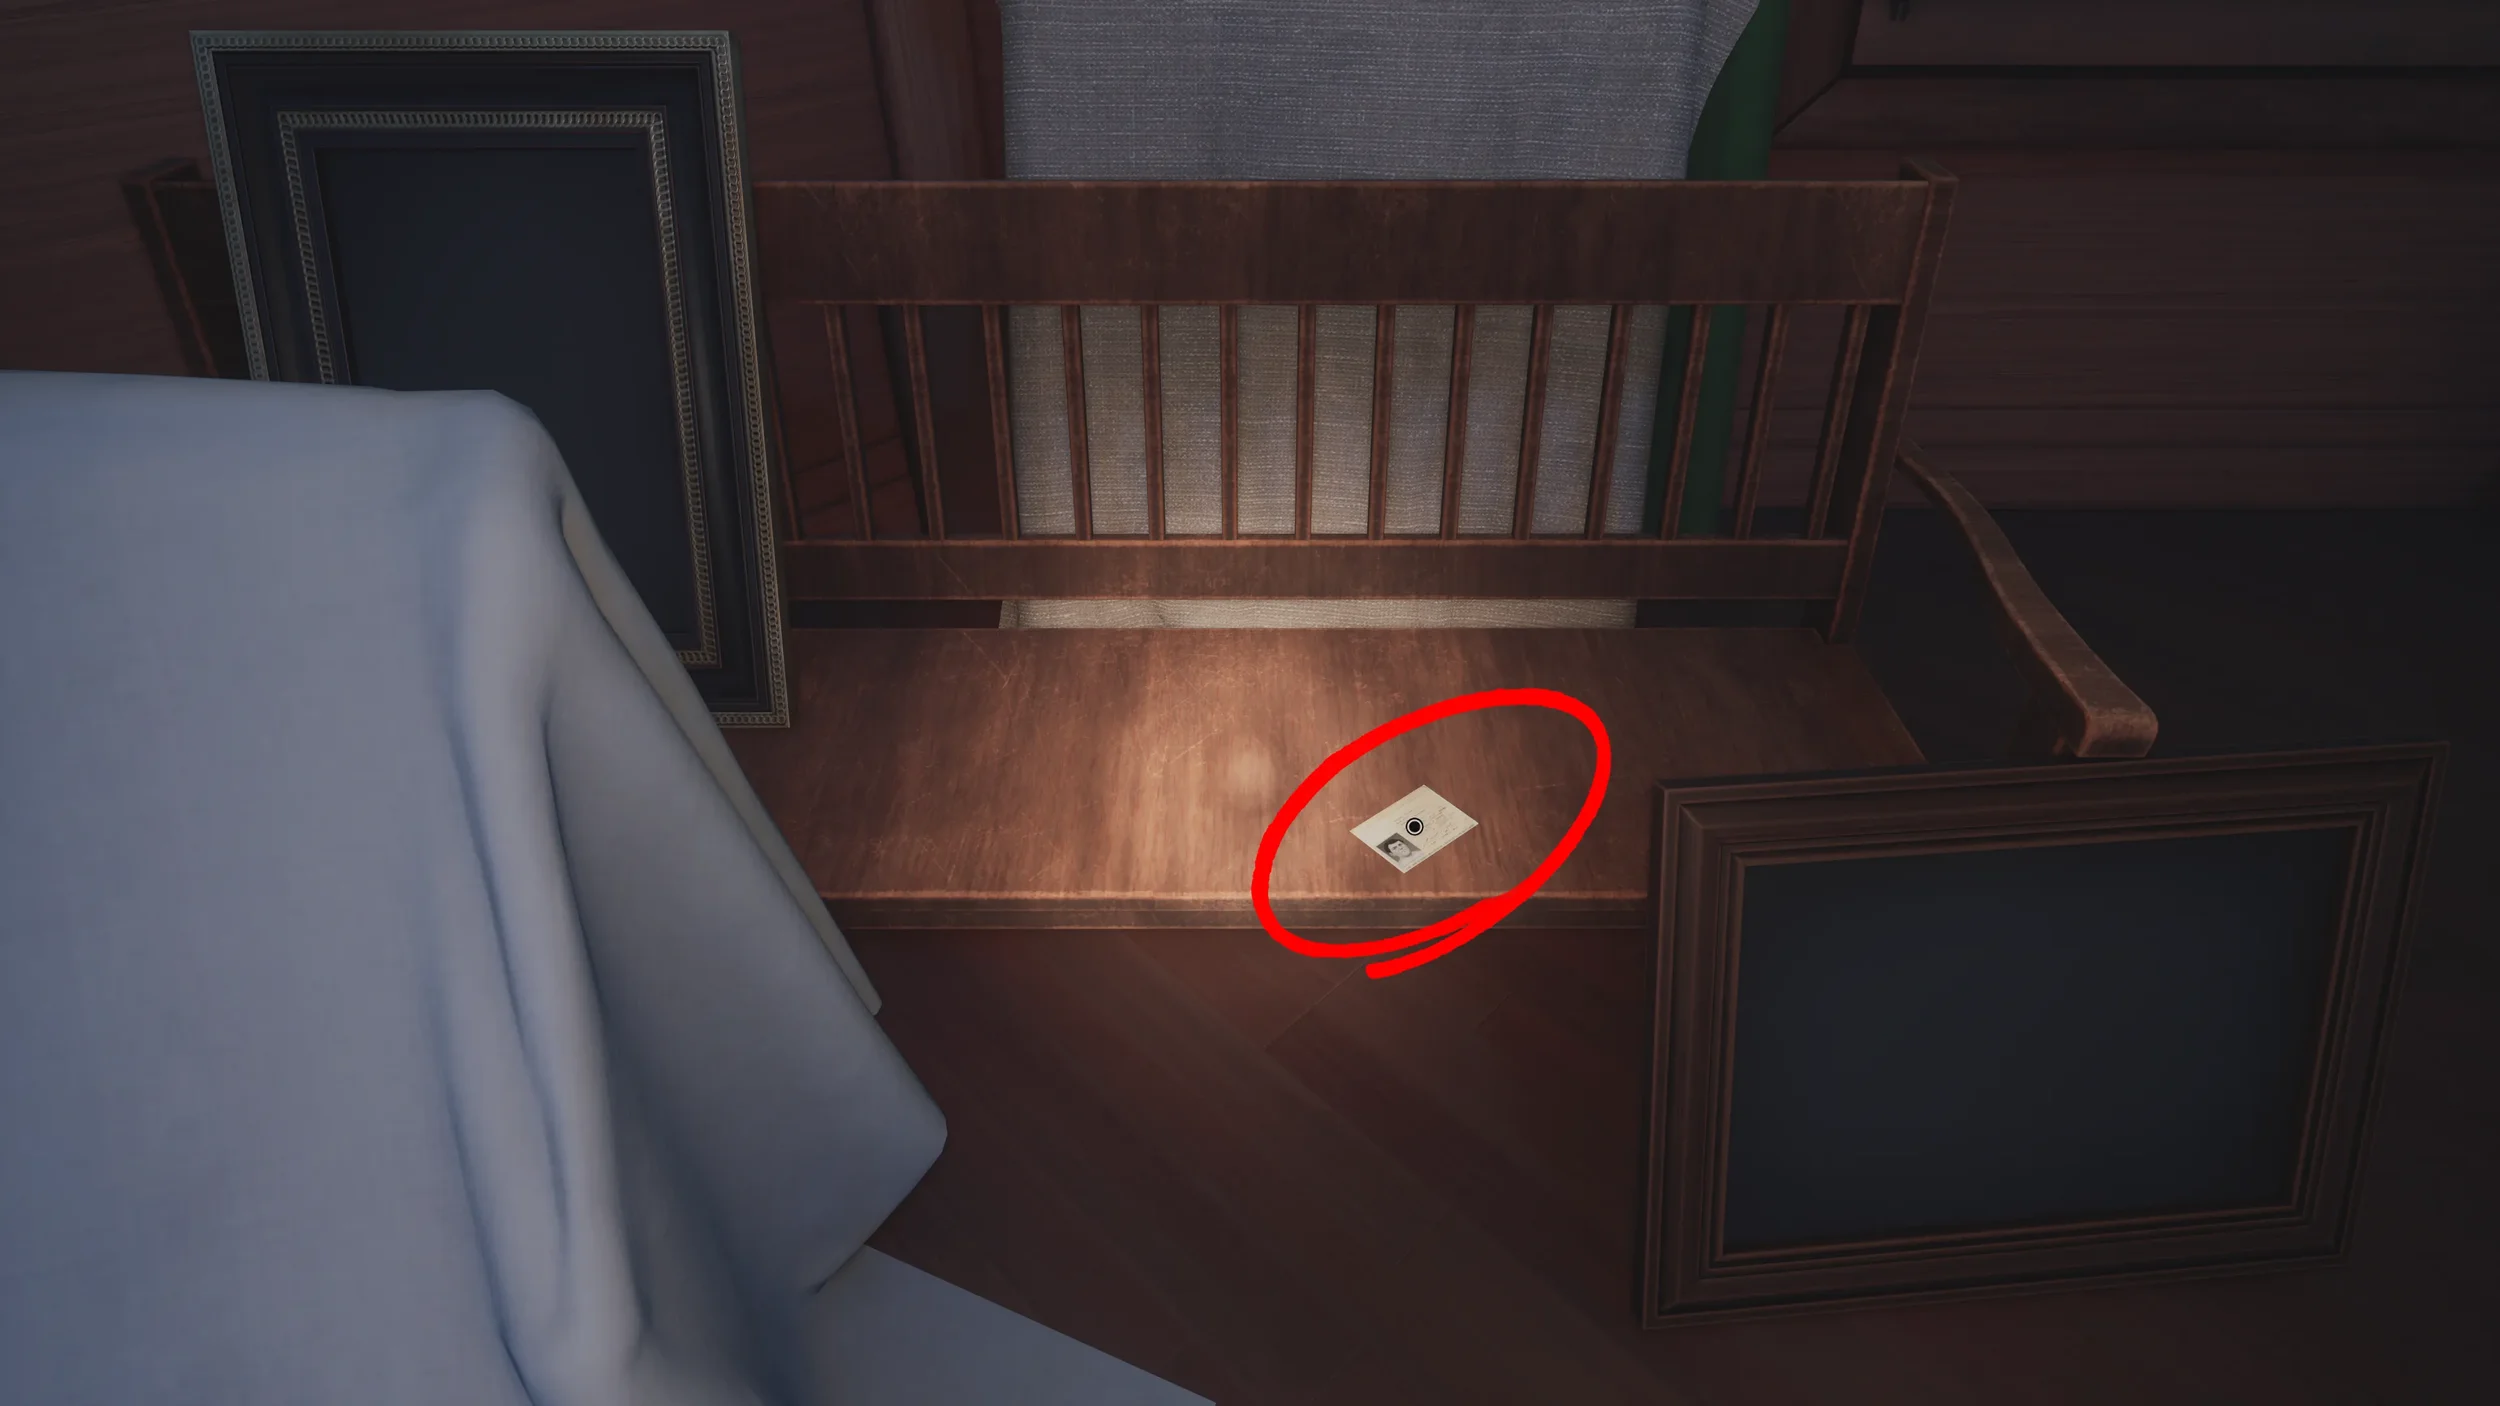
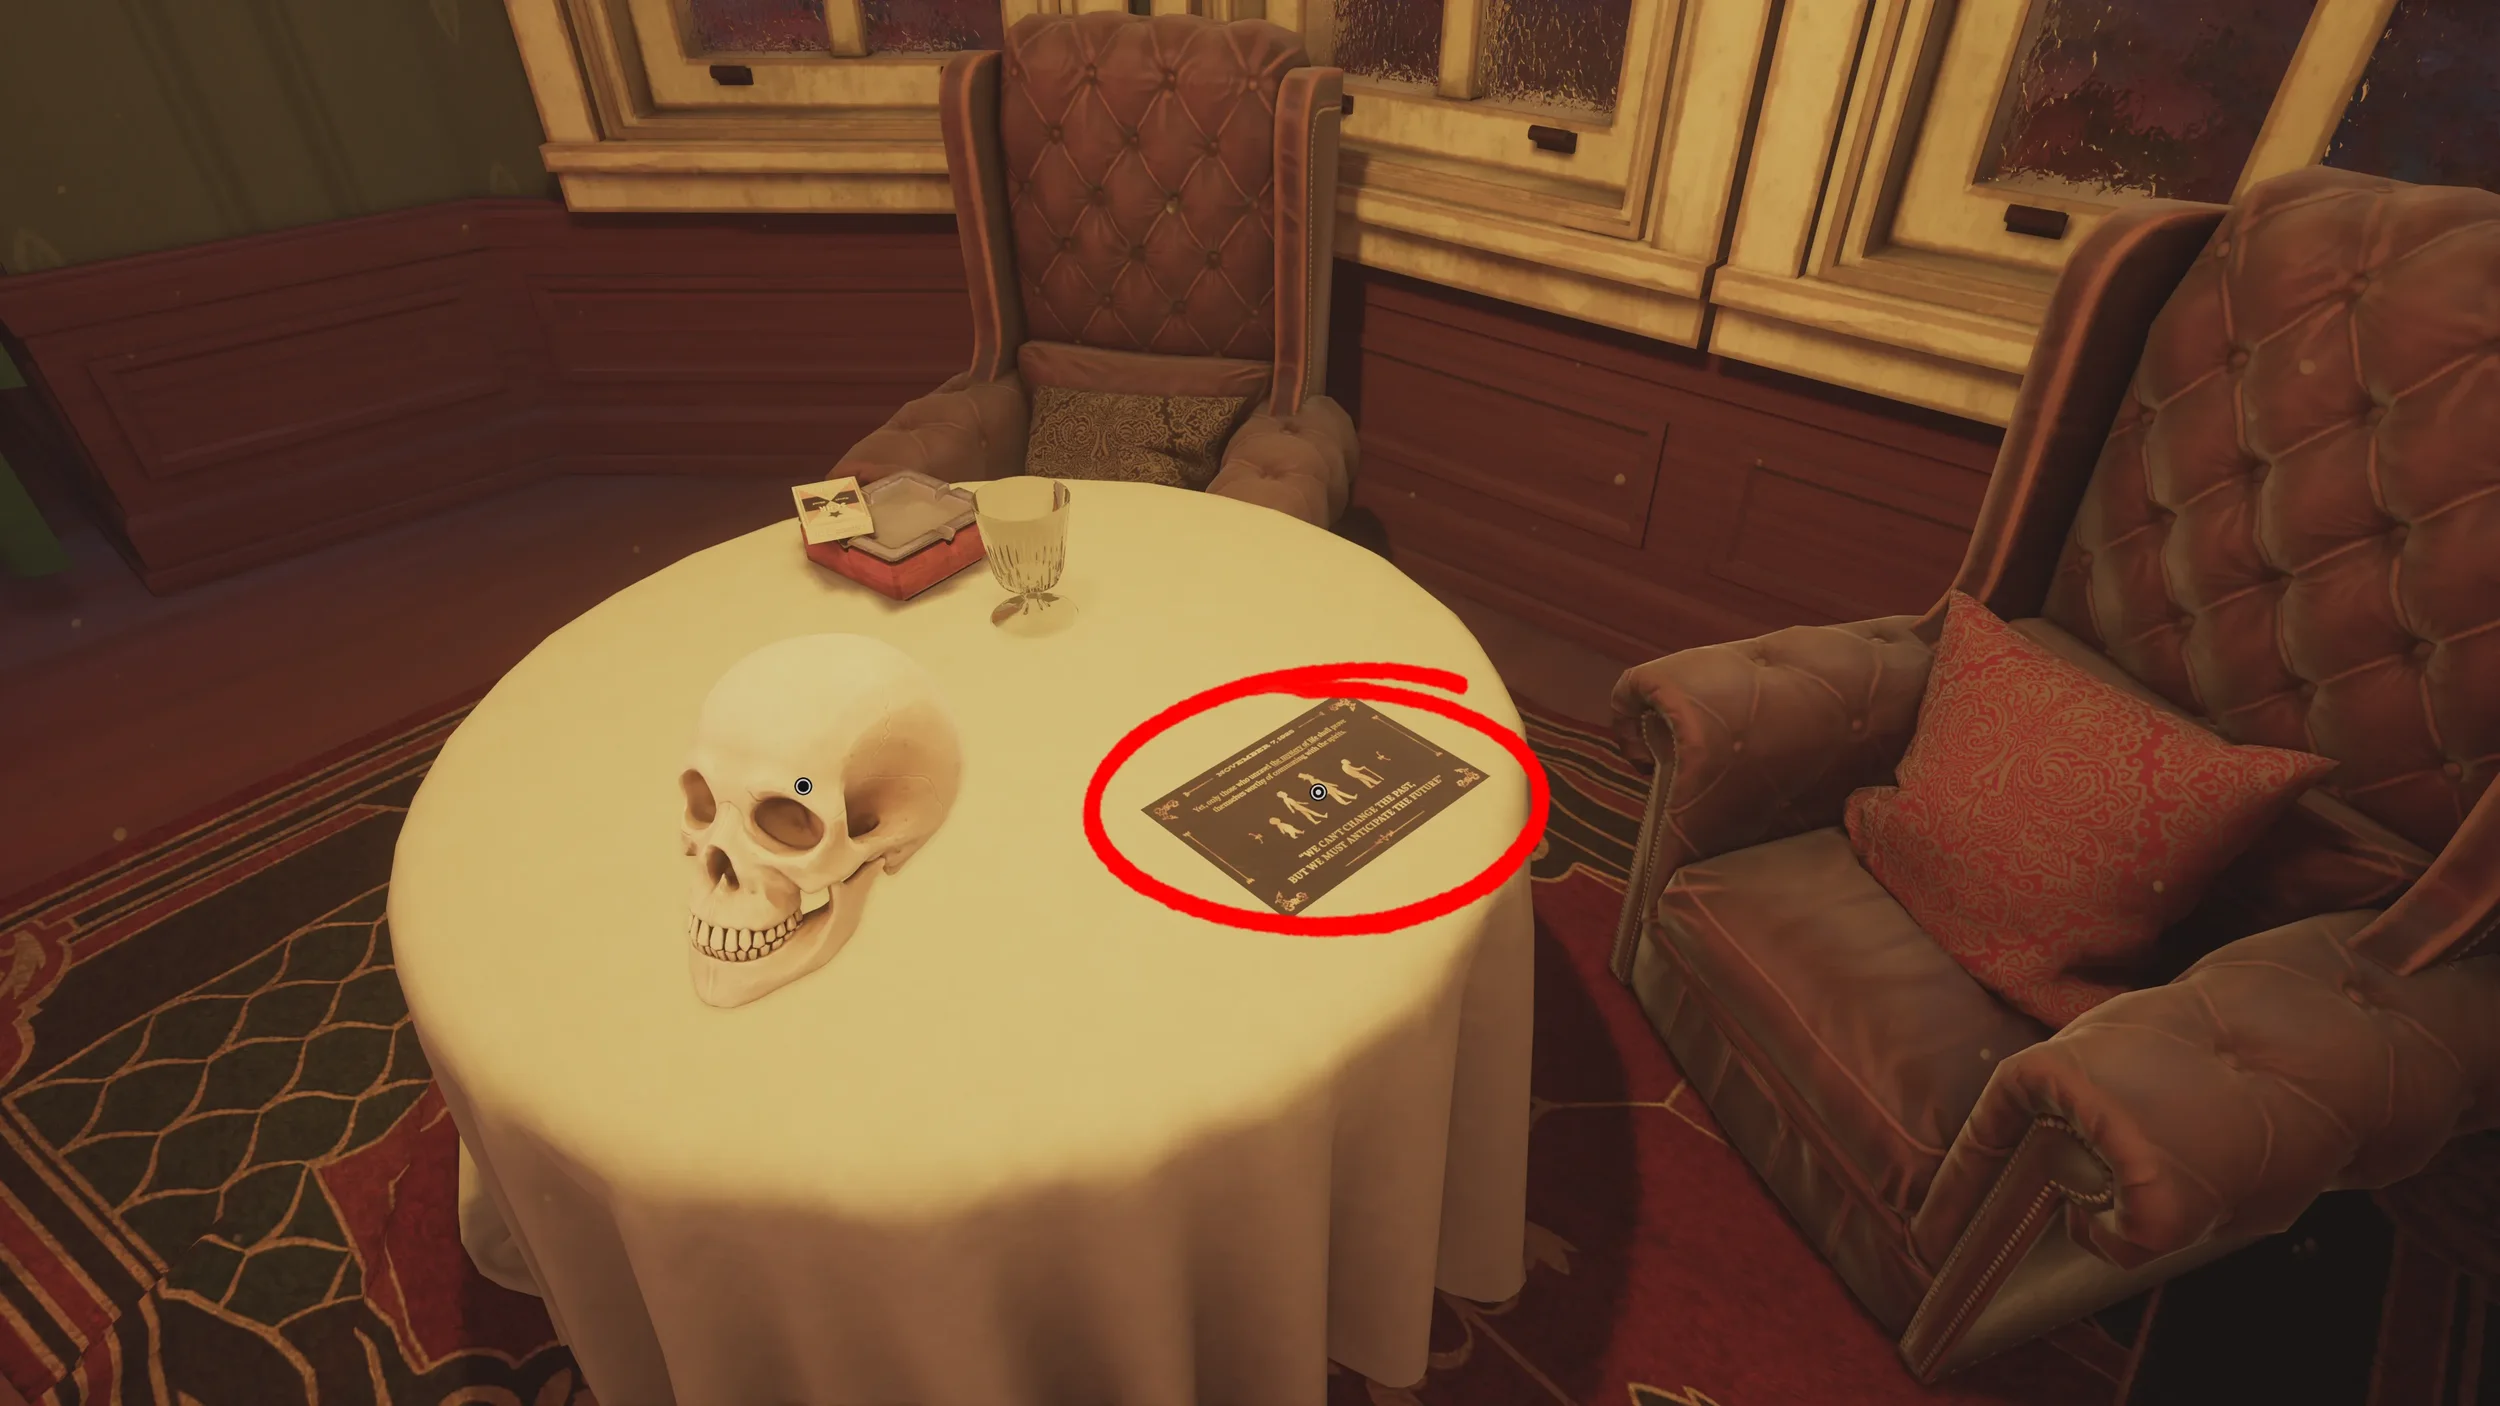
Go back downstairs into the main room, stick to the left side of the room as soon as you go through the door to find the final two clues (excluding the bookshelf itself which you will get automatically when we start the actual puzzle), one of these clues is the Portrait on the wall ahead and the other clue is the Card on the table that shows four people of different ages walking.

We now have all of the clues in Chapter 1, all that is left to do is solve the Bookshelf Puzzle.
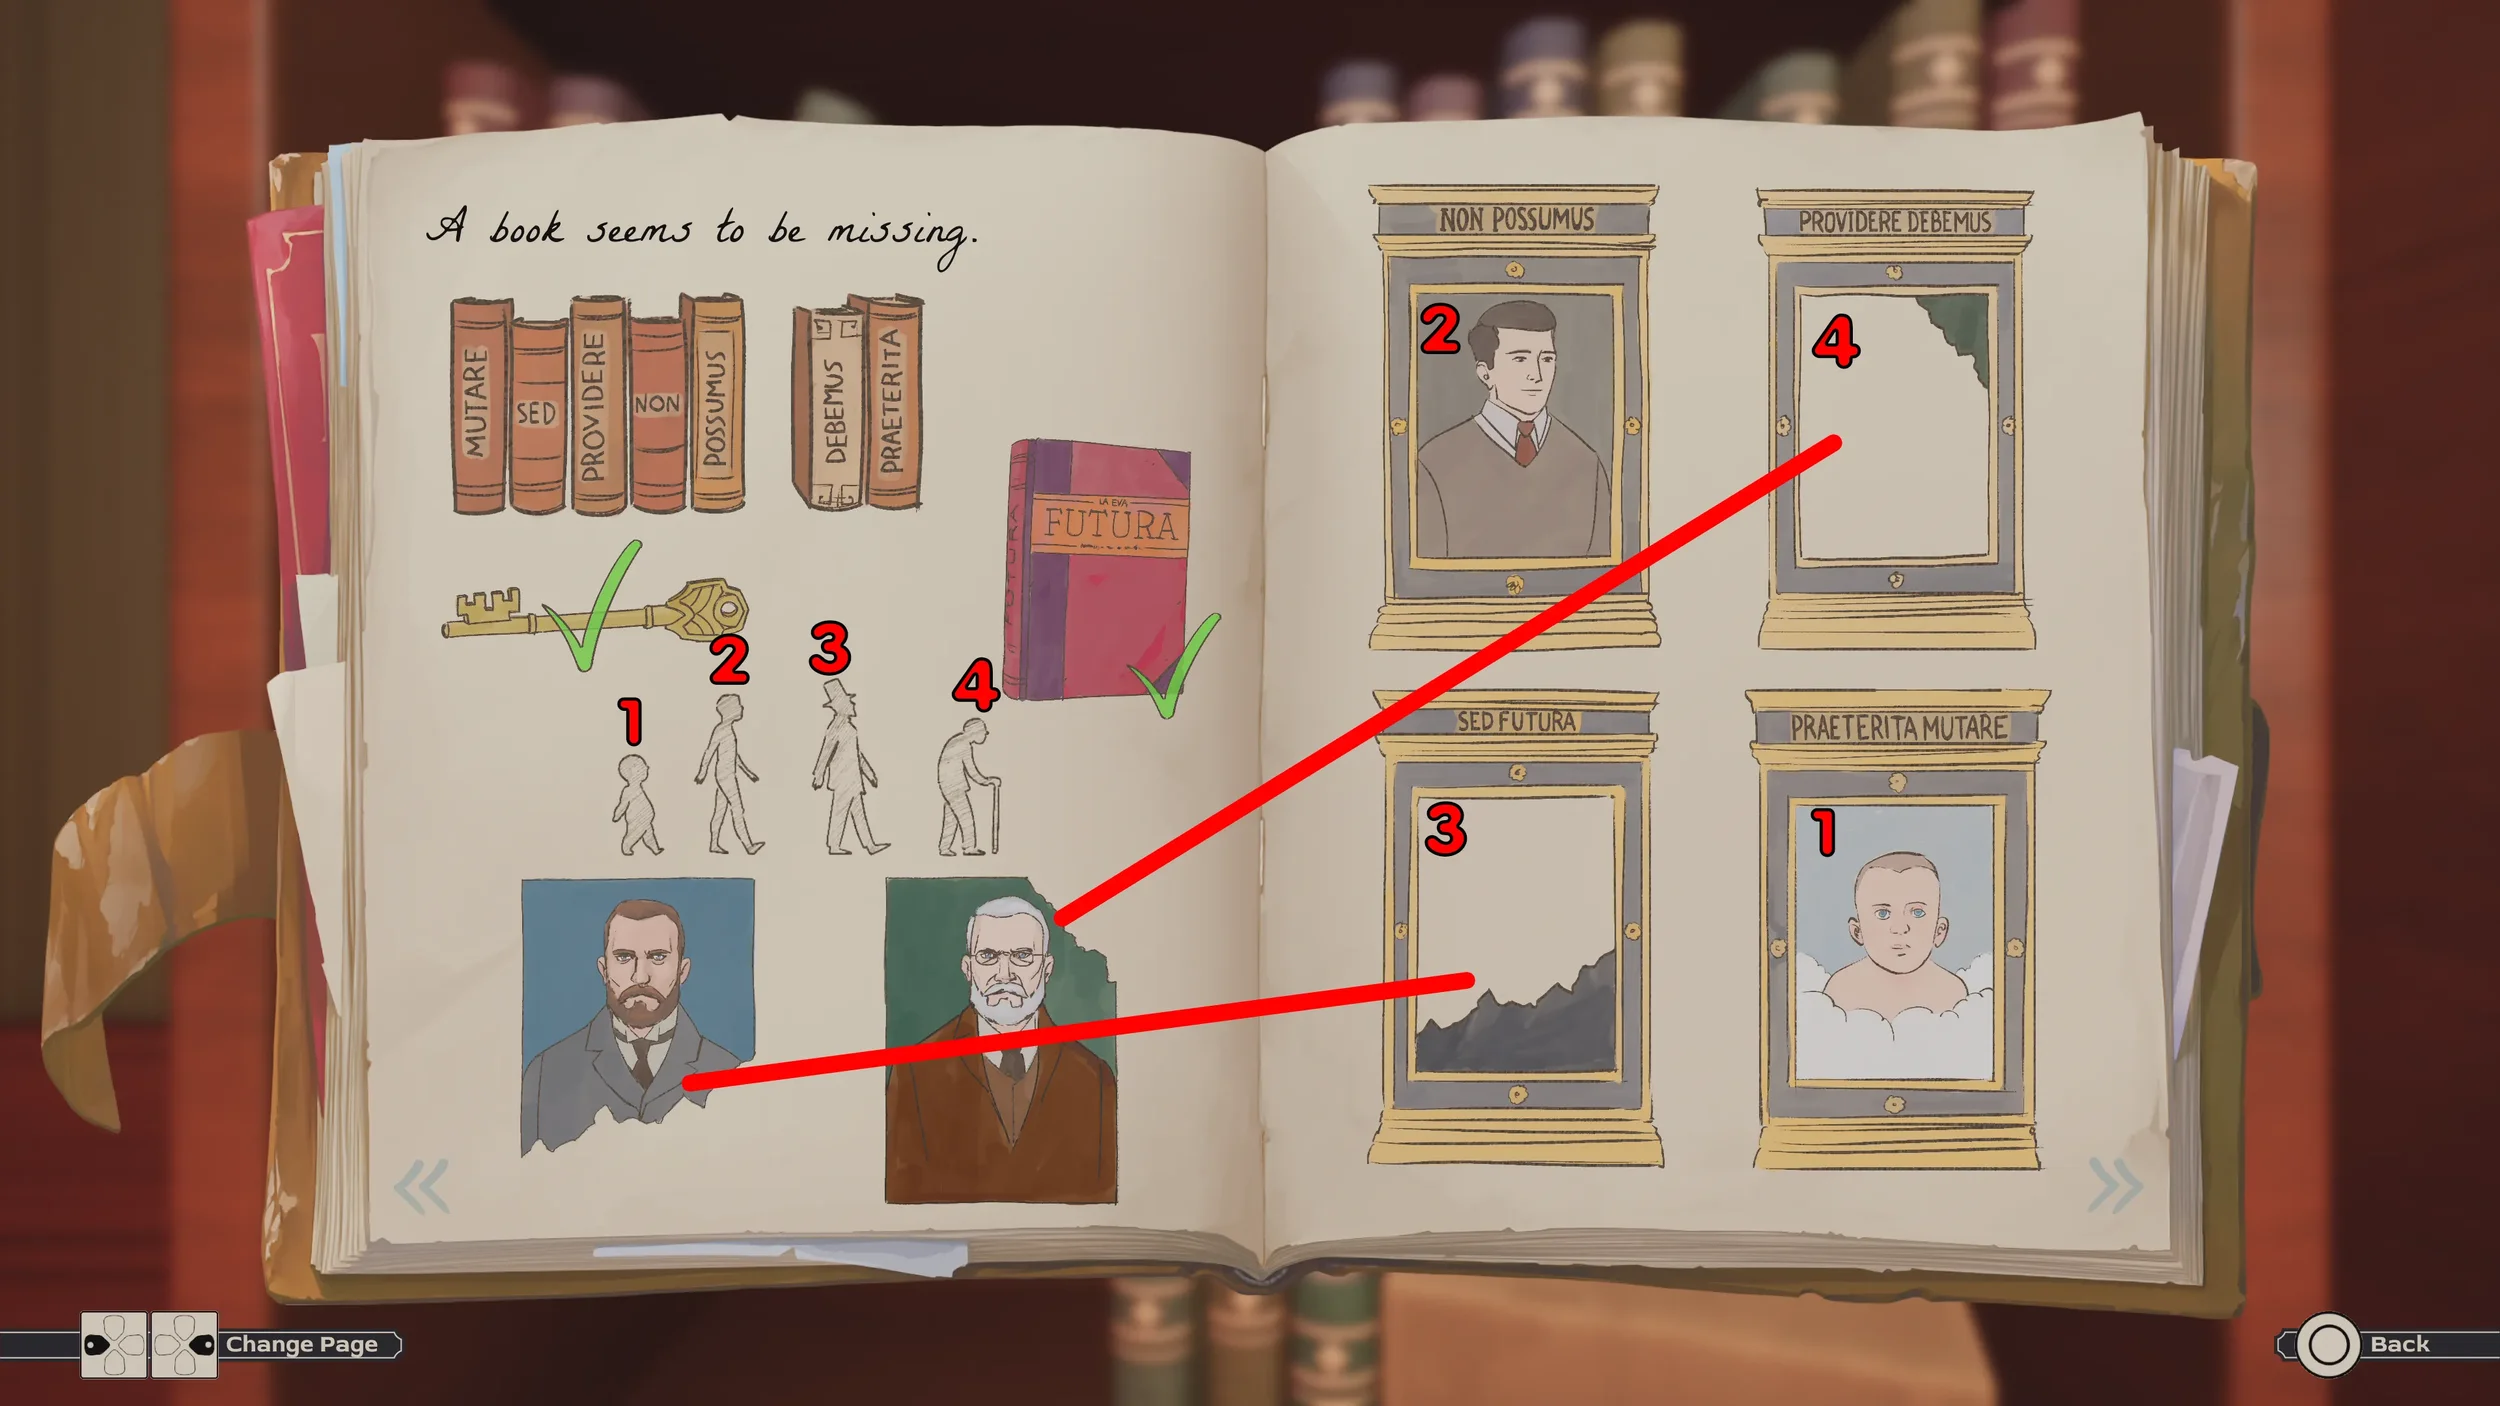
So let’s go back into the Professor’s Office and interact with the Bookshelf, here we will place the Book we got from the Greenhouse to start the puzzle, we need to arrange the Books in the order of the words written on the frames of the Portrait clues, from youngest to oldest (we know this based on the Card clue we found that showed the 4 people of different ages walking).
So from this we can gather that the order we need to place the Books in from left to right is:
PRAETERITA - MUTARE - NON - POSSUMUS - SED - FUTURA - PROVIDERE - DEBEMUS

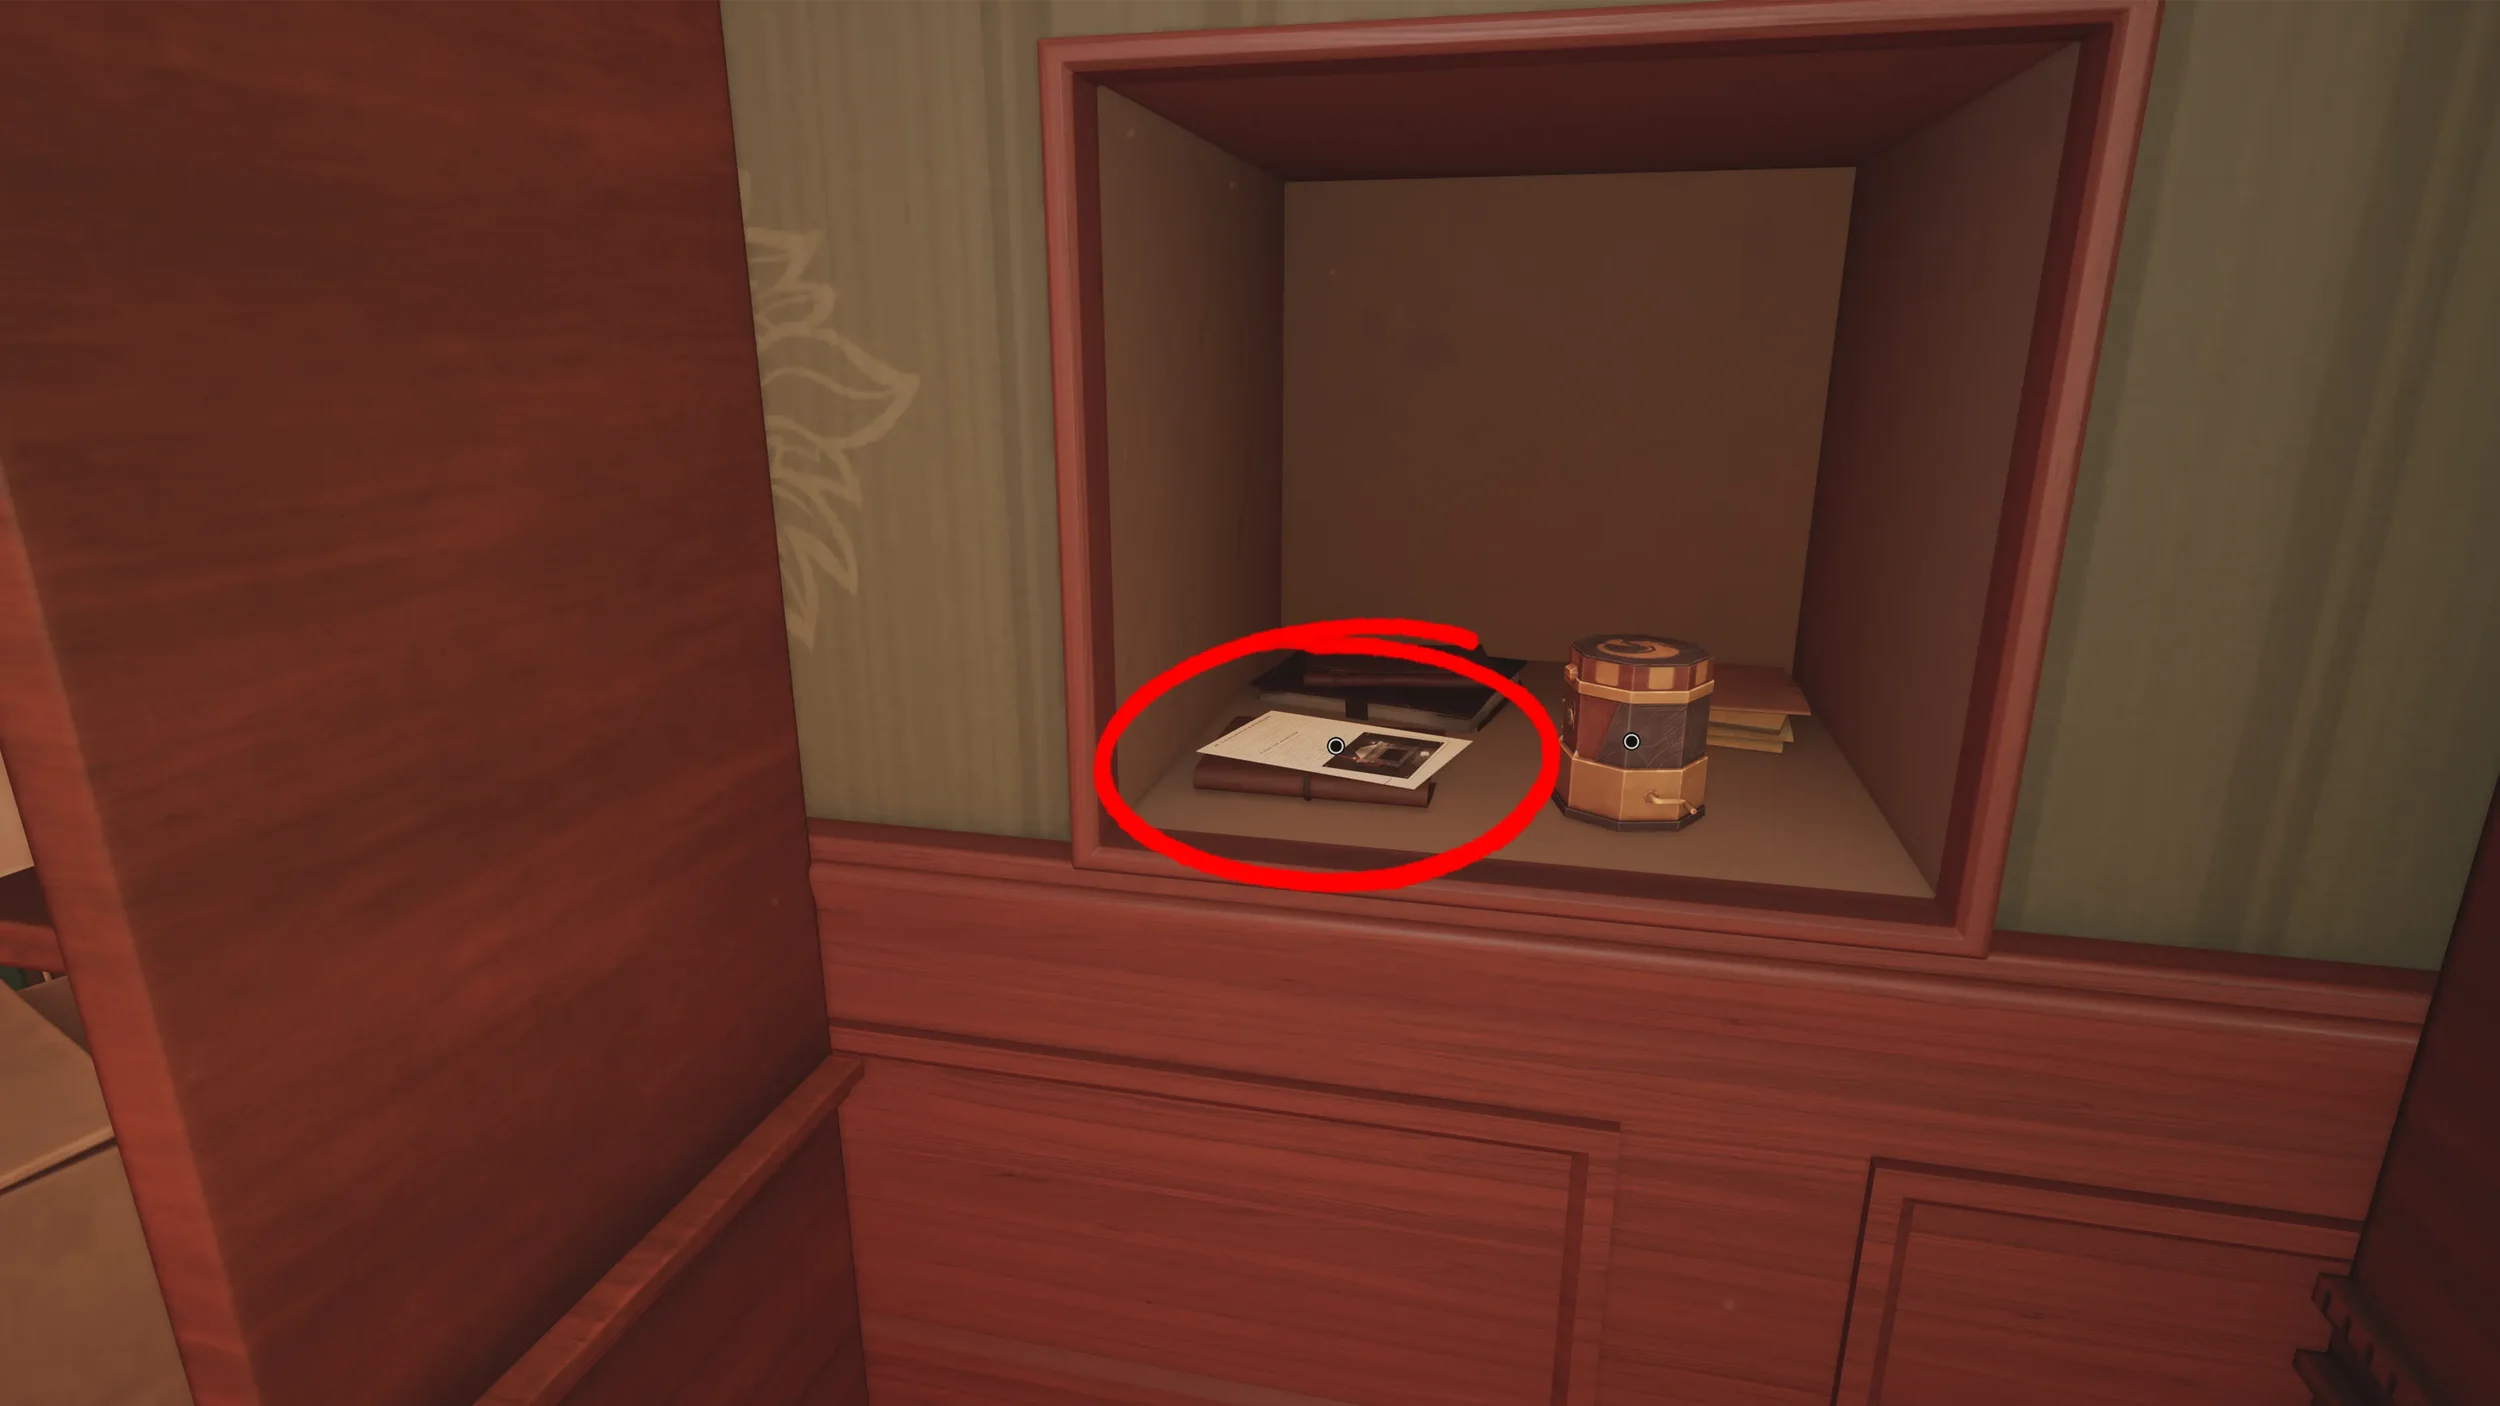
After solving the puzzle, the bookshelf will move to the side revealing a hidden alcove where you can interact with a piece of paper which shows you how to open the secret passage in the fireplace (you need to actually interact with this paper to be able to open the fireplace).
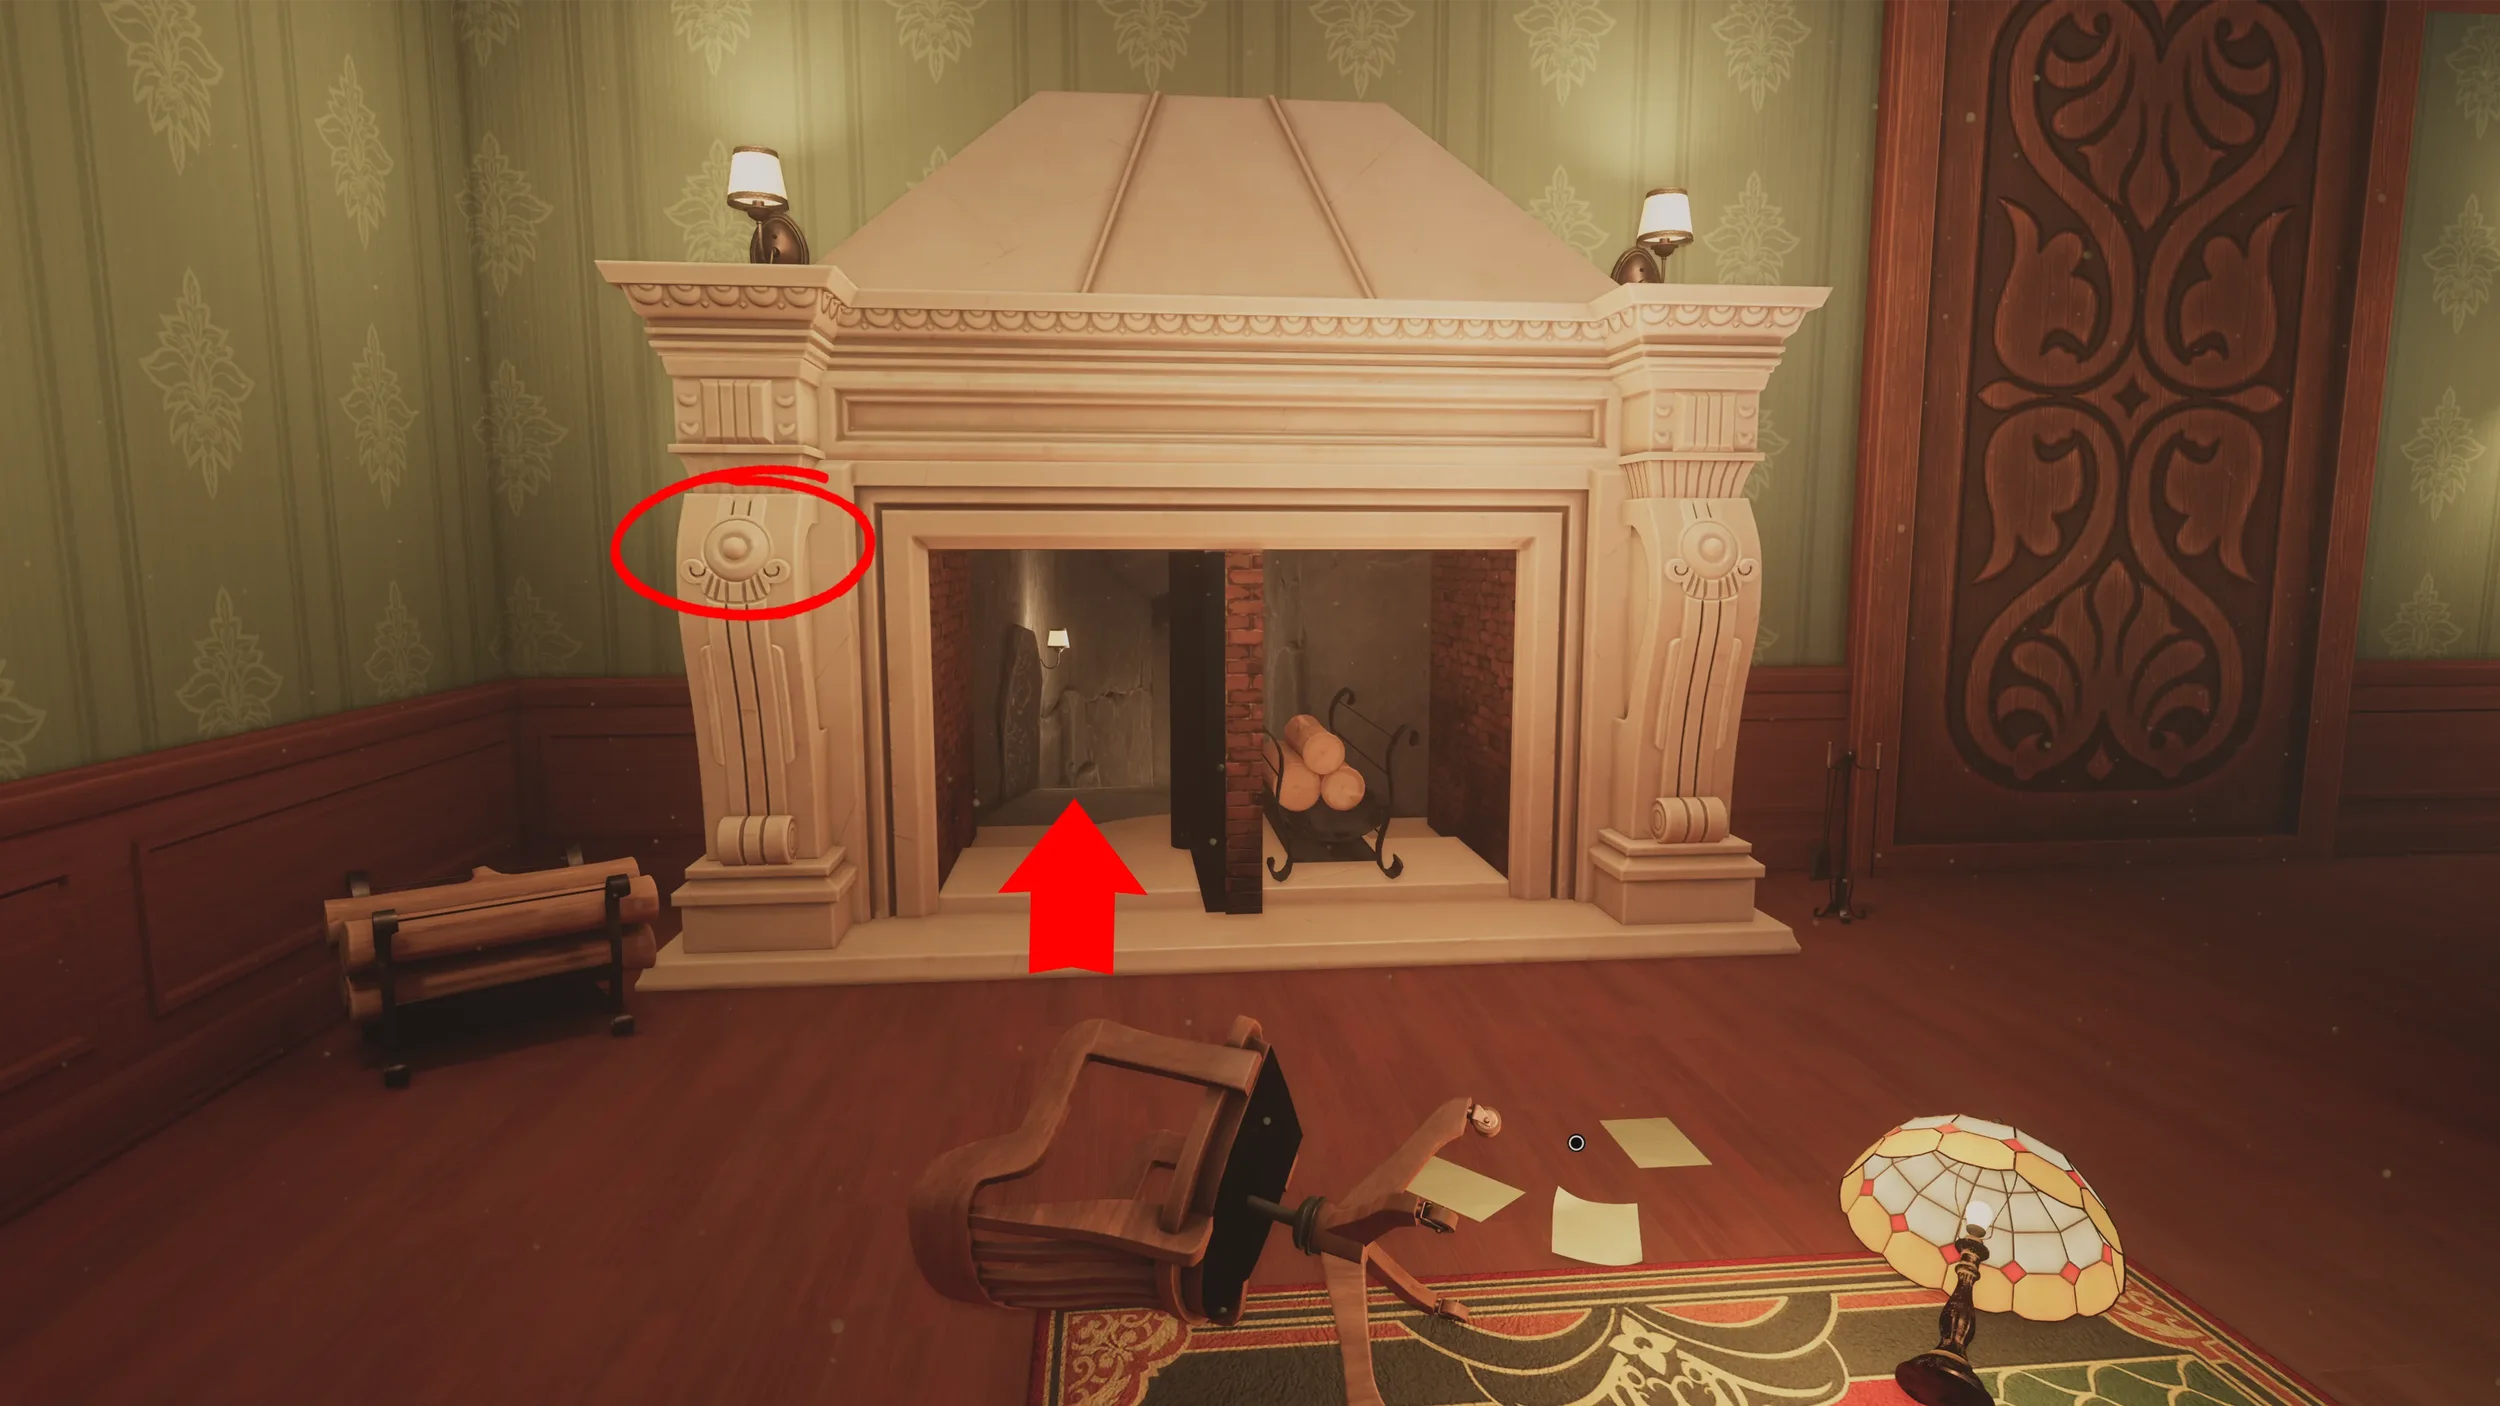
You can now go ahead and press the hidden button on the left side of the fireplace and then proceed through the secret passage.
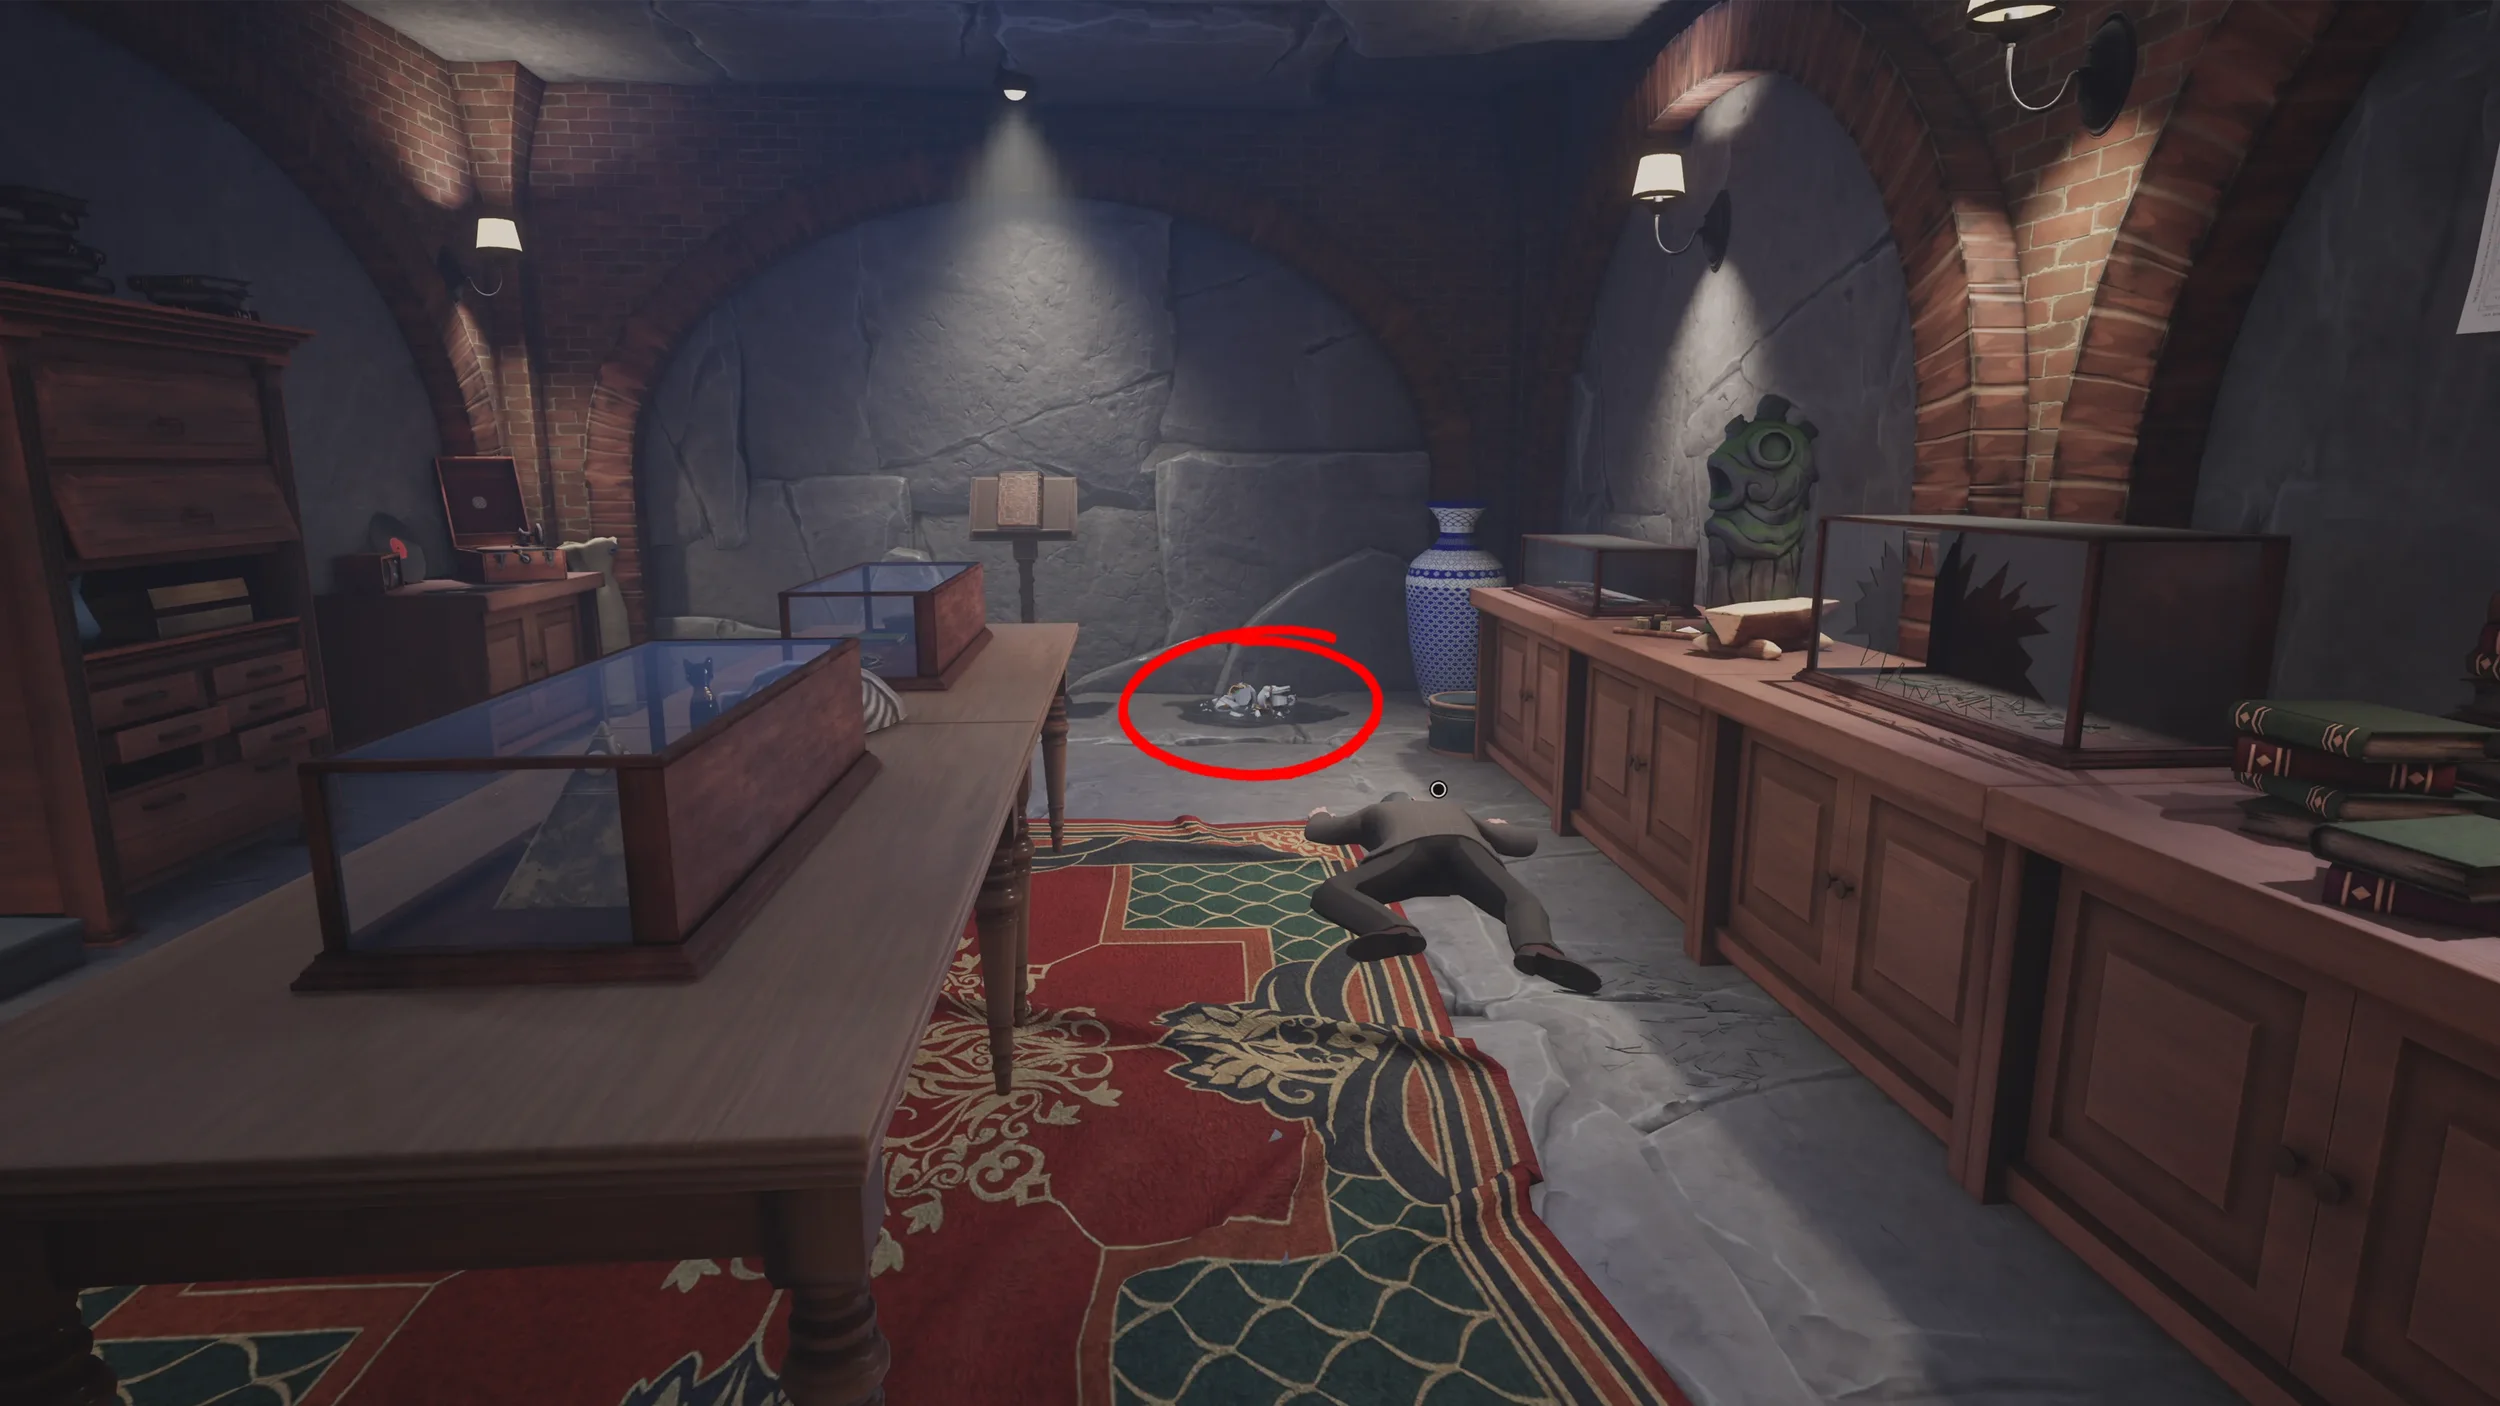
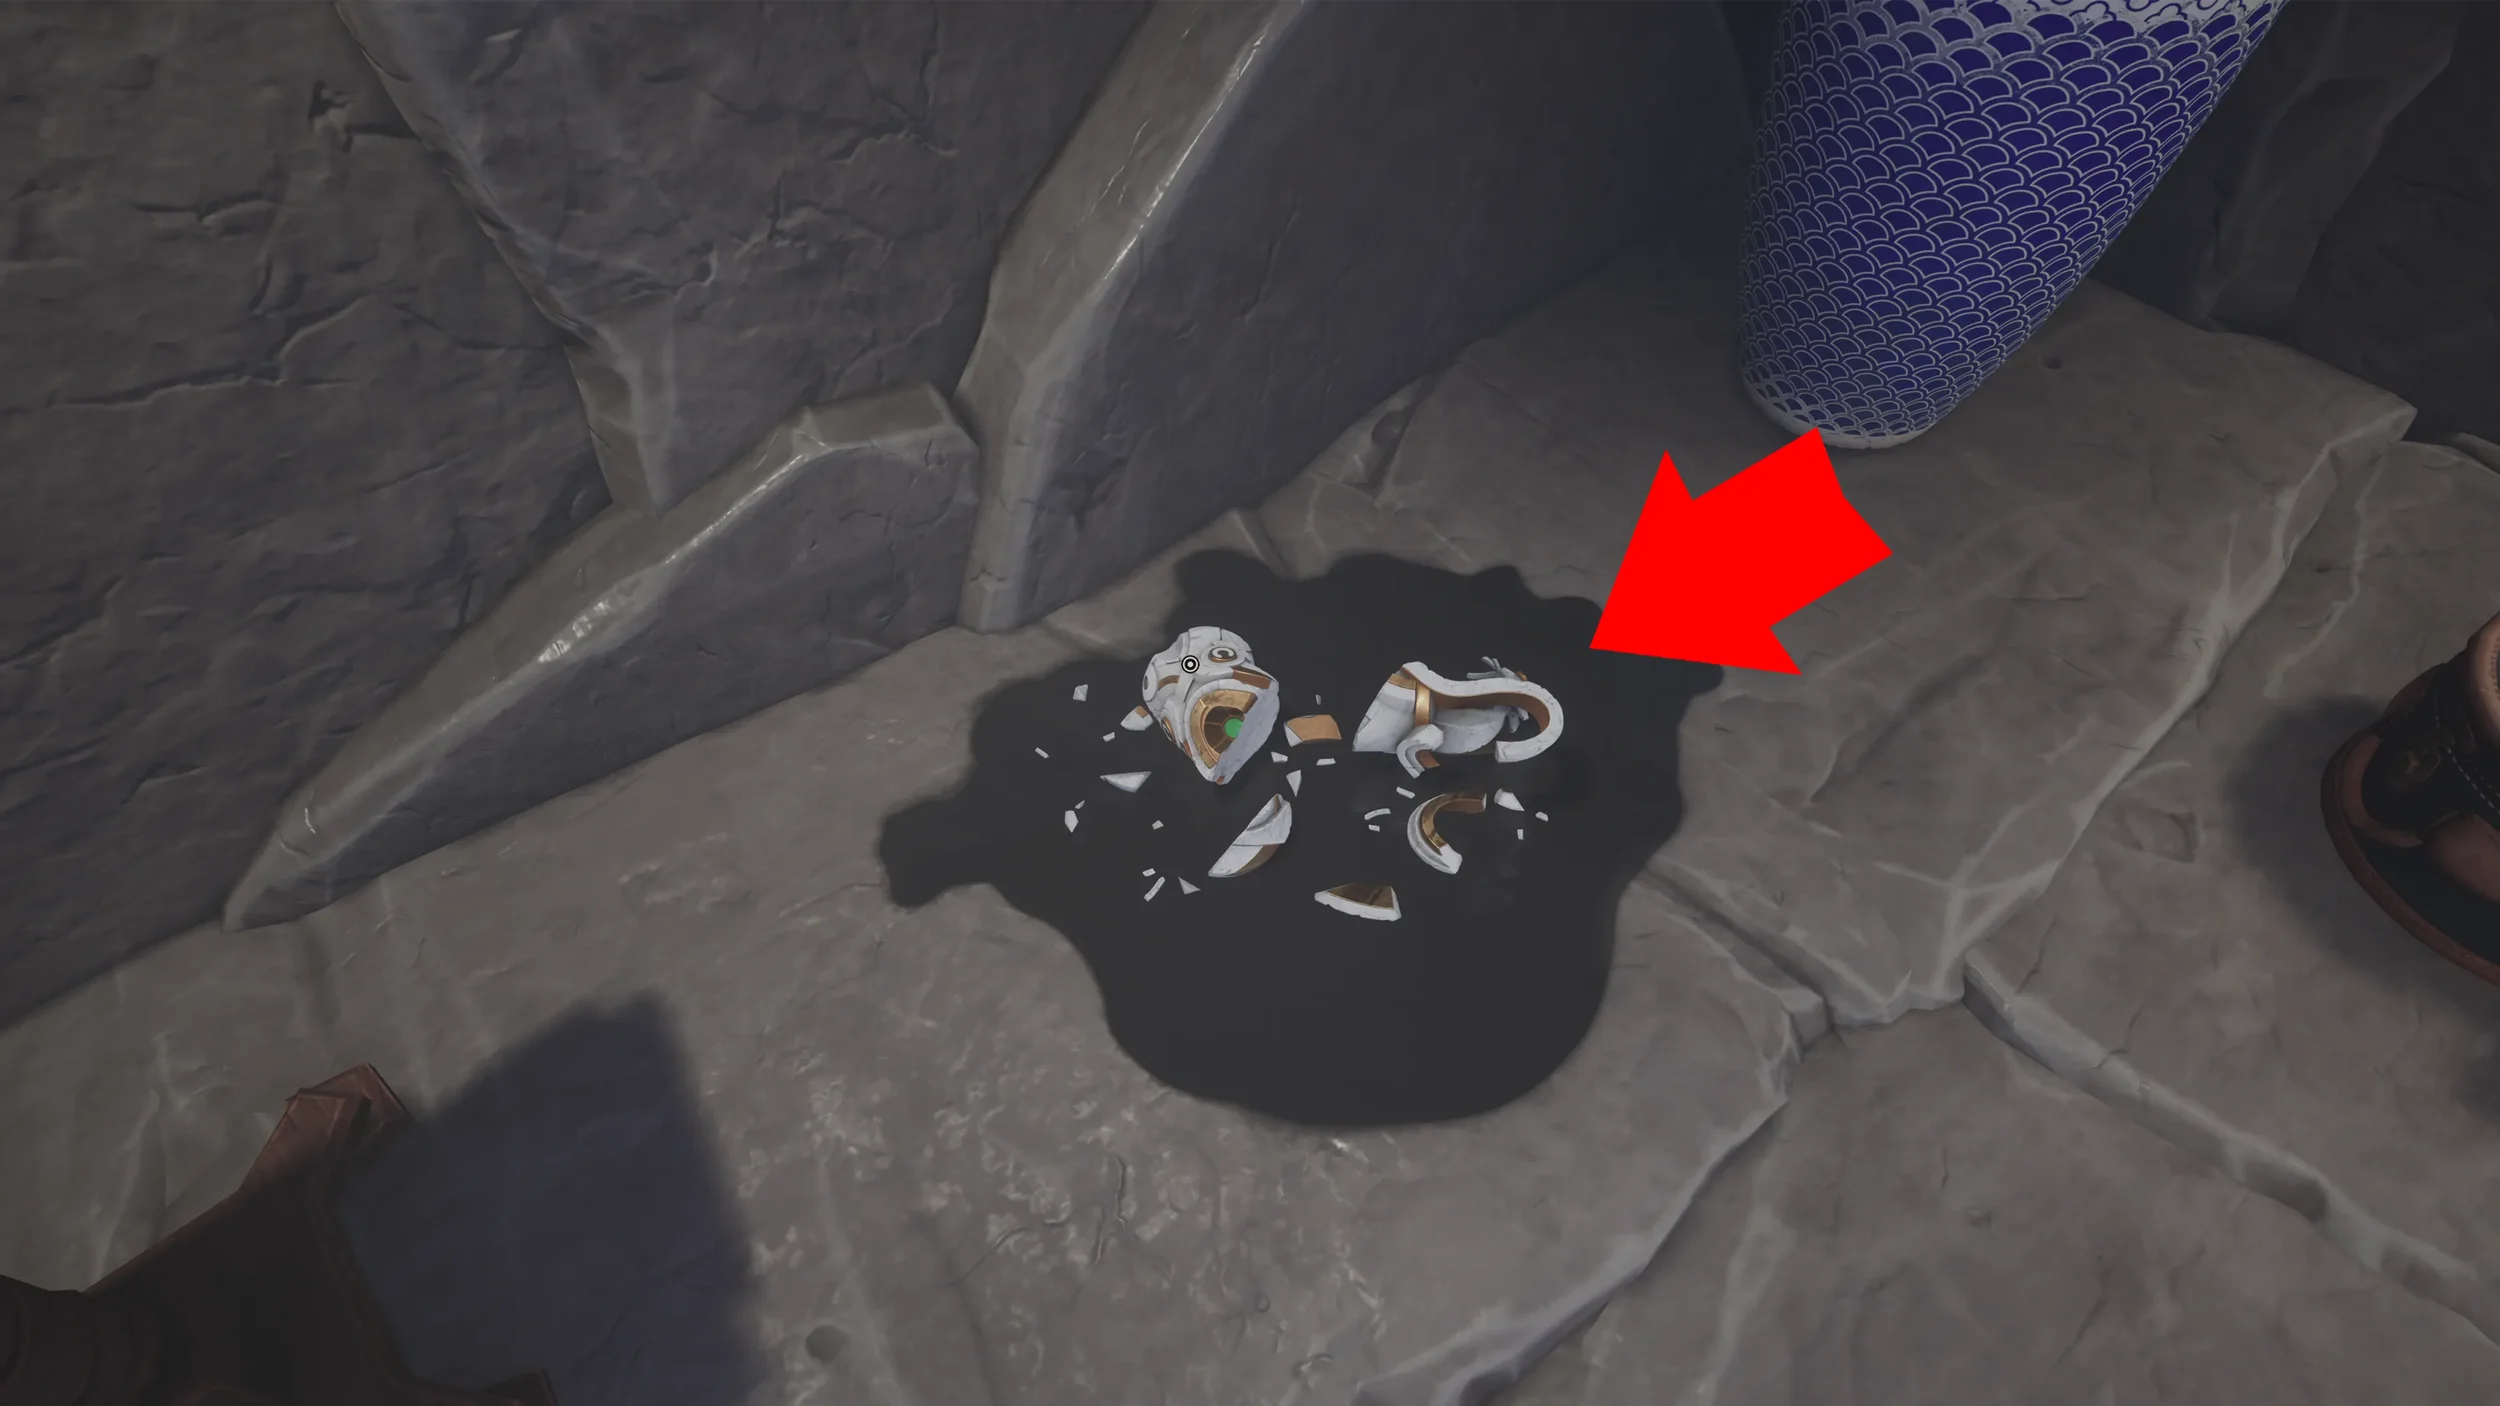
Shortly after you will reach an underground room where you will see the Professor laying on the floor, interact with the Broken Statuette by the wall to finish Chapter 1.
 “Harry The Hermit” Trophy automatically for completing Chapter 1.
Prologue ⮨ ➥ Chapter 2