
Call of The Elder Gods 100% Walkthrough - Chapter 2

Chapter 2 starts by us falling down a hole into a dark cave, the pathway to reach the main open cave area is very linear so just keep walking forward until you reach the room where the Professor is waiting for you.
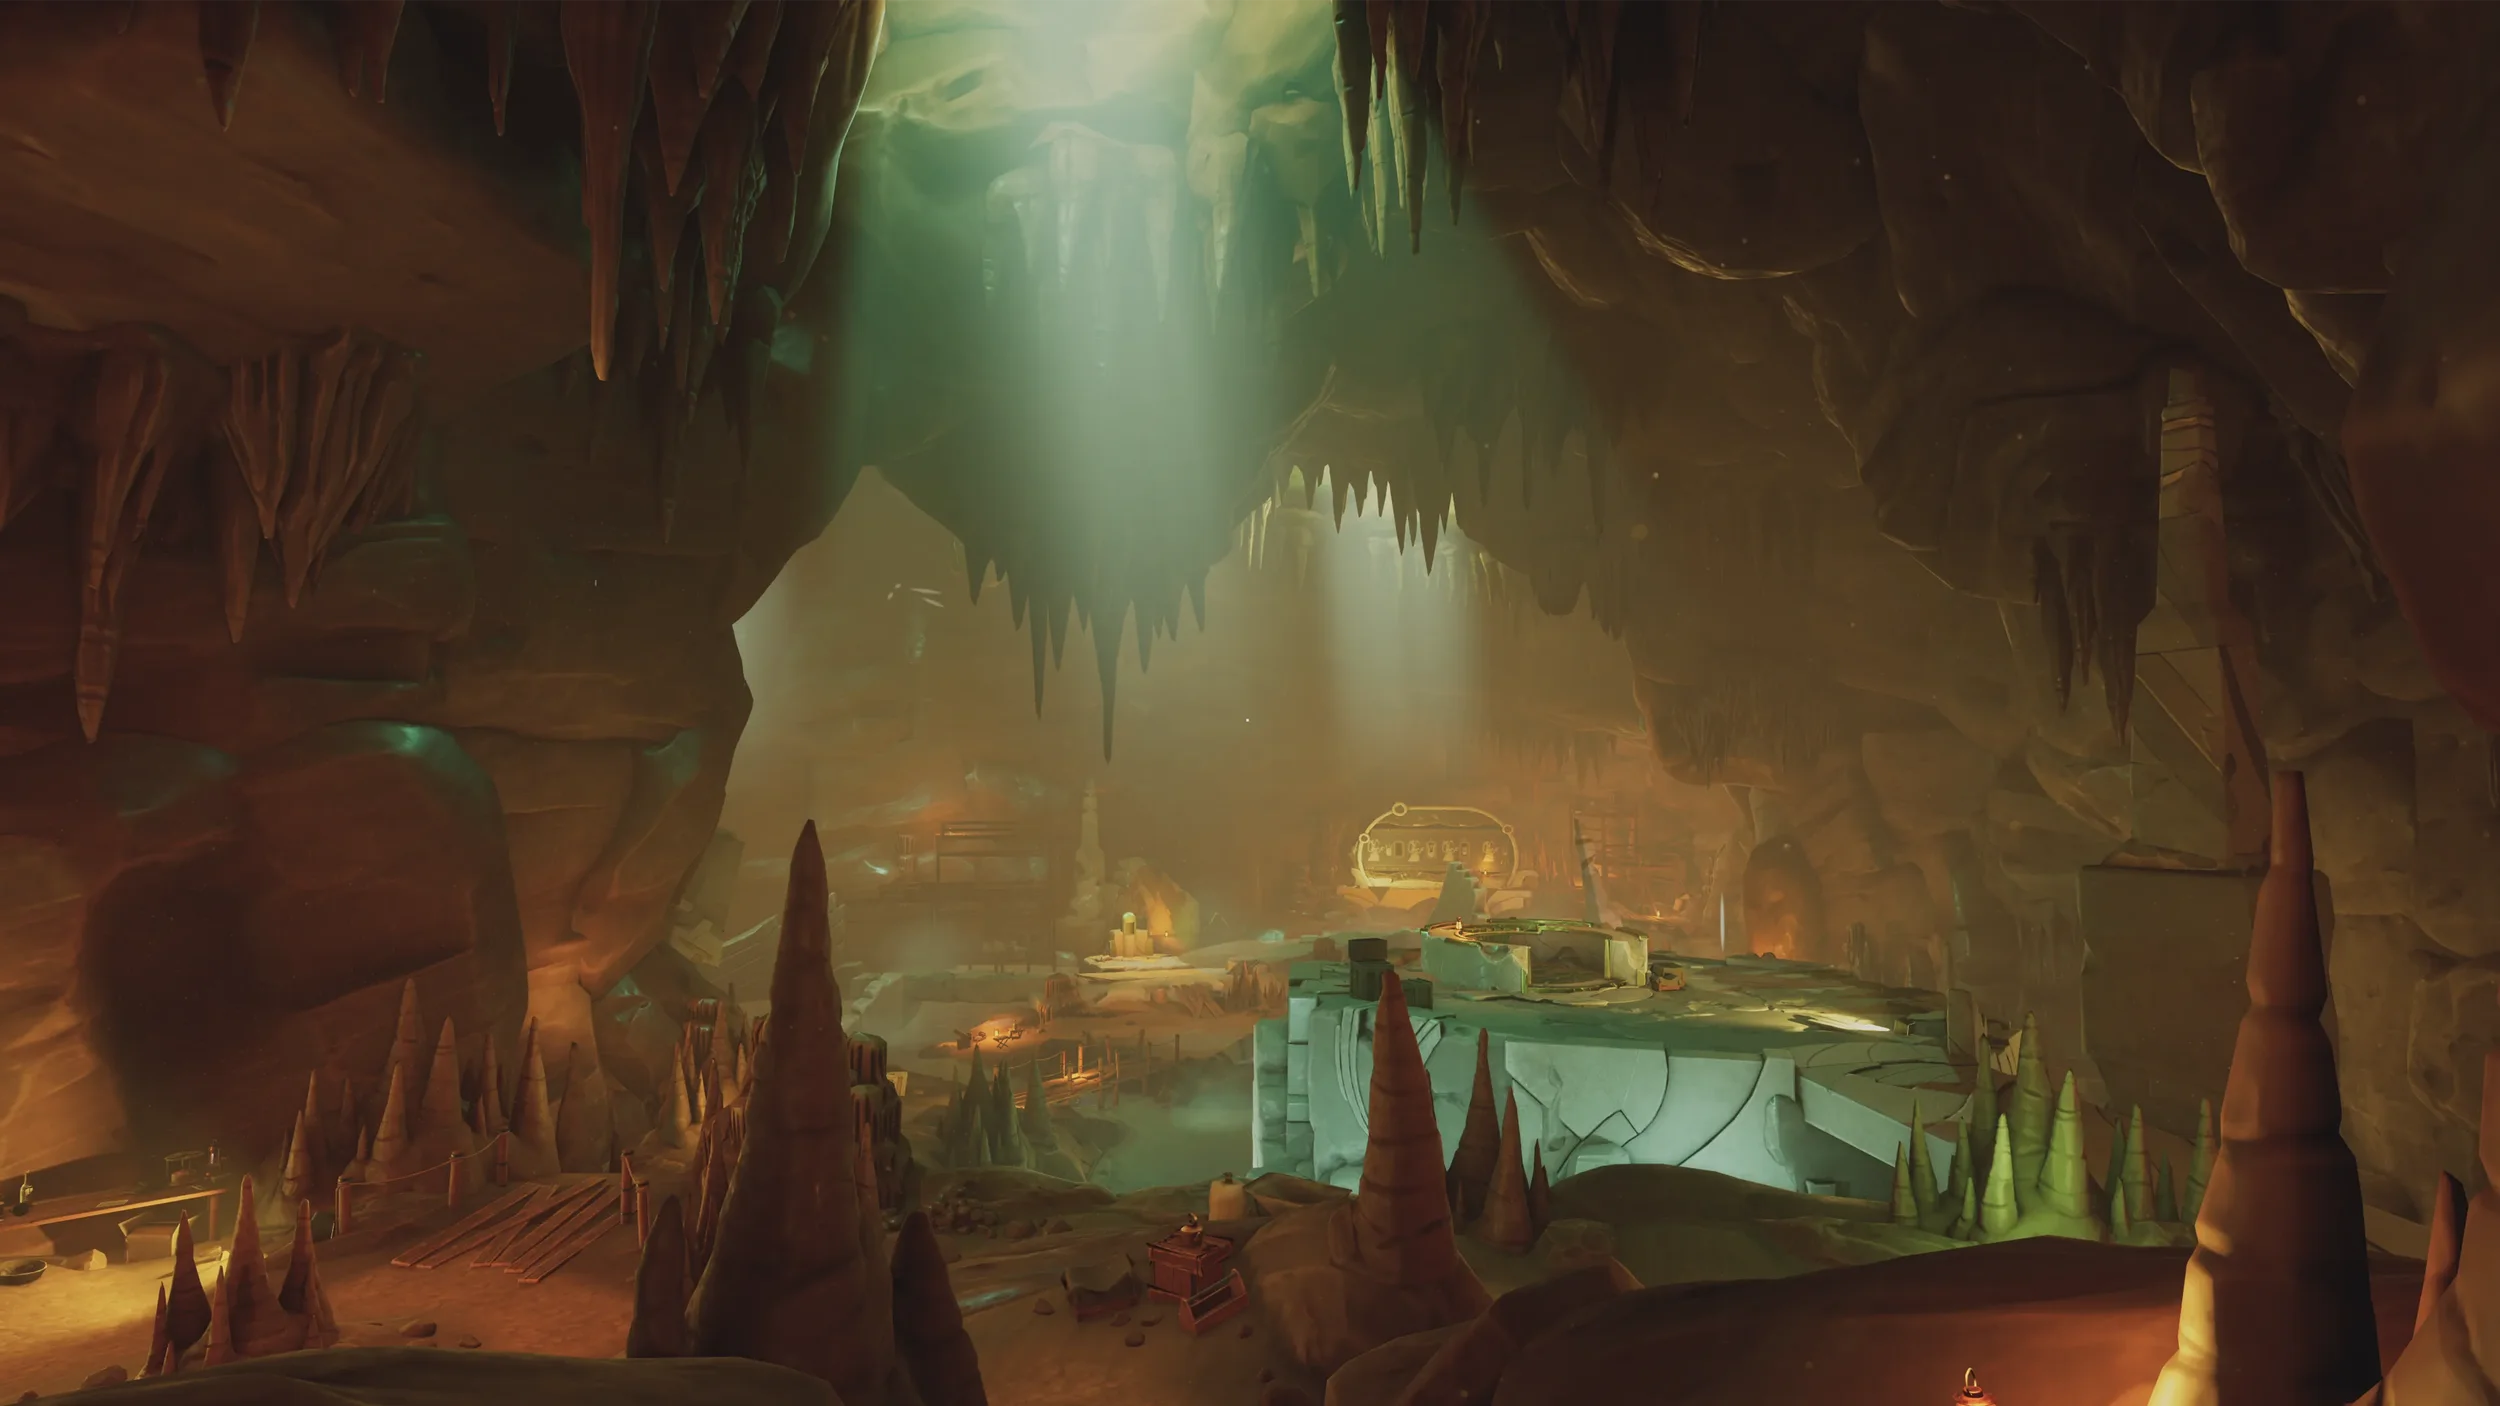
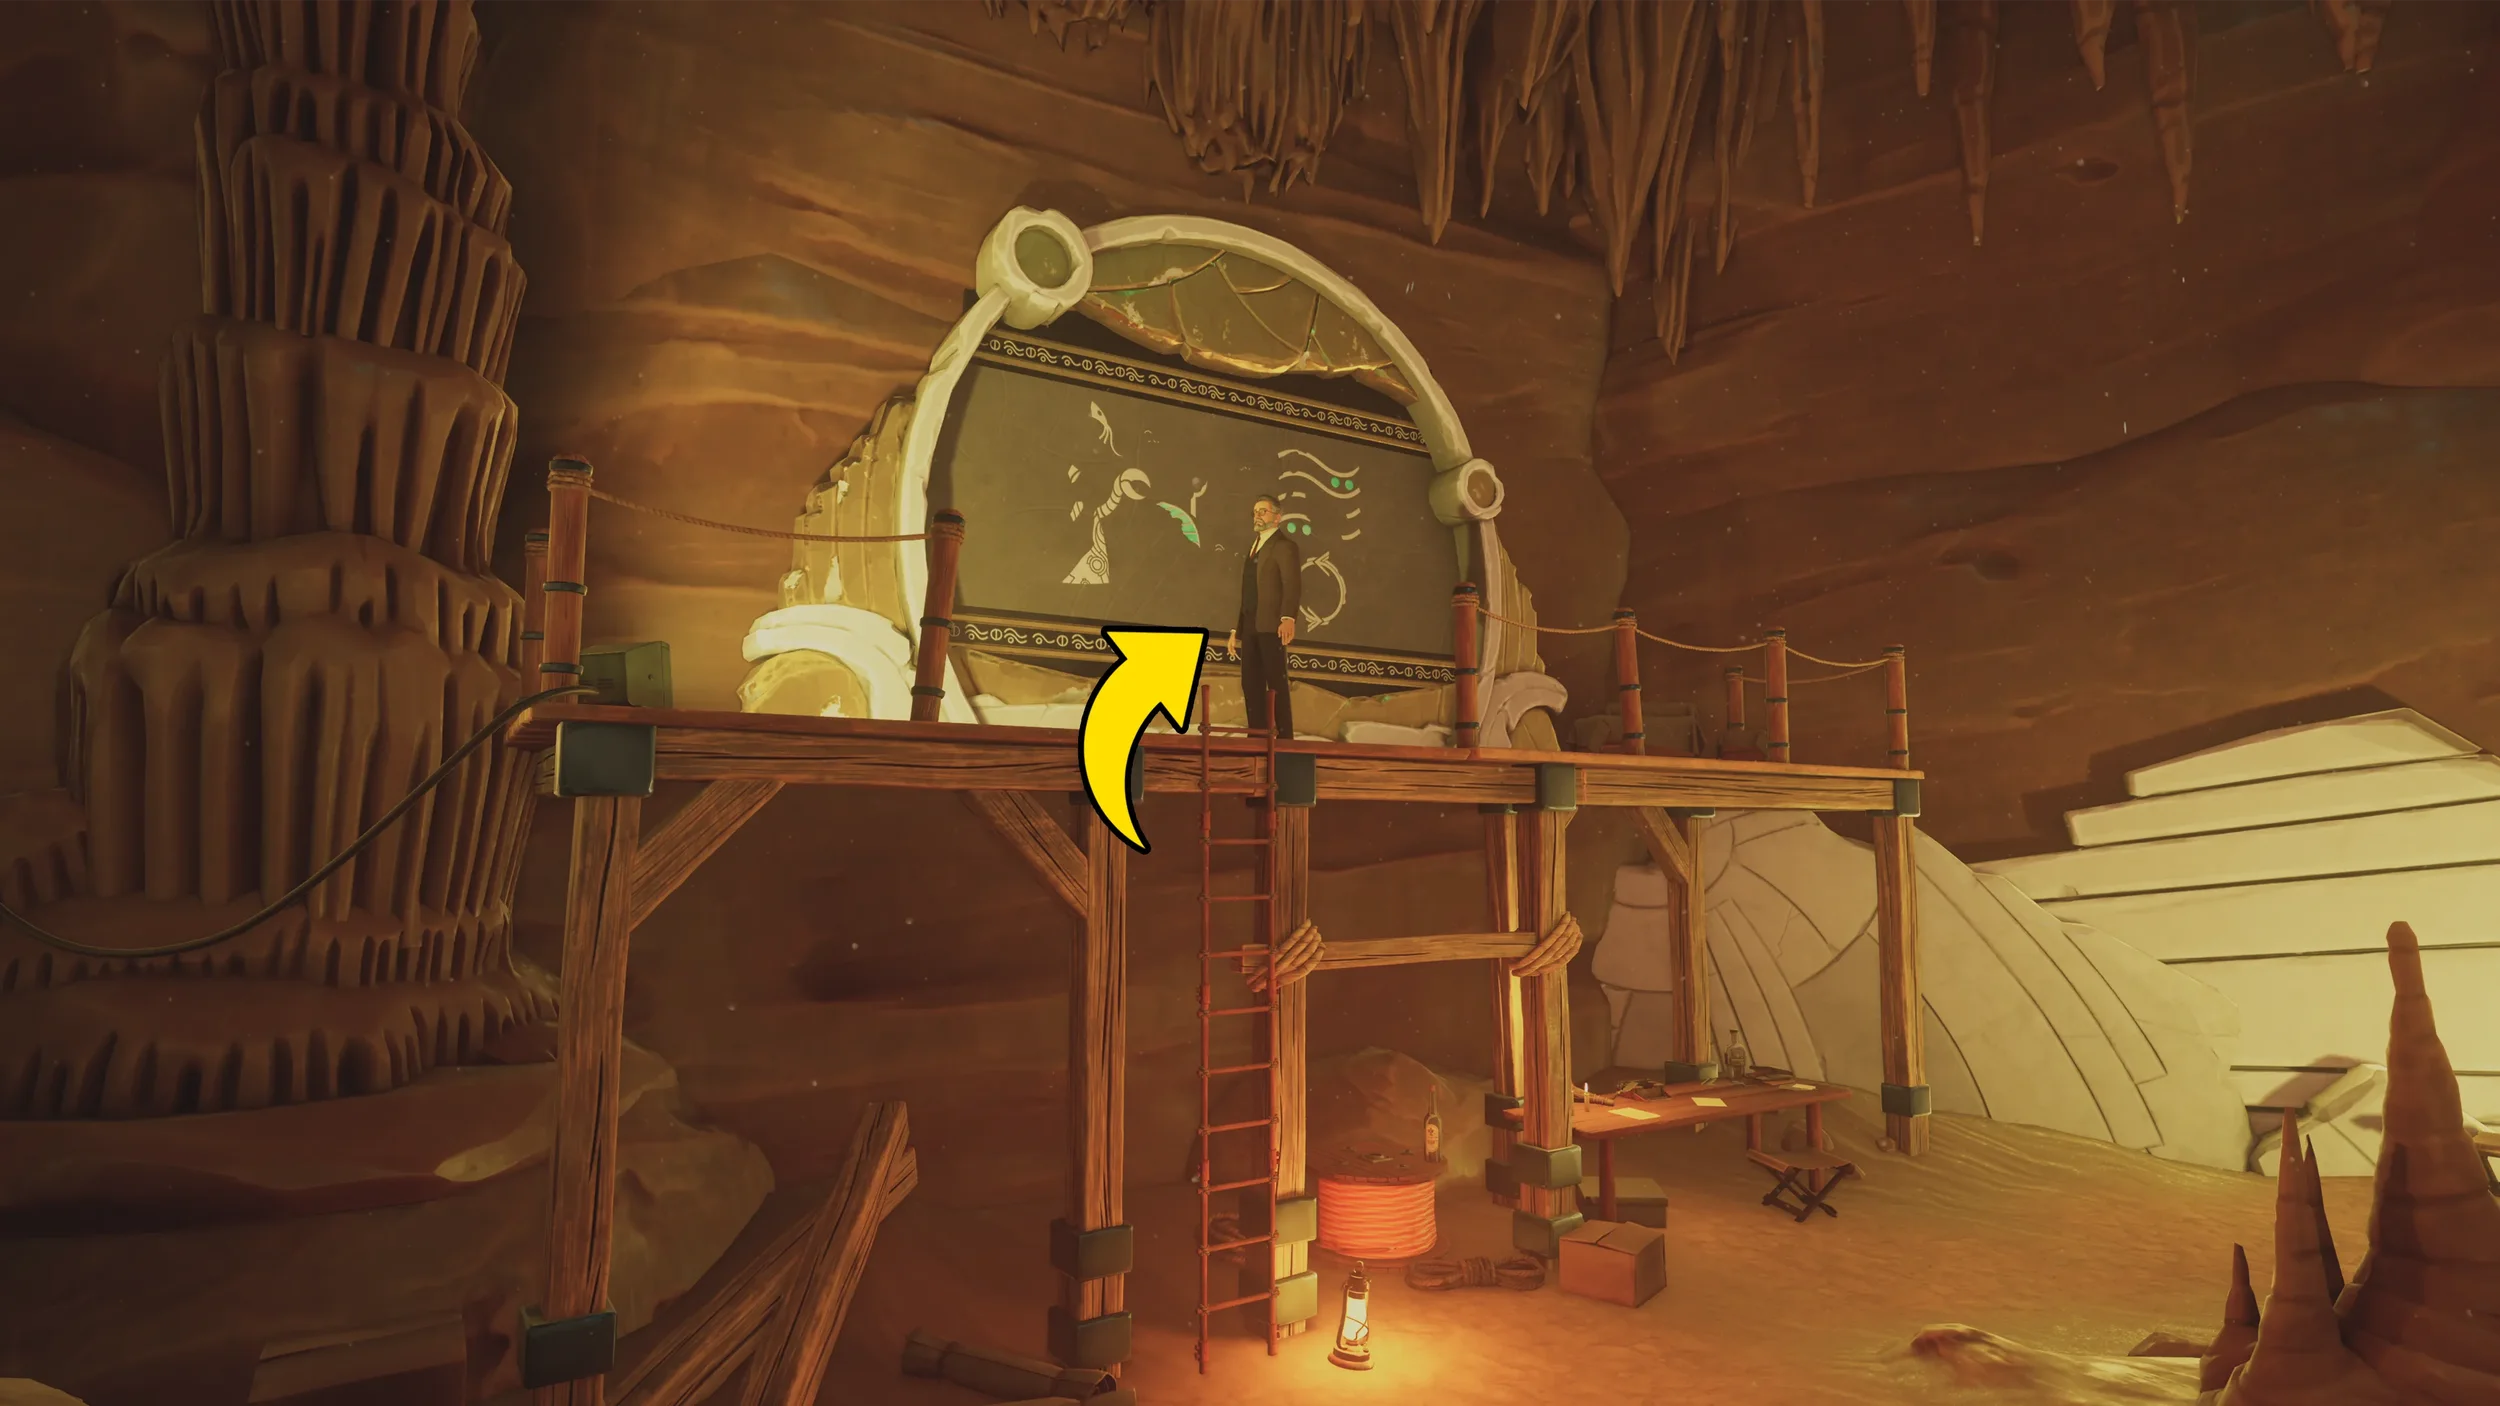
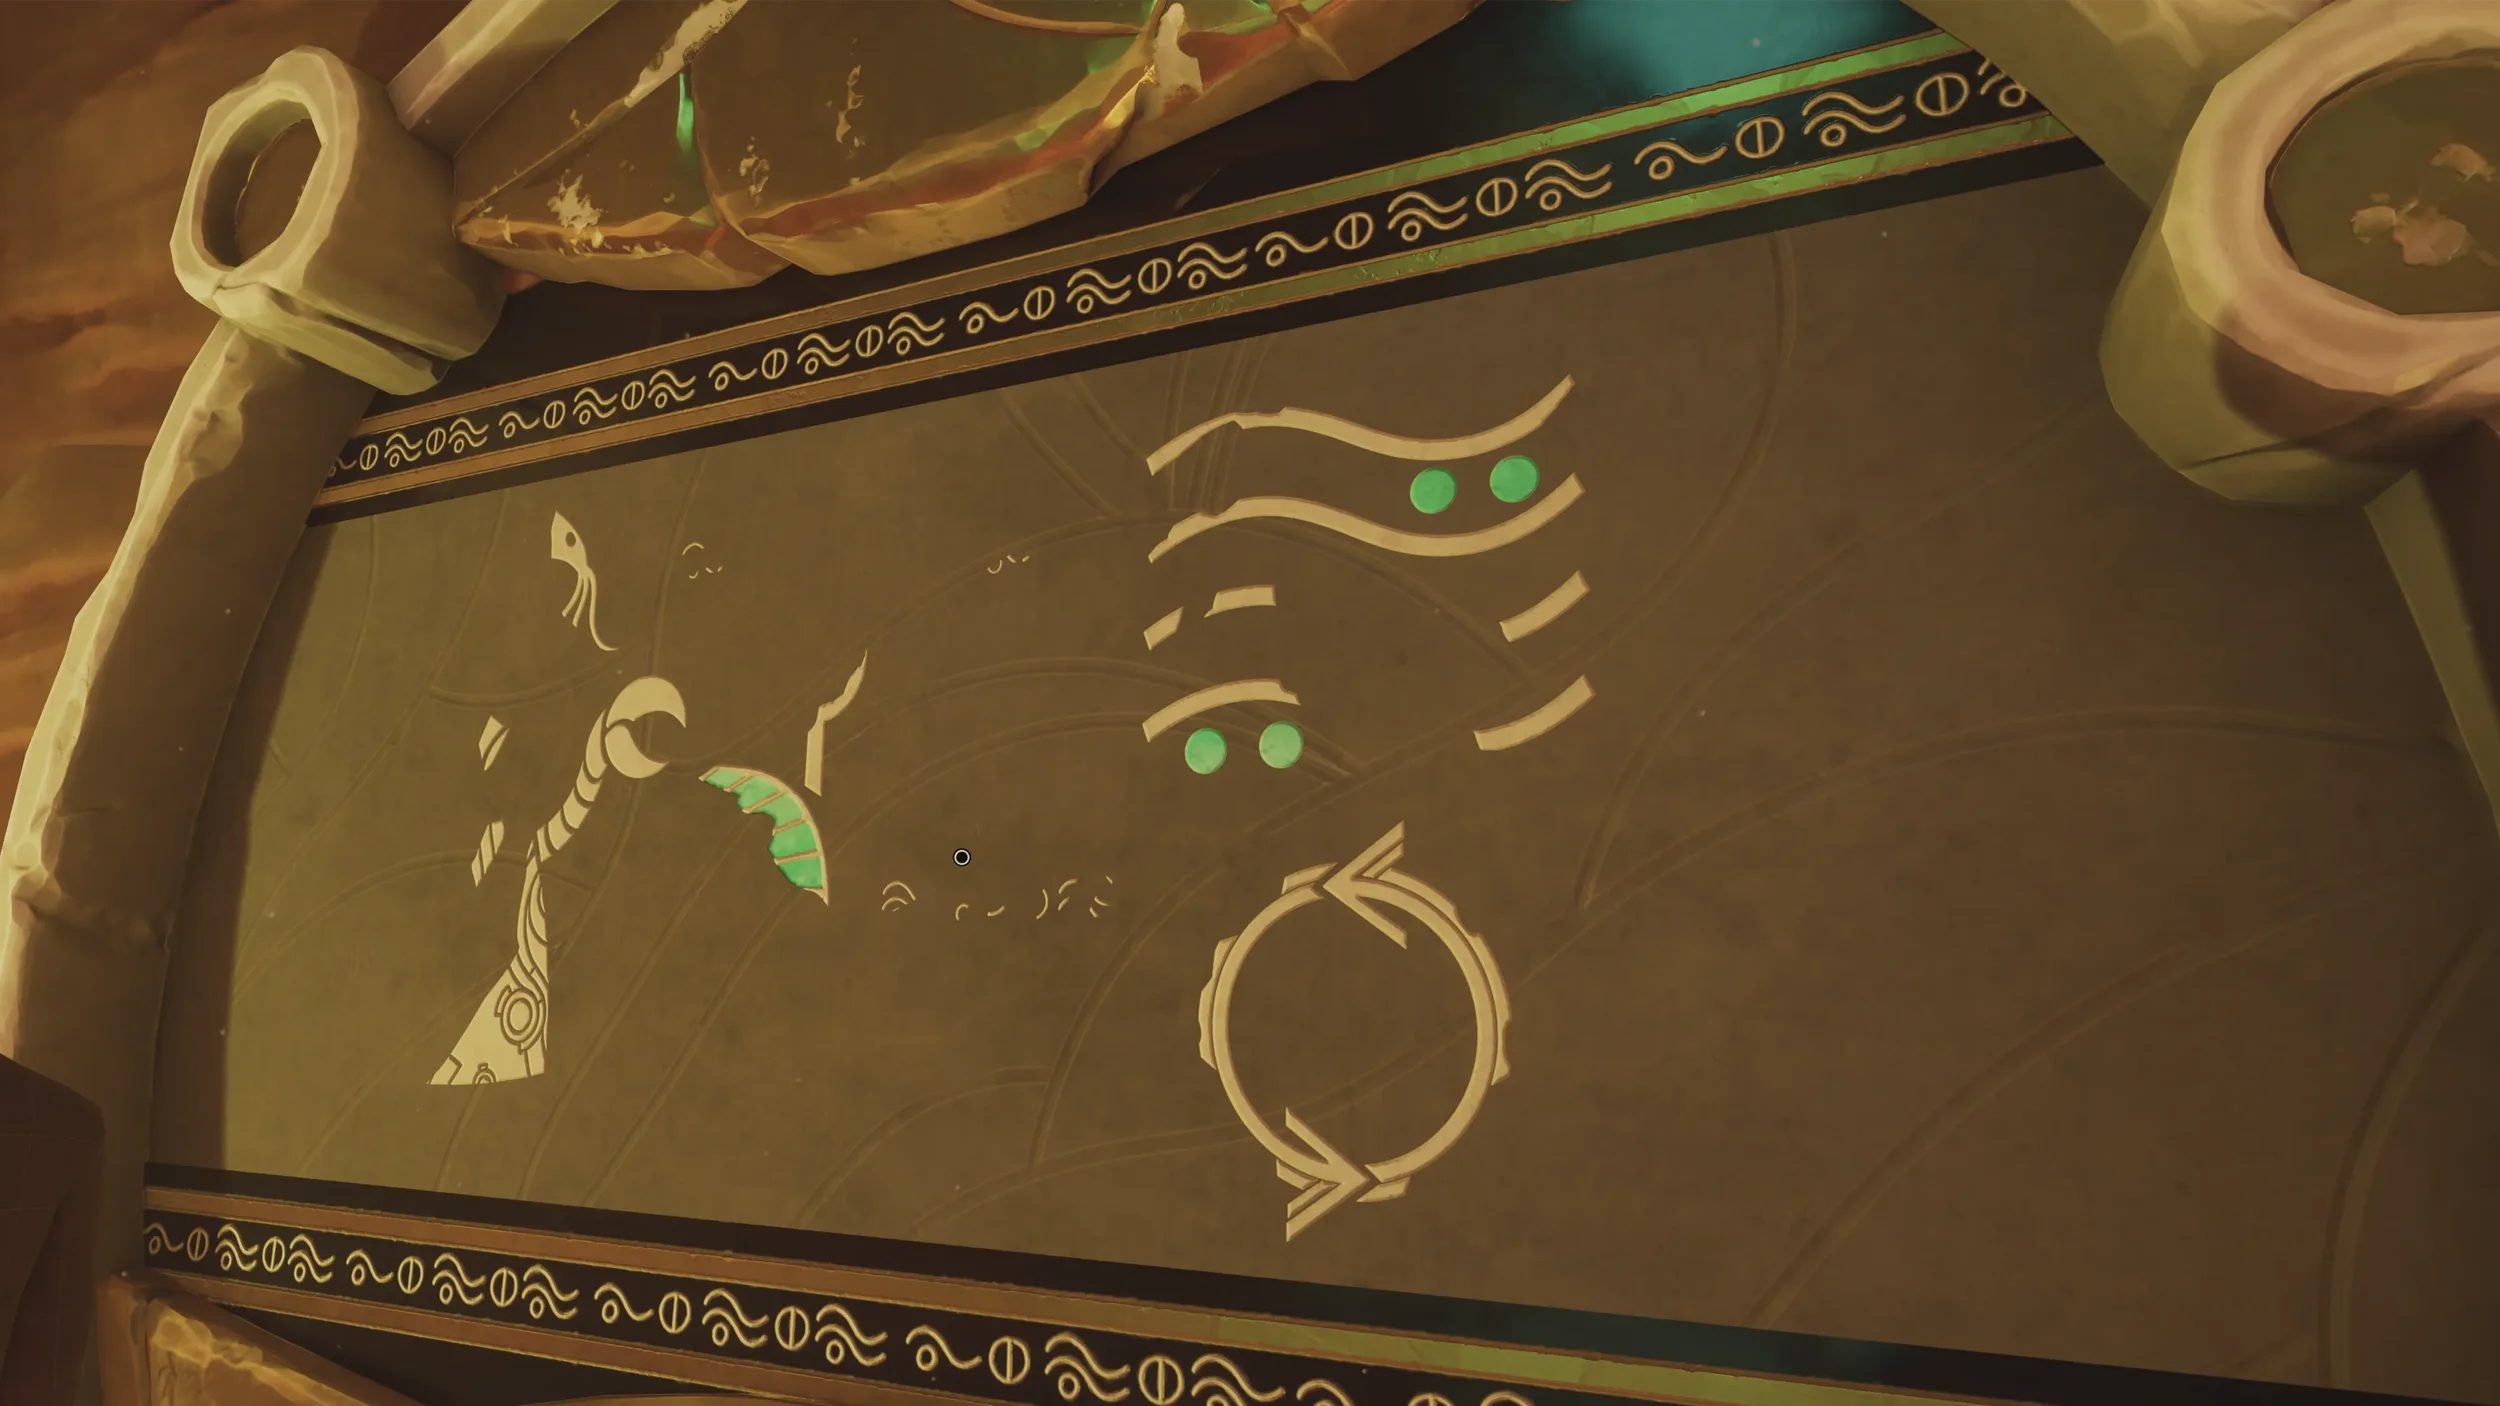
Go up the ladder and speak with the Professor, after the conversation has ended inspect the Mural next to him, this is your 1st clue.
Go down the pathway on the right hand side and go inside the small cave, here you will find the 2nd Mural clue.
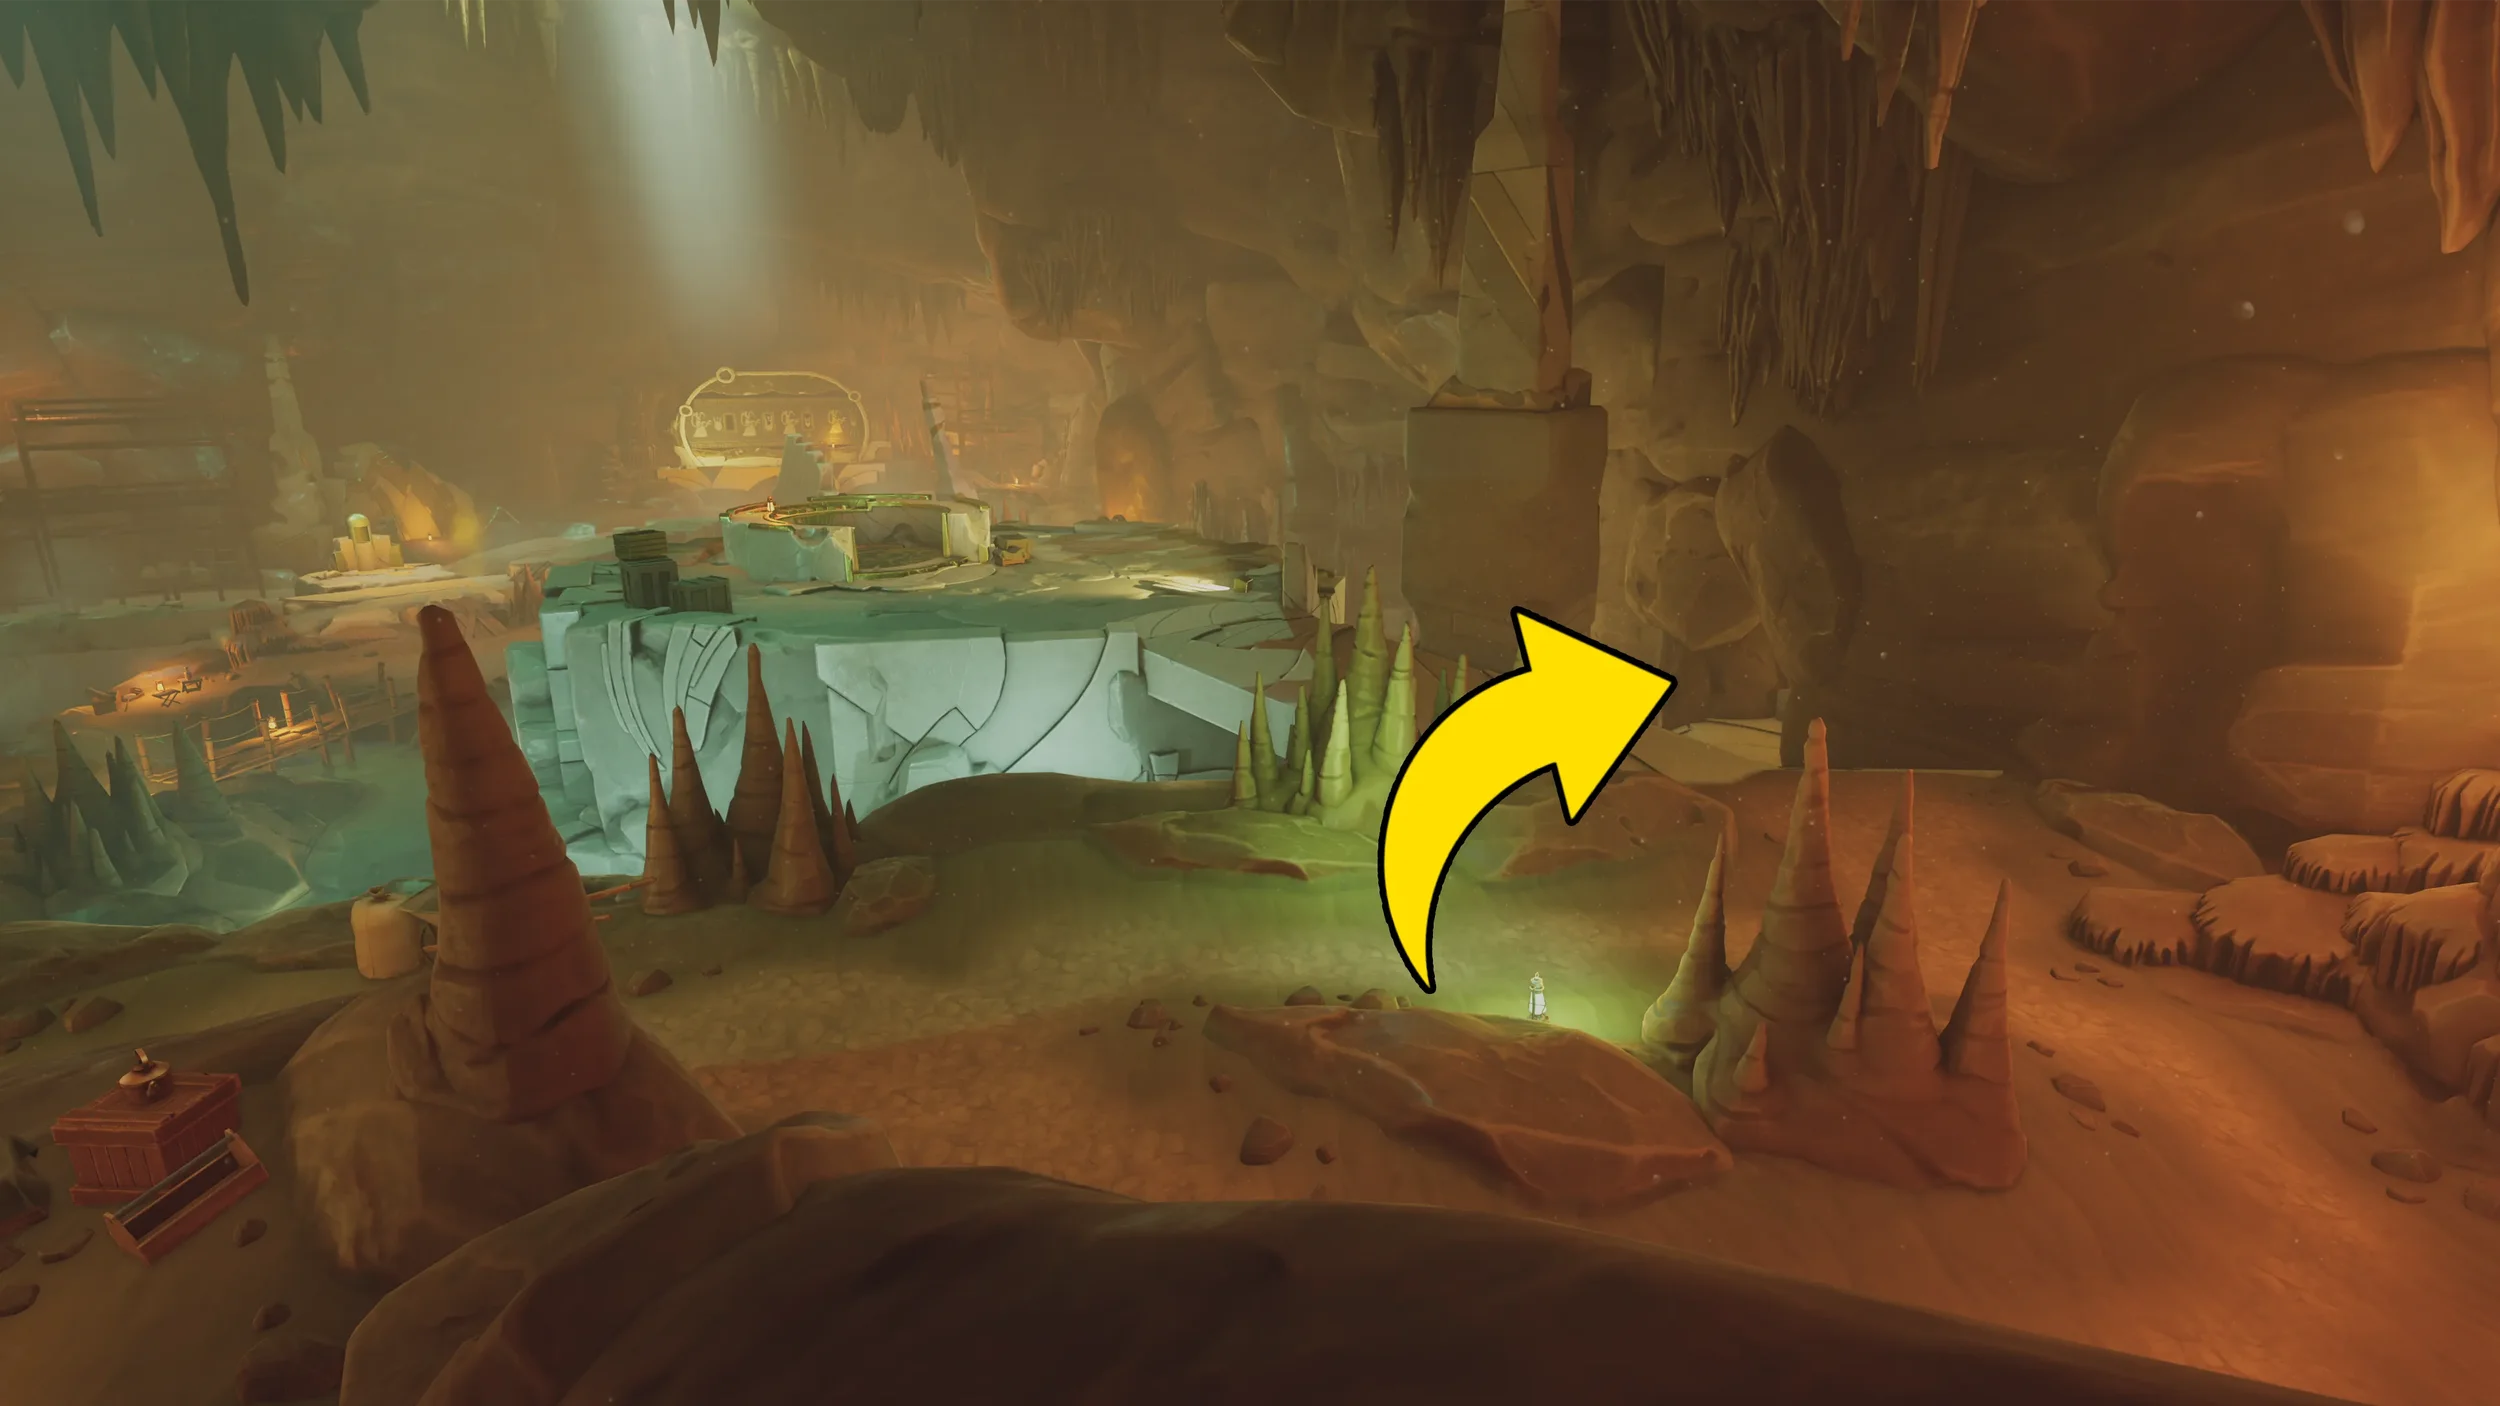
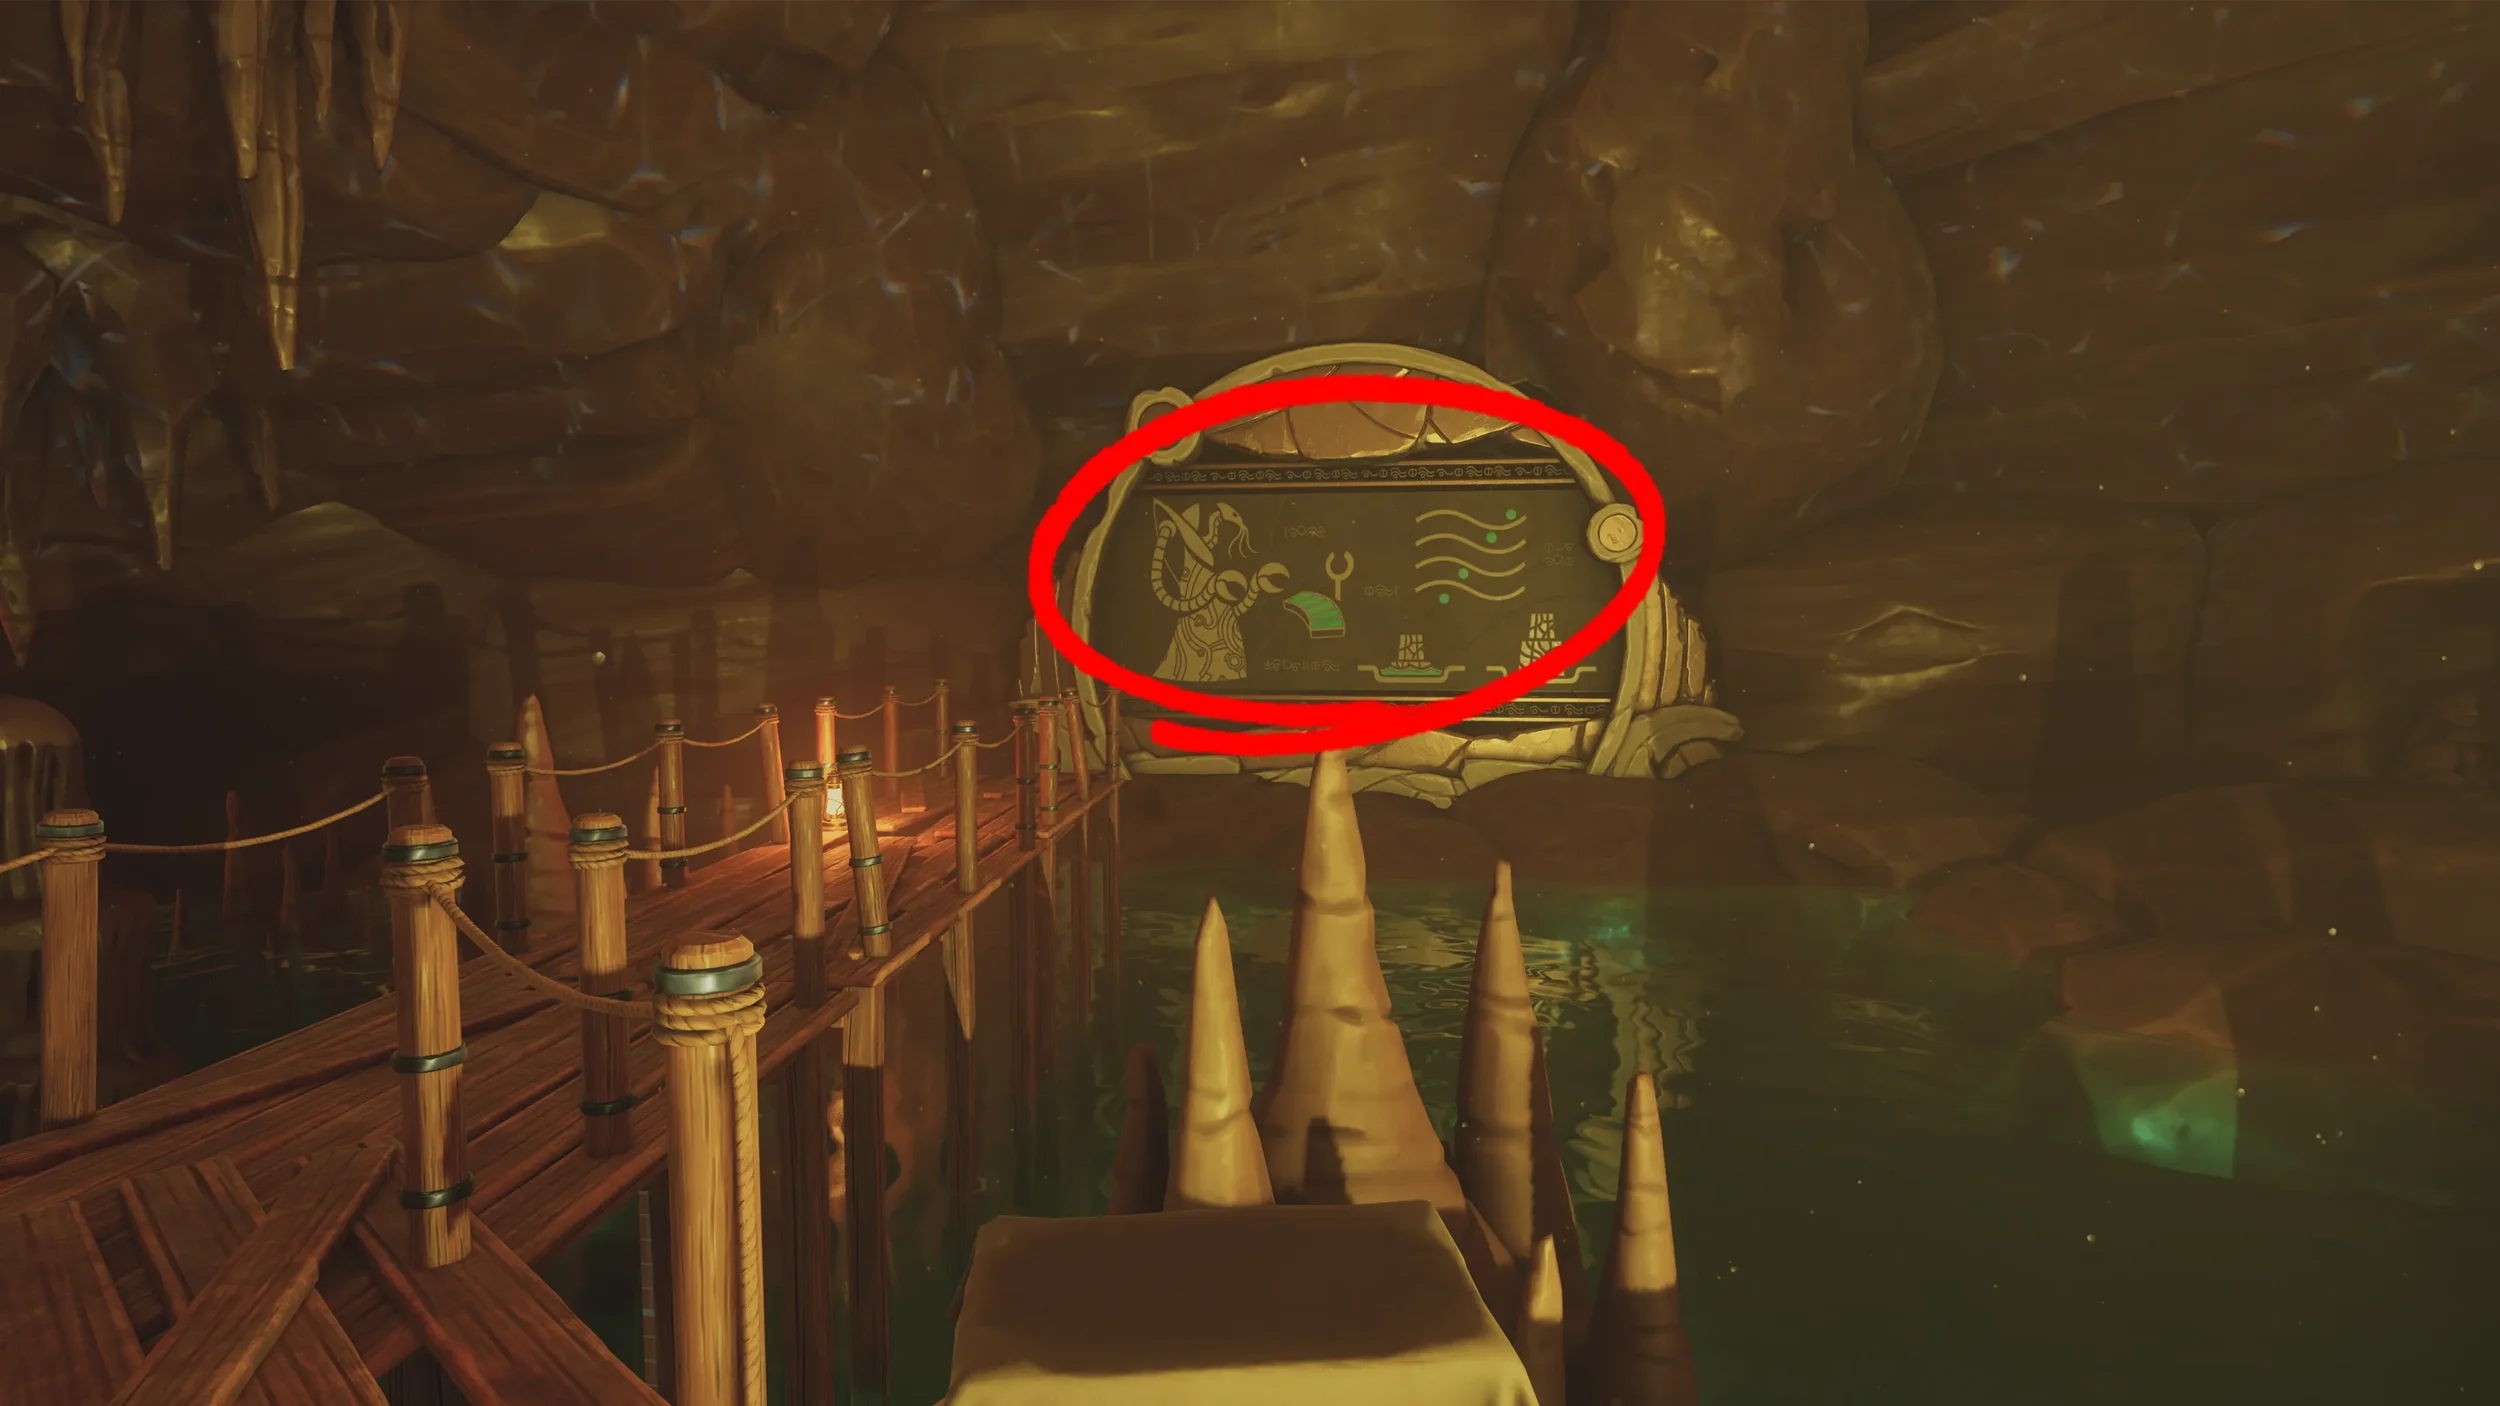
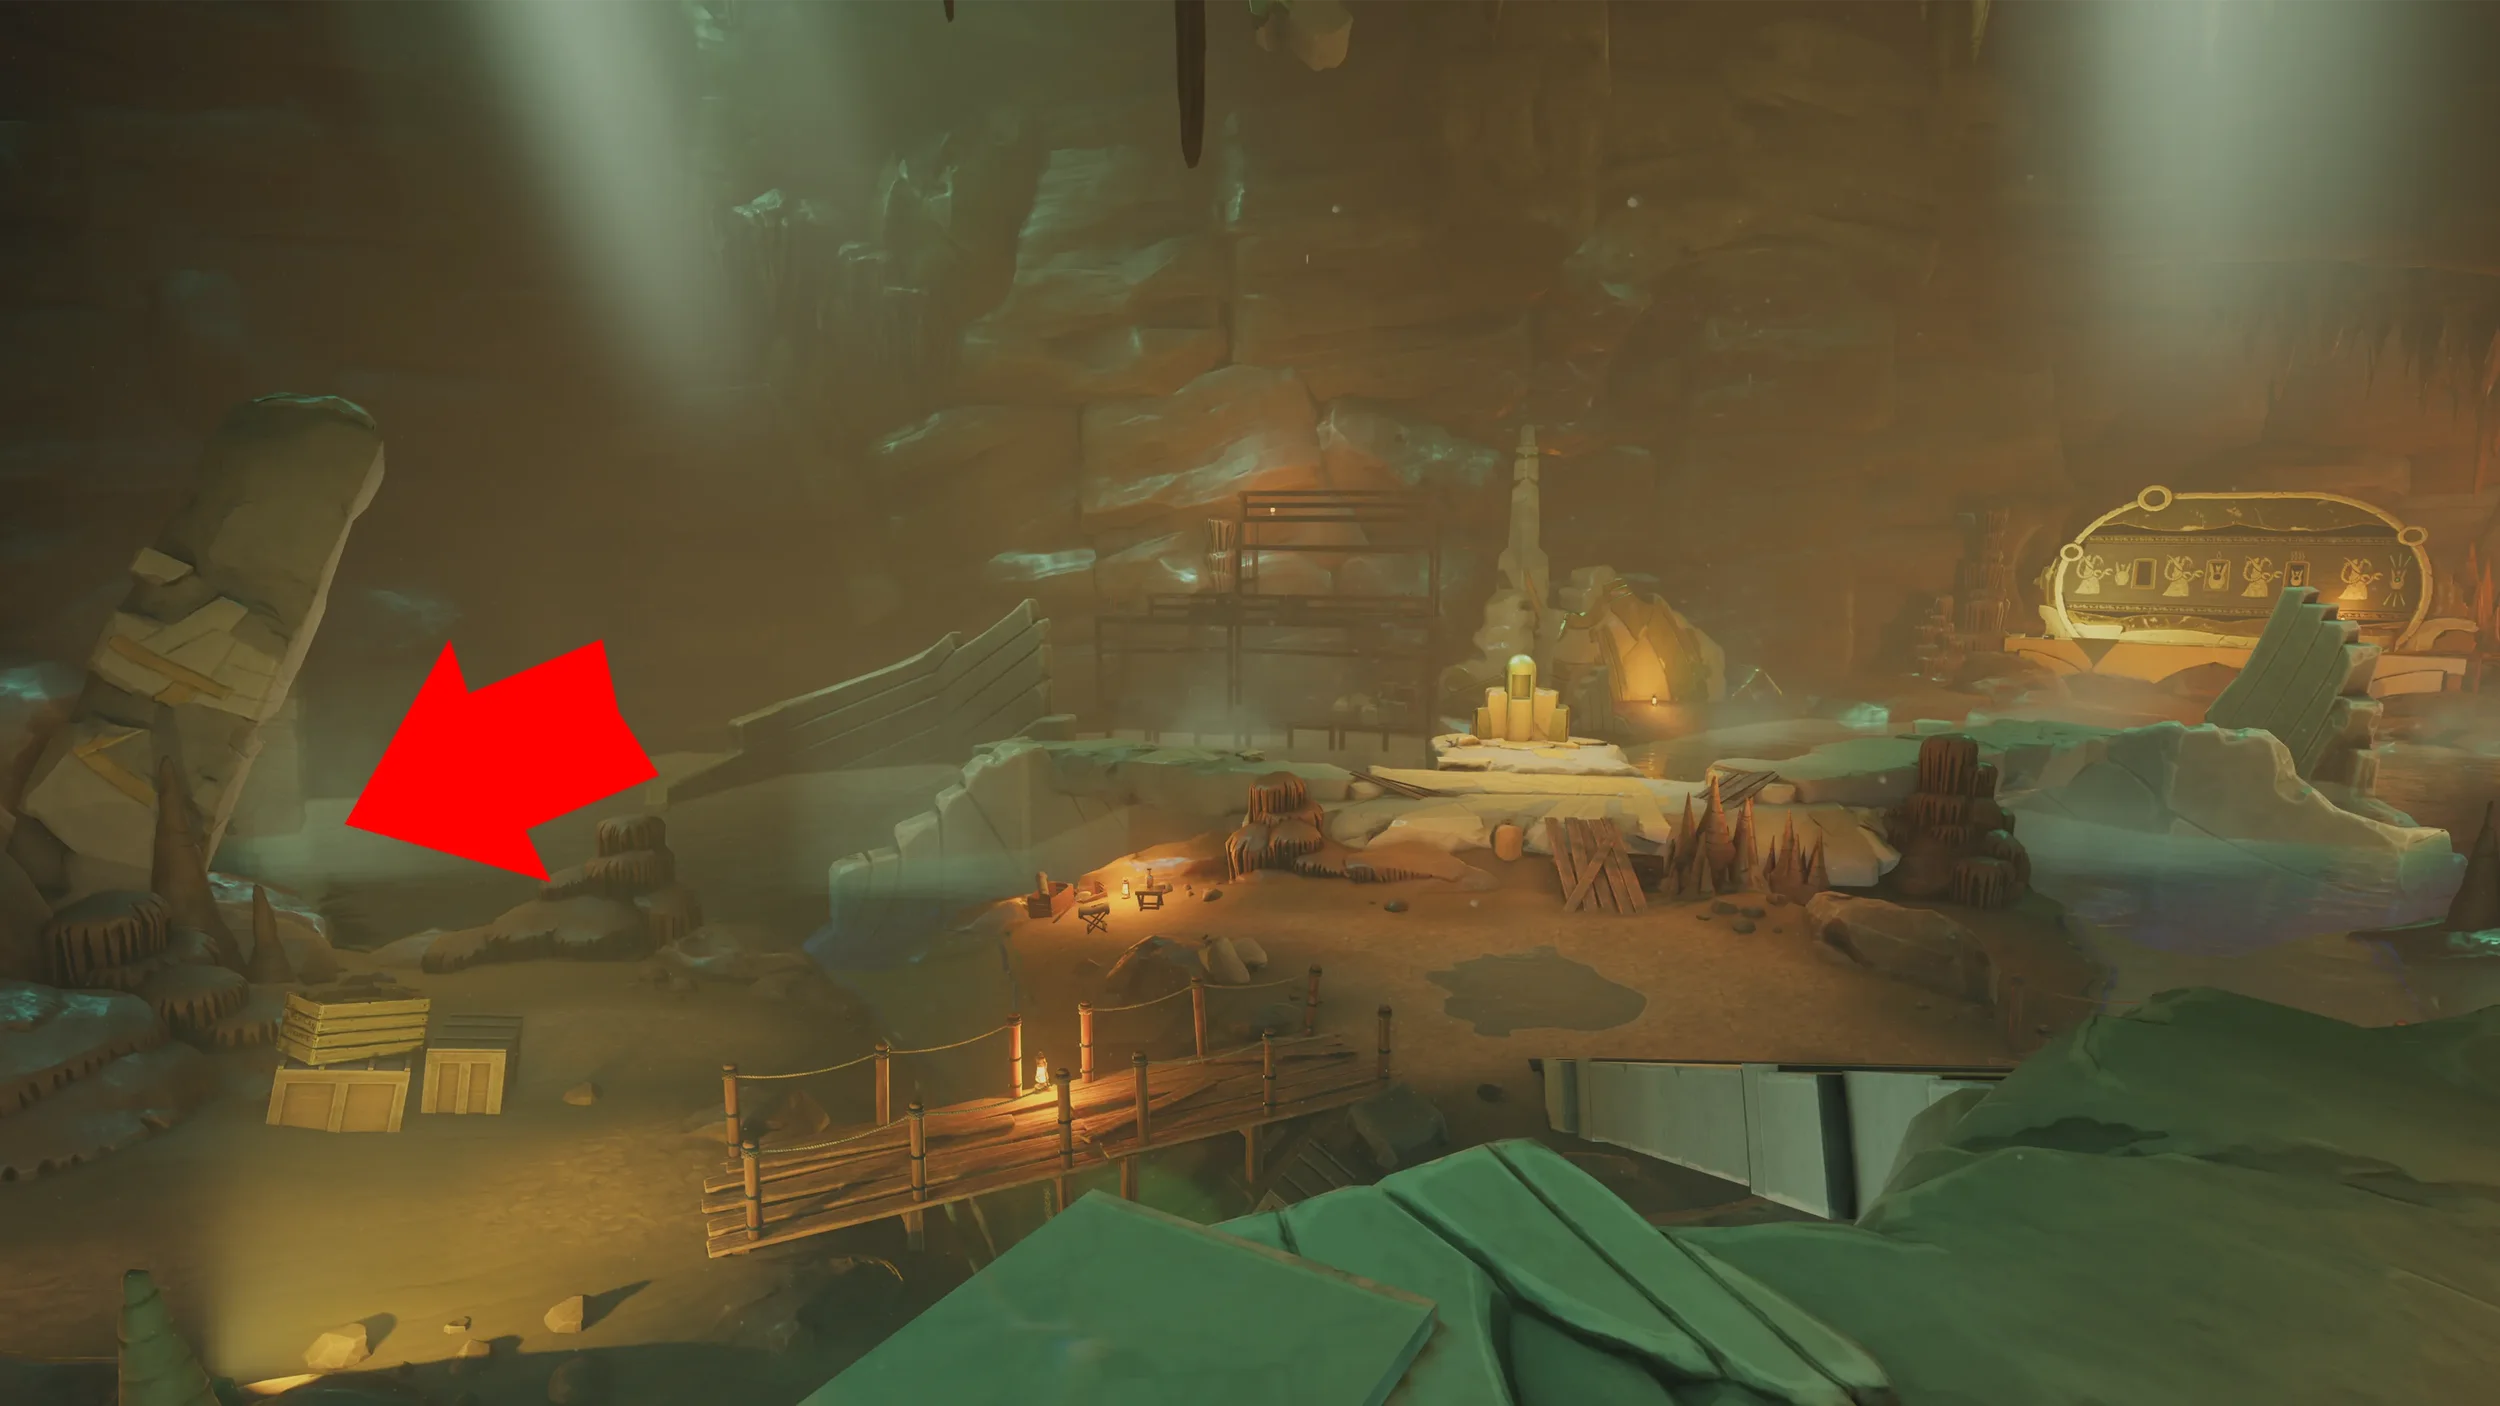
Exit back out of the small cave and continue past the diving suit, for now head towards the far end of the big open area to find the 3rd Mural clue.


Peaslee’s Parliment Trophy
 “Peaslee’s Parliment” Trophy,it is quite dark so remember you can turn on your flashlight by pressing R3.
Diving Suit Puzzle
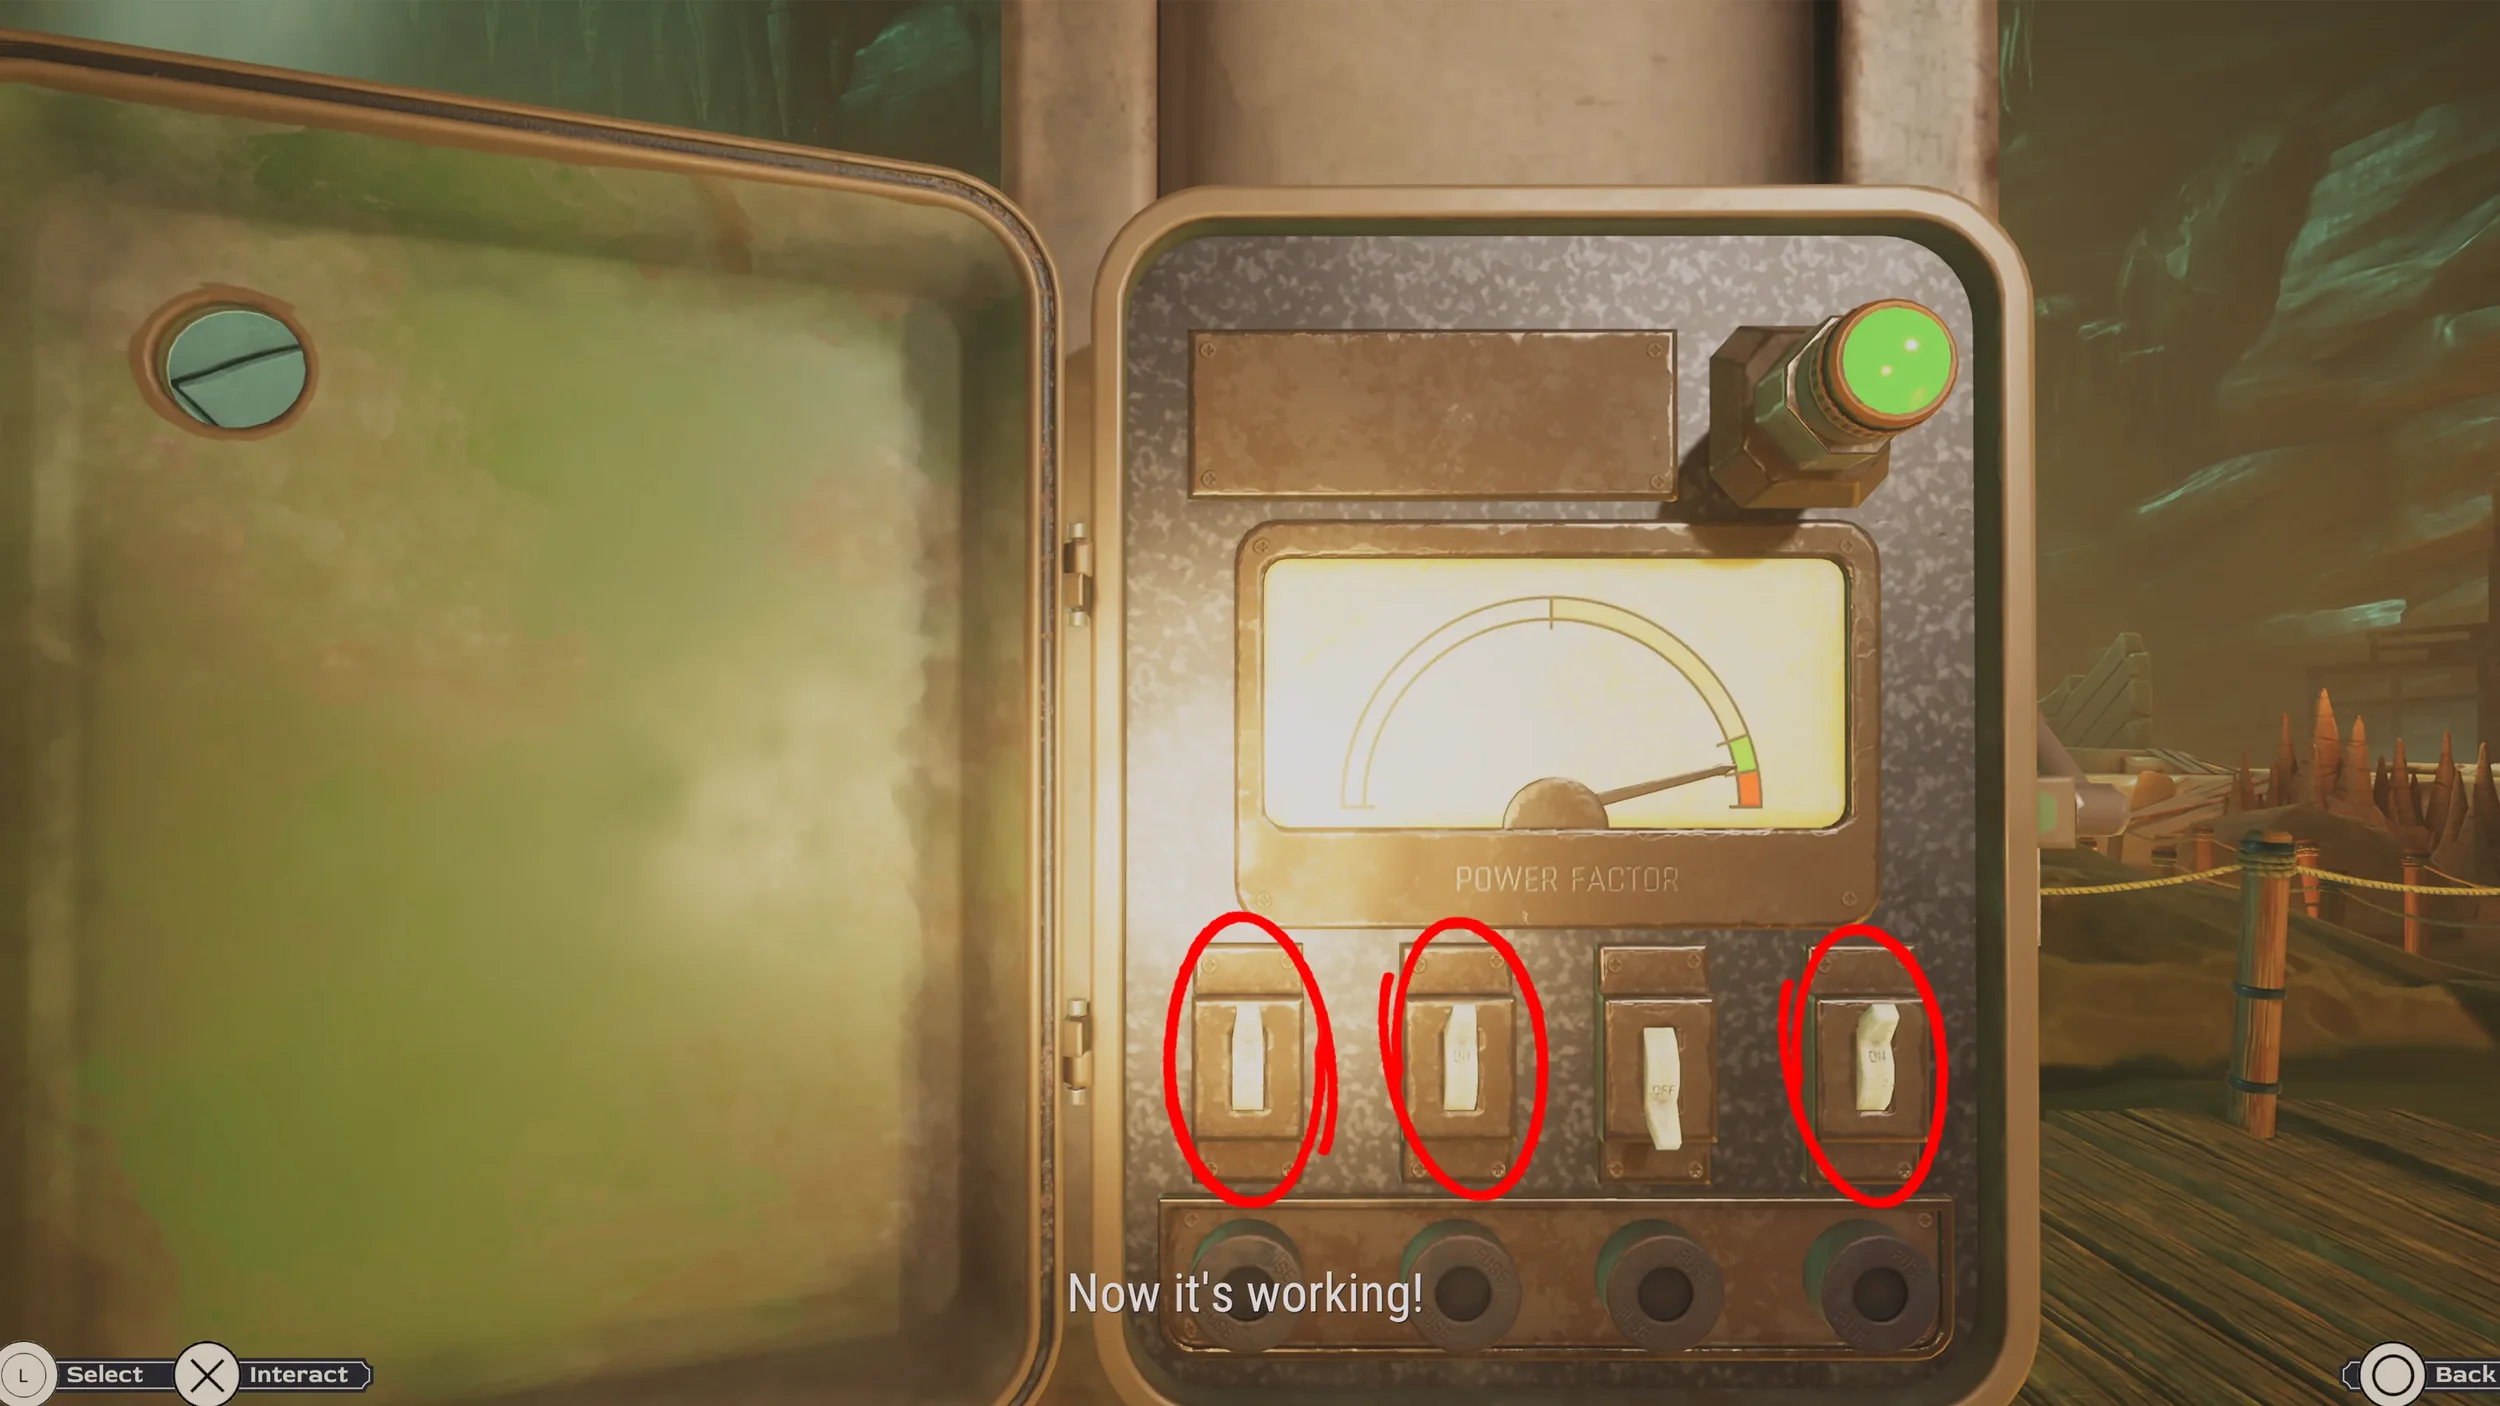
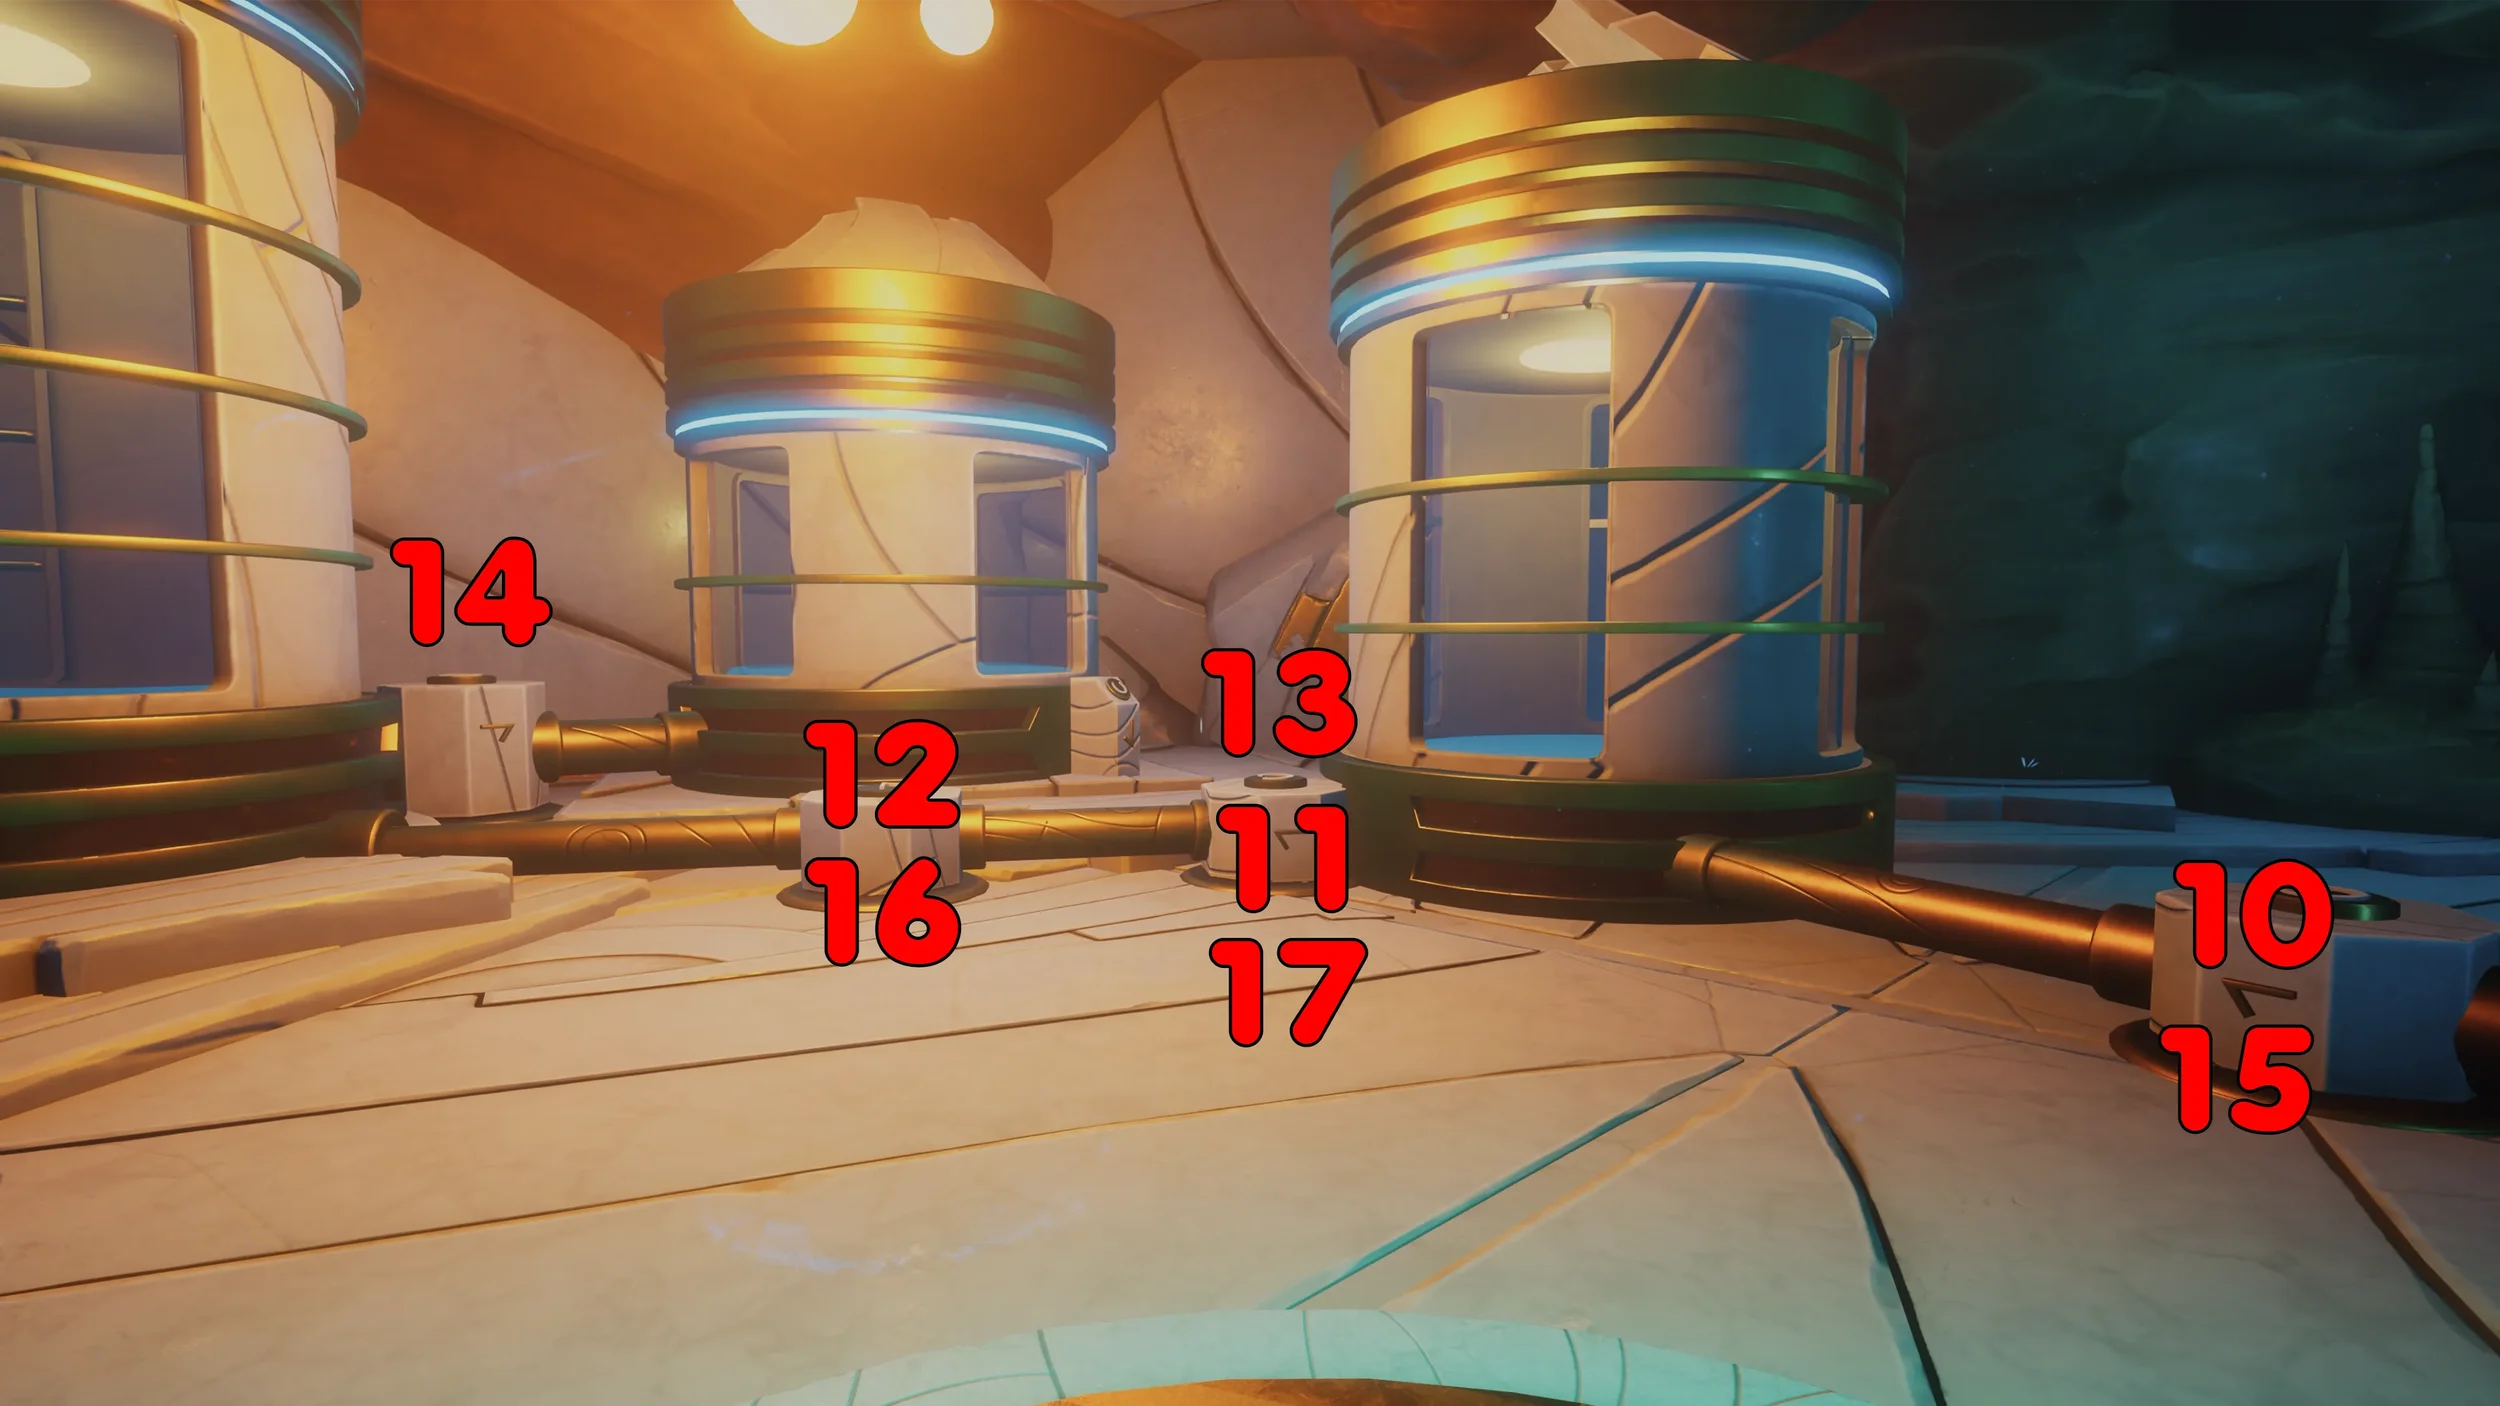
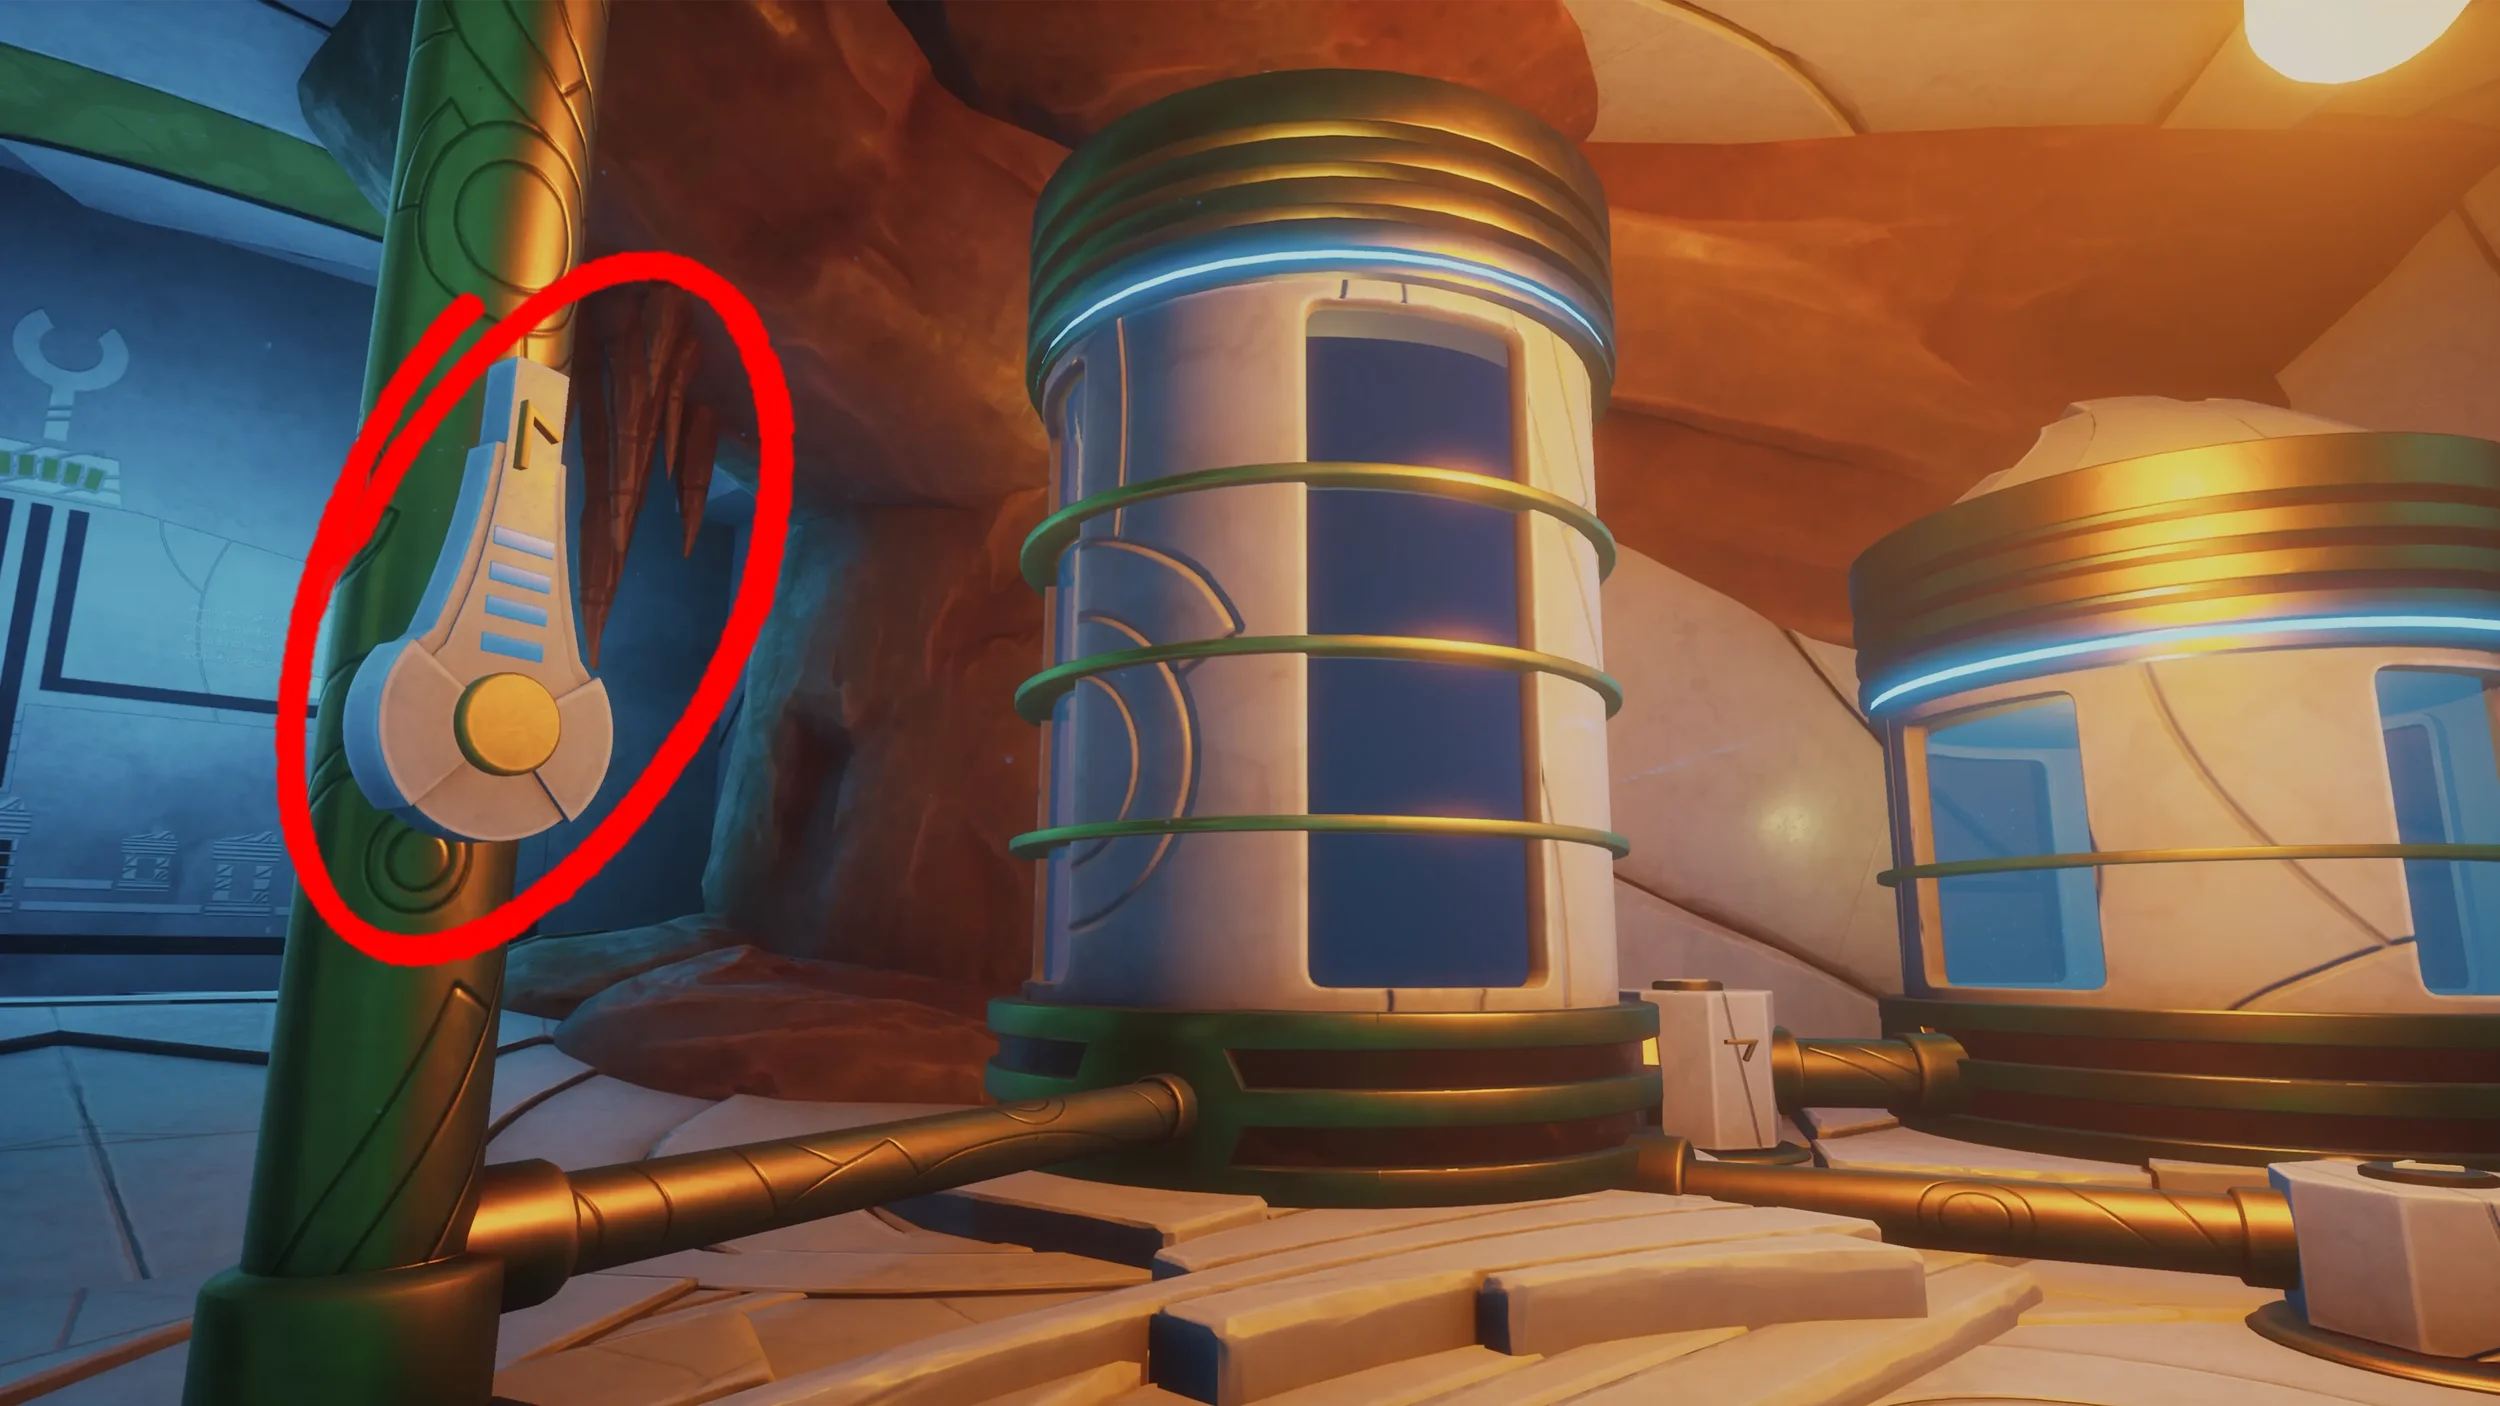
We are now ready to prepare the Diving Suit, for this the first thing we need to do is open up the small panel on the beam beside the suit.
Once it is open, flip the 1st, 2nd and 4th switches to turn on the power.

Now pick up the blue empty Oxygen Tank you can see on the floor to the right of the machine.
Open the cover (1) on the right part of the machine to be able to turn the switch that powers it up. Then rotate the wheel three times so the gauge reaches the green zone (2), now place the empty Oxygen Tank in its holder on the leftof the machine (3), once the Oxygen Tank is placed, press the big Yellow Button (4) to fill up the Tank with Oxygen.
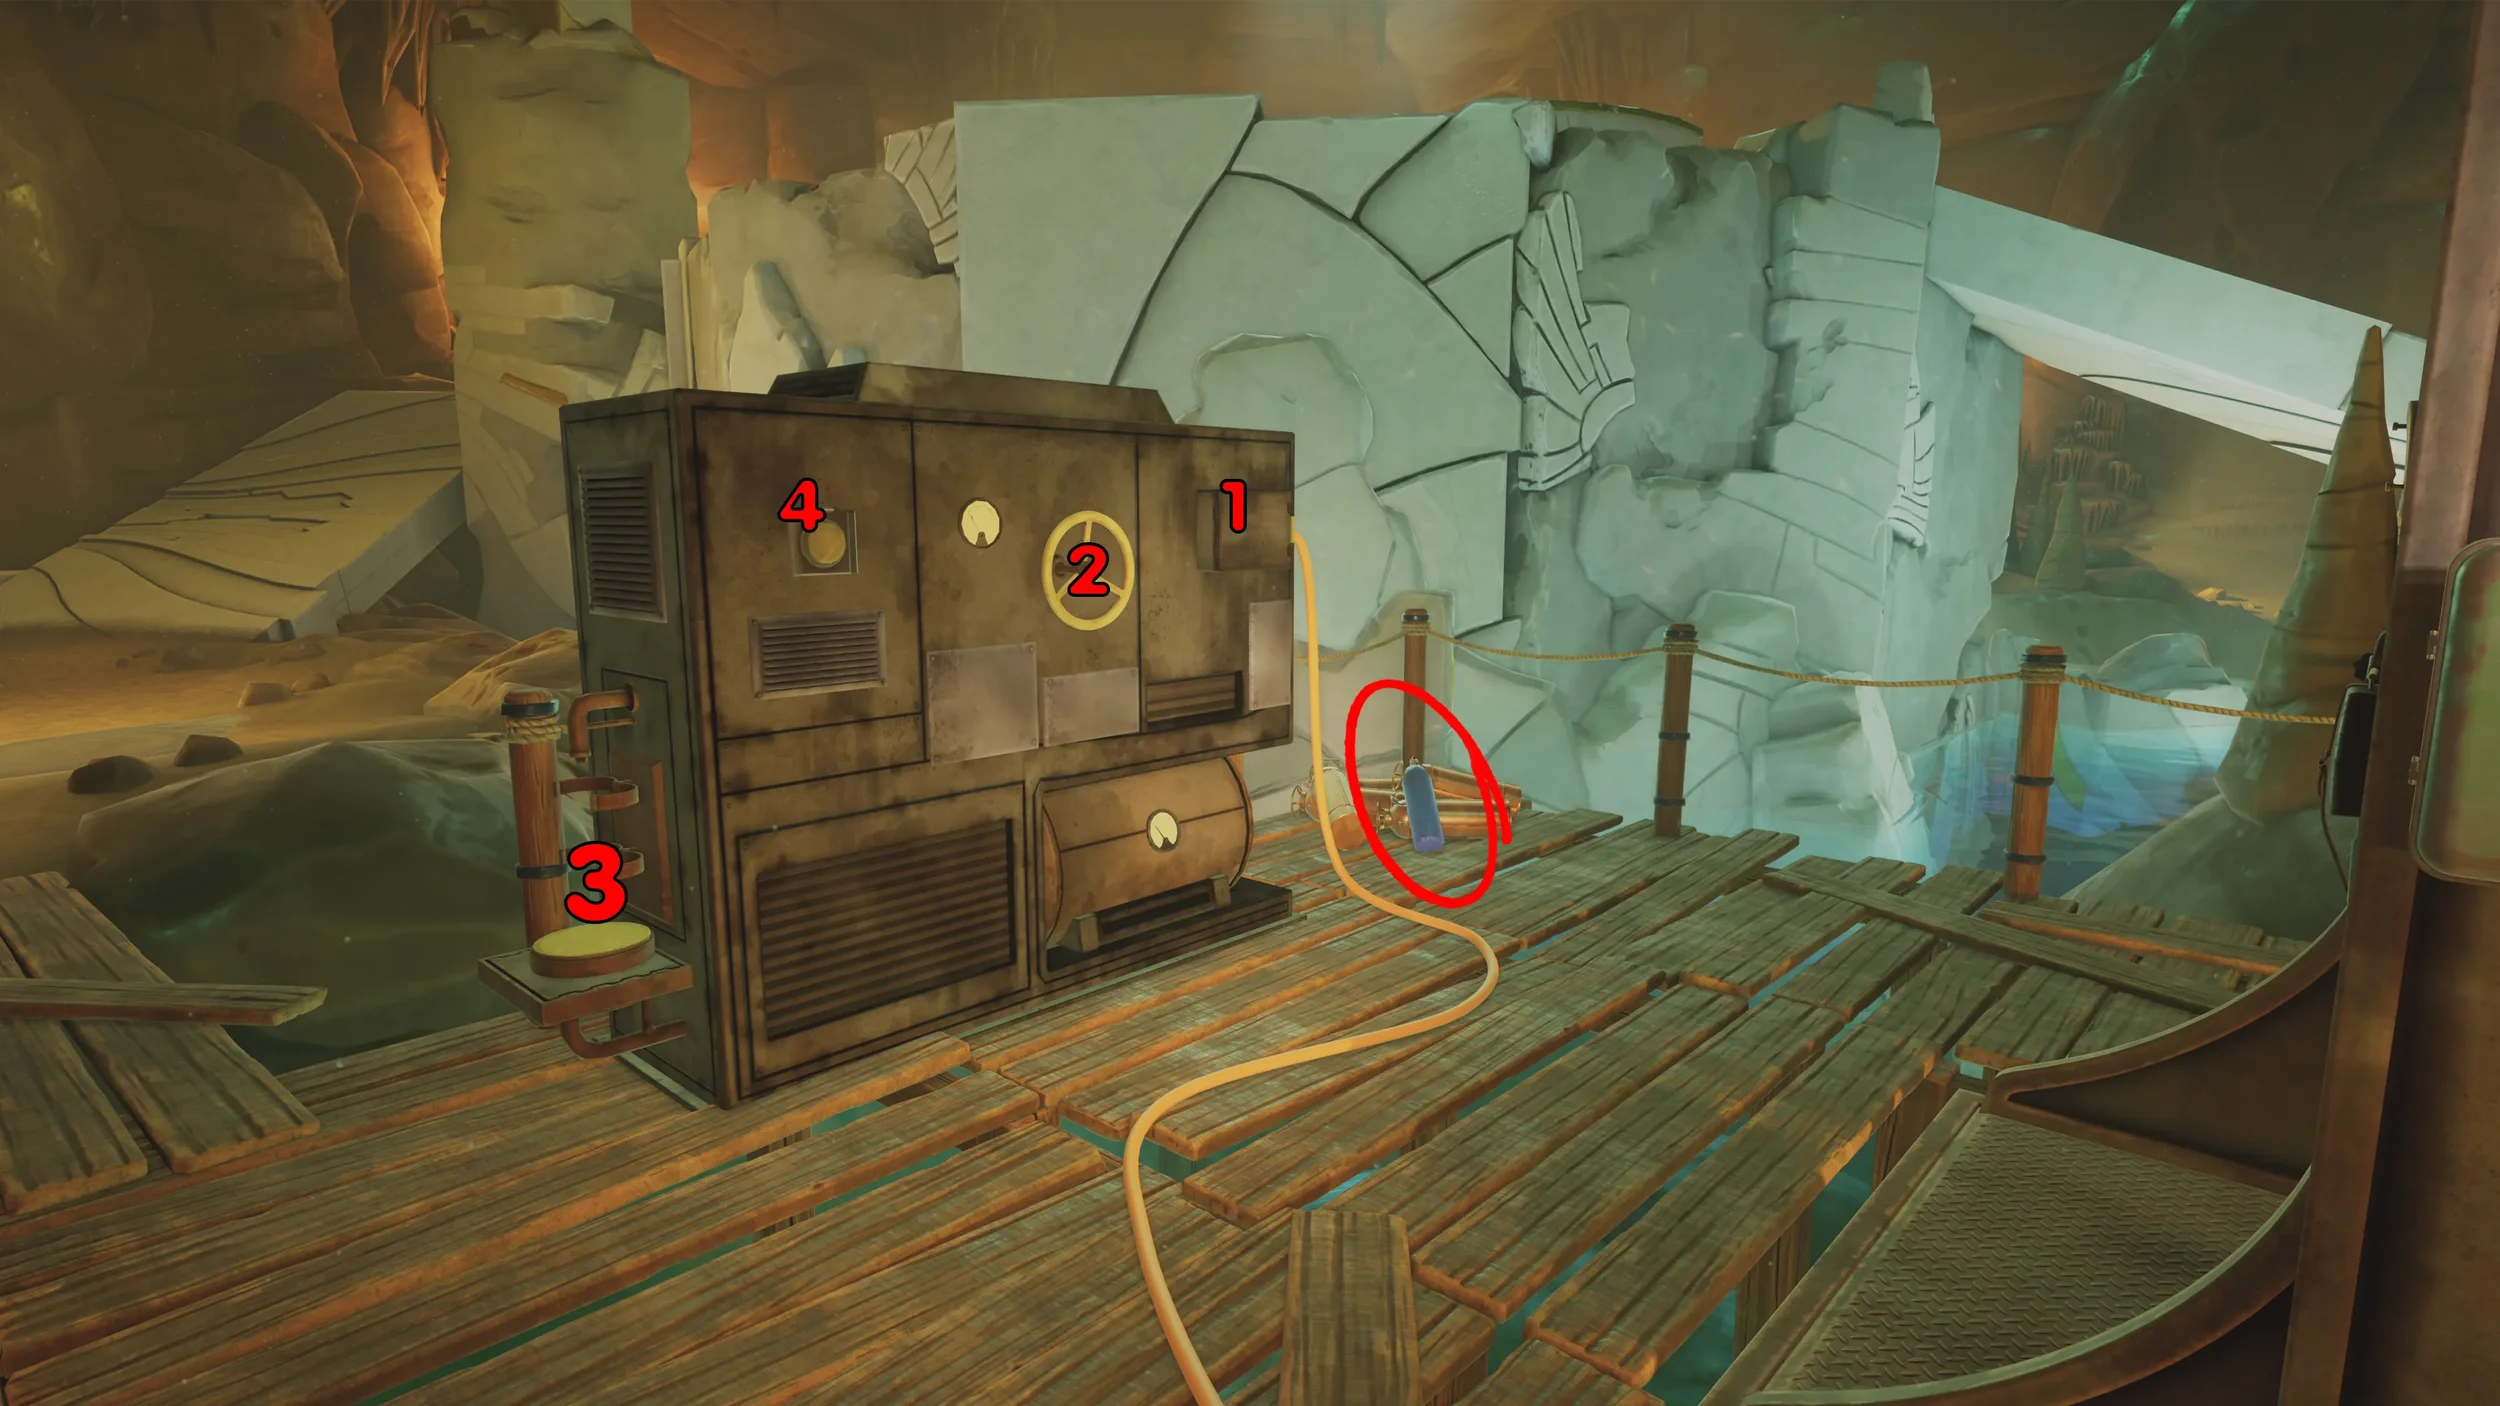
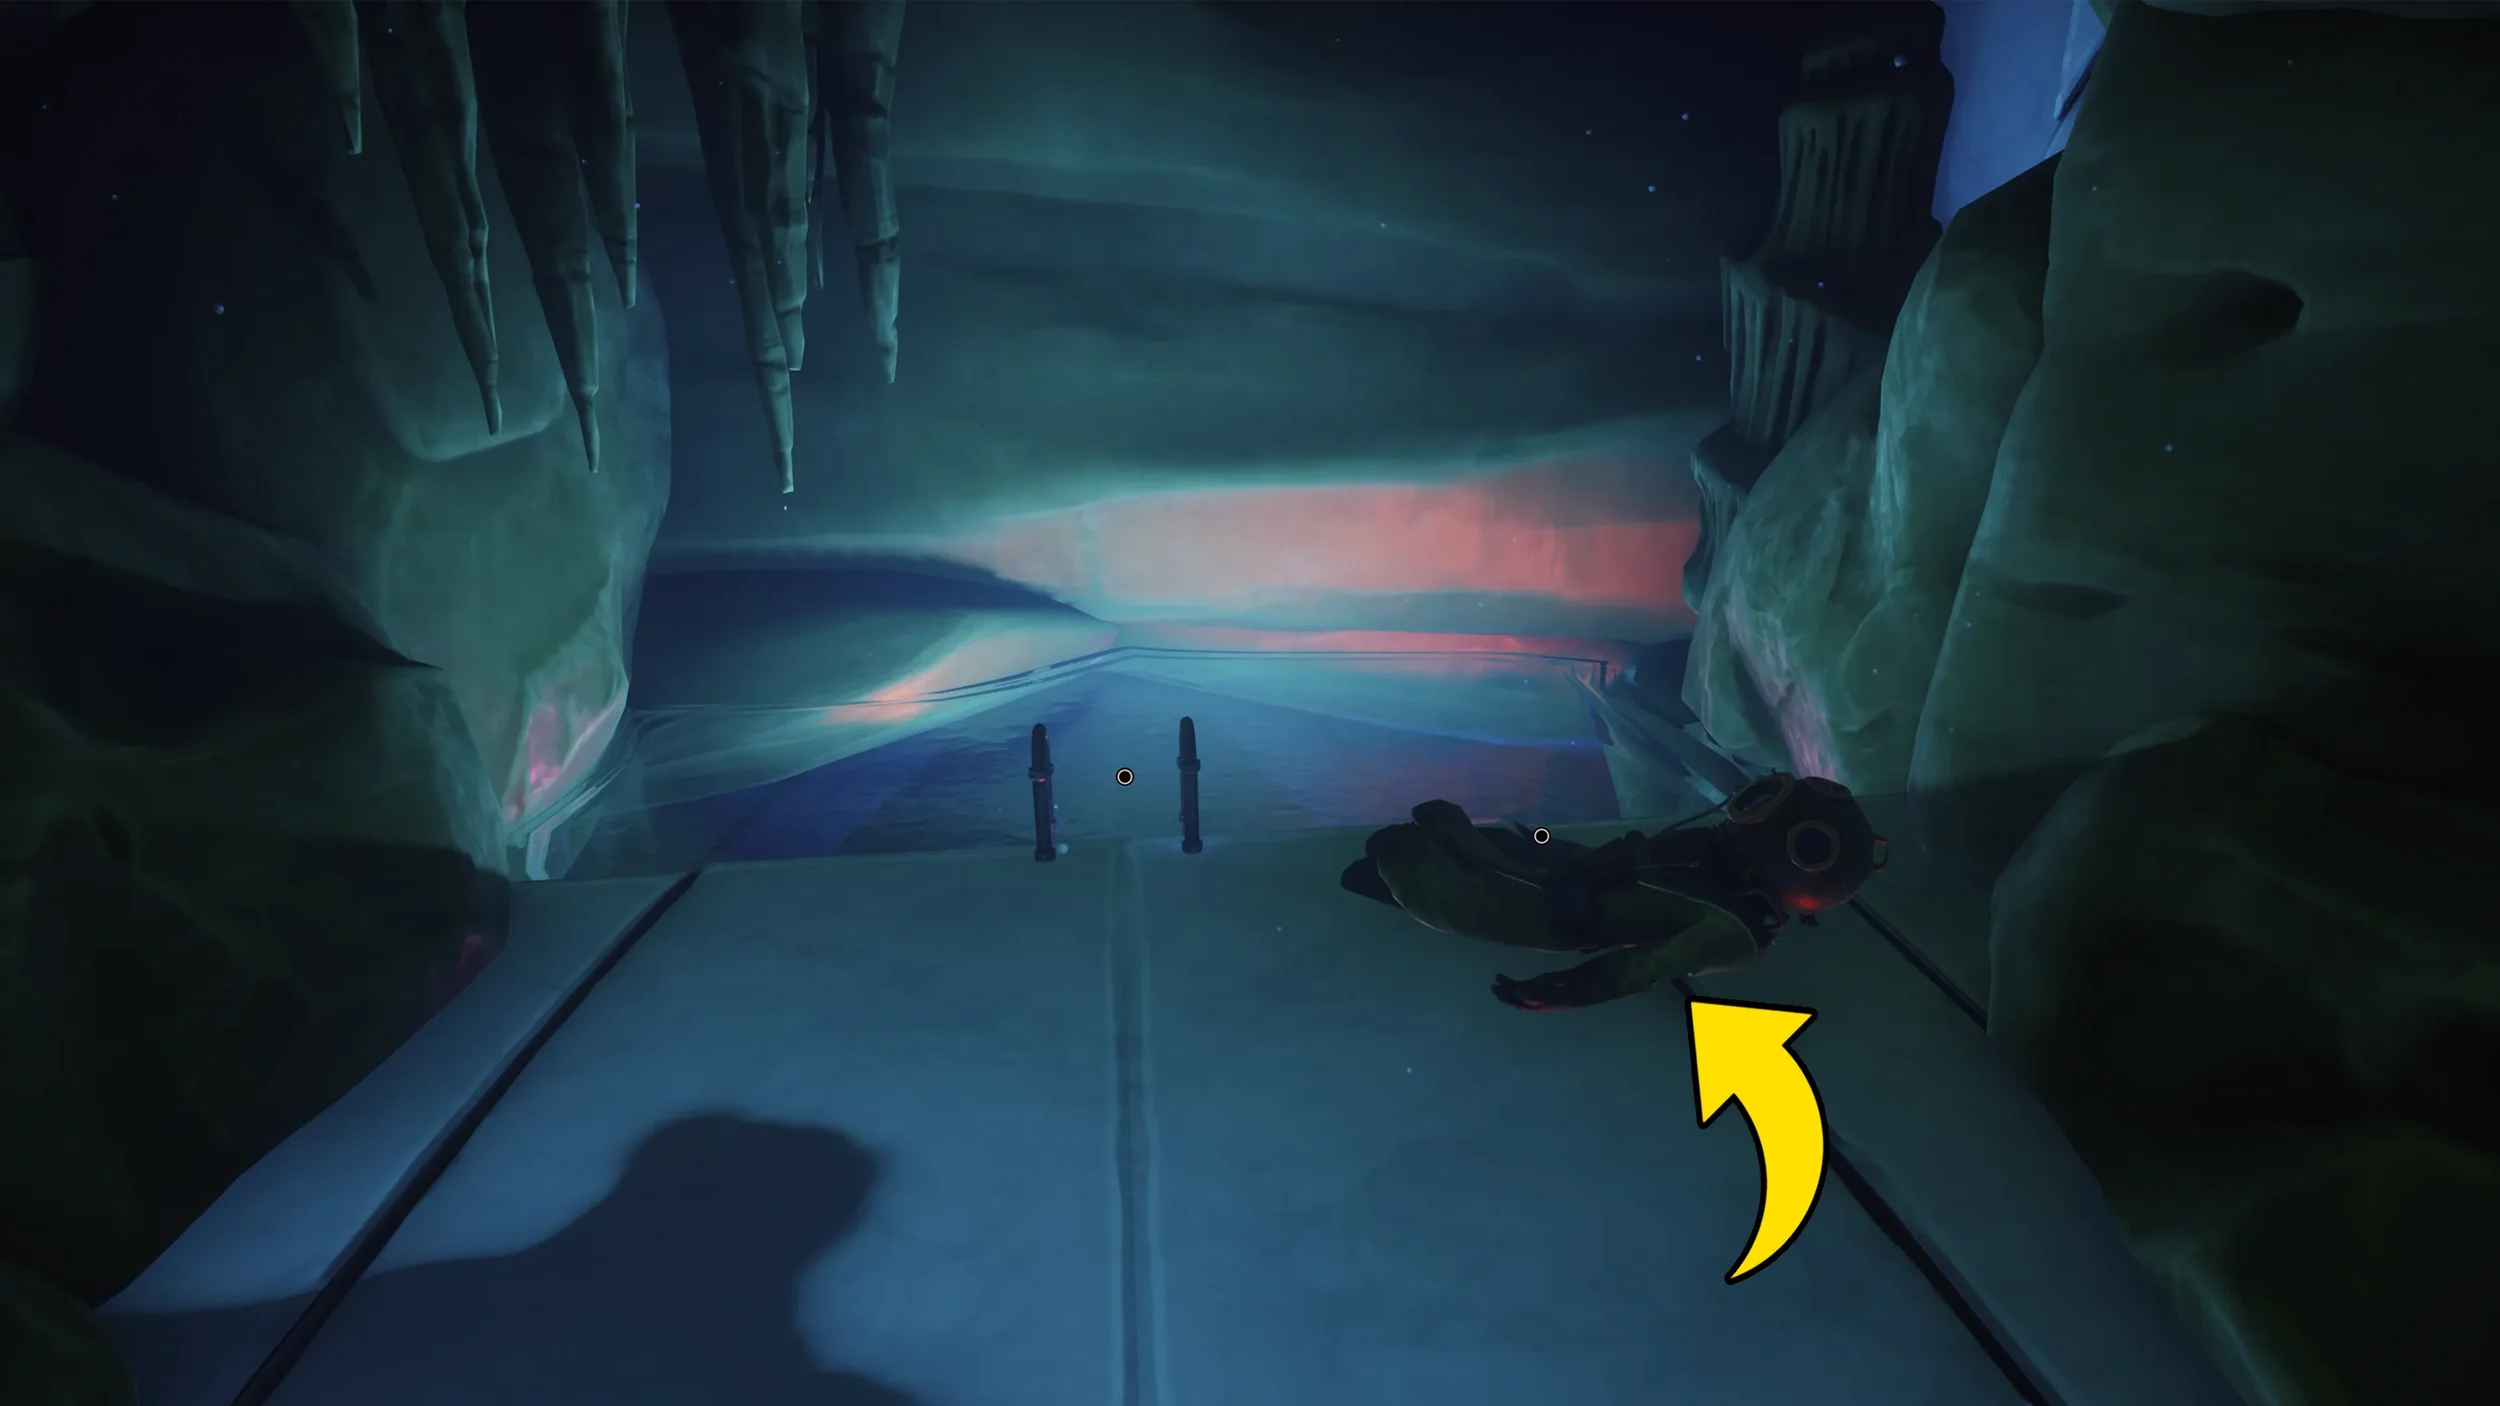
You can now interact with the Diving Suit, the first time you interact with it the Professor will tell you not to use it, simply interact with it again to be given the choice to go down into the water anyway.
The entire underwater section is very linear and there is nothing down there that you need to worry about finding or picking up so just keep advancing until you resurface in the next area.
As soon as you enter the next room inspect the 2 Murals you can see near the entrance as both of these are clues.
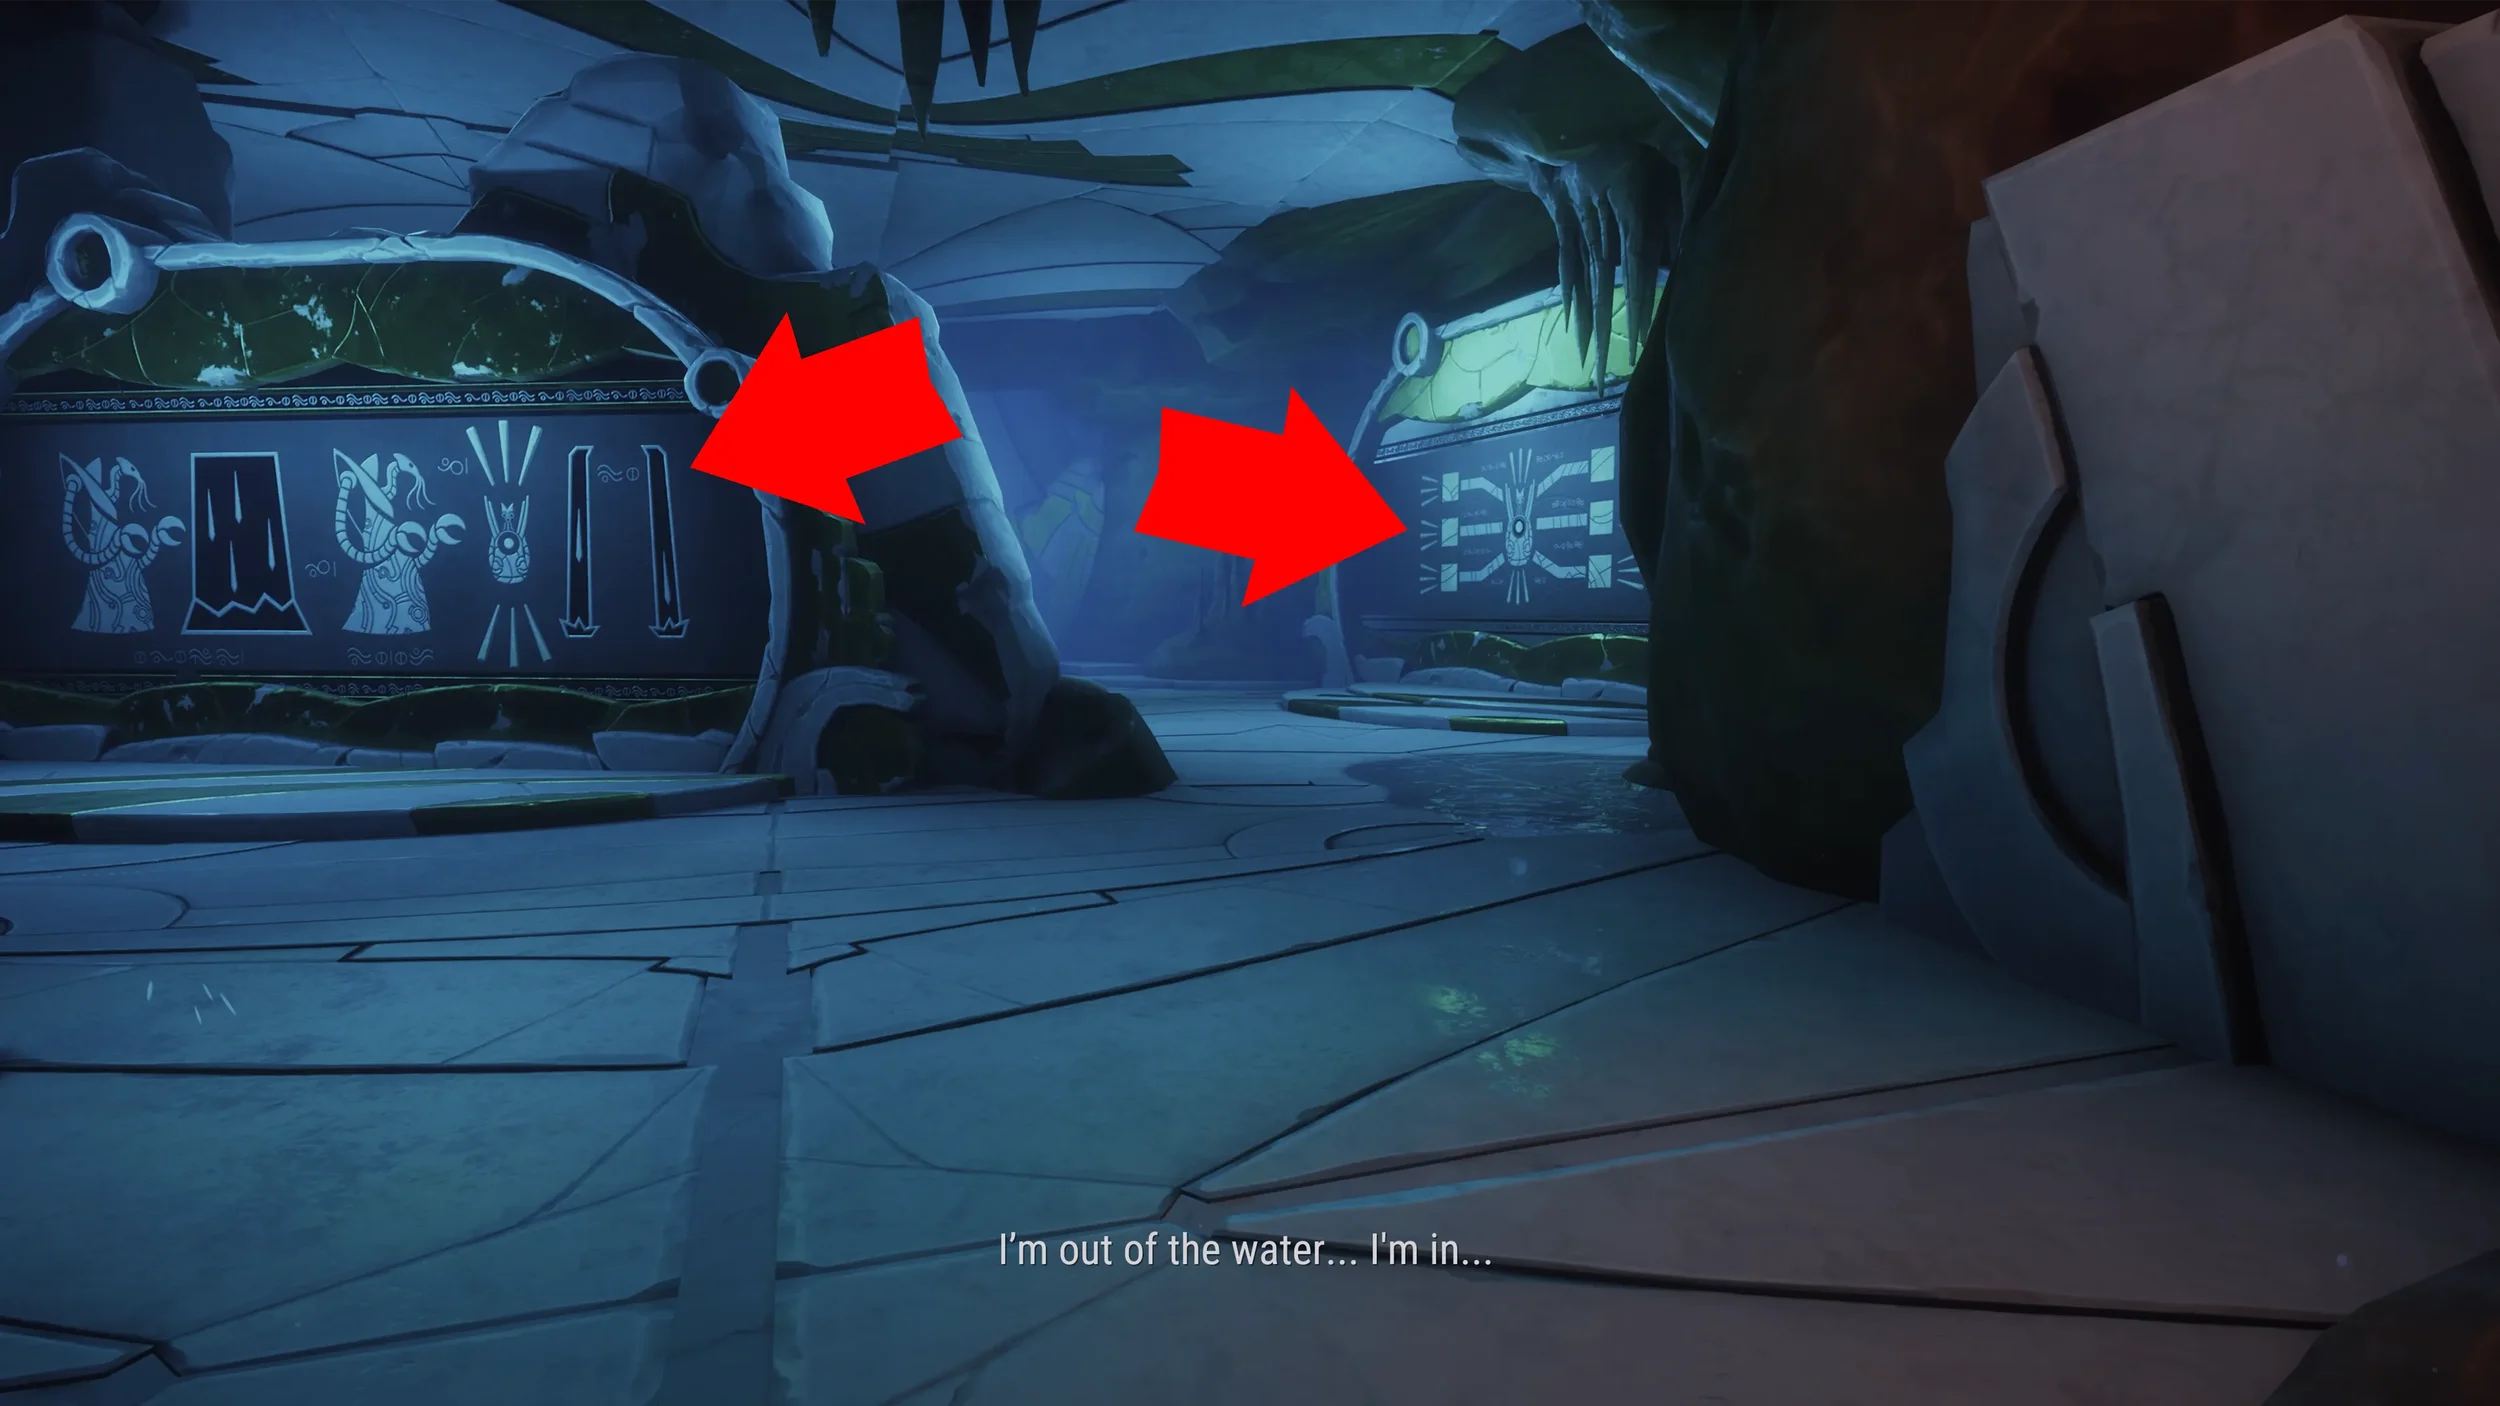
Go to the far end of the room to find another big Mural, you will be able to inspect various different parts of this Mural but the only part that counts as a clue is the smaller part that you can inspect in the lower right corner, so make sure to inspect it correctly so that you get the clue written down in your Journal.

Water Tank Puzzle
In this room our main objective is to fill up the big water tank on the left with Black Ooze while making sure it ends up with no water inside the tank.
To start the puzzle stand on the circle on the ground.
(I will attach a video guide for this puzzle here showing the order in which you need to press each button to complete the puzzle so if you have a hard time following along with the text instructions just follow the order in the video).
The first thing we are going to do is press the right-most button to fill up the 1st tank, then press the button in the middle to redirect the connection from the now filled 1st tank towards the big tank on the left, you can now press the button just to the left of the 1st tank to send all of its liquid to the big tank on the far left, now press the button near the big tank to send whatever amount of liquid will fit in the tank at the back, then press the button at the back to empty it.
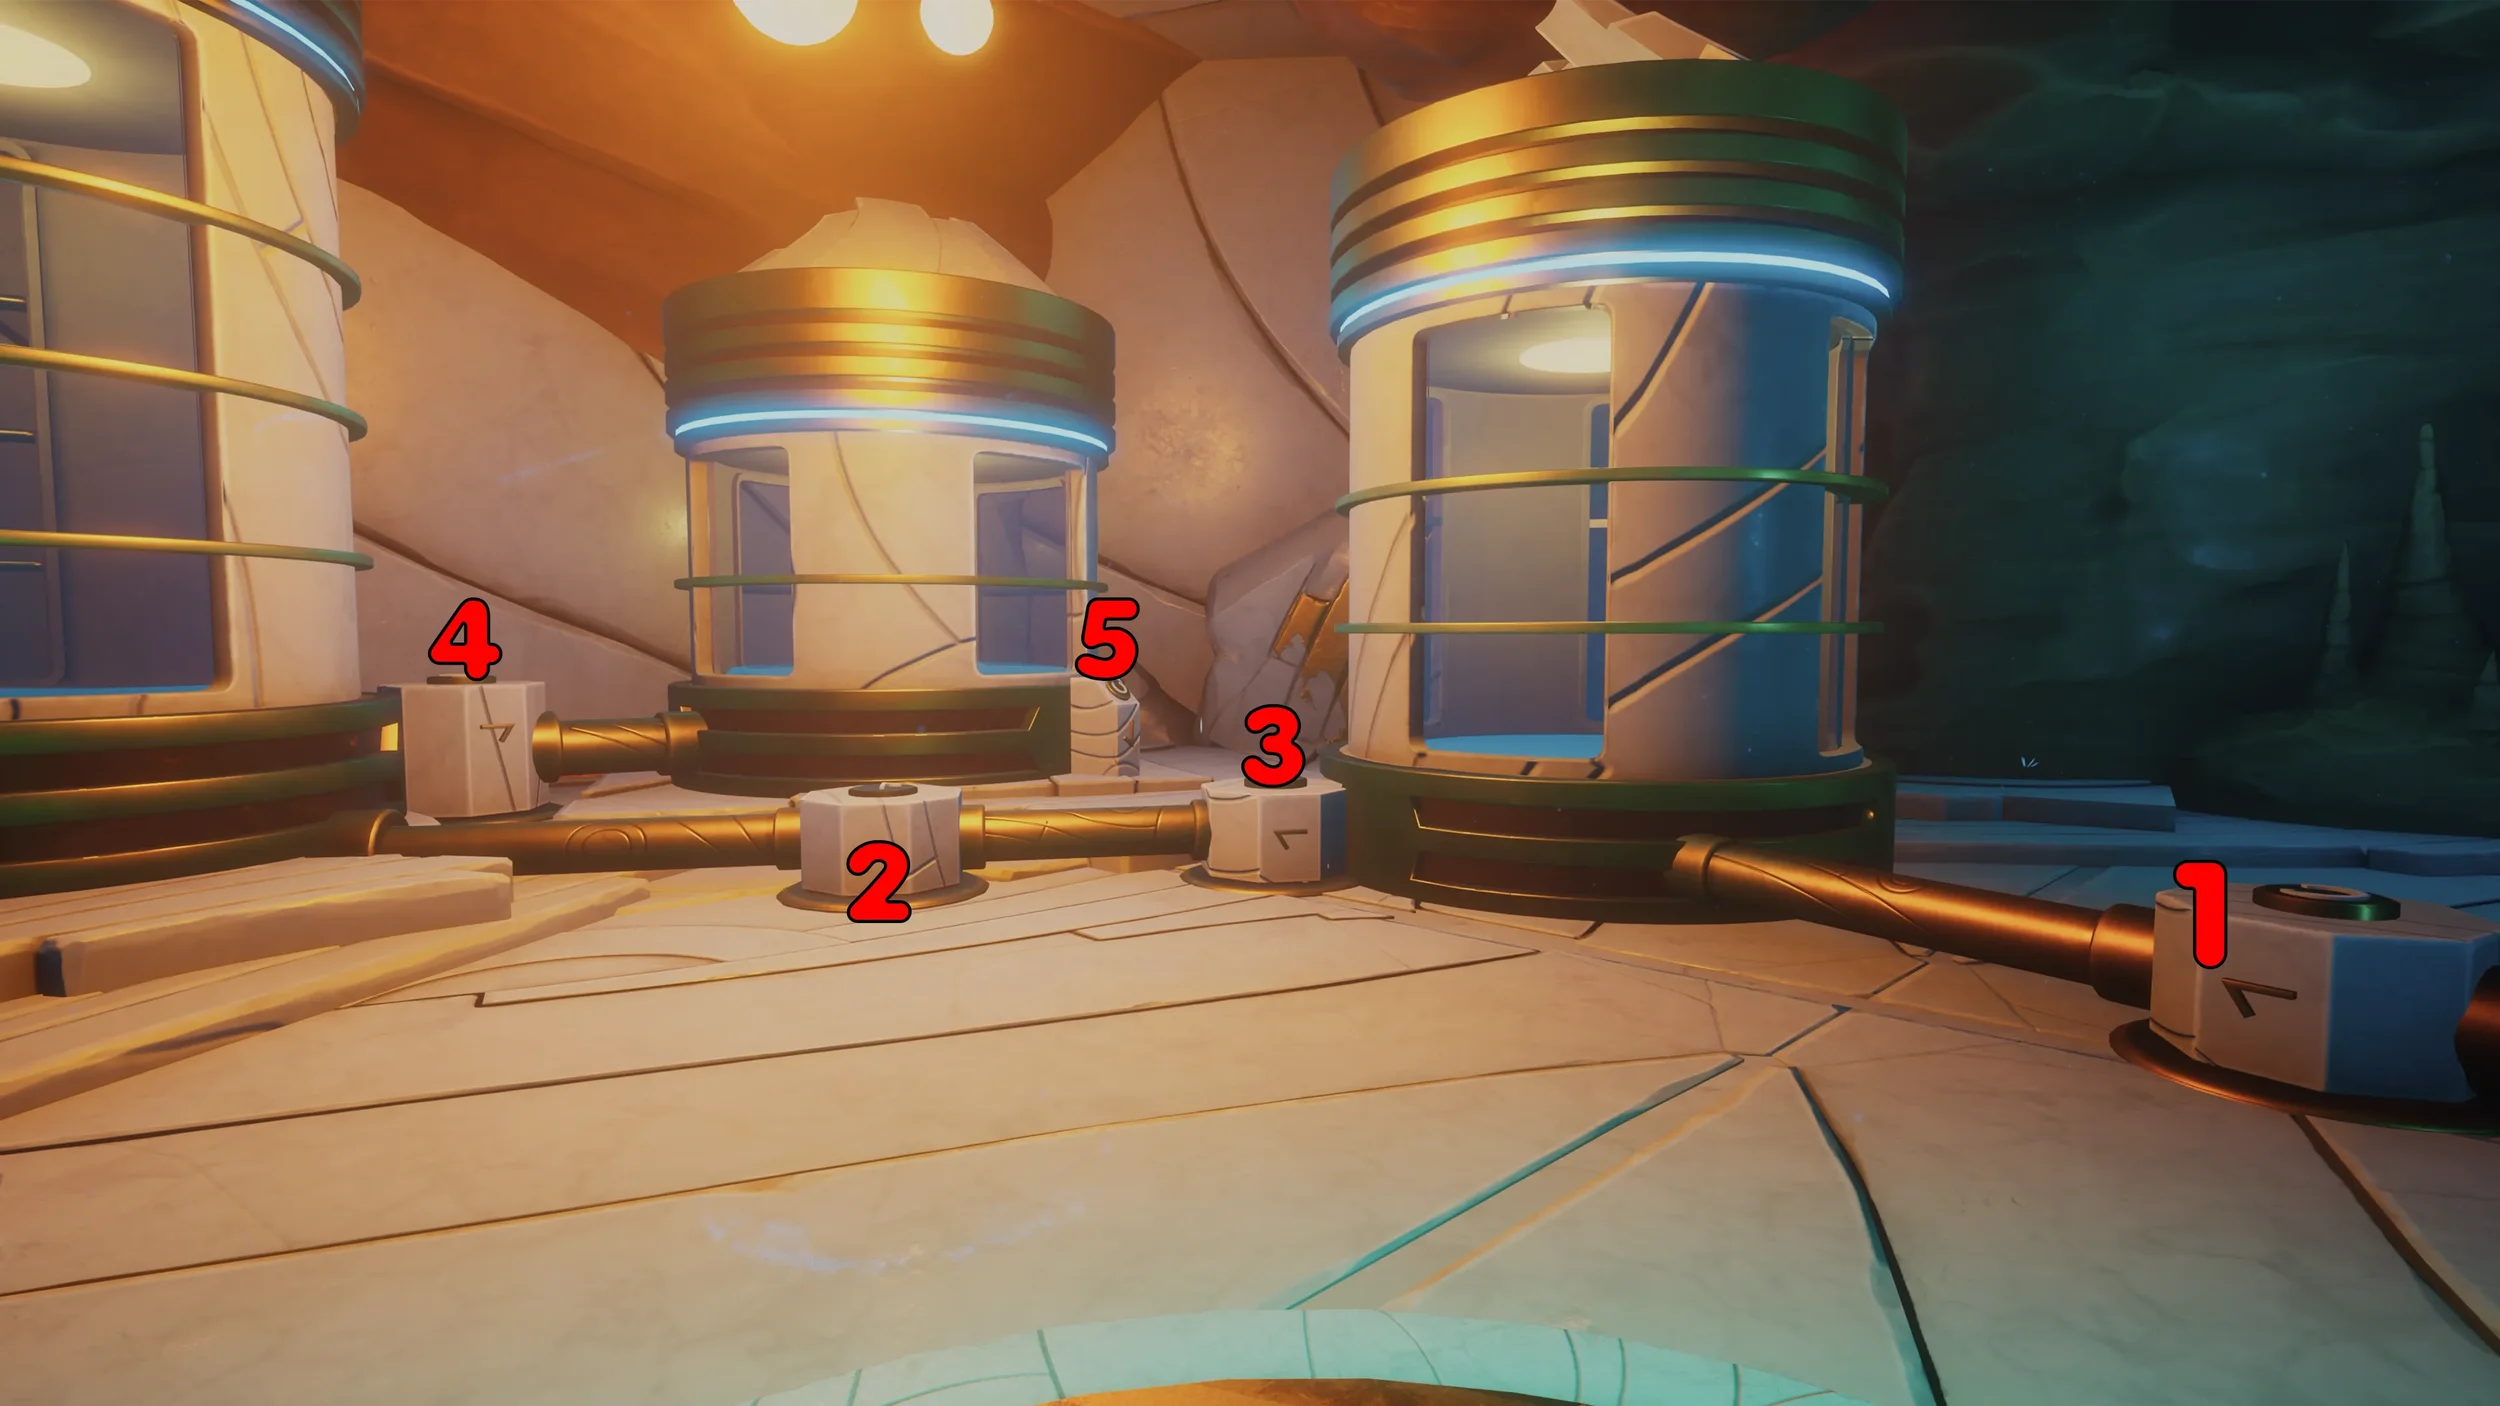
Now press the 1st button again to fill up the 1st tank, send it directly to the far left big tank, and again from the big tank send whatever will fit to the back tank, then empty the back tank again the same as before.
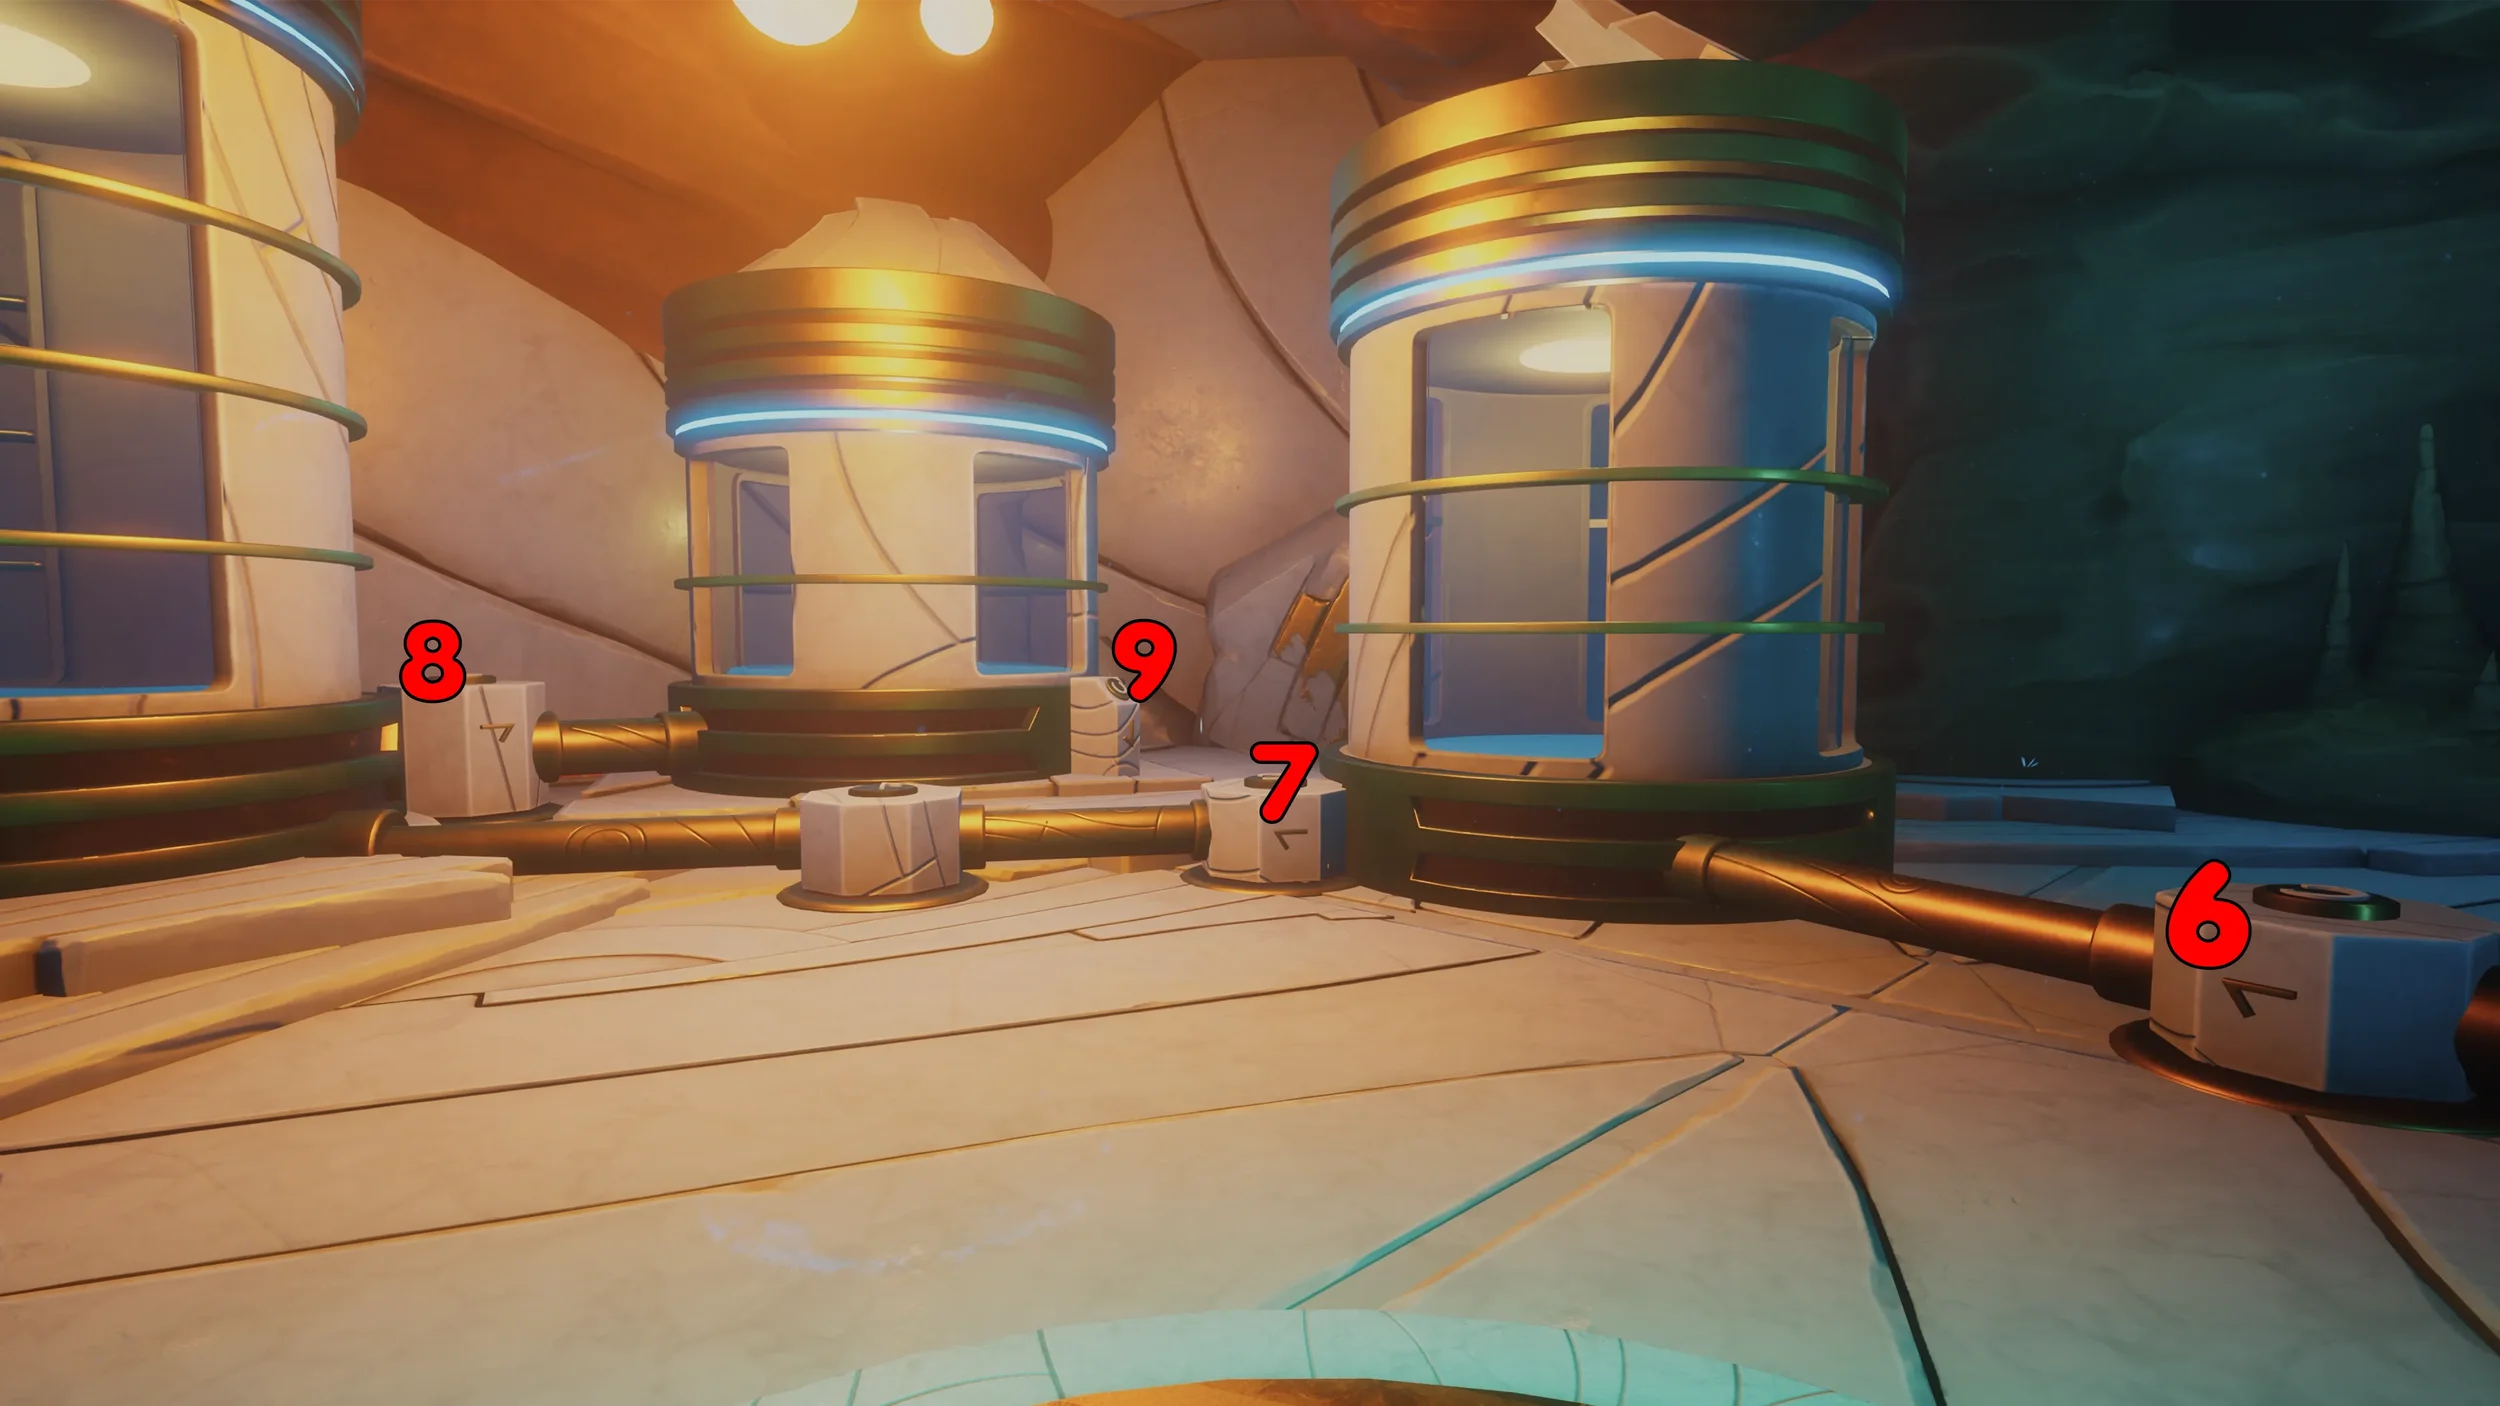
Press the 1st button again to fill up the 1st tank, now send the liquid to the far left big tank again, but this time DON’T send it from the big tank, instead press the middle button to redirect the 1st tank towards the back tank, now send what is left in the 1st tank to the tank in the back so that it becomes half full, NOW you can send the liquid from the big left tank to the back tank, then fill up the 1st tank one more time, press the middle button to redirect to the left big tank and send it from the 1st tank to the big left tank for the last time.
Once the big left tank is filled with black ooze press the button on the left to complete the puzzle.
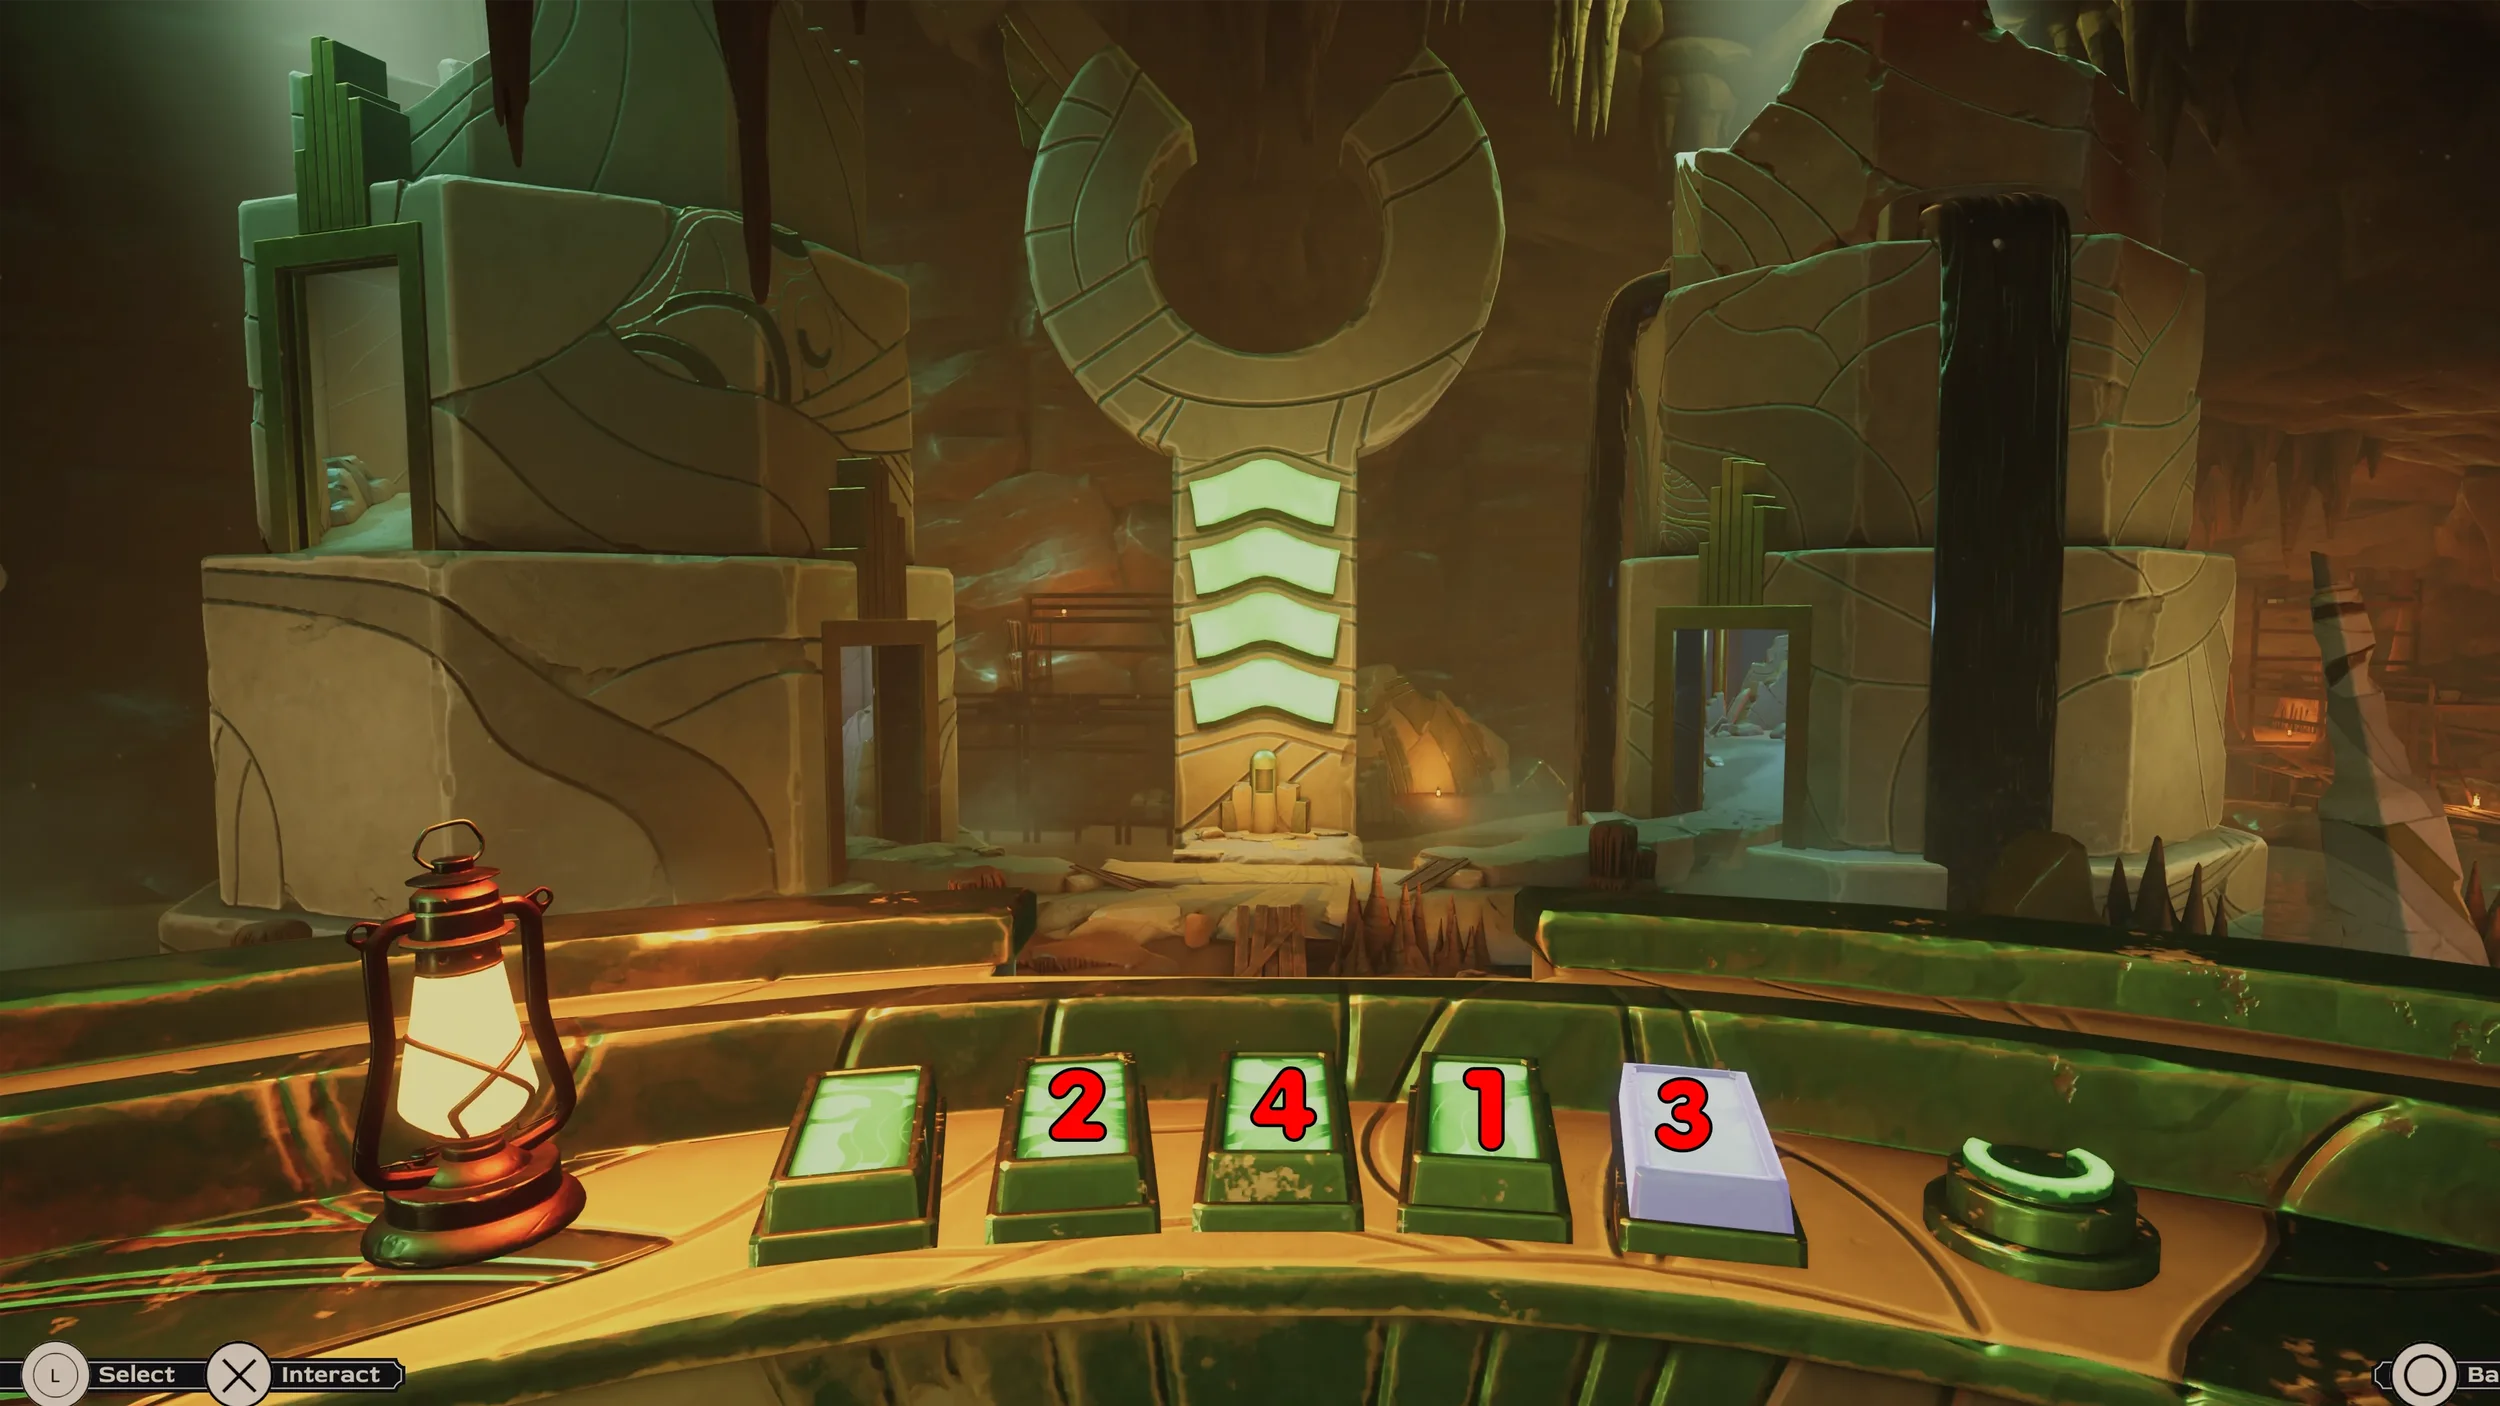
Piano Towers Puzzle
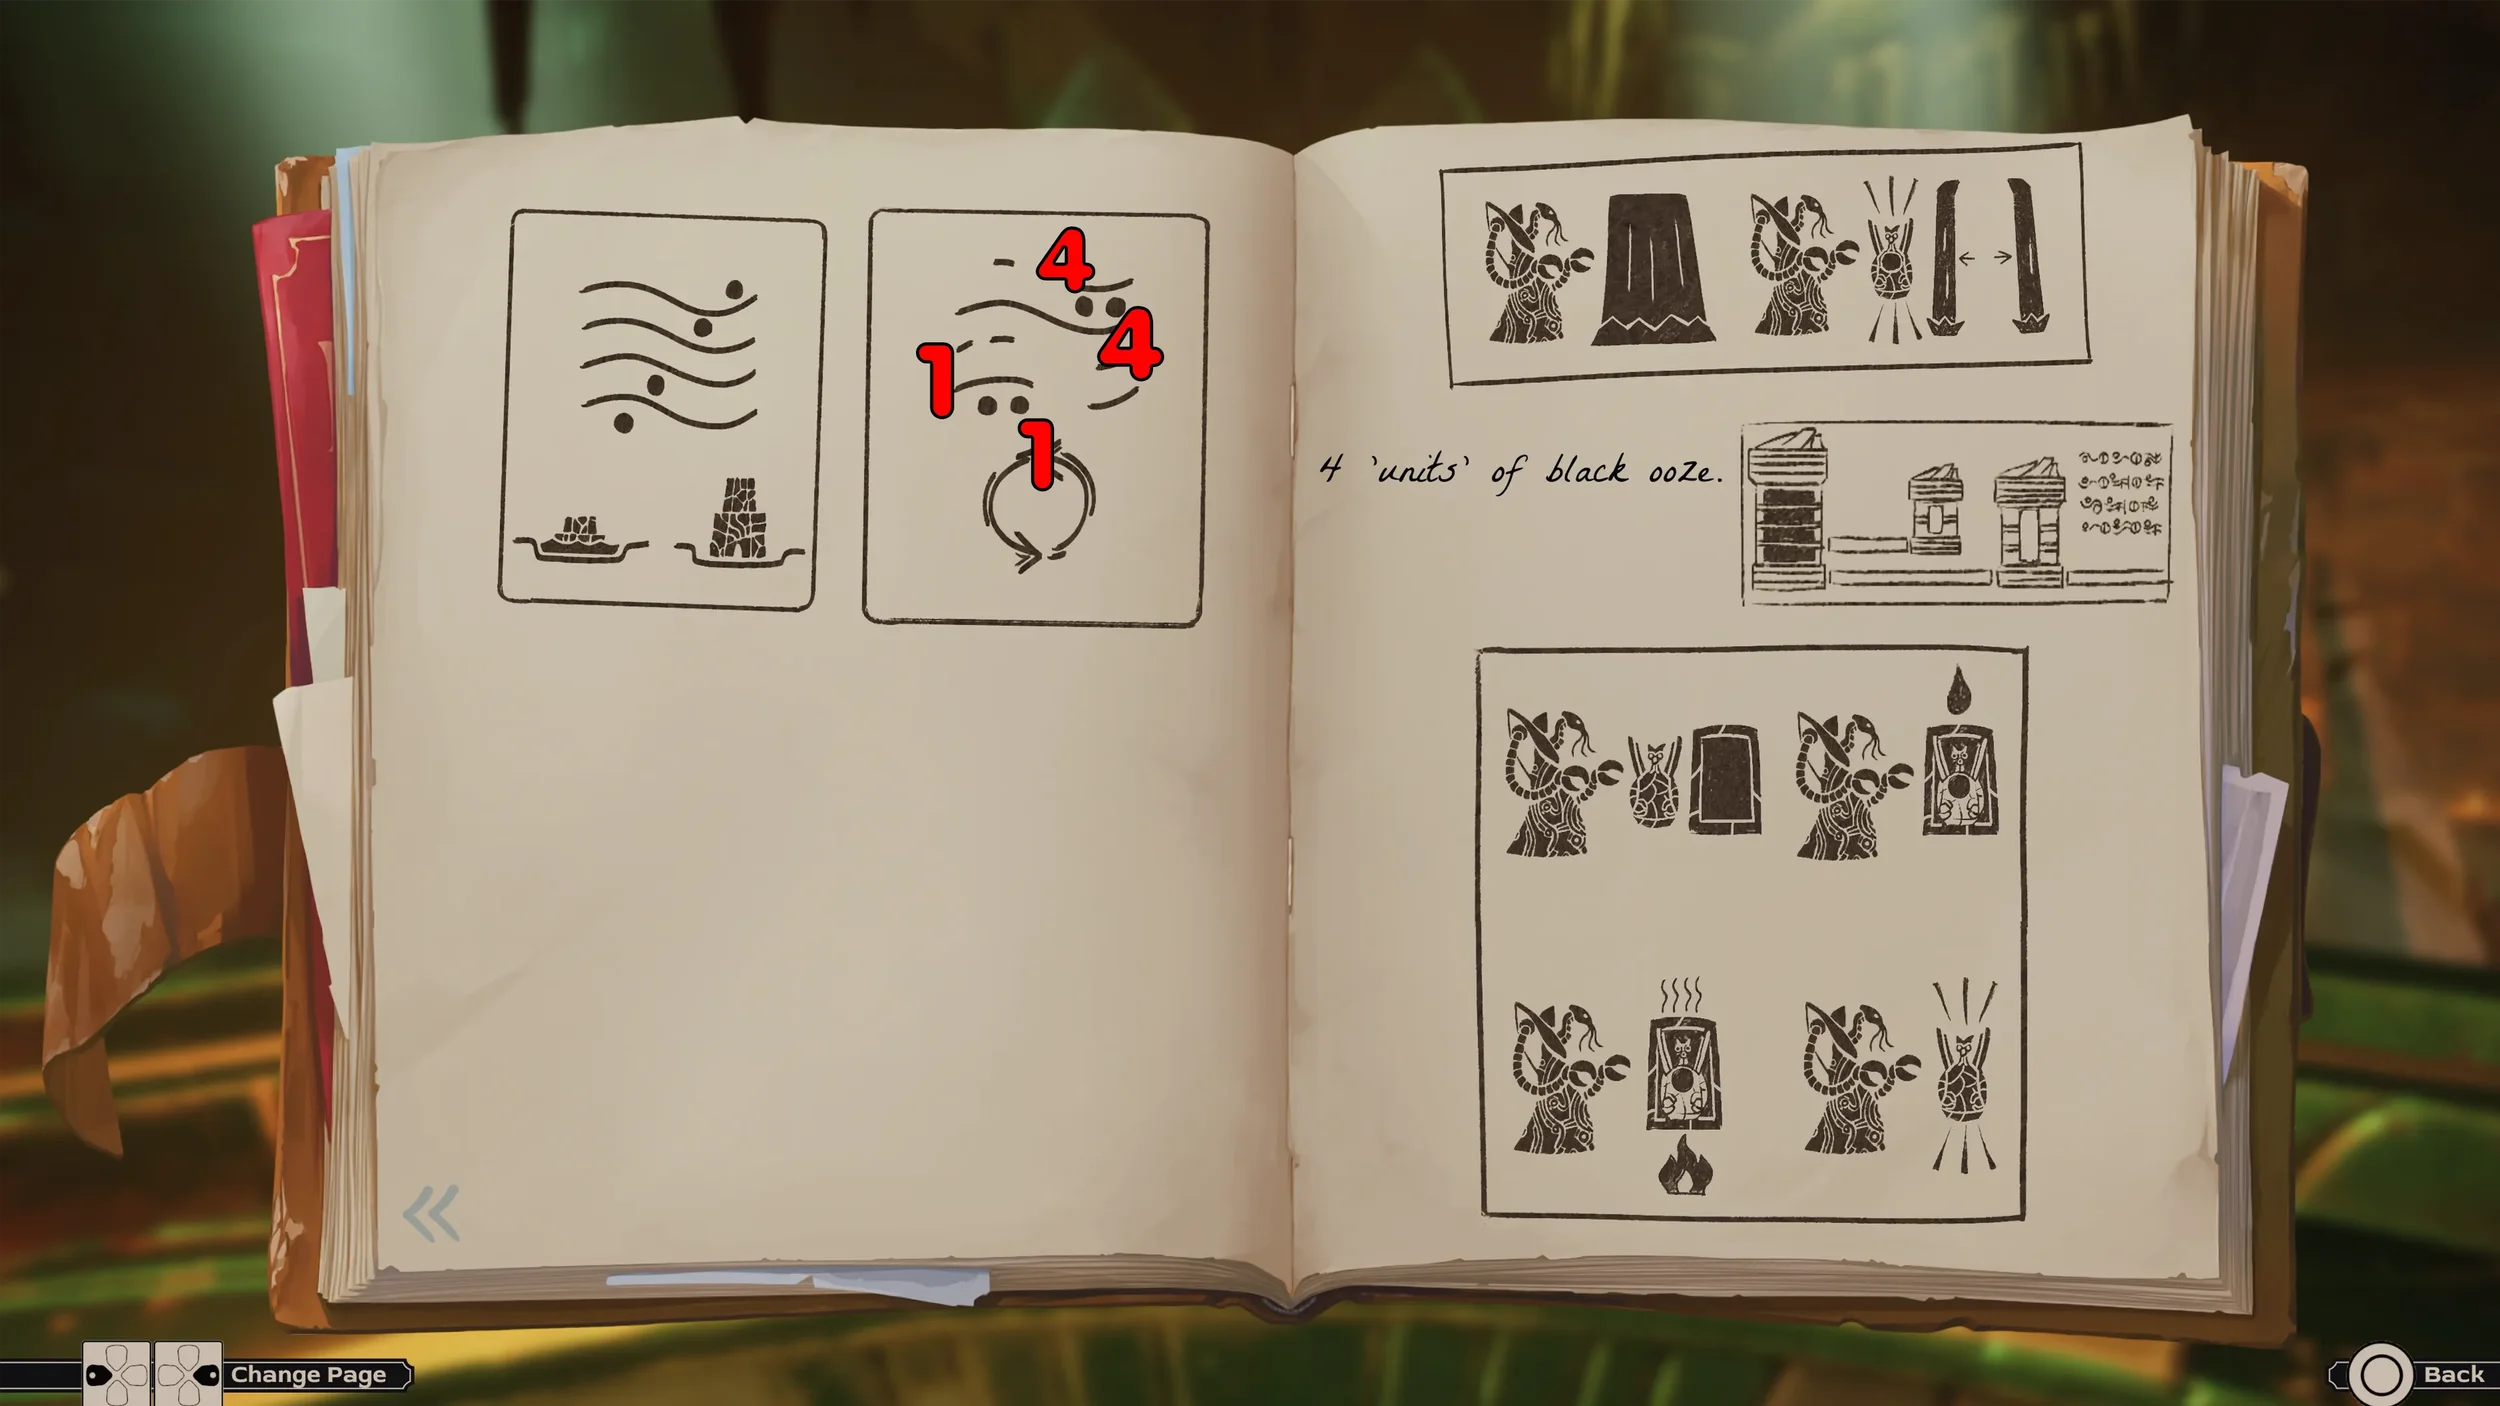
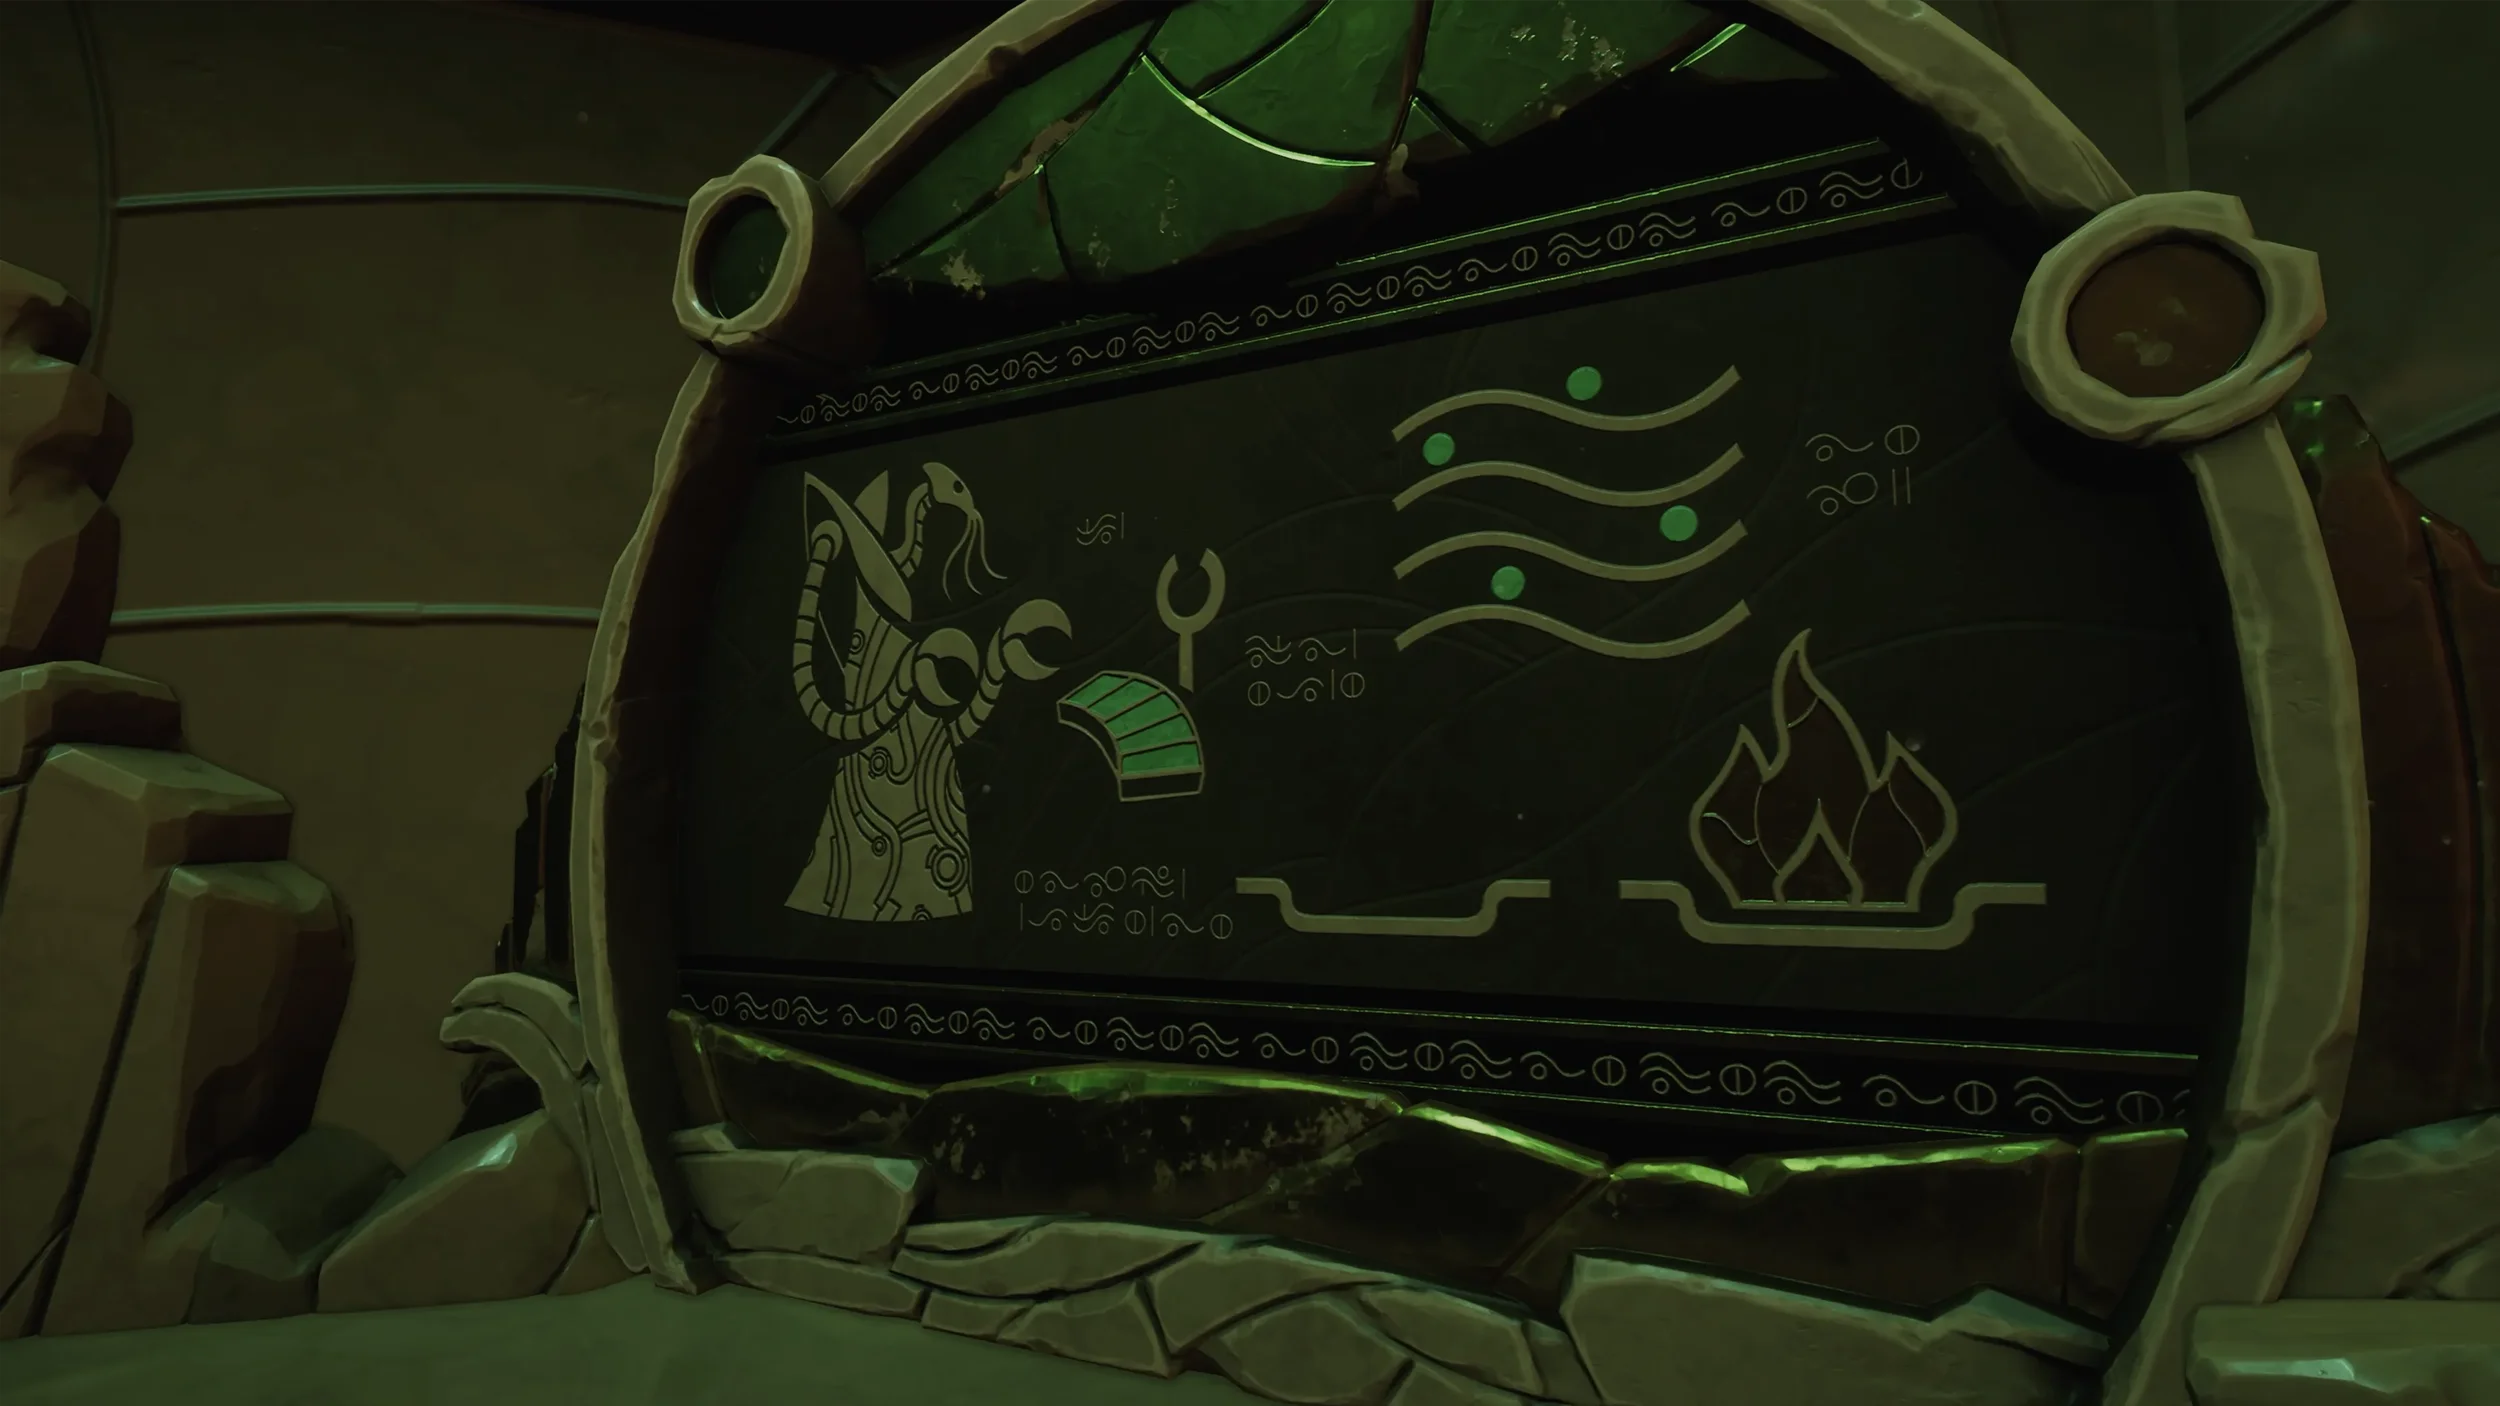
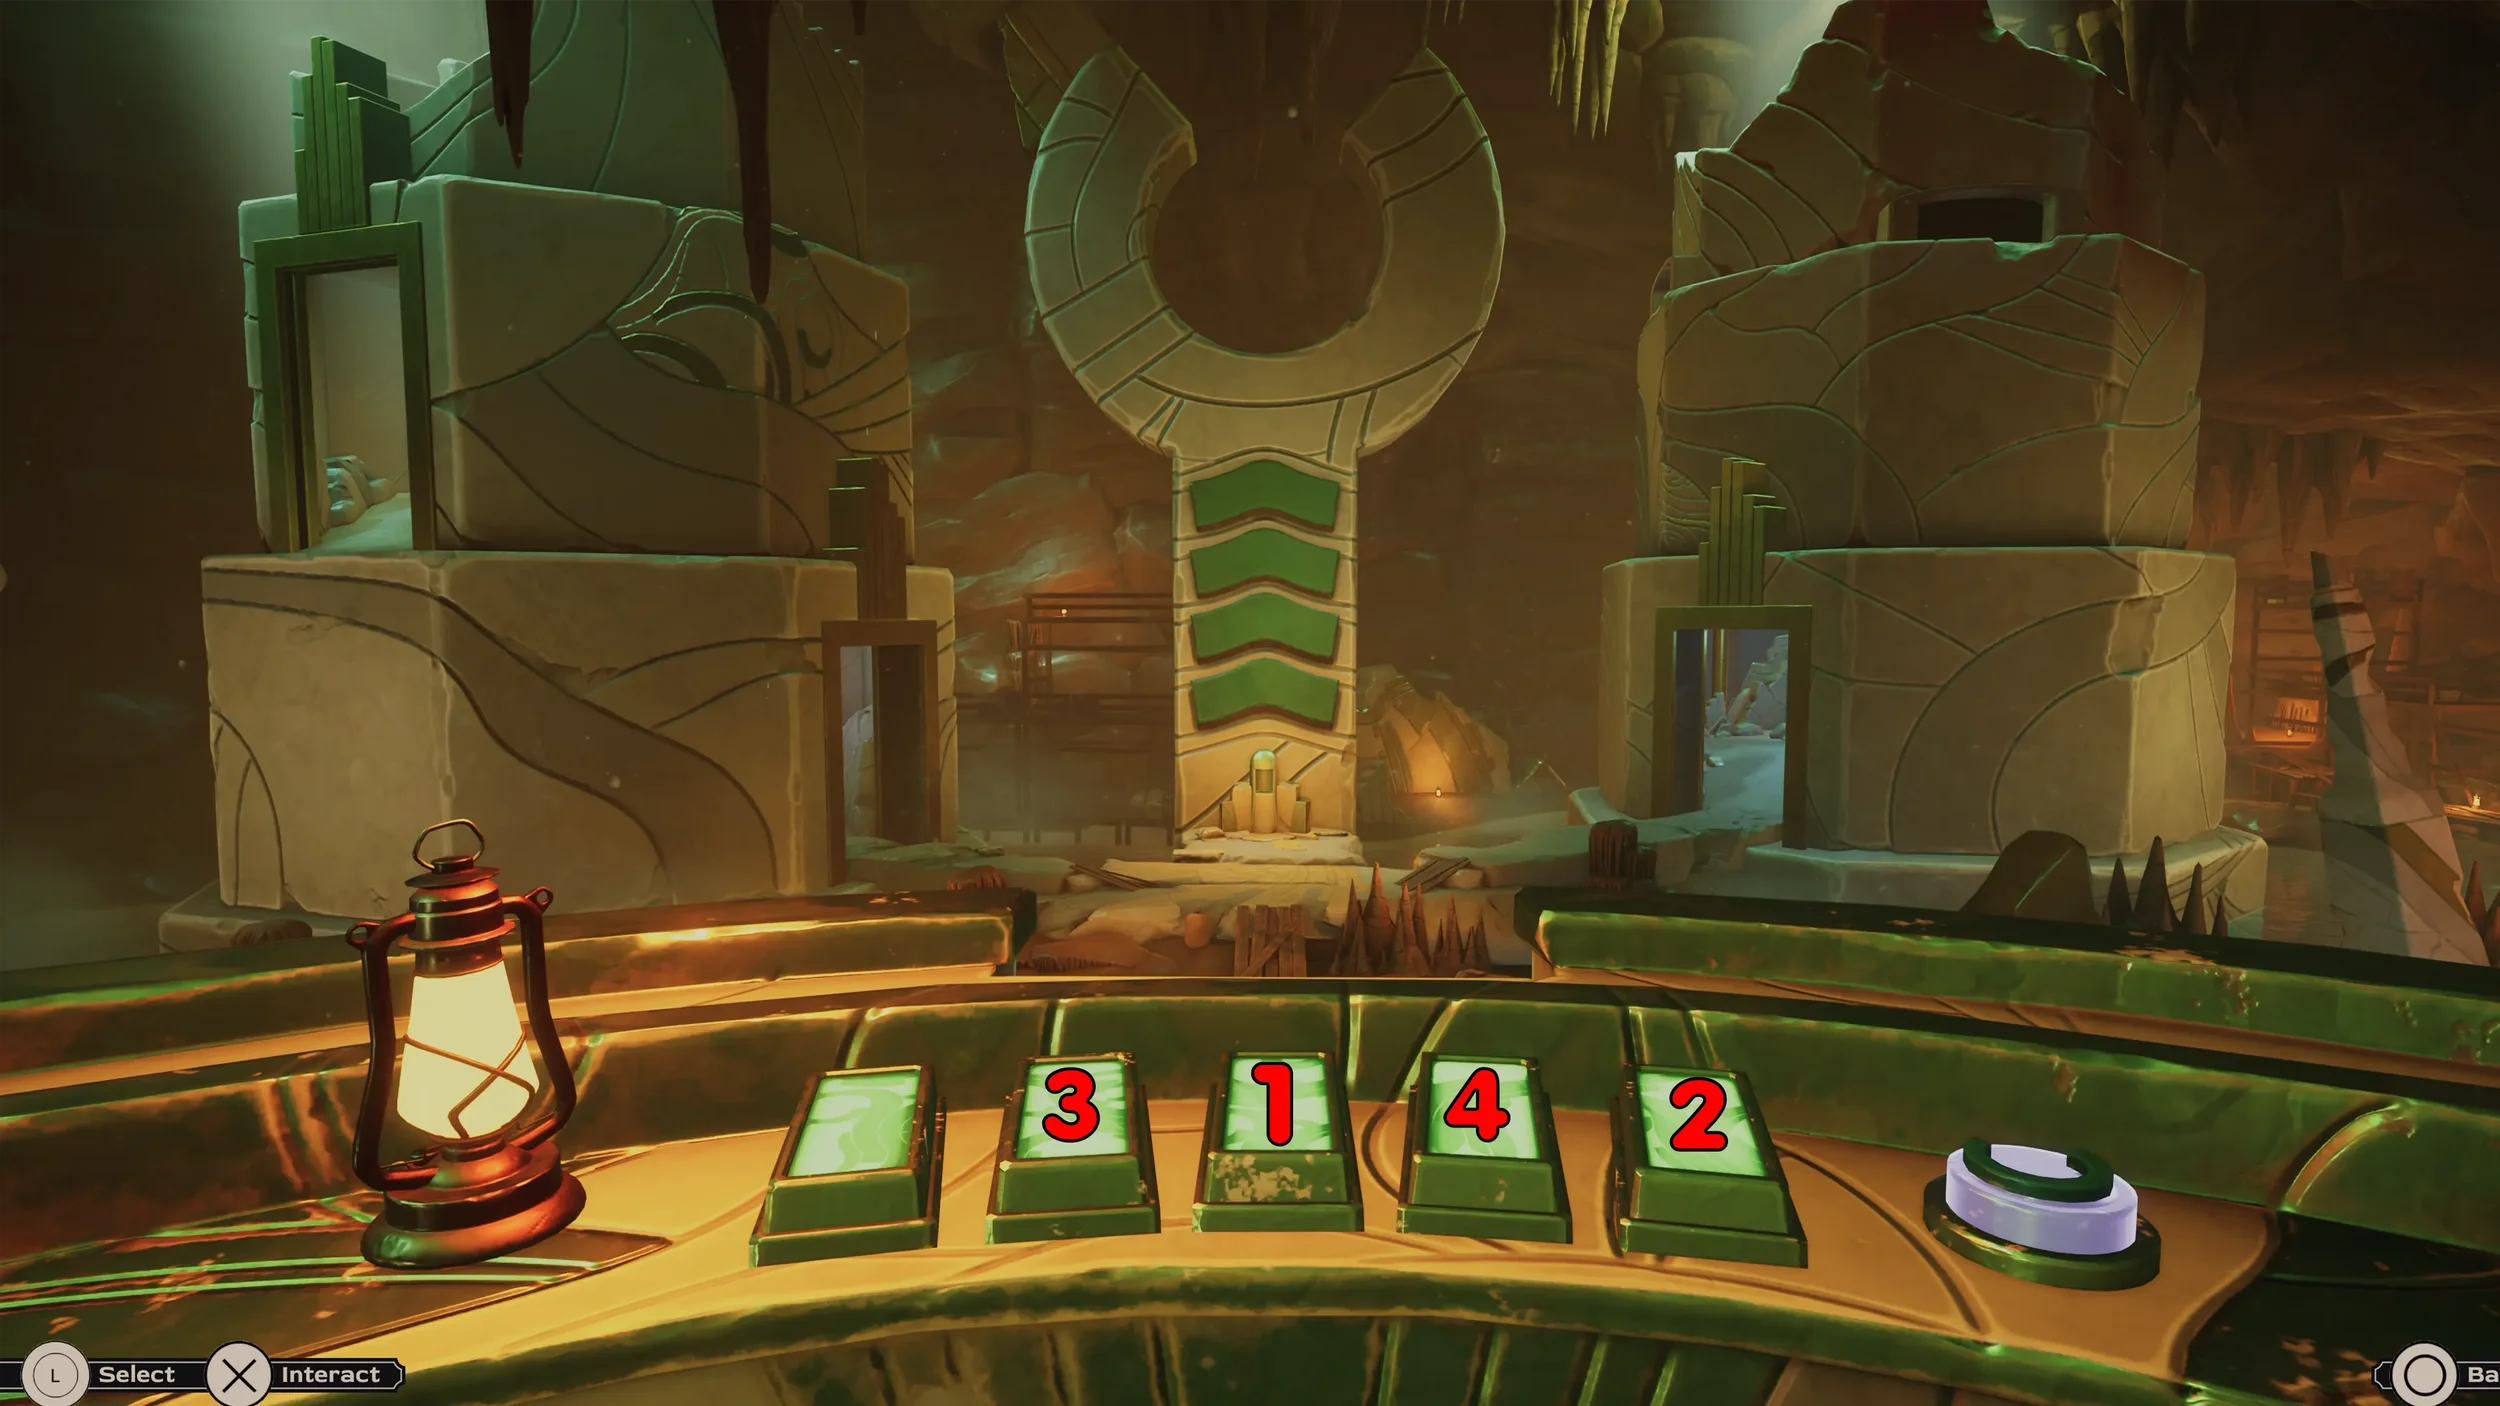
You will now be controlling the Professor back in the first open area of the cave, head to the green piano keys in the middle of the room. The Mural clues that we found earlier with the dots and wavy lines represent what piano keys we have to press for each command.
So for the 1st command, we need to raise the towers from the water so we need to press Key 1 - Key 2 - Key 4 - Key 5 (then press the button on the right).

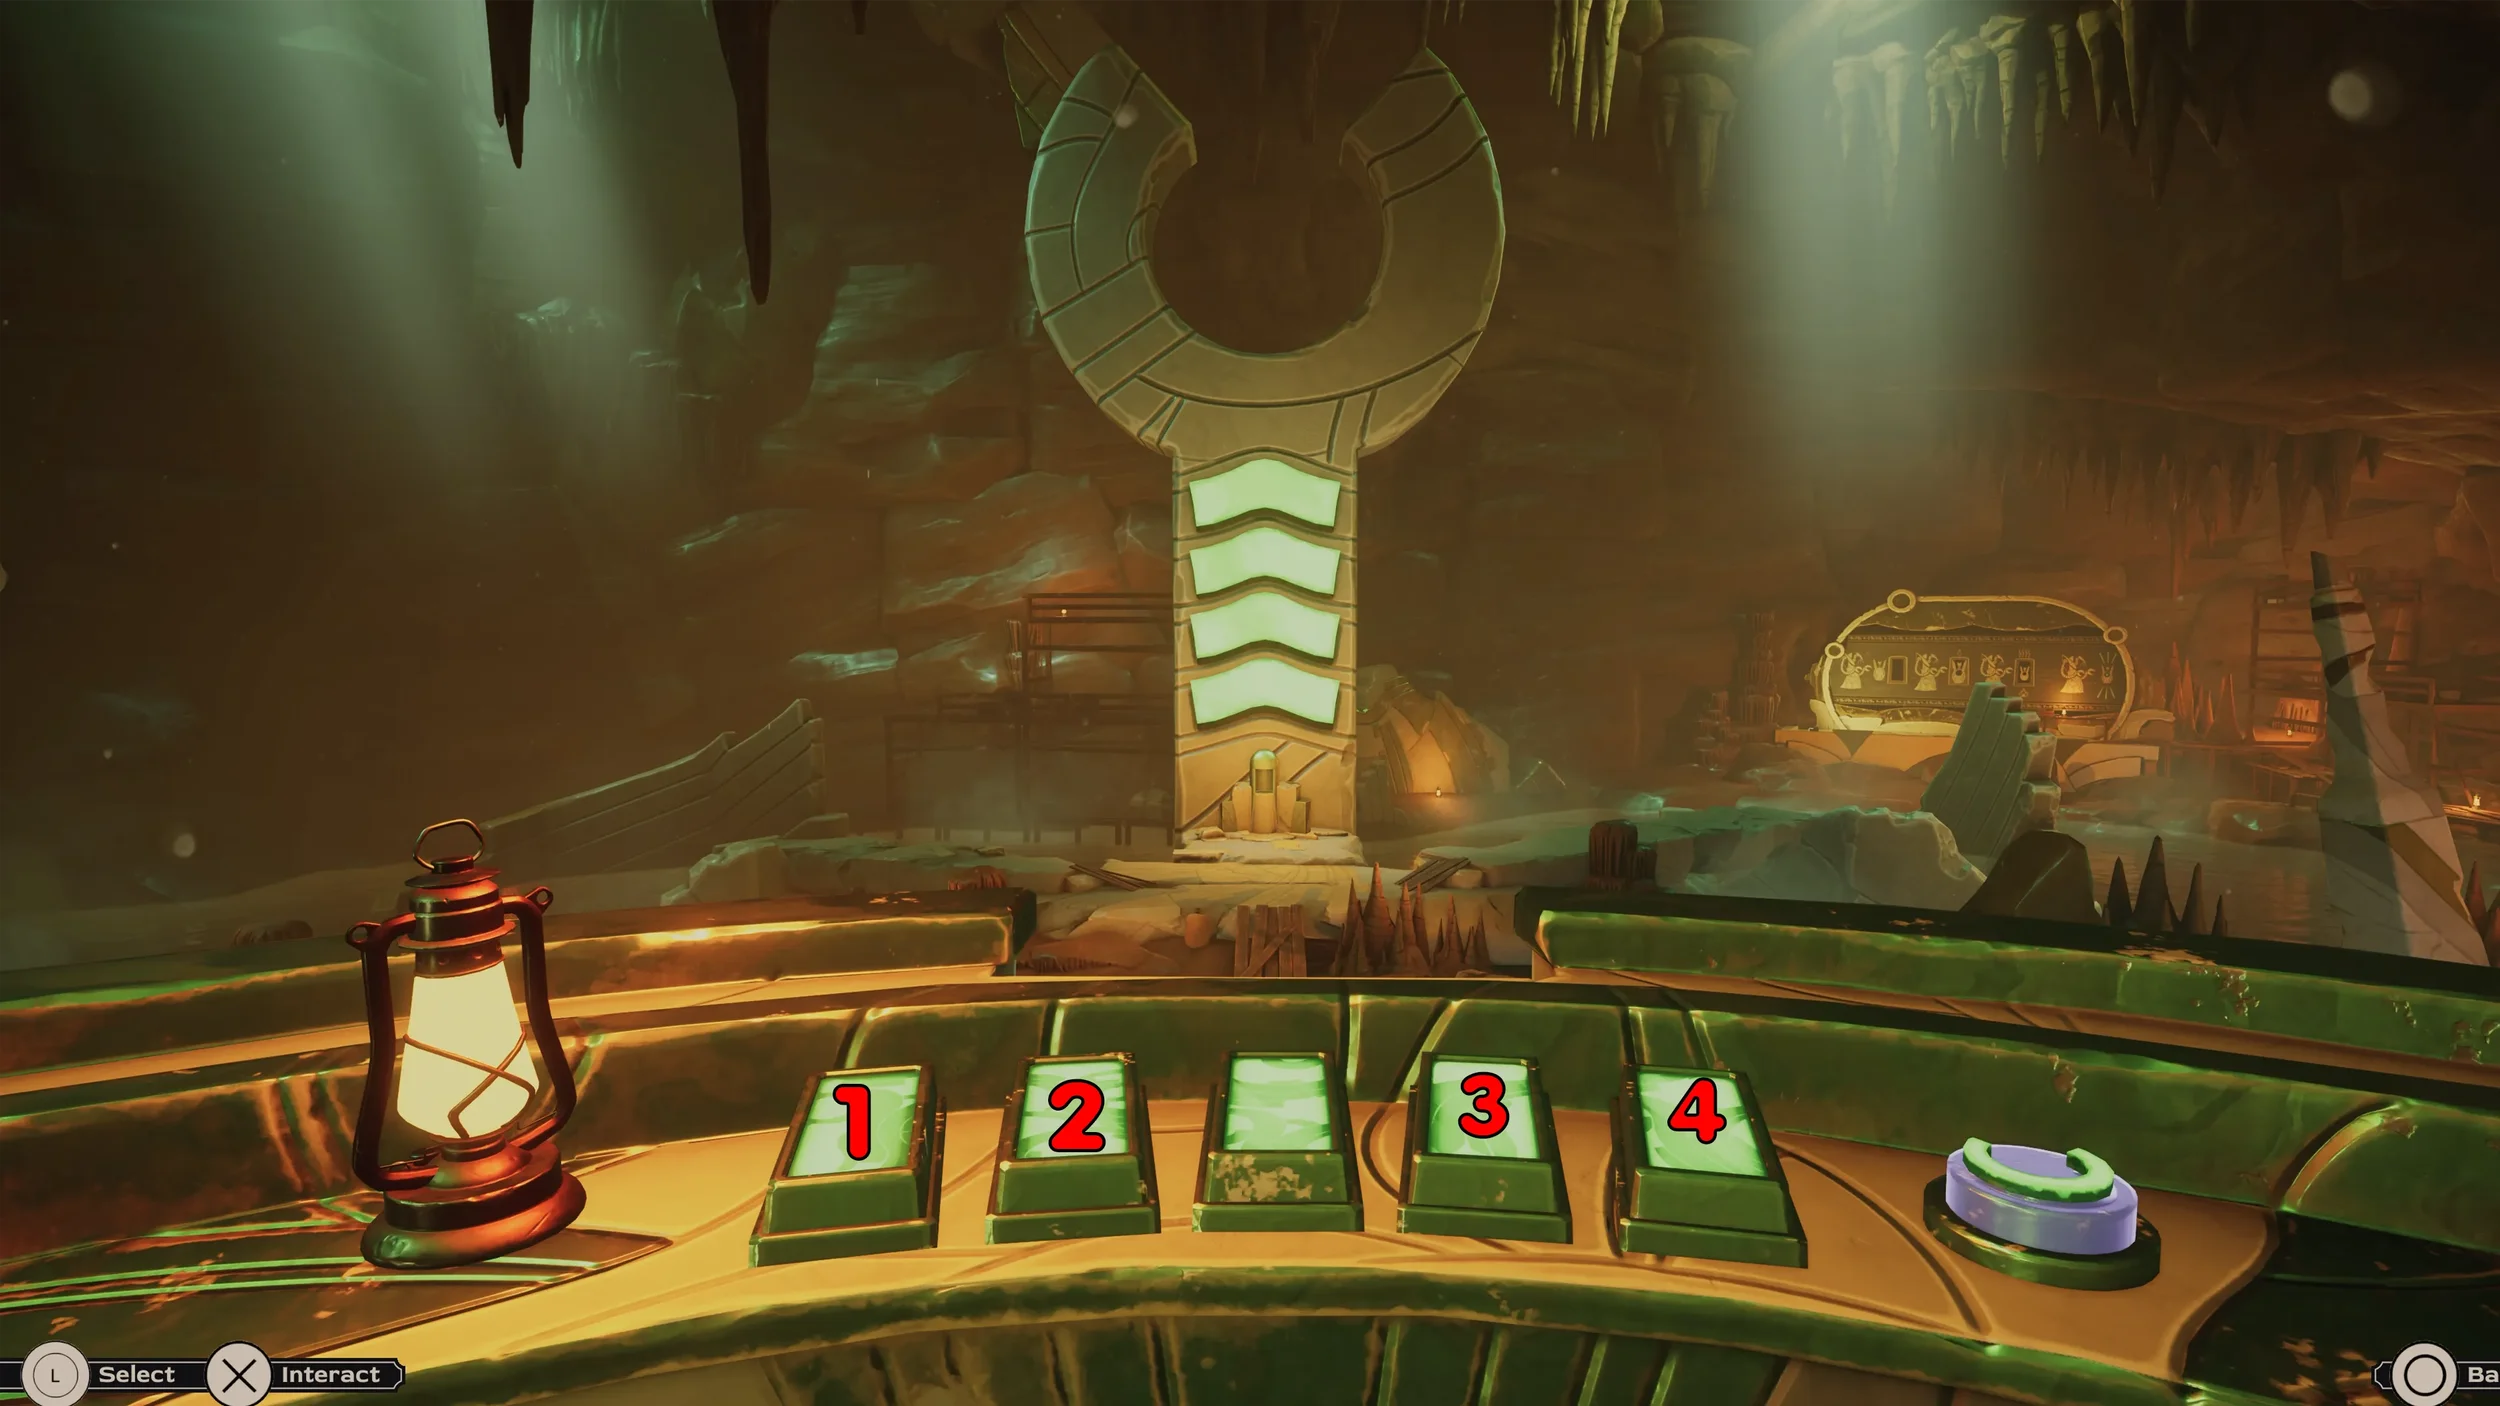
Now the towers are raised 1 level the next thing you need to do is rotate them once counter-clockwise by pressing Key 1 - Key 1 - Key 4 - Key 4 (then press the button on the right).

You can now access the tower on the left, walk down to it and go inside to inspect another Mural, this clue will show you the key combination to start the fire, which we will need in just a bit.
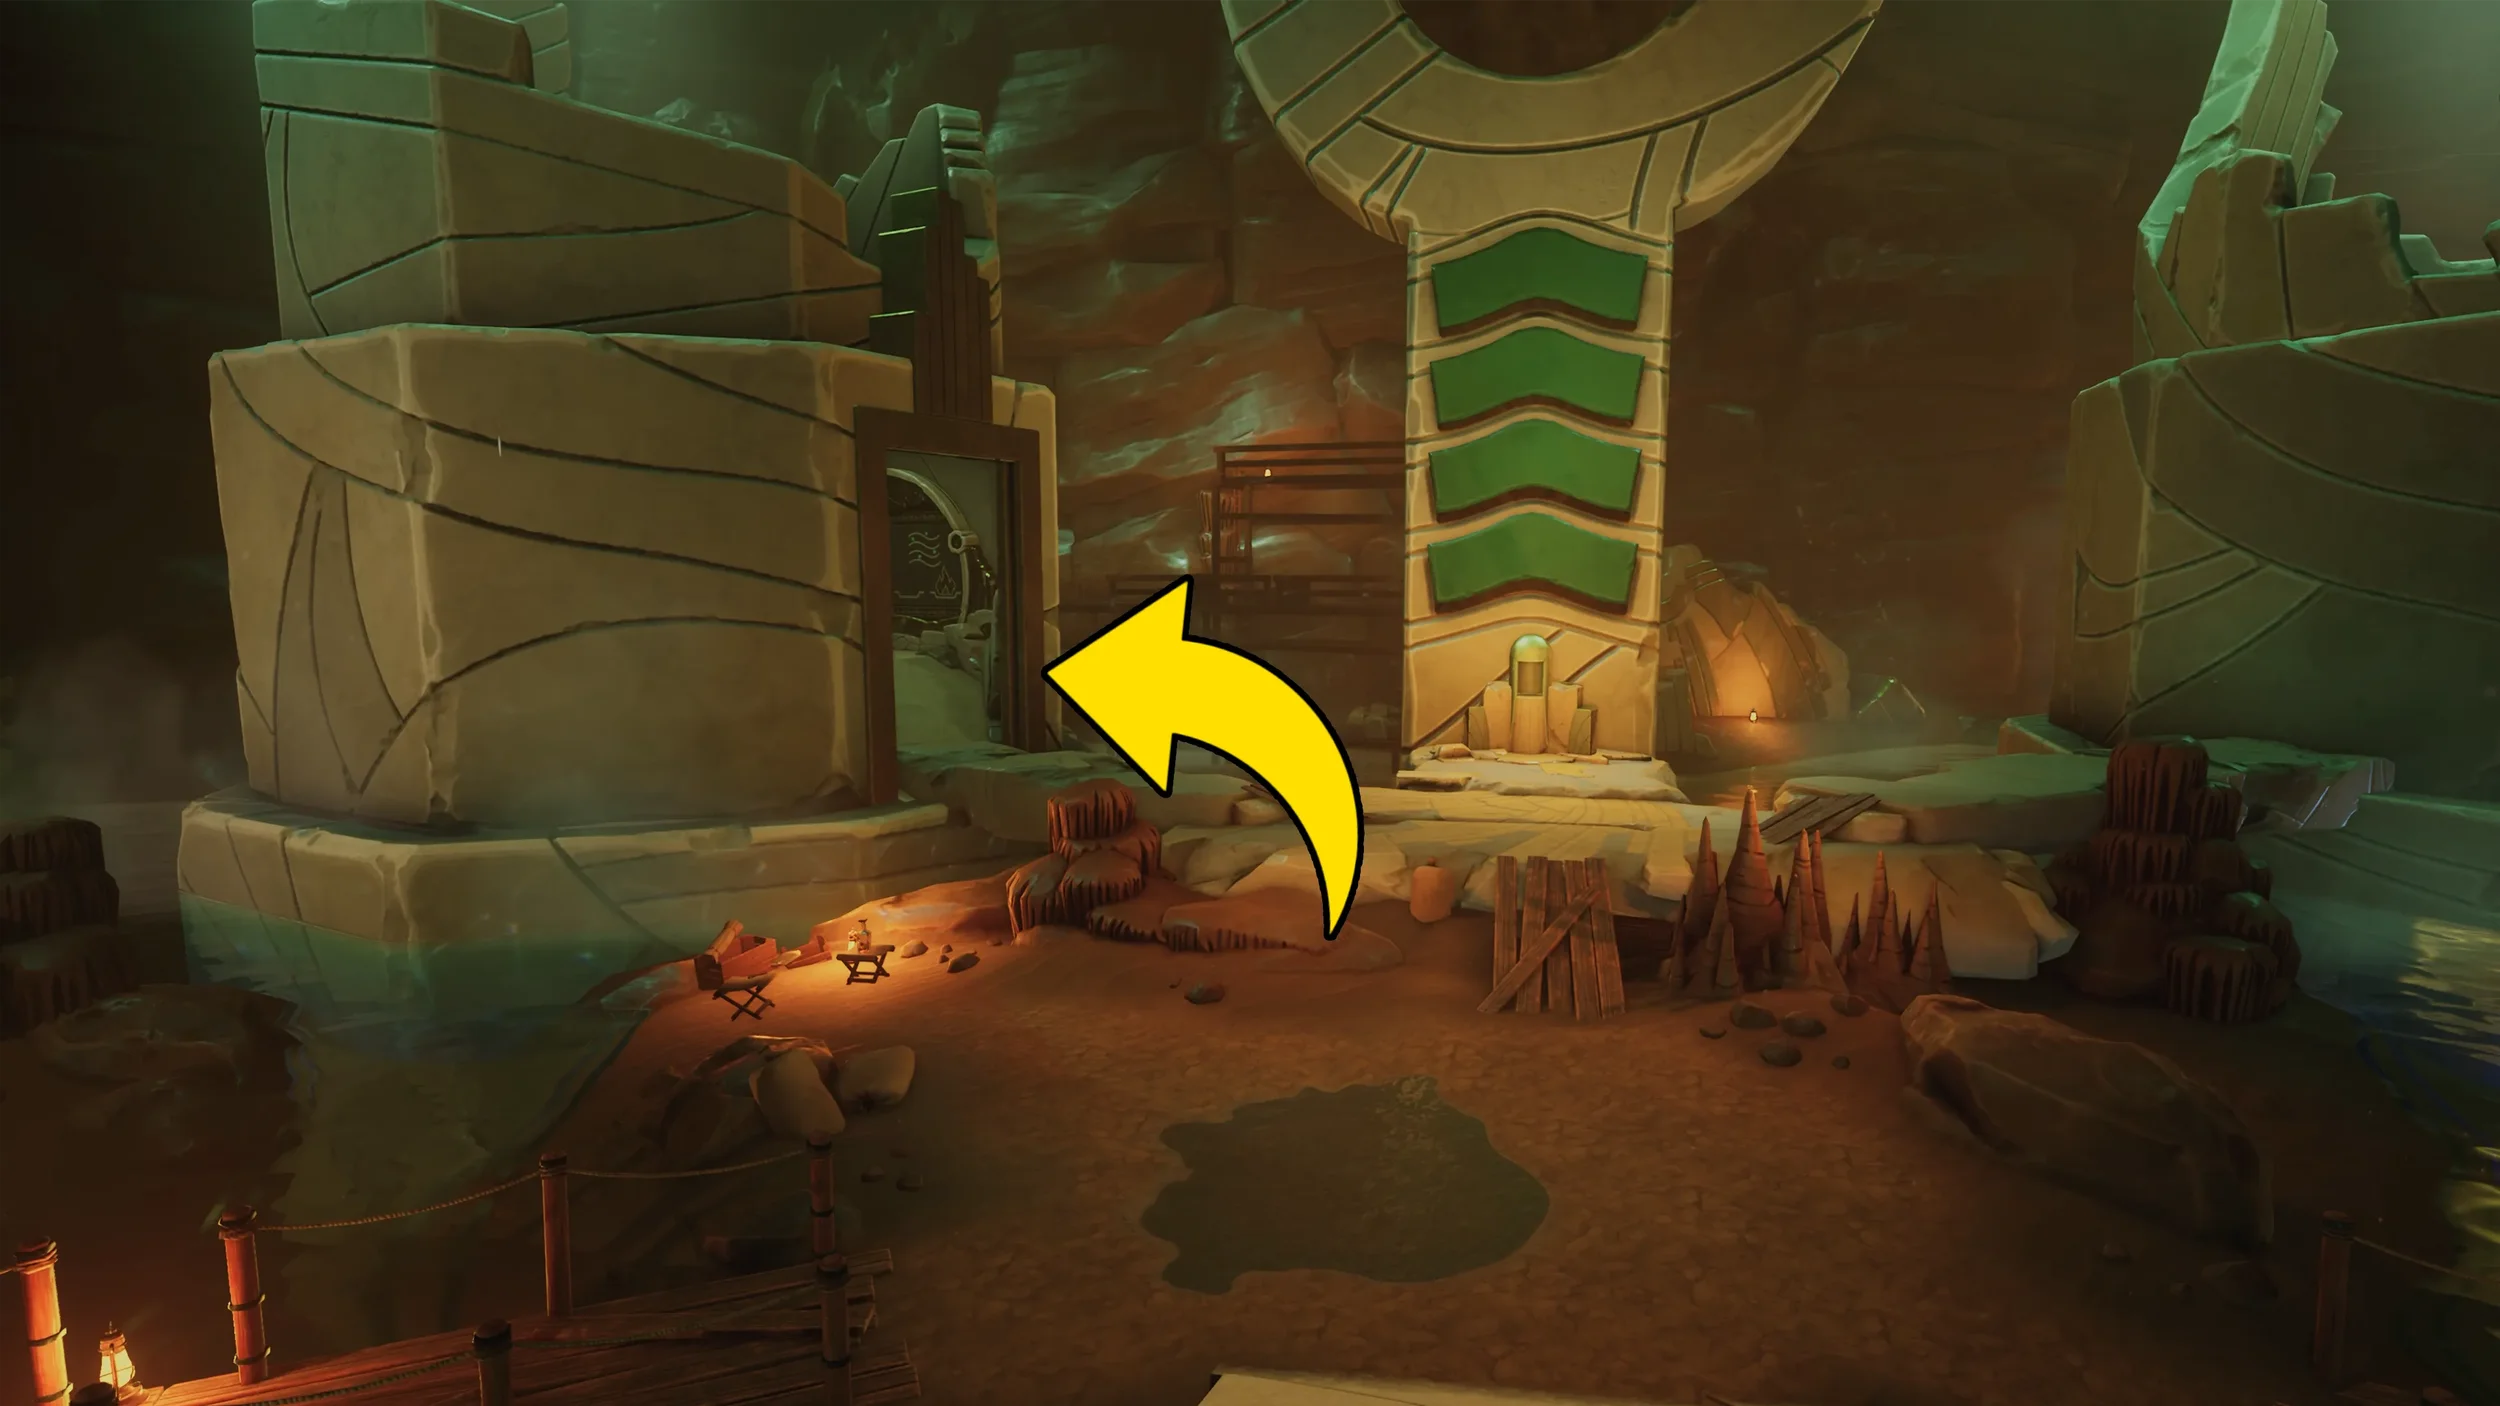
Exit back out of the tower and return to the piano keys, play the combination to raise the towers again: Key 1 - Key 2 - Key 4 - Key 5.
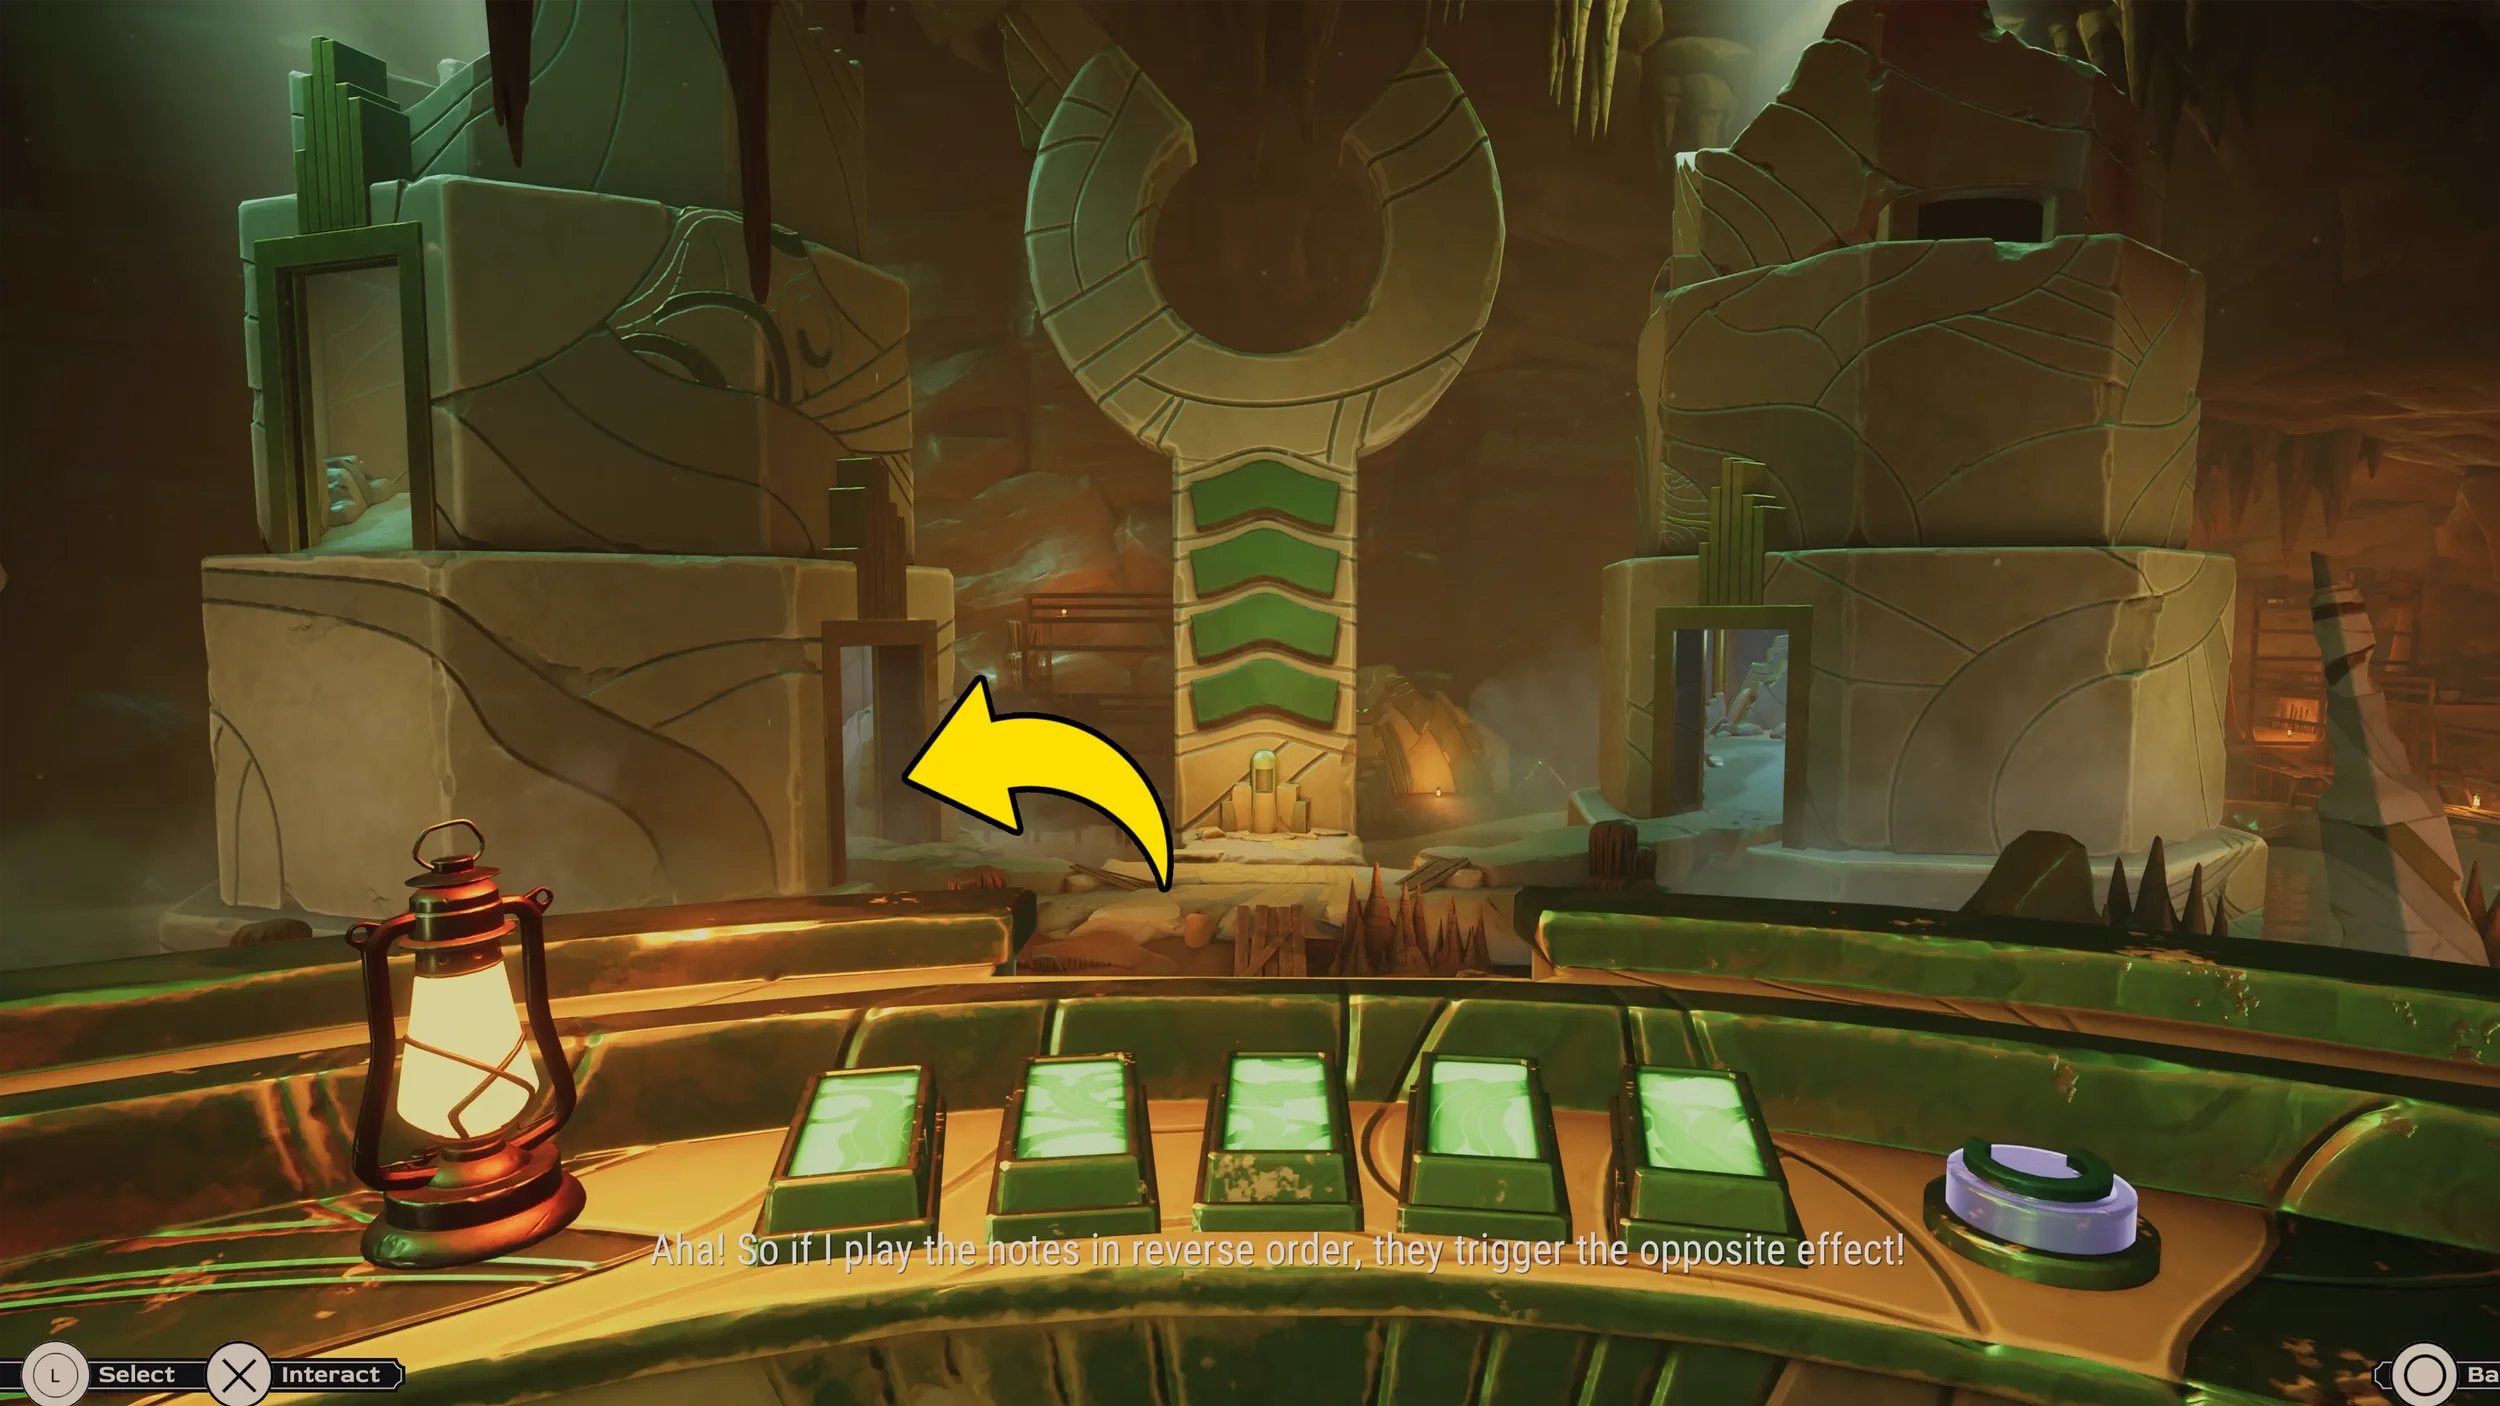
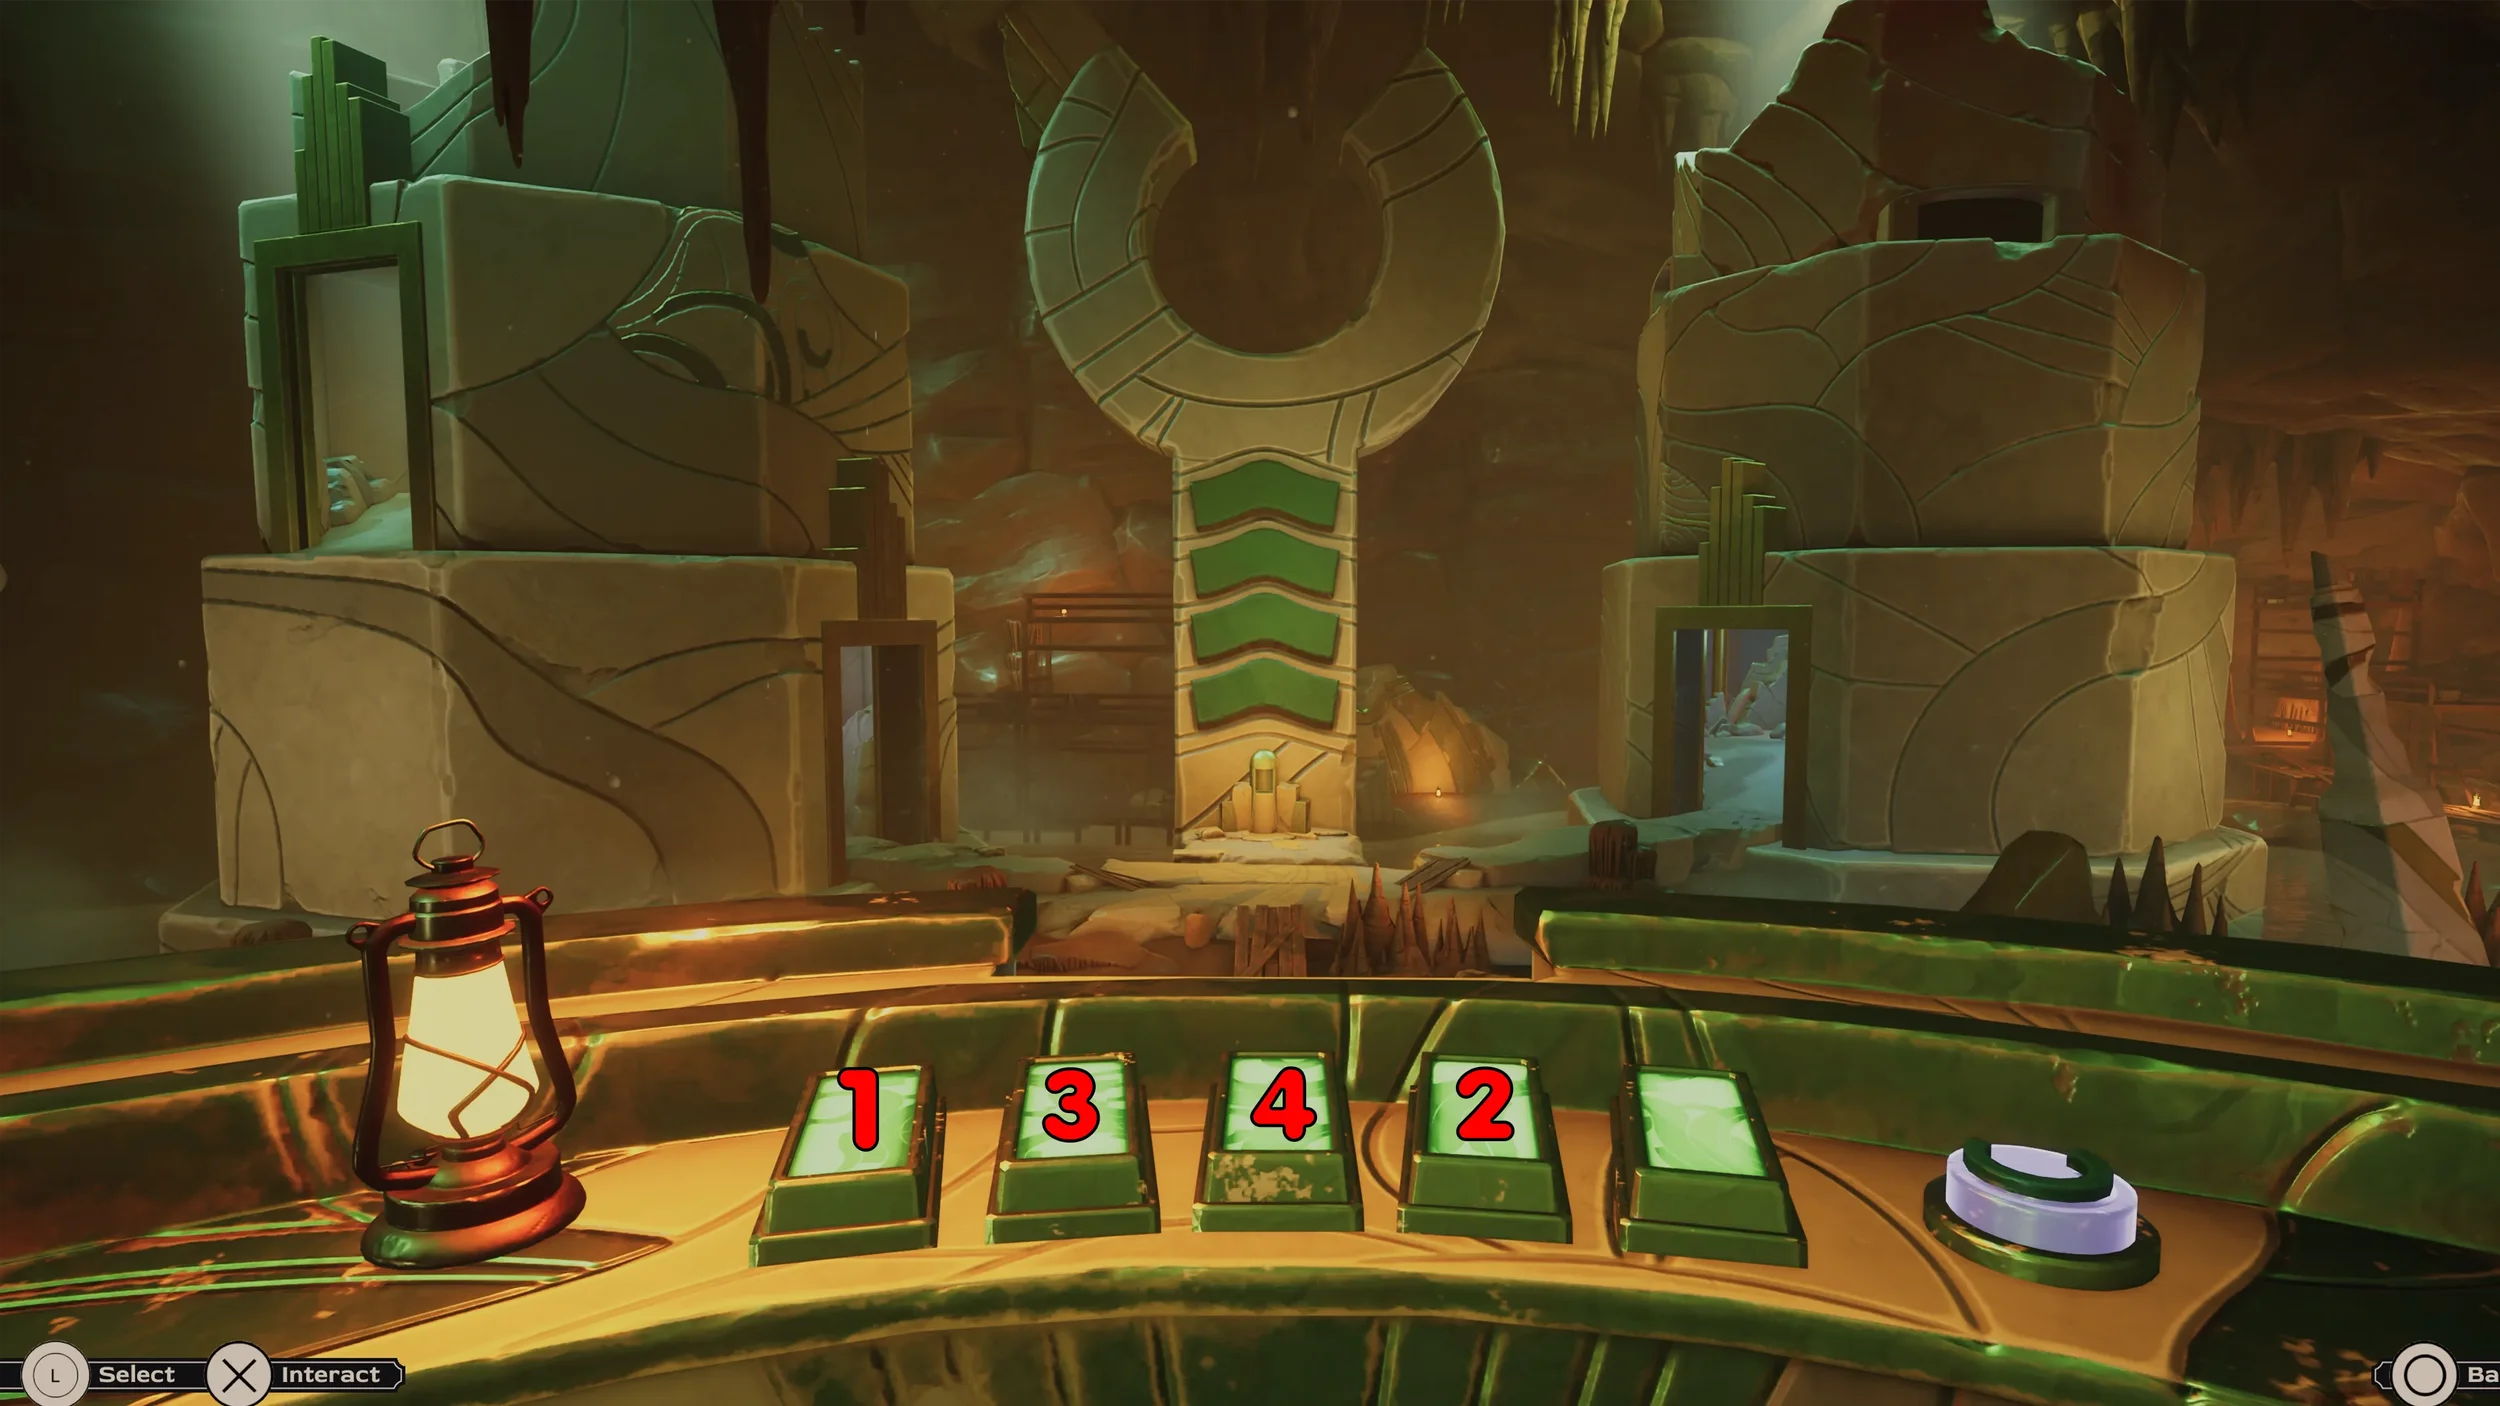
You will notice that the doors aren’t lined up with the pathway so we need to rotate the towers again, but this time we need to rotate them clockwise, to do so we use the same key combination as before but just play it in reverse so: Key 4 - Key 4 - Key 1 - Key 1.
Now the towers should be completely raise and the pathways should be lined up with the doors to both towers.
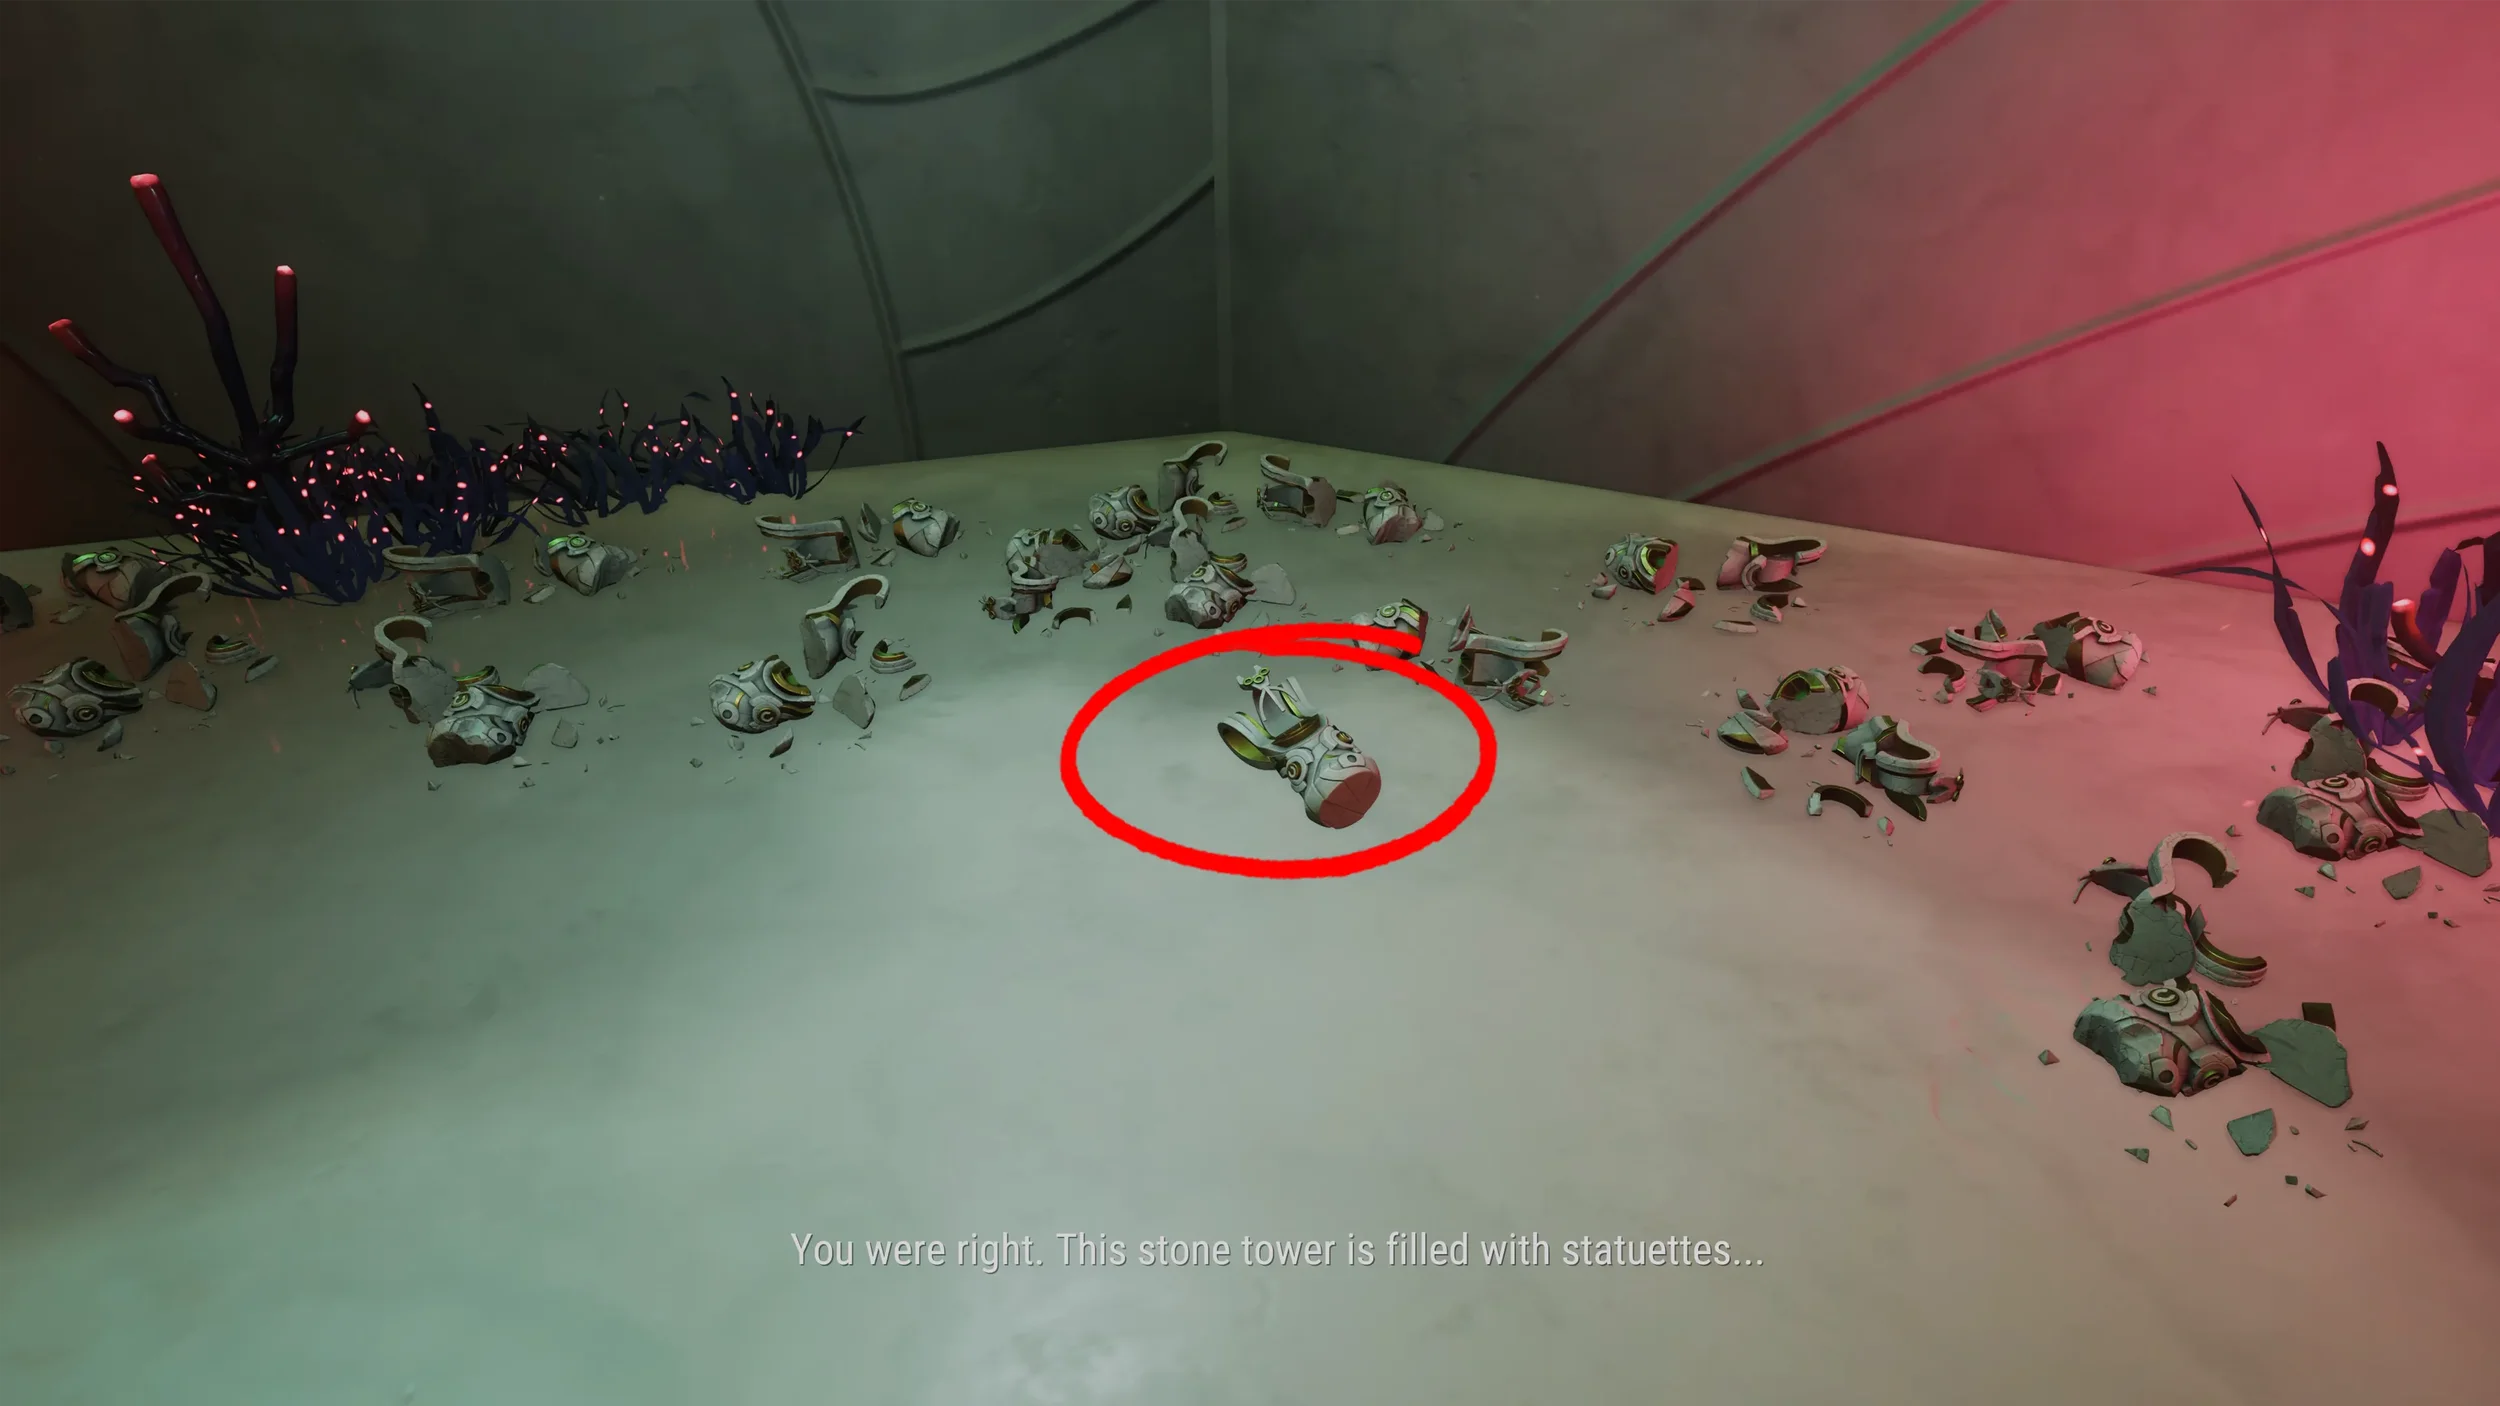
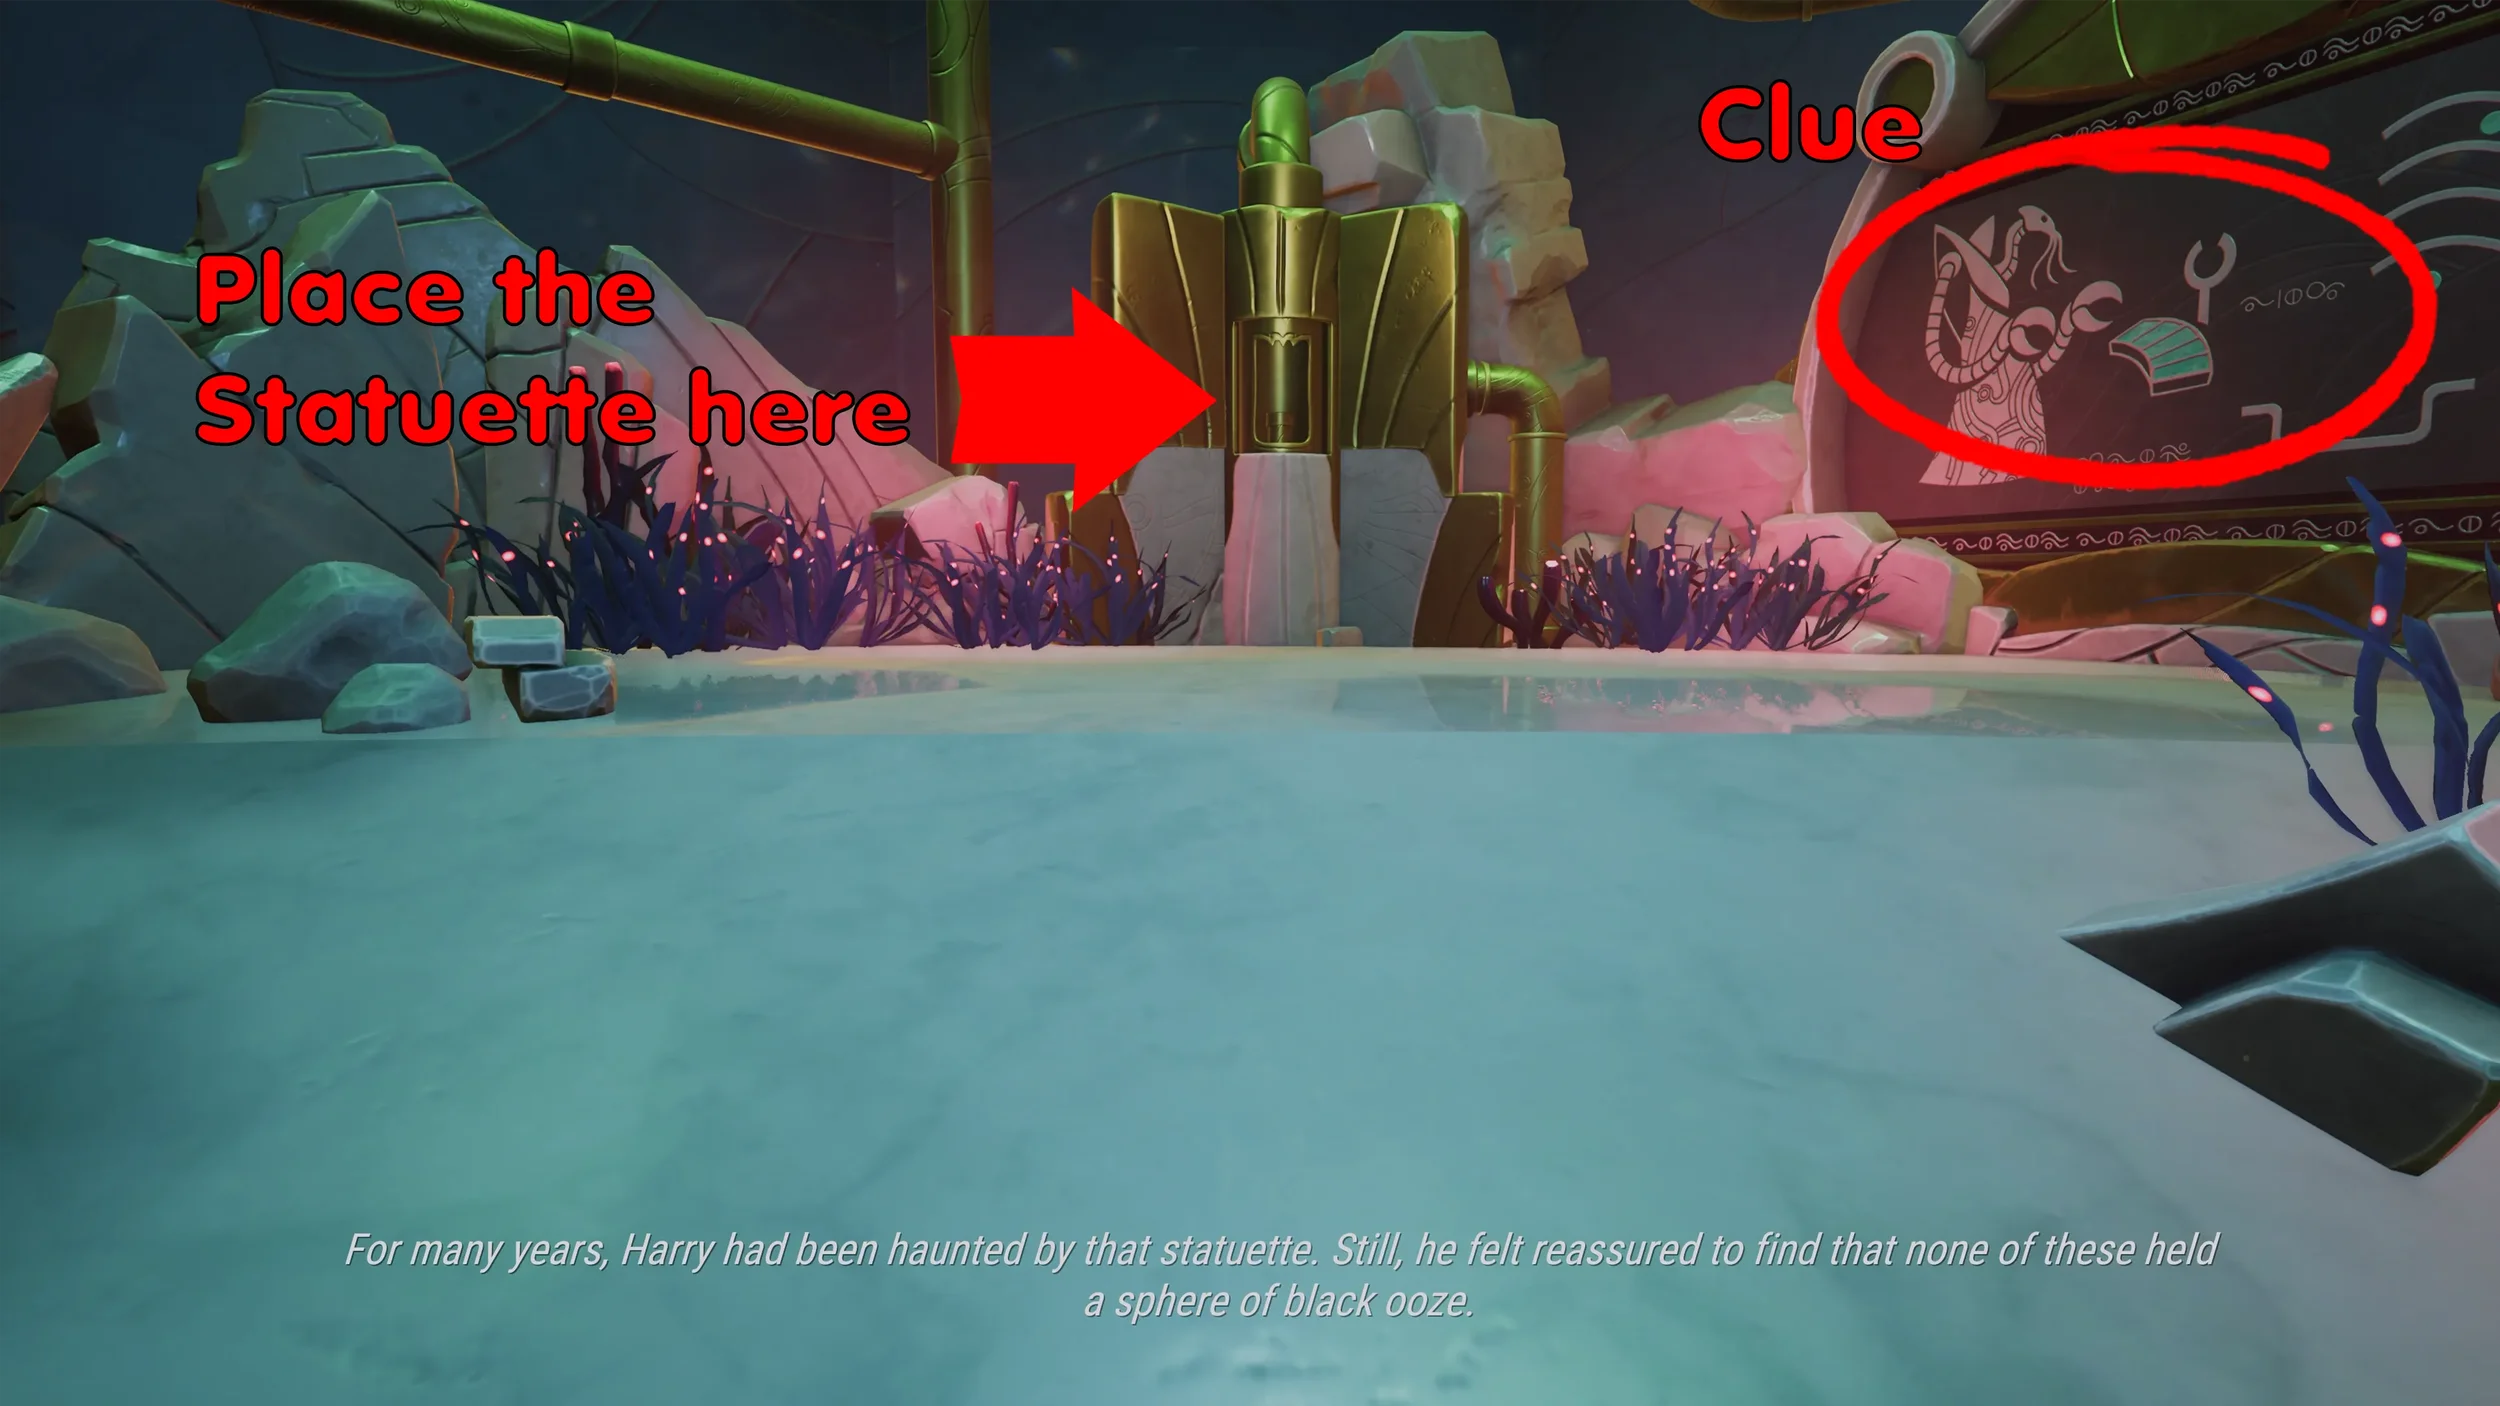
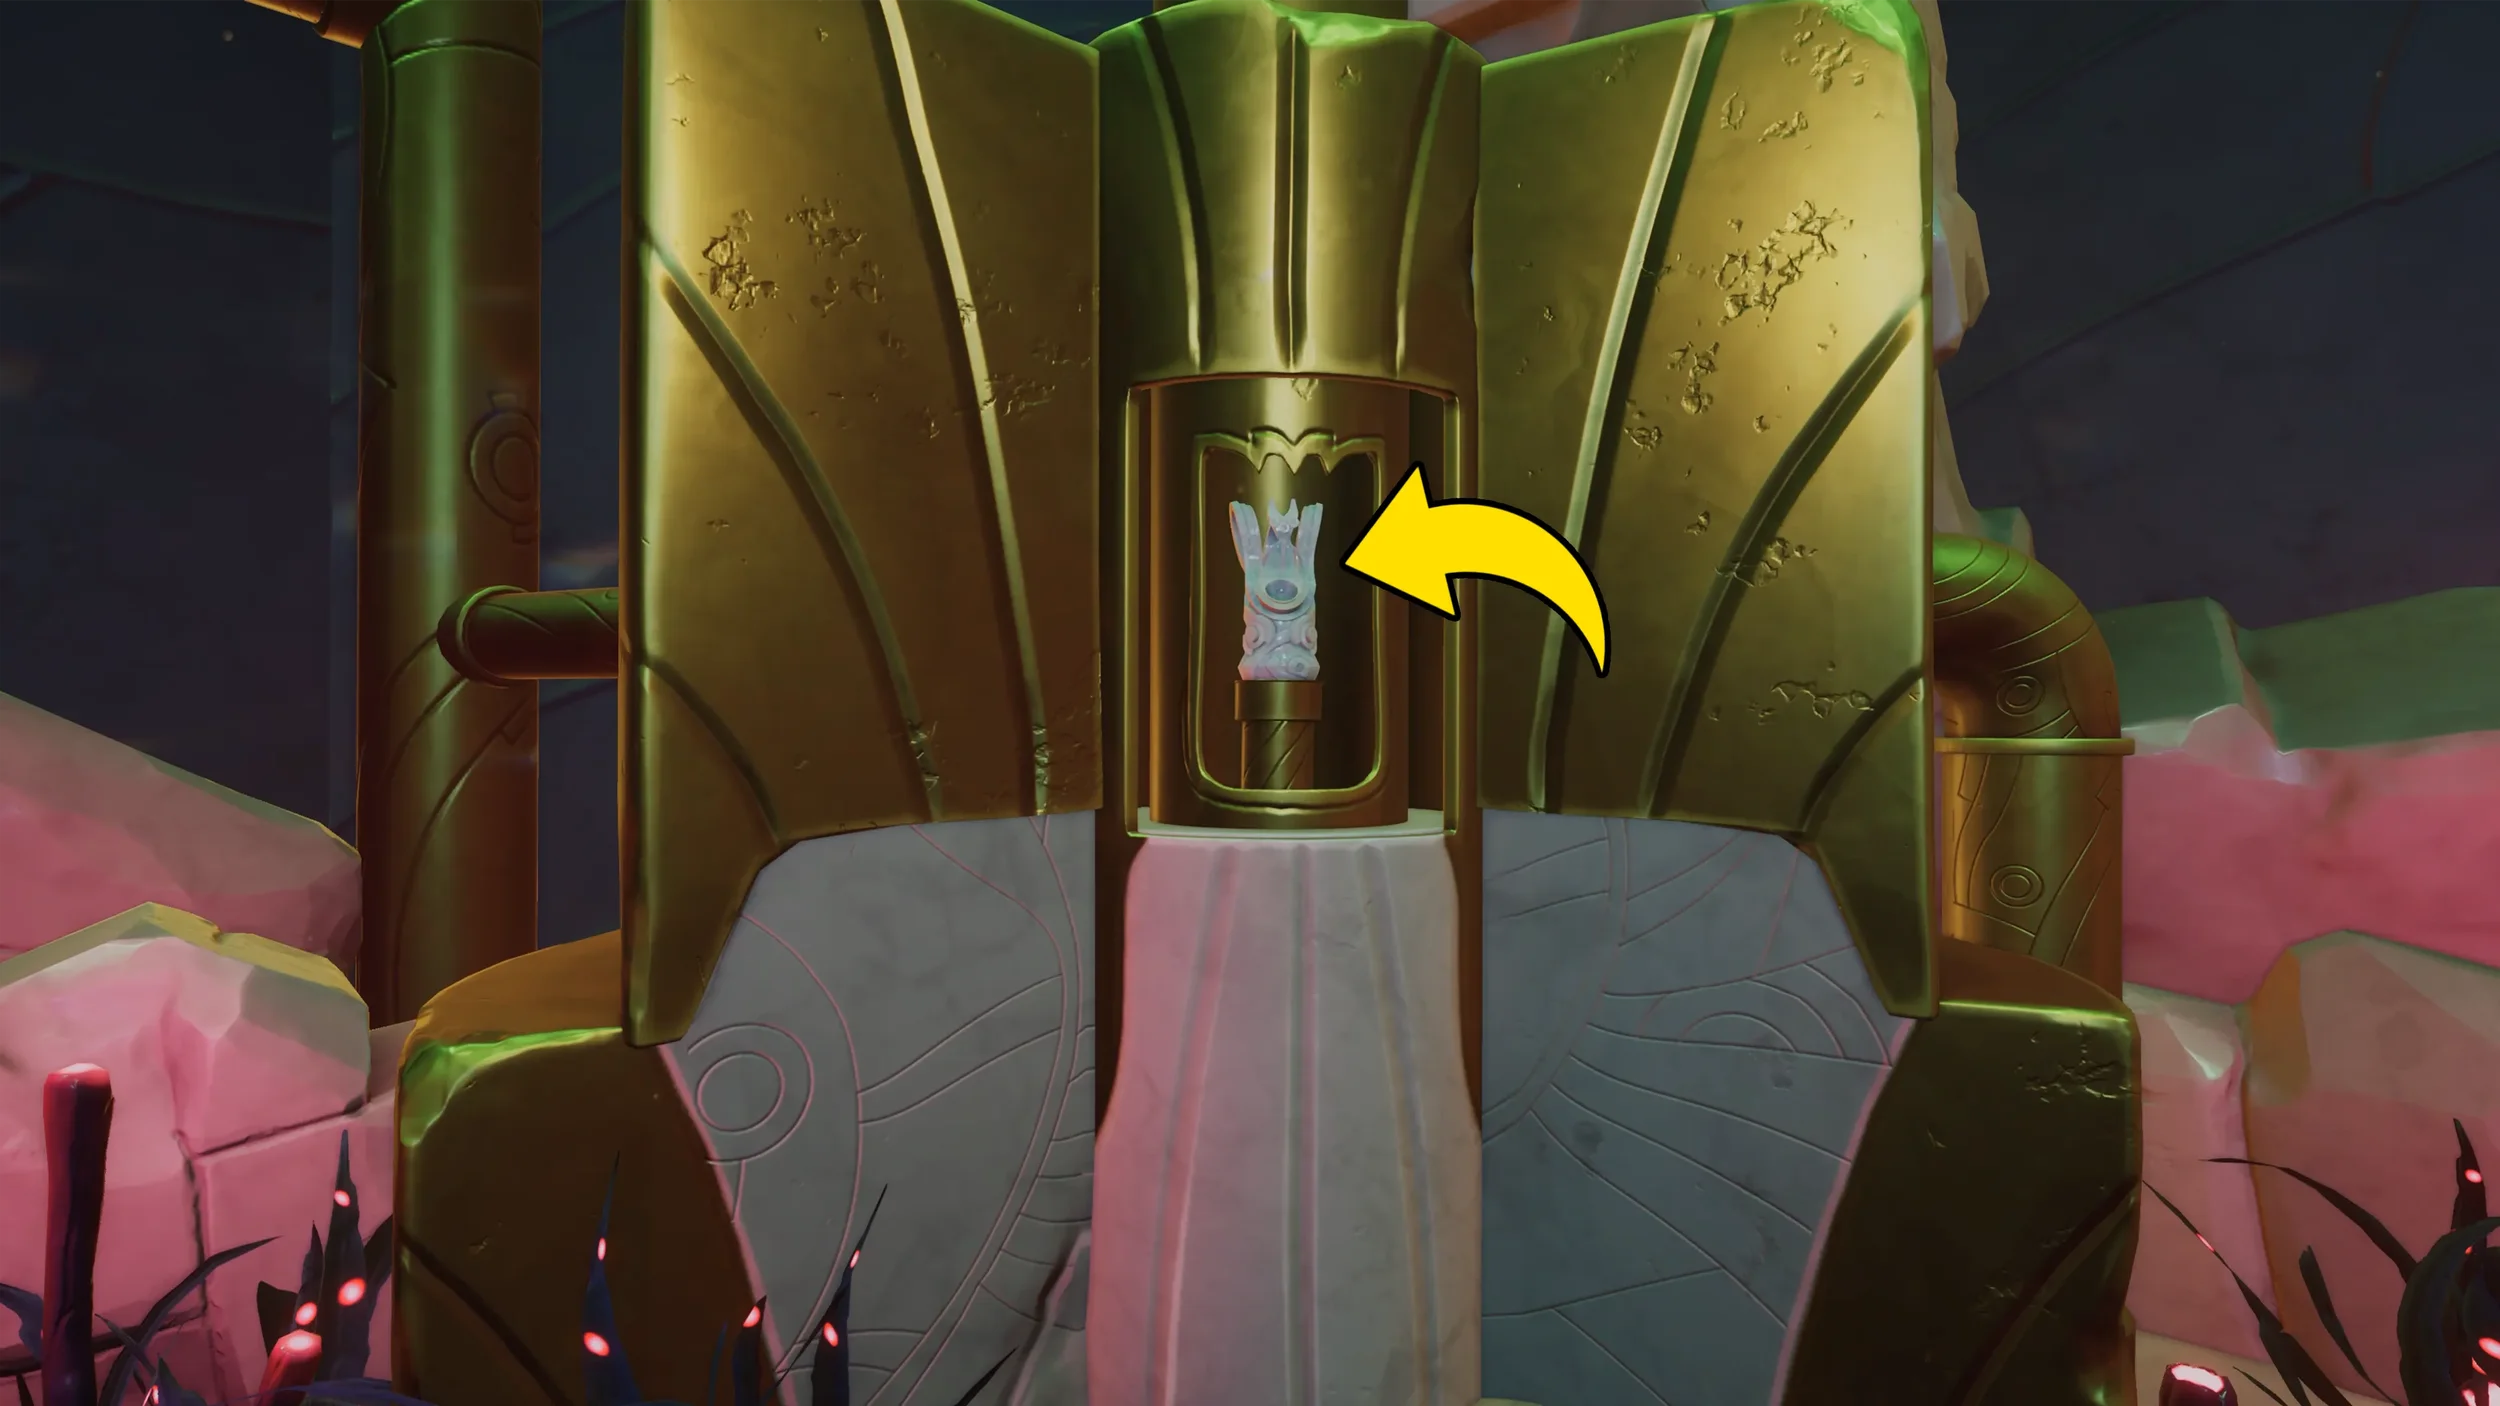
First go inside the left tower and pick up the Statuette on the ground, then place it on the pedestal inside the right side tower. After placing the Statuette in the right tower, inspect the Mural to get the clue for the combination that release black ooze.
 “Best Served Cold” Trophy, to obtain it all we need to do is freeze the tower while the Statuette is inside, to do so just play the fire combination in reverse, so: Key 3 - Key 5 - Key 2 - Key 4, then go down into the right side tower and interact with the frozen Statuette to get the Trophy.
Now it is finally time to finish the puzzle, so go back to the piano keys and play the black ooze combination: Key 1 - Key 4 - Key 2 - Key 3. This will release black ooze over the tower, directly after this play the fire combination: Key 4 - Key 2 - Key 5 - Key 3. You can then go down to collect the Statuette from the right tower and place it on the center pedestal between the two towers to send it to Eva.

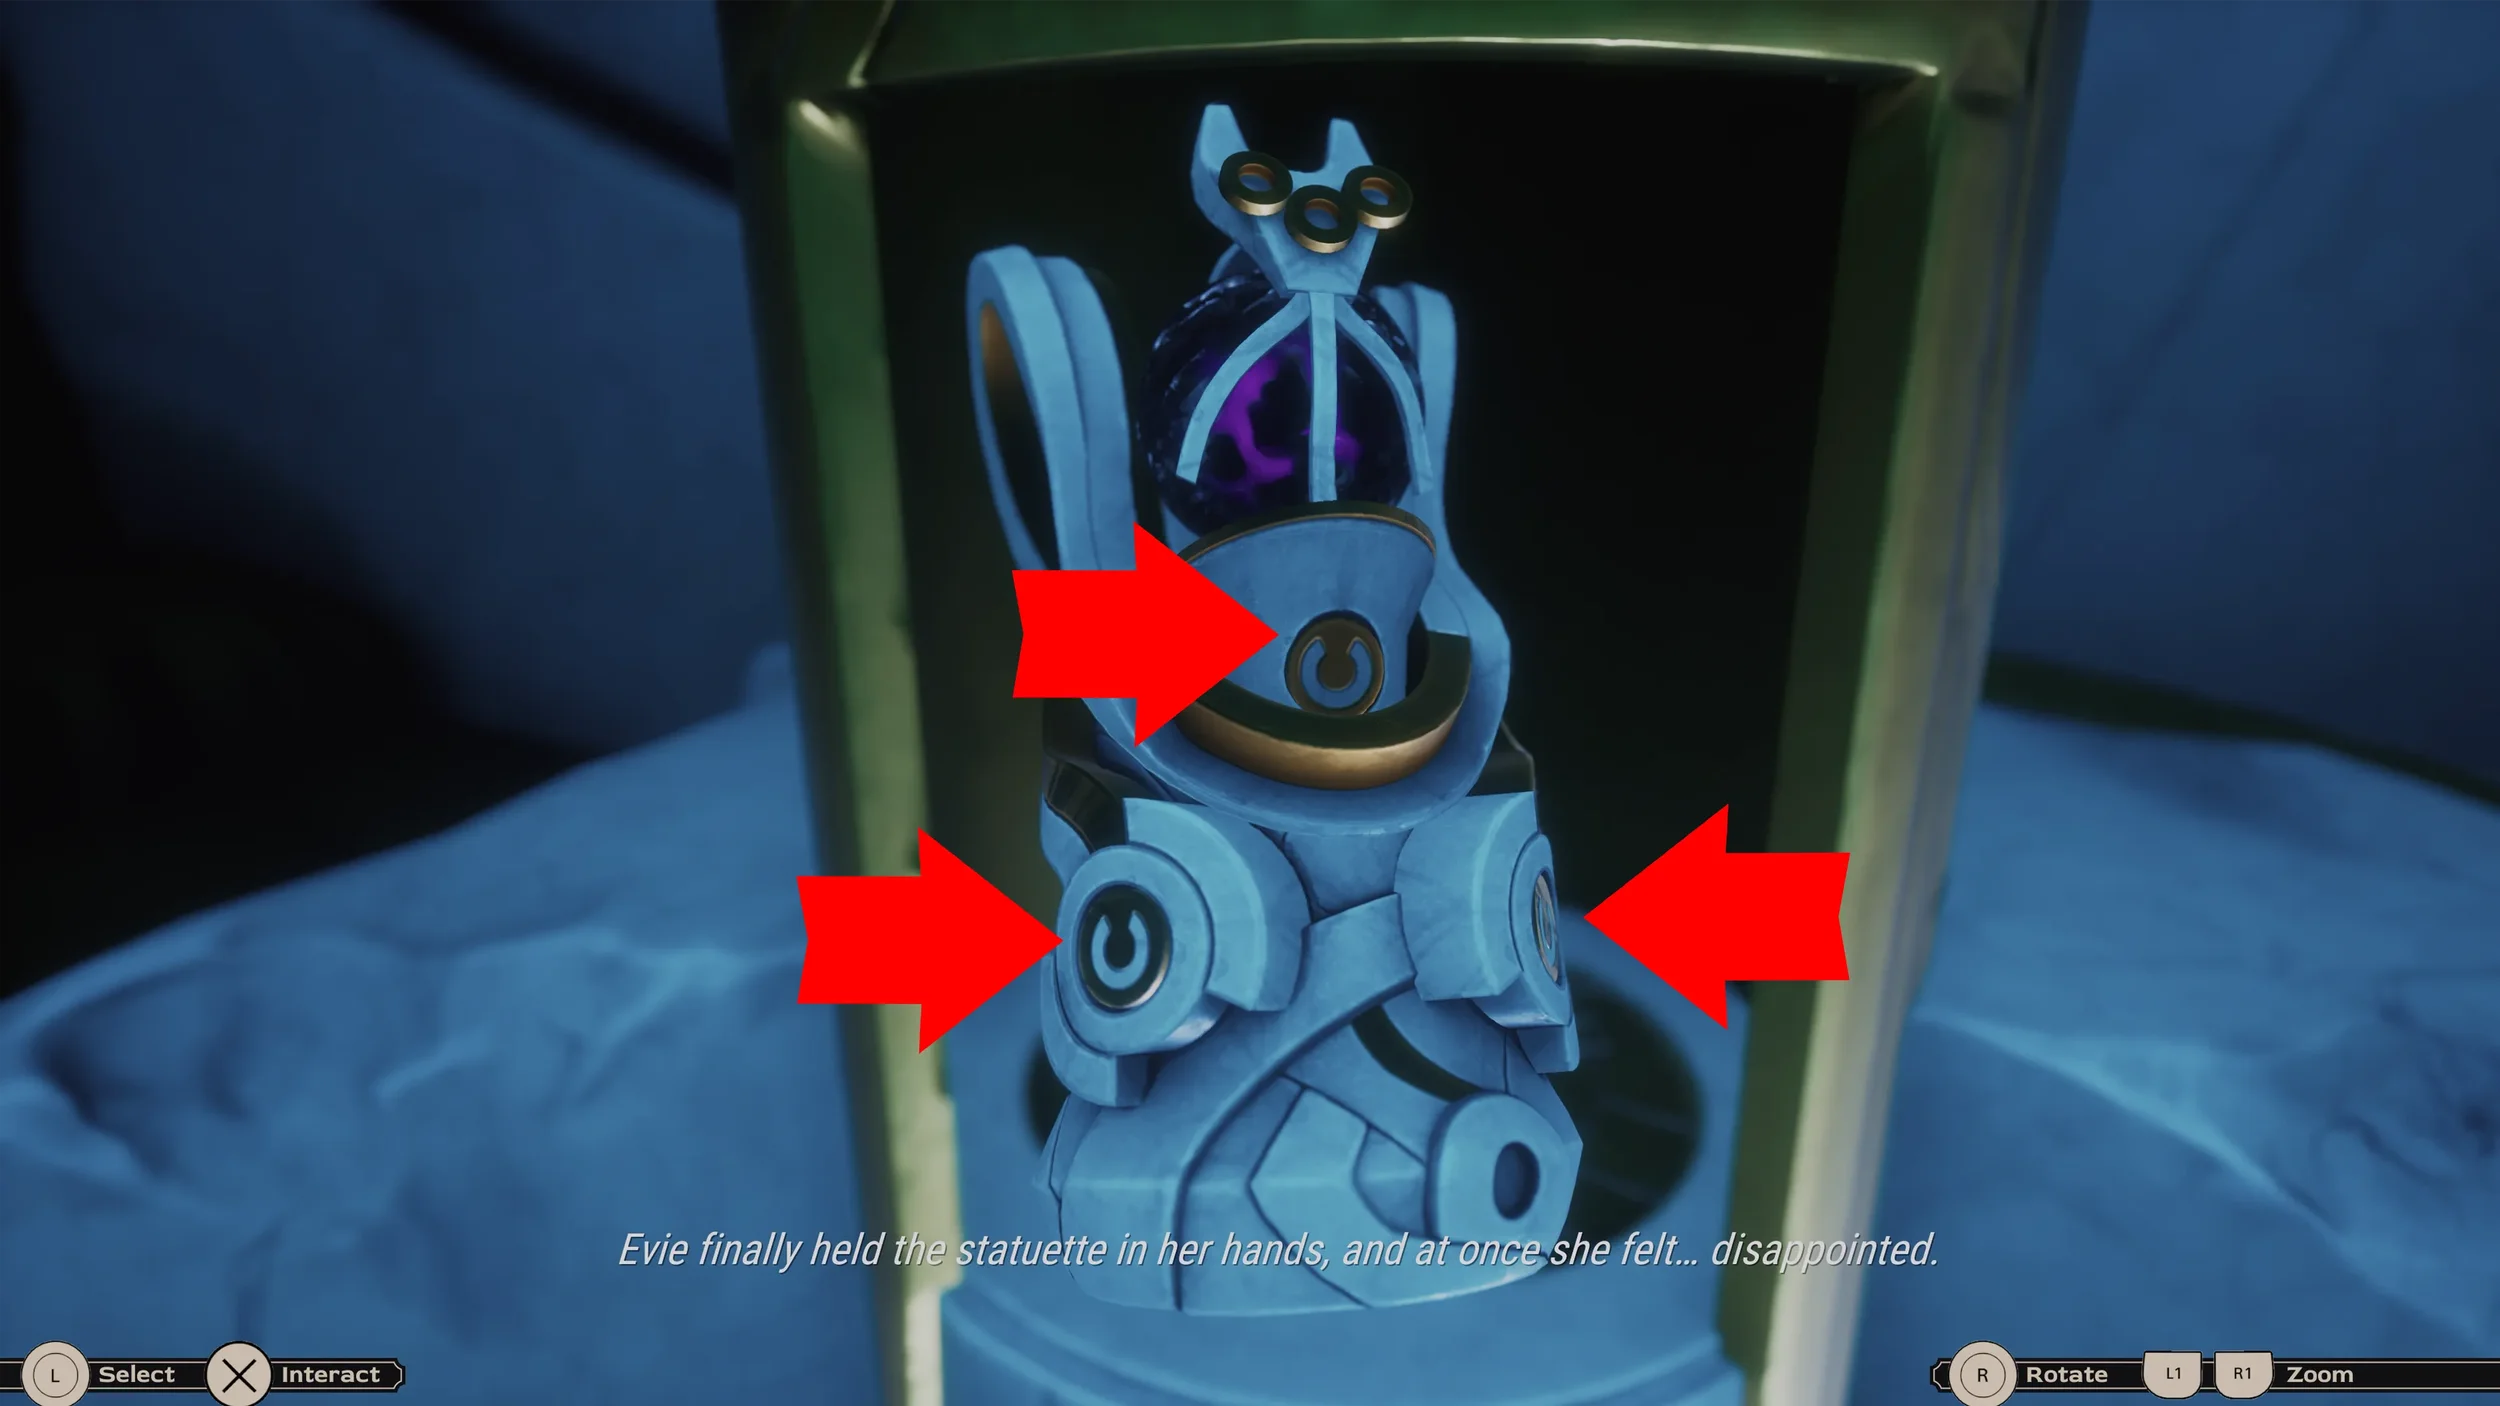
You will now regain control of Eva, pick up the Statuette that will be right in front of you and press the 3 buttons on it.
You can now get back into the water by interacting with the diving suit where you left it. Simply continue walking back along the same path that you came from until a cutscene plays.
 “Unexpected Company” Trophy for completing Chapter 2.
Chapter 1 ⮨ ➥ Chapter 3