
Call of The Elder Gods 100% Walkthrough - Chapter 6

Great Stone Door Puzzle
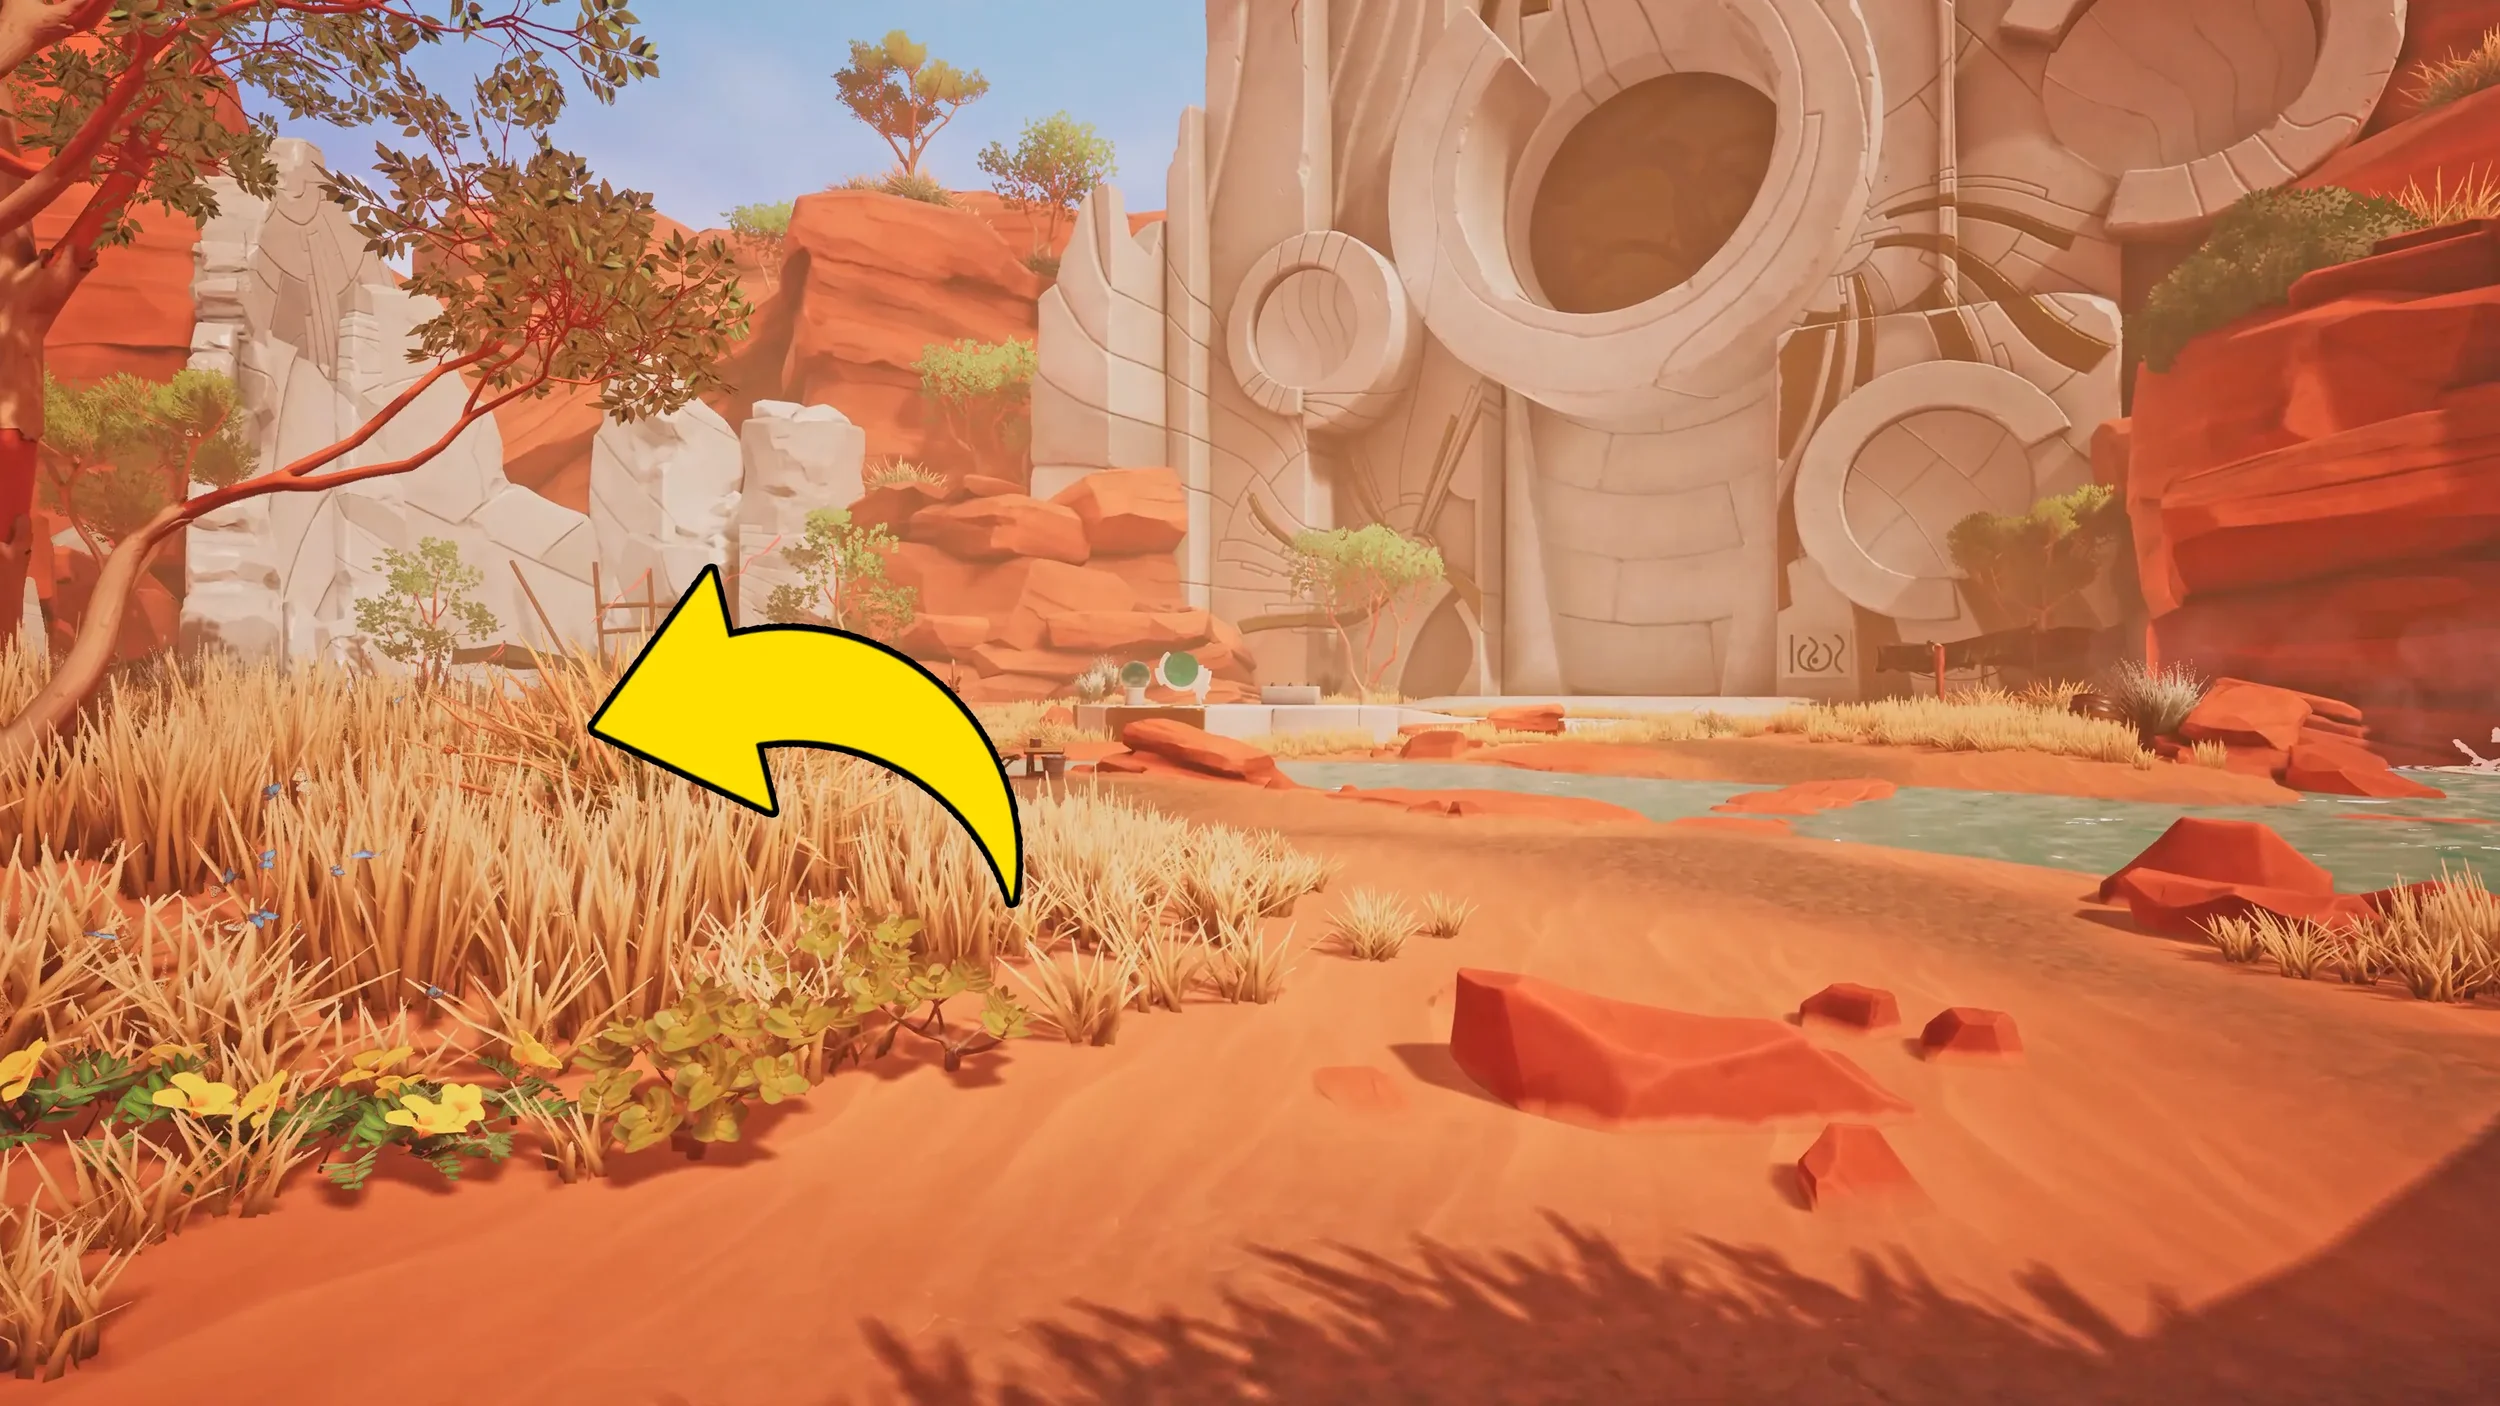
We start Chapter 6 in the Great Sandy Desert of Australia, advance to the main open area where we are going to be gathering a few clues before we start the main puzzle.
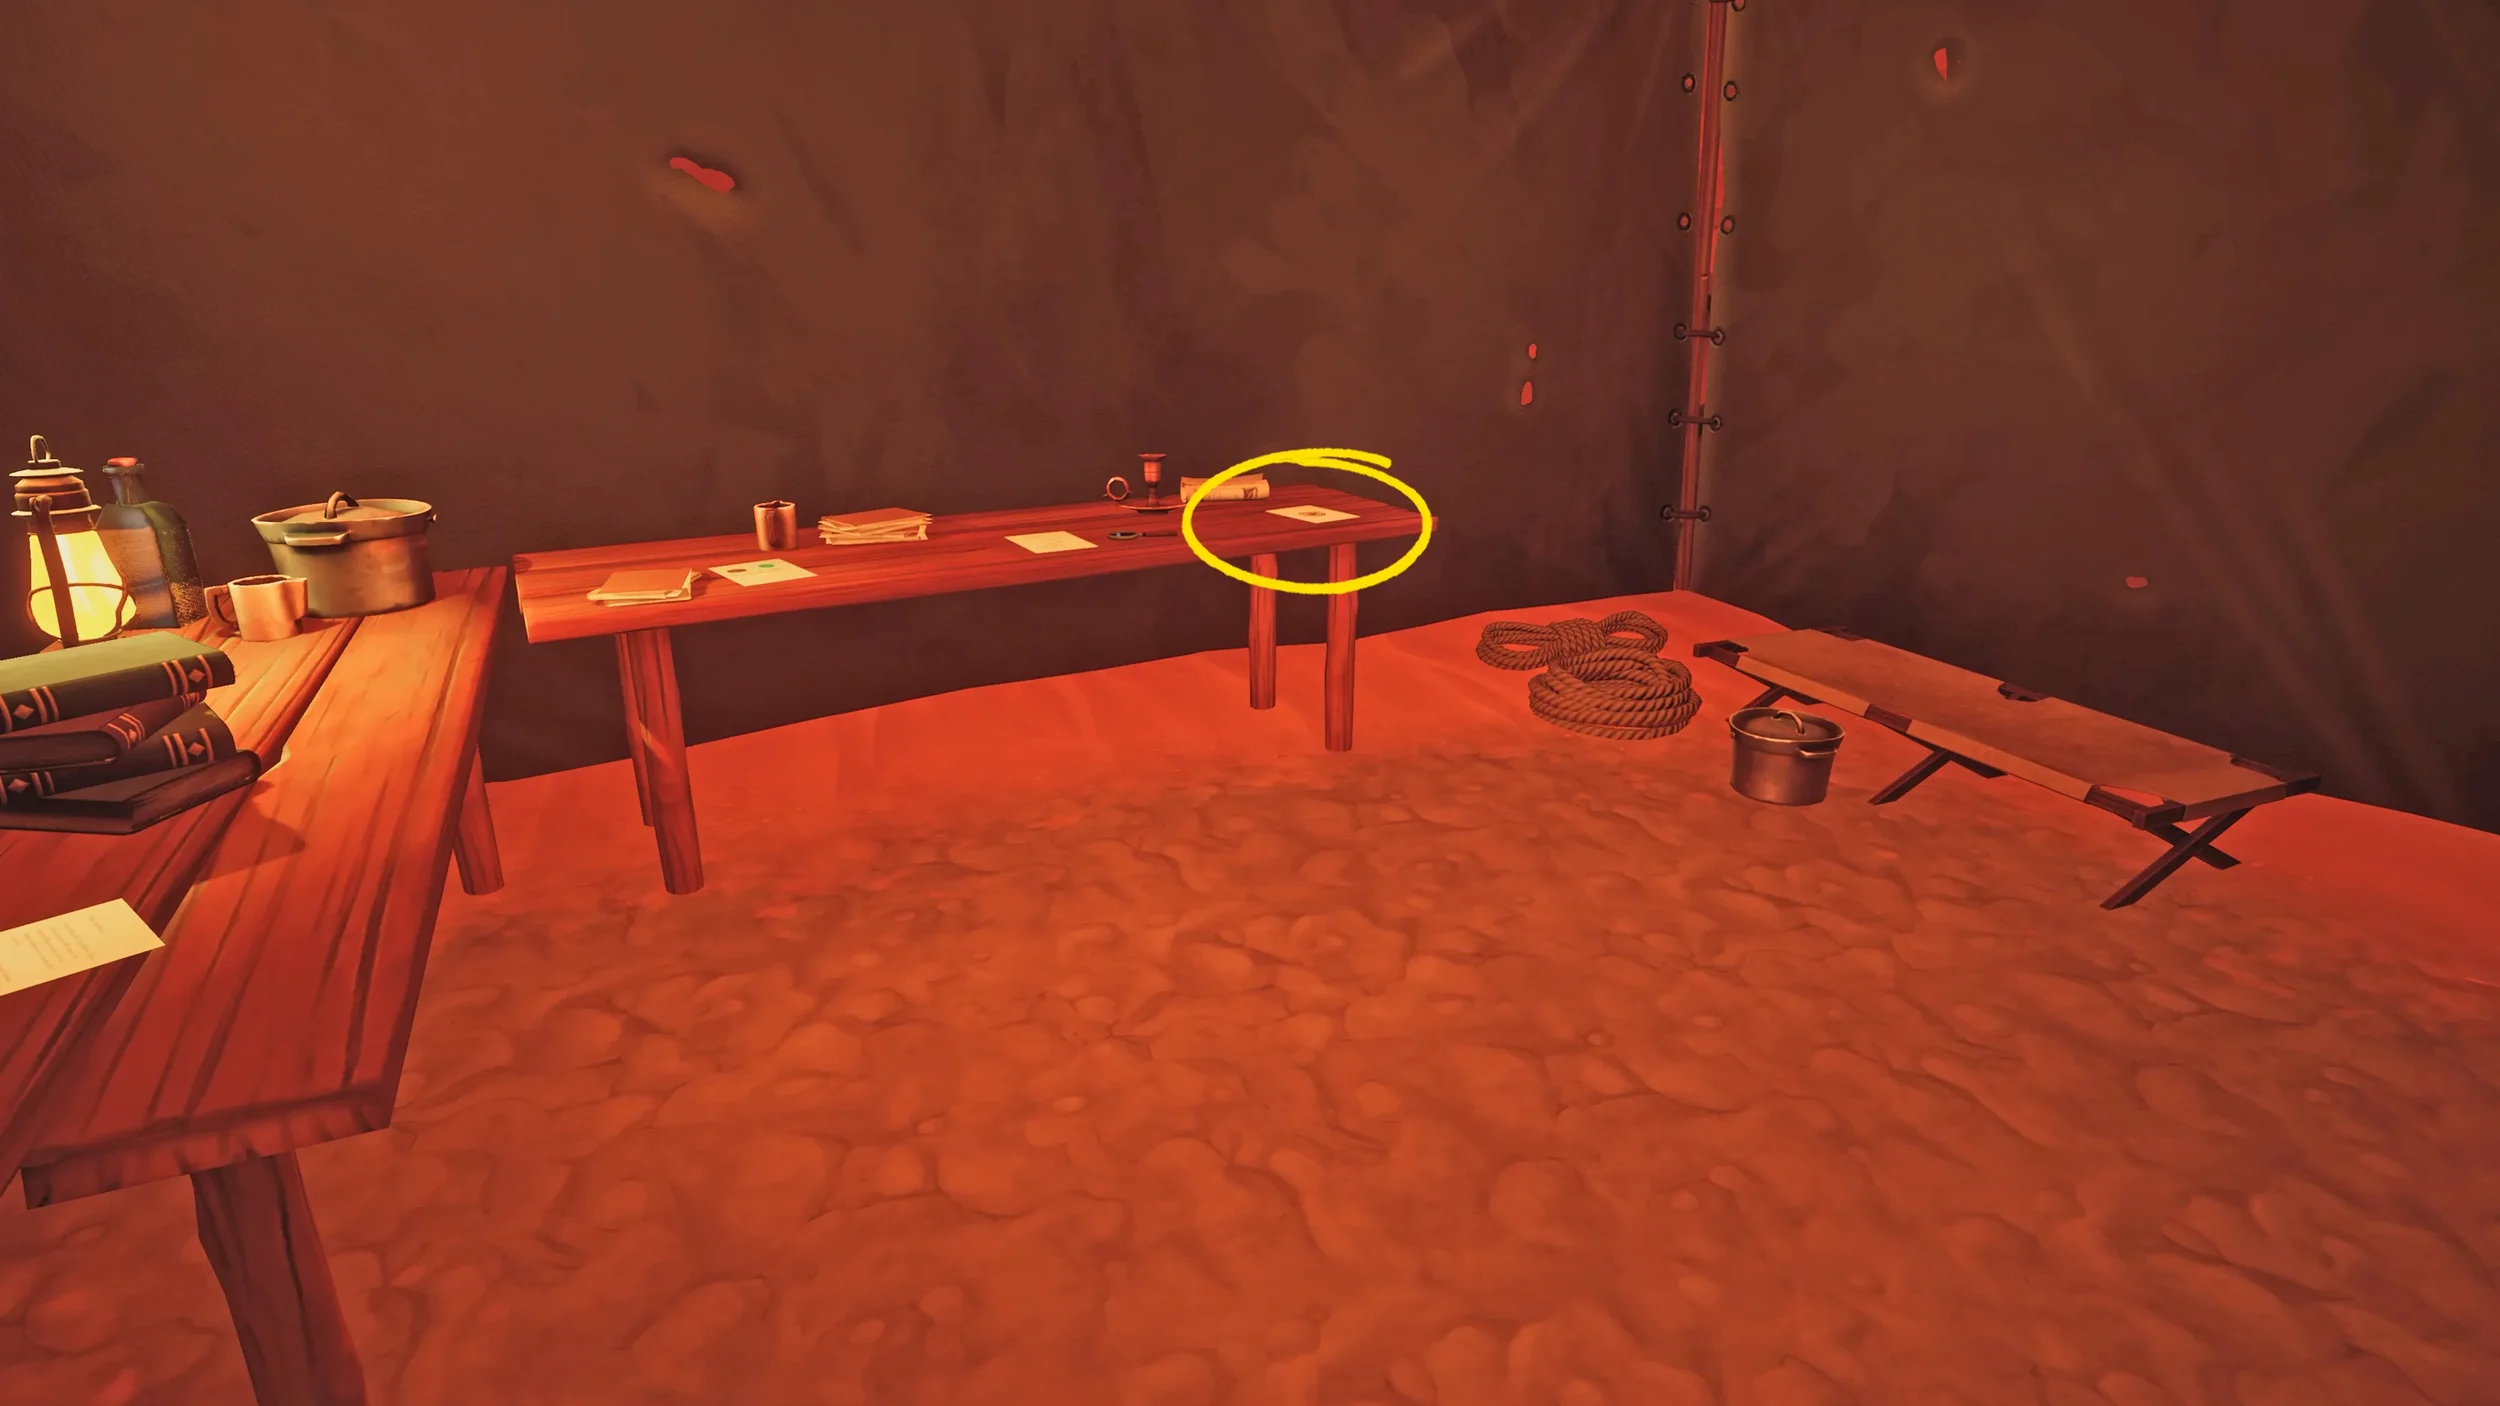
As soon as we reach the open area, go to the small camp on your left, here, the paper on the far end of the table is going to count as a clue, so go ahead and inspect it.
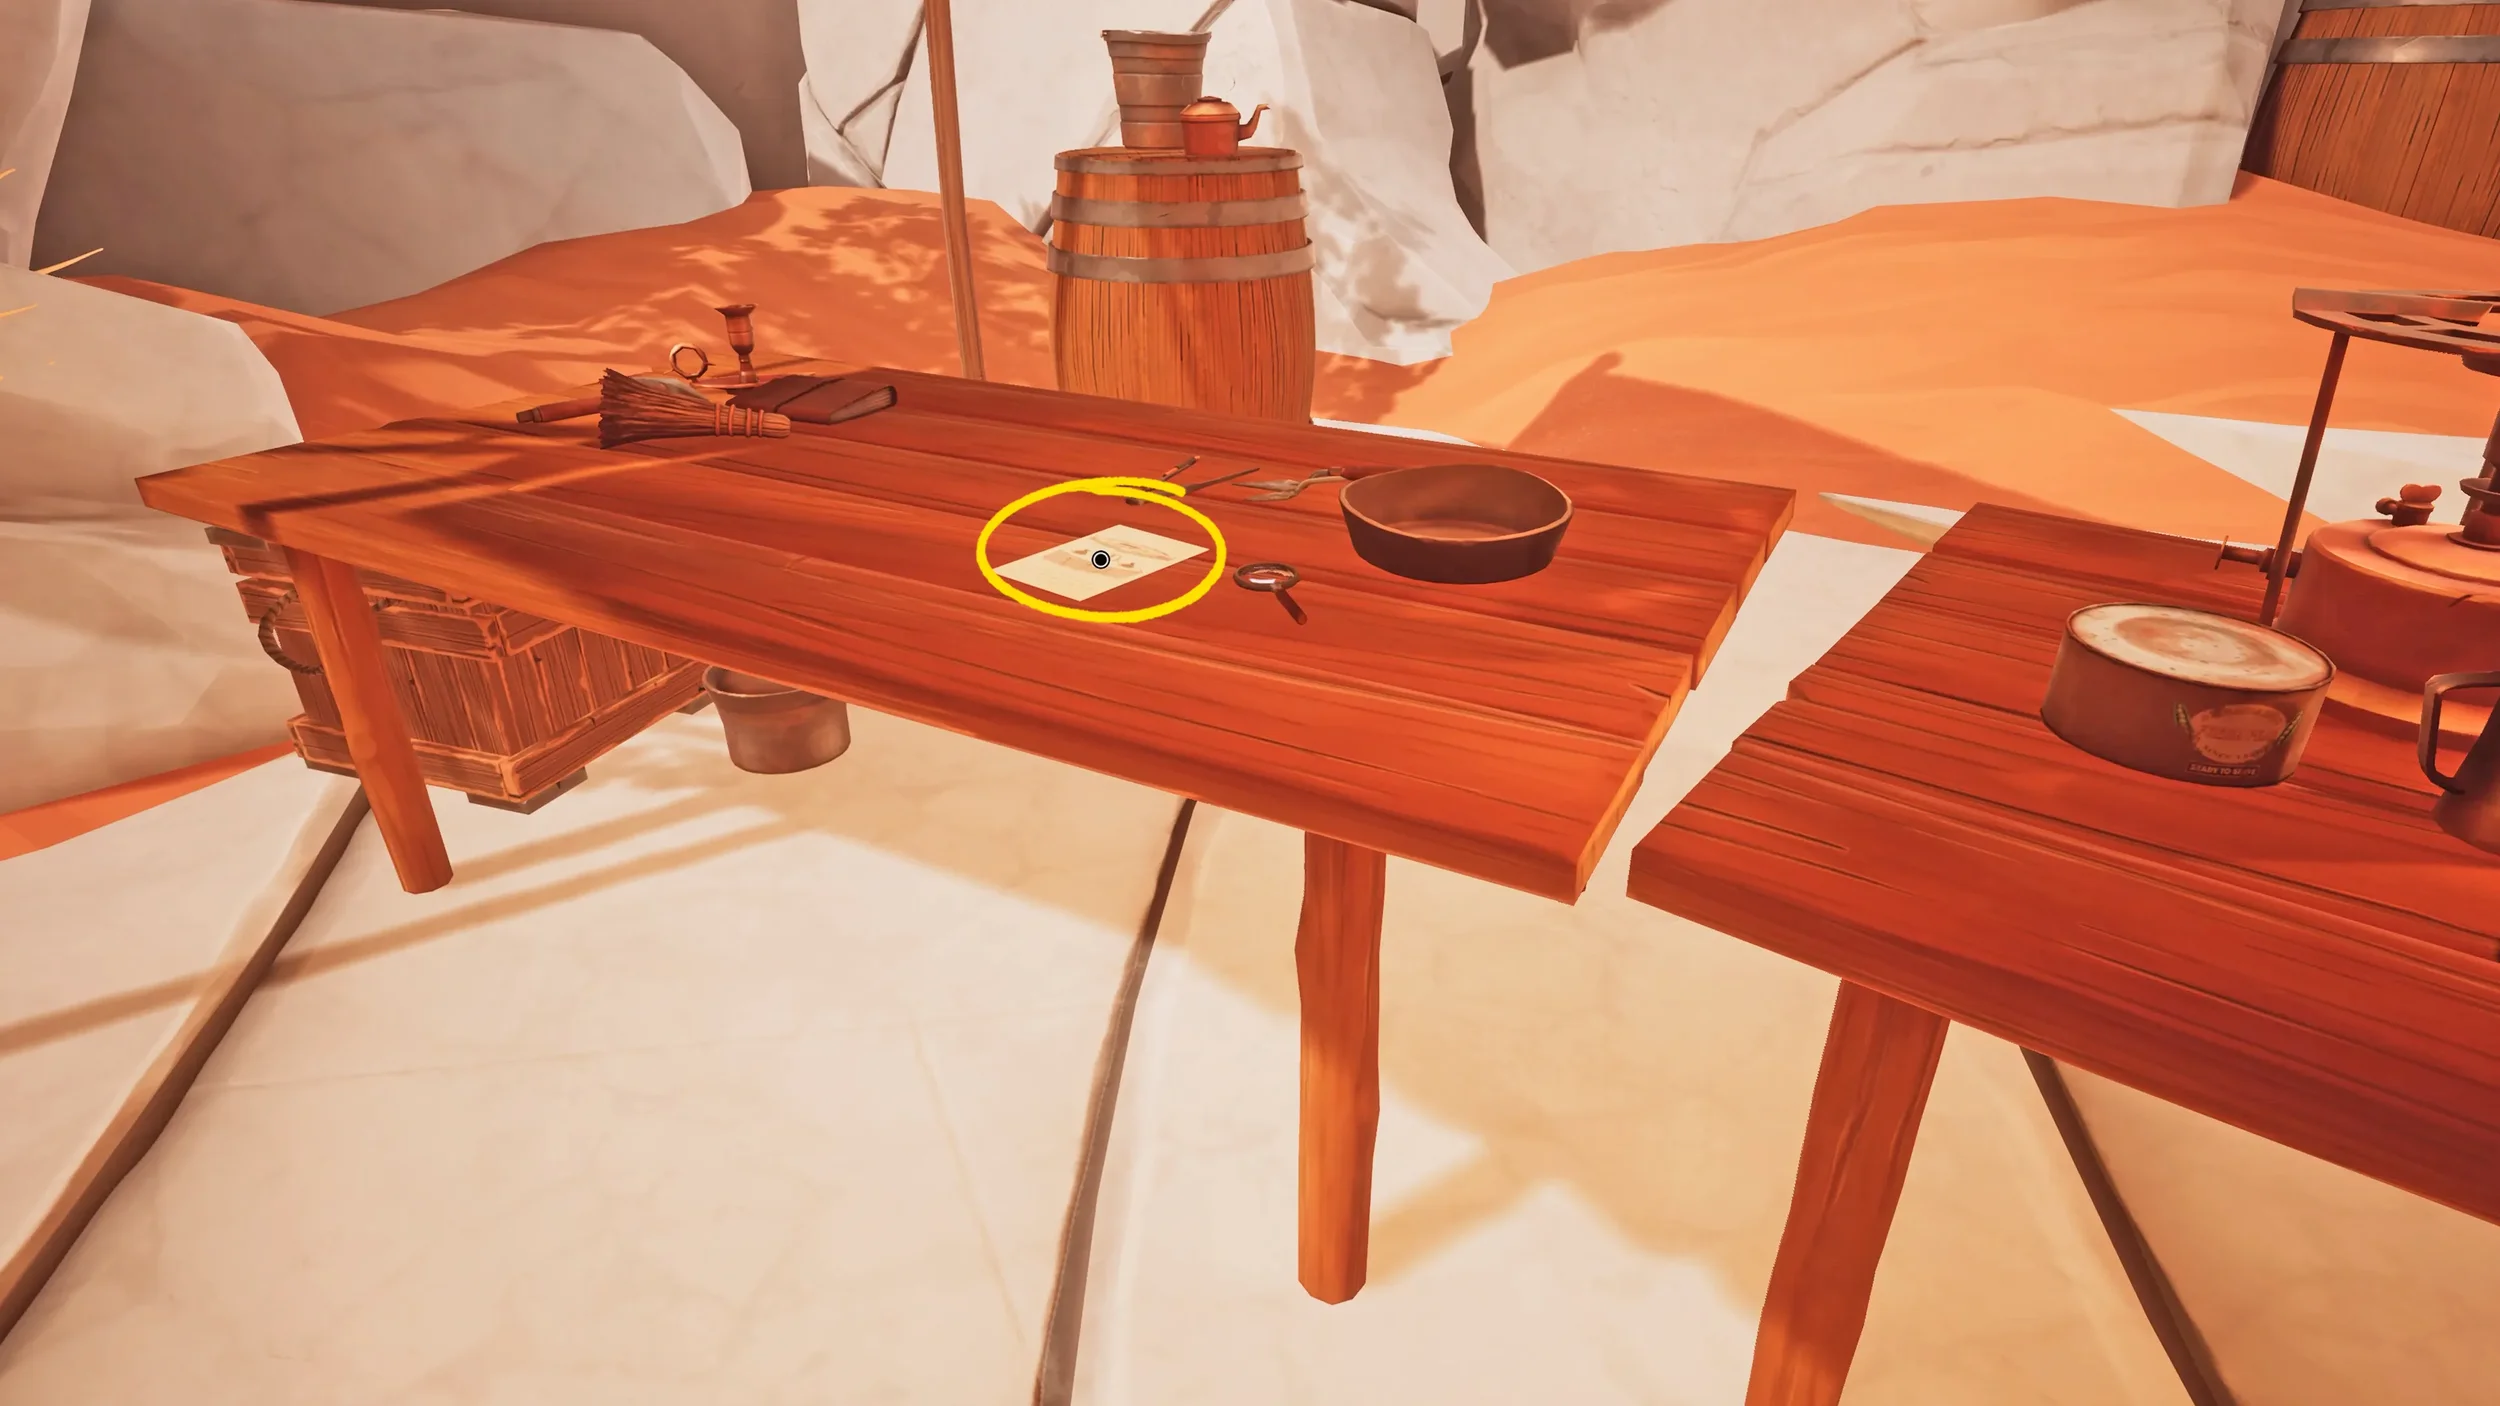
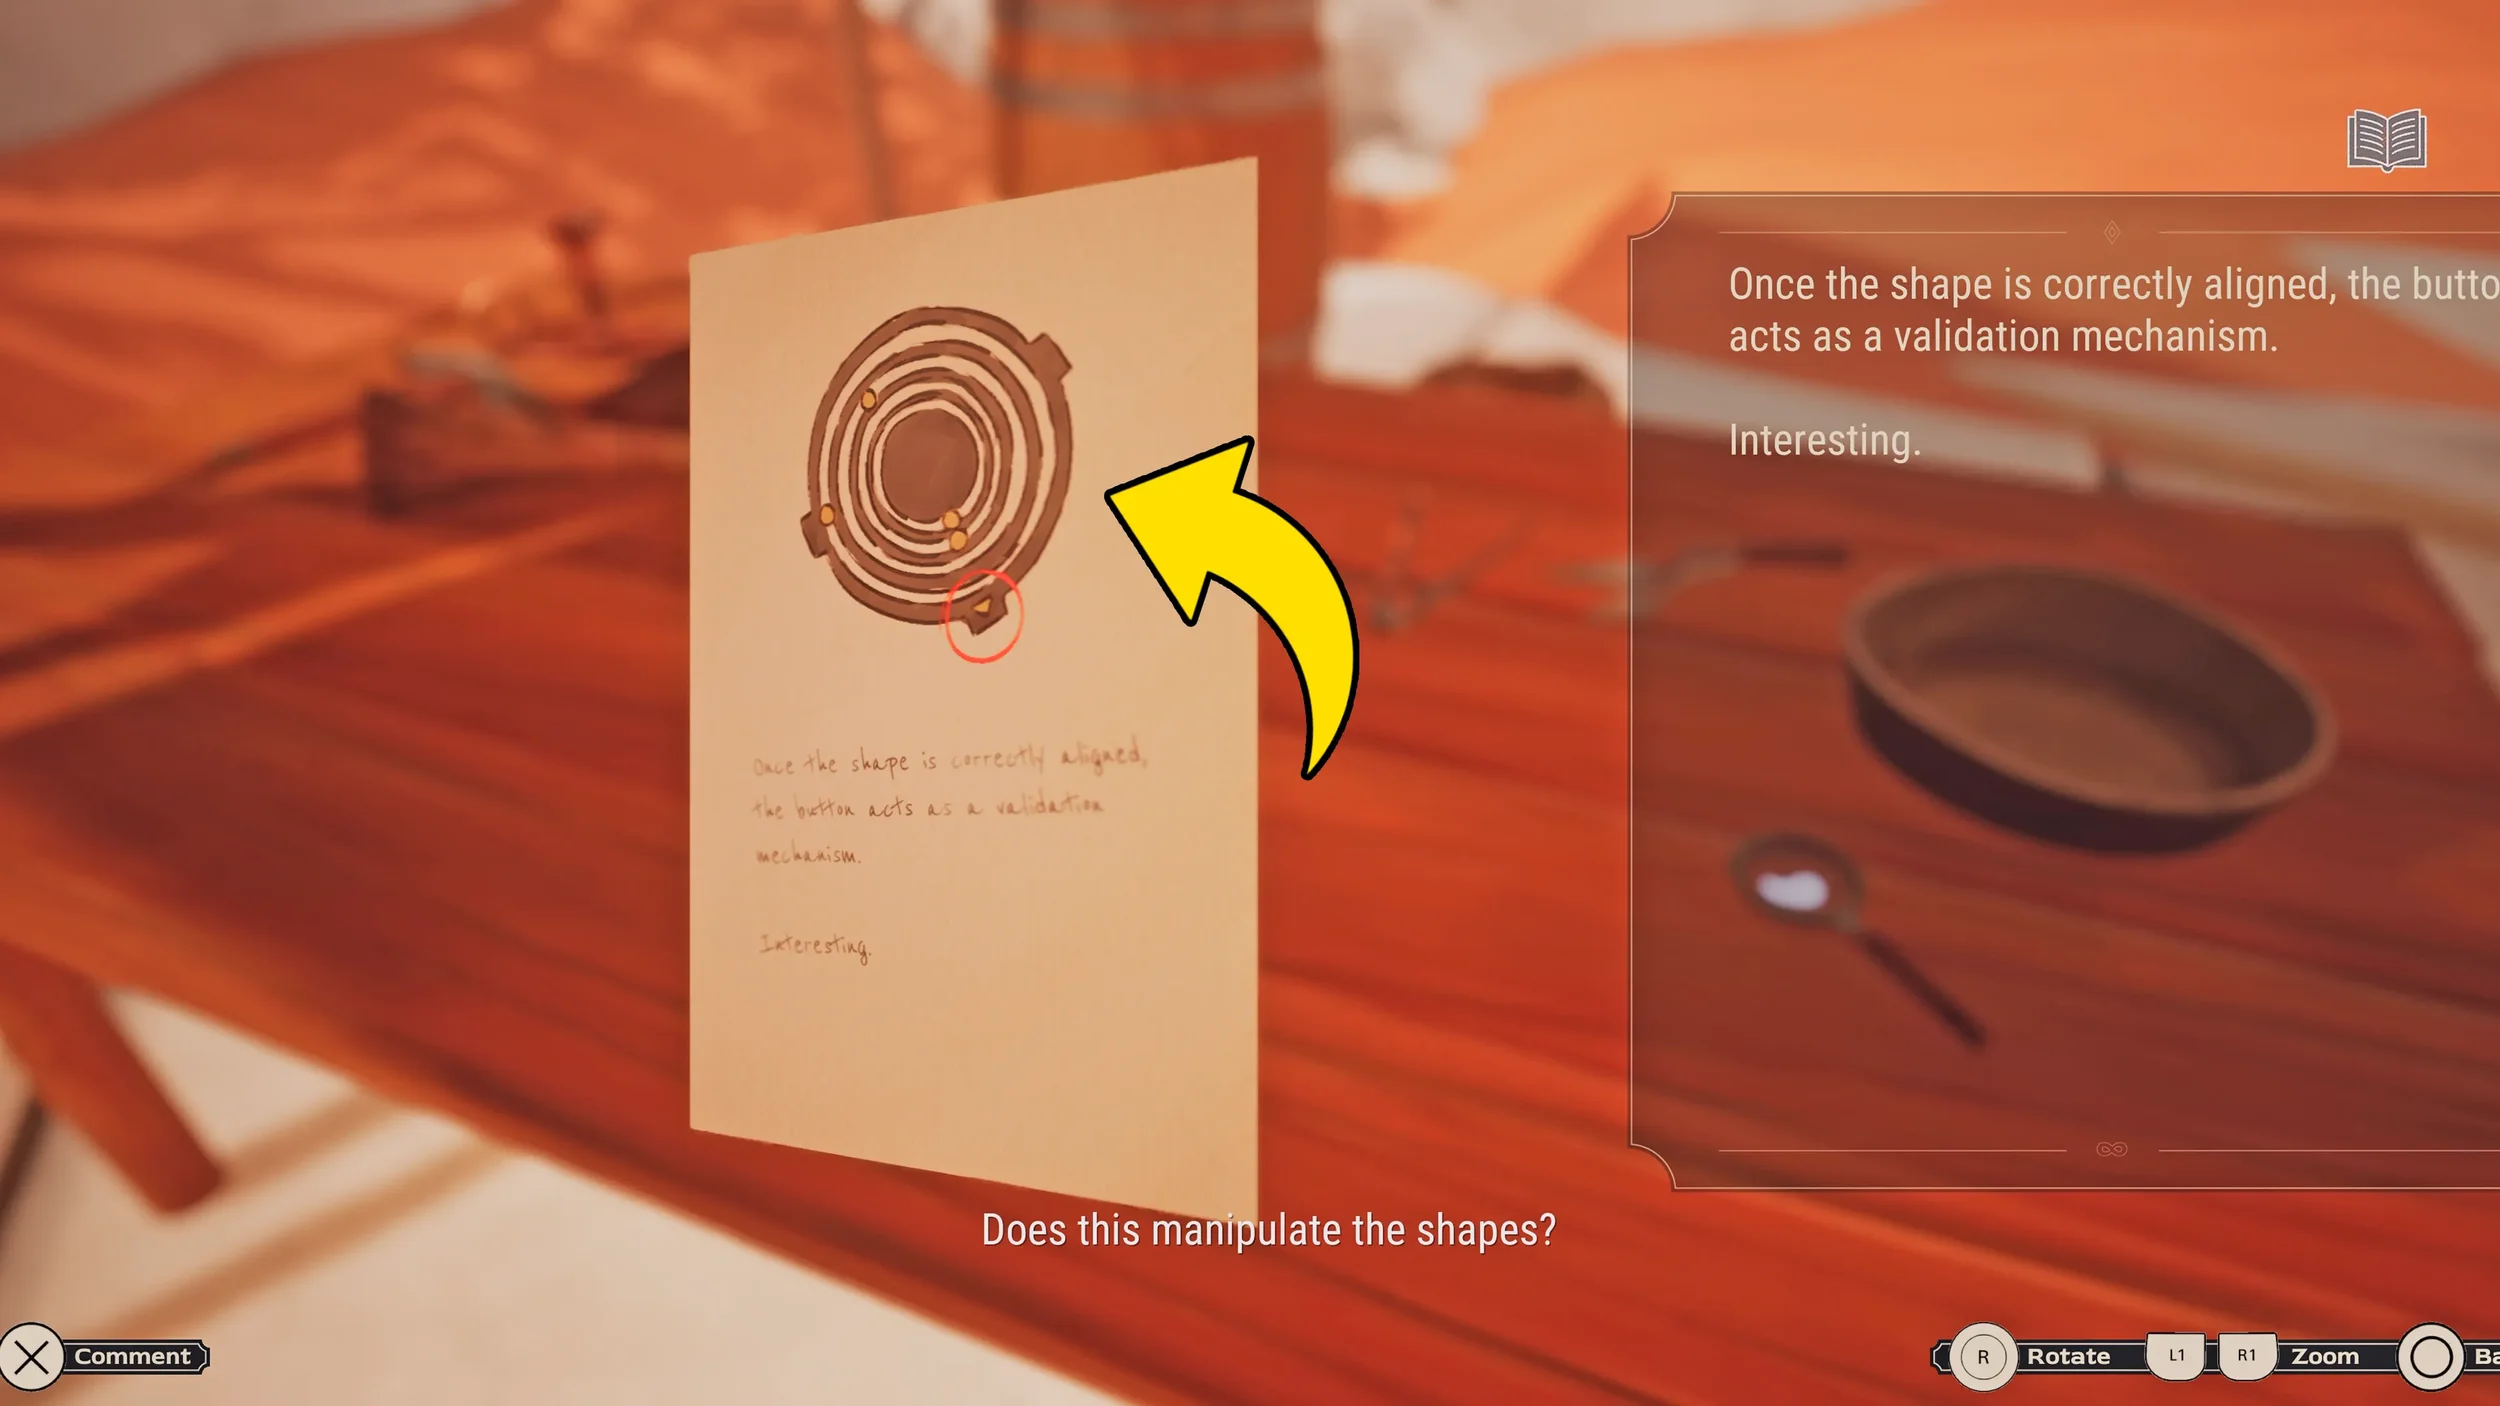
After that, head to the other small camp on the other side of the area, here you will find the dead Doctor, and to his left there will be a few tables, the note on the left-most table is going to count as a clue but only if you turn it over and read the back of the note.
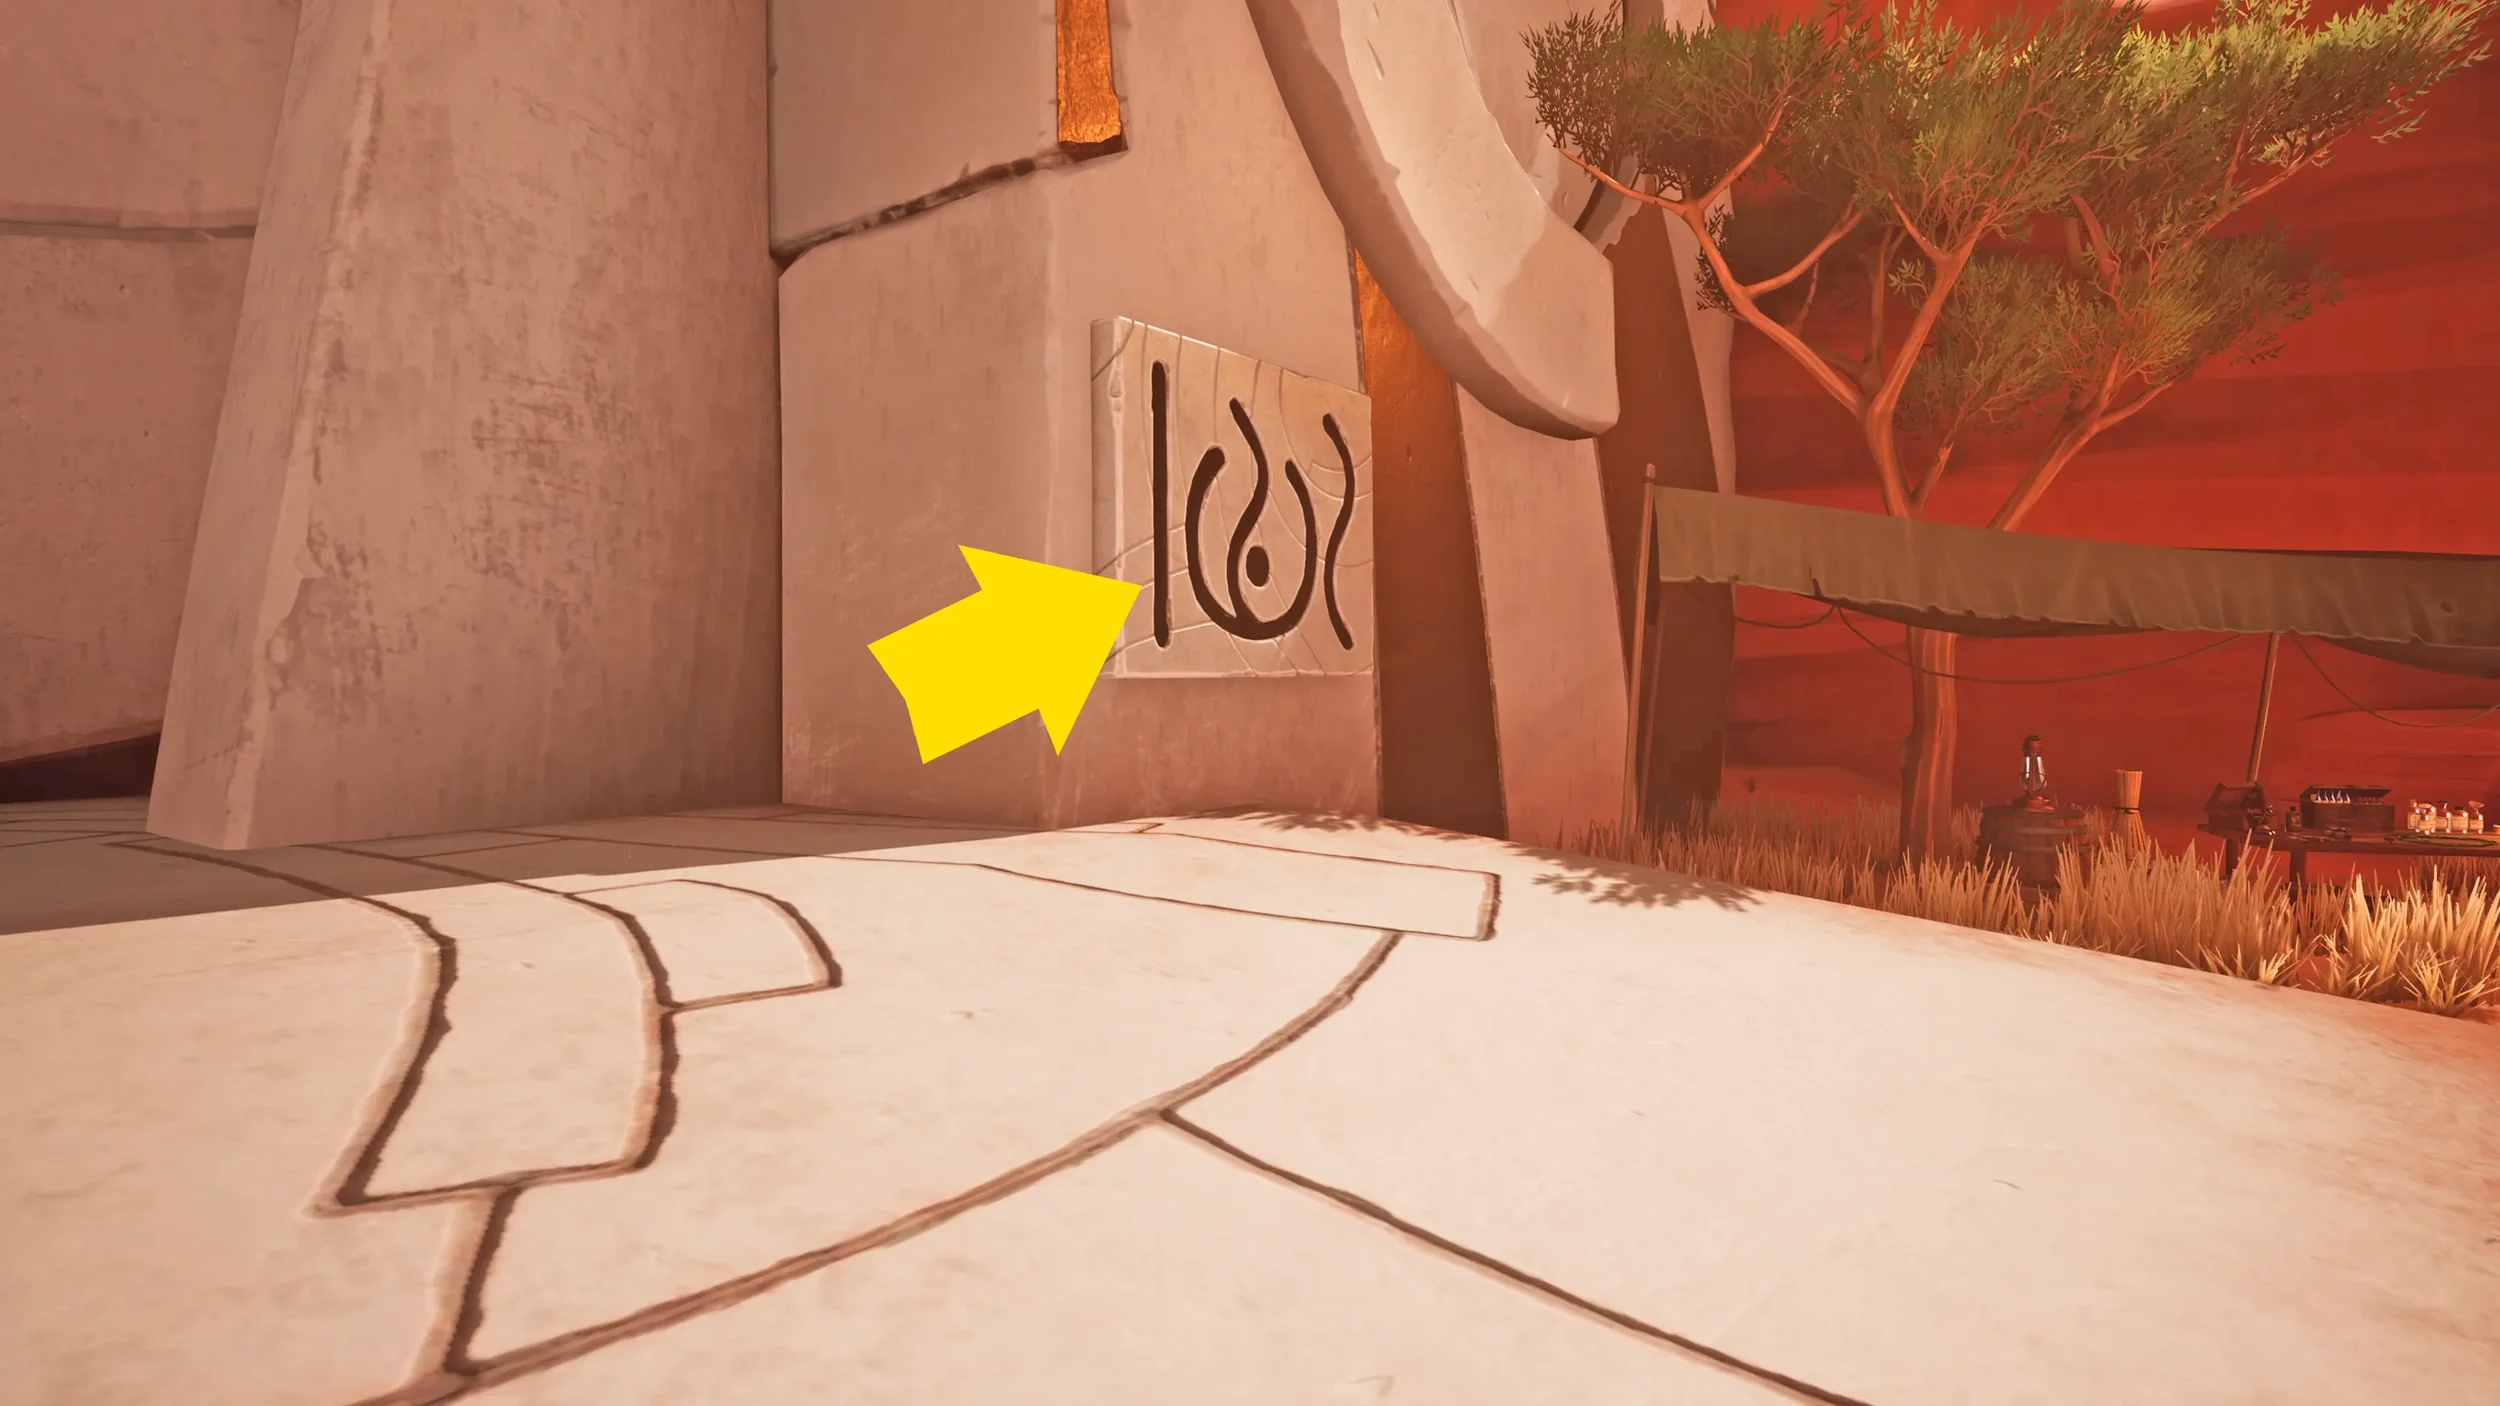
Also inspect the Symbol on the side of the Great Stone Door as the Symbols are also clues.
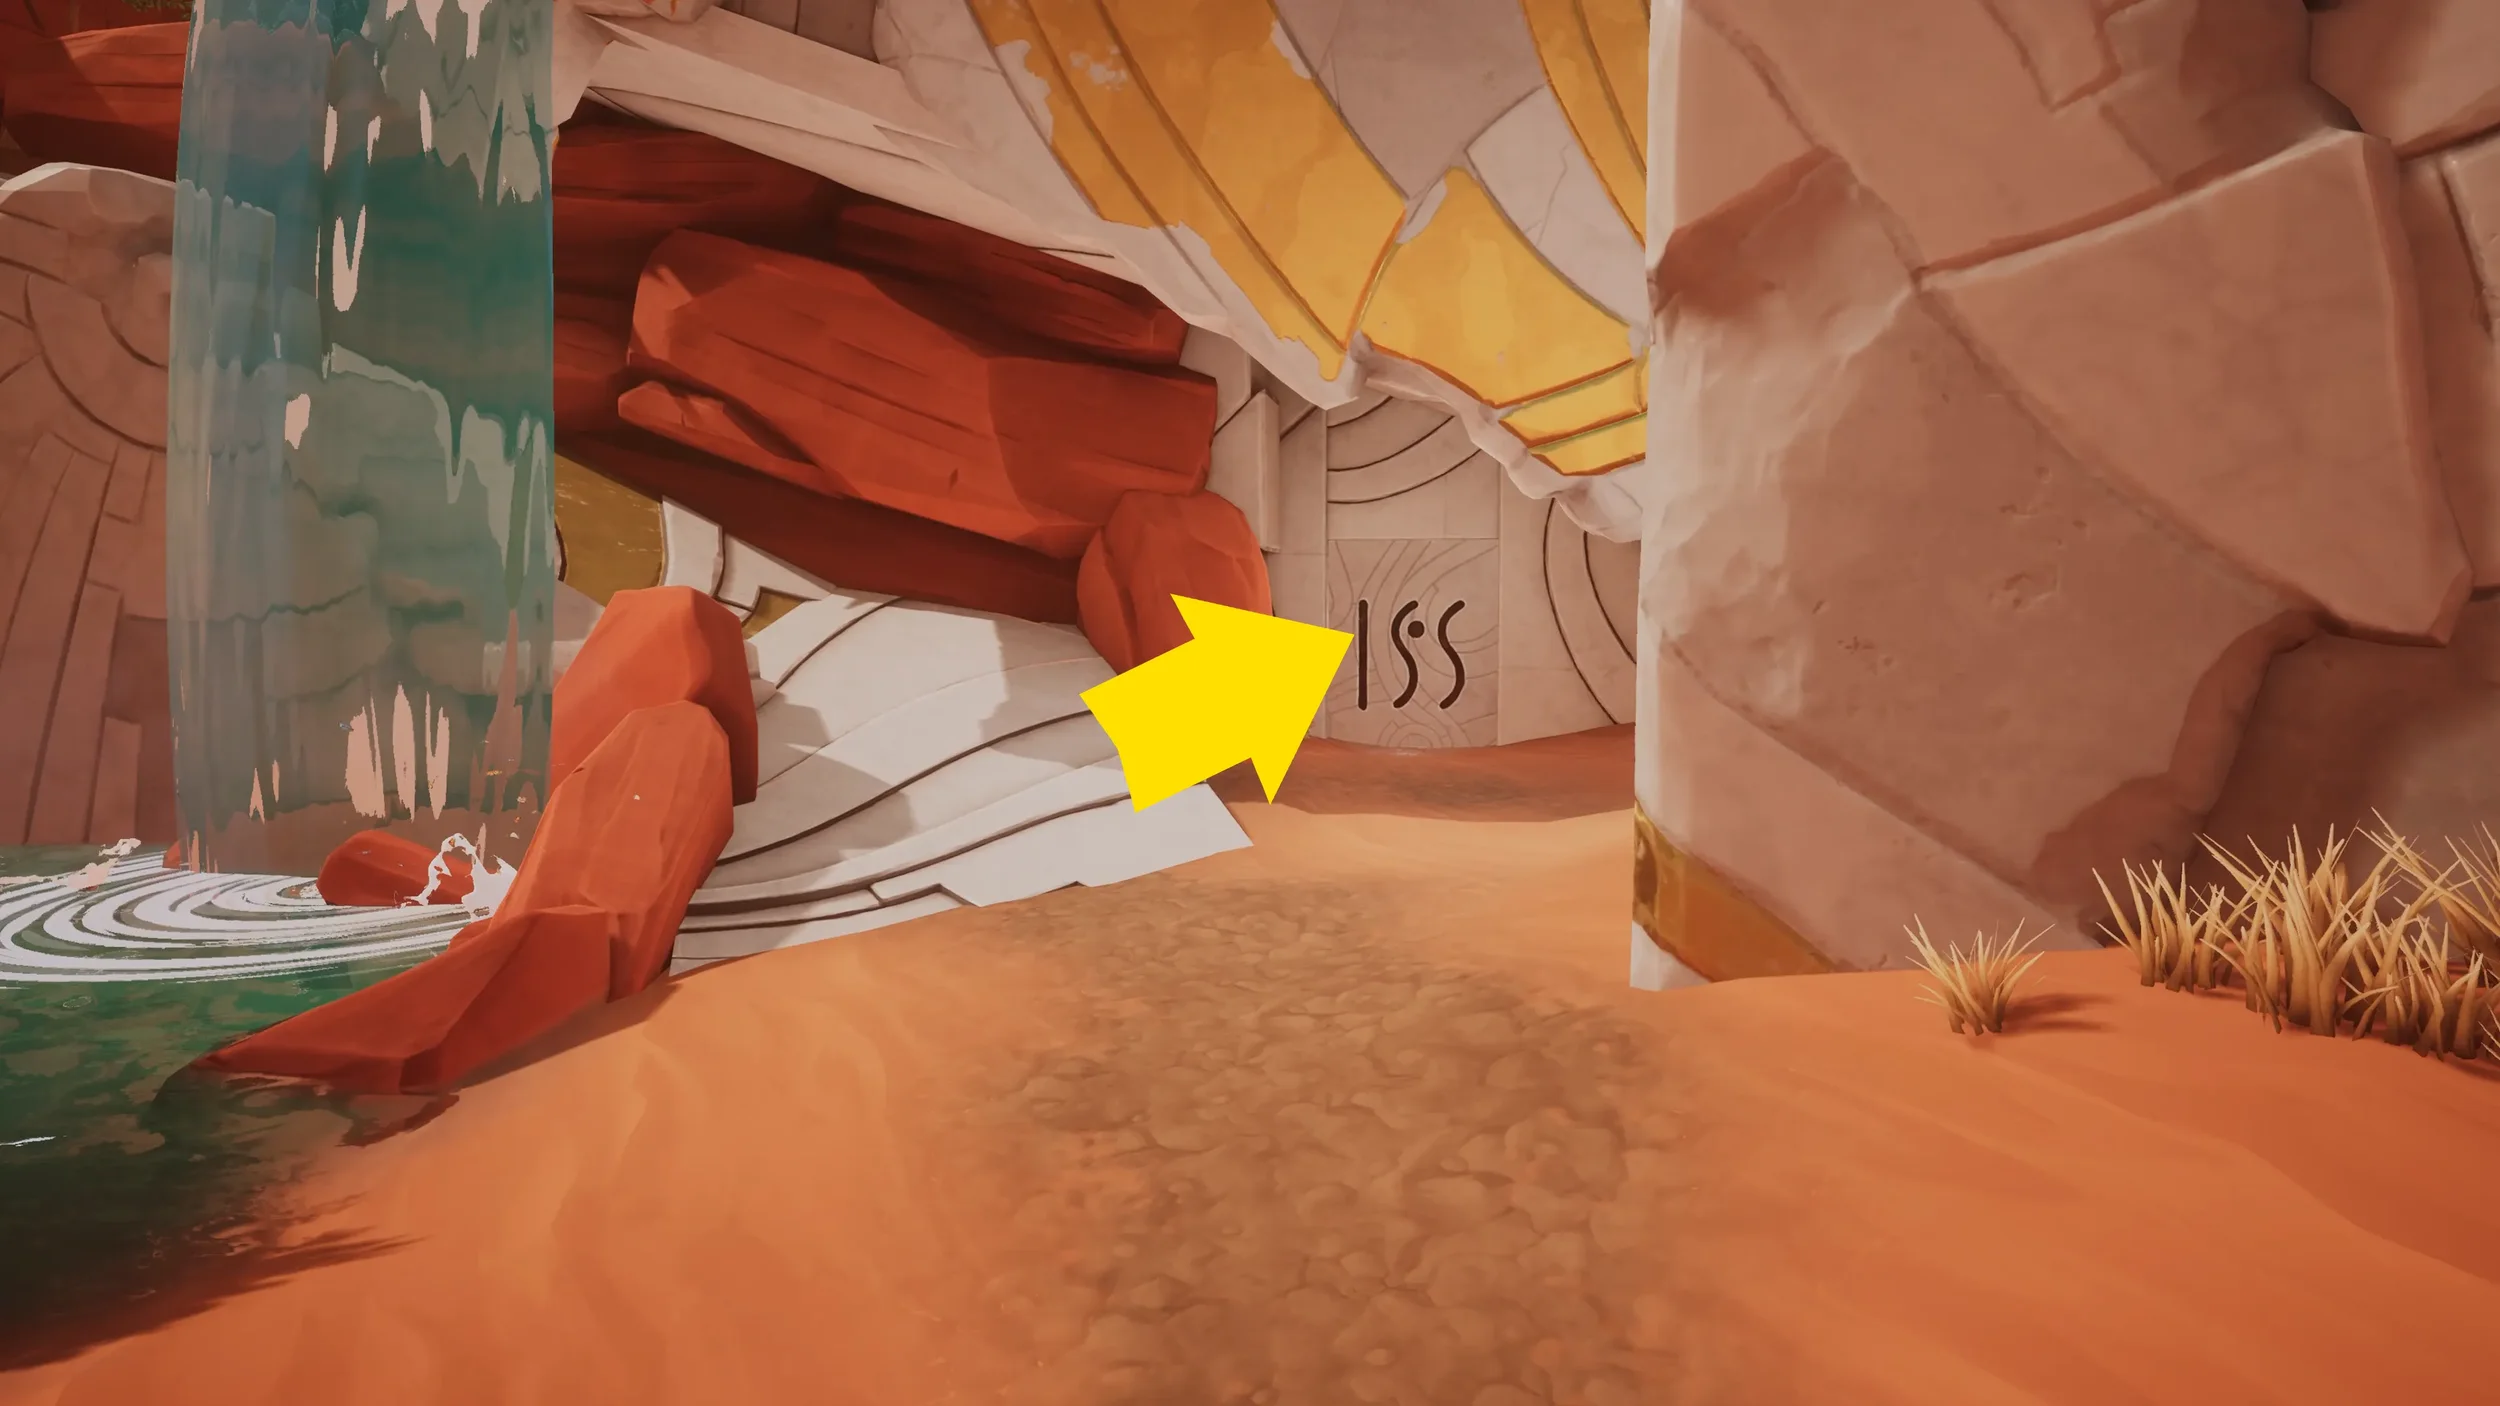
Just before going up the ramp to the upper area, inspect the Symbol on the small door ahead.
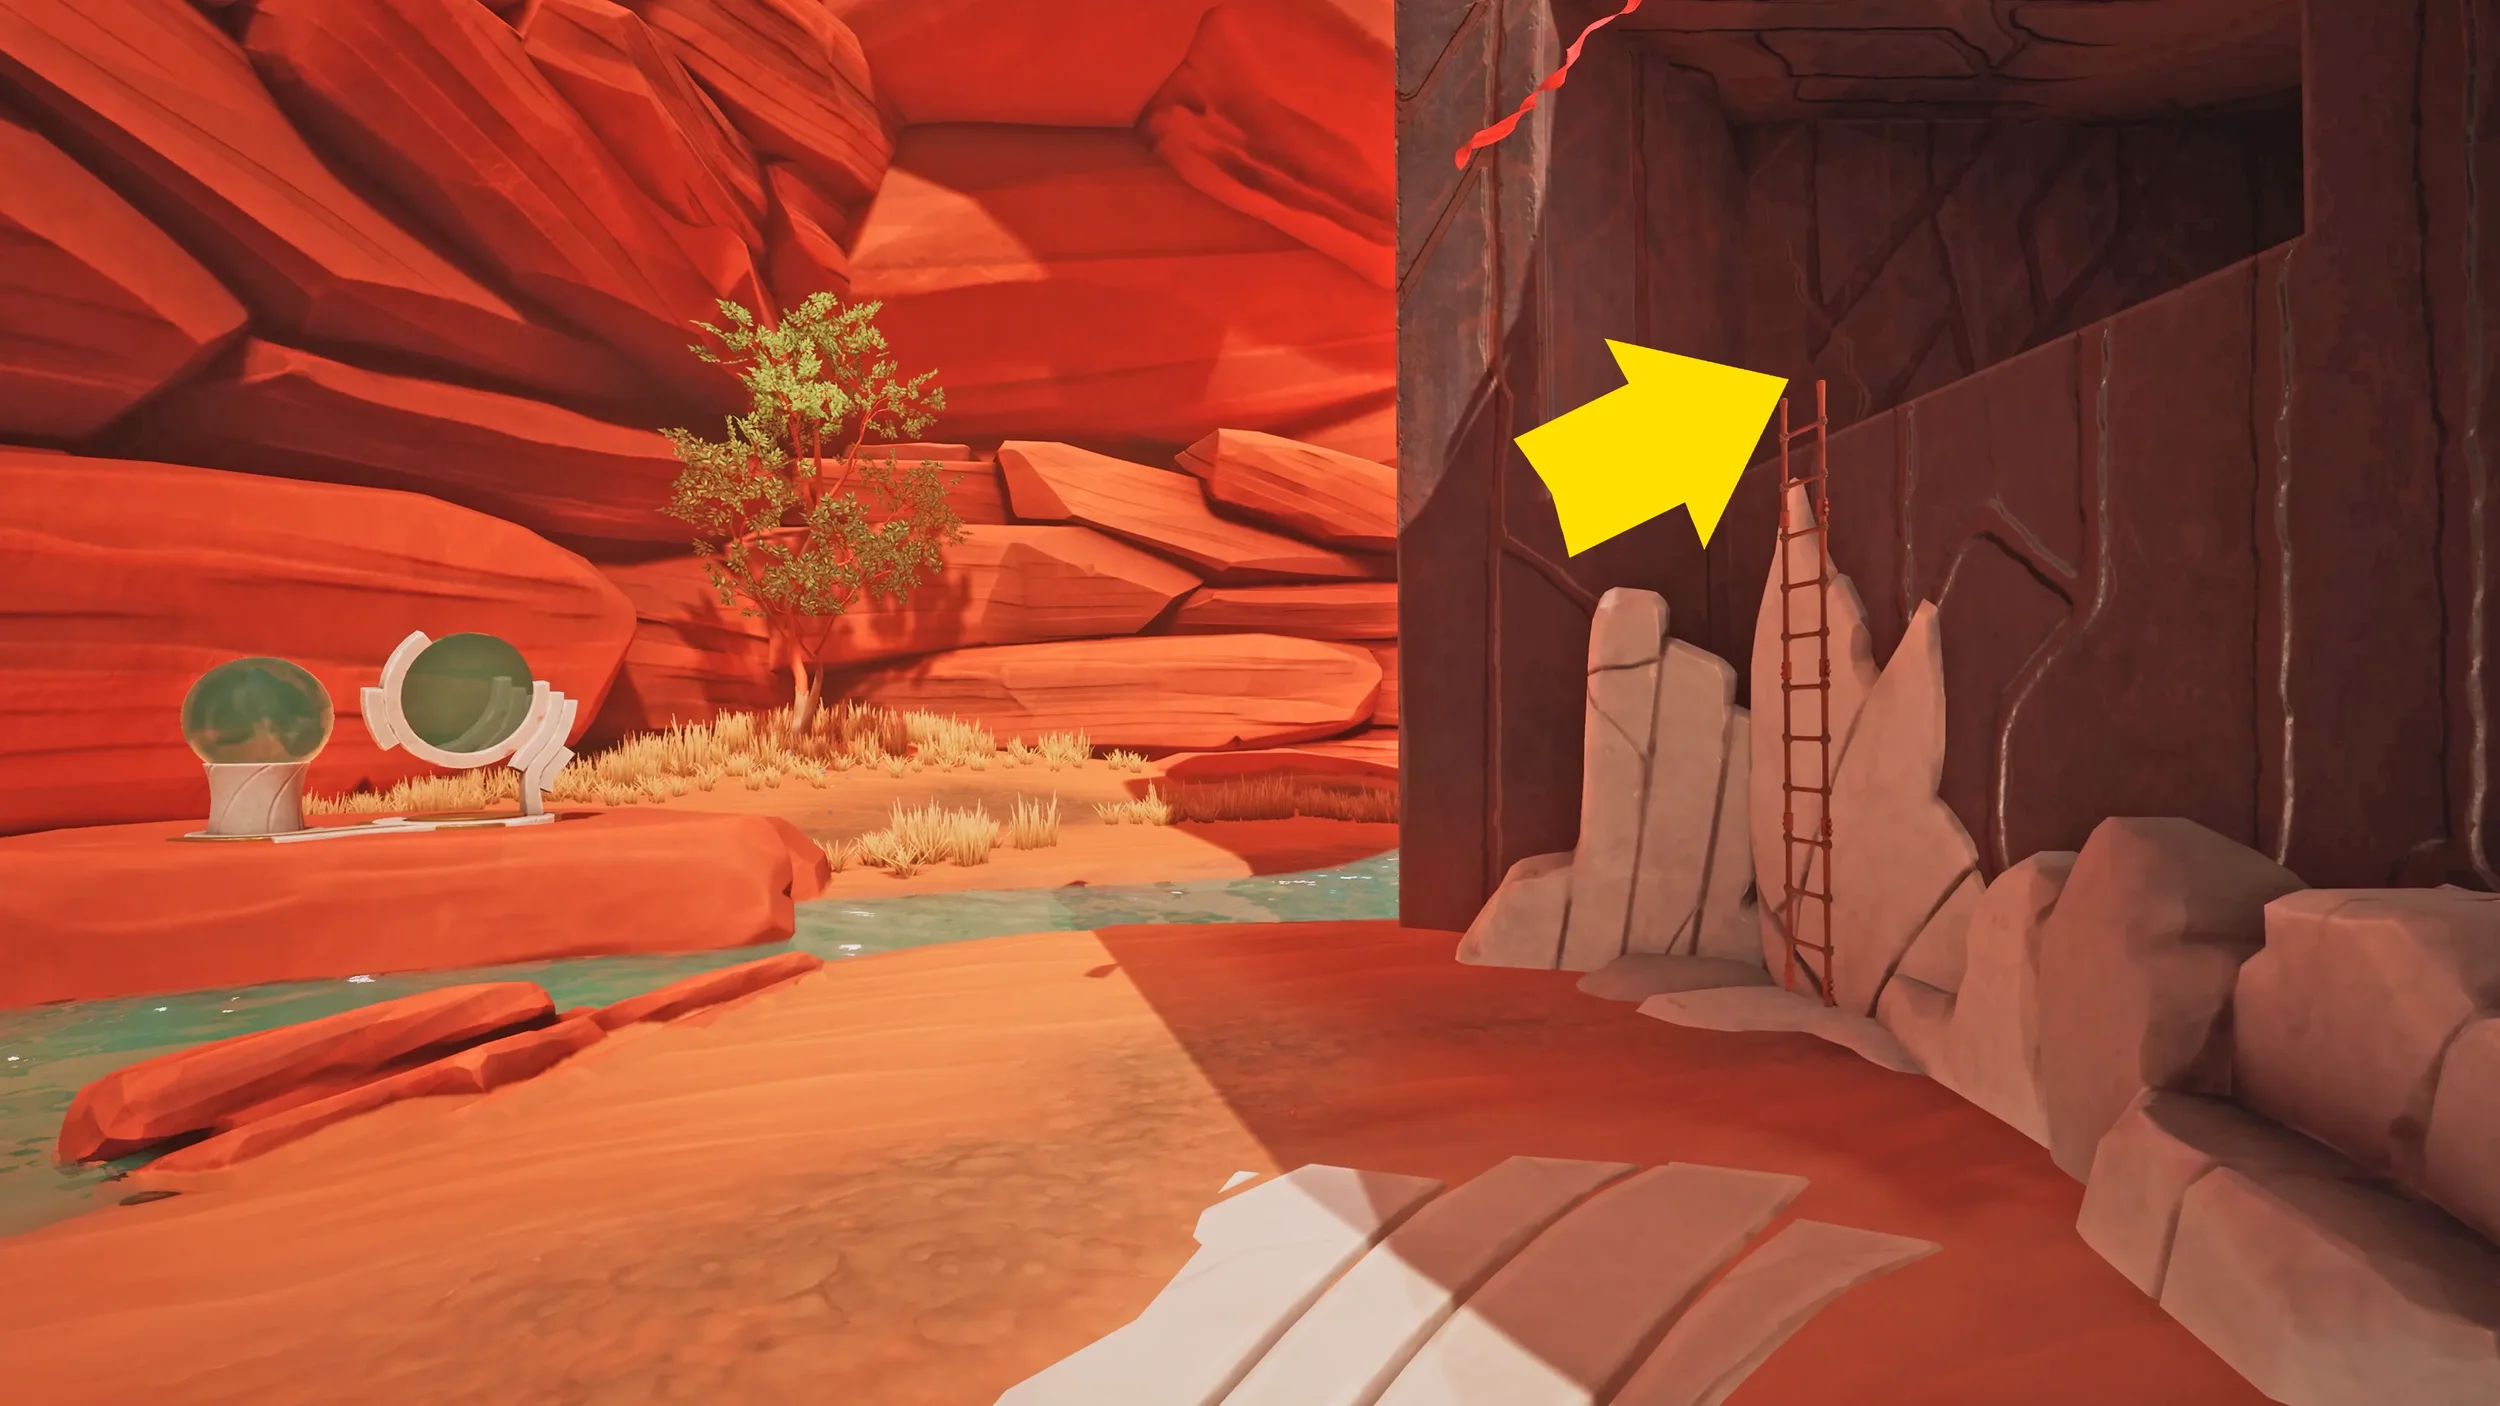
Now go up the ramp to the upper area, there is nothing of interest in the camp up there so you can ignore it, continue walking all the way to the end of the area to inspect the Runes on the elevator, now turn back and go up the nearby ladder.
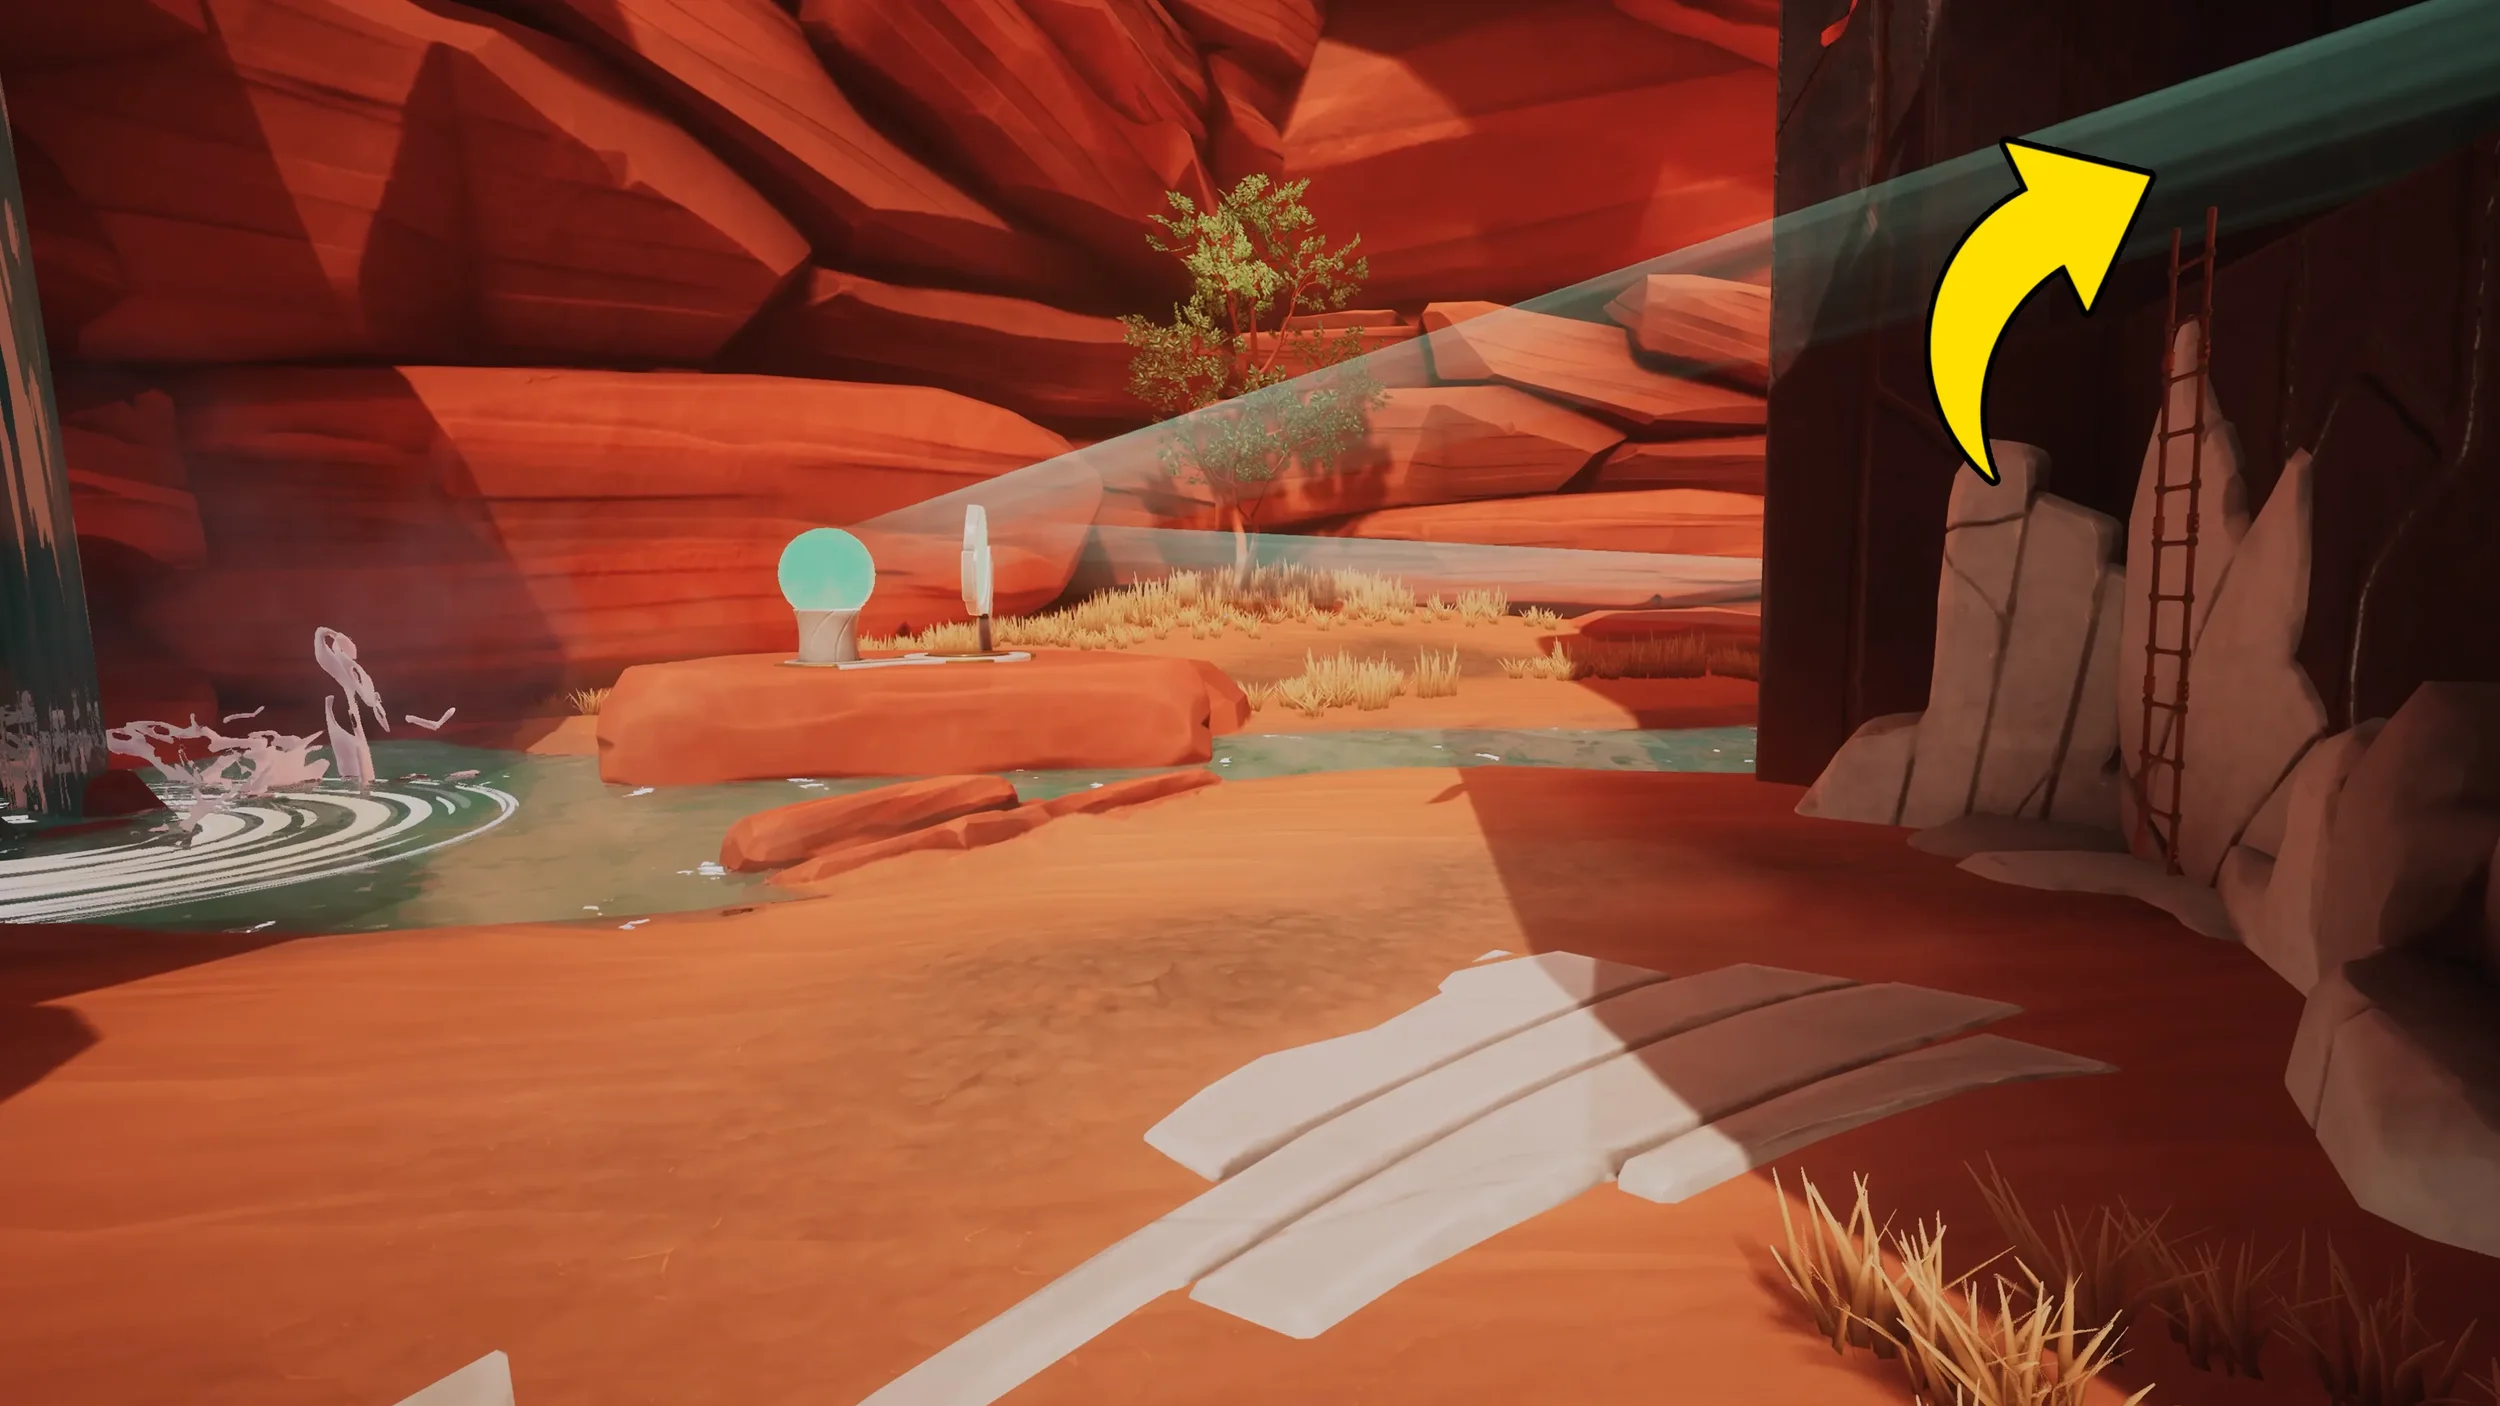
At the top of this ladder we will be able to interact with the device that will release the beam of light. We now need to direct that beam of light to its objective back down near the 1st camp by using the mirrors to reflect the light.
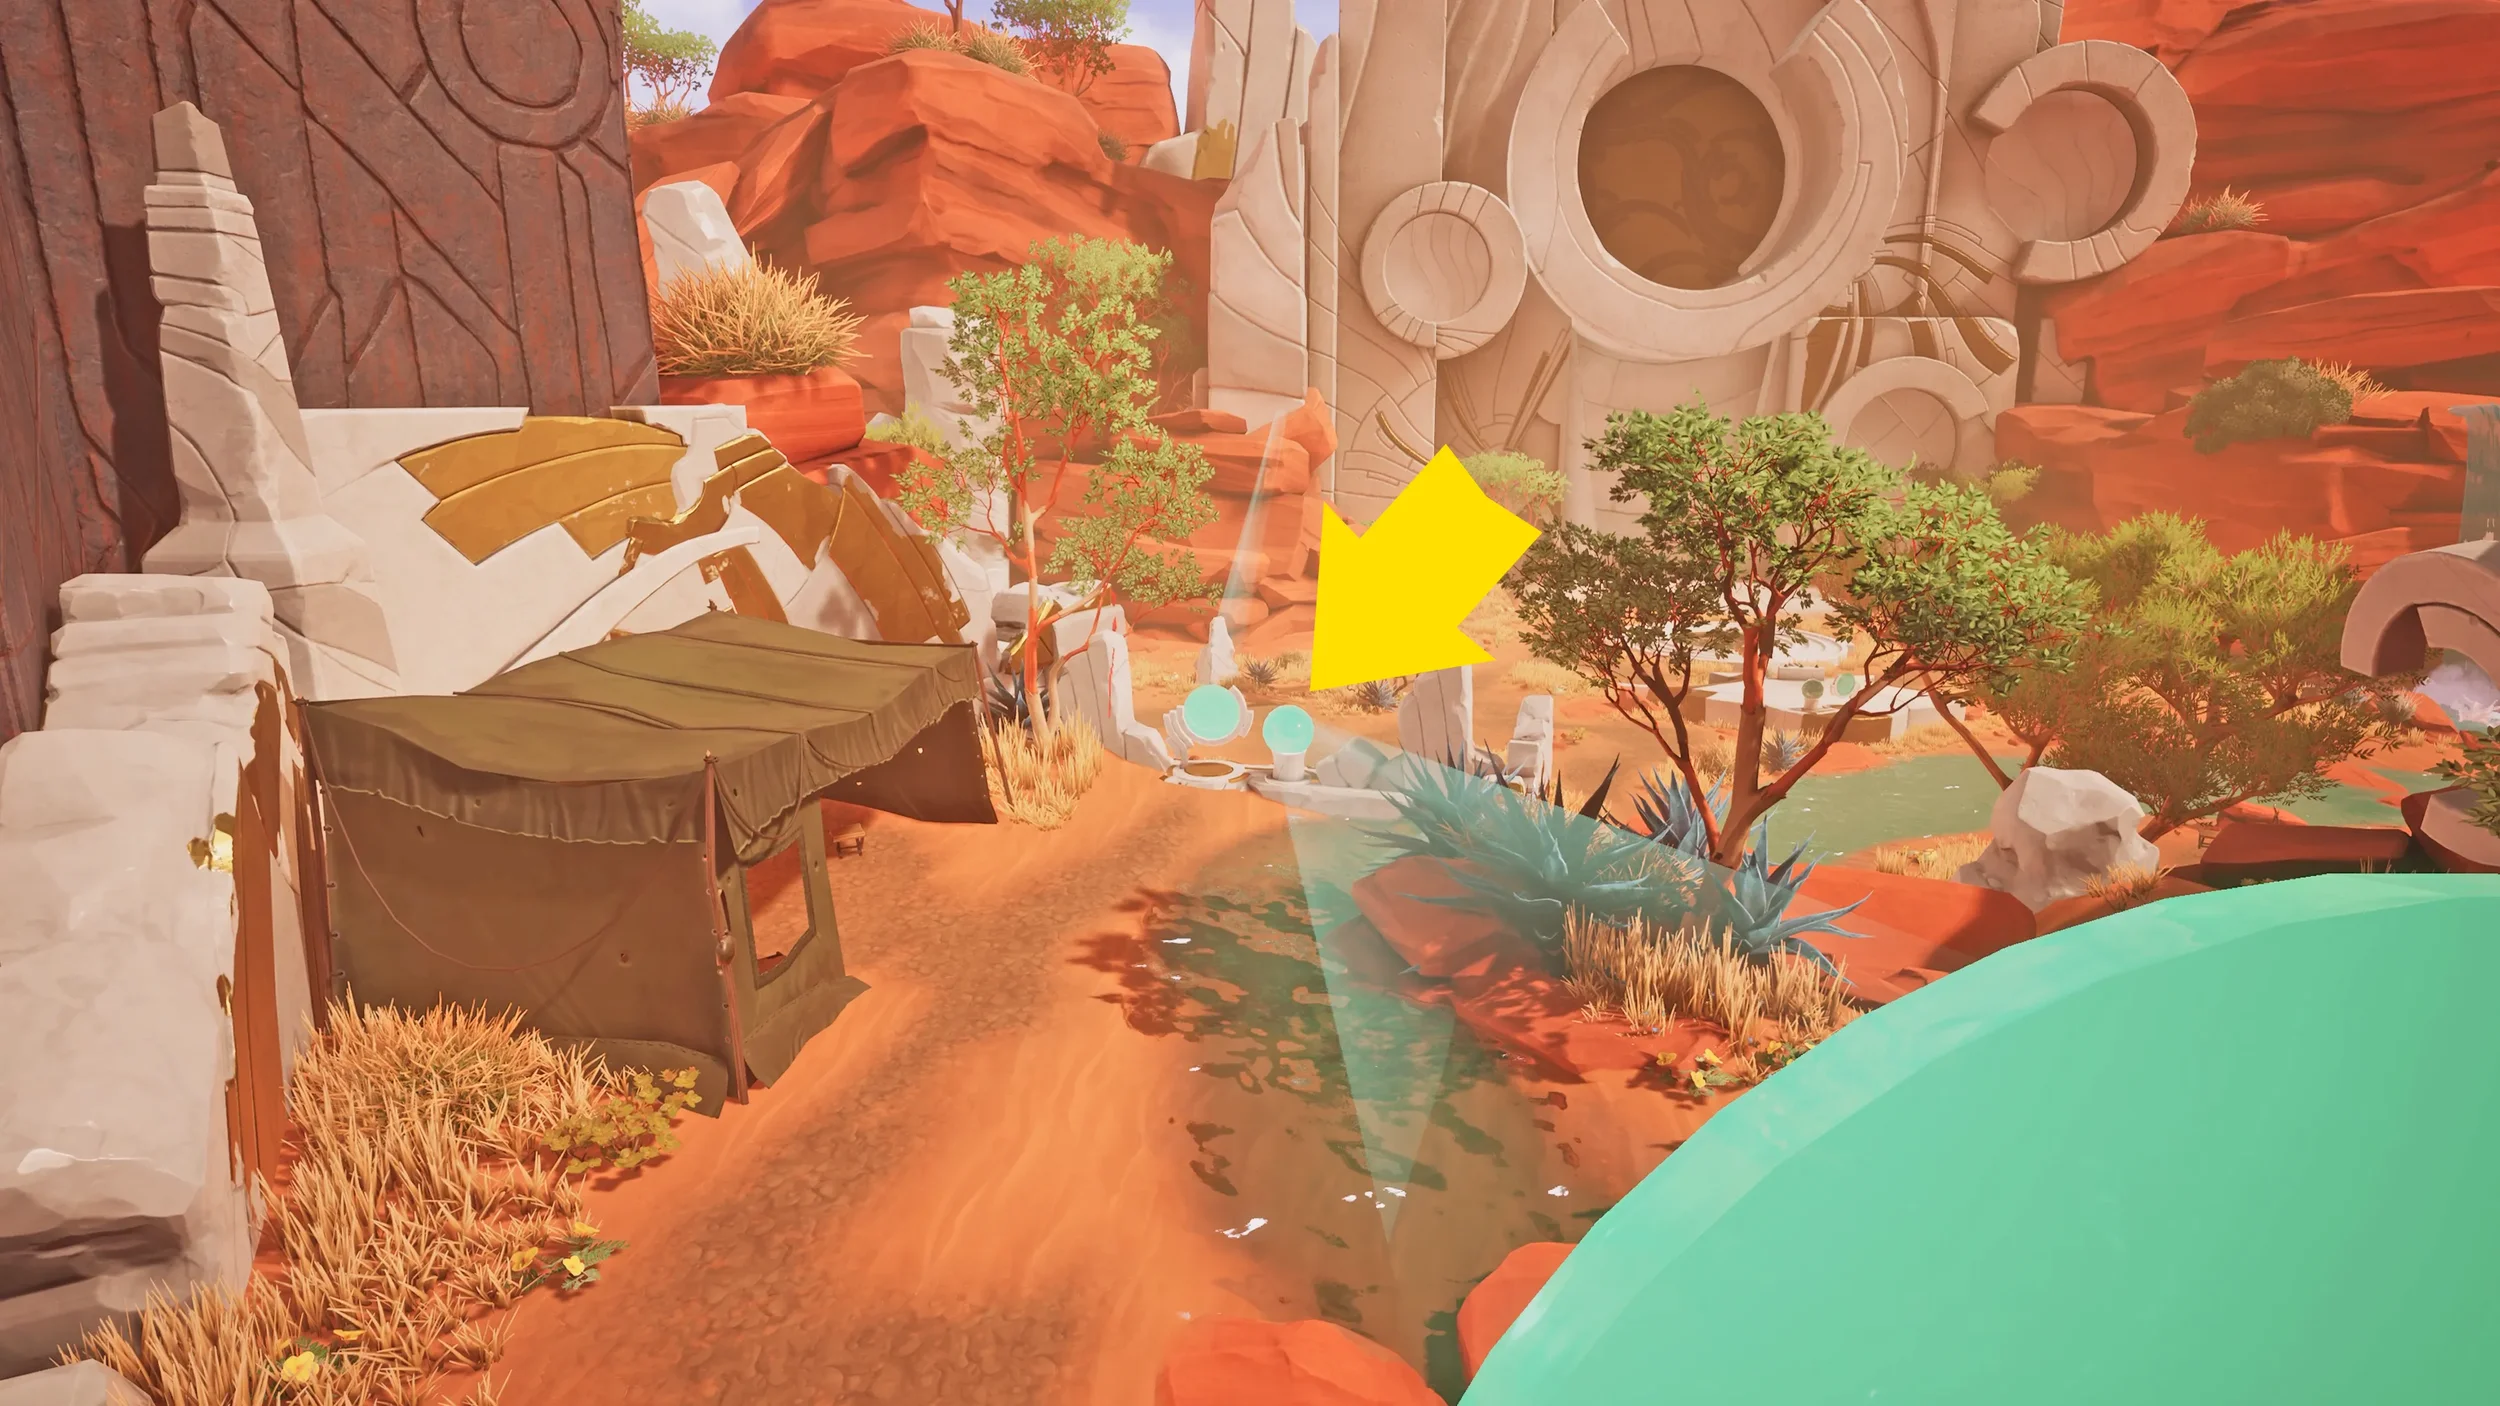
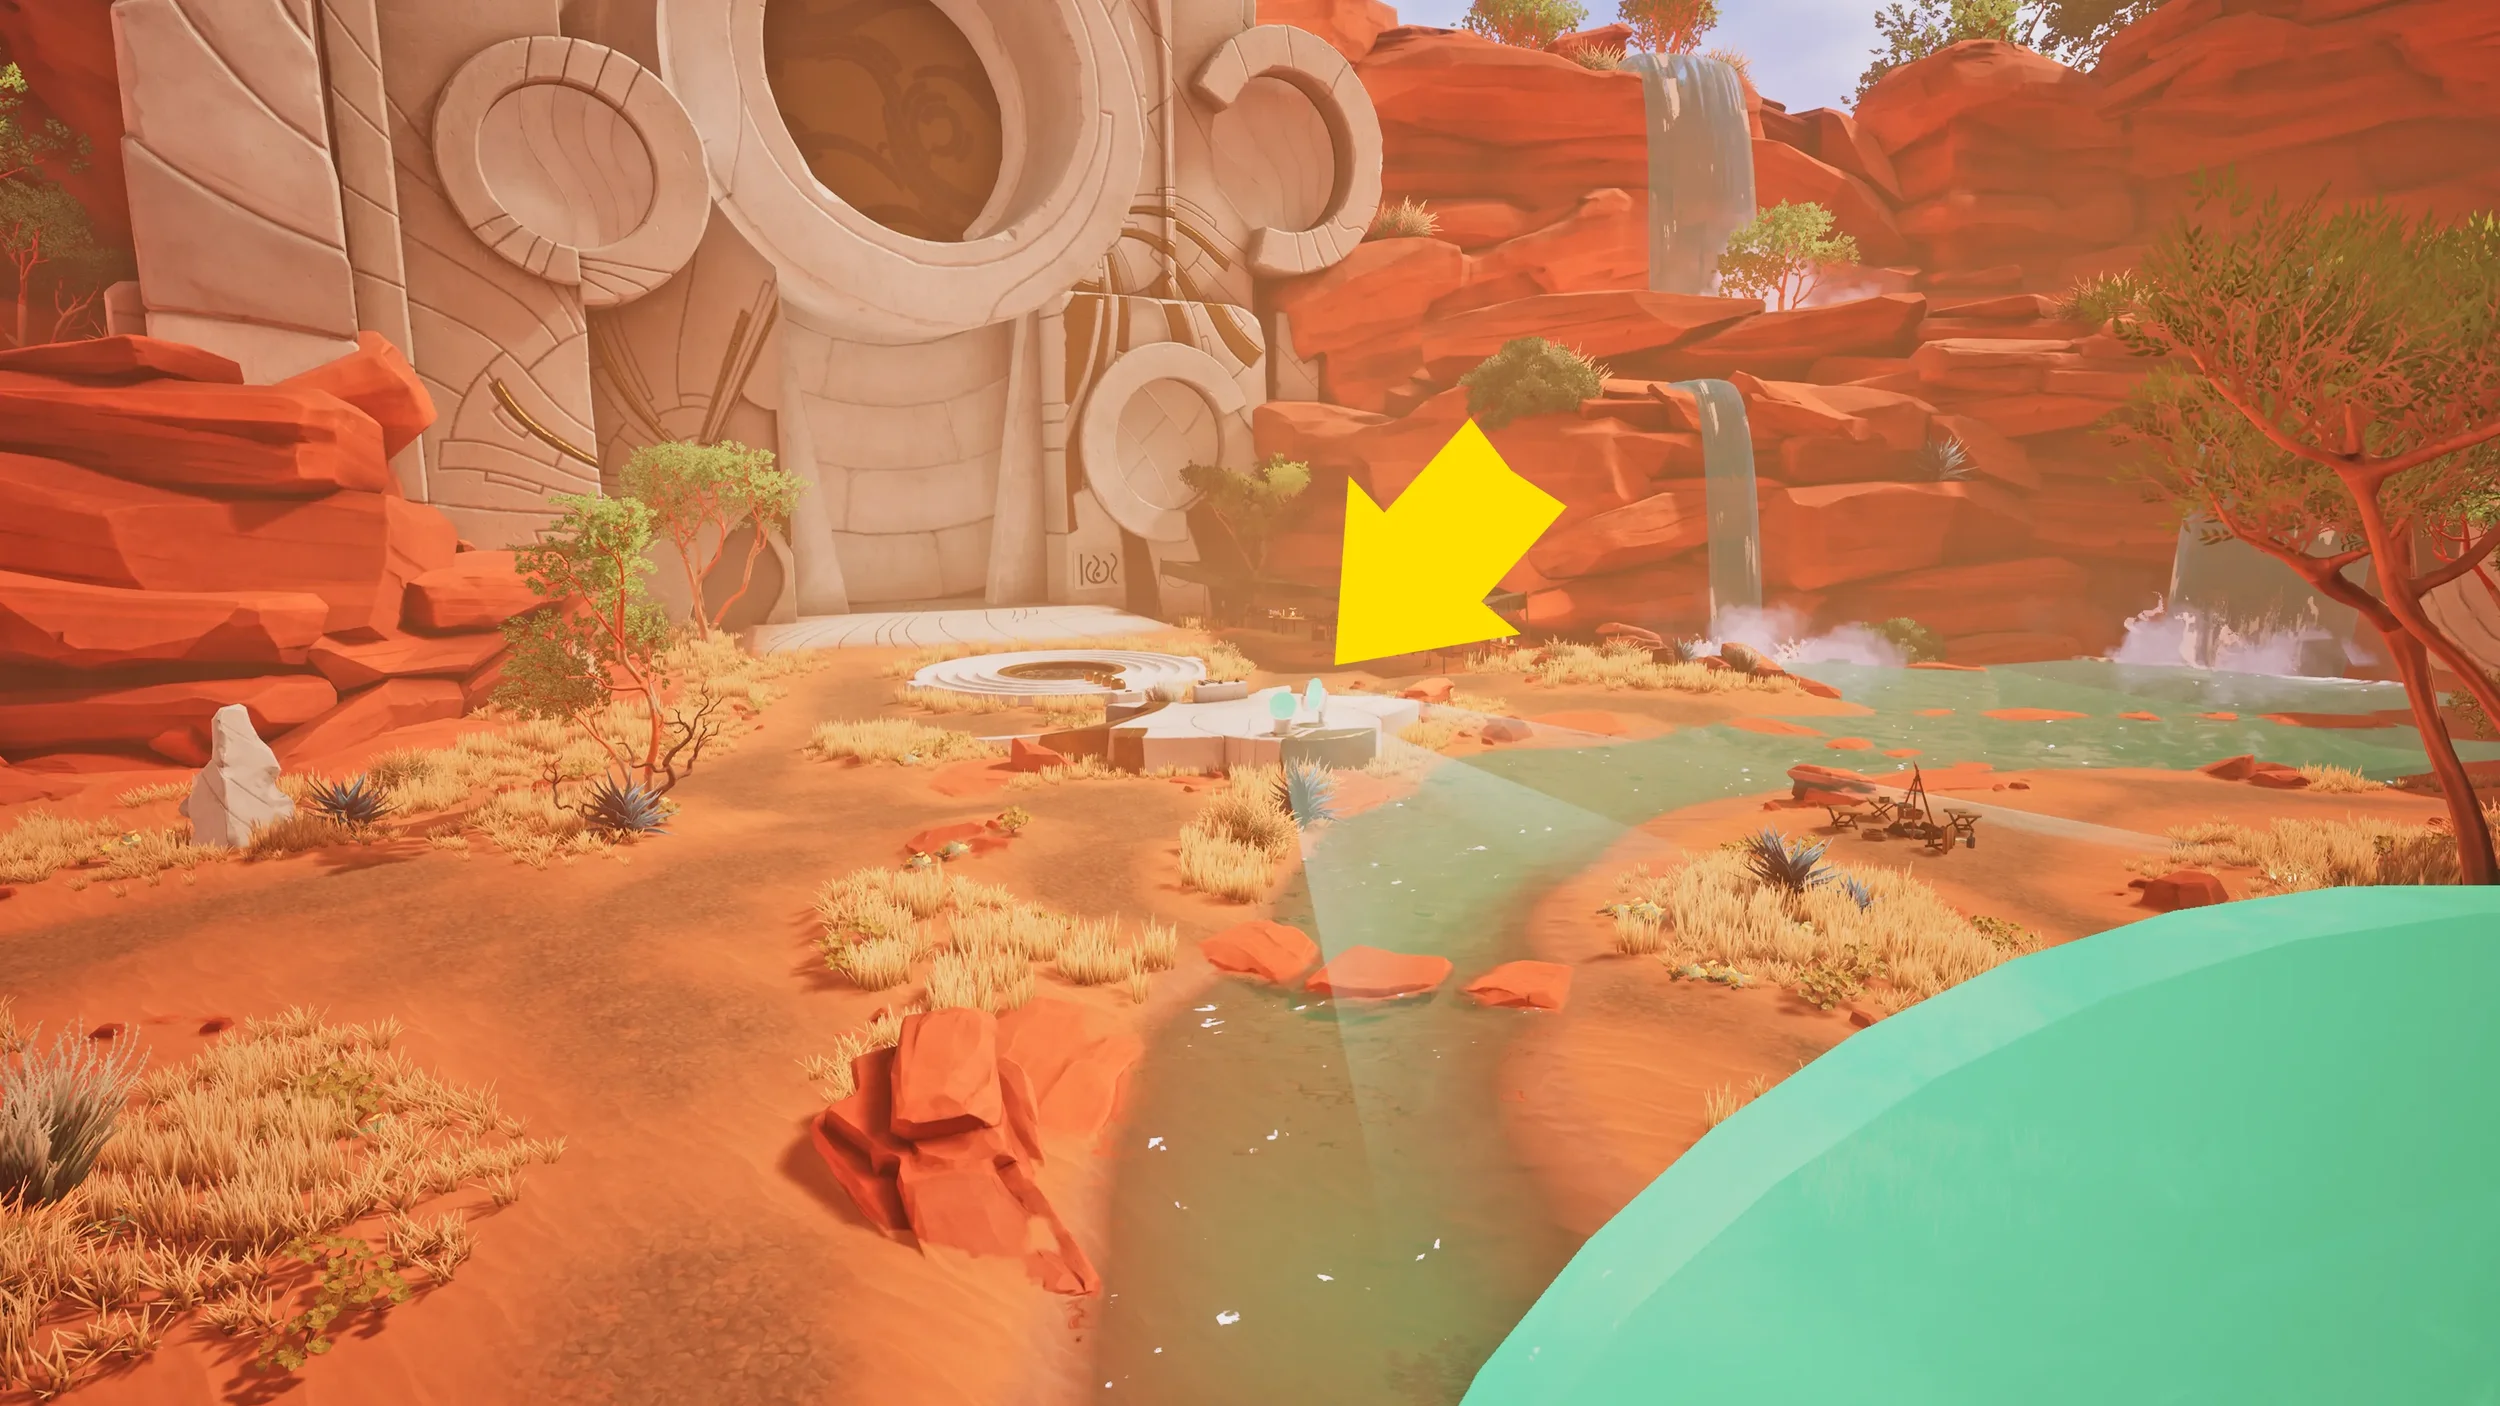
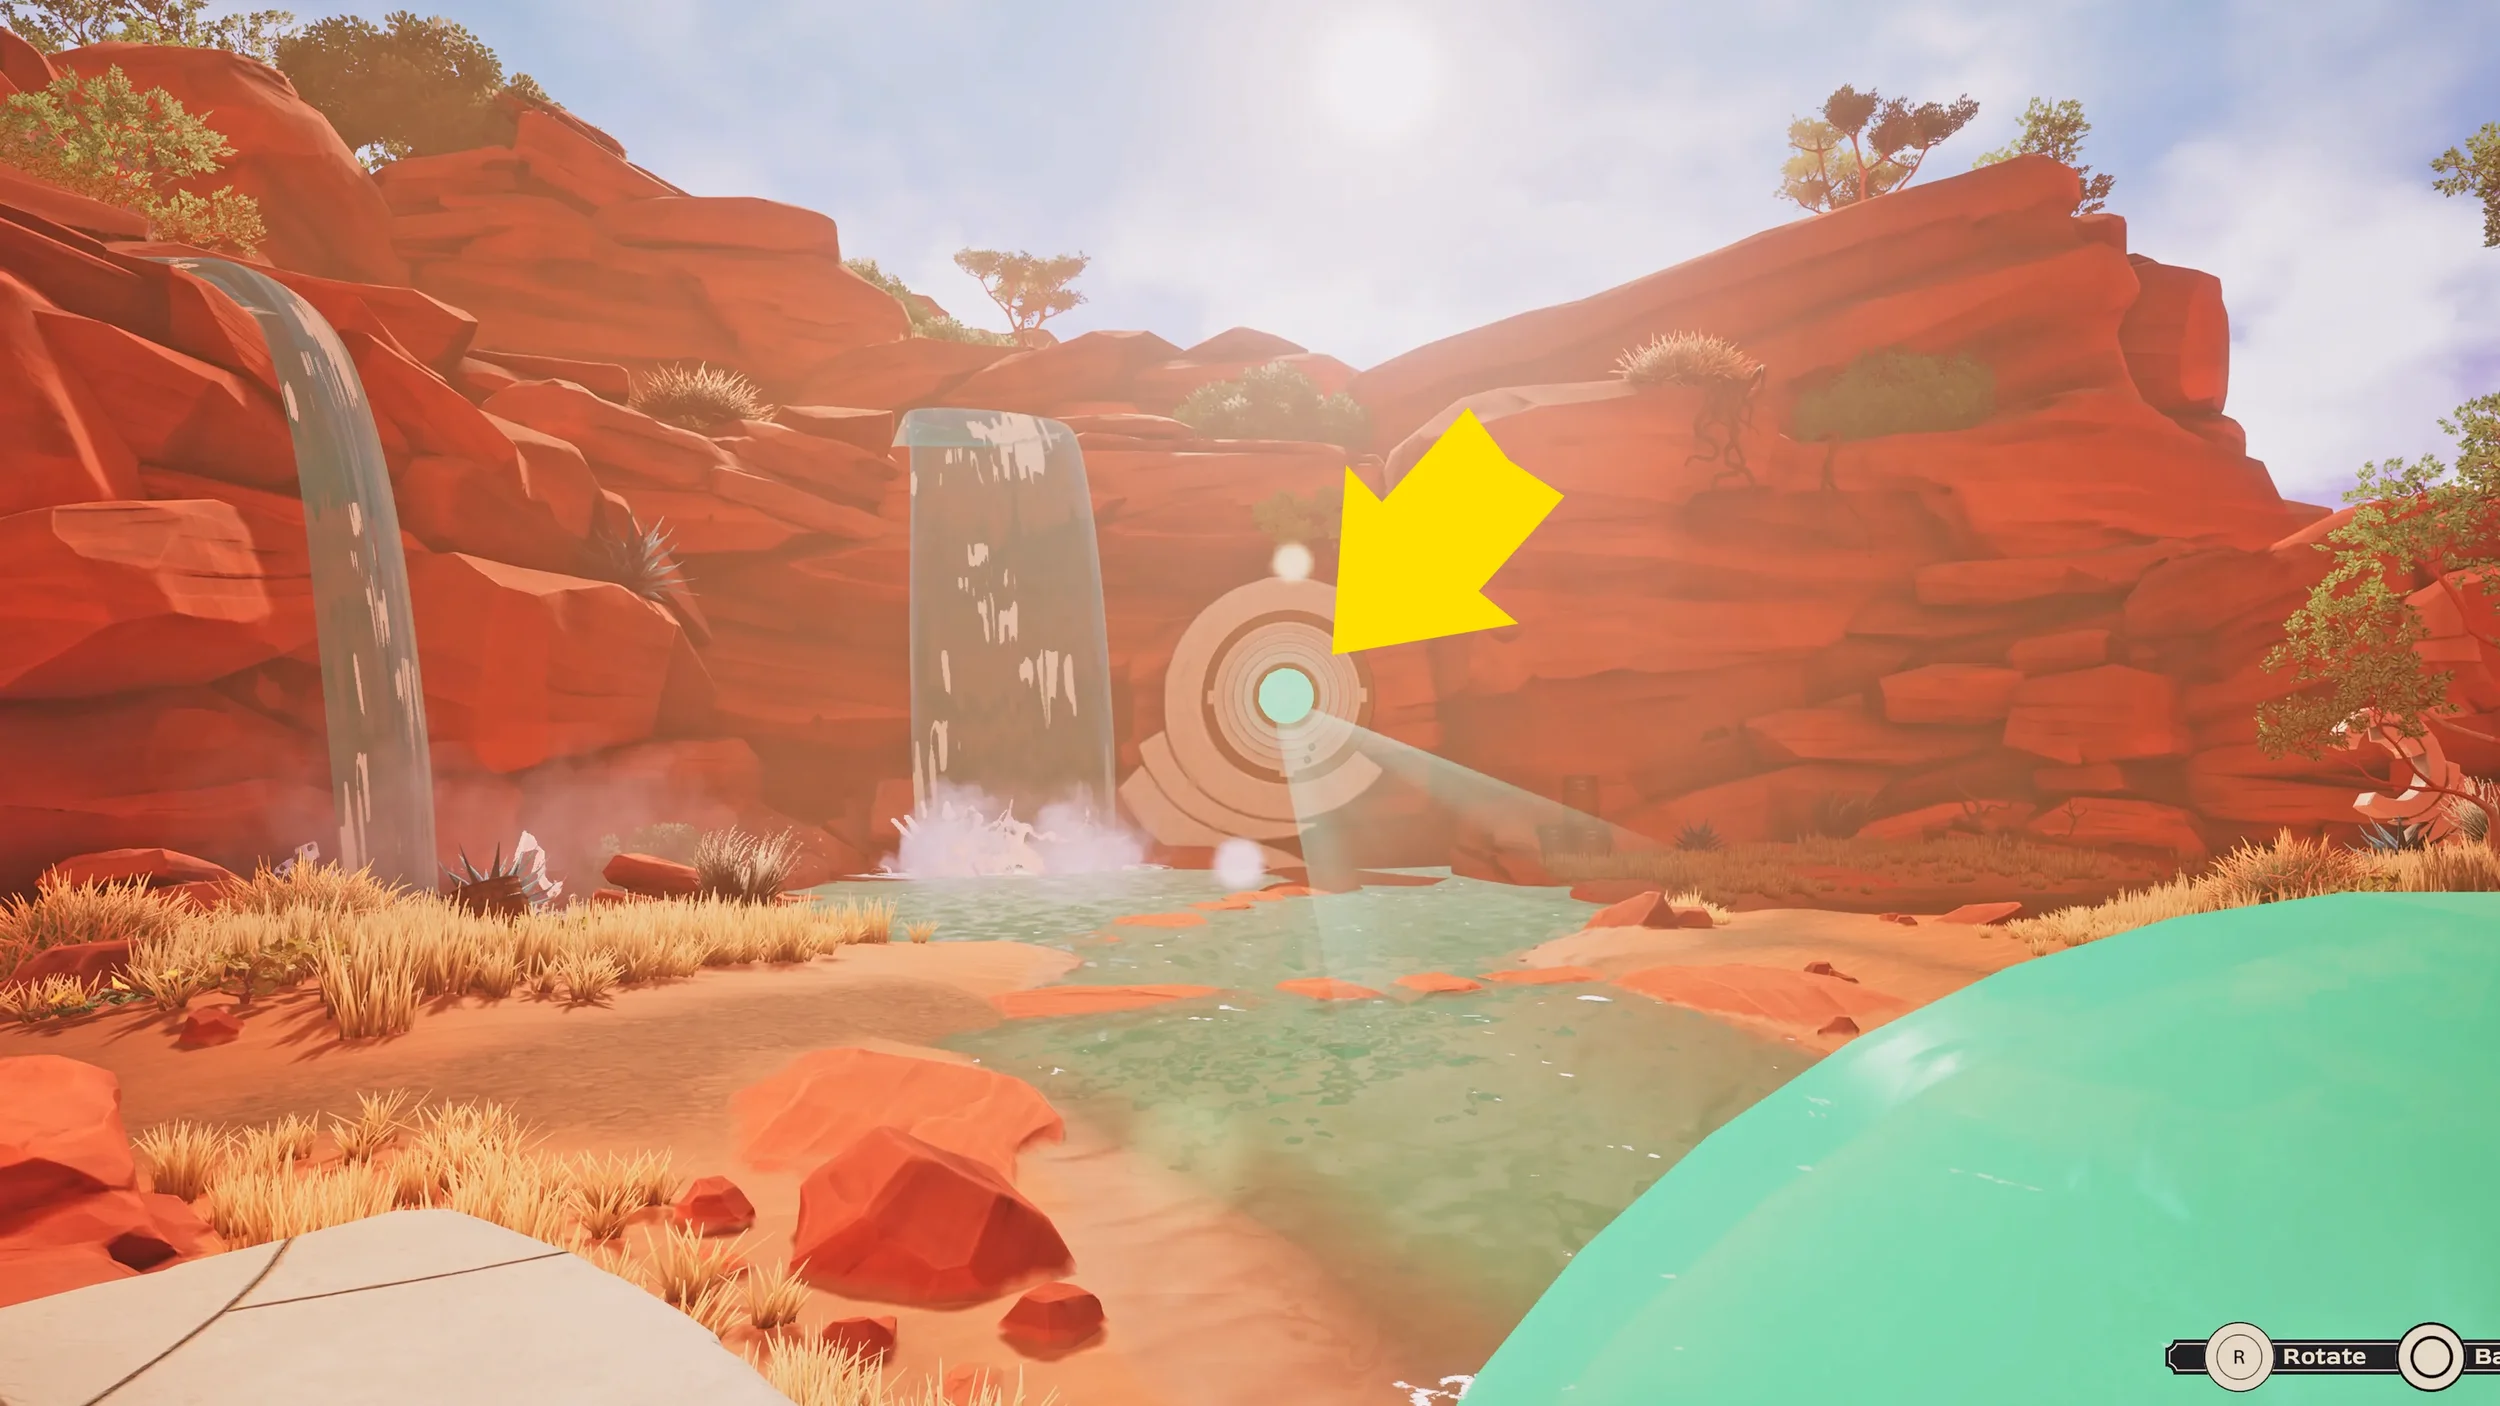
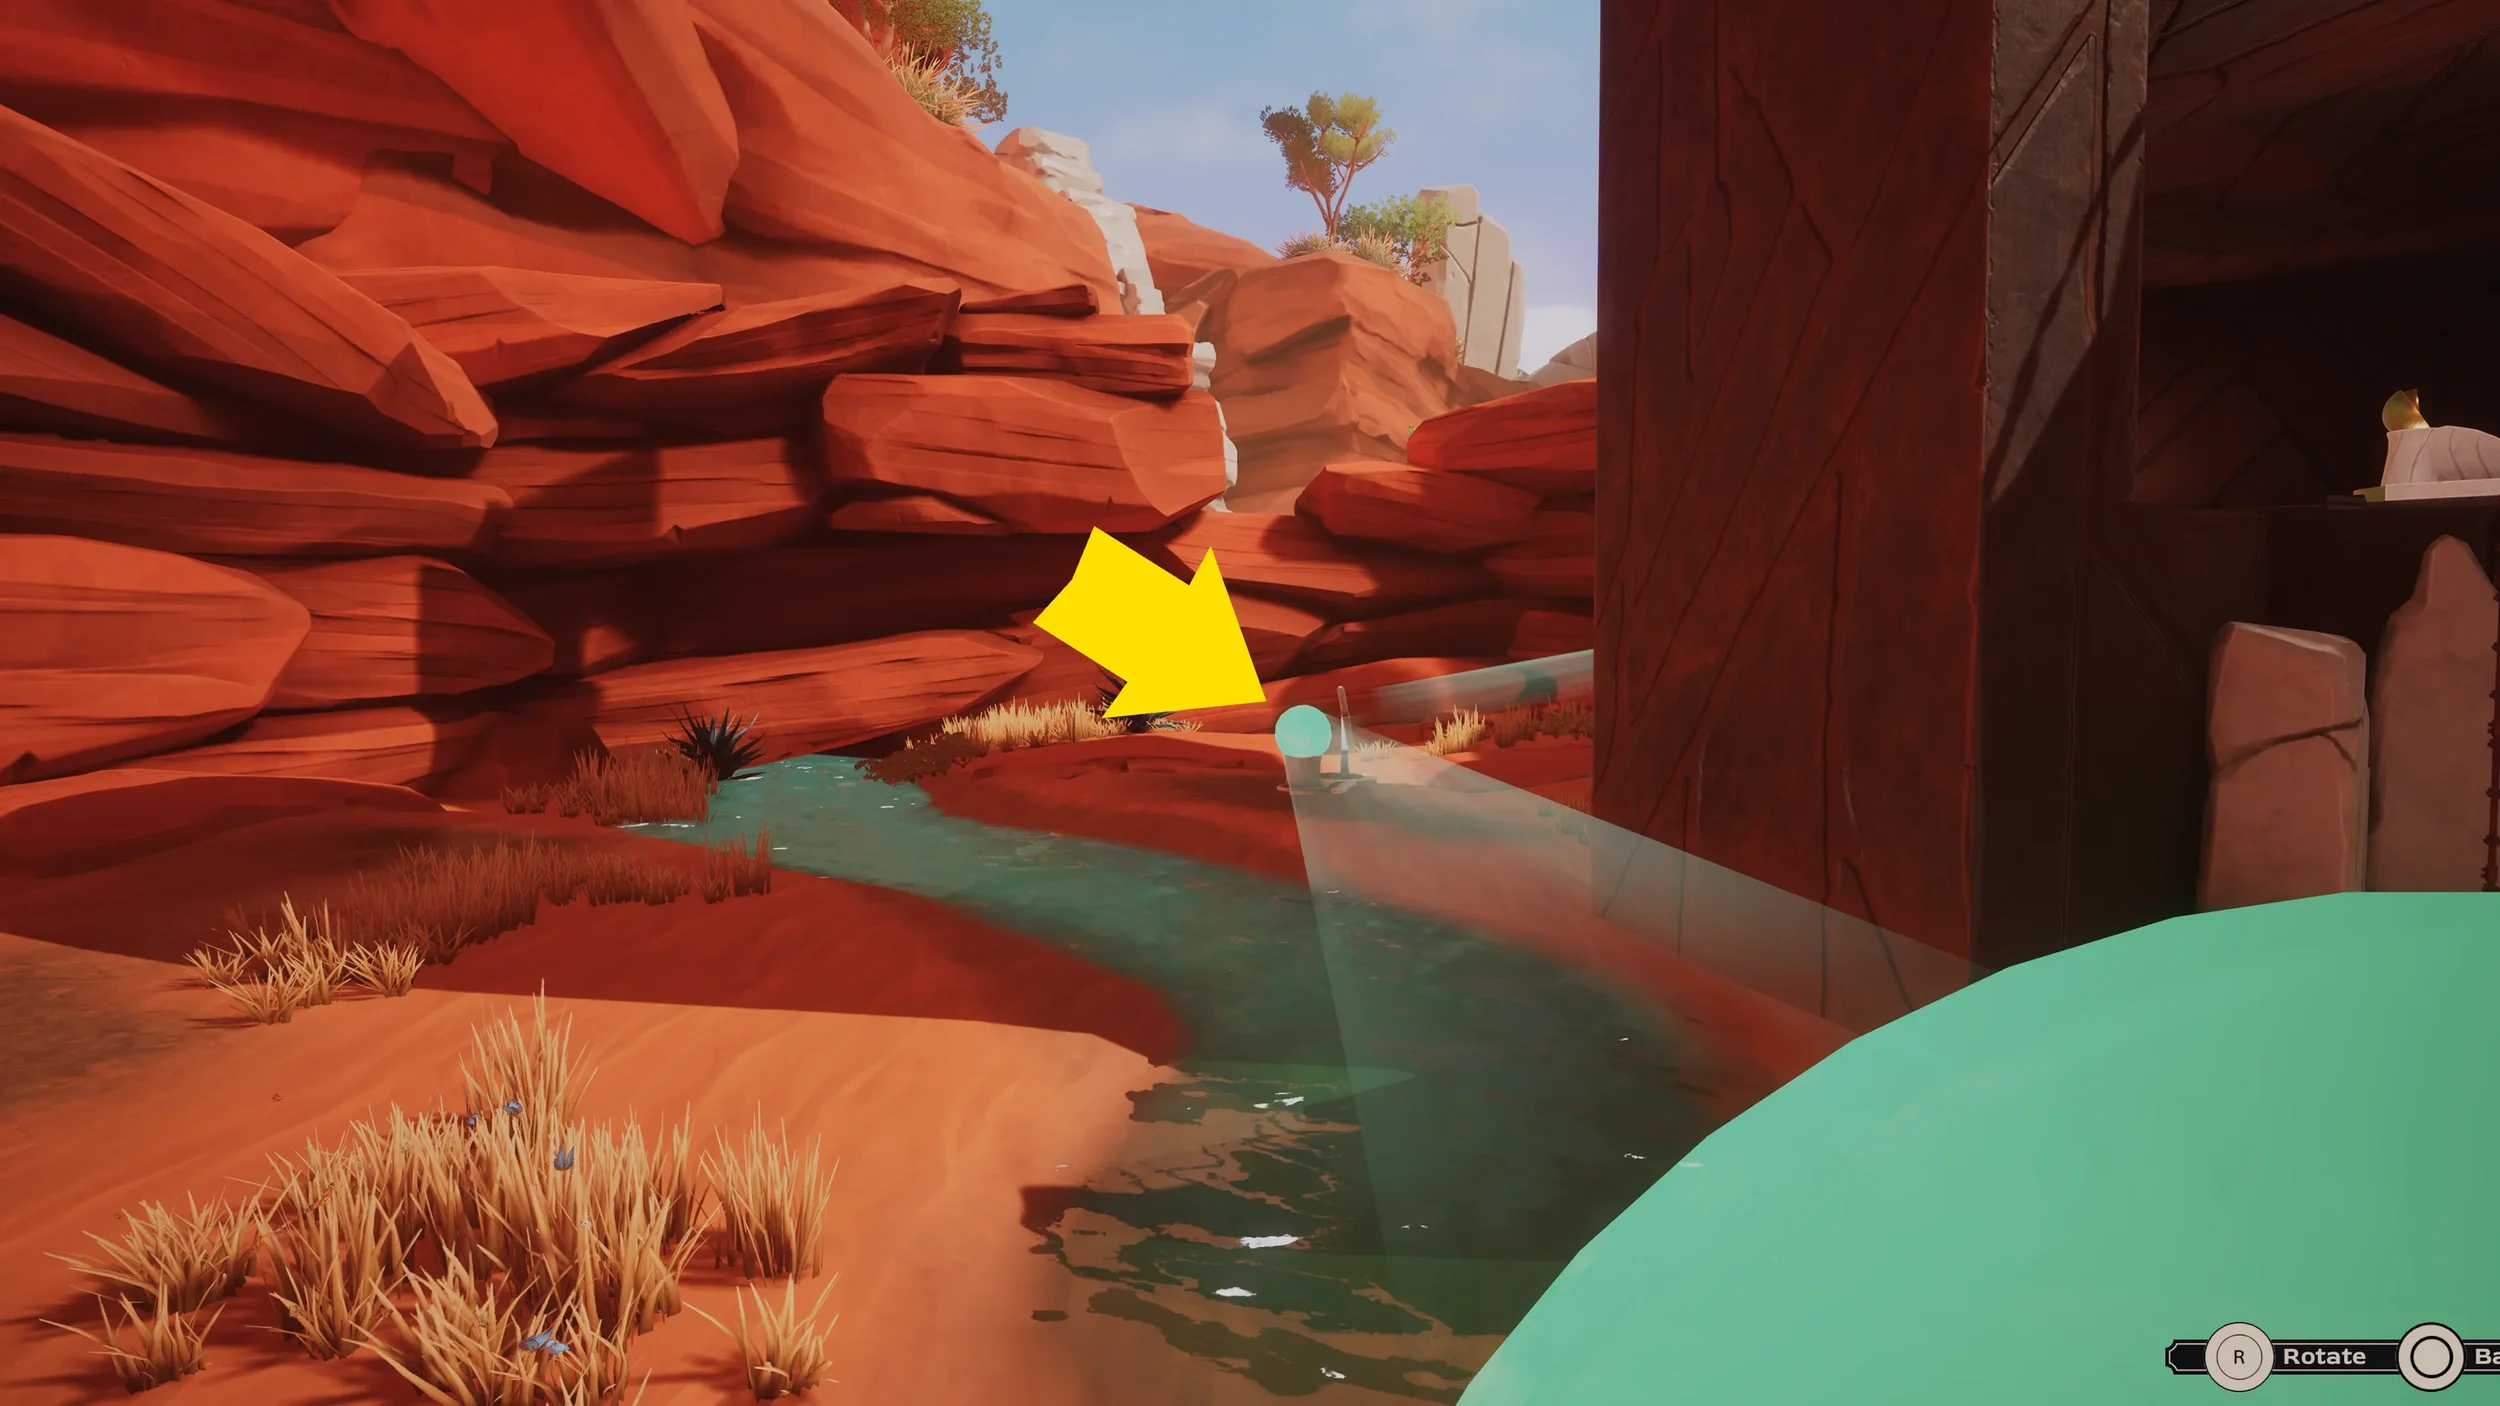
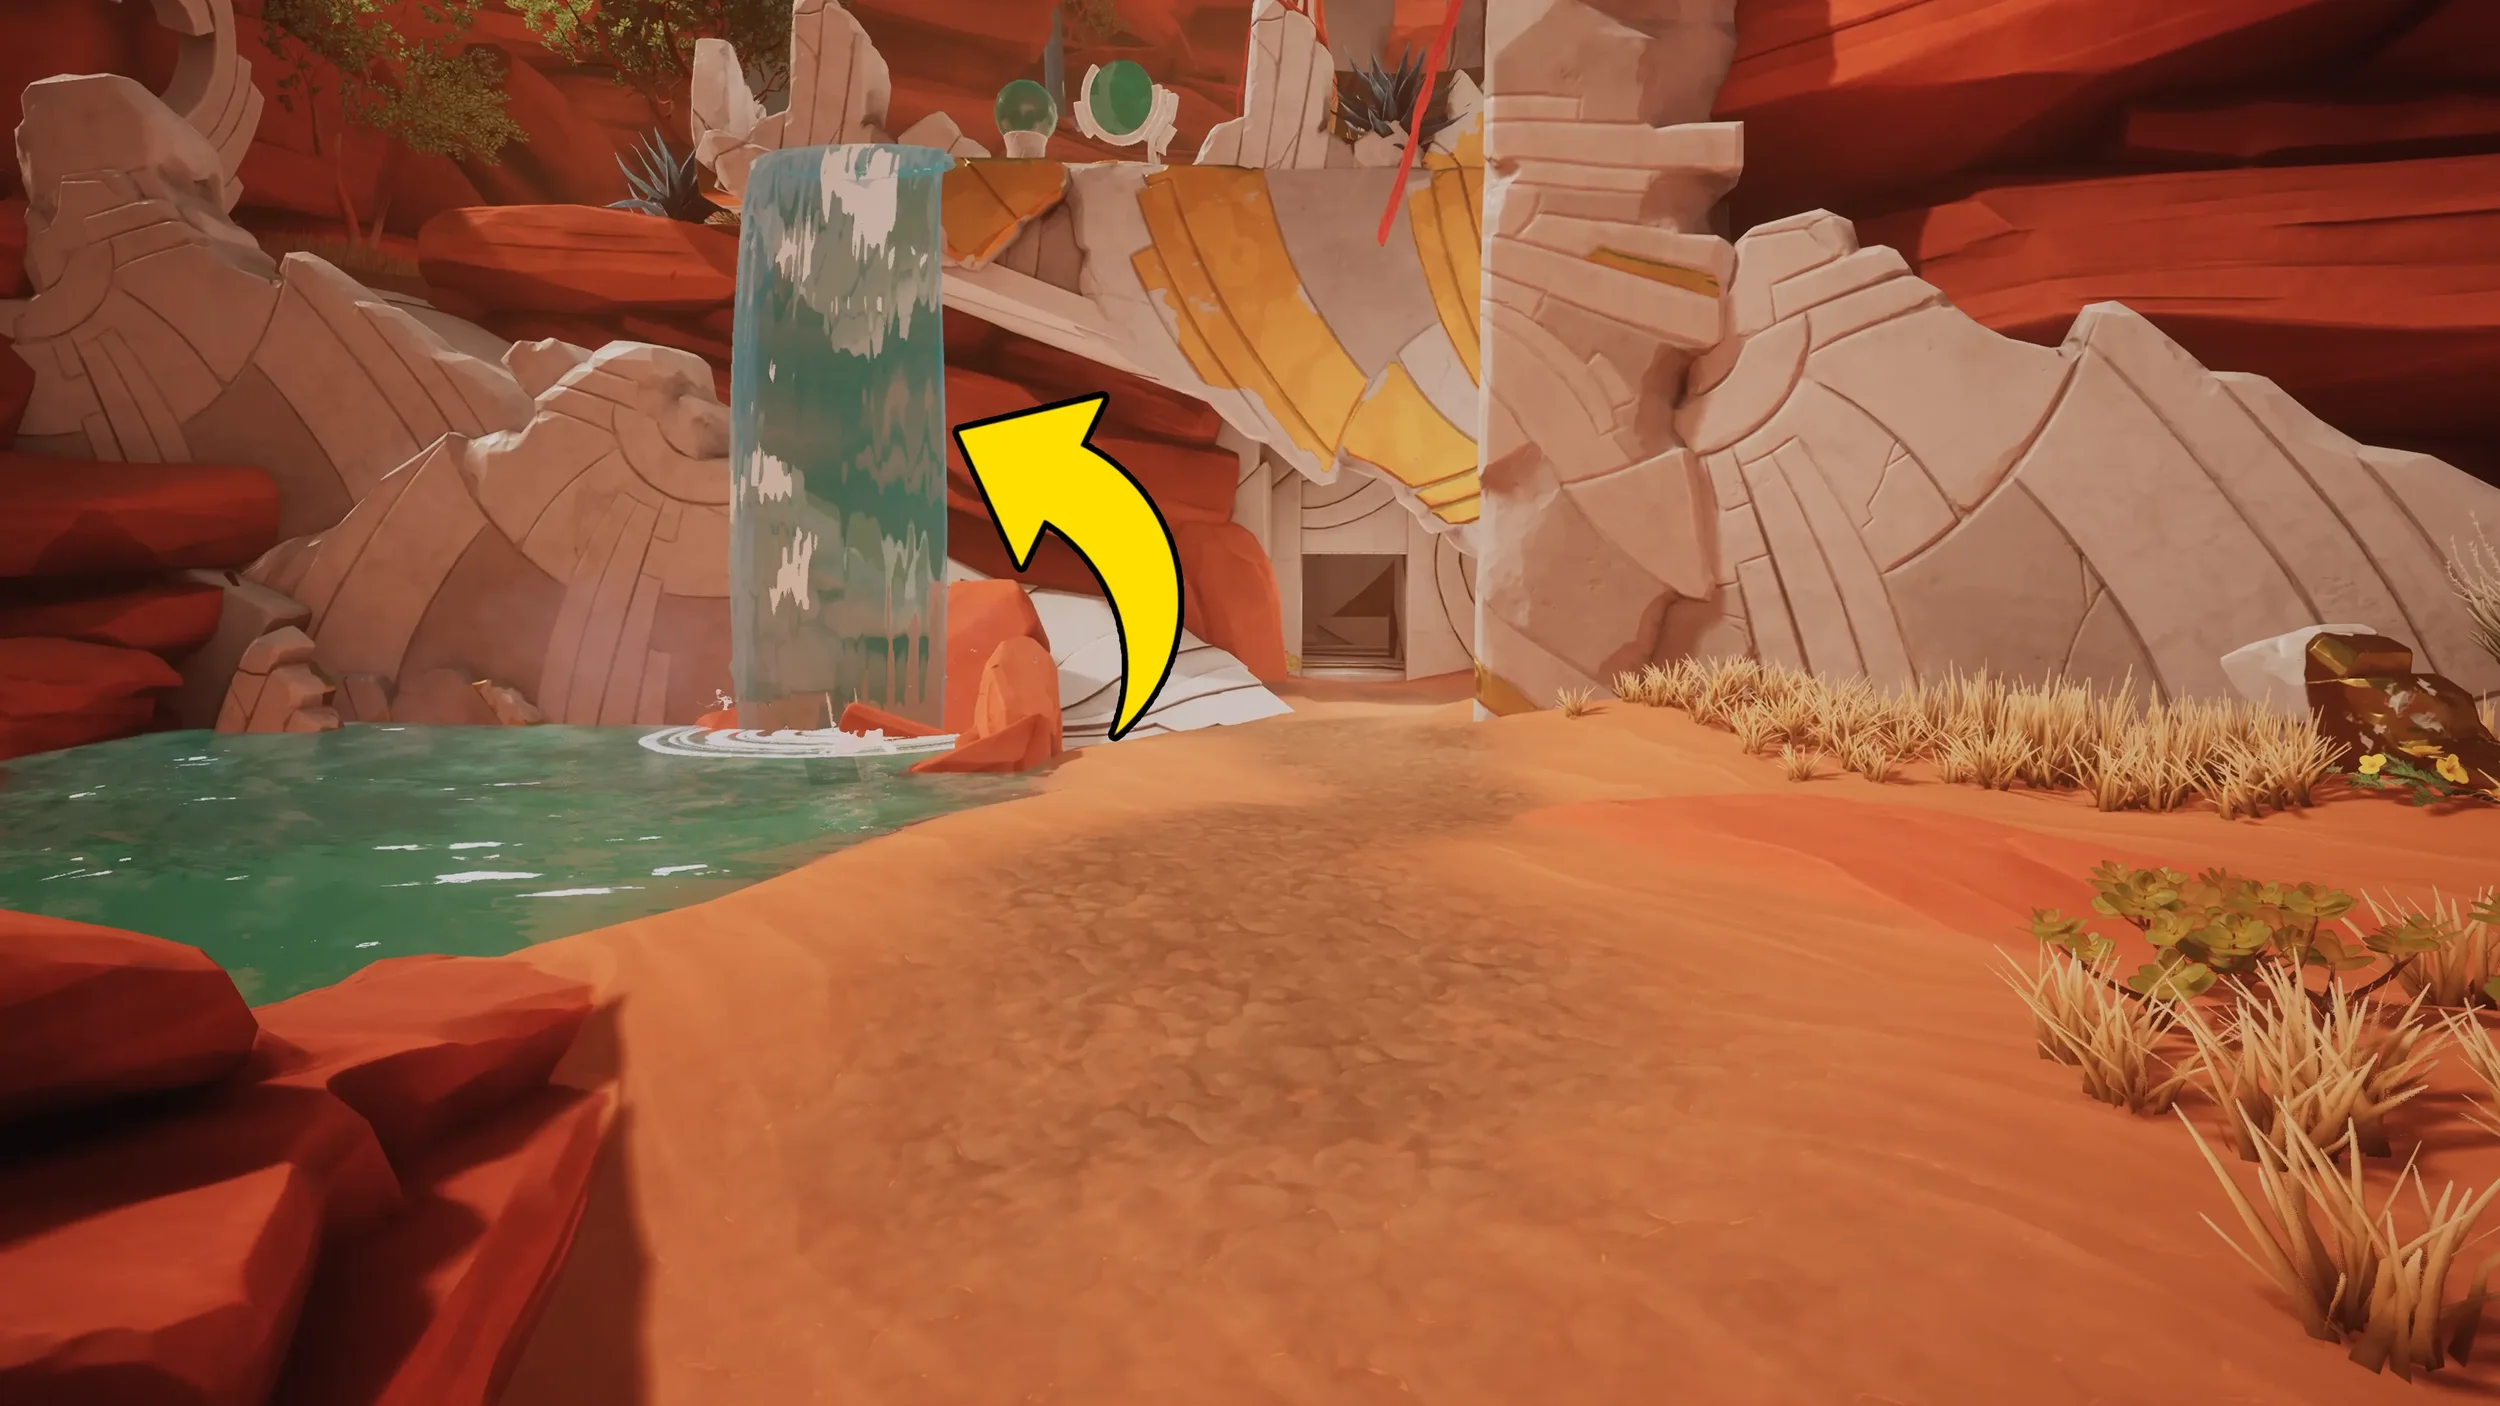
This is fairly easy to do, shine the light from the first mirror at the orb of the mirror just below the ladder, then climb down the ladder and shine the mirror at the bottom at the orb you can see higher up by the waterfall, go up the ramp on your right to reach the next mirror.
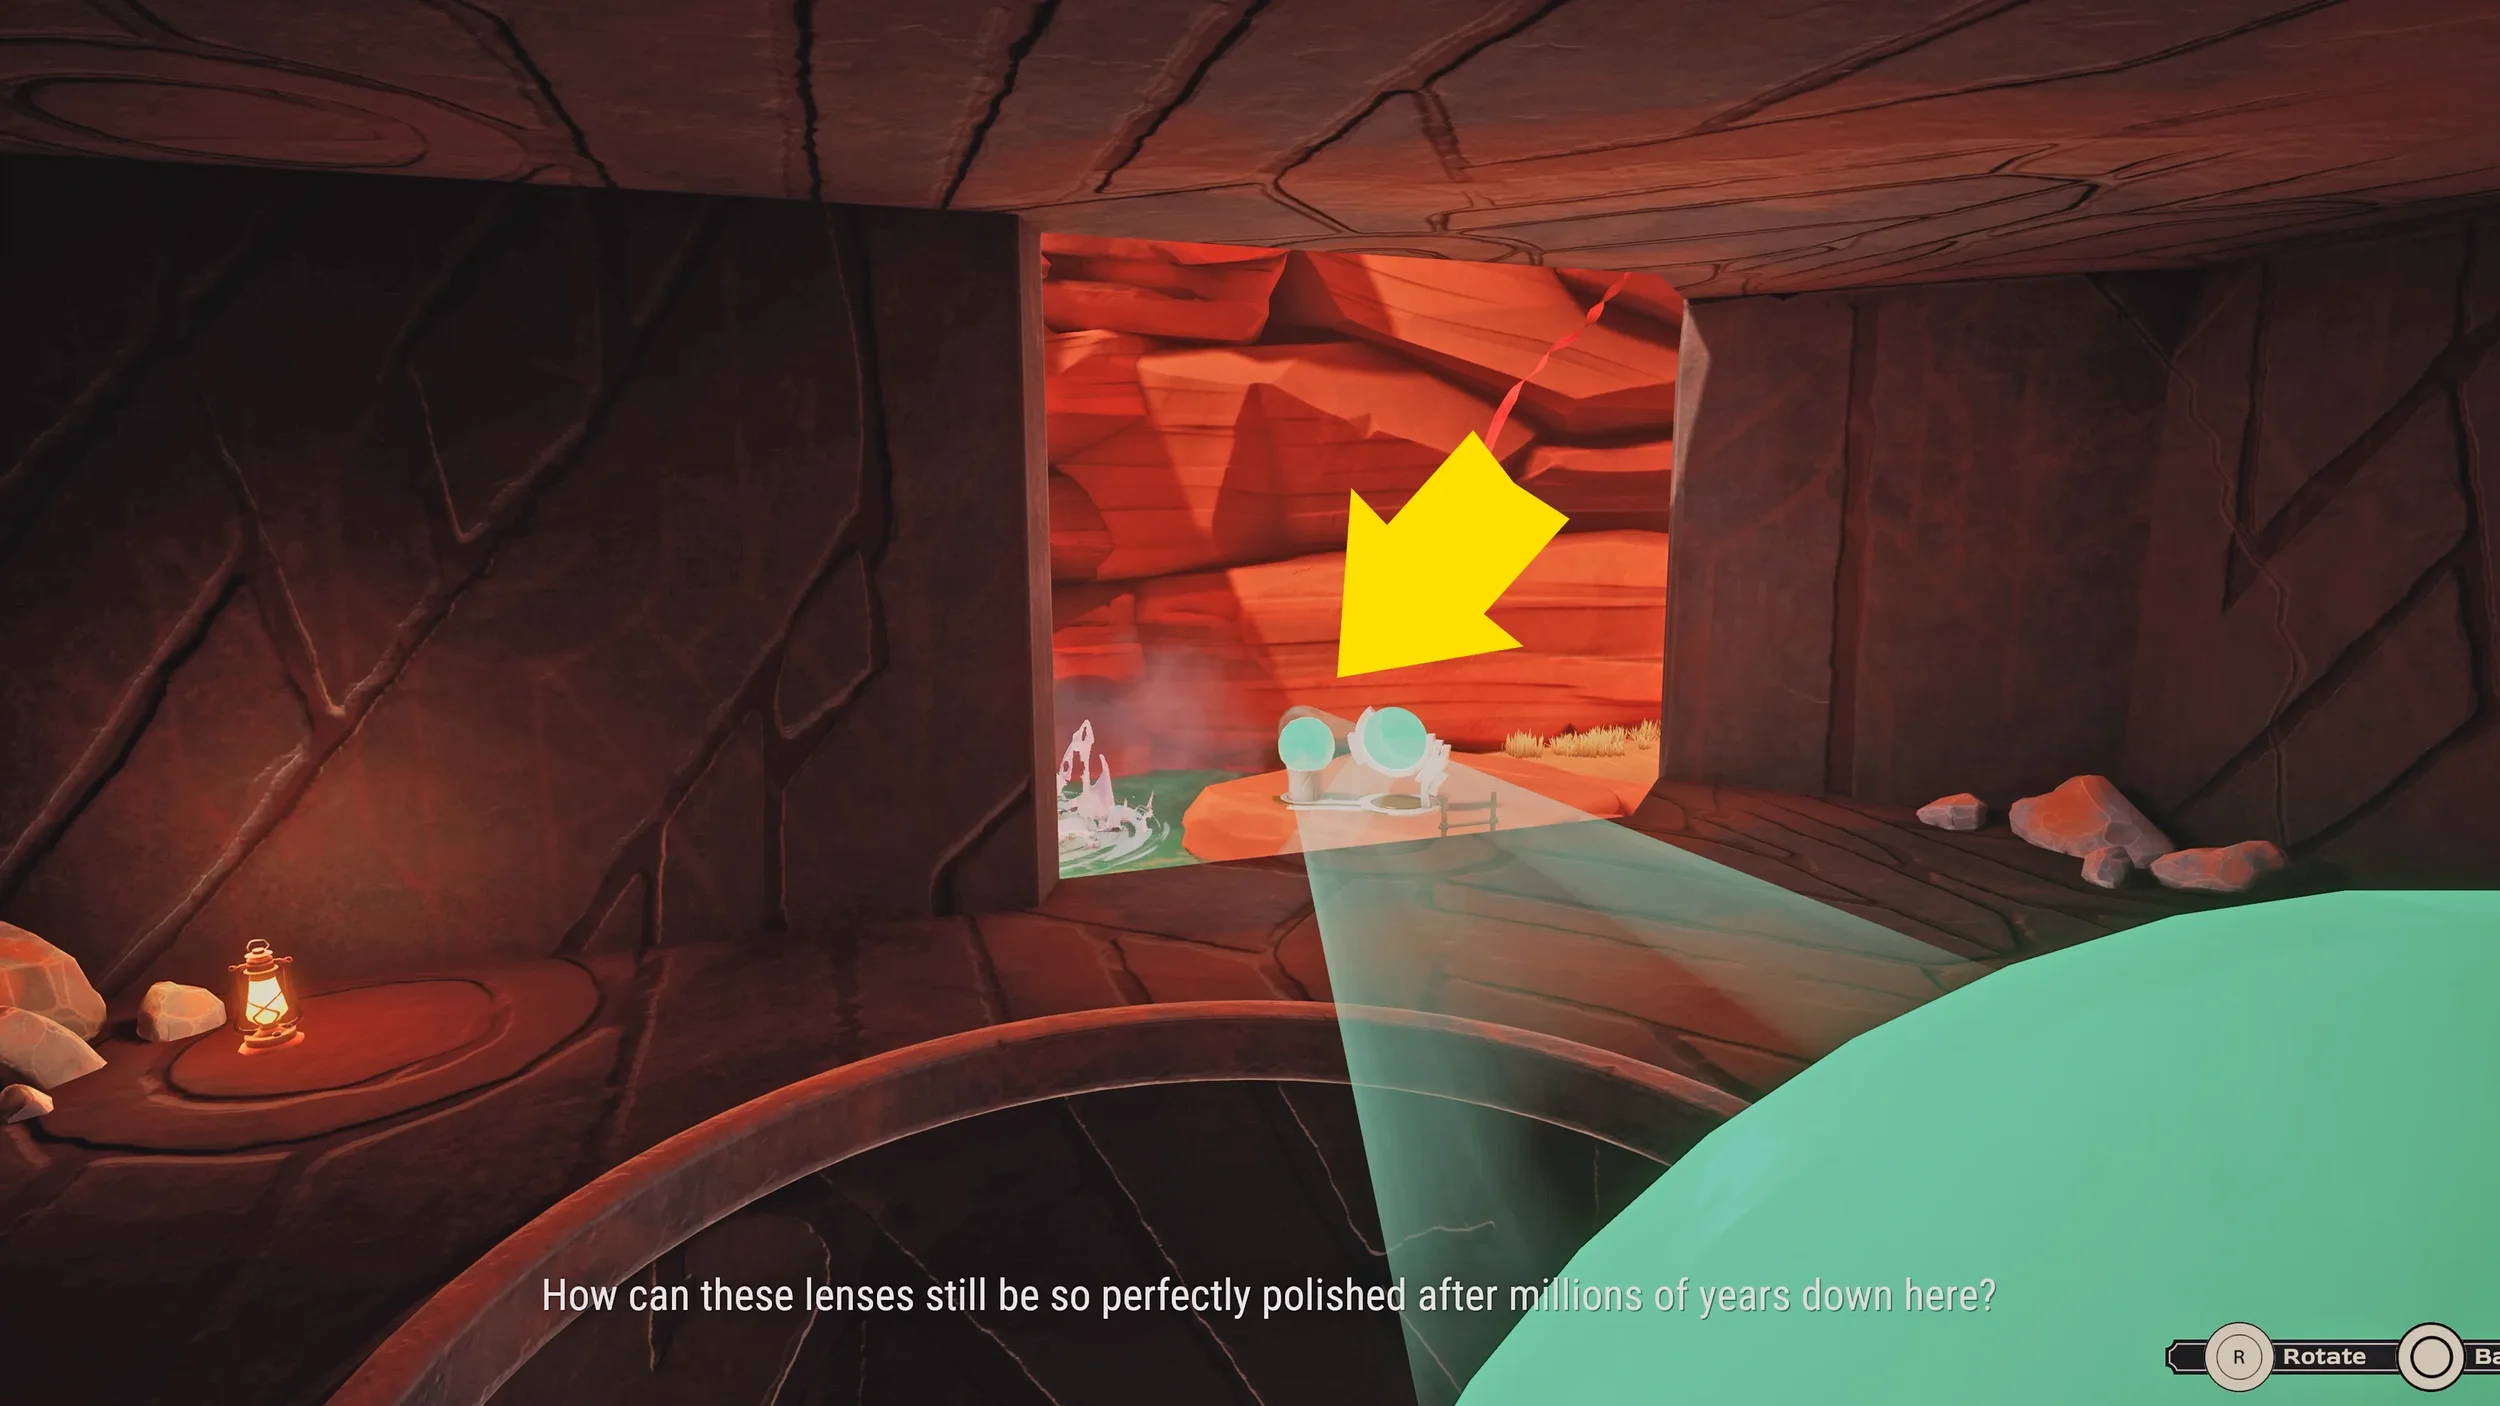

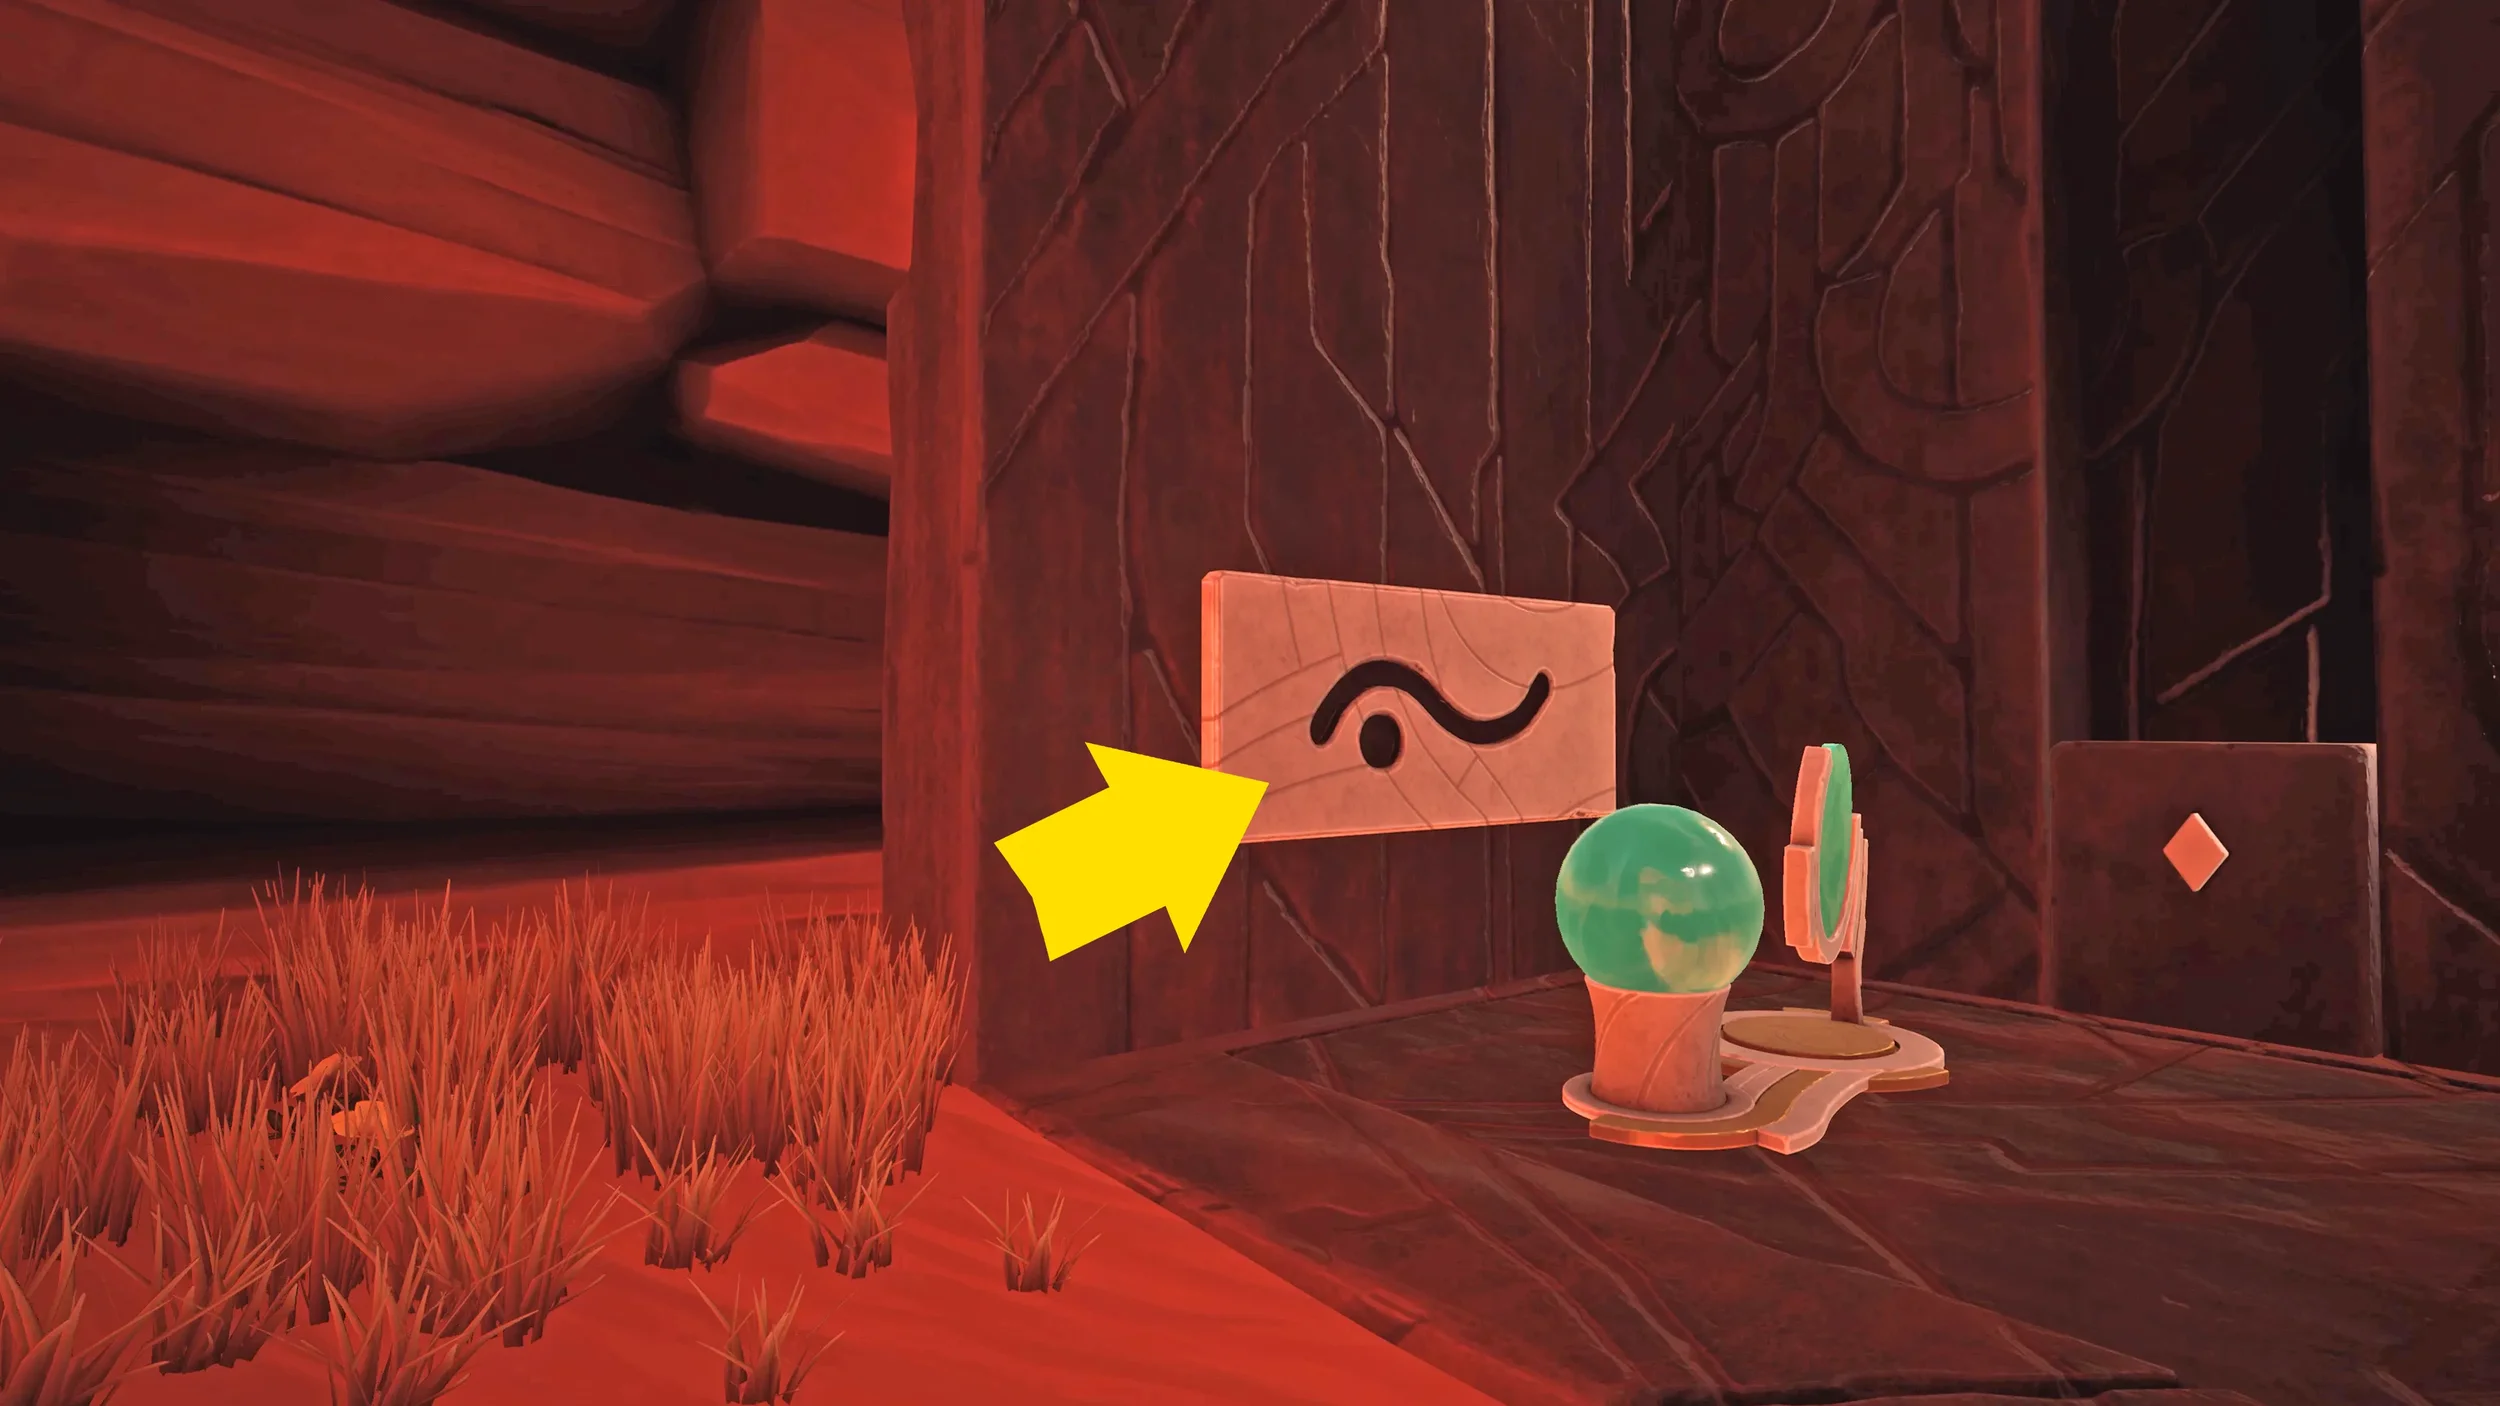
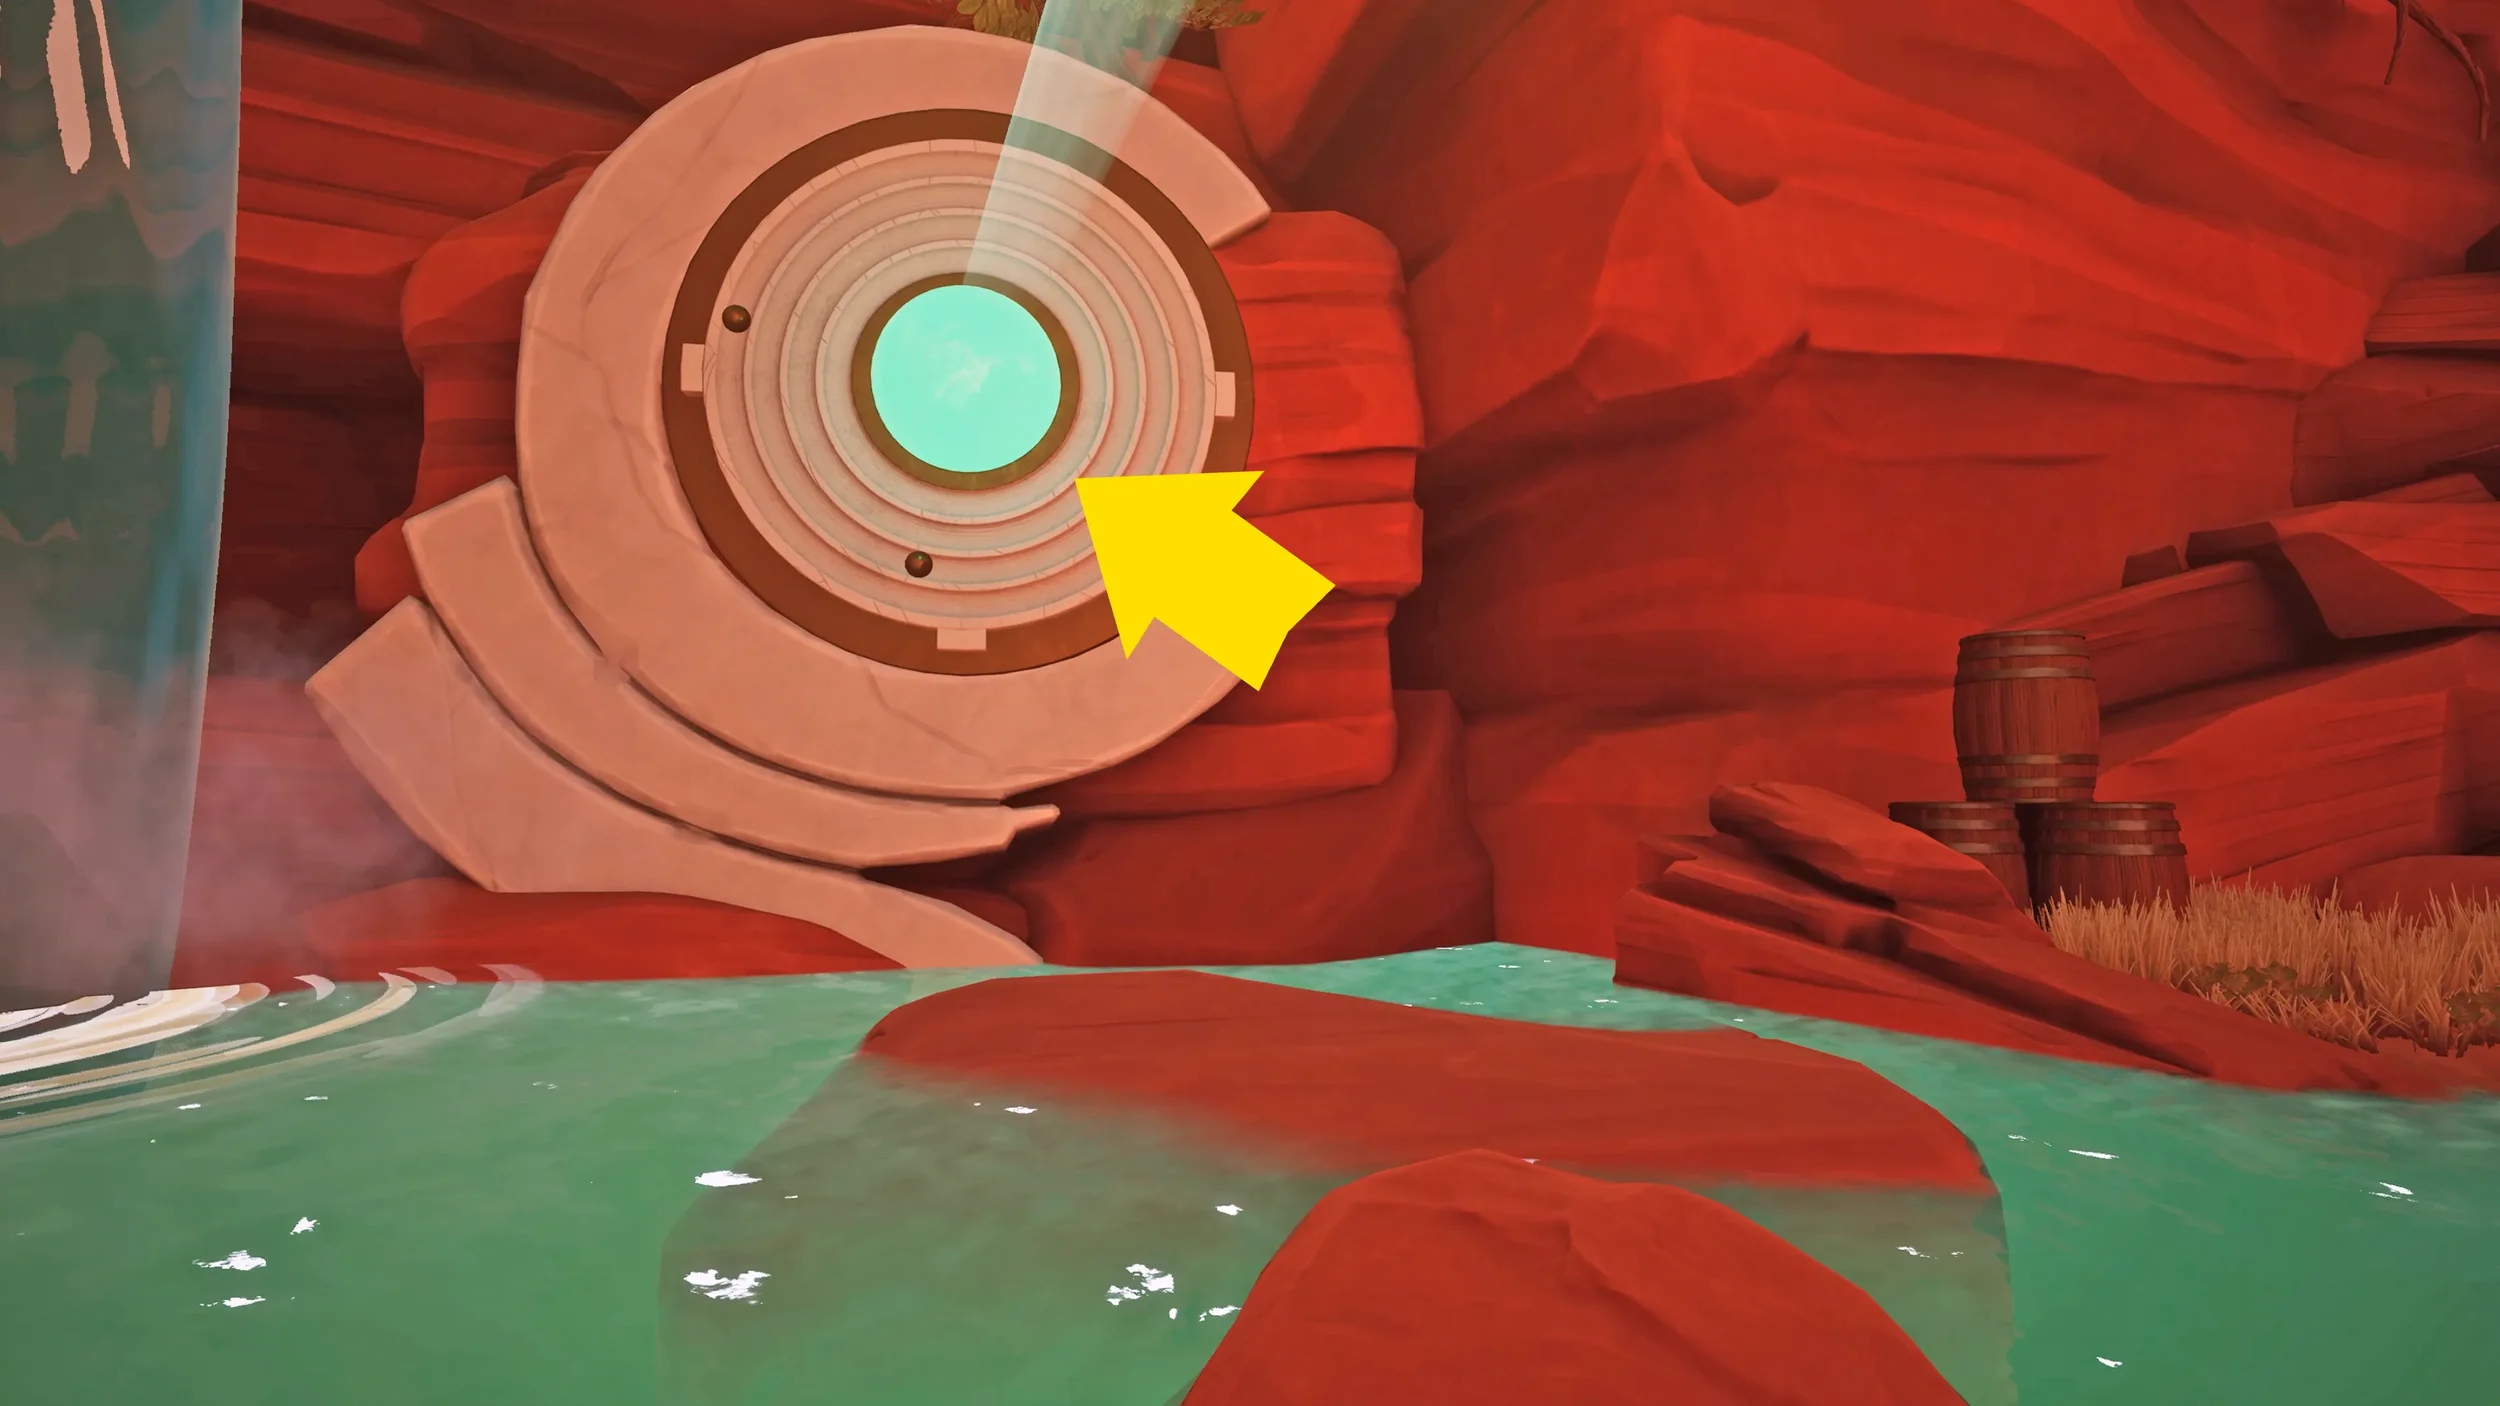
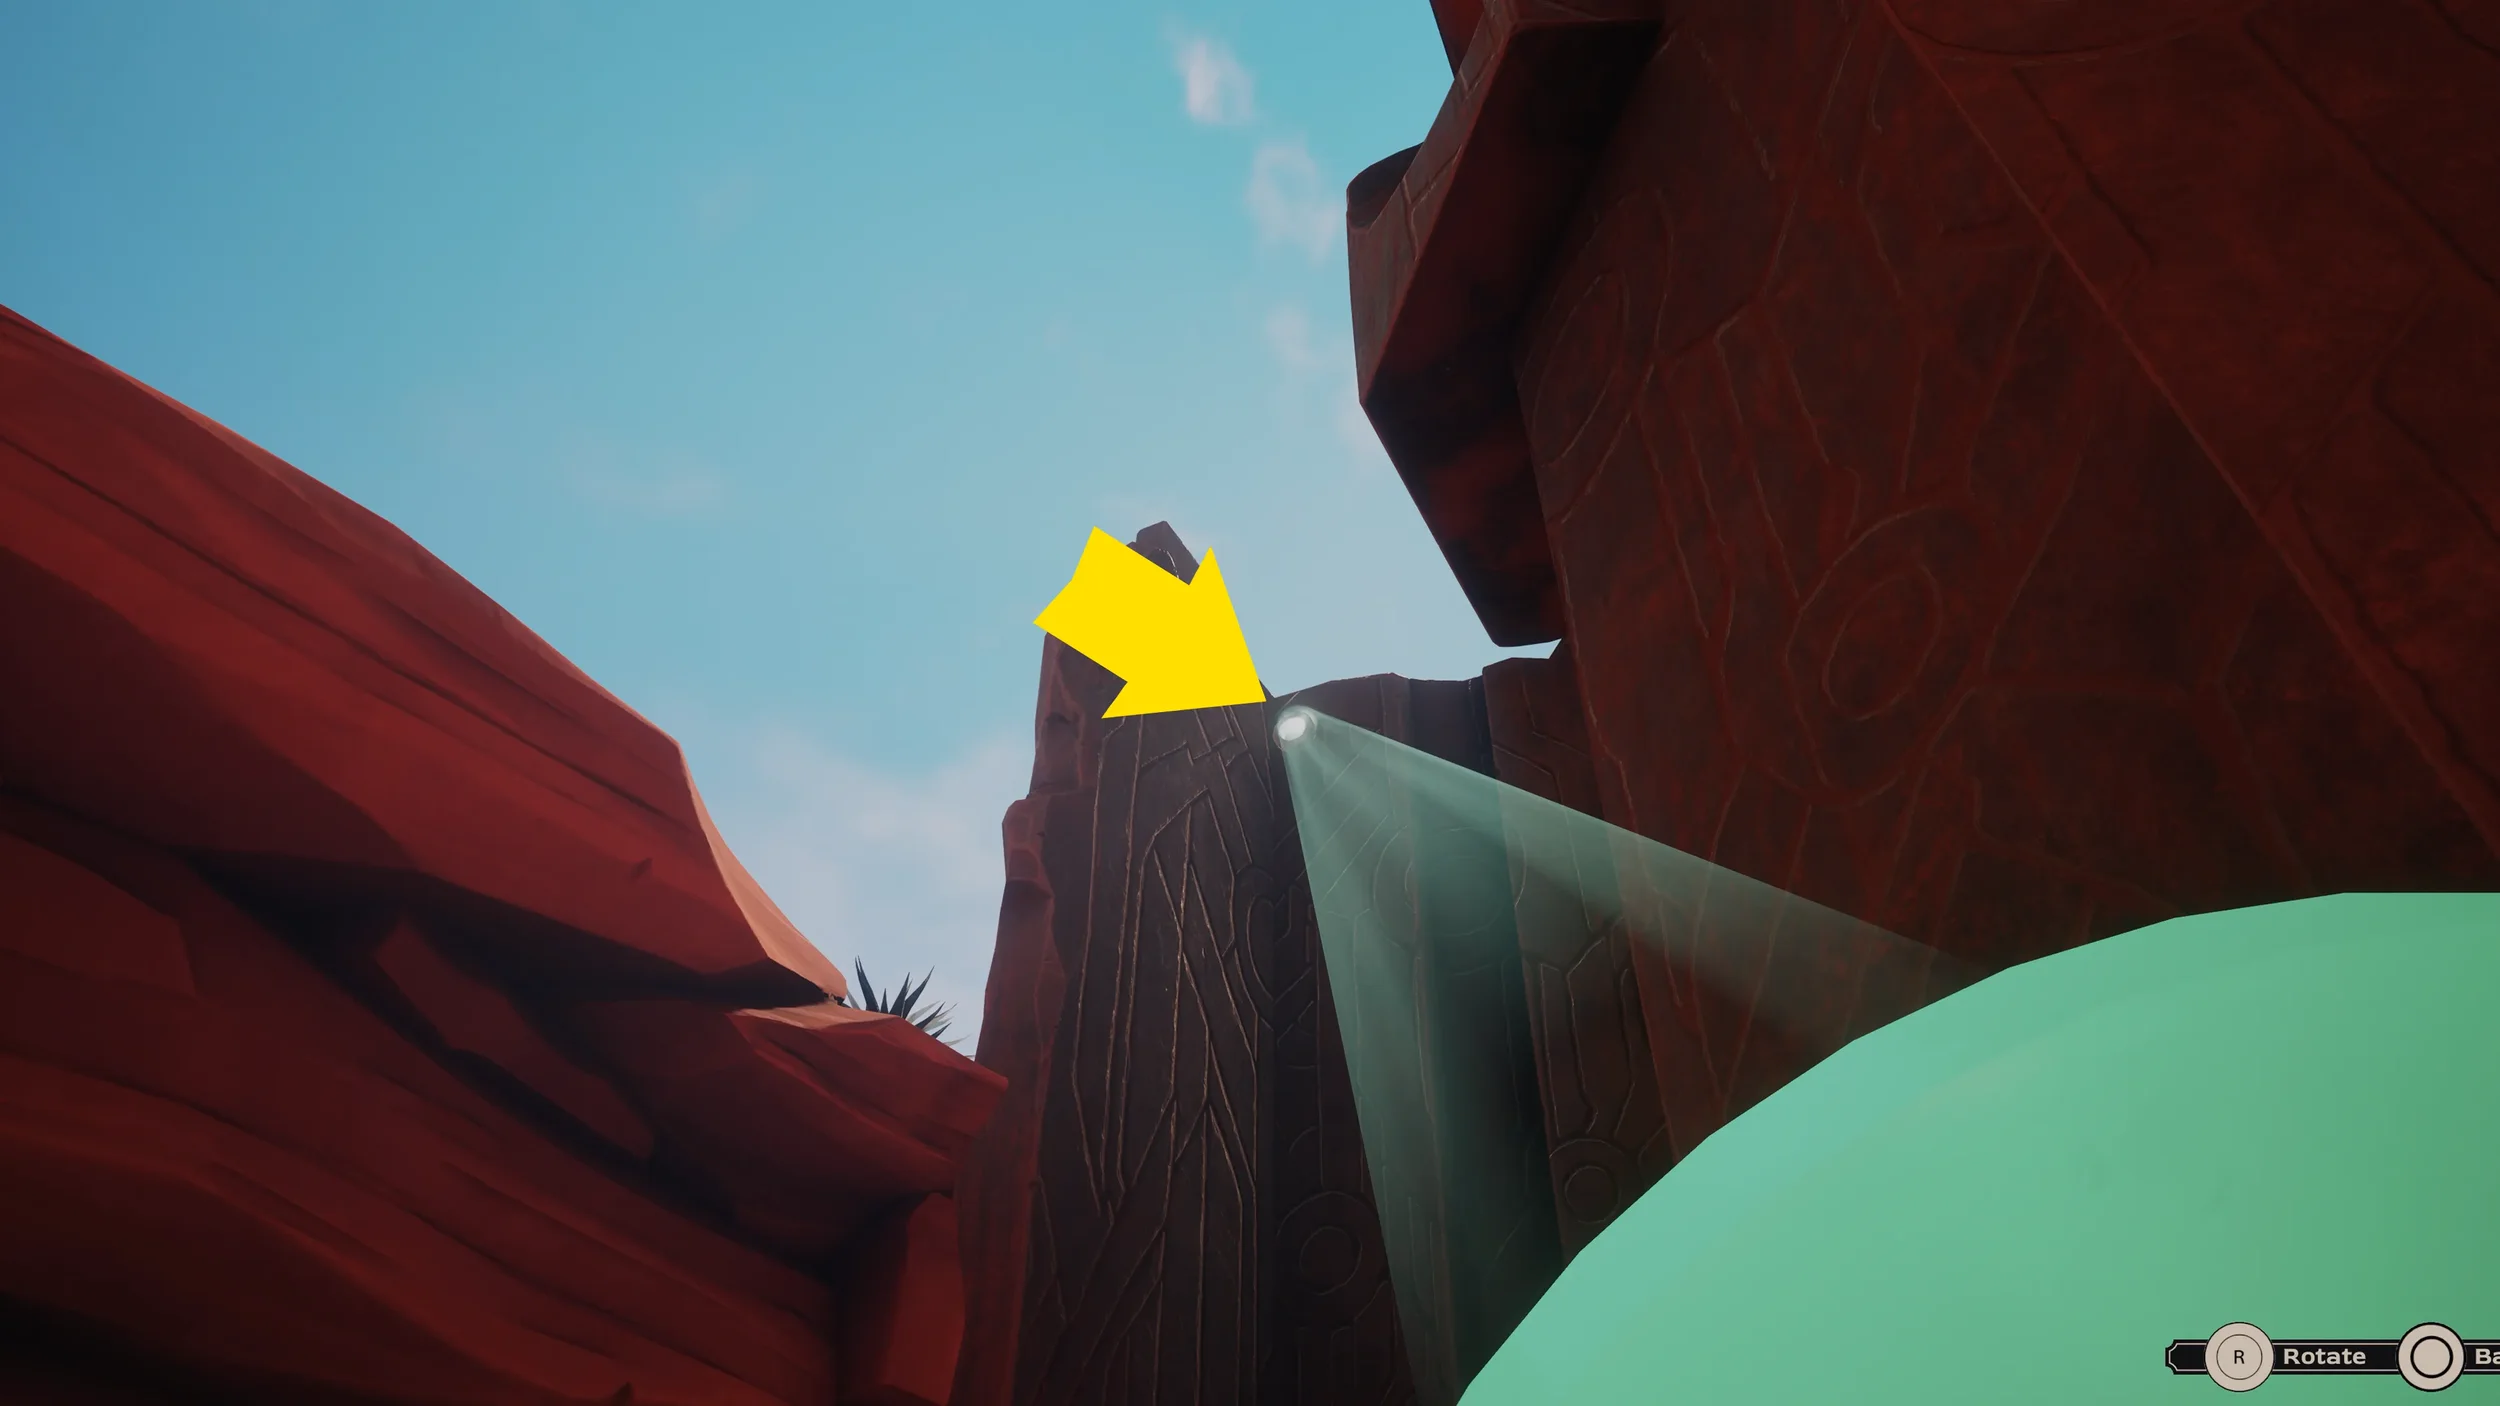
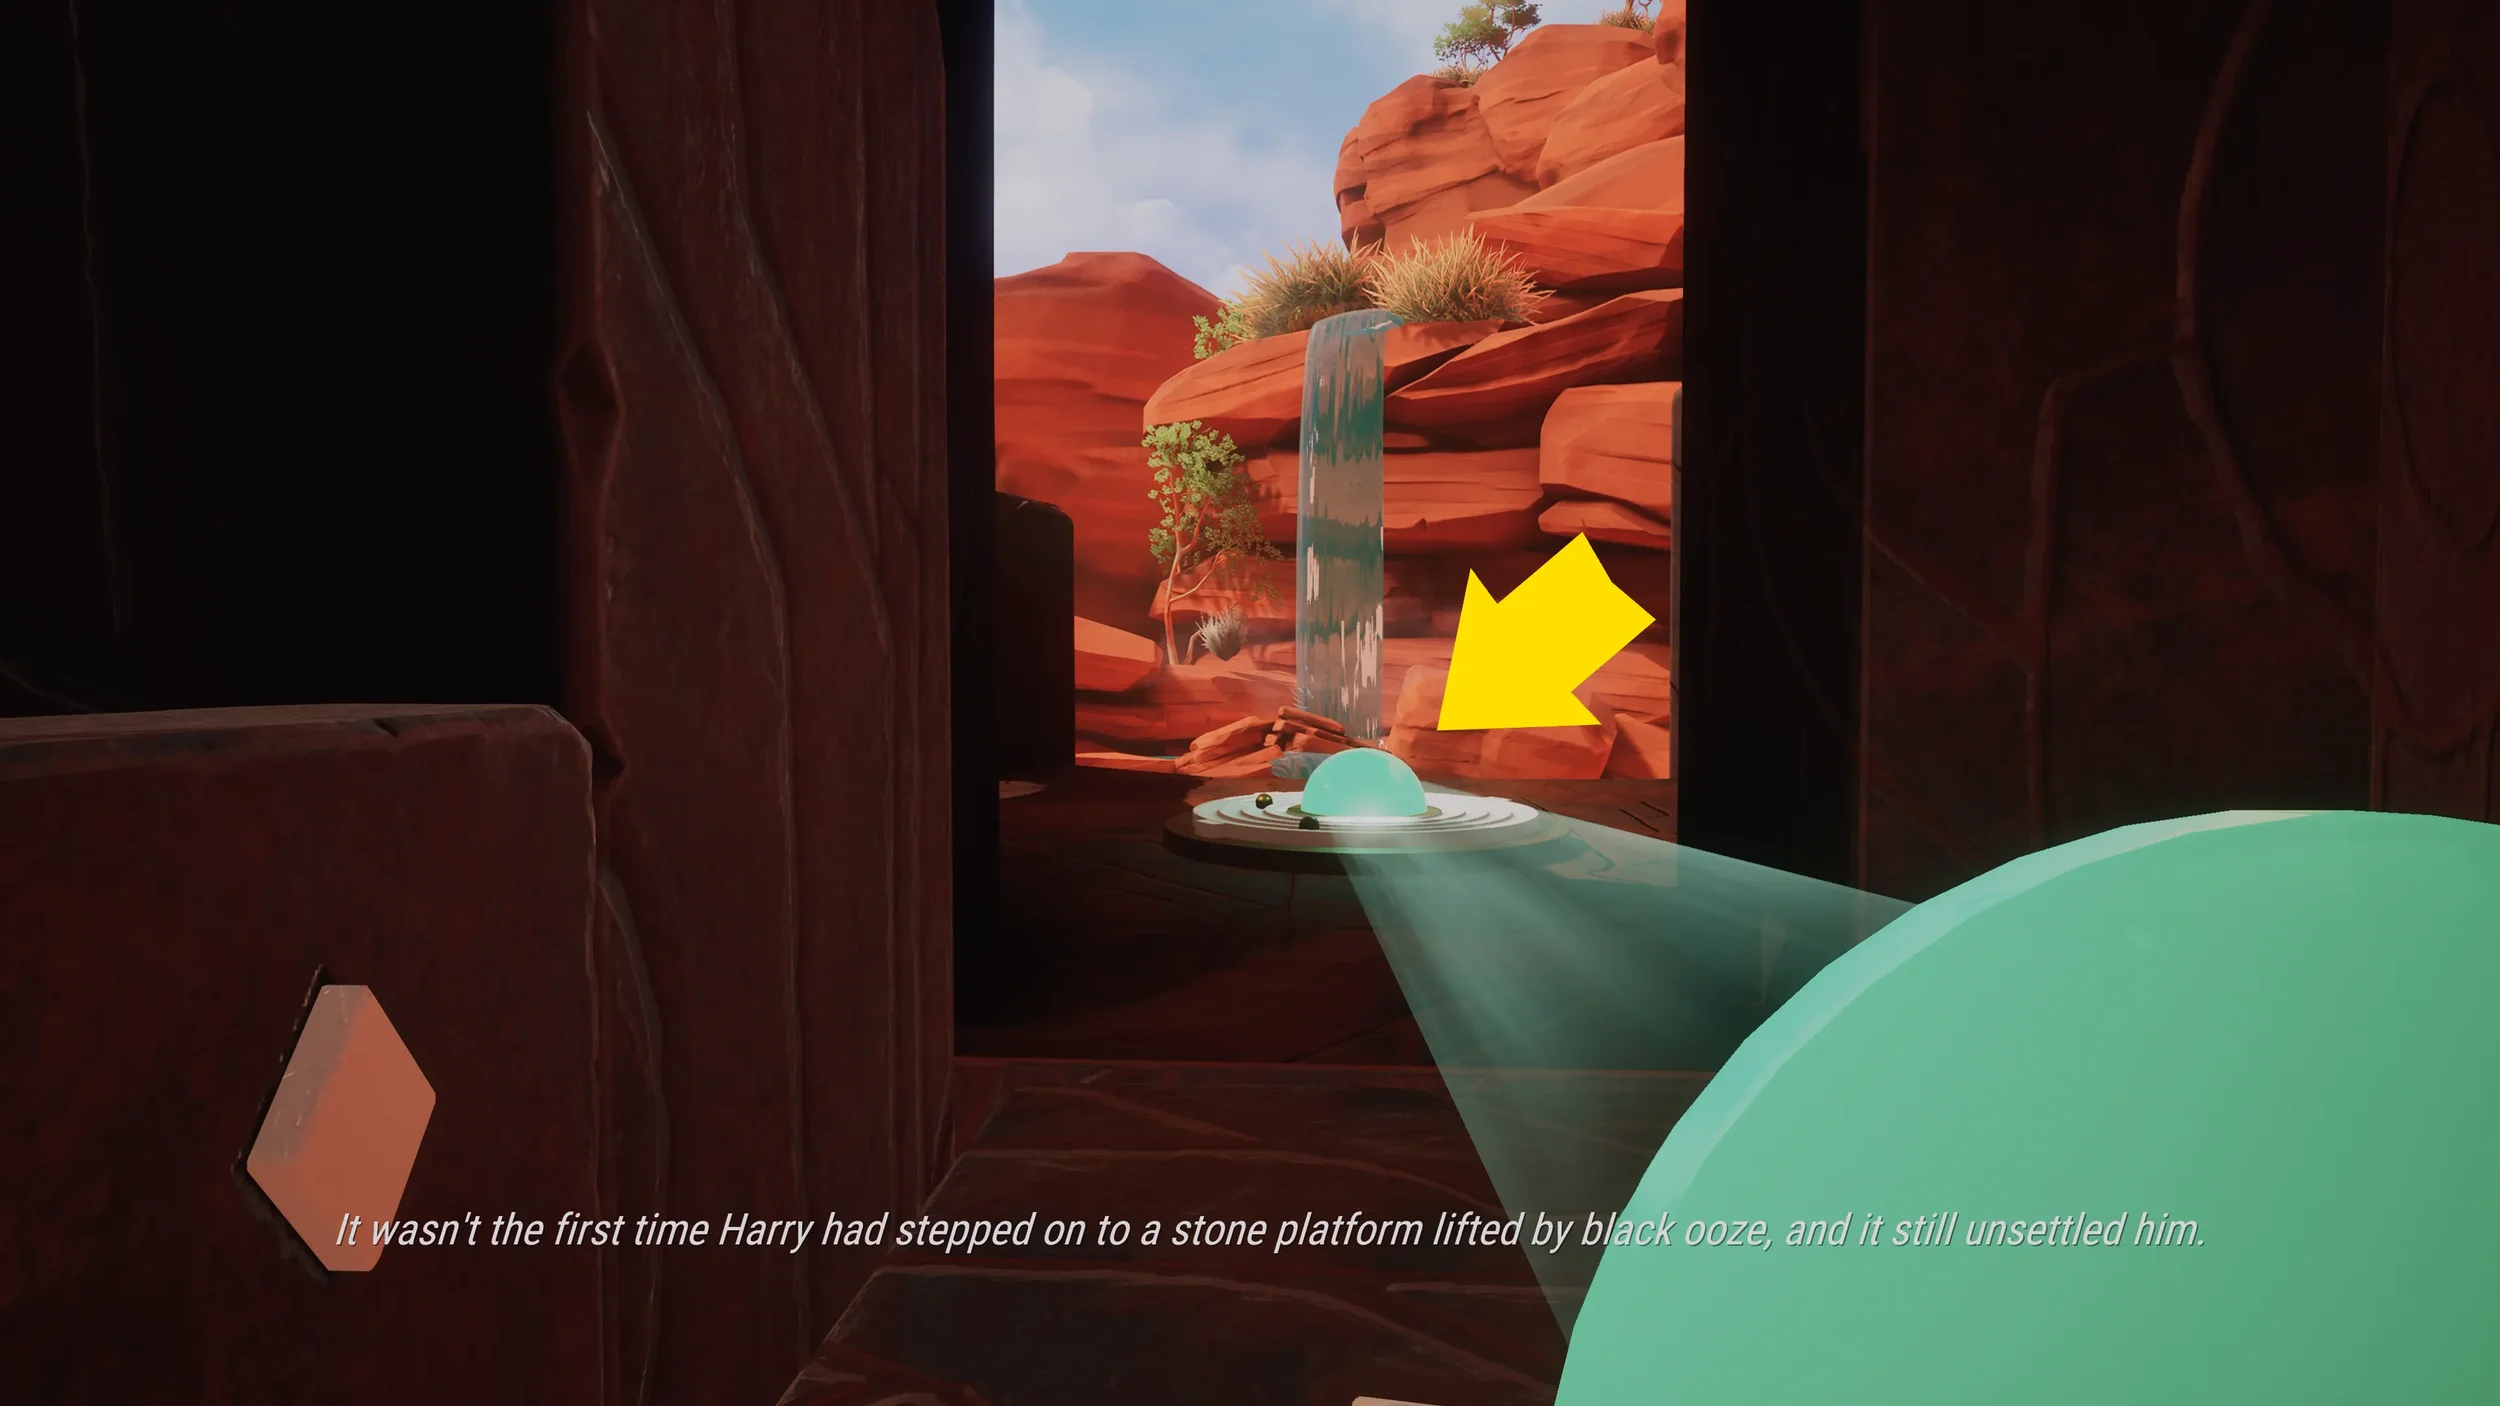
Shine this one at the orb you can see by looking down to the left, redirect that one to the orb right next to the main puzzle area and then finally shine the light from the final mirror onto the Green Orb semicircle sticking out of the nearby wall.
While the light beam is hitting the final green orb make sure to go over and interact with the orb to get the next clue.
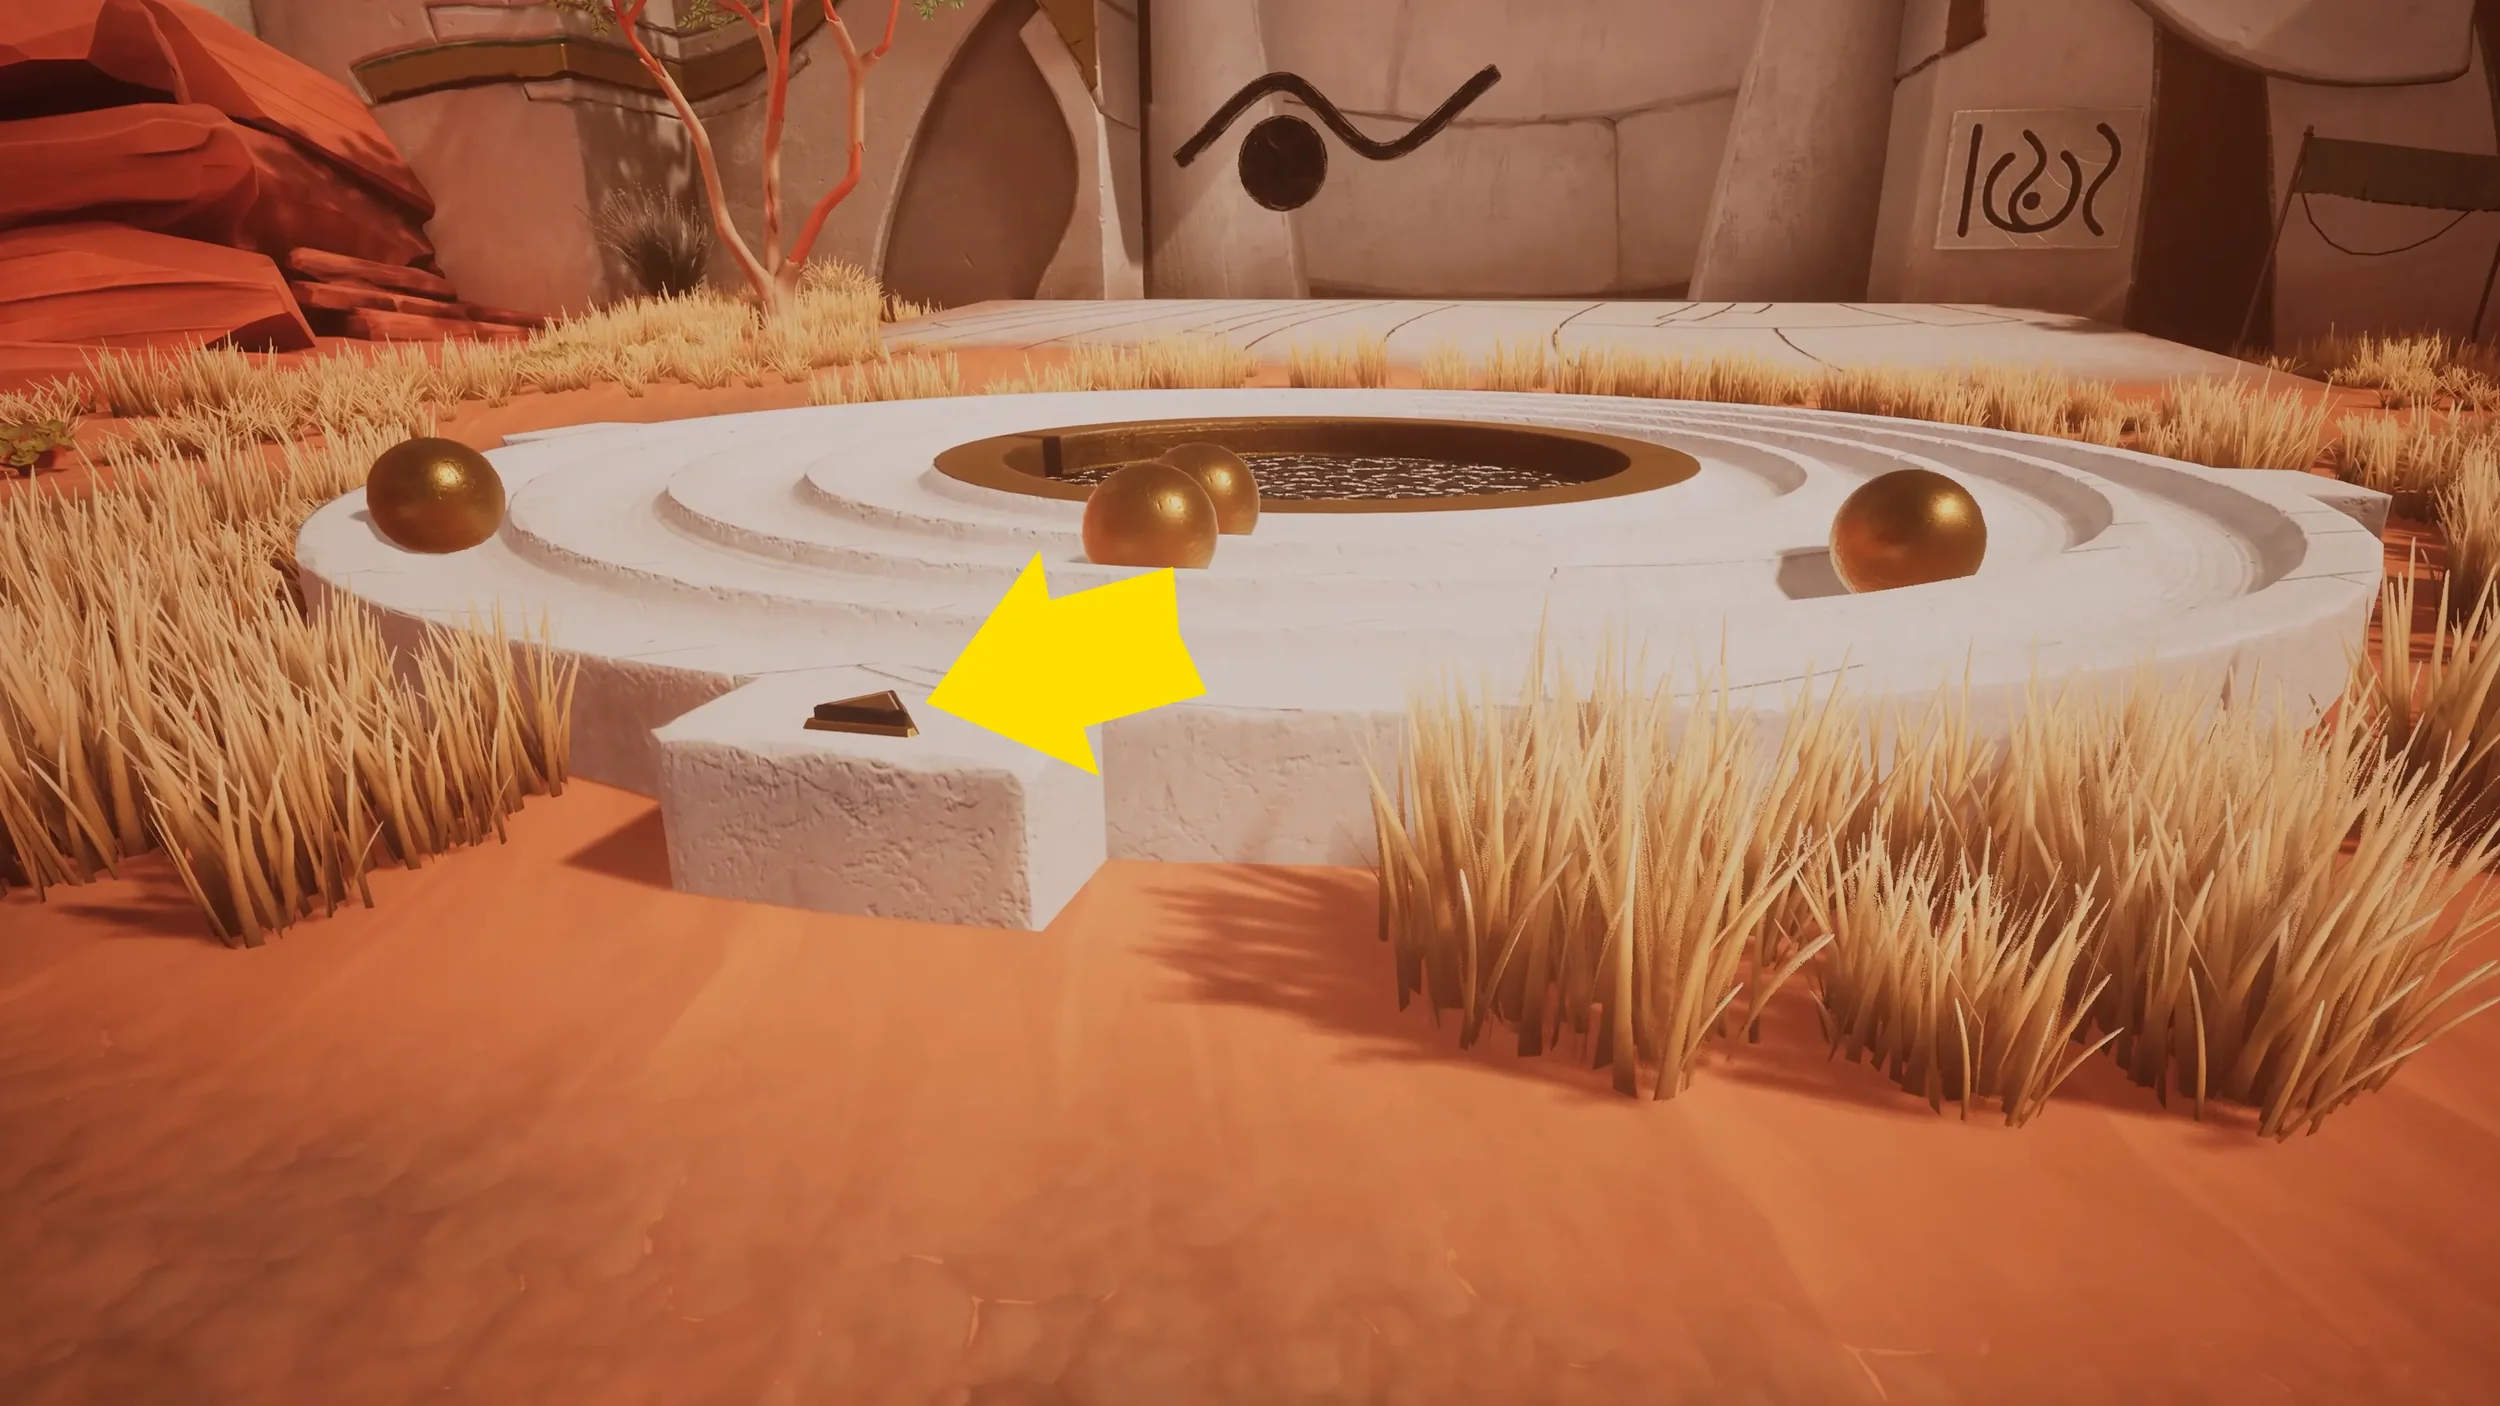
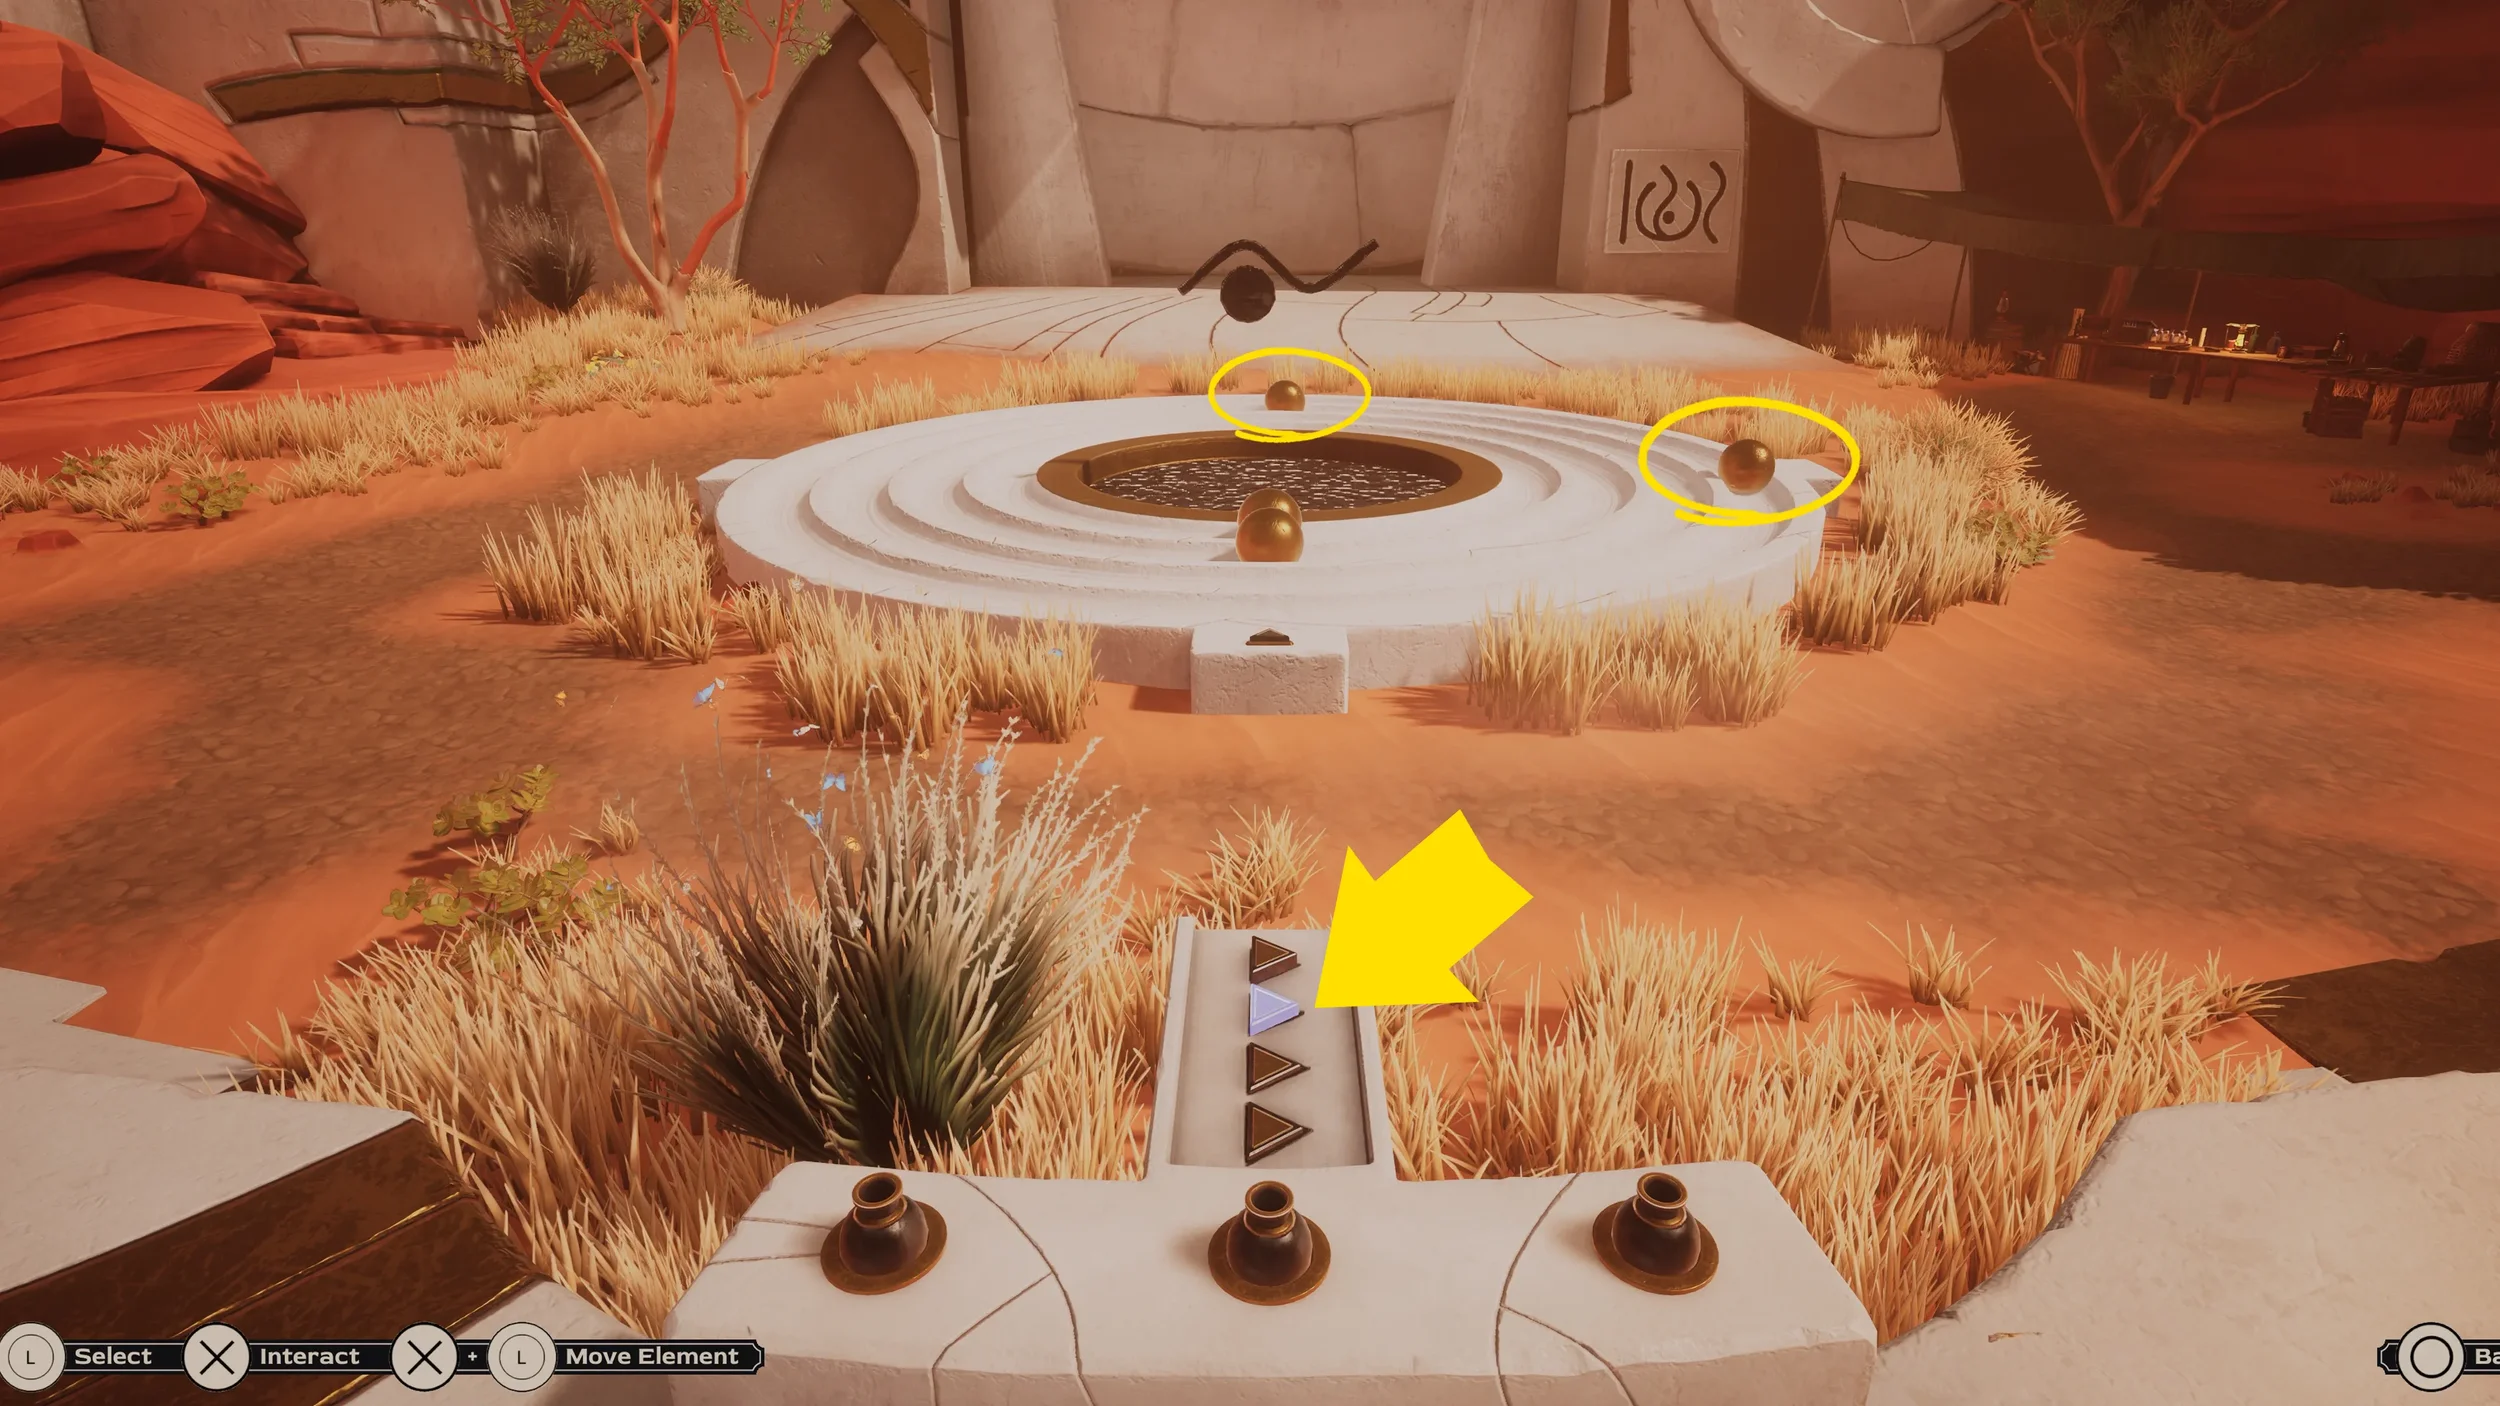
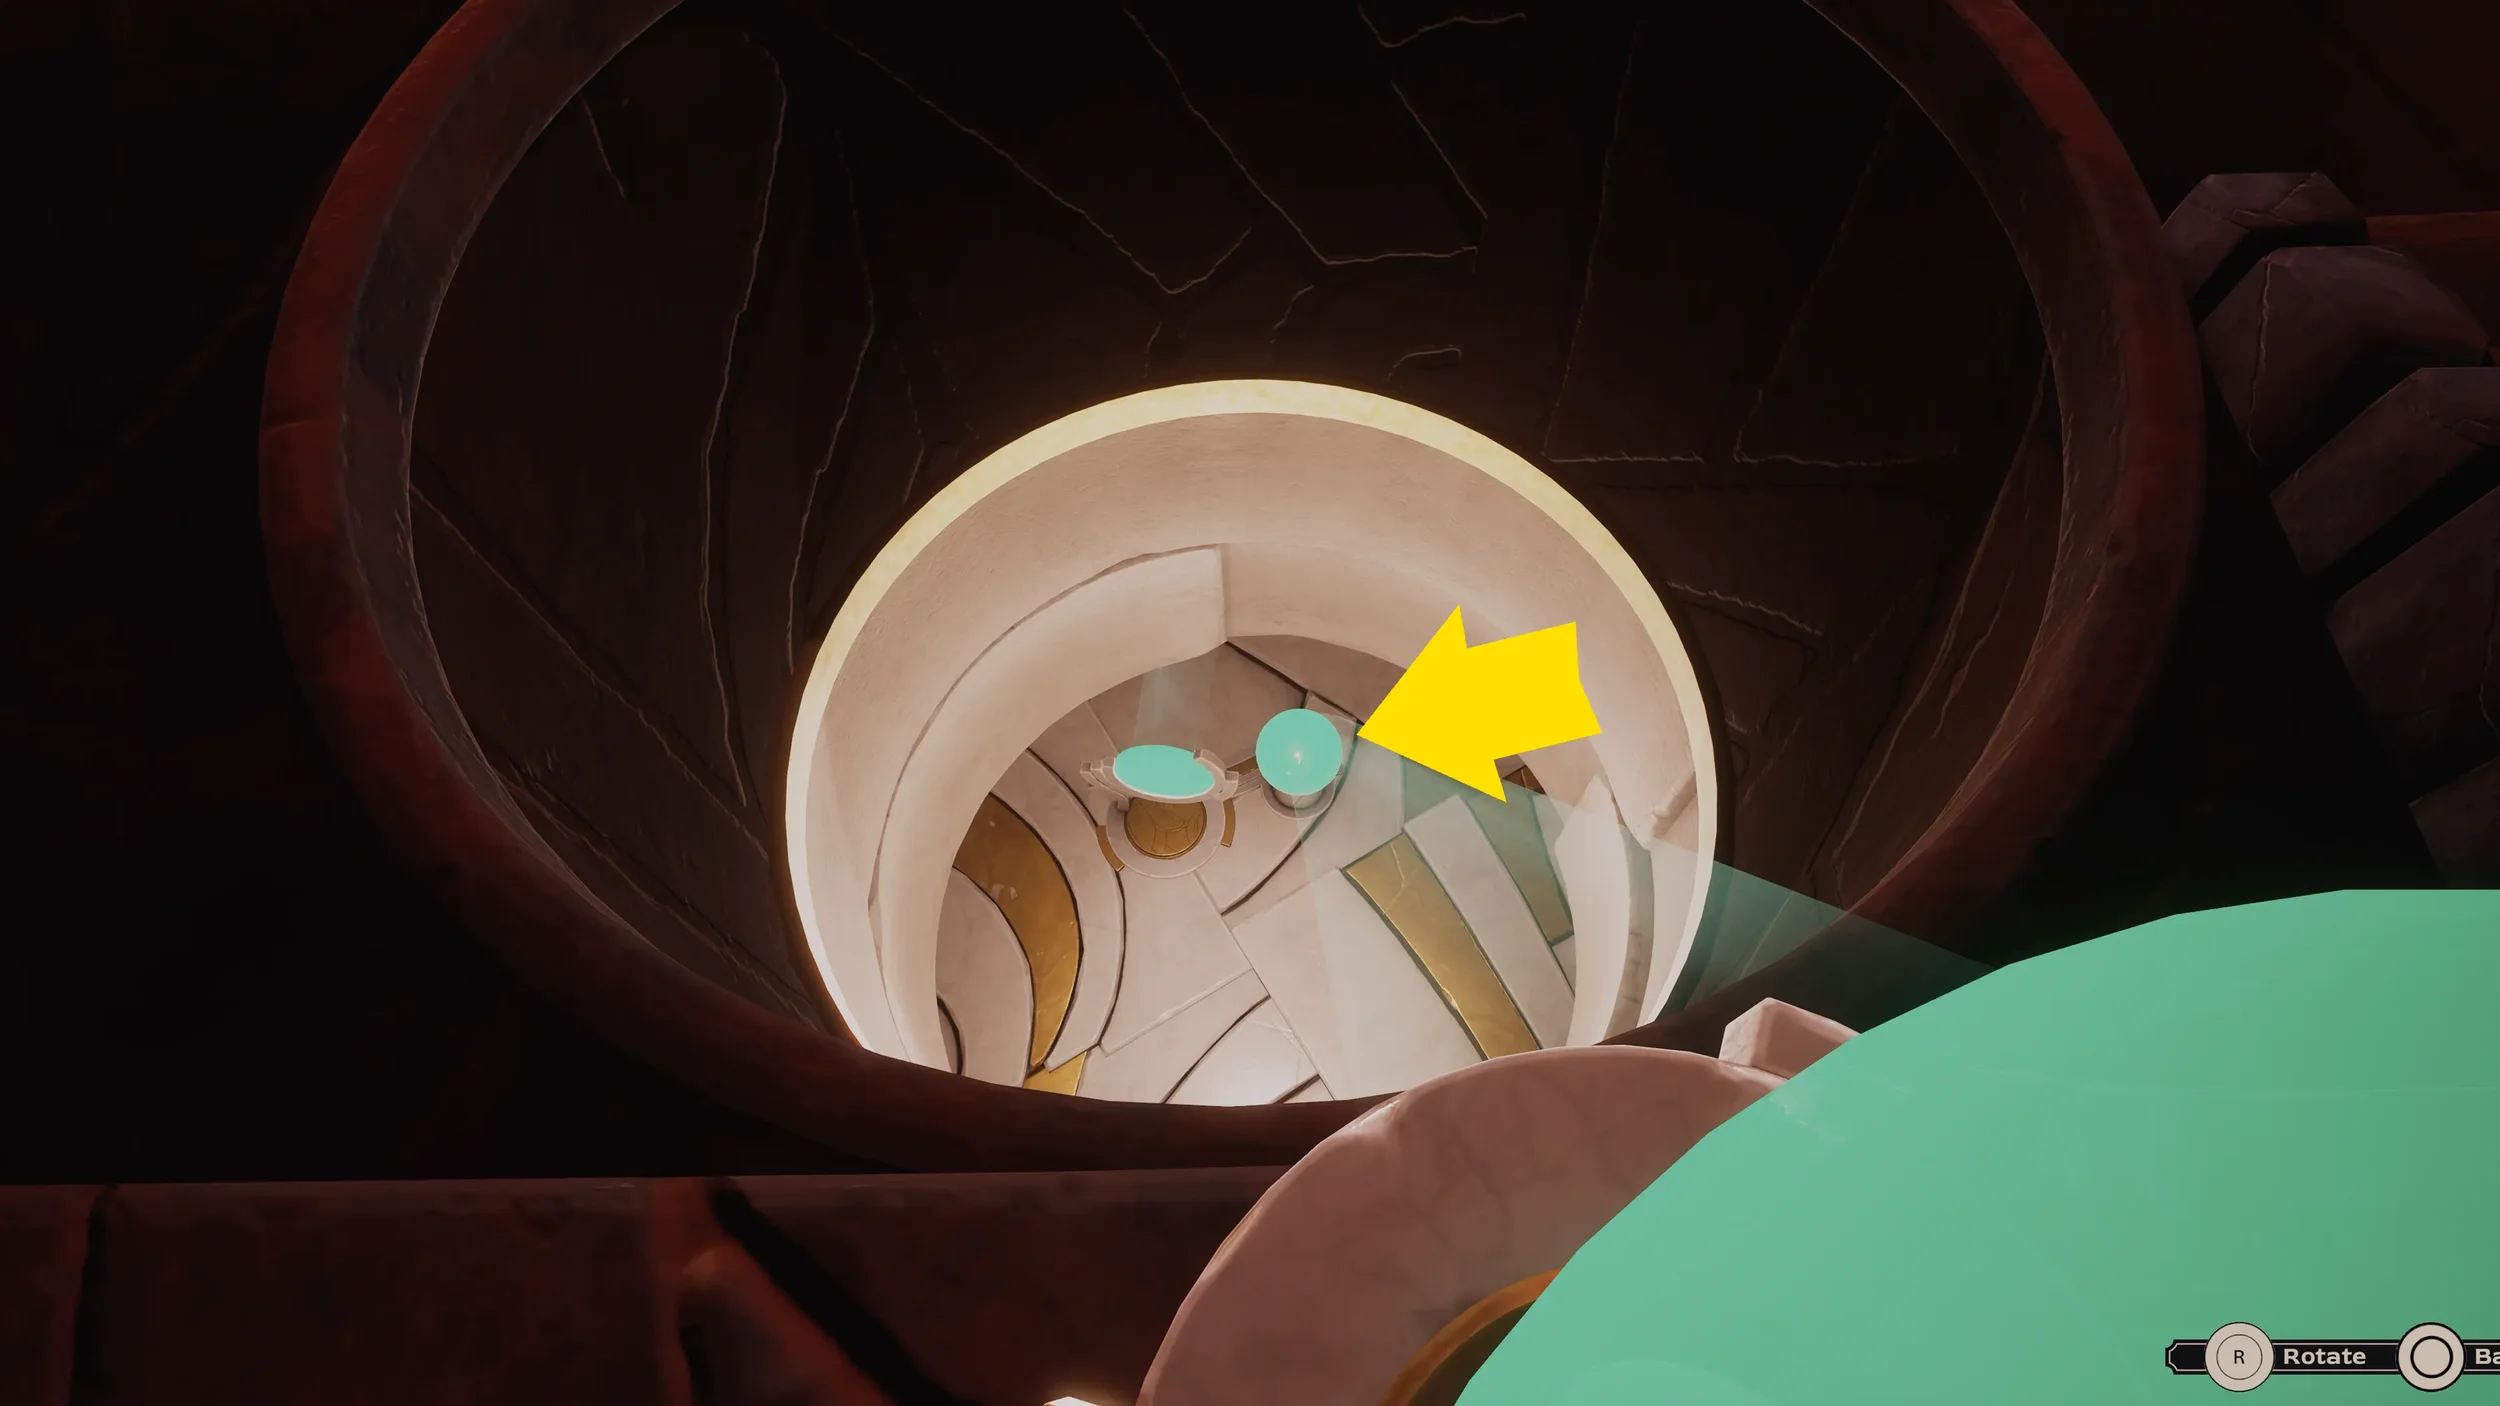
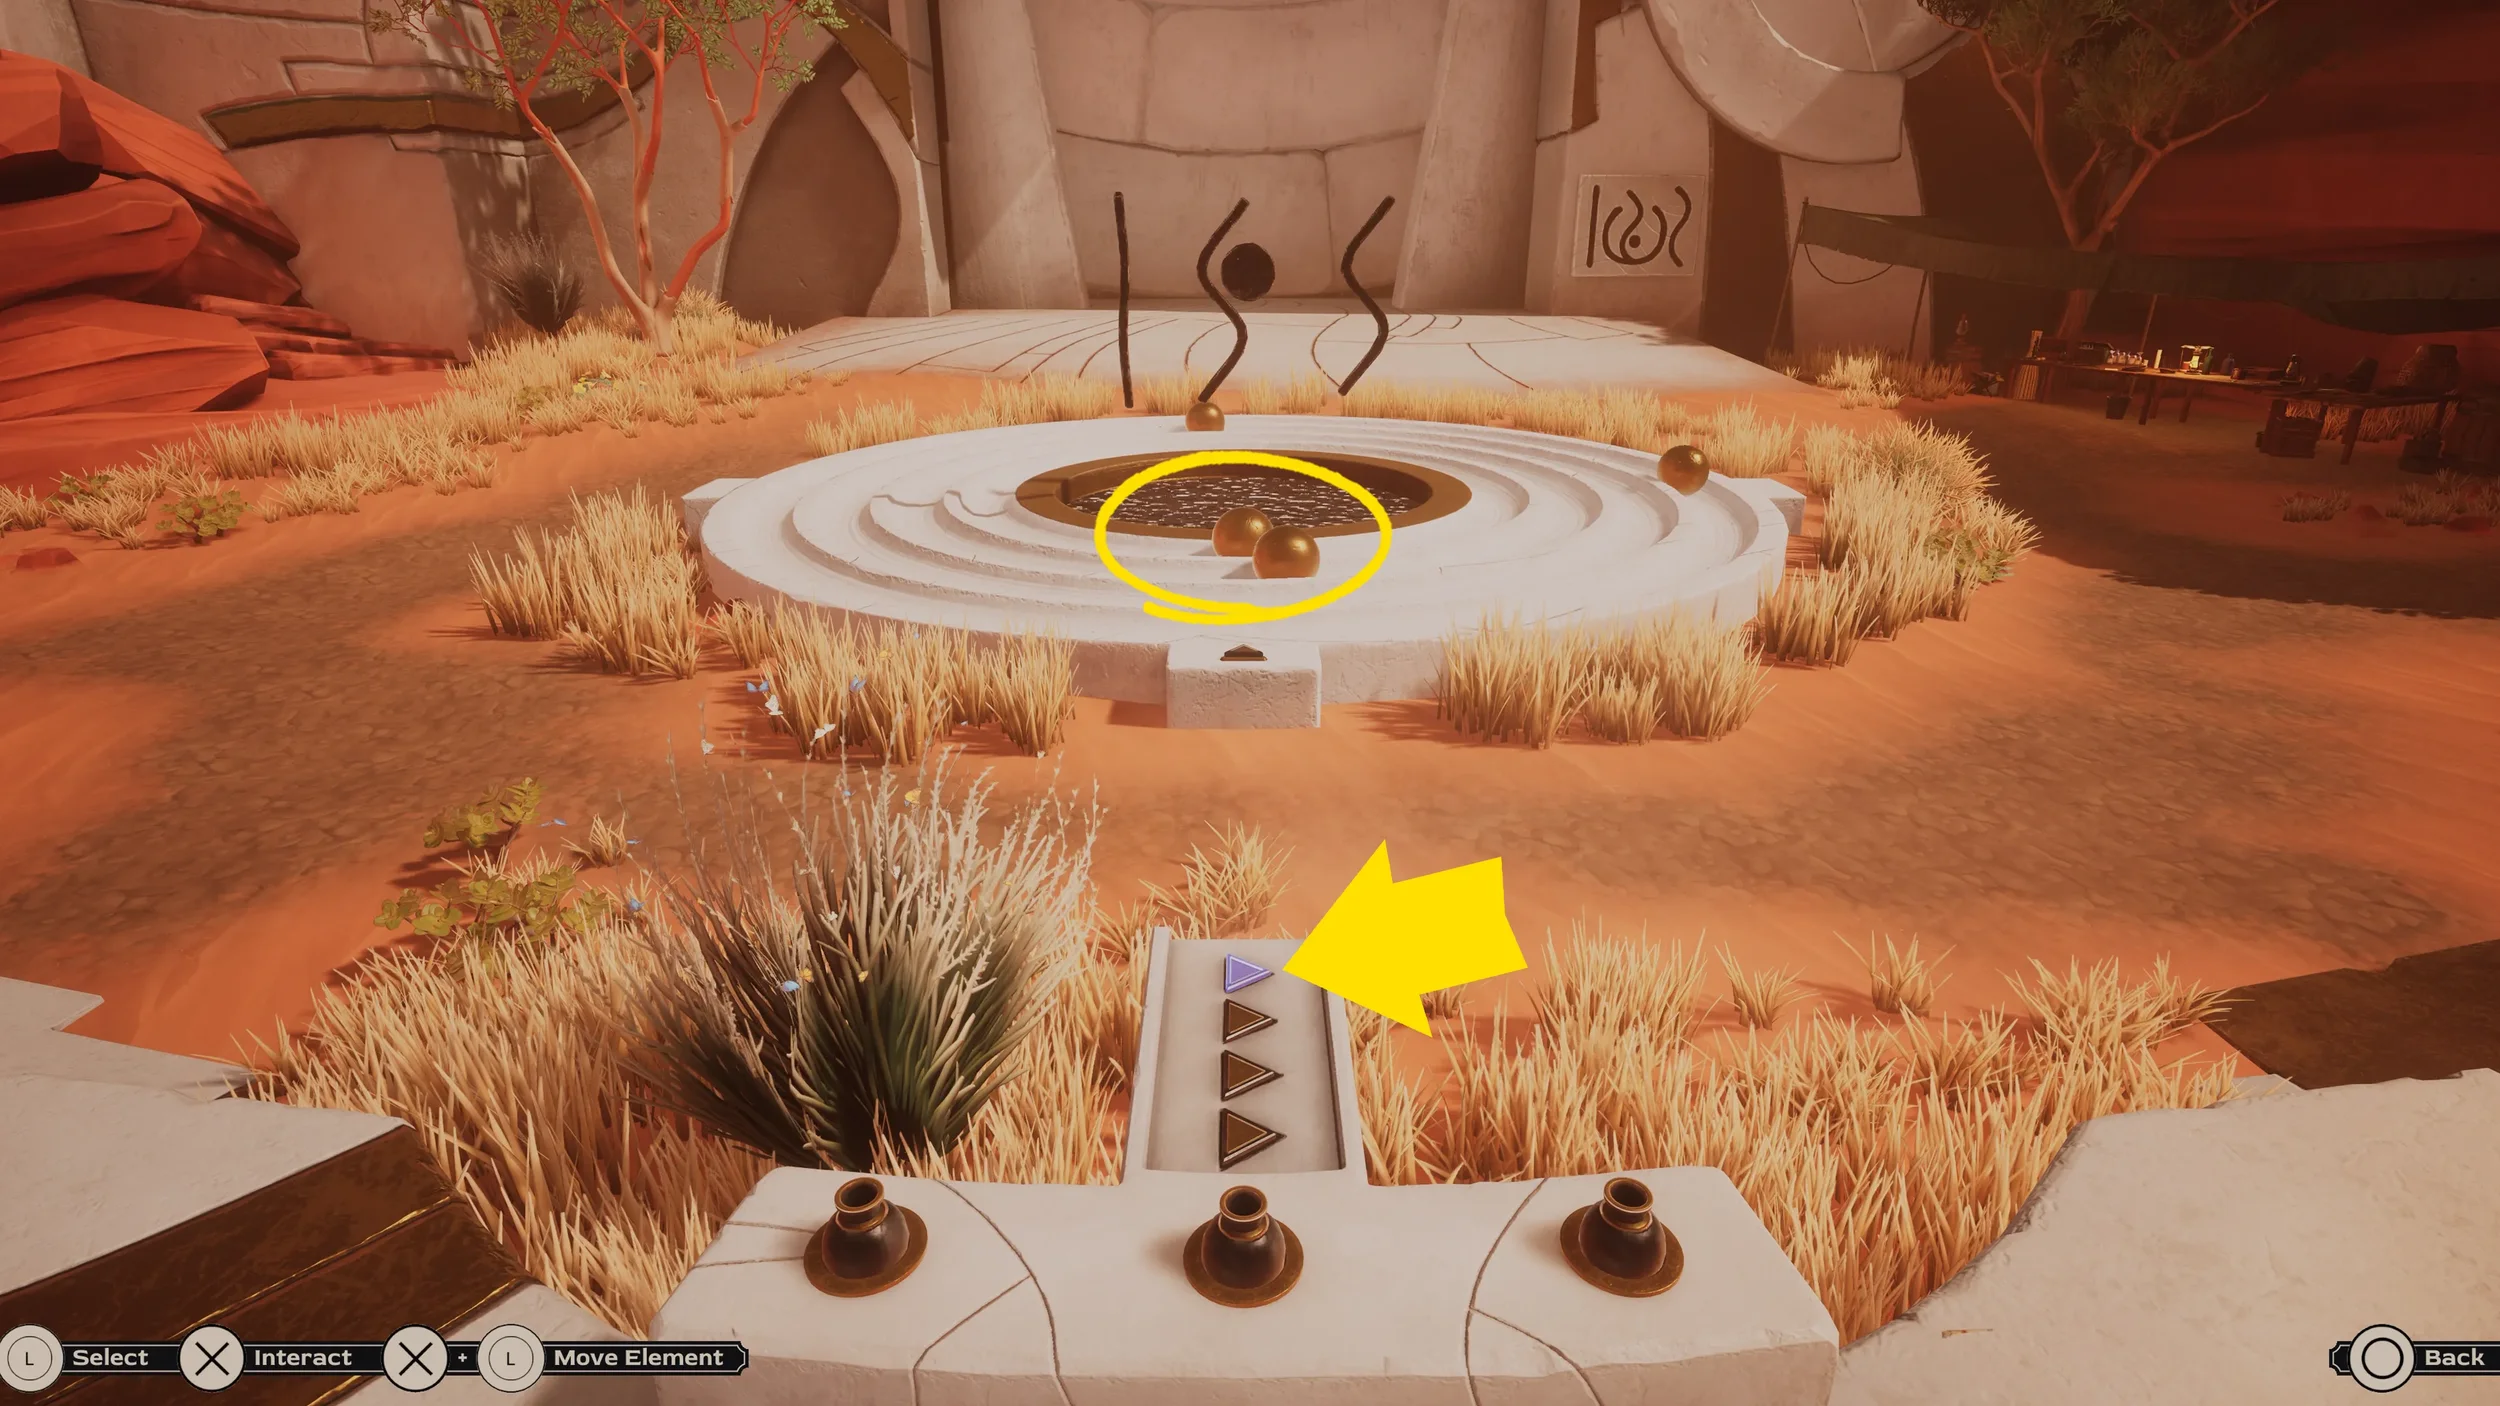
The clue will show us the distance that the balls in the center of the area need to have between each other.
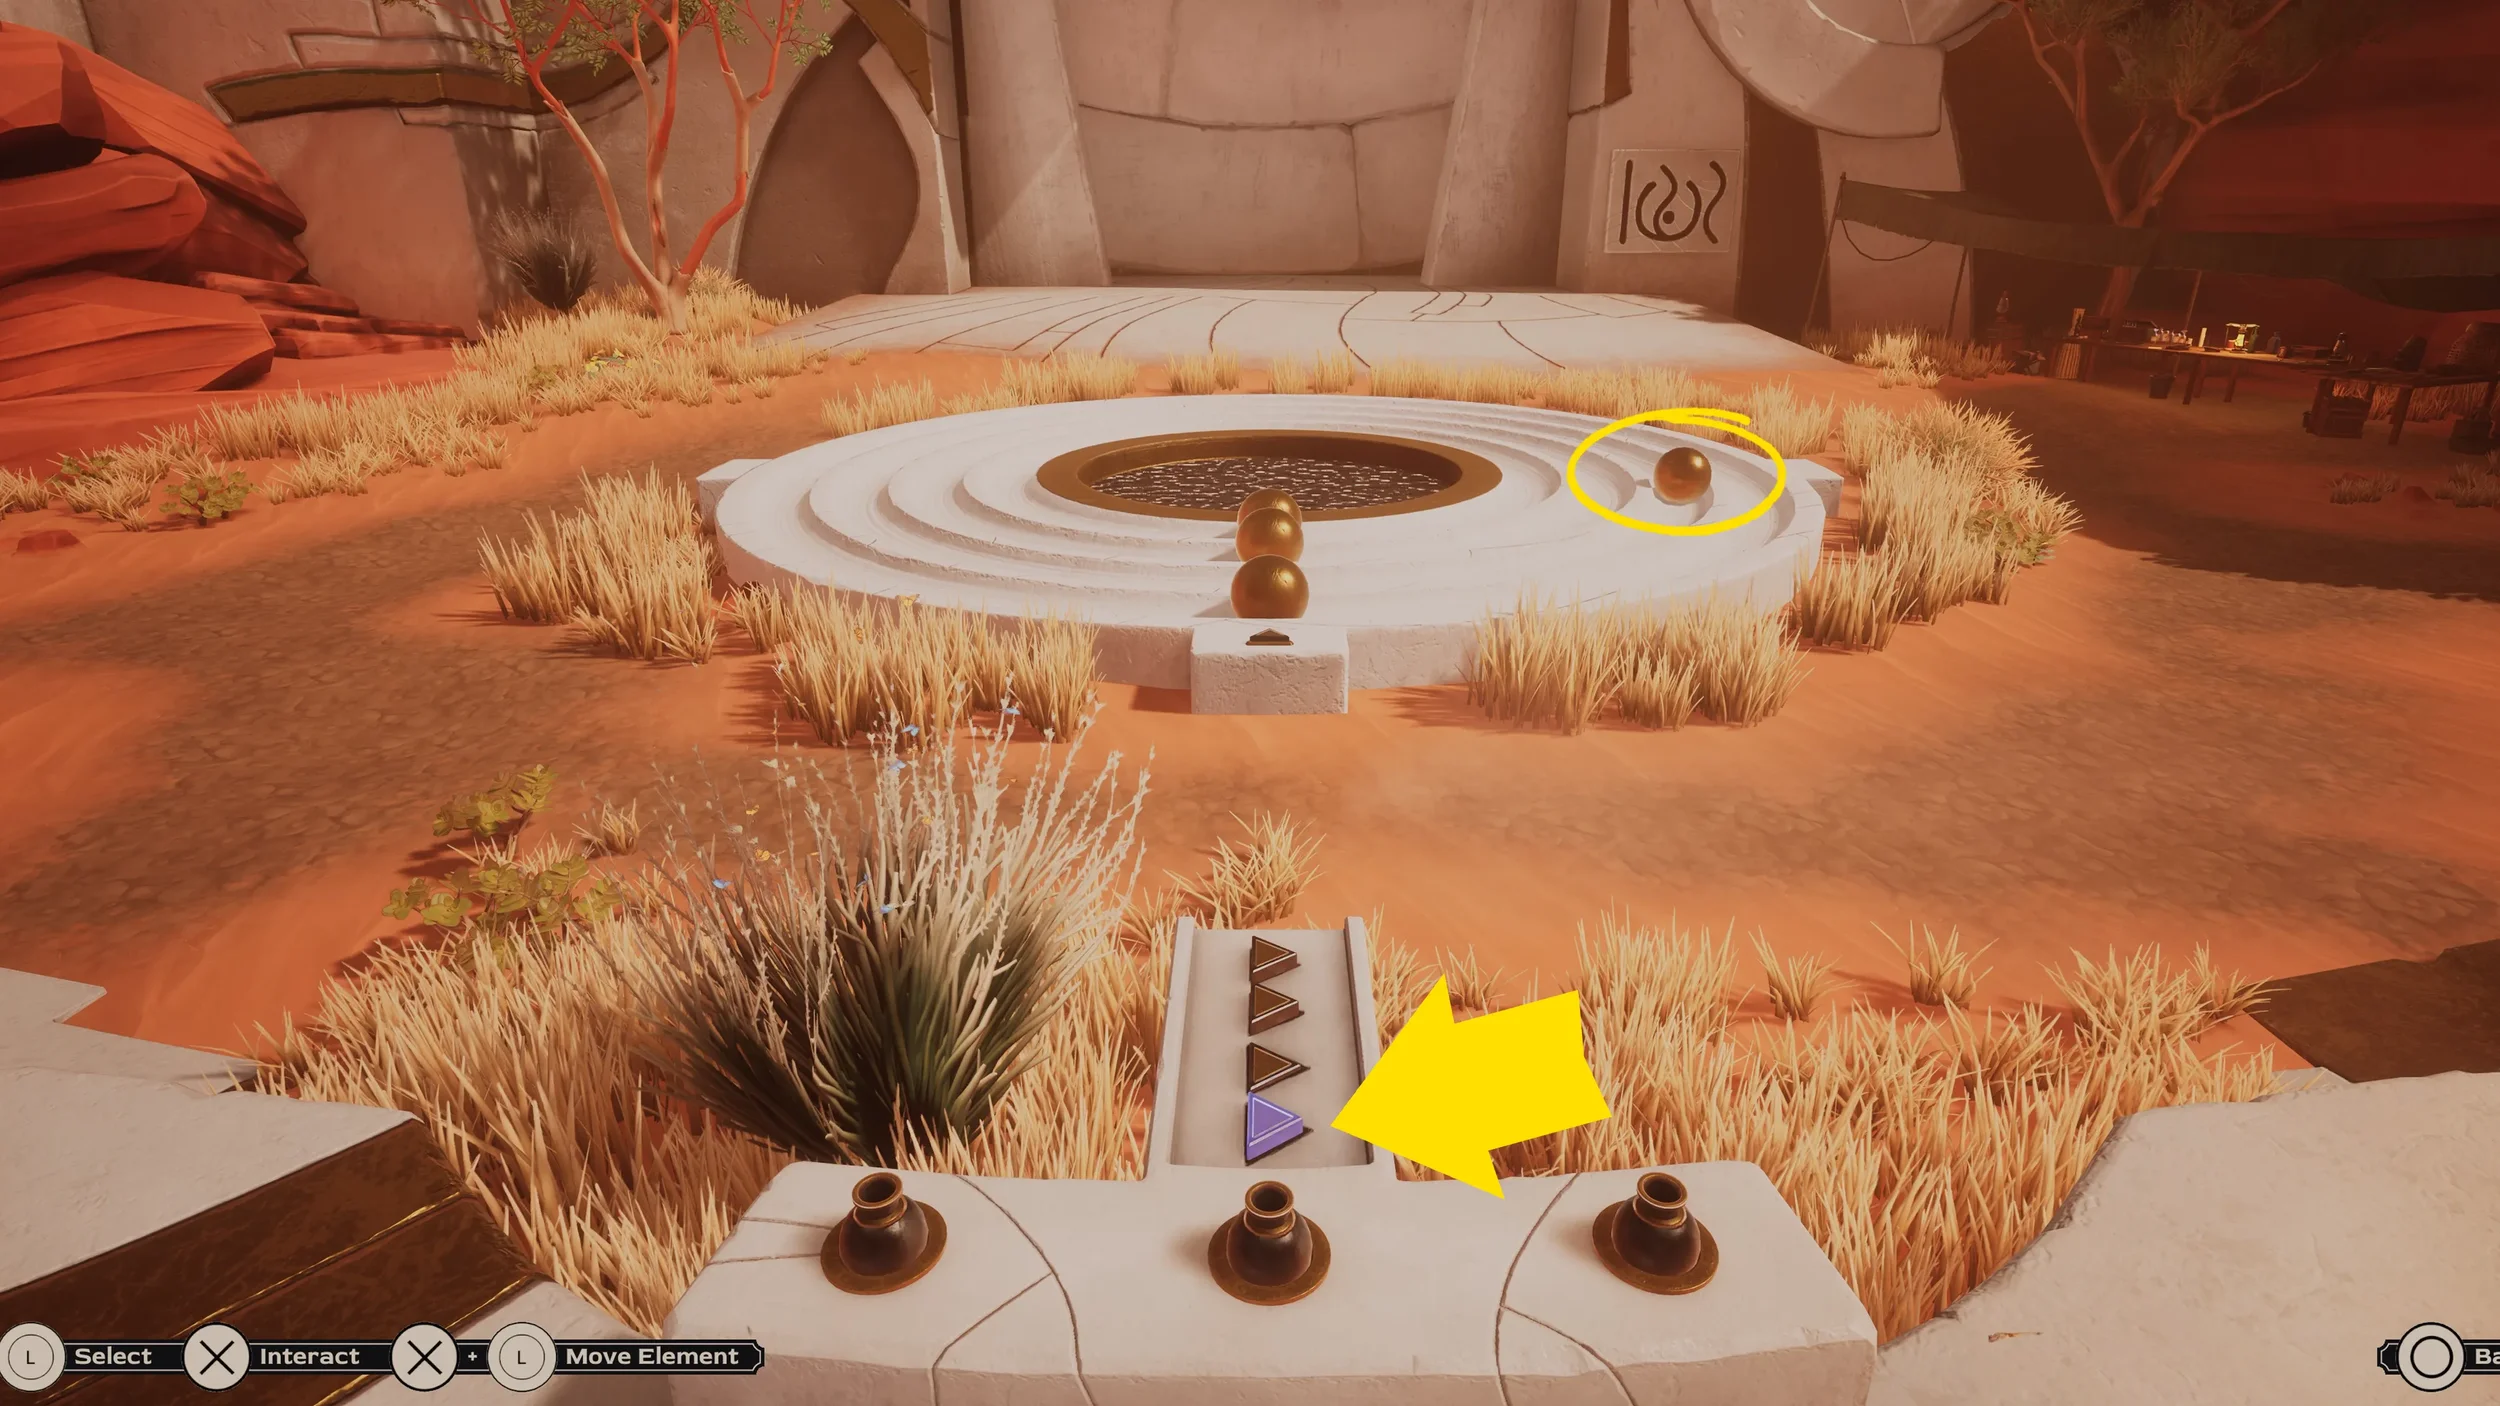
So as we can see in this example the ball in outer most lane needs to be about 90º behind the ball in the next lane inwards.
With this in mind head over to the control panel and press the 3rd button to make the 3rd lane ball start moving, then wait for that ball to be around a quarter of the way around the circle (90º) then press the bottom button to release the 4th lane ball.
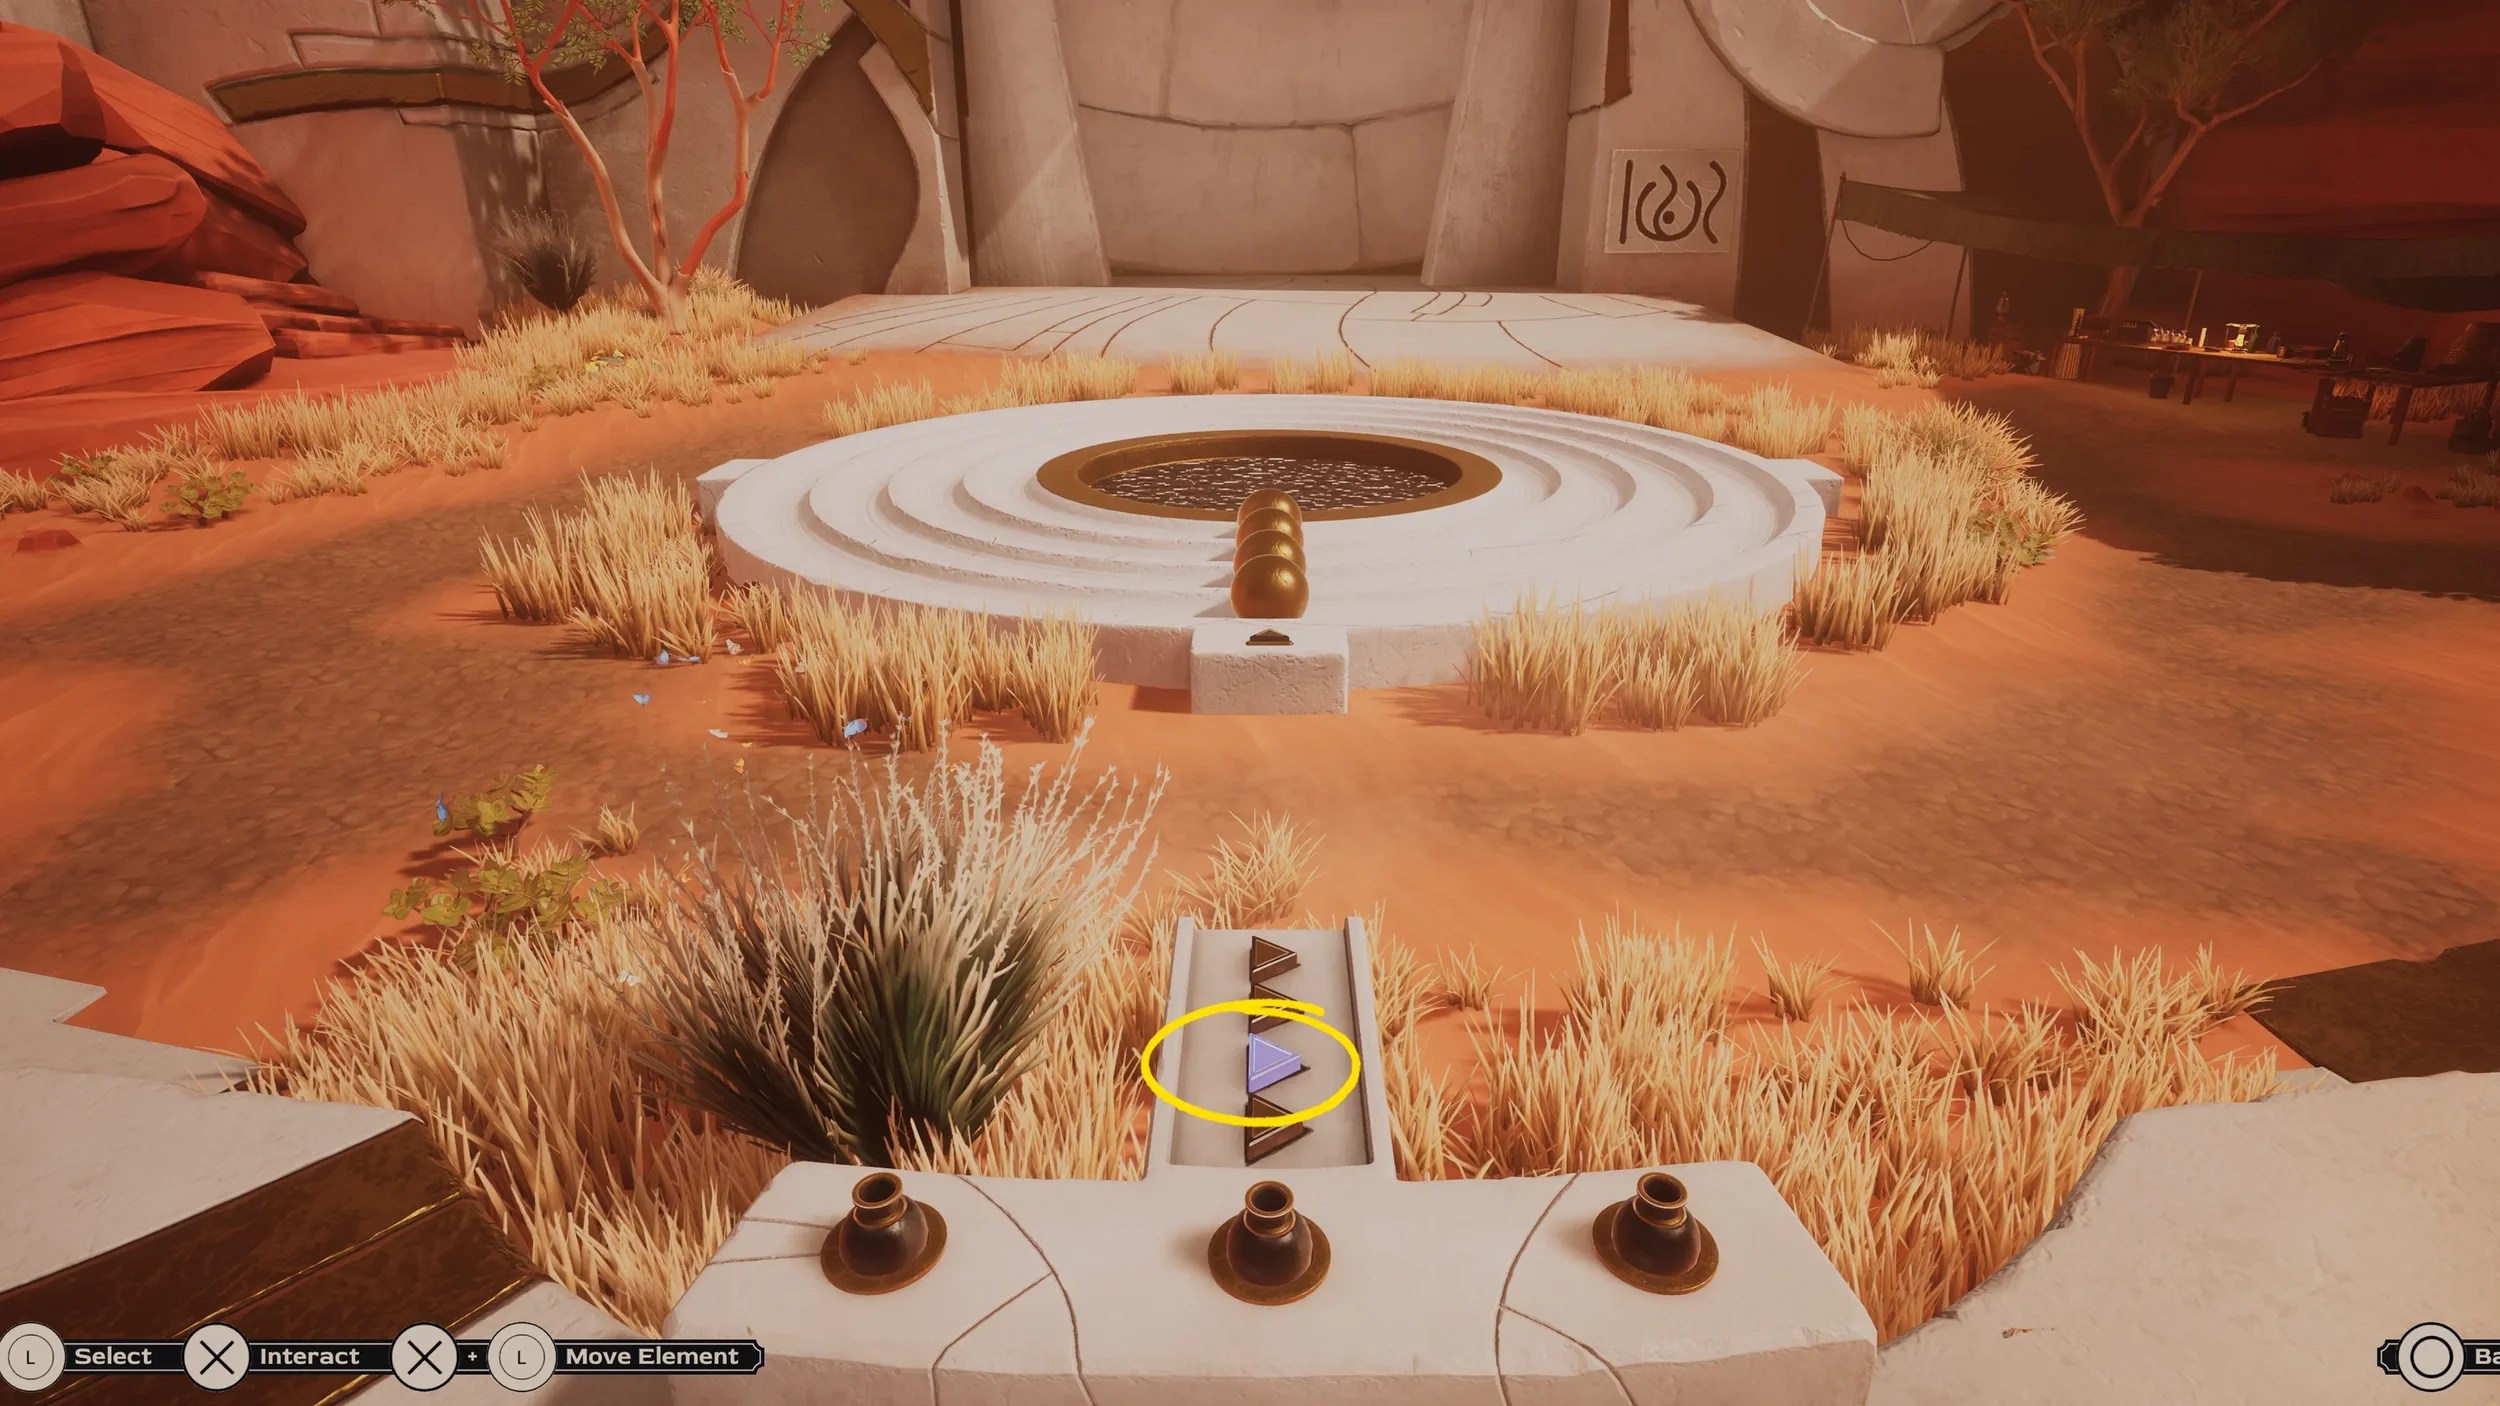
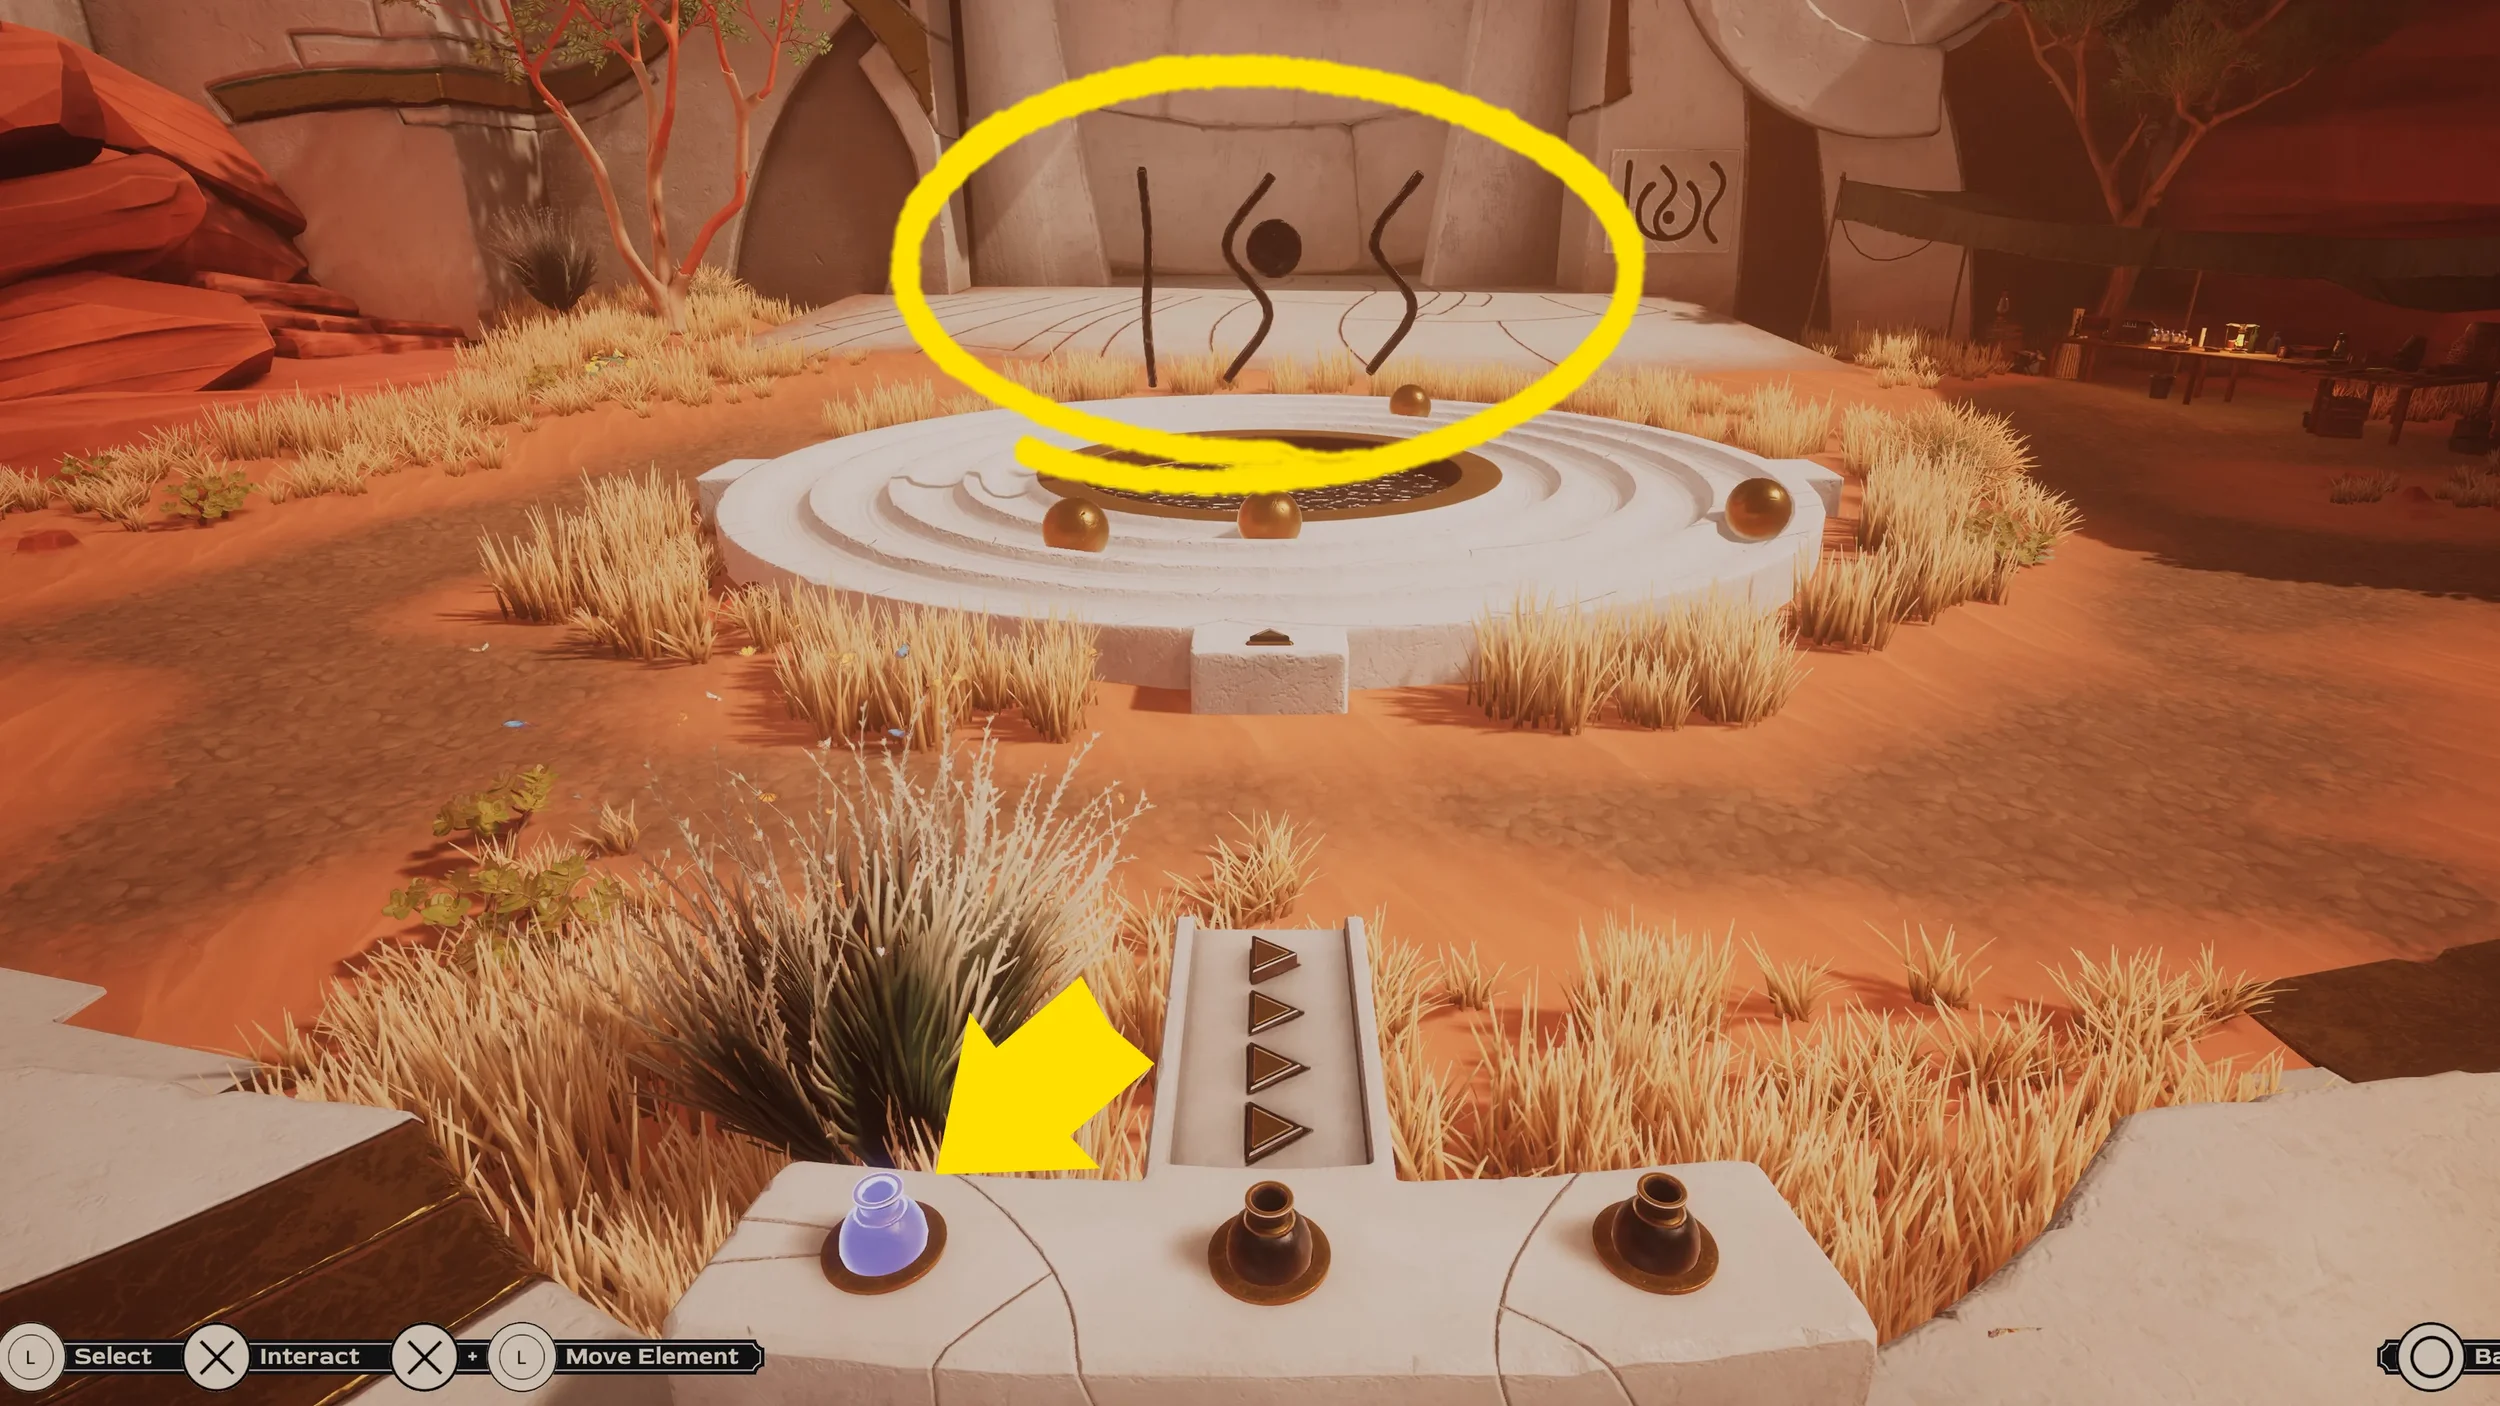
If timed correctly this will spawn a Symbol in the middle of the circle, but it will not be rotated on the correct angle, so we need to look at the clue of the symbol we saw on the elevator and then use the “analog sticks” at the bottom of the control panel to rotate it until it matches the clue.
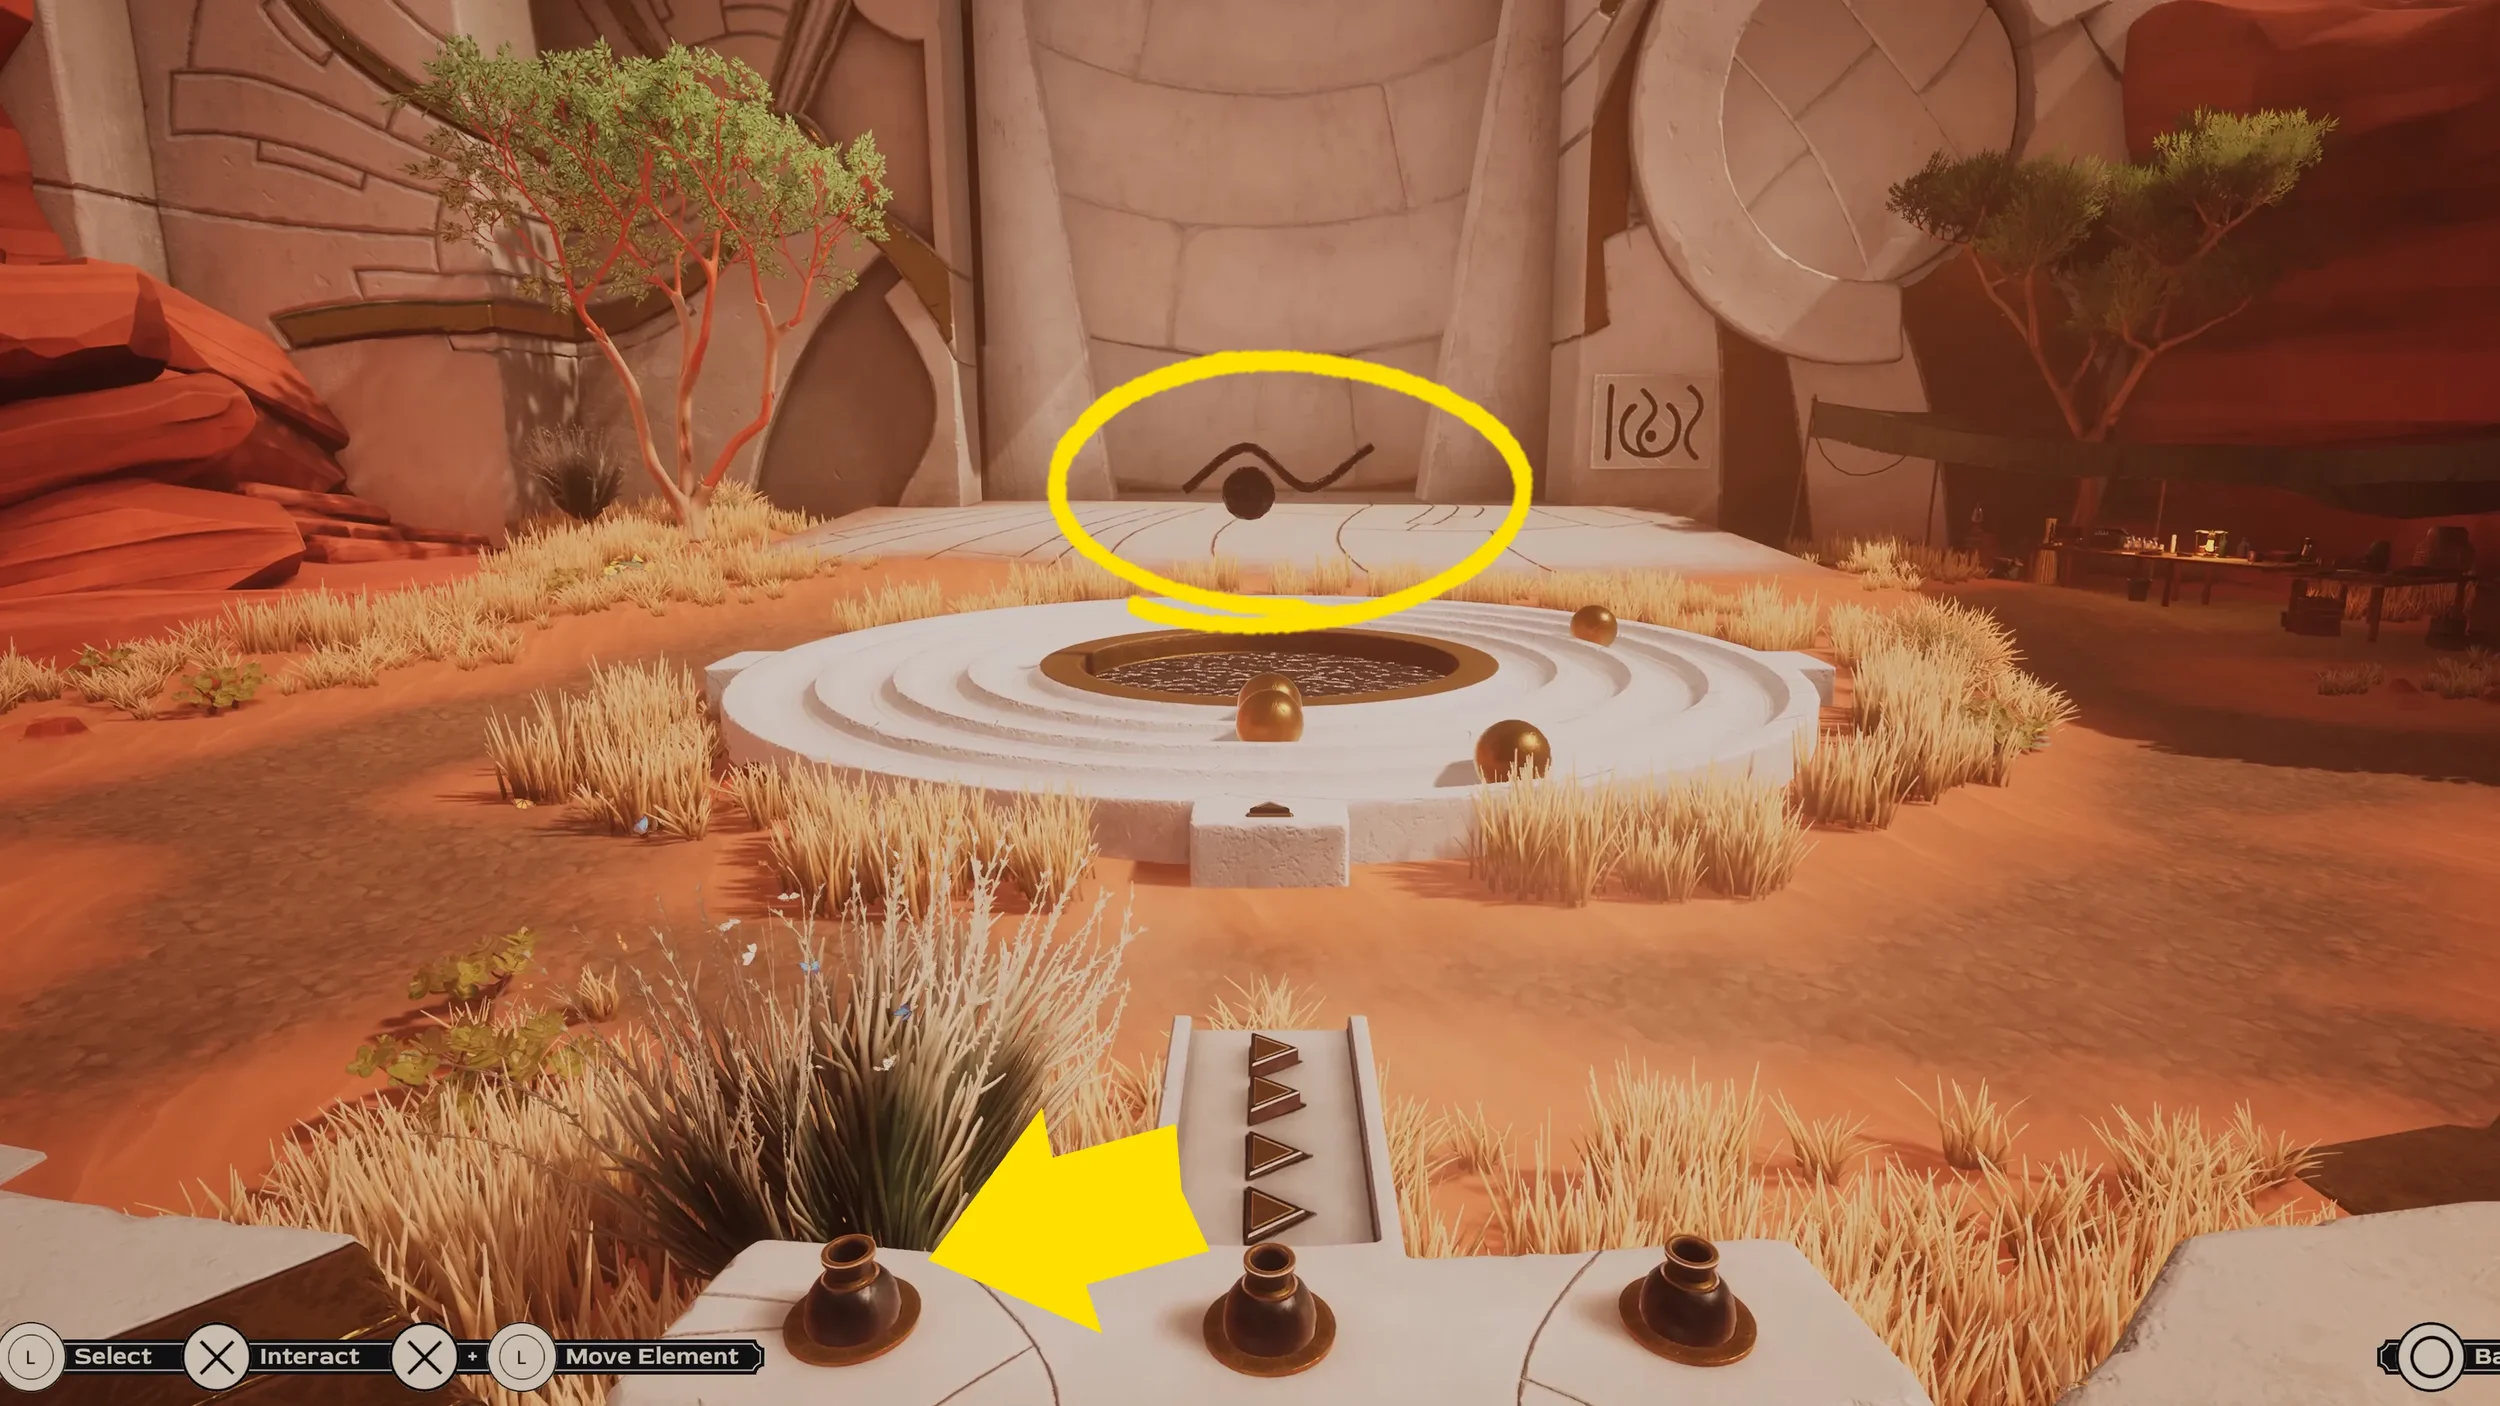
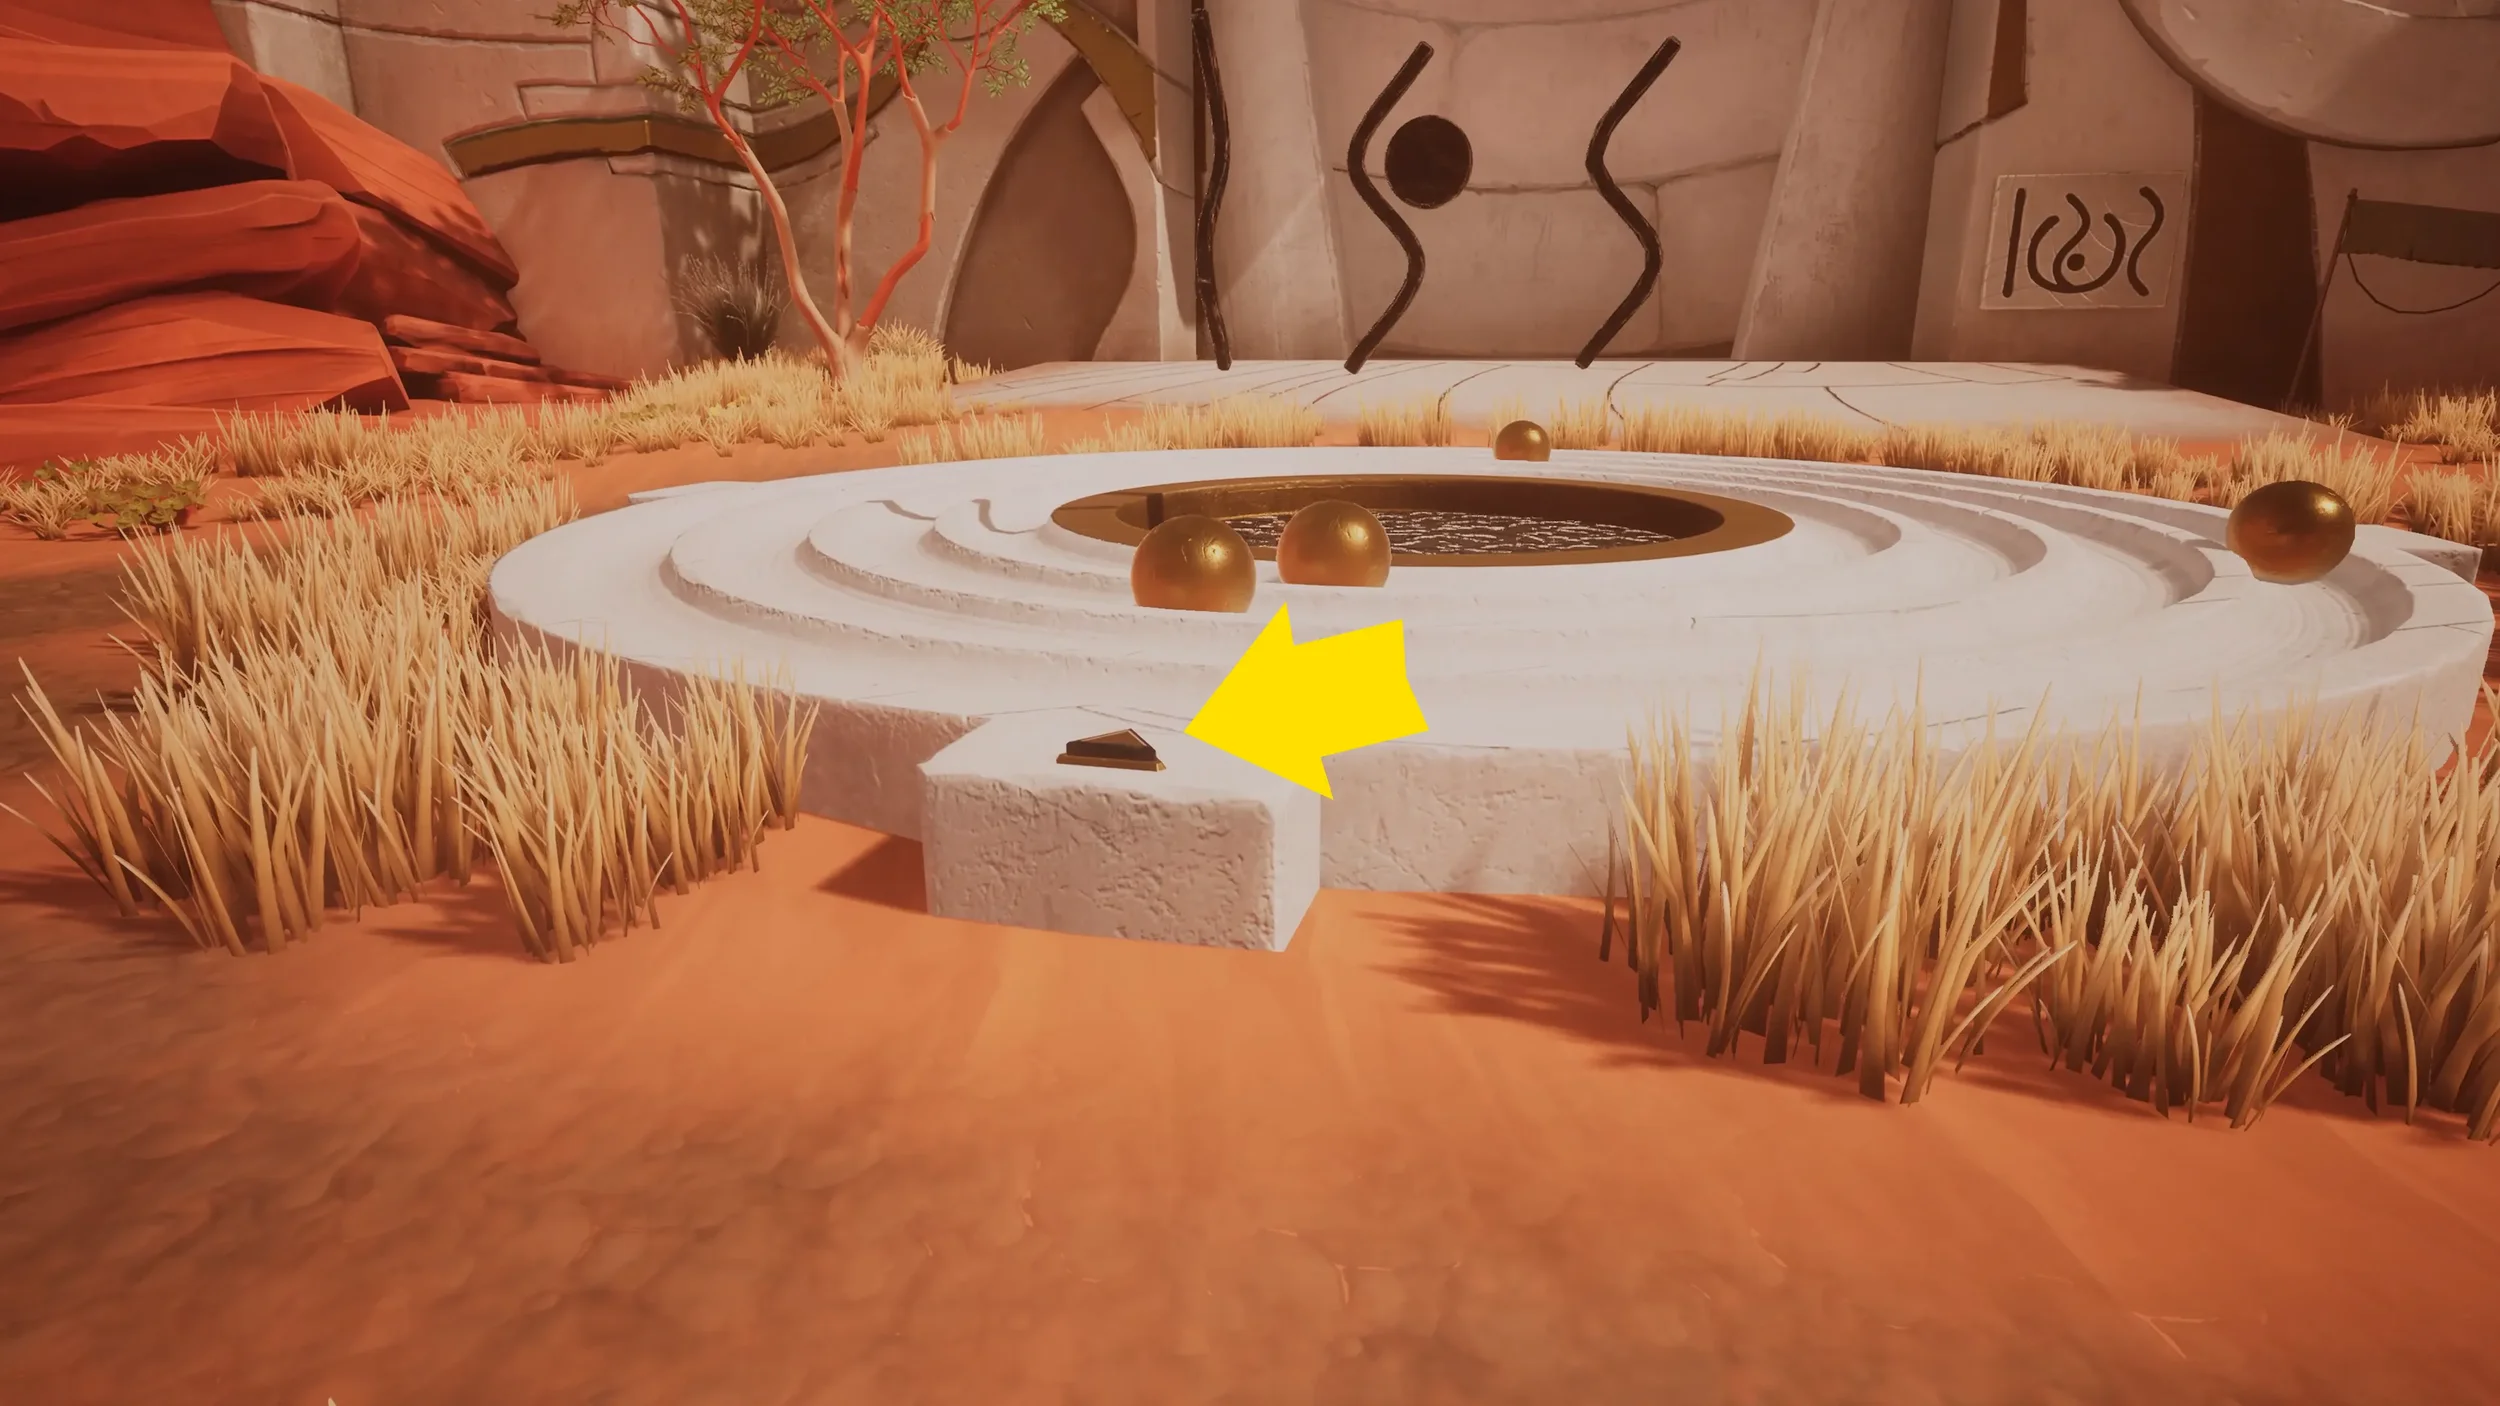
Once the symbol matches the clue, go down to the circle and press the button near the moving balls to activate the lift in the upper area.
Walk back up to the upper area and when you reach the 2nd mirror, rotate it to aim the beam of light to the orb on the left, then rotate that mirror so that it shines the beam of light to the top of the elevator.
Now go over to the elevator and press the button to activate it, when you reach the top, the beam of light should be hitting the orb, use the mirror on the elevator to shine the beam of light at the 2nd Big Green Orb in the semicircle. While the light is shinning at it go over and inspect it to get another clue.
We now need to return to the puzzle control panel and use the distance of the next ball shown in the clue we just got, (a better guideline is to just release the 2nd lane ball when the 4th lane ball is at the 90º spot), this will spawn another symbol in the middle.
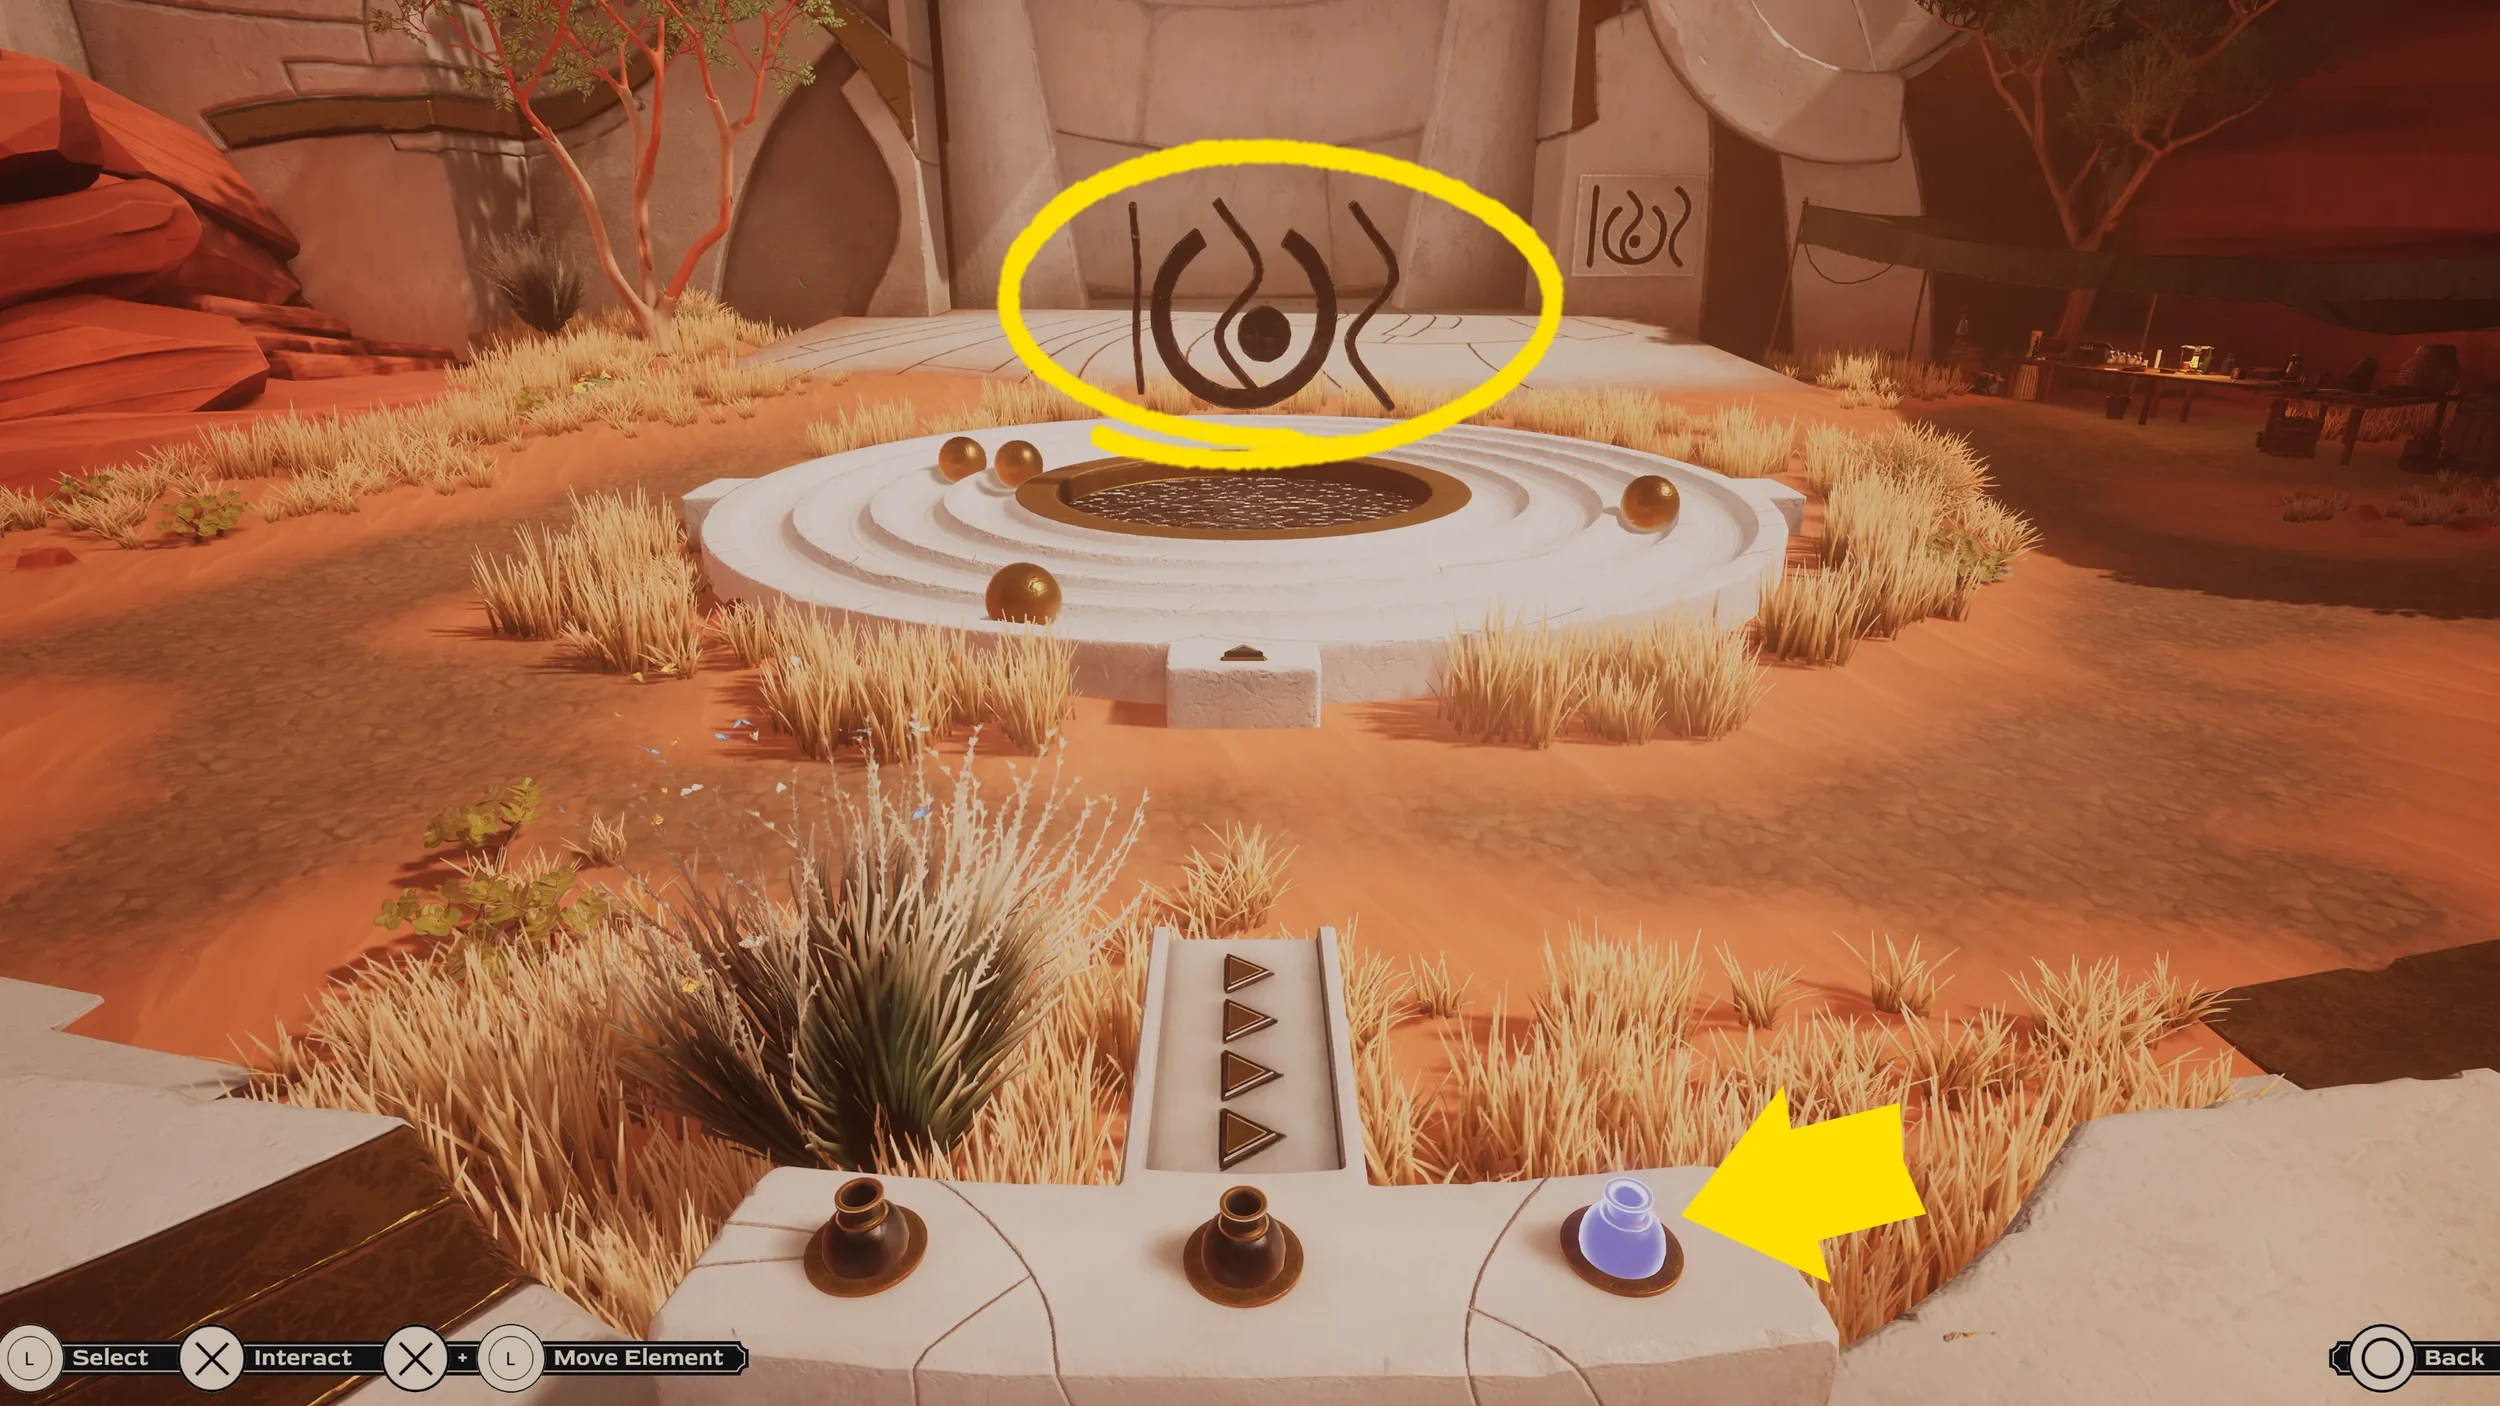
Use the analog sticks at the bottom to rotate both symbols to match them with the symbol clue from the small door below the ramp.
When the symbols match the one from the clue go down and press the button again, this will open the small door.
The small door at the bottom of the ramp will now be open, but before going in the door, go back up the ramp to the upper area one more time, then climb up the ladder to the 1st mirror, aim this mirror almost directly down at the orb in the room below.
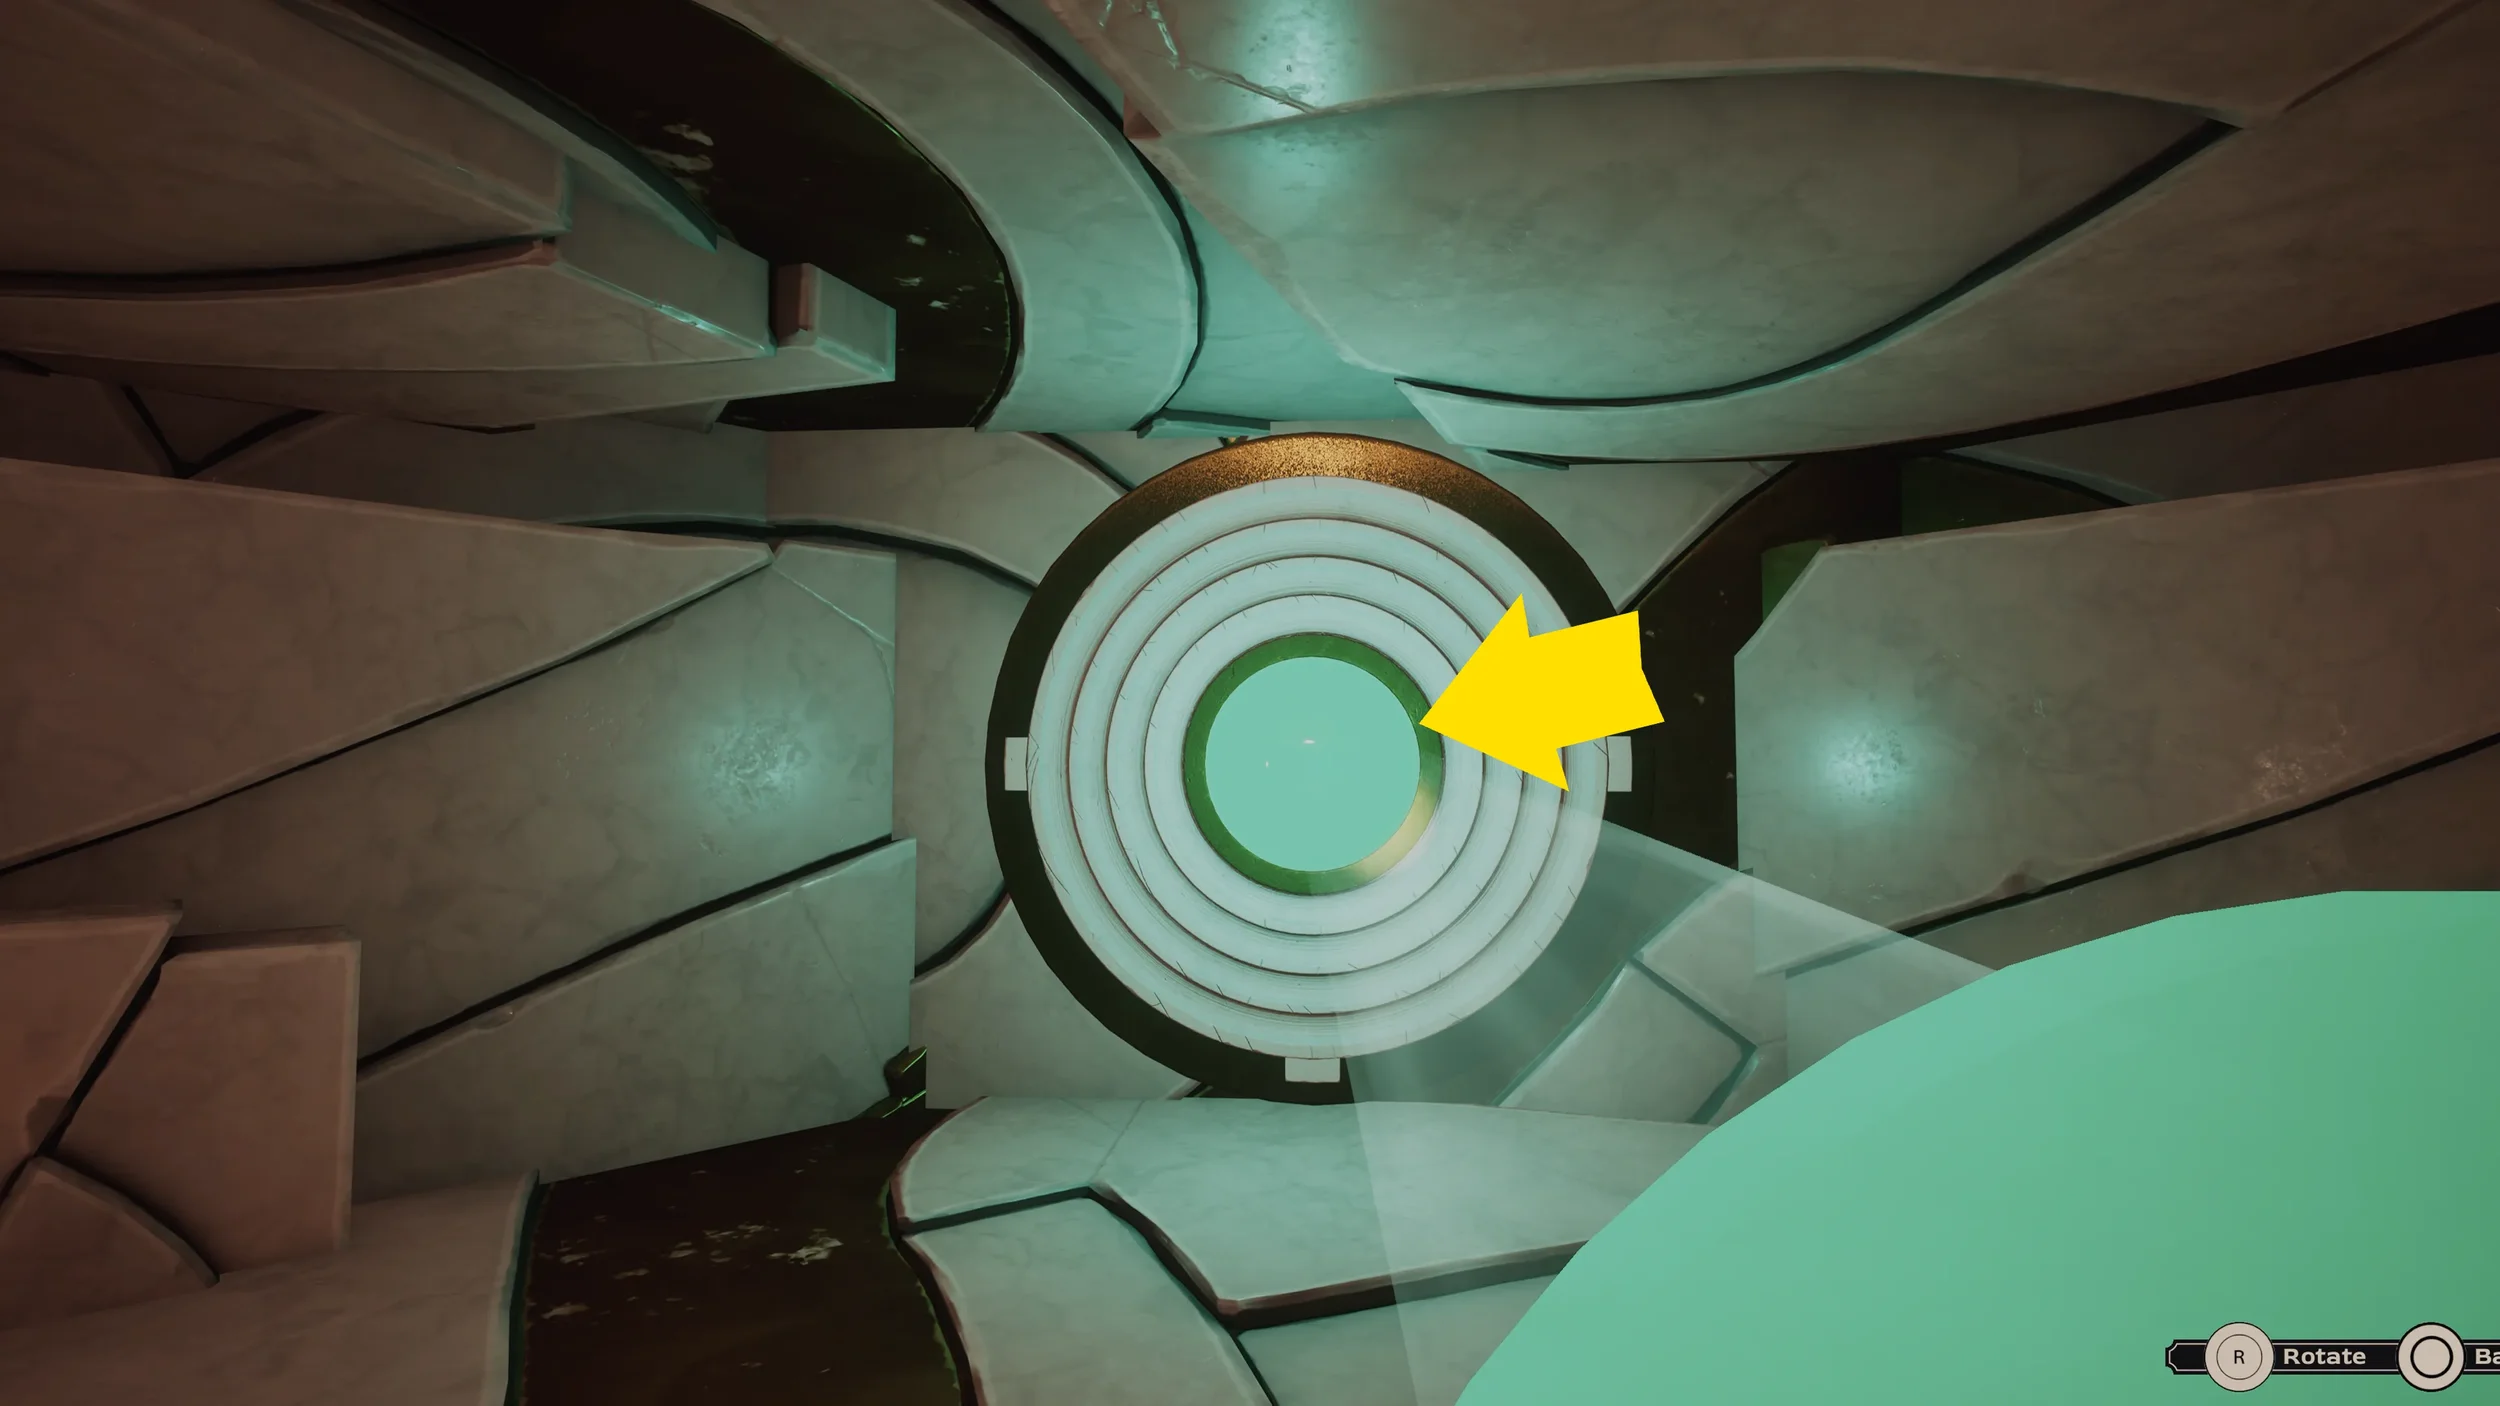
Now you can go back down the ramp and into the newly opened door, go inside and shine the beam of light onto the the final Green Orb.
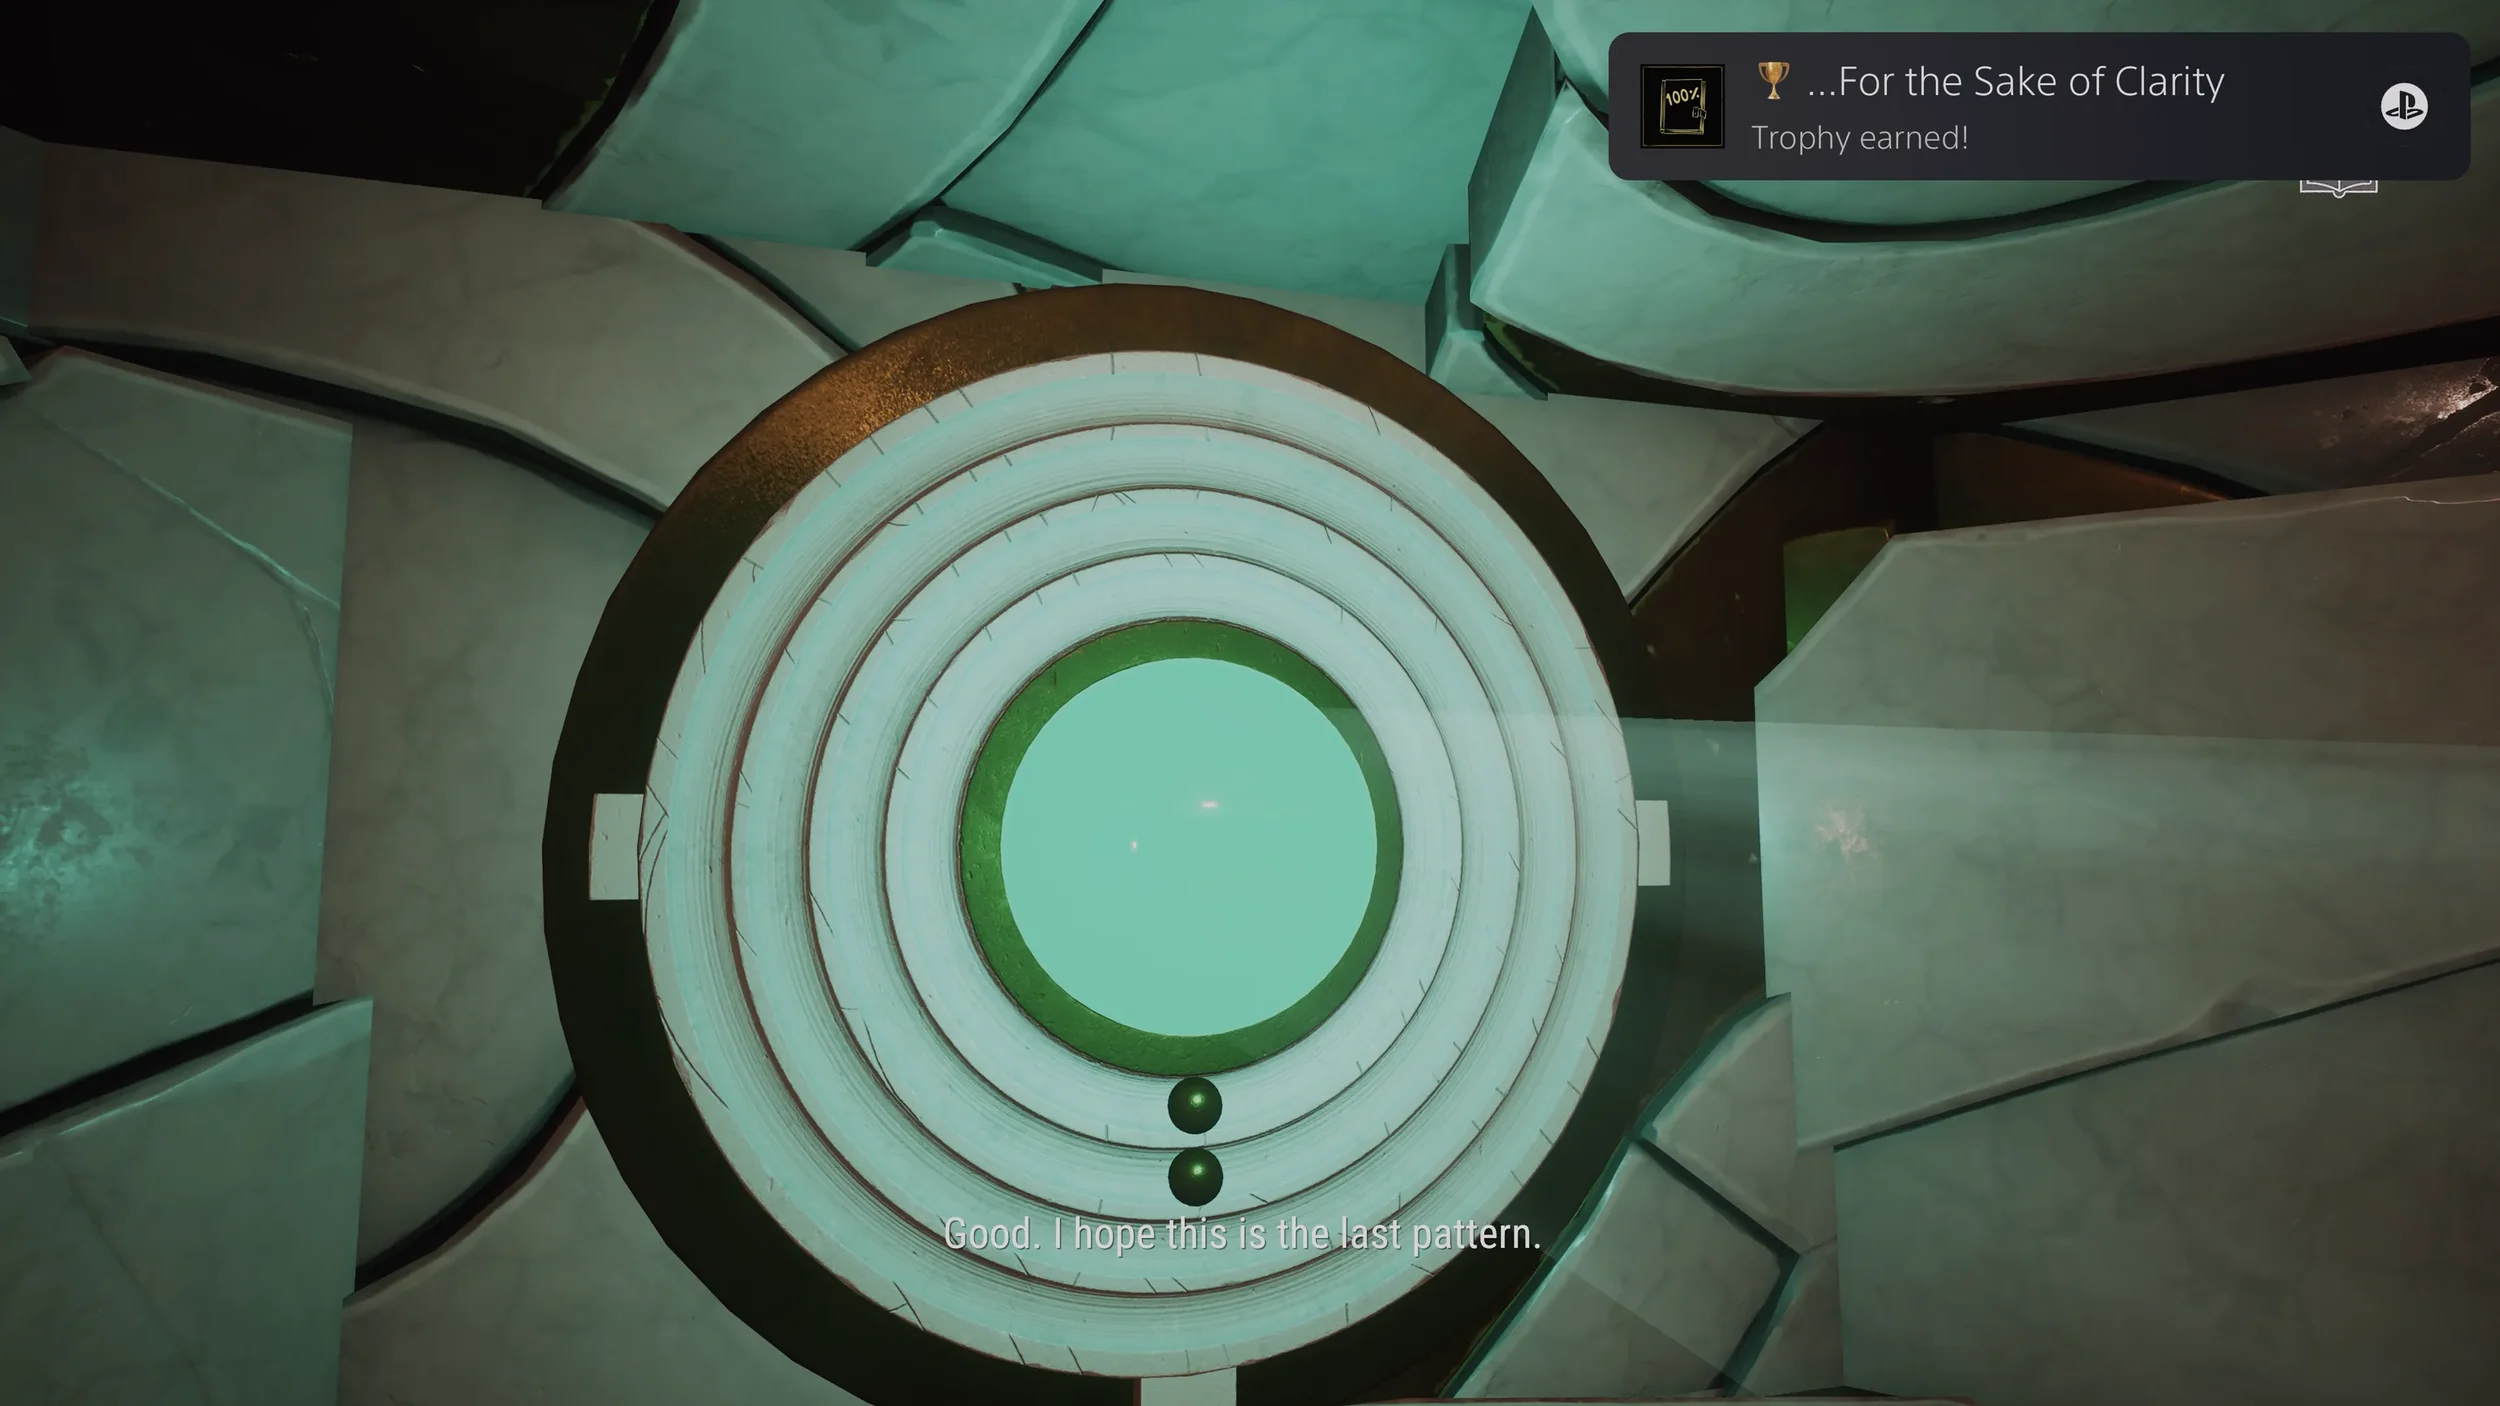
 “…For The Sake of Clarity” Trophy for finding every clue in the game.
By getting this final clue you now also know when to start moving the final ball of the puzzle, for this one just press the top button when the previous ball is also going past the balls starting point.
Same as before, use the 3 analog sticks to match the symbols to the one beside the Great Stone Door, when it matches, go down and press the button by the balls to open the Gate.
 "Just a Matter of Perspective" Trophy.
Wrong Game… or Maybe Not
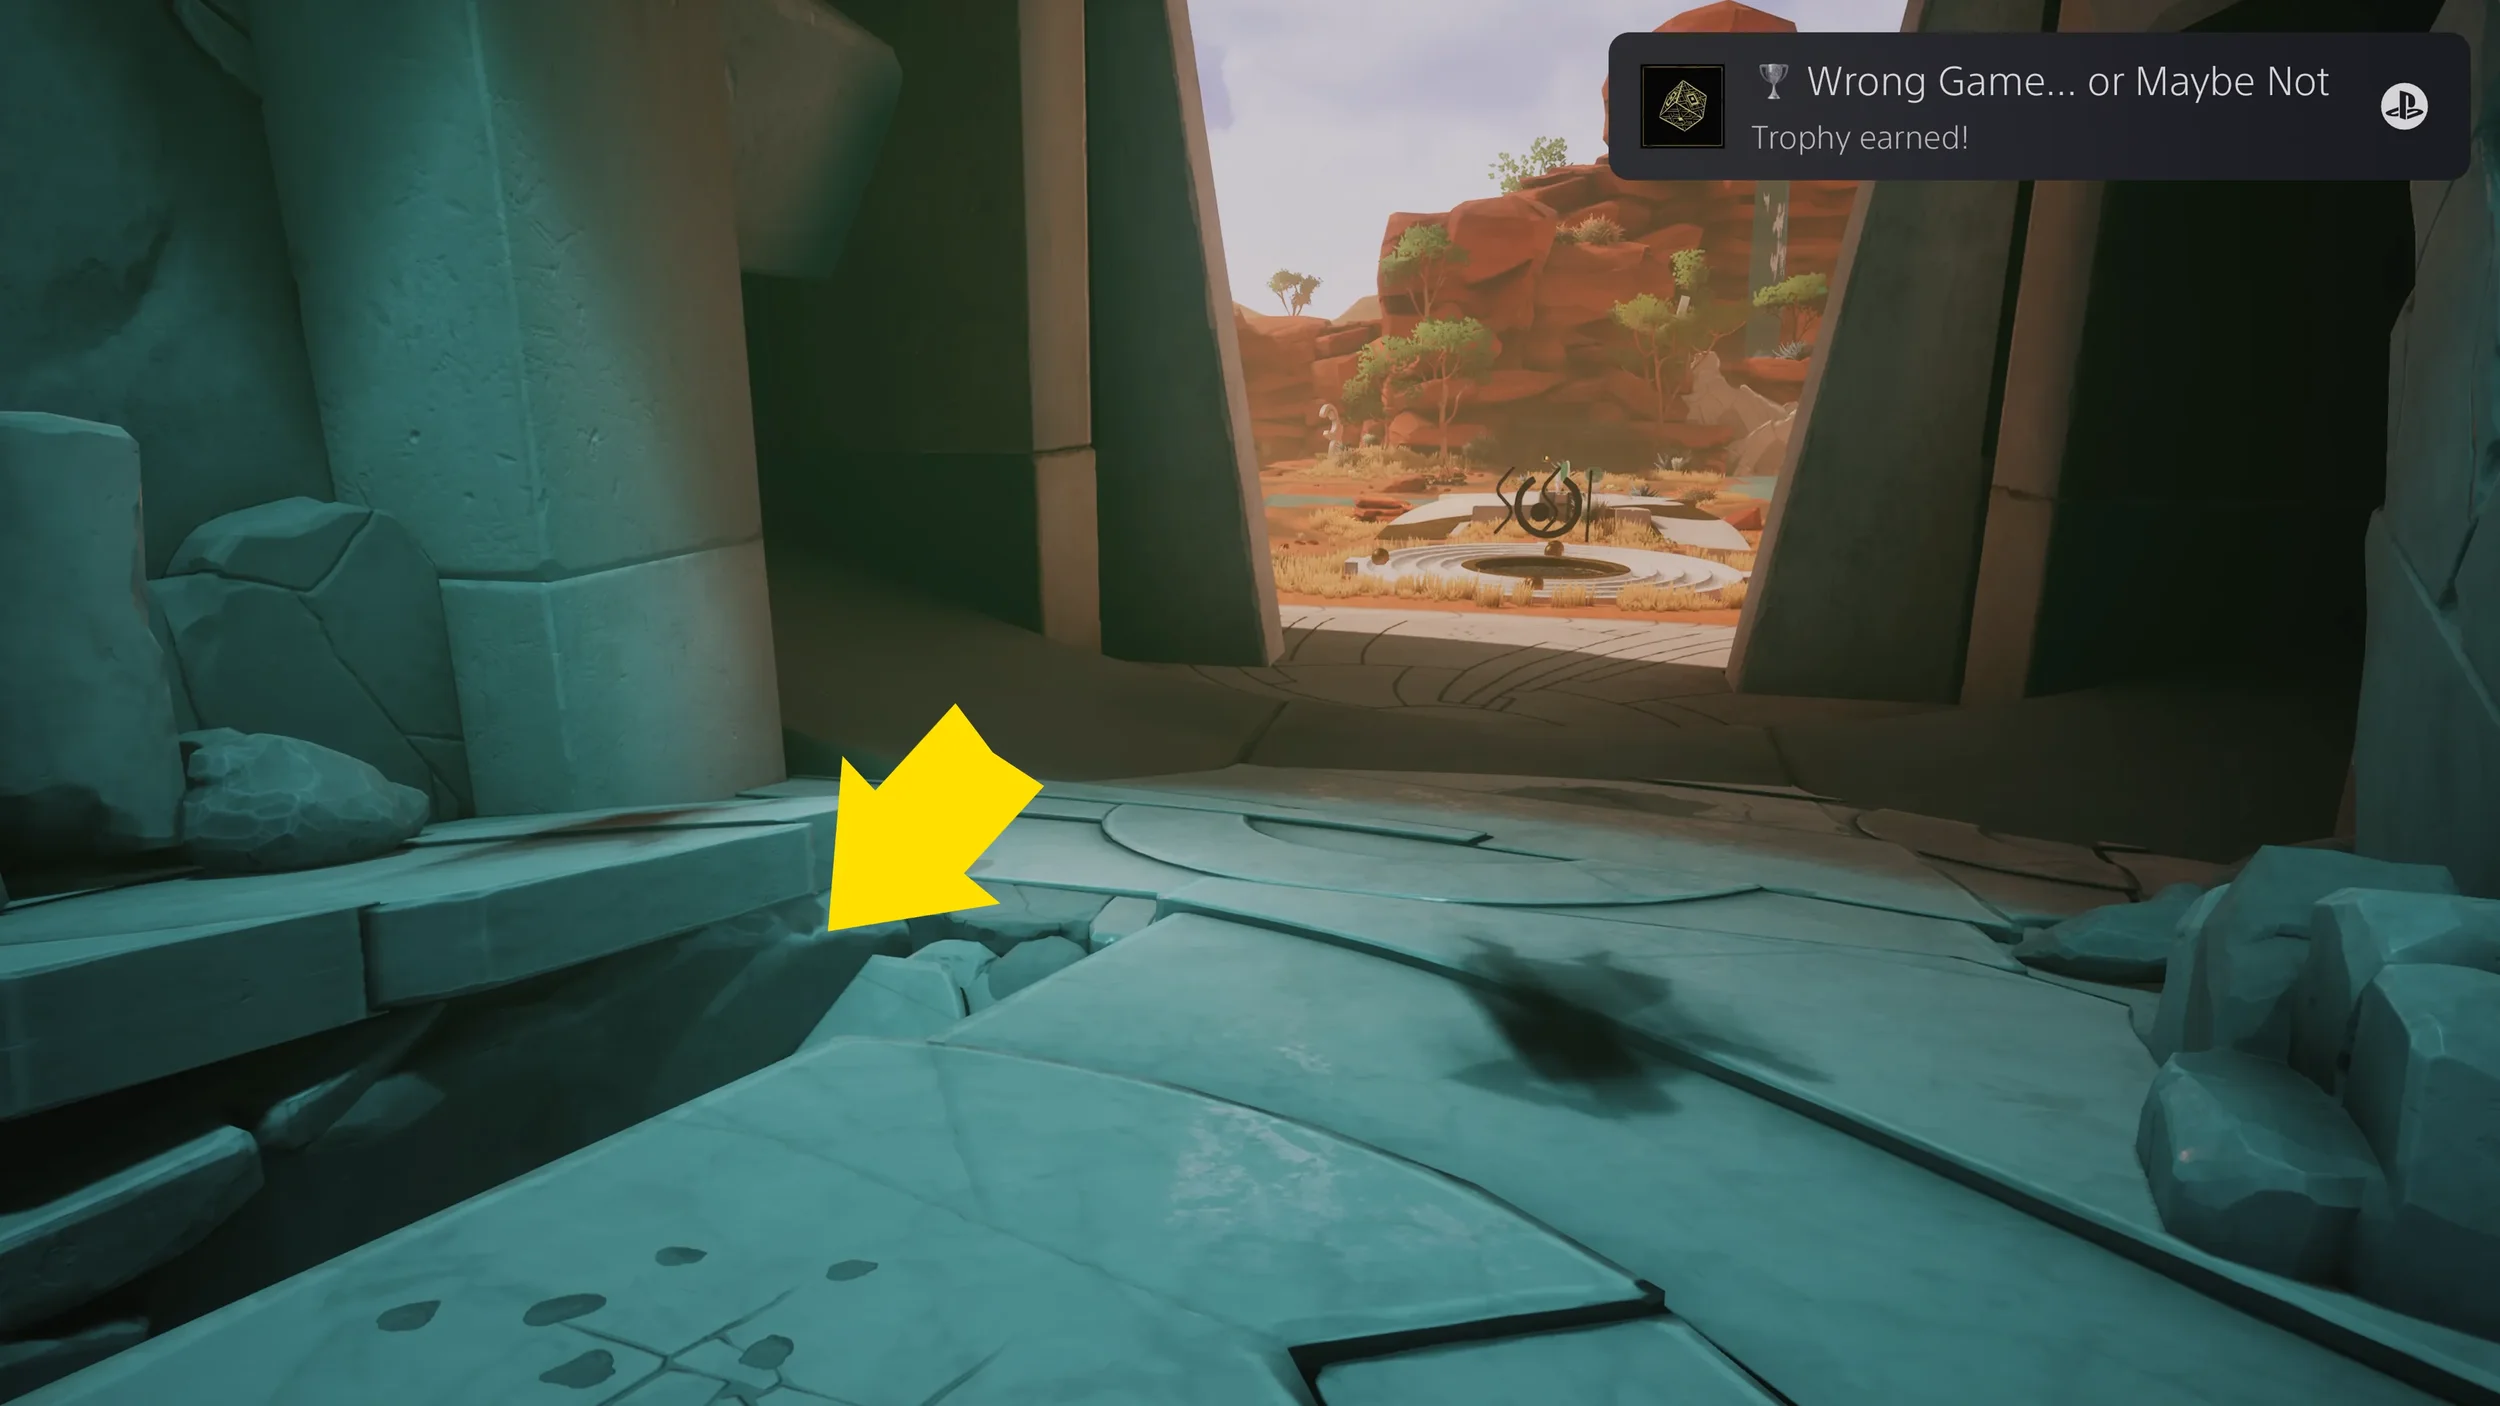
As soon as you open the door, go inside but BEFORE going down the ramp, advance to the end of the hallway and go behind the rubble to find a Cube on the floor.
Turn on your flashlight and inspect the Cube, the Cube has multiple buttons on it, we need to press them in a specific order to open it.
First find the button that doesn’t have any outlines around the button, press it then find the button than has just 1 outline, then 2, then 3, etc…

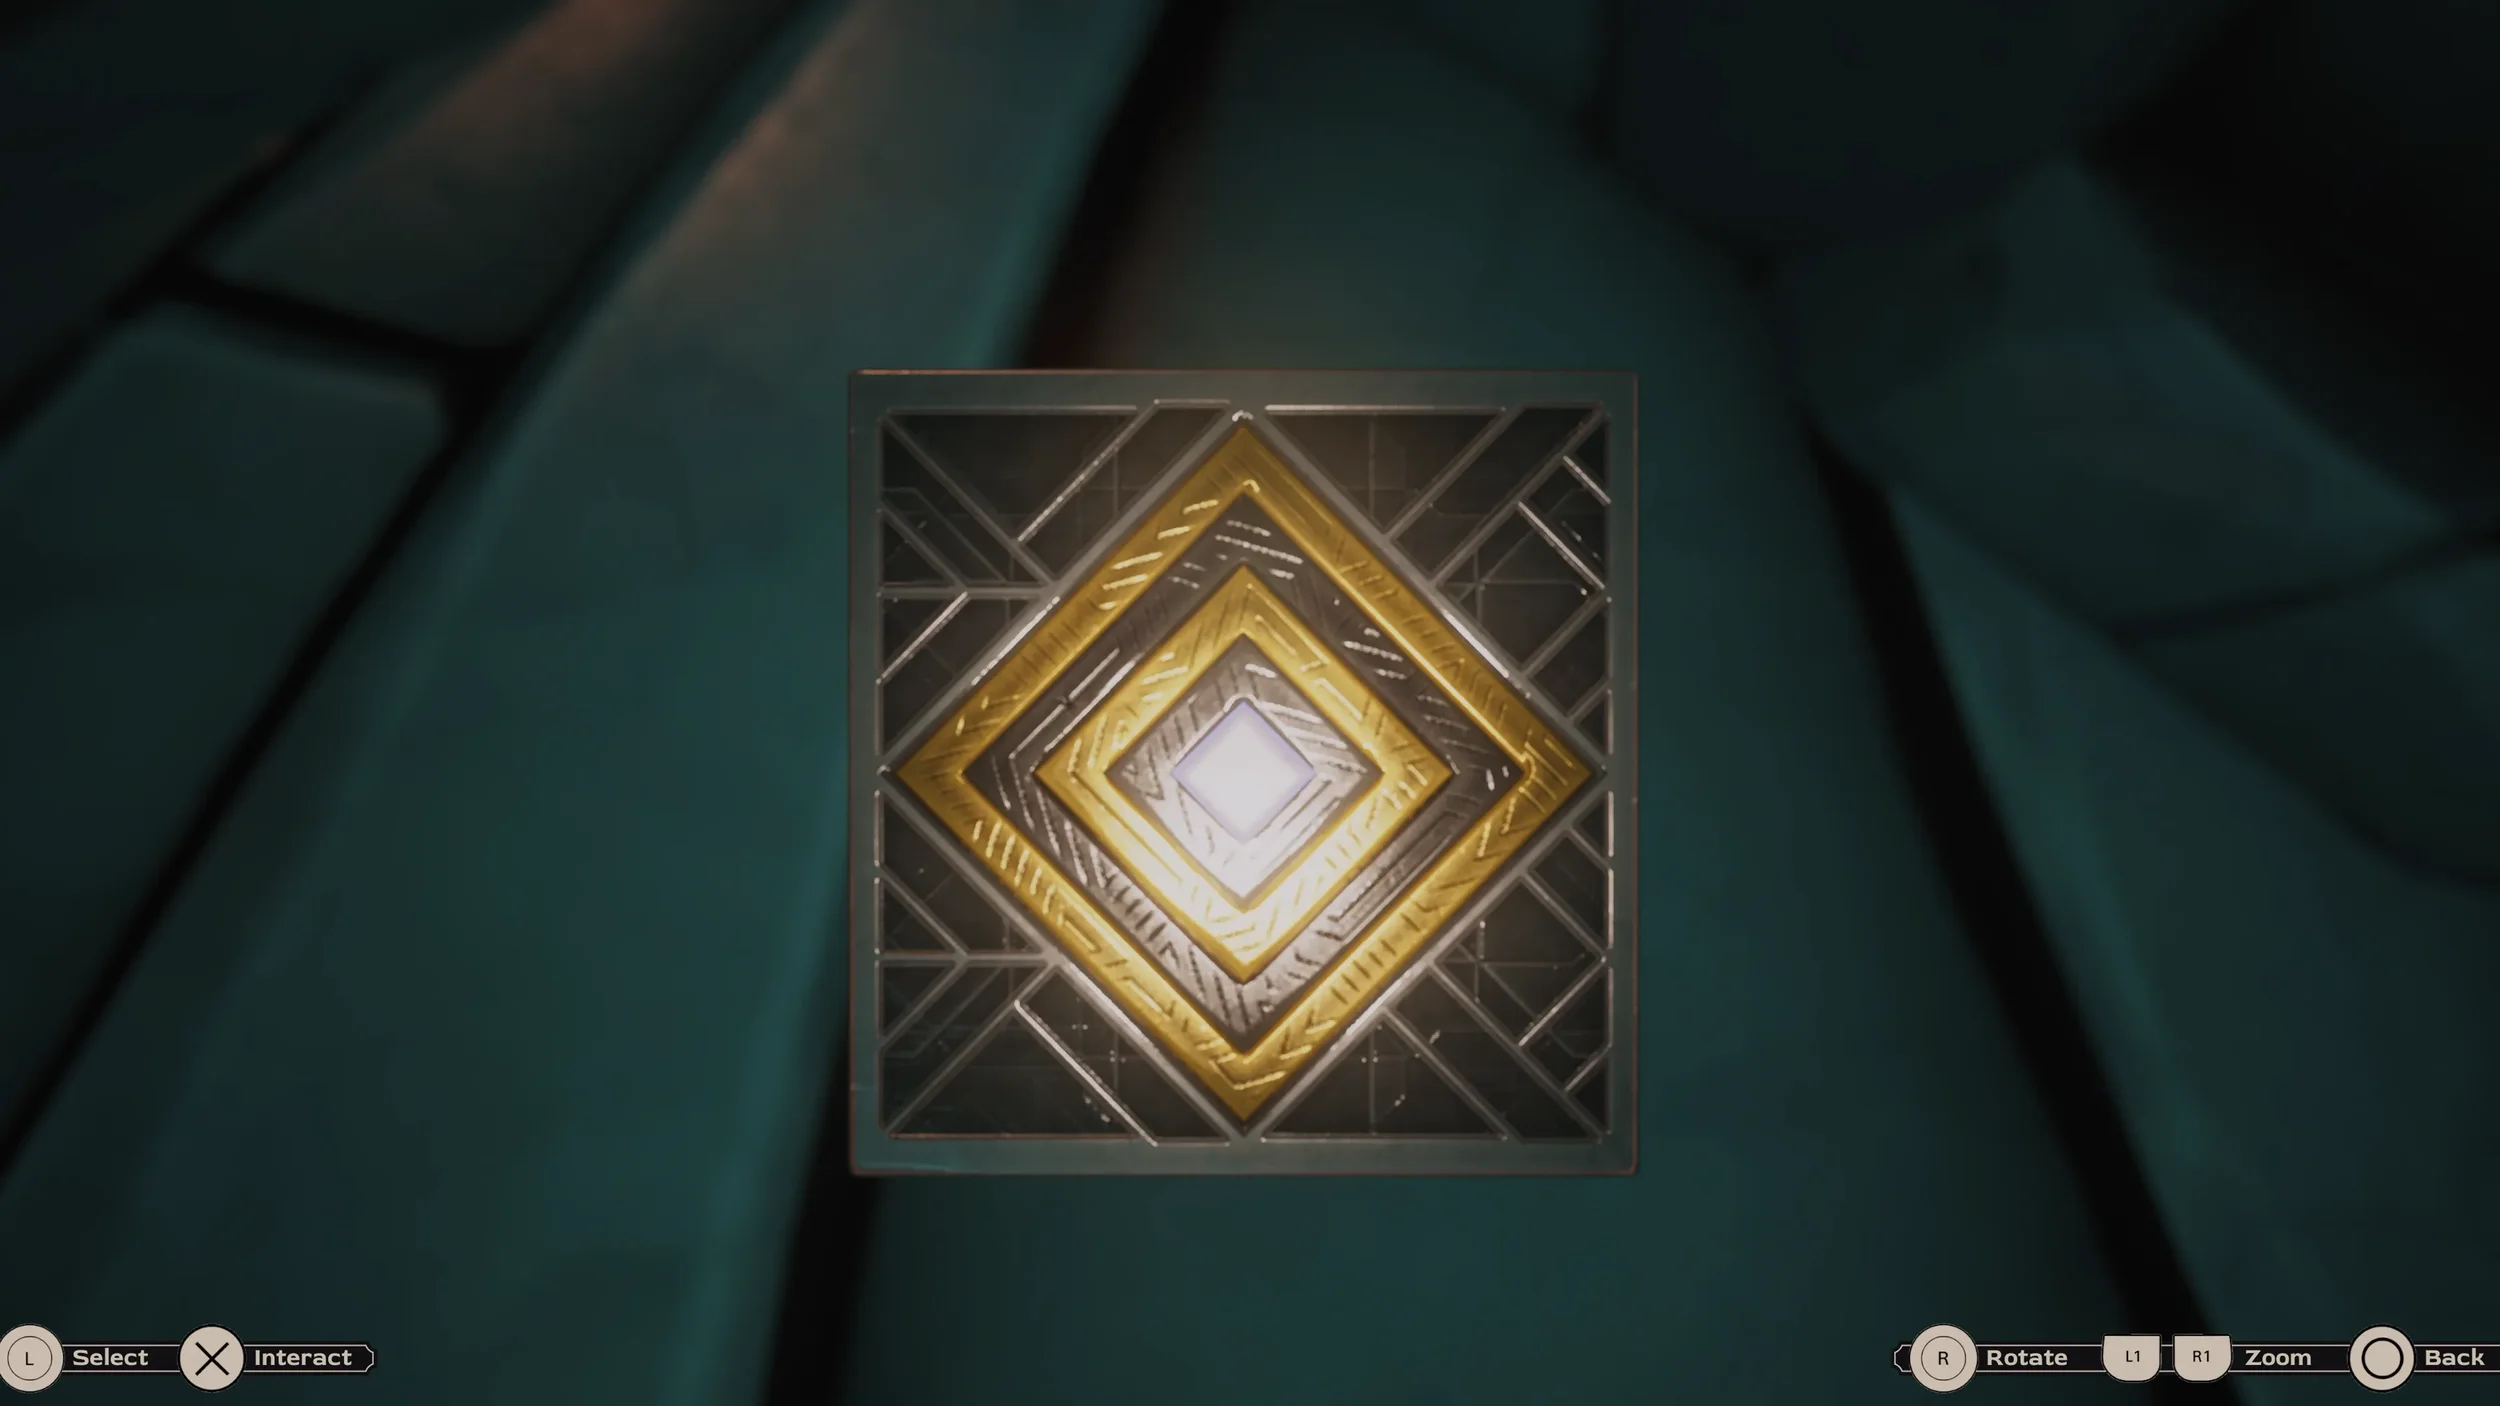
 "Wrong Game... or Maybe Not" Trophy.
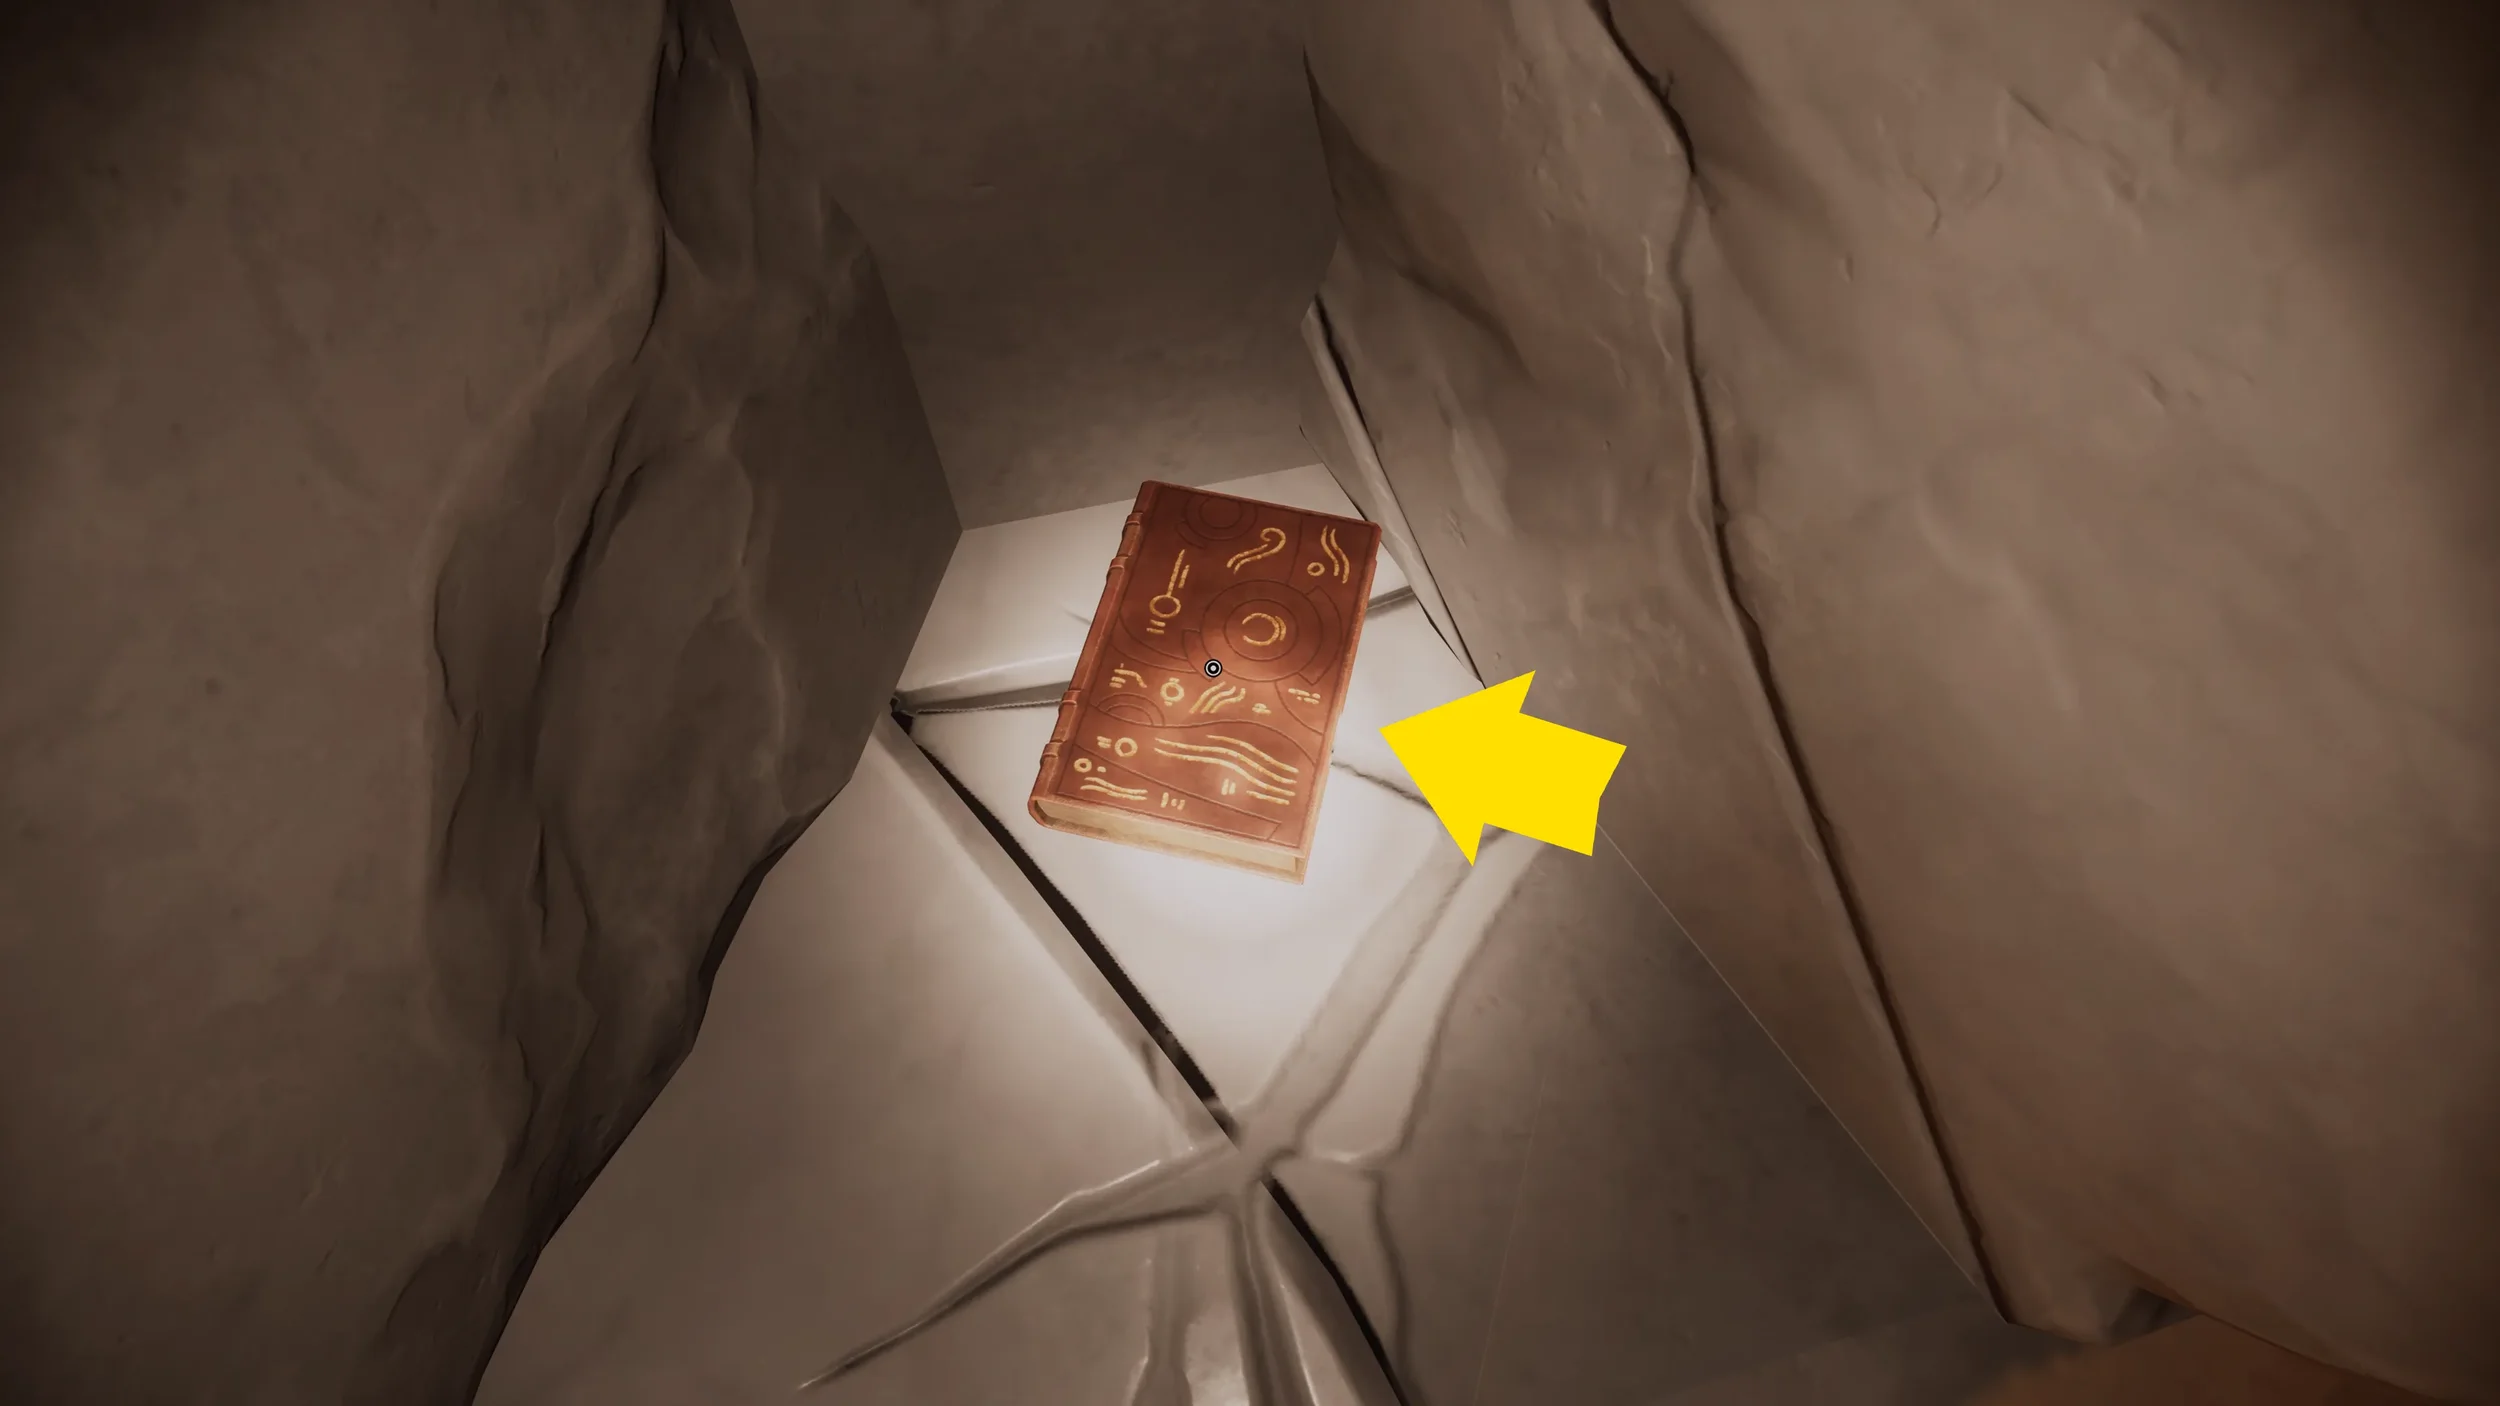
It Belongs In a (Pnakotic) Museum"! Trophy
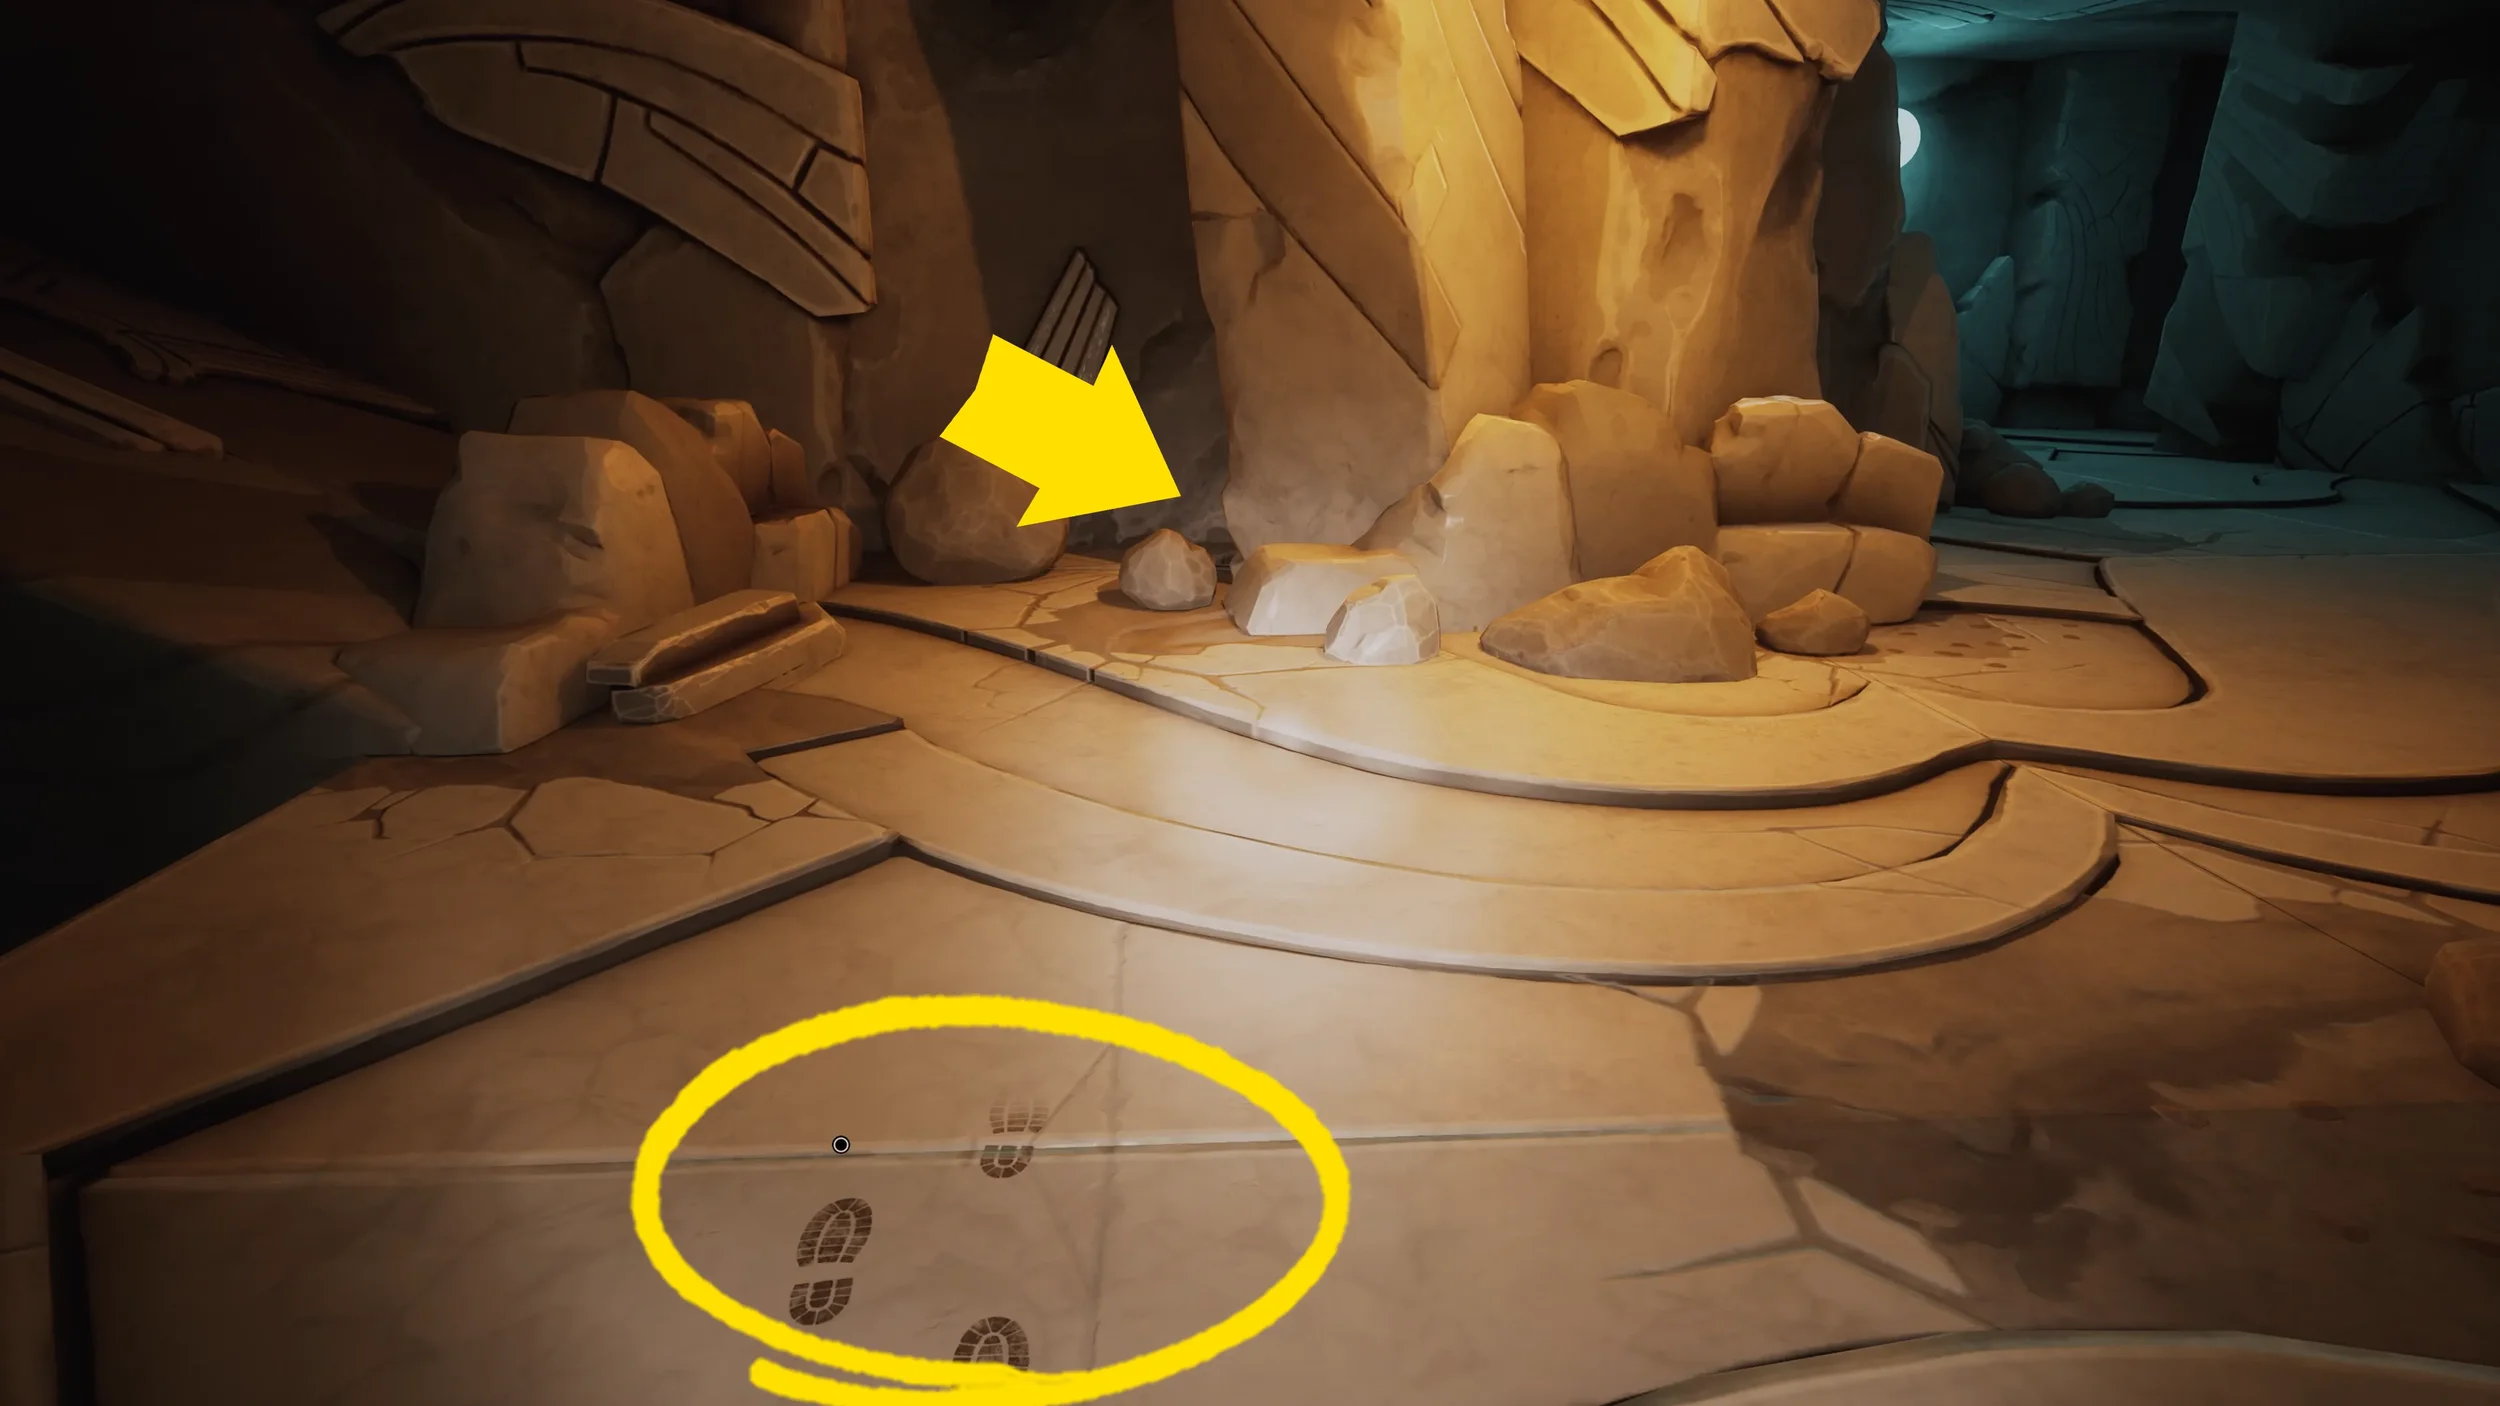
Return back to the cave entrance and go down the ramp, shortly after you will see some footprints on the ground.
"It Belongs In a (Pnakotic) Museum!" Trophy.
Endings Trophies
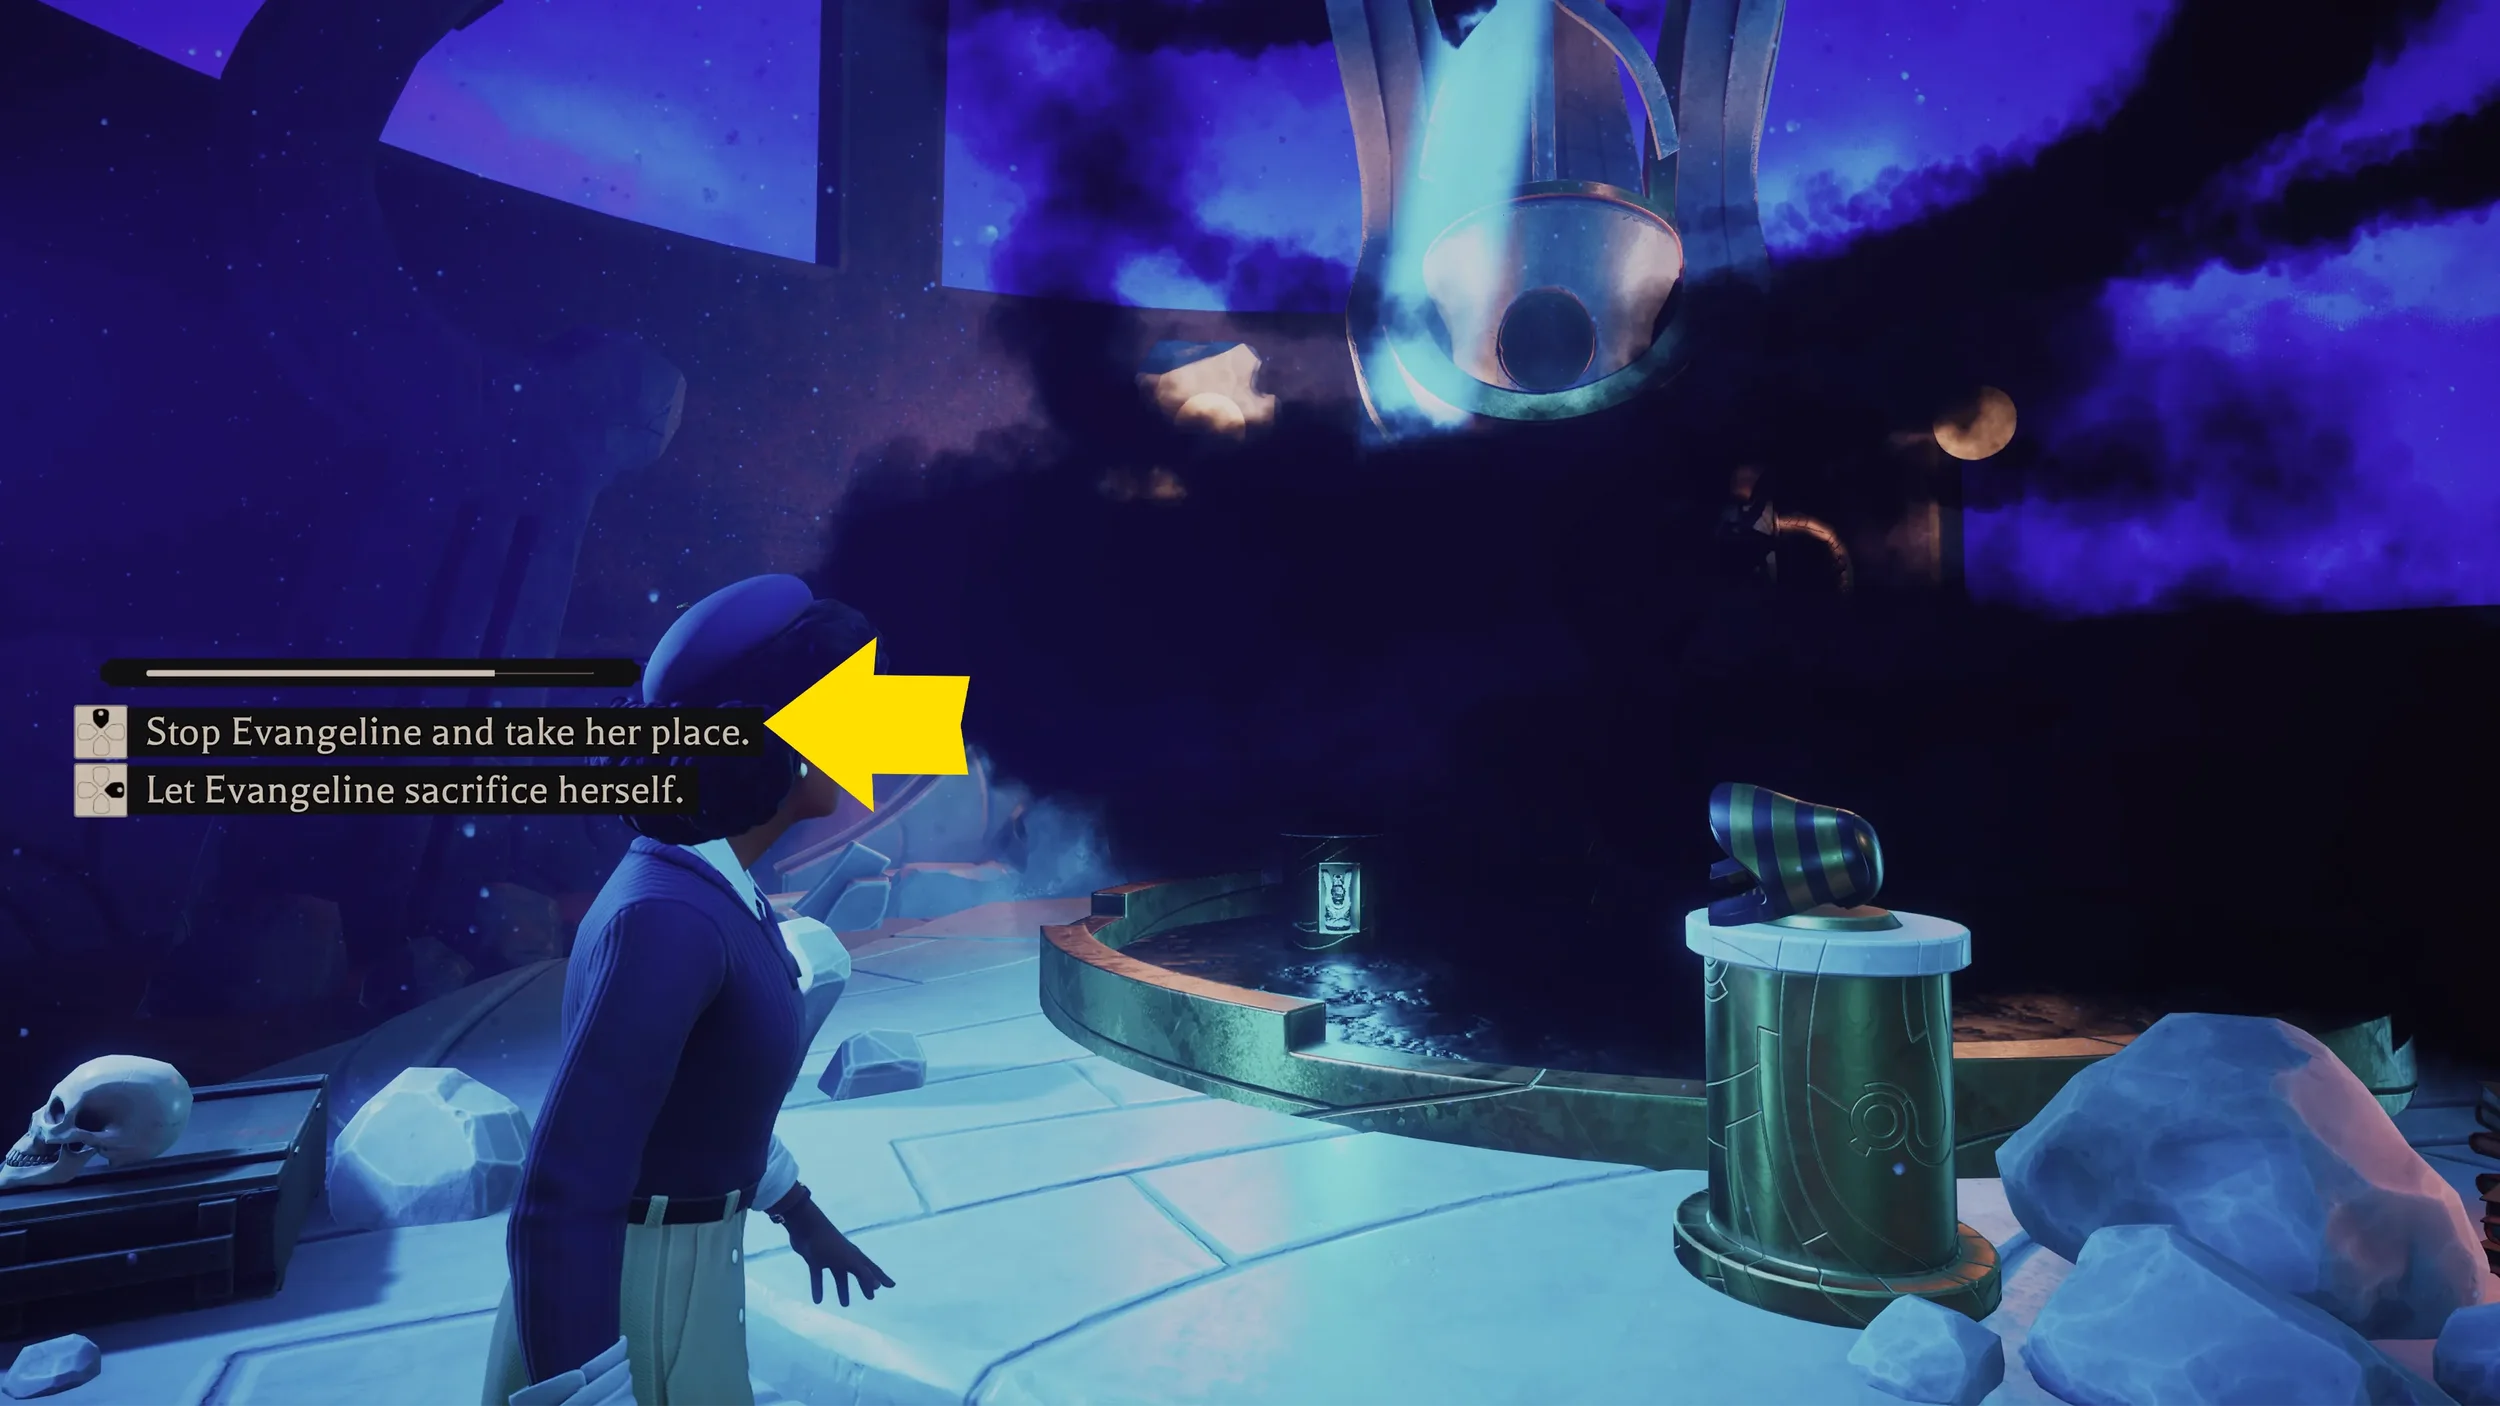
After this just continue down the ramp and shortly after you will reach the final decision of the game.
When confronting Bowen, you need to decide if you want to sacrifice Eva or the Professor.
"Hard-Headed To The Very End" Trophy.
If you decide to sacrifice Eva you will get the "Always Trust The Doctor" Trophy.
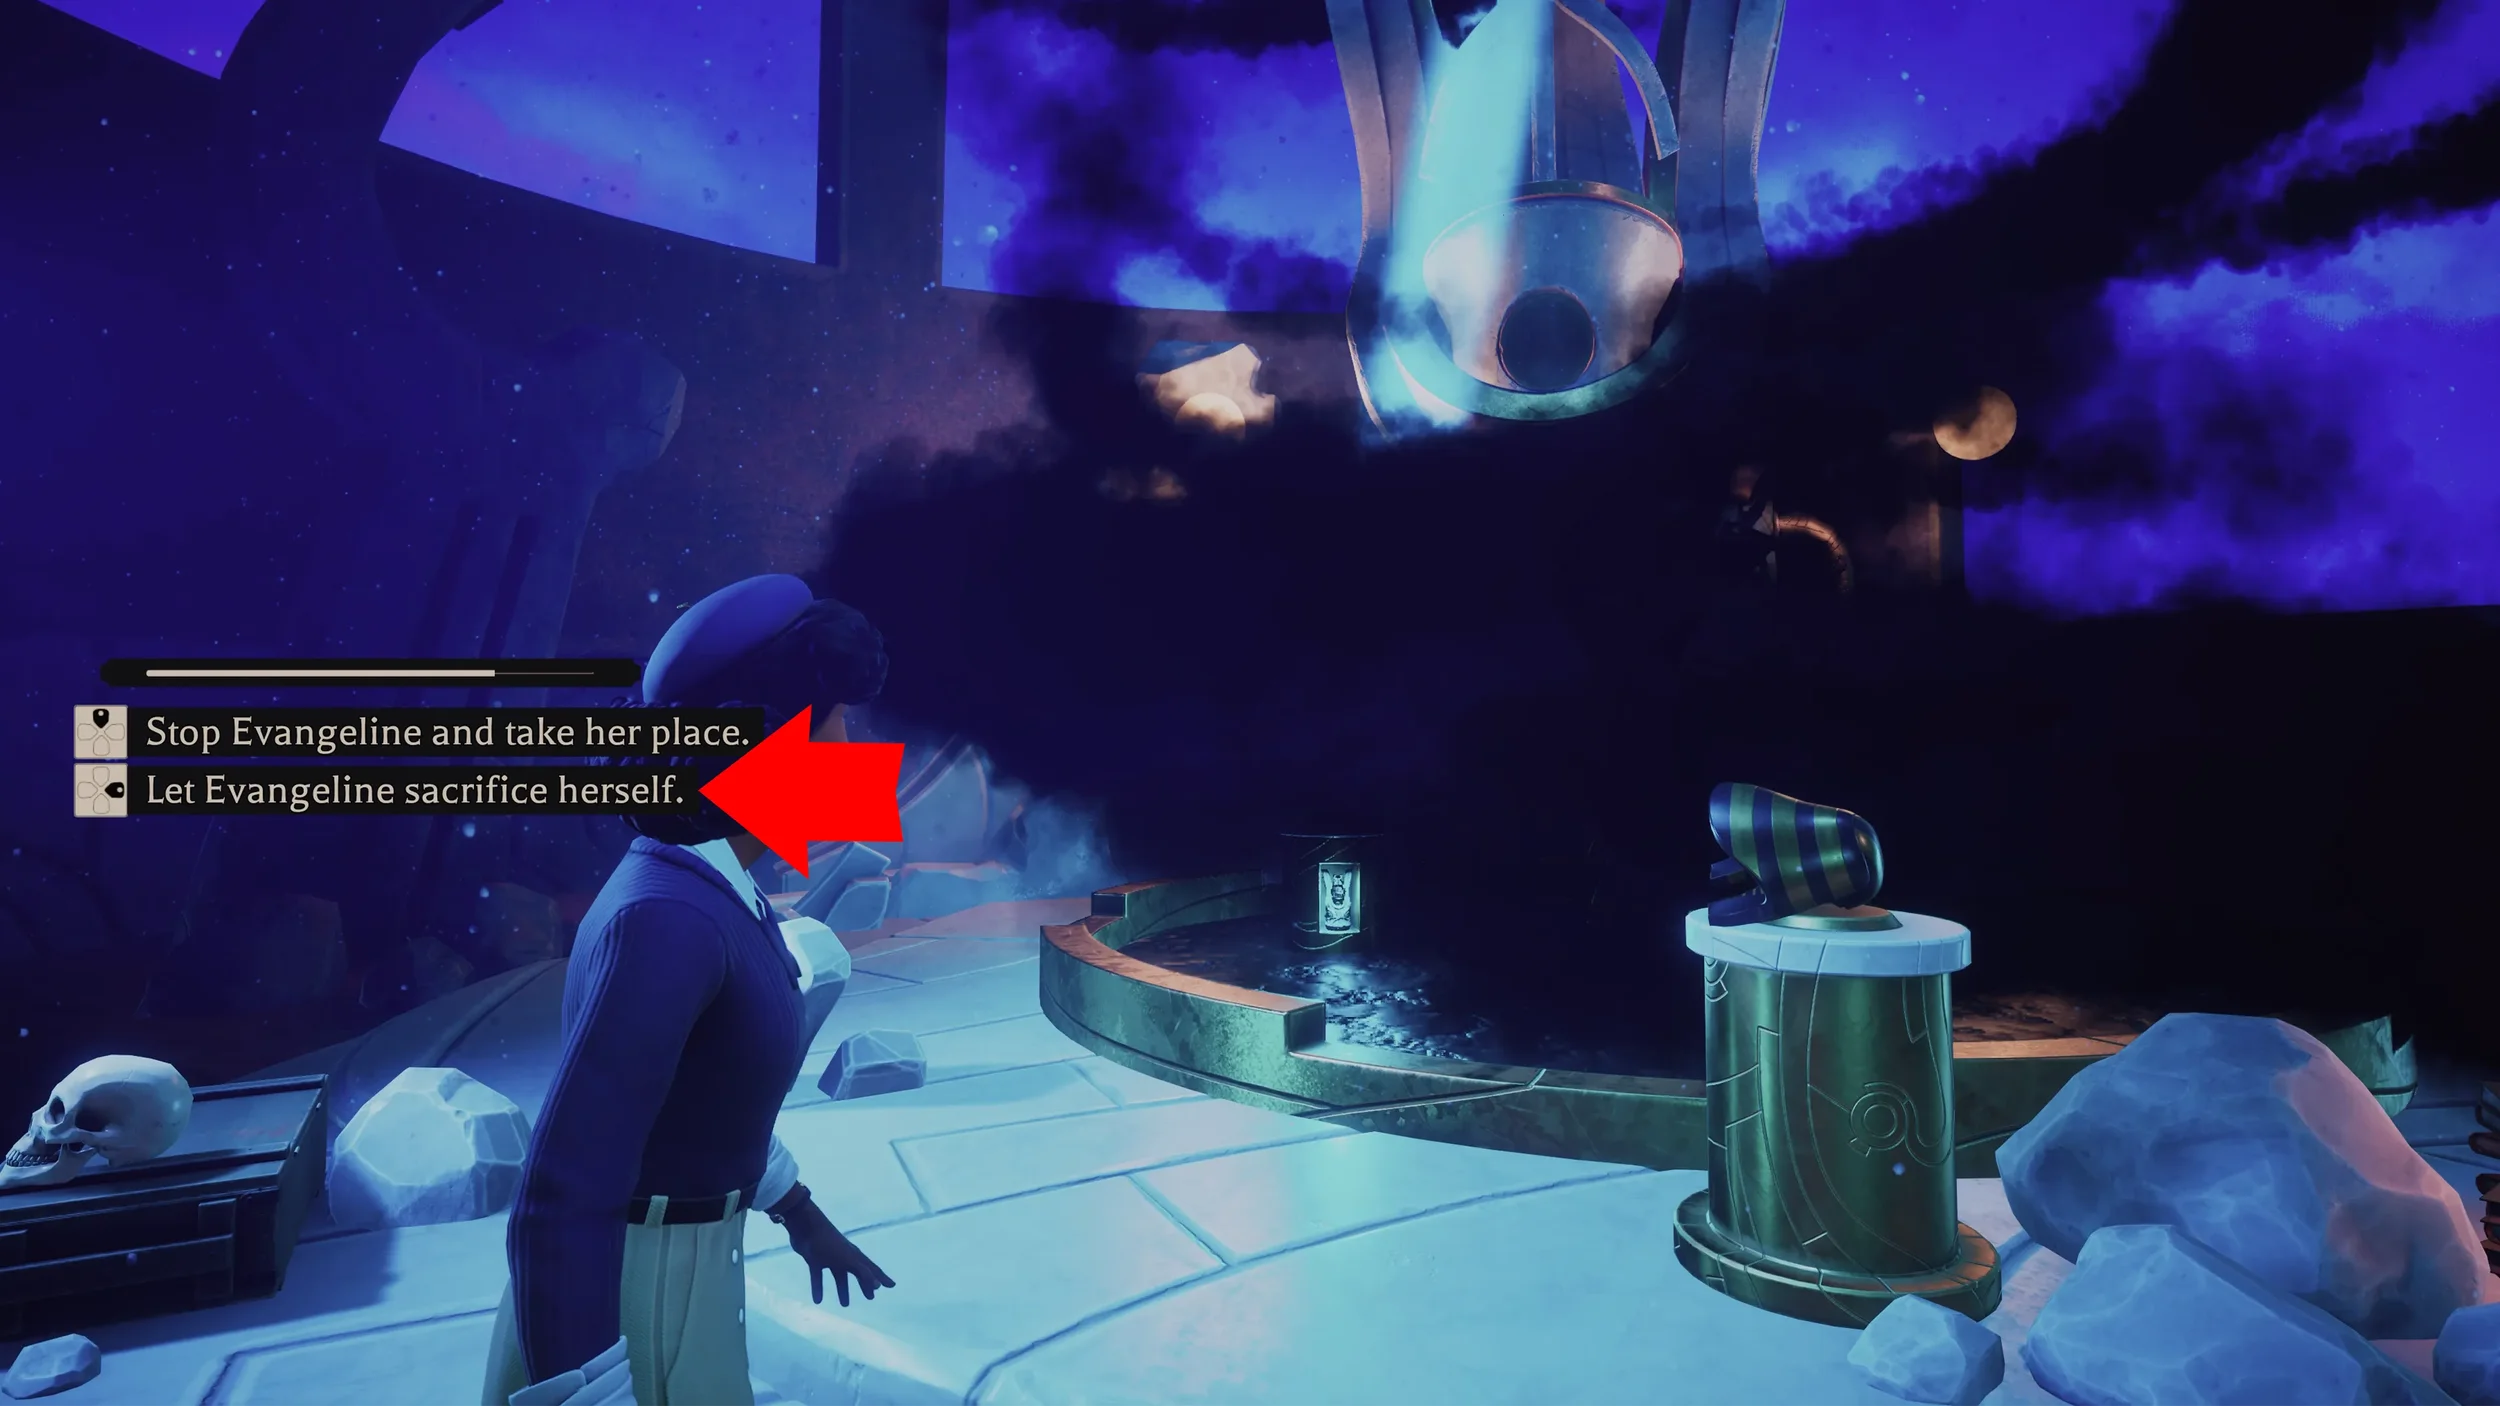
After choosing any of the endings, when the credits finish and you get sent back to the Main Menu, you can just press “Continue” to appear back at the checkpoint just before the Final Decision to quickly get whichever ending you didn’t choose the first time.
 "The Call of The Elder Gods" Platinum Trophy if you have been following this 100% Walkthrough.
Congratulations!
Chapter 5 ⮨