
Call of The Elder Gods 100% Walkthrough - Chapter 3

You Damn Brat! Trophy
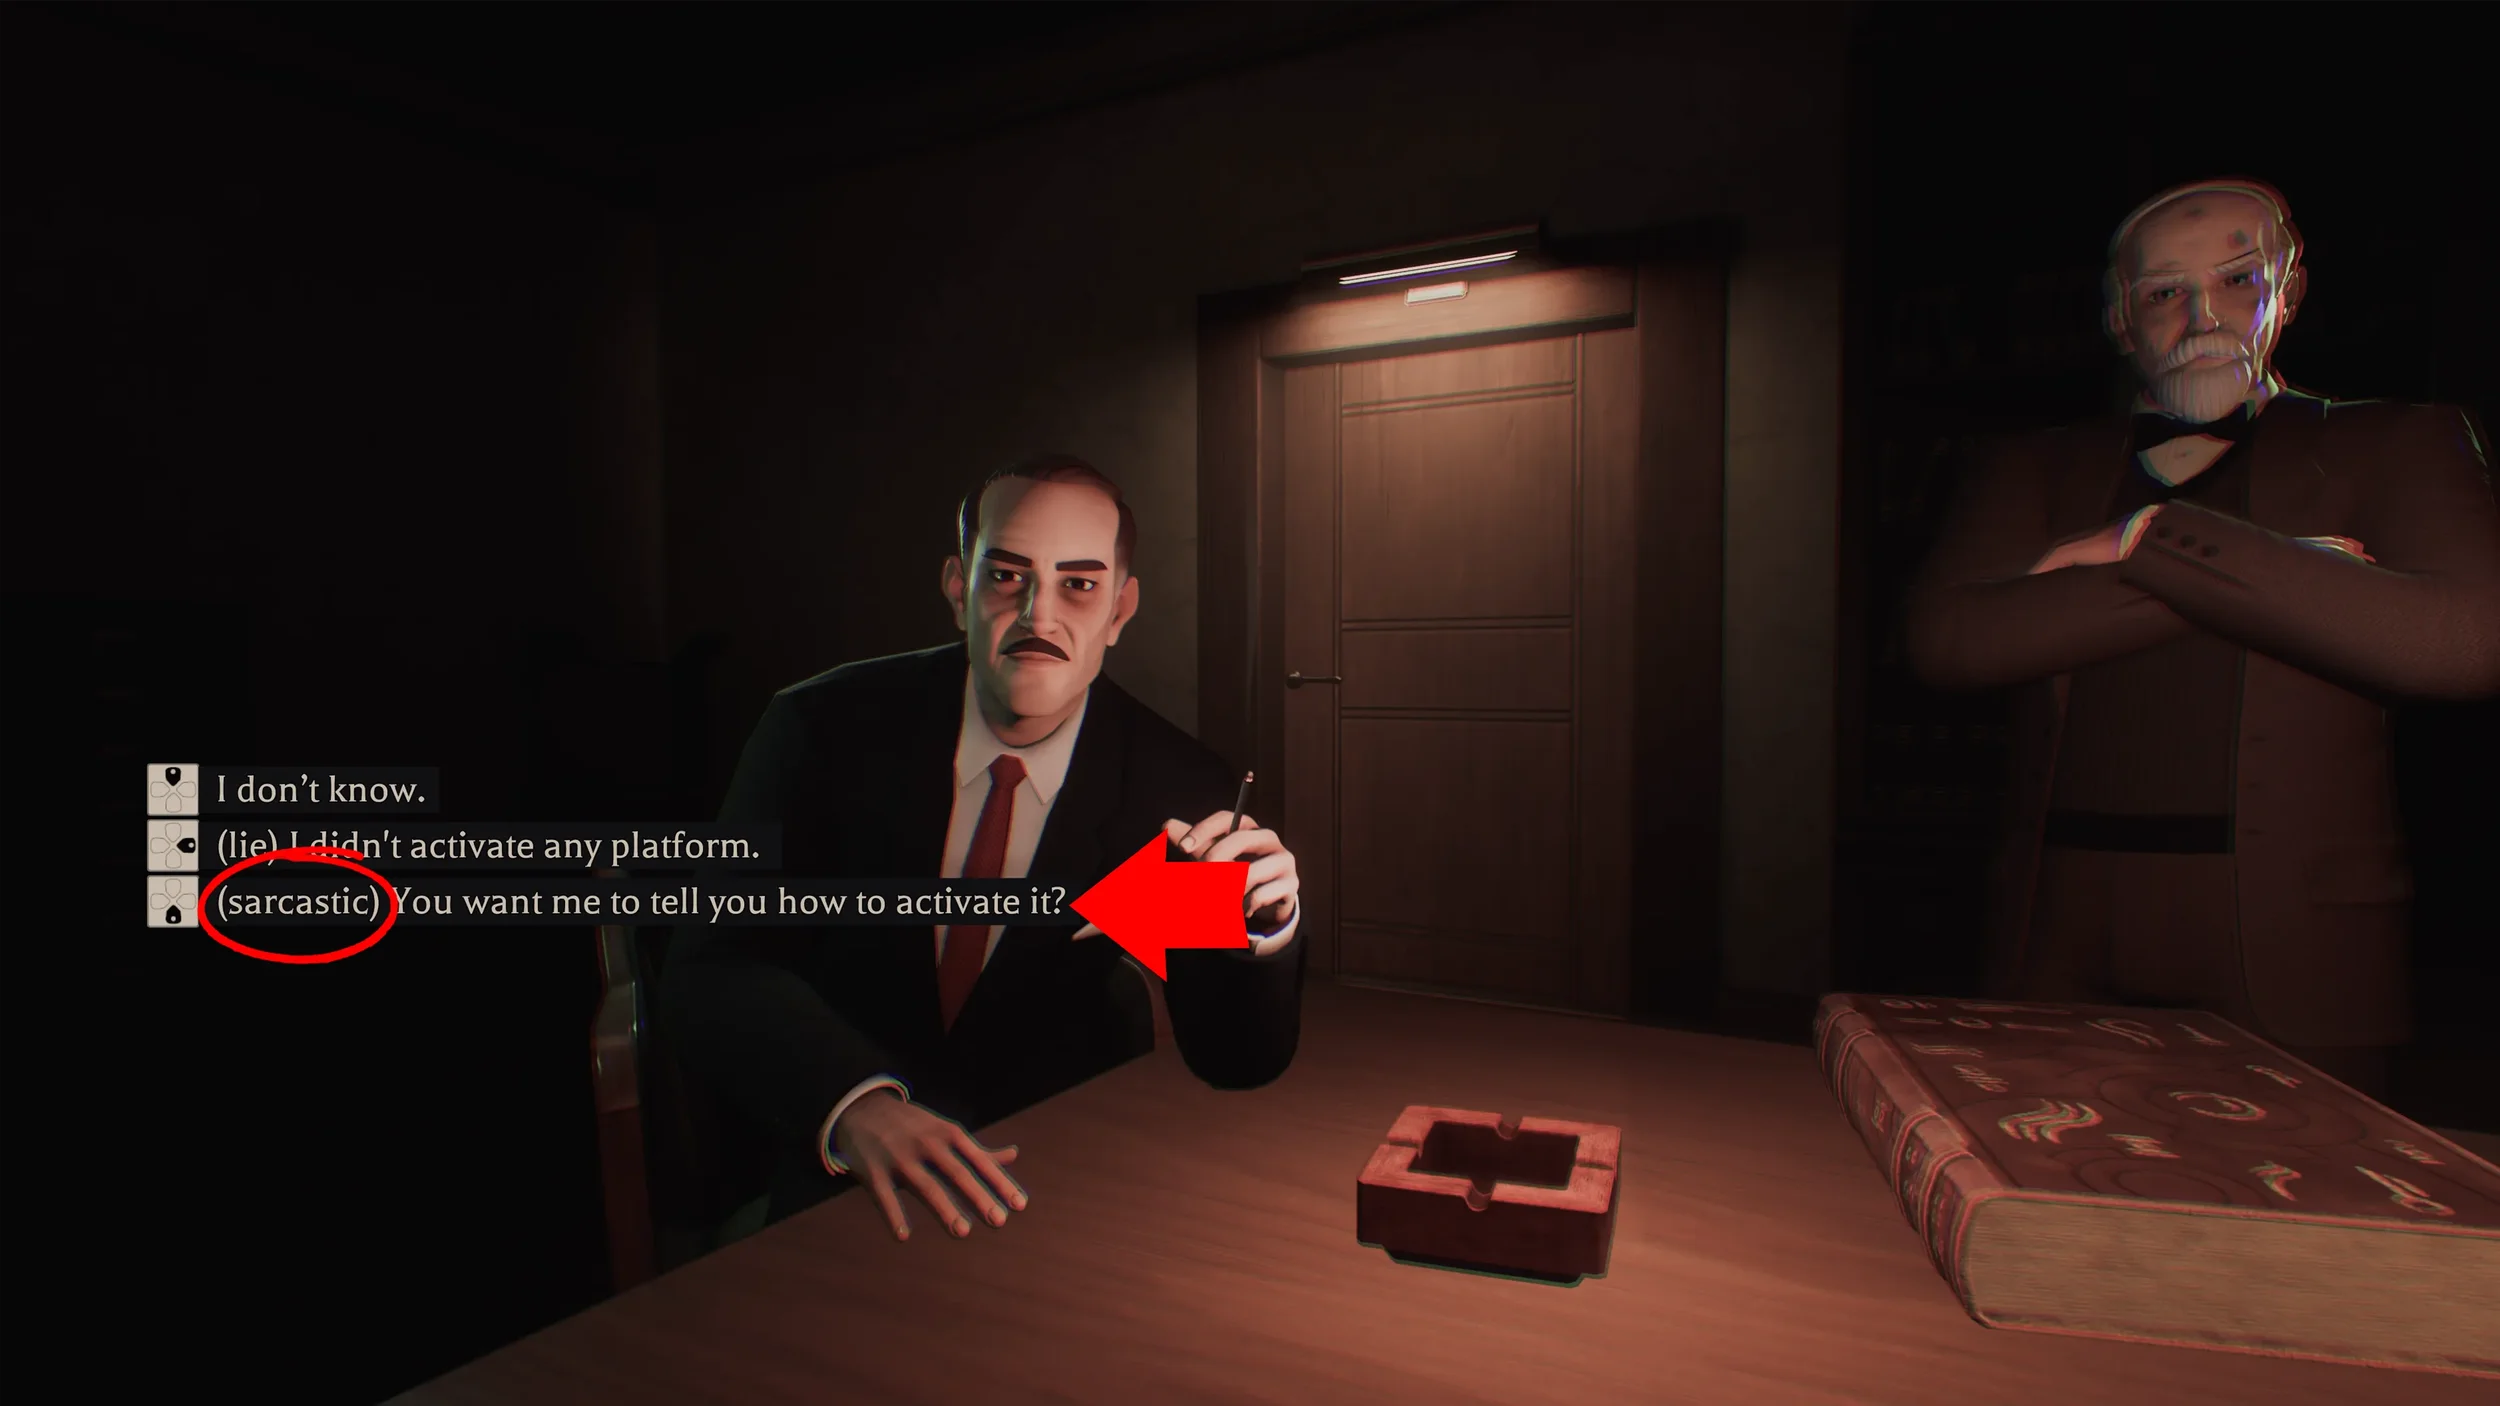
 “You Damn Brat!” Trophy, for this we simply need to respond sarcastically every time we get the chance to during this conversation.
The answers you give him for the first 2 questions he asks you are irrelevant, you can reply with any of the options, but when he asks the 3rd question is when you need to start always choosing the sarcastic answers.
Choose “(Sarcastic) You want me to tell you how to activate it?” > “(sarcastic) It means prick” > “Yes he might help you with your medical condition” (this last one doesn’t indicate it is the sarcastic option but you must choose it anyway).
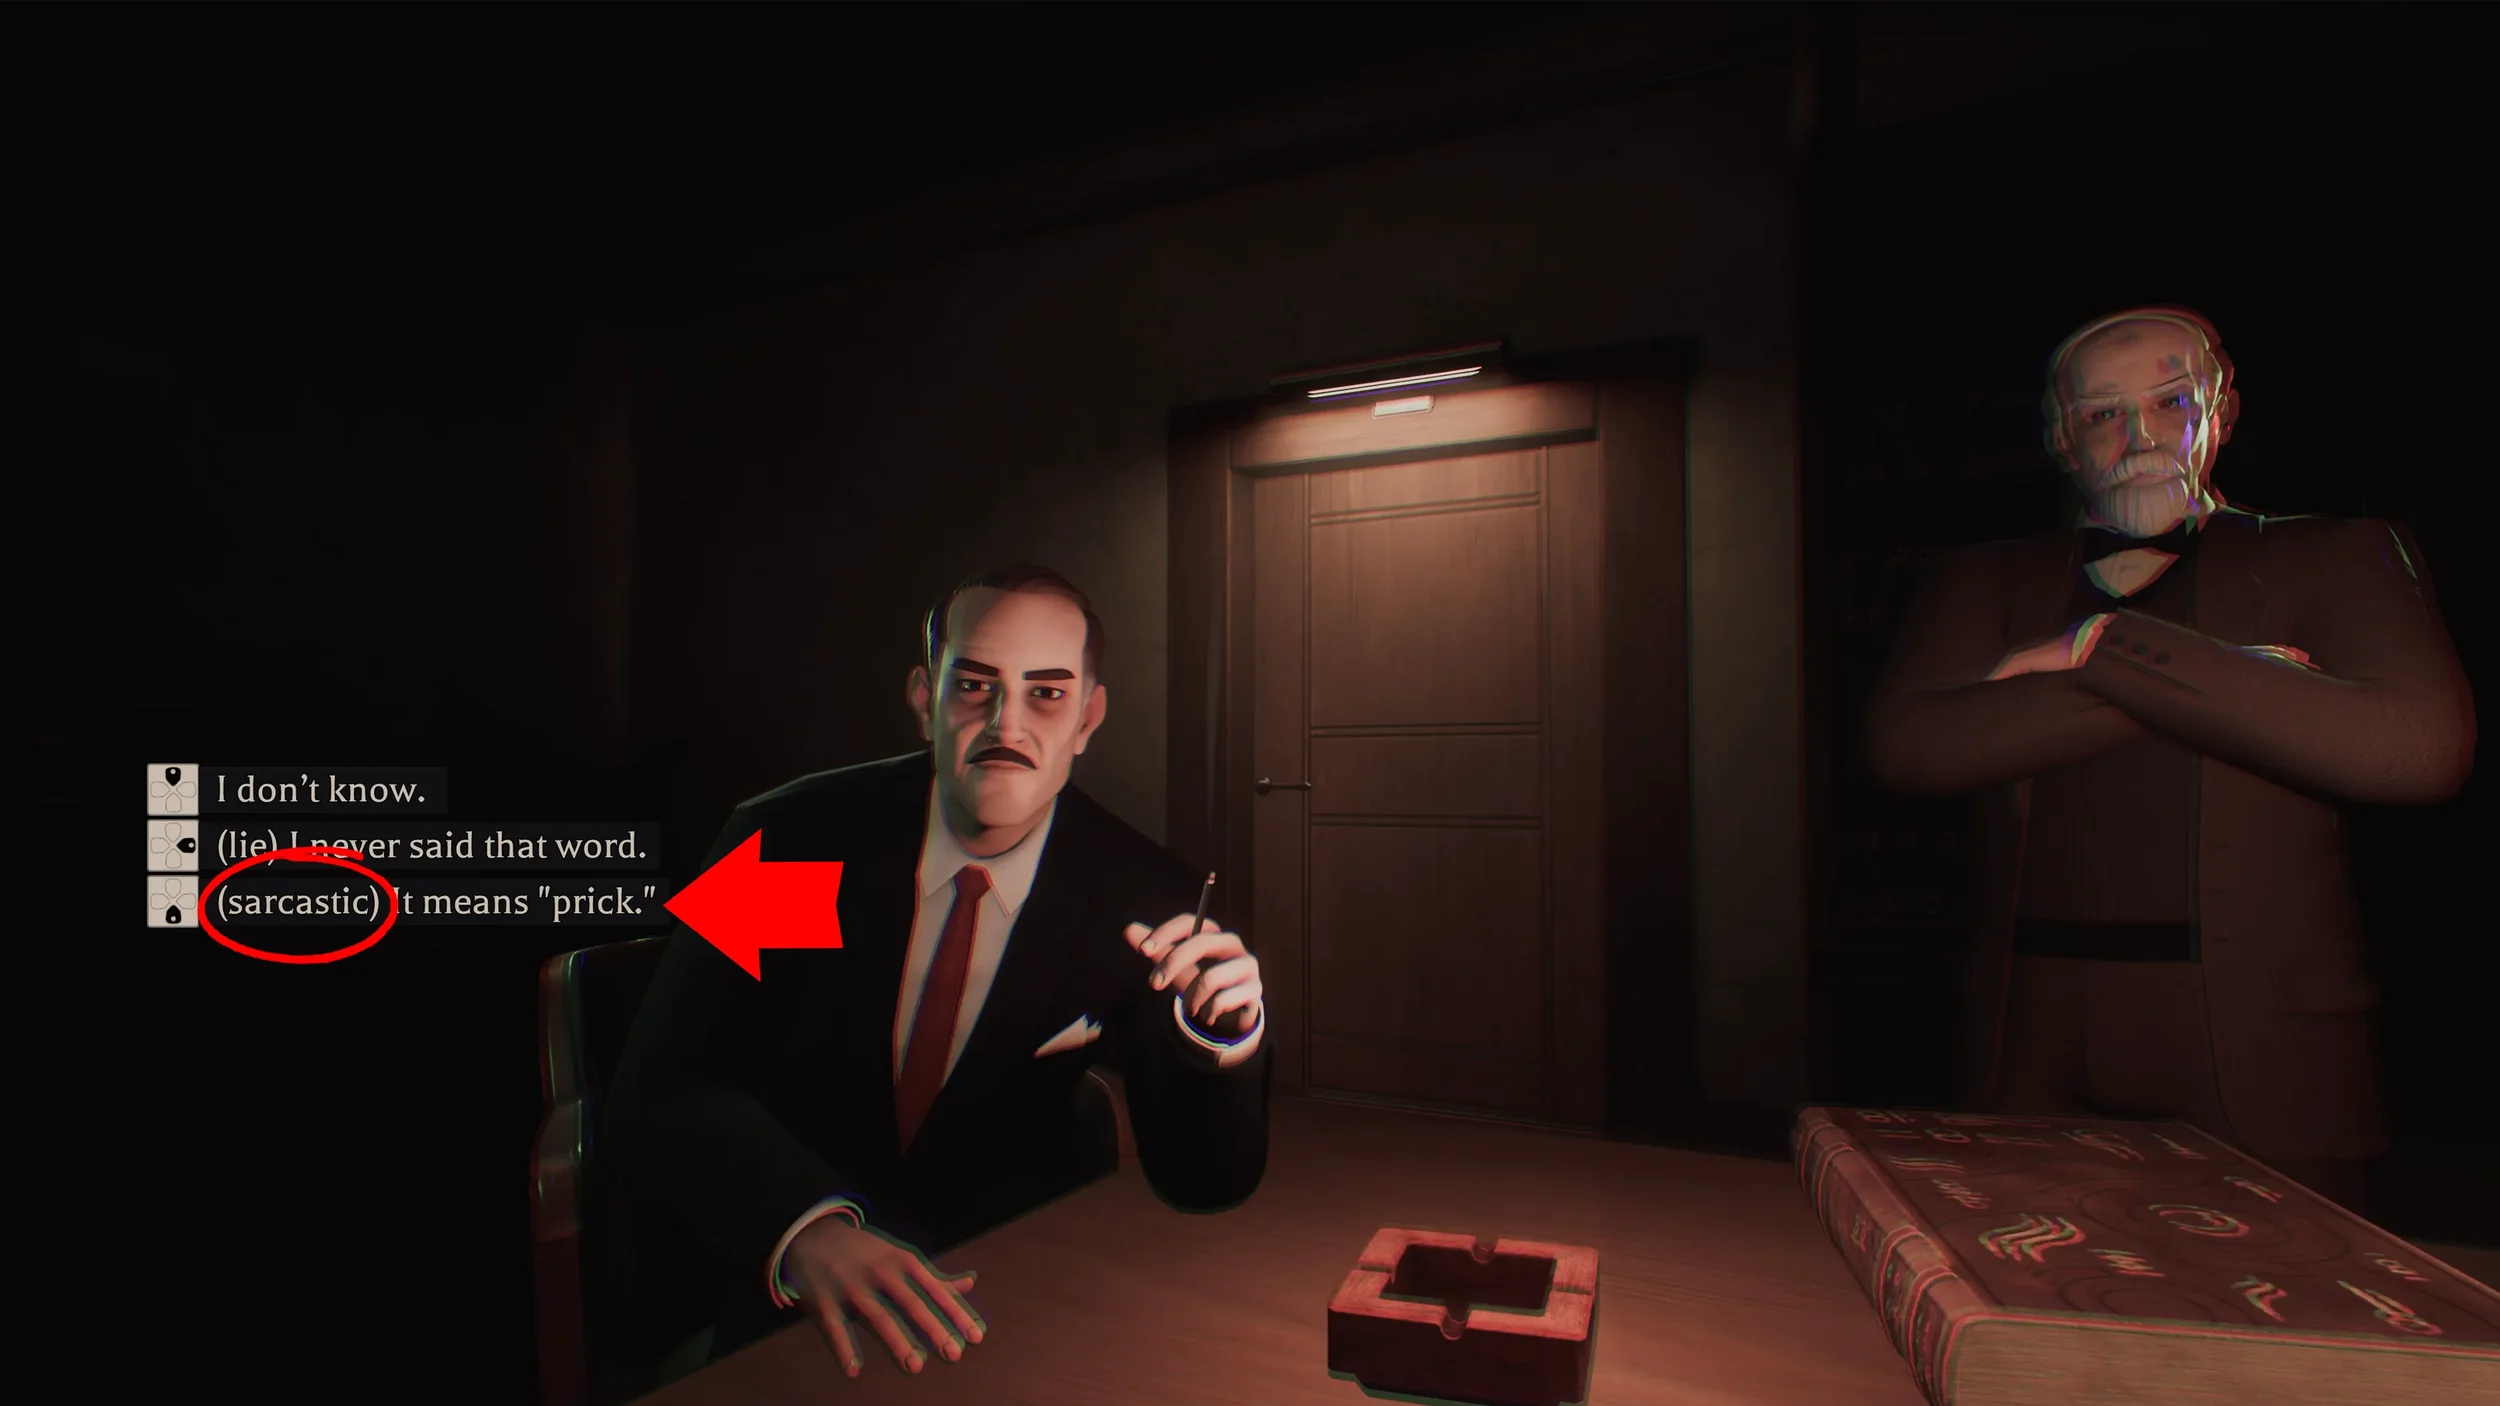
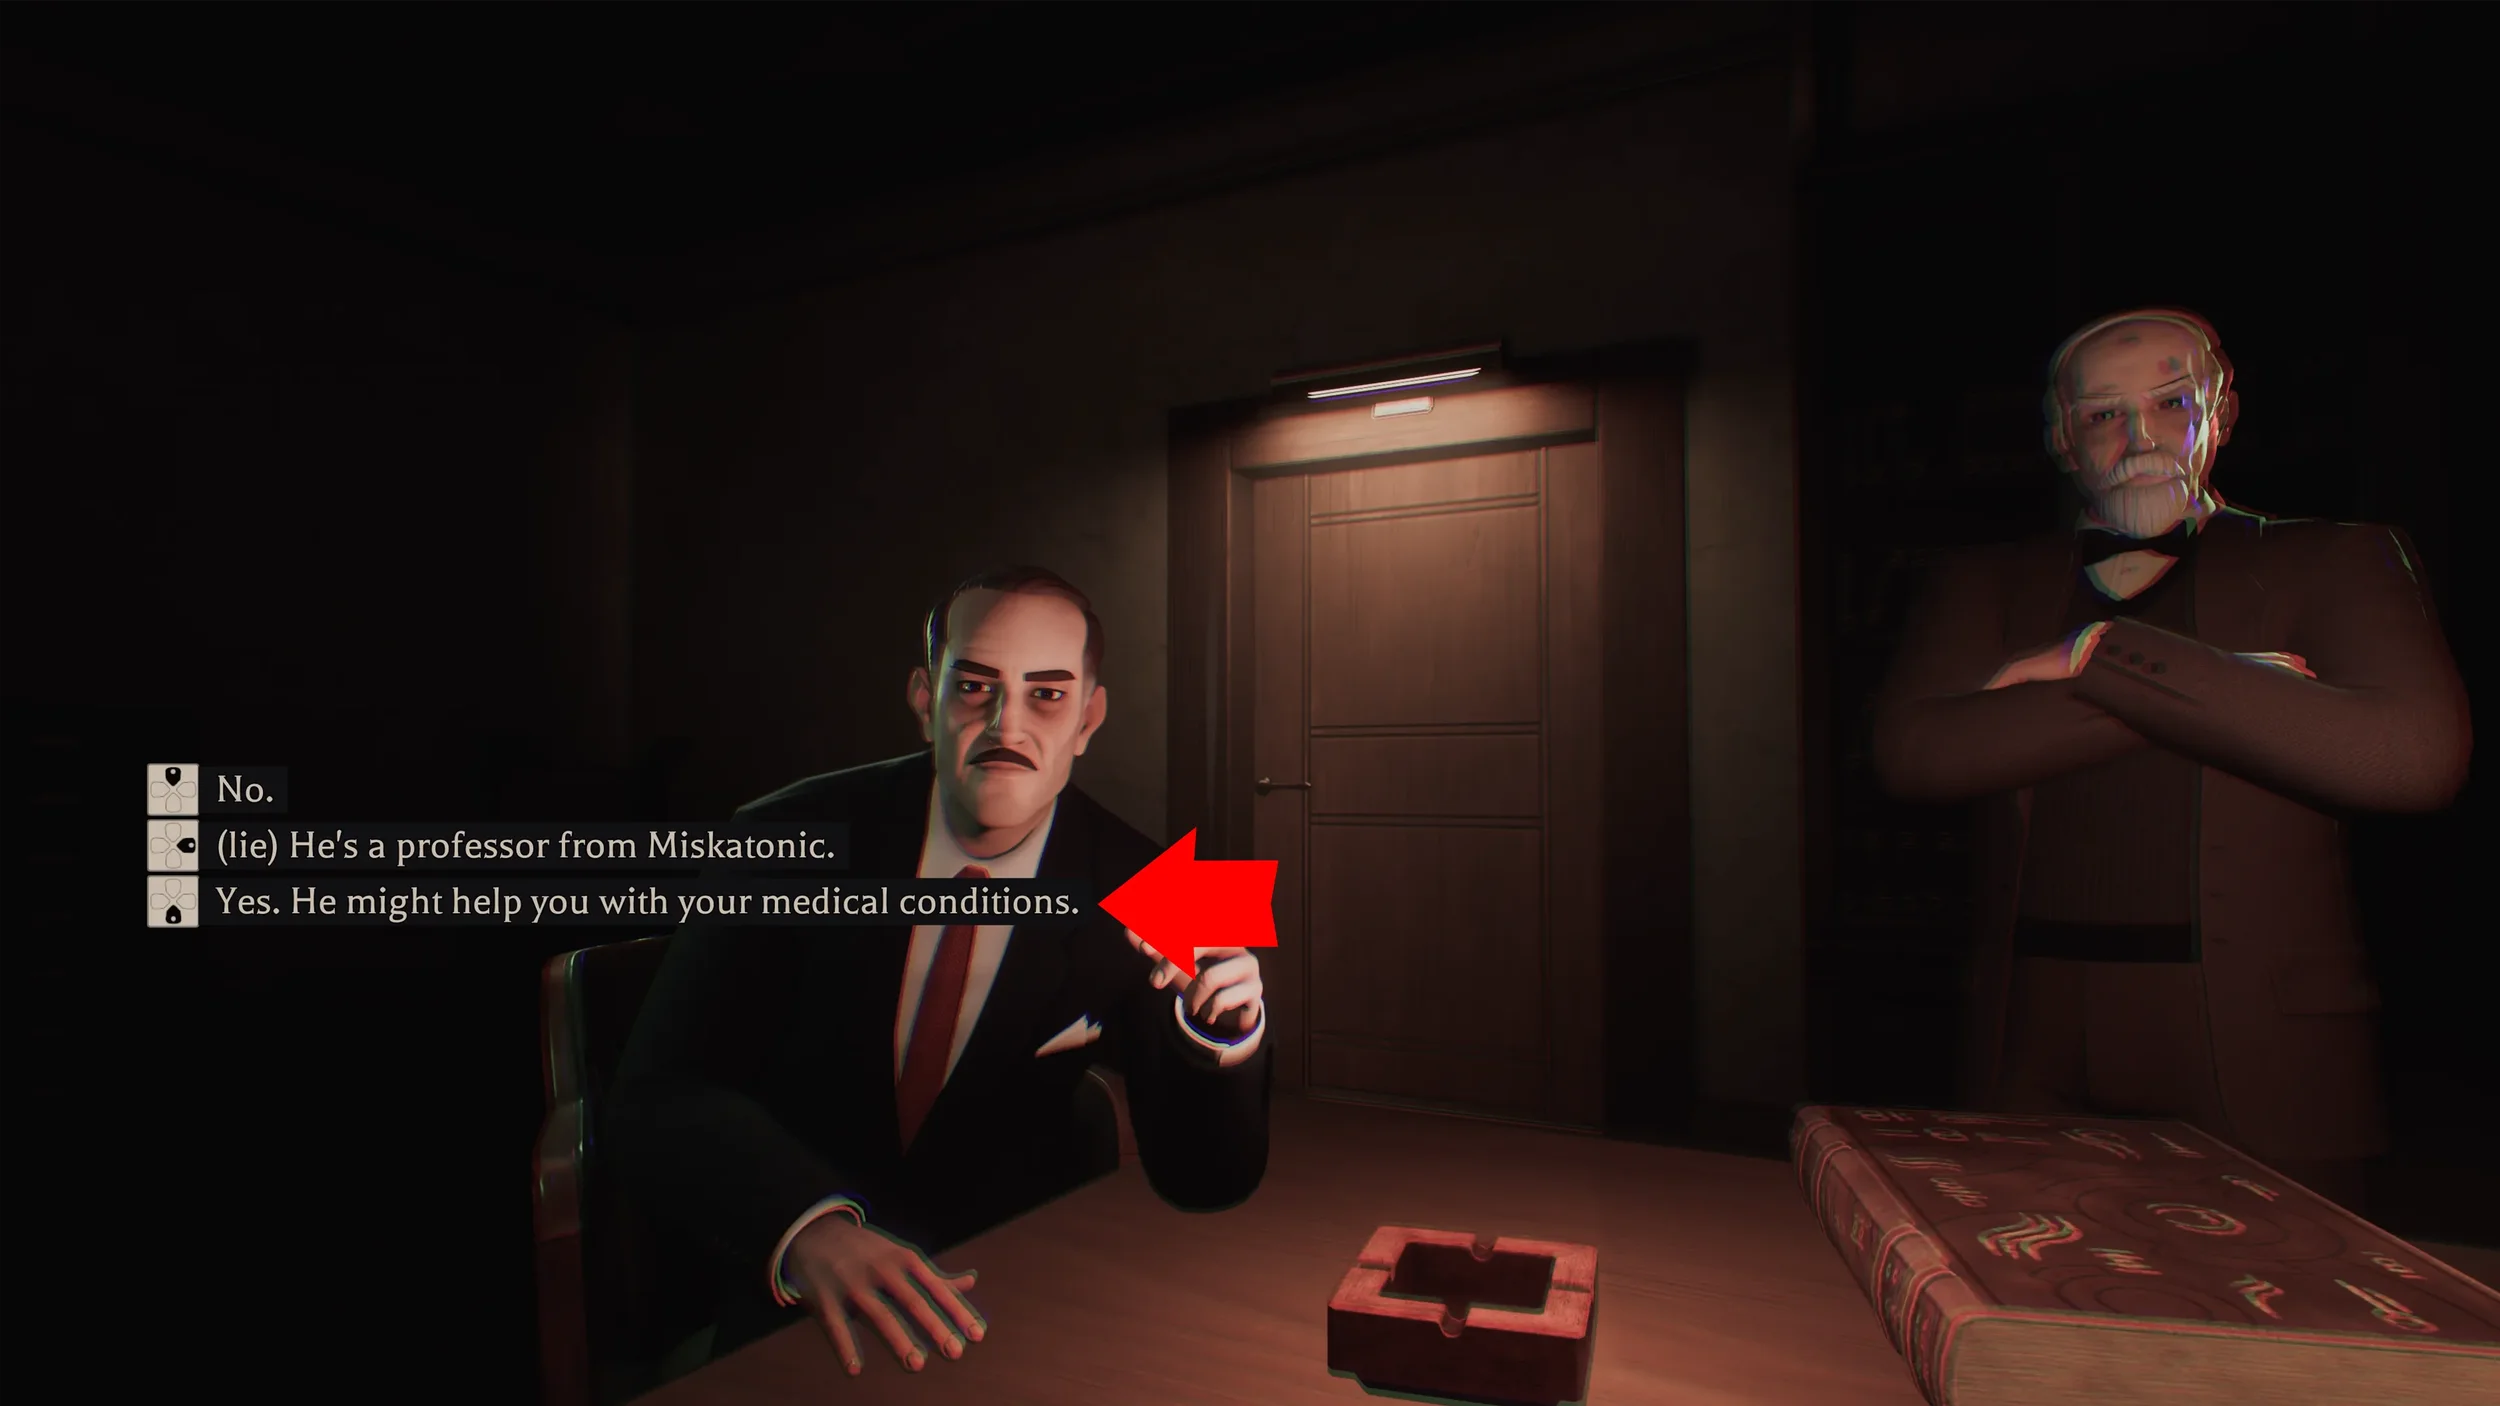
These are the only 3 dialogue options that matter for the Trophy, after you have the Trophy you can reply to the rest of the questions however you prefer.
Meta-Reference Trophy
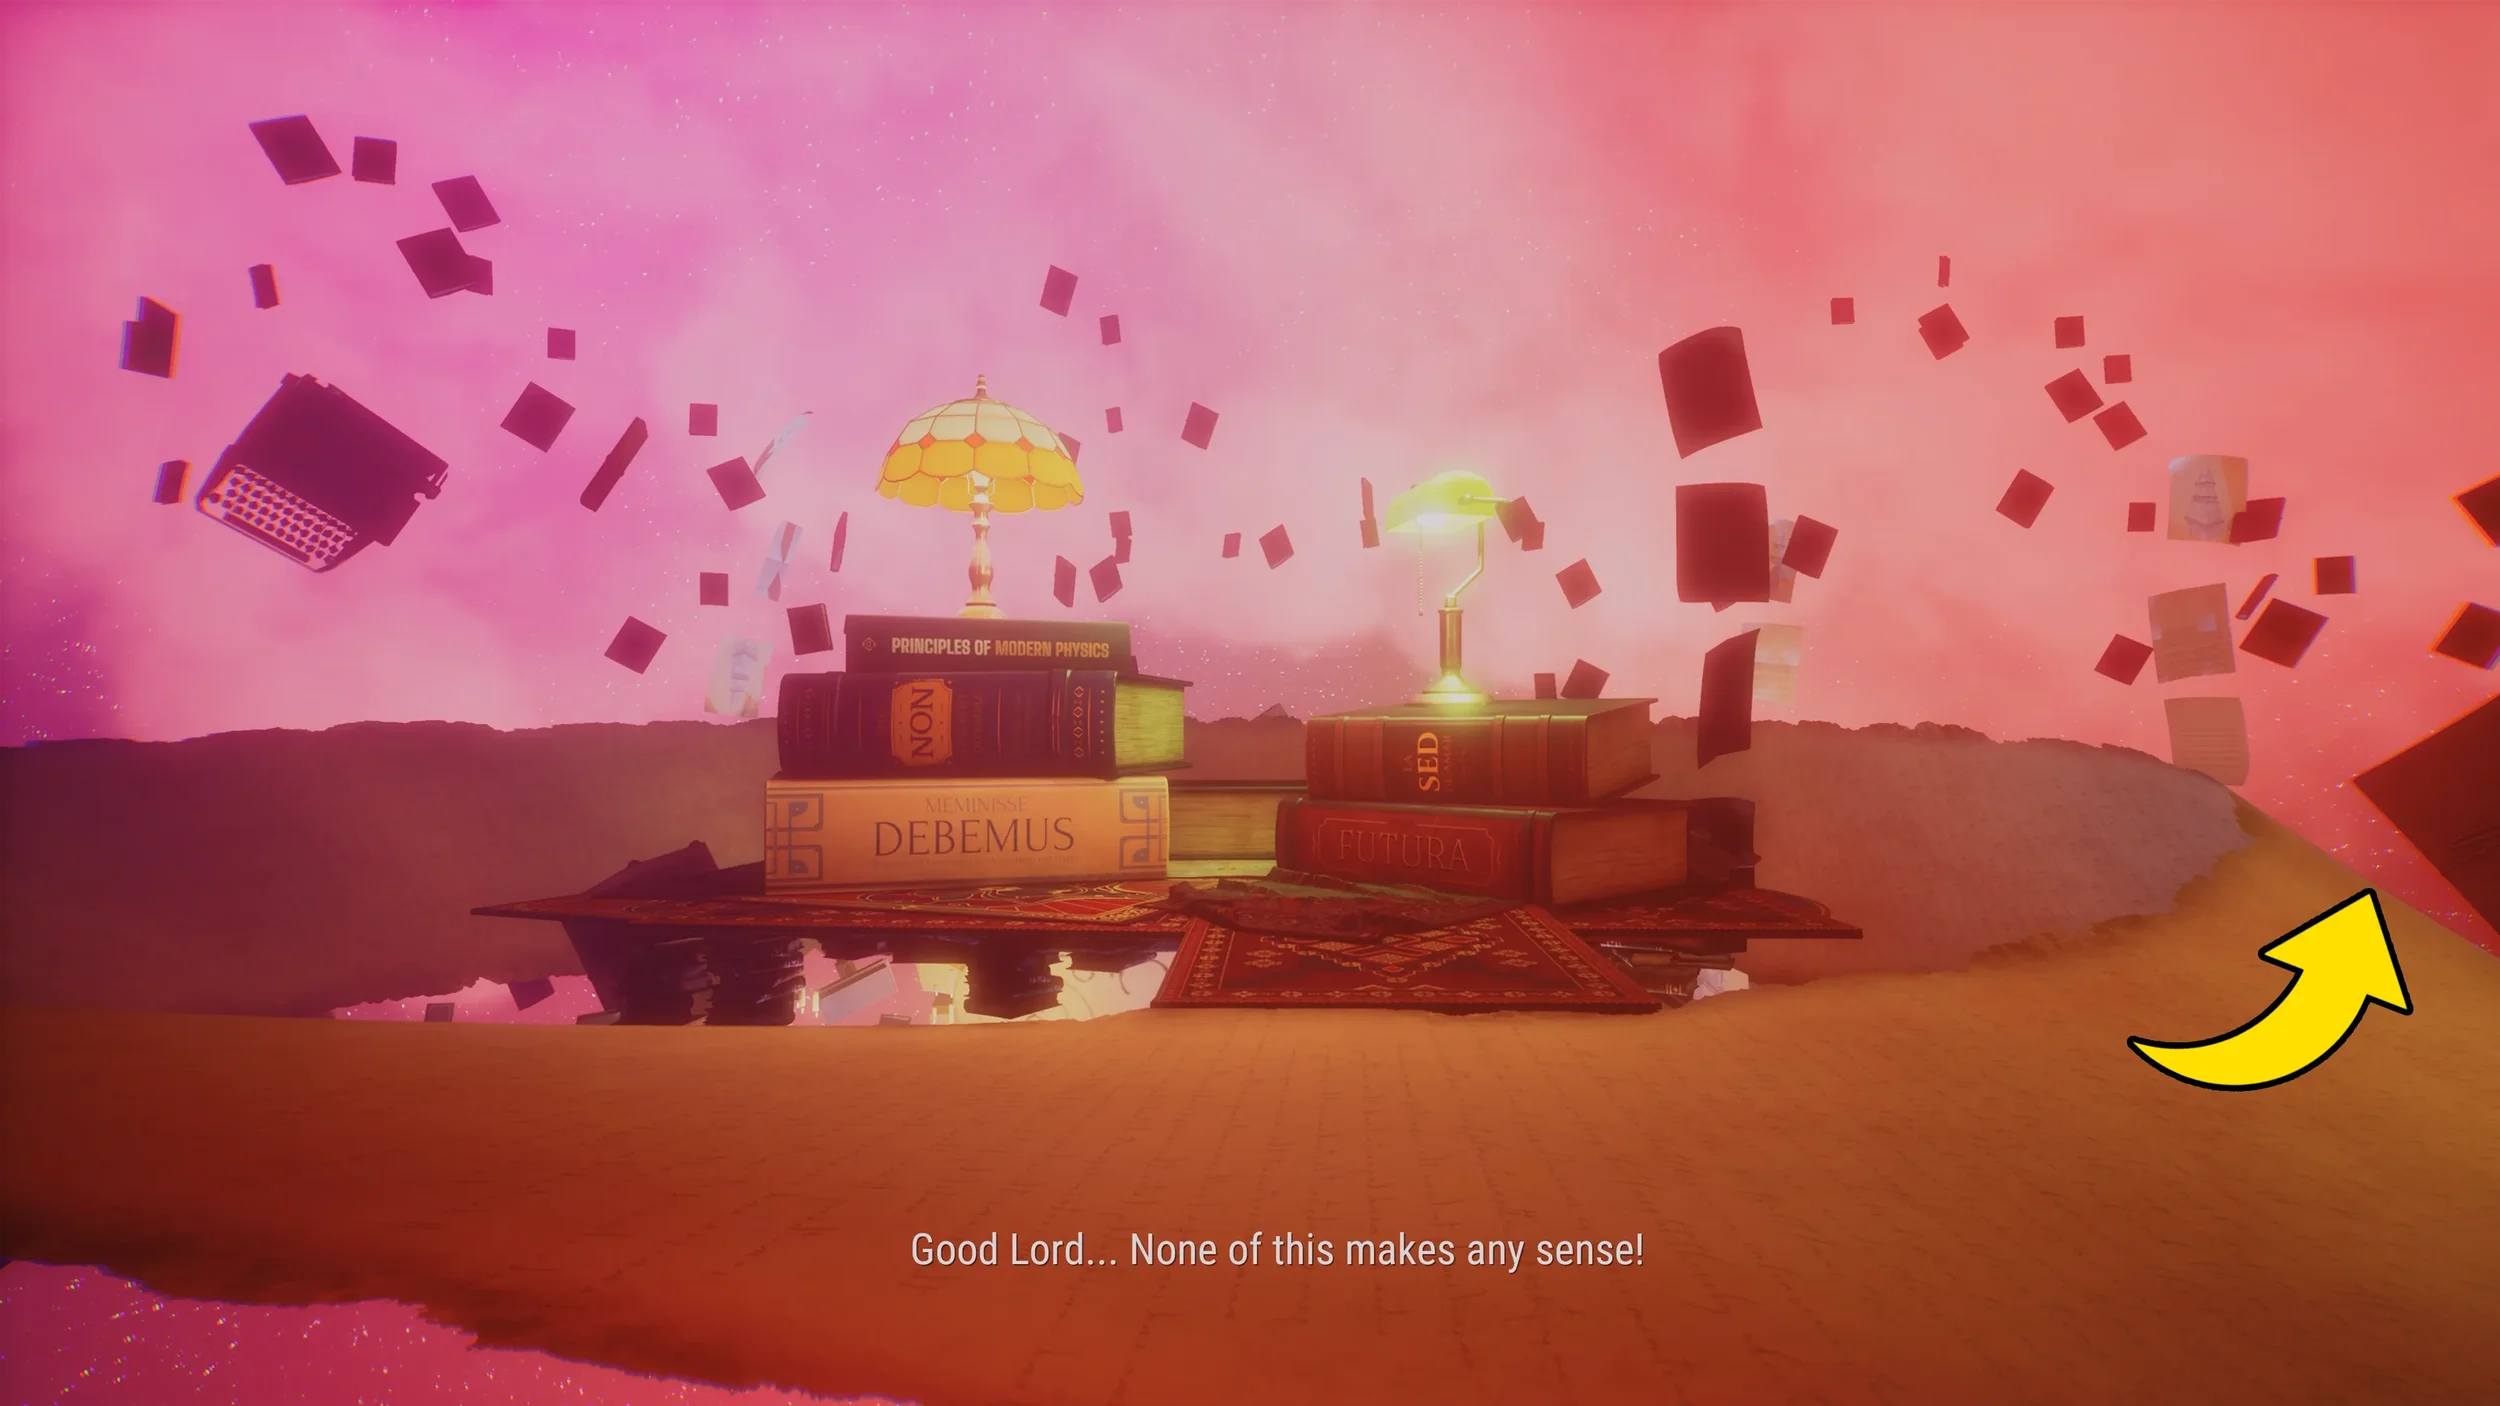
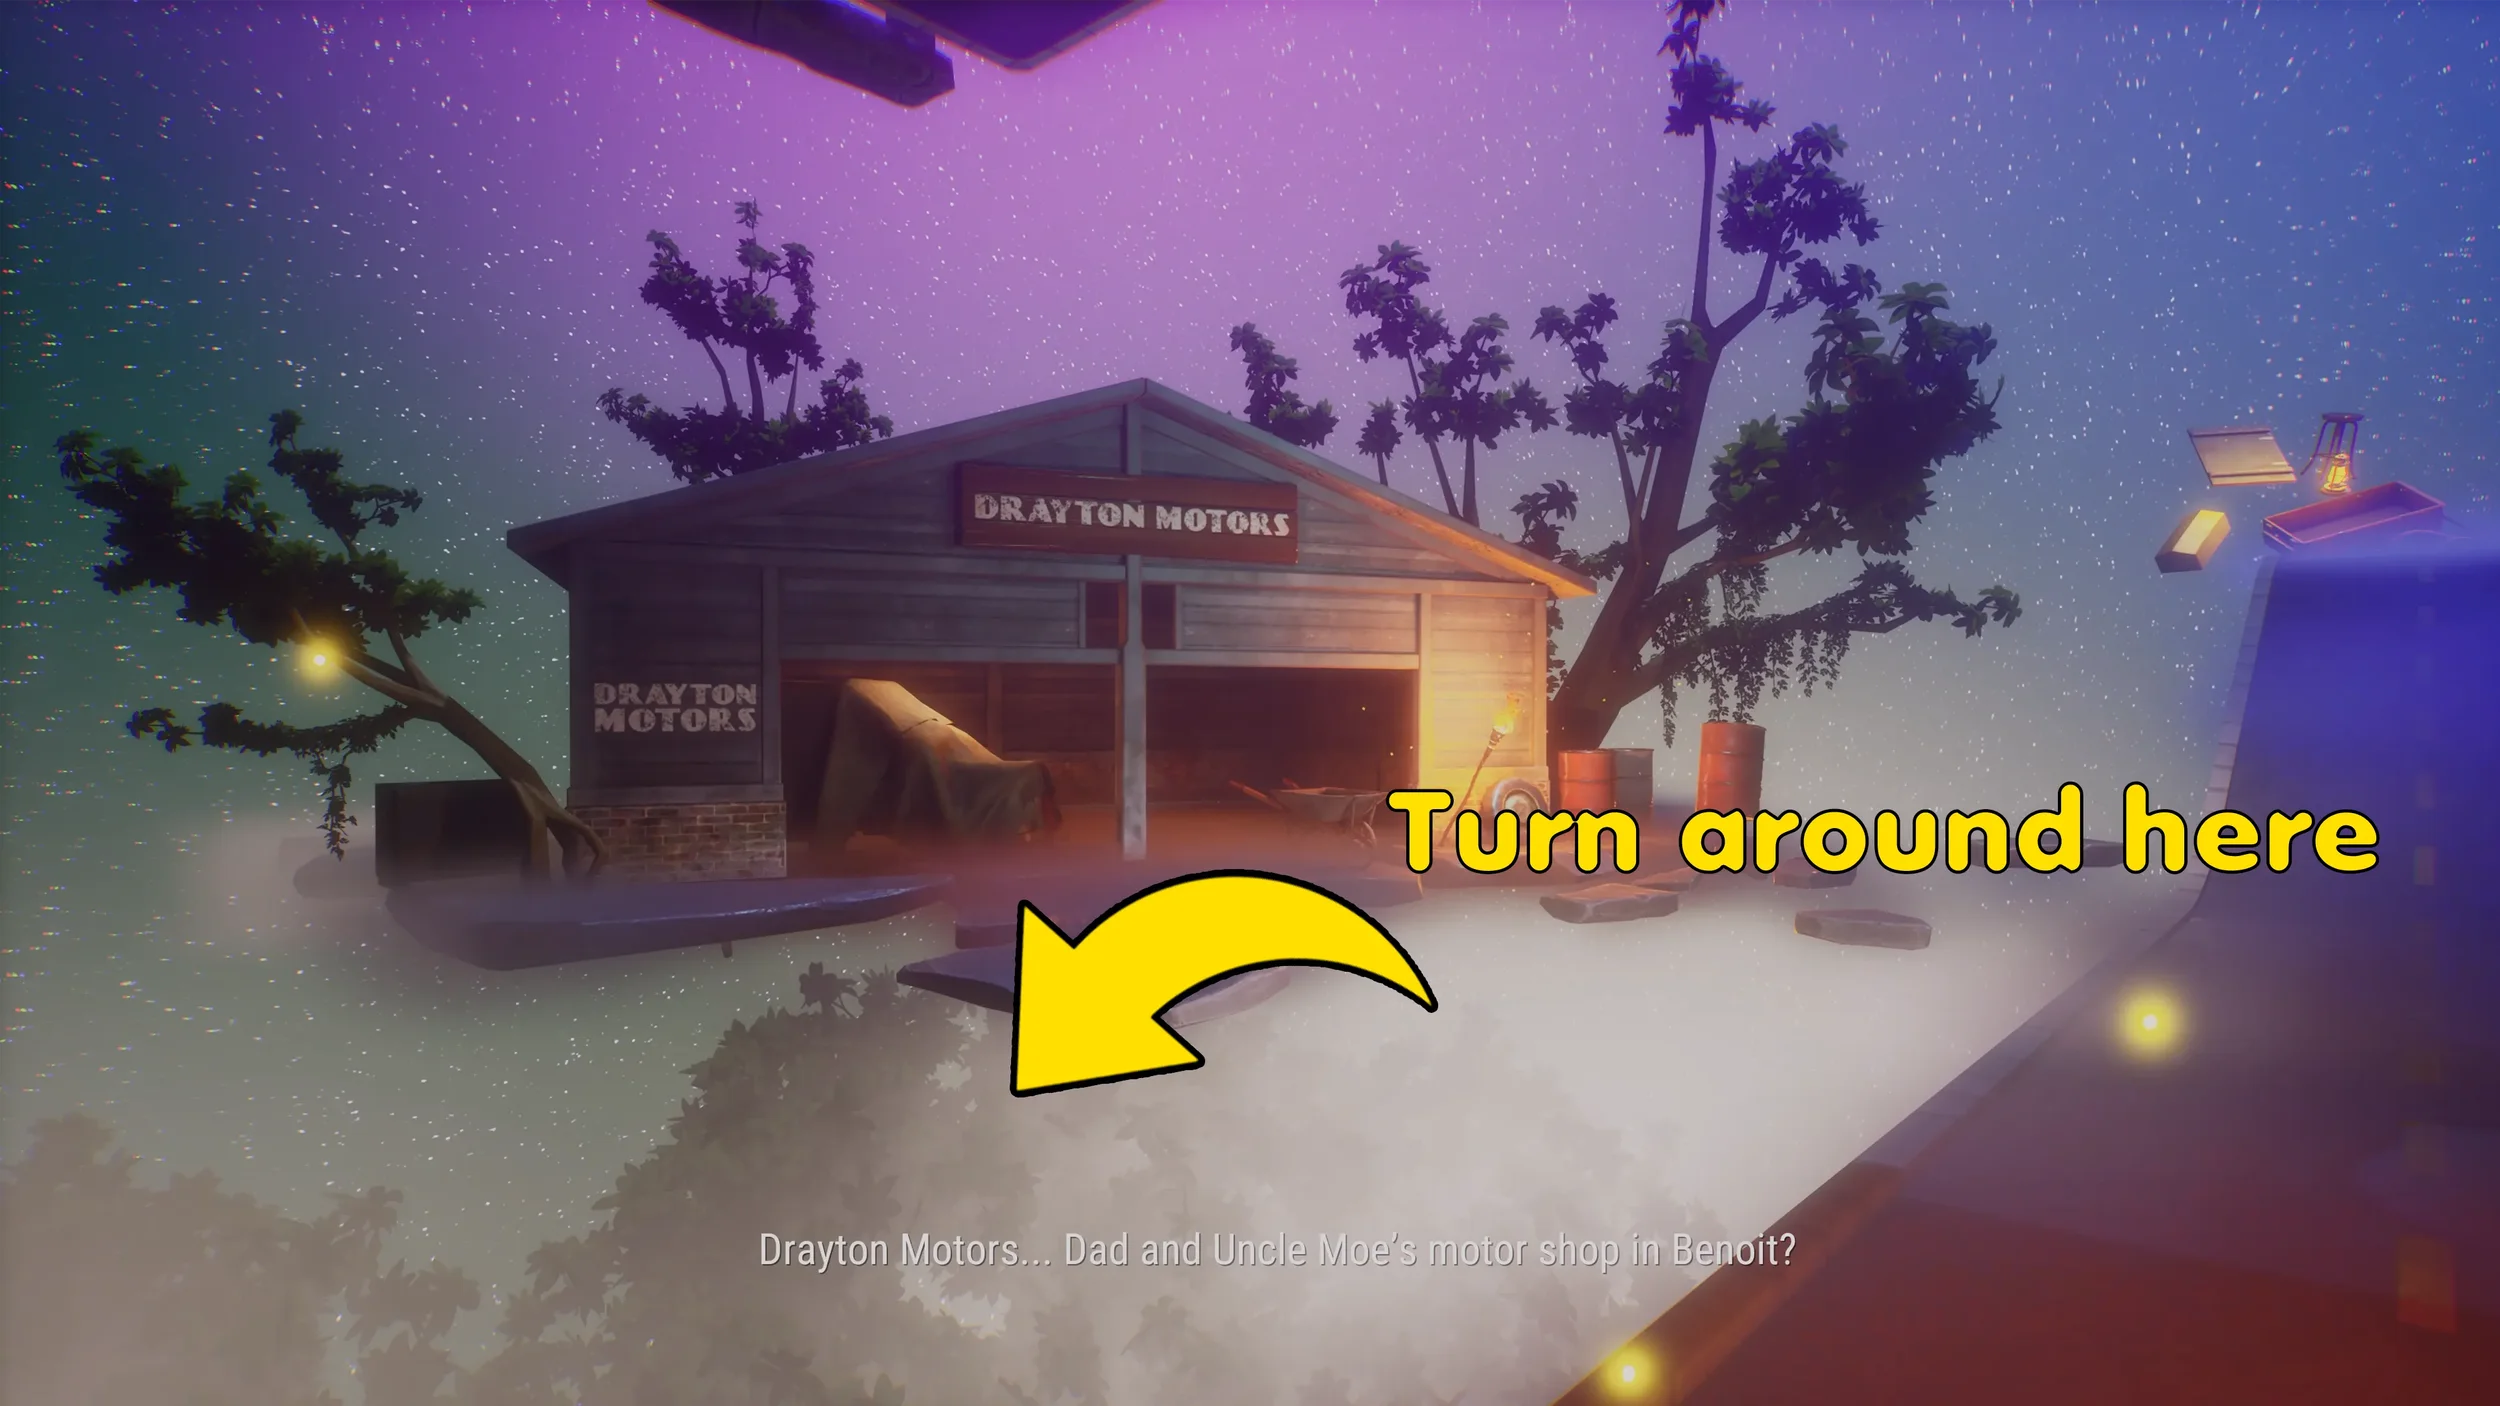
You will then wake up back in Eva’s dorm room, when you leave the bedroom you will be in a “dream-like” area, this part is fairly linear so keep advancing until you reach the giant books surrounded by a scroll, when you get here walk on the scroll (to the right or the left, it doesn’t matter, both paths lead to the same place) when you get to the other side of the scroll a portal will appear when you approach the open book, go through this portal to reach the area where you can see the mechanic shop on the left.
 "Meta-Reference" Trophy.
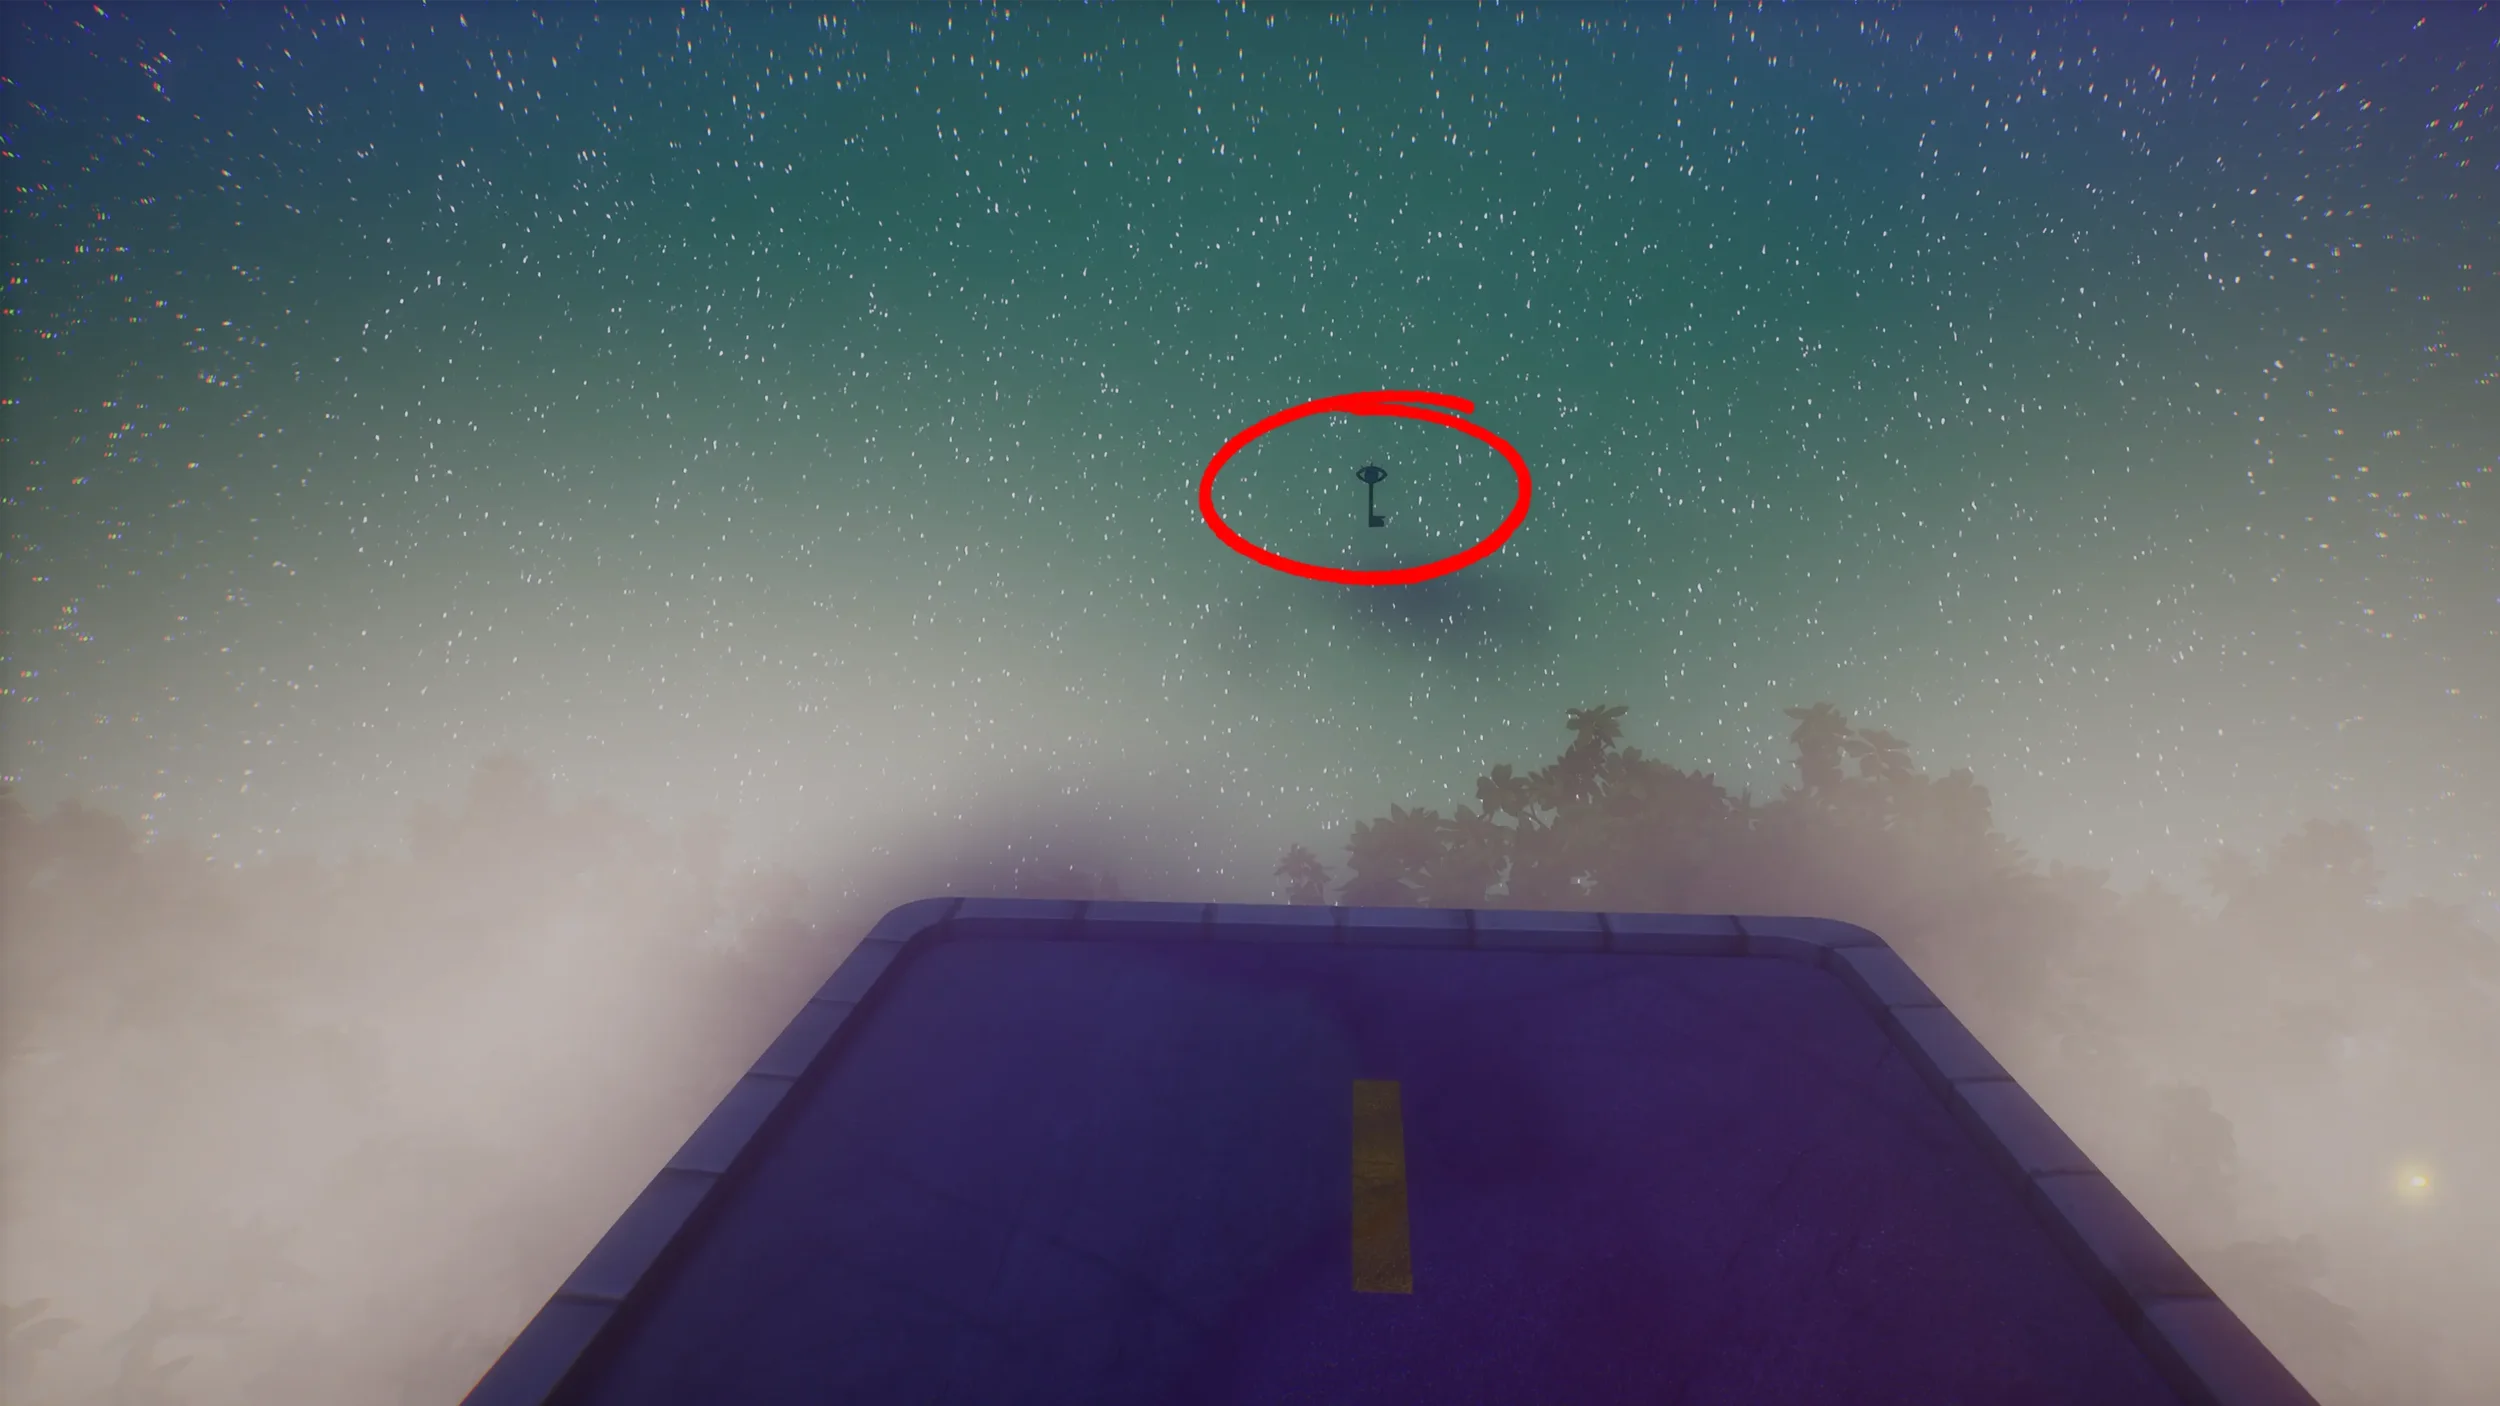
Once you have the Key, the rest of this area is very linear and there isn’t anything else you have to worry about getting along the way, so keep advancing on the main path until you reach the end of the “dream-like” section.
 “Hey, Jitterbug!” Trophy for reaching this far in the story.
Pyramid Puzzle
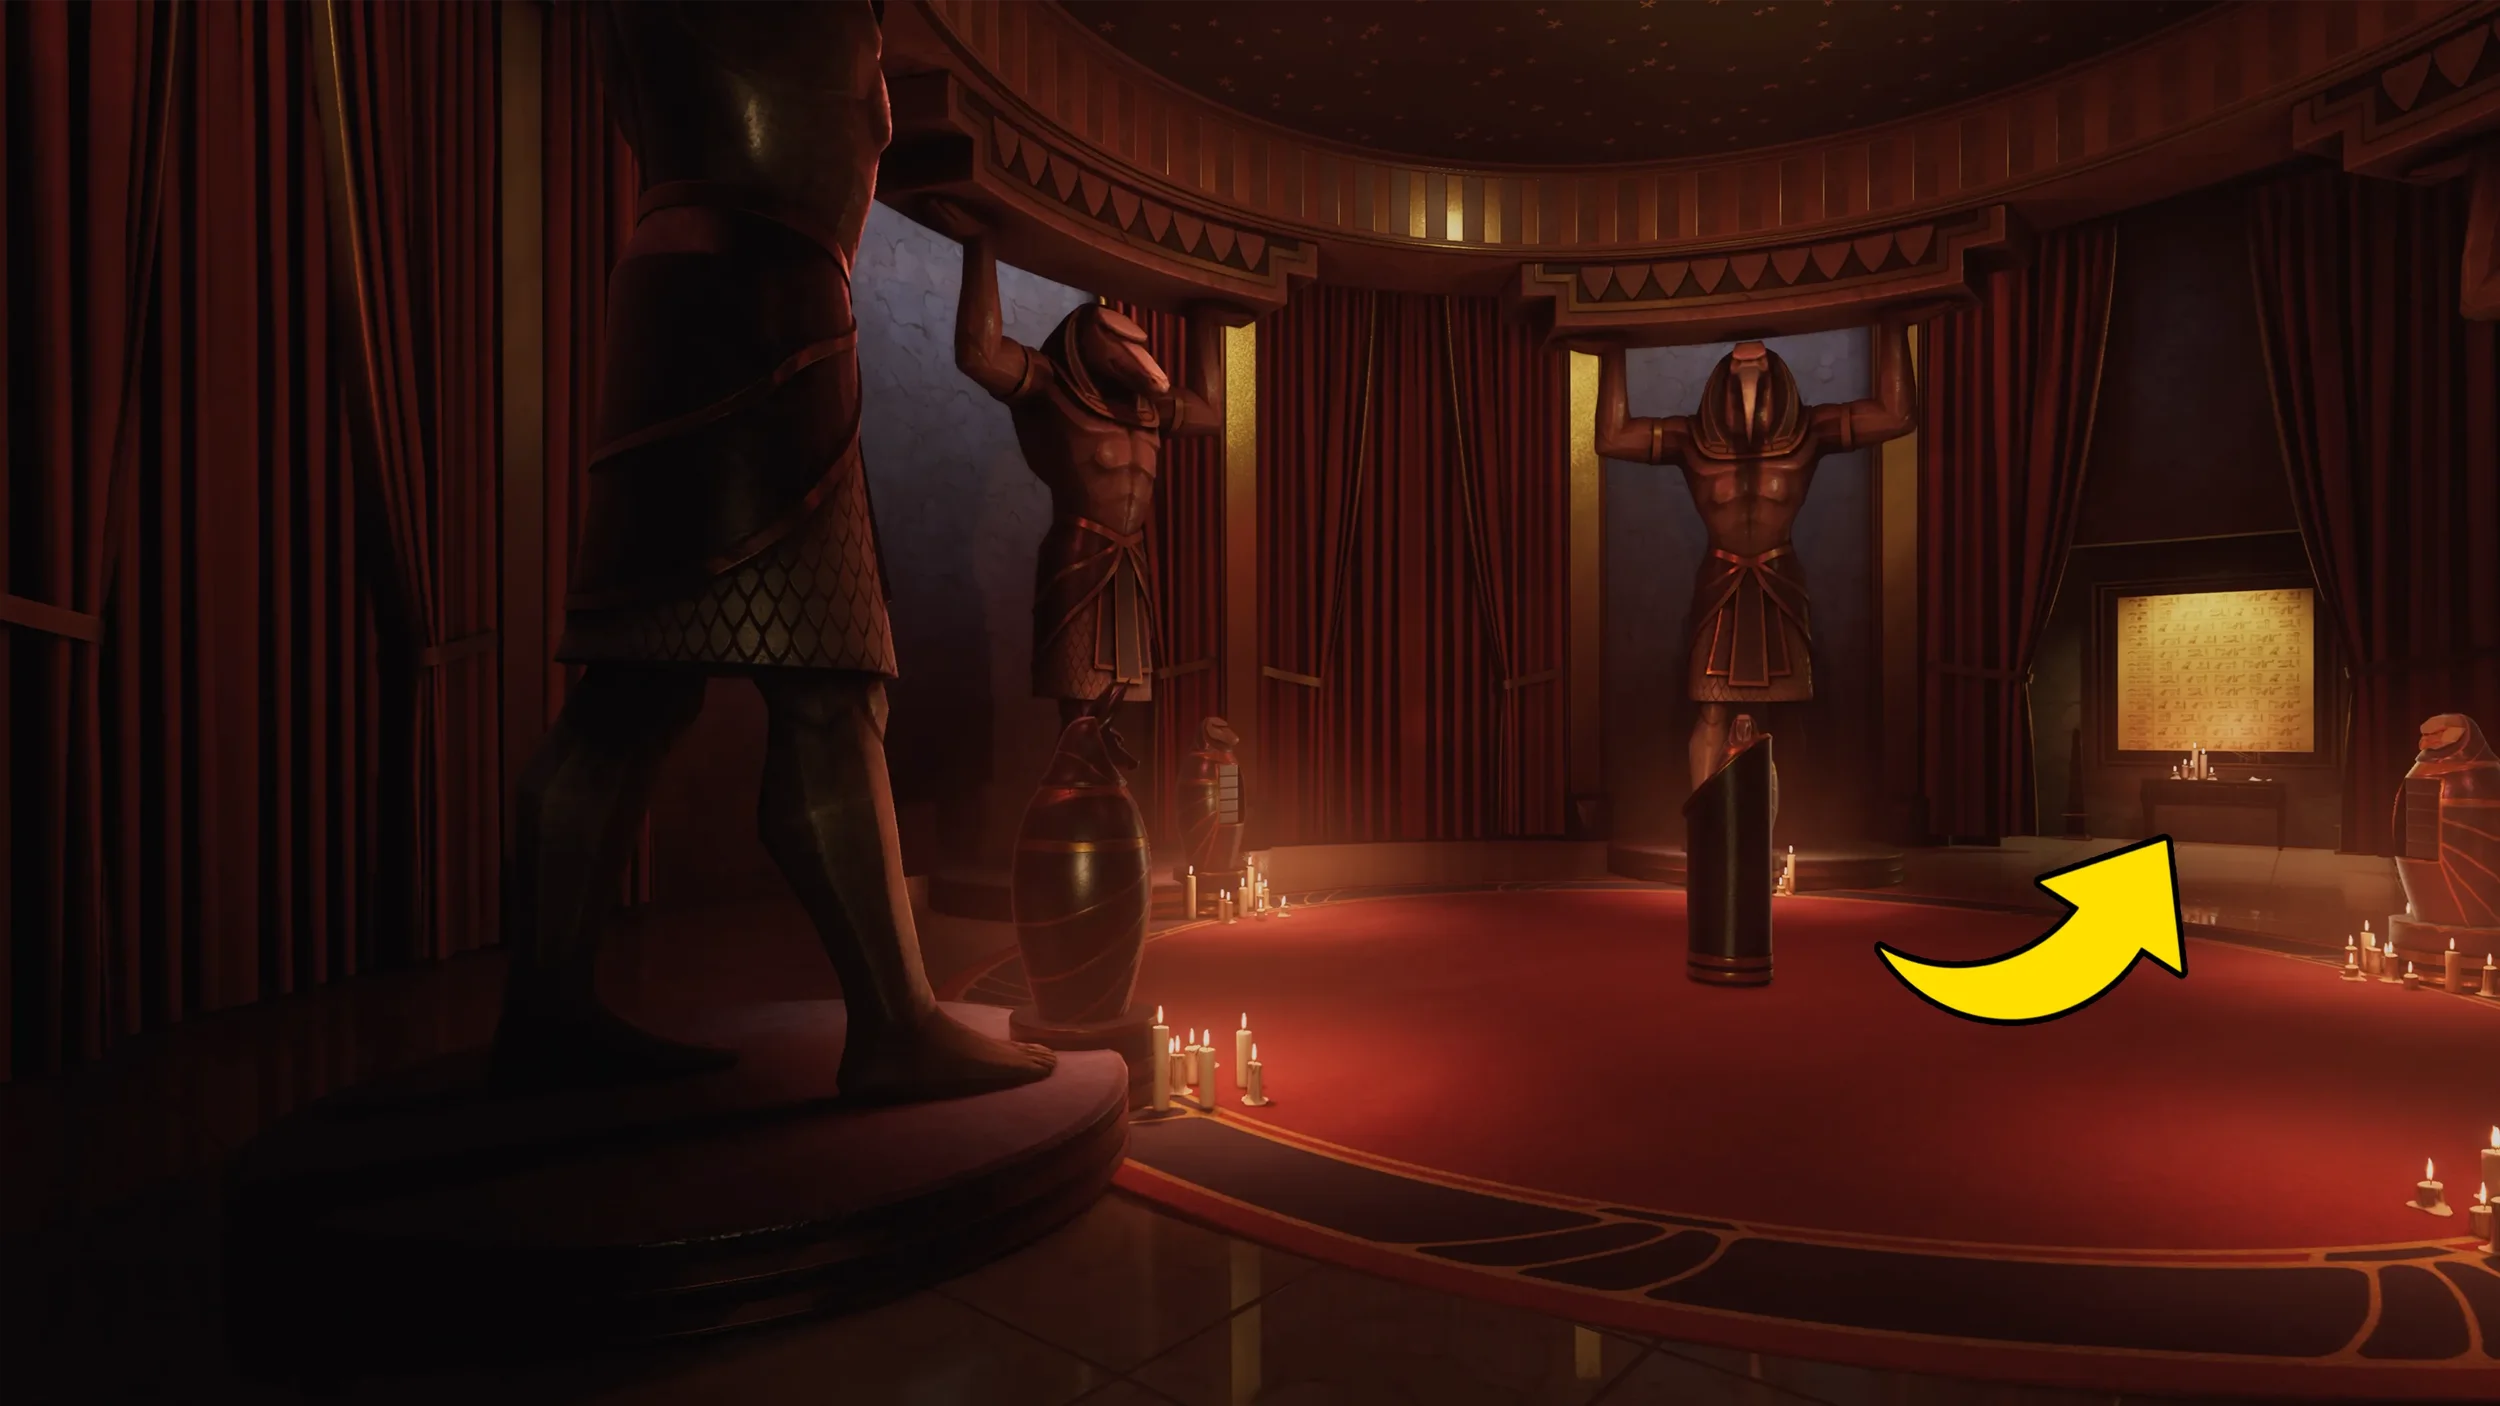
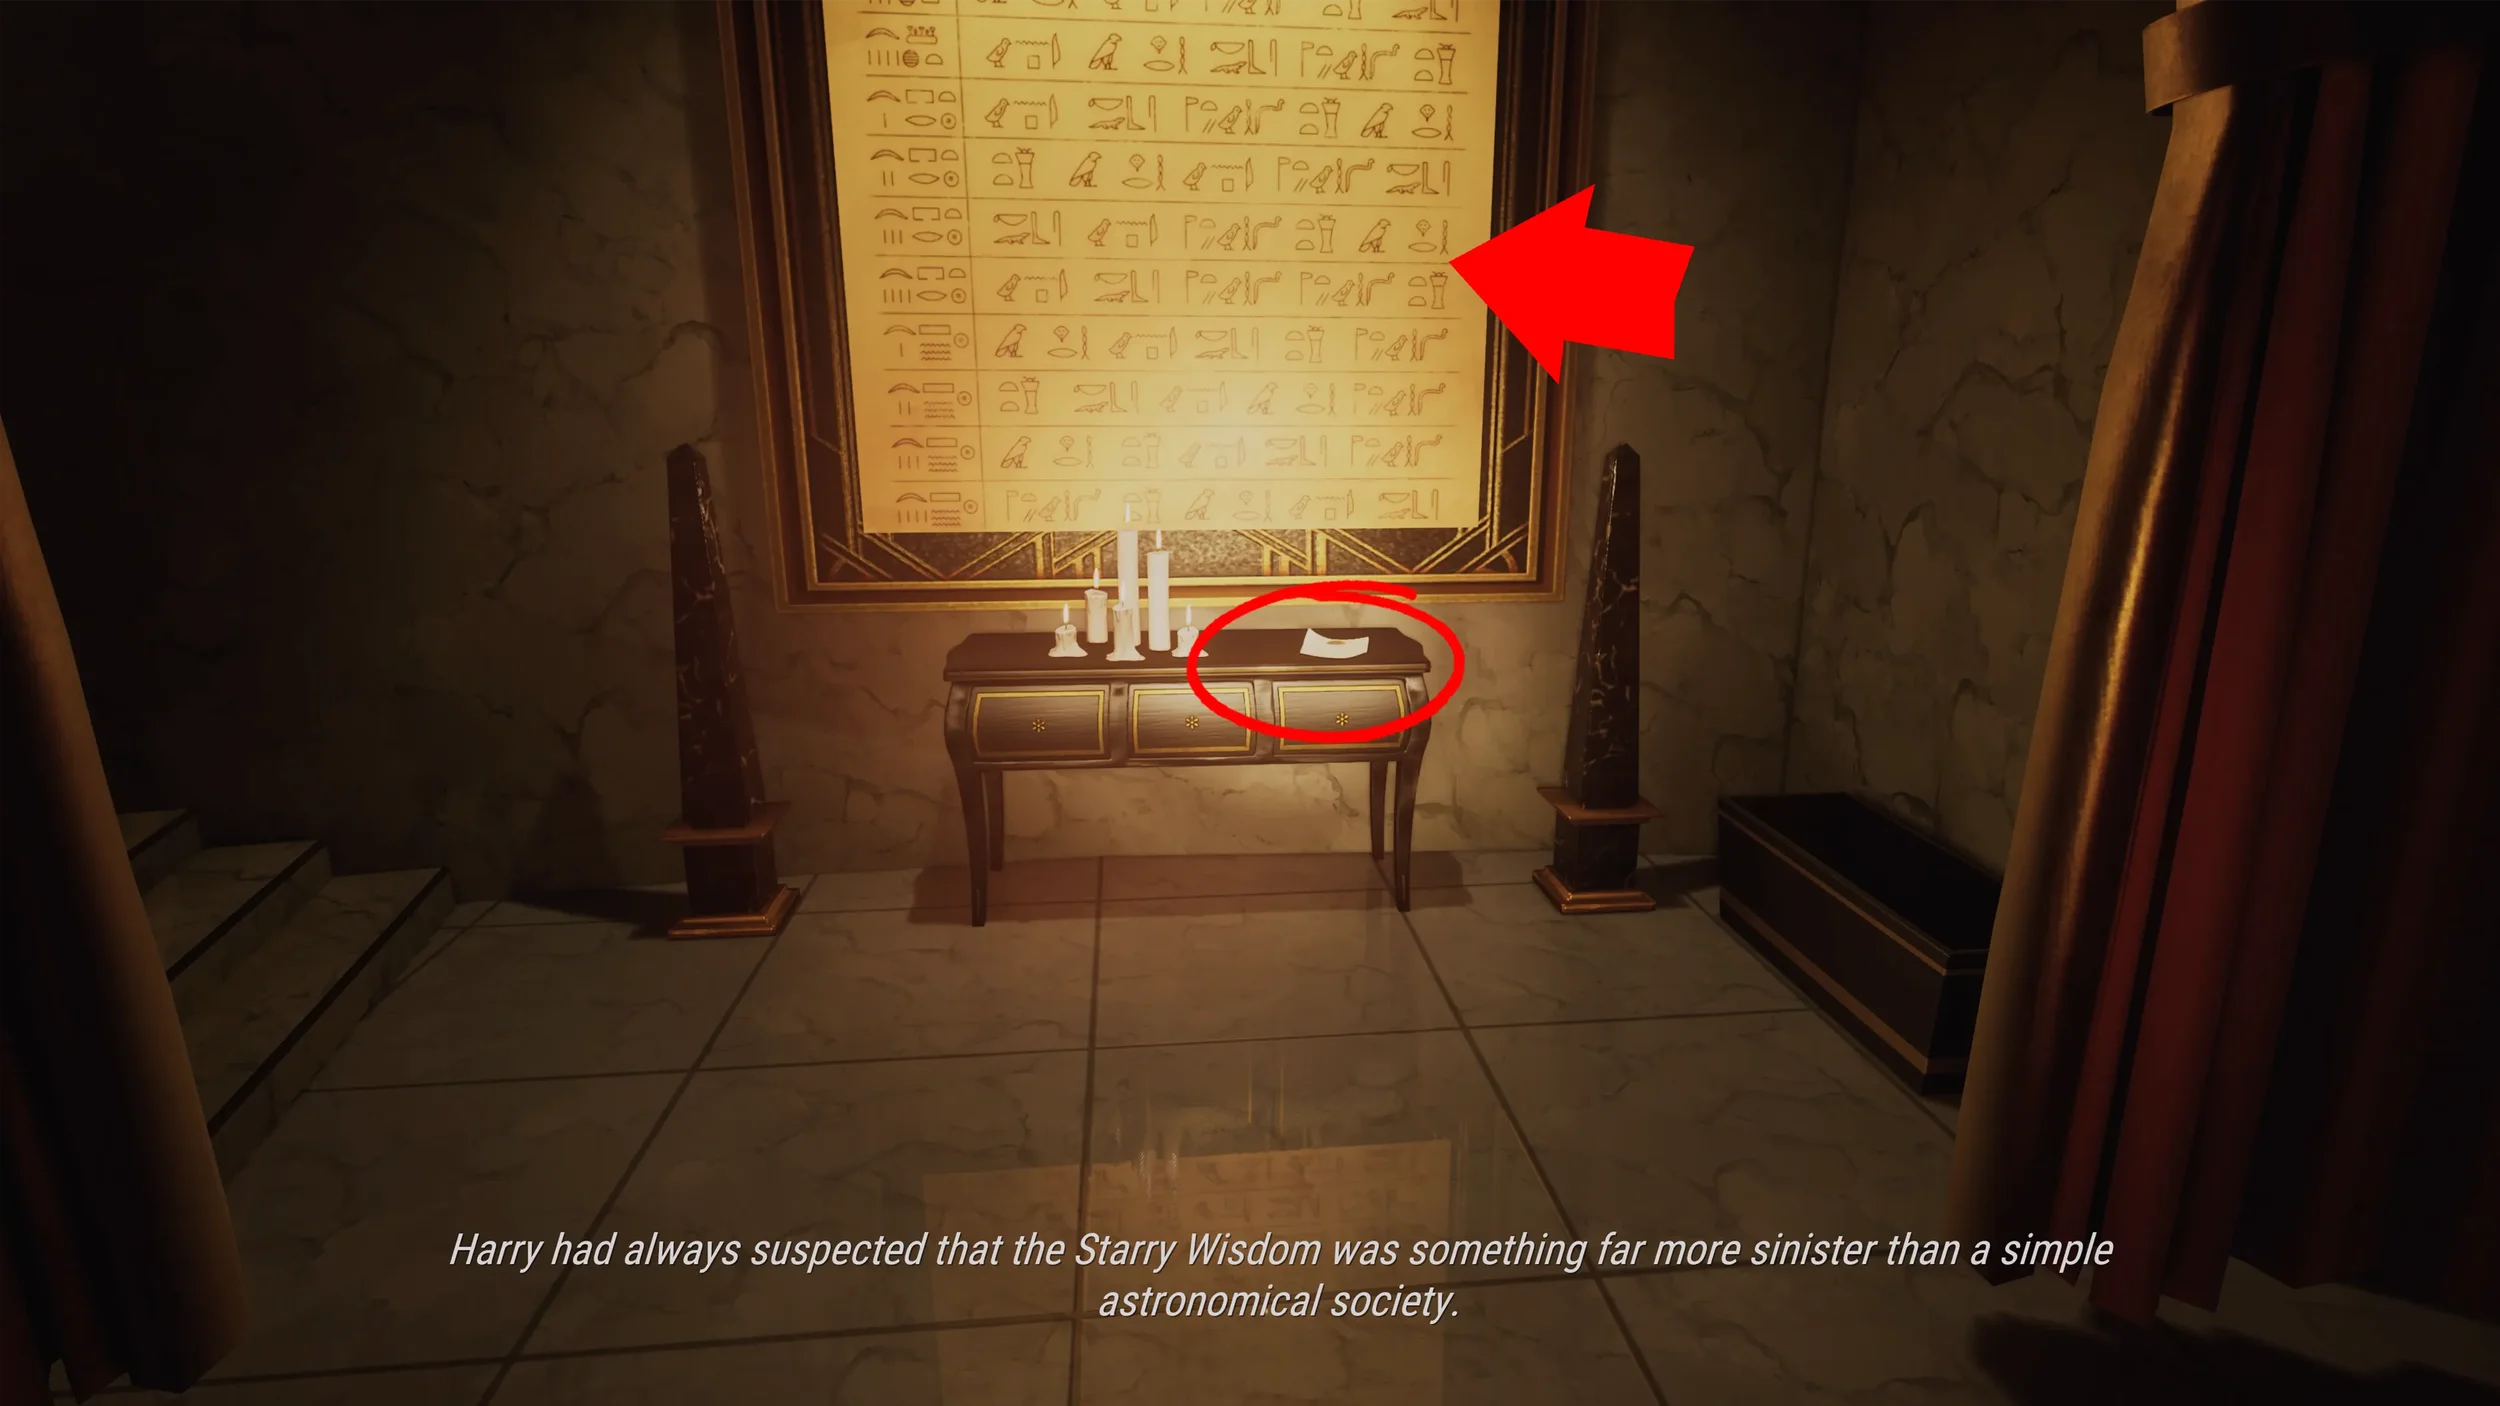
As soon as you gain control of the Professor, exit out of the room you start in into the large room with the 5 Big Egyptian Statues, for now ignore the statues and go to the opposite side of the room, here you will find your first 2 clues, one is the mural with the hieroglyphs and the other clue you need to inspect is the paper on the table just below it.
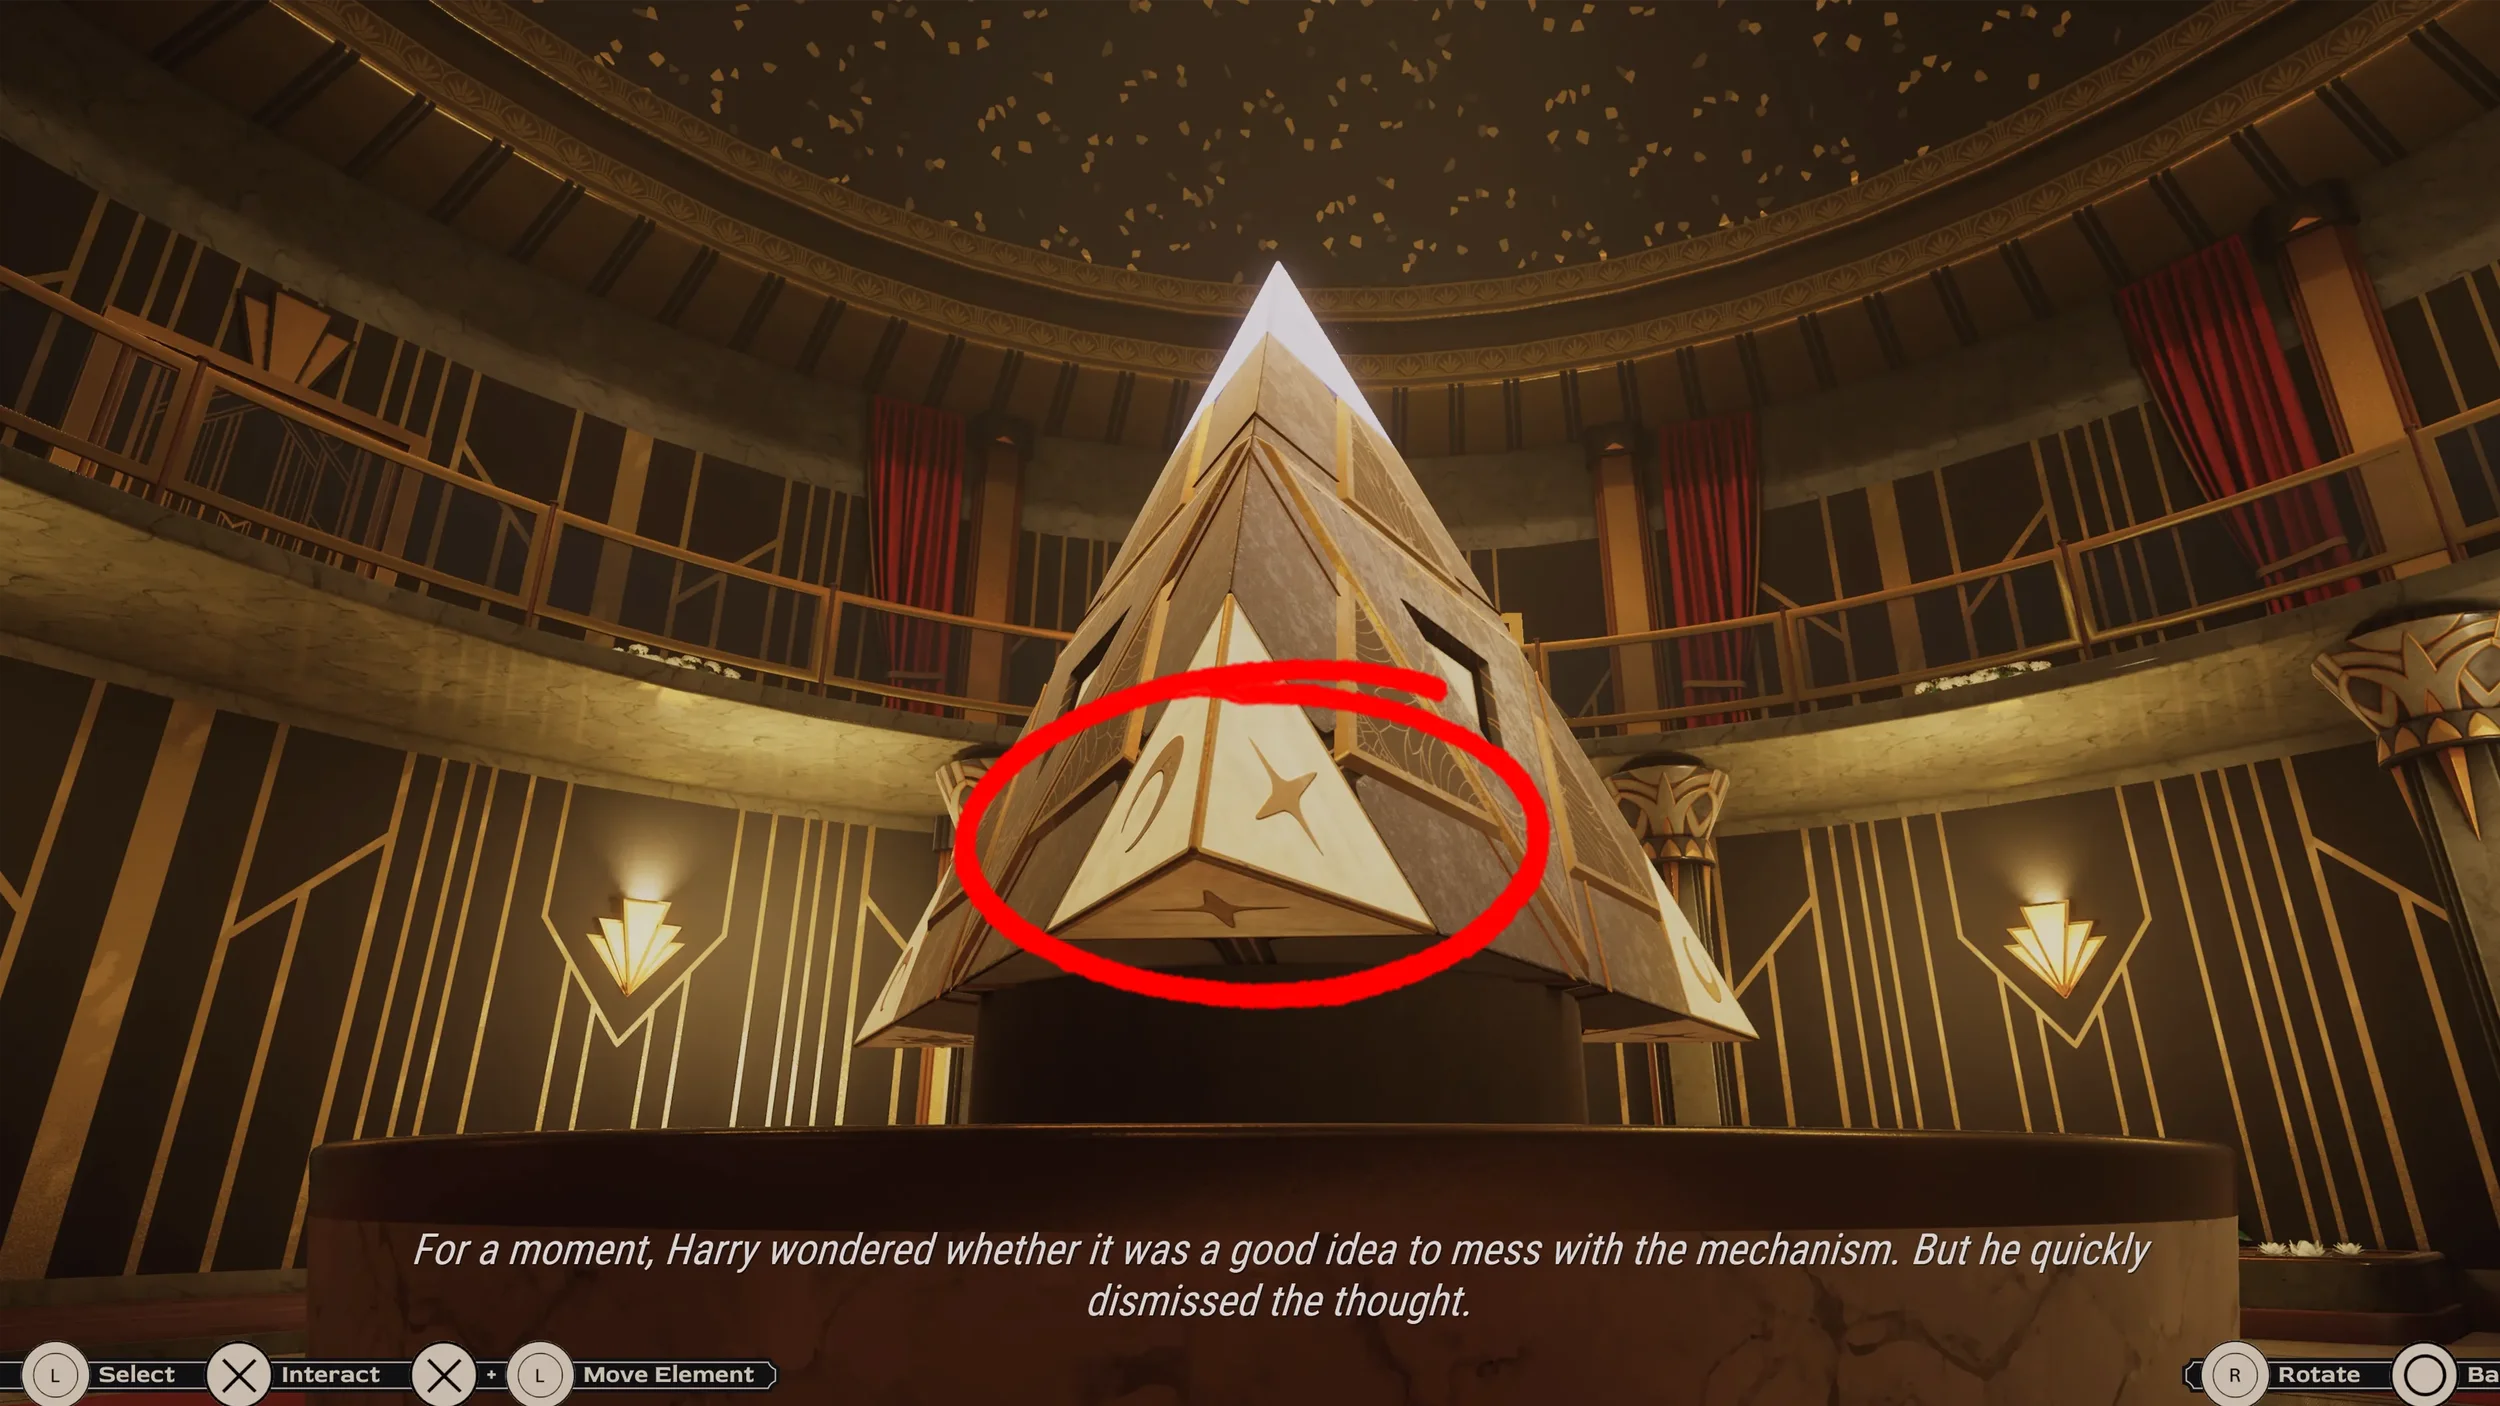
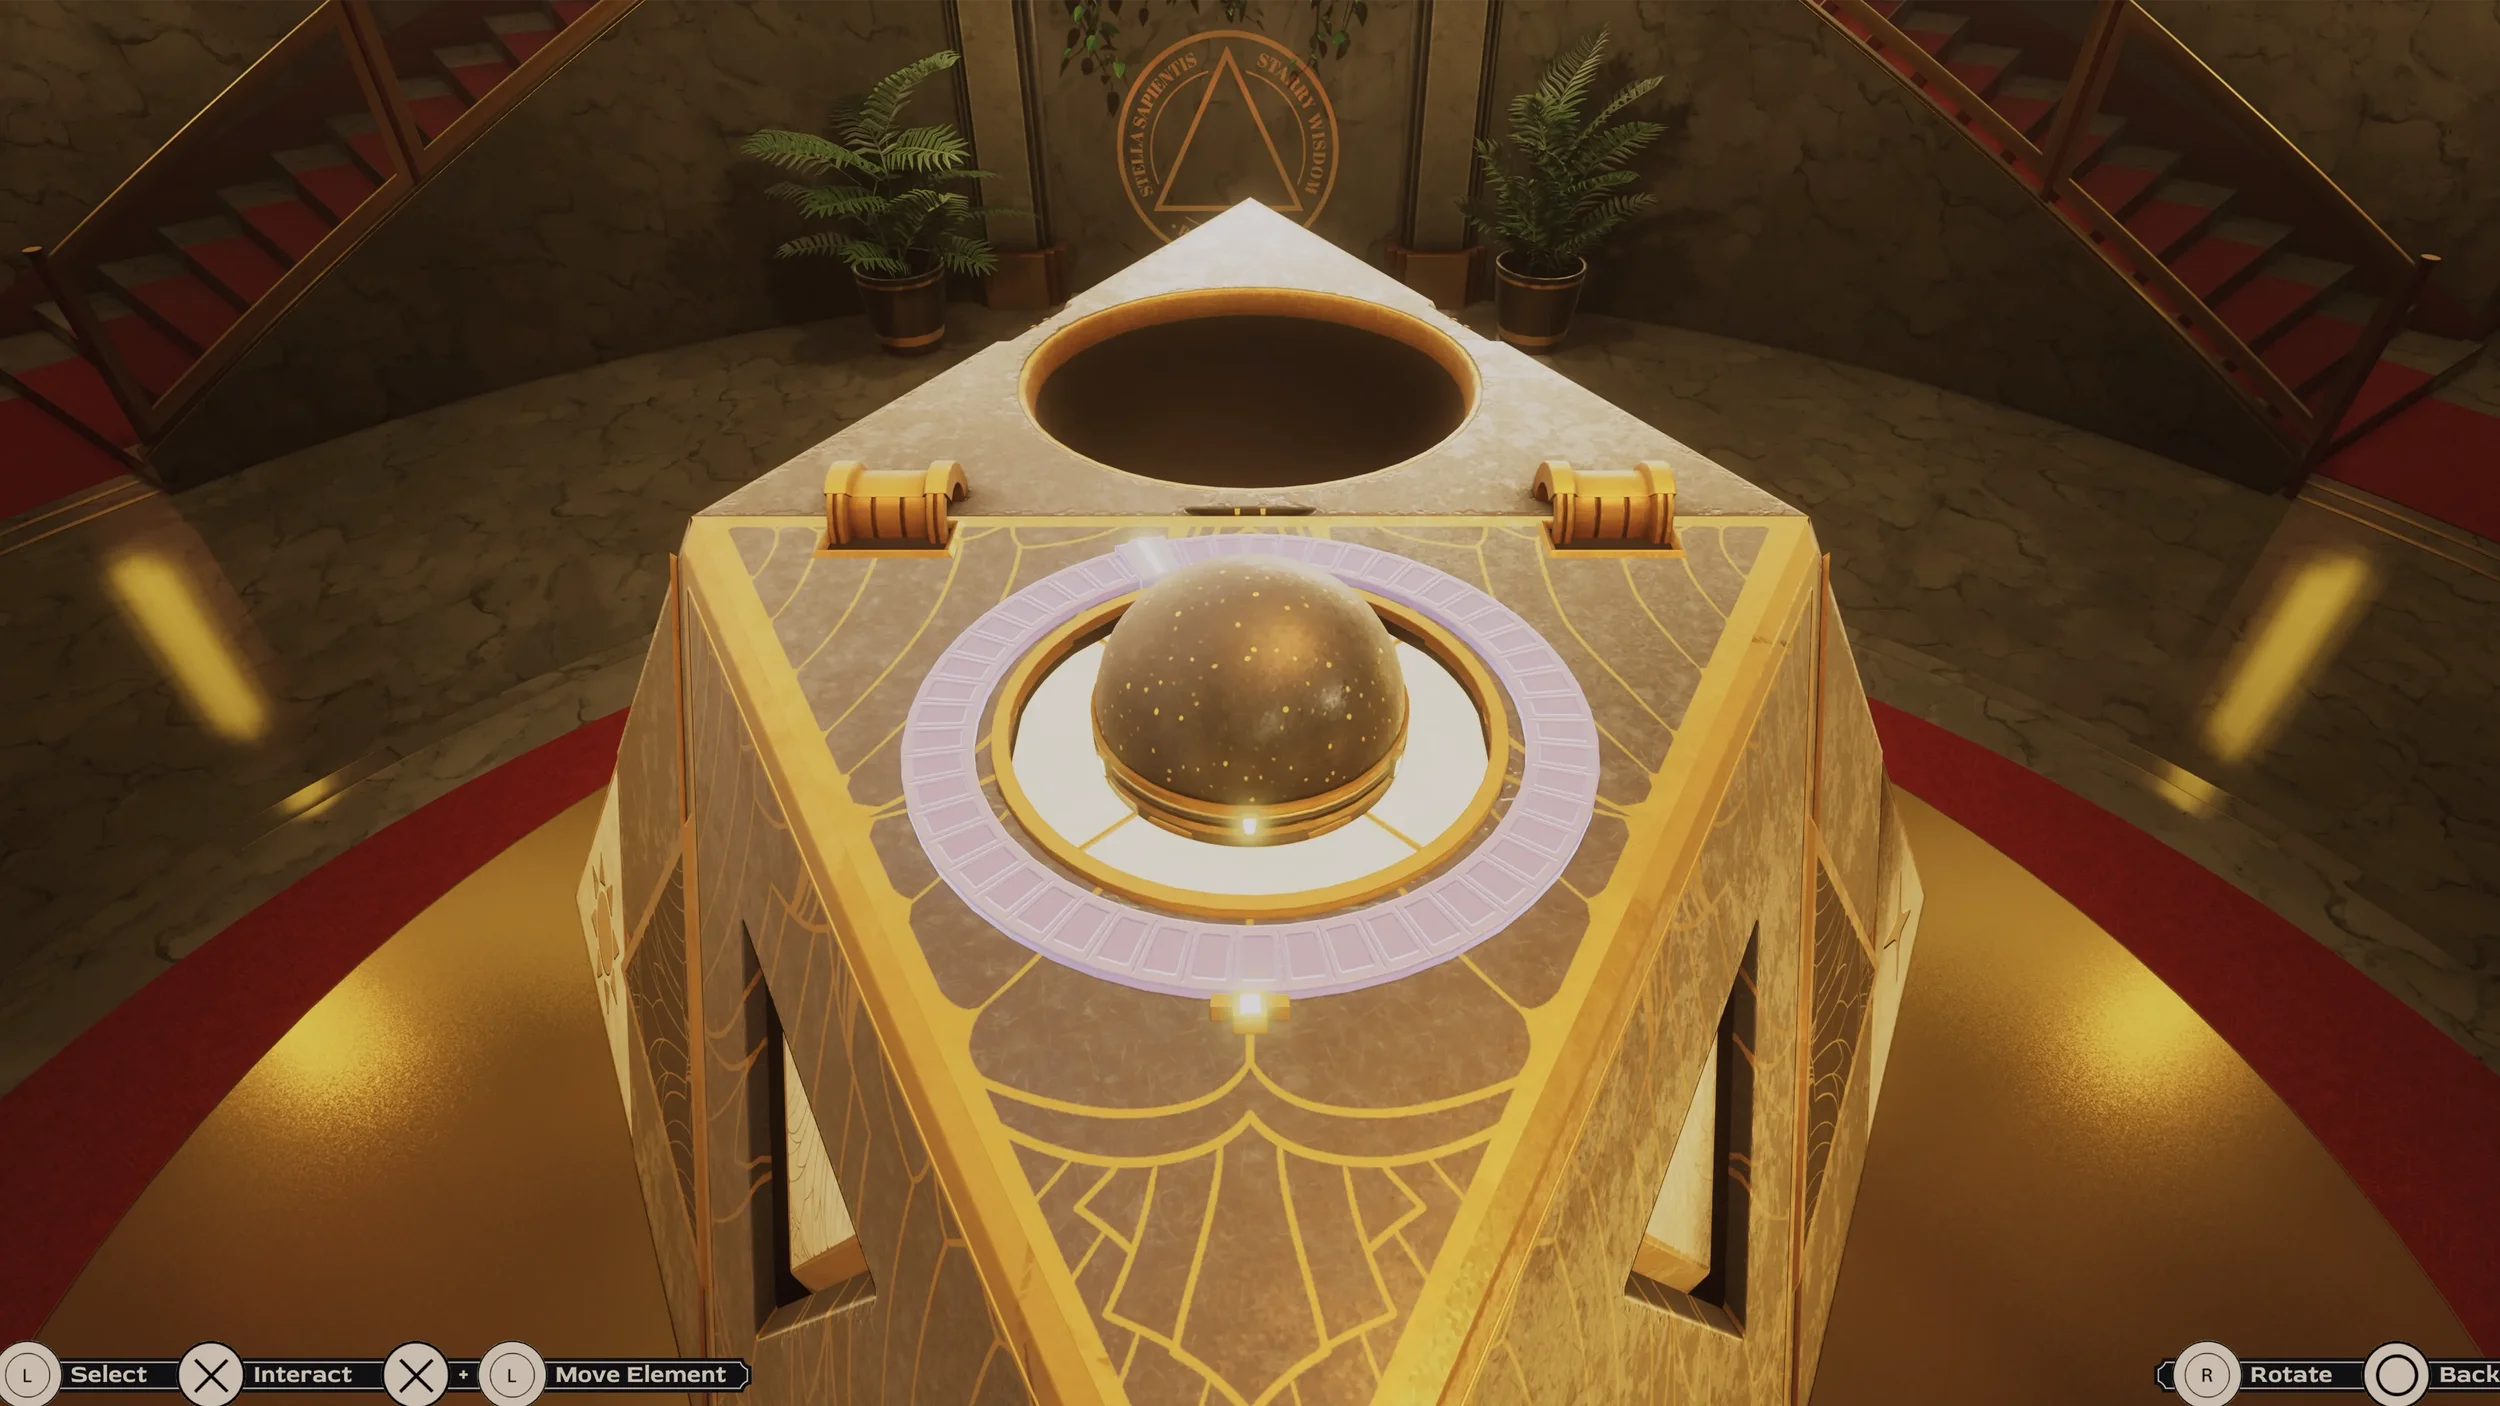
Now go up the stairs just to the left of the mural, in the next room you will see a big Pyramid in the middle of the room, interact with this Pyramid and press the center buttons on each of its faces.
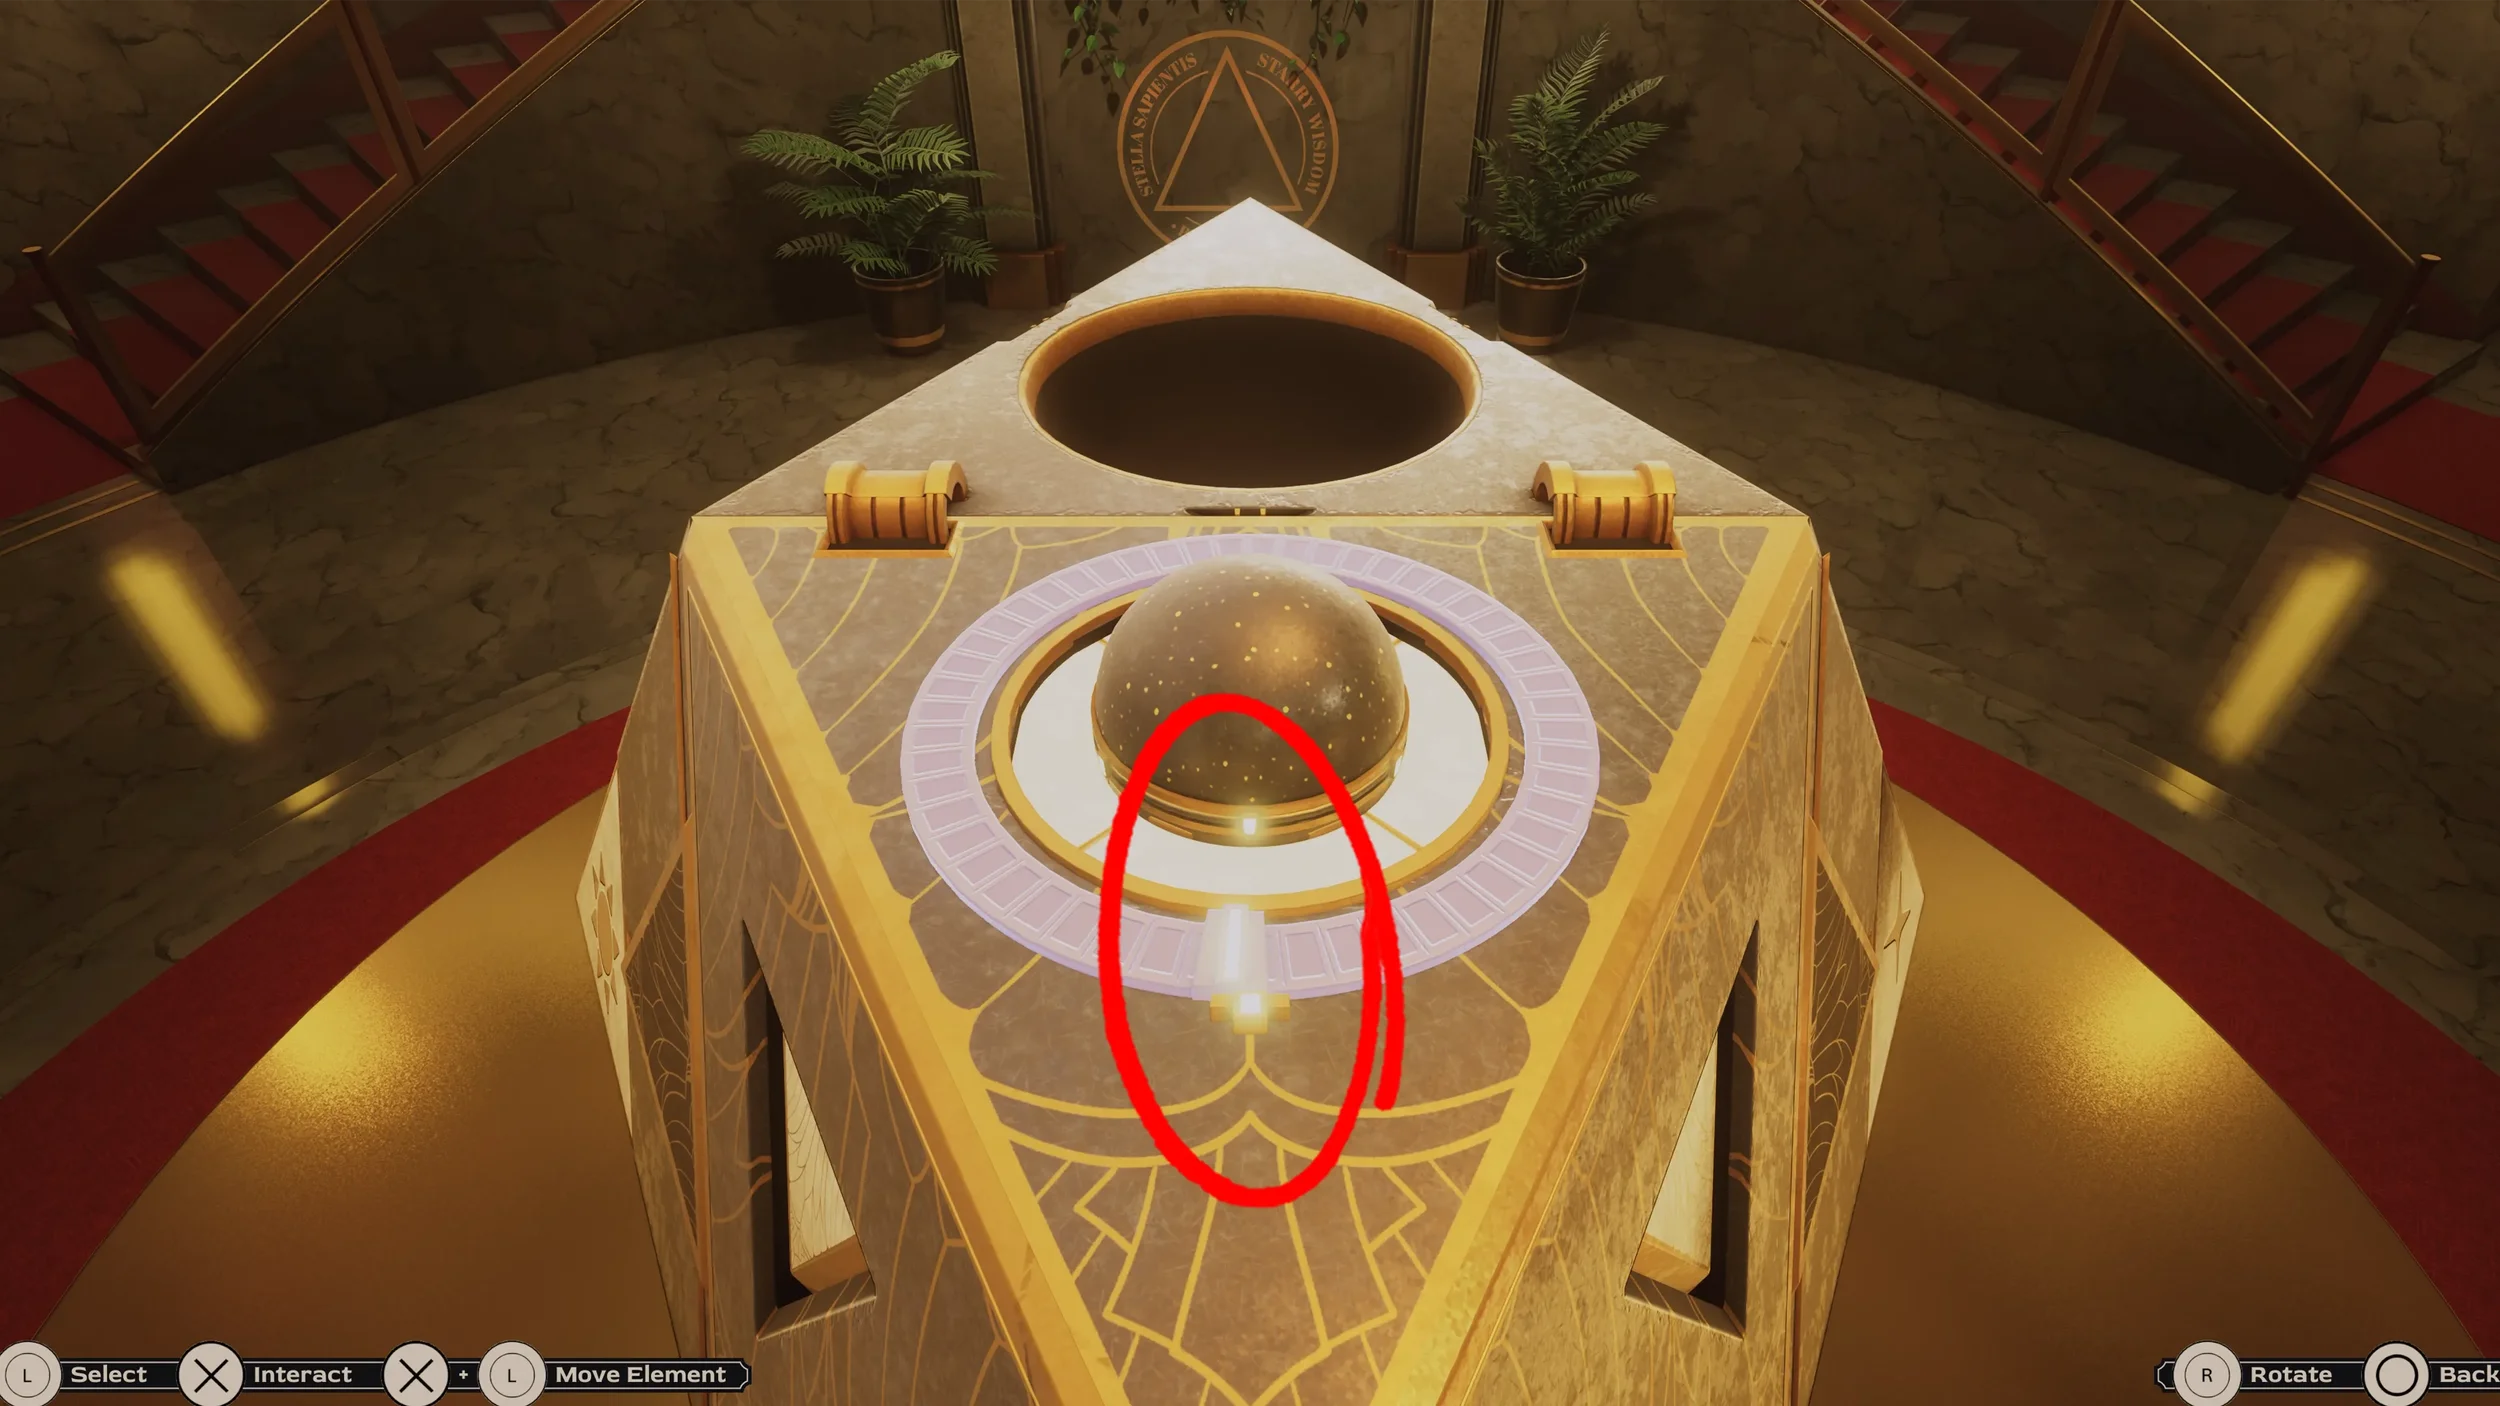
After this locate the bottom corner that has the 2 star shaped symbols (Image 1), rotate this corner so that its moon symbol side is facing to the right as shown in (Image 2).
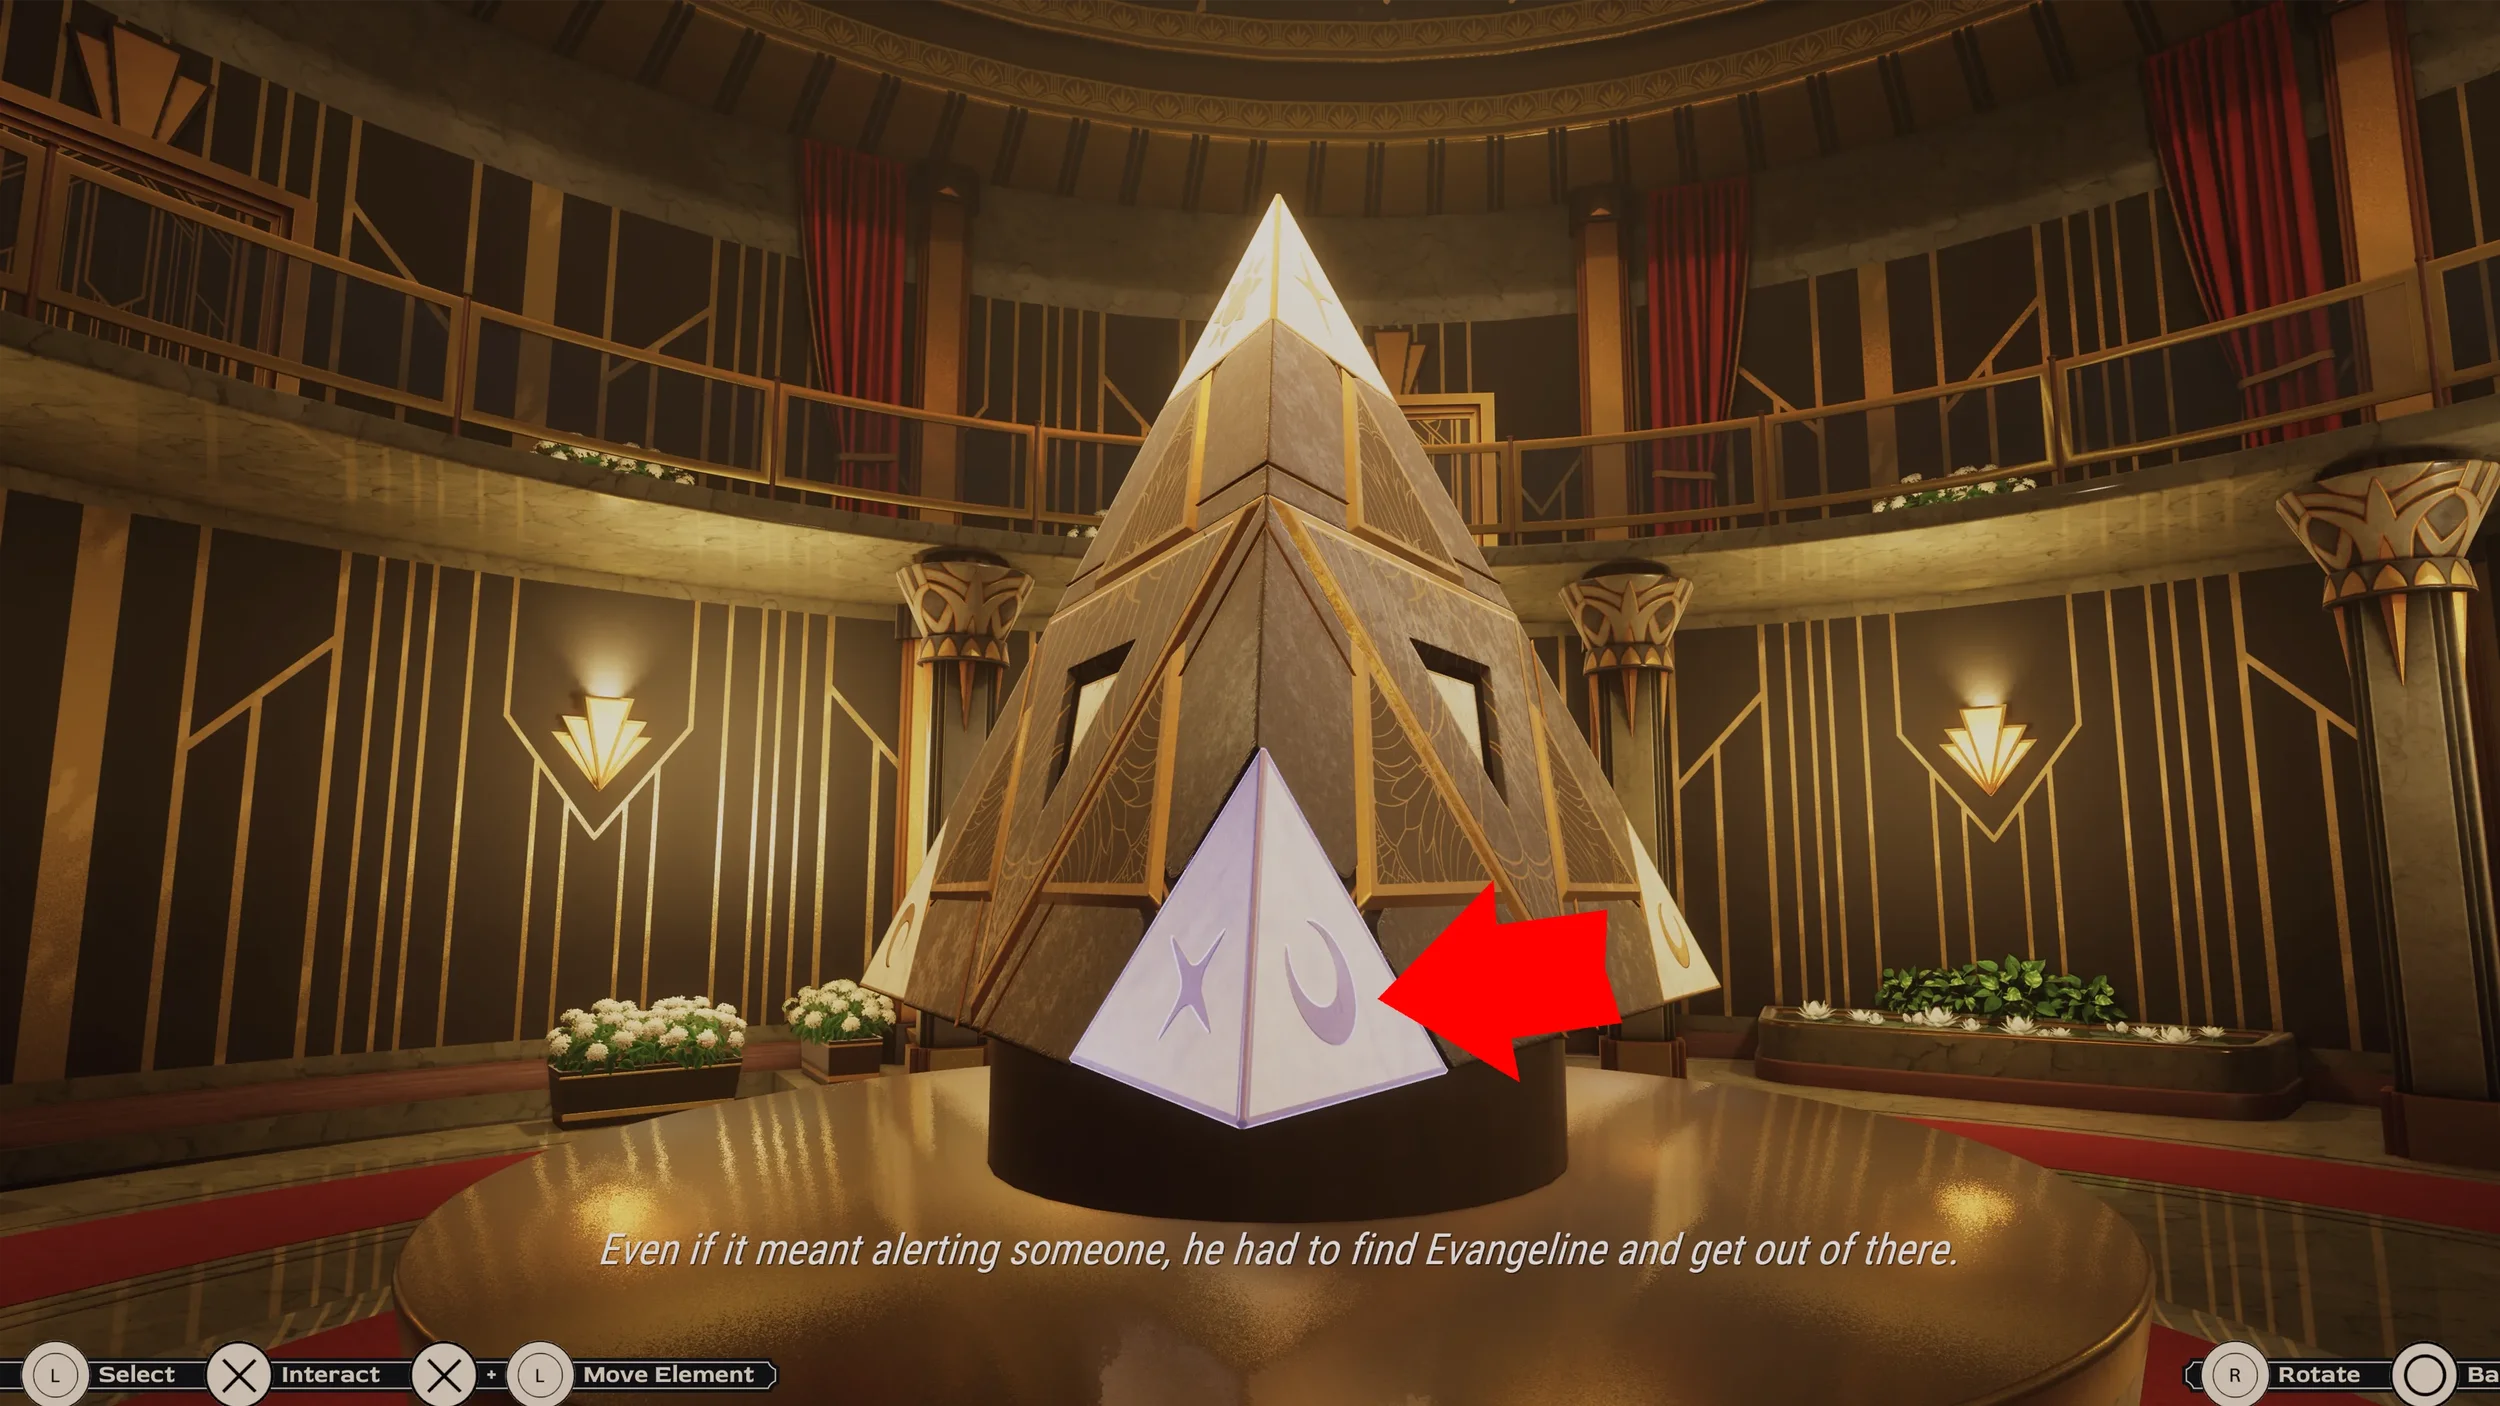
The rest of this puzzle is very simple, just make sure to not rotate the corner that we just solved while you rotate the rest of the corners so that every face has all 3 of its corners showing the same symbol, so one face should be all suns, the other should show only moons and the other only stars. Once all the faces have been solved the Pyramid will open up revealing the next part of the puzzle.
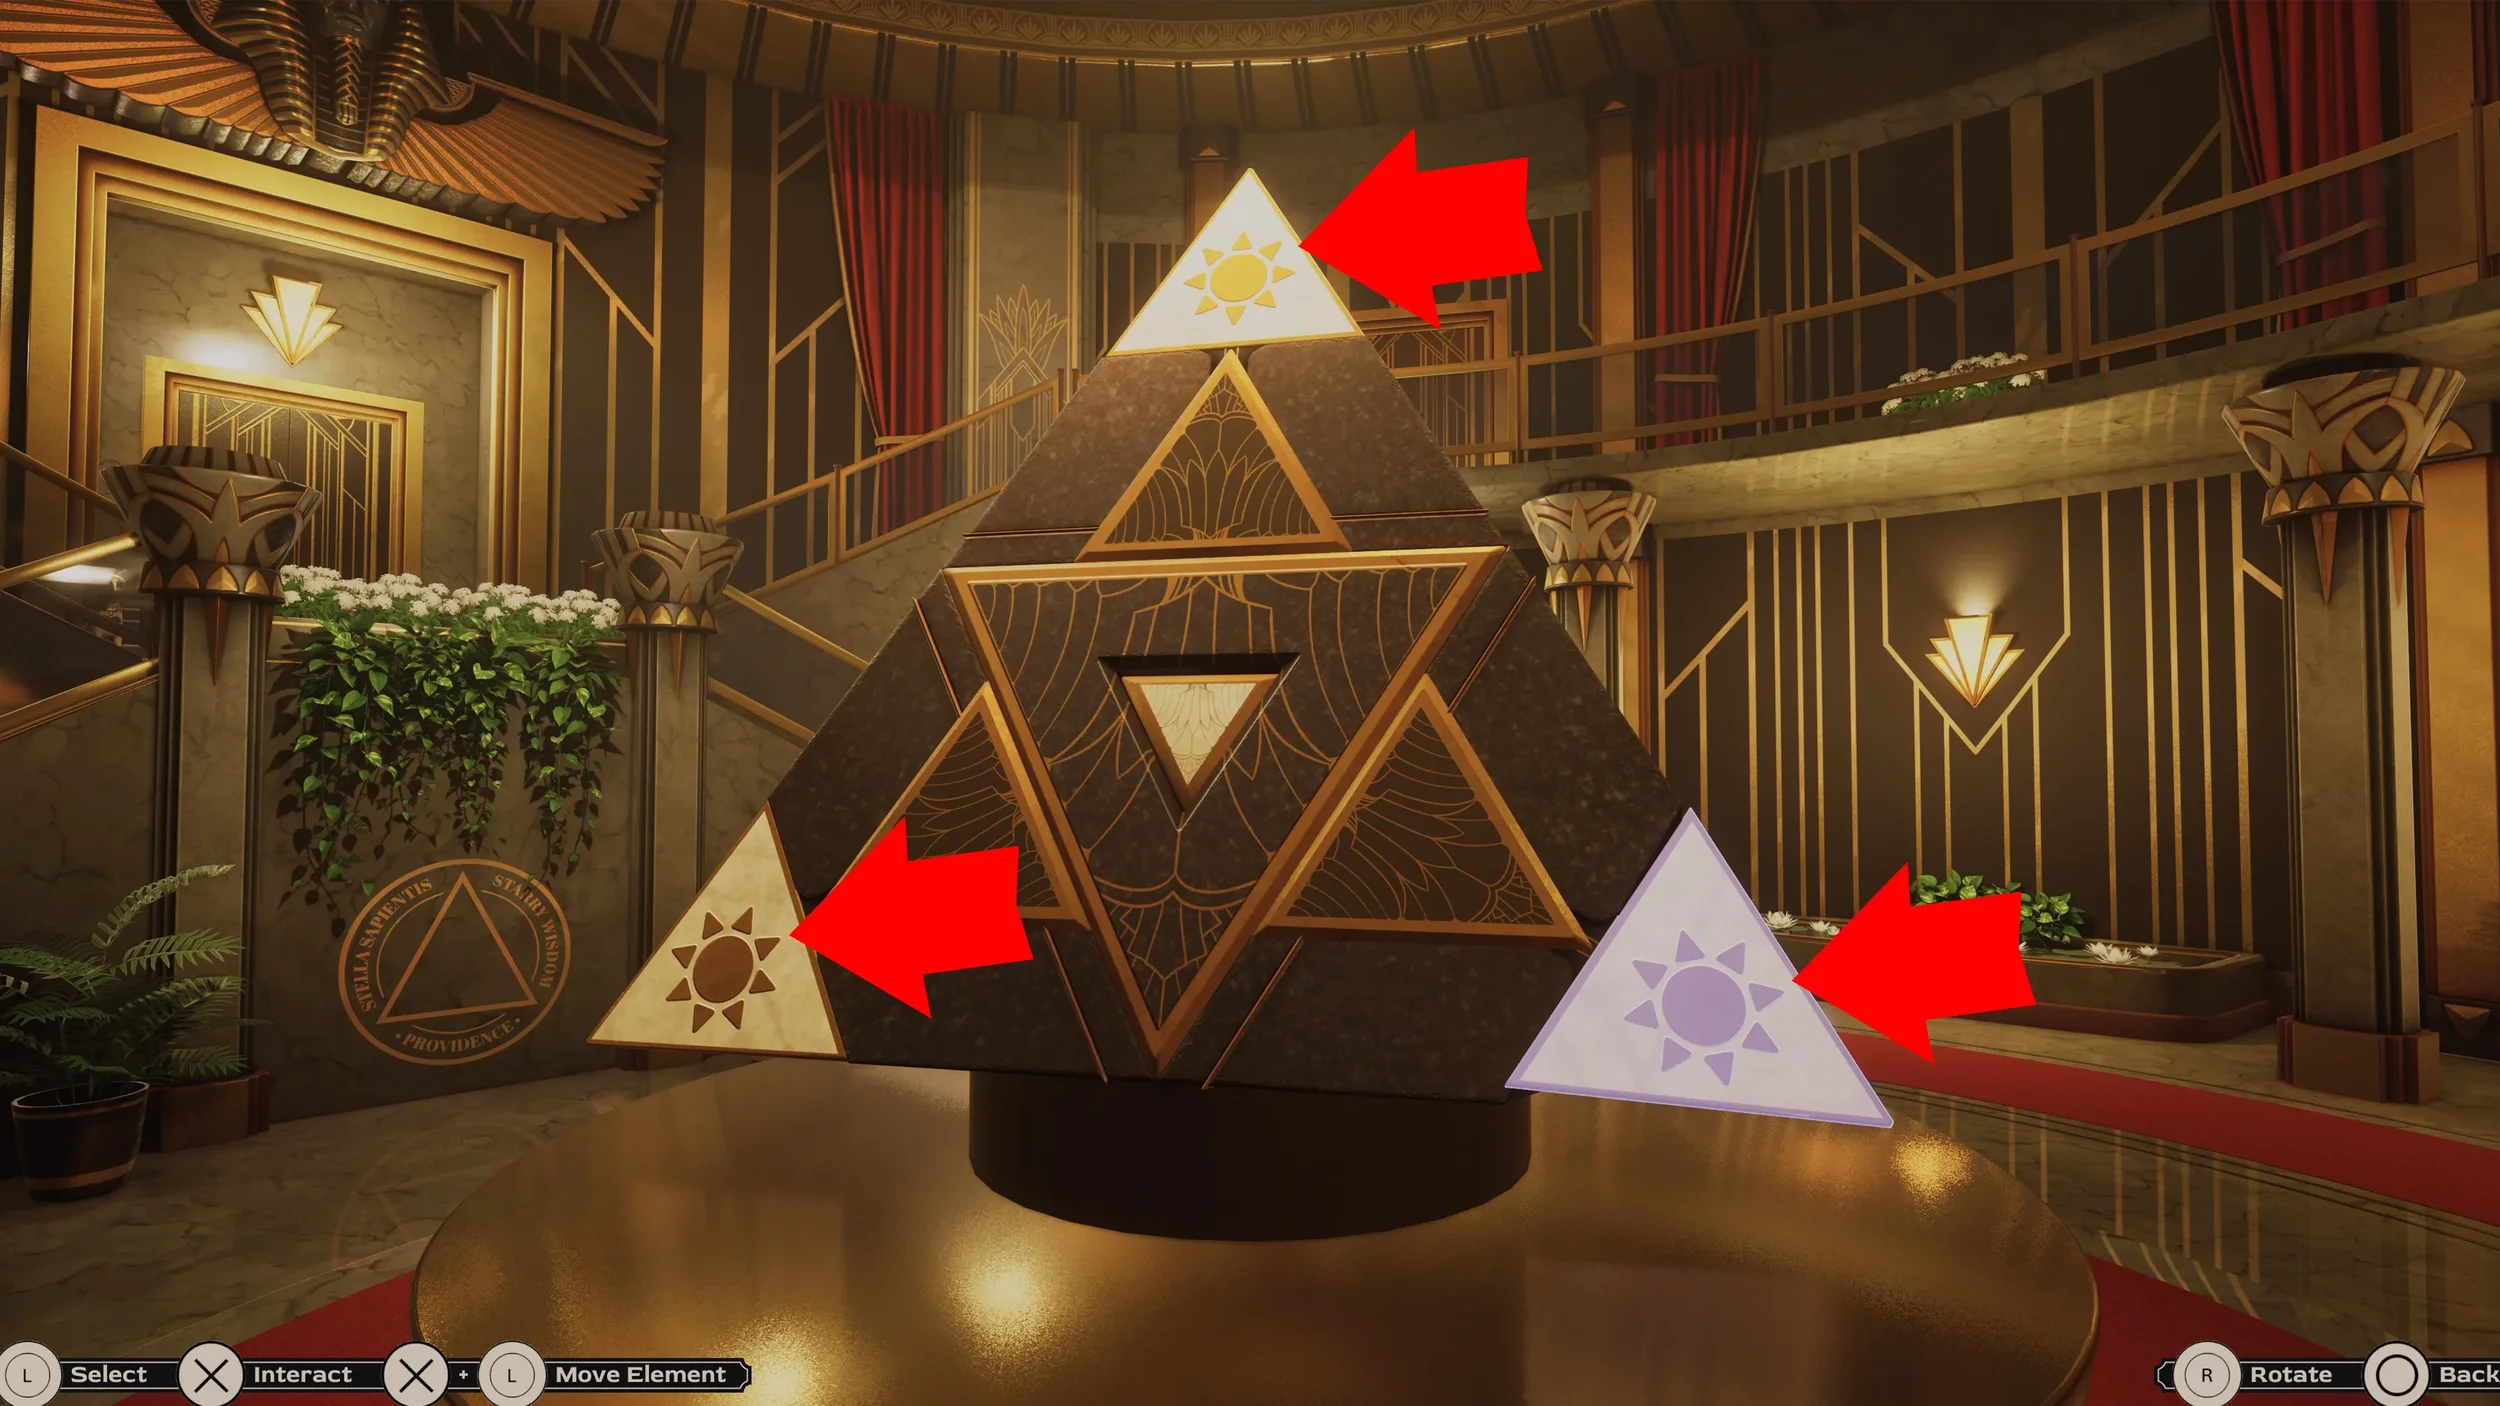
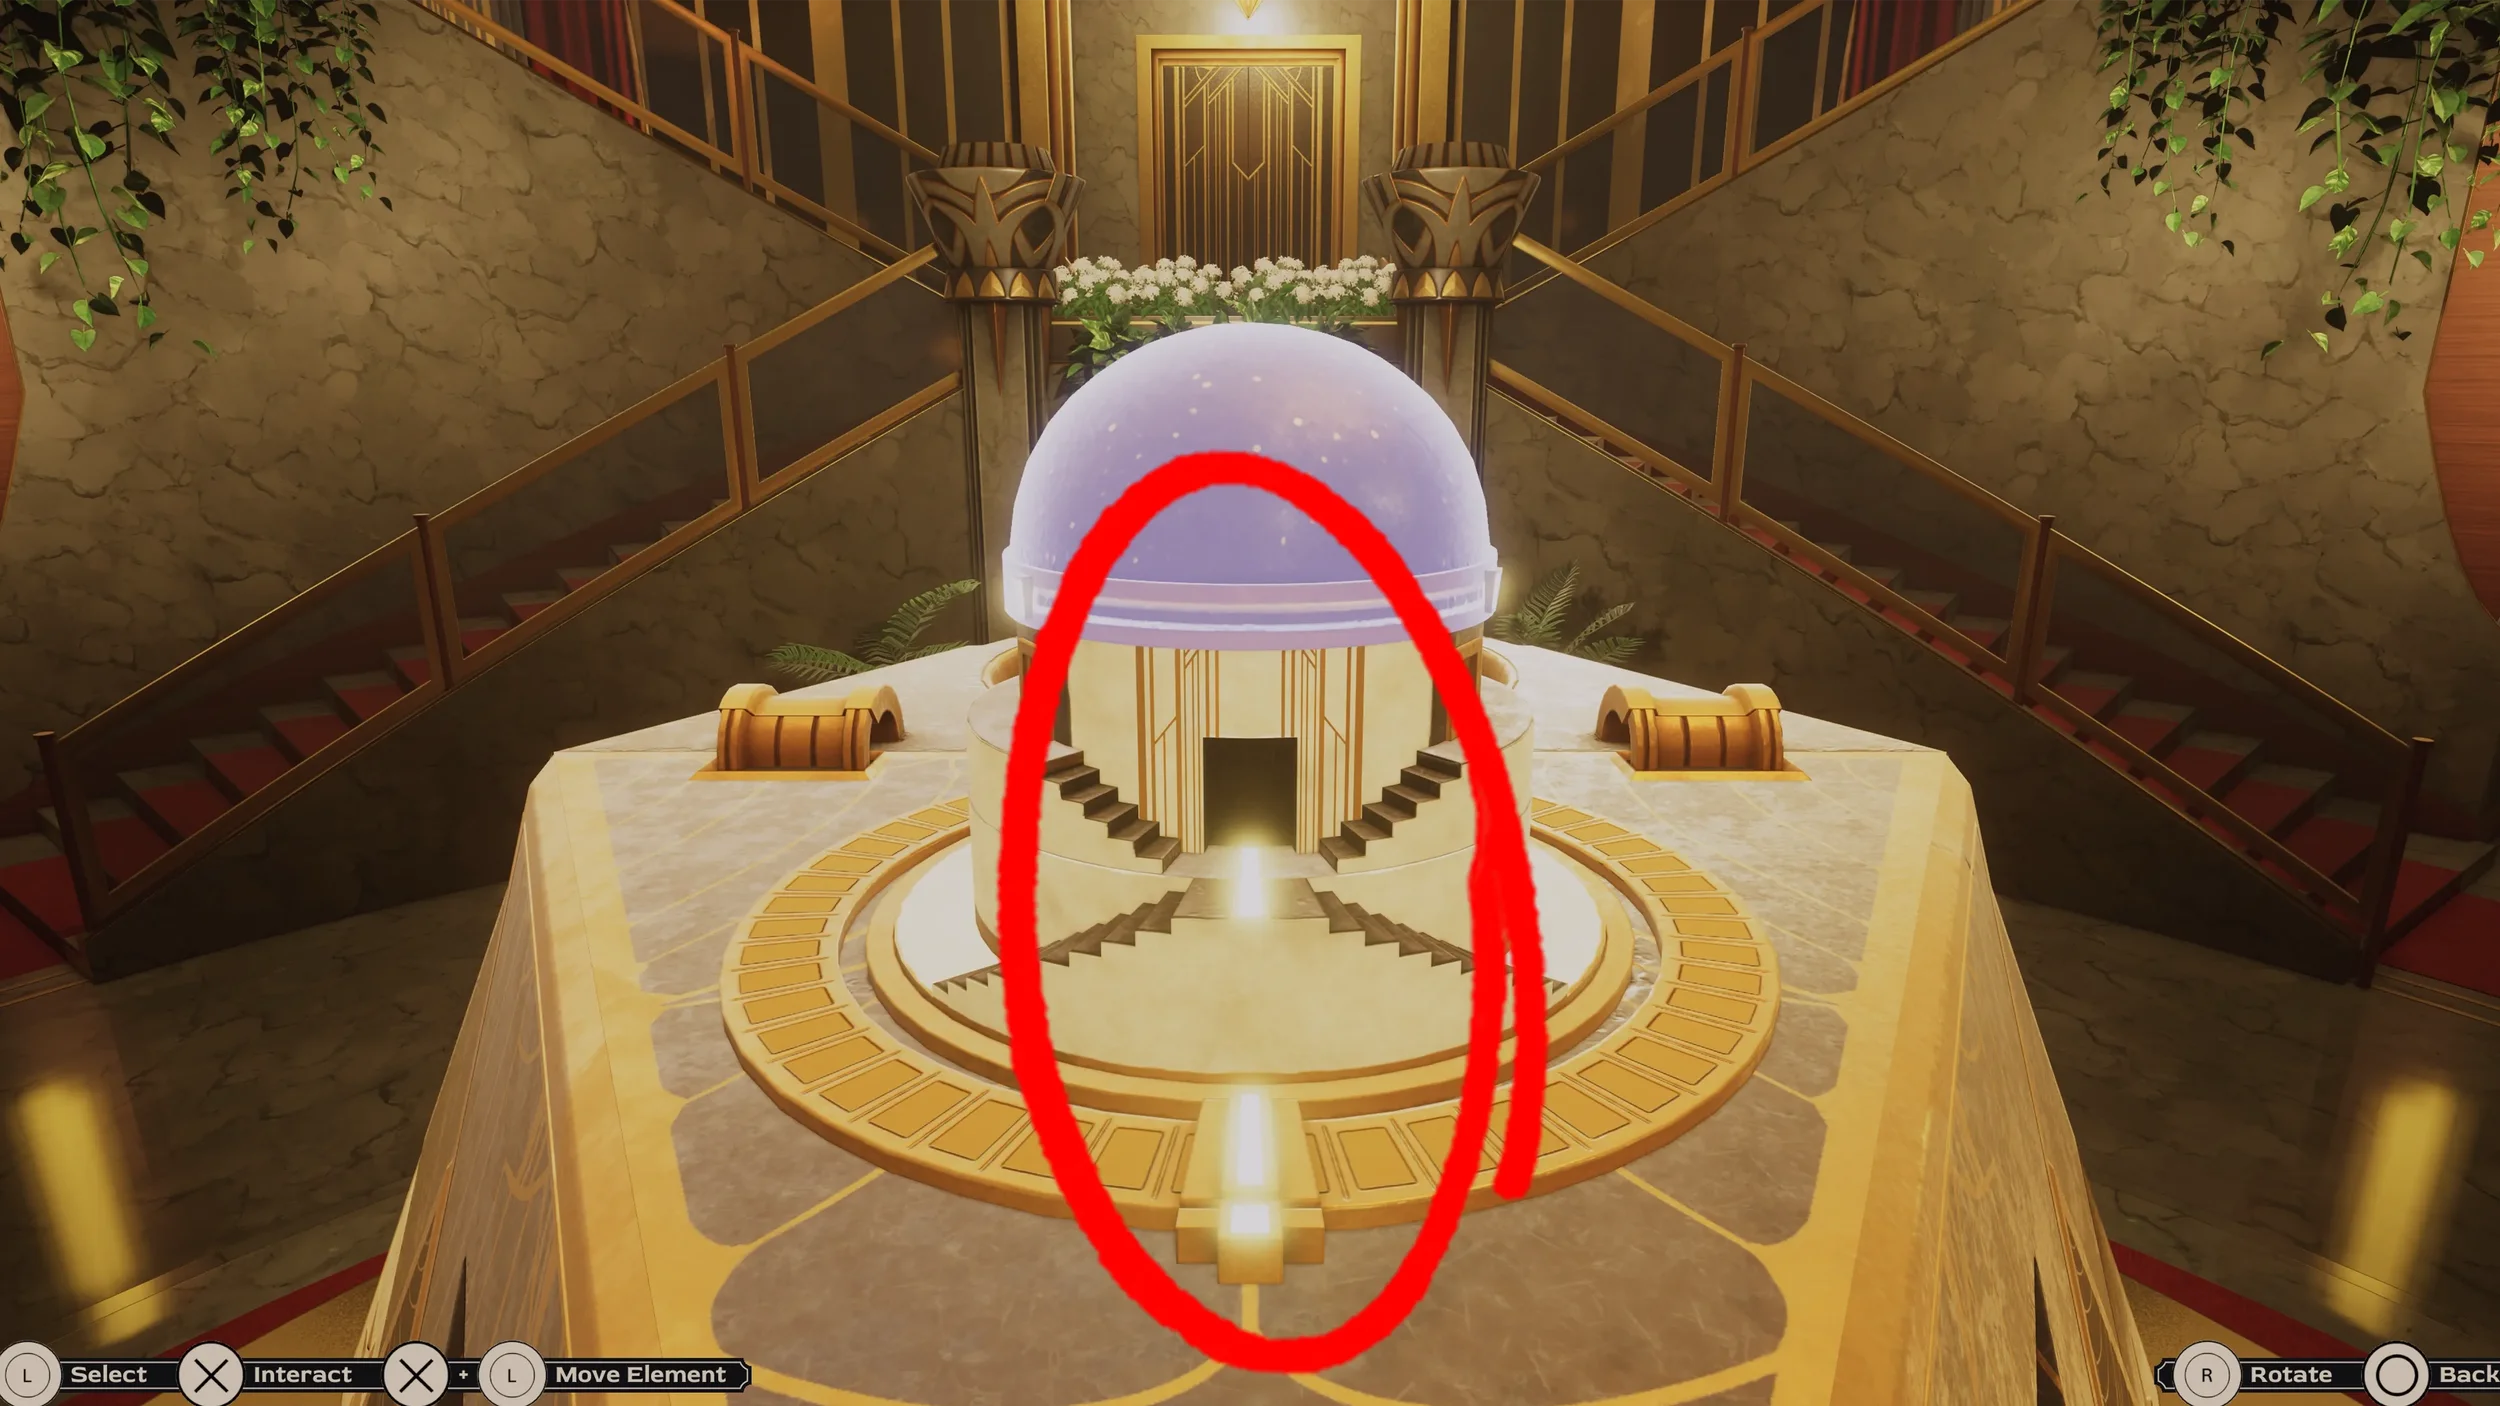
When the Pyramid opens up, we just need to align the line of light inside with the line of light on the part we can rotate, this will expand the small building we were rotating, rotate this new part so that the line of light is aligned again, then for the roof align the lights with the side doors, this will mean that the part of the roof just above the main door should be the part that has no lights.
Egyptian Statues Puzzle
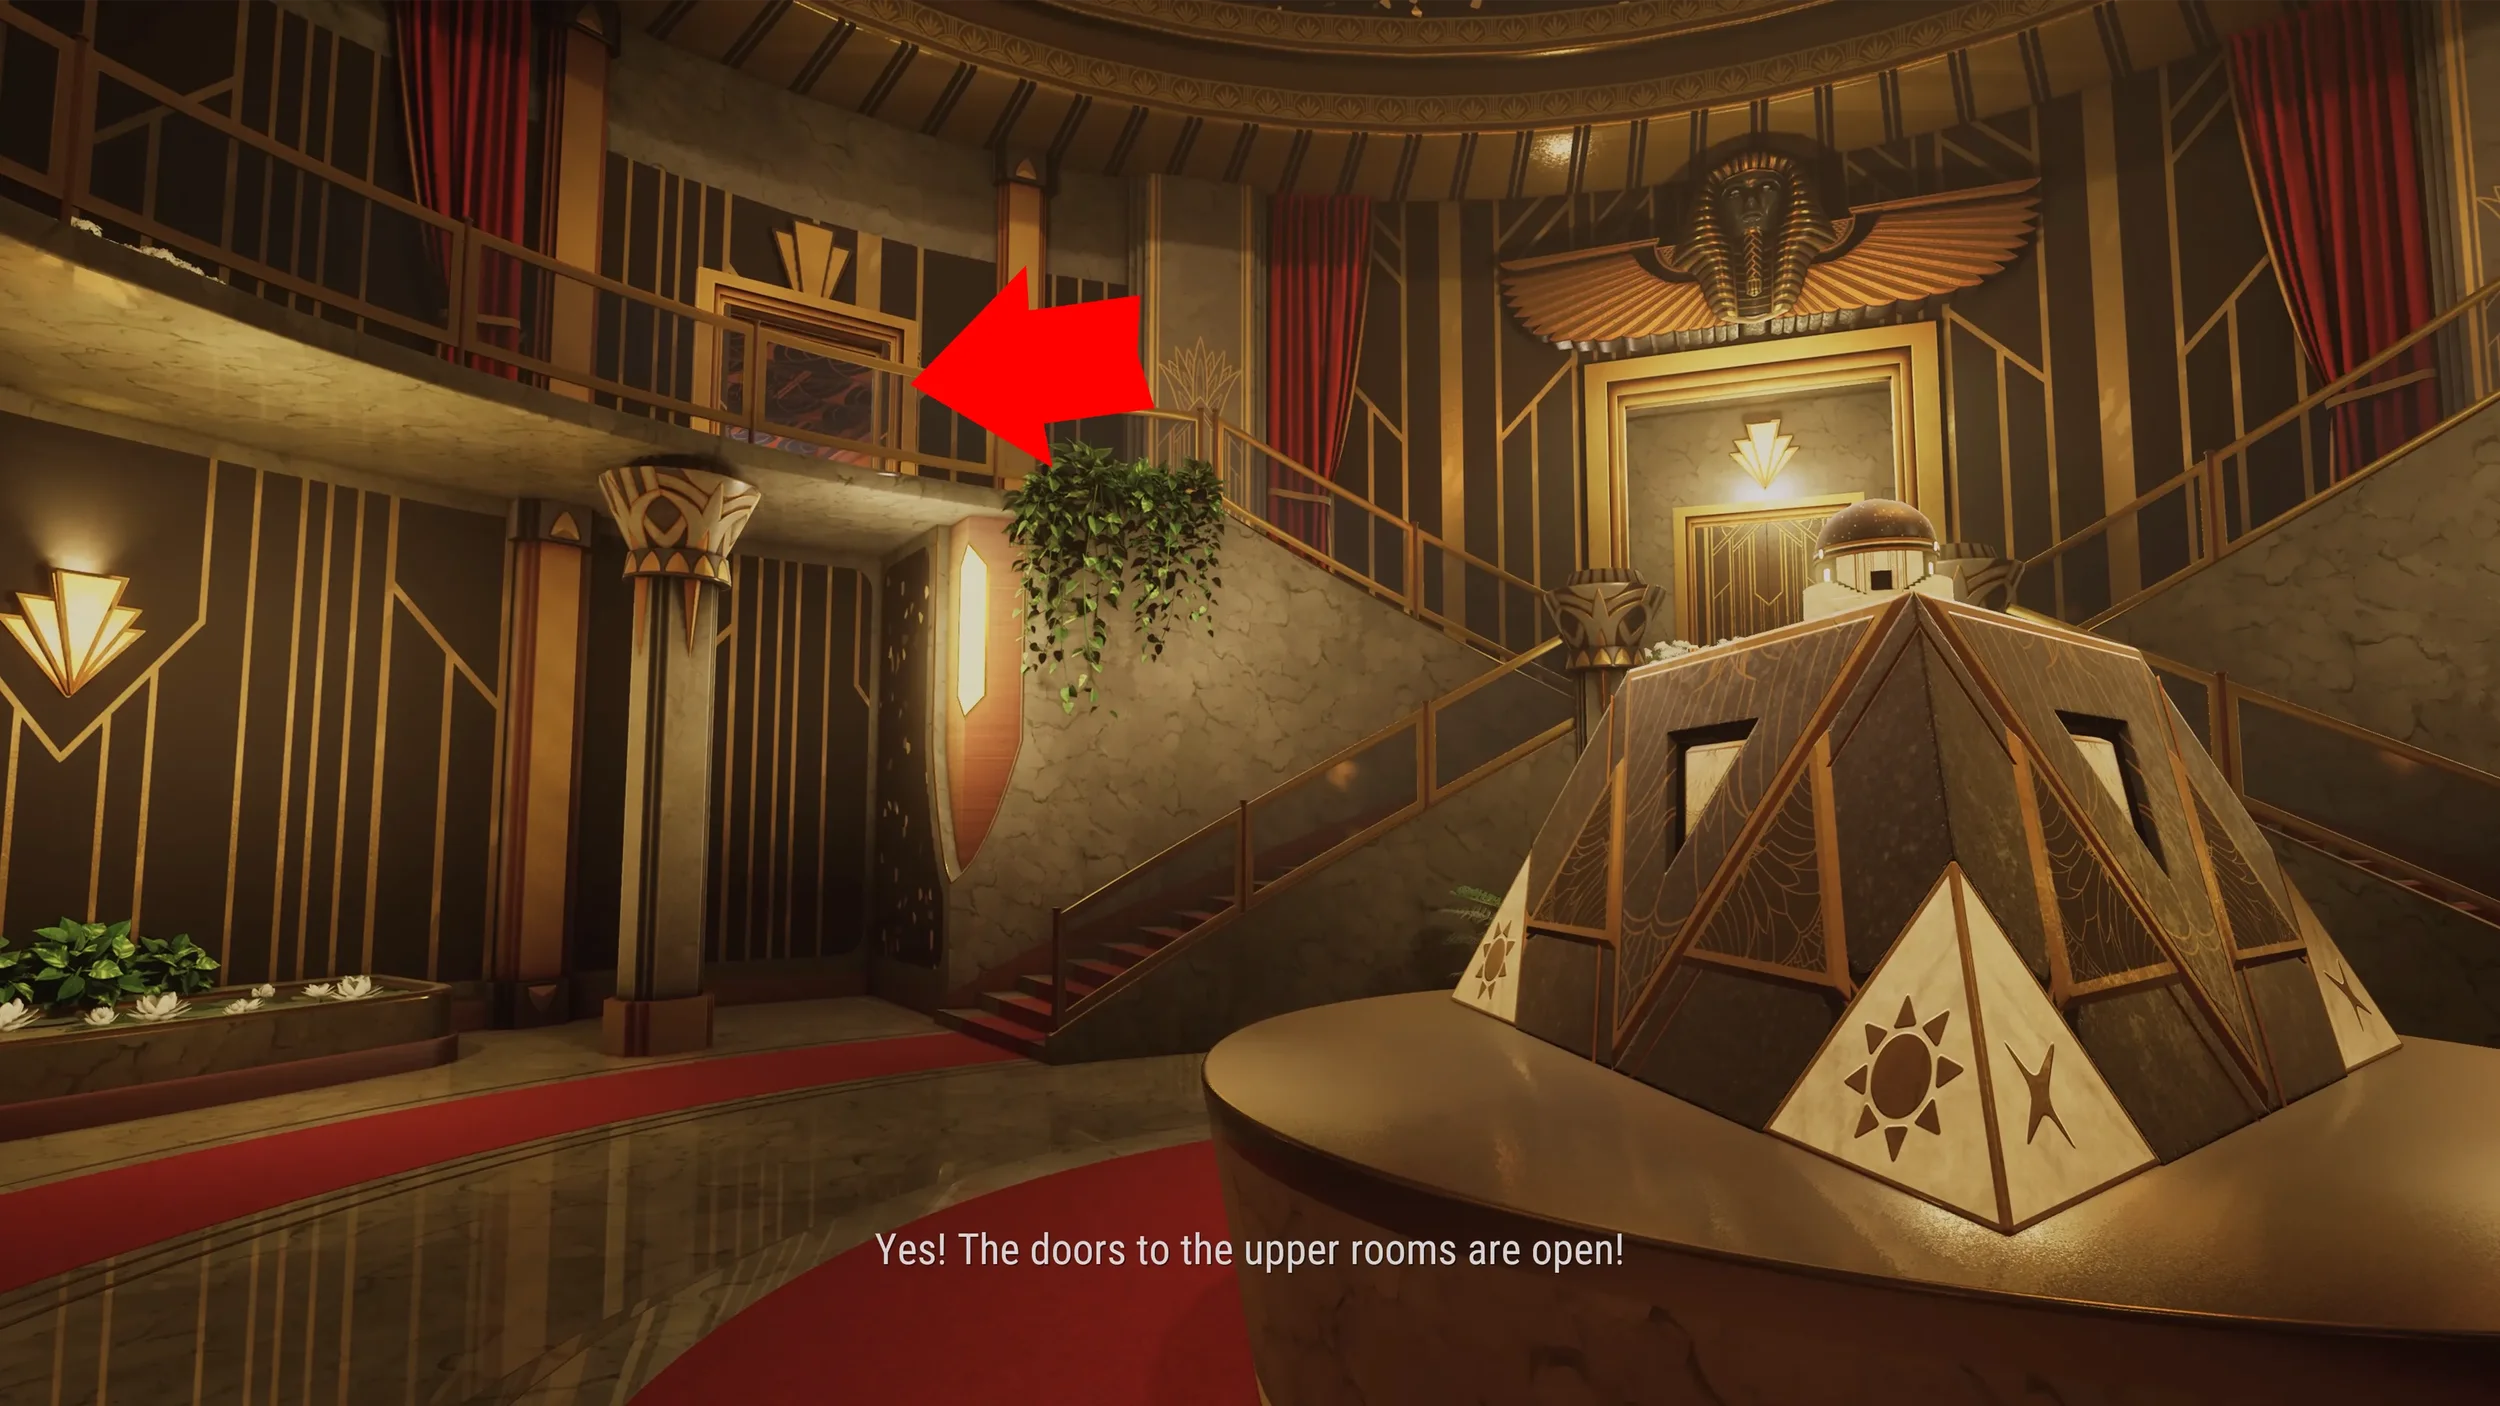
All of the side doors will now be open, our main objective for now is going to be to collect all of the clues from each of the rooms that have now opened up.
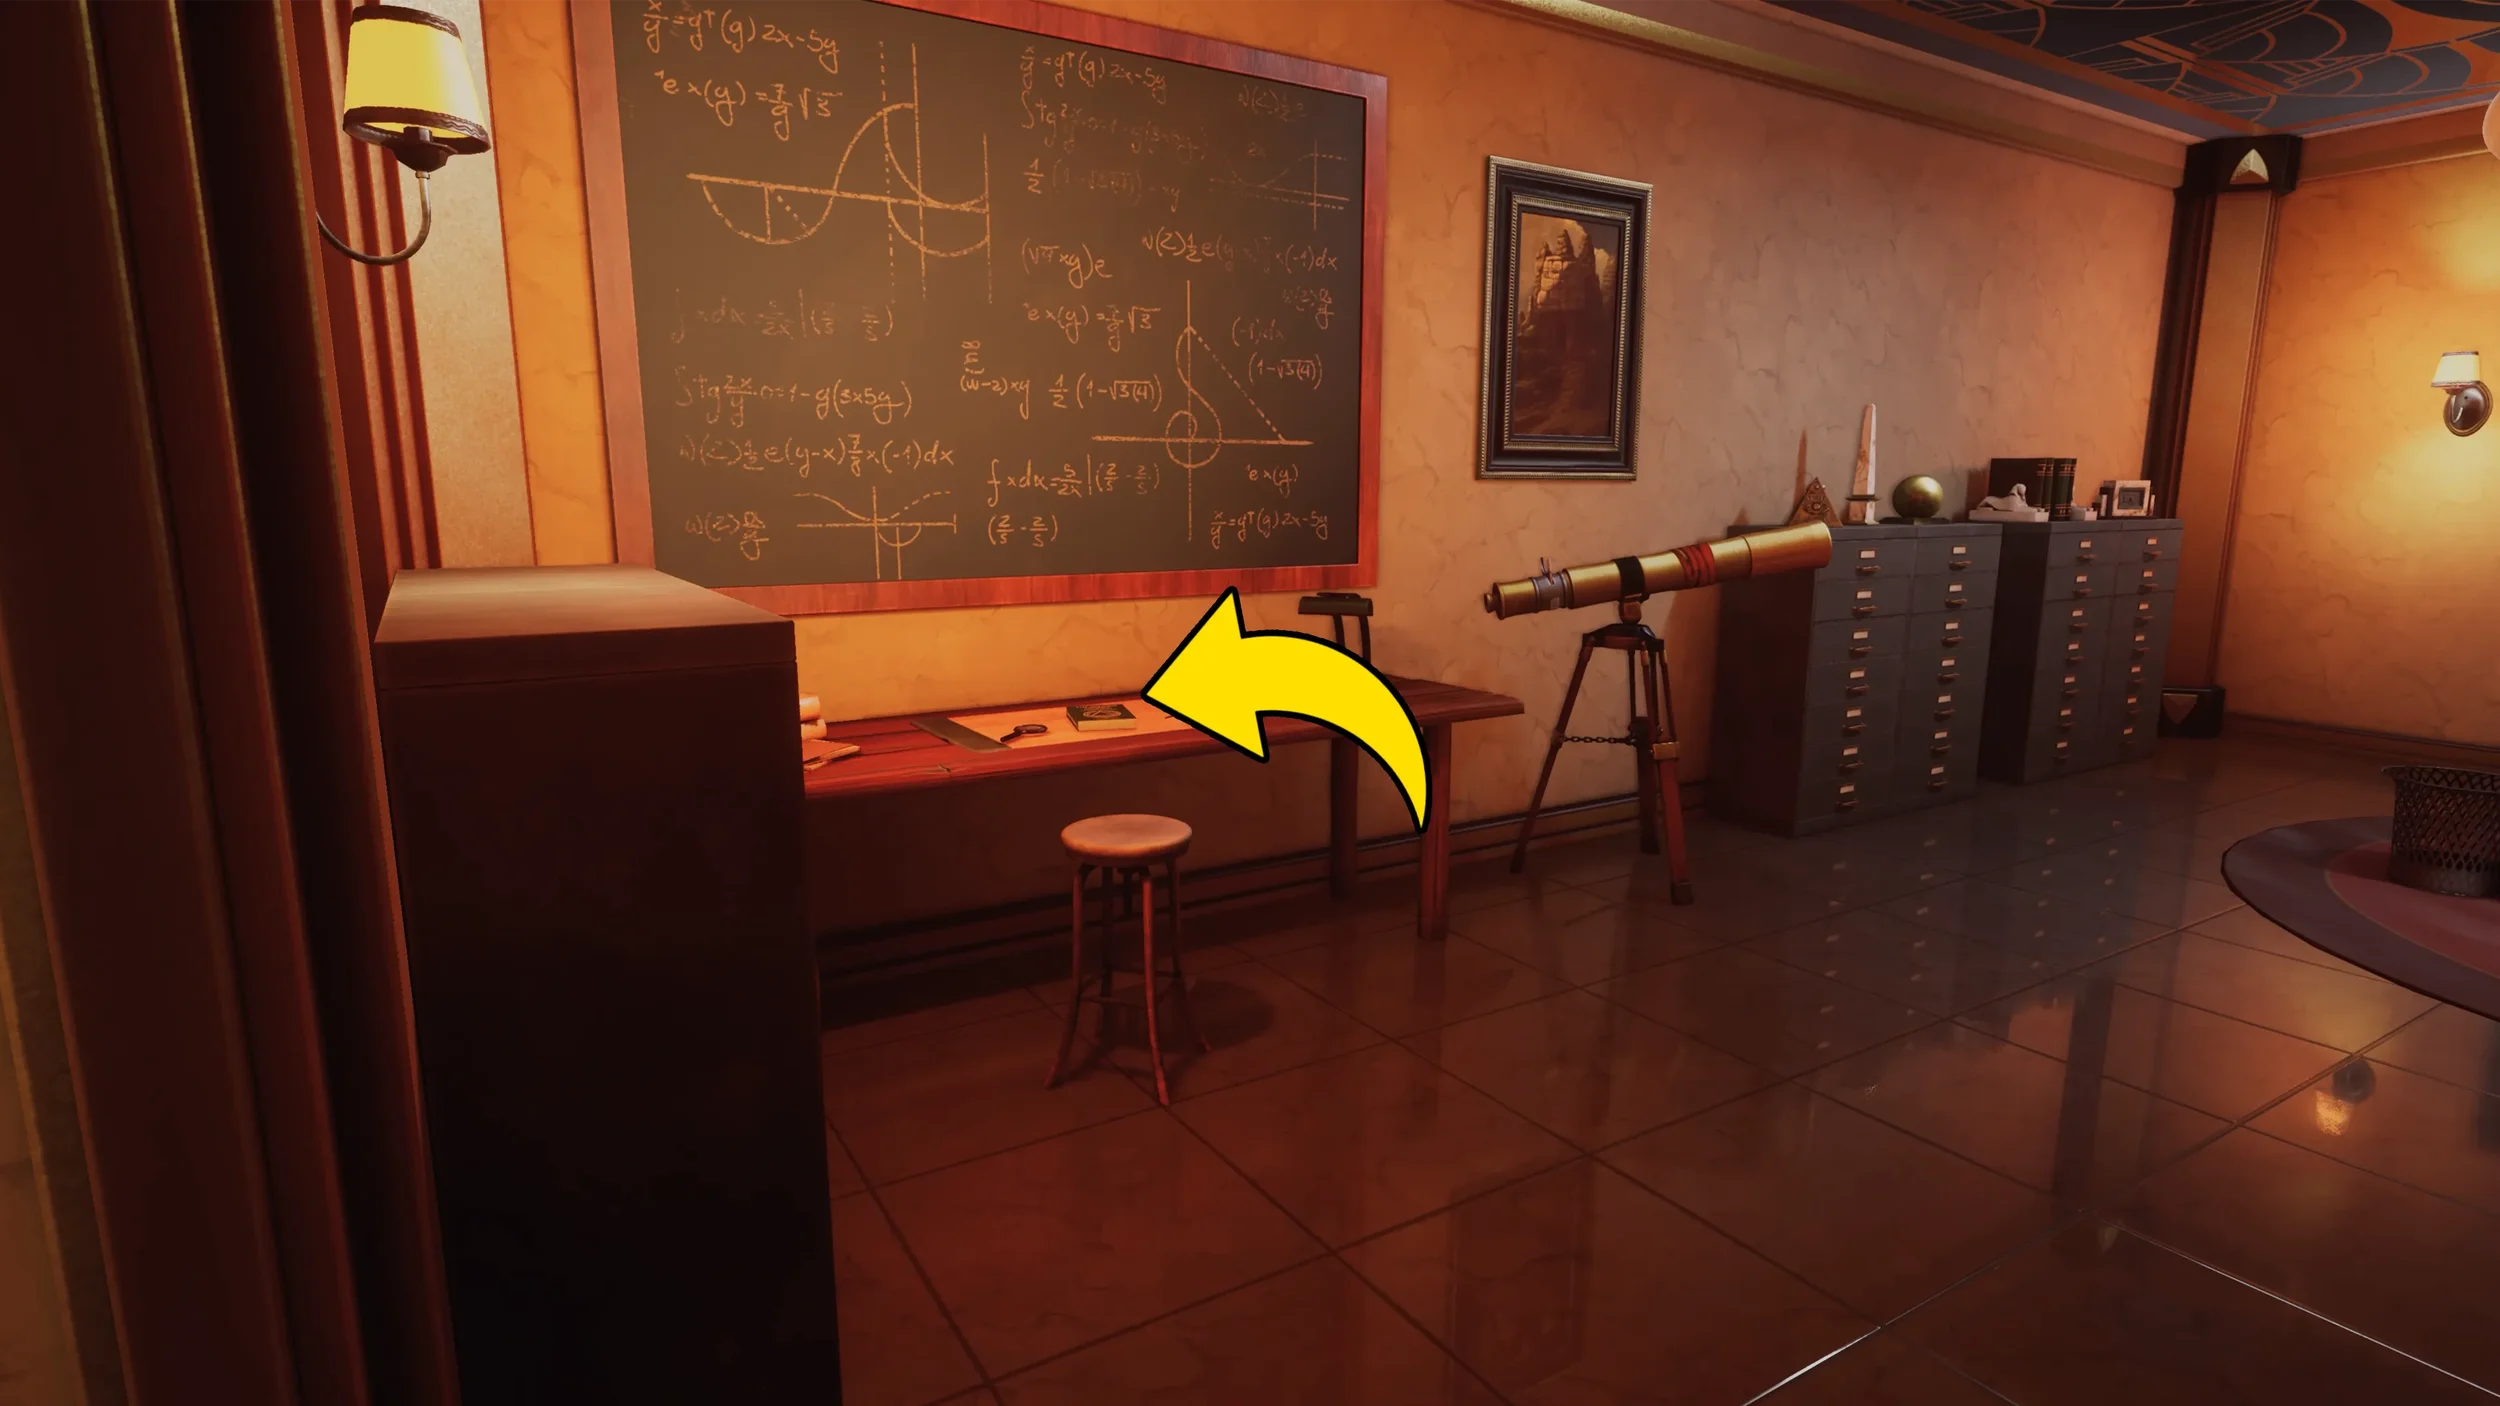
Let’s start by going in the first door on the left of the stairs, this is the Astronomer’s Office, as soon as you walk in you will see a book on the table to the left, inspect it to write it down as a clue. There are another 2 clues in this office, one is the piece of paper on the main desk and the other clue is the paper in the paper rack on the right side of the room.
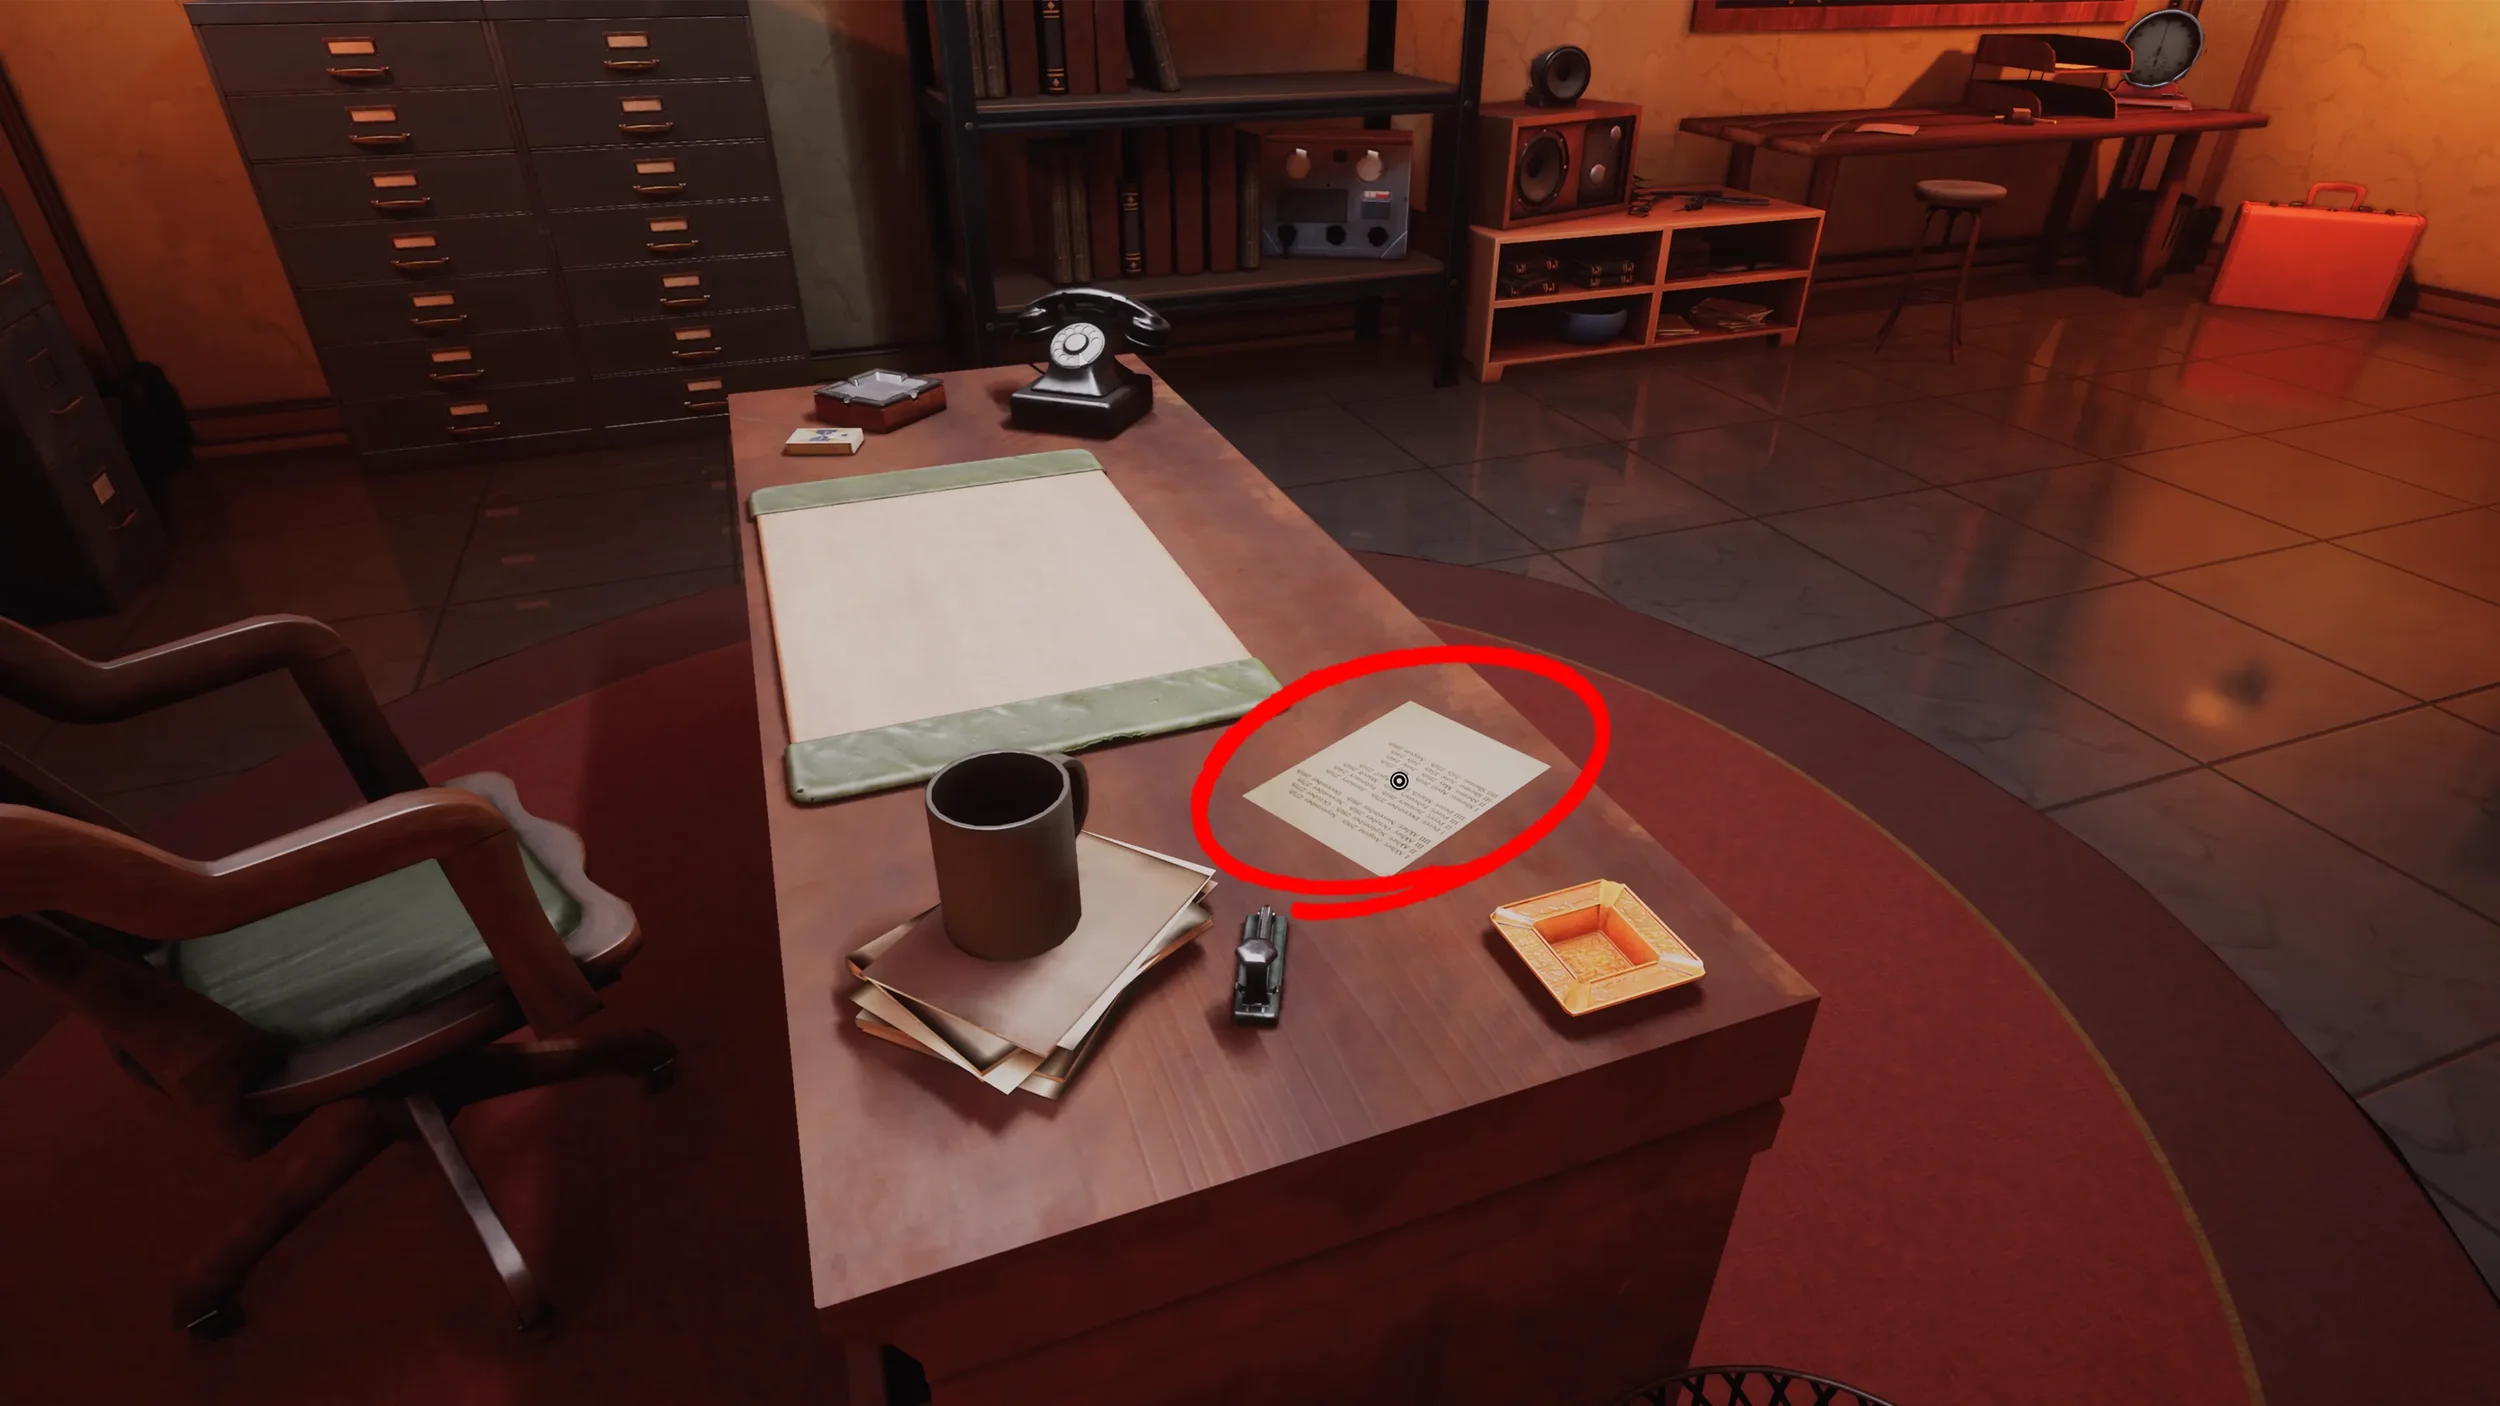
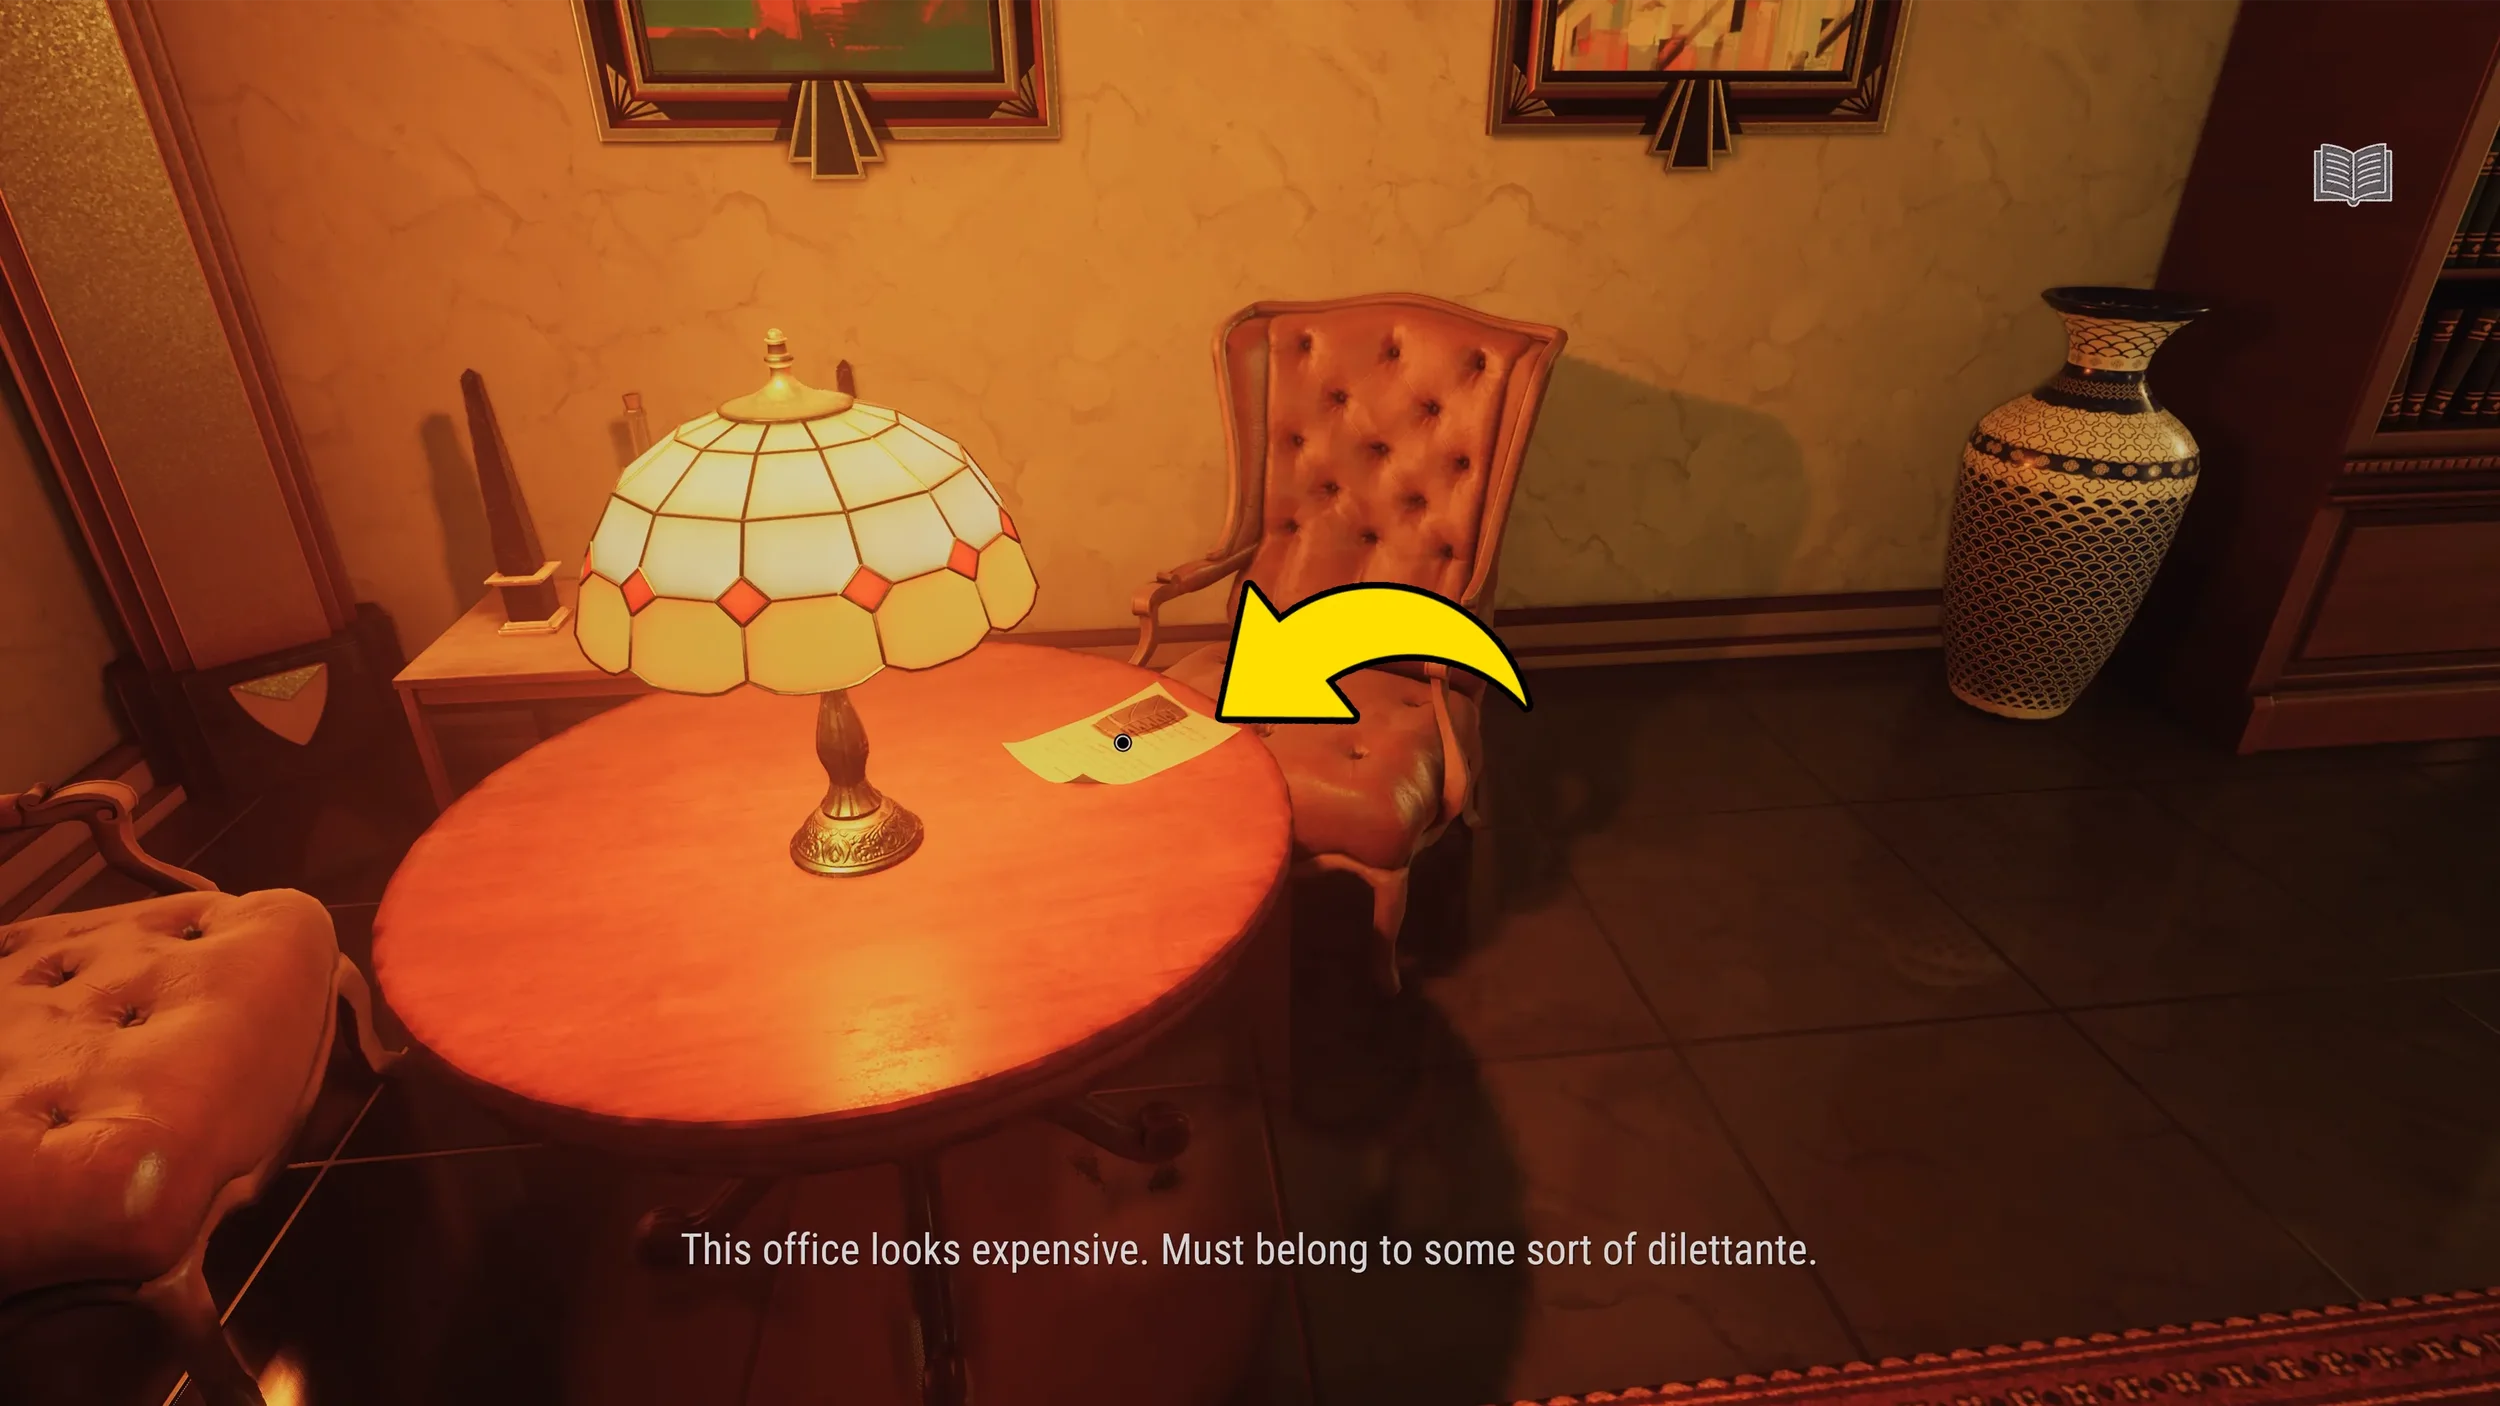
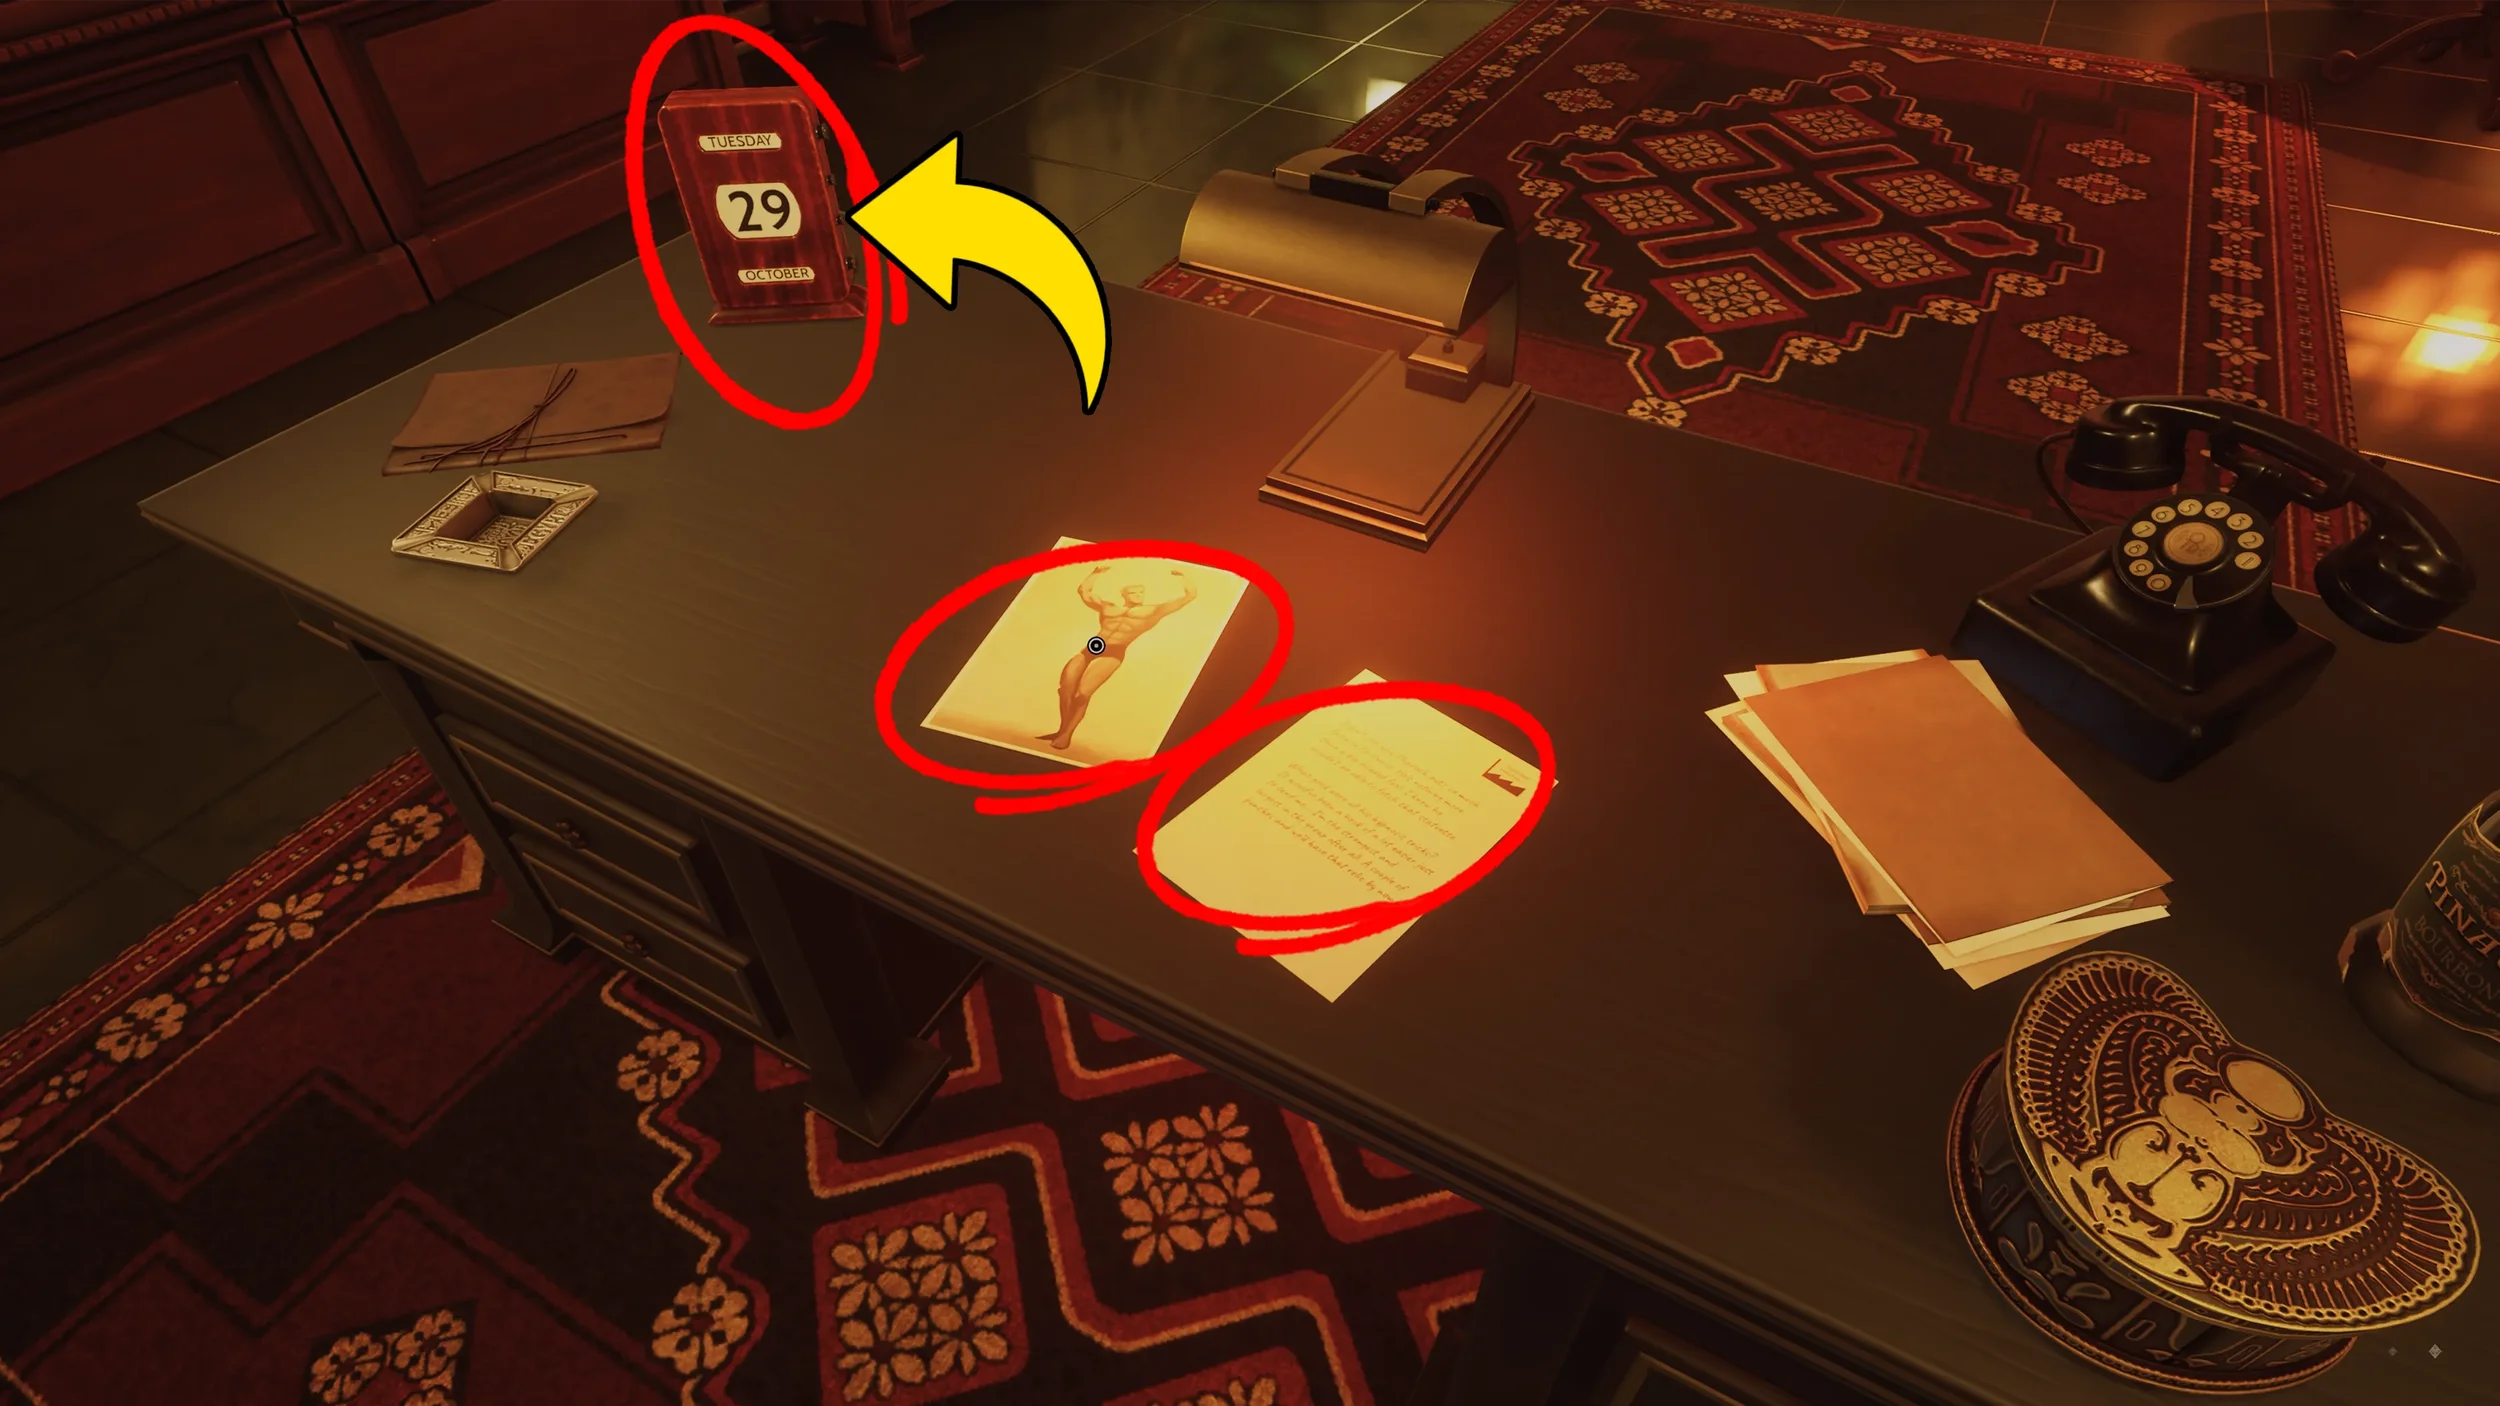
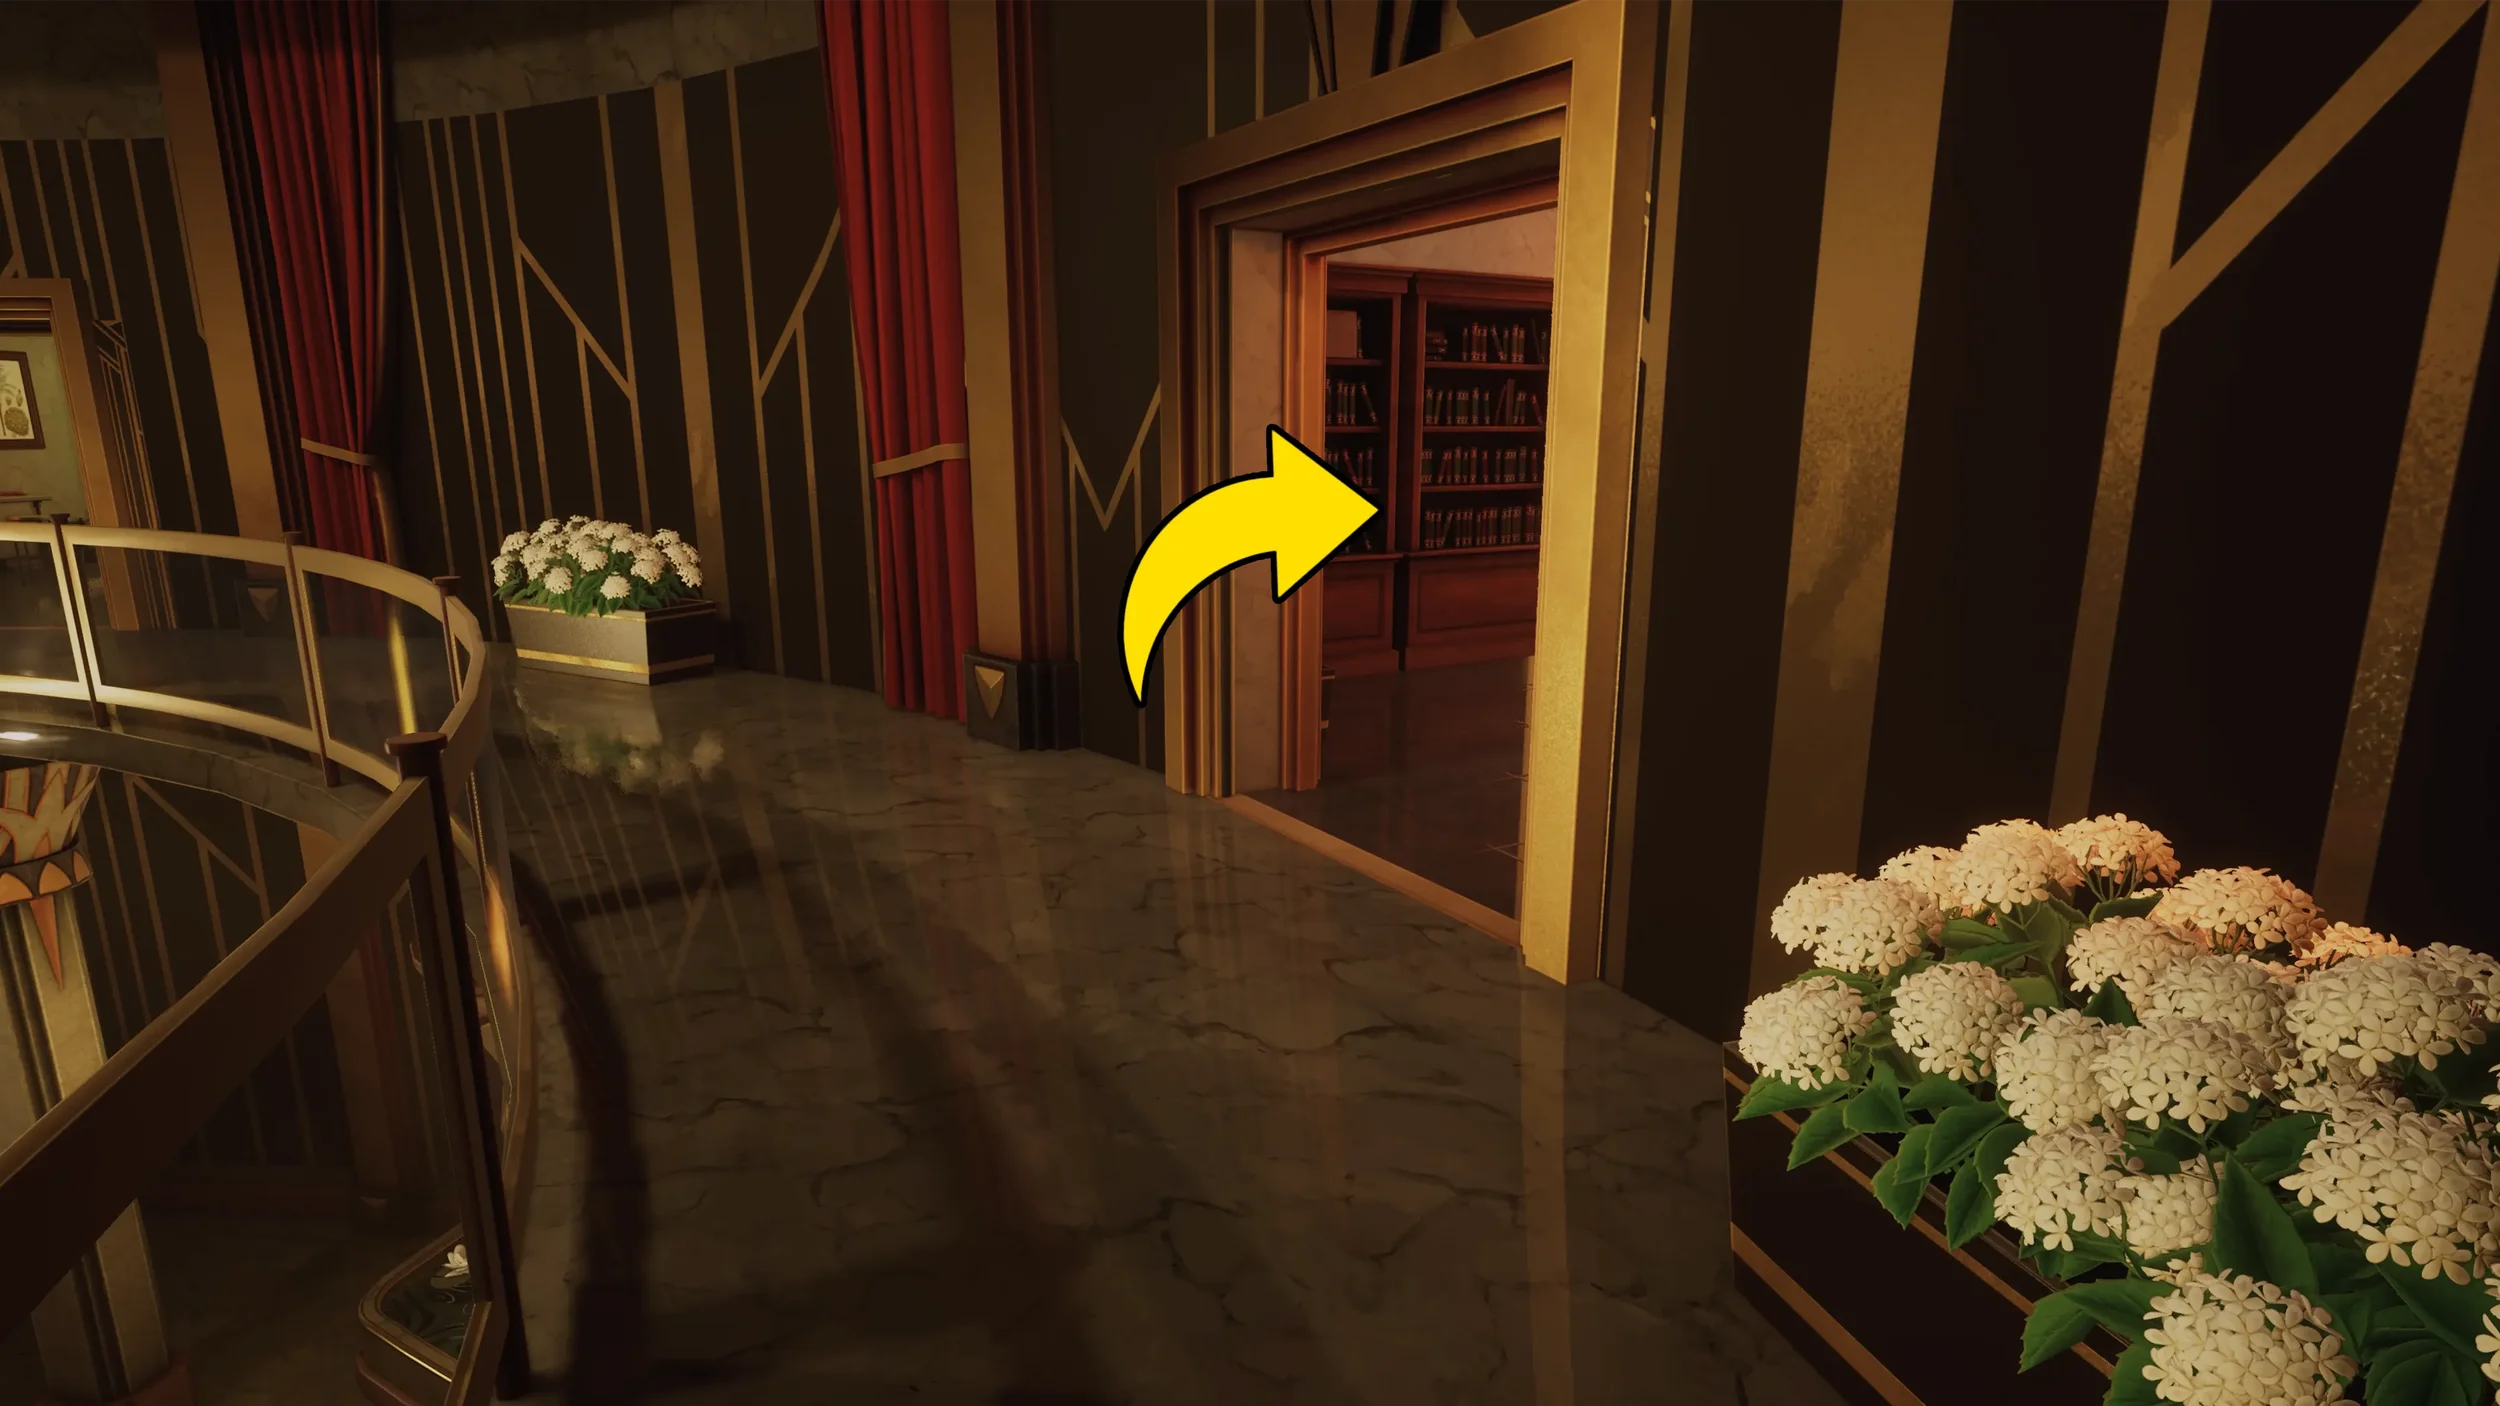
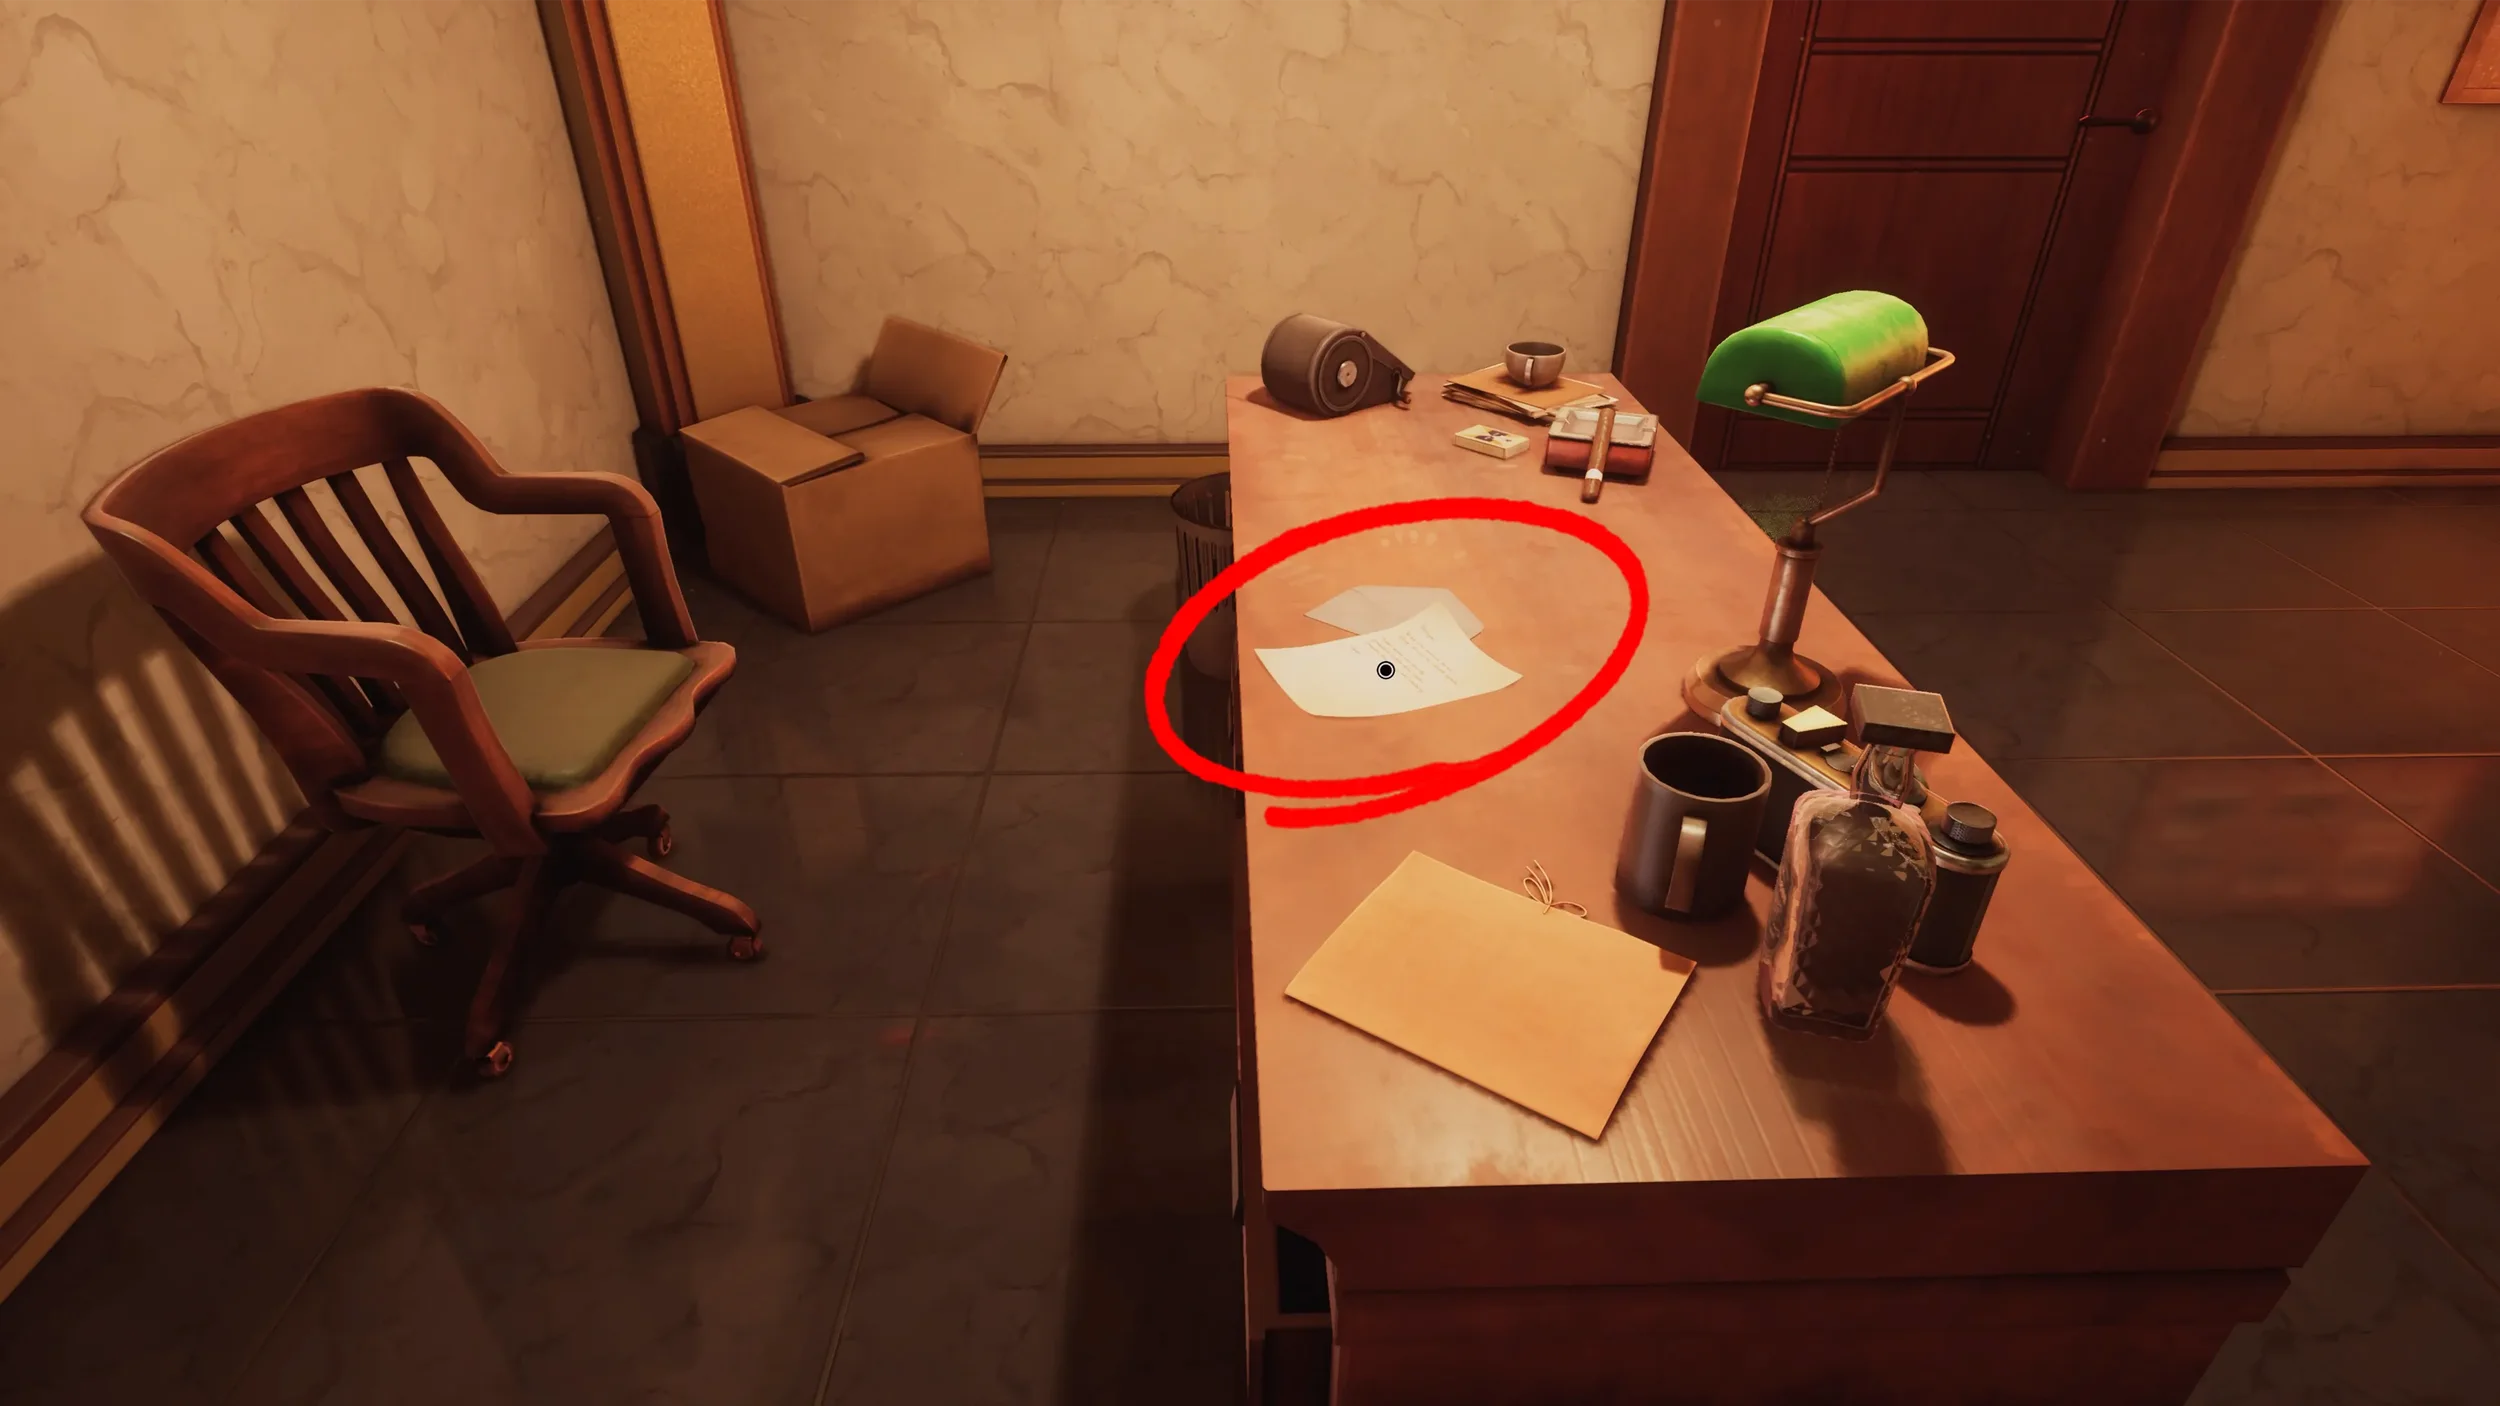
Exit the Astronomer’s Office and continue going around counter-clockwise, but SKIP the next door for now (we will do that one last), go into the room 2 doors down from the one you just exited, this is the Dilettante’s Office. As soon as you enter, inspect the clue on the table on the left, there are also 3 more clues on the main desk in this room, the piece of paper, the photograph and the red calendar.

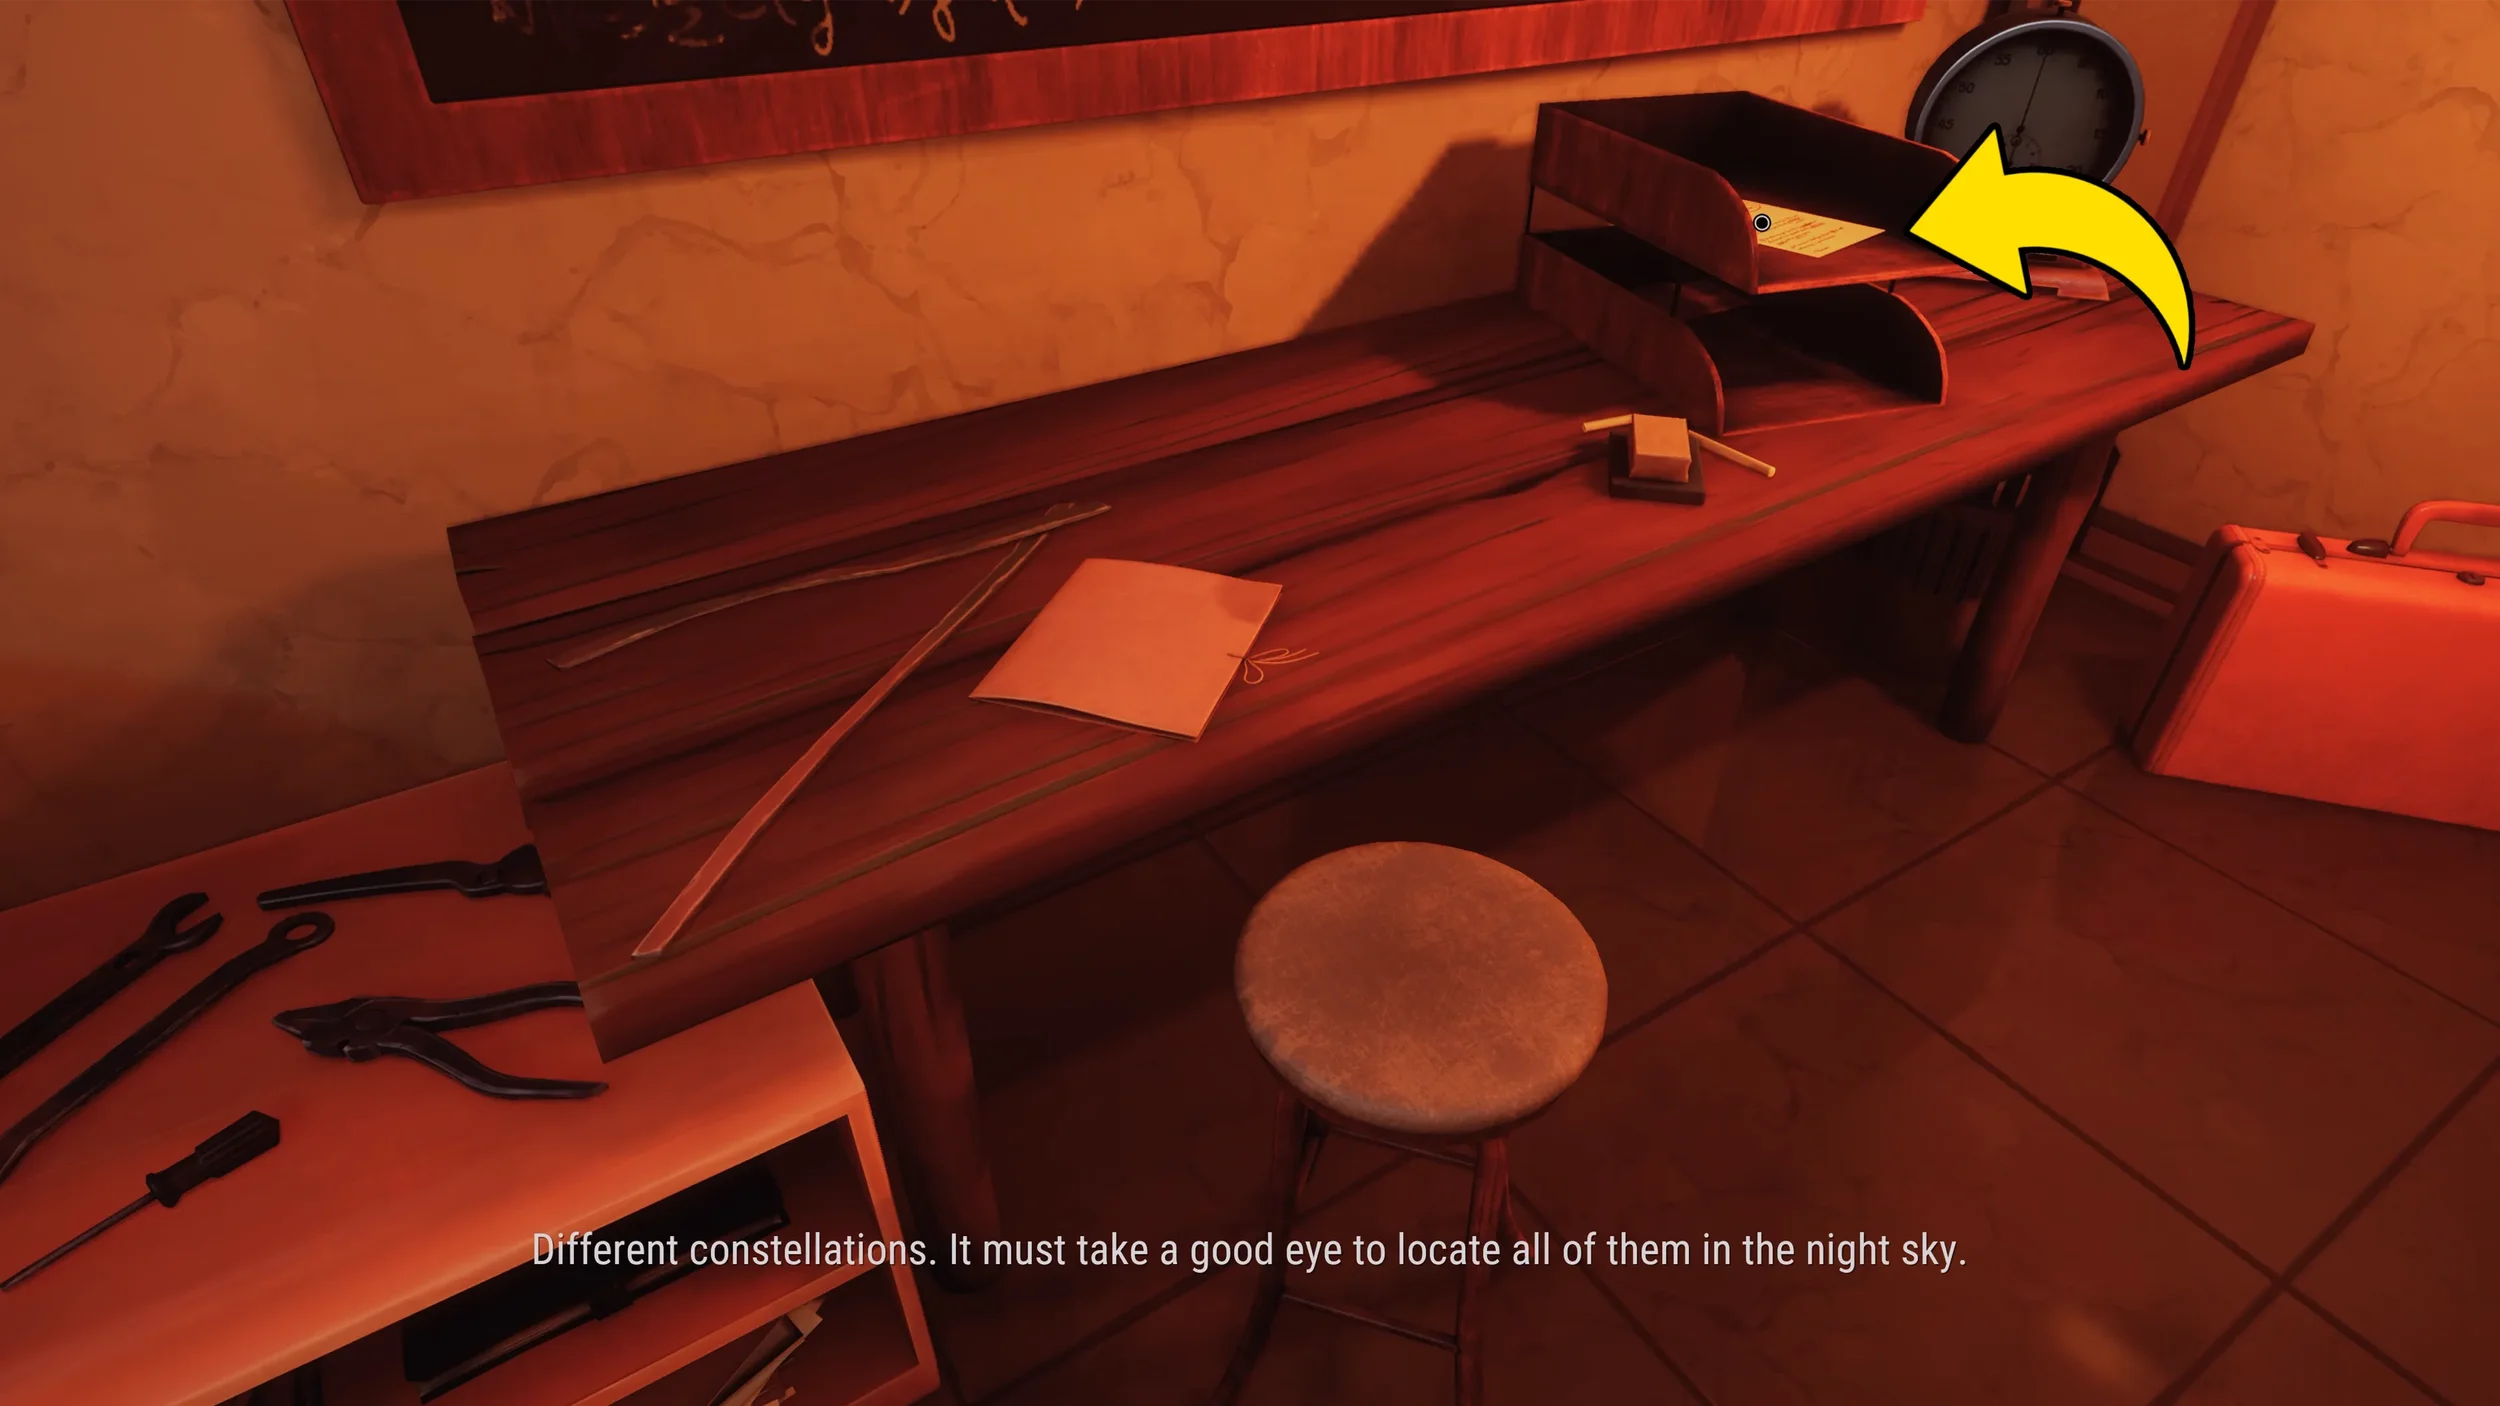
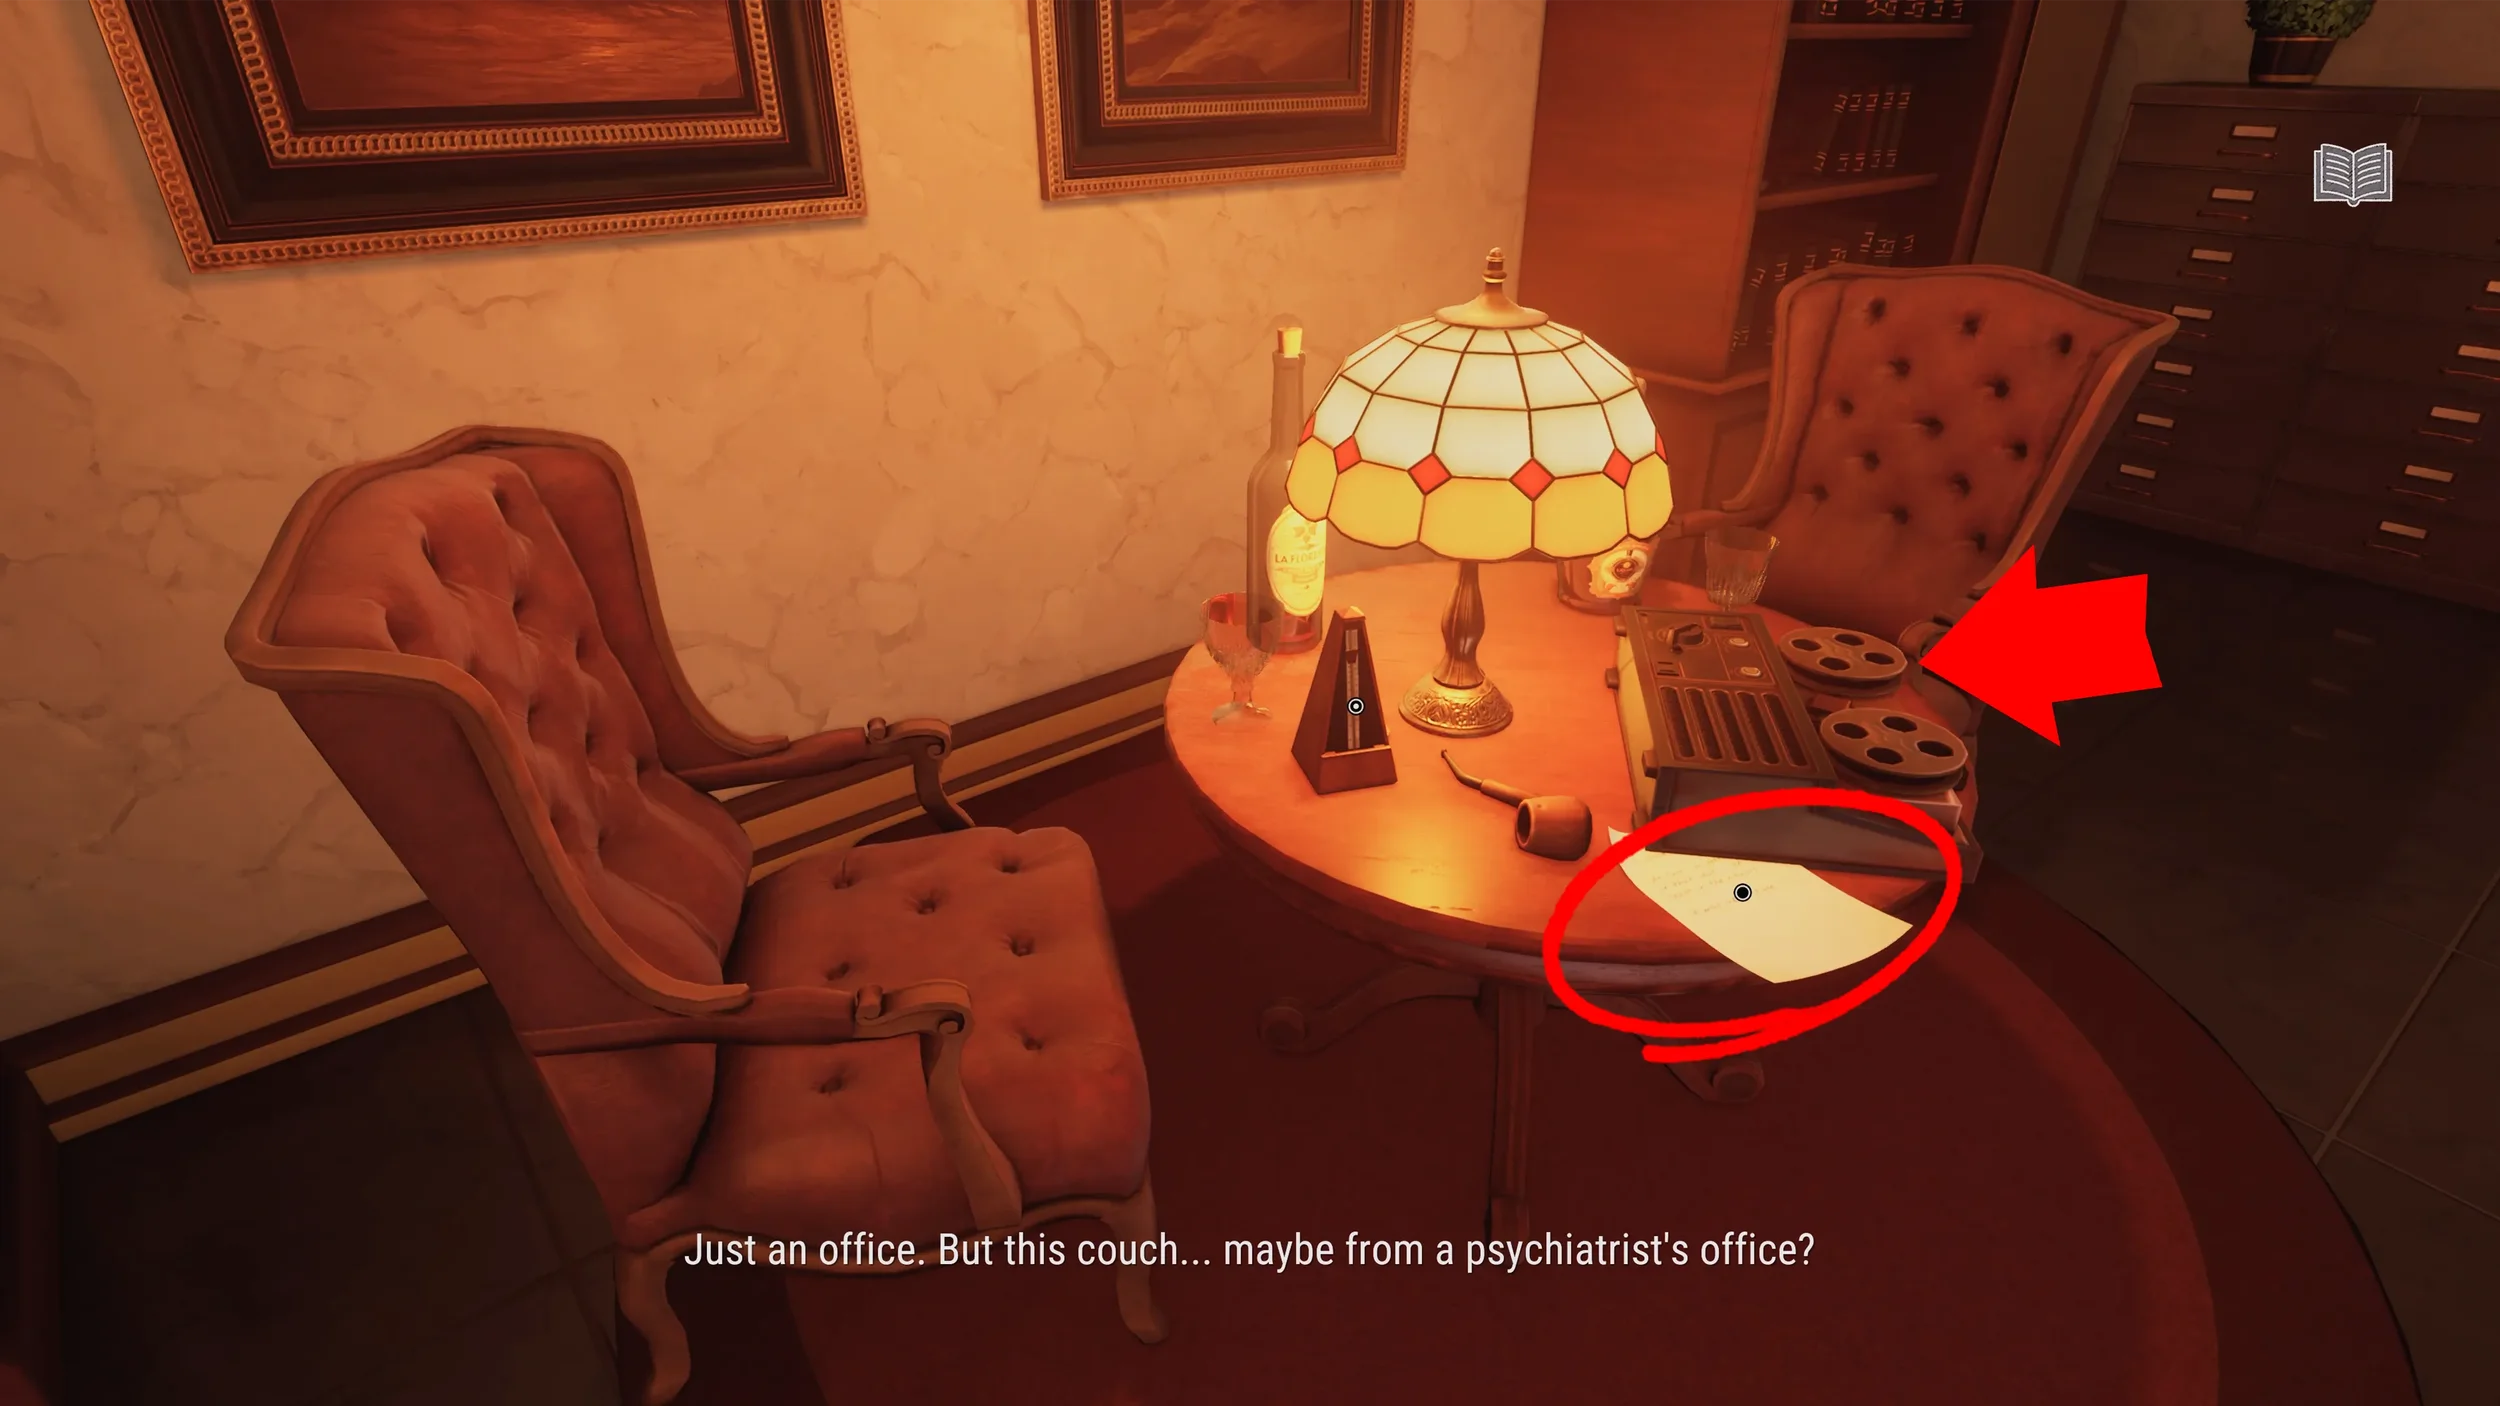
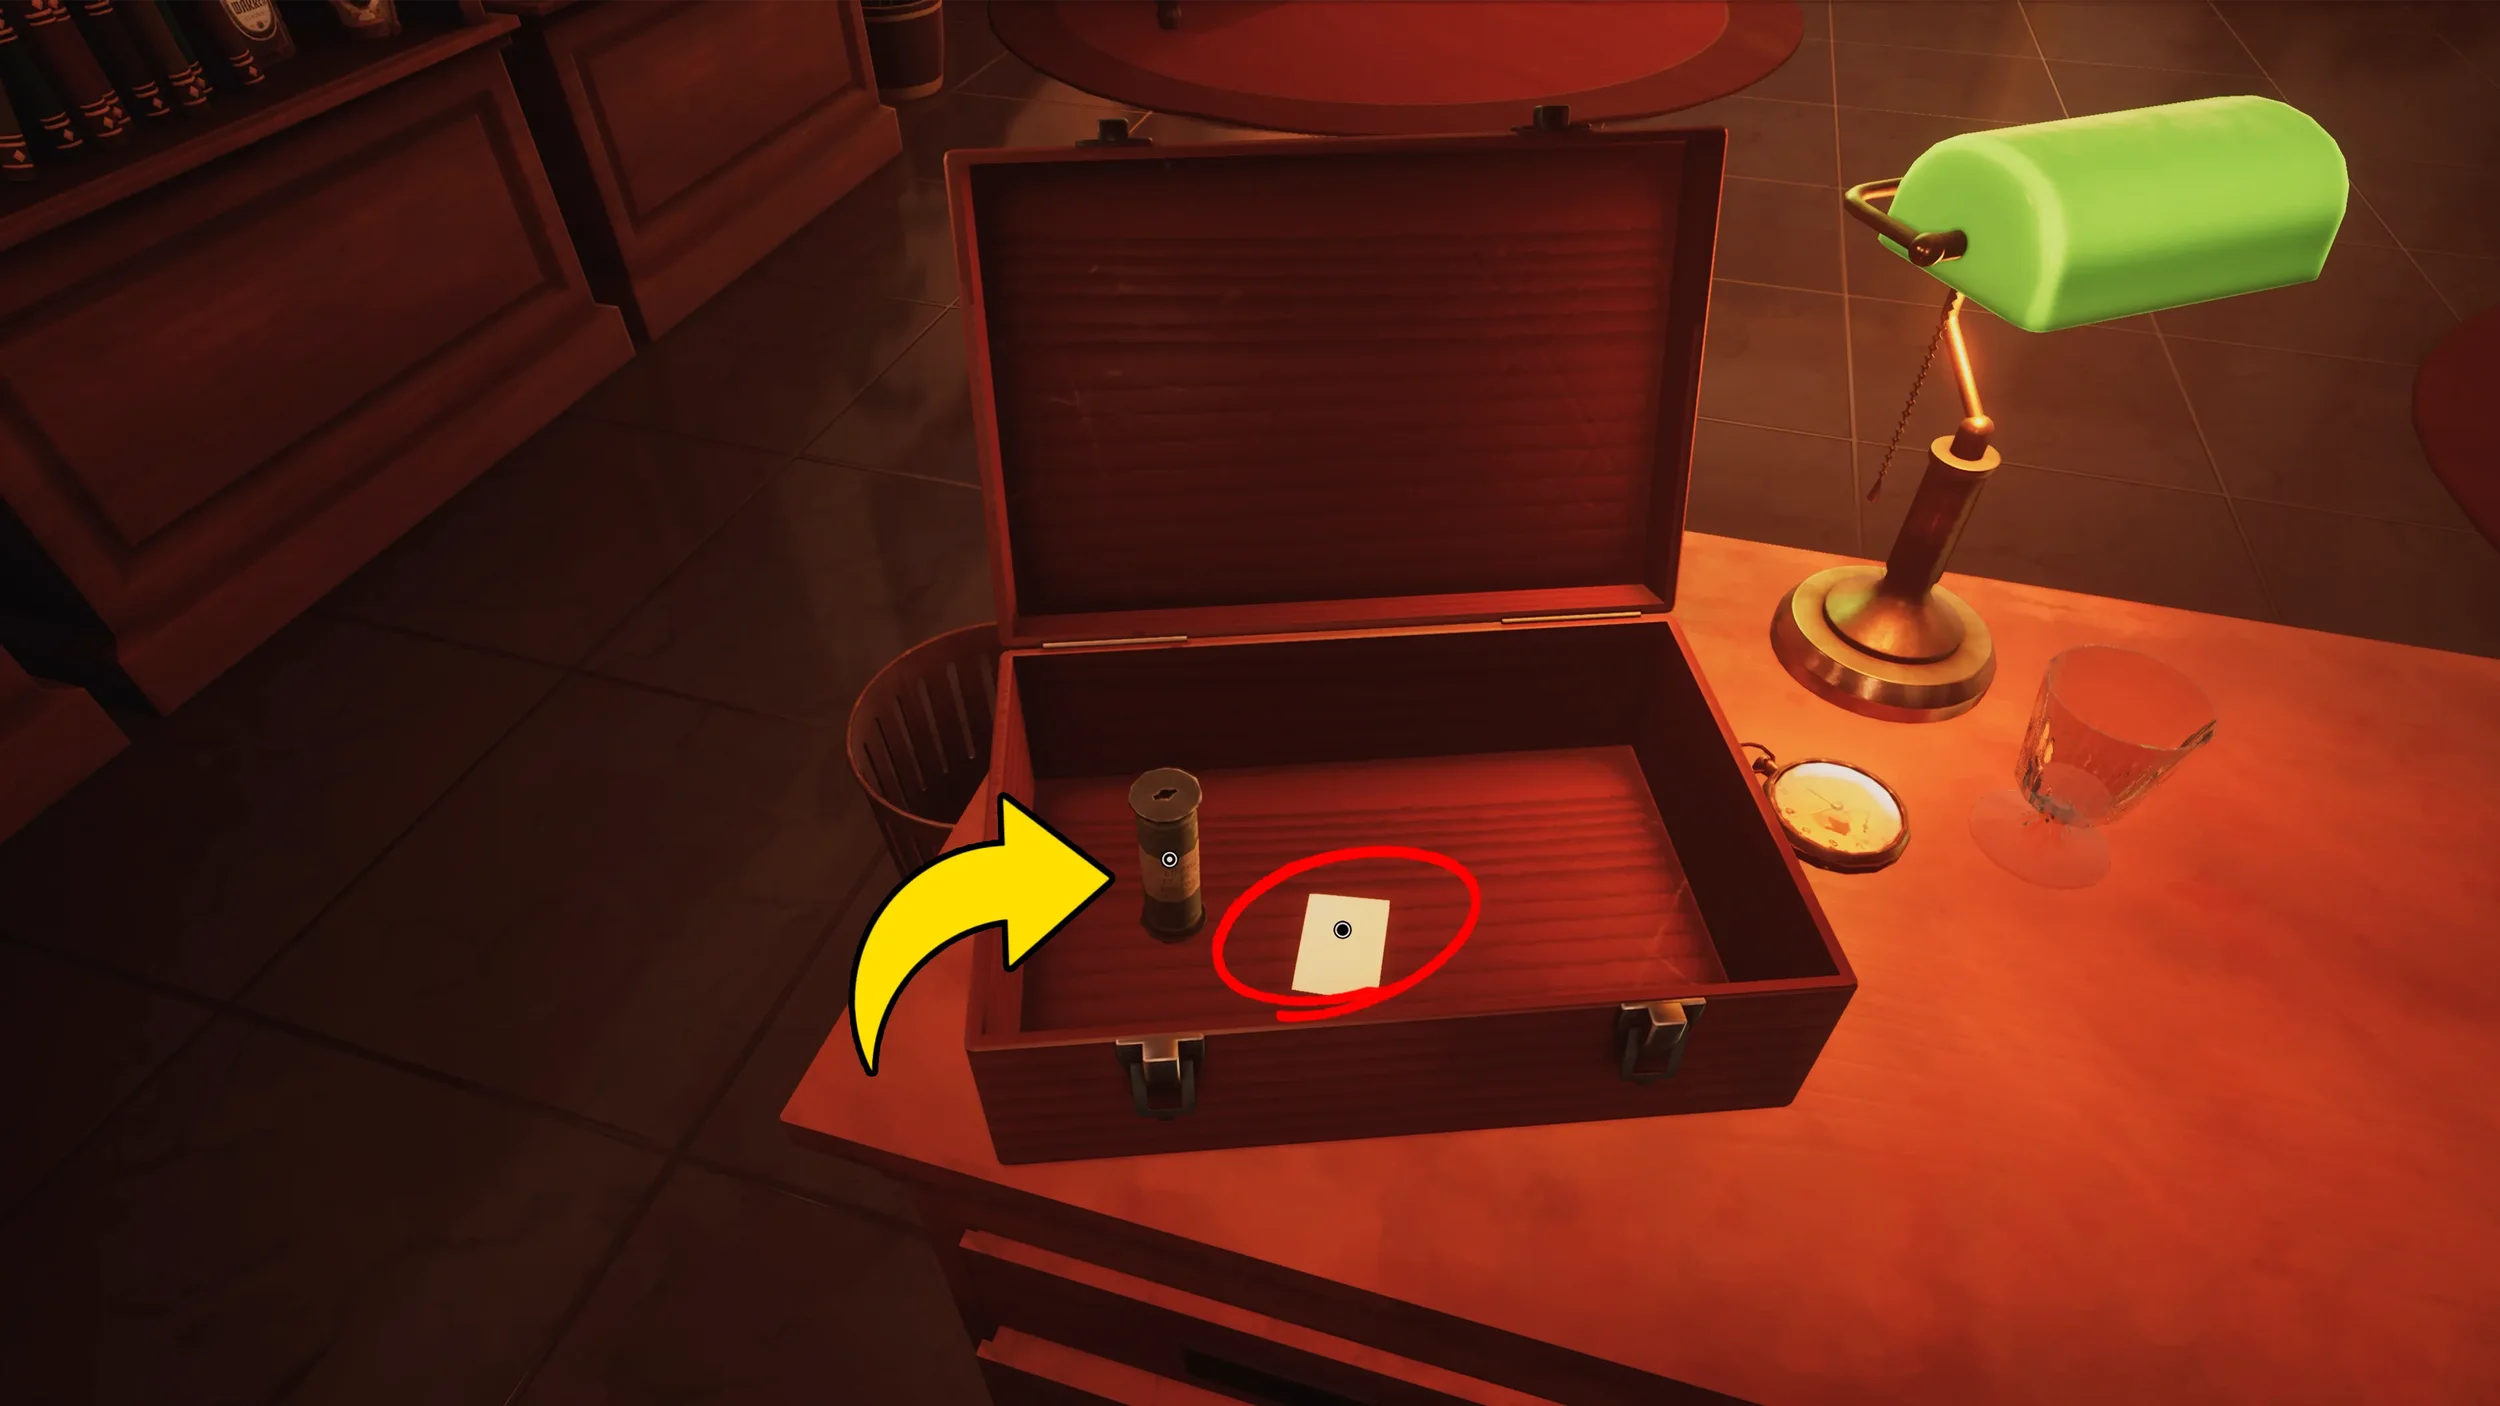
You can now exit the Dilettante’s Office and go into the the room to its left, this is the Psychiatrist’s Office. On the table with the metronome there are 2 clues, the piece of paper and the old tape recorder.
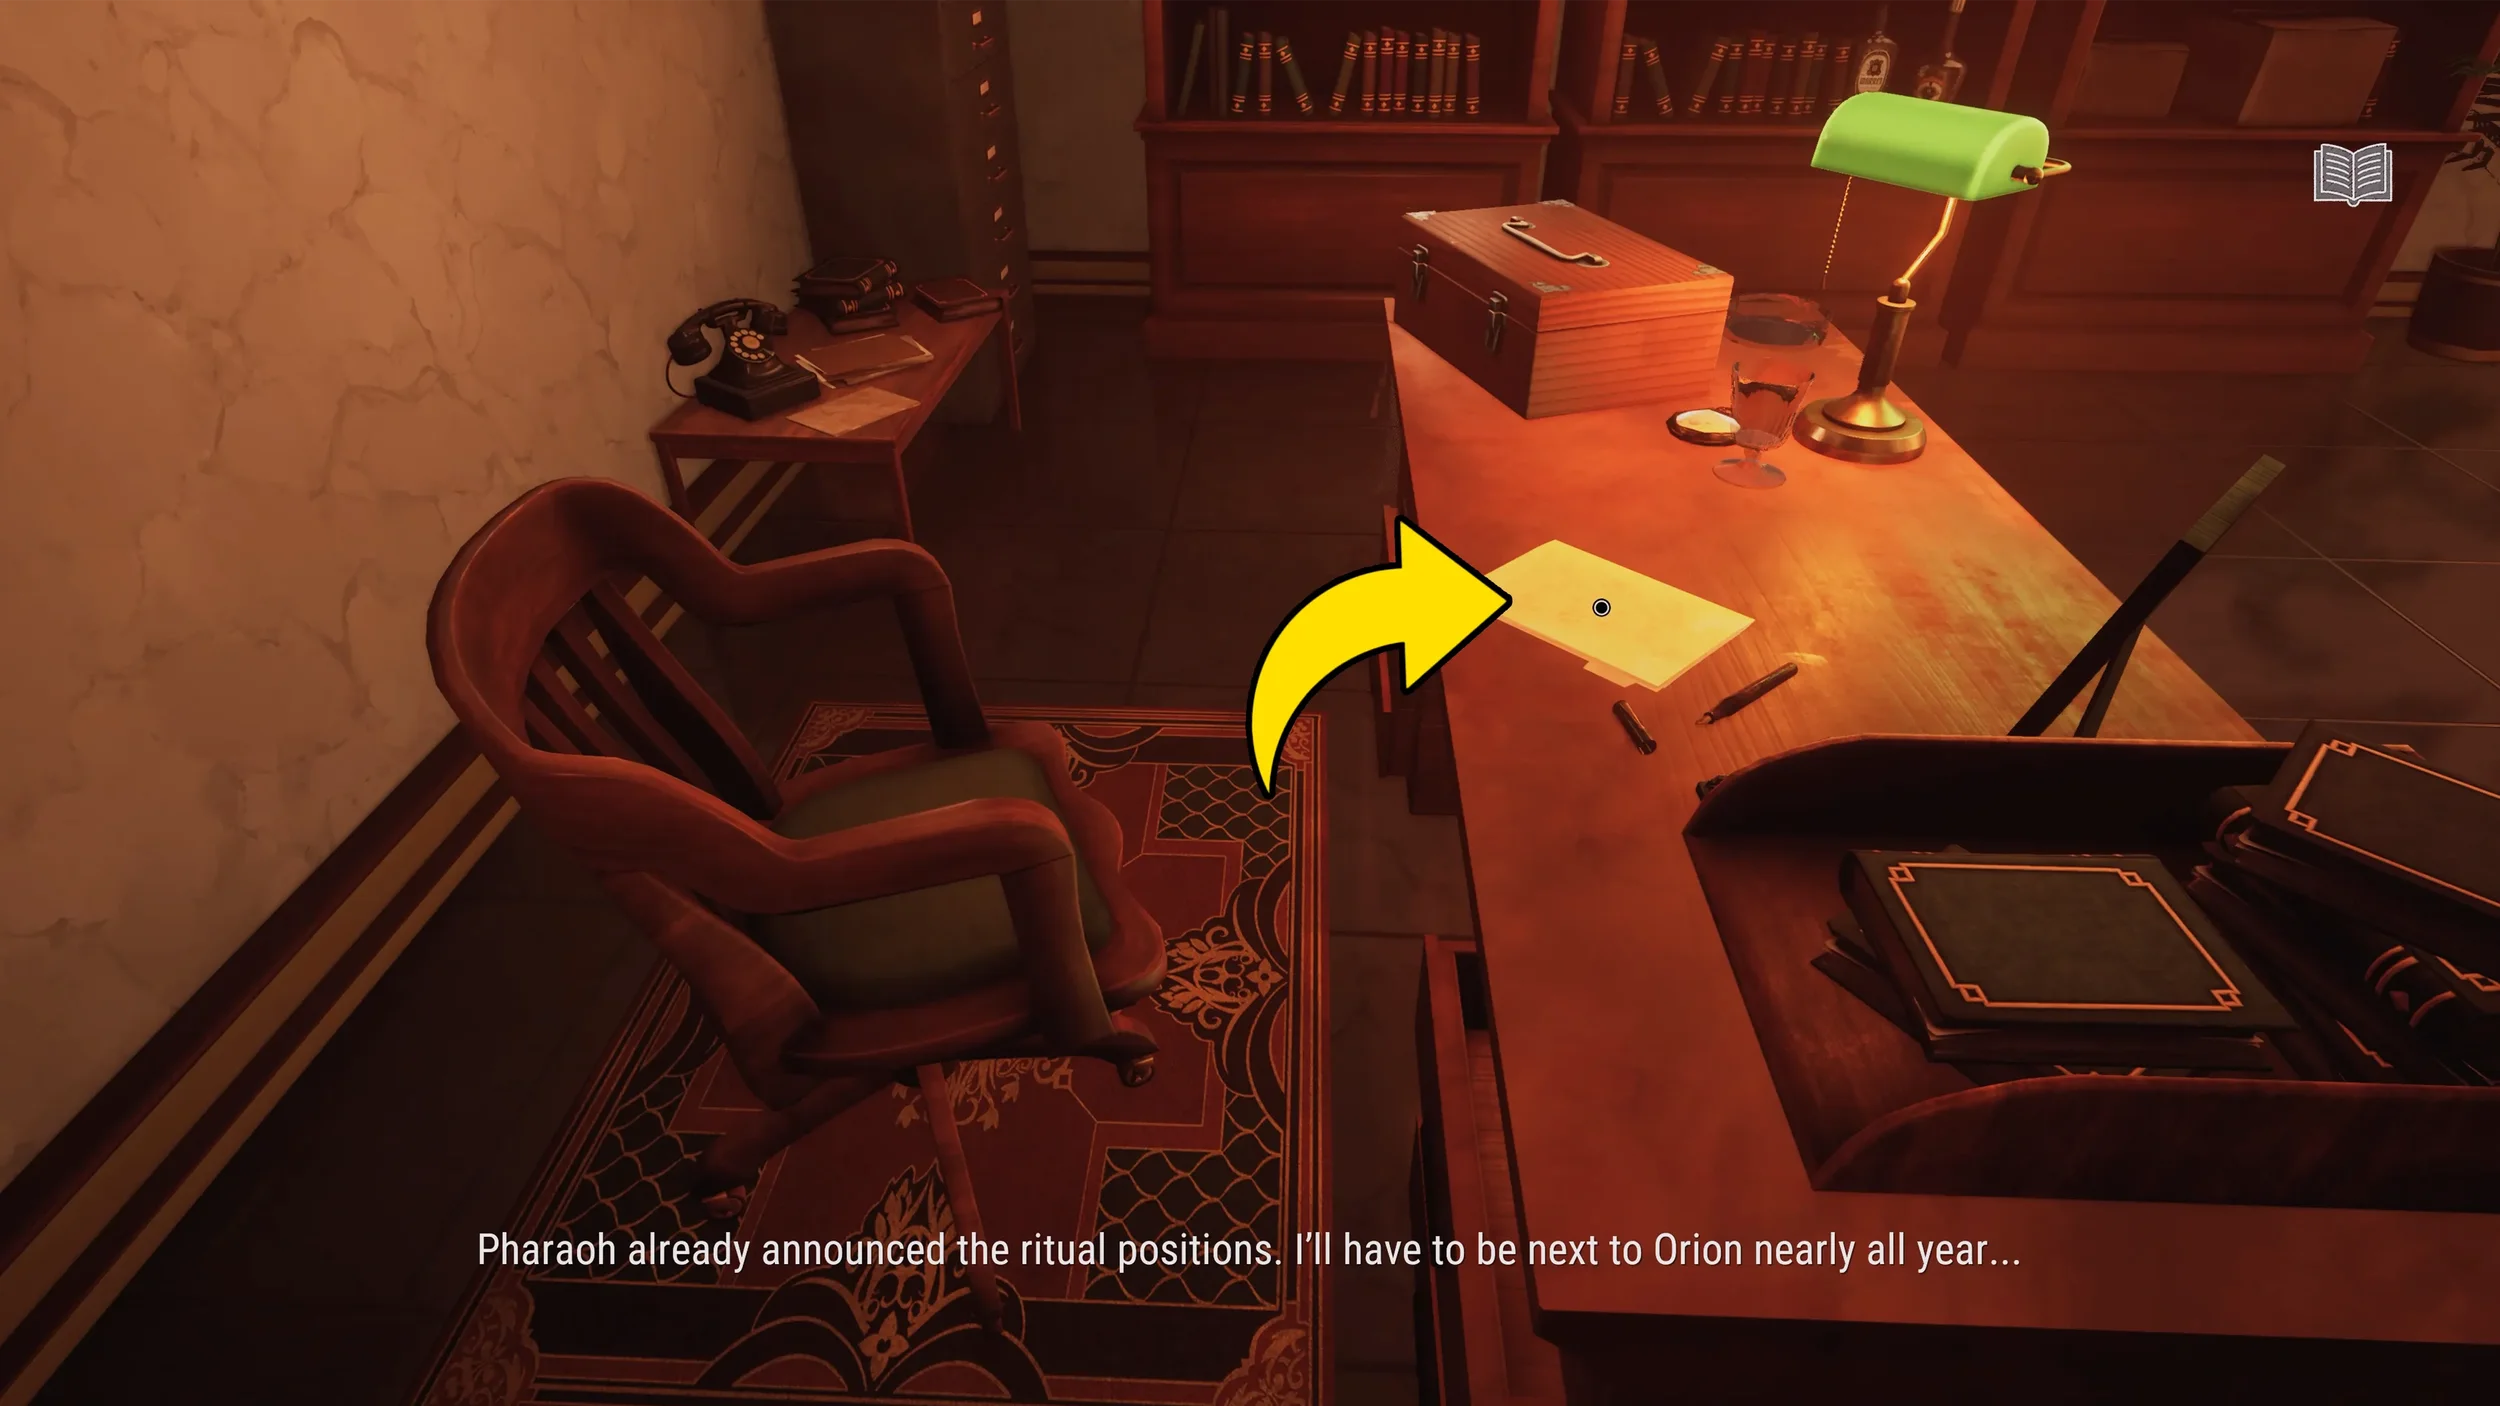
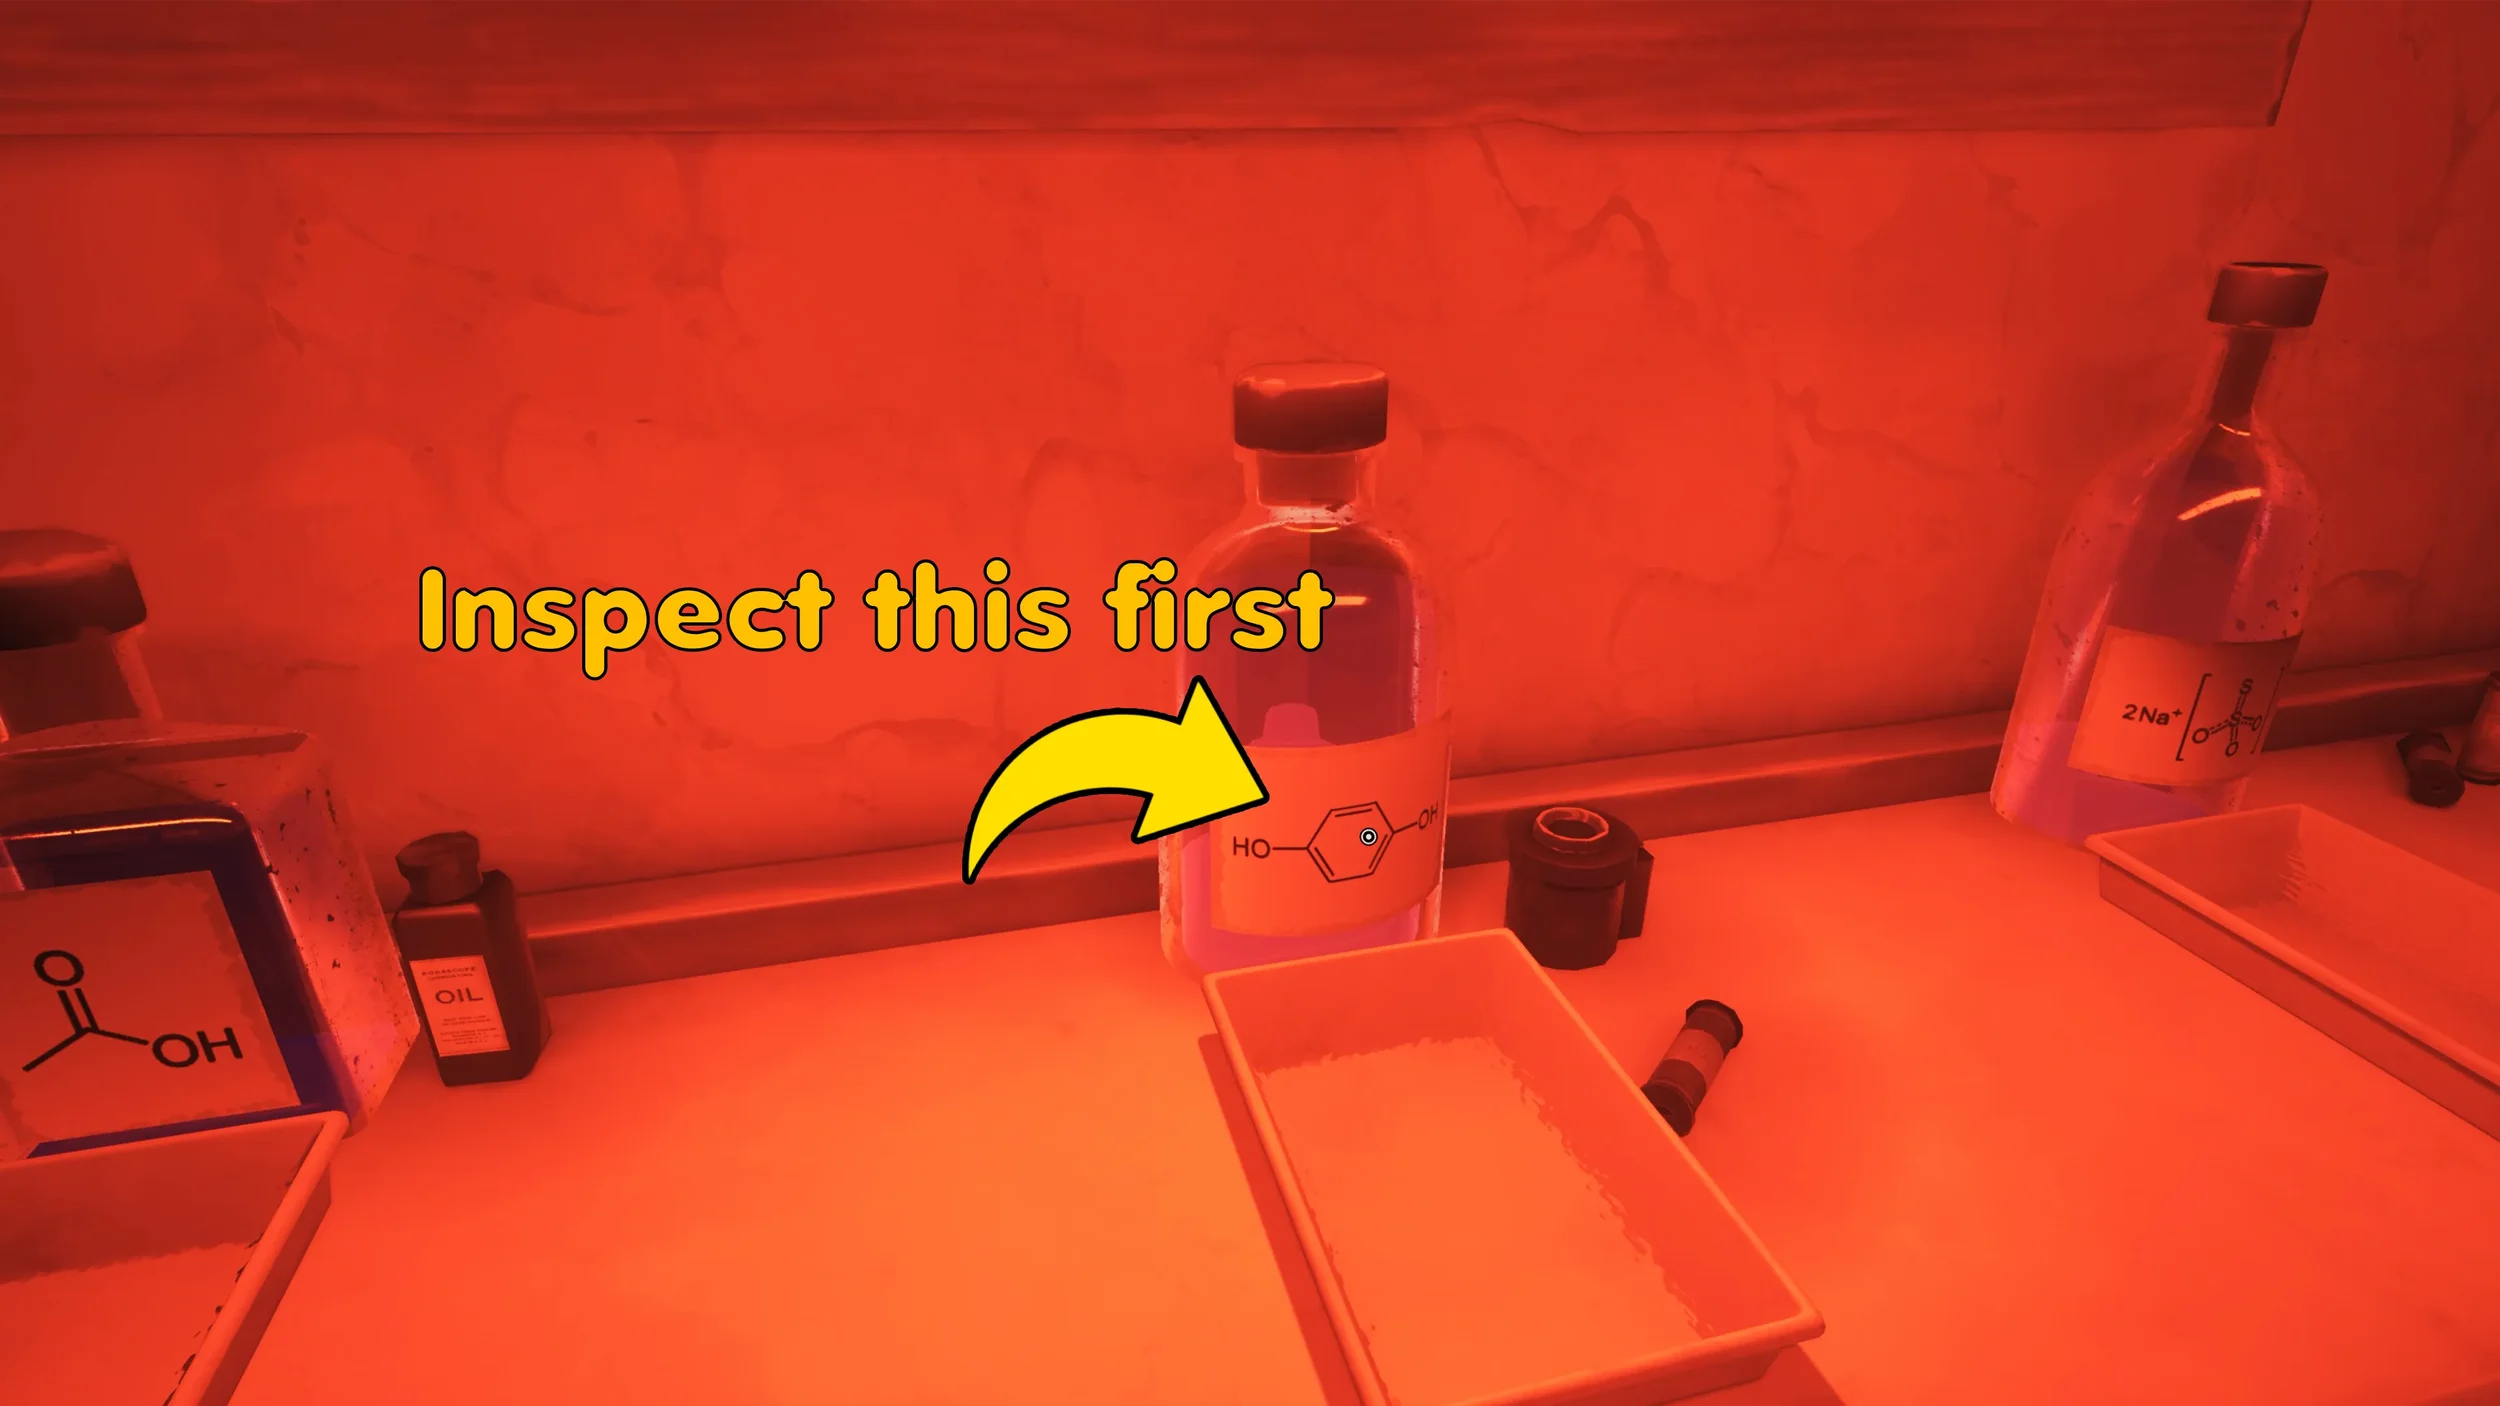
On the main desk you will find another piece of paper that is also a clue, and a small box, open the box to find another clue inside along with a undeveloped film which you also need to take with you for the next puzzle.
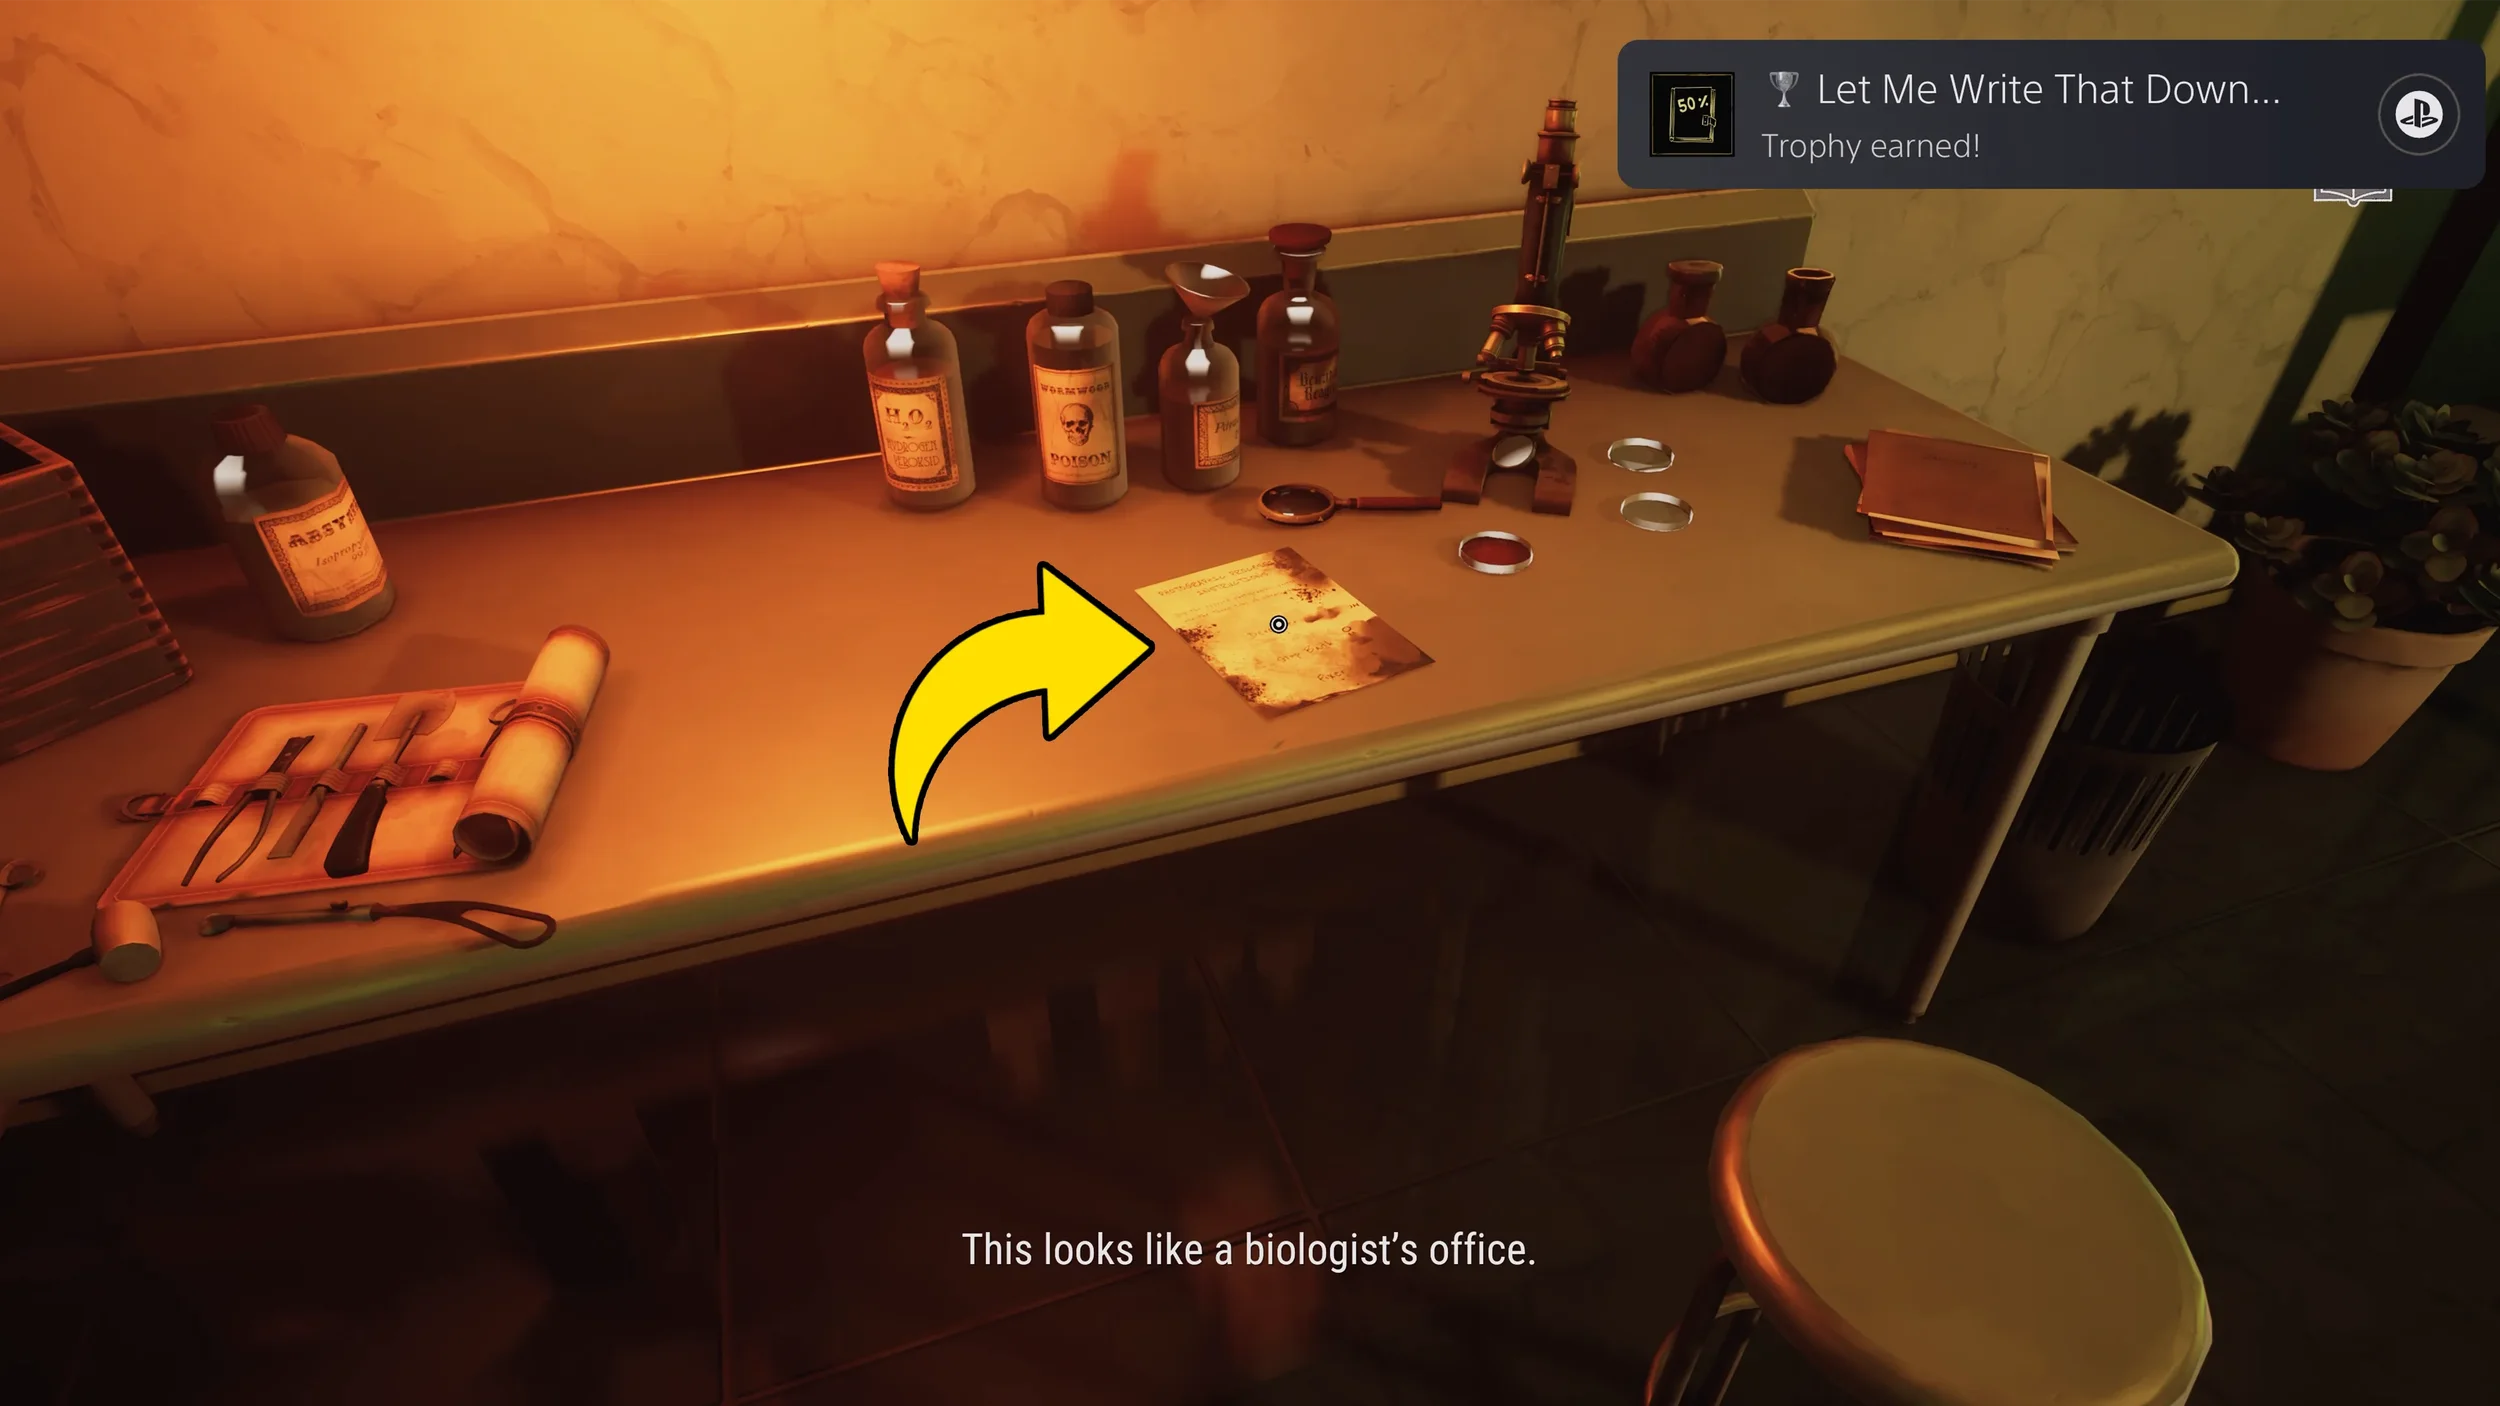
 “Let Me Write That Down” Trophy for finding 50% of all clues in the game.
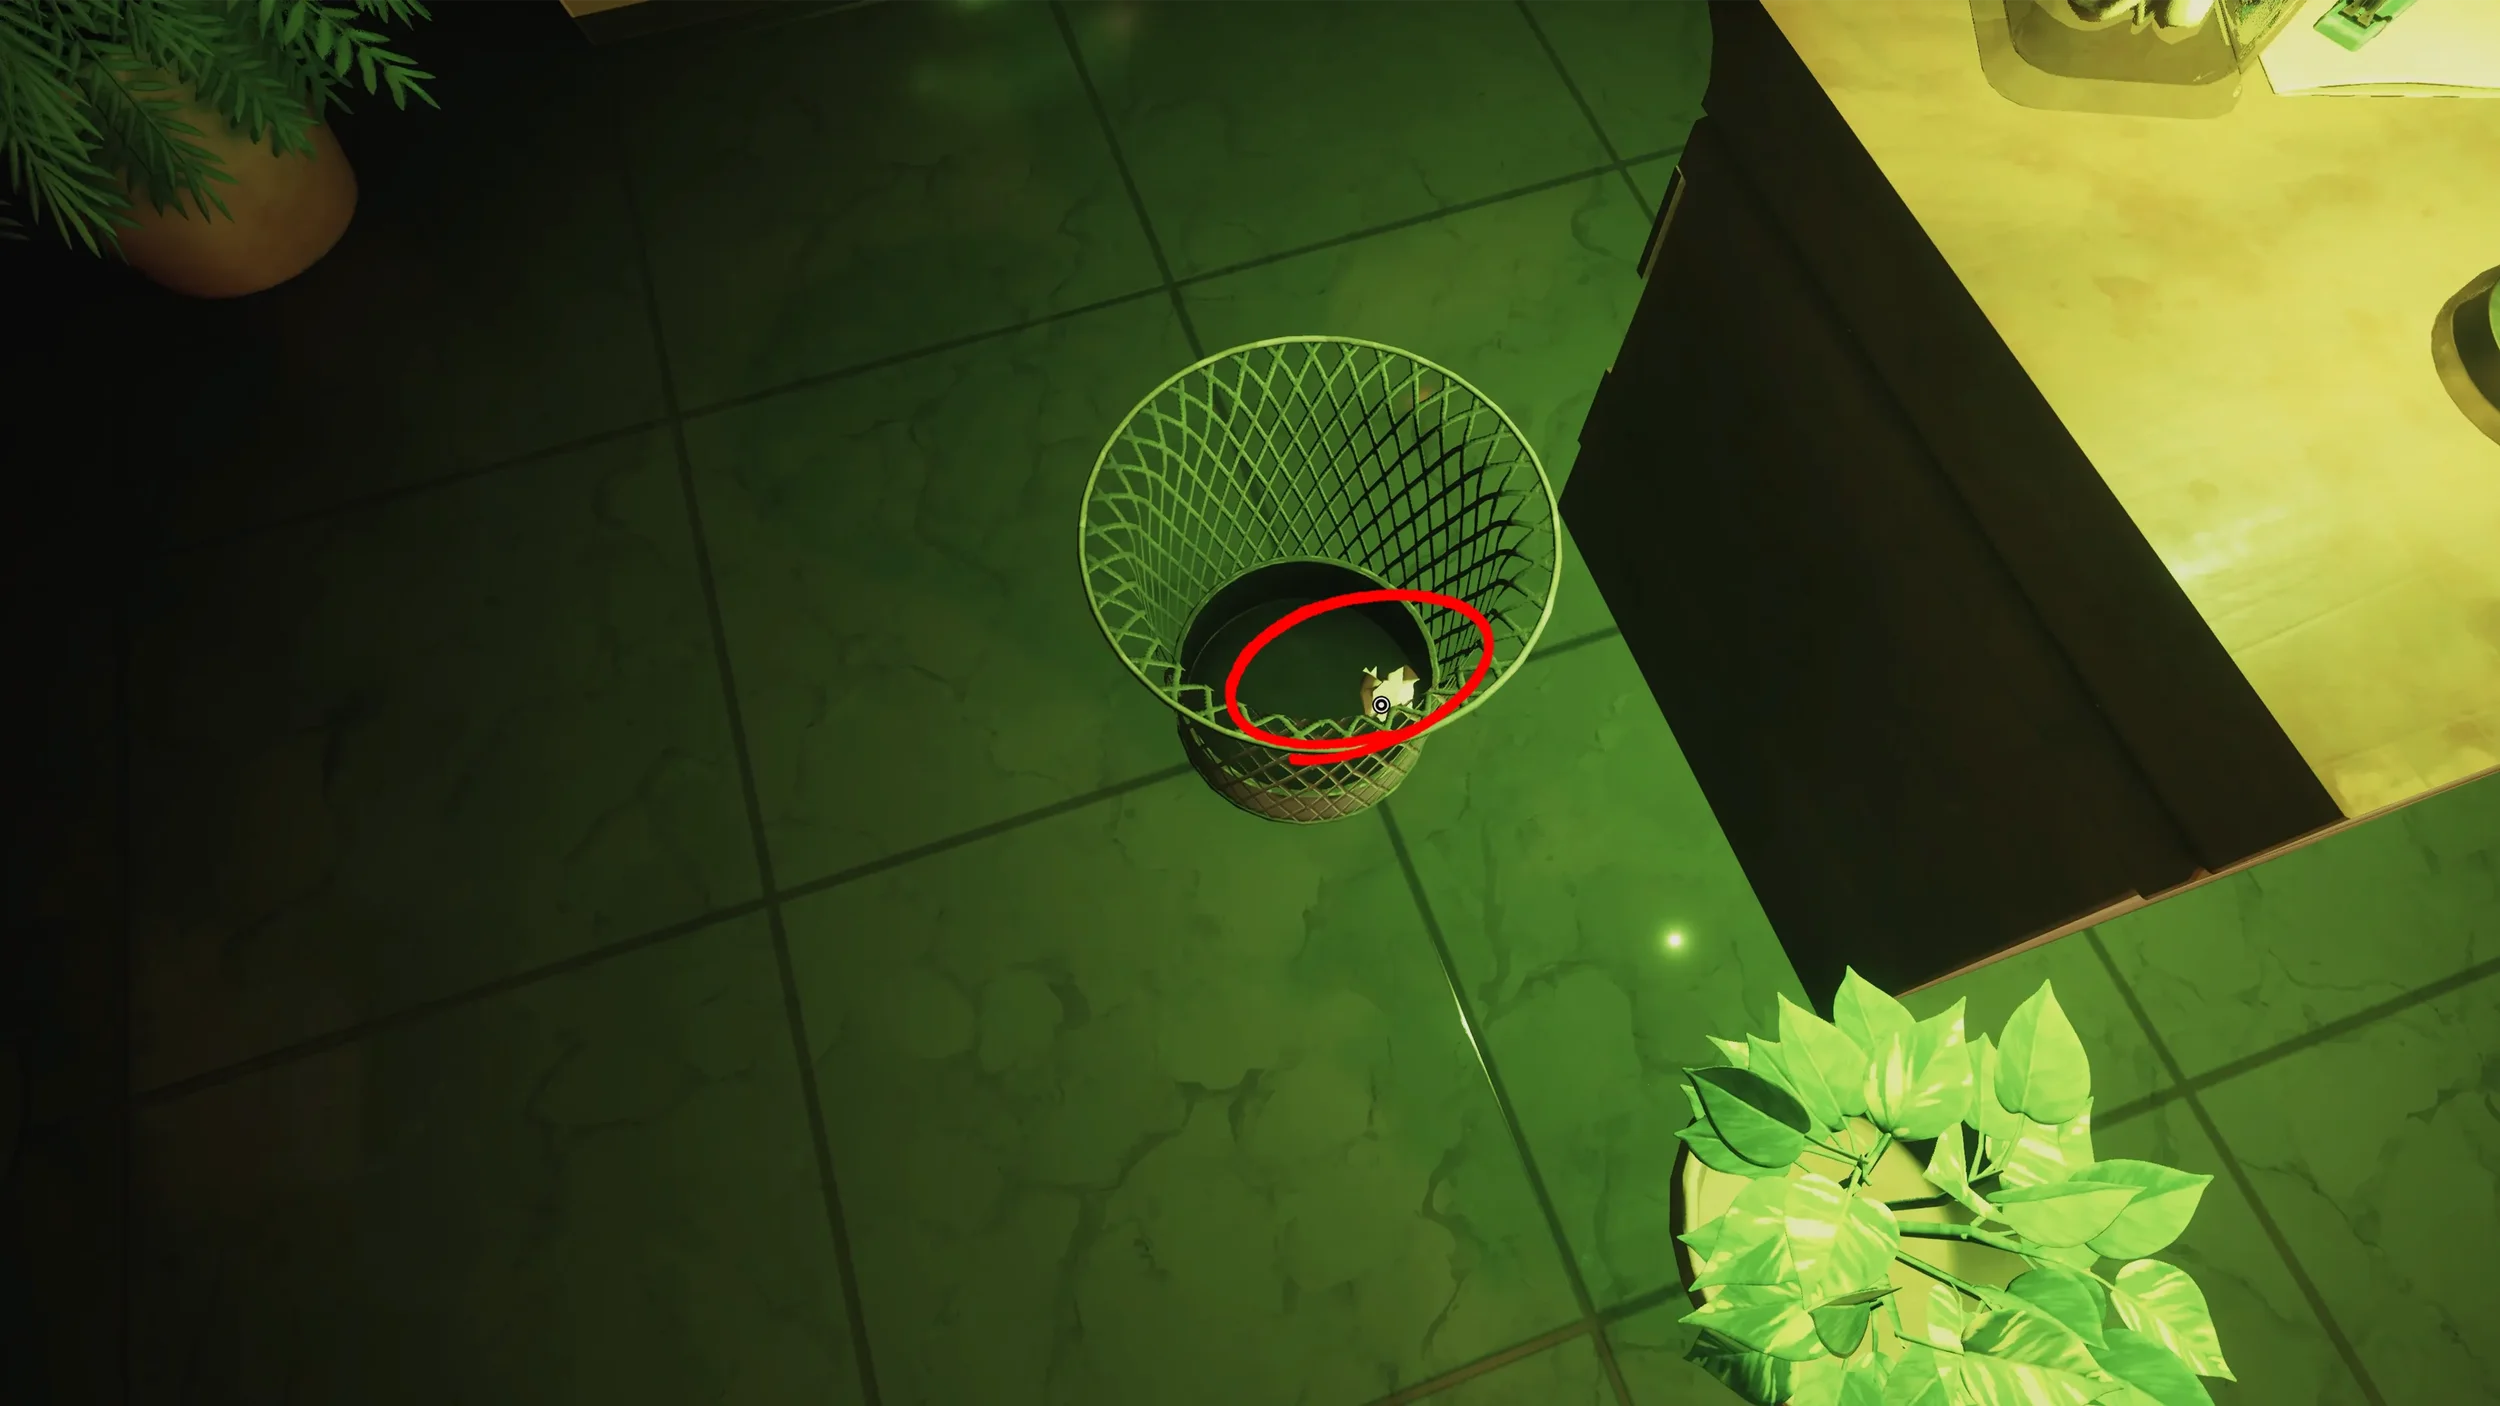
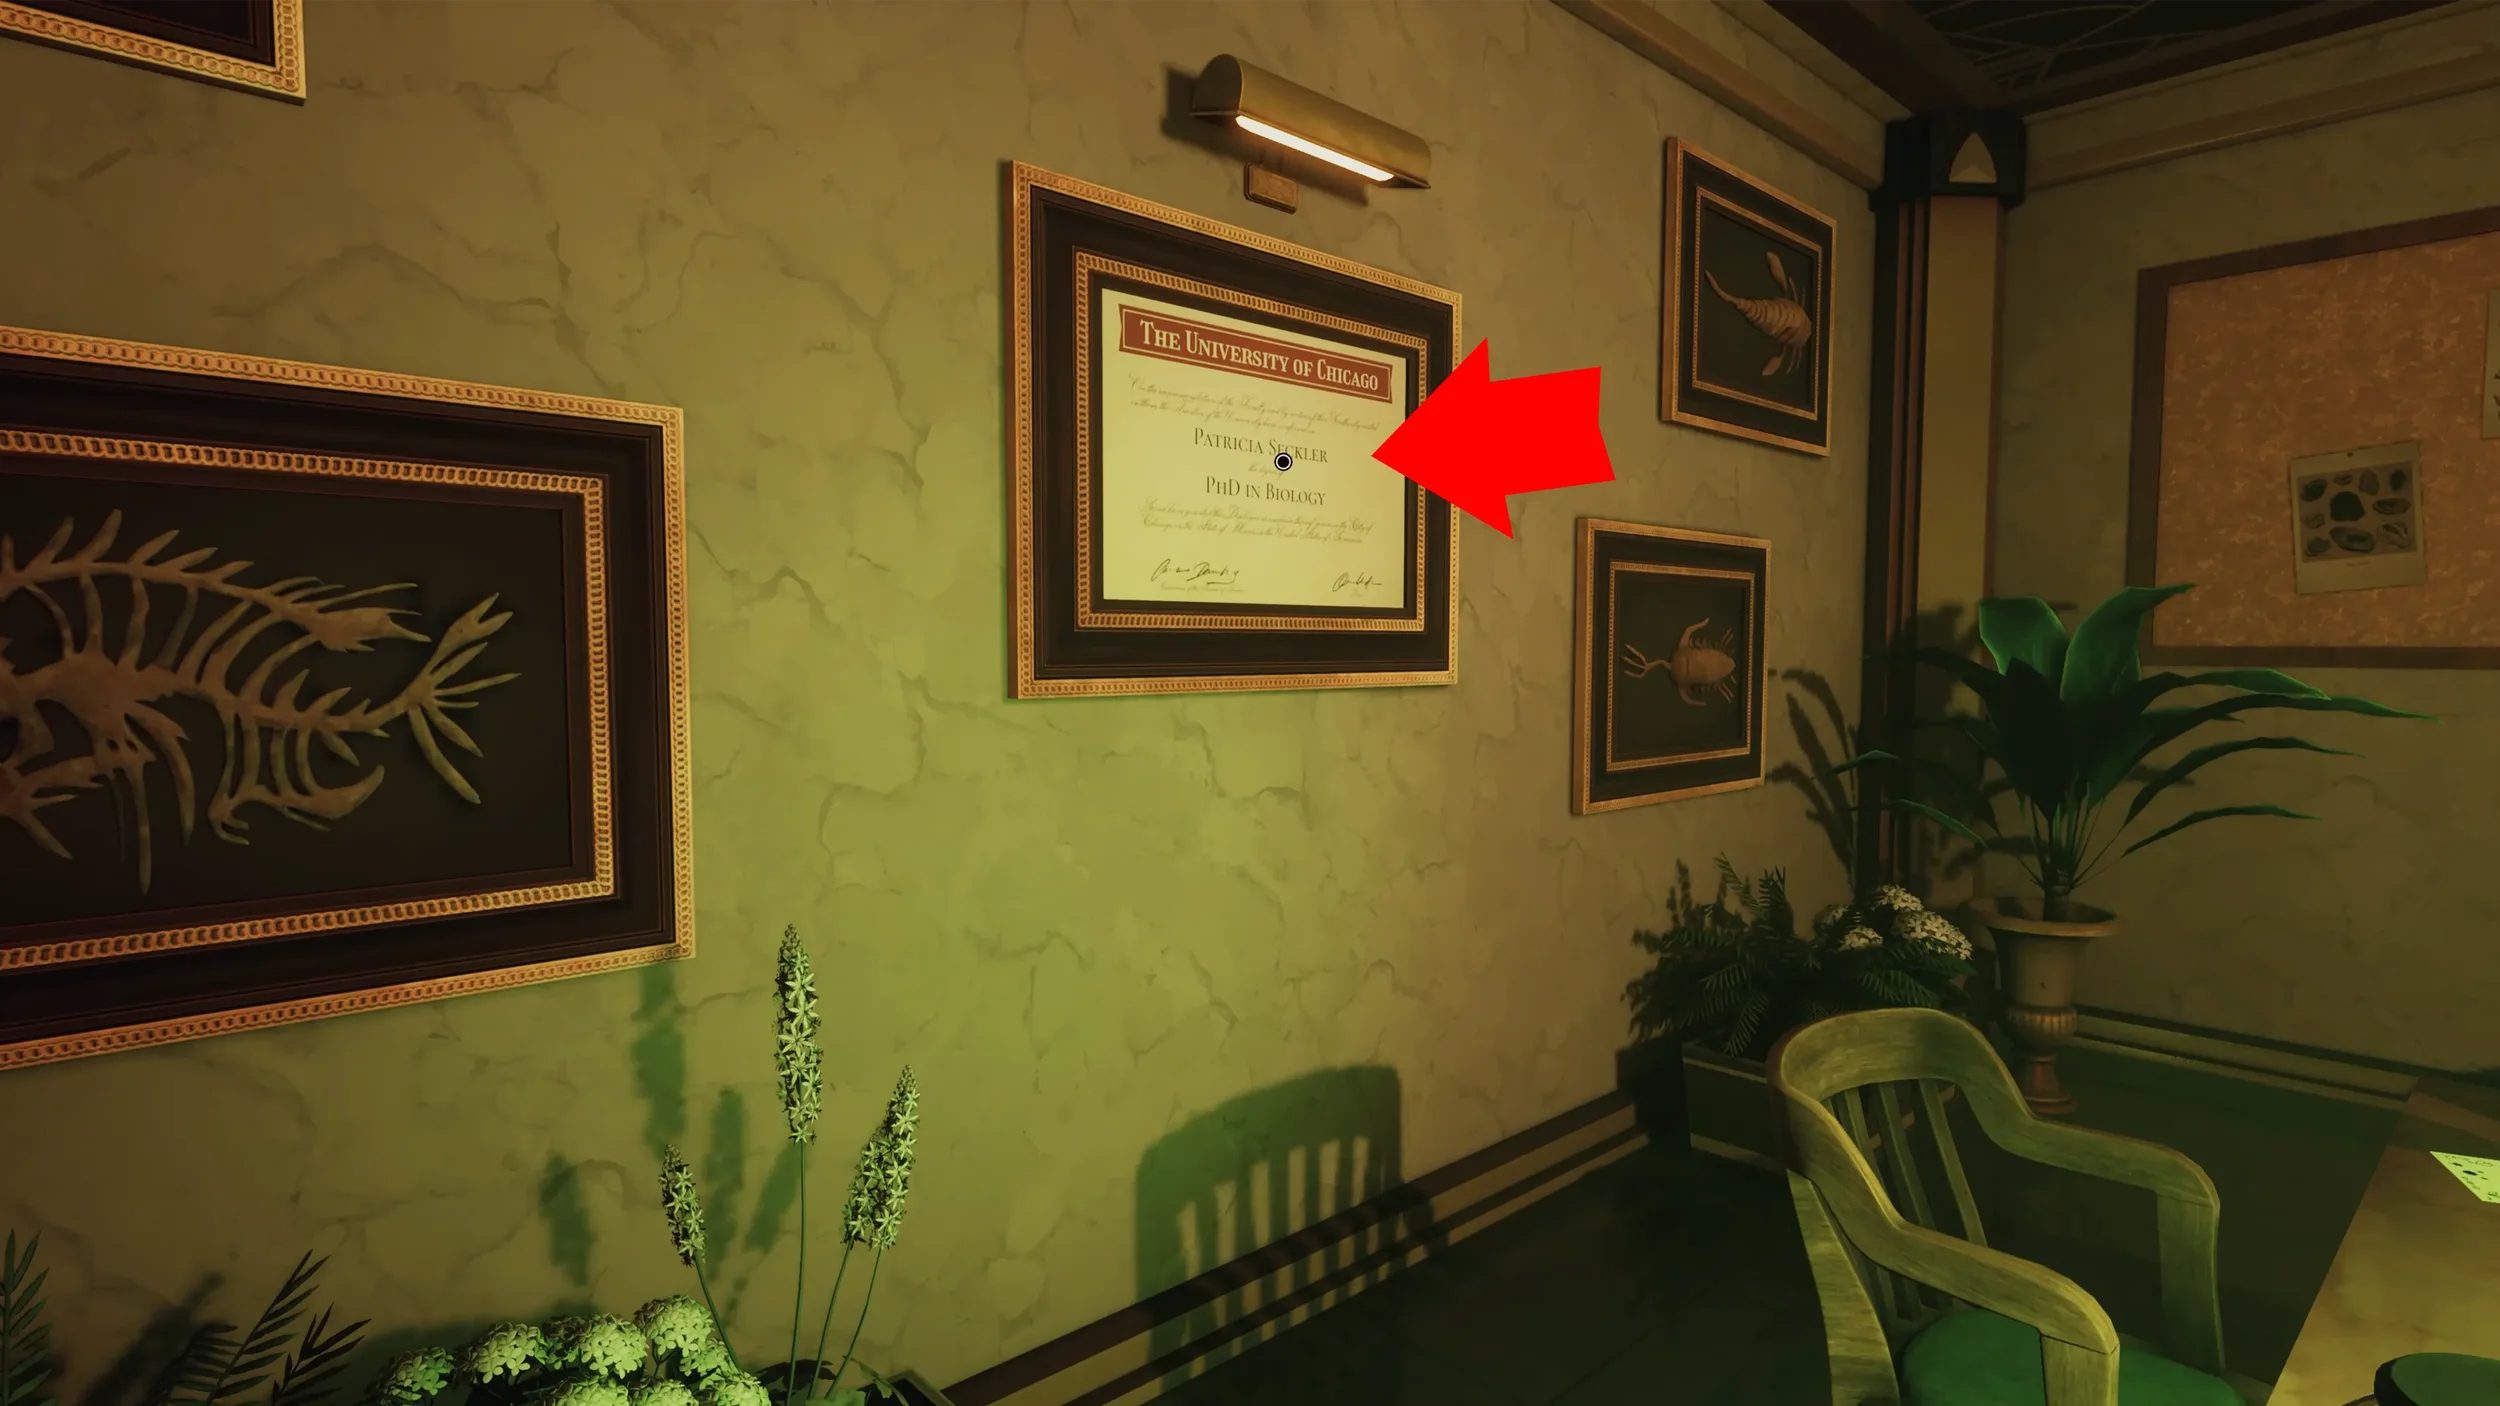
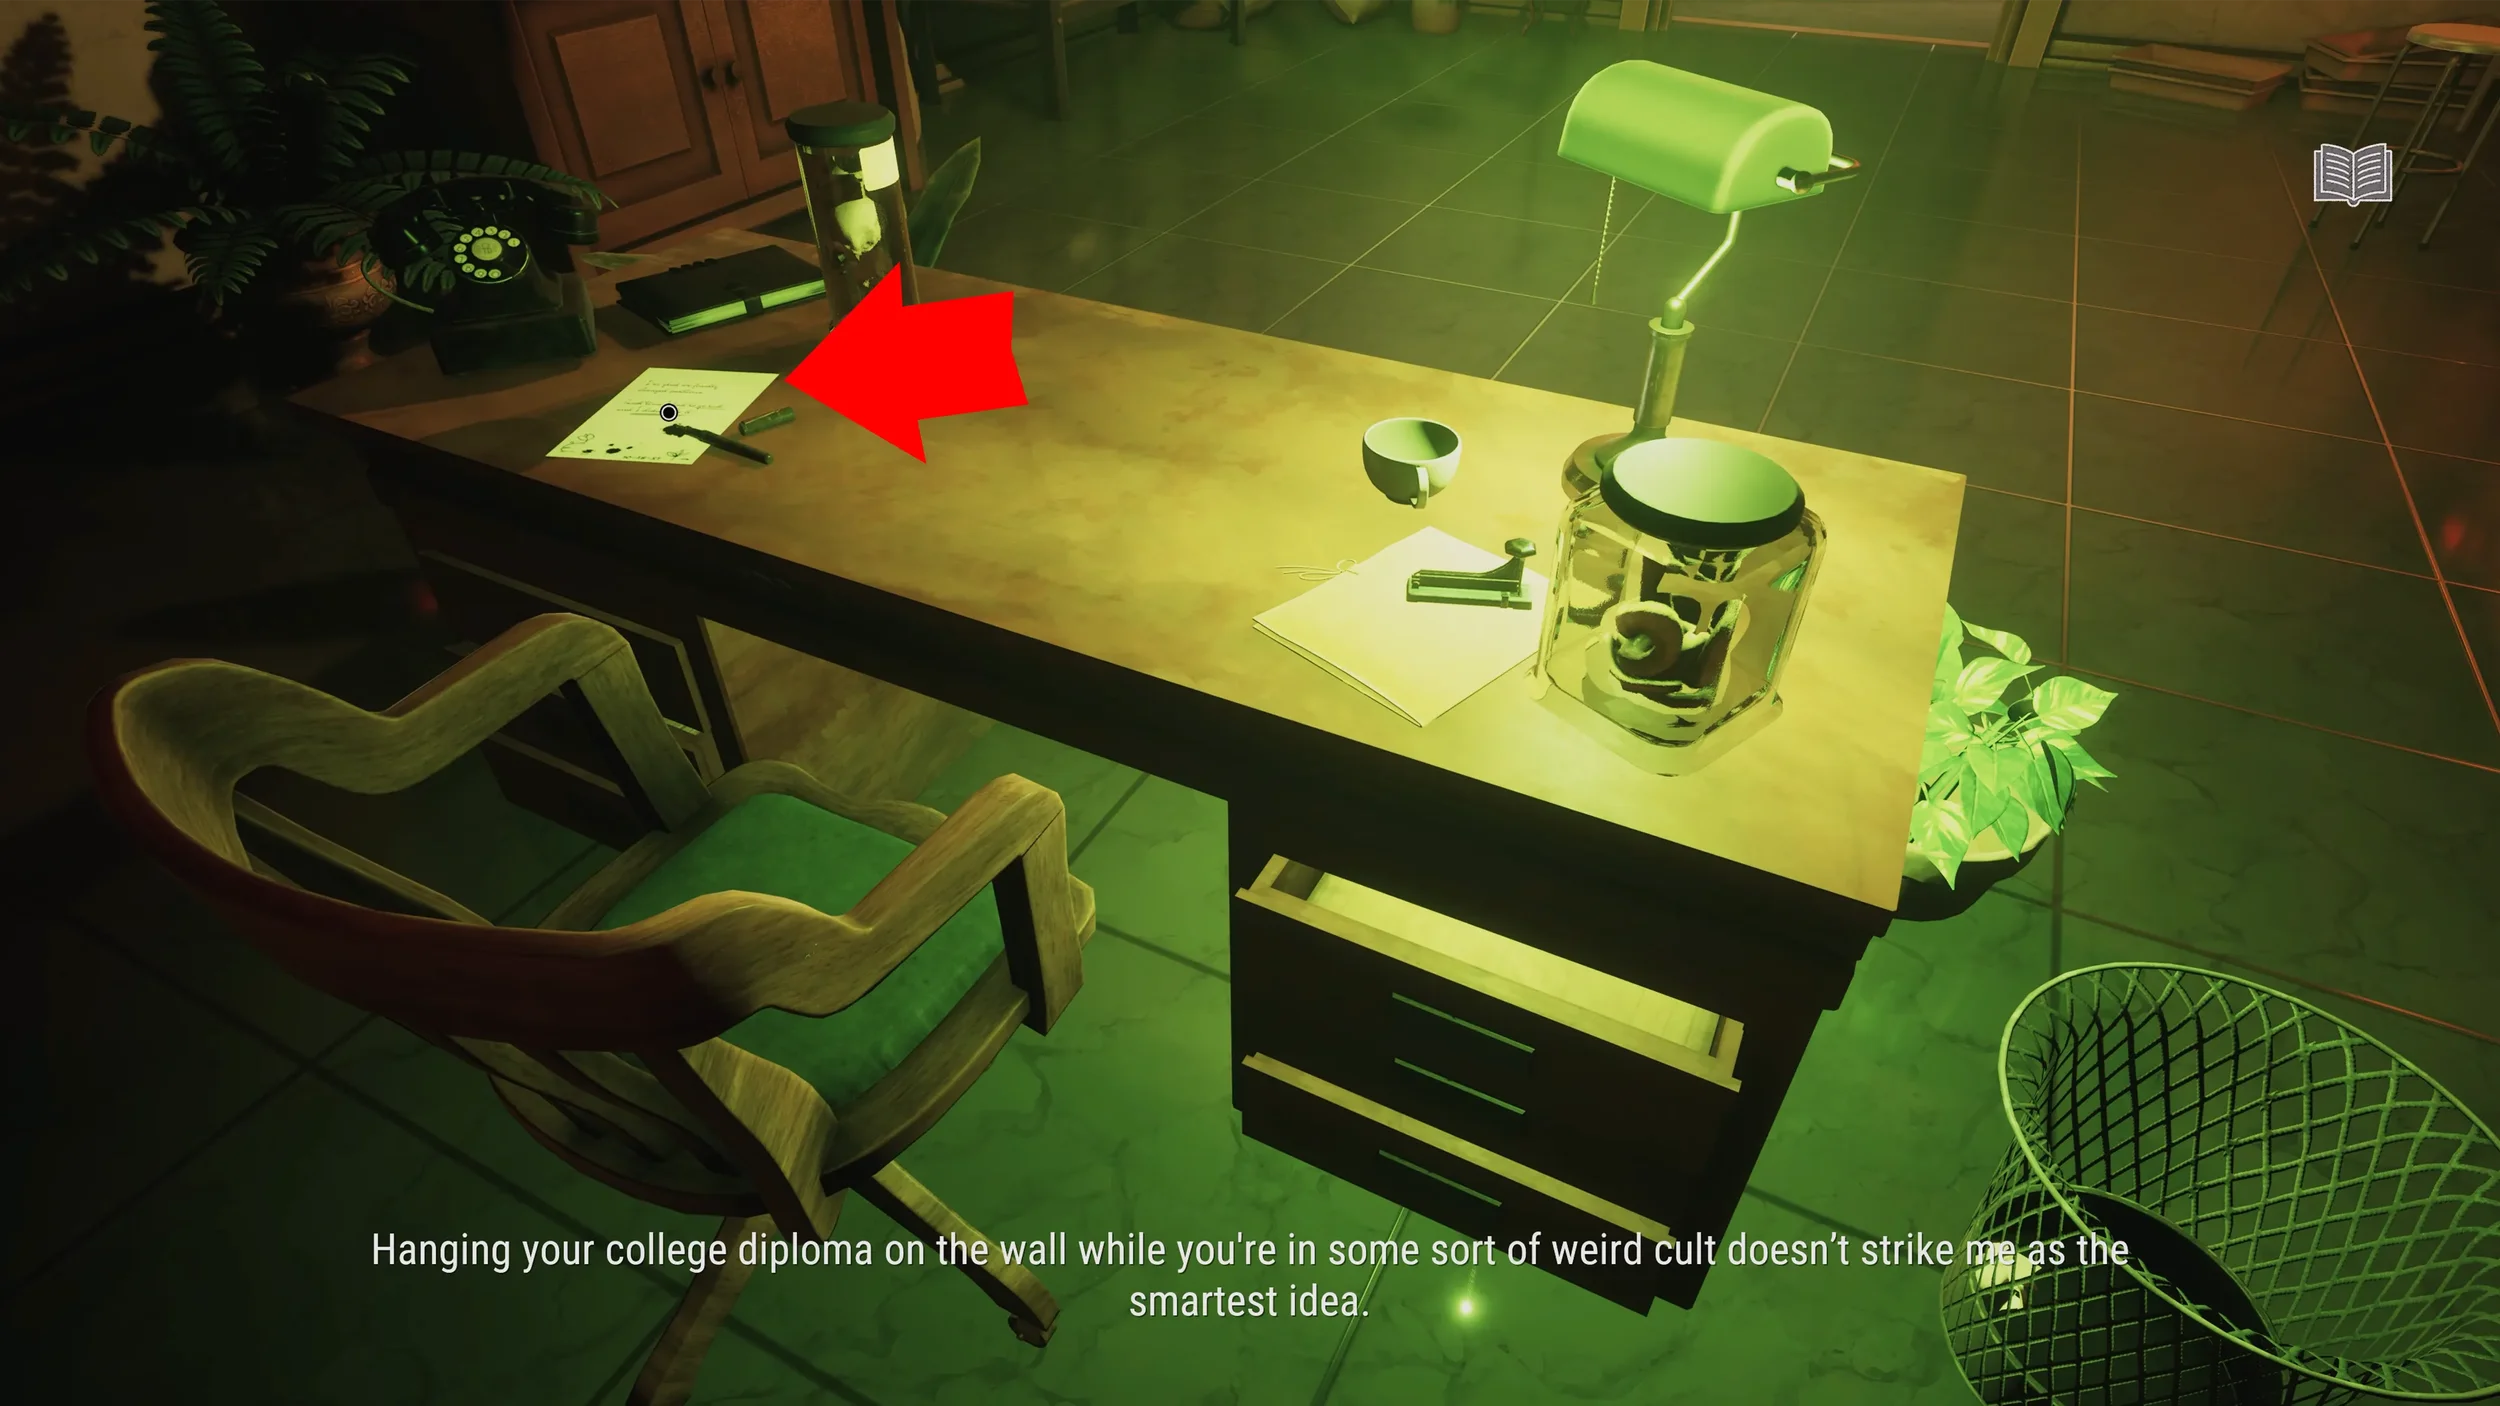
On the table to the left as you enter the Office you will find another clue, an old piece of paper. There is another clue in the bin, another on the desk and the diploma on the wall is also a clue.
Once you have inspected all of the clues in this room it is now time to go into the room we skipped before, the Archaeologist’s Office. The reason we left this one for last is because this is where we need to develop the film we got from the Dilettante’s Office earlier.
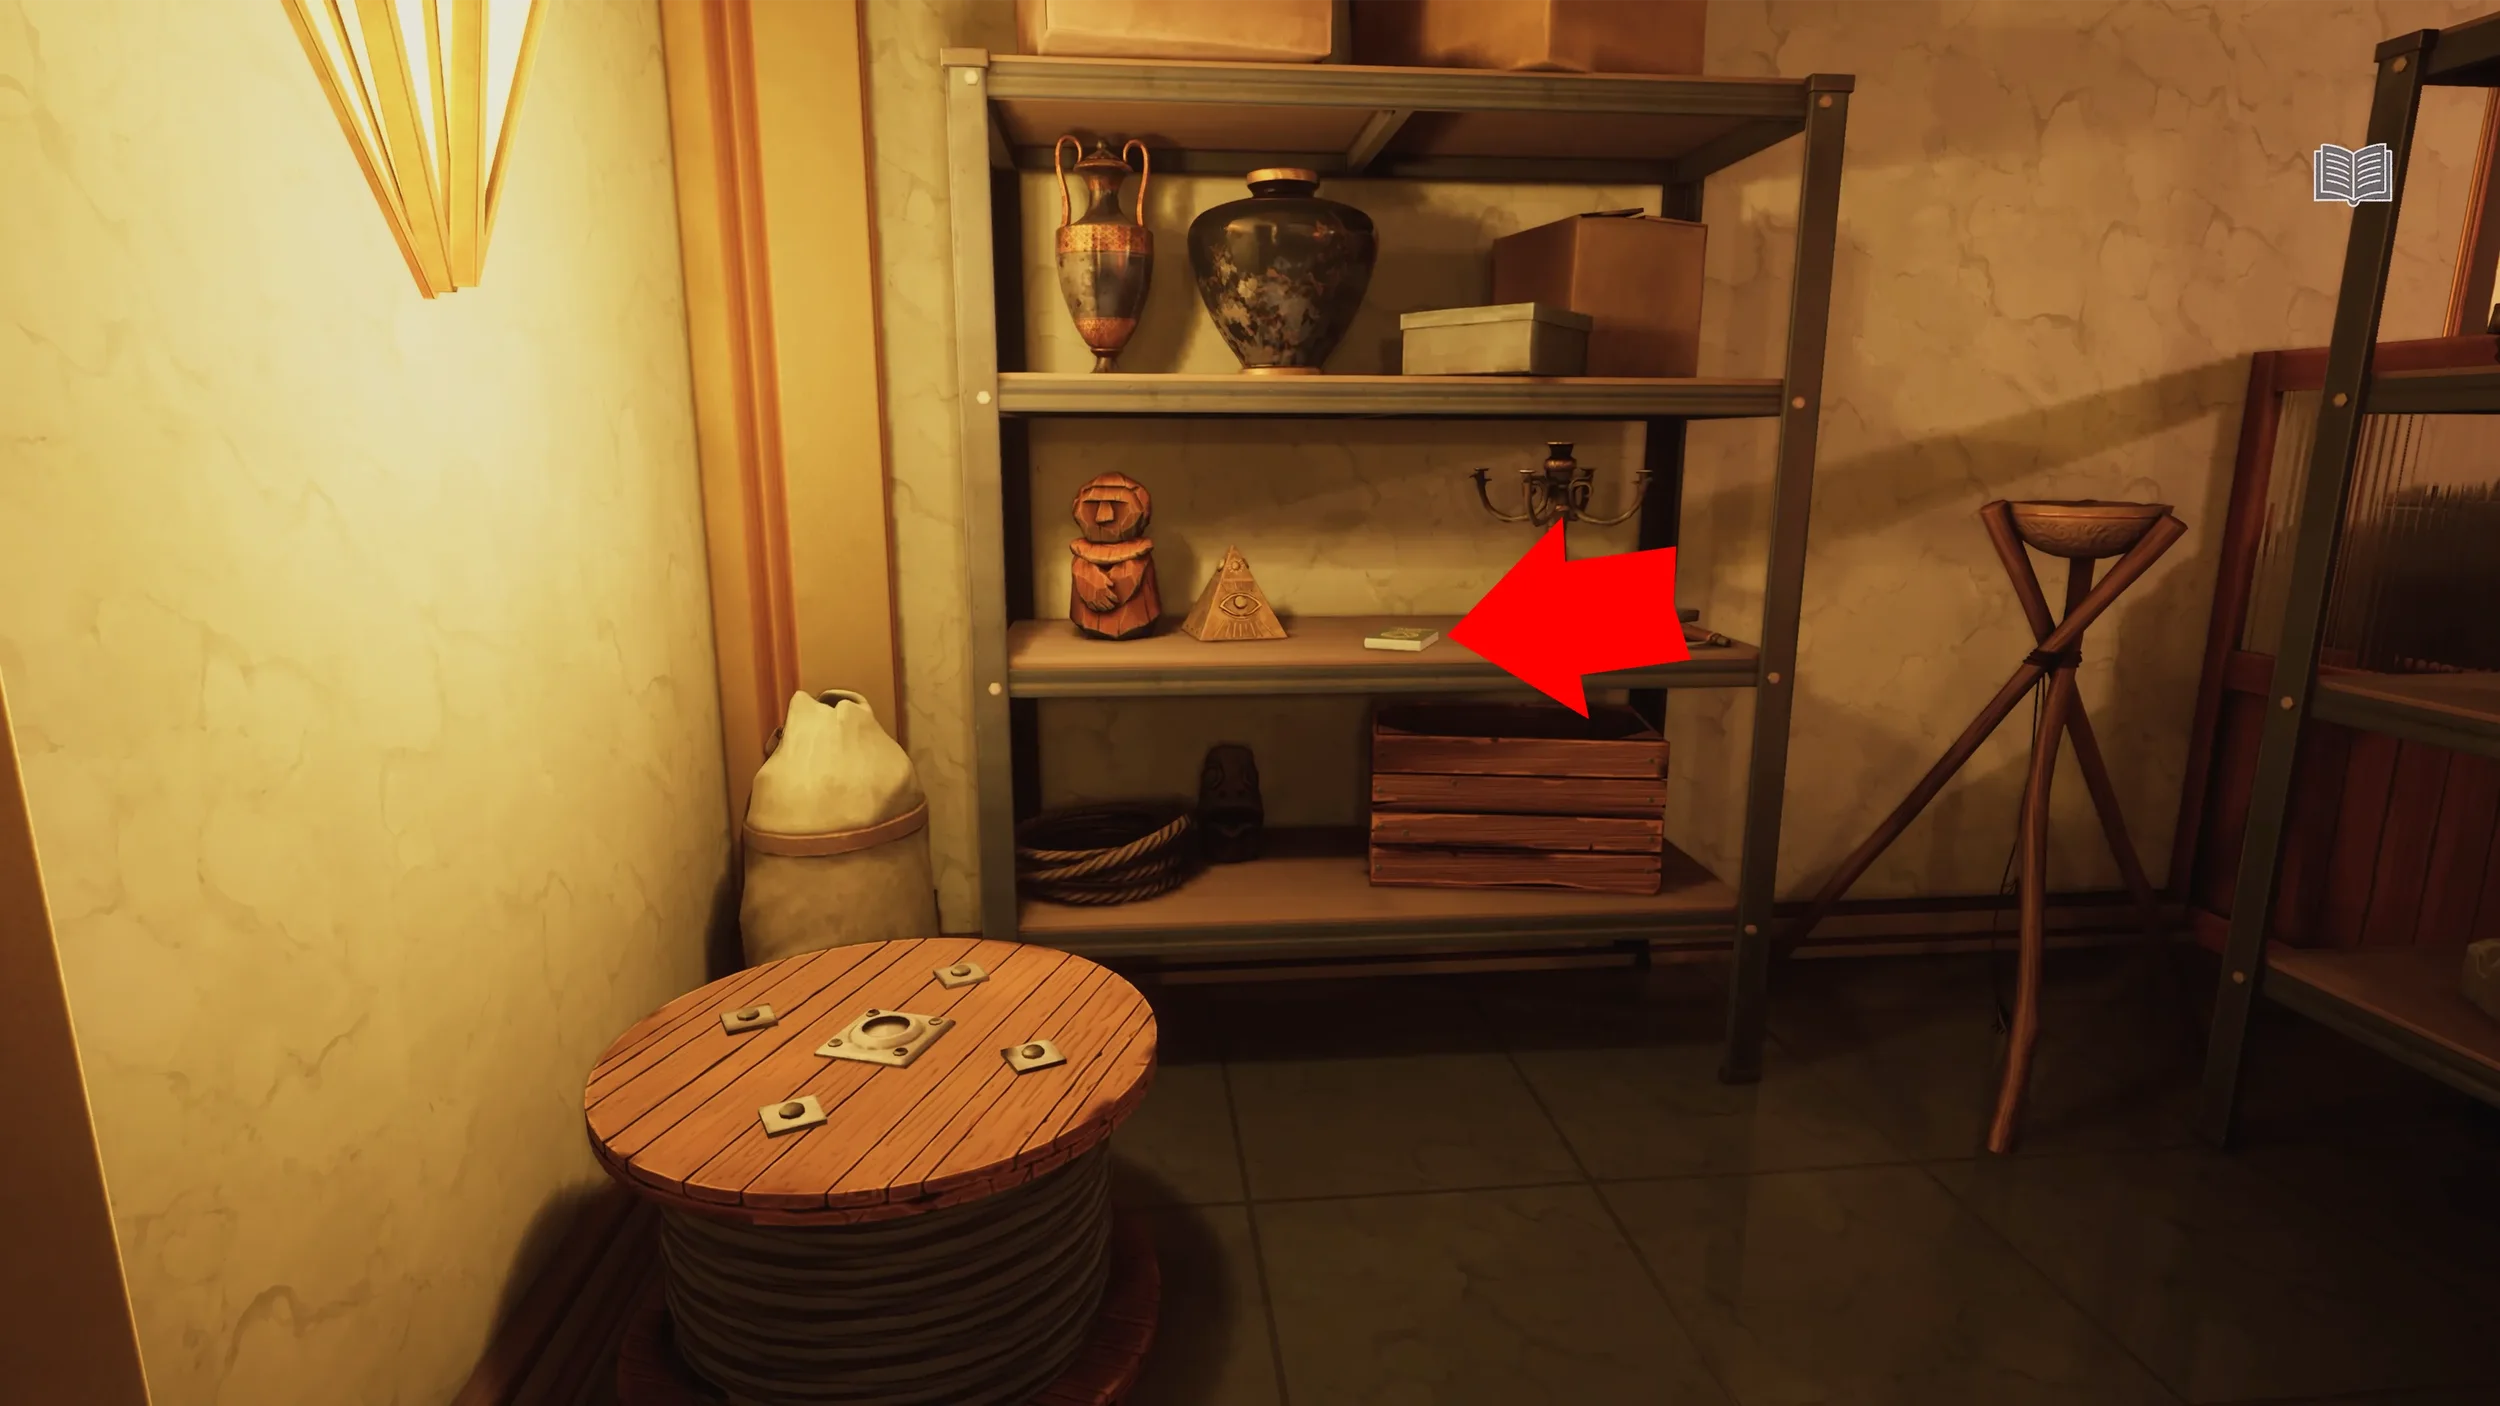
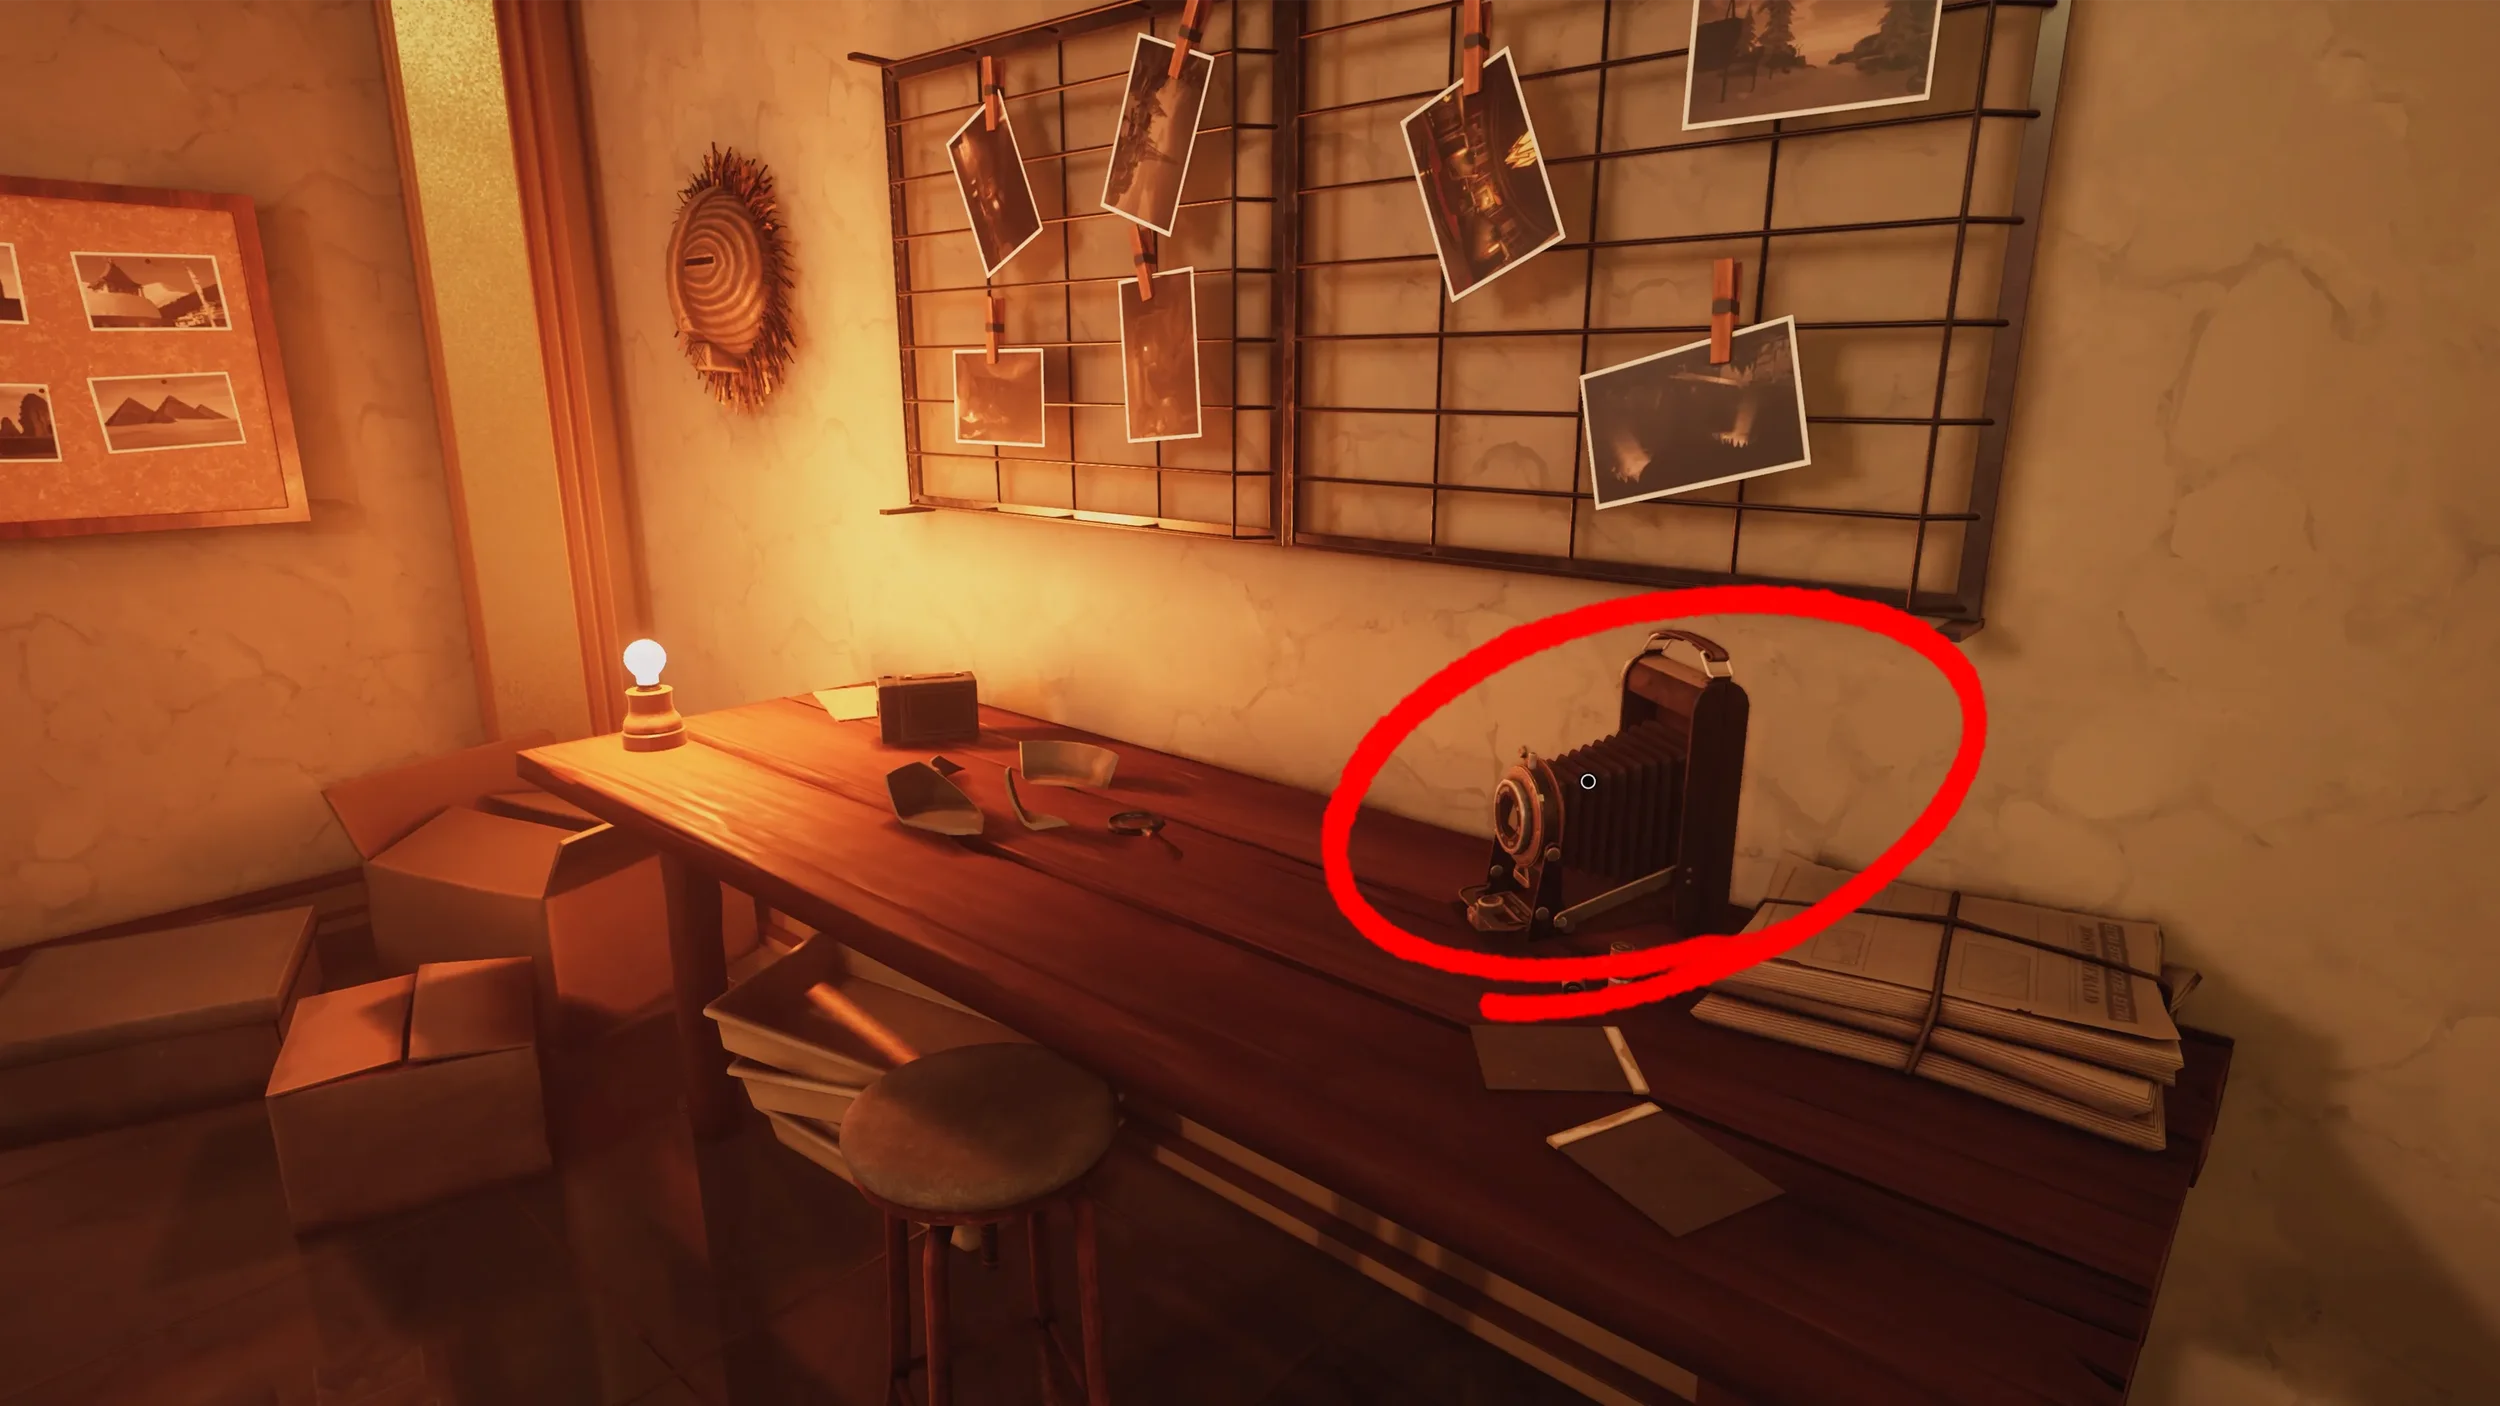
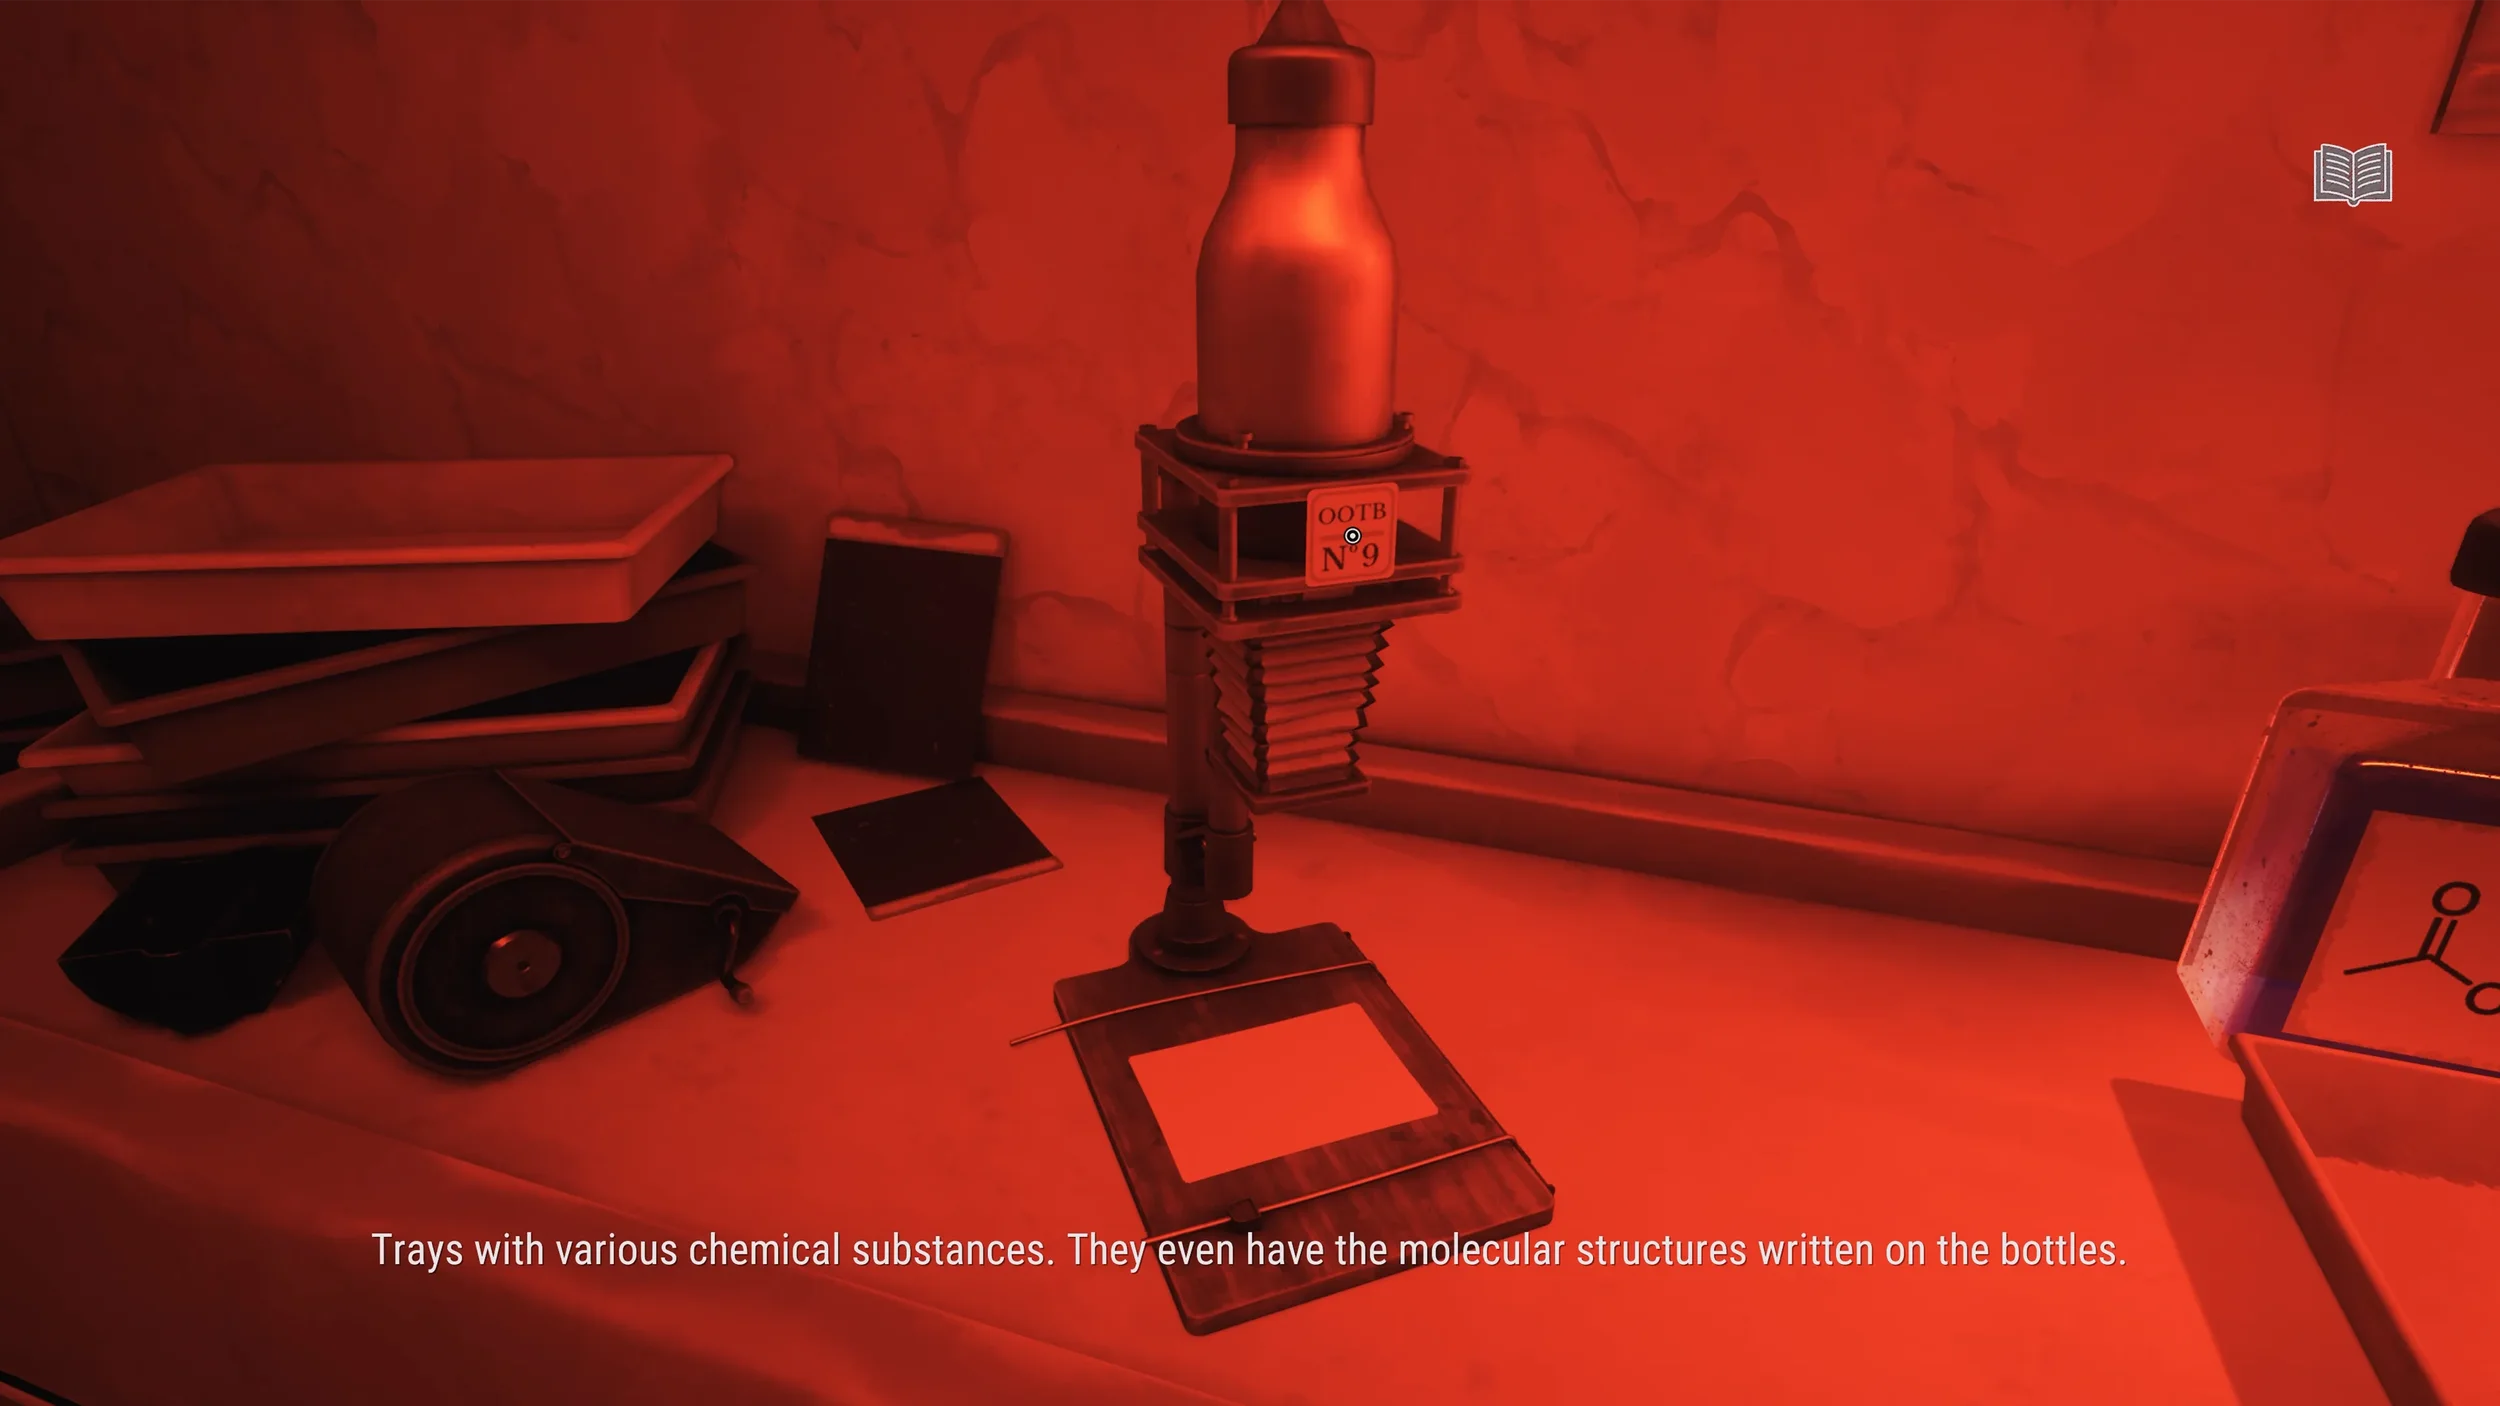
Inside the Archaeologist’s Office, inspect the book on the shelf to the left of the entrance as it is a clue, there are 2 more clues in this room, one is the old camera on the table to the right and the other clue is the piece of paper on the desk to the left.
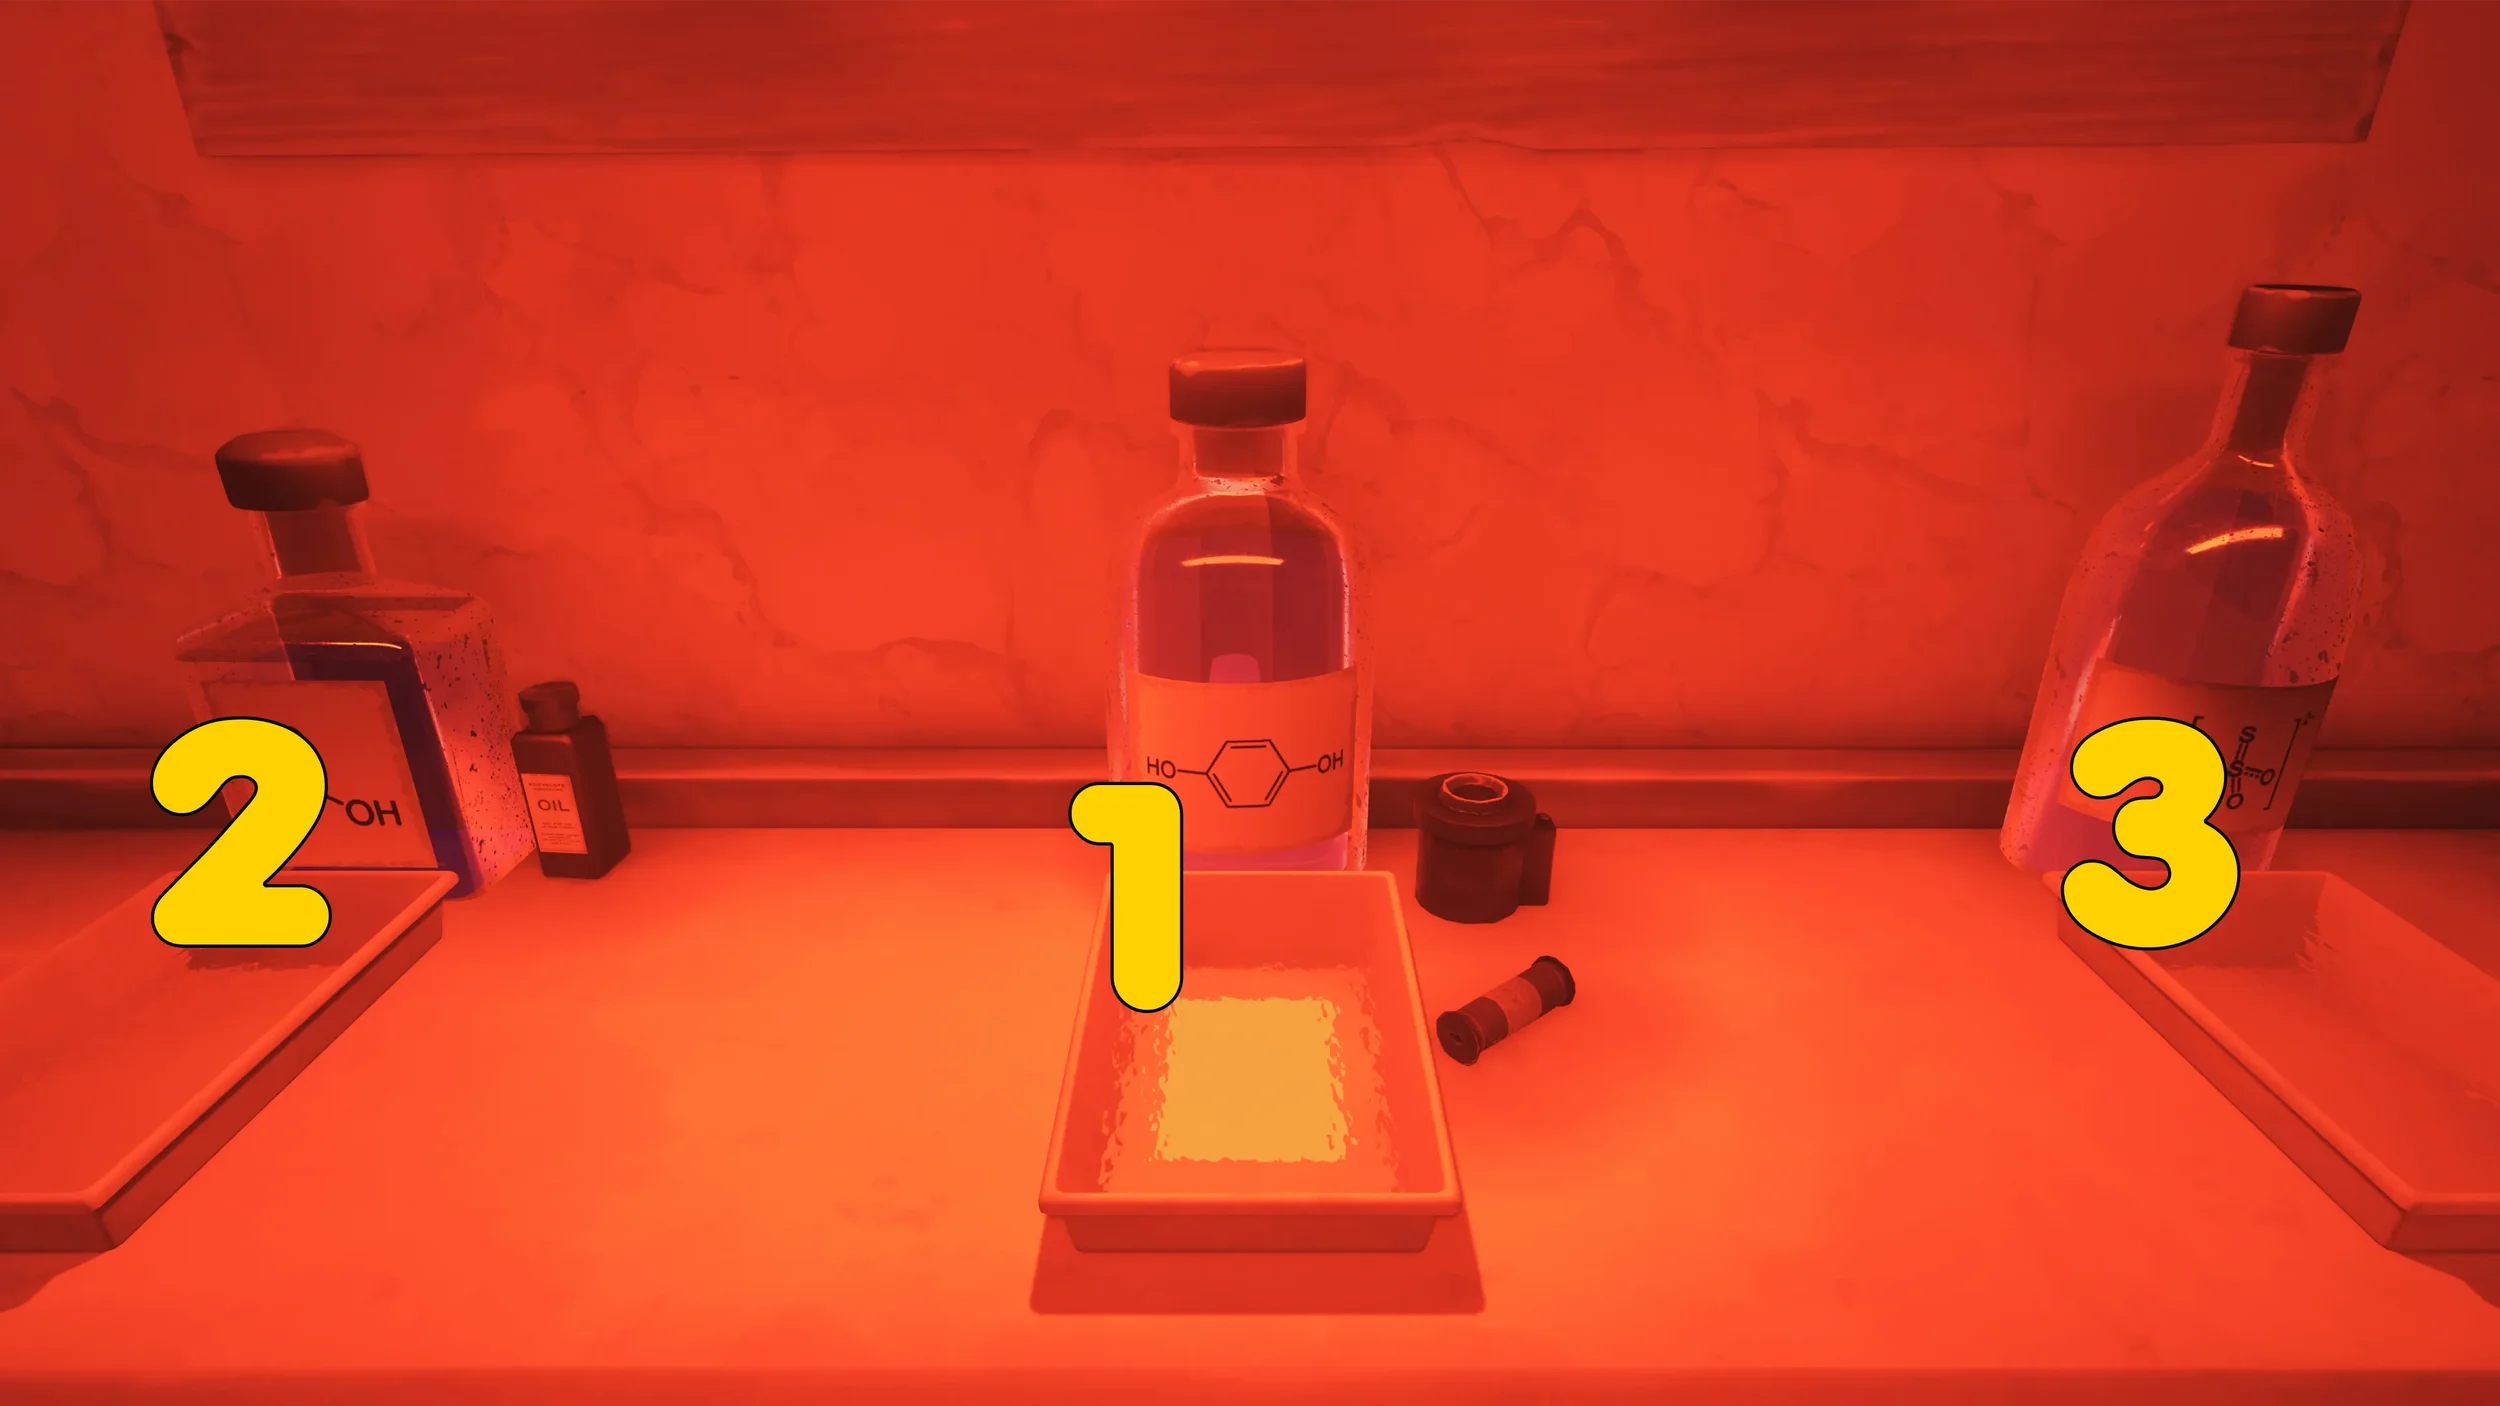
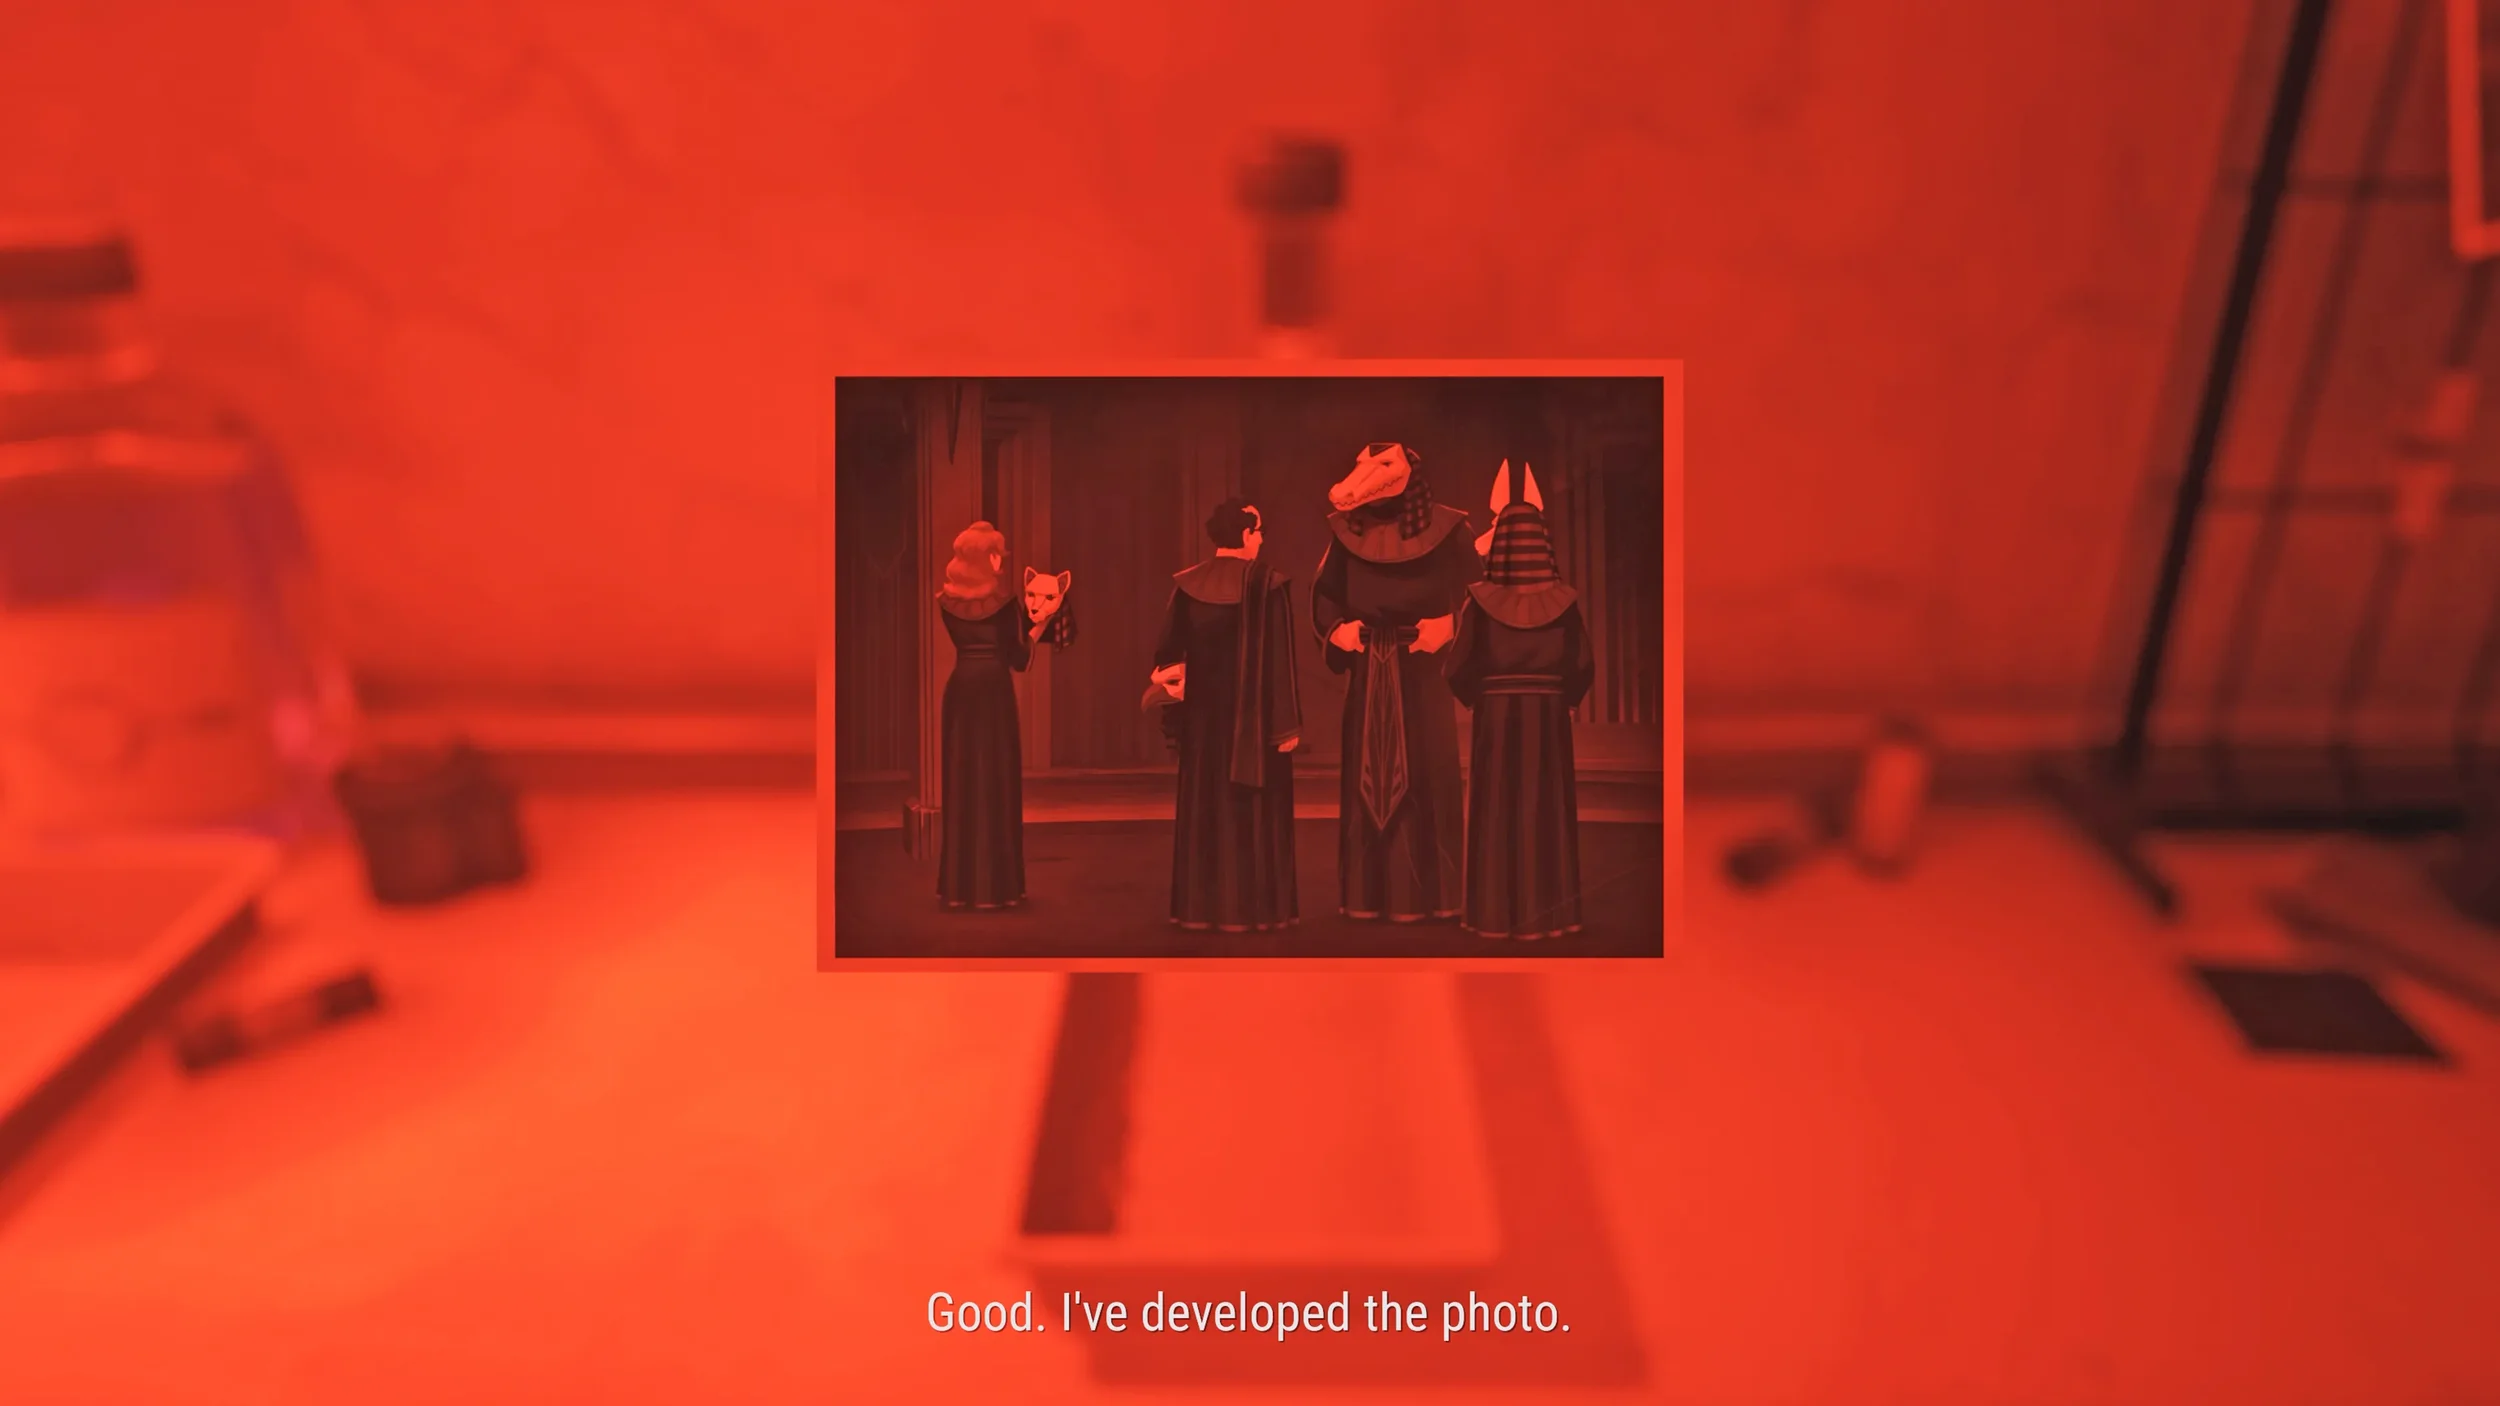
Open the door at the back of this room, you will now be in a photography dark room, inspect the middle tray as this is also a clue, then interact with the device on the left of the table twice to get the blank photograph, place the blank photograph in the middle tray, then the left tray, and finally in the right side tray, this will allow you to see the Photograph which is your final clue for this Chapter.
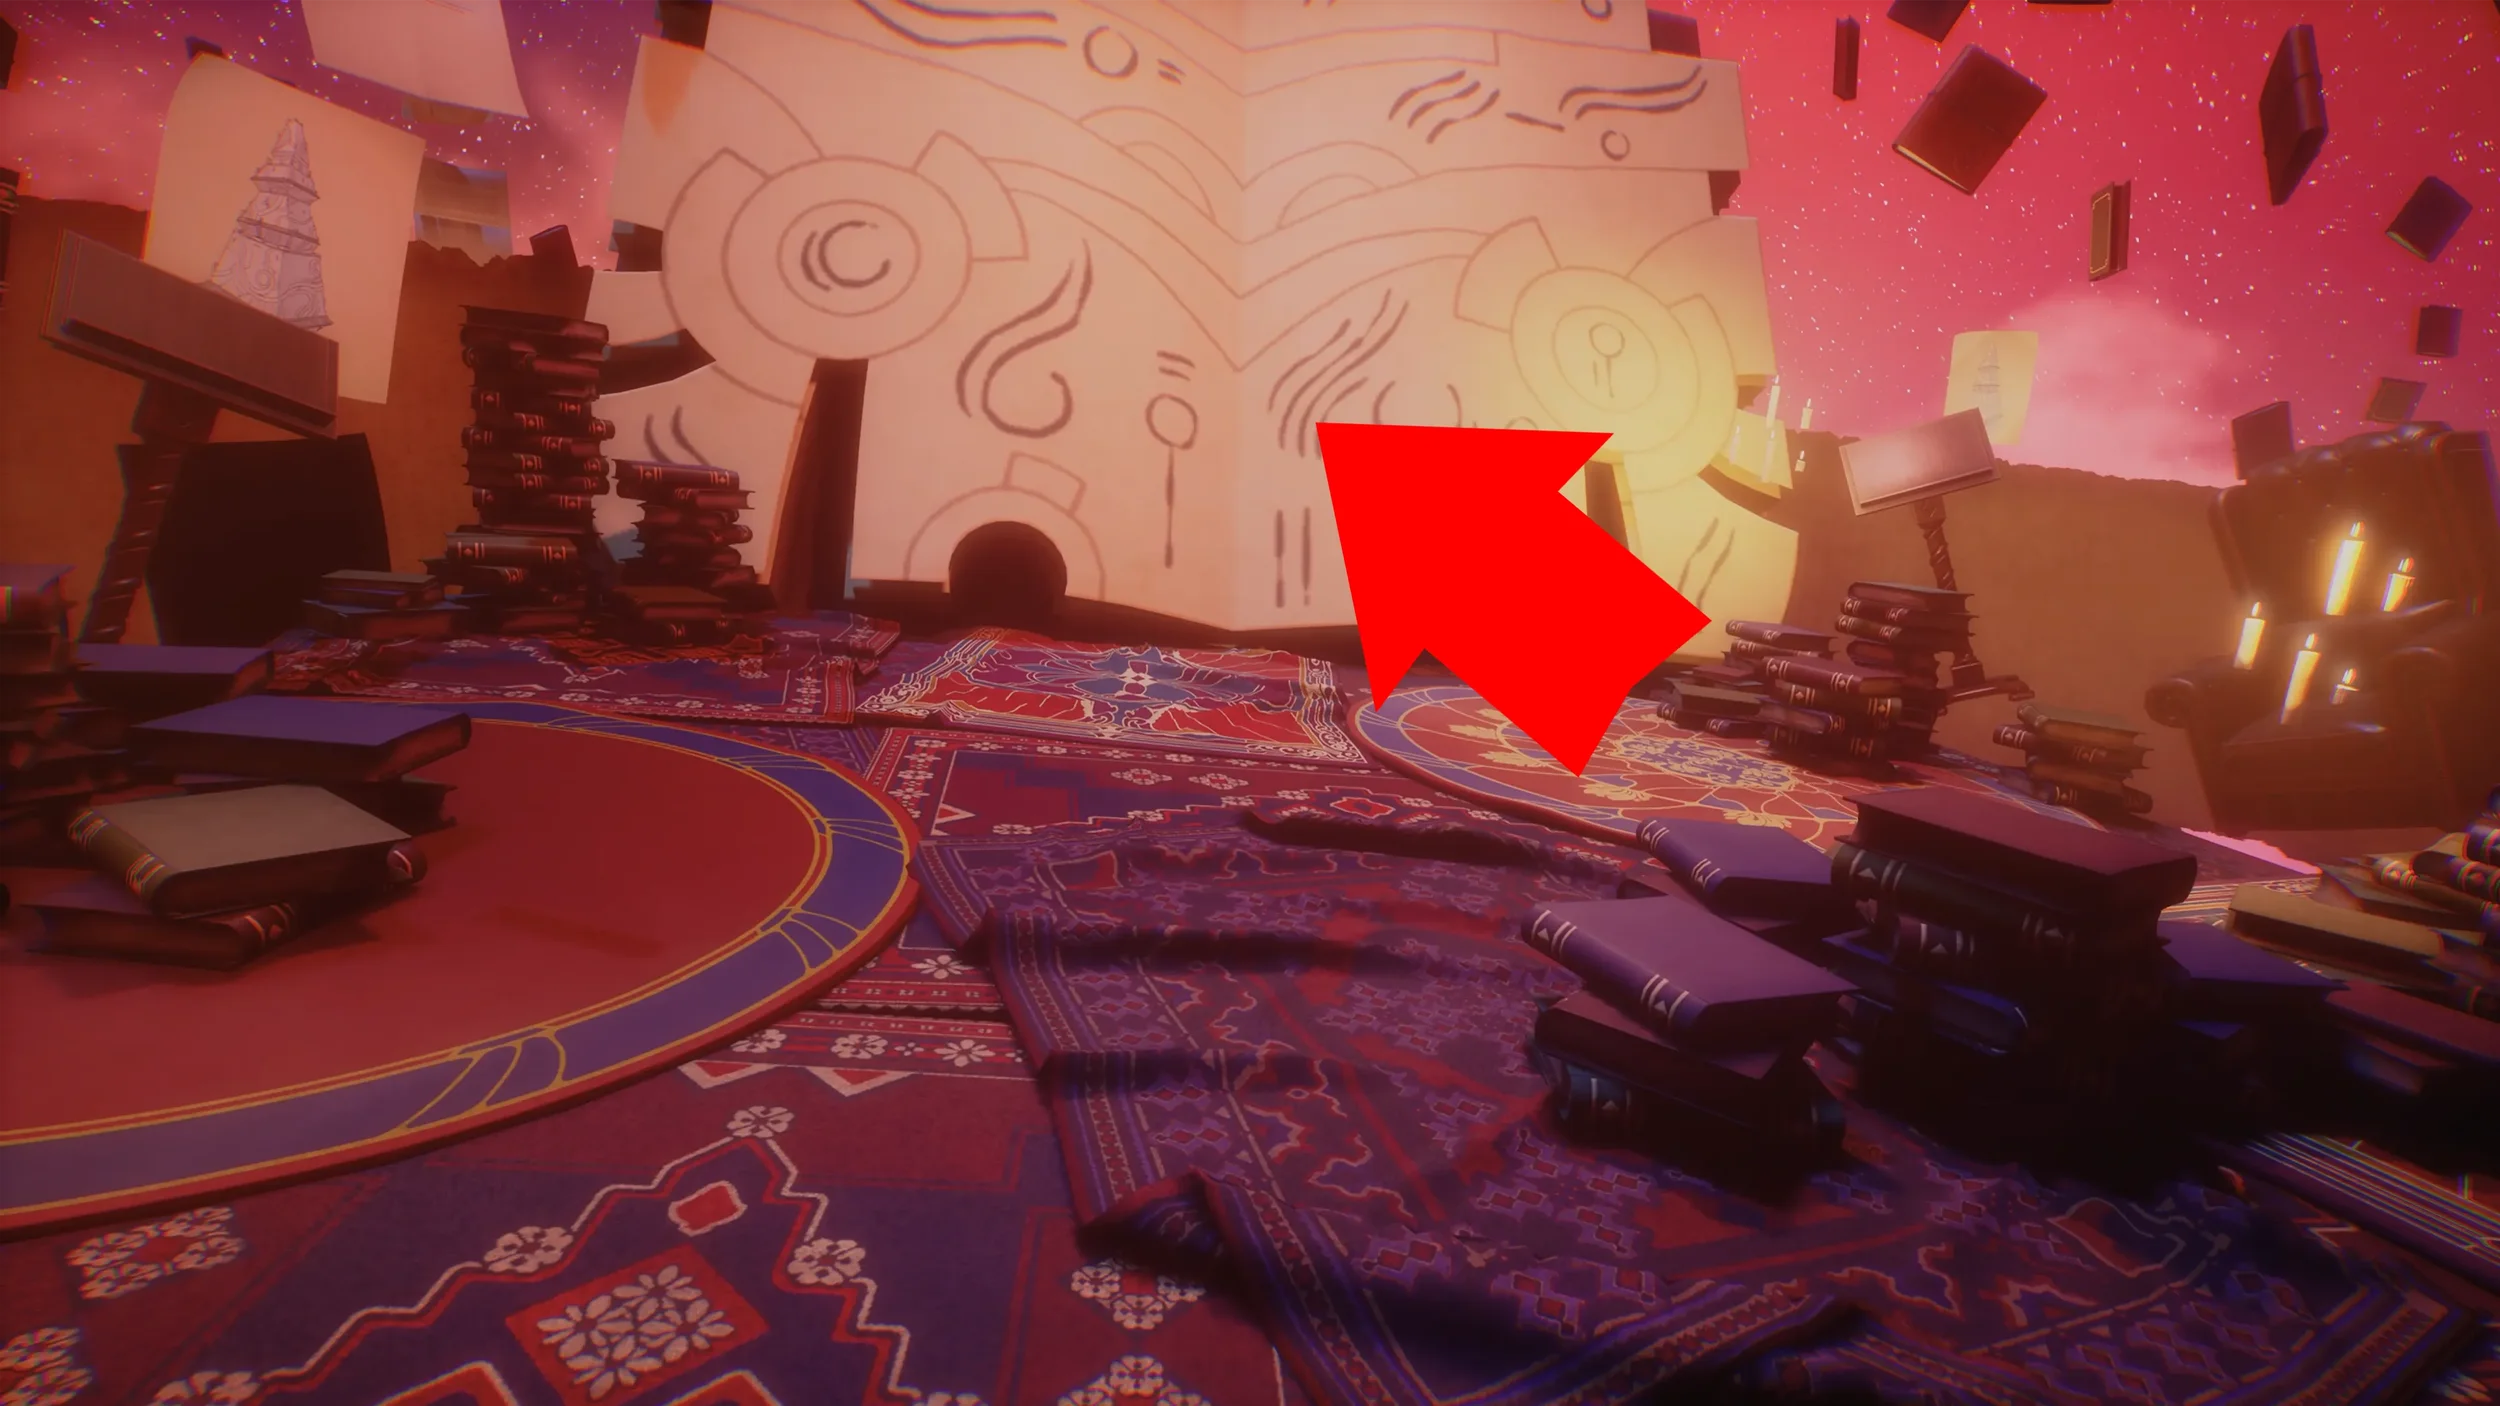
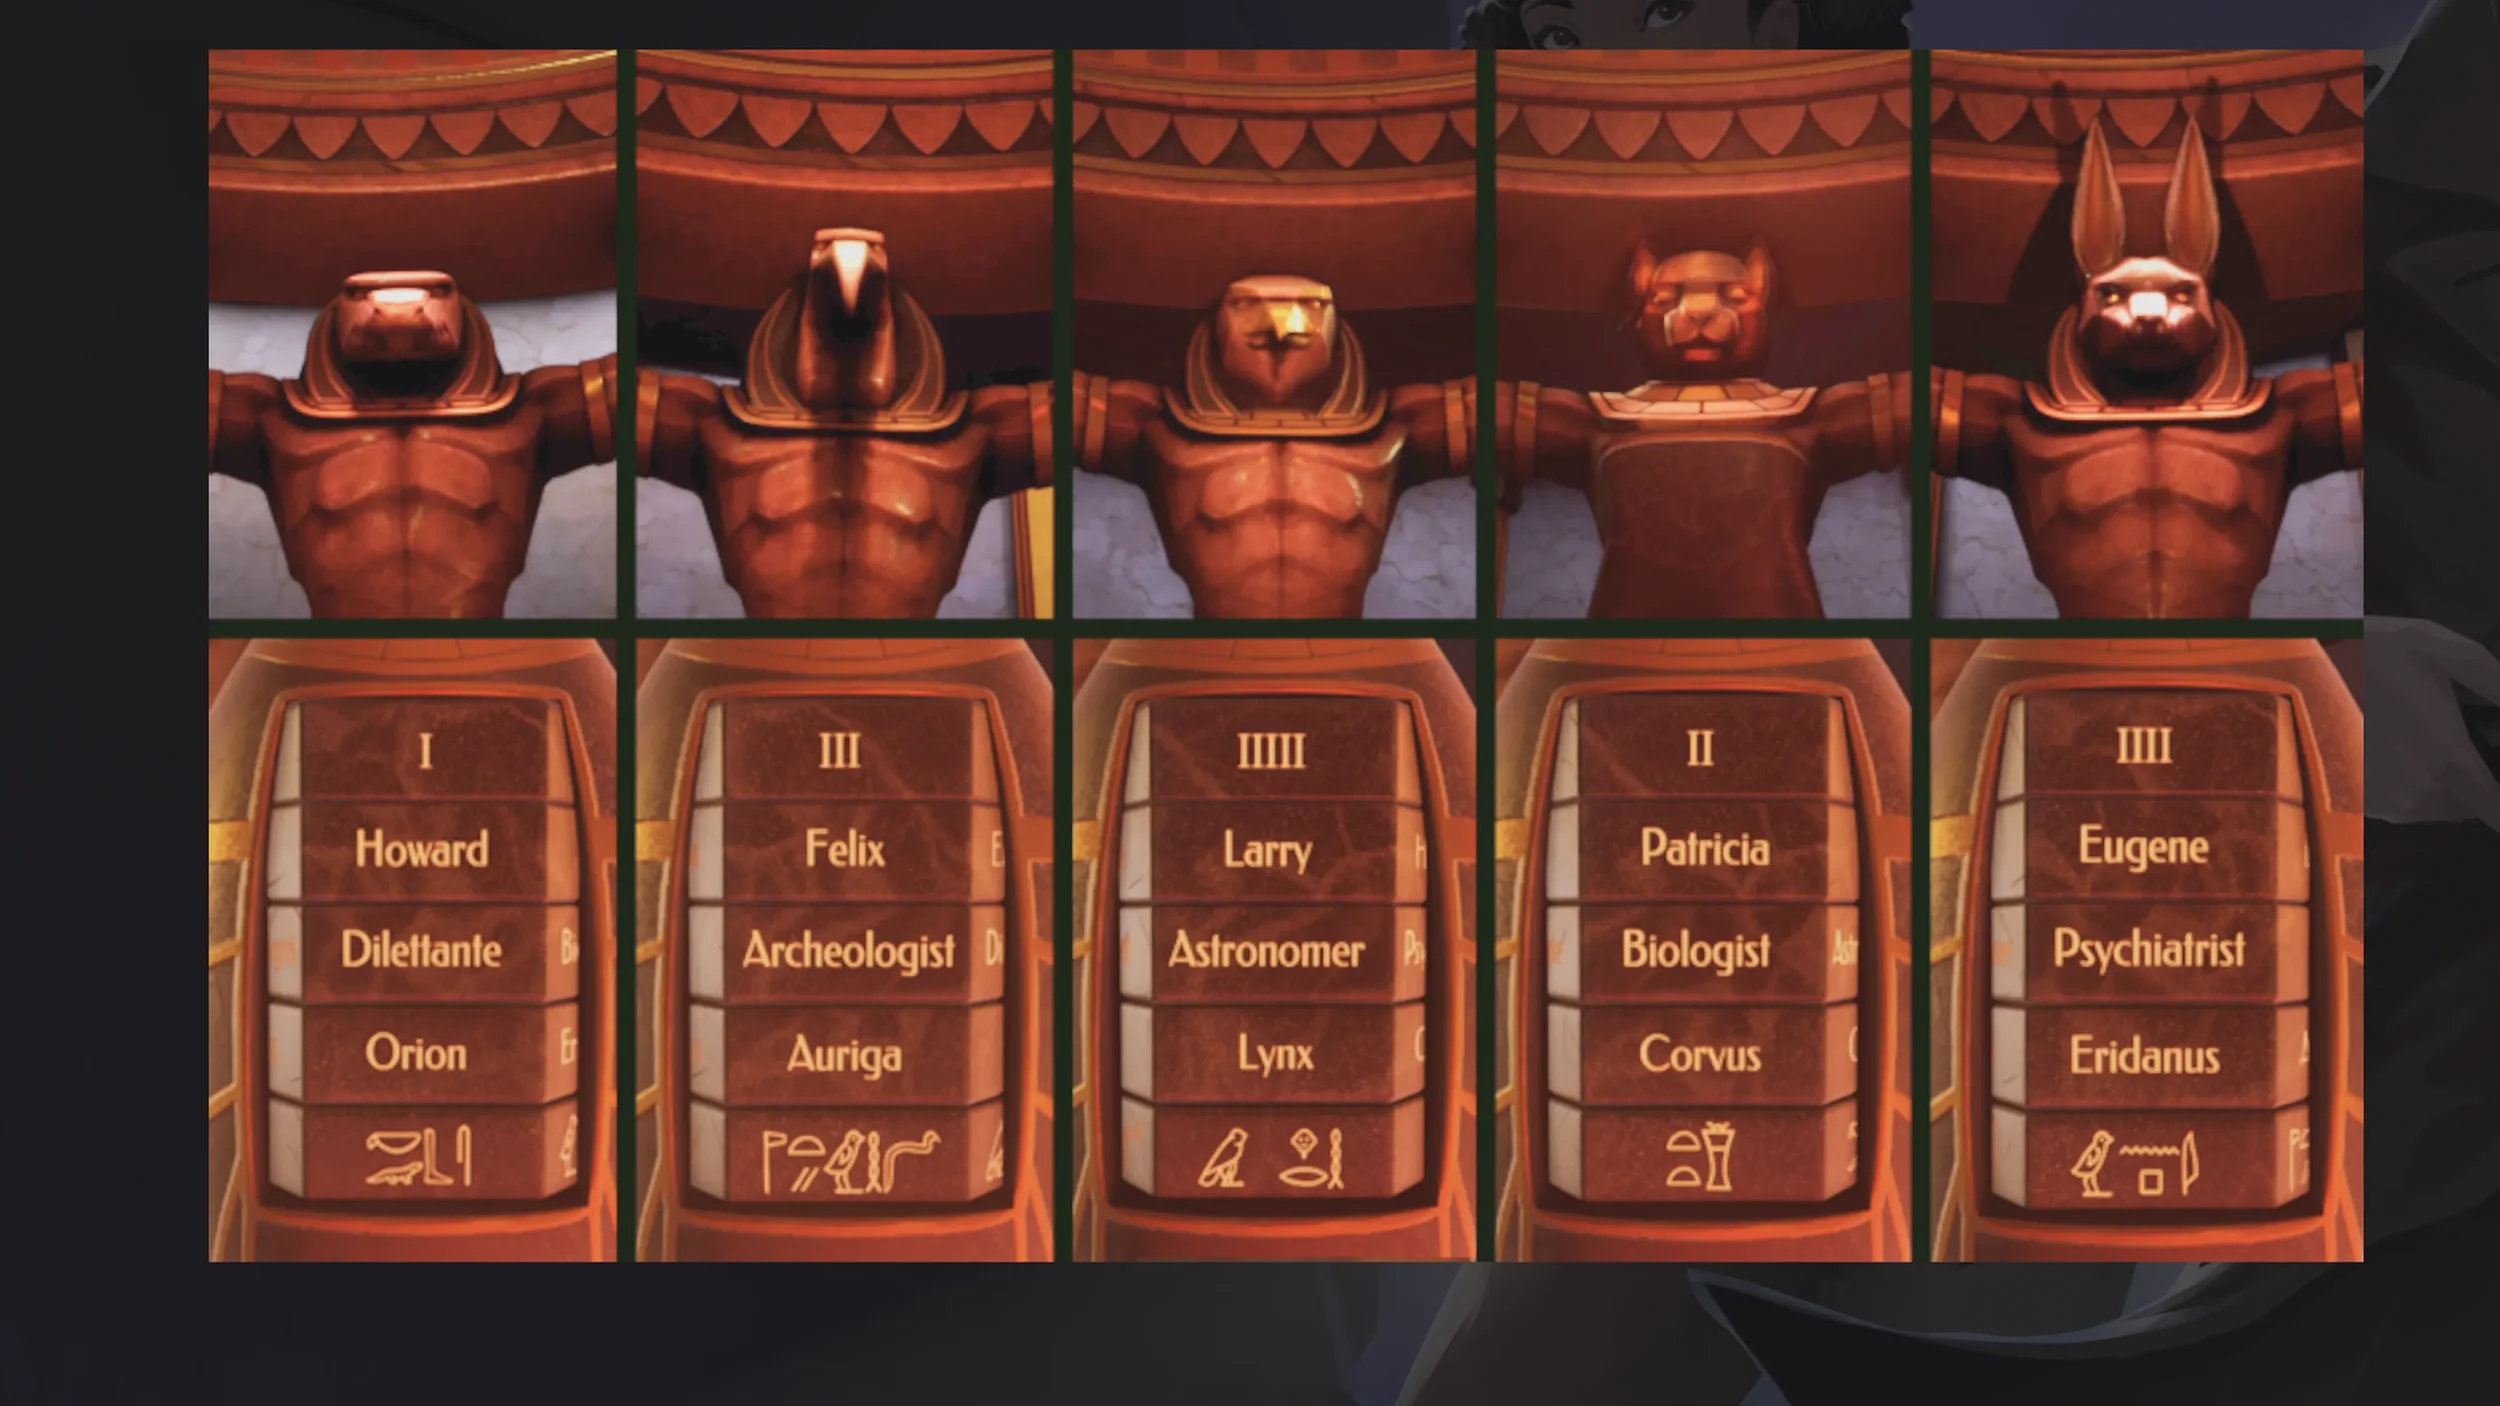
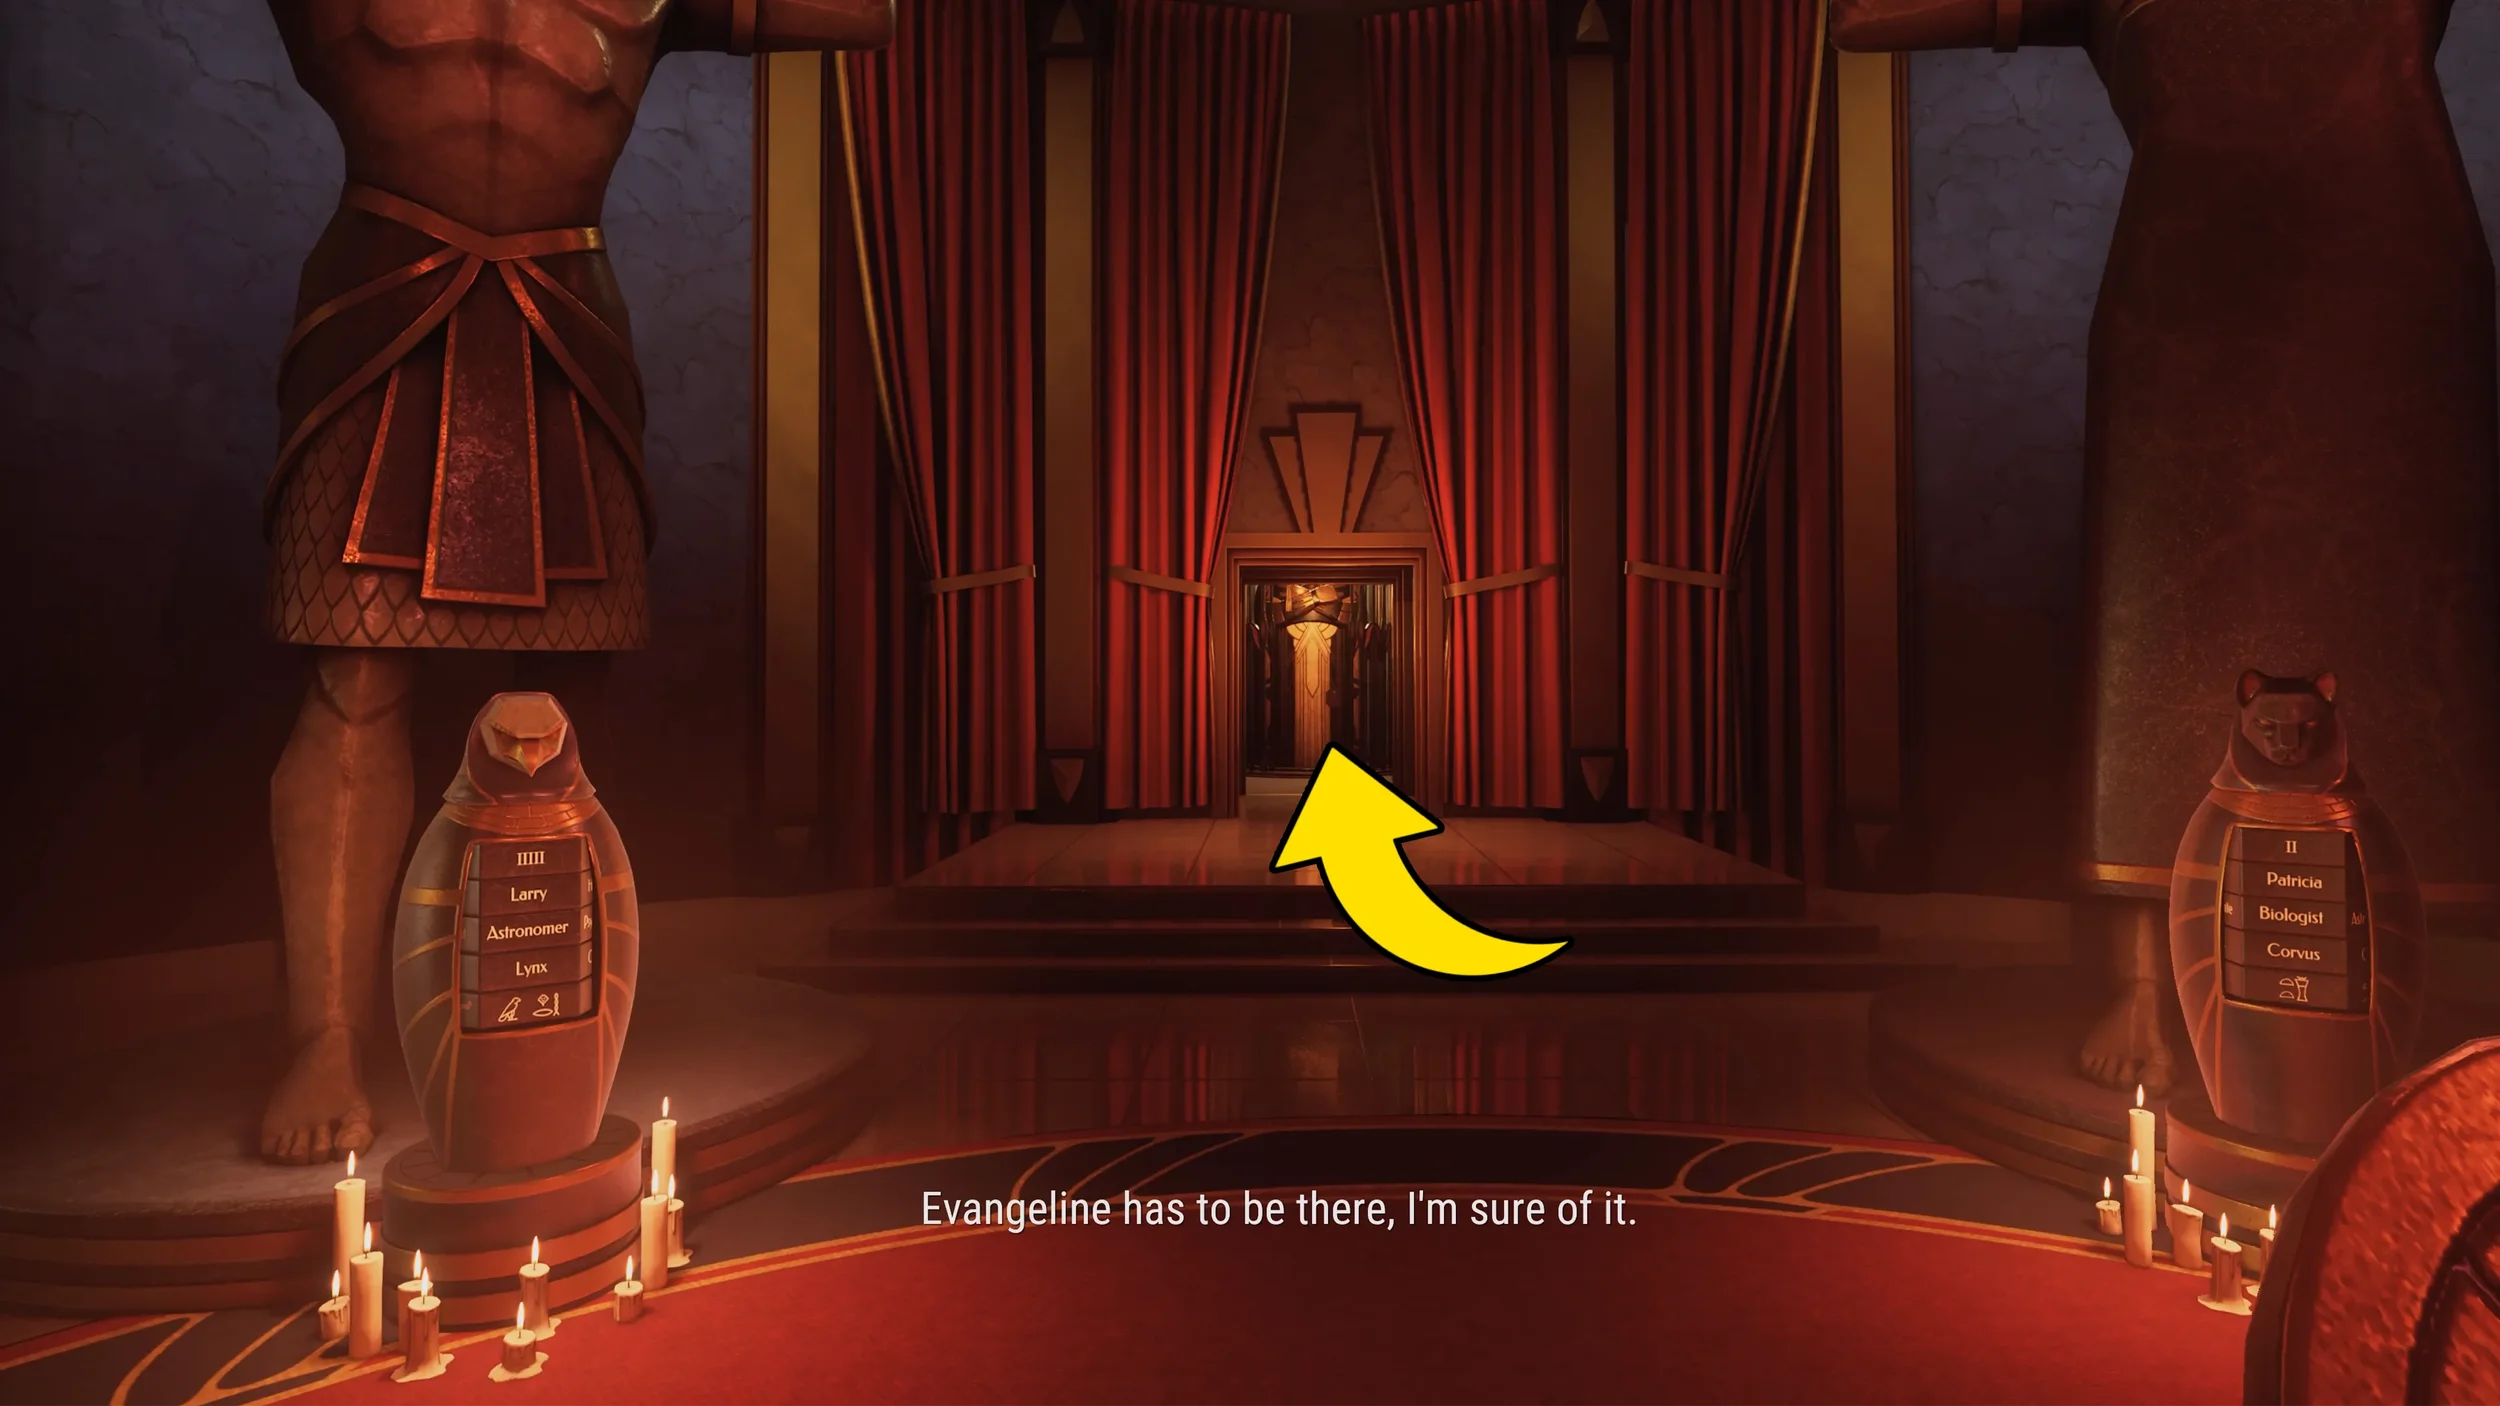
We now finally have all of the clues we need to solve the puzzle in the room from before with the 5 Big Egyptian Statues.
So go back downstairs to the puzzle room, now using the all of the notes and information we have about each of the 5 people (the Biologist, the Psychiatrist, the Dilettante, the Archaeologist and the Astronomer) we can deduce each of their Positions, Names, Roles, Code Names & Hieroglyphs.
For example if we start with the Dilettante, thanks to the clues we know he is the strongest and largest, so by looking at the photograph we revealed we can see that the Dilettante is the one that is linked to the Crocodile Statue, another of the clues says that “Orion and the Astronomer have masks similar to their hieroglyphs”, and one of the images below that is a crocodile, so this means that the Dilettante must be Orion, so we now also have his code name as well as his Hieroglyph.
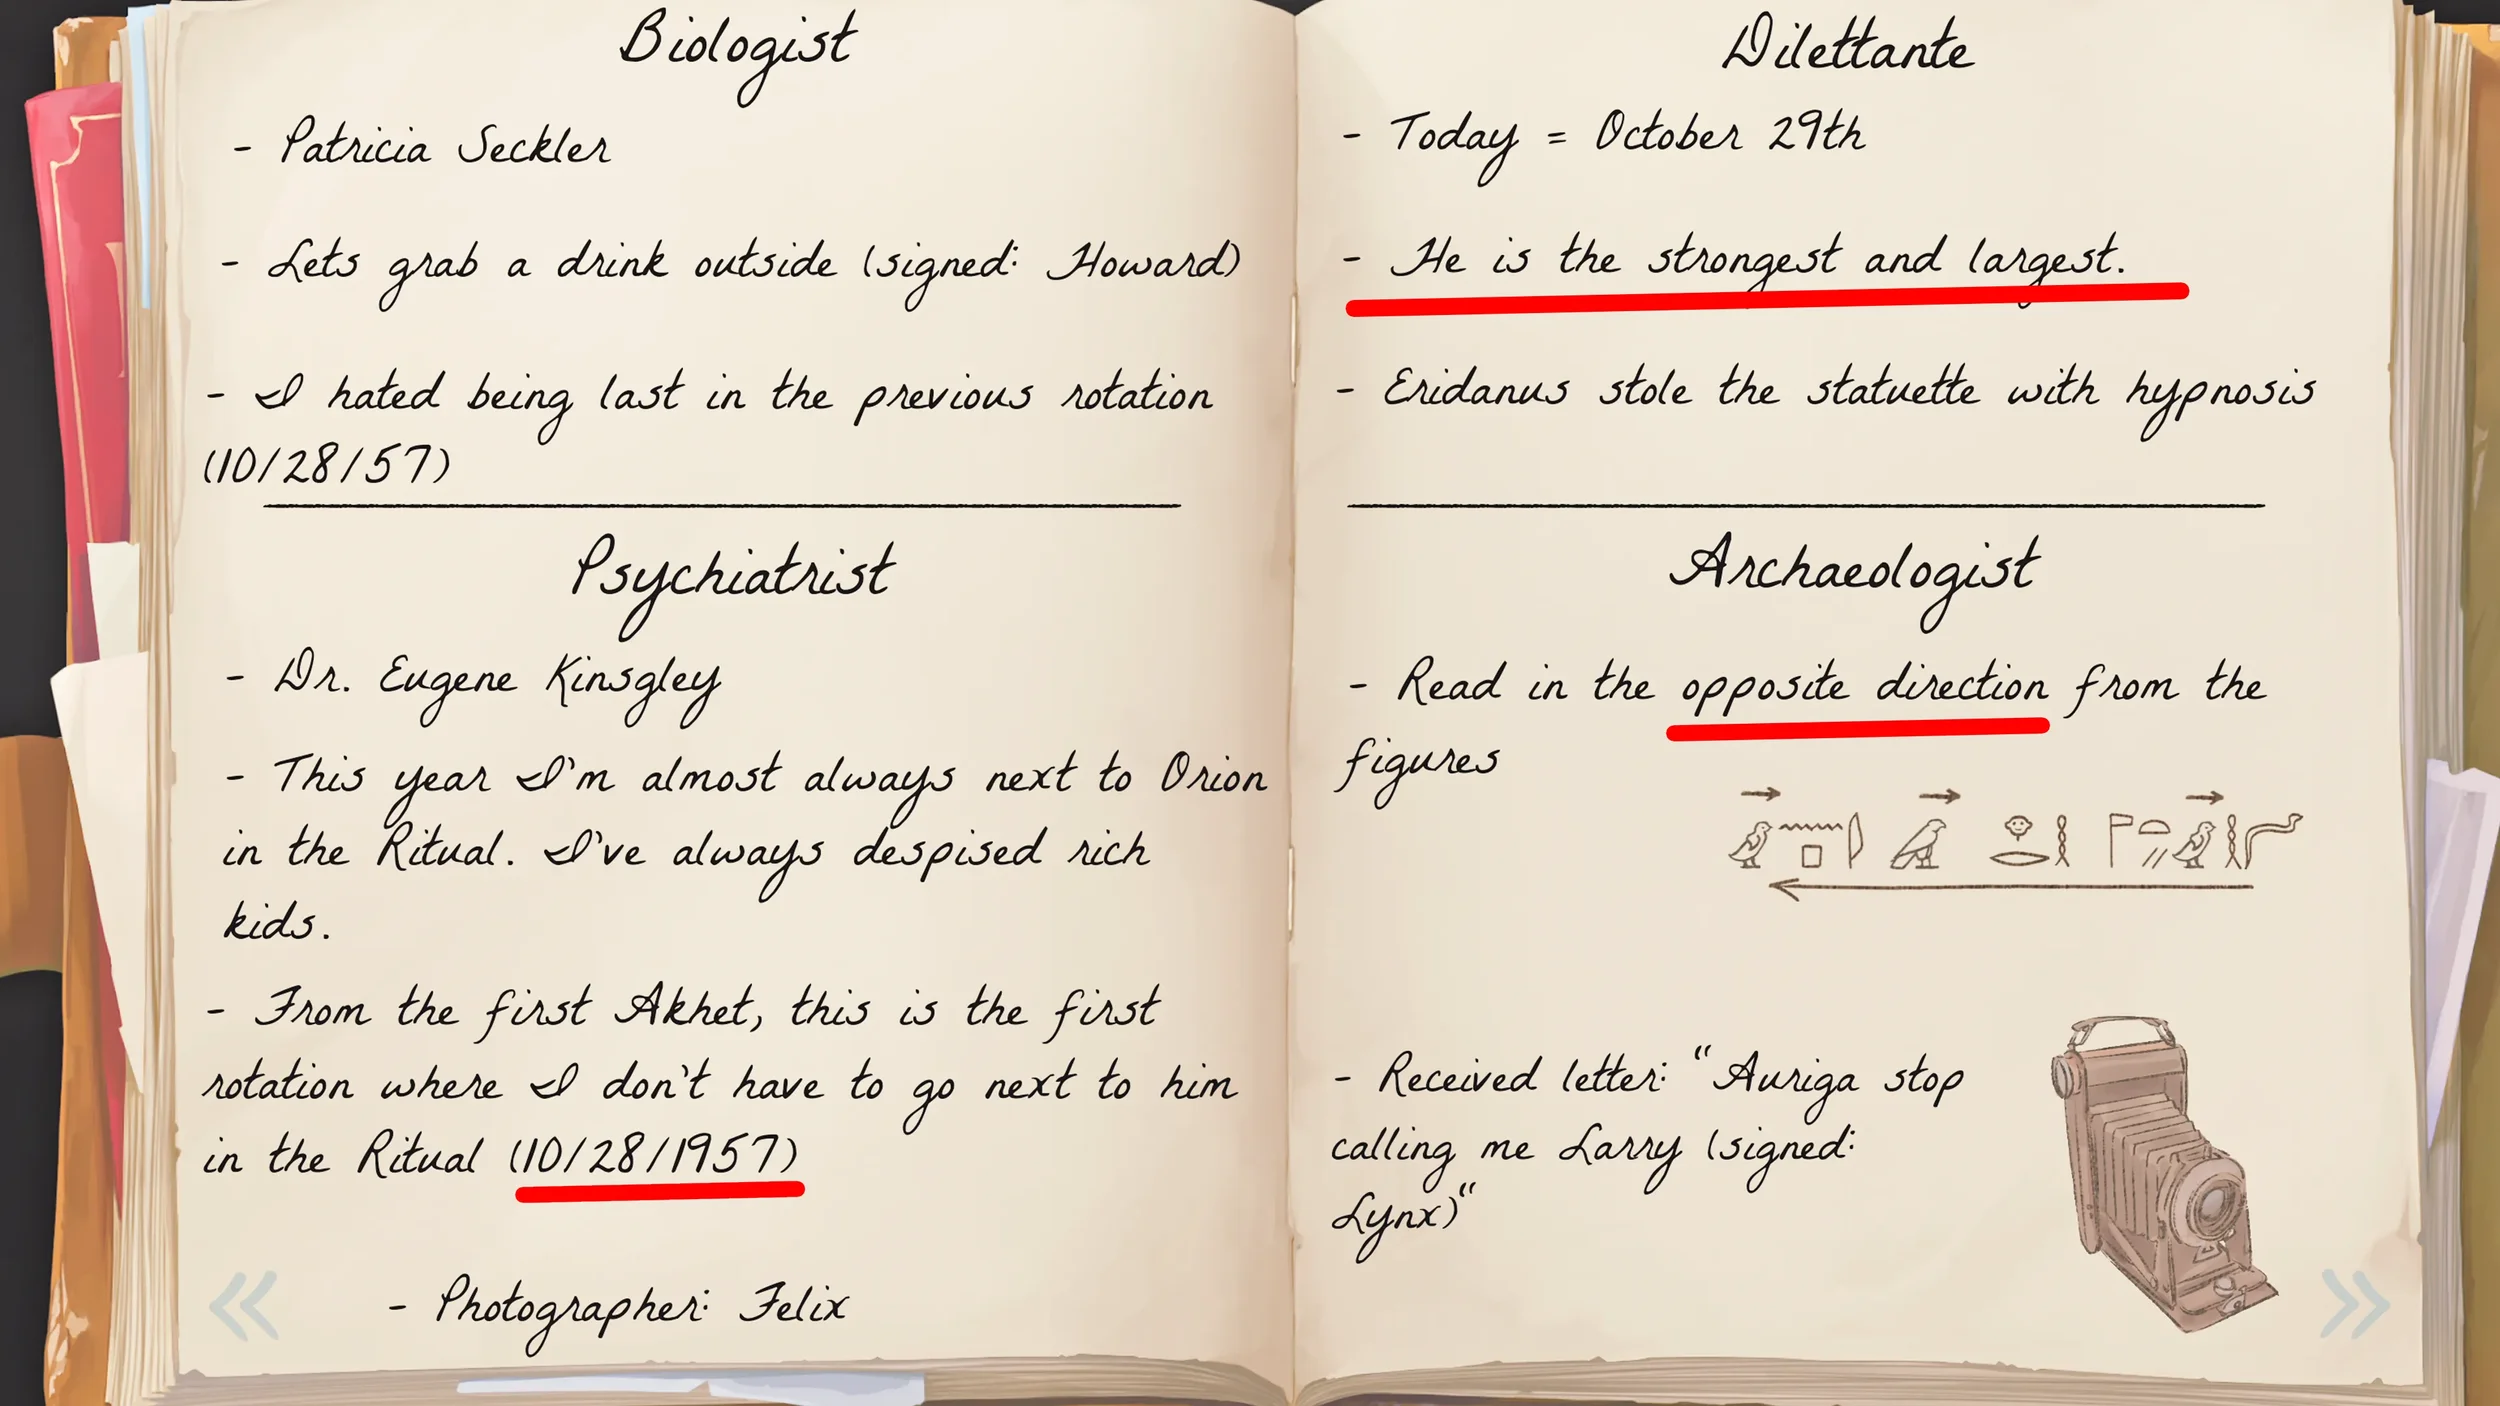
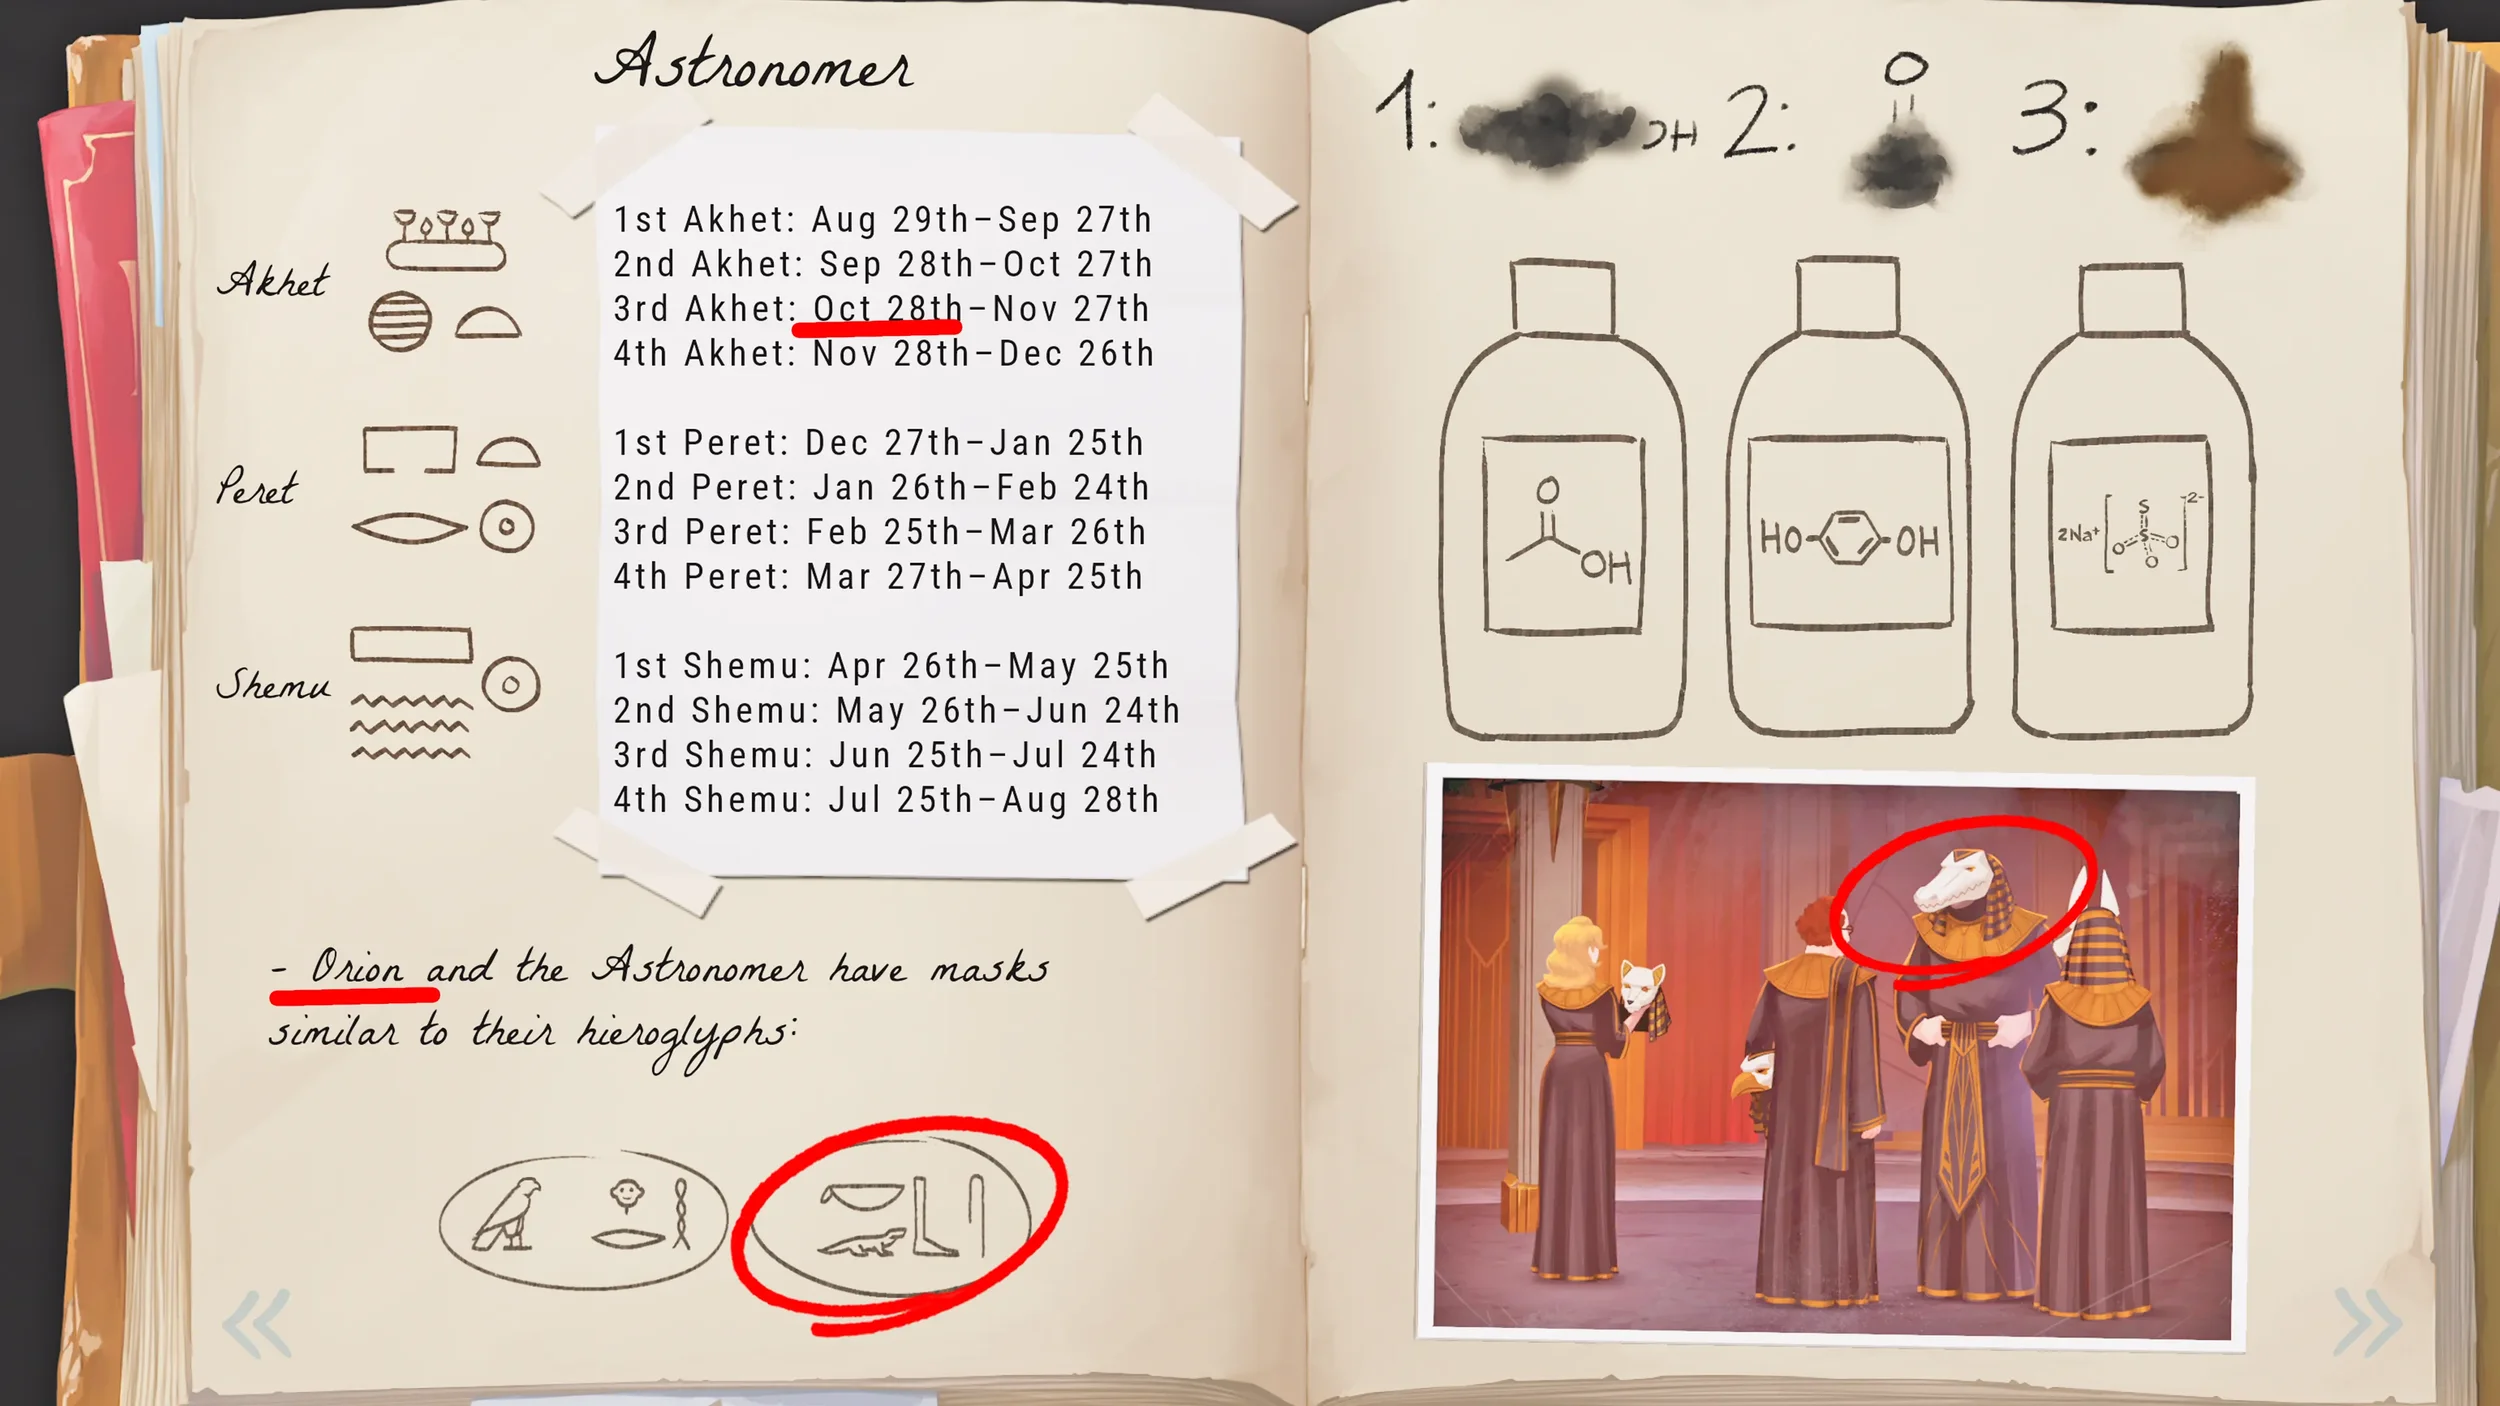
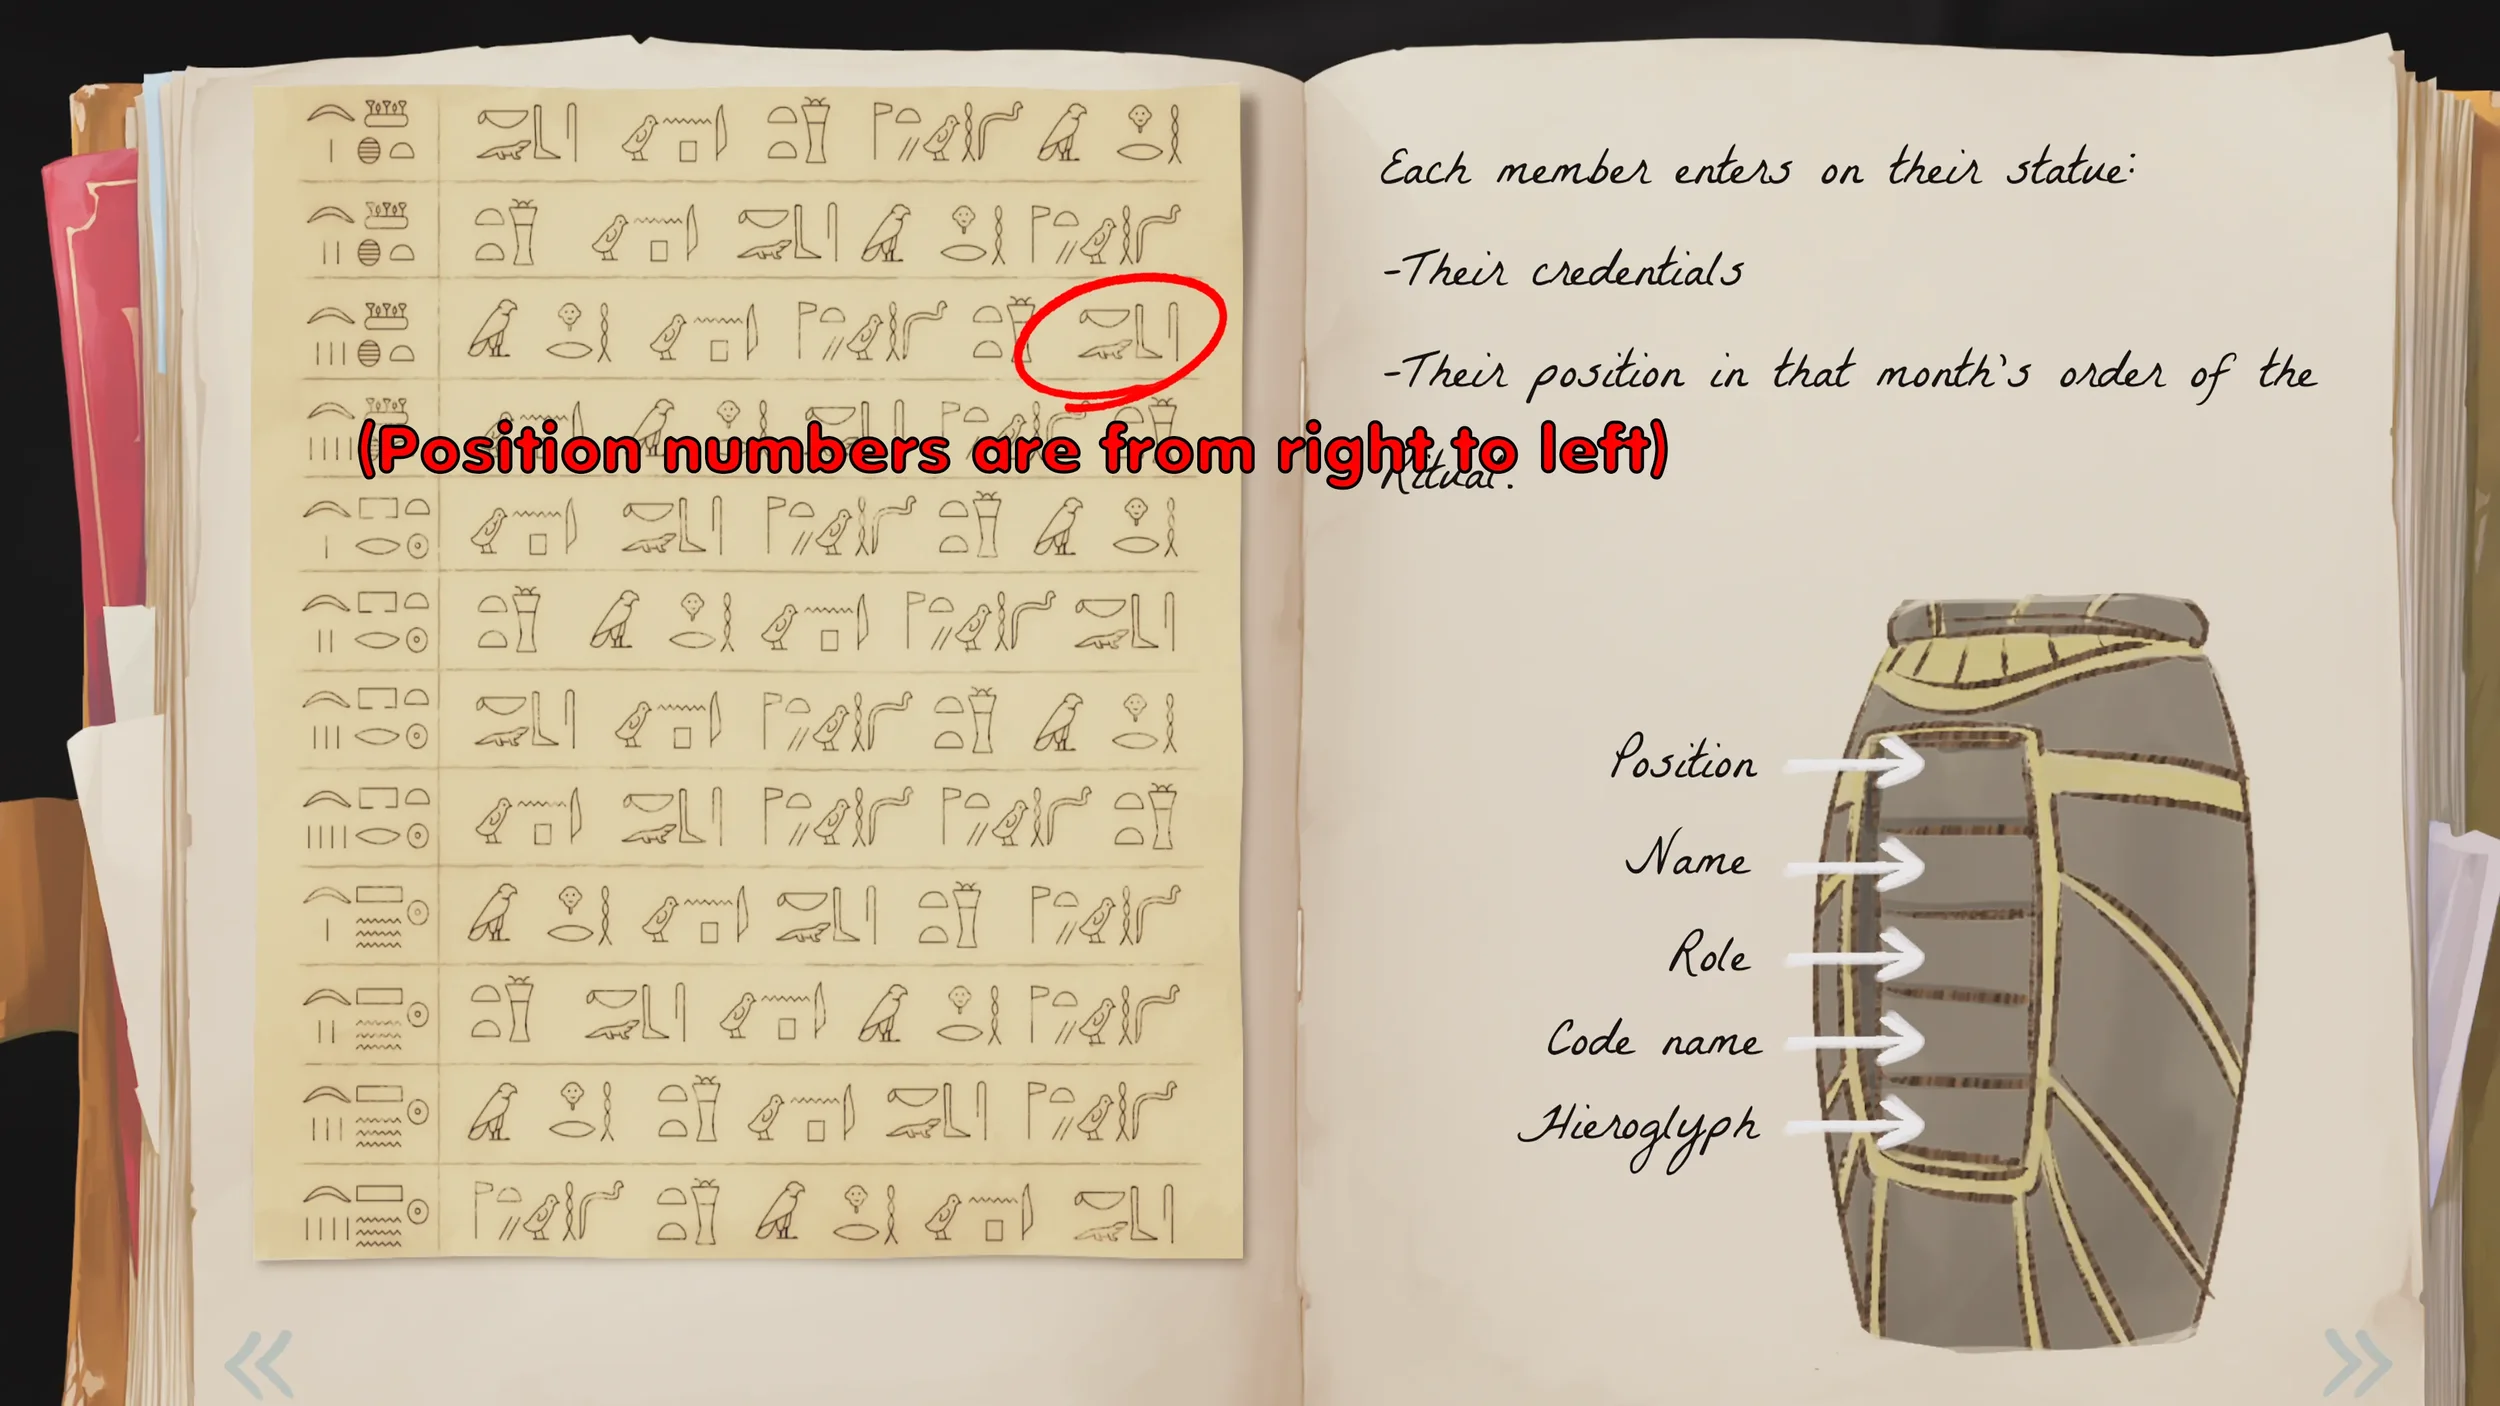
From the clues we can also gather that the ritual was done on the 28th of October, so looking at the chart we can see that based on that date we need to use the “3rd Akhet” table from the Hieroglyphs Mural, and that shows us that the Dilettante’s Hieroglyph is is the 1st Position this rotation (3rd row down), also remember that the Hieroglyph Mural is read from right to left, so it may look like it should be in Position 5 but it is actually Position 1.
Use the rest of the clues to finish solving the puzzle, see the image below if you want the final answers to each:
Pay No Attention To The Man Behind The Curtain! Trophy
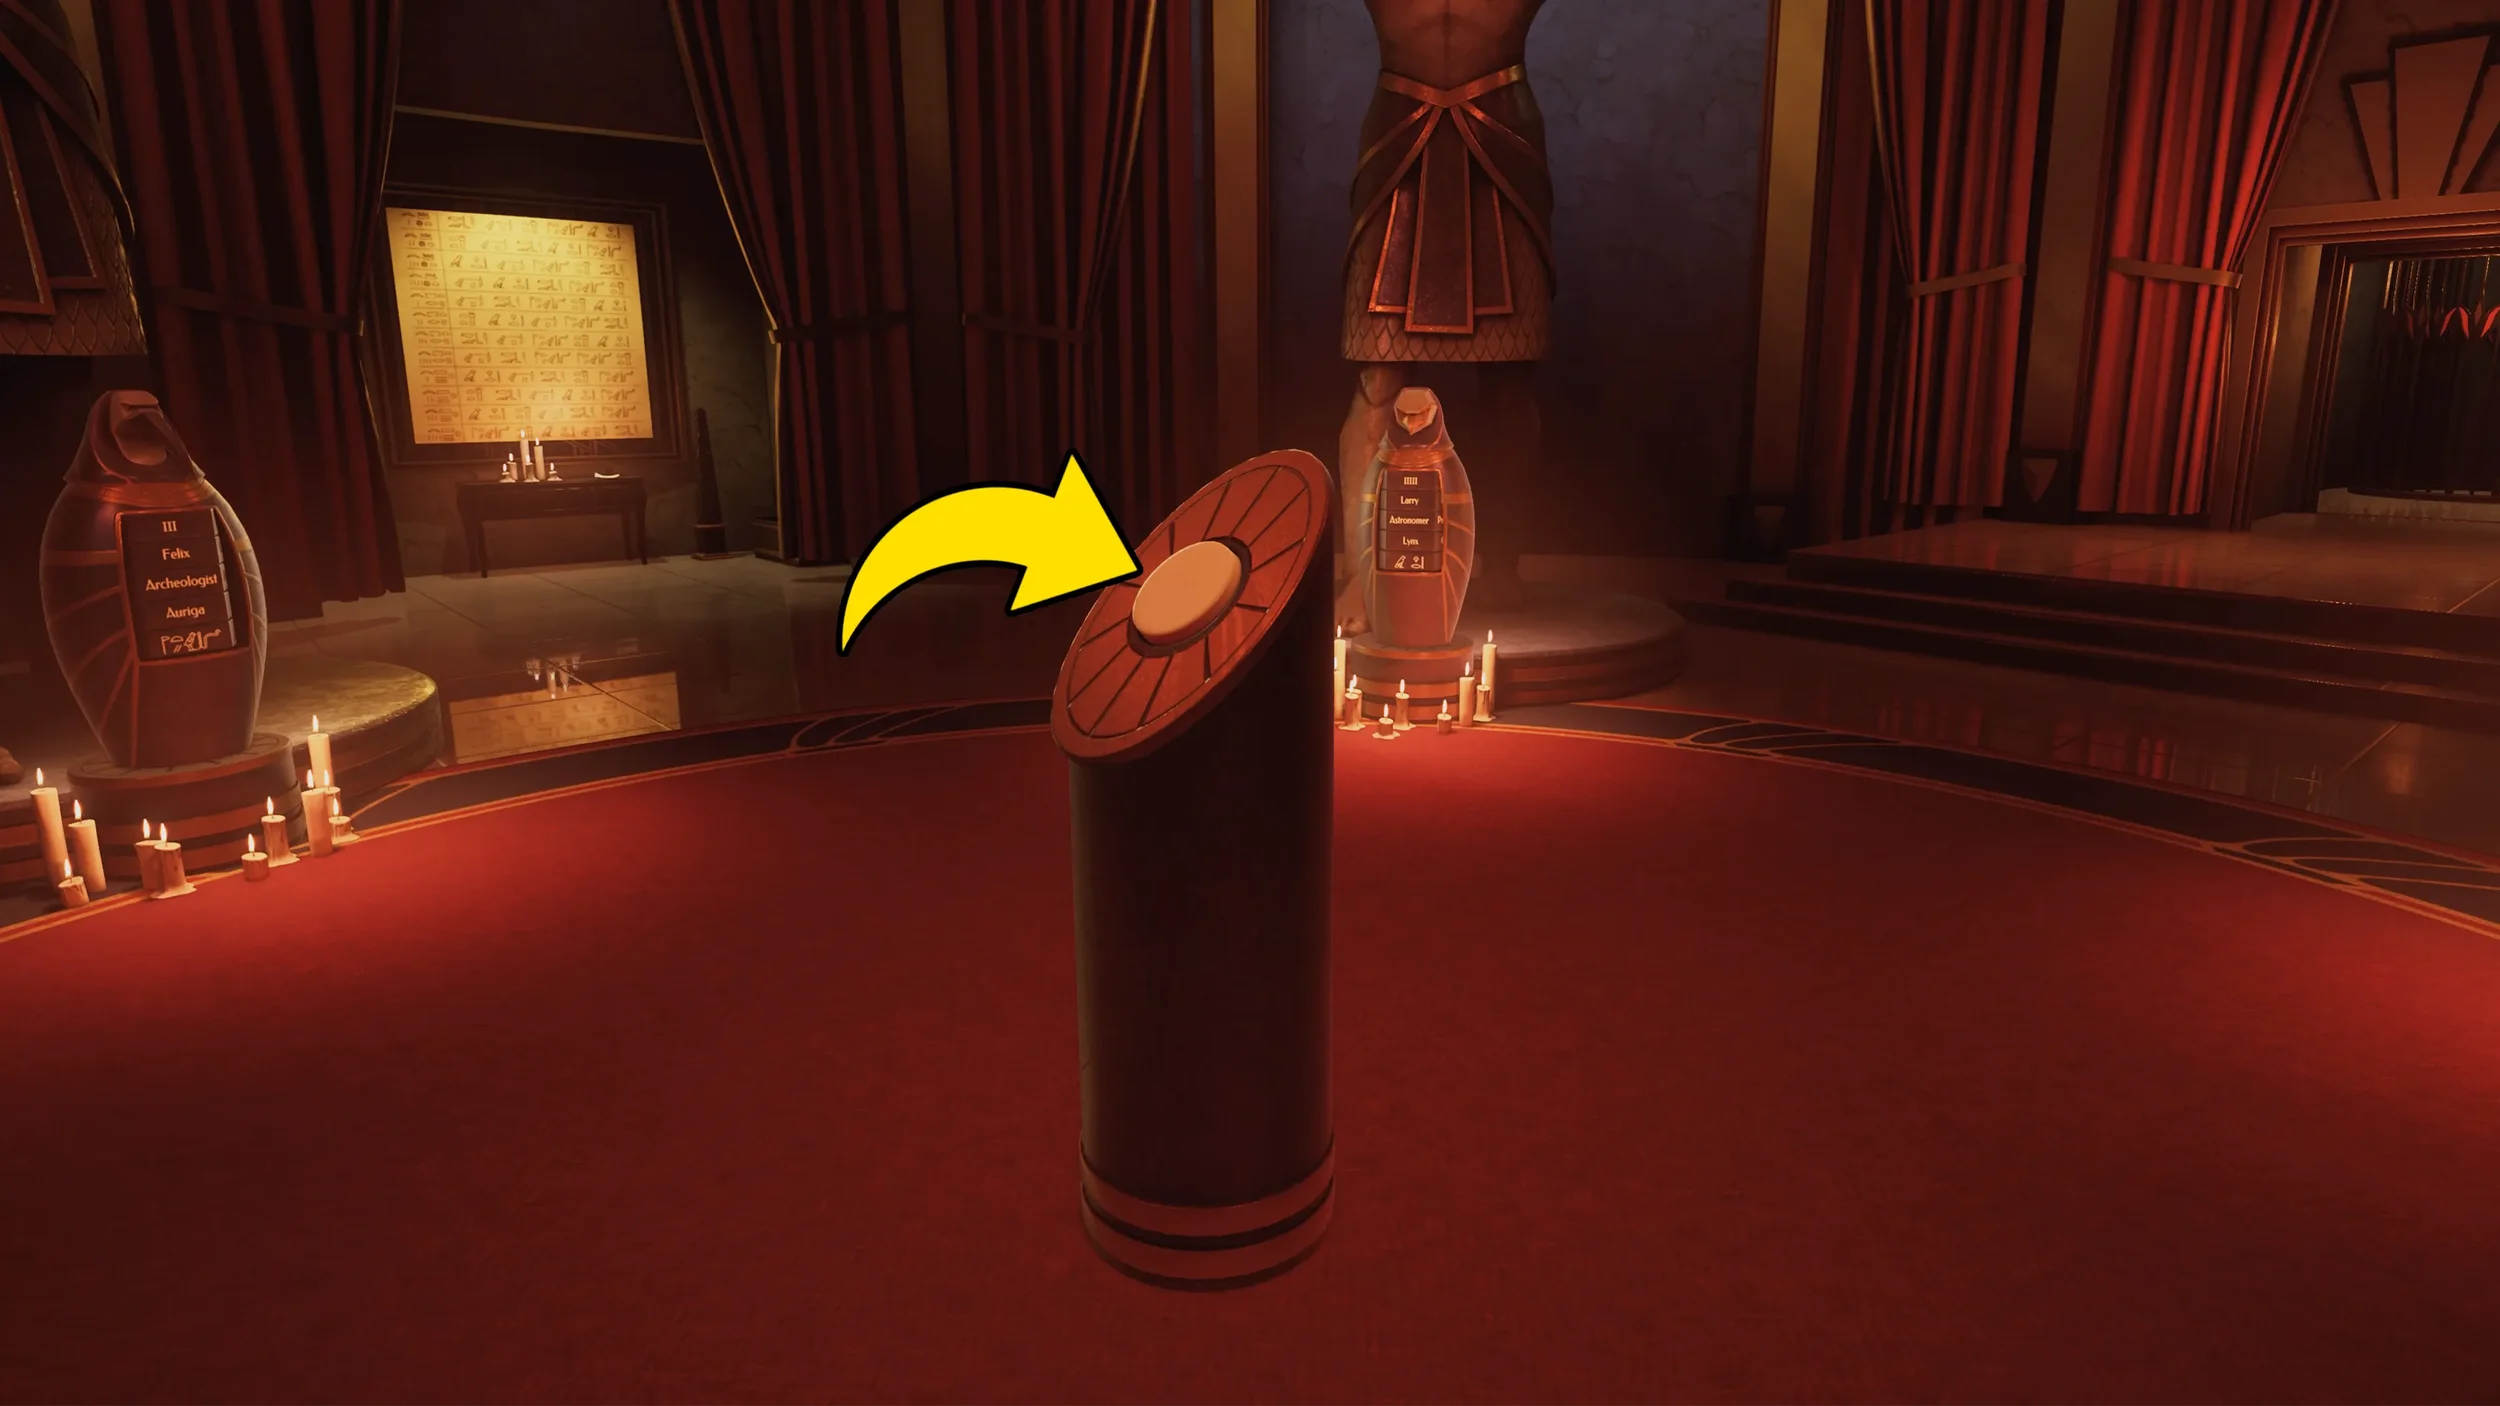
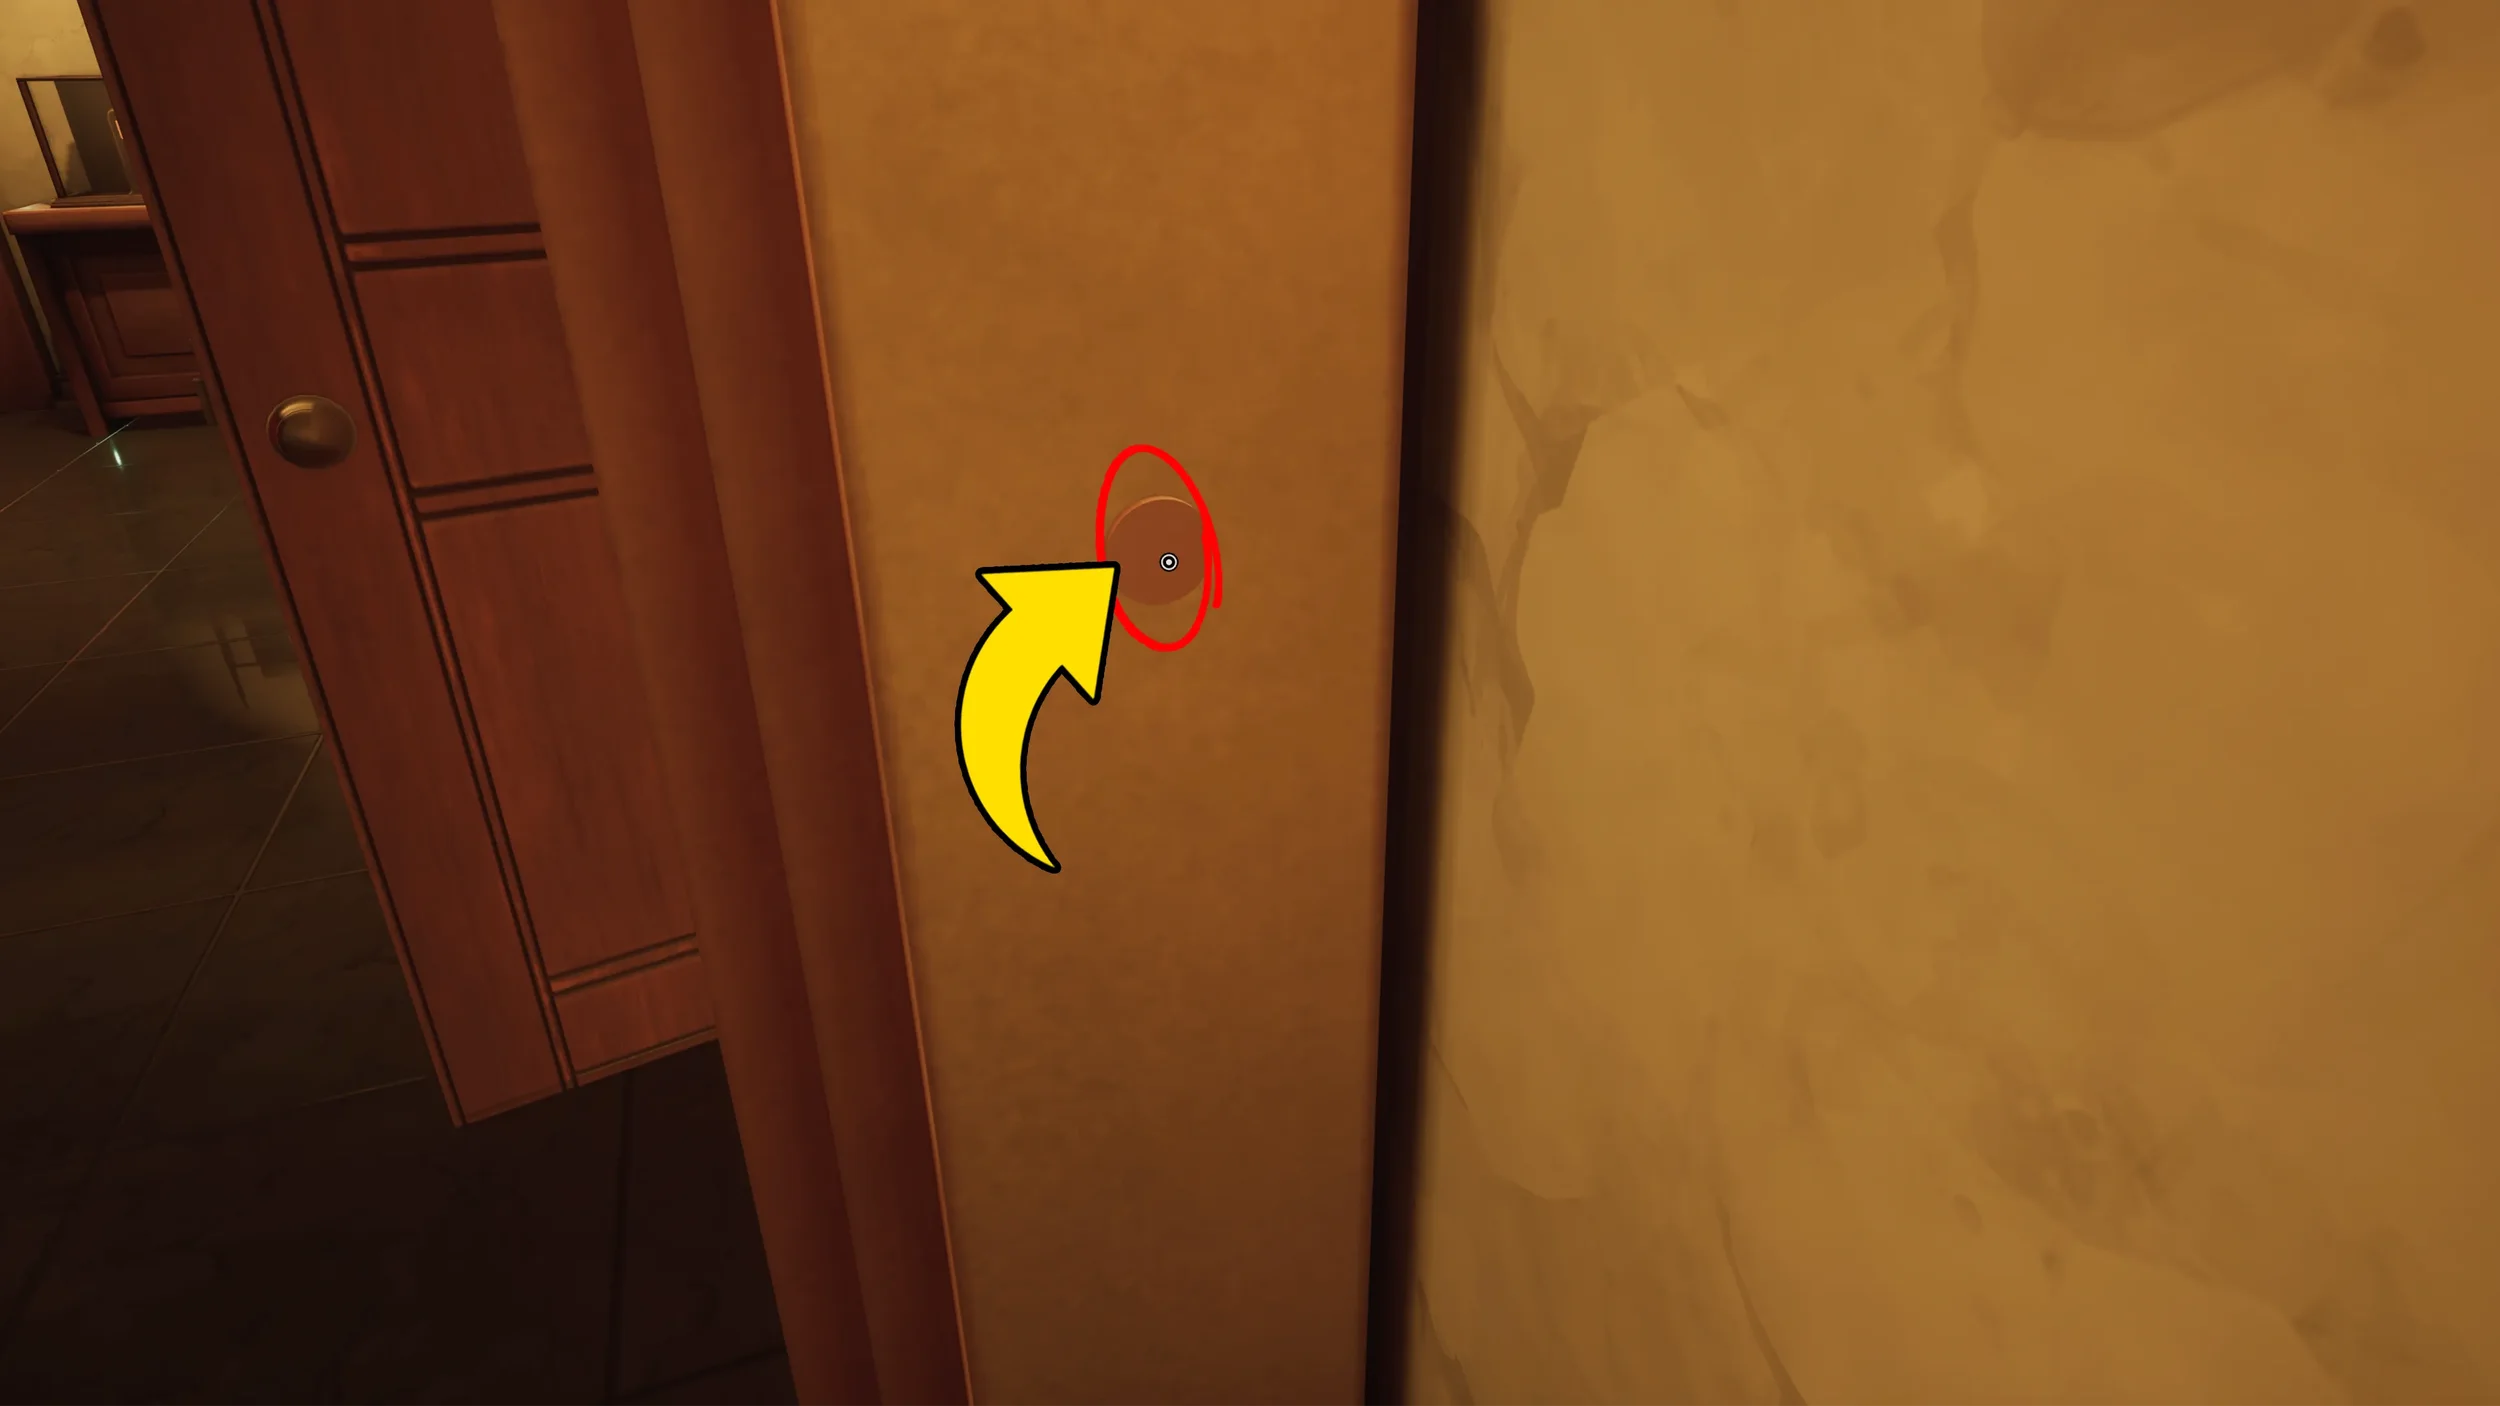
After solving the puzzle press the big button in the middle of the room to call the elevator.
Get on the elevator, close the door and press the button to go up to Bowen’s Office.
 “Pay No Attention To The Man Behind The Curtain!” Trophy.
 “Escape From The Inner Sanctum” Trophy automatically for completing Chapter 3.
Chapter 2 ⮨ ➥ Chapter 4