

Valor Mortis Trophy Guide & Roadmap
39 trophies · PS5
- Estimated trophy difficulty
- 6/10
- Approximate time to platinum
- 20-25 Hours
- Minimum playthroughs
- 1
- Missable trophies
- None
- Online trophies
- None
Intro:
Valor Mortis is a first-person souls-like from One More Level, the studio behind Ghostrunner. It’s set in a dark, alternate-history version of the Napoleonic Wars, as Napoleon’s forces push into Eastern Europe. You play as William, a fallen soldier who is brought back from the dead.
This guide covers everything you need for the Platinum trophy: a step-by-step roadmap, plus tips for every trophy in the game.
Trophy Roadmap
Complete The Main Story
Begin by playing through the main story from start to finish. This first playthrough is all about progression: defeating each of the main bosses unlocks the story-related trophies automatically, so a large part of the trophy list will come naturally as you advance.
There are no missable trophies in this game, so you can play at your own pace without worrying about locking yourself out of anything. Anything you skip can be picked up afterwards.
While you play, keep an eye out for Upgrade Materials and Ambers, and collect as many as you can along the way. You don’t need to search every corner yet, but the more you gather in this first run, the quicker and smoother the clean-up in Step 2 will be.
The Trophies you will automatically unlock during this first playthrough are:
Collectibles & Side Quests Clean-up
Once you defeat the final boss, you’ll find yourself back at the last Lantern, and the world opens up again. You’re free to travel back to every area you’ve visited and explore it fully, with nothing locked off.
This is the time to tidy up. Go back through each area and collect any Upgrade Materials, Ambers and other collectibles you missed during your first playthrough as well as doing the necessary Side Quests. Since there are no missable trophies, everything you passed by is still waiting for you, so you can be as thorough as you like.
Use the collectible trophies further down this guide as a checklist. You can tap the Collectibles filter above the trophy list to see only the Collectible Related Trophies if you wish.
All Valor Mortis Trophies

Nephtis Superioris
Obtain all trophies
Earn every other trophy in Valor Mortis to get the Platinum Trophy.

Torn Banner
Kill General Lothaire, the Eagle-Bearer.
Story related, can't be missed.

Ultima Ratio Regum
Defeat The Iron Marshall.
Story related, can't be missed.

Not a Cat Person
Defeat the Sphinx.
Story related, can't be missed.

Quixotry
Defeat the Slaughtermill.
Story related, can't be missed.

My Dying Bride
Defeat the Bride.
Story related, can't be missed.
True Oath
Defeat Justicar Aurelius.
Story related, can't be missed.
Lament of the Limbs
Defeat Experiment 83.
Story related, can't be missed.

Birdwatcher
Rendezvous with the Shrike.
Story related, can't be missed.
Coup de Grâce
Defeat the Orphan.
Story related, can't be missed.

Behemoth
Defeat Nephtis Superioris.
Story related, can't be missed.
In His Own Image
Defeat the Entity.
Story related, can't be missed.
Arsenal Absolute
Unlock all Weapons and Transmutations.
Story related, can't be missed.
All Weapons and Transmutations (3 Blades, 3 Firearms and 3 Transmutations) are unlocked as you progress through the Main Story, the game will not allow you to advance without picking these up.
We Wear the Same Colours
Complete the Oathbound quest.
To complete the Oathbound Quest you will need to defeat the 7 Eternal Guards that are hidden around the different regions of the game, each one will drop a Mysterious Stone Pyramid which combine into the Mysterious Stone Slab once you have all 7.
You can then use that Slab to open the hidden door in "Fortress > Courtyard", inside this secret room you will find a note on the table, read it to complete the Quest.
Gun of Glory
Upgrade a single Firearm to maximum.
You get this trophy for fully upgrading any of the three Firearms to their max level.
To reach the highest upgrade level with any firearm you will need a Masterwork Firearms Part.
You can upgrade your Firearms at James's Iron Bench in the Abandoned Church hub area.

Ambersmith
Gather all Ambers.
There are a total of 59 Ambers in the game (if you include copies), but for this trophy you will only need to collect at least one of each of the 29 different Ambers.

Transmutation Artifex
Upgrade a single Transmutation to maximum.
You get this trophy for fully upgrading any of the three Transmutation abilities to their max level.
To reach the highest upgrade level with any Transmutation you will need a Quintessential Transmutation Material.
You can upgrade your Transmutations at Louis's Laboratoire Workbench in the Abandoned Church hub area (becomes available after you rescue Louis during Chapter 3 of the Main Story).

Bladesmith
Upgrade a single Melee Weapon to maximum.
You get this trophy for fully upgrading any of the three Melee Weapons to their max level.
To reach the highest upgrade level with any Melee Weapon you will need a Quintessential Blade Material.
You can upgrade your Melee Weapons at James's Iron Bench in the Abandoned Church hub area.

Aerial Annihilation
Kill an enemy with a headshot after a wall jump.
The best spot to easily get this trophy is just before "The Outskirts > Breach" Lantern.
Just below this Lantern is an area with multiple wall jumps with enemies nearby that you can kill in 1 or 2 headshots.
I highly recommend unlocking the "Airborne Aiming" Ability to be able to slow down time while aiming in mid air.

Scattershot
Kill 5 enemies with a single Blunderbuss shot.
The Blunderbuss is a shotgun-like weapon that you unlock during Chapter 3 of the Main Story.
A great spot to get this trophy is by the "Fallen Village > Marketplace" Lantern.
Right by this Lantern is a barn with 5 weak enemies inside you can quite easily kill all in 1 shot as long as your Blunderbuss is upgraded enough (I recommend unlocking the Scatter Shot upgrade to increase the bullet spread).
You can still do this even with a low level Blunderbuss by attacking the enemies individually first to weaken them, then when they are all low on health, line them up and shoot them all in one go.

Windhover
Kill 3 enemies with a Pistol while aiming in mid-air.
For this trophy you just need to kill 3 enemies while in the air using the Pistol.
They DON'T need to be all in one jump, you can do this in 3 different mid-air jumps, just make sure you get all 3 kills with the Pistol specifically.
A great spot for this one is also just before "The Outskirts > Breach" Lantern in the same location we showed for the Aerial Annihilation trophy.

Hood-Snatcher
Decapitate 3 enemies with a single Claymore attack.
The Claymore is the final Melee Weapon that you unlock during Chapter 6 of the Main Story.
Once you have the Claymore, the easiest place to decapitate 3 enemies in a single attack is in the same barn by the "Fallen Village > Marketplace" Lantern.
Go inside the barn just to the right of the Lantern to lure out the enemies and when they are standing close together hold down R2 to perform a charged attack aimed at their heads.
(Also in Options > Gameplay make sure the "Dismemberment" option is ON)

Symphony of Steel
Perform 10 Parries without taking damage.
You will most likely obtain this one naturally just by playing through the game, but if not just stand in front of any basic enemy and wait for them to attack you so that you can keep parrying their attacks with L1, this is easiest with the Rapier weapon. You need to parry 10 times in a row without failing, if you get hit or accidentally block you will have to start again.
(Equipping the "Duellist's Focus" Amber can help as it increases the parry window for melee weapon).
Flaming Feast
Set 4 enemies on fire with a single Flamethrower use.
An easy spot to do this is also on the enemies inside the barn by the "Fallen Village > Marketplace" Lantern as there is a group of 5 low level enemies that you can trigger the burn status on quickly.
Go inside the barn to the right of the Marketplace Lantern to lure out the group of enemies and when they are bunched together, use the Fire Transmutation (L2) to burn them all at once so that at least 4 of them trigger the burn status in the same burst (if you stop holding it down and then press it again it won't count as the "same flamethrower").
Statue of Insanity
Fully lock Sergeant Gaspard 'Cannonhand' Dubois in Stasis.
You unlock the Stasis Transmutation during Chapter 5 of the Main Story.
The easiest location to do this is on the Cannonhand by the "Vale of Wrath > Wolfsbane Field" Lantern.
From the Wolfsbane Field Lantern, go down the main path then turn to the right just past the first house to see the Cannonhand enemy.
With the Stasis Transmutation equipped, hold down L2 to build up Stasis, you will need to fill in all of the circles with Stasis for it to count.
I recommend using the "Lunatic's Grasp" Amber (speeds up stasis build-up) and the "Potent Concoction" Amber (Ferrofluid Flasks also restore Nephtoglobin) to make this trophy a lot easier.
Abyssal Eviction
Kill an enemy by pushing them into the abyss with Shield Bash.
You unlock the Shield Transmutation in the University during Chapter 8 of the Main Story.
To be able to perform a "Shield Bash" you need to fully upgrade the Shield Transmutation to level 5 (for this you will need a Quintessential Transmutation Material).
Once the Shield Transmutation reaches its max level, you will be able to do the Shield Bash by holding down L2 to activate the shield, then press R2 (while still holding down L2) to knock enemies back .
An easy spot to do this is in the area where you need to raise the box just after the "Caverns > Old Mine" Lantern.

Single Stroke
Shoot off a Risen Grenadier’s bucket.
For this trophy you simply need to shoot at the bucket of grenades that the Risen Grenadier enemies have attached to their waist.
They are usually covering it with their arm to make it harder to hit but if you wait until just before they throw a grenade they leave the bucket uncovered so that is the best time to shoot.
You can find a Risen Grenadier by backtracking slightly from the "Valley of Ashes > Demolished Path" Lantern.

God's Trigger
Land 10 consecutive headshots or Weak Point hits without missing.
For this trophy you need to get 10 headshot (or weak point hits) in a row without missing, you can do this against any enemy type.
To make this trophy easier you can equip the "Dilated Moment" Amber which slows down time while aiming to make it easier to line up headshots.
(The Dilated Moment Amber can be found in a chest near the "Vale of Wrath > Ship Graveyard" Lantern. From the Lantern turn around and swing back across to the other side of the broken bridge, then drop off to the left to find a chest on the path below).
Frenzied Flame
Ignite the bonfire in the castle.
To find the bonfire in the castle you need to go to "Fortress > Ramparts" and backtrack into the building behind the Lantern and then go down the ladder on your right as soon as you enter.
When you reach the big open room, use the blue pole to swing across to the door on the left, inside crouch under the webs and go down s set of stairs, at the bottom of the stairs use the Fire Transmutation to burn the web on your left.
This will take you to a long hallway, the bonfire is inside the room on the left near the end of this hallway, when you find it, use the Fire Transmutation to light the bonfire.
Mind the Gap
Die by falling into the abyss.
You can do this anywhere you can fall from, "the Abyss" isn't any specific location, it is anywhere that you can fall from that respawns you back where you fell from, so any drop is fine (for example the bridge by the "Valley of Ashes > Demolished Path" Lantern).
When you fall off a cliff in this game you will just lose a small amount of health and re-appear back at the top again. So you will need to keep jumping off a few times until your health reaches 0 to get the trophy.
Rookie Mistake
Attempt to use a Ferrofluid Flask with none remaining.
This trophy is exactly what it sounds like, just try to heal by using a Ferrofluid Flask (down on the D-Pad) while you don't have any Ferrofluid Flask uses remaining.
In this game it won't allow you to use Ferrofluid Flasks while at full health so you will need to take some damage to be able to consume all of your flasks first, then just try to heal one more time when you have none left.

In the Nick of Time
Interact with a Lantern while below 20% Health and with no Flasks remaining.
This is another trophy that you will most likely get by just playing through the game, but if you didn't, simply take damage from any enemy, use a Ferrofluid Flask to heal and then get hit again, keep doing this until you no longer have any Ferrofluid Flasks left, then have the enemy hit you a few times until your health is below 20% (go to lower level areas as they deal less damage which makes it easier for them to take you down to less than 20% without actually killing you) and rest at any Lantern while still on low health with no Ferrofluid Flask uses left.

Fight Fire With Fire
Ignite an enemy while you are also Ignited.
For this trophy you need to trigger the burn status on an enemy while you yourself are also burning.
The easiest spot to do this is by going to "Caverns > Last Sunlight" Lantern and continue into the first big open room in the cave, here lure any of the enemies back to the start of this room where there is a campfire.
Stand in the campfire to burn yourself and while burning use the Fire Transmutation to burn the enemy as well (this is a great spot as the enemies in this room have very low burn resistance).
Jackknife
Deal damage with every Melee Weapon, Firearm, and Transmutation without dying.
There are a total of 3 Melee Weapons, 3 Firearms and 3 Transmutations, you unlock all of them by just advancing through the Mian Story, the latest one you unlock is the Shield Transmutation which is unlocked during Chapter 8, so you will need to reach at least this far in the Main Story.
Once you have them all you can go to any low level area with enemies ("Fallen Village > Marketplace" for example) and then just cycle through each of the Weapons and Transmutations dealing damage with each and then switching to the next, you need to deal damage with all 9 without dying, if you die you will need to start again.
(To deal damage with the Shield Transmutation you need to take hits while the shield is active).
A Bitter Cure
Complete the Laudanum quest.
The Laudanum Side Quest can be started by talking to the Old Lady through the door in The Outskirts just before the shortcut bridge back to the "Island of Whispers" Lantern.
To complete the Side Quest you need to bring her a Bottle of Laudanum. There is also an optional step by talking to the children through the door in the back of the house to get the poison before picking up the bottle, this will allow you to poison the Laudanum when you pick it up and you will also get the "Potent Concoction" Amber by doing this.
The Bottle of Laudanum can be found in the house directly beside the "Market Square" Lantern.
In the building with the shortcut ladder beside the Lantern, go up the ladder, into the door on the left and drop down the hole in the floor to find the Bottle of Laudanum.
Then take the bottle back to the Old Lady in through the door. After giving her the bottle you will have to rest at any Lantern and when you return to the house, the door will be open.
If you DIDN'T poison the bottle you can complete the Quest by interacting with her corpse on the bed, but if you did poison her you will be able to go upstairs and interact with a diary on the floor to also get the "Potent Concoction" Amber.

Blood and Wine
Complete the Curious Case of Seamus Diggory quest.
The "Curious Case of Seamus Diggory" Side Quest can be started by talking to Seamus Diggory through the window of the cabin the other side of the river just past the "Cursed Hollow > Silent Cannon" Lantern.
He will give you an Empty Bottle which you can fill up with blood or you can choose to simply give him a Bottle of Wine.
Both of these items can be found by going through the small house just to the right of where you start the quest, the other side of the house in the opening where there is also an Elite dog-type enemy, you will see a dead pig on the ground, interact with the pig to get the Blood Filled Bottle.
You can also find the Bottle of Wine in this same area, inside the hut just behind the pig.
You can give Seamus any of the 2 bottles to complete the Side Quest, you will also get a Ferrofluid Flask Power Upgrade with any of the 2 options.

Hand in the Jar
Complete the Deserter quest.
To start the "Deserter" Side Quest you need to swing across from the "Vale of Wrath > Under The Bridge" Lantern and follow the main path until you reach a small wooden hut with a note on the floor, pick up the note to start the Side Quest.
Shortly after this there will be a split in the road where there are 2 dog-type enemies.
At this split take the right path and then use the Grappling Point to reach an Elite enemy that drops the Beekeeper's Key which opens the door to the cabin next to him. Inside the Cabin pick up the note, you now need to find the 3 Anubis Figurines hidden in specific Beehive Boxes.
- Anubis Figurine #1
Inside the left most Beehive Box in the arena where you fought the Elite Enemy that dropped the key.
- Anubis Figurine #2
The 2nd Figurine can be found just before reaching the "Poisoned Camp" Lantern, before the camp entrance, go down the small side path on the right to find more Beehive Boxes, the Figurine is in the right most box.
- Anubis Figurine #3
The final Figurine is just after crossing the bridge, when you go through the gate where you need to use the Stasis Transmutation to hold the gate open, go into the first house you see on the right hand side, the Beehive Box is in the back garden.
Aggressive Reconnaissance
Complete the Unheard Farewell quest.
The "Unheard Farewell" Side Quest can be started by talking to the NPC in the tipped carriage just before the "Valley of Ashes > Demolished Path" Lantern.
He will ask you to go and find his scouts which have disappeared nearby.
To fin the scouts, go up the lift near "The Climb" Lantern, then go through the cave. When you exit back out into the open cliffs, you will soon see another lift on your right hand side blocked by some webs. Shoot the 2 Red Orbs to destroy the webs and call the lift up.
Then ride the lift down and jump off half way onto the platform with a web that you can burn with the Fire Transmutation, inside this cave you will find the Scout Commander which you need to defeat, then simply read the letter in the cave and return to the NPC at the start to complete the Side Quest.
(It doesn't matter if you choose to tell him the truth or lie, you will get the "Sleight of Hand" Amber for either option as a reward).
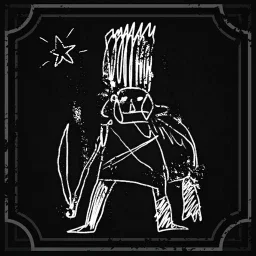
The Book of Beasts
Complete the Monster Hunt quest.
This Side Quest can be started by interacting with any of the 17 Monster Drawings hidden around the City of Orphans region.
To complete the Monster Hunt Side Quest you need to find all 17 of them.
- Monster Drawing #1 (Lancer)
From the "Tribunal Square" Lantern, turn around to find it on the tree very close by.
- Monster Drawing #2 (Risen Soldier)
Continue on the main path from the "Tribunal Square" Lantern until you get to the long street where you will see some stairs on the right hand side that take you down to the water-bed, at the bottom of the stairs go to the left to find the drawing.
- Monster Drawing #3 (Howler)
Shortly after this you will go through a path with a lot of flames on both sides, at the end of this "fire path" go to the left to find the Monster Drawing in a small alcove on the right.
Monster Drawing #4 (Volunteer)
This time from the fire path, take the right path and enter the building in front of you, the drawing can be found under the wooden stairs in the middle floor.
Monster Drawing #5 (Eternal Guard)
Continue through the top floor of the building until you reach back outside onto another path surrounded with fire and spikes, when you reach this path go down the alley on the left.
Monster Drawing #6 (General Lothaire)
Just after exiting this second fire path, take another left to find the drawing on the back of the cart.
Monster Drawing #7 (Sapeur)
Just past the "Shamble Street" Lantern, jump through the broken wall on the left and then drop down through the hole in the floor by activating/deactivating the blue platforms blocking the way, after going through a small hallway covered in poison you will reach the room that has the drawing on the left wall.
Monster Drawing #8 (Slaughtermill)
Go back to the upper floor of the same building and use the Grappling Point to cross over to the building on the other side, then go into the right hand side bedroom to find the drawing in the closet.
Monster Drawing #9 (Swarm Mother)
Continue on the main story path until you reach outside, on your left you will see a building with boxes blocking the doorway, destroy the boxes, go inside and climb to the upper floor, here exit onto the small balcony to find the drawing on the right.
- Monster Drawing #10 (Shambling Civilians)
Exit back outside and continue to the next area where you will see a ramp on your left, go up the ramp but just before going through the archway to the next fire path go to the left and you will see this drawing on a column.
Monster Drawing #11 (Remnant of The Iron Regiment)
Go through the fire path into the open area with the statue, from here go past the statue and the drawing is just under the main tower straight ahead.
Monster Drawing #12 (Sphinx)
Before heading down to the Sewers, continue on the path to the right of the Sewers entrance and then look to your left when you reach the end.
- Monster Drawing #13 (Carrion)
From the "Sewers" Lantern, continue on the main path until you reach the split where there is a ladder heading down on your left and some debris you can crouch under on your right, for now take the right side path under the debris and grapple across to the next area.
Go all the way to the end where there will be a shortcut back to the Lantern, just before the shortcut you will see a ladder that takes you down into a green poison area, go down this ladder and you will soon see the drawing on the right wall.
Monster Drawing #14 (Grenadier)
Go back up the ladder and drop down the shortcut to return to the Sewers Lantern, from here take the same path again until that first split in the road, this time take the ladder down to the area on the left.
Just past the room where there is a cell related to a short side quest, you will see a small alcove on the left with some boxes, the drawing is hidden behind these boxes.
Monster Drawing #15 (Unknown Monstrosity)
Return back to the first Grapple Point near the "Sewers" Lantern and go through the door that required the Sewers Key during the Main Story.
After going through this door, after using the next Grapple Point, go to the right all the way to the end and you will find the drawing just before the exit to the sewers.
Monster Drawing #16 (Abomination)
This time, from the previous Grappling Point, take the left path towards the main exit to the sewers, and just before the exit you will see the drawing on the left.
Monster Drawing #17 (Menacing Figure)
Exit out of the sewers into the next open area, here go to the right to find the final Monster Drawing on the wall.
Once you have picked up all 17 drawings you will complete the "Monster Hunt" Side Quest and get the trophy!
Trophy list from PlayStation Network, last checked October 16, 2026.
